The A/SF-01 B-wing heavy assault starfighter, known simply as the B-wing starfighter, was one of the largest and most heavily armed starfighters/bombers in the Rebel Alliance's fleet. The name B-wing came from the craft's appearance to a "B", when upright, the outline of the upper half and the lower half makes a B shape, although its swordlike shape in attack mode has earned it the nickname "Blade-wing", which may be another reason for the "B" prefix.
Known as "crosses" due to their distinct shape, the B-wing was designed by the Verpine company Slayn & Korpil in cooperation with then-Commander Gial Ackbar as part of the Shantipole Project. The B-wing, though difficult to fly, participated in numerous engagements across the galaxy during the latter parts of the Galactic Civil War, including the Battle of Endor and the liberation of Coruscant. The B-wing was used in its primary role of assault starfighter by both the New Republic and the Galactic Alliance throughout the Yuuzhan Vong War and beyond.
Later models included a two-man version that could be used as a small transport.
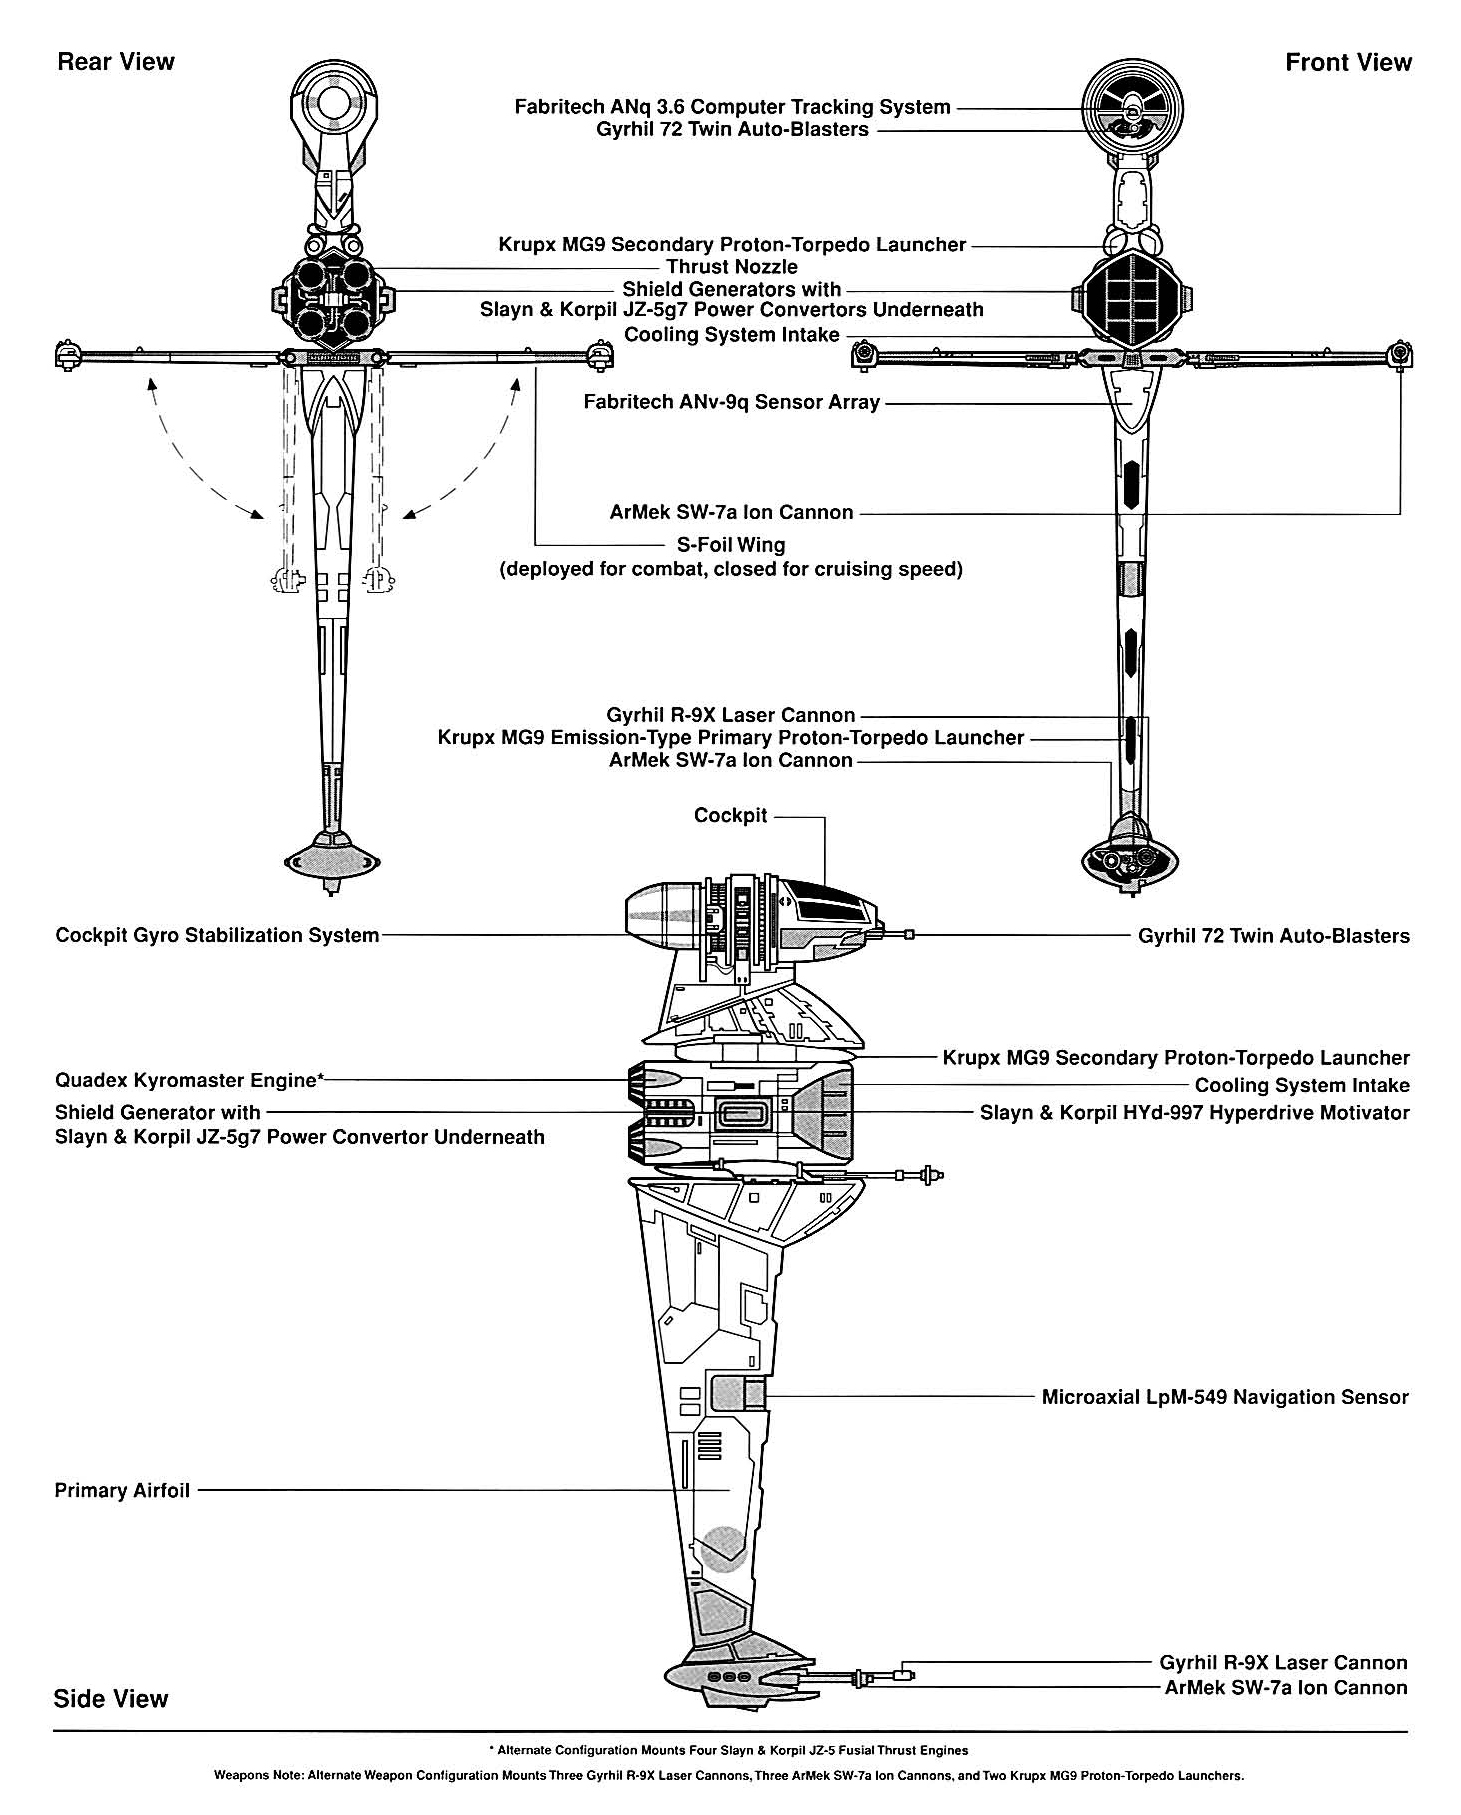
B-wing schematics
Somewhat reminiscent of the H-60 Tempest bomber, and using a wing configuration similar to Slayn & Korpil's earlier V-19 Torrent starfighter, the A/SF-01 B-wing assault starfighter had a somewhat ungainly appearance resembling a top-heavy cross when fully unfurled. The primary airfoil took up the length of the hull, with the cockpit at one end and a weapons pod at the other end. Two S-foils amidships on either side of the airfoil also held weapons. In addition, the B-wing's main body was essentially a single long wing with a pair of folding S-foils. Its primary role was an attack vessel targeting the Empire's capital ships, although it also did escort duty for X- and Y-wing fighter squadrons and Alliance convoys, and were also able to be deployed for assaults on space-based or planetary Imperial facilities.
The B-wing was a highly adaptable design, with modular hardpoints and other components. Its weapons could be reconfigured more easily than many other Alliance fighters. The B-wing also had a unique gyroscopic rotating cockpit module which was independently stabilized to allow the pilot to coordinate advanced flight and attack maneuvers. The fighter was powered by either of two engine systems: a Quadex Kyromaster engine with four thrust ports, or four Slayn & Korpil JZ-5 Fusial Thrust Engines. The Quadex core was the same version carried on-board CEC YT-1300 light freighters. The rotating airfoil allowed the B-wing to be placed vertical in launch racks, although it was also capable of landing horizontally.
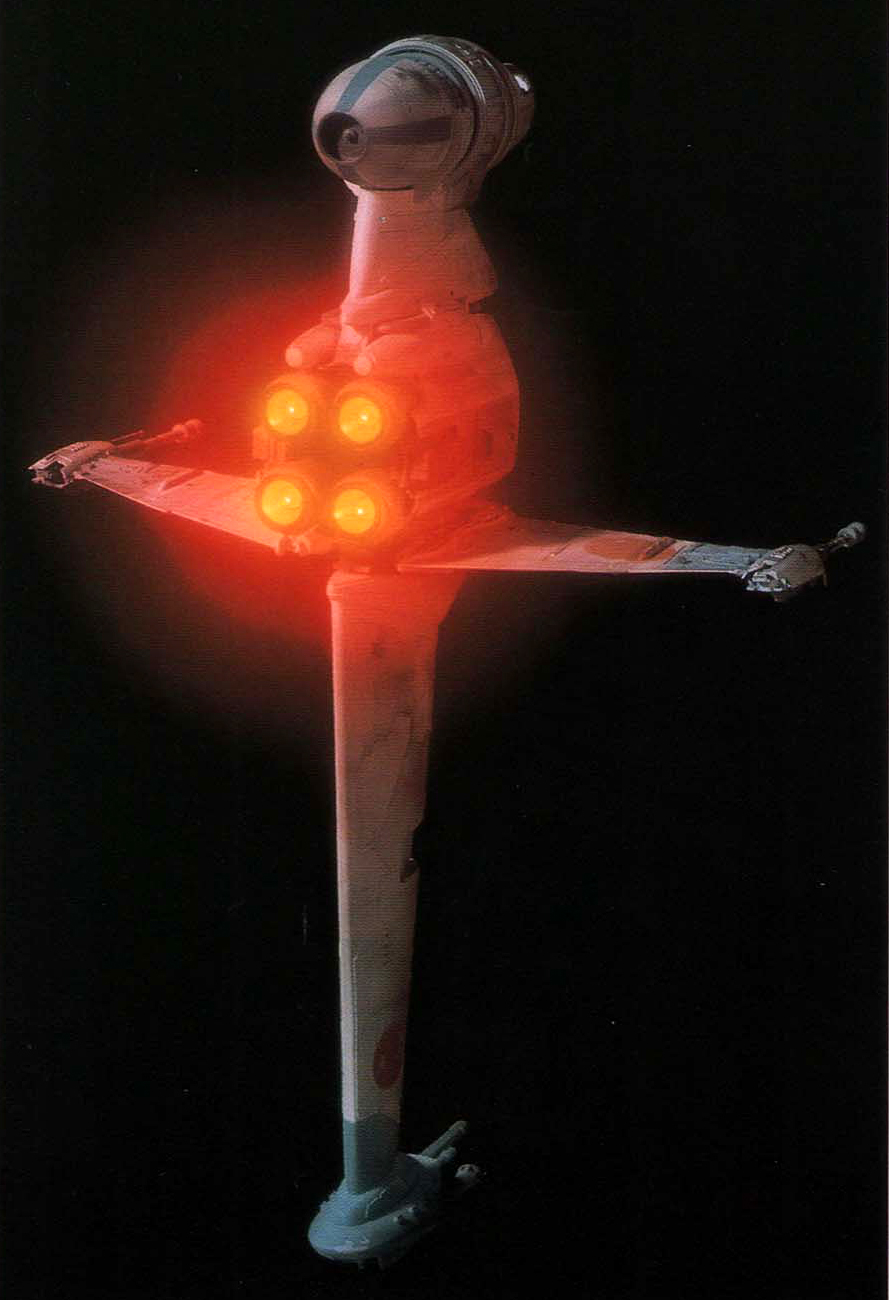
Rear view of a B-wing
Vinop O2 K cryogenic power cells and an ionization reactor fueled the ship, and Slayn & Korpil HYd-997 hyperdrive motivator was a Class 2 lightspeed system. A Sirplex Zr-41 shield generator, rated at 100 SBD, and a reinforced durasteel rated at 60 RU provided protection.
The B-wing carried a Fabritech ANv-9q Sensor Array with PH-5s Phased Tachyon Detection Array and PK-8f Primary Threat Analysis Grid, and its targeting computer was an ANq 3.6 system with IN-344-B "Sightline" holographic imaging system. The navigation computer was a Microaxial LpM-549 unit, and the starfighter was equipped with a Narmox HG.6w flight control avionics system. The powerful systems were originally designed for small capital ships. The targeting computer was also advanced and connected its armaments to the computer for the purpose of coordinated precision strikes, with assistance from low-power targeting lasers, although it alternated between this and being independently controlled by the pilot.
The B-wing was designed to replace the aging BTL Y-wing starfighter in the heavy assault role against capital ships, as it had the advantage of more weaponry and stronger shields. However, the B-wing had several weaknesses, notably being difficult to fly and lacking speed and agility, affecting its dogfighting capability. Its large hull furthermore made it an easier target and it also had less armor protection. Consequently, it did not fully replace the Y-wing in the assault starfighter role until the New Republic was well established. The B-wing was also expensive to manufacture.
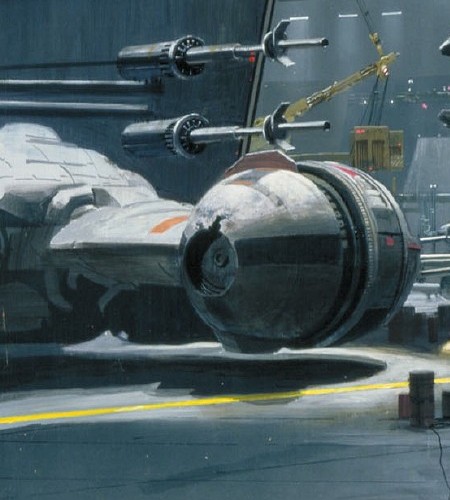
The cockpit module of a B-wing showing the groove allowing for rotation
In particular, the rotating hull system made the B-wing a challenge to master. It also made the ship abnormally delicate; too many sharp turns could cause extreme strain to the spaceframe, and the cockpit rotation system could get stuck in one position. Only a few pilots were qualified to fly the ship before the Battle of Endor, resulting in a smaller number of B-wings present than expected. These difficulties forced the Rebel Alliance to invest in an upgraded Y-wing, rather than an entirely new ship, to fulfill their needs. In addition, the gyro-mechanisms for the fighter were prone to in-flight failure, causing the fighters to end up "frozen" into position, thus leading to maneuvering problems. Another problem is that their parked position had all three of its "wings" being locked into position as well as sitting on the lower wing, making access to the central area awkward, and thus maintenance servicing of the overall craft difficult.
Its weapons systems included three wing-tip ion-cannons, a heavy laser cannon with a low-power targeting laser, twin auto blasters with a low-power targeting laser, a mount for additional weapons consisting of an additional auto-blaster, laser or ion cannon, and two proton torpedo launcher magazines, one that carried four torpedoes on the lower wing launcher and a secondary torpedo launcher magazine just below the cockpit area.
Like its predecessor, the Y-wing, the cockpit could be detached from the rest of the ship, but unlike the Y-wing, the B-wing's cockpit could be ejected into space and support atmospheric re-entry.
The B-wing would go on to participate in many battles throughout the Galactic Civil War, and would lend design elements to other vessels. Sometime after the Battle of Hoth, the hull of a wrecked B-wing was used as the design prototype for the AHS-1 heavy assault airspeeder, and later models followed the same general design. In addition, several B-wings after the Battle of Endor were also modified to include flame-retardant projectors by Alliance technicians so the craft could be used for fire-fighting purposes.
A typical tactic for B-wing squadrons on attack missions was to utilize dense formations as a means of increasing concentrated firepower on targets. This tactic also has the added benefit of overwhelming most deflector shields.
The B-wing/E starfighter, or B-wing Expanded, was a modification to the original Slayn & Korpil B-wing design. The B-wing Expanded had an elongated cockpit that allowed a gunner to assist the pilot on missions. This allowed the pilot to concentrate on piloting, and resulted in the B-wing accounting for an increased number of kills in battle. It was faster and tougher than the original B-wing, but was somewhat less maneuverable. There were two models of B-wing/E, with the second having enhanced torpedo systems. Ackbar used a modified one of these E2-designs as his own shuttle, which he was forced to crash on the planet Vortex after it had been tampered with by Terpfen.
The B-wing shuttle was another variant of Slayn & Korpil's B-Wing fighter which was given a larger cockpit allowing it to house a pilot along with two passengers. It was only armed with laser and light ion cannons.
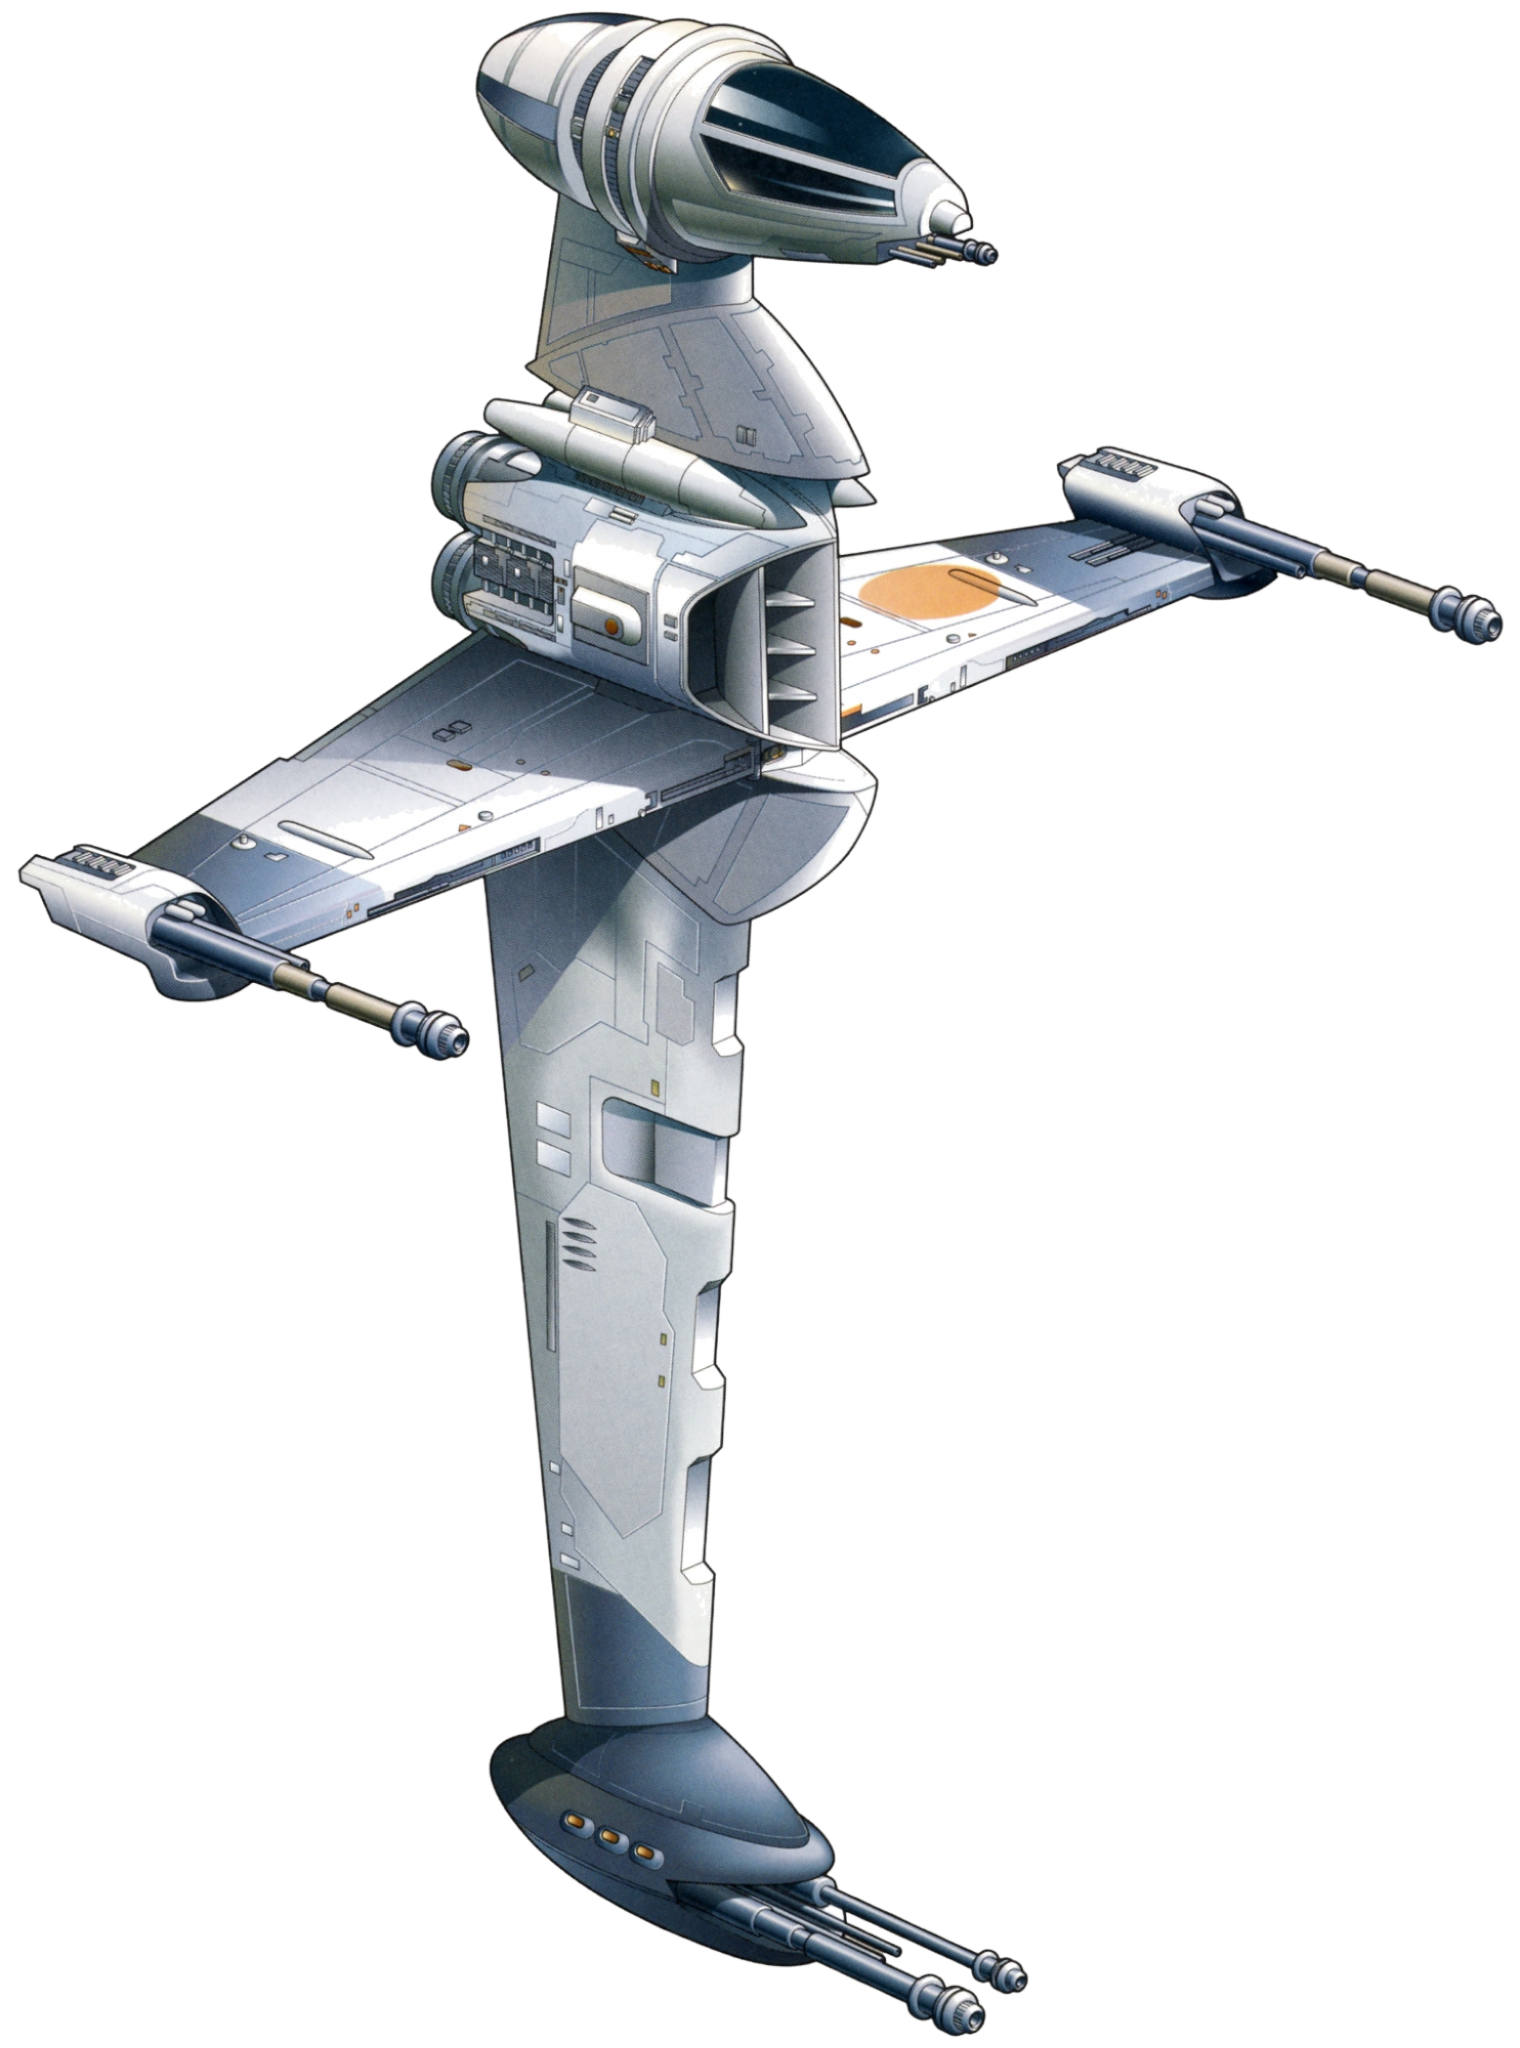
A B-wing in attack configuration
The B-wing carried one of the most powerful armaments of any Rebellion craft. Its standard configuration included three ArMek SW-7a ion cannons mounted on the wing-tips, two Krupx MG9 proton torpedo launchers with four heavy proton torpedoes or six standard torpedoes each, mounted on the end of the main wing and above the engines, one Gyrhil R-9X heavy laser cannon on the main wing and two Gyrhil 72 autoblasters at the cockpit. It was possible to include two more autoblasters there. An alternate configuration places all three SW-7a ion cannons to this cockpit hardpoints and a R-9X laser cannon on each wing-tip, with the torpedo launchers holding six torpedoes each. Another configuration carried a heavy ion cannon, proton torpedoes, auto-blasters and a trio of laser cannons. The launcher was also capable of firing advanced proton torpedoes. Proton bombs or mag-pulse warheads could be launched, too. The starfighter could also carry additional ordnance on hardpoints under the S-foils.
The B-wing was originally designed with a unique fire-control system which fires low-power lasers at a target to give the computer range and vector information for the torpedoes and ion cannons. While its strong deflector shields and great firepower allowed it to be somewhat survivable in fighter engagements, it usually required an escort on the way in. However, with the firepower of many naval corvettes, it fulfilled its purpose as a dangerous foe against many light capital ships.
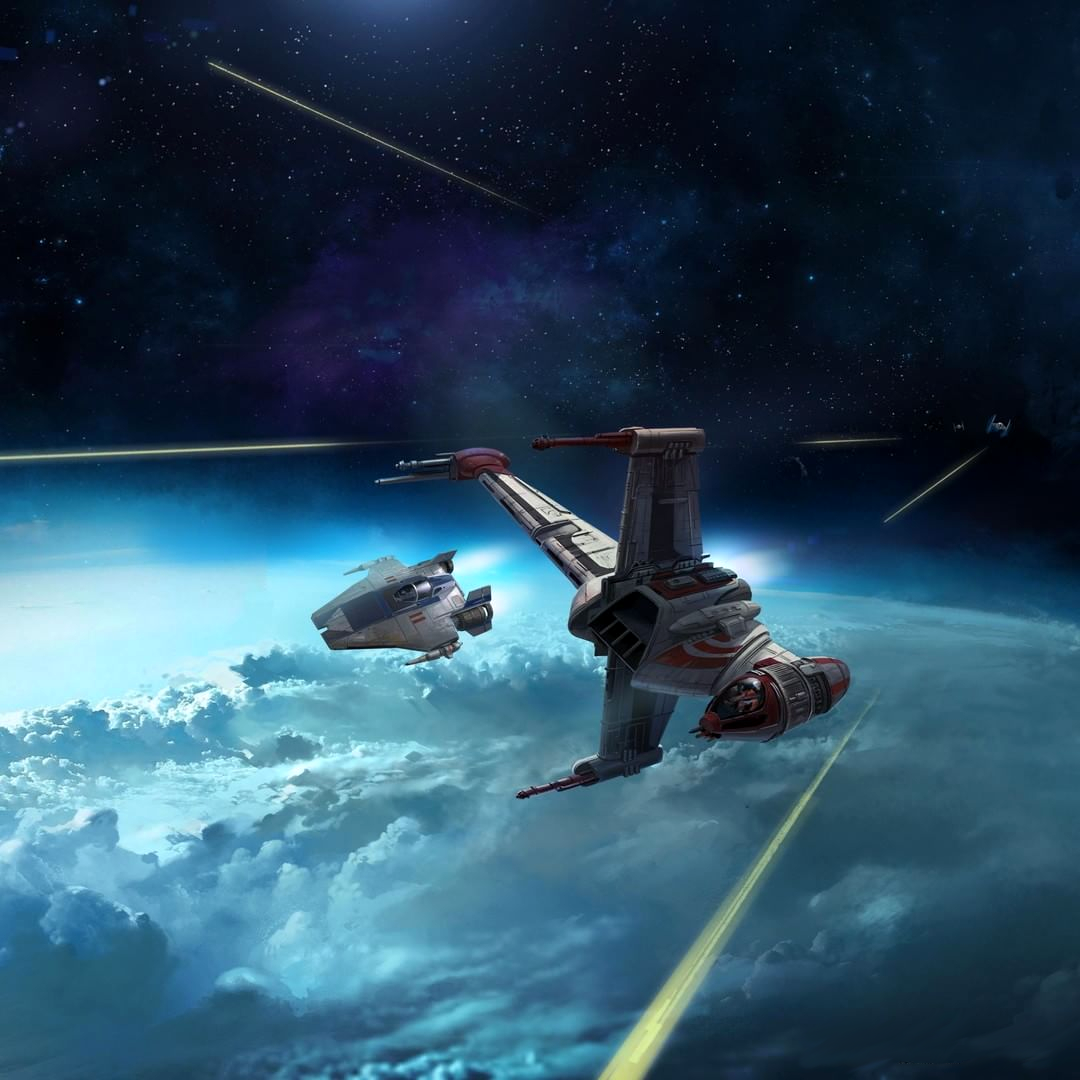
A B-wing and an A-wing being pursued by Imperial TIE fighters
The development of the B-wing began shortly after the Battle of Yavin. The small-unit starfighter tactics of the Rebellion were having a greater effect on the forces of the Imperial Navy than many Imperial commanders thought possible. As a response to this threat, the Empire began to produce and deploy more capital ships with a primary role of anti-starfighter defense. The primary vessel used for this strategy was the EF76 Nebulon-B escort frigate, a starship with which the Alliance was already quite familiar.
The Rebels couldn't afford to field the kind of overwhelming space forces that the Empire could bring to bear in fleet engagements. The Alliance's primary assault fighters, the outdated Y-wings, took large losses in capital ship assaults. A new tactic was needed if the Rebel Alliance Fleet was to continue having any impact on the galaxy.
Fortunately, one advantage the Rebels had over the Empire was their people. Approximately a year before the Battle of Yavin, the Rebels executed a raid on an Imperial Lambda-class shuttle carrying Wilhuff Tarkin and Bevel Lemelisk near Eriadu. The Alliance rescued the renowned Mon Calamari tactician Ackbar, in a military operation the Empire might not have bothered to commit for one of their own personnel. As a commander in the Alliance Fleet, Ackbar revolutionized the strategy and tactics of the Alliance.
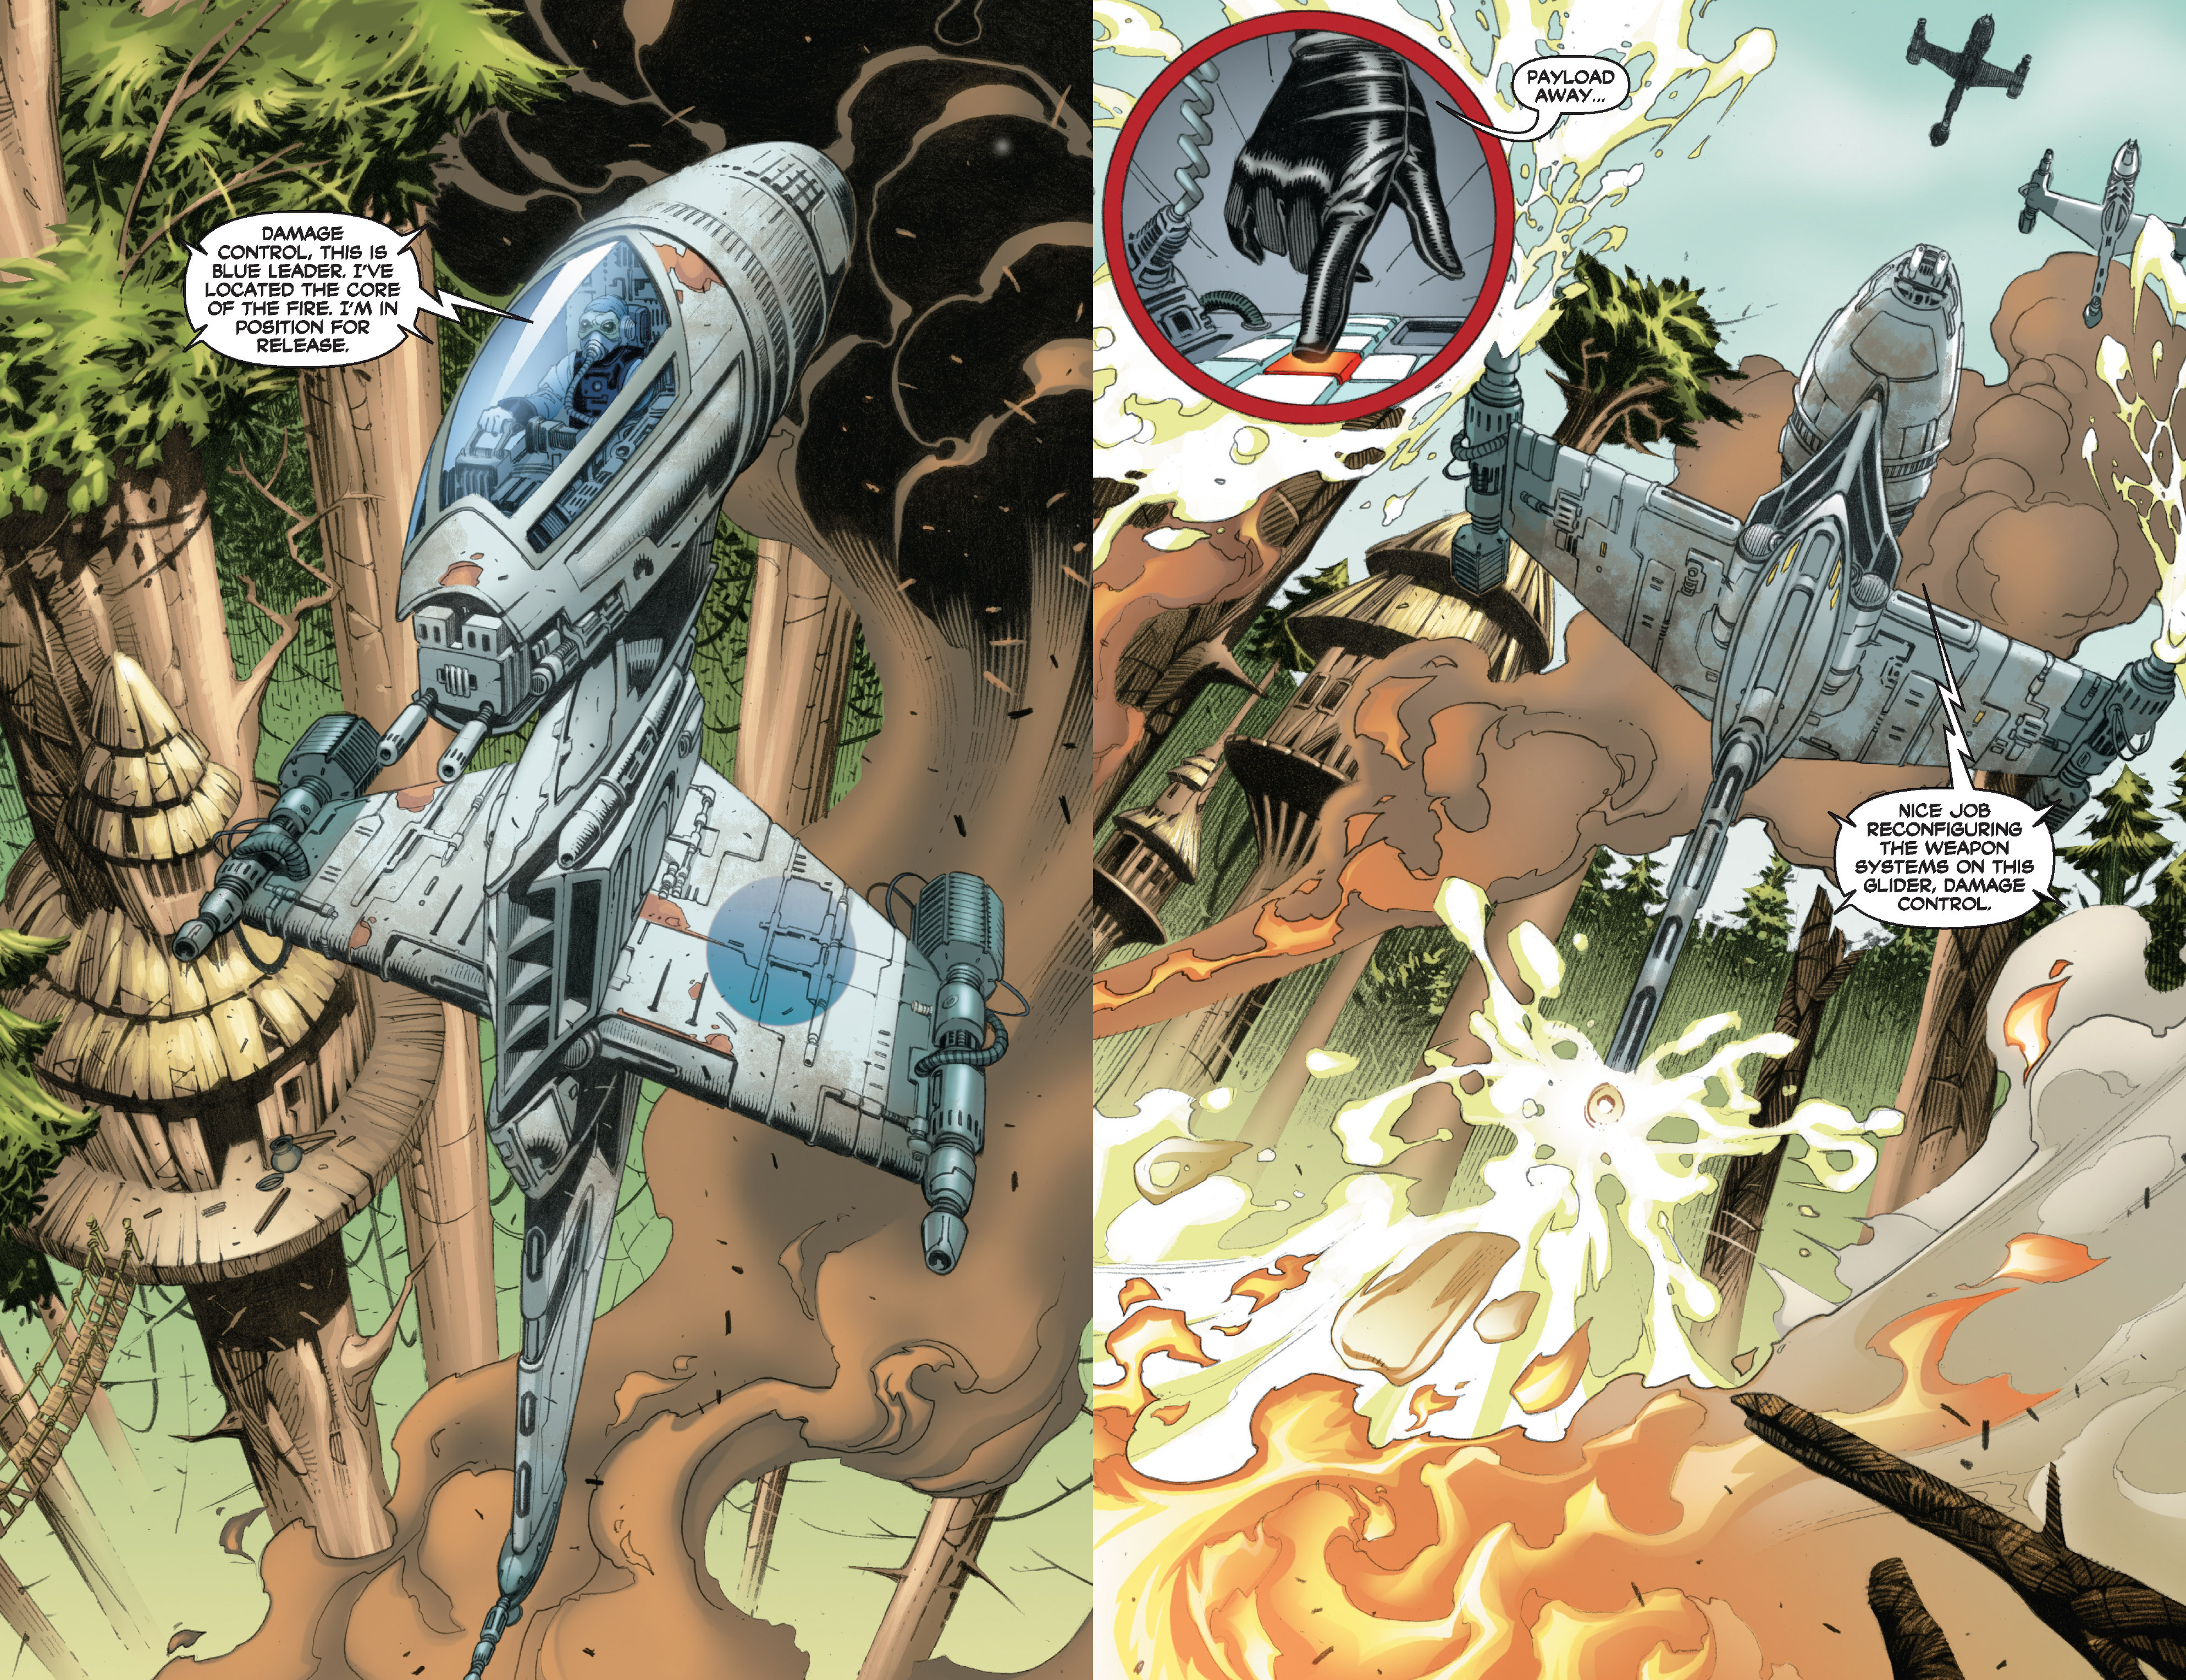
B-wings retrofitted for firefighting duty on Endor
Ackbar knew that the only solution to the Empire's new convoy defense plan was to either use equally powerful starships, which the Alliance could not afford to waste, or to create a starfighter especially for this purpose. Alliance High Command agreed, and placed Ackbar in charge of Project Shantipole. Ackbar went to the Roche system and enlisted the aid of the Verpine colonies of Slayn & Korpil.
Working under Ackbar's direction, Slayn & Korpil produced the first prototypes of the B-wing starfighter in the Roche asteroid field. They were delivered to the Alliance despite Imperial interference. Imperial District Commander Bane Nothos was aware of the project, and decided to allow development to proceed so he could capture the fighters for the Empire. The Empire's efforts to capture the blueprints of the B-wing were actually foiled by the first combat flight of the original prototypes. A squadron of these prototypes was quickly put into service and christened Dagger Squadron.
After the Battle of Hoth, Rogue Squadron Leader Wedge Antilles flew a B-wing during a prison liberation on the Bakura Imperial Prison. He also flew it in an assault against the Motivator above Kothlis.
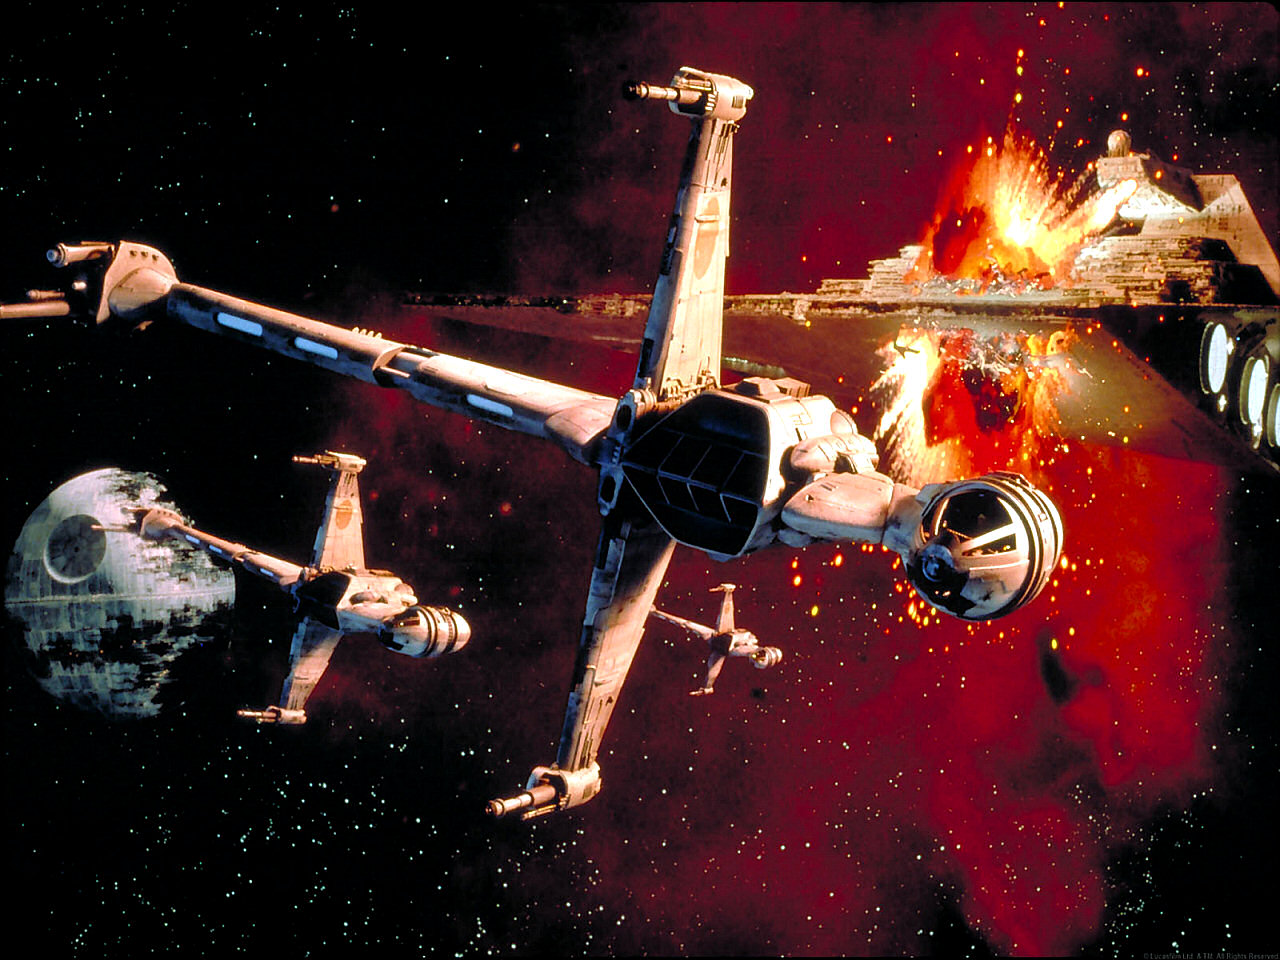
B-wings flee from an exploding Star Destroyer during the Battle of Endor.
Despite its limited numbers at the time, it was a key Rebel craft in the Battle of Endor, where a squad of these fighters took down two Imperial-class Star Destroyers. After the battle, the B-wing's modular design allowed it to be retrofitted with sprayers for firefighting duty on Endor, to extinguish the fires caused by the falling debris.
B-wings continued to serve in the Rebel Alliance and later the New Republic and Galactic Alliance fleets as a heavy assault starfighter. B-wings were present in the Invasion of Bakura, and at least one B-wing squadron, Lancer Squadron, was present at the liberation of Coruscant, where it supported an army group led by General Han Solo. The B-wing fighter also featured significantly in the campaign against Warlord Zsinj: Guardian Squadron of General Horton Salm's Defender Wing was retrofitted with B-wings for a raid on Yag-prime, and the B-wings of Nova Squadron were instrumental in defeating the Star Destroyers Razor's Kiss and Iron Fist. A wing of B-wings also served against Delak Krennel and his Ciutric Hegemony. The New Republic's Green Squadron was partially made up of B-wings at the time of the Battle of Calamari, and B-wing squadrons were present for Admiral Natasi Daala's later attack on Mon Calamari, the Battle of Adumar, and the Battle of Almania. Luke Skywalker flew a B-wing into Nam Chorios.
As it was designed by Admiral Ackbar, Mon Calamari such as Ackbar and Terpfen used expanded versions as their personal shuttles, while other Mon Calamari pilots flew the starfighter into battle, such as Twin Suns Squadron's Beelyath as part of the Second Battle of Borleias. Another group besides the New Republic noted for its use of the B-wing was the Verpine, who preferred to use the craft in high-speed bombing runs if defending their territory was necessary.
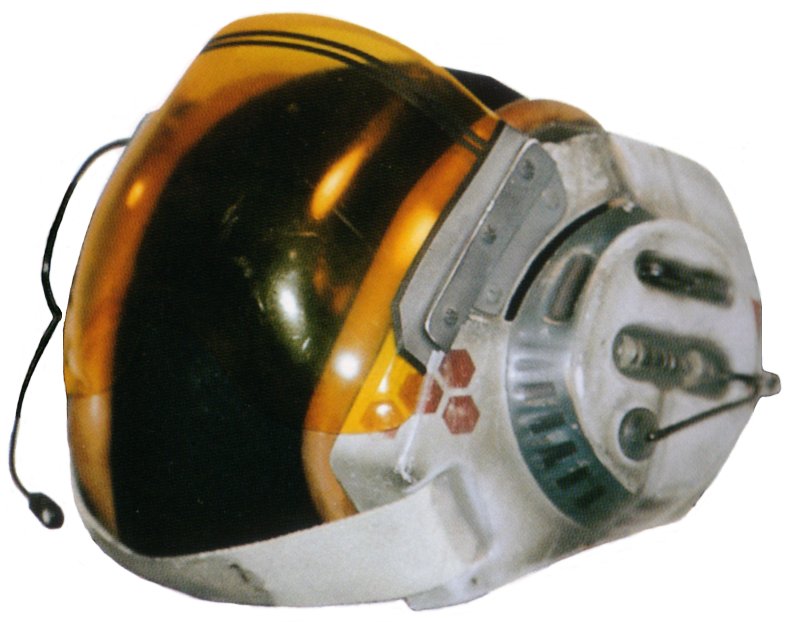
A B-wing pilot's helmet
Some B-wings would be modified to have a YT-series cockpit and a turbolaser cannon, making them uglies. These were called Corellian/B-wing uglies. These modified B-wings were used by the Sacorrian Triad during the First Corellian Insurrection, but were largely unsuccessful against the Bakuran fleet that opposed them.
B-wings continued to play the vital role of heavy assault fighter for the New Republic and its successor, the Galactic Alliance, throughout the Yuuzhan Vong War in all major engagements, including the Battle of Coruscant and Battle of Yuuzhan'tar, the Battle of Ebaq, and the Second Battle of Borleias. In a particular unique use during the latter instance, a Twin Suns pilot named Beelyath and his gunner, Sharr Latt, launched the decoy Goddess missile from his B-wing, luring several coralskippers to their doom.
The B-wing fighter continued to serve in the Galactic Alliance Fleet through the Dark Nest Crisis/Swarm War and the Second Galactic Civil War. Over a century after it was introduced, the B-wing served as the inspiration for the Besh-type personal starfighter.
The B-wing fighter was designed by Joe Johnston and Bill George. The craft derives its name from the fact that the crew labeled the two new Rebel starfighter models in Return of the Jedi as "A fighter" and "B fighter". While the A-wing looks similar to a capital A, the B-wing, on first glance, does not resemble its namesake. However, when viewed upon from a certain angle, it looks like a lowercase b. Bill George had so much input into the starship's development, that his colleagues nicknamed it the "Bill-Wing Fighter".
Star Wars: The Blueprints states that no B-wing cockpit set was ever built for filming pilot footage; however, it contains a drawing of a B-wing cockpit mislabelled as an A-wing cockpit, possibly indicating that the B-wing cockpit was indeed built and filmed for Return of the Jedi.
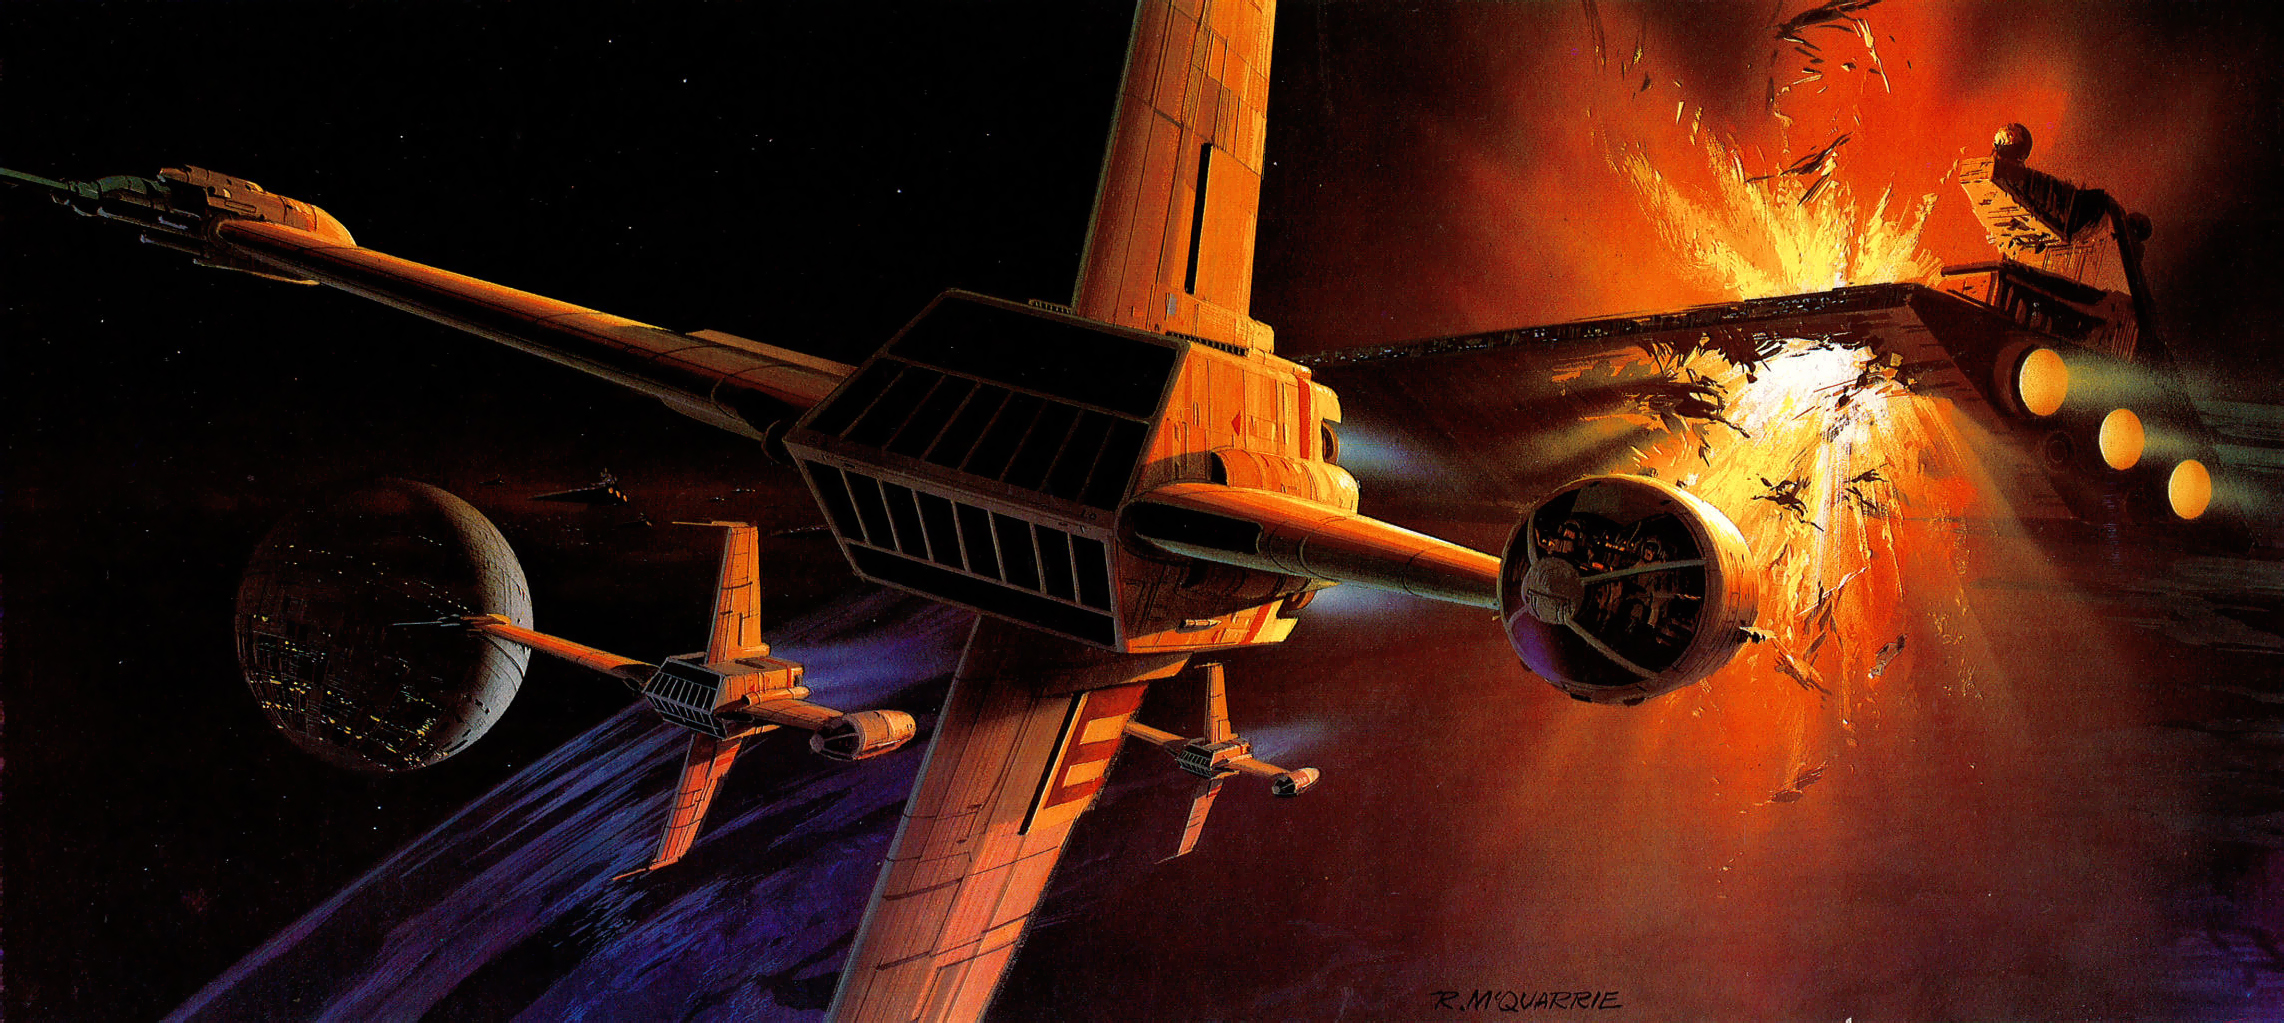
B-wing concept art by Ralph McQuarrie
The craft's unusually thin shape was problematic for blue-screen photography; the model tended to blend into the starfield. As a consequence, some planned sequences with the B-wing were cut from the original release of Star Wars: Episode VI Return of the Jedi, and the B-wing is not explicitly shown in action during the Battle of Endor in the film. In fact, after the ships fly away from the still-active Death Star II shield at the start of the battle, the B-wing is hardly seen at all. The rotating cockpit design of the B-wing was based on early concept art for the Millennium Falcon.
The appearance of the B-wing in the Star Wars Droids episodes "The New King" and "Escape Into Terror" and intro of every episode is disputed, since canon states the B-wing was developed shortly before the Battle of Yavin and Droids is set in 15 BBY.
B-wings are made to land with the cockpit on the right side. However in Star Wars: Rogue Squadron II: Rogue Leader and Star Wars: Rogue Squadron III: Rebel Strike the B-Wing hovers in the hangar with the cockpit on the left side. Still in these two games, for technical reasons, it is impossible to make the cockpit spin as the ship rotates.
Many sources like Star Wars: Complete Cross-Sections and Star Wars: Battles for the Galaxy call the laser cannon a heavy one while not giving a grade to the ion cannons, suggesting them to be medium. Star Wars: Head-to-Head repeatedly calls the ion cannons heavy (with mentioning the heavy laser in the text but forgetting it in the stats). In contrast, Starships of the Galaxy, its Saga Edition and the Star Wars: Age of Rebellion Core Rulebook call the ion cannons light ones because their role-playing game mechanics restrict stronger weapons to larger craft.
In 2000, LEGO released a set titled "B-wing at Rebel Control Center" which included a B-wing and a rebel command center with B-wing pilot, Rebel mechanic, and R5-D4 minifigures. LEGO released another set in 2006 titled "B-wing Fighter", which included an improved model, a display stand, and two minifigures: Ten Numb and a Rebel pilot. In 2012, LEGO released an Ultimate Collector Series edition of the B-wing that included a bigger, non-minifigure display model of the ship, a stand with name plaque and no minifigures. In 2014, another minifigure scaled B-wing (#75050) was released with three minifigures: Ten Numb, General Airen Cracken and a Gray Squadron Pilot.