Invasion of Florrum
An invasion on Florrum, an Outer Rim world, unfolded in 20 BBY. This conflict pitted Hondo Ohnaka's pirate crew, supported by the Jedi Order, against the forces of the Confederacy of Independent Systems. The reason for the Separatist attack was that Ohnaka had previously kidnapped Count Dooku and demanded a ransom for his release. In response, General Grievous initiated an assault on Ohnaka's base. Grievous achieved surprise, penetrating the outpost and confronting Ohnaka directly. He then established a communication link, allowing Count Dooku to speak with Ohnaka. Dooku, still bitter about his earlier captivity, declared his intention to seize control of the planet and dismantle Ohnaka's operations.
Ohnaka's objections led to his immediate imprisonment. Meanwhile, Gwarm returned with Ahsoka Tano and six Jedi younglings, only to discover the droid presence. Tano successfully argued that the Jedi and pirates should unite against their common enemy. Agreeing to this alliance, they freed Ohnaka and his pirates. Grievous, learning of this development, ordered AATs to destroy the outpost. Following a pursuit through a dried geyser field and a brief skirmish with Grievous, the Jedi and pirates managed to escape Florrum aboard Slave I, heading towards Obi-Wan Kenobi's capital ship.
Prelude
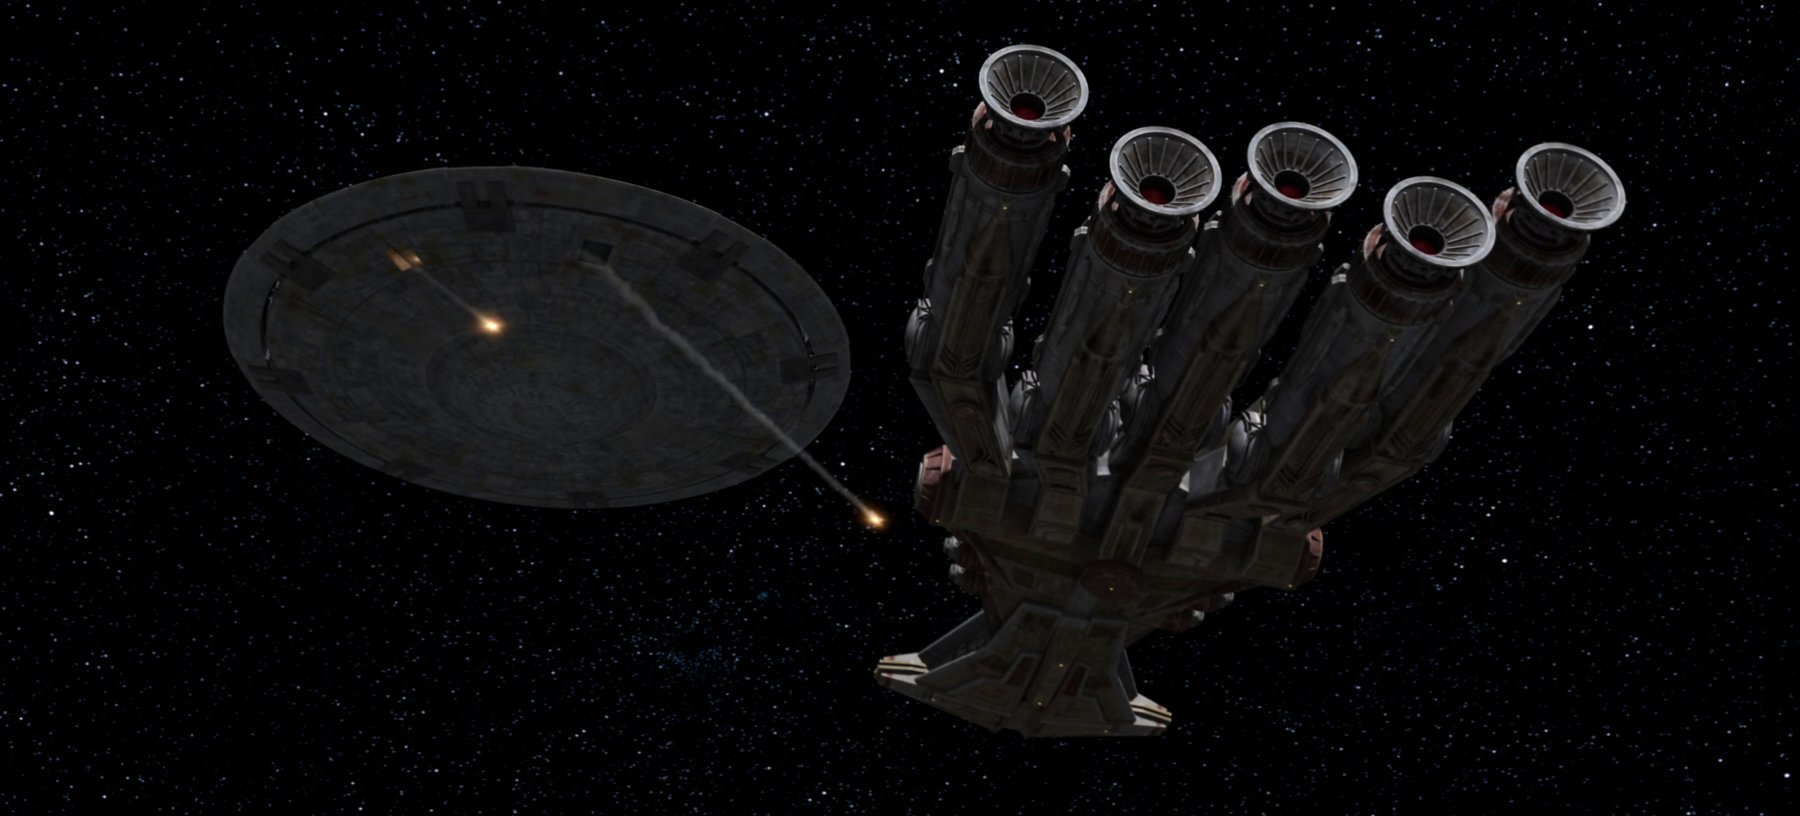
During the era of the Clone Wars, Hondo Ohnaka, along with his band of pirates, attempted to commandeer a Jedi training vessel named the Crucible in order to steal lightsaber crystals. Although they were driven back, they did manage to capture Padawan Ahsoka Tano during their retreat. The Jedi younglings aboard the Crucible, specifically Byph, Ganodi, Gungi, Katooni, Petro, and Zatt, rescued Tano. They disguised themselves as circus performers from Preigo's Traveling World of Wonder. However, the pirates discovered their deception and gave chase. Upon reaching the Crucible, they launched into space, only for the ship's engines to be damaged by a pirate's WLO-5 speeder tank. As a result, the Crucible crashed, leading to the recapture of Tano and the younglings by the pirate gang. Upon their return to the outpost, they noticed a droid army assembling for an invasion. The Separatist forces, under the command of General Grievous and a tactical droid, had initially seized control of the Florrum system, previously held by the Republic, before launching their assault on Florrum. Count Dooku, the Head of State of the Confederacy, sought retribution for his earlier capture and ransom by the Ohnaka Gang, and ordered Grievous to attack Florrum.
The battle
With the Jedi and pirates working together, Tano formulated a plan to distract the droids using R2-D2 and the pirate's tank. This would allow them to infiltrate the pirate base and free Hondo Ohnaka from captivity. After freeing Ohnaka, they released the remaining pirate forces. However, one droid alerted Grievous to their presence. Grievous then decided to quickly resolve the situation by ordering his tanks to level the prison section. The Jedi and pirates managed to escape, fighting their way through the droid forces and fleeing the outpost. Ohnaka, Katooni, and other pirates rode Starhawk speeder bikes, while Tano, Professor Huyang, R2-D2, and the other younglings piloted a WLO-5 speeder tank. Grievous pursued them in his combat speeder, supported by three commando droids on STAPs. During the chase, the Jedi and pirates became separated. Ohnaka, Katooni, and the pirates reached Hondo Ohnaka's secret starship vault, while Tano's team continued to be pursued by Grievous. Initially, Ohnaka intended to abandon the battle, but Katooni convinced him to act honorably.
Meanwhile, Grievous prepared to board the Jedi's speeder tank, forcing R2-D2 to perform risky maneuvers to dislodge him. However, this resulted in the tank crashing, causing both Grievous and the Jedi to fall off. As the stunned Jedi recovered, Grievous prepared to strike, but Slave I arrived to assist the Jedi. Tano sent the younglings to the ship and engaged Grievous in combat to cover their escape. She then narrowly escaped onto the ship herself. Before Ohnaka could properly repay Grievous for his "hospitality", a squad of AATs opened fire, forcing them to flee.
Aftermath
With the remaining pirates and the Jedi retreating from Florrum, the Separatists gained complete control of the planet. The pirates and the Jedi then rendezvoused with Obi-Wan Kenobi, who had been defeated by Grievous and rescued by a Republic rescue team. Aboard Kenobi's Jedi cruiser, Ohnaka attempted to avoid any repercussions by requesting compensation for the expenses incurred while saving the younglings. Kenobi decided to let it go. Ohnaka departed, and Kenobi invited the younglings to create a wheel with their ignited lightsabers.
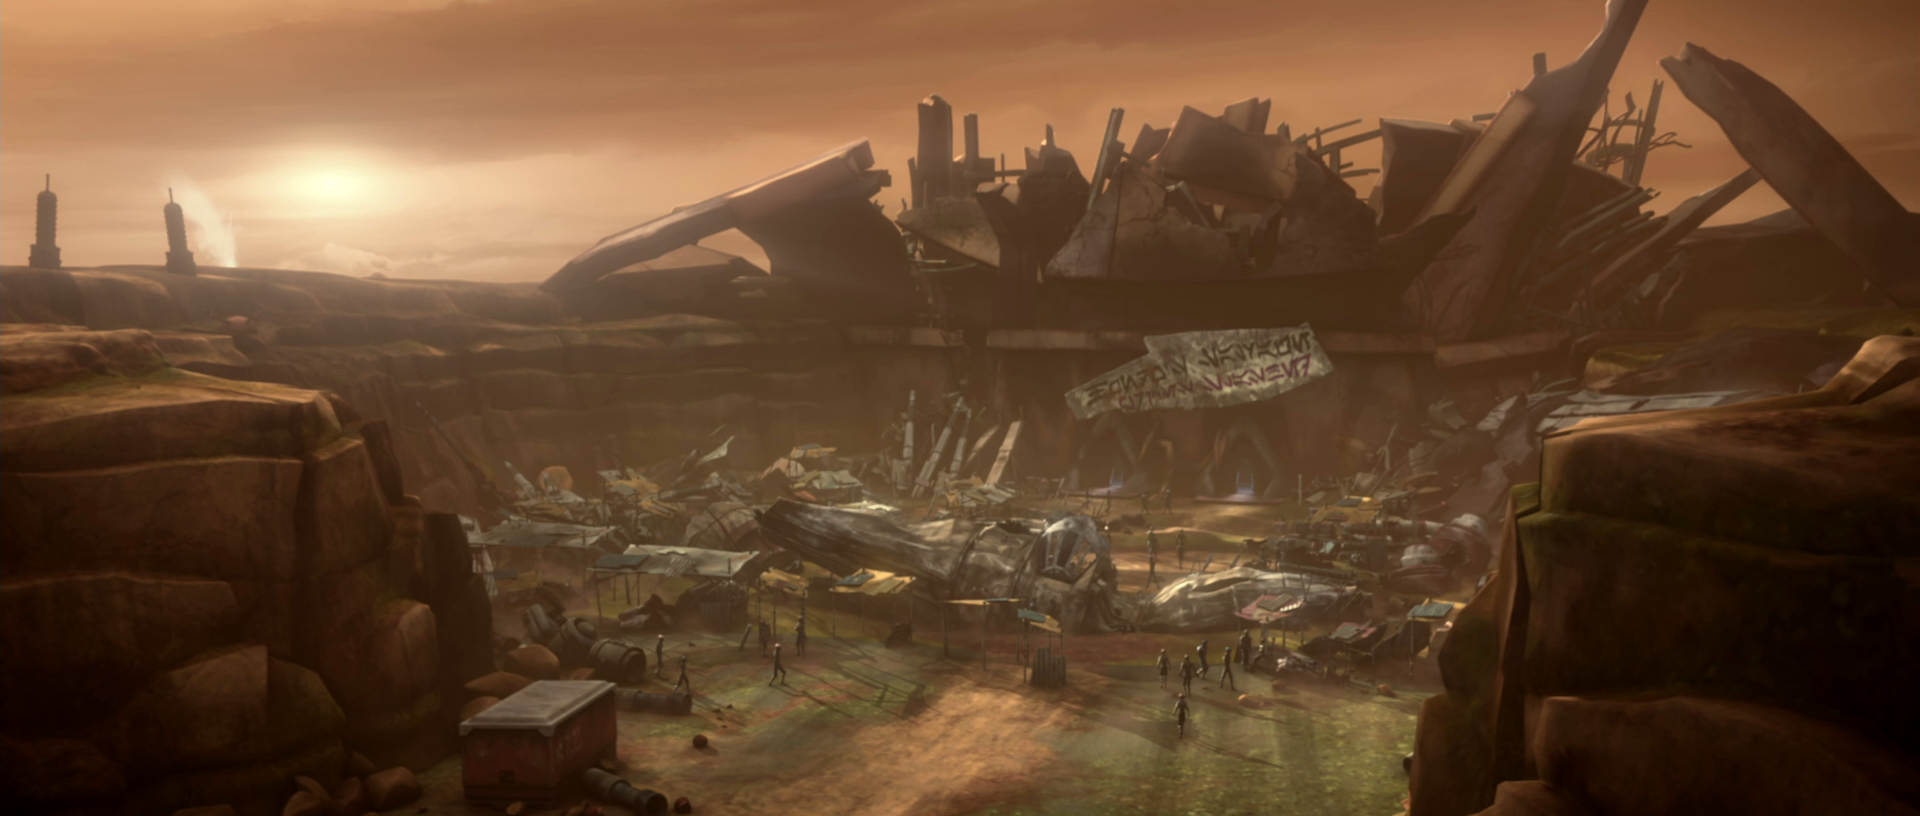
Later in the Clone Wars, Ohnaka returned to his destroyed base with his remaining pirates. Darth Maul, who had resurfaced, and his brother Savage Opress launched an attack on Ohnaka's destroyed outpost with his renegade pirates. However, they were repelled and ultimately defeated with Kenobi's assistance, forcing the brothers to retreat.
Behind the scenes
Hondo Ohnaka first mentioned the battle in "Revival". Later, StarWars.com's episode guide explained that "A Necessary Bond" reveals what happened to Hondo Ohnaka's base, which was seen destroyed in "Revival," the season's opening episode. Originally, "Revival" was intended to air later in the season, in chronological order, but it was moved to the beginning to emphasize the Darth Maul storyline. In "Revival," Ohnaka mentions his base being overrun by General Grievous."