The Battle of Saleucami was fought on Saleucami during the Clone Wars between the Galactic Republic and the Confederacy of Independent Systems. It took place following Confederate General Grievous's capture of Jedi Council member Eeth Koth.
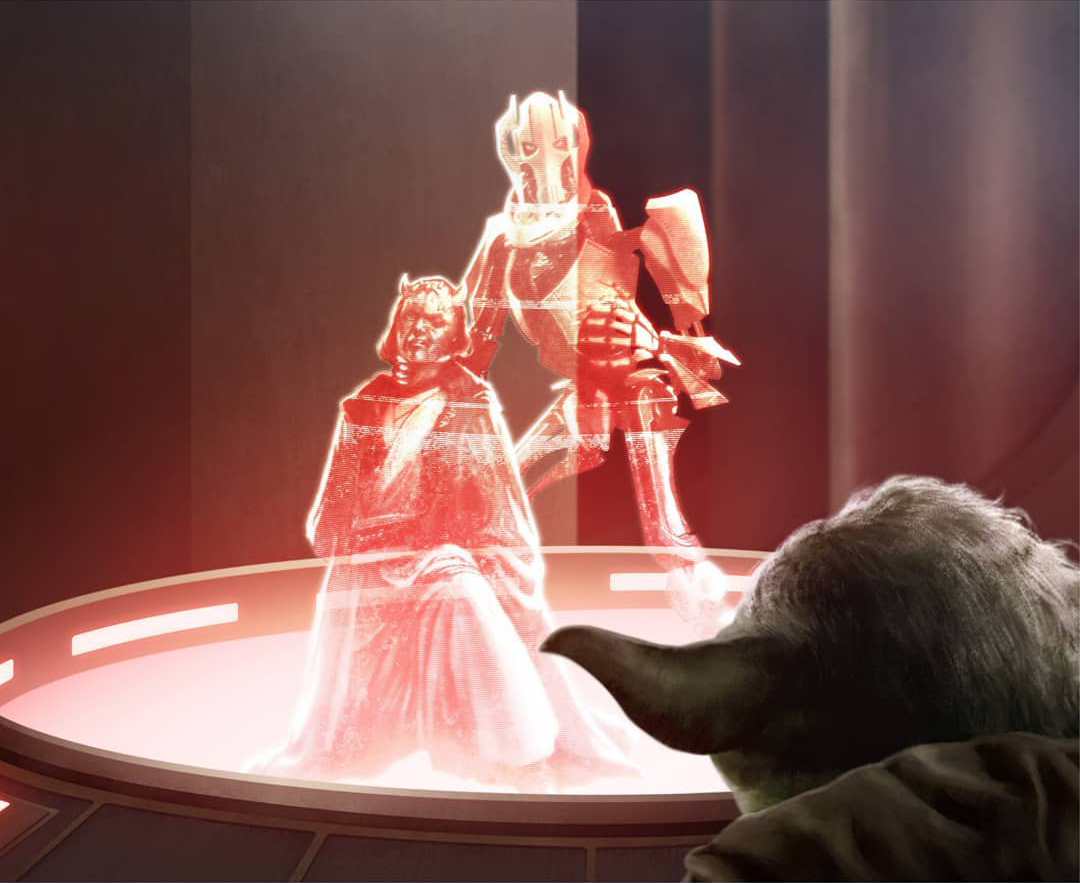
Prior to the battle, Grievous captured Jedi Council member Koth.
After the Jedi Council received a message from General Grievous about his capture of Jedi Council member Eeth Koth, Commander "Wolffe" found a hidden message from Koth. The message said that Grievous was going to the Saleucami system. Thus, Jedi Masters, Adi Gallia, Obi-Wan Kenobi and his former apprentice Anakin Skywalker decided to rescue Koth from Grievous.
Kenobi took command of several Republic warships. The three Jedi decided that Kenobi would distract General Grievous and lure him into the Surrogator whilst Skywalker and Gallia would sneak onto Grievous's Recusant-class light destroyer and rescue Koth, alongside Clone Captain Rex and several other clone troopers.
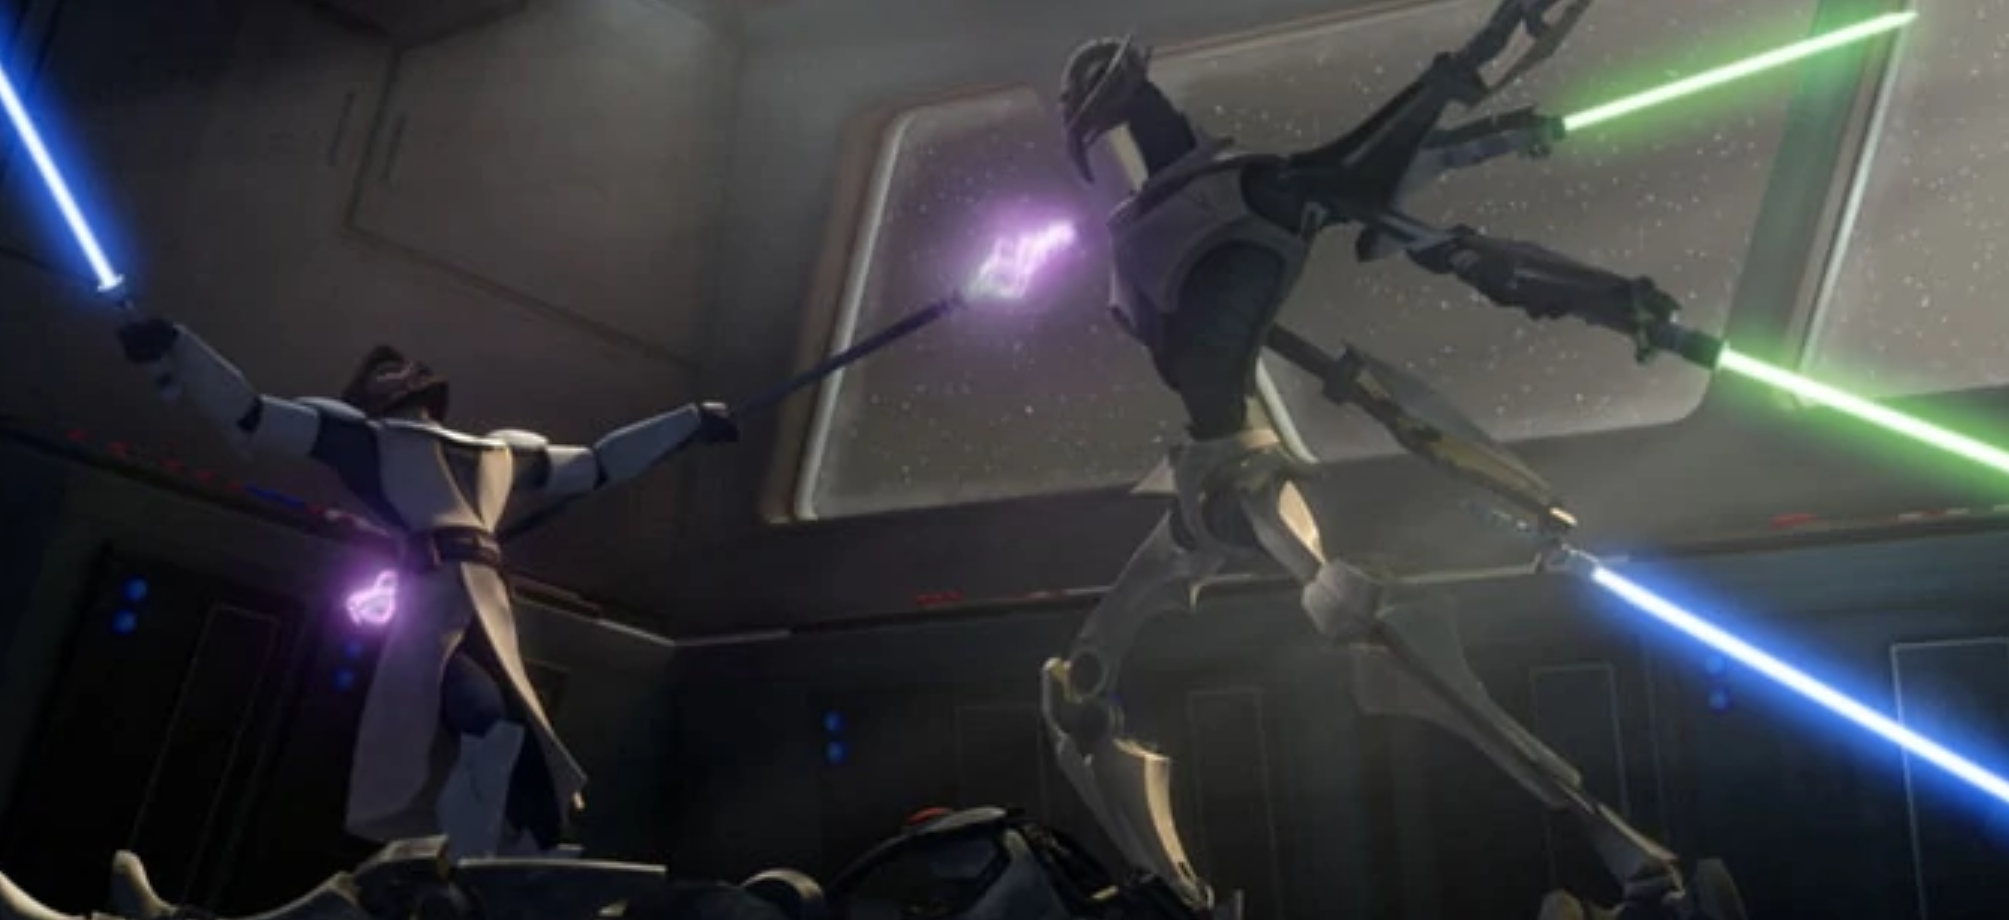
Generals Kenobi and Grievous dueled over Saleucami.
However, Grievous anticipated their plans, leaving several BX-series droid commandos on the bridge with the T-series military strategic analysis and tactics droid TV-94 and the captured Koth. Grievous then boarded Kenobi's ship with several BX-series droid commandos and two IG-100 MagnaGuards. He then dueled with Kenobi on the ship's bridge, who grew very close to defeating him after taking one of the Magnaguard's electrostaffs to use alongside his lightsaber. However, Grievous fled the bridge, and Kenobi contacted Skywalker, who was with Gallia and Koth, having defeated the commando droids. Gallia went to help Kenobi, whilst Anakin took Koth back to the Eta-class shuttle that they had boarded Grievous' ship with.
Gallia engaged Grievous just as the docking tube started to break. With the help of Gallia, Kenobi and two other clones were able to escape onto Grievous' ship just as the Republic ship exploded, killing everyone on it. Skywalker then picked up the two clones, Kenobi and Gallia in the shuttle before flying back to the Resolute. Grievous then prepared to land his forces, but debris from Kenobi's ship crashed into the C-9979 landing craft as they attempted to land on Saleucami. Grievous and what remained of his forces took to the escape pods. Thus, Kenobi took Rex, Commander Cody, and other forces to pursue Grievous while Skywalker would continue fighting the space battle against the Separatist forces.
After his escape pod landed, Grievous and his forces then attempted to send a distress signal to what remained of their fleet in orbit. However, his escape pod's transmitter was destroyed and Kenobi's forces landed near them. Thus Grievous and his forces searched for an escape pod with a working transmitter.
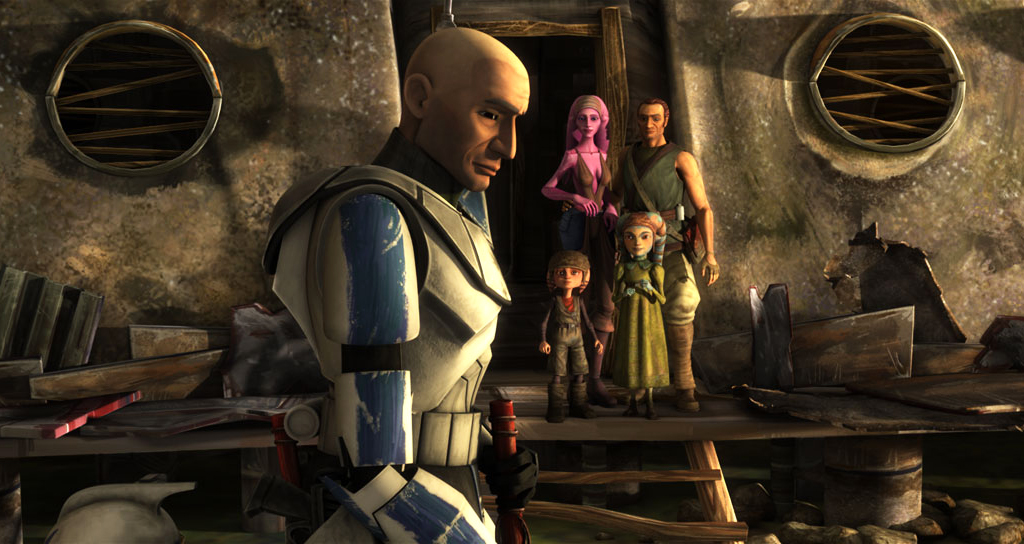
Clone Captain Rex met deserter Cut Lawquane.
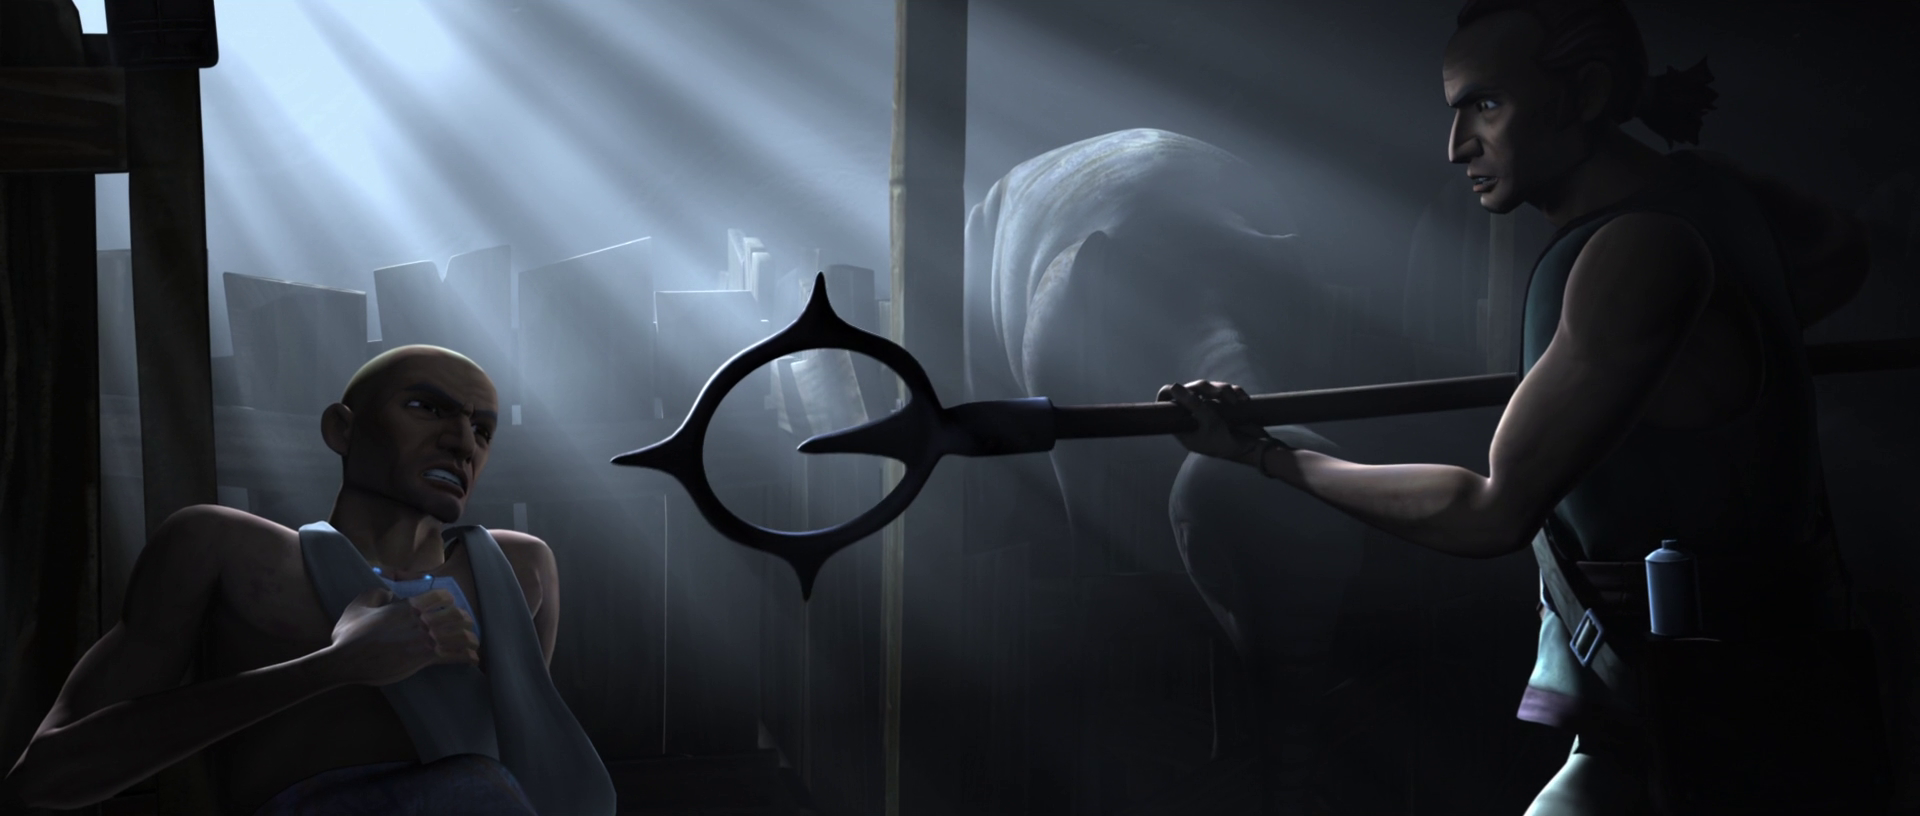
Kenobi then divided his forces; Rex would take several of his troopers on BARC speeder through the wetlands while Cody and Crys would investigate the crash site. As Rex and his troopers went through the wetlands, Rex was shot by a pair of commando droid snipers. Clone medic Kix was able to patch up Rex, but was forced to leave him at the Lawquane's farmstead. Rex then left Jesse in charge and ordered him to continue tracking Grievous down. Later, Rex discovered that the farmer, Cut Lawquane, was a deserter from the Grand Army of the Republic.
General Grievous, riding a Reek, made his way to an escape pod that contained a working transmitter. However, his battle droids were running low on power. They asked Grievous to let them recharge, but the General refused to do so and continued while droids died. Kenobi, Cody and Crys then discovered the locations of the escape pods and continue their search for Grievous.
Following a dinner with Cut's family, Rex and Cut came under attack by commando droids. Together, they were able to defeat the droids. Grievous was able to find a pod with a working transmitter and was able to send a signal to the fleet. However, Kenobi, Cody, Jesse, and their forces were able to find him and attempted to stop his escape. Kenobi then confronted Grievous, and Kenobi briefly dueled with him before he made his escape.
Captain Rex parted ways with Lawquane.
Following Grievous's escape, Kenobi and his forces prepared to leave. Rex decided to allow Cut to remain with his family and not report him. Rex then left on an eopie to rendezvous with Kenobi's forces. With Grievous having abandoned his forces during his escape, the B1 battle droid R0-GR found himself trapped on Saleucami for the next five months before he had a chance to return to the war.
The Battle of Saleucami was first identified in Star Wars: Droidography, but the book itself did not link the battle R0-GR fought in to the battle depicted in "Grievous Intrigue" and "The Deserter." However, Ultimate Star Wars, New Edition later identified the battle depicted in these episodes as the "Battle of Saleucami." Given that the battle mentioned in Droidography and the battle in the episodes share the same name, this article assumes they are the same.
- LEGO Star Wars: The Freemaker Adventures — "A New Home"
- LEGO Star Wars: The Freemaker Adventures — "Thrown Into Battle"