In 21 BBY, during the Clone Wars, Jedi Master Eeth Koth was captured by the Separatist Alliance General Grievous during a battle within the Outer Rim Territories Saleucami system. Assaulted by a Recusant-class light destroyer flagged by the Kaleesh cyborg, Koth's flagship, the Venator-class Star Destroyer Steadfast, was boarded by the general and his battle droid forces. Upon boarding, the B2-series super battle droids engaged Koth's clone trooper forces, while Grievous and a group of BX-series droid commandos and IG-100 MagnaGuards infiltrated the command bridge to attack the Jedi Master.
On the bridge, the Jedi Master's accompanying clone troopers were killed in the ensuing battle, as well as Grievous's commando droids. Soon thereafter, the Separatist general entered combat with the Jedi Master in a brief duel aboard the bridge. During the duel, Grievous managed to gain the upperhand with his MagnaGuards, which led to Koth's subsequent capture. Afterwards, the Jedi Master was displayed in the Kaleesh's message to the Jedi High Council in order to provoke the Jedi Order into launching an assault on Grievous's fleet over the planet Saleucami.
In 21 BBY, following the Galactic Republic's second invasion and capture of the planet Geonosis during the Clone Wars against the Confederacy of Independent Systems, a series of attacks were launched against several hyperspace routes throughout the Outer Rim Territories. In response, Jedi General Eeth Koth and his Republic fleet proceeded to track down the conspirator behind the mysterious attacks. However, in that same year, as the Jedi Master traveled through the Saleucami system in deep Outer Rim space, aboard his Venator-class Star Destroyer flagship Steadfast, Koth and his fleet came under a surprise attack by a Separatist fleet of a single Recusant-class light destroyer and three Munificent-class star frigates led by General Grievous, who had decided to target members of the Jedi High Council.
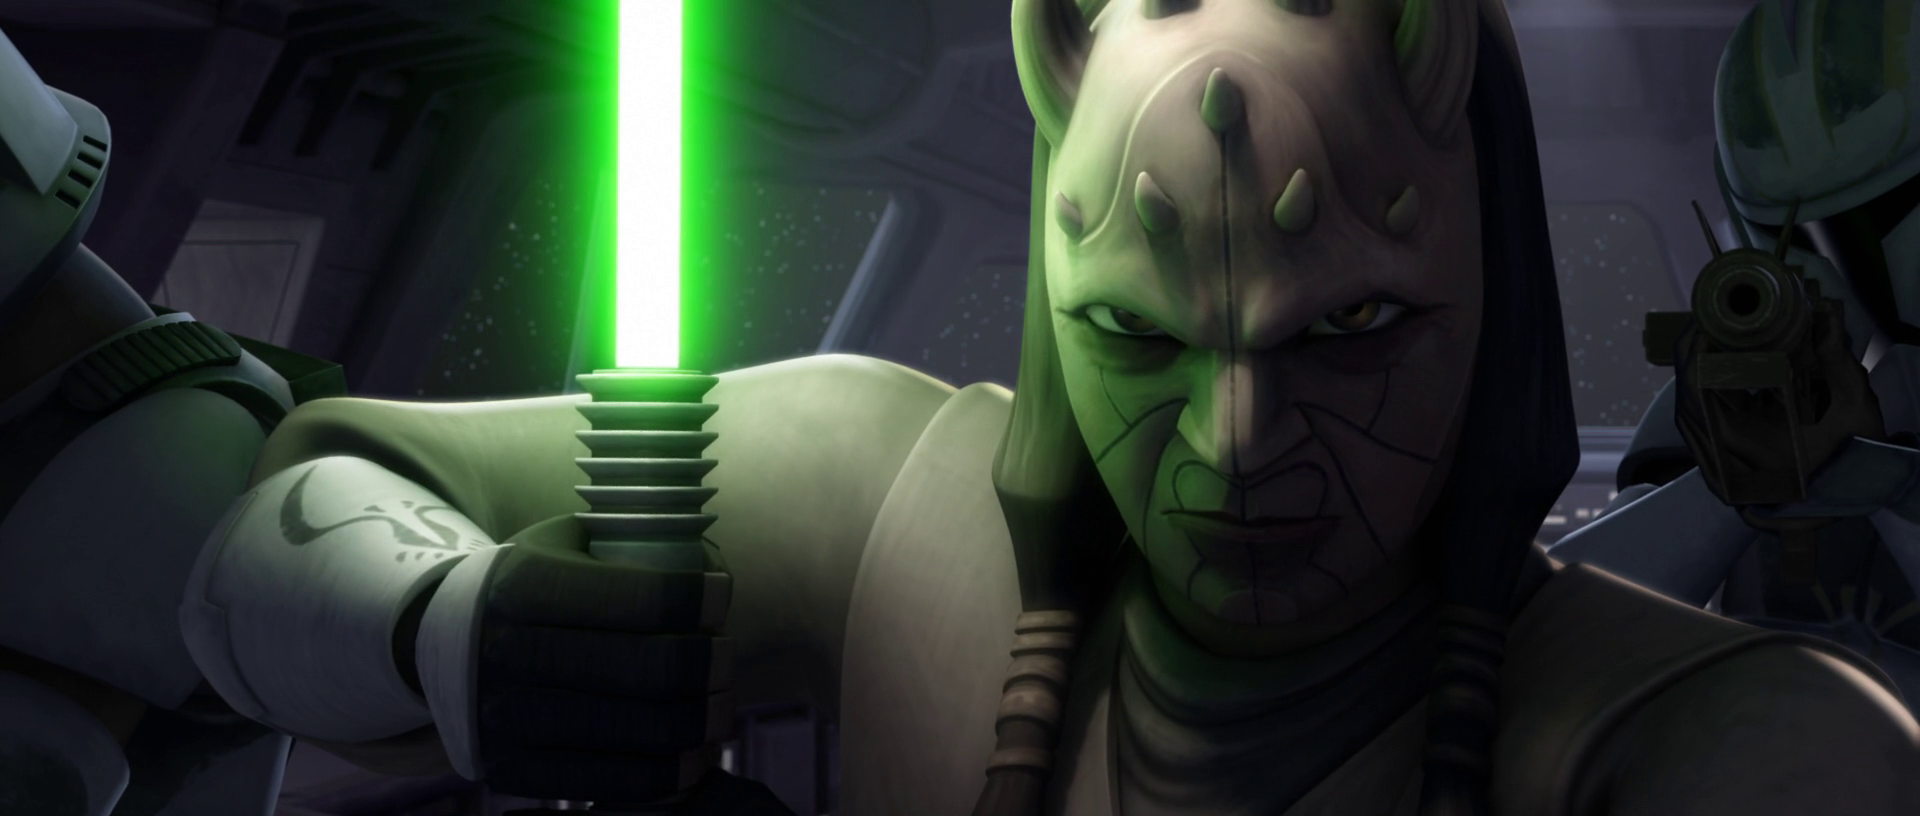
Eeth Koth's clone troopers, battling Grievous's battle droids aboard the Steadfast.
As Koth's fleet came under ambush from Grievous's command ship and accompanying frigates, with the latter remaining away, the Recusant-class light destroyer and Steadfast began to trade a barrage of turbolaser fire against eithers' starboard hulls during broadside engagements, extensively damaging both vessels in the process. While under fire, Grievous's warship proceeded to closely approach the Steadfasts starboard side, in preparation to attach an armored boarding tube with one of the Republic vessel's docking ports. Preparing to board the Star Destroyer, General Koth, aboard the command bridge, instructed his onboard unit of clone troopers, commanded by Clone Captain Lock, to standby as Grievous began to board with his flagship. With the entry door reinforced by Lock and several other clone troopers, the Separatist general deployed multiple groups of B2-series super battle droids and BX-series droid commandos into the Steadfast to attack the clone forces.
While the onboard engagement ensued on the warship's lower levels, Captain Lock was contacted by the Jedi General from aboard the bridge, who ordered him and his remaining clone troopers to make their way to the escape pods and evacuate the Steadfast. Though Koth stated his intentions of withholding the responsibility of combating Grievous on the bridge, the Clone Captain attempted to reason with the Jedi, but Koth insisted he evacuate. Upon his command, Koth's communications with Lock were subsequently disabled as the Separatist commander arrived outside the blast doors to the command center on the bridge. Outside the bridge, the Jedi Master and his accompanying clone troopers assumed defensive positions as Grievous breached the blast doors with his lightsabers. Cutting a circular hole in the doors, the Separatist commander forcefully entered the bridge as he kicked the penetrated door pieces open, sending them into an unsuspecting clone trooper.
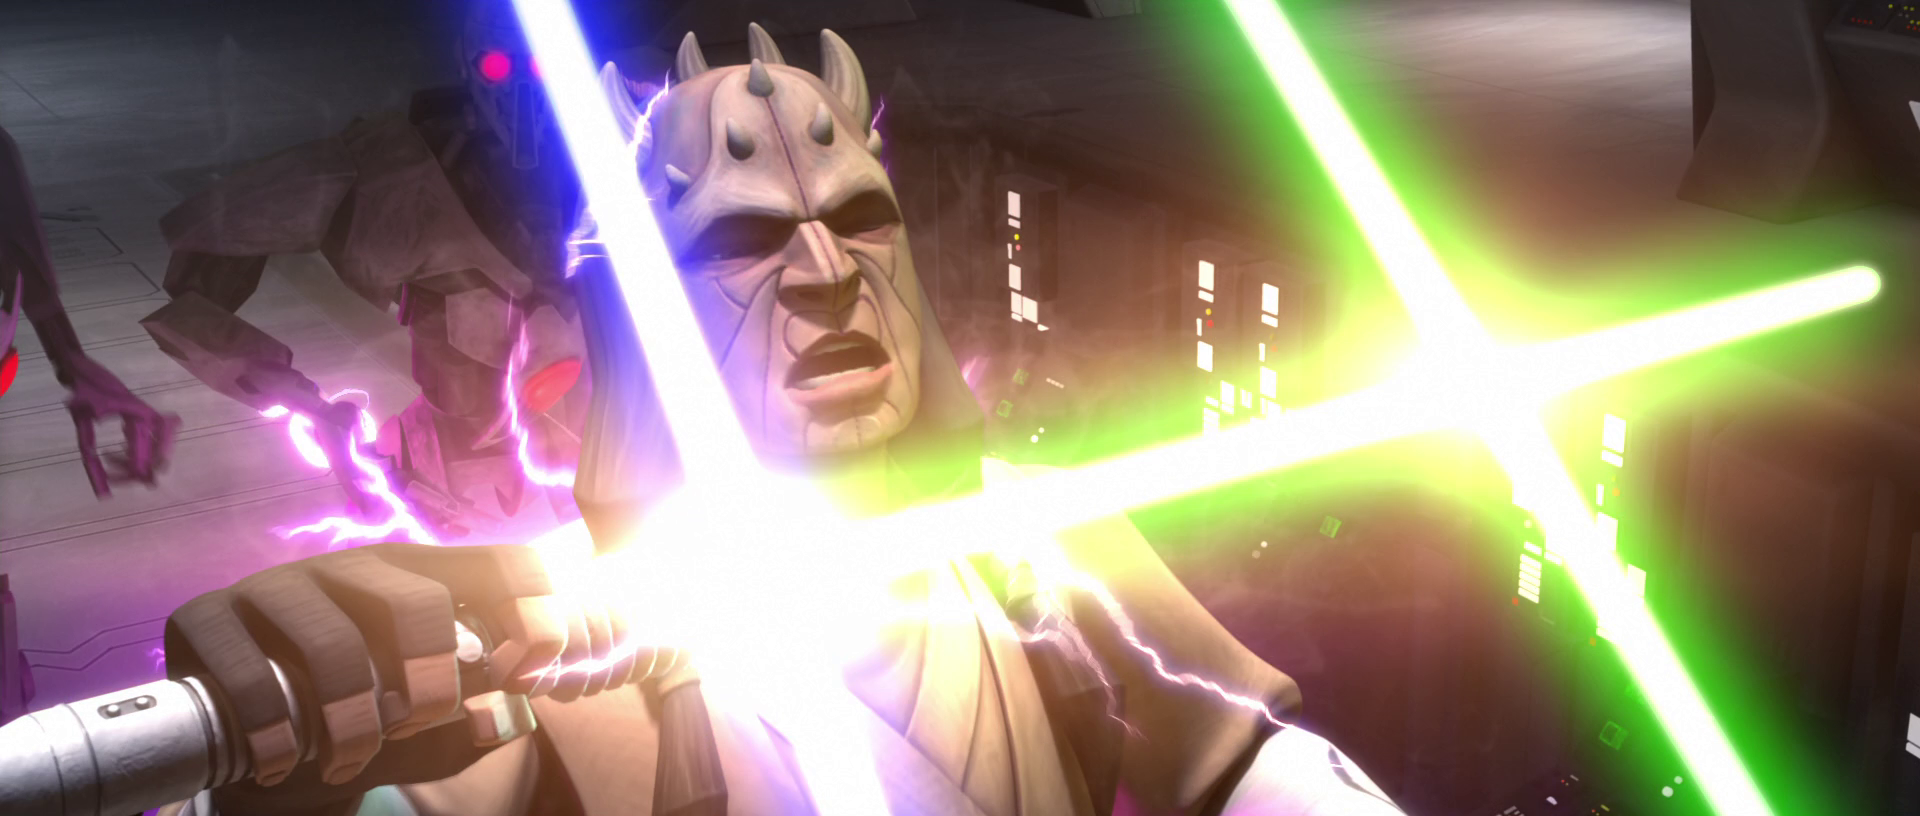
During his duel Grievous, Eeth Koth was electrocuted by IG-100 MagnaGuards.
Entering the command bridge, a squad of droid commandos followed through the doors and attacked the Jedi and his troopers. Killing several of the troopers and the two navigation officers on the bridge, the four battle droids focused their efforts on the Jedi Master, resulting in Koth being wounded as one of the droids shot his arm, which caused him to drop his lightsaber, but not before he destroyed three of the droids. However, as the remaining droid attempted to eliminate the Jedi Master, a remaining clone trooper prevented the droid from following through as he blasted it. With the commando droids destroyed, the surviving trooper was killed upon the entry of a group of four IG-100 MagnaGuards, which proceeded to surround Koth as Grievous leapt onto the communications table.
As Grievous entered conversation with Koth, the Separatist general announced his desire to meet the Jedi Master in person, who proceeded to deride Grievous for his cowardly and murderous reputation. To his derision, the Separatist leader pondered if the extermination of the Jedi Order was to be considered murder, activating his lightsabers in response and kicking Koth backwards, igniting a duel aboard the bridge. Forced back towards the bridge's viewports by Grievous's attacks of parries and various swings, who was closely followed by the MagnaGuards, the general created ample distance from the Jedi Master, who launched the cyborg into the viewports with the Force.
However, while Grievous recovered and Koth attempted to strike at the cyborg, the general's MagnaGuards intervened as they electrocuted the Jedi with their electrostaffs, allowing Grievous to enter a brief saberlock with Koth while the battle droids continued electrocuting him. Weakened by the numerous strikes from the MagnaGuards, Koth soon fell to his knees, which gave Grievous the opportunity to hold the Jedi by his neck and lift him from the ground. Unusually, Grievous decided against killing the Jedi Master, as was the general's common procedure, but instead chose to take ownership of the Jedi's lightsaber. Following his defeat, the Jedi Master was transported aboard Grievous's command ship, where he was held as a hostage and eventually brought to the planet Saleucami.

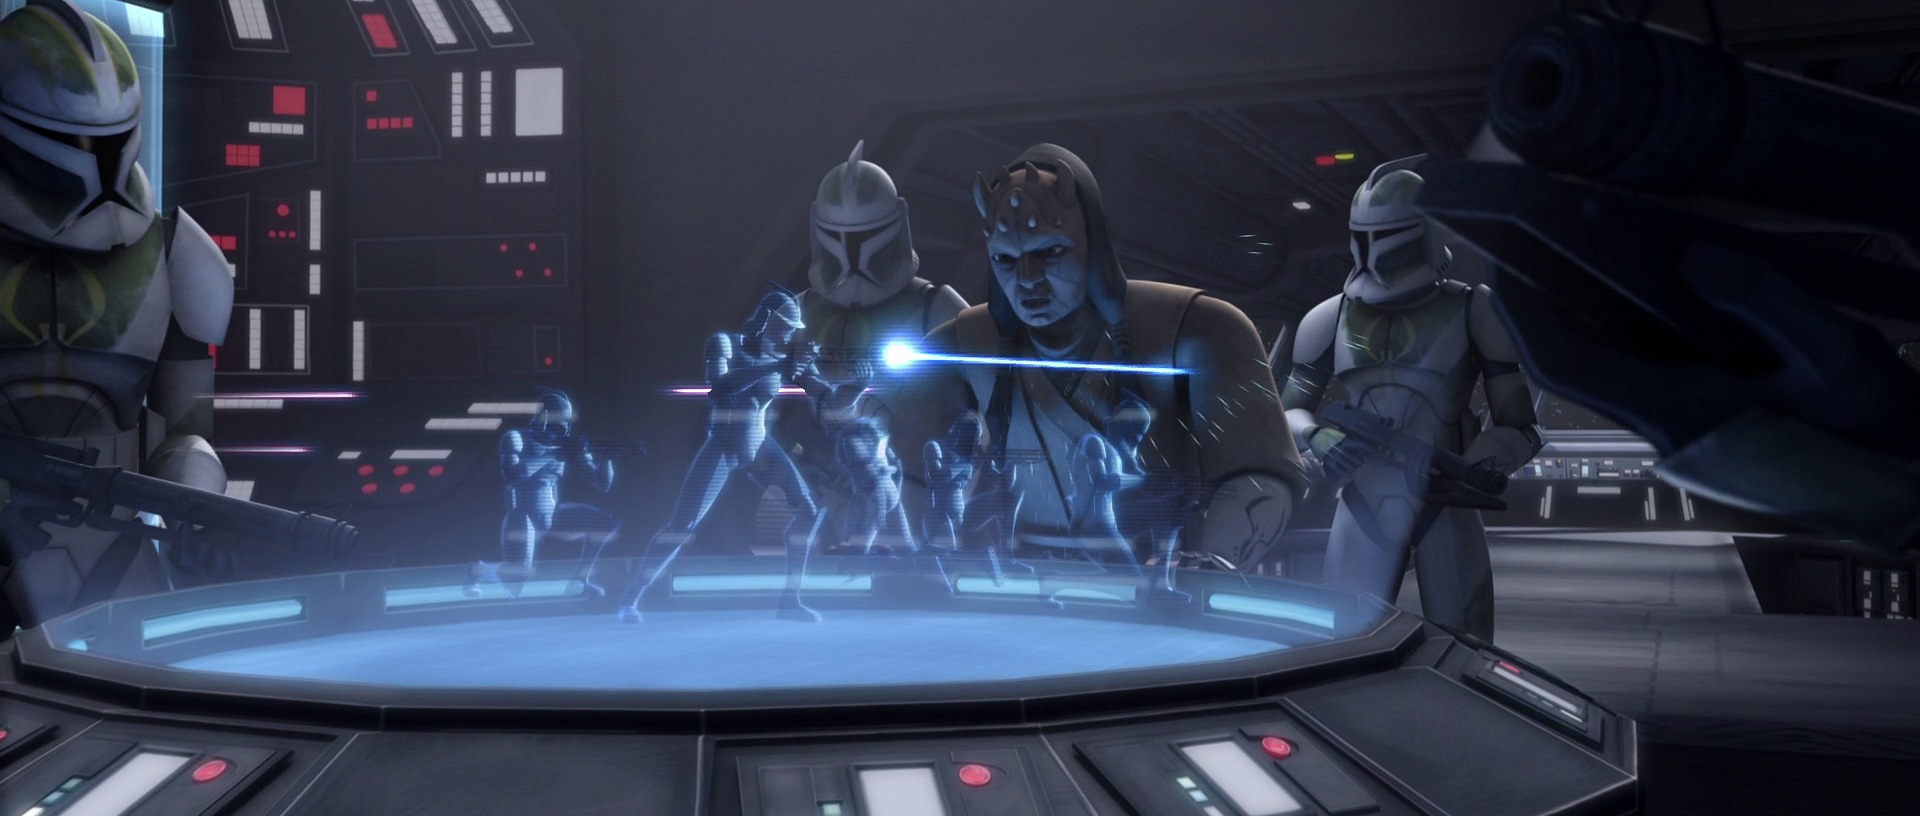
After capturing Eeth Koth, Grievous transmitted a message to the Jedi Order on Coruscant.
Shortly after Grievous's capture of Koth, the cybernetic warlord transmitted a holographic message to the Jedi Order's headquarters on the planet Coruscant, the capital of the Republic. In his message, viewed by several Jedi, such as the Jedi High Council and younglings, displaying his defeat of the Jedi Master, whom Grievous stated was a prized capture due to Koth's service as a member of the Jedi Council, the Separatist commander expressed his disdain for the Force-sensitive organization. Furthermore, Grievous declared that his involvement in the war was not of care for either politics or the Republic, but because of his desire to kill the Jedi. However, as the Jedi Master was tortured by a MagnaGuard, the general then explained that Koth would not be killed, stating his utilization as a tool for fear and anguish, understanding that his suffering would pain the Jedi.
Upon the transmission's end, Republic 104th Battalion Clone Commander Wolffe, designated CC-3636, discovered a hidden message within the recording, which revealed Grievous's location in the Saleucami system, at Sector J-19; coordinates zero-eight, zero-five, two-nine. Although under the impression that Republic Intelligence suggested that neither Grievous or Separatist forces were located in the Suolriep sector, the Republic ordered the immediate dispatchment of a task force to Saleucami to retrieve General Koth from Grievous as well as capture the Separatist leader. Led by Jedi Generals Obi-Wan Kenobi, Anakin Skywalker, and Adi Gallia, the Republic task force left shortly after, planning to distract Grievous, who had anticipated and planned for a rescue mission, with Kenobi in order for Skywalker and Gallia to board his destroyer and rescue Koth.
The original plot for "Grievous Intrigue" saw Eeth Koth's death at Grievous's hands.
The capture of Eeth Koth was introduced in "Grievous Intrigue," the ninth episode of the Star Wars: The Clone Wars television series's second season, which aired on January 1, 2010. In the original plot for the episode, Grievous was set to have killed Eeth Koth during the battle. However, the plot was changed to have Koth captured by Grievous, instead, in order for the character's potential appearance in future episodes as desired by series Director, Dave Filoni. In the current Star Wars canon, the battle was stated to have been fought near the astronomical object of Arda in the 107th issue of The Official Star Wars Fact File, a magazine series published by De Agostini in 2014. However, Star Wars Lightsabers: A Guide to Weapons of the Force, a reference book authored by Pablo Hidalgo and published on April 10, 2018, altered its location to the Saleucami system, which the article assumes to be the correct location due to Star Wars Lightsabers: A Guide to Weapons of the Force being the more recent source.
An image of the duel between Grievous and Koth was later used in the forty-seventh issue of De Agostini's Star Wars: Build Your Own X-Wing magazine series, published in 2020, which was erroneously used to depict the battle of Patitite Pattuna and Grievous's capture of Jedi Master Adi Gallia in "Nomad Droids," the sixth episode of the series's fourth season, which aired on October 14, 2011. In the fifty-seventh issue of De Agostini's Star Wars: Build Your Own R2-D2 magazine series, published in 2018, Eeth Koth's capture was described as occurring over Saleucami, which the article assumes an error due to "Grievous Intrigue" displaying its placement in open space, rather than above Saleucami, coupled with the establishment of its occurrence in the Saleucami system by Star Wars Lightsabers: A Guide to Weapons of the Force and deep Outer Rim space by the corresponding episode guide. The error would later be repeated in Star Wars: The Clone Wars: Character Encyclopedia - Join the Battle!, which claimed the battle was fought "at" Saluecami.
In the subsequent Battle of Saleucami, Grievous duels Jedi Master Obi-Wan Kenobi aboard the Arquitens-class light cruiser Surrogator. However, The Star Wars Book, published by Dorling Kindersley on October 20, 2020, incorrectly establishes that their duel took place aboard the Steadfast. Previously, in the Star Wars Legends continuity, the battle was established by Star Wars: The Clone Wars: New Battlefronts: The Visual Guide, a reference book authored by Jason Fry and published in August 2010, to have been fought near the Arda system of the Gordian Reach.