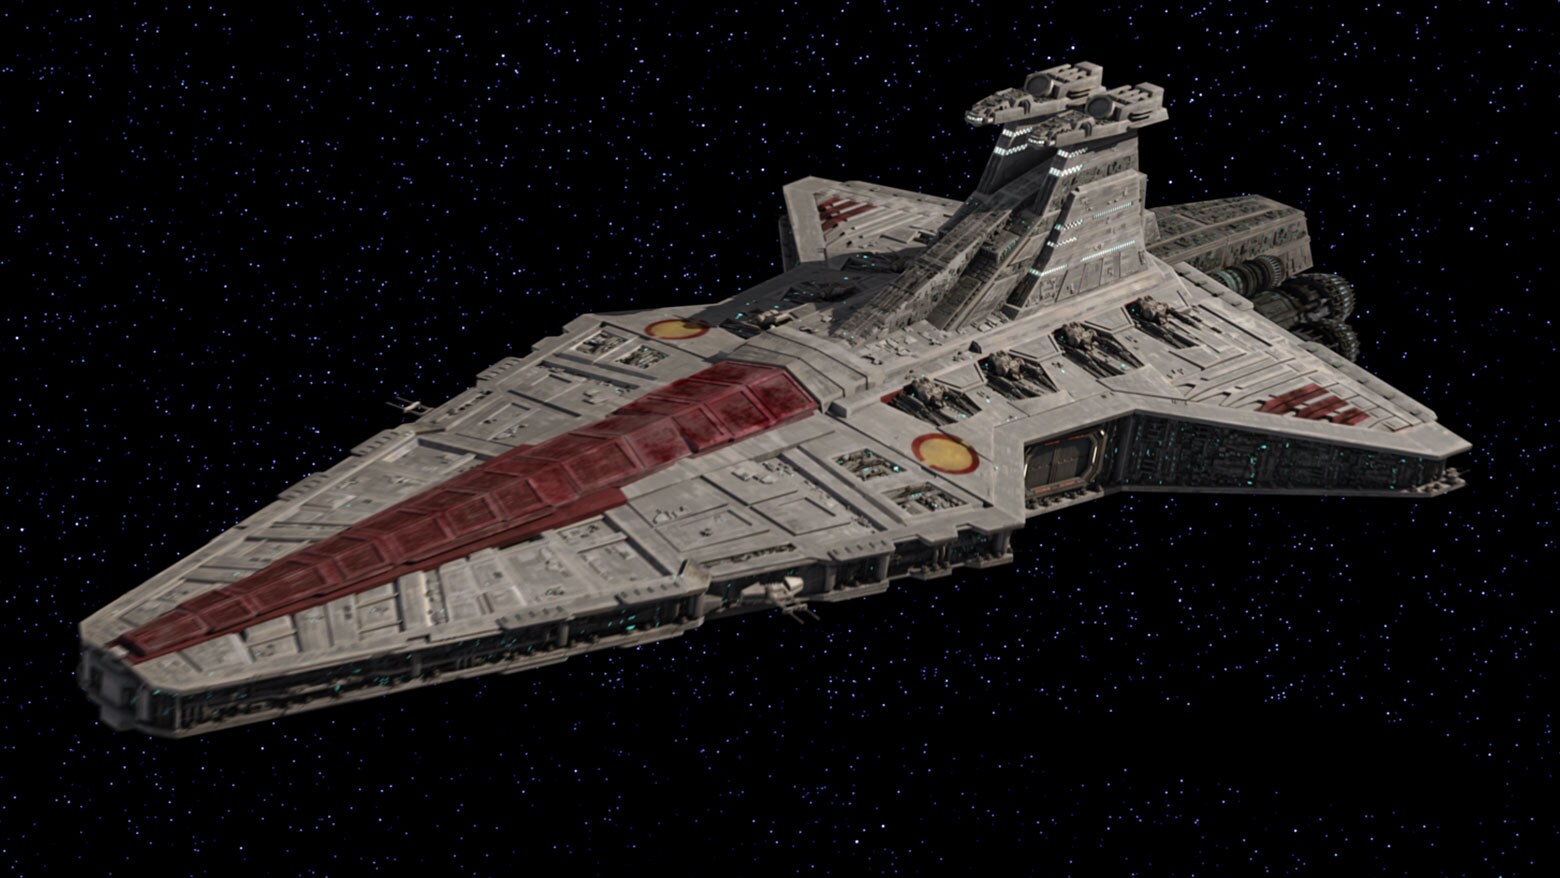
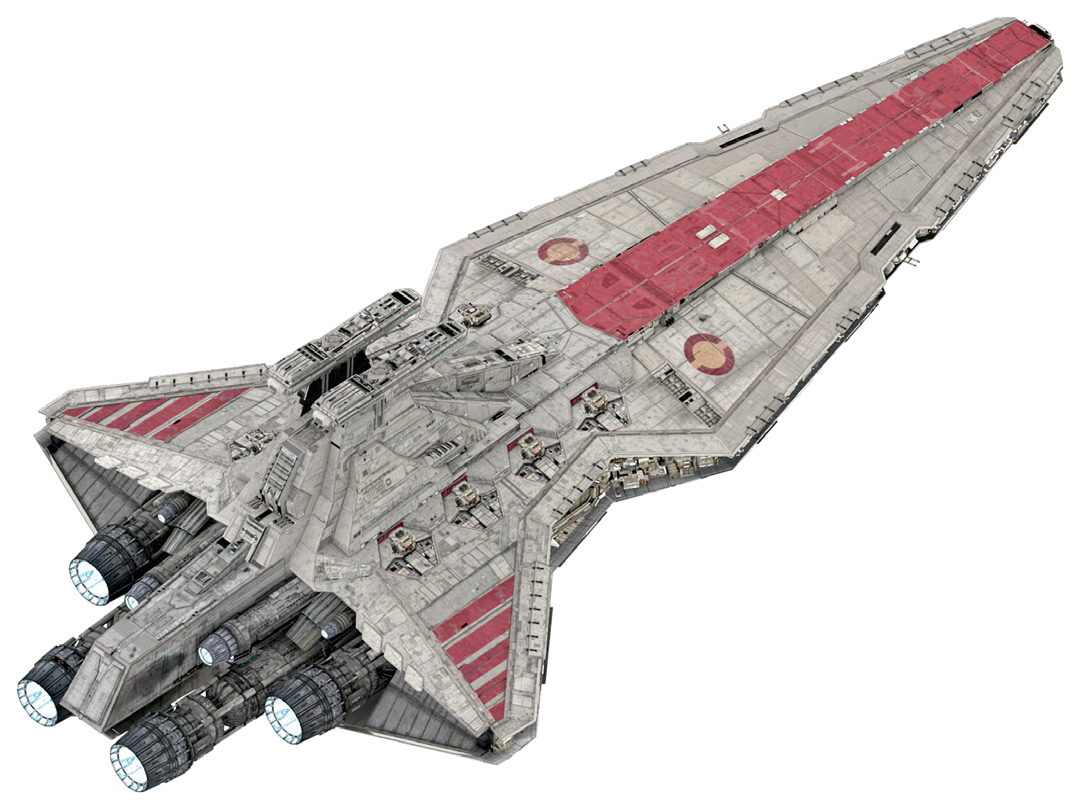
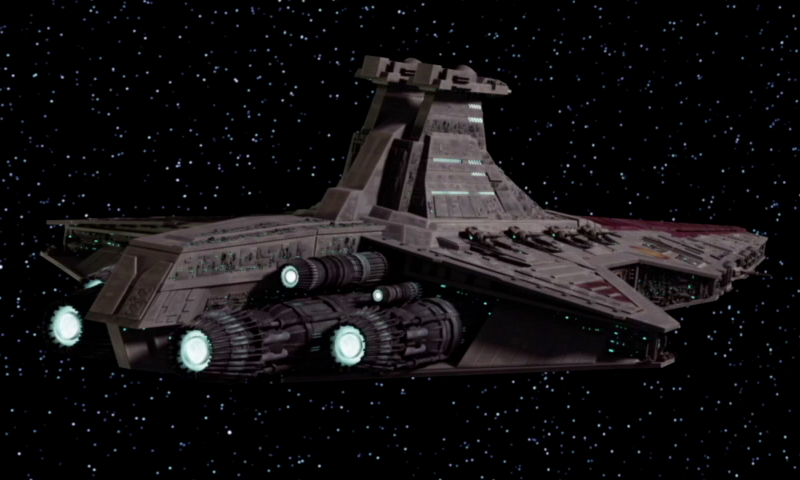
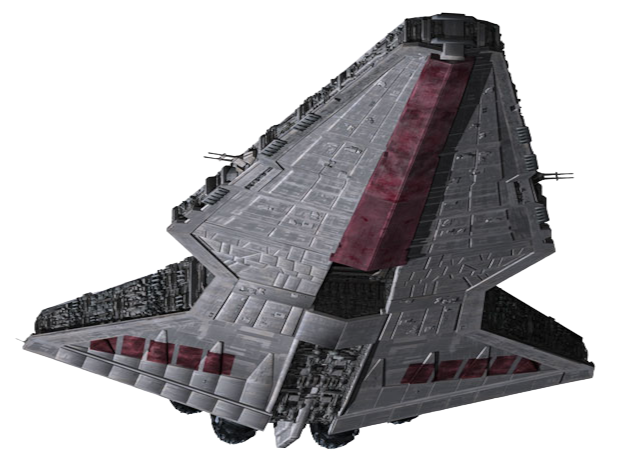
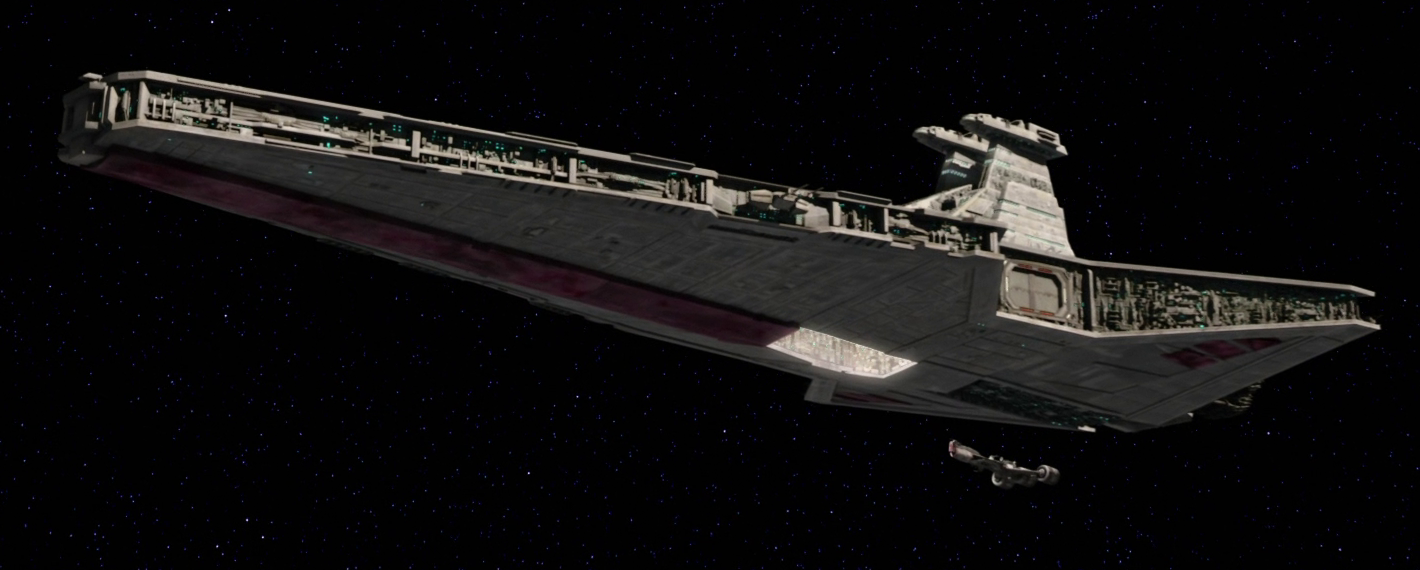
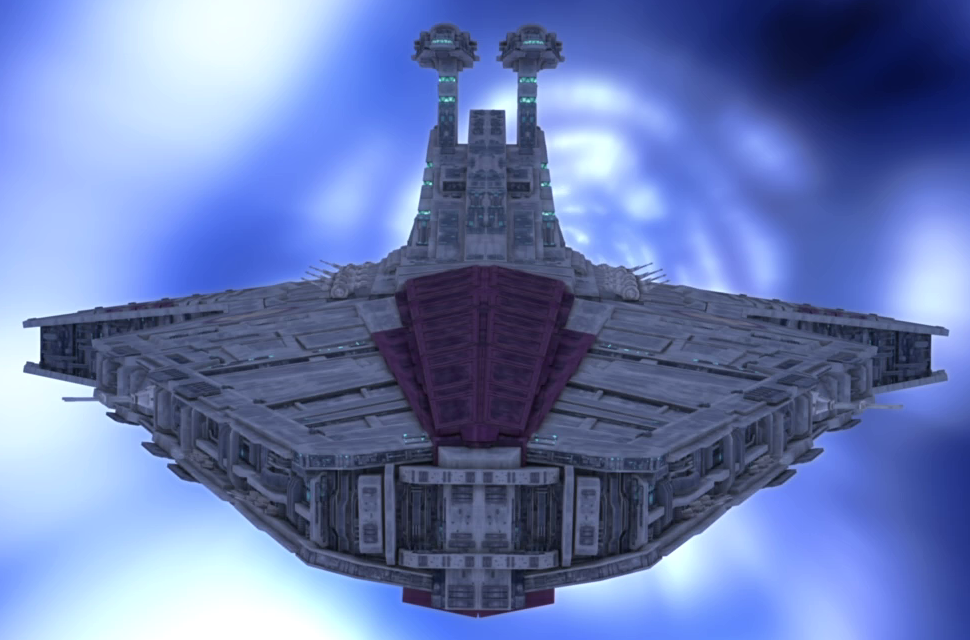
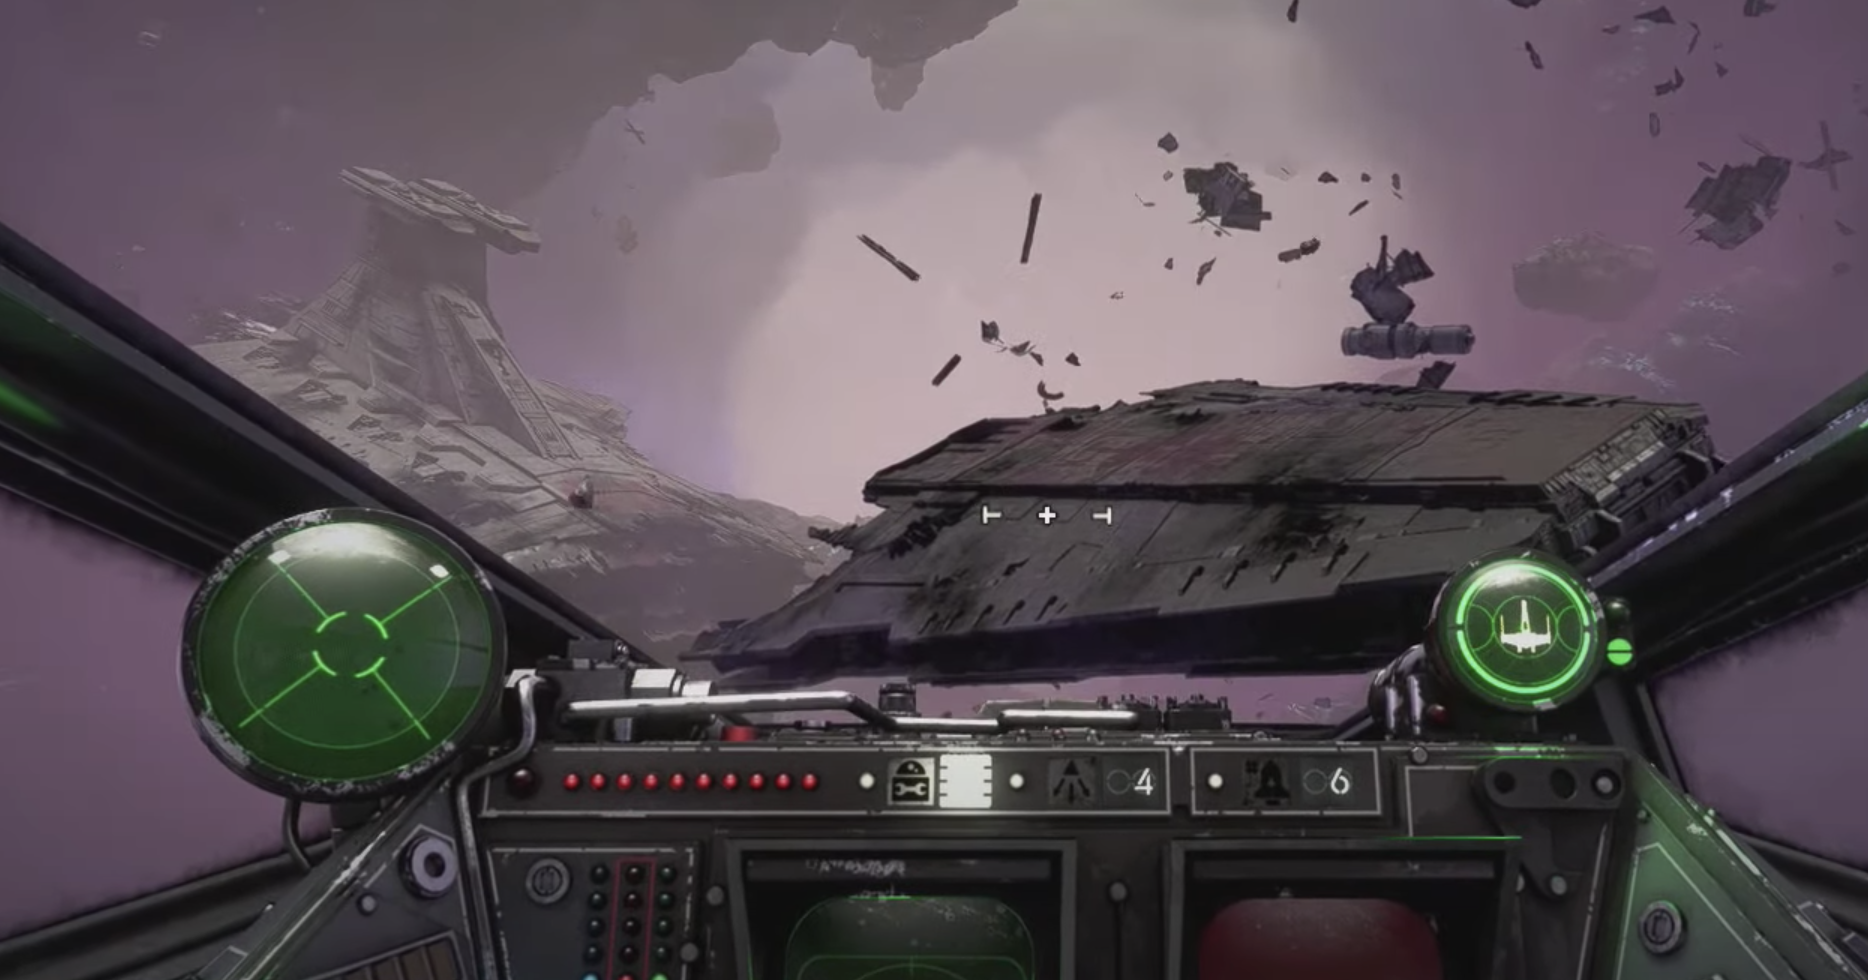
The Venator-class Star Destroyer, also known as the Venator-class cruiser, was a class of more than 1,000 meter-long attack cruiser of the Star Destroyer design family that was operated by the navies of the Galactic Republic and its successor Galactic Empire. Designed by Lira Wessex to feature a double-wedge design and perform a wide range of missions, the Venator was the first class of Star Destroyer to be manufactured by Kuat Drive Yards. Alternatively known as the Republic cruiser, Republic attack cruiser, or Republic Star Destroyer, it was a versatile capital ship capable of serving as both a combatant in ship-to-ship naval warfare and a starfighter carrier, while also being employed as a troop transport, cargo ship, and supply and replenishment vessel. As a warship, Venators were protected by powerful deflector shields and boasted a range of weaponry. For its carrier role, a large flight deck, along with hangars to accommodate a complement of starfighters, gunships, shuttles, armored vehicles and other craft, was contained in the forward section, while three more docking bays were located around the ship. At least two variants existed, the Venator I-class and the Venator II-class.
As the backbone of the Galactic Republic's naval forces during the Clone Wars, the Venator was commonly employed by the Jedi Generals of the Grand Army of the Republic as their flagships, thus earning the moniker of Jedi cruiser. Deployed across the galaxy against the Confederacy of Independent Systems, Venators saw action in many major engagements, such as the Battle of Christophsis, the Malevolence Campaign, the Battle of Ryloth, and the Second Battle of Geonosis. In the climactic Battle of Coruscant in the waning days of the war, over 1,000 Venators defended the galactic capital Coruscant against a massive Separatist fleet. Eventually, these starships emerged on the victors' side as icons of the conflict.
When the age of the Republic ended with Darth Sidious's purge of the Jedi Order and his establishment of the new Galactic Empire, the Venator-class Star Destroyers were absorbed into the nascent Imperial Navy. During the early Imperial Era, Venators were utilized to consolidate Palpatine's authority, and later they fought against the fledgling rebel cause. They were also assigned to the private fleets of Imperial Moffs, and to flight schools. Others were scrapped on planets like Bracca, where they were dismantled and salvaged by the Scrapper Guild. Although Venators were still active at the time of the Galactic Civil War, they had mostly been replaced by the Imperial-class Star Destroyer, a larger warship modeled on its Republic predecessor.
The Venator-class was a class of Star Destroyer designed by Lira Wessex and manufactured by Kuat Drive Yards.
The Venator-class Star Destroyer, or Venator-class cruiser, also called the Jedi cruiser, Republic cruiser, Republic attack cruiser, or Republic Star Destroyer, was a type of cruiser-classed Star Destroyer. Beyond their status as cruisers, specifically attack cruisers, Venators were classified as battleships and destroyers. Designed by Lira Wessex, it cost 59,000,000 credits and was manufactured by Kuat Drive Yards for the naval operations of the Galactic Republic in the Clone Wars.
Spanning between 1,137 and 1,155.0 meters in length, 548 meters in wingspan, and 268 meters in height, the Venator was defended by powerful deflector shields and hull armor plating, while possessing an assortment of armaments. It was also equipped with a long-range sensor suite, as well as a navigation computer and corresponding systems. Venator-class vessels generally carried a crew of 7,400 personnel, including officers, pilots and enlisted crew, but could also hold some 2,000 troops in addition. 7,000 metric tons of cargo could be transported aboard the Venator, as well as sufficient consumables to last two standard years.
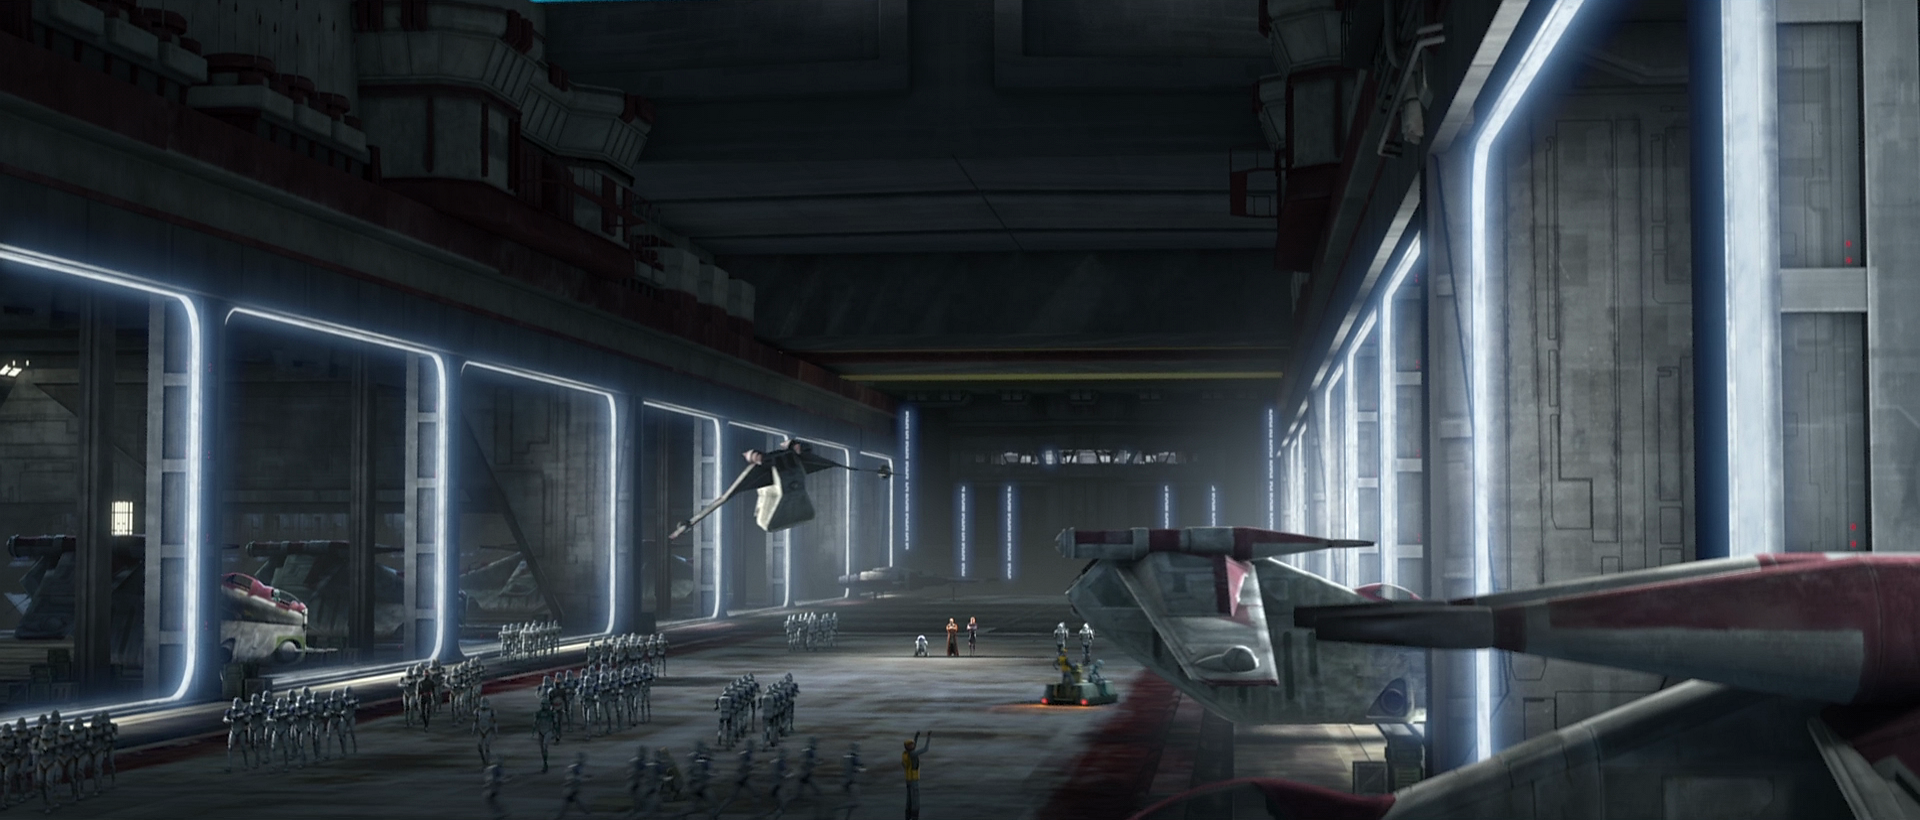
An interior view of the main hangar of a Venator, facing aft
During the early period of the Clone Wars, the Venator-class Star Destroyer featured a wide array of hangar space. The forward section of the Star Destroyer featured a passage measuring 0.5 kilometers down the middle, with bays for starships on either side. It was mainly accessed by large doors on top of the ship. At the fore of this passage, at the bow the ship, was a collection of hyperspace transport rings. Towards the aft of the passage, doors in the floor could open, leading to a space where Republic frigates could dock.
A new version of the Venator-class featured smaller doors on the ship's dorsal side.
If no cruiser was docked, however, the space could be used by personnel to jump out of the Star Destroyer directly onto the battlefield, or to deploy walkers without the need for dropships. Overseeing the passage was a raised command station positioned at the aft. Even further aft, the Venator-class had two independent docking bays on their port and starboard sides, again protected by blast doors. However, in later models, refits were made to incorporate more firepower at the expense of the main hangar.
Towards the end of the war, a different type of Venator was used. These featured a set of smaller doors on the dorsal side of the ship, and lacked access from the ventral side altogether, with the blast doors that previously led to the main hangar space replaced with additional lighting, a crane and sometimes additional weaponry, such as a built-in beam weapon. Additionally, the side doors no longer led to independent hangars, but another passage that linked the two sides of the ship. The central hangar row then joined the smaller passage in the middle, replacing where the command station used to be. At the front of the main passage was a small opening starfighters could launch from without having to go through any of the main doors.

The starboard bridge was designated as the command center, while the port bridge was for starfighter operations.
Venator-class Star Destroyers featured two bridges, with the starboard bridge serving as the primary command center of the ship and the port bridge being dedicated to starfighter operations. These bridges were raised from the main body of the destroyer and provided a wide, panoramic view of the battle. However, the bridges' exposed nature made them vulnerable to attack. The bridges featured large windows at the front, with two sunken pits behind, with a raised command walkway in between. This design would become a staple in Imperial vessels, giving emphasis to the command hierarchy. Further behind, a holotable sat between two sets of blast doors which could be used for communication, ship analysis and troop movements.
Venators possessed multi-purpose DBY-827 heavy turbolaser cannons.
As a capable warship, the Venator-class Star Destroyer boasted a myriad of weapons. On the dorsal side, eight double-barreled DBY-827 heavy turbolaser turrets, four on either side of the bridge area, were a key source of firepower. These heavy turbolasers had different modes of firing: one was to fire alternating between the two barrels, at variable but relatively rapid rates, while another was to fire both barrels simultaneously, but at a generally lower but still variable rate. The DBY-827's precise, long-range tracking was suited for hitting targets at a distance, while it could rotate in three seconds in the close-fighting, fast-tracking mode to engage targets nearby. DBY-827 turrets had seven different blast intensities so that the damage inflicted could be modulated under various circumstances, and the Venator could feed almost its entire reactor output to its heavy guns when needed. During the Battle of Bothawui, one Venator had at least four DBY-827's on the ventral side of the vessel.
Another form of firepower came in the AV-7 Anti-vehicle Artillery Cannon, albeit mounted to the vessel without legs, which could be operated by a single soldier and was also used as an artillery piece for Republic ground forces. The Venator's artillery decks featured long rows of many such cannons that aimed approximately perpendicular to the length of the ship in order to fire at vessels across from it, usually at close range. The AV-7 cannons and their ammunition were susceptible to exploding if struck by enemy fire when Venators brawled with opposing ships.
An anti-starfighter gun aboard the Endurance
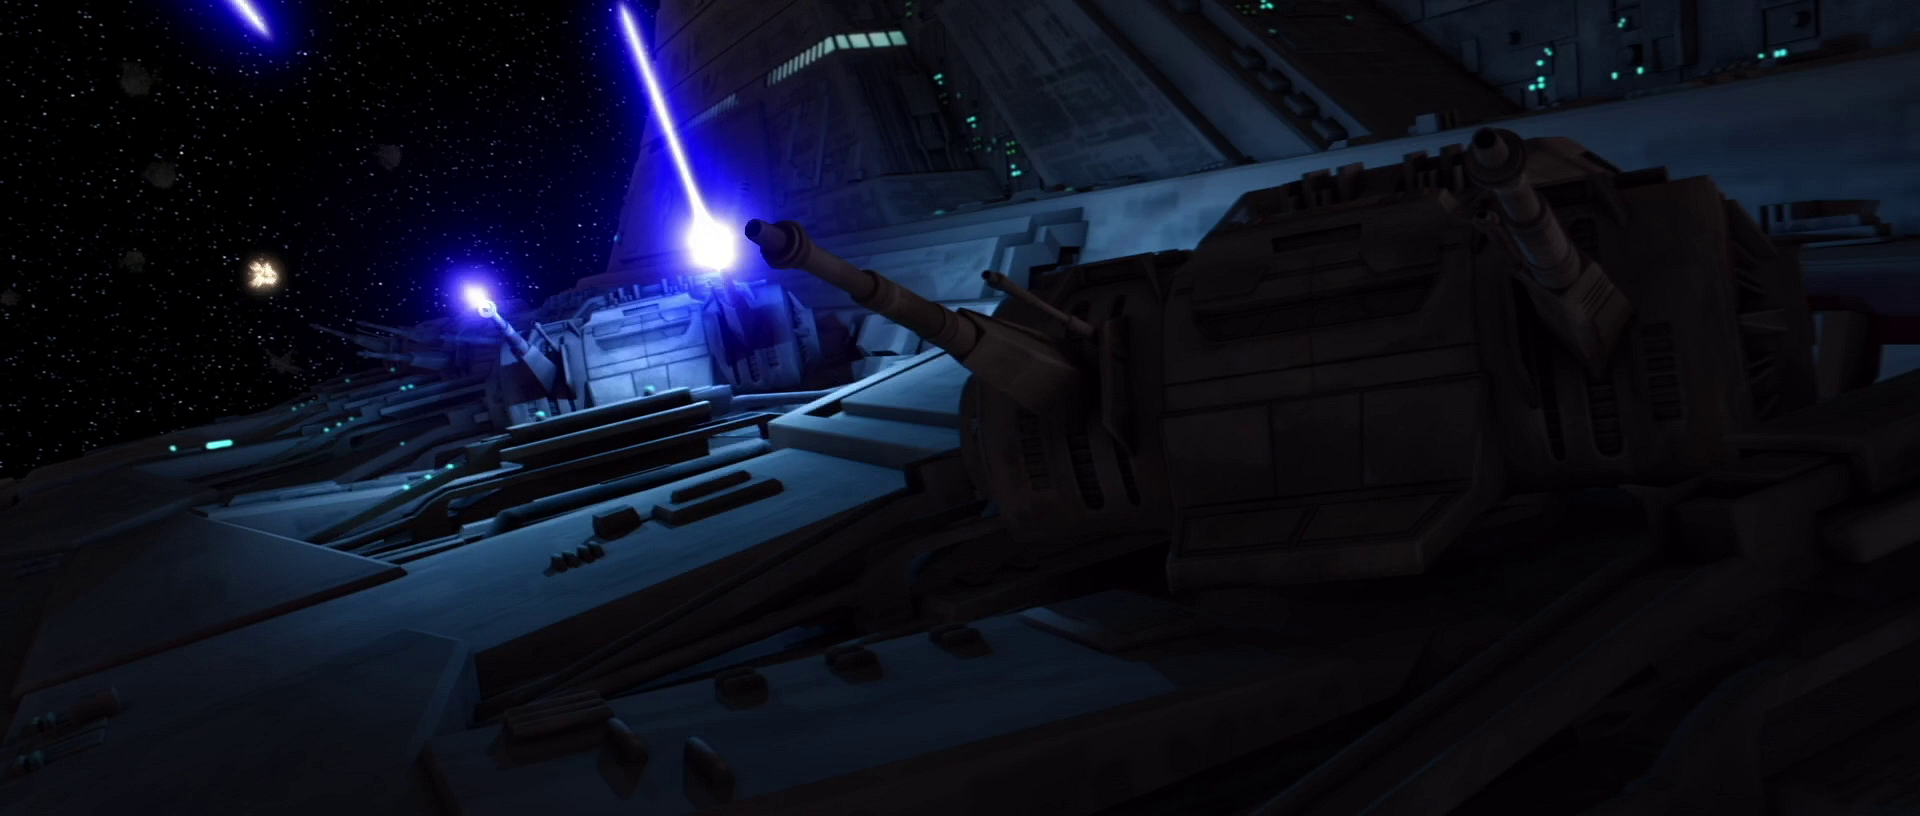
The Venator was also equipped with at least 52 point-defense laser cannons for anti-starfighter purposes. At least one kind was a swiveling double-barrelled turret operated by a single gunner, which had a field of fire—left and right, and up and down—in which the turret could swing to attack a unit. For target practice, mechanical skeet packed with explosives could be launched from these gun emplacements, which a gunner would try to hit.
Near the front of the ship, the Venator-class had two sets of medium dual turbolasers located along the hull trench, one on each side. At the aft, light laser cannons were used to defend against enemy starfighters. Four heavy proton torpedo launchers and six heavy tractor beam projectors could additionally be found as part of the combat apparatus, as well as beam weapons attached to the ventral docking bay on certain Venators which were powerful enough to destroy a Munificent-class star frigate with a concentrated shot. Such a blast could either come from an installed laser cannon or Self-Propelled Heavy Artillery Turbolaser. Numerous other gun emplacements dotted the hull trenches of the Venator.
The Venator-class Star Destroyer featured ion thrust engines.
The Venator-class featured eight or ten ion thrust engines of three distinct sizes, with half on either side of the ship at the aft, arranged symmetrically. Each engine consisted of multiple chambers and rings, and the interiors were covered in a blast primer coating. The reaction that propelled the main engines consisted of a pulse combining to spark off the reactor core rods. If three engines on the starboard side and three on the port side failed, auxiliary power would activate.
Additionally, the engines could be individually controlled from the command bridge. If an individual without protective gear was too close to the ion engines when they were online, they could suffer serious burns that would require immediate medical attention. However, these injuries could be recovered from if the victim's exposure to the ion thrust was minimal.

Designated berthing docks for Venators on Coruscant
A Venator usually required specialized landing strips to perform atmospheric landings, such as those at a cruiser staging area on Coruscant, while the similar Acclamator-class assault ships could perform surface landings with their legs. However, surface landings on natural terrain could occur, as exemplified during the Battle of Kashyyyk, when a Venator was able to touch down at the city of Kachirho and deploy Republic ground forces to reinforce the Wookiees. The Venator also possessed retrorockets which could be used in atmosphere.
BTL-B Y-wing bombers launch from the Resolute.
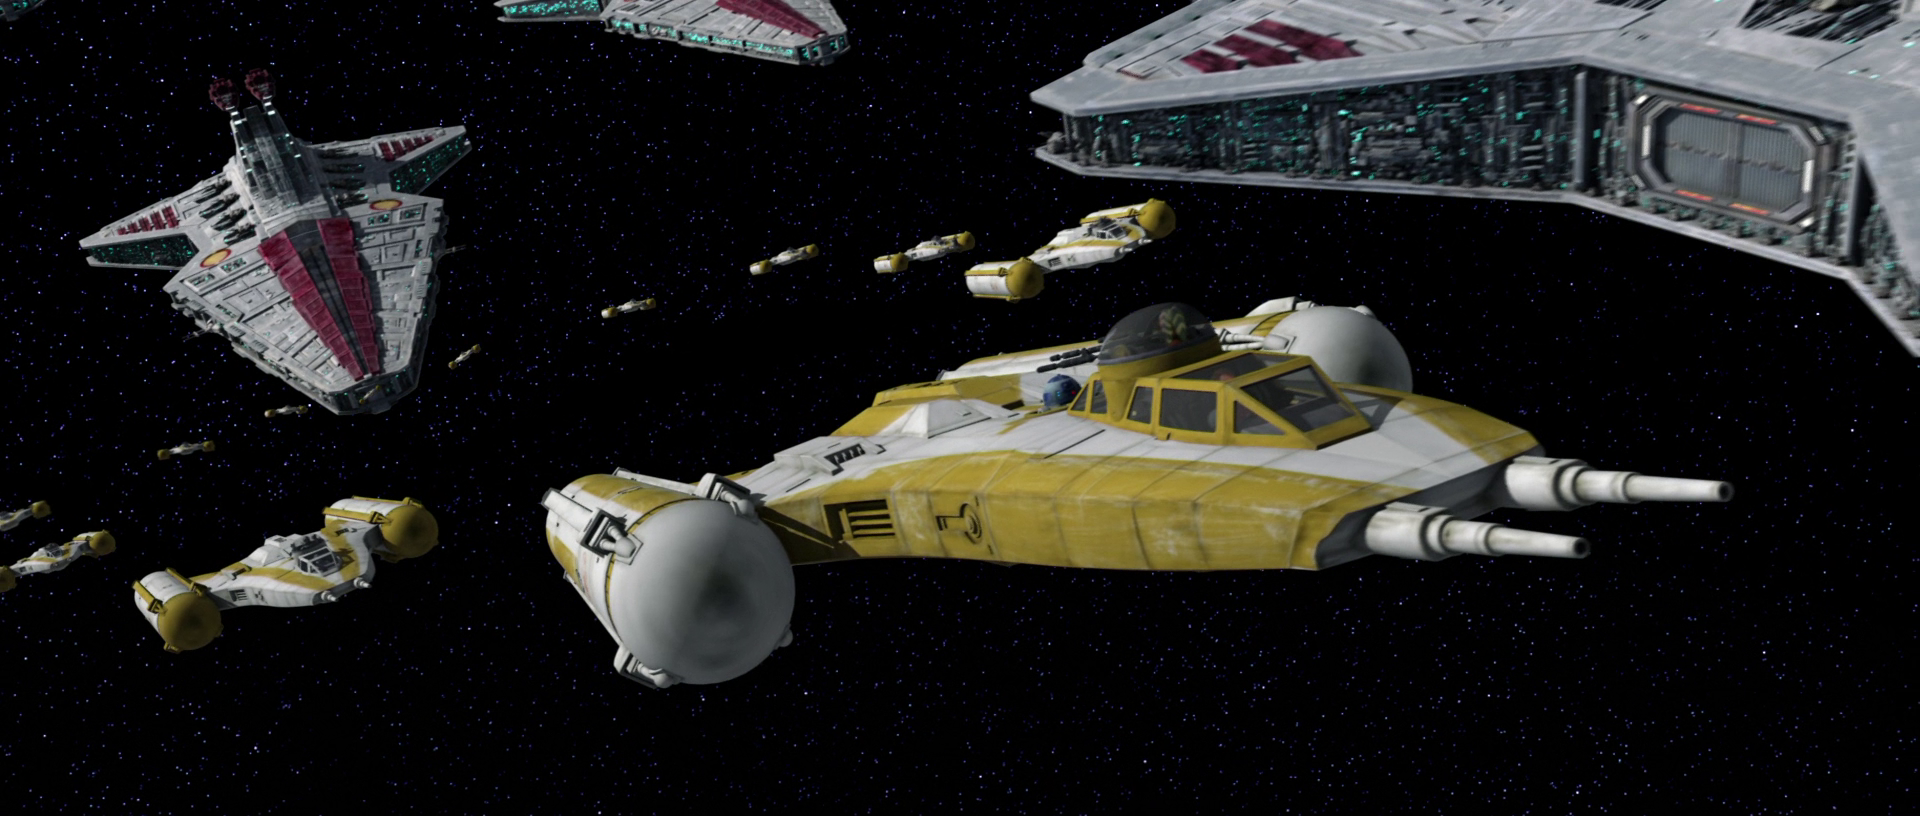
Boasting an impressive starfighter complement, the Venator could carry various types of craft, including 192 Alpha-3 Nimbus-class V-wing starfighters, 192 Eta-2 Actis-class light interceptors, and 36 Aggressive ReConnaissance-170 starfighters, as well as 192 V-19 Torrent starfighters, BTL-B Y-wing starfighter/bombers, and Clone Z-95 Headhunters. It could also hold some 40 Low Altitude Assault Transport/infantrys, a variety of shuttles, and landing craft. Venators could deploy some 24 All Terrain Tactical Enforcer walkers, other ground vehicles and modular components needed for a planetary garrison.
One such chamber aboard the Endurance
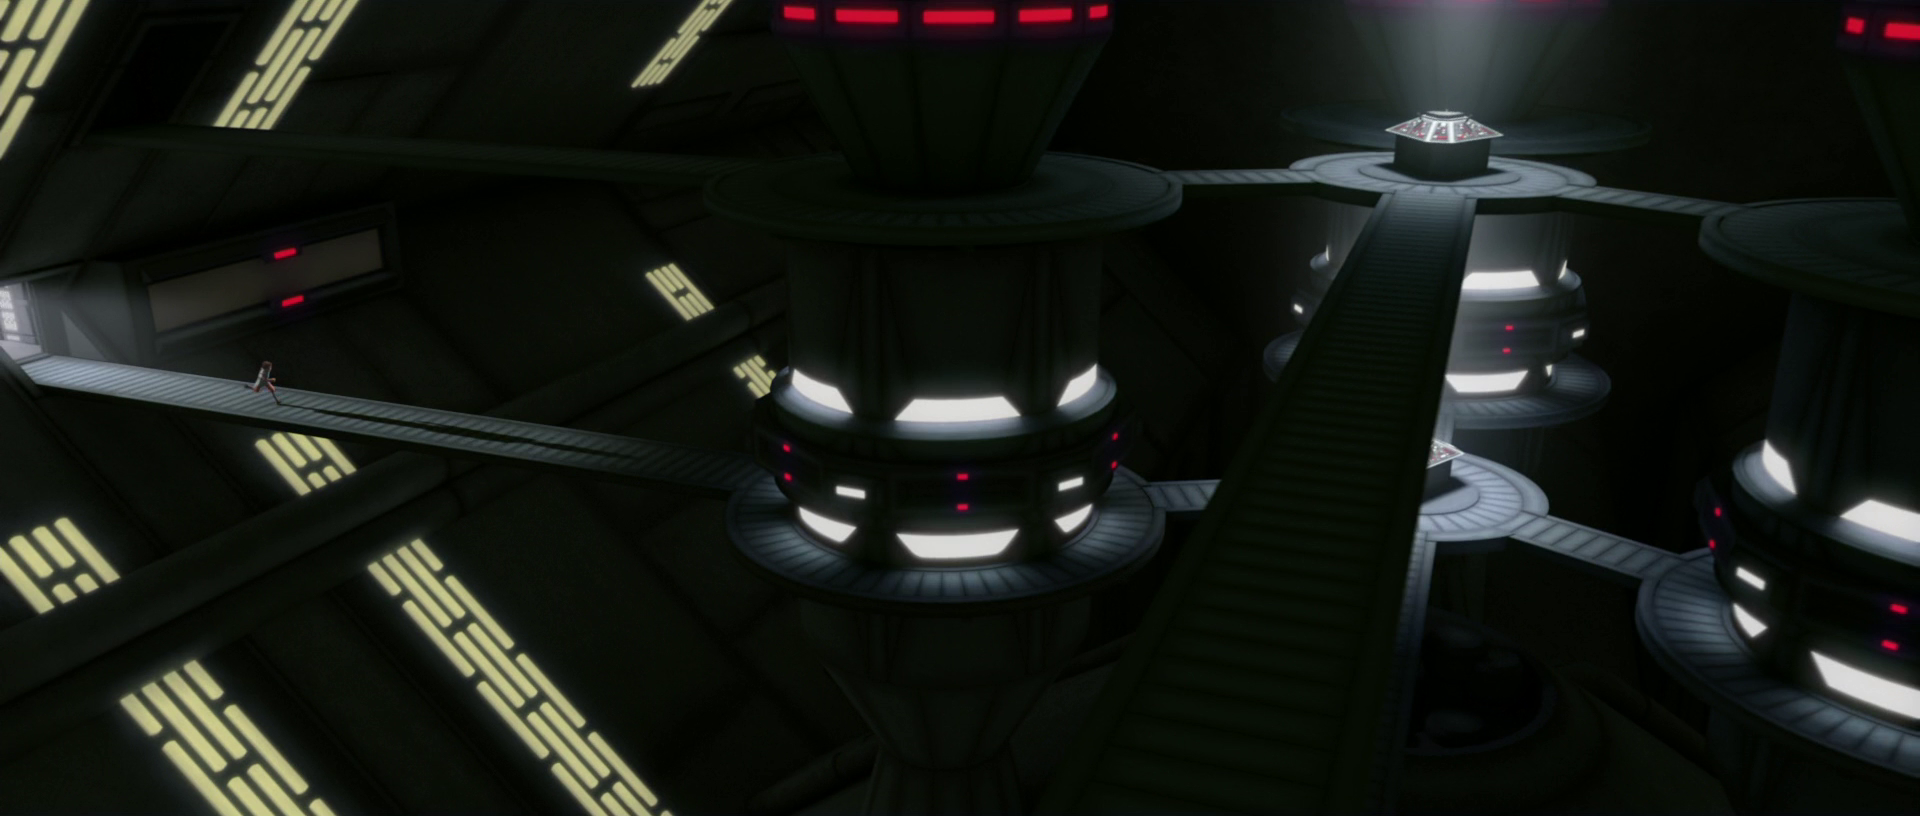
The main reactor of the Venator-class Star Destroyer was a large, dome-shaped chamber located along the center line of the ship, under the bridge tower. It could annihilate up to 40,000 tons of fuel per second at maximum power. Various reactant pumps and ducts, as well as cylindrical annihilation reactant silos, were located to the fore of the main reactor. At least one subsidiary reactor, also dome-shaped but significantly smaller, was found in the left aft "wing" of the vessel. This reactor was surrounded by a collection of power cells.
At least one compartment pertaining to the reactor operations of the Venator contained three vertical shafts and walkways suspended over the chasm. Some walkways approached from three directions between the three shafts to meet at a control station in the middle. Clusters of cylindrical structures were located both below and above this station, as well as extensive tubing throughout the room. Damage to the different systems present in the chamber could sometimes leave the vessel crippled.
Maul was able to destroy several hyperdrive components on the Tribunal.
Each Venator-class ship was equipped with a class 1.0 main hyperdrive, as well as a class 15 backup hyperdrive. At least one hyperdrive generator was located at the back of the rearmost "fin" that separated the ion drive thrusters. In front of it was the main inertial compressor, with the stern power feeds slightly further to the fore.
Similar to one of the reactor operations compartments found aboard Venators, the hyperdrive room was another cavernous chamber, with walkways on at least three levels intersecting above a deep chasm. Situated equidistant from a group of consoles, four tall columns spanned the height of the room, which could be damaged or even knocked completely loose by severe force.
The ventral view of a Republic Venator
As the flagship of the Republic starfleet, the Venator-class was primarily honed for ship-to-ship combat. The large amount of dedicated space for carrying the starfighter complement also supported its duty as a combat ship. However, the Venator had other roles of being a cargo transport, troop carrier, and replenishment or supply vessel. In the Imperial Military, the Venator-class Star Destroyer was still notable as a capital ship that could enforce control over a situation.
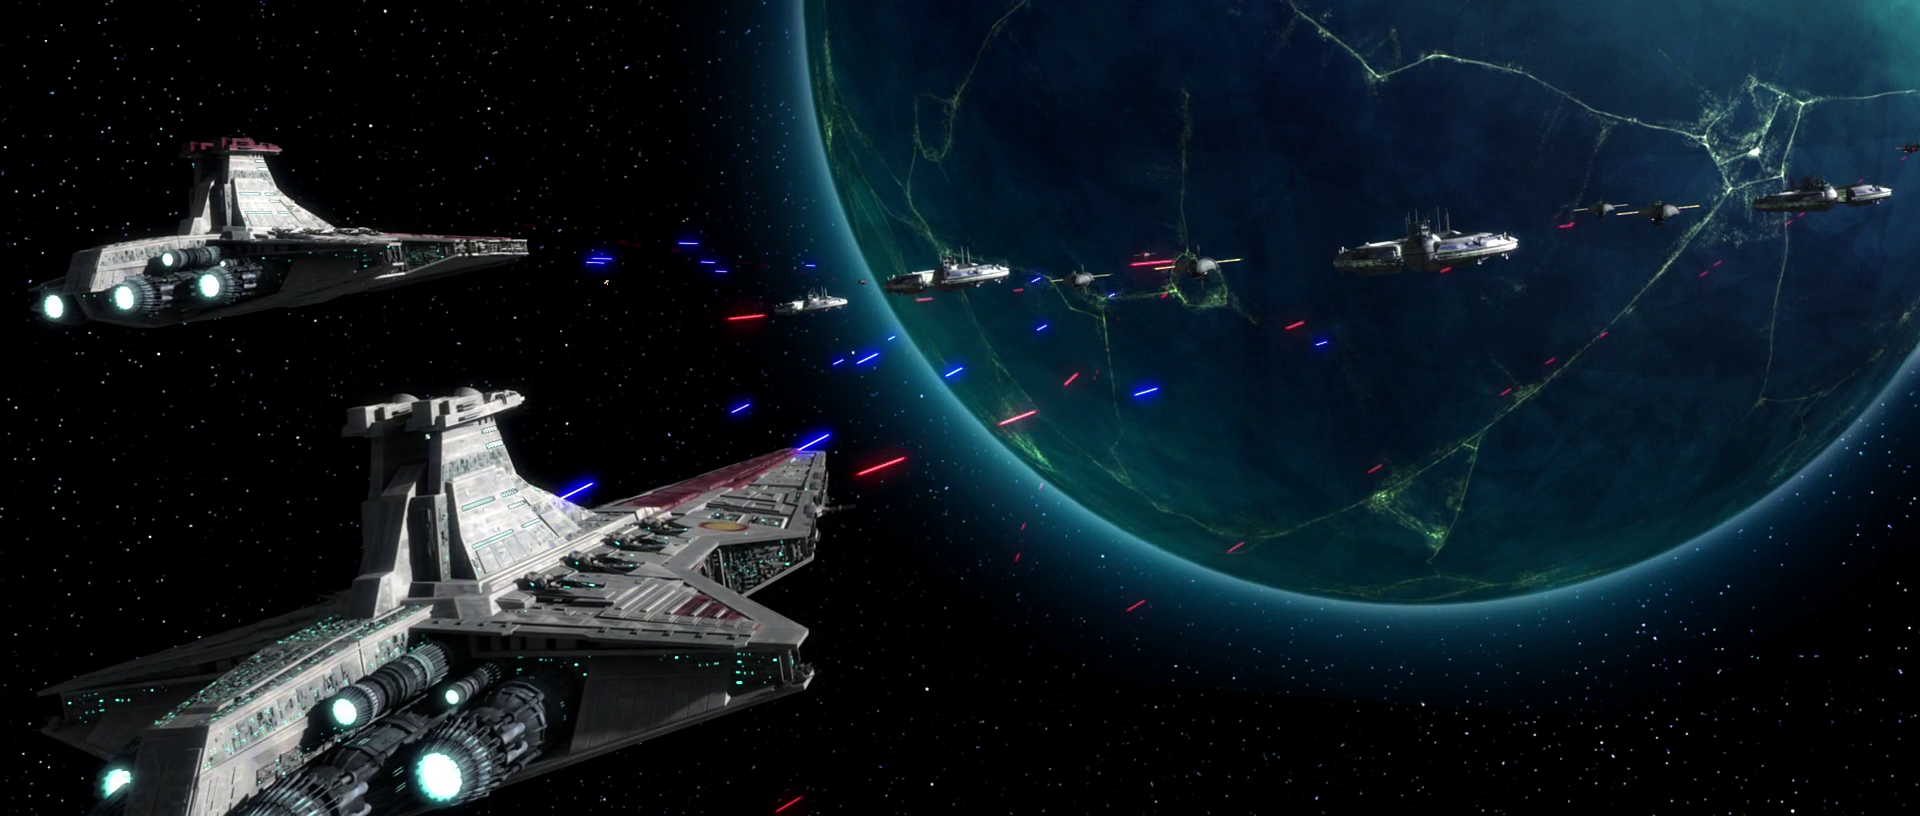
The Galactic Republic deployed a fleet of Venator-class Star Destroyers to break through the Separatist blockade of Christophsis.
In 22 BBY, with the outbreak of the Clone Wars at the First Battle of Geonosis, the Venator was introduced to the galaxy as a vessel in the Republic Navy. A few weeks into the war, a Venator arose to the skies of the planet Coruscant and was seen by the newly-promoted Jedi Knight Anakin Skywalker in the Chancellor's office, where he told Supreme Chancellor Sheev Palpatine about his slaughter of the Tusken Raiders who kidnapped his mother Shmi. Jedi General Obi-Wan Kenobi, Senator Padmé Amidala, and clone troopers of the 7th Sky Corps were deployed from a Venator-class Star Destroyer to the planet Krystar to rescue Republic prisoners from Separatist captivity.
Early into the conflict, the Separatists invaded Christophsis to gain access to the Corellian Run and the resources on the planet surface. A fleet of three Venators, including the flagship Resolute, and three Pelta-class frigates led by Jedi Knight Anakin Skywalker and Admiral Wullf Yularen were sent to engage the thirty-ship blockade under Admiral Trench, but was driven to retreat behind the moon Leesis. The Republic force was bolstered by the arrival of Kenobi's Venator Negotiator, carrying the prototype IPV-2C Stealth Corvette, which Skywalker used to destroy Trench's Invincible and penetrate the blockade. While Skywalker delivered supplies to Senator Bail Organa on the surface, the rest of the Republic fleet attacked the blockade.
During the ground war, the Jedi Council dispatched Yularen aboard a Venator to again penetrate the blockade and land Padawan Ahsoka Tano on the surface. On the ship's return journey away from the planet, it engaged three Munificent-class star frigates and was able to withdraw. In the next attack, Yularen, accompanied by Jedi Master Yoda, commanded the Resolute to lead two other Venators and four Acclamator-class assault ships to breach the Separatist blockade. The Republic forced the Separatist armada into retreat, allowing the Acclamators to reach the surface, deploy clone troops and secure a victory. Following the end of the Christophsis campaign, the 501st Legion under Skywalker and Tano rescued Rotta, Jabba Desilijic Tiure's son, from the B'omarr Order Monastery on Teth. To reinforce the ground forces, Yularen arrived on a Venator, which deployed Kenobi and clone pilots aboard fighters before duelling a Separatist Munificent. A vulture droid's suicide attack damaged the ship's port rear hangar, killing several clone pilots and crew, but the mission to save Rotta culminated in a Republic success.
At least two Venators under Admiral Dao were lost at Ryloth.
Later in the same year, the Confederacy invaded of the Outer Rim world of Ryloth, engaging at a fleet of least two Venator-class Star Destroyers under Republic Admiral Dao which were protecting Jedi General Ima-Gun Di and the Outer Rim garrison. His fleet's necessary resources began to diminish, and, according to Master Mace Windu, it was eventually destroyed. Relief supplies were illictly delivered to Ryloth's pro-Republic resistance via neutral Toydaria. Master Yoda then travelled to the moon Rugosa to negotiate plans for a Republic base on Toydaria with King Katuunko, but was ambushed by the Dark Acolyte Asajj Ventress on Count Dooku's orders. After Ventress's droid battalion was defeated and Katuunko's support won, Yoda's Consular-class cruiser returned with two Jedi cruisers. The Grand Master journeyed back to Coruscant aboard one of the Venators.
Koon's three Venators were destroyed by Grievous's Malevolence.
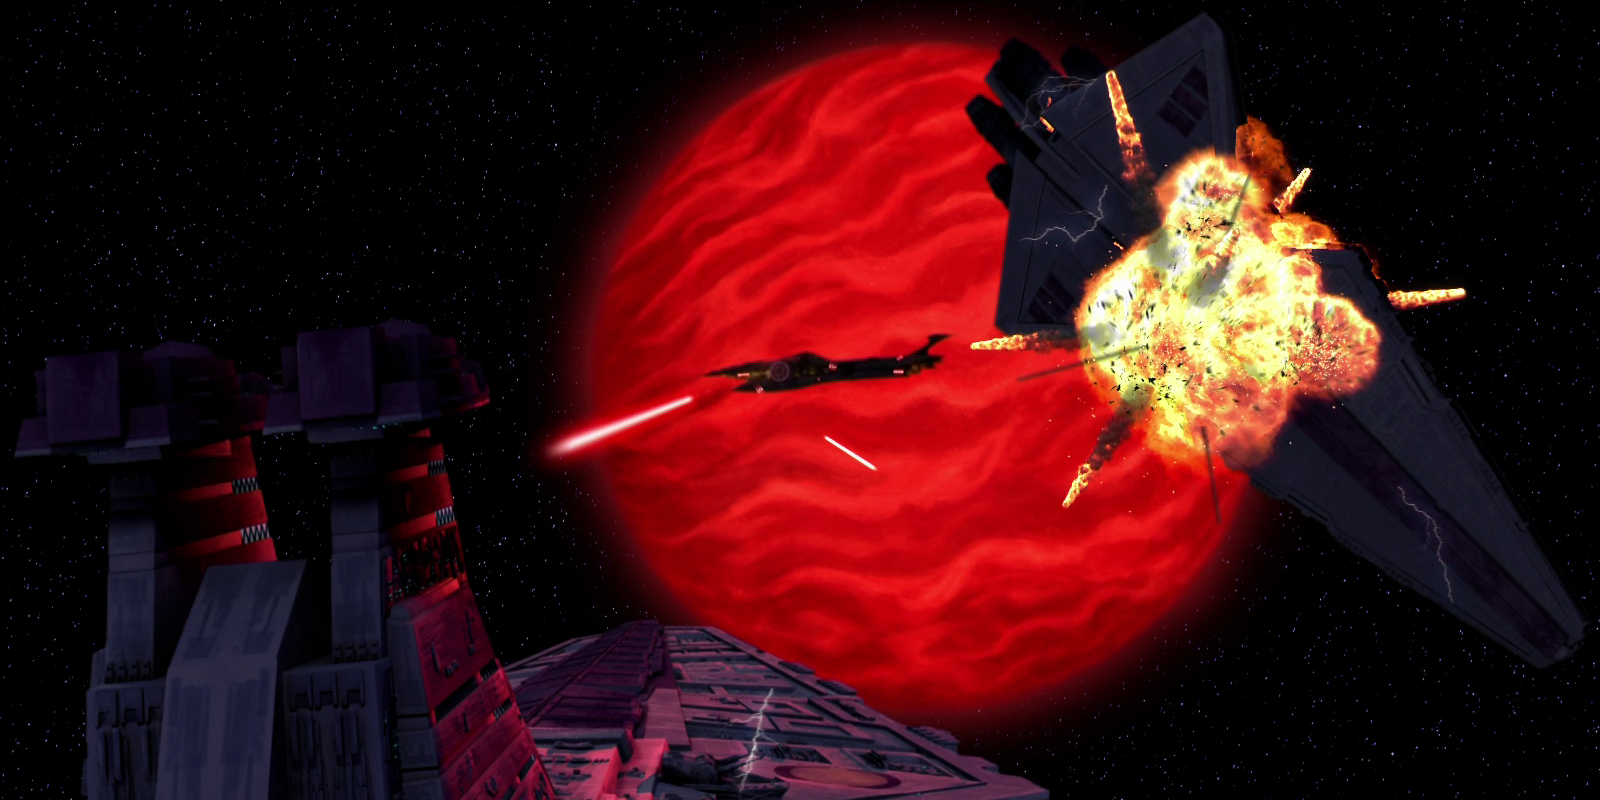
22 BBY also saw Separatist Supreme Commander Grievous's multi–month campaign to assault the Republic starfleet with the Malevolence, a Subjugator-class heavy cruiser equipped with two mega-ion cannons that could easily disable the systems of any ship. At the Battle of the Phu system, Jedi Master Ares Nune's task force of three Venators was destroyed by the Malevolence. Grievous then proceeded to the Abregado system, to which Master Plo Koon was dispatched to intercept the Subjugator. Nevertheless, the Malevolence disabled the fleet of three Venators, including the flagship Triumphant, with its port ion cannon and destroyed them all. While other Venators remained idle, Master Mace Windu announced a redeployment of all battle groups to convoy escort; the Negotiator was positioned in a defensive formation along with another Venator and Acclamators near a blue body in the Bith system, contributing to the protection of the vital Republic convoys. Skywalker and Tano embarked on an unsanctioned but successful mission to rescue Koon and discover the nature of Grievous's weapon.
At the Battle of the Ryndellia system, the Malevolence destroyed a medical convoy of one Venator and three Peltas, leading the Republic to predict that Grievous would next attack the Kaliida Shoals Medical Center. The Galactic Senate planned to send Shadow Squadron, whose Y-wings were being housed aboard the Resolute, to strike the enemy ship. The Negotiator and several other Venators were accompanying the Resolute, and Kenobi decided to take the Negotiator, Resolute, and a third Venator on a longer route to the space station; Skywalker would lead his squadron through a shortcut in the Kaliida Nebula to intercept the Subjugator. After the Y-wings had incapacitated both ion cannons and saved the station, Kenobi's three Venators exited hyperspace and began a chase of the retreating Separatist vessel. Although the Venators' firepower could not destroy the Malevolence, the massive ship was obliterated due to an erroneous hyperspace jump into the Dead Moon of Antar, facilitated by a Jedi boarding action that sabotaged its navicomputer, thus ending the pursuit.
The fleet under Generals Kenobi and Skywalker struck against Grievous above the Rishi Moon.
Sometime after the Malevolence Campaign, Republic starfighters under Skywalker eliminated a Separatist fighter unit in the Corvair sector. In the aftermath, Yularen and Skywalker planned aboard the Resolute to neutralize a droid foundry on the moon Kudo III. Although the admiral wanted to strike the factory from afar, Skywalker elected to survey the location himself and discovered enslaved laborers there. Upon freeing the workers and returning to the Resolute, Skywalker averted unnecessary bloodshed. Afterwards, a Republic fleet of at least three Consular-class frigates and six Venator-class Star Destroyers patrolled a quadrant of space in order to protect Kamino from enemy attack, particularly from the armada of General Grievous. Rishi Station, a Republic outpost on the Rishi Moon, was attacked by Separatist commando droids, who hard-wired an all-clear signal to hide the approach of Grievous's fleet. The visiting clone trooper officers and the surviving clones at the base eventually retook and destroyed the station, disabling the all-clear signal. Alerted, Skywalker and Kenobi moved their fleet to the Rishi system to face Grievous. Engaged by six Venator-class Star Destroyers, Grievous believed that he was outgunned and ordered his force to retreat.
Grievous initiated another offensive, defeating a Republic battle group at Falleen before proceeding to Bothawui. At the subsequent battle, the Resolute and two other Venators under Skywalker and Yularen lured Grievous's six Munificent-class vessels through the Fervse'dra asteroid belt, where the Separatist fleet was completely destroyed by hidden AT-TEs and the Venators' gunfire; Grievous fled in his fighter. The campaign resulted in a Republic victory when Skywalker, Tano, and clone troops managed to infiltrate and destroy the Separatist Skytop Station listening post.
The Jedi imprisoned Nute Gunray aboard the Tranquility.
When Senator Padmé Amidala traveled to Rodia for diplomatic talks with Senator Onaconda Farr, she was detained by Separatist droid forces by order of Viceroy Nute Gunray. Amidala's protocol droid C-3PO evaded capture and contacted a Republic clone trooper; the cruiser Tranquility was dispatched with the 41st Elite Corps, who arrested Gunray after his battle droids had been defeated by the senatorial representative Jar Jar Binks. In 21 BBY, the Viceroy was taken aboard a Consular-class frigate, accompanied by Jedi Master Luminara Unduli and Ahsoka Tano. He was transferred from the frigate to a jail cell on the Tranquility, guarded by Captain Faro Argyus, who was secretly a Separatist agent.
The Tranquility was later attacked by Droch-class boarding ships, penetrating the Star Destroyer's hull and deploying droids and Dark Acolyte Asajj Ventress onto the vessel. Ventress sabotaged the engine room, causing various malfunctions. She fought the two Jedi while Argyus escaped with Gunray. In one of the Republic's attempts to catch Count Dooku, General Skywalker was sent aboard Count Dooku's frigate under the pretense of surrender. General Kenobi later boarded the frigate and the two Jedi confronted Dooku. At the same time, the Resolute attacked the Munificent. Following an unsuccessful pursuit through the Vanqor system and on Vanqor, the Jedi Generals were picked up by Tano and the clones, having been dispatched on a Nu-class shuttle.
Above Quell, Aayla Secura's task force of three Venators participated in a battle against at least five Munificents. With the situation desperate, the Resolute under Yularen and Skywalker was deployed to rescue Secura from her flagship Liberty. Ultimately, all three Venators under Secura were destroyed, and the Confederacy was victorious. During the battle, the Consular carrying Secura and her rescuers made an erroneous hyperspace jump to the Maridun system. On Maridun, the Jedi defended a Lurmen village from Separatist forces under weapons designer Lok Durd. Soon thereafter, the planet was secured by three of Yularen's Venators.
The Republic was forced to retreat in the first attack.
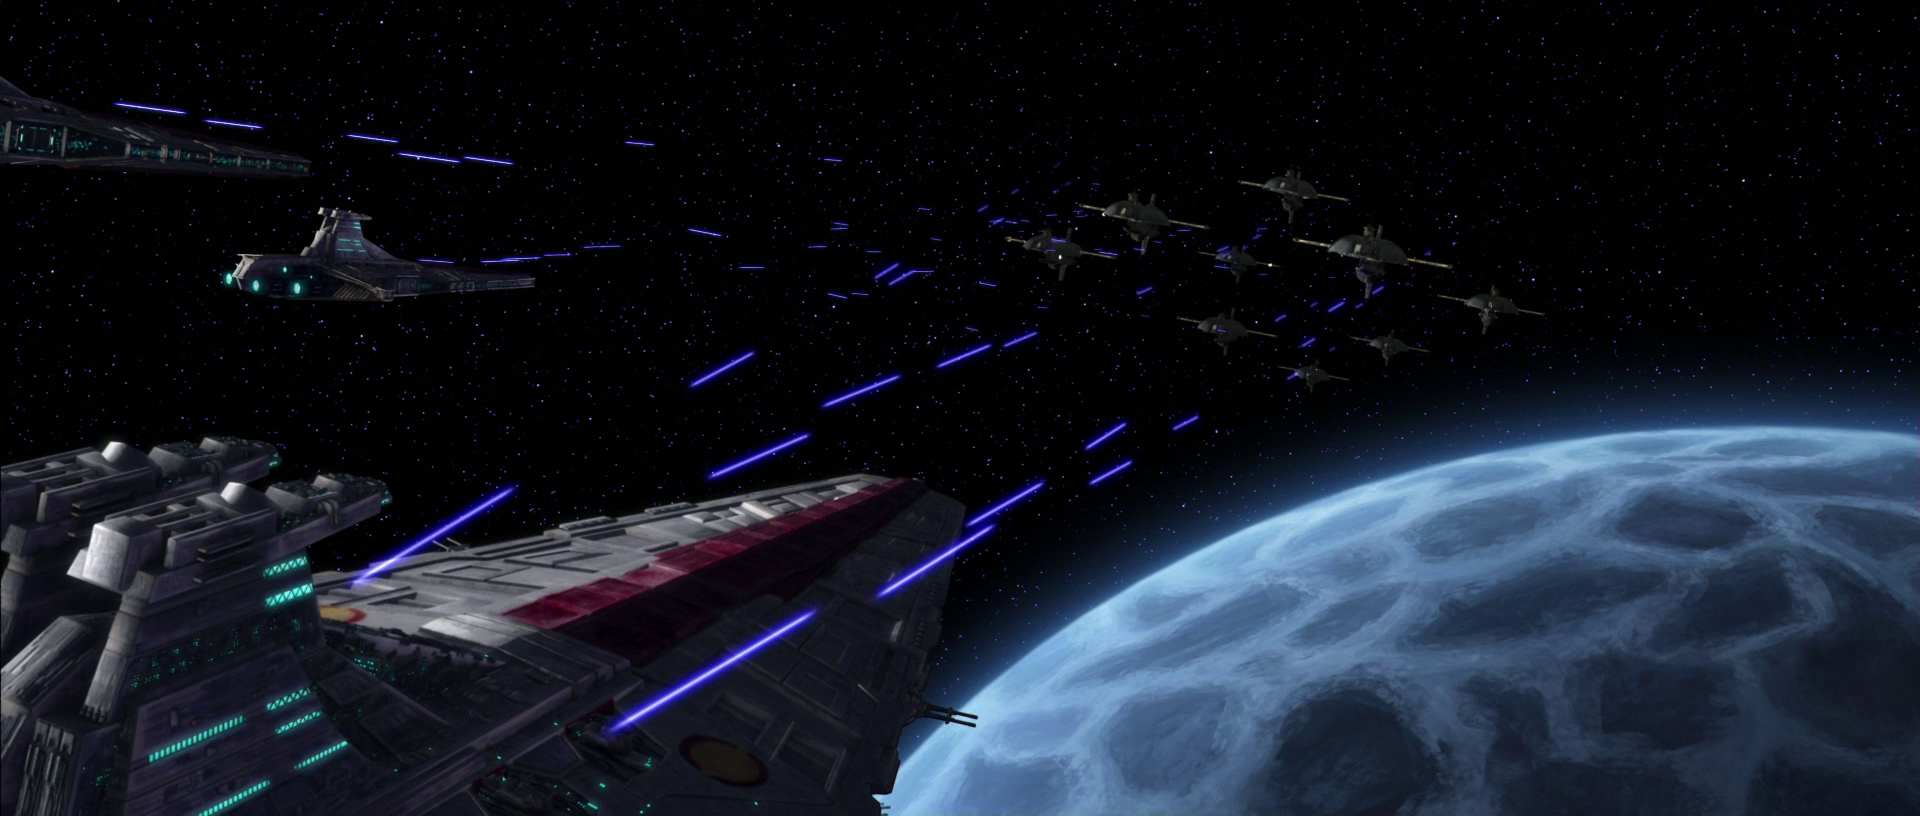
The Republic launched an offensive to retake Ryloth, sending a fleet of three Venator-class Star Destroyers—the Resolute, Defender, and Redeemer—under Skywalker, Yularen and Tano, to break Captain Mar Tuuk's planetary blockade. While Skywalker and Yularen commanded the fleet from the Resolute, Tano led Blue Squadron. The Republic fleet was surprised by Separatist reinforcements consisting of four Munificents, prompting a withdrawal. Amid Tano's insubordination, a vulture droid rammed the Resolutes bridge, injuring the admiral. Although the Resolute and Defender were able to escape, the Redeemer was torn apart in space.
After the Resolute and the Defender fled the system, Skywalker was contacted by Masters Windu and Kenobi, and was ordered to continue his attack unless the Republic's planned invasion was to be postponed. The Defender was badly damaged and in flames, and Skywalker created a strategy in which he alone would fly the Defender into Tuuk's Lucrehulk. Tano, with the Resolute, planned to use a Marg Sabl tactic to then attack the Munificents. The plan was a success; the Defender rammed the Lucrehulk, and the Y-wings from the Resolute disabled all six Munificents, allowing the Republic invasion fleet to land on Ryloth. The Republic's ground forces eventually retook the planet.

The Resolute destroyed Bane's fleet of Munificents.
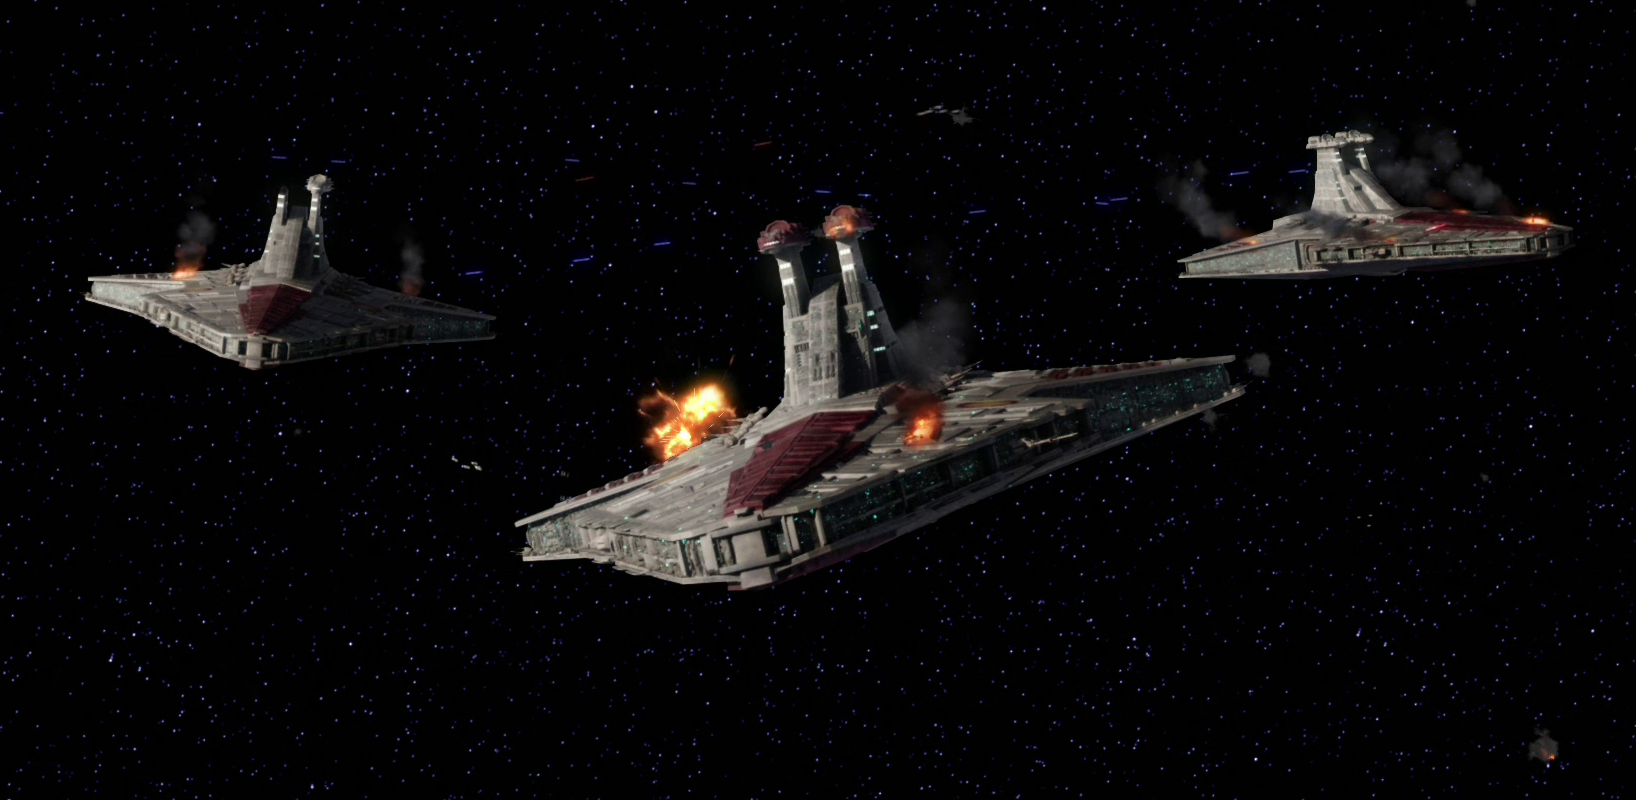
At the First Battle of Felucia, Plo Koon's naval force of three Venators penetrated a Separatist blockade over the planet, destroying one Munificent and damaging another. Koon's fighters and gunships were then able to reach the surface and evacuate the stranded Republic troops. Later, bounty hunter Cad Bane infiltrated the Jedi Temple and stole a holocron. Bane wanted to open the device, so he led a Separatist attack on Jedi Master Bolla Ropal on Devaron. The Resolute was deployed to the Devaron system to oppose Bane, destroying four Munificents and disabling the hyperdrive of Bane's frigate. Skywalker, Tano and the clones boarded the ship but failed to save Ropal, who was fatally electrocuted. In the ensuing skirmish, the Munificent was destroyed, and the Republic forces, along with Bane—disguised as a clone—returned to the Resolute.
Once aboard the Venator, Bane stole a parked V-19 Torrent and Syliure-31 ring, escaping into hyperspace. Using the holocron's information, he kidnapped a Force-sensitive child on Glee Anselm and another on Rodia for Darth Sidious's experiments. On Naboo, he was apprehended by the Jedi and transferred to a prison cell on the Resolute. After his interrogation, the prisoner accompanied Windu and Kenobi to Black Stall Station where the Jedi recovered the holocron but Bane escaped. Having analyzed Bane's Rogue-class starfighter aboard the Resolute, Skywalker and Tano rescued the kidnapped children from Mustafar.
The Renown
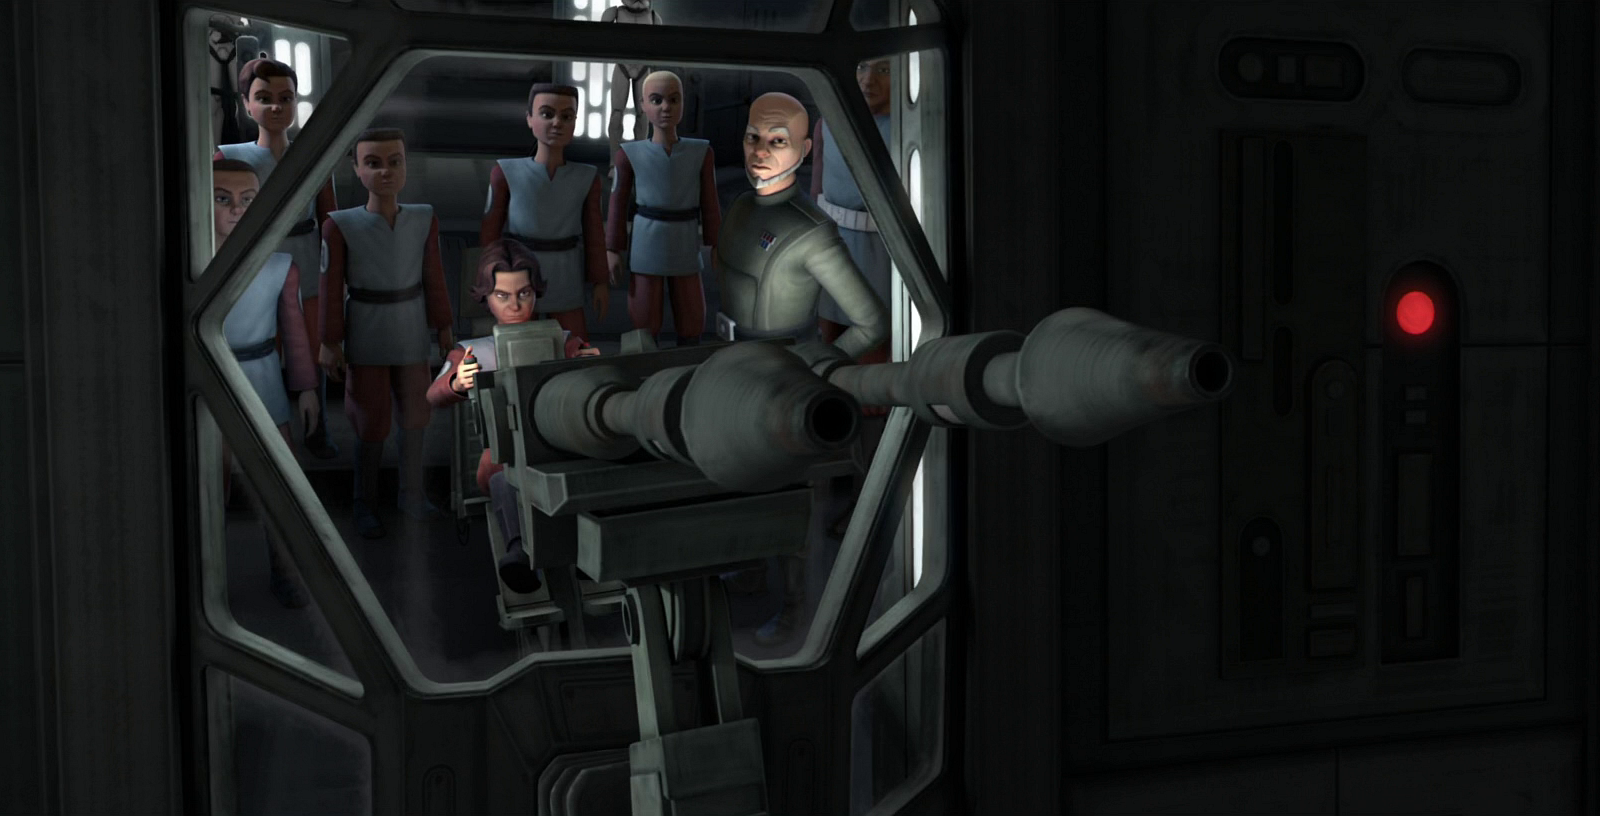
Later in the Clone Wars, the Galactic Republic had held a strategy conference in the Carida system, aboard the Valor orbiting the planet Carida. However, unknown to the Republic, the Confederacy of Independent Systems was planning to bomb Valor and end the conference. As part of their plan, the Separatist forces managed to hijack one of the Republic's Venator-class Star Destroyers, the Renown, which had been held in orbit above the Outer Rim world of Abafar, a planet rich in an extremely valuable and highly volatile starship fuel known as rhydonium, which the Separatists were mining from a mining facility established on the surface by the Confederacy, with the intent of loading the Star Destroyer with thousands of canisters of rhydonium to transform the vessel into an unassuming bomb.
Following their escape from Abafar, the Republic's D-Squad, a covert unit of Republic astromech droids and one DUM-series pit droid, led by Zilkin Colonel Meebur Gascon, managed to board the Star Destroyer, assuming that the Republic had sent the Venator to rescue them. However, once they arrived on the Star Destroyer's command bridge, they discovered that Separatist forces had hijacked the vessel, and, after narrowly escaping the pursuing battle droids, Colonel Gascon and the droids found a detonator painted in the respective colors of the Separatist Alliance in the center of the hangar bay control room, coming to the realization that the ship was truly a massive, unassuming bomb, opening the doors inside the hangar, revealing thousands of rhydonium canisters stacked together in each hangar, and upon sight of the canisters, Colonel Gascon remarked that the amount of rhydonium aboard the vessel could possibly destroy the entire Republic Navy.
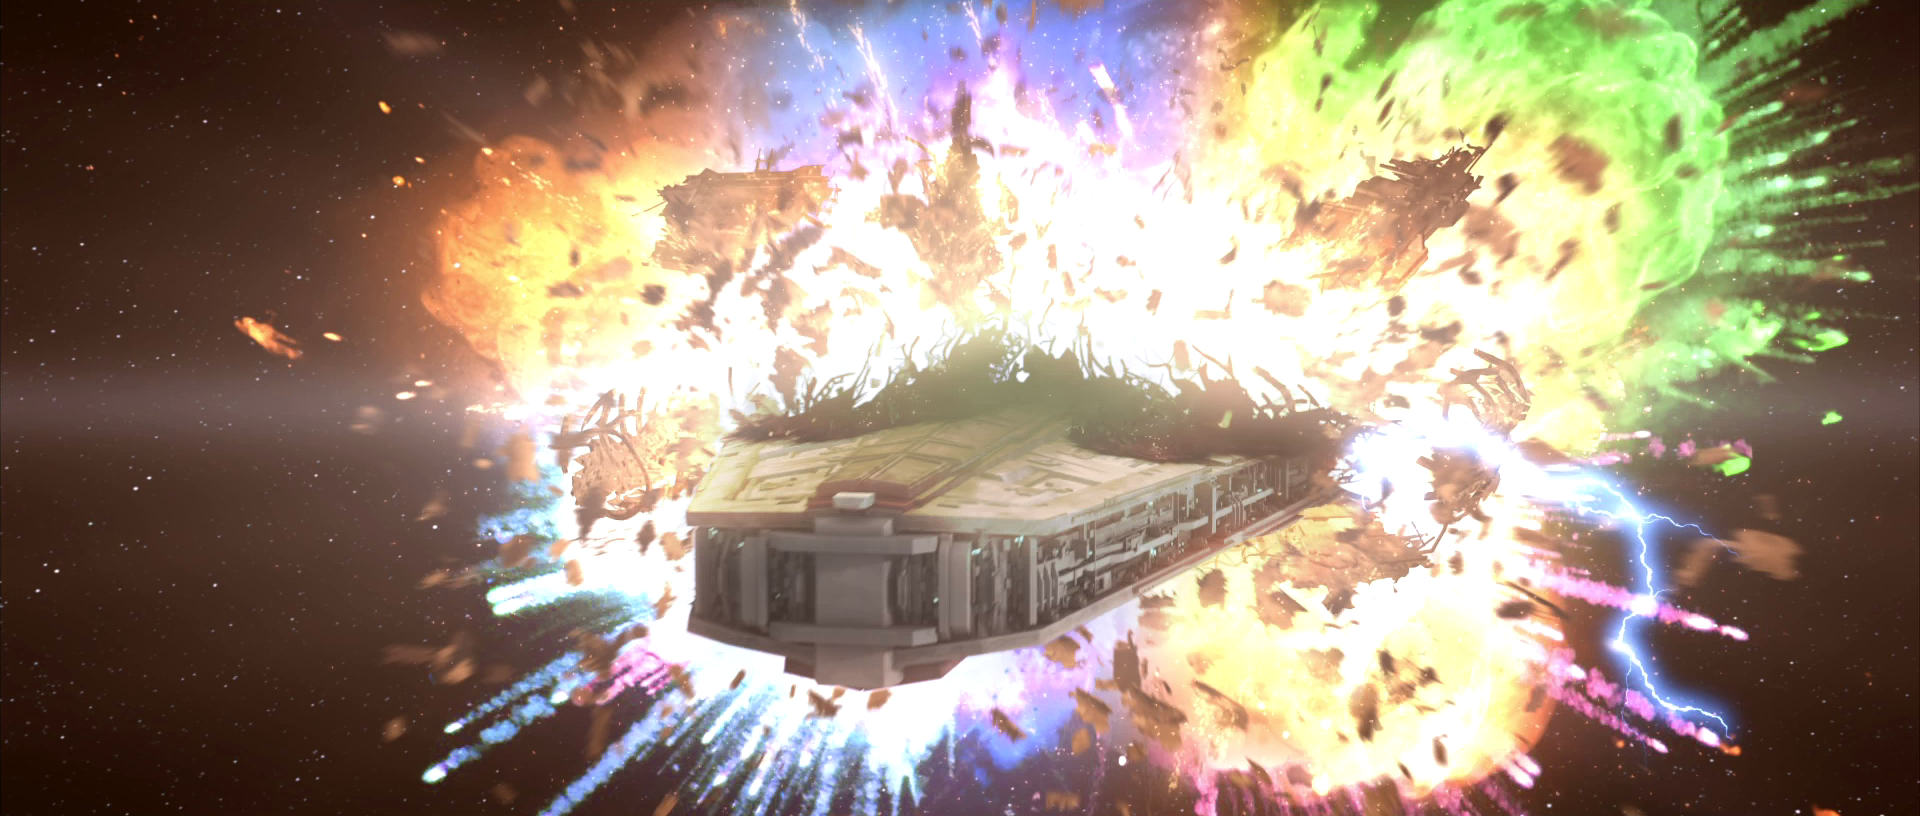
A hijacked Venator was destroyed in a rhydonium-fueled explosion.
While aboard the Venator in hyperspace, D-Squad came across a small group of Republic droids that served aboard the Star Destroyer before the Separatists took control, one of which was the LEP-series service droid BNI-393, who informed the squad that the ship had been hijacked by the Separatists, and that its destination was a space station located within the Carida system, bringing the Zilkin to realize that the Separatists intended to use it to take out the Republic space station Valor, the location of the Republic's strategy conference, forcing the team to take matters into their own hands and thwart the Separatists' plans by triggering the ship's explosion sooner than intended. However, the team soon ran into a series of complications as the super tactical droid in charge of the operation sent a swarm of buzz droids after the squad to dispatch them, but were eventually defeated at the cost of one of the team's members, M5-BZ, who sacrificed himself in order to defeat the buzz droids by opening the airlock, pulling the buzz droids into hyperspace. After BZ's sacrifice, the Star Destroyer exited hyperspace in the Carida system, and the engines were put to maximum power.
Before the super tactical droid could initiate the countdown sequence, he crossed paths with the astromech droid R2-D2, who managed to keep the Separatist droid out of reach of the detonator, granting him a small amount of time to trigger the detonation before it reached the station, resulting in a simultaneous explosion of the rhydonium canisters, destroying the Star Destroyer and creating a large blast that engulfed the station and all vessels flanking it, sending large pieces of debris hurtling through space, obliterating a single Arquitens-class light cruiser, and damaging the station.
Nearing the end of the Clone Wars and, subsequently, the Galactic Republic, the Confederacy of Independent Systems—under the orders of Darth Sidious, the true leader of the Confederacy—launched a massive and startling assault on the planet Coruscant in the Core Worlds, the capital of the Republic, in an attempt to capture Supreme Chancellor Sheev Palpatine, who secretly orchestrated the battle and arranged for himself to be kidnapped by the Kaleesh cyborg Grievous as part of his plan to bring Jedi Knight Anakin Skywalker closer to the dark side of the Force.
Prior to the assault, the Republic and Separatist Alliance became enmeshed in the climax of the Outer Rim Sieges campaign, which was primarily fought on various worlds of the Outer Rim Territories, far from the Core Worlds and, consequently, Coruscant. As a result of the Sieges, most of the Republic's fleets, experienced officers and Jedi Generals were preoccupied on the various fronts of the campaign, leaving Coruscant sparsely protected by the Republic's remaining officers and the ill-prepared Coruscant Home Defense Fleet, which had seen little to no action in the duration of the Clone Wars, giving the Separatists an opportunity to launch an unexpected and seemingly effortless attack on the Republic's capital.
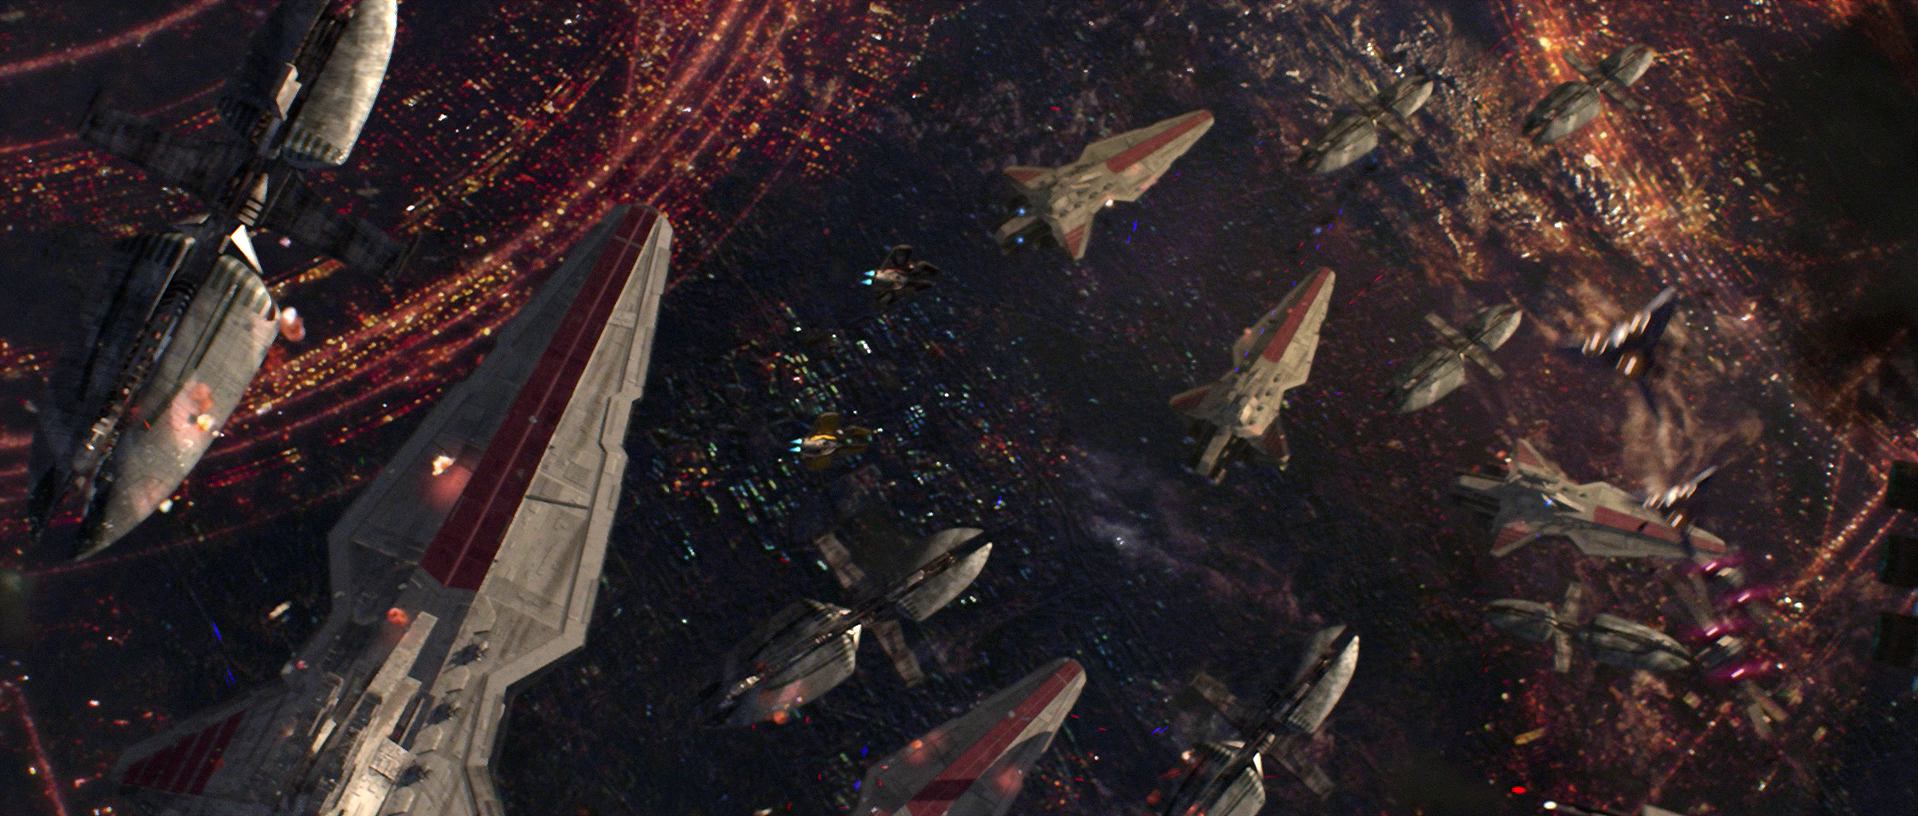
Over a thousand Venators defended the Republic capital during the Battle of Coruscant.
Despite the high belief that the Separatists would never attempt such an attack, the Confederacy unexpectedly attacked Coruscant with a fleet of over 1,000 starships led by Grievous' flagship, the modified Providence-class Dreadnought Invisible Hand, catching the Home Defense Fleet off guard and quickly overwhelming them, with the Chancellor, after a lengthy chase through the Federal District, taken captive by Grievous back to the Invisible Hand.
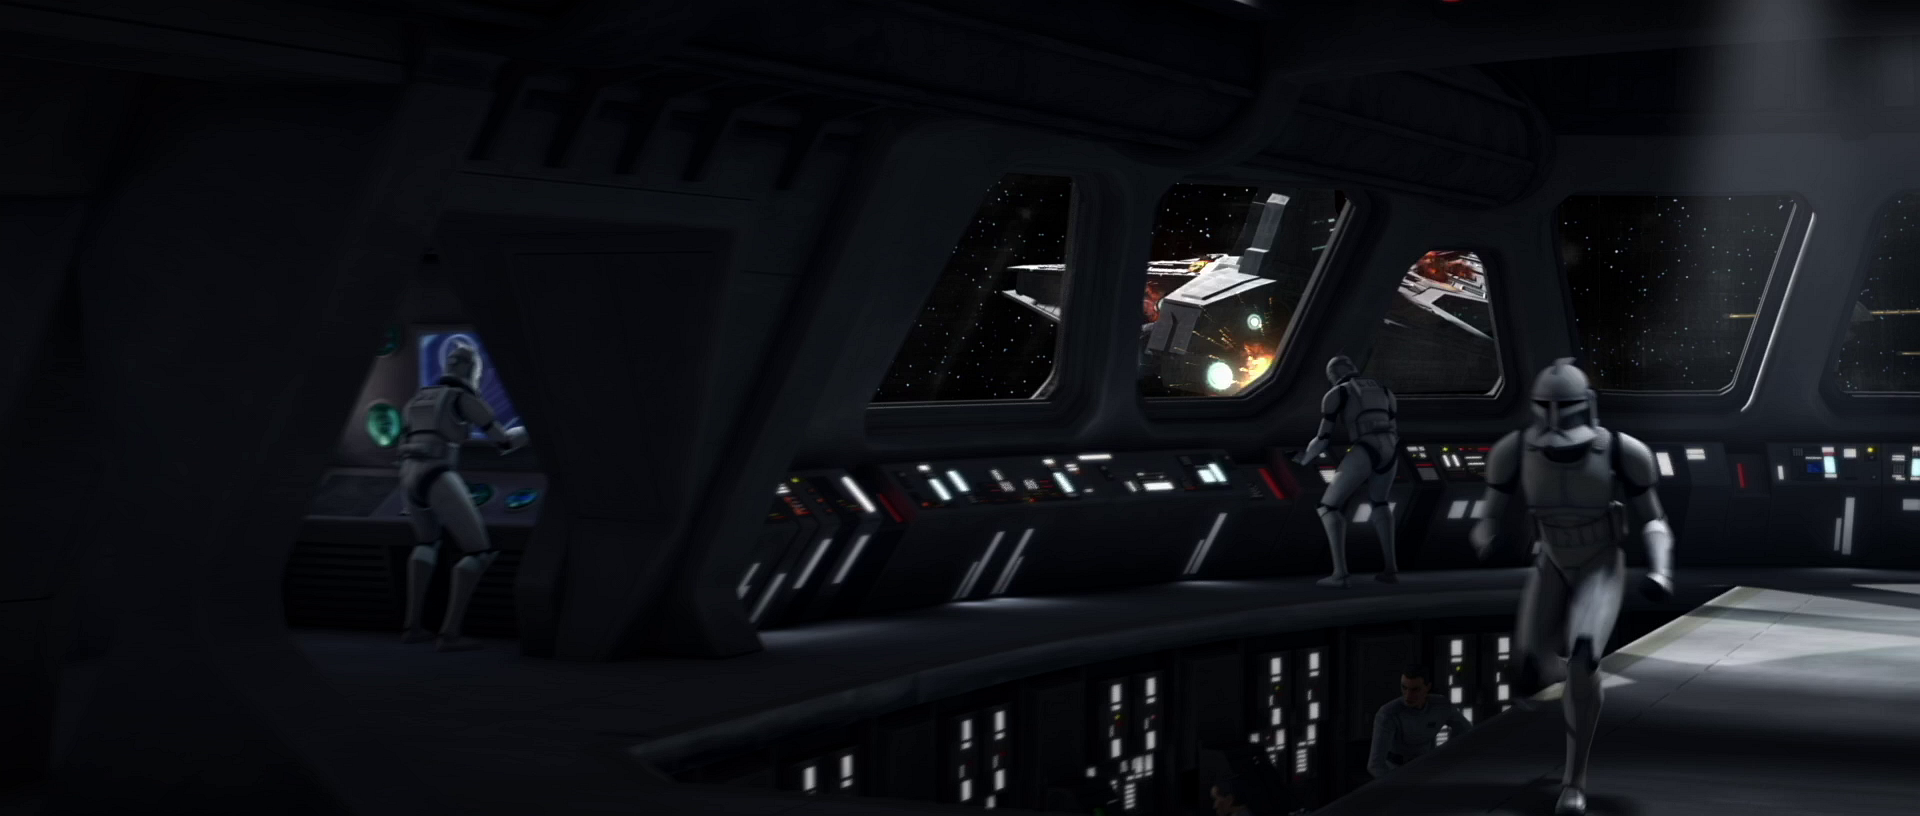
Learning of the Separatist attack, the Republic's Open Circle Fleet and Jedi Generals Kenobi and Skywalker were recalled to Coruscant to rescue the Chancellor from Grievous. The Coruscant Home Defense Fleet, despite being outnumbered, attempted to prevent the Invisible Hand from escaping with the Chancellor onboard. Before the Separatists could make their escape from the besieged capital, the Open Circle Armada and the two Jedi arrived in time, bolstering the number of Venator-class Star Destroyers to the thousands, including the Star Destroyer Ro-ti-Mundi, to engage the large number of Munificent-class star frigates, Recusant-class light destroyers and Lucrehulk-class Battleships, which were escorting the Invisible Hand in order for it to flee, and allowed Generals Kenobi and Skywalker to enter the heart of the chaos of turbolaser fire and starships with their personal Eta-2 Actis-class light interceptors. Struggling to reach the flagship due to the interference of hundreds of Vulture droids, droid tri-fighters, and a brief evasion of discord missiles, two of which managed to deploy buzz droids onto Obi-Wan's starfighter, but were nonetheless destroyed. Returning to their flight path to the command ship, the Jedi quickly discovered that the hangar bay still had its deflector shields raised, forcing Anakin to open fire on a vulnerable point of the hangar to deactivate its shields, granting them mere seconds to enter the hangar before the blast shields were completely shut.

The Guarlara sustained damage while trading fire with a Separatist warship, but emerged victorious after striking a crippling blow.
While aboard the Invisible Hand, the Jedi released the Chancellor from captivity and managed to kill the Sith Lord Count Dooku, the Confederate Head of State, and following their triumph over Dooku, the dreadnought briefly came into confrontation with the Venator-class Star Destroyer Guarlara and the two starships exchanged turbolaser fire as they engaged one another, with Guarlara inflicting extensive damage upon the Invisible Hand, causing it to momentarily plummet towards the planet below before the crew regained control. Despite rescuing the Chancellor and destroying a third of the CIS Navy, Grievous nonetheless managed to escape his flagship aboard an escape pod, which was retrieved by the Lucrehulk-class Battleship Profusion. Only days later, however, Kenobi killed Grievous and, shortly after that, Skywalker turned to the dark side of the Force. He slaughtered the Separatist Council on Mustafar and ordered the Trade Federation to deactivate all remaining Separatist droids immediately, officially ending the Clone Wars.

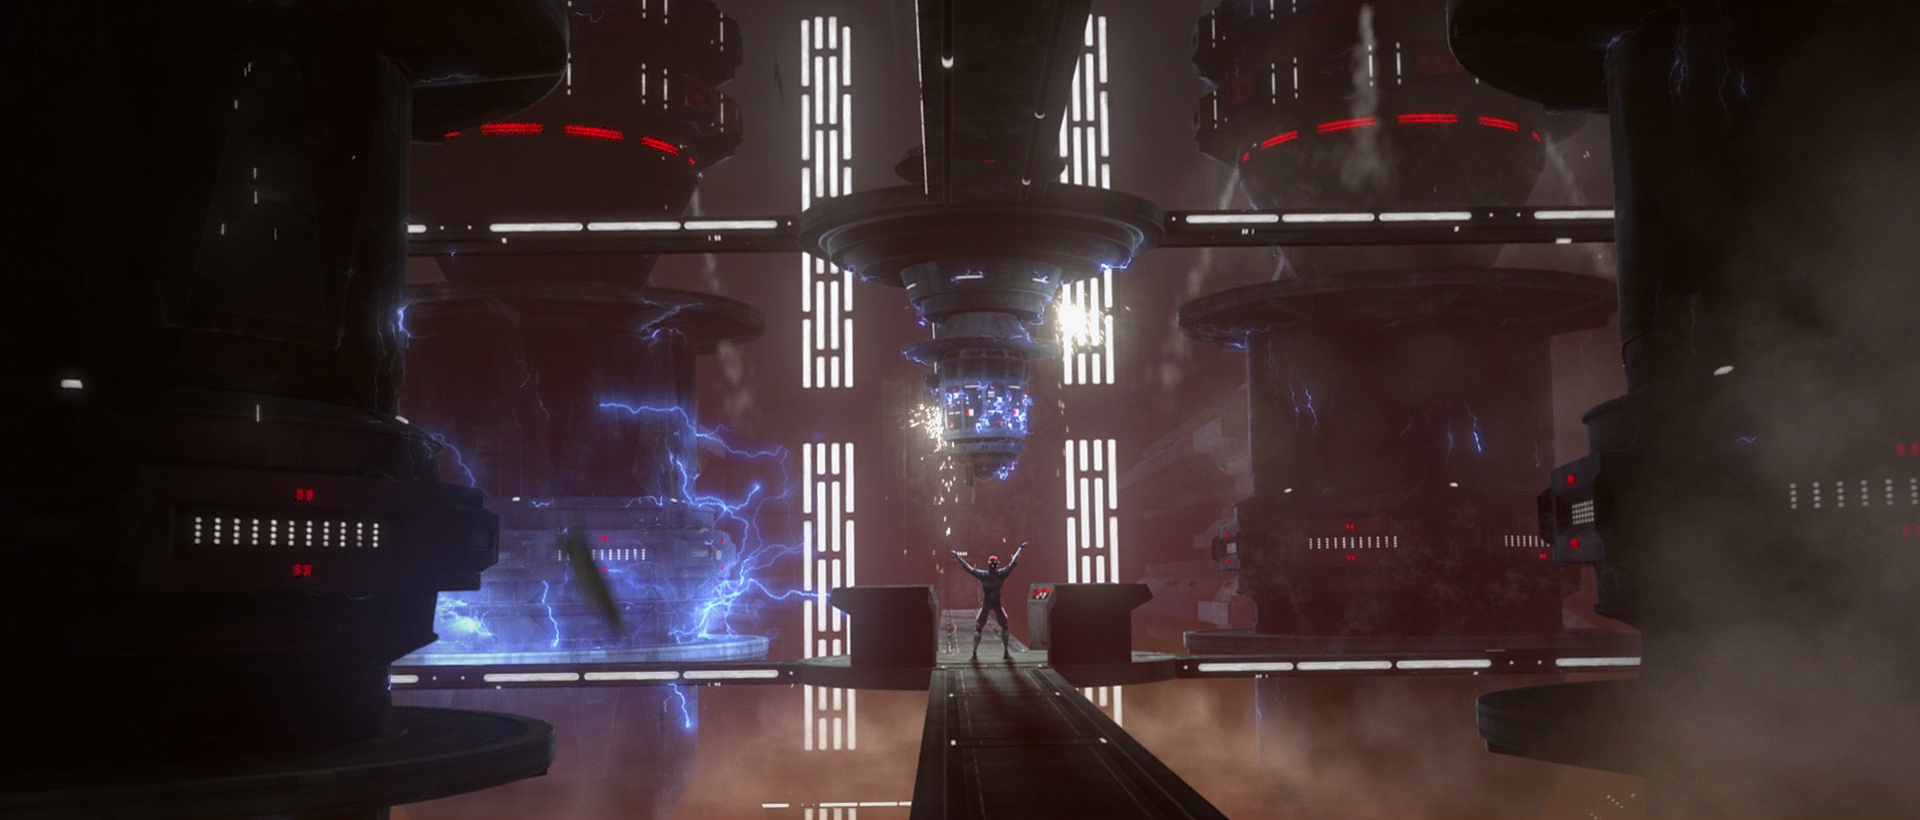
The Tribunal was lost along with its crew during the onset of Order 66.
The Venator-class Star Destroyer Tribunal of the Open Circle Fleet was commanded by Ahsoka Tano and her special division of the 501st Legion. The cruiser ferried Tano, Commander Rex and the division back to Coruscant following the successful capture of former Sith Lord Maul on Mandalore, with Maul a restrained and guarded prisoner in the detention level. En route to Coruscant, however, Order 66 was implemented and the clones turned on Tano, also attempting to kill Maul on Darth Sidious' orders only for him to be freed by Tano as a distraction. This allowed her to ambush Rex and have his control chip removed, freeing him from the brainwashing. The ensuing skirmish aboard the Venator resulted in it crashing onto a desolate moon after Maul destroyed the hyperdrive, with the loss of all hands aboard save for Maul, Tano and Rex. The wreckage of the Venator would remain on the moon well into the Imperial Era, becoming buried in snow, until it was discovered by the Empire and investigated personally by Darth Vader, Skywalker's Sith identity, who retrieved his former apprentice's lightsaber from the crash site before departing.
Another Venator, commanded by Jedi Master Chiata, engaged in battle with a Separatist dreadnought in the final hours of the Clone Wars. Though it managed to destroy the opposing warship, the Venator was itself critically damaged and ended up crashing on the isolated world of Zeffo. Chiata, her Padawan Marseph, her unit's Clone Commander and a majority of the clone unit survived the crash, but the implementation of Order 66 saw the deaths of all involved, with Chiata being buried in the cruiser's wreckage by her Padawan before he succumbed to his own wounds and the clones being buried by the native villagers, who set up a shrine to them near the crash site. The wreckage of this Venator would also endure into the time of the Empire, becoming inhabited by various native fauna.

The Albedo Brave was destroyed by Jaro Tapal after his clone troopers turned against him.
The Albedo Brave was a Venator-class Star Destroyer commanded by Jedi Master Jaro Tapal and his 13th "Iron" Battalion. The Albedo Brave was stationed in orbit above Bracca, having successfully secured the planet after a lengthy campaign, and was due to move on to Mygeeto when Order 66 was issued, forcing Master Tapal and his Padawan Cal Kestis to fight for their lives against their formerly loyal comrades. Though the two Jedi managed to kill many of the clones in their path, including the battalion's commander, and reach the escape pod bay, they were outnumbered and Tapal was fatally wounded just as they boarded an escape pod. The Albedo Brave was subsequently destroyed due to Tapal sabotaging its reactors to mask their escape, taking all the surviving clones aboard with it.
Venator-class Star Destroyers were inducted into the Galactic Empire.
In the years after the formation of the Galactic Empire, Venator-class Star Destroyers were still in service as a capital ship of the Imperial Navy. Imperial Venators were repainted to remove the red markings of the Republic, becoming whitish-grey in color like their successor warships. In the Imperial Starfleet, the Venator-class stood out for its ability to dominate, and Imperial officers of the new government were given leadership over these Star Destroyers.

Darth Vader was in charge of a Venator shortly after the Empire was formed.
One Venator-class Star Destroyer operated under the command of Dark Lord of the Sith Darth Vader, which carried his personal meditation chamber aboard. While preparing to meditate in his chamber, Vader was interrupted by Admiral Mummert, who told him that he could not deploy Imperial starships to the Hortolo system by the set deadline. The Sith Lord, irritated by the admiral's ineptitude, choked him to death by way of the Force. Next, Vader was stopped by an Imperial general, who reported Imperial troop deployments to the Winnikk system. Because Vader had ordered 50,000 troops to be dispatched, and only 10,000 were, the dissatisfied Sith Lord choked the general to death with the Force as well. A third Imperial officer disturbed Darth Vader, announcing that his personal TIE fighter could not be repaired, despite the efforts of the crew. Once again tired of the excuses, Lord Vader used the Force to choke him to death too. Before beginning his meditation, Vader became irritated at the MSE-6-series repair droid in the room, which had observed the whole episode, because it bumped into his leg, and destroyed it. By 14 BBY, this Venator had been replaced by the Imperial-class Star Destroyer Perilous as Darth Vader's flagship.
In the weeks following the rise of the Galactic Empire, a Venator-class Star Destroyer from the very first production line was among numerous other older models awaiting to be scrapped on Bracca. It was visited by Captain Rex and Clone Force 99 in order to use its onboard medical facilities, similar to those on the Tribunal, to remove the latter's control chips. After a brief skirmish where Wrecker's control chip was activated and caused him to attack his comrades, the chips were successfully removed and Rex departed from Bracca whilst the Bad Batch remained behind to salvage munitions from the Venator's weapons bay. However, they were spotted by members of the local Scrapper Guild and their presence reported to the Empire, which dispatched their former comrade Crosshair and a complement of Imperial troops to eliminate them.
Despite the rather deteriorated condition of the wreck, many of the Venator's systems remained operational including engines and weapons and the Bad Batch made use of both to escape the Imperial troops. As they were attempting to escape through the Venator's main starboard engine, Crosshair ordered the engine turned on in order to kill them but the Bad Batch managed to escape this by detonating salvaged explosives within the engine tube, causing it to break off whilst the ion drive was still active. Crosshair was exposed to the full power of the ion drive and sustained severe burns to his face before it was switched off, necessitating immediate medical attention.
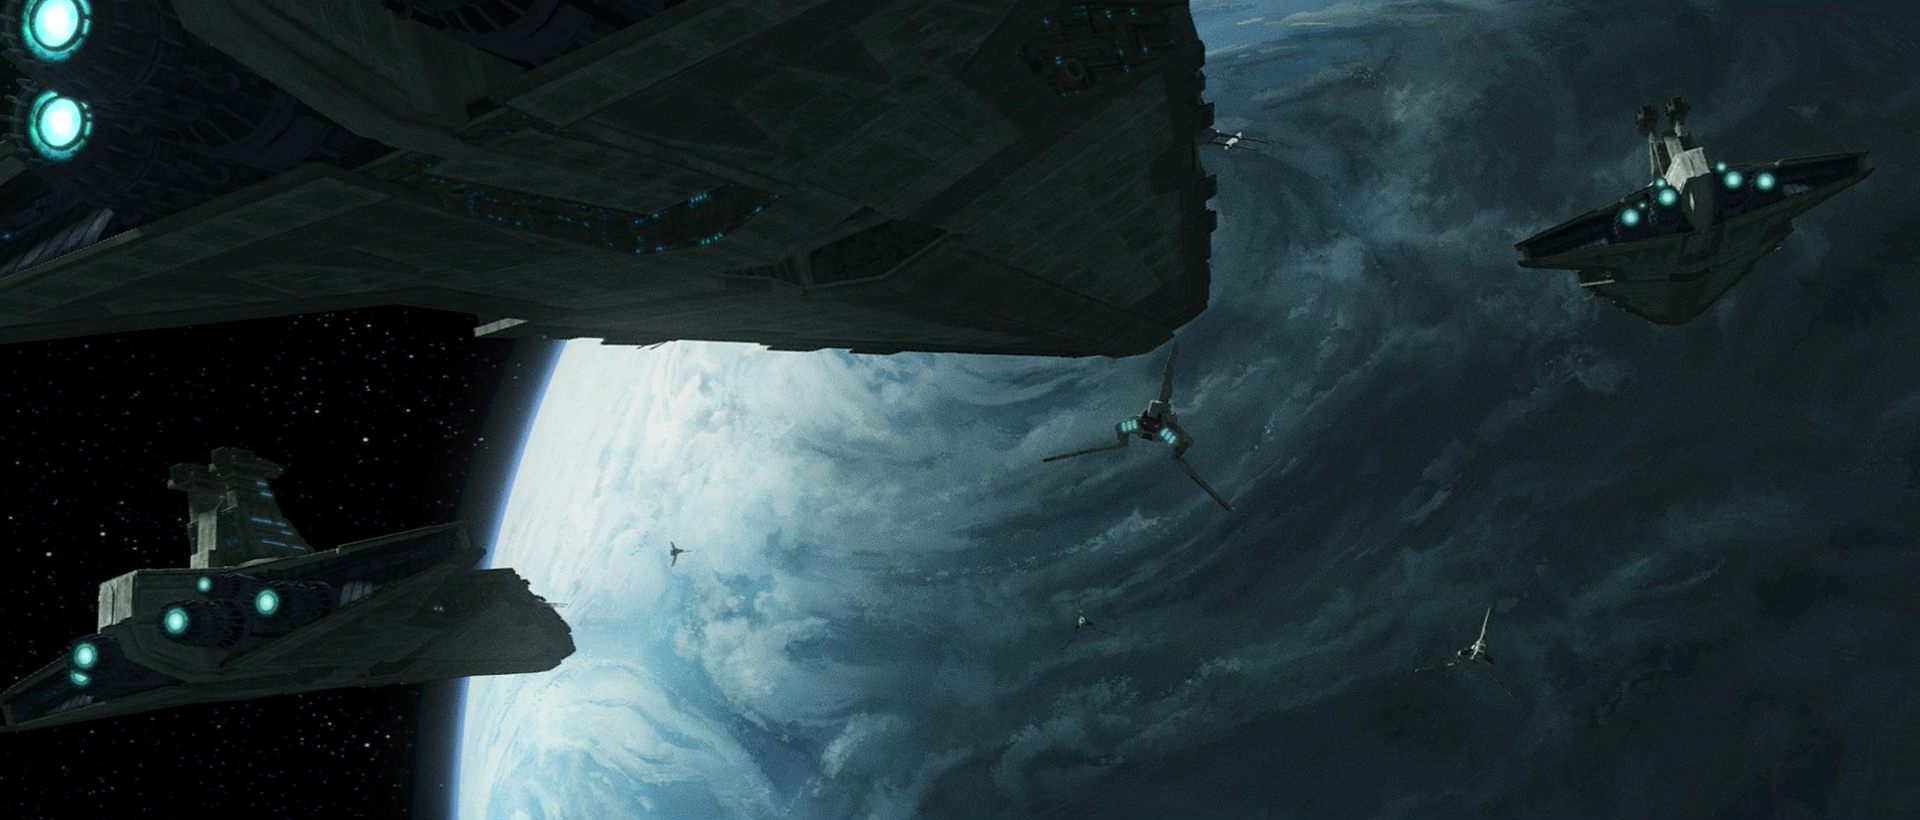
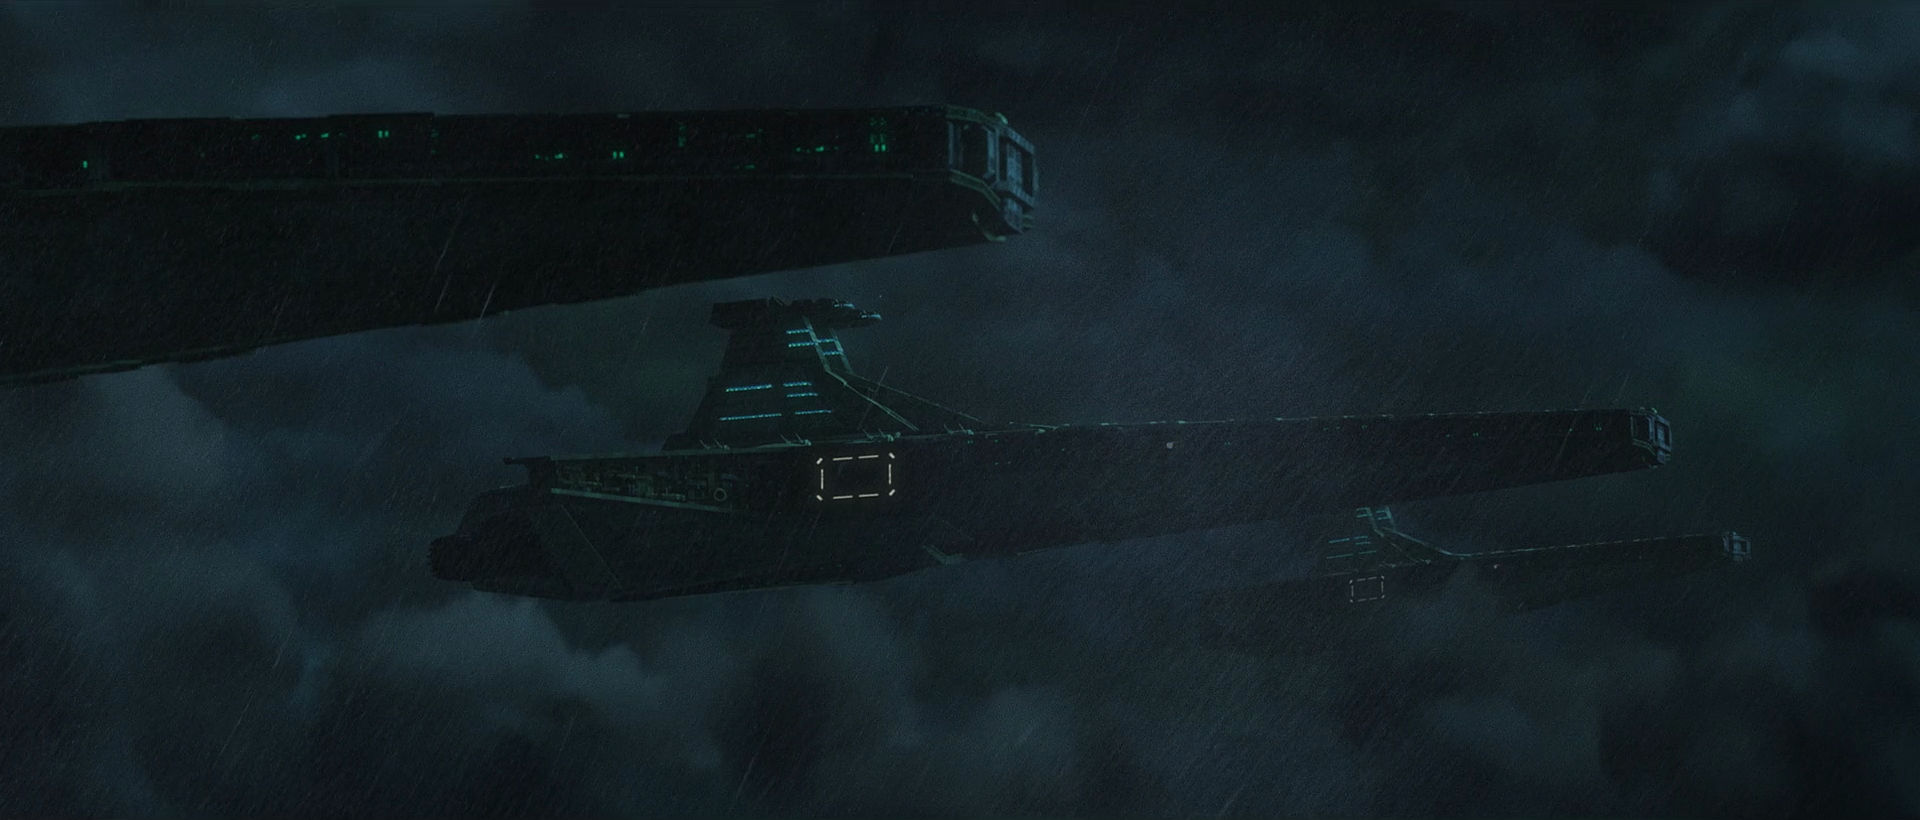
A fleet of Venators was in orbit of Kamino during the evacuation.
Three Venator-class Star Destroyers of the Imperial Navy were stationed above Tipoca City during the operation to withdraw the Empire's clones from Kamino in the early months of the regime. Goods and personnel were flown out from the city on various transport craft to the Star Destroyers, with Vice Admiral Edmon Rampart and Commander Crosshair supervising the process. Later, as the evacuation was nearing completion, the Venators had moved further away from the city. Crosshair brought his former squadmate, the renegade clone commando Hunter, who had been captured on a rescue mission on Daro, to Tipoca City, intending to draw the rest of Clone Force 99 into a trap. However, after the Bad Batch had arrived, Crosshair killed his squad to appeal to his brothers to join him. ES-02, realizing this betrayal, left the city aboard the last outgoing ship, returning to the Venators.
On the bridge of one of the Star Destroyers, Vice Admiral Rampart informed Governor Wilhuff Tarkin that all personnel and technology were safe in Imperial control. Tarkin then commanded him to destroy Tipoca City. The Venators proceeded forwards through the stormy clouds before pausing once the ships were in the correct position. Upon Rampart giving the order to clone navigation officers to open fire, the three warships unleashed a steady barrage from their starboard and port dual medium turbolaser cannons. Setting the city alight with fiery explosions, the turbolaser fire ripped through the domed buildings, toppled over platforms, and felled the underwater stilts, plunging the burning facilities into the depths of the ocean.
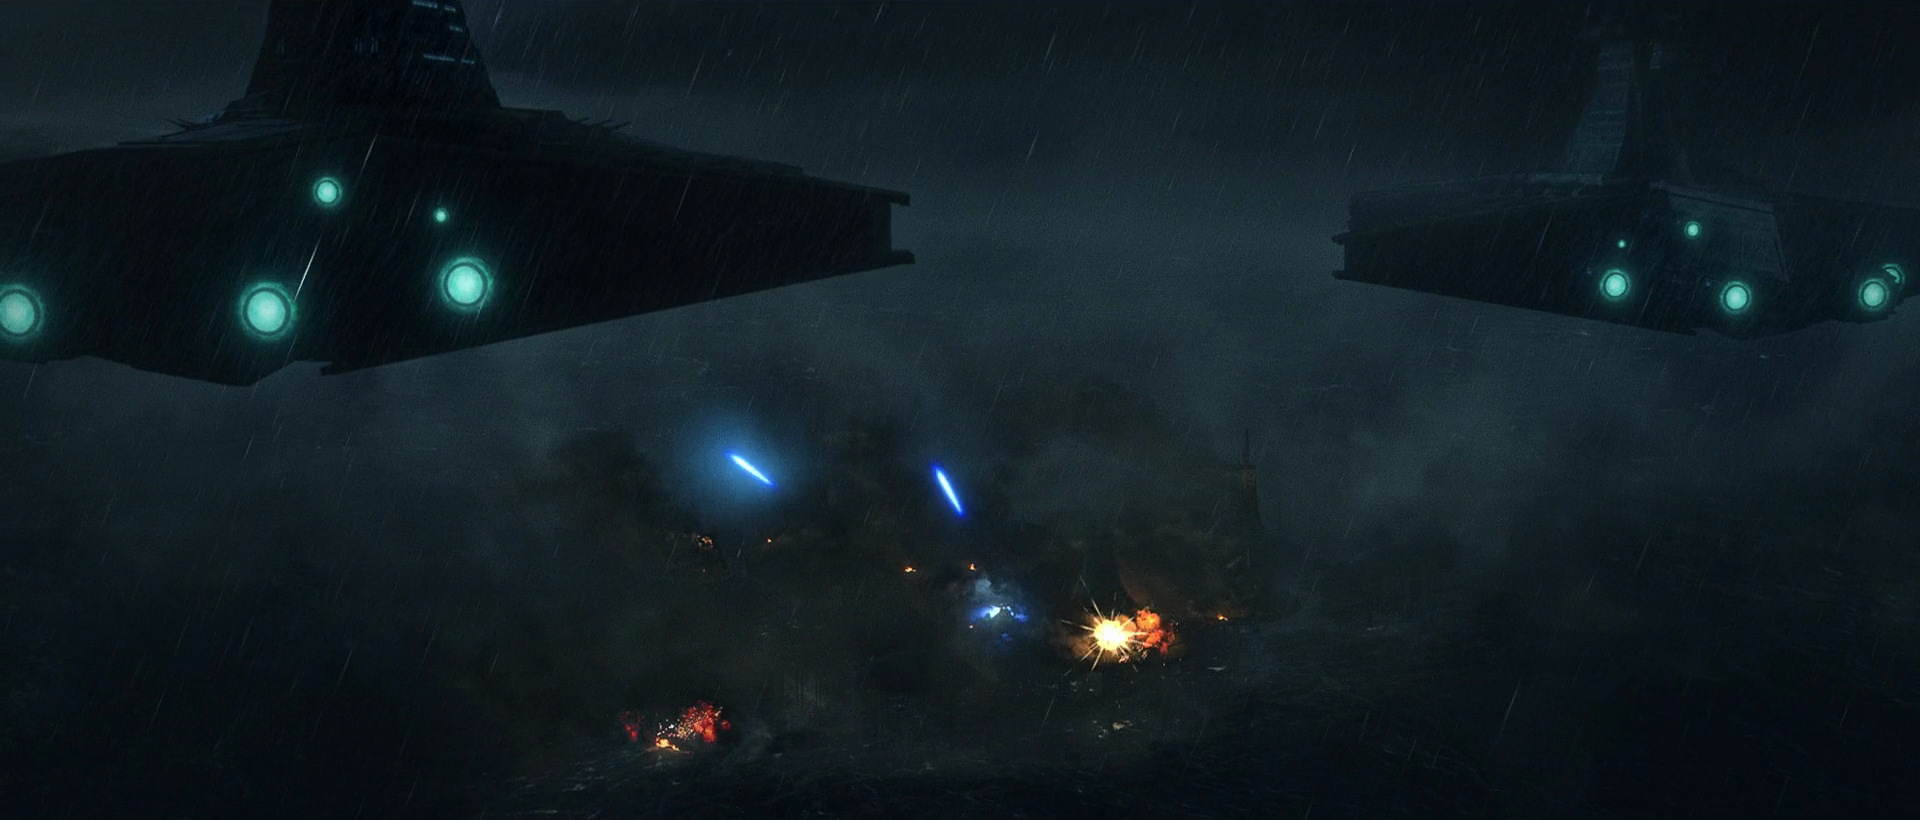
Edmon Rampart's three Venators bombarded Tipoca City to ruins.
The aerial bombardment persisted, with the Tipoca City Military Complex knocked into the water when the Bad Batch, Crosshair and AZI-3 were still inside. After the guns had fallen silent, a clone stormtrooper reported to Rampart that all Kaminoan facilities had collapsed into the sea. Satisfied with the outcome, the Vice Admiral withdrew his ships to rendezvous with the fleet, leaving the remains of the city to sink beneath the waves. In this way, the Empire destroyed Tipoca City, although the Bad Batch and their companions ultimately managed to escape their underwater predicament.
Several months after the destruction of the Kaminoan cities and cloning facilities, multiple Venator-class Star Destroyers were stationed on Coruscant, with several remaining in orbit above Imperial City. Among the ships was Vice Admiral Rampart's personal Venator, VZ-114, which was docked at Coruscant's Imperial Shipyard for maintenance and repairs. As his Venator was worked on, Rampart attended the Imperial Senate to oversee the passing of the Imperial Defense Recruitment Bill, which would see the formalization of the Imperial Military's transition from a clone army to a recruitment-based force. In order to expose Rampart's treachery to the Senate, Senator Riyo Chuchi worked with the rogue clones of Clone Force 99. As Chuchi stalled the passing of the bill in the Senate Building, the rogue clones snuck aboard Rampart's Venator in order to obtain its command log, which held the records of Kamino's destruction. After battling through the ship's clone stormtrooper crew and extracting the command log, the clone mercenaries fired the Venator's engines and escaped on an escape pod as VZ-114 slid off of its docking clamps and collapsed to the bottom of the shipyard. Ultimately, the command log was delivered to the Senate Building, where recorded footage of Rampart's fleet destroying Kamino was shown to the entirety of the Senate. Rampart was subsequently arrested, but the Imperial Defense Recruitment Bill was still passed on the behest of Emperor Palpatine.
Sometime between 19 BBY and 18 BBY, a juvenile Zillo Beast cloned by the Imperial Advanced Science Division escaped from captivity, and caused the vessel it was aboard to crash on the planet Silla. As a result, two Venators were dispatched to the planet to recapture the beast, who had grown substantially after feeding upon electricity. After dropping out of hyperspace, one of the Venators deployed numerous Alpha-3 Nimbus-class V-wing starfighters and LAAT/I gunships, which descended upon the planet's surface and engaged the Zillo Beast clone, who was eventually recaptured.
In 18 BBY a Venator came to the aid of a Gozanti-class cruiser under the command of Captain Pearce, which was under attack by rogue clones. Soon after, several Venators were deployed to the planet of Ord Mantell as Imperial forces conducted a raid in Ord Mantell City to capture the rogue clone "Omega", while also subsequently occupying the planet.
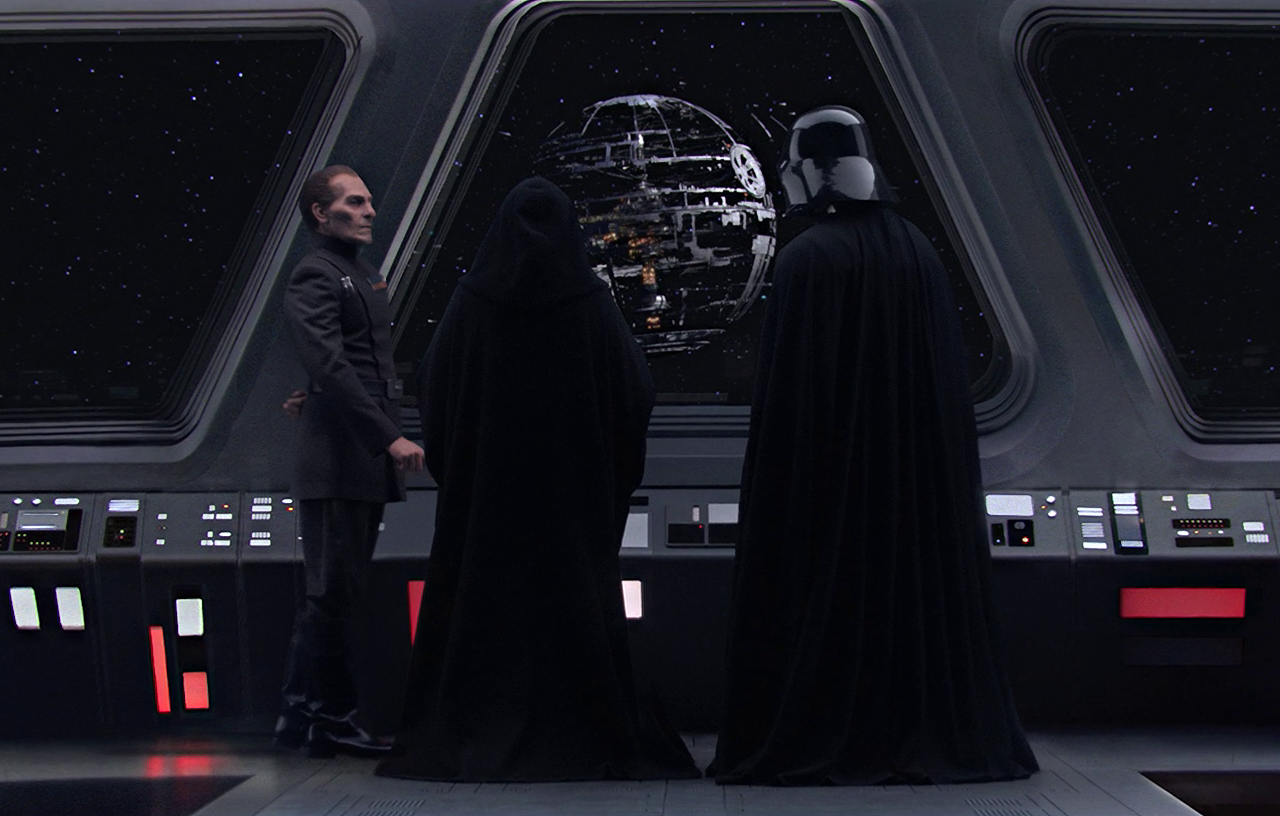
Darth Sidious, Darth Vader, and Wilhuff Tarkin observed the construction of the Death Star from the bridge of a Venator-class Star Destroyer.
While the DS-1 Death Star Mobile Battle Station was being built in the orbit of Geonosis, at least three Venators were posted near the gargantuan battle station. On board one Venator-class Star Destroyer, both Darth Sidious, the Galactic Emperor, and Darth Vader watched the construction of the superweapon, accompanied by Tarkin. The bridge crew of this Venator was no longer comprised of clone naval officers, but non-clone human personnel, such as Barrow Oicunn, who had previously served in the Republic Navy but was now devoted to the Empire.
During the campaign at Salient in the Salient system in 18 BBY, Moff Wilhuff Tarkin commanded multiple Venator-class Star Destroyers reassigned from Telos. Supporting Tarkin's Imperial I-class Star Destroyer Executrix, the Venators launched ARC-170 starfighters as part of the operation against Captain Saw Gerrera. At this time, both the Venator and the ARC-170 were considered older-generation models by Tarkin, which were starting to be phased out.
In 15 BBY, the crew of a Venator dubbed the Strikefast encountered an Unidentified planet while pursuing smugglers in Wild Space. Following Imperial UA Protocols, teams of clone stormtroopers and Imperial Navy Troopers were deployed on the planet's surface in an effort to identify any intelligent alien life. Nearby, an exiled officer of the Chiss Ascendancy, Mitth'raw'nuruodo, took notice of the Imperial presence and continually harassed the troopers as they conducted their search. Eventually, Thrawn managed to steal the armor off of a clone stormtrooper that he had killed, and snuck aboard the Strikefast, though he was quickly discovered. Impressed with the Chiss' immense knowledge in strategy and tactics, Captain Voss Parck brought Thrawn back to Coruscant for a personal audience with the Emperor.
Sometime between 9 BBY and 2 BBY, at least four Venator-class Star Destroyers served as escorts to an Imperial-class Star Destroyer above Coruscant where Morgan Elsbeth was presenting her designs of the TIE/d "Defender" Multi-Role Starfighter to the Empire.
Around 2 BBY, a Venator-class Star Destroyer under the command of Imperial Moff Ahr arrived above the planet of Namzor in order to crush an insurgent uprising and secure the rebels' Coaxium supplies. Numerous V-wing starfighters were deployed from the Venator and proceeded to strafe the insurgents positions, inflicting heavy casualties. Noticing a deposit of Coaxium near the insurgent lines, Ahr recalled the starfighters back to his Venator so that the supplies could be secured. Darth Vader however, who had been participating in the attack, ignored Ahr's orders and continued strafing the rebel positions until both the insurgents and the Coaxium deposit were destroyed.
At least one Venator-class Star Destroyer would go on to fight on the frontlines of the Galactic Civil War together with half a dozen Imperial-Class Star Destroyers.
The Galactic Empire scrapped many older Venators, especially as the larger Imperial-class Star Destroyer came into production.
As early as 19 BBY, many older Venator-class Star Destroyers from the first production line and other Republic Era starships were beginning to be scrapped on planets like Bracca, which was the site of a major campaign during the war. The breakdown of many of these older Venators lasted into 14 BBY. The salvaged parts were meticulously picked through by large numbers of workers and the salvageable material was used to support the construction of newer Imperial machinery and ships.
The design of the Venator-class Star Destroyer ultimately evolved into the similarly wedge-shaped Victory-class Star Destroyer and Imperial-class Star Destroyer, the signature battleship of the Galactic Empire. However, it was still in production by 5 BBY and at least one Venator-class was stationed at the Anthan Prime Orbital Dockyard several months after the Battle of Yavin. During the Battle at Padmé's tomb around 3 ABY, the former Naboo Royal Handmaidens of Padmé Amidala understood they would be unable to best the Sith Lord Darth Vader, but Eirtaé used the opportunity to strike, and therefore tap into, Vader's armor with her electrified spear. Given an incomplete mess of code, Eirtaé traveled to the wreck of a Venator that had seen use in the Republic Era and tapped into its systems, cross referencing Vader's data with its technology to find forty-seven percent of Vader's command codes.
Vanguard Squadron happened upon the wreckage of a Venator in the Zavian Abyss.
A nearly-entirely intact Venator was left abandoned on Level 201 of Coruscant, with the Millennium Falcon racing past the forsaken Star Destroyer during the aerial assault on Coruscant. During the construction of the second Death Star, Venator-class Star Destroyers still remained in active service to the Empire, where several were used to protect the Sanctuary Pipeline leading to the Endor system and the Death Star. Following the Death Star's destruction in 4 ABY, the New Republic's Vanguard Squadron came across the wreckage of a Venator-class, while escorting three GR-75 medium transports, before coming into contact with the Imperial II-class Star Destroyer Overseer. This was part of a New Republic ambush in the Zavian Abyss, where they revealed their prototype Starhawk.
The wreckage of a Venator-class Star Destroyer was located on the junk world of the Necropolis by the time of the New Republic Era. In 34 ABY, the Force-sensitive scavenger Rey visited the Necropolis in order to repair the Millennium Falcon. She was granted permission to salvage spare parts by Ara-Nea, a proprietor of the Necropolis, who charged the scavenger five hundred credits. Surveying the junk field from the dorsal side of a Venator, Rey considered it a "feast" as opposed to a typical day of scavenging for her.
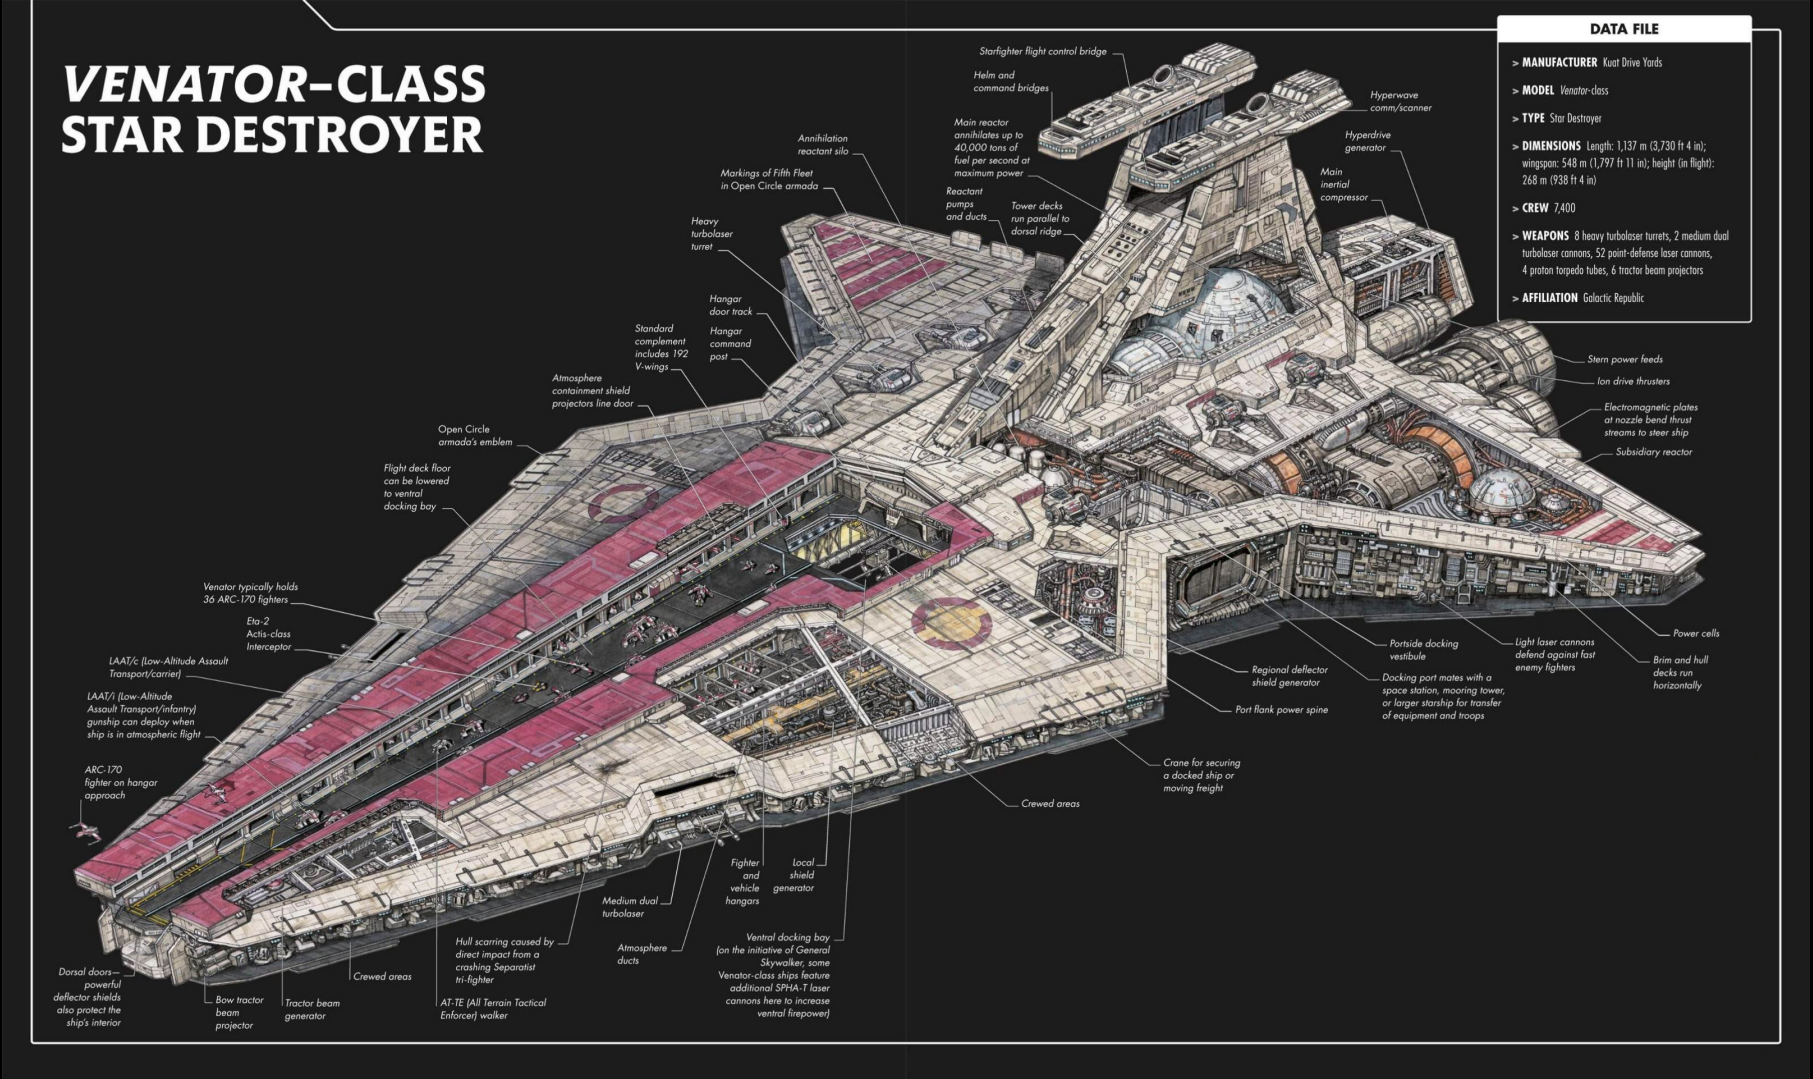
Cross-sections of the Venator-class Star Destroyer.
The Venator-class Star Destroyer first appeared in the film Star Wars: Episode III Revenge of the Sith. In Latin, the word vēnātor means "hunter." The opening hangar doors across the middle of the Venator were seen in Revenge of the Sith concept art by Ryan Church but would not be seen in action until the Star Wars: Clone Wars micro-series and the Star Wars: The Clone Wars series. The dual bridges of the Venator helped suggest the craft was more of a warship: in Church's mind, the Venator was given an extra bridge after losses sustained to previous craft. Church saw the Venator as a ship designed during the Clone Wars, rather than before it, and hoped the design made it clear to audiences that it was not the same vessel as the Acclamator-class seen in Star Wars: Episode II Attack of the Clones. Church's design for the Venator featured a long "tail" at its back, subtly giving off the look of a sword.
Church started designing the Venator before the script for Revenge of the Sith was finished. Church cited aircraft carriers and the F-16XL fighter jet as inspirations for the Venator. As the story of Revenge of the Sith developed, Church drew a piece of concept art depicting a Venator crashing into the surface of the planet Mustafar. The long tail of the Venator seen in concept art was removed at the request of George Lucas, who noted many recent ships had a similar design at their back. The sizzle reel of concept art for Andor depicted a Venator being dismantled in the scrapyards of the planet Ferrix.
The roleplaying sourcebook Rise of the Separatists claims that the Venator was introduced about twenty years before the outbreak of the Clone Wars, placing its introduction to circa 42 BBY. However, the article ""Peace" à la Tarkin – The Imperial Fleet on a mission of terror" states that the Venator was developed during the Clone Wars itself. Indeed, the reference book Star Wars Encyclopedia of Starfighters and Other Vehicles states that the Venator was introduced during the war after the conflict spurred on "a demand for larger and more powerful battleships." Ultimate Star Wars and its updated edition both stated the Venator was first deployed during the Clone Wars. Star Wars: Complete Vehicles and Star Wars Complete Vehicles, New Edition also both say that the Venator was "new" at the time of the Clone Wars.
The reference book Star Wars: Timelines would later provide a timeline on Star Destroyer development, in which it is stated that Kuat Drive Yards received a secret order for "Star Destroyers" and other warships in 31 BBY. It does not outright say if the Venator was a result of this order, Project Icefang. With the Venator's earliest known appearance coming in the 22 BBY-set novel Brotherhood, this article assumes the Venator was introduced in 22 BBY if it was first deployed in the Clone Wars, as written by Ultimate Star Wars and Ultimate Star Wars, New Edition. As Brotherhood is only set a few weeks into the Clone Wars, it is unclear if the Venator was developed in that time, as suggested by "Peace" à la Tarkin and Encyclopedia of Starfighters and Other Vehicles, or if it was developed beforehand and only saw its first action once the conflict began, as suggested by Timelines. From a behind the scenes perspective, concept artist Ryan Church intended for the Venator to be a vessel developed during the war after "hard won lessons" about the Acclamator's weaknesses, with those losses in his mind stemming from the fact that the Acclamator had not been developed in wartime.
- LEGO Star Wars: The Skywalker Saga