Battle of Mylok IV
The Battle of Mylok IV represents an operation led by Admiral Demetrius Zaarin. Its purpose was to secure experimental hyperdrive technology. The technology was in the hands of Habeen and Nharwaak researchers during the Galactic Civil War. This battle took place soon after then-Thrawn's campaign at the Battle on the Frontier.
While the Habeen scientists readily agreed to sell the novel technology to the Galactic Empire, the Nharwaak leaders disagreed with the Habeen's choice. They instead wanted to negotiate a deal with the Rebellion. Zaarin's military forces were ultimately successful in acquiring the advanced technology after suppressing the Nharwaak dissenters. The hyperdrive technology obtained from the Habeen ultimately enabled the creation of the TIE Avenger starfighter.
The Campaign
Escort the Convoy
Once Admiral Zaarin was informed by Habeen researchers about novel hyperdrive technology, he was extremely interested in the opportunity to enhance and produce new TIE/Advanced starfighter prototypes. Following discussions, the Habeen researchers scheduled a convoy of demonstration prototypes of their technology for Admiral Zaarin to assess.
The Habeen team dispatched two cargo ferry groups, Verack and Stimner, to meet with Admiral Zaarin aboard the Nebulon-B2 frigate Shamus. Because of Rebel incitement and the known disagreement between the Habeen and Nharwaak, members of the Secret Order advised trusted pilots to verify that the cargo aboard the Habeen transports matched their declared contents.
The frigate Shamus launched three flight groups of TIE/LN starfighters, named Alpha, Beta, and Gamma, to secure the immediate vicinity for the cargo transfer to the Shamus. As TIE fighter Alpha 2 inspected Verack and Stimner, Nharwaak BTL Y-wing starfighters, in Red and Gold groups, entered the system. As predicted, they were planning to disrupt the cargo transfer.
As combat broke out between the Imperial escort fighters and the approaching Nharwaak Y-wings, CR90 corvettes Charger 1 & 2 joined the fight. Imperial fighters managed to suppress the initial attackers, but were quickly challenged by additional Y-wings supplementing Nharwaak losses. Furthermore, the Y-wings successfully launched proton torpedoes against the cargo vessels. The Habeen Ferries suffered significant damage from Y-wing Torpedo attacks, but Imperial starfighters ultimately succeeded in eliminating the Nharwaak intruders, allowing the cargo transfer to be completed.
Attack the Nharwaak
Following the prototype transfer, Habeen representatives visited Admiral Zaarin, urgently wanting to express their views about the Nharwaak. Aboard the Shamus, Admiral Zaarin was informed of their concern that the Nharwaak intended to sell the new technology to the Rebellion if the Habeen succeeded in making a deal with the Empire. After the meeting, Admiral Zaarin decided to send a message to the Nharwaak. With the assistance of Imperial Intelligence, Admiral Zaarin initiated a raid on the primary Nharwaak base, where their portion of the hyperdrive technology was stored.
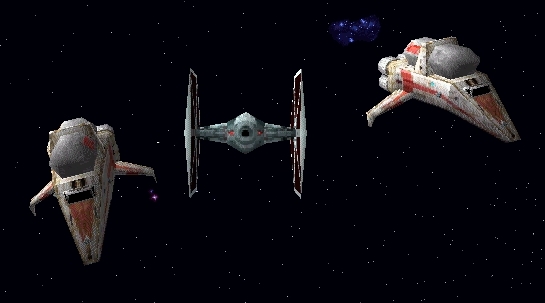
Three flight groups of TIE/sa bombers spearheaded the assault on the Nharwaak assembly of corvettes, including Petor and Shotgun, as well as various cargo containers, Lambda-class T-4a shuttles like Pamir, transport ships, and waiting Y-wings. The Imperial elimination of the Nharwaak installation occurred quickly. Only the Nharwaak Delta-class DX-9 stormtrooper transport Sunbird managed to pose any significant threat by launching torpedoes at the frigate Shamus, but it was also silenced by Imperial TIE bombers.
Defend the Tech Center
The Nharwaak immediately retaliated. Imperial starfighter pilots quickly mobilized as Nharwaak Y-wings entered realspace near the Habeen research center. The Assassin-class corvette Phoenix launched three groups of TIE bombers to join Habeen corvettes Notz and Phalanx. They were defending Habeen shuttles Doyle, Sgidek, and the transport Runner during docking operations to protect hyperdrive technology stored aboard defenseless containers.
Imperial TIE bombers swiftly engaged the equally-sized force of Y-wings, which were already firing proton torpedoes at the Habeen facility. The Empire's bomber pilots frantically expended their concussion missile magazines against the array of Y-wing fighters. Habeen containers sustained heavy damage, but not before Habeen rescue craft could complete the vital docking procedures. Imperial starfighters once again demonstrated their superiority over Nharwaak bomber pilots, concluding the conflict with a barrage of missile volleys.
Diplomatic meeting
Having quelled the Nharwaak rebellion for the moment, Admiral Zaarin arranged a meeting with Habeen diplomats to finalize a deal to provide Imperial forces with the new hyperdrive technology, while recognizing the Habeen as Imperial citizens. Zaarin's frigate Shamus would meet with the Habeen EF76 Nebulon-B escort frigate Lendova. Upon arrival, both frigates would launch diplomatic shuttles for a neutral meeting in space. If all parties could agree on suitable terms, Lendova would transport the finalized hyperdrive technology to the Shamus. Imperial Intelligence warned that despite the previous engagement with Nharwaak resistance, pilots should be prepared for another attack aimed at disrupting the final agreements between the Habeen and the Empire. Secret Order agents also requested that pilots inspect the cargo of arriving transports to ensure Habeen leaders kept their word.
TIE interceptors from flight group Alpha patrolled the space surrounding the frigate Shamus, awaiting the arrival of the Habeen diplomats. The Imperial shuttle Nexus departed from the hangar shortly after the Lendova arrived. Nexus boarded the Habeen diplomatic shuttle Fairfax just as the Nharwaak corvettes, including Phazer, and two groups of Y-wings arrived. Deal finalizations were completed as TIE interceptors prevented Nharwaak forces from interfering.
Habeen transports from group Ferry began moving toward the frigate Shamus as combat continued between interceptors and the smaller Y-wings. Phazer 1 began to take heavy fire from passing TIE interceptors and was ultimately destroyed by a heavy volley of turbolaser fire from the frigate Lendova. Transports from Ferry continued their journey across the battlefield one by one as Z-95 Headhunters arrived to support the Nharwaak effort. Ferry 5 reached the safety of the Imperial frigate as hostilities ended, with TIE interceptors from Alpha driving off or destroying the persistent Nharwaak resistance.
Following the confrontation, Maarek Stele met with a representative from the Secret Order to report his findings. The robed figure expressed interest in an unusual discrepancy in the cargo of one of the transports. The Secret Order agent suspected that the new technology contained in the final transport might have been the result of a subversive arrangement. The robed figure concluded the conversation by informing Stele that Nharwaak researchers were still collaborating with Rebel forces and that he should expect additional flight action soon.
Rebel arms deal
Imperial Intelligence uncovered a planned meeting between Rebel forces and the Nharwaak, who were honoring their commitment to provide the Rebellion with the new technology. The frigate Shamus immediately deployed to the local system, dispatching Alpha-class Xg-1 Star Wing assault gunboats and TIE bombers to attack the Rebel frigate Xerxes and its complement of starfighters. Imperial leadership emphasized the importance of preventing Rebel forces from obtaining the new hyperdrive technology.
Imperial fighters aggressively engaged Rebel B-wing starfighters and RZ-1 A-wing interceptors emerging from the Xerxes hangar. Assault gunboats effectively divided their attacks between enemy starfighters and the frigate Xerxes, maintaining pressure on the Rebel starship. The frigate Shamus approached the Xerxes as the battle unfolded between the clashing starfighters. The Xerxes' weakened shields quickly succumbed to the combined firepower of the superior Nebulon-B2 frigate Shamus. Gunboat Tau 1 moved swiftly over the transport Tela as it emerged from the collapsing hull of the Xerxes, carrying escaping Rebel officers. Several volleys of precise laser fire reduced Tela to space debris.
The aftermath
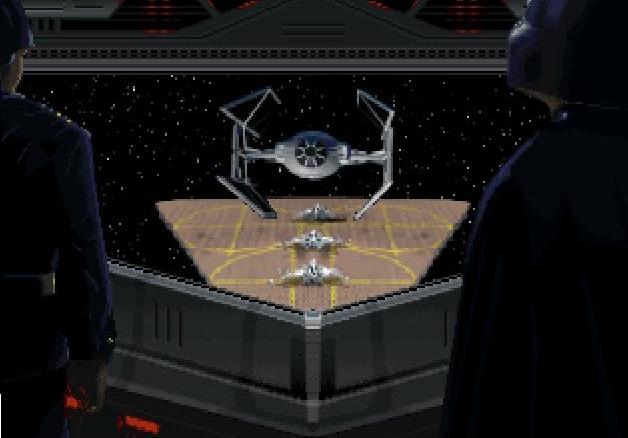
Admiral Zaarin successfully acquired new technology from the Habeen and applied it to the latest TIE Advanced prototype. Admiral Zaarin invited Darth Vader to his research platform to demonstrate the new TIE Avenger starfighter, which was now combat-ready. Lord Vader was impressed by the new starfighter's hyperdrive capability, and Zaarin further elaborated on research into an even more advanced TIE prototype. Vader conveyed the Emperor's interest in Zaarin's progress, as well as his desire to receive a prototype of this newer TIE starfighter.
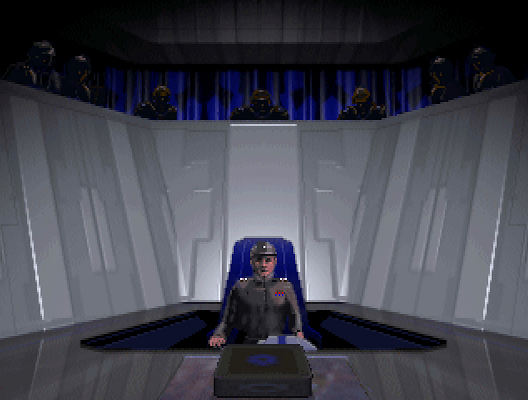
Elsewhere, Maarek Stele received instructions from the Secret Order regarding another transfer. The Order's representative suggested that a pilot of Stele's skills was needed to achieve the Emperor's objectives. Further details revealed that Stele's transfer was to Admiral Harkov's Victory-class Star Destroyer Protector. Before his transfer, he attended a small awards ceremony with a few Imperial officers, where he was presented with the Medal of Order for his actions in the conflict. However, he found it difficult to be enthusiastic about winning the award because he was experiencing doubts about the Empire he had been serving.