Death Star Uprising
The Death Star Uprising, a significant prison disturbance, began within Detention Block 2180 on the first Death Star. In this event, Rebel Alliance prisoners of war attempted an escape. Their plan involved fighting their way to two separate hangars with the intention of commandeering a Sentinel-class landing craft. While the escape attempt was entirely thwarted, the riot served as a potential diversion for a more crucial and ultimately successful operation. During the chaos, a section of the Death Star plans was secretly pilfered and then transported to Rebel forces stationed at a clandestine base located on Polis Massa.
Prelude
As the Death Star's construction neared completion, captured enemies of the Empire from across the galaxy were secretly transported to the highly classified space station. They were intended for interrogation and subsequent imprisonment. Within Block 2180, a group of Rebel captives encountered an unidentified Human Jedi prisoner. This Jedi had conceived a straightforward plan to escape the Imperial battle station, a plan that depended on the cooperation of the other inmates.
The Uprising
It is likely that the Empire remained unaware of the clandestine prison break until the rioters had successfully raided an Imperial armory. This allowed them to arm themselves in anticipation of the inevitable stormtrooper counterattacks.
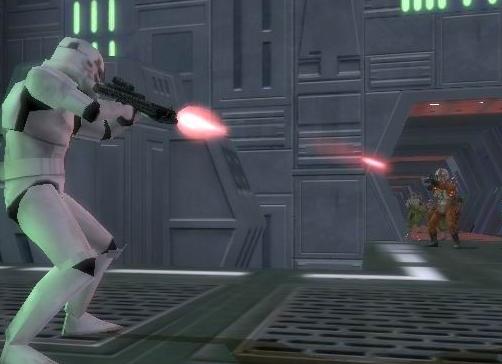
The first stormtroopers to detect the uprising were stationed in Hangar 84G. They encountered troopers from the elite 501st Legion, who were coincidentally present on the Death Star for an external inspection. Together, they assembled in the hangar and forced the Rebels back through two blast doors that the Rebels had stormed through. Recapturing most of the prisoners proved impossible without resorting to force, resulting in a bloody and unexpected massacre. After a brief but intense assault, Hangar 84G was finally secured and locked down by Imperial forces. Consequently, the Rebels shifted their focus toward the Fire Control Room, the location of the superlaser.
Simultaneously, stormtroopers hurried across walkways towards the superlaser, eliminating a Rebel who had managed to steal the Death Star's schematics. Unfortunately for the Empire, the bridge that typically spanned a reactor tunnel, connecting Hangar 84G on one side and the Fire Control Room on the other, had been disabled earlier. This forced the stormtroopers to take a longer, alternative route through the prison area. Meanwhile, other Rebels successfully reached Hangar 85G, situated just beyond the Fire Control Room. They seized control of it long enough to transmit a separate, partial set of the schematics to a Rebel base on Polis Massa. Additional sets of the plans would later be acquired at Danuta and Toprawa.
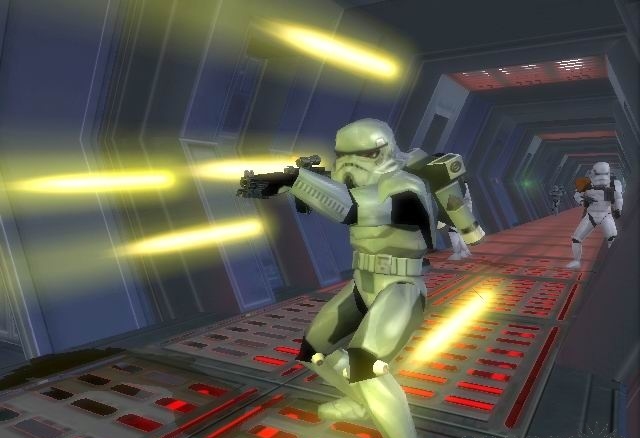
After eliminating all rioters within the Fire Control Room, the Imperial troopers advanced towards Hangar 85G. Their goal was to prevent the Rebels from fully boarding and hijacking a Sentinel-class landing craft for use as an escape vehicle. With only moments remaining before takeoff, stormtroopers stormed into the hangar, eliminating as many escaping prisoners as possible. The Jedi leader revealed himself in a desperate attempt to reach the shuttle, but Imperial shock troopers destroyed it moments later.
The enraged Jedi activated his lightsabers and cut down any trooper who dared to stand in his way. Ultimately, the Jedi and his remaining squad of troopers were overwhelmed and killed. Imperial intelligence subsequently traced the stolen schematics and the few Rebels who managed to escape to Polis Massa, where an even more fiery skirmish would eventually erupt.
Aftermath
The prison break was a significant source of shame for Darth Vader's supposedly "Elite" 501st Legion, which in turn reflected poorly on Vader himself. As a consequence, Vader reassigned the Legion from their relatively comfortable position on the Death Star to his personal army. Their new mission was to assist in the galaxy-wide search for both the stolen Death Star plans and the escaped Rebel prisoners. However, this search proved unsuccessful, as the plans were not recovered in time to prevent the Death Star's destruction. Despite this failure, the reassignment ensured that the Legion was not stationed on the Death Star when it was destroyed. The troopers who replaced them, however, were ultimately doomed.