Battle of Toprawa
The Battle of Toprawa marked an early engagement during the Galactic Civil War. In this conflict, the Alliance to Restore the Republic successfully seized a substantial portion of the Death Star plans from the clutches of the Galactic Empire. This event represented the Rebellion's inaugural significant space battle and their first major triumph.
After the Rebels ambushed an Imperial convoy orbiting Toprawa and secured the plans, enhancing them with additional schematics from a research station located on the planet's surface, and yet more from a facility on Danuta, the Toprawa Rebels were in need of a method to transmit the plans away from Toprawa and into the hands of the broader Rebellion. Although the Empire had declared the planet a restricted zone, an opportunity arose when Princess Leia Organa arrived in the system aboard the Tantive IV. The Toprawa Rebels then took control of an Imperial communications center and transmitted the plans to the Princess's vessel, while simultaneously defending against Imperial ground forces. While the Tantive IV narrowly escaped the system, pursued by the Star Destroyer Devastator, most of the ground forces were killed, and the remaining survivors were forced into hiding.
Despite the fact that these plans would eventually enable the Rebellion to destroy the Death Star, Toprawa did not share in this fortune. As retribution, the Empire devastated the planet's surface and forced its inhabitants into subjugation.
Prelude
The Rebel Alliance became aware of the existence of the Death Star, a battle station of moon-like proportions capable of planetary destruction, thanks to an operative stationed on Ralltiir, a world under the control of Lord Tion. Tion had been persistently courting Princess Leia Organa of Alderaan, and when she arrived on Ralltiir to meet with the agent, she was compelled to feign interest in Tion to allay his suspicions. Seizing the opportunity, Tion invited himself to the Organa residence on Alderaan, intending to dine with Leia and her father, Bail Organa.
During the dinner, Leia skillfully coaxed Tion into revealing his knowledge of the Empire's secret battlestation and the imminent departure of a convoy carrying its plans from Grand Moff Wilhuff Tarkin's headquarters. However, Leia inadvertently mentioned the code name "Death Star," a term Tion had not used, leading him to realize her affiliation with the Rebels. In the ensuing conflict, Tion was killed. Bail Organa then contacted the Rebellion, relaying information about the convoy. Meanwhile, Rebel operative Ta'al Pierc discovered that the Imperial Research Station on Toprawa was developing the control systems for a superlaser. Upon learning of the Death Star's existence, the Rebels deduced that this superlaser was its primary weapon. Armed with this intelligence, the Rebellion prepared to intercept the convoy and seize the Death Star plans. Those selected for the mission understood the high risk of failure, and the Rebellion made it clear that the troops sent to ensure the successful capture of the plans were expendable and unlikely to be recovered.
The battle
The space battle

The Imperial convoy's itinerary included a stop at Toprawa to acquire the superlaser control plans before proceeding to Coruscant to deliver the plans to the Imperial Information Center. However, the Rebellion lay in wait, and Rebel starfighters intercepted the Imperial convoy above Toprawa.
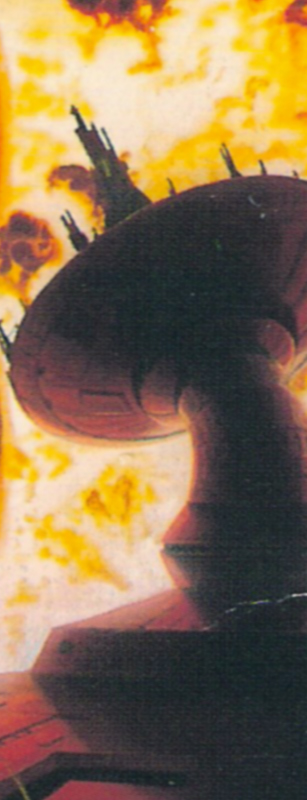
The starfighters faced considerable resistance, and the spaceport's ground-based defenses opened fire. Nevertheless, the Rebels gradually gained the upper hand. The fighters crippled the convoy and captured the Death Star plans, and one by one, the remaining Imperial ships were destroyed. One battlecruiser, with a decimated crew, managed to escape into deep space, while other ships sought refuge in Toprawa's atmosphere. Despite their attempts to escape, these vessels were destroyed, along with all escape shuttles launched from them. Some of the crashing ships inflicted damage on the city below.
Despite the heavy casualties suffered by the Rebels—over one hundred lives—this engagement marked the Rebellion's first genuine space battle and Toprawa became the site of the Alliance's first significant victory.
The ground mission
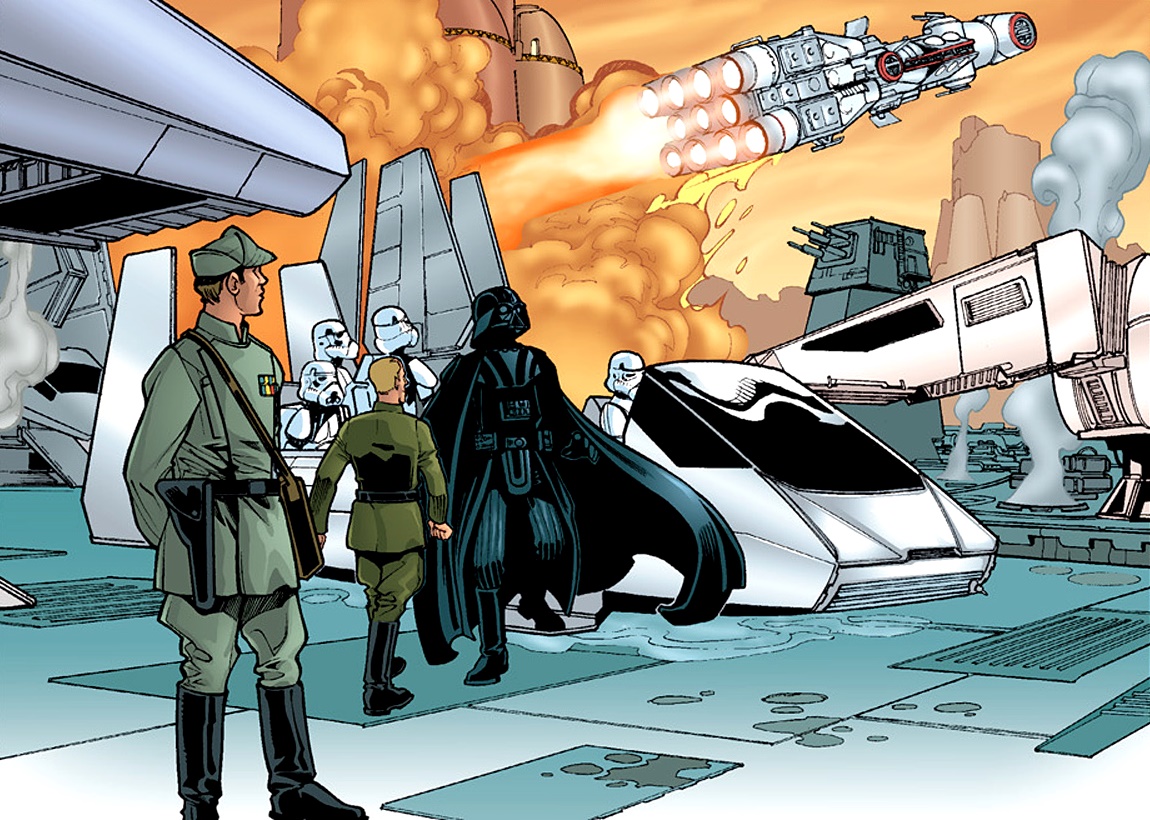
Upon learning of the security breach from Imperial Intelligence, the Empire swiftly responded. Declaring Toprawa a restricted system, the Imperials established a blockade, preventing any Rebels from leaving the planet with the plans. Darth Vader, realizing that the plans were now in Rebel hands, set a course for the world, prompting the Rebels to seek an immediate means of getting the plans off-planet.
Upon receiving news of the space victory, Bail Organa prepared to depart for Toprawa aboard the Tantive IV. According to the Toprawa Rebels' plan, the Tantive IV would enter the Toprawa system, utilizing its diplomatic immunity as a shield. As the Tantive IV approached the planet, the Rebels on the surface would transmit the plans. However, Leia insisted on piloting the Tantive IV herself, arguing that her reputation for undertaking missions of mercy would attract less suspicion. Bail conceded, and Leia, under the command of Captain Raymus Antilles, set off for Toprawa in the Tantive IV.
The Rebels decided to seize the communications center within the Imperial Research Station. Their intention was to use its burst transmission system, capable of rapidly transmitting compressed data, to send the plans to the Tantive IV before the Empire could jam the signal. The Rebel leader Vermilion planned to launch an assault on the research facility, while Rebel agent Havet Storm infiltrated the base to retrieve the superlaser control plans stored there.
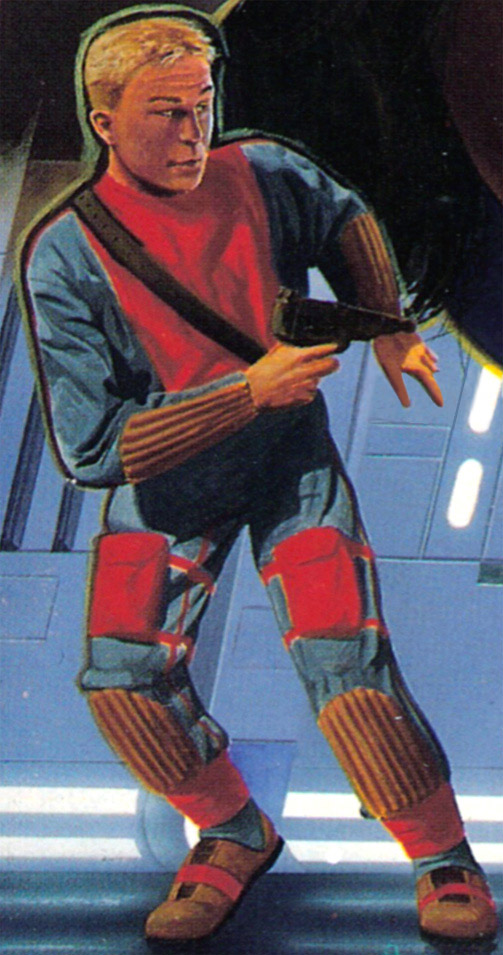
As the Rebels initiated their assault, aiming to break through the reception building and cross a landing field to reach the communications center, Storm navigated the facility via an alternate route. Utilizing a password bypass previously added to the system by the Rebel Ta'al Pierc, Storm obtained the necessary security clearance to move freely throughout the facility. After donning an Imperial uniform, he headed for the quarters of Facet Anamor, the Executive Personnel Officer for the facility. Following the drugging of Anamor and the retrieval of the research station schematics from her computer terminal, Storm proceeded to the room of Facet's father, Head of Research Druth Anamor. Employing the password bypass, Storm downloaded the superlaser schematics onto a set of discs, then engaged in a brief but intense fight with the elder Anamor. After killing him, Storm, having achieved his objective, made his way to the communications center.
Meanwhile, the other Rebels had reached the communications center. Red Hand Squadron, led by Commander Bria Tharen, established a perimeter outside the center to repel the Imperial assault while the communications technicians prepared to transmit. The Imperial forces had destroyed the Rebel spacecraft, eliminating any possibility of escape, but the Rebel soldiers were instructed to defend the comm center for as long as possible. Upon reaching the comm center, Storm encountered Vermilion, who was carrying the discs containing the remaining plans. However, their situation remained precarious. As fake panels slid down around them, the Rebels realized they were surrounded by a squad of stormtroopers led by Facet Anamor. As Anamor drew her weapon on Storm, Vermilion lunged at her, and Anamor shot him. Storm, in turn, killed her, and without their leader, the remaining stormtroopers quickly fell. In his final moments, Vermilion provided Storm with the frequency, 1215, and the code word, "Skyhook," necessary to transmit the plans.
The Toprawa plans contained information regarding the Death Star's hull and life-support systems, while those retrieved by Storm from the base detailed the designs for the superlaser. Simultaneously with the Toprawa operation, the Rebels had other plans in motion, and agent Kyle Katarn had obtained a third set of plans, containing specifications on weapons emplacements and engineering details, from a facility on Danuta. Storm compressed all of these plans into a single data packet and prepared to transmit it to the Tantive IV, which was due to arrive in-system at any moment.
The arrival of the Tantive IV
Meanwhile, Leia Organa and Captain Antilles had been formulating their own plan to divert the Empire's suspicion upon the Tantive IV's arrival in the restricted zone. The astromech droid R2-D2 was to be positioned outside the vessel, near the navicomputer sensor suite, and feign repairs. If questioned by the Imperials, the Tantive IV would explain that their hyperdrive was malfunctioning, forcing them to drop out of hyperspace to conduct repairs. R2-D2 would maintain contact with his counterpart, C-3PO, and if the Imperials scanned the droid, they would corroborate the Tantive IV's cover story.
As the Tantive IV entered the Toprawa system, they detected a scrambled transmission. Leia entered the correct code, revealing the voice of Havet Storm instructing the Tantive IV to prepare to copy. Storm began transmitting the plans to the vessel. However, three Star Destroyers, including the Devastator, were now in orbit. As the data was being transmitted, the Devastator detected the signal, and Commander Nahdonnis Praji contacted the Tantive IV, ordering it to halt and prepare for a search. Desperate for more time, Antilles informed the Devastator of their "malfunction" and attempted to invoke the vessel's diplomatic immunity. The Devastator acknowledged the message and, under Vader's command, withheld its fire, but ordered the Tantive IV to maintain its course and prepare for boarding.
The transmission finally concluded, and Antilles responded to the Devastator, asserting that their diplomatic mission precluded detention. As the Tantive IV prepared to jump to hyperspace, Antilles ordered all troops to battle stations, raised shields, and began accelerating away from the planet. The Devastator announced its detection of the plans' transmission, reiterated its order for the Tantive IV to halt, and prepared to open fire. Vader ordered the Star Destroyer to fire with minimal damage, and only moments after it began firing, the Tantive IV finally jumped to hyperspace. The Devastator followed.
Last stand
Following the completion of the transmission, Havet Storm and the technicians planted their explosive charges and evacuated the communications center. Mere seconds after the transmission ended, an Imperial blast destroyed the communications tower, leaving the Rebels on the surface unaware of the Tantive IV's fate.
Meanwhile, Bria Tharen and Red Hand Squadron continued to hold their ground. As the battle raged on and day turned to night, the communications tower was reduced to rubble, and the surrounding area was littered with wrecked speeders and bodies. The Rebels knew they would not survive Toprawa, and when an HAVr A9 Floating Fortress arrived, they prepared for another assault. Ultimately, all members of Red Hand Squadron were either killed or committed suicide. Tharen ingested a suicide pill, knowing that neither she nor any of her team could be captured alive with the knowledge they possessed.
Aftermath
Although the Rebels suffered significant losses due to the Devastator's ambush, the battle was nevertheless regarded as the Rebel Alliance's first formal victory, following a series of informal battles by various resistance groups, due to the successful completion of the stolen Death Star plans.
The Devastator pursued the Tantive IV to Tatooine and captured it, but the plans were smuggled off the ship, stored within R2-D2. They were eventually delivered to the Rebel base on Yavin 4, enabling the Rebellion to destroy the Death Star.
However, Toprawa did not escape the Empire's retribution. As punishment, the Empire razed the planet's cities, plunging the planet into a pre-industrial state, and subjugated its people.
Among the battle's many casualties was an Imperial battlecruiser that sustained superficial damage and escaped the fighting, only to suffer a reactor failure. The pirate Crimson Jack discovered it adrift in deep space and captured it, eliminating the remaining crew.
Behind the scenes
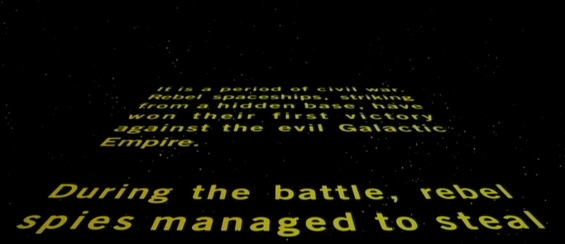
The Battle of Toprawa was conceived by Brian Daley in the Star Wars radio drama to expand upon the opening words of the Star Wars saga, the introductory crawl of Star Wars: Episode IV A New Hope. Despite the battle's significance, only two sources since then, Jedi Dawn and Rebel Dawn, have depicted it, with only Jedi Dawn explicitly showing the "first victory" itself, the space battle.
Star Wars: Rebel Assault may also feature the space battle in its opening cutscene, which comprises a montage of video clips that mirror the cutscene's narration. During the portion of the narration that mentions the Rebellion's first victory, an unidentified space battle is shown.
In the initial story draft for Star Wars: The Force Unleashed, the Battle of Toprawa played a prominent role as the setting for the game's climax. Throughout the battle, the game's protagonist would act as Leia's protector and duel Vader's other secret apprentice. Following the defeat of the other apprentice, the protagonist would face a choice between fighting Vader, enabling Leia's escape, or resuming his apprenticeship, leading to the destruction of the Rebel Alliance. When the game's developers presented their plot outline to George Lucas, he rejected the idea of setting the game just before A New Hope, precluding the battle's inclusion in The Force Unleashed. He also suggested that Leia have a less prominent role in the storyline and expressed his belief that Vader and Palpatine would serve as better antagonists. The developers subsequently altered the storyline, resulting in the elimination of the second secret apprentice as a character, the creation of Juno Eclipse, and a confrontation between the game's protagonist, Vader, and Palpatine aboard the first Death Star.
Continuity
In the radio drama, the events at Toprawa were portrayed as the exclusive means by which the Death Star plans were obtained. However, Star Wars: Dark Forces presented an alternative account of the plans' theft, this time at the hands of Kyle Katarn on Danuta. Dark Forces: Soldier for the Empire reconciled this discrepancy by explaining that each set of plans represented only a portion of the whole, and that the complete schematic was assembled on Toprawa.
The endnotes for The New Essential Chronology assert that the attack on the Imperial convoy is playable in the game Star Wars: X-Wing. However, X-wing's depiction of the capture of the Death Star plans and their transmission to the Tantive IV differs from all other accounts of these events, and the transfer of the plans does not occur at Toprawa. It is possible that, as with the Danuta plans, these were merely a portion, transferred separately from the plans at Toprawa.
Other sources, such as Star Wars: Empire at War, Star Wars: Battlefront II, and Star Wars: Lethal Alliance, offer their own versions of how the plans were acquired, none of which mention the Toprawa mission.
Although the opening crawl of A New Hope declares that this was the Rebellion's first victory, other engagements in which the Rebels emerged victorious have been portrayed as occurring earlier, such as the Battle of Fresia from Star Wars: Empire at War or the Battle of Turkana from Star Wars: X-Wing, as well as the Assault on Kamino in The Force Unleashed II. It is plausible that the Battle of Toprawa was the Rebellion's first significant victory. The Visual Guides, when addressing this, clarified that it referred to the Rebellion's first formal victory, citing the prior engagements as informal battles waged by various resistance groups.
While the Battle of Toprawa is no longer canon and is now categorized as part of Star Wars Legends, the battle in which the plans for the first Death Star battle station were stolen by the Rebels, known as the Battle of Scarif, is depicted in the climax of the 2016 Star Wars Anthology film Rogue One: A Star Wars Story. However, instead of Toprawa, the battle took place on the planet of Scarif, and instead of Havet Storm, Rebel soldiers Jyn Erso and Cassian Jeron Andor transmitted the plans to the Tantive IV.