Star Wars: The Force Unleashed II
Star Wars: The Force Unleashed II is the sequel to Star Wars: The Force Unleashed, with its unveiling occurring at the 2009 Spike Video Game Awards on December the 12th, 2009. The narrative continues to be set in the period between Star Wars: Episode III Revenge of the Sith and Star Wars: Episode IV A New Hope, specifically six months following the events of the initial Force Unleashed game. The plot revolves around Starkiller, a clone of Galen Marek, and his endeavors to liberate himself from the control of Darth Vader.
Introductory Text
Narrative Overview
Departure from Kamino
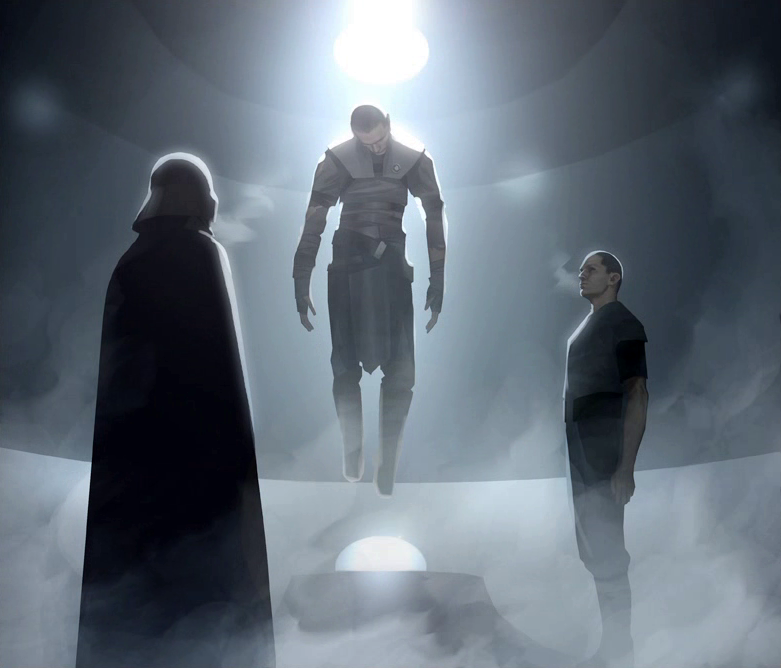
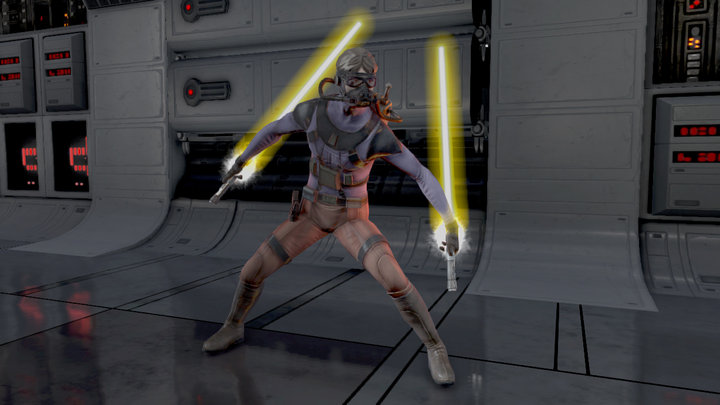
In the year 1 BBY, the TIE fighter of Darth Vader approaches the planet of Kamino. Vader makes his way into a sizable chamber, where a large, circular cell is embedded in the floor. Inside resides a young man, who is informed that he has been isolated for thirteen days as a test of his resilience. The clone is plagued by visions, which include a burning forest and the voice of a woman echoing in his mind. Vader clarifies that these are merely remnants of a dead man and will eventually dissipate. He then presents the clone, who is tasked with eliminating Starkiller's former Jedi master, with a pair of identical red lightsabers and commands him to destroy several training droids. These droids take on the forms of Rebel soldiers and a mysterious woman. The new Starkiller decimates the soldiers but hesitates when he recognizes the woman as Juno Eclipse, the original Starkiller's former pilot and romantic interest. His inability to kill her prompts Vader to intervene, destroying the final droid and declaring that the accelerated cloning process used to create him is flawed. Vader explains that previous clones succumbed to madness within months and that he had hoped this Starkiller would be the first success, but it appears he will suffer the same fate. After questioning Vader's intentions, Starkiller experiences another vision of Vader impaling his past self before the Emperor.
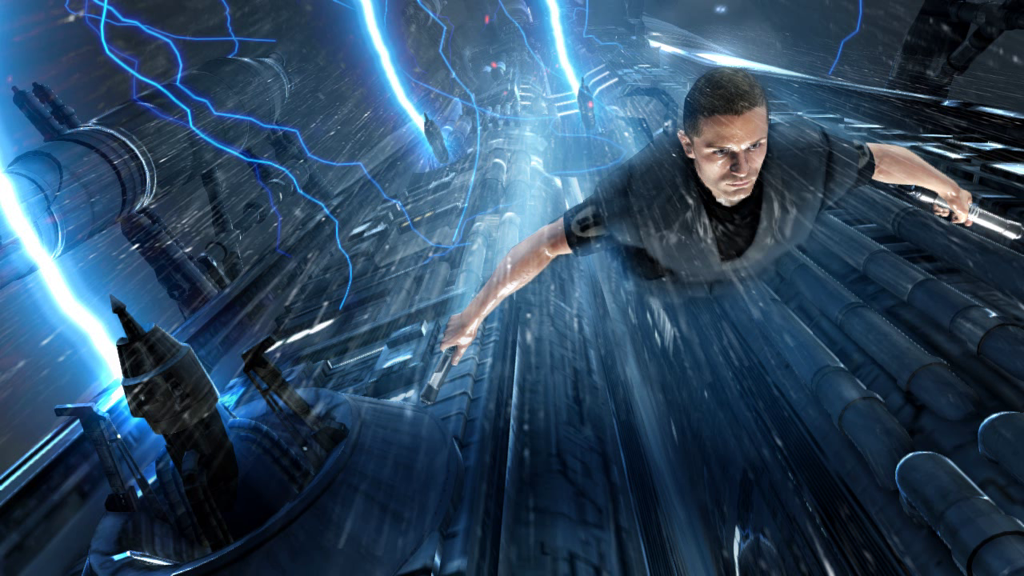
Unleashing Force lightning upon Vader, Starkiller obliterates a section of the wall, allowing him to escape. However, he is confronted with a perilous drop filled with hazards like lightning towers, platforms, and TIE fighters. After blasting through these obstacles, Starkiller crashes through a glass roof into another part of the facility. He proceeds to fight his way through various Imperial troops, including Riot troopers, stormtroopers, two Carbonite War droids, and jumptroopers. After evading an Imperial dropship, Starkiller reaches a large tower, which he topples by hurling several TIE fighters at it. The tower crushes one of the three AT-STs guarding his master's starfighter. After destroying the remaining two, Starkiller seizes the fighter as Vader arrives on the landing platform. Vader watches as his fighter speeds away into space.
Cato Neimoidia and Rahm Kota

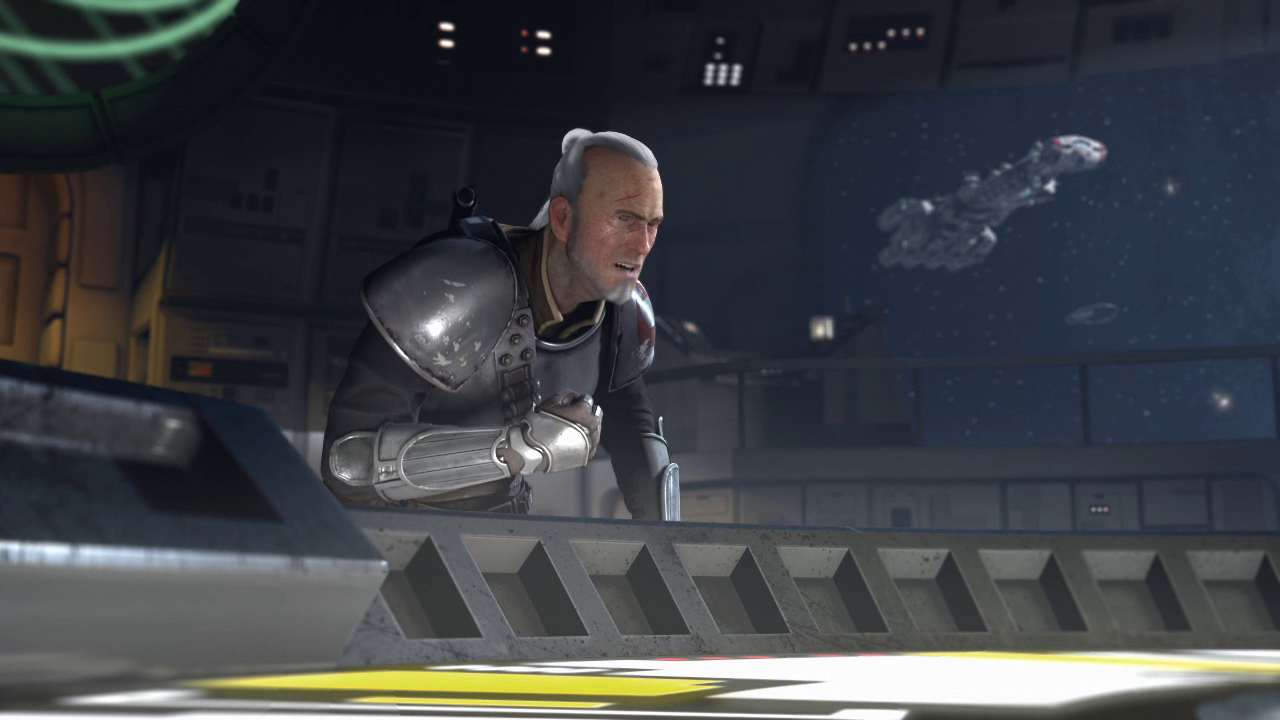
On Cato Neimoidia, a Massiff is poised to attack a competitor in an arena. However, the competitor, who is revealed to be Rahm Kota, the Rebel and Jedi General who mentored the original Starkiller, cuts it down mid-leap. After defeating a Feeorin Gladiator, Kota addresses a "Baron" in an observation canopy, stating that he is "running out of executioners." The Baron, Merillion Tarko, suggests using "Corellian slice hounds." One of his Neimoidian aides informs him that Vader's ship is approaching. Tarko, believing Vader himself is arriving, orders a squad of stormtroopers to assemble in the hangar.
However, it is Starkiller, not Vader, who arrives. Tarko, immediately suspicious, demands the sector's security codes. When Starkiller fails to provide them, Tarko orders the troopers to attack. Starkiller easily dispatches the troopers, but Tarko flees to the safety of the city. Starkiller proceeds into the city after destroying an AT-MP and two Imperial Sith Acolytes. Starkiller eliminates numerous Imperial forces along the way but is attacked by one of Tarko's Nemesis-class gunships, which destroys a bridge, killing Imperials and destroying buildings. Starkiller evades the ship, but it is not the last time he encounters it. After entering a gambling hall filled with game machines, he discovers several Carbonite War Droids in the lower levels that have seemingly frozen many Neimoidian citizens. After passing through another, smaller room with three game machines, the Nemesis attacks again, destroying the bridge Starkiller is standing on. Starkiller reaches a tram and uses it to reach the Eastern Arch. He is forced to destroy many TIE Fighters to protect the tram, but the Nemesis catches up, firing its hellcaster cannon and several missiles. While unable to deflect the laser blasts, Starkiller redirects the missiles back at the ship, forcing it to retreat. The tram is too damaged, however, and it plunges off its power supply line, with Starkiller barely managing to leap off it to reach a platform.
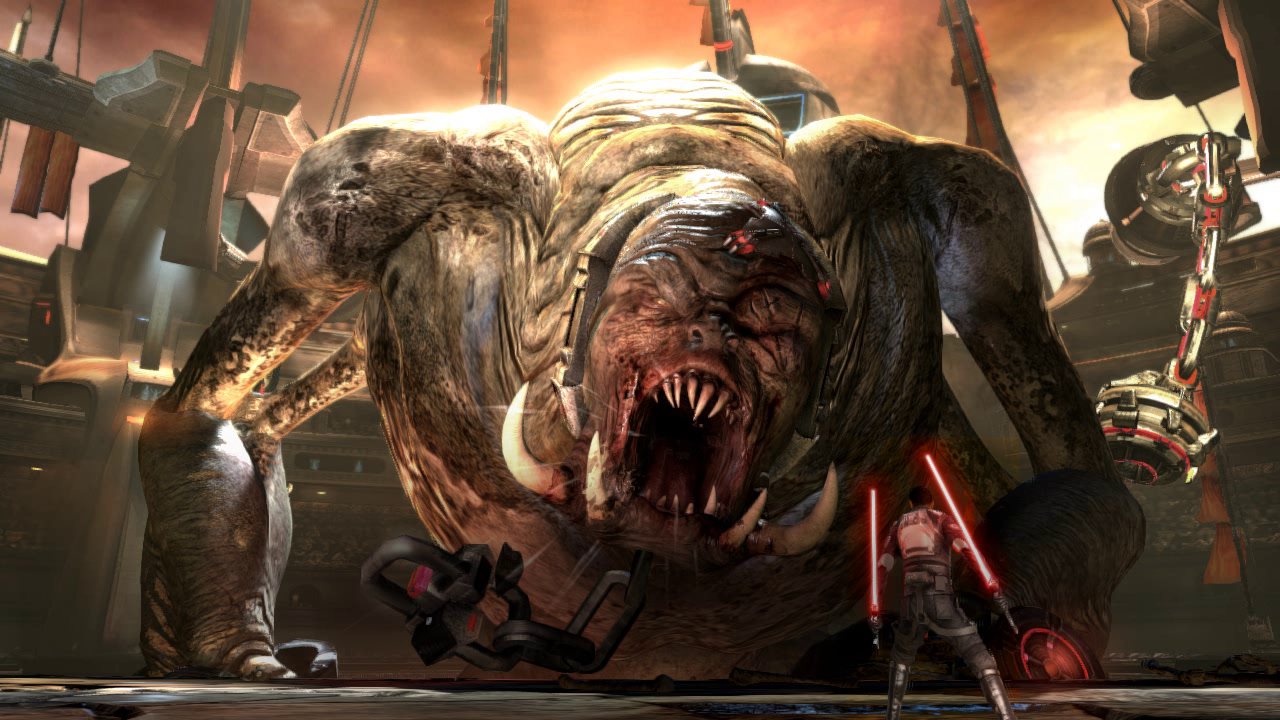
After eliminating more Imperials, Starkiller finally reaches his destination: the Arena. However, the bridge he is standing on is partially destroyed by another Nemesis. Starkiller crushes its engines, destroying it, and uses it to leap to the other side of the destroyed bridge and into the arena's ventilation shaft. He uses a lift to access a gateway into the arena. He enters, finds Kota, and tells him that he "can sit this one out." Kota is overjoyed to see Starkiller seemingly alive. Tarko, on the other hand, is enraged and orders his aide to "send out the Gorog." His aide panics, stating that the arena's restraints have not been properly tested. Tarko insists that the Gorog gate be opened. A rancor enters the arena. Starkiller ignites one of his lightsabers and looks smugly at the rancor. Before the rancor can attack, however, an immense hand emerges from the floor, crushes the rancor, and pulls it below. Then, the same arm emerges, pulling with it an immense creature: The Gorog.
Starkiller is forced to damage the creature's manacles and push them into chains hanging on the walls. Once this is done, he grips the creature's neck chain and pulls it towards the floor, slamming it down twice. This appears to be the only way to greatly damage the beast. The Gorog frees its hands, and Starkiller repeats the process. He then leaps at the Gorog, slicing off a metal plate on its forehead and stabbing at a gash hidden behind the plate. The Gorog, now fully enraged, frees its left wrist, completely shattering the manacle. It flings Starkiller onto the arena's side wall, frees its other wrist, and climbs the arena. Kota, who had gone after Tarko, suggests destroying the arena's supports. Starkiller realizes this would bring down the whole structure but does it anyway. Just before the arena collapses, he proceeds towards Tarko's observation box. Kota is already dueling Tarko and three stormtroopers. The Gorog punches its way into the box, still seeking to kill Starkiller. Tarko is promptly eaten, but Kota is trapped in the beast's grip. He is pulled down with it when the arena collapses. As Kota is the only one who knows where Juno is, Starkiller dives after him, dodging debris on his way down. Unable to kill the Gorog or harm it in a way that would release Kota, Starkiller uses the Force to charge towards the Gorog at an insurmountable speed, punching a hole through the Gorog's chest with his own body. The Gorog finally releases Kota. Kota chides Starkiller's lack of an escape plan, but he reveals that the Rogue Shadow is plummeting towards them, rescuing them just as the Gorog and the rest of the arena fall to the bottom of the chasm.
Starkiller, assuming Eclipse is at the helm, barges into the bridge but discovers that she is not there. Kota then reveals that Eclipse's ship is out of his reach and that they have lost contact. He suggests that Starkiller create a major diversion to rally the troops. Starkiller interjects, revealing that he is a clone grown in a vat to replace Marek. Kota laughs, stating that it is impossible to clone Jedi. When Starkiller reveals that he came from Kamino, Kota requests information on the cloning facilities for a major strike. Starkiller refuses and says that he needs a place to meditate. Kota snaps at him but inadvertently inspires Starkiller to visit Dagobah. After dropping Kota off at Malastare, Starkiller travels to Dagobah.
Negotiation with a bounty hunter
Elsewhere, on Kamino, Boba Fett was inspecting the damage resulting from Starkiller's escape. Vader, who is also present, instructs Fett to locate "the woman" (Juno Eclipse) and bring her to him, knowing that Starkiller will follow her. Fett requests a squadron of stormtroopers from Vader, anticipating they would not return. Vader instead provides him with some Terror Troopers and an enormous four-legged walker. Fett examines them and then states, "they'll do."
The Grotto

Starkiller journeyed to Dagobah and encountered a small, green being just outside the entrance to a cave. Starkiller initially believed this being to be a guardian, yet the individual clarified that he was merely an observer. He proposed that Starkiller was in search of something lost, "a part of [himself], perhaps." Upon learning that what he sought was within the cave, Starkiller entered, his TIE Fighter attire transforming into more traditional Jedi robes. Inside, he came across several clones of himself, ensnared in vines. Further along, Starkiller saw Juno standing in a fog, which morphed into a bridge on a ship. Starkiller witnessed Juno being attacked and called out to her. She limped towards him but then vanished, as did the rest of the vision.
The Salvation
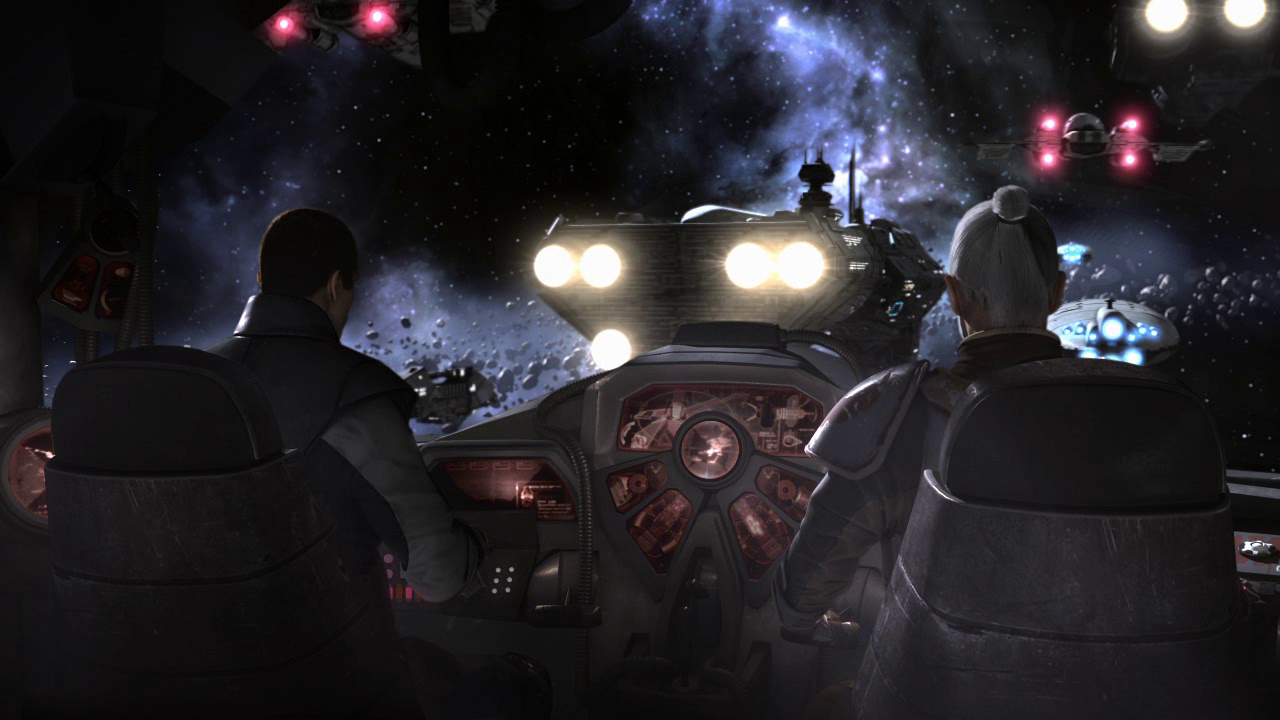
Starkiller retrieved Kota from Malastare, and Kota revealed that the glimpses into the future that Starkiller experienced were rarely inaccurate. After locating and boarding the Salvation near the Itani Nebula, Kota and Starkiller proceeded towards the bridge. Along the way, Starkiller was informed by Kota that his status as a clone was irrelevant. Starkiller then provided Kota with an encrypted code cylinder containing the coordinates for Kamino and schematics of the secret cloning facilities. At that moment, the Salvation was attacked. Kota and Starkiller entered the bridge, where they discovered a battered but functional PROXY, missing his right photoreceptor and arm. Starkiller instructed Kota to order the attack, and just before departing, PROXY warned him of Boba Fett's presence on board.
Starkiller encountered several small spider-like robots and Terror Troopers en route to a scientific room, where he found Juno unconscious. Finding his path blocked, Starkiller sought an alternate route, encountering more Terror Droids and Troopers. He accessed the scientific room, only to find Boba Fett taking Juno away. Just before she exited the room, Juno saw Starkiller. He blasted his way through, and after battling more droids, he saw an entire corridor melted by an unseen creature. The damage appeared too extensive to be caused by the small Terror Droids, and similar damage was evident throughout the ship. It served as a guide for Starkiller, and he accessed the engine room, where he defeated a large, terror-trooper-like droid. Afterward, he accessed the hangar, where he witnessed Boba Fett's Slave I departing with Juno. He threatened to leave Kota behind if he didn't order the attack on Kamino, but Kota had already issued the order. They agreed that Vader likely wasn't expecting the entire Rebel fleet to converge on Kamino.
Starkiller then noticed the source of the extensive melting damage—the enormous Terror Walker. He pursued it and deactivated its shields by triggering an energy burst from a nearby reactor. The walker managed to offline the reactor, reactivating its shields. Starkiller brought the reactor back online, deactivating the shields again. After inflicting more damage, Starkiller leaped atop the machine's "head" and walked it into the reactor. His plan succeeded, and the walker was fried—its body serving as a step to exit the reactor room and return to the hangar.
Invasion of Kamino
The Salvation then arrived above Kamino, where it became clear that the Imperial fleet was anticipating them—the Rebellion suffered significant casualties. Five boarding pods deployed Imperial troops onto the Salvation. Starkiller eliminated the invading Imperials, including two AT-STs and three AT-MPs. After clearing the hangar of the boarding pods, several Y-wings were able to launch. Starkiller then retraced his steps, passing through the drive core, clearing Imperials from the engine room, and accessing the gunnery area. A fortunate shot from a nearby Imperial I-class Star Destroyer disabled the Salvation's main gun. Starkiller used the Force to power the main gun, firing at the Star Destroyer with such force that it cleaved it in half. From there, he proceeded to the bridge, where Kota ordered the fleet to continue the assault despite numerous casualties. After informing Starkiller that Kamino's planetary shield was preventing any ground assault, Starkiller told him that the shield would not withstand a direct hit from a cruiser and advised him to get to the Rogue Shadow. Kota took the advice, but not before ordering everyone to abandon ship. Starkiller used the Force to clear debris during the ship's descent. Before the ship struck Timira City, Starkiller bailed out and watched the ship crash into the city.
Plunging into the city, Starkiller encountered Imperial walkers and Incinerator war droids. He assisted Kota's troopers several times, who in turn aided Starkiller by securing the security center and deactivating security screens. An Imperial bombing run destroyed a nearby bridge, but Kota and Starkiller were able to reform it, allowing the two Jedi to reunite. Kota said that the upper levels had been sealed off, though Starkiller went up there anyhow. Kota, unable to bear the thought of Starkiller facing Vader alone and risking his life for Juno, begged Starkiller to reconsider his actions and abandon Juno. He also requested that Starkiller join the Alliance. Starkiller, however, informed the General that he could not join the rebellion because he loved Juno.
As Starkiller ascended the main tower, he came across thousands of cloning platforms, each containing dozens of clones of himself. Realizing that Vader had cloned an army, he informed Kota of this fact. Starkiller leaped across several of these platforms, battling faulty clones of himself as he moved towards the top of the spire. He encountered fierce resistance in the form of Saber Guards and Sith Acolytes. He asked Kota if he thought the original Starkiller was within the facility, but Kota reiterated his belief that Jedi could not be cloned.
Showdown with Vader

Starkiller finally reached the top of the spire, but he found himself plagued by anxiety, fear, hatred, and love. He was unable to run and could only walk through this self-inflicted nightmare. Kota desperately begged Starkiller to join the alliance, as his lines of communication were slowly being cut due to Starkiller being out of range, which only irritated Starkiller further, ultimately leading to Starkiller angrily firming his resolve, implying that he regretted saving Kota in the first place.
His anxiety, amplified by the Force, crushed nearby equipment. Visions of Vader attacked him without warning, but he repelled them, and voices of Juno and Kota echoed around him, Juno labeling him a "monster" and a "thing," while Kota branded him "Vader's puppet—just a body filled with the memories of a dead man."
Finally overcoming the visions, Starkiller entered a large cloning chamber and saw Vader standing on a cloning platform, where the clones in this area were fully grown. Vader and Starkiller dueled, with Vader unleashing the clones on Starkiller. One group of clones could only wield lightsabers, while another group could wield Force powers and were therefore able to deflect Starkiller's own Force attacks. The clones, however, were not mentally stable, which Starkiller used to his advantage, mind-tricking many of them into attacking Vader. Numerous times, Vader threw cloning pods and even platforms at Starkiller. Throughout his duel, Starkiller saw visions of his (and his template's) past. As the duel progressed, Starkiller and Vader locked blades just as the clone received another vision, this time of the future: a vision of him cradling Juno's body, saying that he "should have stayed here." Vader used this distraction to break the blade lock and push Starkiller away. He then hopped onto one of the floating droids in the facility and floated up to the room where he was keeping Juno, Starkiller following right after.
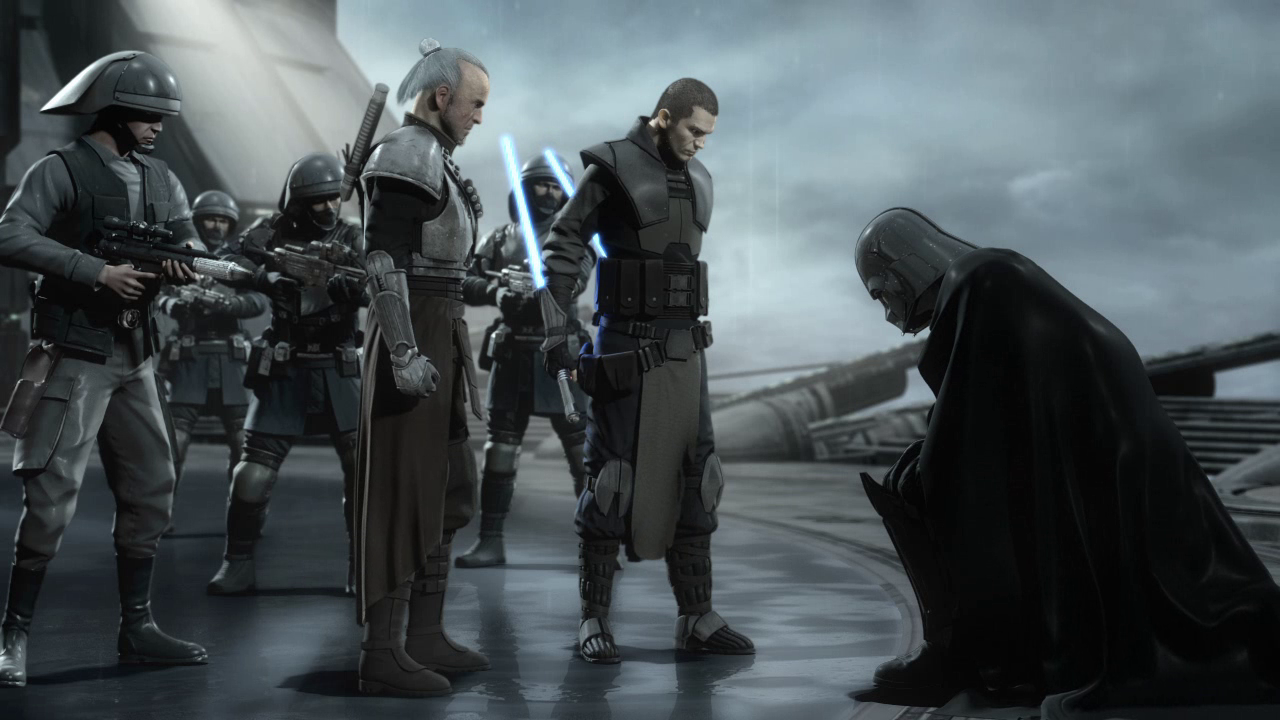
Arriving in front of Vader, Starkiller demanded to know Juno's location. Vader stepped aside and revealed her. Gripping Juno by the throat using the Force, Vader ordered Starkiller to bow before him, or Juno would die. Starkiller obeyed, dropping his lightsabers. Juno was set down by Vader, and unseen by both Vader and Starkiller, she crawled towards one of the discarded sabers. Vader ordered Starkiller to execute Kota, give himself to the dark side, and execute the remaining rebel leaders. If he did not do any of these, then Juno would die. However, Juno ignited the saber she picked up and slashed at Vader, but he dodged the attack, and she was thrown through a window by him, landing on an electrified platform, seemingly dying. Starkiller, believing this had killed Juno, let out a feral scream and charged Vader, summoning back his lightsabers. They engaged in a brief lock before Vader gripped and threw Starkiller as well, although he made a perfect landing. Vader jumped down after him.
The decisive conflict
The two engaged in another duel, with Vader attempting to convince the clone that Juno and Starkiller's connection to her were both meaningless. Starkiller was inconsolable, however, screaming that he would kill Vader. During the duel, Starkiller electrified Vader several times by pushing him against the electrical pylons surrounding the area. Vader at last disarmed the clone and threw him from the platform where the duel was taking place. Starkiller grabbed onto the edge of the platform, and Vader attempted to dislodge him by throwing his lightsaber at him repeatedly. Starkiller managed to catch the lightsaber on its fourth throw and tossed it back at Vader, severing the Dark Lord's right hand. The injury, however, only momentarily distracted Vader, who, after missing Starkiller with a backhand punch, Force-pushed him across the platform and attempted to crush him with one of the pylons. Starkiller barely held it off himself and raised another pylon from the platform. Vader glanced over at the second pylon, and Starkiller used the distraction to toss the first pylon off himself. Using the Force, he caused the remaining pylons to release a huge amount of electricity, which he then absorbed and used to blast an incredible amount of Force lightning at Vader, finally subduing him. Starkiller stood before Vader, intent on killing him, accusing him of taking everything from him. Vader calmly reiterated that the clone's feelings for Juno were not real. Starkiller reiterated that the feelings were real—to him. At that moment, Kota and several Rebel troops arrived, stopping him from immediately killing Vader. Kota wanted to arrest him and put him on trial for crimes against the true Republic. He also mentioned that Vader was the only one who knew if the original Starkiller survived.
Reconciliation: Favorable Conclusion
Starkiller spared Vader, and Kota requested that he be restrained.
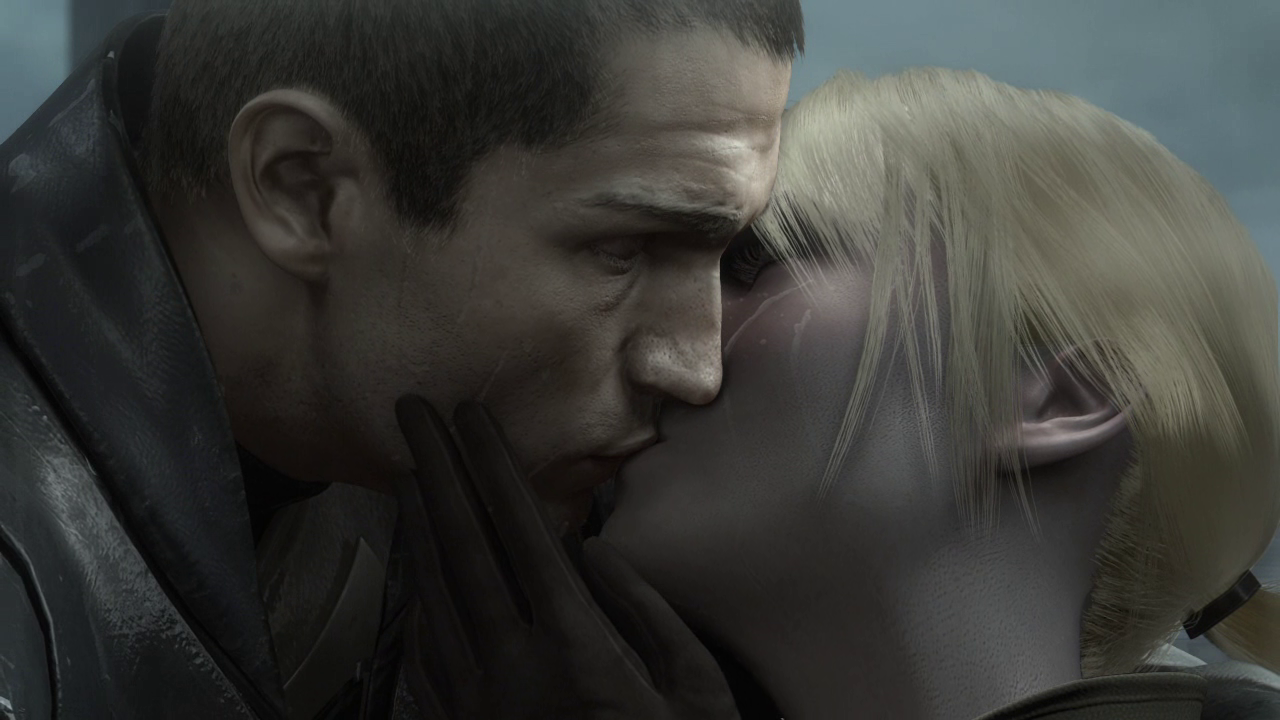
Starkiller ran to where PROXY was attempting to revive Juno, to little success. Starkiller cradled her body in his arms and said that he should have stayed on Kamino, thus acting out his final vision. Juno, however, woke and kissed Starkiller.
After affirming that they were still alive, the two kissed again. Later, Juno and Kota were having a discussion with Princess Leia Organa. Juno said that they were sending a dozen small freighters in all directions—if the Empire discovered that Vader had been captured, they wouldn't know which ship to follow. Leia told them that they should be proud and that the Force was with them. Her image dissolved to reveal a still-damaged PROXY. All three walked towards the Rogue Shadow.
A concluding dialogue
Inside, Starkiller entered Vader's prison room. Vader was restrained on a metal table, with several large, heavy bolts fixing him to it. Starkiller told him that, despite Vader telling him that he was a clone, he chose to spare Vader—he had finally broken Vader's hold over him. Vader said nothing to that. As he left, Vader told him that as long as Juno lived, he would always control Starkiller. Starkiller paused but brushed off the remark and returned to Juno in the cockpit. They shared a sentimental moment as Juno said "prepare for lightspeed," and the Rogue Shadow disappeared into space.
However, Boba Fett's ship, Slave I, detached from the remains of a Star Destroyer and followed the Rogue Shadow into hyperspace.
Instruction
Darth Vader brings a clone of Starkiller to multiple sites and puts him through trials against various Imperial forces.
These sites could include Dagobah.
Deceived by fury: Unfavorable Conclusion
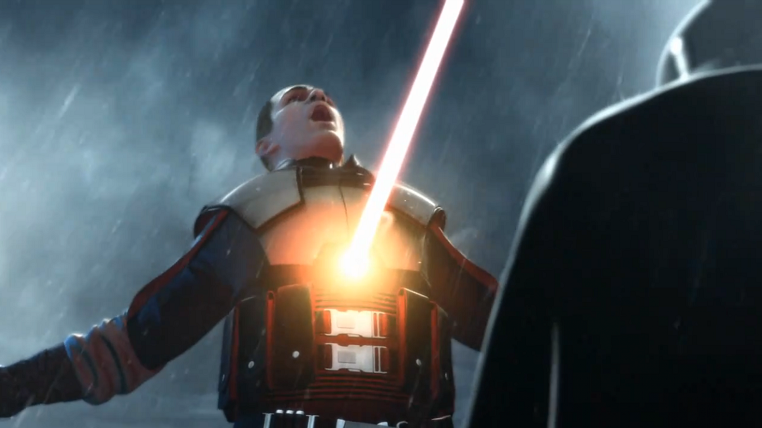
Starkiller succumbs to his rage and hatred, disregarding Kota's urgings to capture Darth Vader alive for the Rebellion. Just as he's about to strike his former Master, a lightsaber with a red blade pierces his torso from behind. Overwhelmed by excruciating pain and shock, Starkiller drops his lightsabers and collapses before Vader. With Starkiller incapacitated and fatally wounded, his assailant reveals himself by deactivating his cloaking device, showing that he had been secretly observing the entire duel. Rahm Kota ignites his lightsaber and attempts to eliminate Vader's savior, but his efforts are futile. The dark assassin expertly deflects all of Kota's attacks and swiftly slashes the general across the chest. While Terror Troopers deal with PROXY and Kota's Rebel soldiers, the assassin uses the Force to seize Kota and hurls him into the remaining Rebels. With a powerful Force push, he sends Kota and his men into the vast ocean of Kamino, presumably killing them.
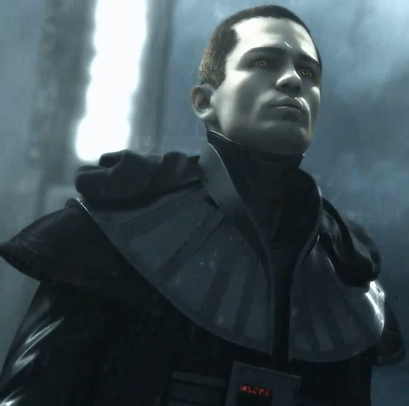
As Starkiller struggles in vain to move despite his mortal wound, Darth Vader slowly approaches the dying clone and reveals that he had been untruthful about his inability to perfect the accelerated cloning procedure. At that precise moment, the mysterious assassin approaches Vader's side and lowers his hood, revealing his identity. As Starkiller gazes upon the face of his killer, he recognizes his own, but paler and visibly tainted by the dark side. The assassin identifies himself as another clone of Darth Vader's fallen apprentice, the only successful clone among numerous failures, including Starkiller. After one last look at the prone form of Juno Eclipse, the flawed clone succumbs to despair and dies. As the dark clone awaits his new instructions, Vader praises him for completing his final trial and then orders him to commandeer the Rogue Shadow to hunt down and eliminate the remaining Rebel leaders throughout the galaxy. As the Dark Apprentice turns to depart, he pauses to gaze at the lifeless body of the woman who loved his genetic source. Having purged himself of the original Starkiller's emotions, the dark clone walks past Juno's corpse, feeling only hatred and revulsion. Accompanied by a small TIE fighter escort, the Rogue Shadow navigates through the debris of the space battle above Kamino and jumps into hyperspace.
Distant Thunder
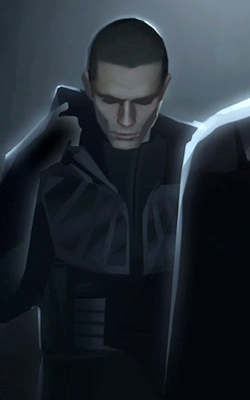
The Dark Apprentice's creation and evolution are depicted in a brief series of cinematics entitled Distant Thunder. Just like the player character, the dark clone underwent a similar training program to assess the skills he inherited from the original Starkiller, Galen Marek. Like the previous clones, the apprentice was plagued by visions of his progenitor's life. His initial confusion led to a sort of identity crisis, to the point where he questioned whether Marek's memories were his own. Despite his commitment to completing his training and succeeding where the other clones had failed, he remained curious about the number of clones that came before him and the kind of person his genetic source was. Vader dismissed the clone's curiosity as irrelevant; the only thing that mattered was whether any more clones would be created. As for Marek, Vader considered his former apprentice to be a weak and broken individual who had been surpassed in power by the dark clone.
As Marek's dark clone progressed through his training, he continued to impress his Master while learning to overcome the memories of his progenitor—the same issue that had plagued all of the other clones, as Vader pointed out. After finally breaking free from the influence of Marek's memories, Vader rewarded him by revealing the truth that the dark clone already suspected—that he was a clone of a deceased man. To that end, Vader led the clone to a chamber containing the preserved corpse of Galen Marek, the source of all the Starkiller clones. The clone, having embraced his purpose and the truth of his identity, fully committed himself to becoming what his progenitor and "brothers" could not be—the perfect Sith apprentice of Darth Vader. His training culminated when he struck down a Sith training droid disguised as Juno Eclipse, thereby purging himself of Marek's feelings for the former Imperial Captain. Towards the end of his trials, the clone had developed a deep contempt for Galen Marek's weaknesses, and thus cultivated a sense of pride in overcoming Marek's shortcomings. By proving himself to be the only perfect clone of the original Starkiller, the clone had become Darth Vader's Dark Apprentice.
Before the Battle of Kamino, Vader instructed his new disciple not to interfere in his battle with the other clone, known as "Starkiller," unless absolutely necessary. However, Starkiller chose to spare Vader's life rather than kill him, thus rendering the Dark Apprentice's immediate intervention in the duel unnecessary.
The Battle of Endor (DLC)
The fall of the Alliance
In response to the threat posed by the Rebel Alliance during the Battle of Endor, Darth Vader orders the Dark Apprentice to prevent the Rebels and their Ewok allies from destroying the Endor shield generator bunker, thereby preventing any risk to the new Death Star's destruction. To maintain the secrecy of his existence, the Sith Lord instructs the clone to leave no survivors in his wake, including Imperial troopers. After landing the Rogue Shadow on Endor, the "reborn Starkiller" makes his way through the forest moon, eliminating dozens of Rebels and Ewoks. By the time he reaches the Imperial bunker, Han Solo and Chewbacca are positioned in front of the entrance, attempting to delay the Dark Apprentice while Princess Leia Organa and her commandos try to destroy the bunker from within.
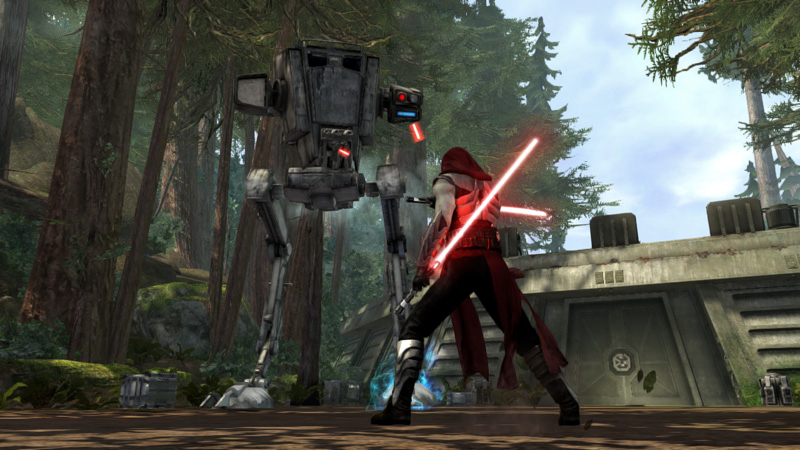
Chewbacca attempts to kill the clone using a commandeered AT-ST Walker, aided by Solo and a group of Ewoks. However, their efforts prove futile as the Dark Apprentice eliminates the indigenous creatures and hurls numerous explosive objects at the walker. Seeing the situation deteriorating, Solo fires rockets at the clone, but the clone redirects the rockets into the walker, disabling it. After boarding the Walker, the clone engages Chewbacca and easily overpowers the Wookiee. As the Dark Apprentice holds Chewbacca by the throat, Solo tries to save his friend by shooting the clone but instead accidentally kills Chewbacca, whom the clone uses as a shield. Solo fires several more shots at the clone, only to see them all effortlessly deflected by the clone's lightsaber. The Dark Apprentice then uses the Force to grip Solo and pull him towards his lightsaber, impaling the former smuggler. With both Chewbacca and Solo dead, the clone enters the base to complete his mission.
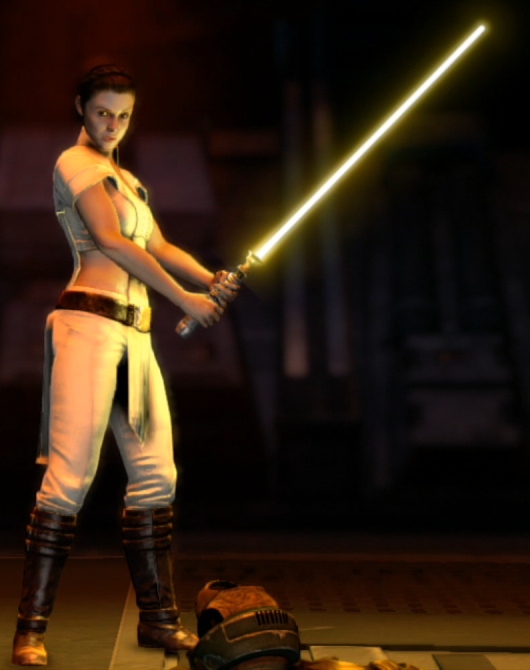
Inside the bunker, the Dark Apprentice arrives just in time to witness Rebel soldiers engaged in combat with Imperial troopers, who are committed to protecting the shield generator. Obeying Vader's orders to the letter, the clone eliminates everyone in his path. He eventually encounters Organa, who retreats deeper into the bunker while her commandos try to buy her time to destroy the generator. However, the Rebels fail, and the clone pursues the Rebel princess until he finally confronts her at the core of the base. To his surprise, Organa removes her Rebel gear, revealing her Jedi robes and wielding a yellow-bladed lightsaber, constructed in the same style as Obi-Wan Kenobi's. According to Organa, her twin brother's presumed death at the Battle of Hoth necessitated her training as a Jedi Knight.
Organa demonstrates remarkable skills in lightsaber combat and Force techniques while dueling her father's apprentice. Using the Force to enhance her strength, speed, and agility, Organa manages to hold her own against the clone for a short time. However, even Leia's training is insufficient to overcome the Dark Apprentice's raw power, experience, and superior skills. Organa, outmatched both physically and in the Force, attempts to use the bunker's defenses to eliminate her opponent, but fails. When the duel moves outside to the top of the bunker, Organa tries once more to defeat the Dark Apprentice with her lightsaber and Force powers, only to be pushed onto the defensive as the clone counters her offense with a relentless assault of his own. The duel, and the Rebel Alliance's last hope for victory, ends when the Dark Apprentice impales Organa with his lightsaber, killing the last offspring of Anakin Skywalker.
On the Death Star, Emperor Palpatine and Darth Vader sense the defeat of the Rebels on Endor. With the bunker secured and the shield generator still active, the Rebel fleet's chance of destroying the battle station with the two Sith Lords aboard is gone. After Palpatine declares that the end of the Alliance marks a new golden age of peace for the Galactic Empire, he reveals his awareness of his apprentice's latest act of treachery. True to his nature, Palpatine gloats about how he knew about Vader's attempts to clone the original Starkiller since the beginning of the secret project on Kamino. In a desperate attempt to rid himself of his master, Vader activates his lightsaber to strike down the Emperor. However, Palpatine anticipates his apprentice's intention and counters with Force lightning, calling him Skywalker before doing so. Unable to withstand the pain and damage that the lightning inflicts on his armor's life-support systems, Vader quickly falls to his knees in submission. The Emperor then orders Captain Sarkli to dispatch his forces to Endor and eliminate the clone, seeing no further use for him.
As a group of Imperial Star Destroyers converges on the Dark Apprentice's location, the clone sits in meditation with Organa's corpse nearby. As the vessels approach, the apprentice opens his eyes, showing no fear, as he prepares to confront the latest threat to his and Vader's plans.
Gameplay
Players take control of Starkiller in the game, utilizing a third-person, over-the-shoulder perspective and wielding two lightsabers. CGI cutscenes serve as level transitions. Defeated enemies replenish the Force Fury meter, which, when activated, grants Starkiller a significant boost to his combat prowess. Additionally, there's a pivotal moment at the game's conclusion where players must decide whether to spare or kill Vader by pressing a button. The game received an expansion in the form of a non-canonical dark-side storyline centered around the Battle of Endor.
Aside from the campaign, the game offers Challenge missions presented as various Trials. The console versions lack a multiplayer mode, although the Nintendo Wii version includes one. Players select from eight characters, each possessing a unique special ability, and battle across six different locations.
The Force powers from the previous game make a return, accompanied by a new addition: mind trick. This power allows players to manipulate enemies into fighting each other or fleeing, potentially jumping off ledges to their deaths, depending on the environment. Force lightning plays a more prominent role in this installment, functioning as a "Force Grenade" when combined with telekinesis. Furthermore, the combo system has undergone a complete overhaul.
The game engine is powered by Euphoria, Digital Molecular Matter, and Havok.
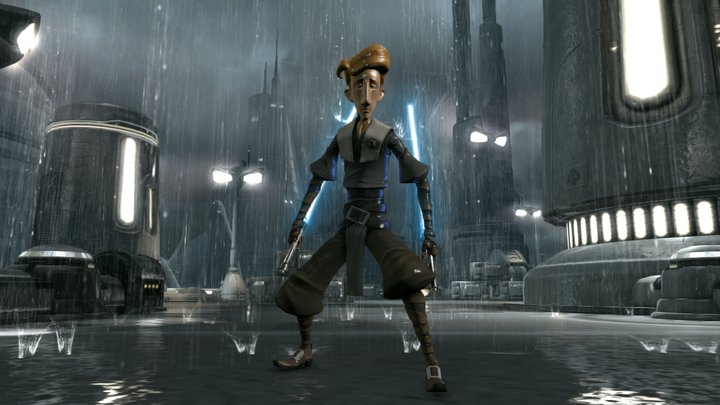
The Collector's Edition of the game included a steelbook case, a Starkiller Mimobot USB drive (pre-loaded with a digital art book), and access to exclusive in-game content: three exclusive challenge mode levels, a Deak Starkiller character skin (inspired by early Star Wars concept art by Ralph McQuarrie), and a lightsaber crystal. A special promotion for GameStop customers offered a Maulkiller character skin (the result of cloning experimentation on the DNA of Darth Maul and Galen Marek) and his silver lightsaber crystal.
For PS3, Xbox 360, and PC owners, having a save file from the first game unlocks several bonuses: the Training Gear costume, the Sith Stalker Armor, and the Ceremonial Jedi Robes, which are available to players who completed the dark and light endings of the first game, respectively.
Extra content
Star Wars: The Force Unleashed II features two sets of downloadable content, as well as various add-ons for the player's Avatar on Xbox Live. One DLC pack is a costume pack, which includes four new Starkiller costumes and skins such as Darth Malak, Admiral Ackbar, and Luke Skywalker during his training on Dagobah. The other is an extra mission that continues the dark-side storyline. In this mission, the dark clone of Starkiller travels to Endor to eliminate the Rebellion permanently, encountering Han Solo and Chewbacca, as well as Princess Leia, who has become a Jedi after Luke Skywalker's death on Hoth. However, this DLC is unrelated to the Hoth mission from the first game, as the two dark-side storylines are distinct.
The Collector's Edition comes with a steel case, a Starkiller Mimobot containing behind-the-scenes content like concept art and the game script, three additional Challenge modes, and the Deak Starkiller McQuarrie concept art skin. The Challenge missions serve as training scenarios, and players can unlock trophies by completing them. The Amazon.com version included two extra Challenge maps, while the GameStop version featured the Maulkiller character skin and "Maulkiller Silver Saber Crystals." Maulkiller's backstory involves him being a clone of both Galen Marek and Darth Maul. Although powerful, his conflicting genetic makeup ultimately led to his demise. Players can also unlock a "Guybrush Threepkiller" skin, inspired by Guybrush Threepwood from the Monkey Island series. Pre-orders and the Collector's Edition also feature a brief voice-over of McQuarrie's concept and early script version, entitled "The Adventures of Starkiller." The Challenge missions consist of Combat Trial, Kamino Drill Grounds Trial, Deadly Path Trial, Deflection Trial, Retrieval Trial, Terror Trial, The Cloning Spire Trial, the Scout Trooper Trial, and the Gauntlet Trial, along with the Collector's Edition trials: the Core Destruction Trial, the Tower of Death Trial, and The Trial of Agility. The Amazon preorder edition includes the Defend the Core Trial and The Trial of Dagobah.
Development
W. Haden Blackman served as the executive producer for the game, while David W. Collins reprised his roles as both producer and the voice of PROXY. The original music was composed by Mark Griskey. According to producer Matt Fillbrandt, 90% of the team that worked on the first game and its post-release content returned for the sequel.
The producers aimed for a variety of contrasting environments during the "on the run" sequence to provide visual diversity and emphasize the story.
Producers Blackman and Julio Torres had to devise a way to bring Starkiller back from the dead. According to them, the game begins with Starkiller being informed by Vader that he is a clone and a failure. Describing the sequence on Cato Neimoidia, they envisioned the Empire as having taken over, with Tarko acting as a Pablo Escobar–like figure. They view the Star Wars universe as filled with "daddy issues" and incorporated those themes into the game. There is a conflict between Kota's plans for him and his own quest to discover if he is a clone. The game is designed as an emotional chase, rather than Starkiller confronting his masters in battle. Torres expressed a desire to explore more of the alternate ending where Starkiller serves the Emperor. Instead, the team opted to clone Starkiller, utilizing a technology previously seen in Star Wars, and make him more mature. The game also allows for greater freedom.
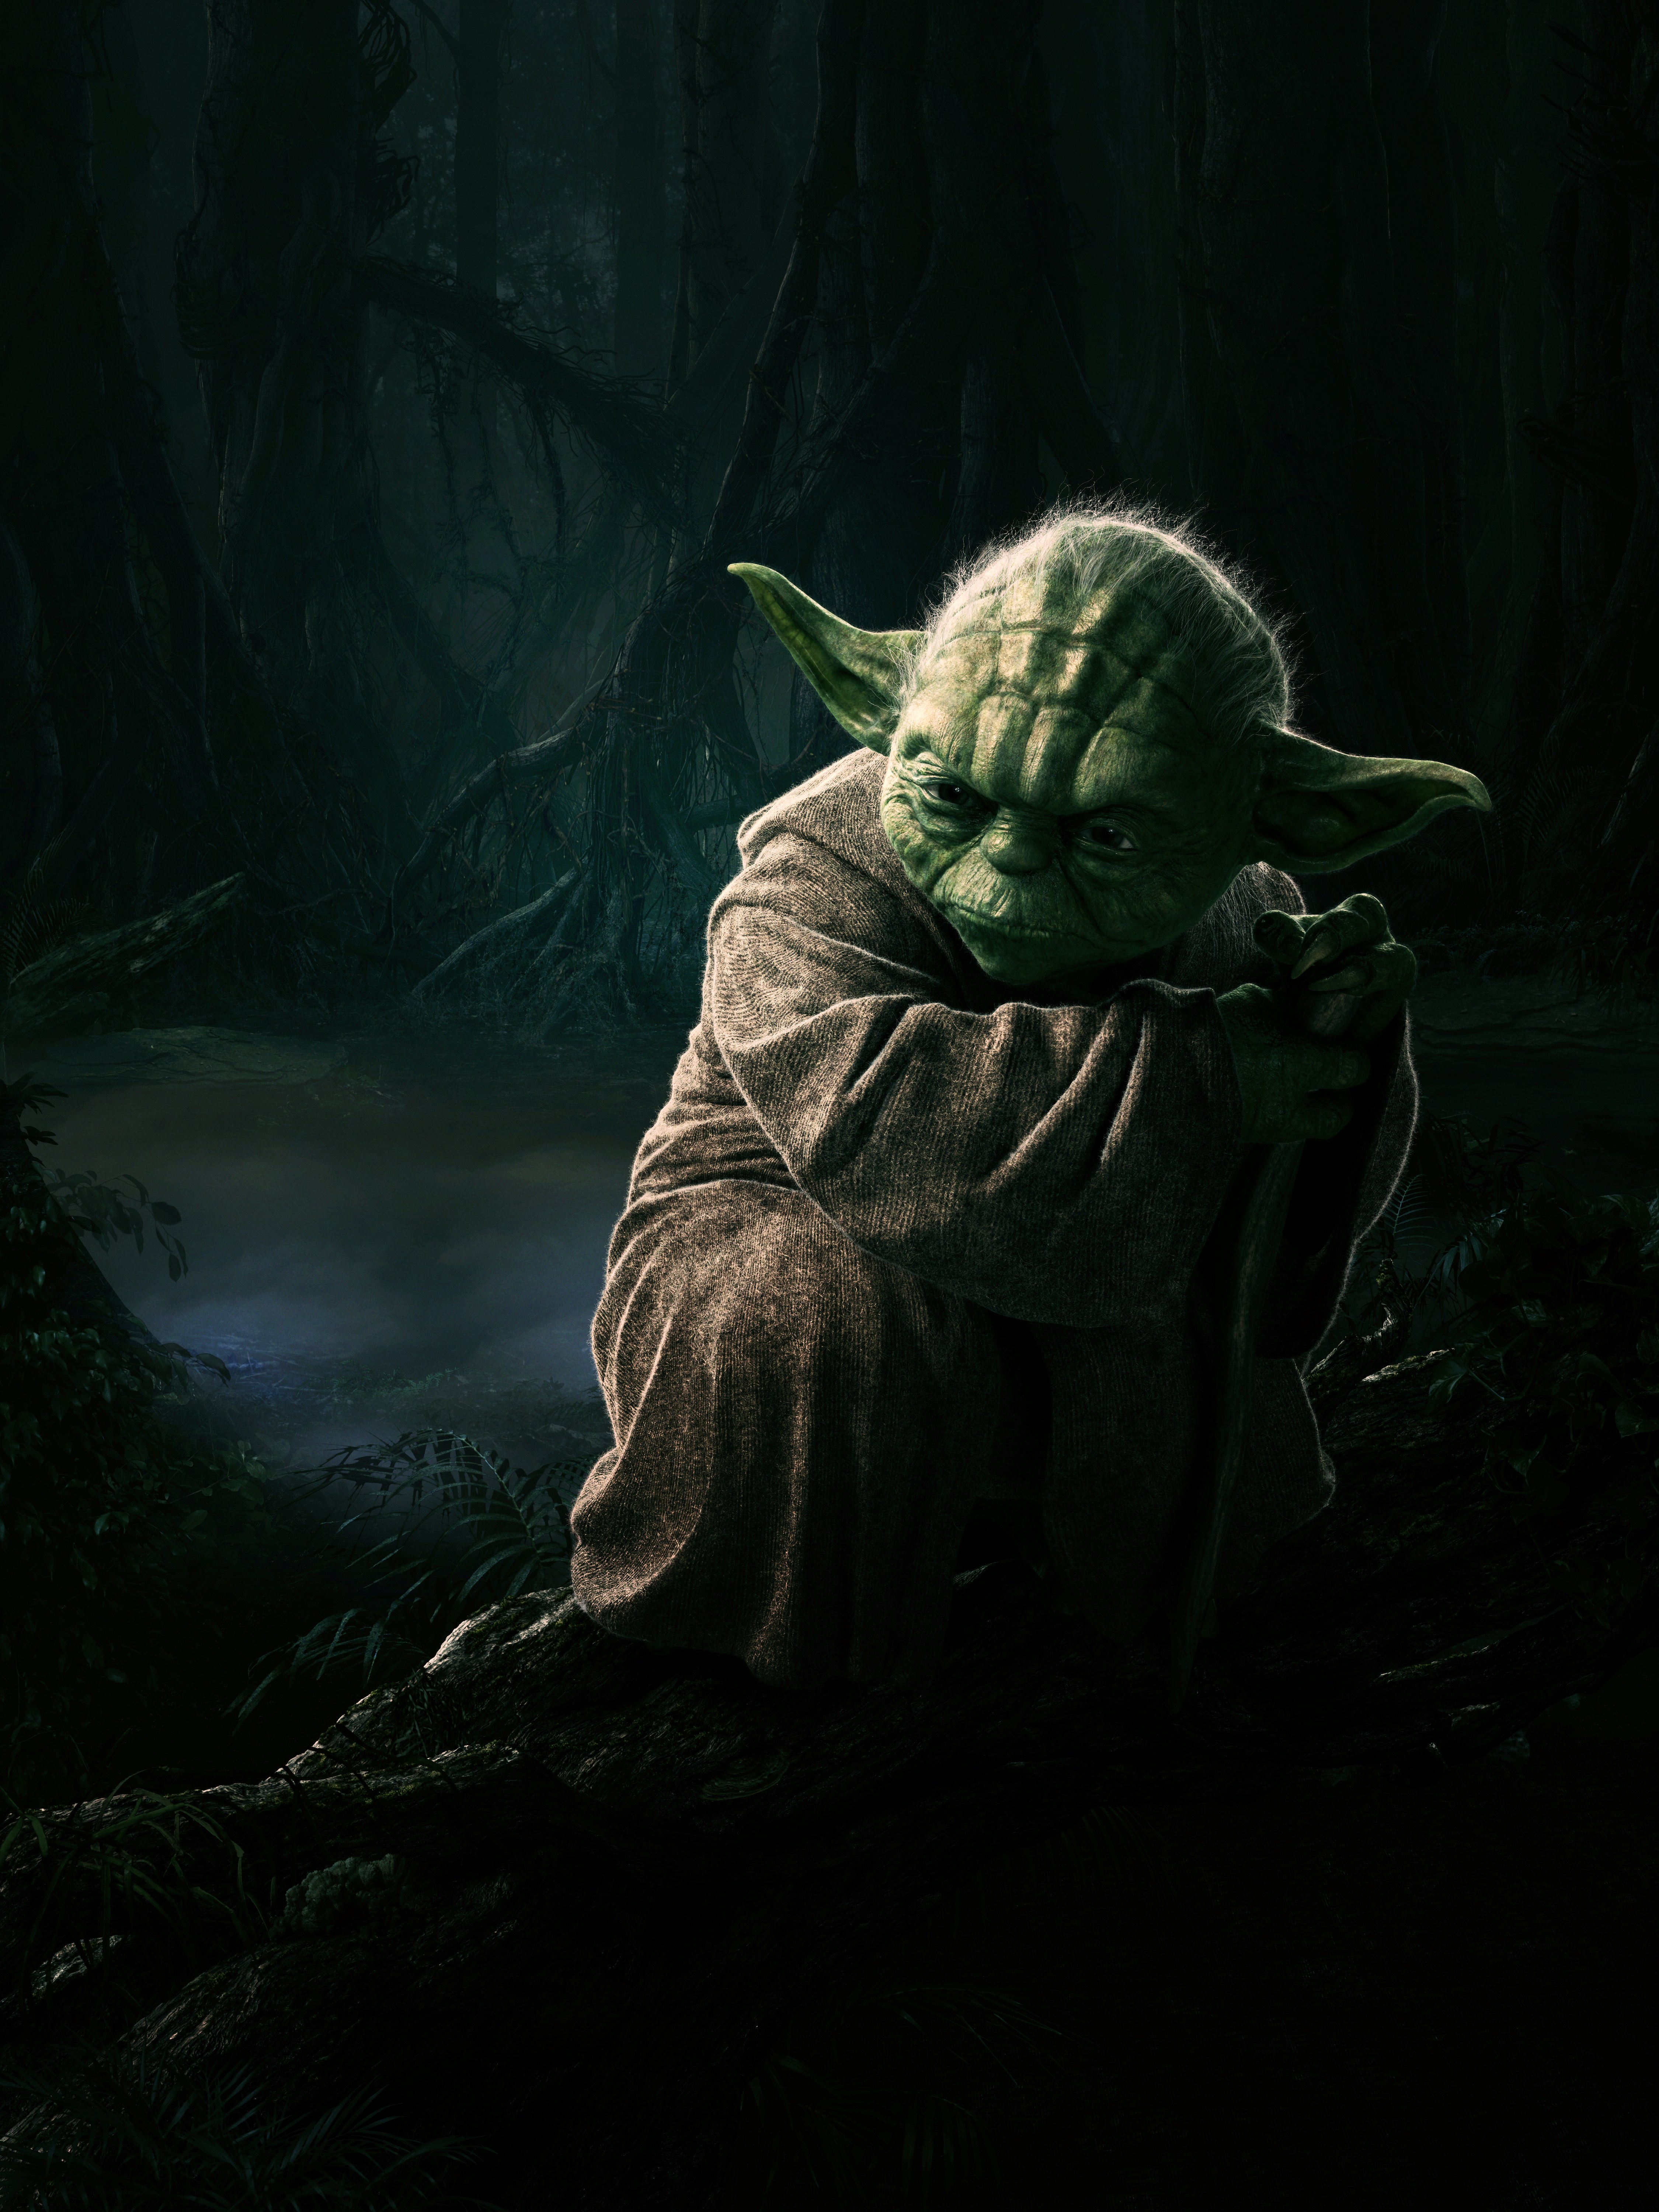
The producers also intended the story to be darker and grittier than its predecessor, and made Starkiller more self-aware. This allowed them to delve into the character's motivations while also enriching the overall Star Wars saga. Blackman wanted to maintain a sense of ambiguity regarding Vader's motives. According to the producers, Boba Fett and Yoda also play significant roles, mirroring the themes in Star Wars: Episode V The Empire Strikes Back.
In another interview published in July 2010, Blackman revealed that they were focusing on epic battles and that they were revisiting Starkiller because he was a known entity. They aimed to deliver an "unleashed" cinematic experience for the player at the game's outset. However, they felt that the first game was overly ambitious and wanted to scale it down, prioritizing quality over quantity. As a result, the enemy types present a greater tactical challenge. The production team collaborated with the ESRB to make the combat more visceral without violating any policies.
A planned PlayStation Portable version was ultimately cancelled.
The article The Good, the Bad, and the Gorog in Star Wars Insider 121 features concept art for enemy characters by lead concept artist Amy Beth Christenson.
The game received a T (Teen) rating from the ESRB due to violence (killing, dismemberment, etc.).
Release
VGA Announcement Trailer (cinematic trailer)
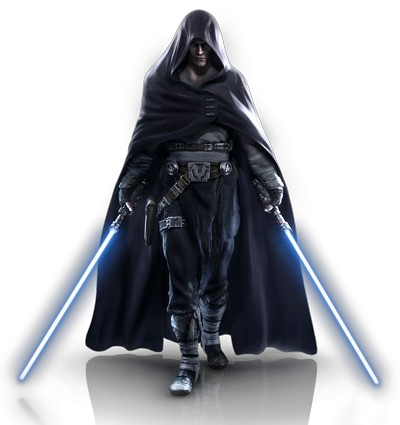
Star Wars: The Force Unleashed II was initially revealed at the 2009 SPIKE TV Video Game Awards on December 12. The English-language trailer, lasting 2:11 minutes, featured the voices of Darth Vader and Yoda, the latter voiced by Tom Kane, speaking to a hooded figure walking down a hall, using the Force to destroy everything in his path. The man stops upon hearing Juno Eclipse's voice, and as he lowers his hood, Galen Marek's face is revealed. He enters an arena on Cato Neimoidia, where a dead rancor is thrown into the air and lands nearby. A Gorog then emerges from a large gate, and the man charges Force lightning before unleashing it on the massive beast. He then draws two blue lightsabers and leaps onto the beast. The background fades, and the lightsabers transform into the Roman numeral "II" behind The Force Unleashed logo.
Star Wars: The Force Unleashed II - Cloning Tank (viral marketing campaign)
The game was also promoted through its own website, which featured the trailer and the press release from LucasArts. On May 26, the website was updated to present a first-person perspective of someone inside a cloning tank, known as Subject 1157. The tank included a holographic display where users could click on and play minigames, which periodically triggered visions. Two medical entries contained passwords to unlock: KAMINO and JUNO. On July 28, the website was updated again to incorporate an interactive menu.
Betrayal (cinematic trailer)
The second preview was initially shown to the public on June 11, 2010. The footage depicts Starkiller, restrained by chains on the floor, surrounded by a contingent of stormtroopers. Darth Vader informs him that his usefulness has ended, declaring that he no longer requires the apprentice's services. Vader then departs, giving the order for Starkiller's execution. As the stormtroopers advance to eliminate him, Starkiller seizes his chains, causing a sudden blackout. He swiftly maneuvers and eliminates the troopers one after another. Upon entering the corridor, Starkiller encounters more troopers and a heavily armored flamethrower droid, which he obliterates by rupturing the fuel tank on its back and directing Force lightning into the escaping gas, triggering a massive explosion. Subsequently, he confronts additional troopers and a colossal four-legged walker, all of which he ruthlessly destroys, annihilating a significant number with a powerful Force wave. While assessing the devastation, Starkiller is taken by surprise by a Terror walker. The droid initiates an attack with a laser barrage, but Starkiller absorbs the energy and redirects it as lightning to cripple the droid's leg. As the droid collapses, Starkiller severs its front legs and leaps onto the machine, relentlessly stabbing and tearing it apart. After dismounting, Starkiller levitates the crippled droid, crushing it before launching himself into the air and bisecting it. As Starkiller departs, he proclaims that he now possesses a purpose to fight for, and no one, not even Vader, can impede him. In the meantime, levels below, Vader enters a chamber filled with cloning pods, and one of the clones awakens.
"Snow" & "Walls" (television commercials)
Blur Studio also produced a pair of CGI commercials, with Dave Wilson directing. "Snow" portrays Starkiller battling stormtroopers on an ice-covered planet as he searches for Juno Eclipse. "Walls" showcases a confrontation with Darth Vader, where Vader is subjected to a forceful Force push, sending him crashing through multiple walls.
Gameplay trailer
A new gameplay trailer debuted on October 6, 2010, providing more in-depth cutscenes and cinematic sequences from Kamino, Cato Neimoidia, Dagobah, and the Salvation.
The game's demo became available on October 12 for both Xbox 360 and PS3 platforms. The demo centers on the planet Kamino, specifically the initial level where Starkiller breaks free from the cloning facilities and commandeers Vader's TIE Fighter to escape the planet.
Official Facebook page
In the weeks leading up to the game's launch, the official Facebook page for Star Wars: The Force Unleashed II disseminated announcements pertaining to the game's content, along with behind-the-scenes information. On October 27, the flash-based game Escape from Kamino was released.
Tie-ins
The Force Unleashed II novelization delves deeper into the narrative, and is considered the definitive version of the story. An complete audiobook version was also made available.
The game was re-released for the Xbox 360 as part of the "Platinum Hits" series.
The comic focuses on Boba Fett and his role in Starkiller's mission, and was authored by Haden Blackman.
The Nintendo Wii iteration replaces the Salvation with an Assault Frigate Mark I instead of a Nebulon-B.
In the Xbox 360, PS3, and PC versions, during the Dagobah level, Starkiller experiences visions of himself within the Cave of Evil. However, the Wii version presents him with actual clones of himself. During the escape from Kamino level, Starkiller throws a tower at Vader before entering his starfighter in the Wii version. The fight with the Gorog also proceeds differently, and the creature is missing its head covering. During the battle for the Salvation, Starkiller is briefly attacked by Boba Fett.
The massive Terror Walker also meets its end differently across versions. In the novelization, the machine is pulled into hyperspace, whereas in the console version, Starkiller destroys it and uses its remains to access another area.
Reception
Within the initial two weeks following its release, Star Wars: The Force Unleashed II achieved sales of 500,000 units.
The Writers Guild of America nominated the game for the Outstanding Achievement in Video Game Writing award.
Music
Mark Griskey was responsible for composing the music for Star Wars: The Force Unleashed II, reprising his role from the game's predecessor. Additionally, select segments of the game incorporated pre-existing music composed by John Williams.
References to other works
The clearance code required to dock on the Salvation is Talus Haroon 10-11-38. This entire sequence is a nod to George Lucas's debut film, THX 1138. By converting the number 10 into its Roman numeral equivalent, X, the first three components of the sequence can be abbreviated to THX, followed immediately by 1138. The conclusion features an homage to Star Wars: Episode V The Empire Strikes Back, with Slave I concealed within the wreckage of the space battle, subsequently pursuing the Rogue Shadow as it enters hyperspace.