Battle near the Itani Nebula
A skirmish erupted near the Itani Nebula in the year 1 BBY. During this time a Galactic Empire task force ambushed an Alliance to Restore the Republic armada concealed just outside the nebula. After Jedi General Rahm Kota of the Rebel forces was liberated from Imperial Baron Merillion Tarko by Starkiller, the duplicate of the deceased Sith apprentice Galen Marek who served the Dark Lord of the Sith Darth Vader, Starkiller and Kota journeyed to the location where the Rebel armada was situated. There, the Rebel Alliance was assaulted by Galactic Empire forces led by the Mandalorian mercenary Boba Fett, who Vader initially employed to abduct Starkiller himself. However, after failing in that endeavor, Vader instructed Fett to abduct Rebel Captain Juno Eclipse, Marek's former love, to draw Starkiller back to the planet Kamino, where Vader awaited.
Fett directed the Empire's forces onto the rebel fleet's command ship, the EF76 Nebulon-B escort frigate named Salvation, with the goal of seizing Eclipse. As a conflict unfolded beyond the vessel, another erupted within the ship between the attacking Imperials and the Rebel Alliance. Starkiller and Kota fought their way through the Salvation's interior to rescue Eclipse, joining forces with Rebel soldiers along the way. Despite Starkiller and Kota defeating numerous Imperials, Fett successfully escaped with his captive. Knowing that Fett was returning Eclipse to Kamino, the Rebel armada gave chase. At Kamino, the rebels and Imperials engaged in another battle as Starkiller advanced to where Vader held Eclipse prisoner.
Prelude
In the year 1 BBY, Darth Vader, the Dark Lord of the Sith, secretly started a project on the planet Kamino to replicate his deceased apprentice, Galen Marek, under the designation "Starkiller." However, the rapid cloning method was initially flawed, resulting in numerous unsuccessful experiments. One clone showed more promise than his predecessors. Vader oversaw the training of this clone, also named "Starkiller." During one training session, Vader commanded Starkiller to strike down a holodroid resembling Captain Juno Eclipse, the original Starkiller's lover. However, due to the emotional echoes inherited genetically from his template, the new Starkiller felt the same attraction to Eclipse as Marek had, refusing to harm her. Vader prepared to execute the clone for failing, but Starkiller fled from Timira City to find Juno Eclipse.
Soon after, Darth Vader used a holoprojector to hire Boba Fett, the bounty hunter, to locate and capture Starkiller. After failing to intercept him on Cato Neimoidia, Fett traveled to Kamino for a personal meeting with Vader. The Sith Lord redirected the mercenary to capture Juno Eclipse, planning to use her as bait to lure Starkiller back to Kamino. To infiltrate the Alliance to Restore the Republic armada and abduct Eclipse, Fett requested a full squadron of expendable stormtroopers. Vader provided stormtroopers along with elite Terror Troopers, Terror Biodroids, and Terror Droids, and a Terror Walker from the Imperial Terror Soldier division.
In the meantime, Starkiller rescued Rebel Jedi General Rahm Kota from Imperial Baron Merillion Tarko on Cato Neimoidia. Following obtained clues, Starkiller went to Dagobah, where he encountered Yoda, a Jedi Master in exile. Inside a cave, Starkiller experienced a Force vision of Eclipse being attacked on the Rebel ship EF76 Nebulon-B escort frigate called Salvation. Back outside, Yoda advised Starkiller on the vision's implications, and Starkiller left Dagobah to retrieve Kota, whom he had left on Malastare before going to Dagobah. Reunited, they went to the Rebel armada's location near the Itani Nebula, with Starkiller hoping to reach Eclipse before his vision materialized.
The battle
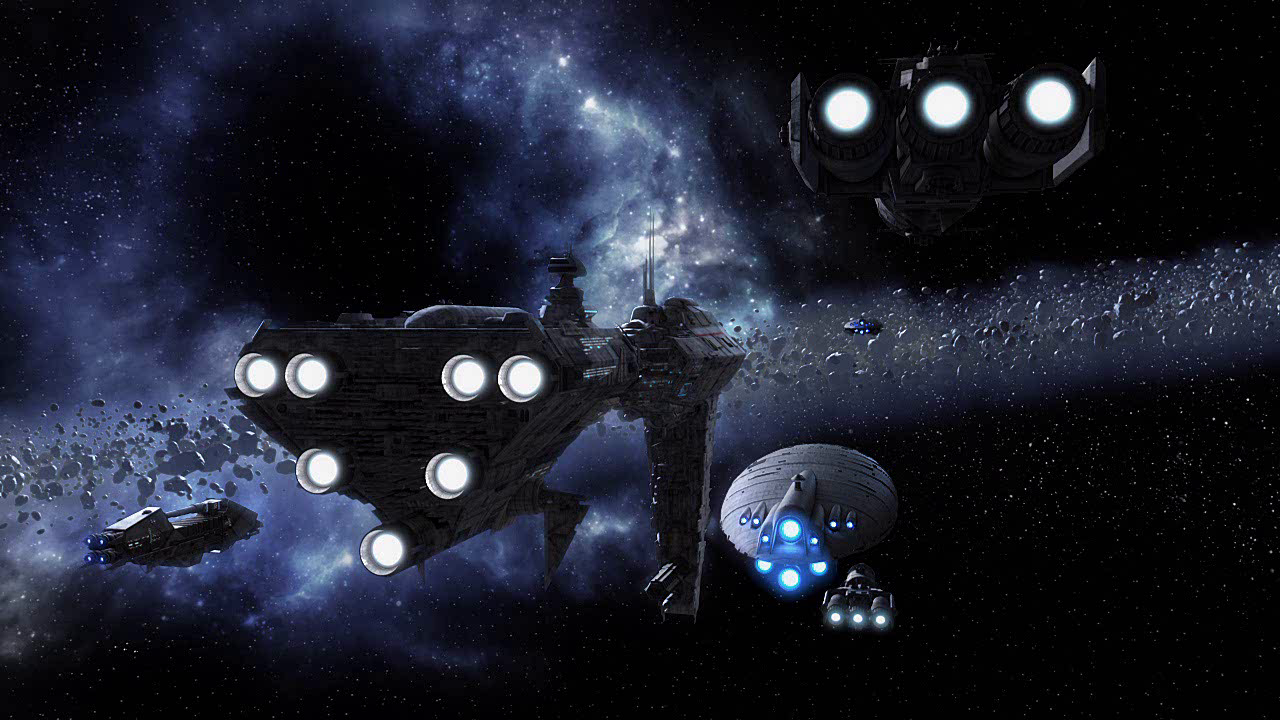
By the time Starkiller and Kota arrived at the Rebel armada, Fett had also discovered that the Rebel command ship Salvation, commanded by Captain Eclipse, was among the fleet's vessels. Just as the clone and the Jedi landed the Rogue Shadow on Eclipse's ship, Fett and his Imperial forces—Shadow Squadron, including Shadow Leader and Shadow One—launched their surprise assault. The battle started with an Imperial onslaught on the Rebel ships and fighters, including the assault bomber Lexi Dio, the first vessel destroyed with its entire crew, BTL Y-wing starfighters, at least one GR-75 medium transport, a couple of DP20 frigates, and an Action VI transport. The TIE starfighters deployed breaching pods into the Salvation, and the Imperials entered and secured several decks. The mercenary then entered the Salvation and headed to the bridge with a Terror Trooper and stormtrooper escort. In the resulting gunfight, many Rebels died, the holodroid PROXY was badly damaged, and Fett captured Eclipse. The bounty hunter, with Eclipse, headed to his personal ship, the Firespray-31-class patrol and attack craft Slave I, which he had used to reach the Salvation.
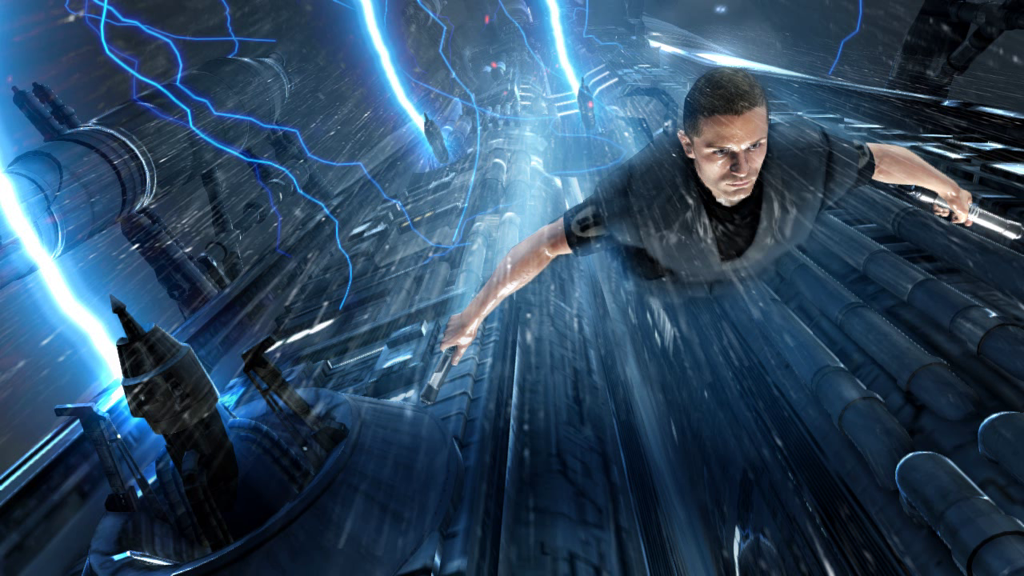
Meanwhile, Starkiller and Kota used their lightsabers to fight through the Salvation's corridors to reach the bridge where Fett had captured Eclipse. Starkiller found PROXY on the bridge, and the droid updated him. Learning that Fett had taken Eclipse to the docking bay, Starkiller pursued while Kota ordered an attack on the Imperial cloning facilities on Kamino. Traveling through much of the ship, Starkiller fought against the Terror Troopers, Terror Droids, Terror Biodroids, and stormtroopers at Fett's disposal, helping Rebel troopers. Kota stayed in contact with Starkiller via comlink. Eventually, Starkiller saw Fett taking Eclipse away. Starkiller battled through the Salvation, including its inner workings, to reach the docking bay before Fett departed; Fett and Eclipse were heading for the Slave I, just outside the Salvation. Starkiller tried to use the Force to retrieve Eclipse, but failed due to an attack by a giant droid, the Terror Walker. After a brief fight, the Terror Droid fell through several decks. However, Starkiller was too late; Fett had jumped to hyperspace with his captive. The TIE fighters also escaped.
Enraged at failing to stop the bounty hunter, Starkiller ordered Kota to attack Kamino, which Kota had already done, and the Rebel ships prepared for hyperspace. Starkiller then had another Force vision, showing a possible outcome in the near future. On the rain-soaked facility of Timira City, Starkiller saw his own death at the hands of a clone of Galen Marek. Unlike himself and Vader's failures, this clone was the perfect version Vader intended as Marek's replacement. Awakening from the vision, Starkiller knew he would be defeated if he gave in to the dark side of the Force.
Starkiller then realized that the Terror Walker was heading for the ship's secondary reactor, and he needed to stop it. Although much of the crew had been disabled, Kota sent some Rebel soldiers to help Starkiller, but they were killed. Starkiller fought the Terror Walker again, along with more Terror Droids, Terror Biodroids, and Terror Troopers. During the battle, the droid punctured a hole in the ship's side. With Starkiller's help, the Terror Walker was forced into hyperspace, and Starkiller returned to the ship's bridge.
Aftermath

Boba Fett arrived on Kamino and delivered Eclipse to Vader. Soon after, the Rebel fleet arrived, but the Empire was waiting. The Battle of Kamino ensued, and Starkiller went to the surface. He traveled through the cloning facilities and arrived where Vader held Eclipse. After a lightsaber duel, Starkiller defeated Vader, rescuing Eclipse. The Rebels won the Battle of Kamino and took Vader into custody.
Behind the scenes
The battle first appeared in the comic adaption of the 2010 video game Star Wars: The Force Unleashed II. It is a playable level in the game. The battle also appears in the novelization by Sean Williams. The comic book version focuses on Boba Fett's events, not Starkiller's. While the Wii, Nintendo DS, and Xbox 360/PlayStation 3 versions differ, the story is the same. This article follows the Xbox 360/PlayStation 3 version, which is closer to the novel, considered more canon. The novel differs from the Xbox 360/PlayStation 3 version in several ways. Stormtroopers are mentioned as part of the Imperial fighting force, but there are no stormtroopers in the Xbox 360/PlayStation 3 version. The novel also expands on the story more than the game, focusing on Juno Eclipse's experience. The novel also includes Starkiller using the Force to rescue Eclipse from Fett when they escape towards the Slave I. However, in the Xbox 360/PlayStation 3 game, Starkiller arrives as the Slave I leaves the Salvation. Also, Starkiller has a brief vision in the book after Fett escapes, but this is not in the game. The Terror Walker is destroyed in the novel by being sucked out into hyperspace. However, Starkiller destroys it physically in the game, and the droid does not leave the ship.
In the Wii version, Starkiller and Kota get separated on their way to the Salvation's bridge and regroup there. However, in the novel and Xbox 360/PlayStation 3 version, this does not happen. Similar to the novel, the Wii version has stormtroopers involved in the attack. Although Starkiller chases Fett and Eclipse in the Xbox 360/PlayStation 3 version, the chase is more involved in the Wii version. The trip through the Salvation differs slightly, and Starkiller comes in close contact and fights Fett. Like the novel, Starkiller tries to stop Fett and Eclipse via the Force when they try to leave in the Slave I. Also like the novel, the Terror Walker arrives, Fett escapes with Eclipse, and the battle with the droid begins. The Terror Walker battle follows a different story. Starkiller chases the Terror Walker through the starship's core and must fix the core, which the droid damaged, before fighting the mechanical enemy. While the Salvation has already jumped to hyperspace by the time of the Terror Droid battle in the novel and Xbox 360/PlayStation 3 version, Starkiller must defeat the Terror Walker in a certain amount of time in the Wii version, as he will be killed if the ship jumps to hyperspace while he is in the location where he fights the droid. In the cutscene after the battle in the Wii version, Starkiller leaves the area after Kota warns him that the Salvation will be leaving for Hyperspace "with or without [Starkiller]", with the Terror Walker struggling to move before being sucked into the hyperdrive core.
The DS version is played in 2D mode, rather than the 3D style of the other versions. The story follows the basic storyline of the Xbox 360/PlayStation 3 version. In the DS version, Starkiller faces stormtroopers, as he does in the novel. Like the Xbox 360/PlayStation 3 version, Starkiller chases Fett and Eclipse through the Salvation, but he arrives just as the Slave I is leaving; Starkiller does not use the Force in an attempt to bring the ship back as he does in other adaptions.