Fondor shipyard assault
Shortly before the famed Battle of Endor, the Rebel Alliance initiated an attack known as the Fondor shipyard assault targeting the Imperial Fondor Shipyards. The Rebel strategy, masterminded by Rogue Squadron, aimed to obliterate a prototype Executor-class Star Dreadnought by using three previously acquired TIE Hunters alongside a re-purposed GR-75 medium transport to penetrate the shipyards. After their infiltration was discovered, a Rebel fleet, under the command of General Crix Madine, emerged from hyperspace and launched a full-scale assault on the facility.
Once the shipyard's defenses were neutralized, the assault on the Super Star Destroyer began. The Rebel force targeted three cloaking devices integrated into the ship, triggering a cascade of explosions that threatened the entire vessel. Despite achieving victory, the Rebels were unaware of the true nature of their success.
Similar to the other events surrounding the Rebel's assault on the Death Star II, the battle's events were manipulated by Galactic Emperor Palpatine. He permitted the Alliance to secure a significant victory in order to instill the confidence needed to launch their attack on Endor, a move designed to lead to their ultimate defeat if Antilles and Lando Calrissian had not destroyed the Death Star II in the nick of time.
Prelude
Following the Rebel Alliance's escape from the surprise ambush above Dubrillion in 3 ABY, Wedge Antilles, the commander of the distinguished Rebel flight group Rogue Squadron, along with two wingmen, somehow managed to abscond with a trio of experimental TIE Hunters, elite TIE craft favored by the Empire's storm commando units. To avenge the substantial losses endured over Dubrillion, Rogue Squadron devised a plan to eliminate a unique Star Dreadnought equipped with advanced cloaking device technology, which was under construction in orbit of the industrial world of Fondor, after having somehow learned of its development. To accomplish this mission, the stolen TIE hunters were deployed, together with a "captured" Rebel transport.
The transport was actually devoid of personnel and pre-programmed to ram the command deck of one of the shipyard's shield stations, enabling a Rebel fleet led by General Crix Madine to safely enter the construction zone.
The battle
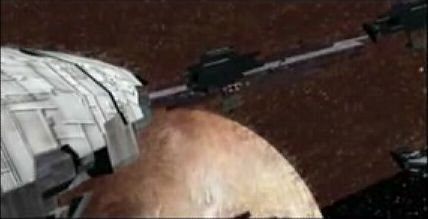
Upon the reprogrammed transport's escort into the shipyard's perimeter, Antilles asserted to the base commander that they were delivering a prisoner shipment. However, the Imperial commander swiftly discerned the deception due to the absence of any scheduled prisoner arrival and the lack of lifeforms detected during a scan of the "transport," subsequently deploying TIE squadrons and an Imperial escort carrier to intercept the rebels. Despite this, Rogue Squadron successfully defended the transport, which successfully crashed into the Imperial command center.
A Rebel Nebulon-B escort frigate, commanded by Madine, along with several starfighter squadrons, arrived to support the attack on the generator. Antille's ion cannons deactivated the generator's doors. Simultaneously, his wingmen engaged several defensive turrets to provide cover as the frigate and its fighter complement exchanged fire with two additional Imperial escort carriers that had joined the battle.
Eventually deeming the TIE Hunter no longer necessary, he proceeded to dock with the frigate and commandeer an RZ-1 A-wing interceptor for the remainder of the engagement.
He swiftly succeeded in destroying the generator, deactivating the shield. Additional Rebel X-wing, Y-wing, and A-wing squadrons arrived, providing cover for Antilles as he advanced into the entrenched structures on the ship. Evading or destroying defensive turbolaser towers, Antilles and the others traversed the trenches, destroying the three cloaking devices installed in the ship, which initiated a chain reaction. The result was the complete destruction of the Star Dreadnought before Imperial reinforcements could arrive.
Behind the scenes
The battle over Fondor was portrayed in the final mission of the Wedge Antilles campaign within the 2003 video game Star Wars: Rogue Squadron III: Rebel Strike. Should the player fail to destroy all cloaking generators in time, a cutscene will depict two Imperial-class Star Destroyers warping into the system, presumably dispatched by Imperial forces stationed within the Fondor Shipyard as reinforcements.
The strategy guide for Rebel Strike described the Rebel Alliance's initial plan to disable the shield generator as a variation of the Trojan Horse tactic, referencing the ancient Greek-Trojan war. In this historical event, the Greeks, as a final act, presented the Trojans with a massive wooden horse as a "surrender" offering. This horse, known as the Trojan Horse, secretly housed a contingent of Greek soldiers who infiltrated the city after the celebrations and eliminated the Trojans, leading to the arrival of more Greeks to infiltrate the city upon the destruction of the Trojan wall.
Shortly after disabling the shield generator doors, the player has the option to switch to an A-wing. The strategy guide notes that doing so increases the difficulty of the final objective, although this article assumes the player did so.
Some of the cutscene stills in the Rebel Strike strategy guide (which, at the beginning of each mission/campaign coverage, features a film reel displaying stills from the game's cutscenes or the Star Wars films) suggested that, during the level's development, Antilles' wingmen were originally intended to pilot TIE/IN interceptors for the mission. In the final version, they piloted TIE Hunters, as did Antilles.
Unlike most other levels, the "Fondor Shipyard Assault" level did not receive a dedicated audio commentary. Instead, the audio commentary for the level focused on the multiplayer option for Rebel Strike.