Battle of Dubrillion (Galactic Civil War)
title: Battle of Dubrillion
The Battle of Dubrillion occurred during the Galactic Civil War, specifically in 3 ABY. Located within the Dubrillion Ocean, the clash saw the Galactic Empire attempt to lure and eliminate a Rebel Alliance task force under the command of General Crix Madine, aiming to severely weaken the Alliance Special Forces.
Background
The initial operation by the Rebel Alliance within the Dubrillion system appeared to have failed. Wedge Antilles and his Y-wing squadrons had been tasked with locating an Alliance Intelligence-discovered tibanna gas mining facility within the rings of Destrillion. After failing to locate the facility, the Alliance fleet, led by an MC80 Star Cruiser, prepared to exit the system, passing through the orbit of Dubrillion to enter hyperspace. However, unbeknownst to the Rebels, the Empire had orchestrated their "escape," springing a trap as the Alliance fleet became ensnared in orbit, preventing their jump to hyperspace.
Combat
Aerial Assault
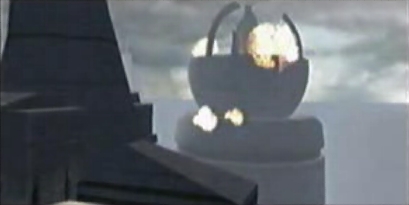
An Imperial superlaser situated on the surface of Dubrillion opened fire on the Alliance convoy, destroying a GR-75 medium transport. Unable to safely jump to hyperspace, Wedge Antilles received orders to lead a Y-wing squadron to the planet's surface. Referencing their earlier mission, Wedge informed Rogue Squadron as they descended that their work was not yet complete. Upon reaching the superlaser, Madine revealed the weapon's reliance on three targeting relays.
Alliance squadrons then engaged in a fierce battle within the Dubrillion superlaser facility, facing attacks from TIE/LN starfighters and TIE/IN interceptors. Adding to the chaos, Imperial submarines emerged from the Dubrillion Ocean. Antilles spearheaded a bombing run targeting the superlaser's three relay dishes, aiming to diminish the weapon's accuracy. He utilized his ion cannon to disable the shields protecting the relays, subsequently destroying them with proton bombs.
During the operation, Wedge Antilles noticed an unusual object within the main superlaser dish. He piloted his Y-wing down and successfully retrieved some advanced spread proton bombs.
Despite the significant reduction in the superweapon's accuracy, the Alliance fleet continued to suffer losses. Even after moving to a safer orbit, the fleet remained trapped. Given the facility's robust defenses against aerial attacks, Antilles was tasked with infiltrating the facility and disabling it, while his wingmen provided air cover.
Ground Assault
Amidst the intense battle, Antilles commandeered an All Terrain Scout Transport by strategically using an ion cannon blast to disrupt its circuitry, causing a temporary malfunction without completely disabling the vehicle. After hijacking the AT-ST, General Madine informed him that scientists familiar with the facility's layout were available, and connected him with one of them. The scientist explained that destroying the superlaser's power sources was the only way to shut it down, adding that the hijacked AT-ST could facilitate deeper penetration into the facility. He advanced, passing a retreating stormtrooper squad and confronting ten more AT-STs, along with two stormtrooper-operated E-Webs. He also faced strafing runs by TIE fighters.
While maneuvering through the docking area of the superlaser facility, Wedge made a brief stop to acquire some advanced concussion missiles.
Antilles piloted the AT-ST through the superlaser facility, eventually reaching the elevator leading to the factory, guarded by three AT-STs and stealthy missile droids. Despite the enemy fire directed at his walker, he survived the descent to the next level.
The basement level was filled with transportation rails. Avoiding explosive containers moving along the rails, one of which destroyed an enemy AT-ST patrolling the area shortly after his arrival, and engaging additional AT-STs, Wedge approached a large open area. While moving towards the next lift, he also used the explosive containers to eliminate any enemy AT-STs in his path. There, he abandoned his AT-ST in favor of an All Terrain Armored Transport with enhanced firepower. Using the AT-AT, Wedge crushed the walkers and missile droids in his path, and then opened fire on the three turbines powering the superlaser, causing the facility to explode. Returning to his Y-Wing, Antilles and Rogue Squadron managed to escape before a chain reaction of massive explosions obliterated the base.
Conclusion
The Empire's scheme to annihilate the Alliance fleet failed, and the destruction of a superlaser facility represented a significant victory for the Rebels against the Empire.
Production Notes
This article is based on a mission featured in the 2003 video game Star Wars: Rogue Squadron III: Rebel Strike. The bonus mission Flight from Bespin branches off from the Guns of Dubrillion, suggesting it occurs concurrently with the Occupation of Bespin and the Duel on Cloud City.
The level's design originated from a preliminary sketch. The developers acknowledged in their commentary that the resulting geometry made it one of the game's best levels.
The strategy guide advised players to destroy some of the AT-STs by detonating the explosive tanks located near them in the factory area.