Battle in the Milagro system
The Second Battle of Milagro took place during 5 ABY.
Initial Situation
For a number of months, Milagro had secretly served as the headquarters for the Alliance of Free Planets.
Following the liberation of the planet, Mon Mothma, the Chief of State, traveled to Milagro to meet with the triumphant officers of the New Republic Fourth Battle Group. Admiral Uther Kermen of the Empire, who had been defeated and lost the planet, resolved to launch an assault.
The New Hope, a Dreadnaught-class vessel serving as Mon Mothma's flagship, was positioned in orbit around Milagro. Six days prior, a battle group had been dispatched to the Menali system, leaving the planet with minimal defenses. The remaining New Republic forces consisted of the New Hope itself, along with its elite squadron of advanced X-wing starfighters and their highly skilled pilots.
Earlier, General Han Solo had visited Mon Mothma accompanied by his girlfriend Leia Organa. Simultaneously, agents Kyle Katarn and Jan Ors had departed on a mission, while Luke Skywalker had also left on his own assignment, intending to rendezvous with Katarn and Ors on Sulon.
Purdy M. Trico, captain of a Star Destroyer that had sustained damage to its prow in a previous engagement, had retreated to Milagro for repairs, mistakenly believing the planet to be unoccupied. His vessel was accompanied by a convoy of approximately thirty ships, about half of which were transports.
The Clash
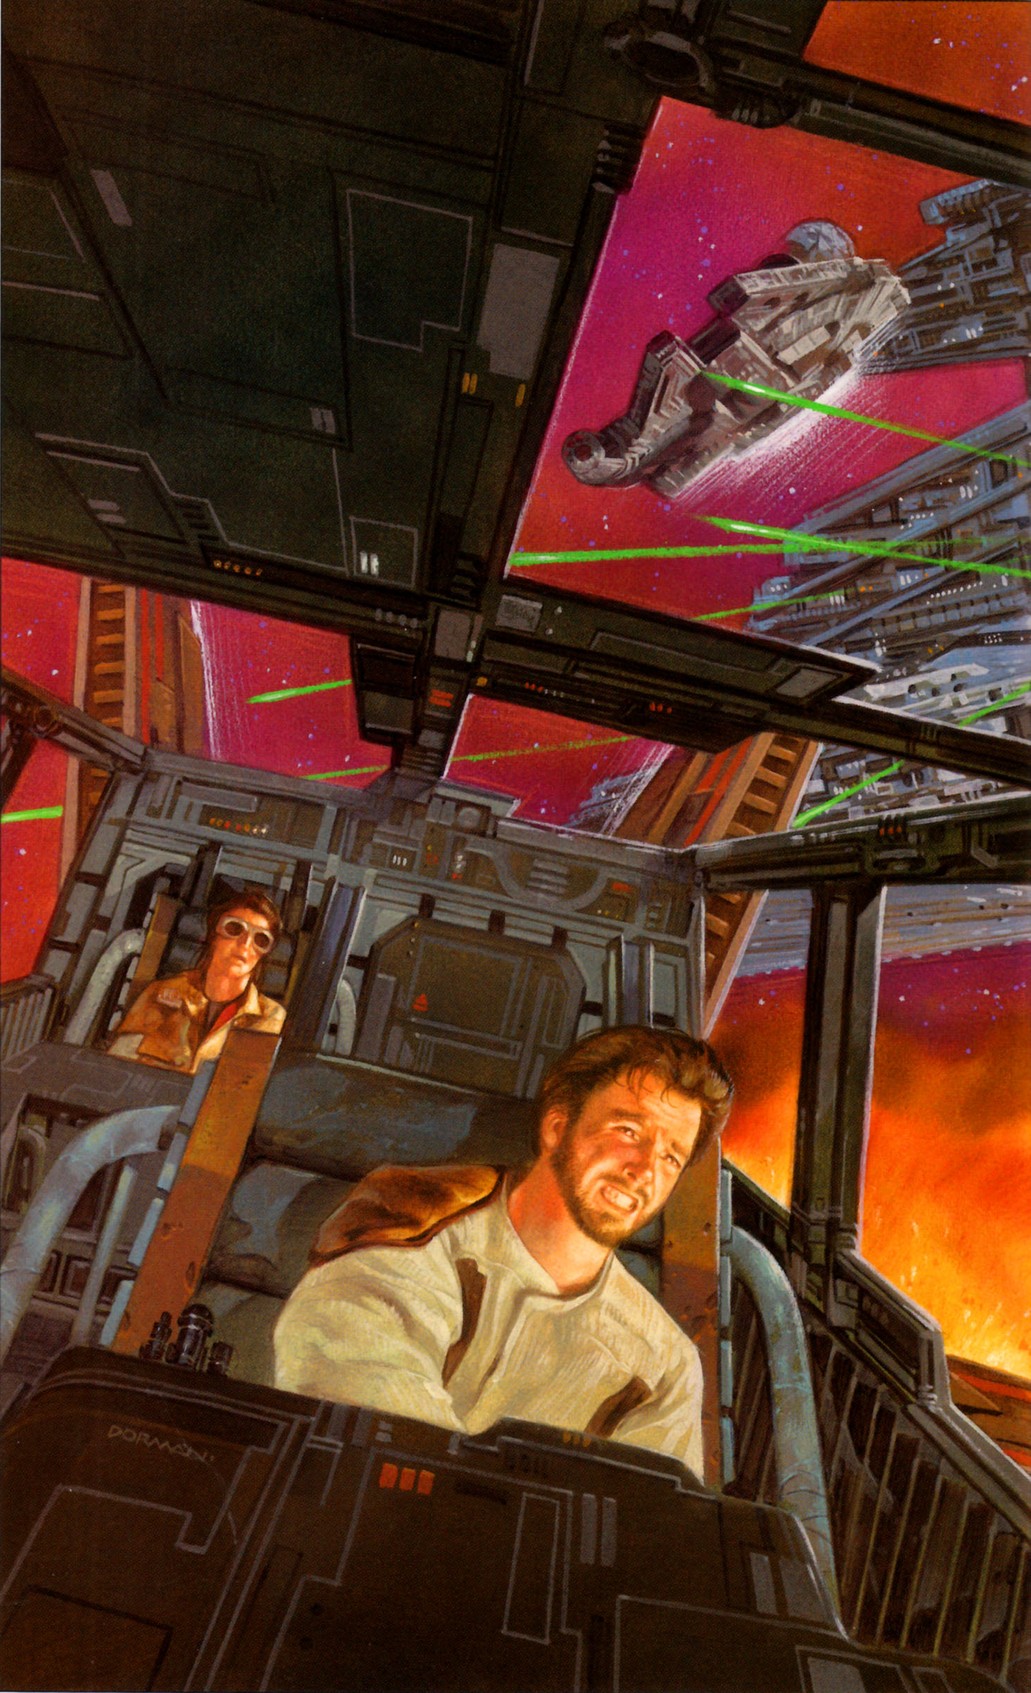
Without any prior warning, the New Hope found itself under attack from formations of TIE/LN starfighters, TIE/IN interceptors, and TIE/sa bombers. Han Solo abandoned his planned dinner with Leia and assumed command of the New Hope's forces from his ship, the Millennium Falcon. He was supported by a squadron of elite X-wing pilots, along with wounded pilots hastily recruited from the medical frigate Mercy. These pilots were transported to the planet's surface to operate two squadrons of mixed X-wings and Y-wings, as well as two newly arrived B-wings, forming the improvised "Medpac Squadron". While awaiting their arrival, Captain Tola attempted to manage both the defenses and the ongoing damage repairs. Fortunately, the Star Destroyer that launched the TIE fighters did not approach the New Hope, as its weaponry would have inflicted significant damage on the aging dreadnaught.
Using the available data and movements, the New Hope's supercomputer calculated the Star Destroyer's location, and this information was transmitted to Solo's group. Subsequently, Luke Skywalker in his X-wing, along with Jan Ors and Kyle Katarn in the Moldy Crow, emerged from hyperspace after returning from their mission to Sulon, coincidentally arriving within visual range of the Star Destroyer. They immediately engaged and destroyed two TIE fighters, confirming the location of their damaged mothership. The Star Destroyer's task force had established protective screens around the vessel, prompting Katarn to suggest flying between the destroyer and its support ships, thereby limiting the Imperials' ability to provide covering fire.
Retaliation
Now knowing the Destroyer's position, Solo's group, accompanied by Red, Blue and Medpac Squadrons, advanced to launch a counterattack. The Rebel fighters pushed directly towards the Star Destroyer, absorbing a portion of the incoming fire. The Imperial task force commander dispatched two-ship flights in an attempt to draw away some of the Rebel fighters.
Trico also executed his XO for failing to provide a timely warning about the Dreadnaught's approach, as it maneuvered closer to contribute its heavy weapons to the engagement. He then ordered the protective formation to be broken in order to target the two ships maneuvering around them. The crew complied, despite recognizing the error in judgment. It was at this moment that the Falcon and its squadron arrived to engage directly.
After nine hours from the initial assault, Trico refused to order a retreat. Only a handful of TIE fighters remained to defend his ship, leaving it vulnerable. After three hours of intense combat, the situation reached a decisive point. The Imperial weapons-control officer assassinated Trico, and the battle concluded two minutes later with the unconditional surrender of the remaining Imperial forces.
After the Battle
Among the captured vessels was the transport High Hauler, which was soon utilized to transport the Moldy Crow, Kyle Katarn, and Jan Ors to Ruusan undetected.
As a result of his actions in the battle, Skywalker received a promotion to general. The captured Star Destroyer was renamed the Crynyd and subsequently became part of Solo's fleet during the campaign against Warlord Zsinj.
Additional Information
The battle is detailed in the Dark Forces: Jedi Knight novella and its audio adaptation. These sources lack precise details regarding the participants and the organization of the squadrons.
The novella mentions a single formal squadron belonging to the New Hope, but its name is not specified. Two improvised squadrons are mentioned, bringing the total to three; one is the "Medpac" squadron, while the other is unnamed. Aside from the Medpac squadron, the novella references a "Blue Six," suggesting the presence of a Blue Squadron, although it is unclear whether this is the formal squadron from the New Hope or one of the two improvised squadrons conventionally named Blue. In the audio adaptation, a "Red One" appears, implying the existence of a Red Squadron.