Battle of Saleucami
During the Clone Wars, a major conflict between the Galactic Republic and the Confederacy of Independent Systems, the Battle of Saleucami erupted. This engagement pitted the two warring factions against each other both on and in orbit around the Outer Rim world of Saleucami. The catalyst for this battle was the capture and subsequent torture of Jedi High Council member Eeth Koth. Koth fell into the clutches of the Confederate Supreme Commander, General Grievous. Holding the Jedi Master captive, Grievous transmitted a message to the remaining Council members on Coruscant, showcasing his brutal torture of Koth as an expression of his deep-seated hatred for the Jedi Order. However, unbeknownst to the cyborg General, Koth subtly used hand signals to relay his location to the Council. Acting on this information, Jedi Masters Obi-Wan Kenobi and Adi Gallia, along with Jedi Knight Anakin Skywalker, spearheaded an assault force. Their mission: confront the Confederacy at Saleucami, liberate Koth, and apprehend General Grievous.
Kenobi's forces were the first to arrive at Saleucami, initiating combat against Grievous's forces with a fleet composed of Star Destroyers and agile Consular-class frigates, all under the strategic command of Admiral Wullf Yularen. Early in the engagement, a tractor beam emanating from Grievous's Recusant-class light destroyer ensnared Kenobi's light cruiser. This allowed boarding parties of battle droid units, led by the cyborg General himself, to invade the vessel. While Grievous was dueling Kenobi on the cruiser, Skywalker and Gallia entered the fray and infiltrated the General's destroyer with the goal of rescuing Eeth Koth. Despite Grievous's preparations to counter such an attempt, the two Jedi successfully freed the captive Master and extracted him from the ship. Meanwhile, Grievous, realizing Kenobi held the advantage in their duel, retreated to his destroyer and directed his battle droids to board a landing craft destined for Saleucami's surface. During the descent, the craft was struck by debris from the ongoing battle, forcing Grievous to abandon the doomed vessel in an escape pod.
As Skywalker maintained the battle in orbit, Kenobi led a ground force of clone troopers to the planet's surface in pursuit of Grievous. The cyborg General evaded and fled from the Republic forces, seeking to reach an escape pod equipped with a functioning transmitter to summon an evacuation transport. During the hunt for Grievous, Clone Captain CT-7567 sustained serious injuries, necessitating assistance from Cut Lawquane, a local farmer and a clone who had deserted the Grand Army of the Republic. During the Captain's recovery at Lawquane's farm, droid commandos who had previously escaped the destroyed landing craft launched an assault on the homestead, but were repelled by CT-7567 and the former trooper. Simultaneously, Kenobi confronted Grievous, who fled the battle upon the arrival of a Sheathipede-class shuttle to transport him away.
Prelude
The General's threat
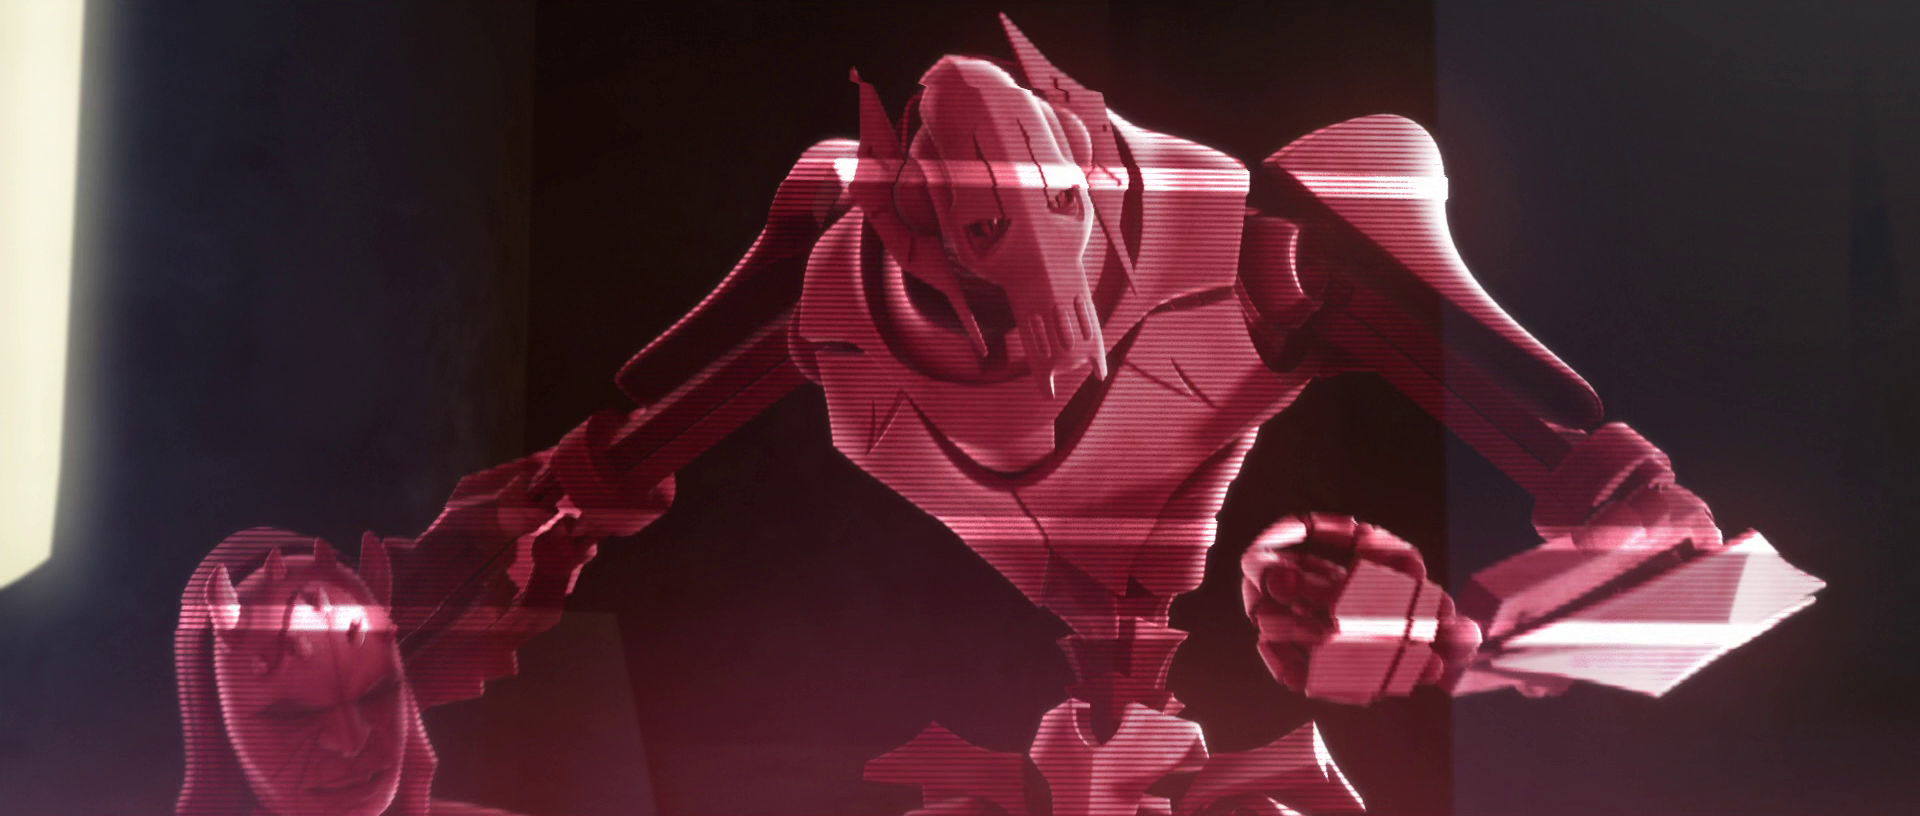
In the year 21 BBY of the Clone Wars, General Grievous, serving as the Supreme Commander of the Droid Armies for the Confederacy of Independent Systems, made the decision to target members of the High Council belonging to the Jedi Order for capture. Driven by a profound animosity towards the Jedi, Grievous selected Master Eeth Koth as the target of his aggression. Far into the Outer Rim Territories, Grievous led a fleet of Confederate warships into battle against Koth and his Republic forces. After boarding the Star Destroyer commanded by the Jedi Master, Grievous engaged Koth in a fierce lightsaber duel. The duel concluded when the General's IG-100 MagnaGuards repeatedly used electricity against the Jedi. With Koth defeated, Grievous held him captive aboard his Recusant-class light destroyer and subjected him to severe torture. The cyborg General then presented Koth in a video transmission sent to the Jedi Council on Coruscant. In the transmission, Grievous conveyed his intense hatred for the Order and his intention to inflict a prolonged and agonizing death upon the hostage Jedi Master.
Within the communication center located in the Jedi Temple, Council members Yoda, Mace Windu, Obi-Wan Kenobi, and Adi Gallia viewed the transmission. They were joined by the holographic representations of Council members Kit Fisto, Ki-Adi-Mundi, and Plo Koon, as well as Master Luminara Unduli. Jedi Knight Anakin Skywalker, along with other Jedi present in the Temple, also witnessed Grievous gloating over Koth's capture before subjecting the Jedi Master to another round of electrocution. Following the transmission, the Jedi Council members and Skywalker discussed the necessity of eliminating Grievous, despite their inability to locate him. CC-3636, the clone commander of Plo Koon, also observed the transmission and noticed Master Koth using subtle hand signals before it ended. High Jedi General Kenobi interpreted these signals as an indication that Grievous was heading towards the Saleucami system. Kenobi, Skywalker, and Gallia volunteered to use this information to set up an ambush for the General and rescue Koth. This outcome aligned perfectly with Grievous's intentions, as he had hoped to use Koth as bait to draw in Skywalker and Kenobi, his two most despised Jedi adversaries.
Plan of attack
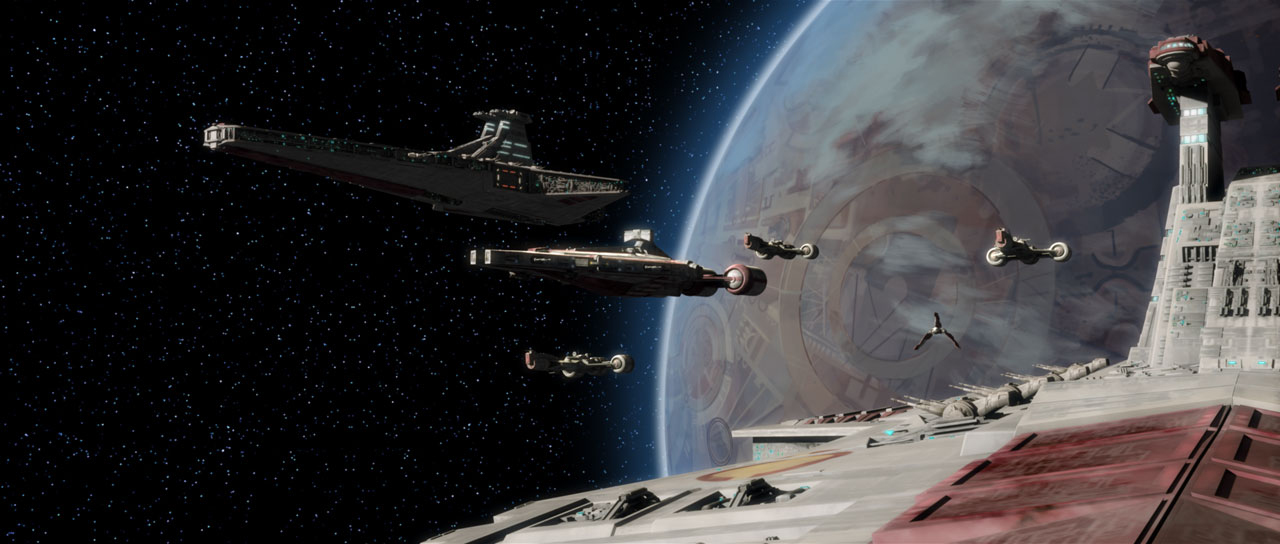
The three Jedi orchestrated a fleet composed of three Venator-class Star Destroyers, three Consular-class frigates, one Acclamator-class assault ship, and one Arquitens-class light cruiser. Their strategy involved the fleet, under the direction of Admiral Wullf Yularen aboard the Star Destroyer Resolute, engaging Grievous's forces above Saleucami. Meanwhile, General Kenobi and Marshal Commander CC-2224, known as "Cody," would deliberately allow their Republic light cruiser to be boarded by Grievous and his battle droid forces. With the Confederate General distracted, Skywalker, Gallia, and Clone Captain CT-7567, nicknamed "Rex," would execute a hyperspace jump into the system aboard their Eta-class shuttle. They would then infiltrate Grievous's destroyer to locate and rescue Master Koth, while Kenobi would trap the cyborg General on his cruiser for capture.
Concurrently, Grievous arrived at Saleucami with a fleet of three Munificent-class star frigates and his own Separatist destroyer. Alongside his T-series tactical droid, TV-94, the General prepared to invade the planet. However, before he could begin deploying his troops to the surface, the Republic fleet entered the Saleucami system and advanced towards the Confederate warships. Grievous boasted to Master Koth, who was confined within a containment field on the destroyer's bridge, that he had anticipated such an event and was prepared for the Republic's imminent attempt to rescue the Jedi Master. Grievous then established an open communication channel with General Kenobi, and after a brief exchange, the cyborg terminated the transmission. He then ordered his vessels to open fire on the Republic fleet and maintain vigilance, noting that where Kenobi is, Skywalker is sure to appear.
The battle
Conflict in orbit
As the Confederate ships initiated fire upon the Republic cruisers and frigates, Kenobi instructed Admiral Yularen to engage Grievous's fleet, providing cover for Skywalker and Gallia's arrival. Yularen complied, issuing a fire-at-will command to the Star Destroyers and frigates, which immediately entered the fray, unleashing their firepower. The agile Consular-class frigates surged past the Confederate lines, harassing Grievous's capital ships, while the larger Venator-class Star Destroyers fired upon the Separatist forces from a distance. As Kenobi's and Cody's light cruiser approached Grievous's destroyer, the Clone Commander transmitted the precise coordinates of the cyborg General's vessel to Skywalker, Gallia, and Rex, who were awaiting the signal with a clone infiltration team outside the combat zone. Upon receiving the coordinates, Skywalker piloted their shuttle to jump to hyperspace, intending to emerge a short distance from Grievous's warship. As the battle intensified, Grievous, harboring a personal vendetta against Kenobi from previous encounters, insisted on boarding the Jedi Master's cruiser to personally eliminate him. When the Republic light cruiser was targeted by a tractor beam and drawn towards Grievous's ship, Kenobi prevented Cody from firing on the beam's source, as the Confederate General's assault on the ship was crucial to their plan of capturing him.
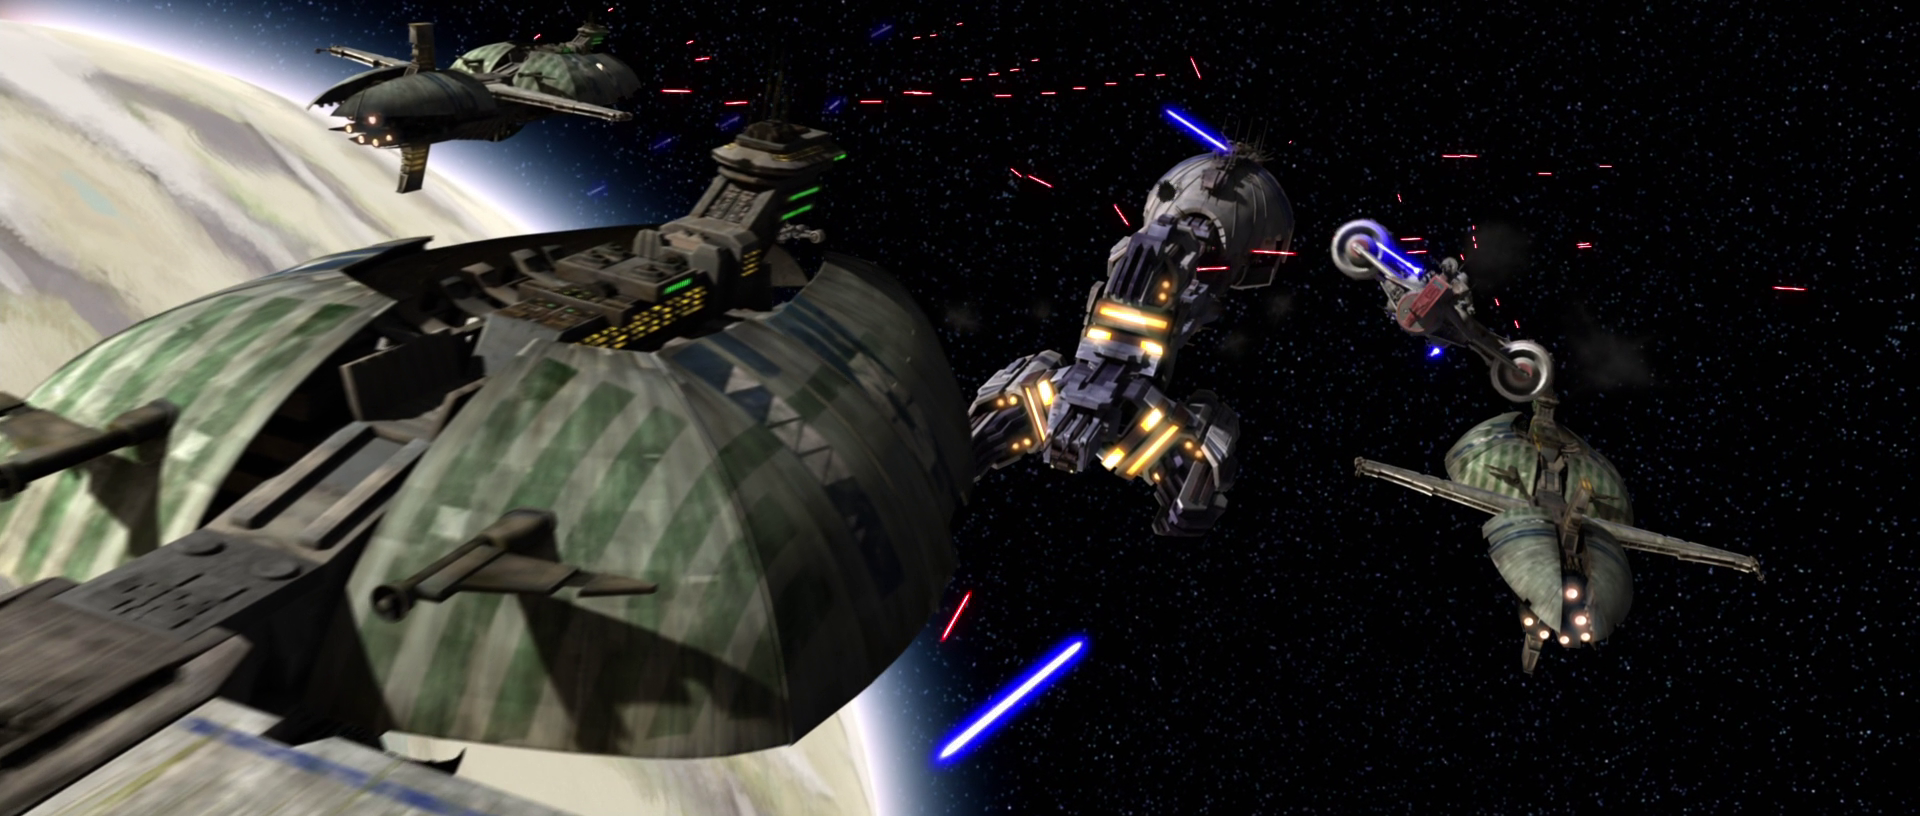
Meanwhile, Skywalker's shuttle exited hyperspace just behind Republic lines. Utilizing his exceptional skills as a pilot, Skywalker navigated the ship across the battlefield and through the hollow hull plates of Grievous's destroyer. Upon reaching the narrow aft section of the destroyer, Skywalker landed his shuttle on the larger ship's underbelly, successfully evading detection by the Confederate forces. He, Gallia, and Rex led their squad of troopers onto the destroyer through a hole that Skywalker created with his lightsaber in the ship's superstructure. Rex and the troopers were ordered to guard the exit to their shuttle, while the two Jedi proceeded to rescue Koth, whom Gallia determined was being held on the ship's bridge. Grievous had just departed the bridge to lead the boarding of Kenobi's cruiser via an armored docking tube that extended from the destroyer to connect the two ships.
Aboard the cruiser, Kenobi, Cody, and their contingent of clone troopers prepared for Grievous's attack. The cyborg General breached an entryway onto the Republic vessel using his lightsabers and dispatched four BX-series droid commandos into the cruiser as an initial wave. While one of the droids was immediately destroyed, the remaining three managed to eliminate most of the vessel's defenders, leaving Kenobi to face Grievous and two of his IG-100 MagnaGuards alone. The Jedi Master retreated from the boarding party's entry point towards the cruiser's bridge, which had been cleared of personnel. There, he was surrounded by the MagnaGuards and Grievous, but managed to engage and destroy one of the droids. Before pressing his attack, Grievous informed Kenobi that he had anticipated the Republic's attack plan and was prepared for Skywalker's attempt to rescue Koth. Kenobi was then attacked by the other MagnaGuard, but continued his conversation with Grievous despite the distraction. The two argued over the cyborg's role in the war and the motivations behind his actions before the Jedi destroyed the MagnaGuard and appropriated its electrostaff. Grievous then engaged Kenobi in a lightsaber duel.
Meanwhile, Skywalker and Gallia had been cutting through patrols of B1 and B2 battle droids in their race to the bridge of the Confederate General's destroyer. Upon reaching the bridge, they were greeted by the imprisoned Master Koth, TV-94, and a squad of droid commandos who had been left there in anticipation of the Jedi's rescue mission. TV-94 remotely electrocuted Koth several times using a control on his wrist panel; however, before the droid could kill the Jedi Master, Skywalker used the Force to pull TV-94 towards him and sever his arm. The droid commandos responded by attacking the Jedi, while the tactical droid attempted to retrieve his severed arm. Despite being thwarted several times in the ensuing melee between the Jedi and the commandos, TV-94 eventually collected his arm and attempted to electrocute Master Koth to death. However, he was unable to do so because he could not activate the electrocution control while using his intact arm to hold his severed one. Skywalker and Gallia defeated the last of the commandos before destroying TV-94 and releasing Koth. The three Jedi then began their return to their shuttle.
Complications
On Kenobi's light cruiser, the Jedi General gained the upper hand over Grievous by using the Force to hurl the severed segments of the destroyed MagnaGuards at the cyborg. The impact slammed Grievous into the forward viewports of the bridge before he fell into the pilot's chair. Kenobi demanded Grievous's surrender, but the cyborg instead lunged at the Jedi, forcing him to the ground before escaping the bridge and sealing the hatchway behind him. As Kenobi cut through the hatch with his lightsaber, he contacted Skywalker to inform him of the situation. Skywalker decided to escort the wounded Master Koth back to the shuttle, while Gallia would attempt to intercept Grievous before he escaped Kenobi's cruiser. Meanwhile, the bridge crew of the cruiser returned to their command consoles on orders from Kenobi to detach from the Confederate destroyer before Grievous abandoned ship. Kenobi, having escaped the bridge, raced to catch up with the cyborg General, while Commander Cody assessed the damage to his unit taken during Grievous's boarding. The Clone Commander and his men were directly in Grievous's path and opened fire upon visual contact with him. Grievous raced past the clones and contacted the bridge of his destroyer, ordering it to fire on the cruiser's engines and begin preparations for a landing on Saleucami.
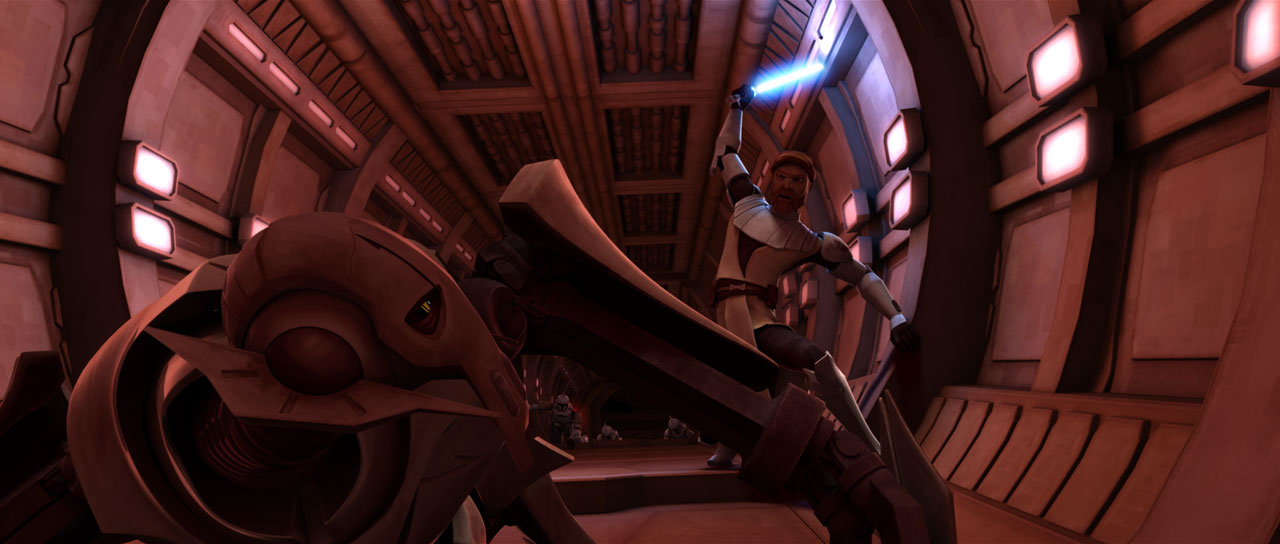
Before Grievous could reach the docking tube and escape back to his destroyer, one of Cody's men fired their blaster rifle's cable at the General and electrocuted him, allowing the clones to reel the cyborg in and pile on top of him. Grievous threw the troopers off of him and made a break for the docking tube, but was followed into the tube by Kenobi, Cody, and several clones. The Separatist destroyer had begun firing on the cruiser's engines, causing the vessel to jostle and heave uncontrollably. The tremors shifted the docking tube into a steep angle, throwing Grievous, Kenobi, and the clones to the floor. The cyborg escaped the tube after a short duel with Kenobi and attempted to ensure the Jedi's death by sealing him within the damaged docking tube. Grievous was stopped by Gallia, who engaged him in a duel. During their melee, the heavily damaged Republic cruiser dipped far below the Confederate destroyer, causing the docking tube to rupture and expose those within to the vacuum of space.
While Grievous escaped the distracted Jedi, Gallia pulled Kenobi and Cody into the safety of the destroyer using a grappling cable. Kenobi reluctantly agreed to postpone his pursuit of Grievous in favor of escaping the destroyer and contacted Skywalker to arrange an extraction from the ship. He, Gallia, and Cody met Skywalker in one of the destroyer's hangars and fled the vessel on the Eta-class shuttle. As the damage to Kenobi's cruiser caused it to explode, Grievous boarded a C-9979 landing craft bound for Saleucami's surface. Debris from the destroyed cruiser collided with the craft during its descent, throwing it into an uncontrolled free-fall towards Saleucami. Grievous and the droids aboard the landing craft scuttled the doomed vessel, fleeing on numerous escape pods that scattered across a large region of Saleucami. The Jedi returned to the Republic fleet to prepare for the next phase of the battle, with Kenobi leading the hunt for Grievous on the surface while Skywalker commanded the battle in space.
To eliminate the remaining Confederate naval forces, General Skywalker ordered the deployment of all starfighters in a concentrated effort to destroy Grievous's Recusant-class destroyer. The Republic's BTL-B Y-wings and V-19 Torrent fighters were engaged by waves of Vulture droids, Hyena-class bombers and tri-fighters while making their way towards the Confederate forces, but managed to destroy their attackers and disable the turbolaser turrets on the destroyer and its escorting frigates. After the Republic pilots completely destroyed one of the frigates, three more Munificent-class frigates emerged from hyperspace to support the crumbling Separatist forces. These vessels were supported by several more waves of Vulture droids, but Skywalker's fighters were able to destroy the droid combatants. Once the droid starfighters were neutralized, the Confederate frigates were almost immediately met by four newly-arrived Republic Venator-class Star Destroyers, marking the end of the orbital engagement. Skywalker recalled his fighters as his reinforcements mopped up the remaining Separatist vessels.
Hunt on the surface
Kenobi arrived on Saleucami's surface in an Acclamator-class assault ship carrying a contingent of clones and All Terrain Tactical Enforcers assigned to search the planet and capture Grievous. Accompanying Kenobi were Commander Cody of the 212th Attack Battalion and Captain Rex, the latter of whom was leading a squad of troopers from the 501st Legion on BARC speeders. While Kenobi's forces headed for the downed Confederate landing craft, Grievous and the droids he had escaped with regrouped and assessed their situation. The transmitter in their pod had been destroyed during the landing, and only one other escape pod was still functioning. Unable to contact the Separatist fleet in orbit for extraction, Grievous and his droids set off for the other functioning escape pod. During the trek to the pod, the cyborg used one of Saleucami's reeks as a mount and several eopies to carry supplies, but refused to allow the droids under his command to ride any of the creatures or stop to recharge their power cells. When one of the B1 battle droids accompanying him explained that their power was running low, Grievous bisected it with one of his lightsabers in frustration.
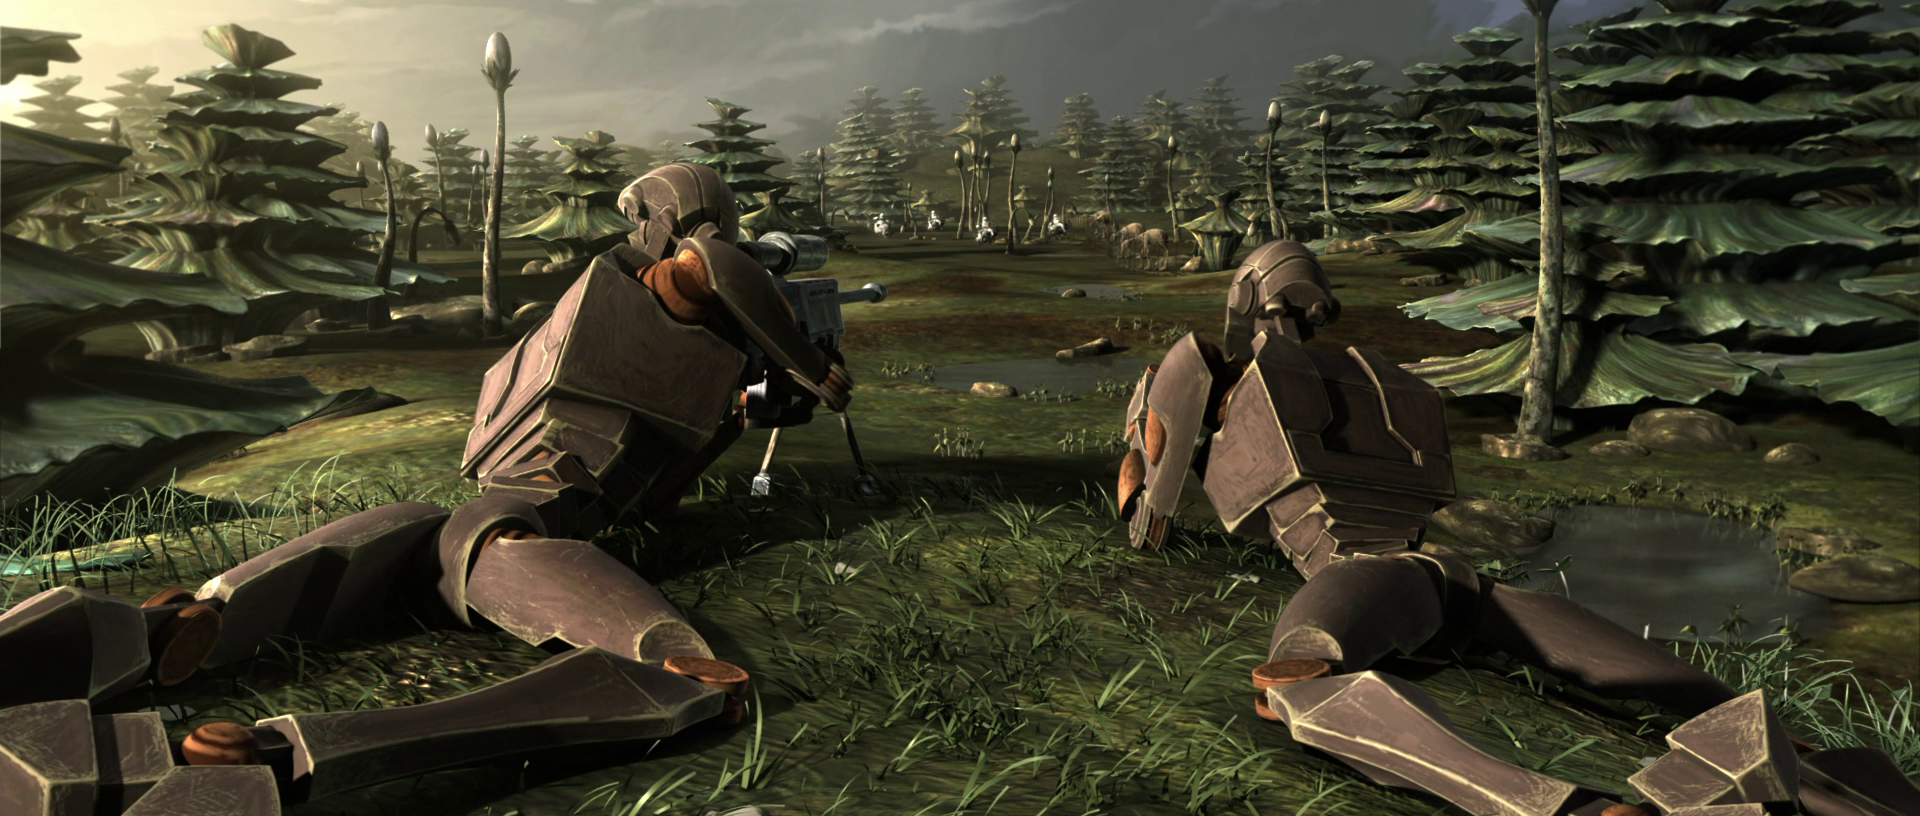
The Republic's military units made their way to the wreckage of the crashed landing craft, and upon examining the debris, they concluded that the crash had happened not long before their arrival. Kenobi gave Rex instructions to lead troopers Jesse, Hardcase, and Kix on a scouting mission of the Saleucami wetlands using their BARC speeders, while he and Cody would continue leading the AT-TEs in their search across the arid landscapes. After they set off on their assignment, Rex's team found themselves under attack by a pair of droid commandos. One of the commandos, using a sniper rifle, shot Captain Rex in the chest, causing him to fall from his speeder. While Jesse and Hardcase chased after and eliminated the droids, Kix, who served as the squad's medic, stayed behind to protect the injured Captain. Following a quick assessment, Kix determined that he needed to remove Rex's armor in order to fully evaluate the extent of his injuries, but the team decided to first find a safe place to take cover from any potential enemy reinforcements. Realizing that they were on farm land, the clones started looking for the farm's main house. Meanwhile, General Kenobi, Commander Cody, and trooper Crys were performing a robolobotomy on a deactivated battle droid they discovered near the crashed landing craft. The droid's memory logs revealed that the escape pod it was in had crashed because it nearly collided with another pod during its descent. Using this information, Cody was able to figure out the general location of the other pod.
Rex's team reached the farm's homestead and were greeted by Suu Lawquane, the Twi'lek wife of the farm's owner. Initially, she refused to help the soldiers, but she eventually agreed to let them use the benches in her eopie barn as a place to treat their Captain. Kix did his best to heal Rex by applying a bacta patch over his wound; however, the Captain had suffered significant nerve damage, which caused temporary paralysis in his left arm. After regaining consciousness, Rex insisted on continuing the search for Grievous, but Kix wouldn't allow his Captain to leave his makeshift bed. After a brief argument and an interruption from Suu and her daughter, Shaeeah, Rex agreed to stay in the barn while the rest of his team, under Jesse's command, resumed the search.
After departing from the farm, Jesse, Kix, and Hardcase received a communication from General Kenobi, who had found a second pod that he believed had carried Grievous to the surface of Saleucami. Kenobi deduced that the cyborg General was heading towards another escape pod and instructed Jesse to meet him at Grievous's location. Grievous, in the meantime, was getting closer to his destination, but he was steadily losing battle droids as their power supplies depleted and they shut down. After night fell on Saleucami, Rex was confronted by Suu's husband, who had returned from delivering his harvest. The man was Cut Lawquane, who Rex soon realized was a clone trooper who had deserted from the Grand Army. Despite some initial hostility between them, Lawquane welcomed Rex into his home for dinner and spent time talking to the trooper about his reasons for abandoning the army and trying to convince Rex that the GAR's methods went against the idea of free will. Rex disagreed, but he developed a reluctant respect for Lawquane because of his dedication to his children, Shaeeah and Jek.
The end of the pursuit
As Shaeeah and Jekk were playing in Lawquane's field, they stumbled upon an escape pod that had fallen from Grievous's ship after the battle in orbit. Not knowing what it was, they both went inside the pod and accidentally activated it, releasing a full platoon of BX-series droid commandos that it was carrying. The frightened children ran back to the homestead, claiming that they were being chased by monsters from the "big egg" in the field. Lawquane went to investigate and discovered that the commandos—numbering twenty in total—were approaching the house. The former trooper told Suu to take Jekk and Shaeeah to the upper level of their home and hide there with them. Suu followed his instructions and took the children to hide from the droids, while Rex and Lawquane armed themselves to prepare for the droids' arrival. Although the Captain wanted to stay with Lawquane, the farmer insisted that he could handle things on the first floor and that Rex needed to position himself upstairs as the last line of defense for his family.
Rex agreed and left Lawquane on the lower floor. The droids started entering through the doors and windows, but the farmer easily fought them off. However, they eventually managed to get into the cellar and surprised Lawquane by coming up through a hatchway in the floor. As Lawquane was overwhelmed by a commando and pinned under support beams that had fallen from the home's ceiling during the fight, several of the droids made their way upstairs, where they encountered Rex. The clone destroyed the droids but was ambushed and tackled by an oncoming commando. Rex fell through a hole in the second story floor as the home's structure was weakened by blaster fire from Lawquane's battle on the first floor. The Captain landed next to Lawquane and was almost killed by an attacking commando, but the farmer saved him by shooting the droid in the head. With all the droids destroyed, the family was able to breathe a sigh of relief.
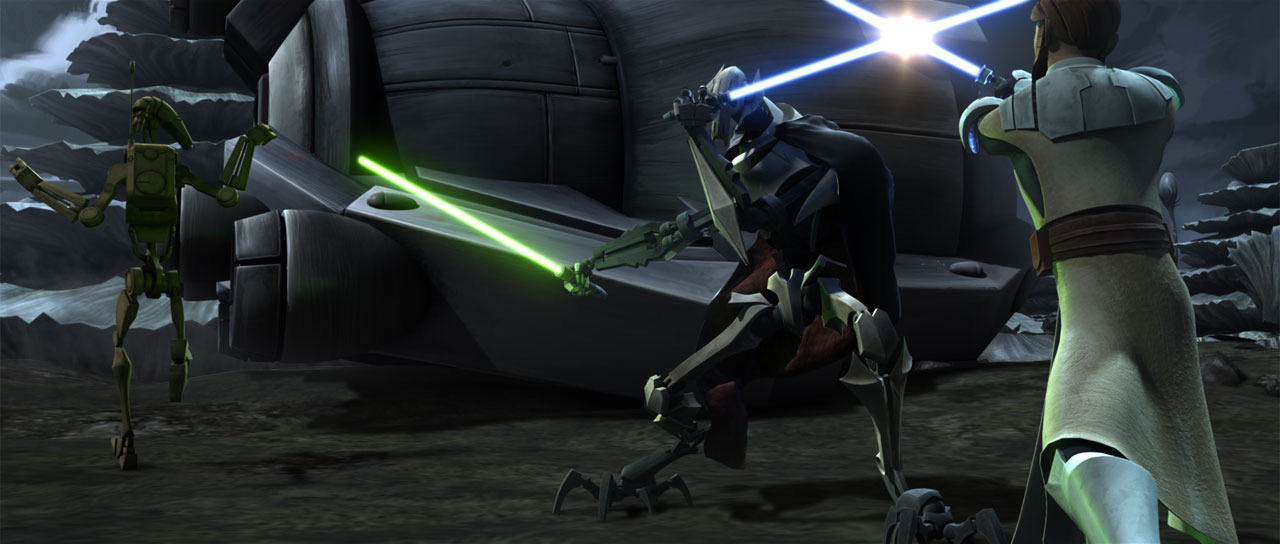
Elsewhere on the planet, General Grievous arrived at the location of the final escape pod. While the B1 battle droids at the pod sent out a distress signal to the fleet in orbit, Grievous prepared for battle against Kenobi and his forces, who were quickly approaching his location. As the Republic forces got within range, the droids under the cyborg's command opened fire on Kenobi's AT-TE walkers. The walker that the Jedi General was riding in was quickly struck in the leg by a missile, disabling it, while the other walker managed to use its mass-driver cannon to intercept the incoming missile fire. Jesse, Kix, and Hardcase arrived at the battlefield and engaged the droids on their BARC speeders, while a Confederate Sheathipede-class shuttle from the fleet arrived to take Grievous away from the battle zone.
Kenobi was alerted to the arrival of the shuttle and ordered his remaining AT-TE to shoot it down. Although the walker was somewhat successful in preventing the shuttle from landing, its cannon soon overheated, rendering it useless. The shuttle's droid pilots took advantage of this opportunity to approach Grievous's location, prompting Kenobi to join the fight. The Jedi charged towards the cyborg, cutting down several of his droid defenders before engaging Grievous himself in combat. The two fought briefly, but Grievous managed to escape Kenobi by throwing his cape in the Jedi's face and climbing up the side of the downed escape pod. As Kenobi tried to pursue him, Grievous ordered the shuttle to abort its landing and simply hover over the battlefield. The cyborg reached the top of the escape pod and fired a grappling hook built into his arm into the hull of the waiting shuttle. The shuttle sped away with Grievous hanging beneath it, deflecting blaster bolts from clone troopers below. When Commander Cody arrived at Kenobi's side to check on the General's condition, the Jedi requested that the clone contact the fleet in orbit and order them to intercept the ship. General Kenobi realized, however, that Grievous had once again slipped through his fingers.
The Aftermath
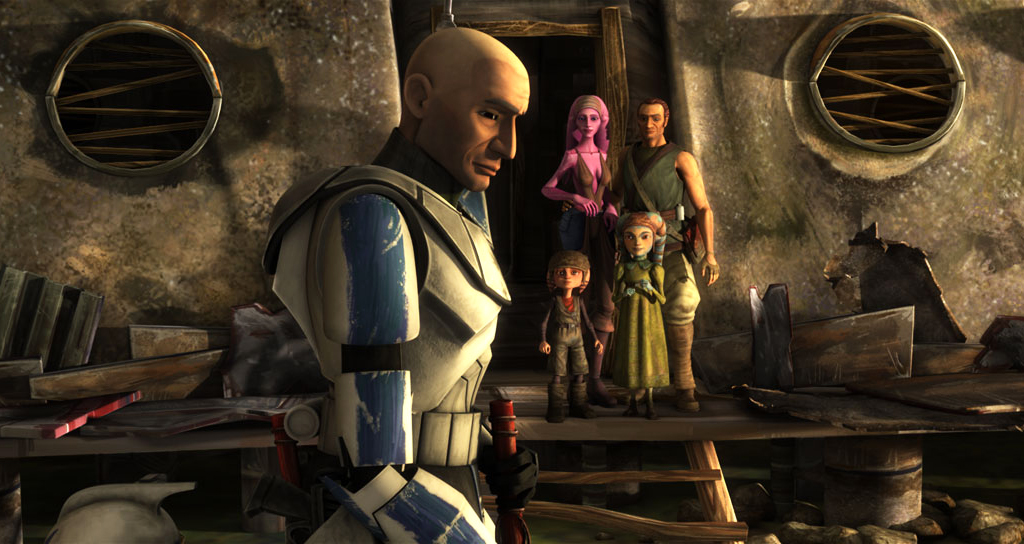
The next morning, the Republic forces that were still on Saleucami's surface gathered together and began boarding an Acclamator-class assault ship to be transported off the planet. At the Lawquane farm, Captain Rex was getting ready to leave and rejoin his men. As he loaded an eopie that the family had lent him, Suu asked him if he planned to report her husband to the Republic authorities for his desertion. Rex admitted that he was still obligated to do so, but he probably wouldn't "remember" the encounter due to his injuries. Rex was thanked for his discretion before General Kenobi contacted him. The Jedi expressed his regret that Rex had missed the fight against Grievous, but the Clone Captain assured Kenobi that he had his own important battle to deal with. The Captain then left the farm to rejoin the larger war and leave the Lawquane family in peace.
Despite Grievous's defeat there, Saleucami once again fell under the control of the Confederacy during the Outer Rim Sieges later in the war.
Behind the Curtain
The initial conflict on Saleucami was showcased in episodes nine and ten of the second season of the Star Wars: The Clone Wars animated series. The episodes, entitled "Grievous Intrigue" and "The Deserter," were the only episodes in the season to feature General Grievous, even though he was a prominent recurring character in the series' first season. These episodes and the battle also served to introduce Jedi Masters Adi Gallia and Eeth Koth to the series. Koth, who had previously been confirmed as having died during the First Battle of Geonosis, was retconned to have survived so that he could appear in "Grievous Intrigue."
In addition to the characters, the battle also introduced three new starship designs to the series. The Separatist destroyer in "Grievous Intrigue" was inspired by the Confederate Recusant-class destroyer, which first appeared in Star Wars: Episode III Revenge of the Sith. The other two ships—the Republic light cruiser and the Jedi ambassadorial shuttle—were completely new to both The Clone Wars series and Star Wars canon.
This battle is actually the second depiction of a conflict on this world. The initial battle to be portrayed on Saleucami was featured in the Siege of Saleucami story arc of the Star Wars: Republic comic series, and it was briefly seen in Revenge of the Sith. That conflict, known as both the "Battle of Saleucami" and the "Siege of Saleucami," occurs in the final stages of the war, well after the battle depicted in The Clone Wars. Given the chronological placement of the pre-existing conflict, this article initially adopted the "first battle of Saleucami" as a speculative title for The Clone Wars battle, but now it simply uses "battle of Saleucami," due to the event's official naming in Star Wars: Clone Wars Adventures.