Endor shield generator bunker
The Endor shield generator bunker functioned as an Imperial installation situated on Endor's forest moon. It encompassed the Death Star II's deflector shield generator, a spacious landing zone, a fortified bunker, a primary entrance, and a concealed rear entrance. The ground engagement of the Battle of Endor unfolded primarily around this clandestine back entrance.
Attributes
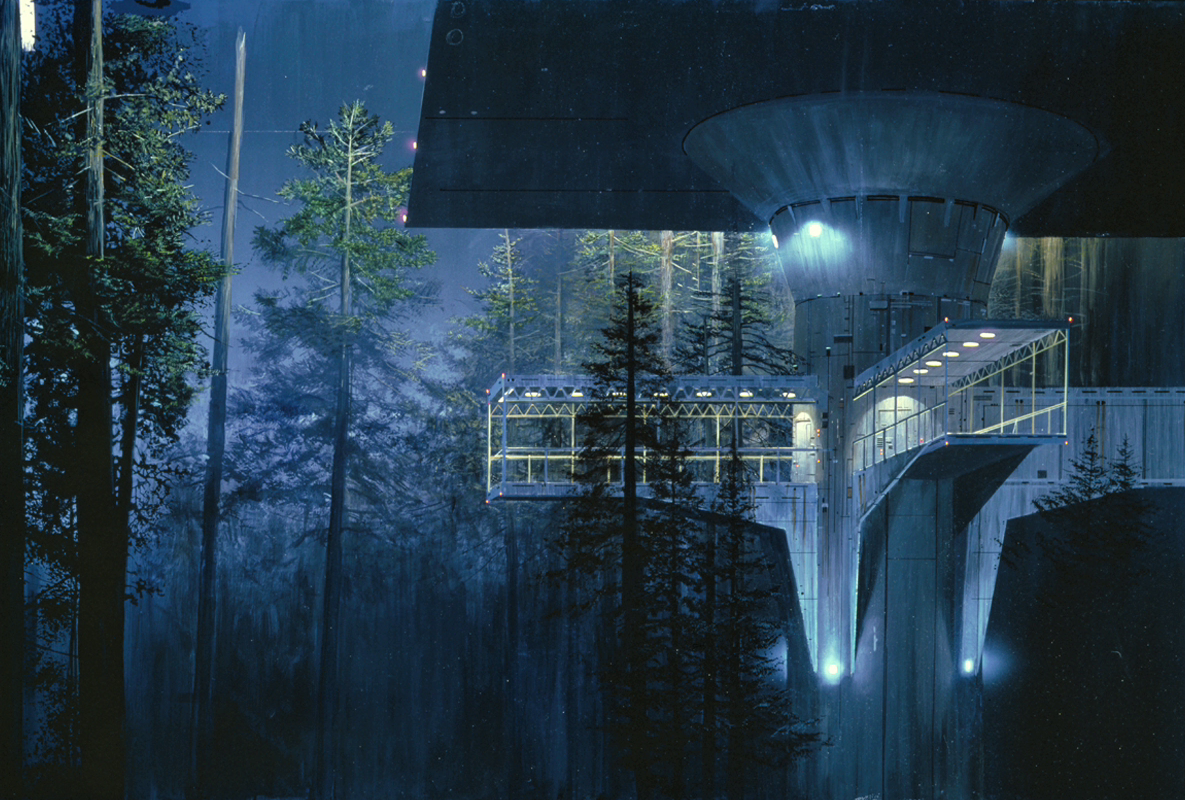
This installation was sizable, featuring a landing area capable of accommodating a minimum of two Lambda-class T-4a shuttles. Its elevation reached at least 22.5 meters above ground level, evident from the fact that an All Terrain Armored Transport belonging to Tempest Force, the bunker's security detail, specifically Tempest 1, stood shorter than it. The landing platform's support framework incorporated several under-mounted catwalks, linked to the platform's surface via elevators. These catwalks served as docking points for AT-AT walkers. The main access point was located on one facet of the landing zone.
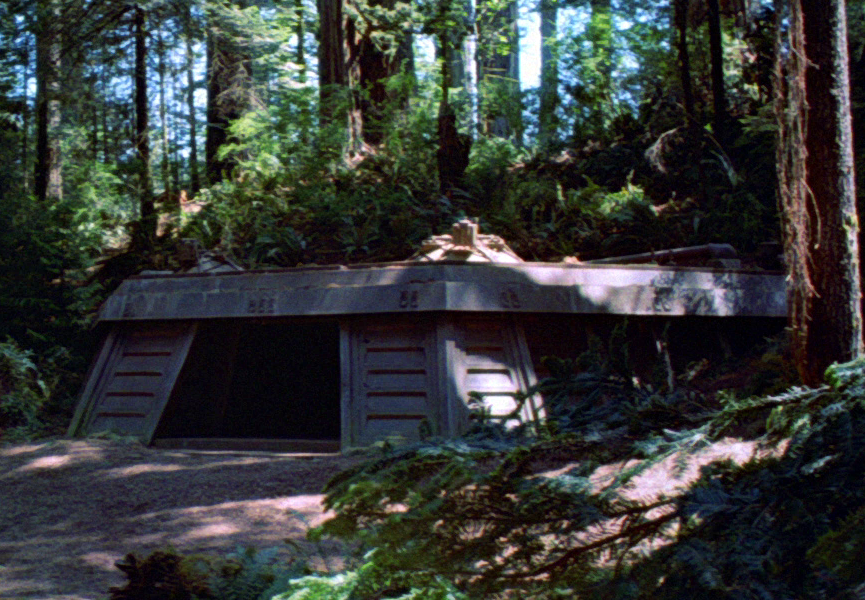
The base included a rear entrance that opened into a compact bunker. Carved into a hillside with a small open area in front, it was secured by blast doors. The bunker's interior comprised a labyrinth of extended corridors that ultimately descended into the main power control center. This center was defended by stormtroopers along with several Death Star troopers under the command of Major Hewex, Lieutenant Grond, and Colonel Dyer. The control room itself was equipped with a series of computer terminals, a display screen mounted on one wall, and two points of entry: one leading to the bunker's network of hallways and the other providing access to the generator chamber. The generator room's vertical space spanned approximately two stories from the generator base to the ceiling, and it featured a small, railed catwalk overlooking the area.
Historical Context
Establishment

When the Galactic Empire required a fresh location to construct the second Death Star, the Forest Moon of Endor was selected. Construction of the bunker commenced sometime between 0 ABY and 3 ABY on the grounds of the Dulok Swamp, formerly inhabited by Gorneesh's tribe. Many of the indigenous Duloks were forced into slave labor for the project. Darth Vader, accompanied by members of the Emperor's Royal Guards, personally supervised the bunker's development.
Upon arrival of Imperial units tasked with building the bunker's deflector shield generator complex and related facilities, they encountered Rebel Alliance Captain Junas Turner, who had journeyed to the moon to uncover the location of the new Death Star. He was captured and incarcerated at the automated prison facility Balis-Baurgh, alongside an Ewok named Grael. Although they later managed to escape, they were unable to relay the intelligence about the looming threat to the Rebellion in time.
The Endor Confrontation
Around 3–4 ABY, a Rebel Alliance assault team, under the leadership of Dash Rendar and Luke Skywalker, secured vital data from the cruiser Suprosa stationed at Kothlis. This information verified the existence of a second Death Star, along with the location of both the battle station and the shield generator bunker. Unbeknownst to the Rebels, Emperor Palpatine had intentionally allowed the plans to fall into their hands, intending to lure them into a carefully orchestrated trap. To ensure the Rebels could not disable the shield generator before the Rebel fleet's arrival, Palpatine established Tempest Force, a specialized unit composed of elite personnel from the Imperial Army, Navy, and Stormtrooper Corps. This force, comparable in size to a stormtrooper legion, was tasked with guarding the generator, anticipating the potential for an infiltration attempt on the moon.
The Rebel fleet gathered near Sullust and devised a strategy to destroy the Death Star II. A Rebel strike team, commanded by General Han Solo, was assigned to infiltrate Endor and neutralize the shield generator bunker, rendering the Death Star vulnerable. Simultaneously, the fleet, under the command of Admiral Gial Ackbar, along with a substantial starfighter contingent led by General Lando Calrissian, would execute a jump to Endor via hyperspace and engage the unshielded, incomplete Death Star.
Han and his commando unit were accompanied by Princess Leia Organa, Chewbacca, Luke Skywalker, C-3PO, and R2-D2. They utilized the stolen Imperial shuttle Tydirium to bypass Imperial defenses and land on the moon, where they encountered the Bright Tree Village Ewok tribe. The Ewoks pledged their support to the Rebels in their struggle against the Imperials on Endor.
Skywalker, fearing his presence would jeopardize the mission, separated from the group and allowed himself to be captured by Commander Igar, who delivered him to Darth Vader on the shield generator's landing platform. On the platform's catwalks, Luke implored Vader to return to the light side, but Vader resisted, steadfastly refusing to betray his master, Palpatine. Vader and Luke departed Endor, with Vader escorting Luke to Palpatine aboard the Death Star. Hours later, Ewok scouts guided the strike team to a ridge overlooking the shield generator's landing platform. Acting on the advice of an Ewok, Wicket Wystri Warrick, the team proceeded towards the secret entrance, guarded by only four scout troopers. Another Ewok, Paploo, commandeered a speeder bike, prompting three of the guards to pursue him. Solo drew the attention of the remaining guard, leading him around the side of the bunker's entrance, where the rest of the Rebels lay in wait, weapons trained on the trooper. The guard surrendered, and Rebel Nik Sant donned the guard's uniform, assuming his post while the team infiltrated the bunker.
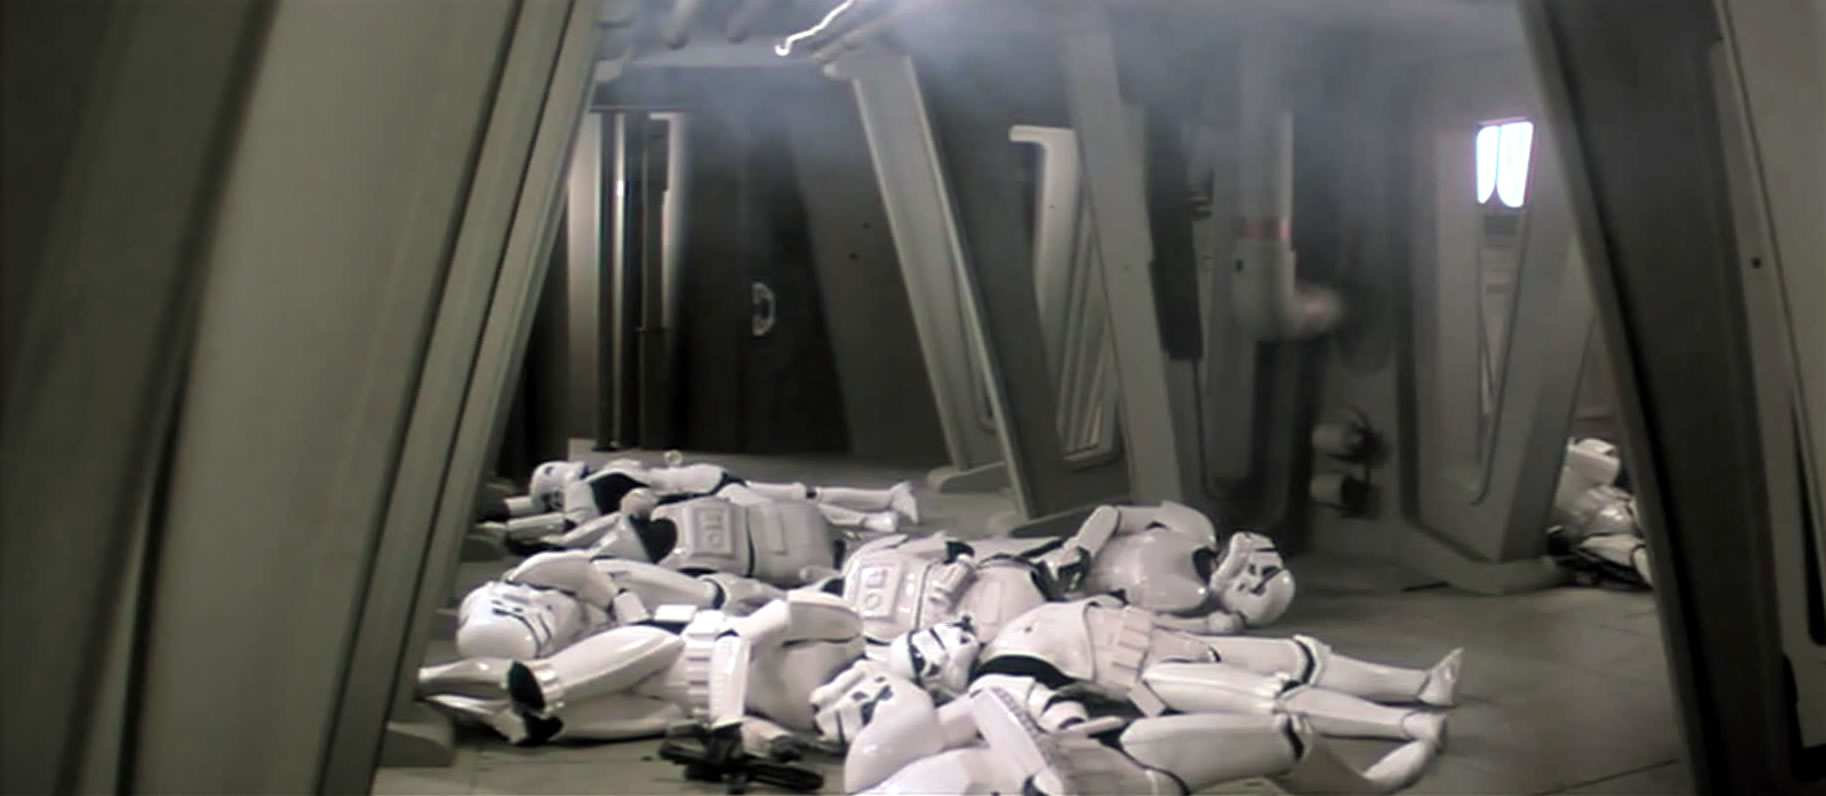
Inside, they encountered a squad of stormtroopers in one of the corridors, leading to a firefight. The stormtroopers were eliminated, with the Rebels sustaining only minor casualties. The Rebels advanced and reached the control room. They entered and forced the Imperial personnel, including Major Hewex, against the wall, as they prepared to set charges. As part of the Emperor's scheme, the remainder of Tempest Force was prepared for their arrival and began entering the bunker. The first to arrive, Colonel Dyer, attempted to confront the Rebels, but Han hurled a charge at him, sending him over a railing into the generator room below, resulting in his demise. The remaining Imperials, led by Lieutenant Renz, arrived and captured the Rebels. Above the moon, the fleet arrived but could not engage the Death Star due to the active shield. Calrissian recognized this and ordered their fighters to retreat, though some were unable to avoid colliding with the shield. A massive Imperial fleet emerged from behind the far side of the moon and launched its fighters.
On the Death Star, as Luke was presented to the Emperor, Palpatine contacted the station's commander, Moff Tiaan Jerjerrod, and instructed him to fire the superlaser at the moon should the Rebels succeed in destroying the shield generator bunker.

As the Rebels were being escorted out of the bunker, the Ewoks, aided by an impromptu diversion from C-3PO and R2-D2, attacked the Imperials. The Rebels seized the opportunity amidst the ensuing chaos. A group of Imperial officers barricaded themselves inside the bunker, and R2 sustained a blaster hit while attempting to open the doors. Han attempted to override the system, but inadvertently closed the blast doors. Meanwhile, Chewbacca and two Ewoks captured an AT-ST and brought it to the bunker's entrance. Han, disguised in a stolen Imperial uniform and posing as Major Marquand, contacted the bunker's control room via the walker and informed Hewex that the Rebels were fleeing and that Imperial assistance was needed to pursue them. Hewex fell for the ruse and ordered the back door to be opened, allowing three squads to assist. As the Imperials exited the bunker, they were quickly surrounded by Rebel forces and promptly surrendered.
Solo and his team re-entered the bunker, planted the explosive charges, and initiated the timer. As they hastily evacuated the bunker, Imperial Storm commando Sarkli attempted to prevent Solo's escape, but was shot near the entrance. Solo continued out of the bunker and took cover shortly before it detonated, obliterating the shield generator and enabling the Rebel fleet to commence their assault on the Death Star.
When the personnel in the Death Star's control room realized that the deflector shield had been deactivated and they were unable to establish contact with the shield bunker, Jerjerrod was notified and reluctantly issued the order to fire on the moon. However, the Death Star was destroyed before it could execute the command.
Aftermath
Thirteen months following the battle, in 5 ABY, one of the strike team members and a scout trooper, both stranded on Endor since the conflict, stumbled upon the remnants of the shield generator bunker. Having been unaware of the battle's outcome, the destroyed shield generator confirmed the Rebel victory.
Behind the Scenes
The setting for the Endor shield generator bunker was located near the Smith River's redwood forests. In 2010, the Star Wars Insider staff attempted to locate the area at the request of longtime Star Wars fan Brandon Alinger, but the search proved elusive. They later documented their efforts in the article "The Hunt for Endor's Forest Moon," featured in issue 122 of the magazine.
At Disney Hollywood Studios theme park in Florida, a replica of the shield generator bunker serves as the backdrop for the stage that hosts the Jedi Training Academy attraction.
The shield bunker is featured in both the Leia Organa and Darth Vader campaigns in the 2001 video game Star Wars: Galactic Battlegrounds. The Darth Vader Battle of Endor mission presents an alternate-history scenario, while the Leia Organa mission contradicts the film's narrative. The bunker has also been reimagined in LEGO form in the 2006 video game LEGO Star Wars II: The Original Trilogy.
The bunker also serves as the location for the battle in the alternate-history scenario presented in the Star Wars: The Force Unleashed II Endor downloadable content. Darth Vader's Dark Apprentice tracked down and eliminated Leia Organa, the last of the Jedi.