All Terrain Heavy Hauler
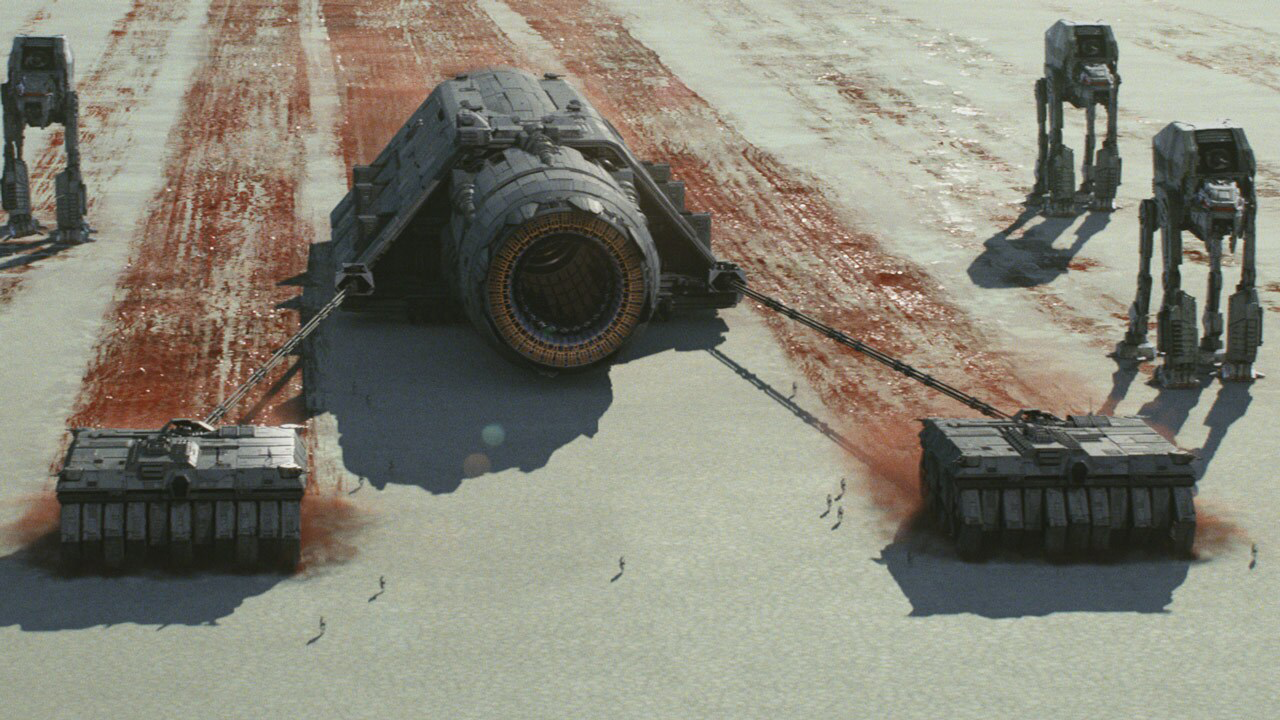
The All Terrain Heavy Hauler (AT-HH), alternatively known as the Tug Walker, represented a walker design utilized by the First Order throughout their conflict against the Resistance. During the Battle of Crait, two of these walkers were deployed to tug a superlaser siege cannon in the direction of the Resistance base. While their main function involved towing substantial ground-based weaponry, they possessed considerable defensive capabilities. The cables employed to tow the superlaser were constructed from 27,572 individual steelton wires. In addition to this, the mech had impressive defenses consisting of a medium fire-linked dual laser cannon on each corner, along with matrixed composite armor on par with the All Terrain MegaCaliber Six. They further benefited from support provided by patrolling snowtroopers, AT-M6s, First Order AT-ATs, and TIE starfighters.
Characteristics
The AT-HH was engineered to fulfill the specialized task of transporting extremely heavy payloads across the battlefield. Its distinctive multi-legged configuration, reminiscent of insects and crustaceans, delivered exceptional strength while ensuring mobility even with damaged legs.
This walker was equipped with three rows of legs that could be rotated and repositioned. The front row contained eleven legs, while the middle and rear rows each had ten. Backup legs were incorporated as a safety measure in case the primary legs failed. Each leg was connected to a robust dowel structure and built with durable hinge joints and refined durasteel bearings. Power was supplied by a main piston actuator, combined with strong "knuckle" actuators and hydraulic "tendon" pistons. This design proved to be quite effective, as the tug walkers demonstrated the capability to complete their objectives even with over forty percent of their limbs out of operation during field tests conducted on Dromondar Beta.
The AT-HH's flat upper deck was shielded by thick armor plating, and each corner was armed with a medium fire-linked dual laser cannon, for a total of four. These turrets were operated from the two engineering and gunnery stations situated on the port and starboard sides of the walker. The bridge was positioned at the front of the deck, offset towards the starboard side near the primary sensor node hub. First Order Walker Drivers and the vehicle commander were stationed there in a layout similar to that of an AT-AT.
During combat scenarios, the AT-HH relied on a combination of escort units and its own defensive systems for protection. Each individual strand within the tow cables that linked the walker to its payload consisted of a bundle comprising 27,572 steelton wires, capable of withstanding direct laser cannon fire. These cables could be used to haul various objects, ranging from crippled warships to prefabricated base modules, drawing power from the onboard fusion reactor.
History
In 34 ABY, the First Order strategically deployed a superlaser siege cannon with the intention of breaching the main defensive structure of the Resistance hideout located on the planet of Crait. During the subsequent Battle of Crait, two AT-HHs successfully tugged the cannon beneath the planetary shield.