Battle of Ottega
The Battle of Ottega, a conflict within the Galactic Civil War, unfolded in the Ottega system. Initially anticipated as a straightforward operation to eliminate the remaining forces of the traitorous Admiral Harkov, the battle unexpectedly marked the beginning of the Grand Admiral Zaarin Insurrection.
Prelude
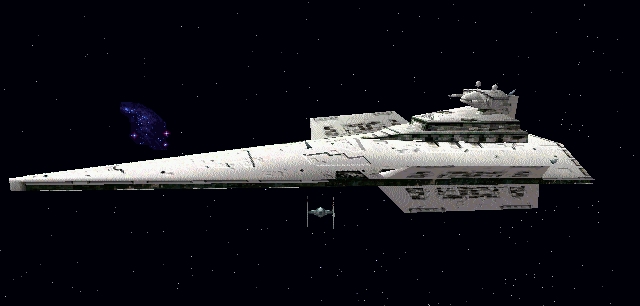
Following the demise of Admiral Harkov by execution, the Galactic Empire resolved to eradicate Harkov's residual military strength. The surviving elements of his fleet, specifically the Victory-class Star Destroyer named Protector, were successfully tracked down within the Ottega system. This warship had docked at a location where Rebel forces had left cargo containers to resupply the traitorous troops. Darth Vader then deployed a fleet into the system, spearheaded by the Imperial-class Star Destroyer Garrett and accompanied by the Interdictor cruiser Harpax.
The battle
Trap the Protector
The Harpax warped into the system near the Protector, immediately activating its gravity well projectors to prevent Harkov's allied forces from escaping. Two flight groups of TIE Avenger starfighters, deployed from the Harpax, received orders to obliterate the cargo containers, thus disrupting the enemy's resupply efforts, and to safeguard the vulnerable Harpax against any potential counterattacks until more Imperial reinforcements could arrive.
Upon exiting hyperspace, TIE Avengers designated as Alpha encountered TIE/IN interceptors labeled H-Delta rapidly approaching with warhead launchers primed. Dividing their flight group, Avengers Alpha proceeded to destroy the Rebel supply containers while their wingmen engaged the harassing TIE/LN starfighters, TIE/IN interceptors, TIE/sa bombers, and Avengers. Imperial starfighters swiftly succeeded in destroying the supply cache, then shifted to repelling enemy fighters. Avengers Alpha regrouped near the Harpax, awaiting the arrival of additional Imperial forces. Remaining traitorous TIEs continued their pursuit, joined by the Mon Calamari MC40a light cruiser named Warhawk. Z-95 Headhunters and T-65 X-wing starfighters, launched from the Warhawk, soon entered the fray and began attacking the Harpax. Shortly thereafter, the Nebulon-B frigate Akaga also emerged from hyperspace, deploying more Z-95s. Imperial TIE Avengers reacted quickly to neutralize the looming threat to the Interdictor Harpax as Z-95 Headhunters from the Akaga initiated attacks with proton rockets and bombs. The Avengers successfully intercepted the incoming warheads using laser cannonfire while eliminating the remaining starfighter threats. The Assault Transports Lambda arrived on the scene, followed by Avengers Alpha and Beta, who returned to their hangars to prepare for the next assault.
Destroy the Akaga

With the arrival of the frigate Akaga, Imperial pilots from TIE Avenger Alpha redeployed to the battlefield to defend the Interdictor. Anticipating the arrival of Darth Vader aboard the Imperial-class Star Destroyer Garrett, TIE Avengers Alpha entered the system equipped with space bombs to destroy the Akaga. Alpha inflicted the initial, devastating blow on Akaga, collapsing the warship's shields with a single volley of space bombs. As Avenger squadrons depleted their warhead magazines and prepared for reload operations, the Delta-class DX-9 stormtrooper transport Goya arrived. Avengers Beta and Gamma provided cover for the attack operations on the Akaga by intercepting incoming enemy TIEs and Z-95 Headhunters. Members of Alpha flight conducted docking operations until the Akaga succumbed to their massive missile assault. With the frigate eliminated, Imperial Avengers continued their mop-up operations as the Garrett arrived. The operation's tempo increased with Darth Vader's presence; Imperial pilots reported to the Garrett to prepare for the next phase of the attack.
Retribution
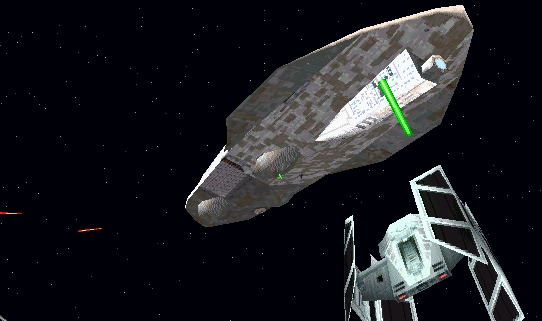
Maarek Stele and his wingmen were dispatched once again, flying TIE Avengers, this time with the objective of eliminating the Protector and the Warhawk before they could destroy the Harpax and escape. With neither ship possessing any remaining fighters, Stele's flight group faced a relatively straightforward task.
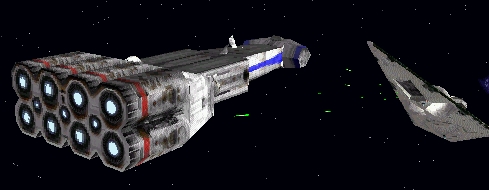
Targeting the Warhawk initially, the cruiser was swiftly destroyed, and the Imperials then focused their attention on the Protector. At this juncture, several Alpha-class Xg-1 Star Wings arrived. These ships formed the vanguard of a force dispatched by Grand Admiral Demetrius Zaarin, ostensibly to aid the Imperials in the area. However, the Gunboats instead targeted the TIE Avengers of Stele and his colleagues.
As the TIE Advanced closed in on the Protector, Zaarin's Assassin-class corvettes arrived, followed by several Gamma-class ATR-6 assault transports. However, instead of engaging the Protector, they commenced firing upon the Garrett and other loyal Imperial vessels. The Immobilizer 418 cruiser, Harpax, which had been attempting to flee the battle, was intercepted by a portion of the traitorous forces. Having sustained damage in earlier engagements, the interdictor was destroyed, enabling the Protector, under a barrage of torpedo fire, to activate its hyperdrive. Its escape attempt proved futile, however, as Stele personally destroyed the defecting Star Destroyer. Subsequently, a small Rebel force, consisting of two CR90 corvettes, two Delta-class JV-7 escort shuttles and several B-wing starfighters arrived, but this was disregarded as Zaarin's forces posed a greater threat to the Garrett. Stele spearheaded an attack on Zaarin's forces, obliterating their entire contingent while sustaining minimal casualties. With the traitors vanquished, Stele eliminated the remaining Rebel force before landing on the Garrett.
Aftermath
Having uncovered Zaarin's treachery, Darth Vader resolved to hasten to Coruscant to thwart Zaarin's attempted coup. However, the Garrett was too severely damaged to travel to the Imperial Center. Vader selected five elite pilots, including Maarek Stele, to accompany him in piloting six TIE/D Defenders to Coruscant.
Behind the scenes
The battle was initially presented in the 1994 LucasArts video game Star Wars: TIE Fighter, where players assume the role of Maarek Stele. The battle is depicted in the initial three missions of the game's seventh tour of campaign, "Treachery at Ottega."
While saving the Harpax is possible within the game, its destruction is confirmed within Maarek Stele's mission report in TIE Fighter: The Official Strategy Guide.