Treachery at Ottega
The Treachery at Ottega unfolded as a campaign within the Parmel system. Orchestrated by the Galactic Empire, its objective was the annihilation of Admiral Harkov's remaining forces. Simultaneously, Grand Admiral Demetrius Zaarin launched a coup d'etat against Emperor Palpatine. Imperial forces achieved victory by obliterating Harkov's flagship alongside other Rebel Alliance elements. However, Zaarin's own units then appeared, moving to intercept Imperial starships, including Darth Vader's Garrett. Utilizing the newly developed TIE Defender, Vader pierced Zaarin's defensive lines in a bid to reach the Emperor. With the assistance of Maarek Stele, the Sith Lord successfully shielded Palpatine from Zaarin's assault but ultimately could not destroy Zaarin's flagship.
The Campaign
Trap the Protector
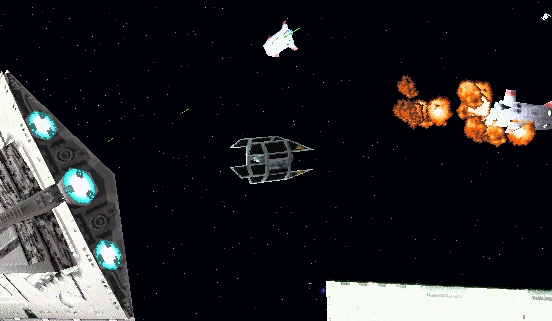
Vader had successfully tracked down the surviving elements of Admiral Harkov's fleet, notably the Victory-class Star Destroyer Protector. This warship had paused in a system where Rebel units had left cargo containers intended to resupply the remaining traitorous forces. Concurrently, the Interdictor cruiser Harpax warped into the system near the Protector, activating its gravity well projectors to prevent the escape of Harkov's fleeing allies. Two flight groups of TIE Avenger starfighters were launched from the Harpax, tasked with destroying the cargo containers to impede the traitor's resupply efforts and safeguarding the vulnerable Harpax from any counterattacks until more Imperial reinforcements arrived.
After emerging from hyperspace, TIE Avengers in Alpha squadron encountered TIE/IN interceptors in H-Delta squadron rapidly approaching with armed warhead launchers. Dividing their flight group, Avengers Alpha set about destroying the Rebels' containers while their wingmen dealt with the harassing TIE/LN starfighters, Interceptors, TIE/sa bombers, and Avengers. Imperial starfighters swiftly accomplished the destruction of the supply cache, then transitioned to repelling the enemy fighters. Avengers Alpha regrouped near the Harpax, awaiting the arrival of additional Imperial forces. The remaining traitorous TIEs continued their pursuit, joined by the Mon Calamari MC40a light cruiser Warhawk. Z-95 Headhunters and T-65 X-wing starfighters soon entered the battle from the Warhawk and began attacking the Harpax. Shortly thereafter, the Nebulon-B frigate Akaga also jumped out of hyperspace, launching TIE Bombers. Imperial TIE Avengers acted quickly to neutralize the incoming threat to Interdictor Harpax, while Z-95 Headhunters from the Akaga began firing proton rockets and bombs. The Avengers managed to intercept the incoming warheads with laser cannonfire while also eliminating the remaining starfighter threats. The Assault Transports Lambda arrived on the scene, followed by Avengers Alpha and Beta, who returned to their hangars to prepare for the next engagement.
Destroy the Akaga
With the arrival of the frigate Akaga, Imperial pilots from TIE Avenger Alpha squadron redeployed to defend the Interdictor. Anticipating the arrival of Darth Vader aboard the Imperial-class Star Destroyer Garrett, TIE Avengers Alpha entered the system equipped with space bombs to destroy the Akaga. Alpha delivered the initial devastating blow to Akaga, weakening the warship's shields with a single volley of space bombs. As Avenger's warhead magazines ran dry, the Delta-class DX-9 stormtrooper transport Goya arrived to resupply. Avengers Beta and Gamma provided cover for the attack operations on the Akaga by intercepting incoming enemy TIEs and Z-95 Headhunters. The pilots of Alpha flight conducted docking operations until the Akaga succumbed to the overwhelming Imperial ordnance. With the Rebel frigate eliminated, Imperial Avengers continued their mop-up operations as the Garrett arrived. The operation's tempo increased with Darth Vader's presence; Imperial pilots reported to the Garrett to prepare for the next phase of the attack.
Retribution
Having neutralized the threat of the Frigate Akaga, Imperial starships advanced to destroy the remaining defecting forces, along with the local Rebels. With Interdictor Harpax still operational, preventing any escape, Imperial forces launched another starfighter assault on enemy capital ships. Imperial Commanders anticipated Admiral Zaarin's imminent arrival, tightening the noose around any remaining forces. Supported by group Gamma, Avengers Alpha re-entered the battle to eliminate the remaining capital ships.
TIE Avengers Theta squadron engaged the enemy fighter cover as Alpha squadron delivered Proton torpedoes into the Calamari Cruiser Warhawk. Transport CUV18f1 departed the Garrett as Avenger magazines emptied, standing by with additional warheads. With Theta occupied with enemy starfighters, Alpha and Gamma squadrons conducted bombing runs on the Warhawk unhindered, returning to the safety of the Imperial Star Destroyer Garrett's Turbolaser range to reload as needed. With the Warhawk aflame in space, Imperial pilots shifted their focus to eliminating the Victory Star Destroyer Protector. Imperial forces overwhelmed the defecting force with unparalleled efficiency, continuous fire from the attacking starfighters reducing the Protector to space debris.
The Interdictor cruiser Harpax came under fire just as Alpha squadron finished off the Protector. Two Rebel CR90 corvettes Triumph arrived near the Harpax, closely followed by Escort Shuttles Spitfire, attempting to support the failing Rebel cause. Imperial fighters scrambled to engage the incoming Rebel ships, now within firing range of the Harpax. Interdictor Harpax began sustaining damage from Corvettes Triumph just as Admiral Zaarin's force arrived.
To the shock of loyal Imperial forces, Zaarin's fighters and Assassin-class corvettes began firing on the Imperial Star Destroyer Garrett. Imperial forces responded immediately; TIE Avengers Alpha armed their Torpedo launchers, unleashing them on Corvettes Arditi. Avengers Theta instantly engaged rogue Assault Gunboats escorting Zaarin's Assassin-class Corvettes. Imperial fighters succeeded in destroying corvettes Arditi, only to be replaced by Corvettes Falcon group, and Assault Transports Upsilon, and later Corvettes BaKaar. A chaotic battle erupted around the Imperial Star Destroyer Garrett as loyal Imperial starfighters desperately confronted the approaching rogue Imperial assault force. Remaining Rebel B-wings Blue squadron still lingered in the system, unnoticed by the distracted Imperial forces. Having already sustained heavy damage, B-wings Blue managed to deliver the final blow to Interdictor Harpax. Despite the destruction of the Harpax, Imperial starfighters succeeded in eliminating all enemy forces in the system, protecting the Garrett, and Lord Vader.
TIE Defenders
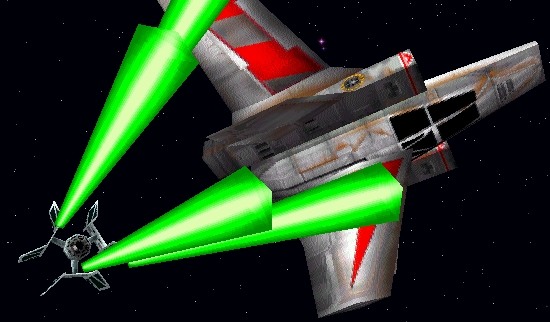
Upon learning of Admiral Zaarin's plot against the Empire, Lord Vader assembled a flight group to travel to Coruscant and inform the Emperor. Having worked closely with Admiral Zaarin and currently serving aboard the Garrett, Vader selected Maarek Stele to lead his mission to Coruscant. Vader departed the Garrett with his assembled team aboard the newly assigned TIE Defender starfighters. To reach the Emperor, Vader arranged for Nebulon-B2 frigate Osprey to rendezvous with his TIE Defenders from group Delta. Before their departure, a member of the Secret Order informed Stele of the gravity of his mission; Lord Vader must reach Coruscant at all costs, and he must be prepared to fight his way out of any trap or ambush.
TIE Defenders Delta squadron emerged from hyperspace directly into a trap set by Zaarin's rogue forces. Interdictor Harpago had positioned itself in the system to prevent Lord Vader's departure with its gravity well projectors. Rogue Assault Gunboats immediately attacked the loyal TIE pilots, despite being heavily outmatched. Stele and Vader decimated the rogue starfighters with remarkable zeal. Despite the combined skill of an Imperial Ace and the Dark Lord of the Sith, rogue Imperials had deployed numerous starfighters, further delaying Delta's assault on the Harpago. Frigate Osprey arrived during the fighting; the Harpago responded by deploying TIE Bombers to attack it. The fierce starfighter combat had created a sense of urgency; TIE Defenders Delta soon turned on Interdictor Harpago with a payload of Proton torpedoes. Harpago fought desperately against the loyal Imperial forces, including exchanging turbolaser fire with the Osprey, but soon fell victim to the notorious piloting skills of Delta 6, Darth Vader, and his wing mates.
With the silencing of the Harpago, Defenders Delta boarded Frigate Osprey. Delta received a payload upgrade to Concussion missiles for the upcoming sortie, as Frigate Osprey departed for Coruscant to deliver the news to the Emperor.
Rescue of the Emperor
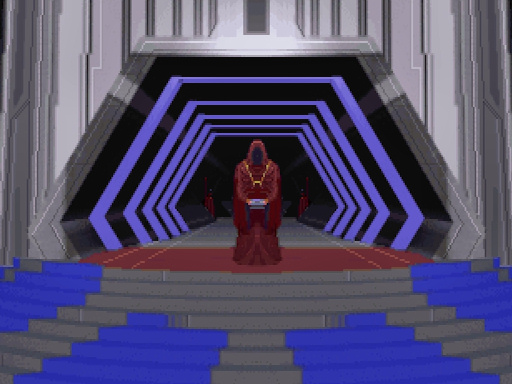
Aboard the Osprey, Lord Vader arrived near Coruscant to discover that Admiral Zaarin's forces had abducted the Emperor from his Imperial-class Star Destroyer Majestic. Lord Vader dispatched Maarek Stele to the battlefield, tasking him with locating the craft transporting the Emperor to Zaarin's Imperial Star Destroyer Glory. Once located, Assassin-class Corvette Mescue would arrive to rescue Emperor Palpatine while Darth Vader, Maarek Stele, and other pilots held off the defecting Imperials.
Lord Vader, in TIE Defender Delta 4, emerged from hyperspace directly behind the Majestic, with Maarek Stele commanding the rest of flight group Delta. Escort Shuttles Hellcat and Haven emerged from the Majestic's hangar moments after Vader's arrival. Stele ordered his wingmen to attack Shuttles Hellcat following his inspection, not revealing the Emperor onboard. Stele flew past Shuttles Haven, locating the Emperor aboard Haven 3. TIE Defenders Delta destroyed the traitorous Escort Shuttles, except for Haven 3. With the shuttles eliminated, Delta group split up to disable Haven 3 and attack Imperial Star Destroyer Glory. Stele blasted Haven 3 with Ion cannon fire until it was completely disabled. With Haven 3 disabled, Corvette Mescue arrived for docking, liberating the Emperor. While the Mescue docked with Haven 3, Star Destroyer Majestic limped into hyperspace, evading Zaarin's forces. Stele, along with the rest of Delta, proceeded to attack the newly arrived TIE Avengers from the Glory. As loyal TIE Defenders clashed with mutinous Avengers, Admiral Thrawn aboard Imperial-class Star Destroyer Vanguard emerged from hyperspace. The Vanguard launched TIE Bombers to assault the Glory. Imperial starfighters pursued the traitorous fighters relentlessly, eliminating opposing fighters before assaulting the Glory en masse. With enemy starfighters eliminated, Imperial pilots hammered away at Imperial Star Destroyer Glory, only to be disappointed. Having sustained heavy damage, the Glory fled into hyperspace.
The aftermath
Imperial forces successfully eliminated the remnants of Harkov's fleet and destroyed a Rebel cruiser in the process. The Empire's loyal servants then confronted the treachery of Admiral Zaarin and his rogue Imperials. This conflict presented one of the most formidable enemies that loyal Imperial forces had ever faced. Admiral Zaarin, known for his technological affinity, possessed some of the most advanced starships in the Imperial Navy. Despite this, Lord Vader and Maarek Stele successfully rescued the Emperor from capture, restoring him to the throne. Stele even received The Emperor's Will at a special ceremony on Coruscant after his courageous rescue. With the Emperor safe, Imperial forces mobilized to combat the traitorous Admiral Zaarin.
Behind the scenes
"Treachery at Ottega" is the designation for Battle Seven in Star Wars: TIE Fighter. Maarek Stele has attained the rank of Colonel by this battle; the reasons for his promotion are not known. During this battle Hamo Blastwell, using the alias Commander Trace, fails in his attempt to steal the plans for the TIE Defender from Zaarin's vessel.