Harbinger (Hammerhead-class)
The vessel known as the Harbinger was a cruiser of the Hammerhead-class, serving the Galactic Republic in the era immediately following the Jedi Civil War. Initially tasked with patrolling Republic territories and addressing localized problems, the Harbinger received orders in 3951 BBY to proceed to the Outer Rim Territories. Its mission: to retrieve the Jedi Exile and transport her to the destination of Telos IV.
However, the Harbinger's journey took an unexpected turn when it altered its trajectory to investigate a conflict unfolding between a Sith warship and a light freighter. This decision led to its capture by Sith forces under the control of the Sith Lord Darth Sion. Seizing command, Sion piloted the Harbinger to Peragus II in his relentless pursuit of the Exile, who had been forcibly removed from the ship during the earlier chaos. Surik, along with her allies, found themselves navigating the corridors of the captured vessel in a desperate attempt to reach their own ship. Their escape attempt triggered a confrontation, resulting in the Harbinger unleashing its weaponry. The ensuing battle culminated in the catastrophic destruction of the unstable Peragus asteroid field, with the Harbinger caught squarely within the devastating explosion.
Description
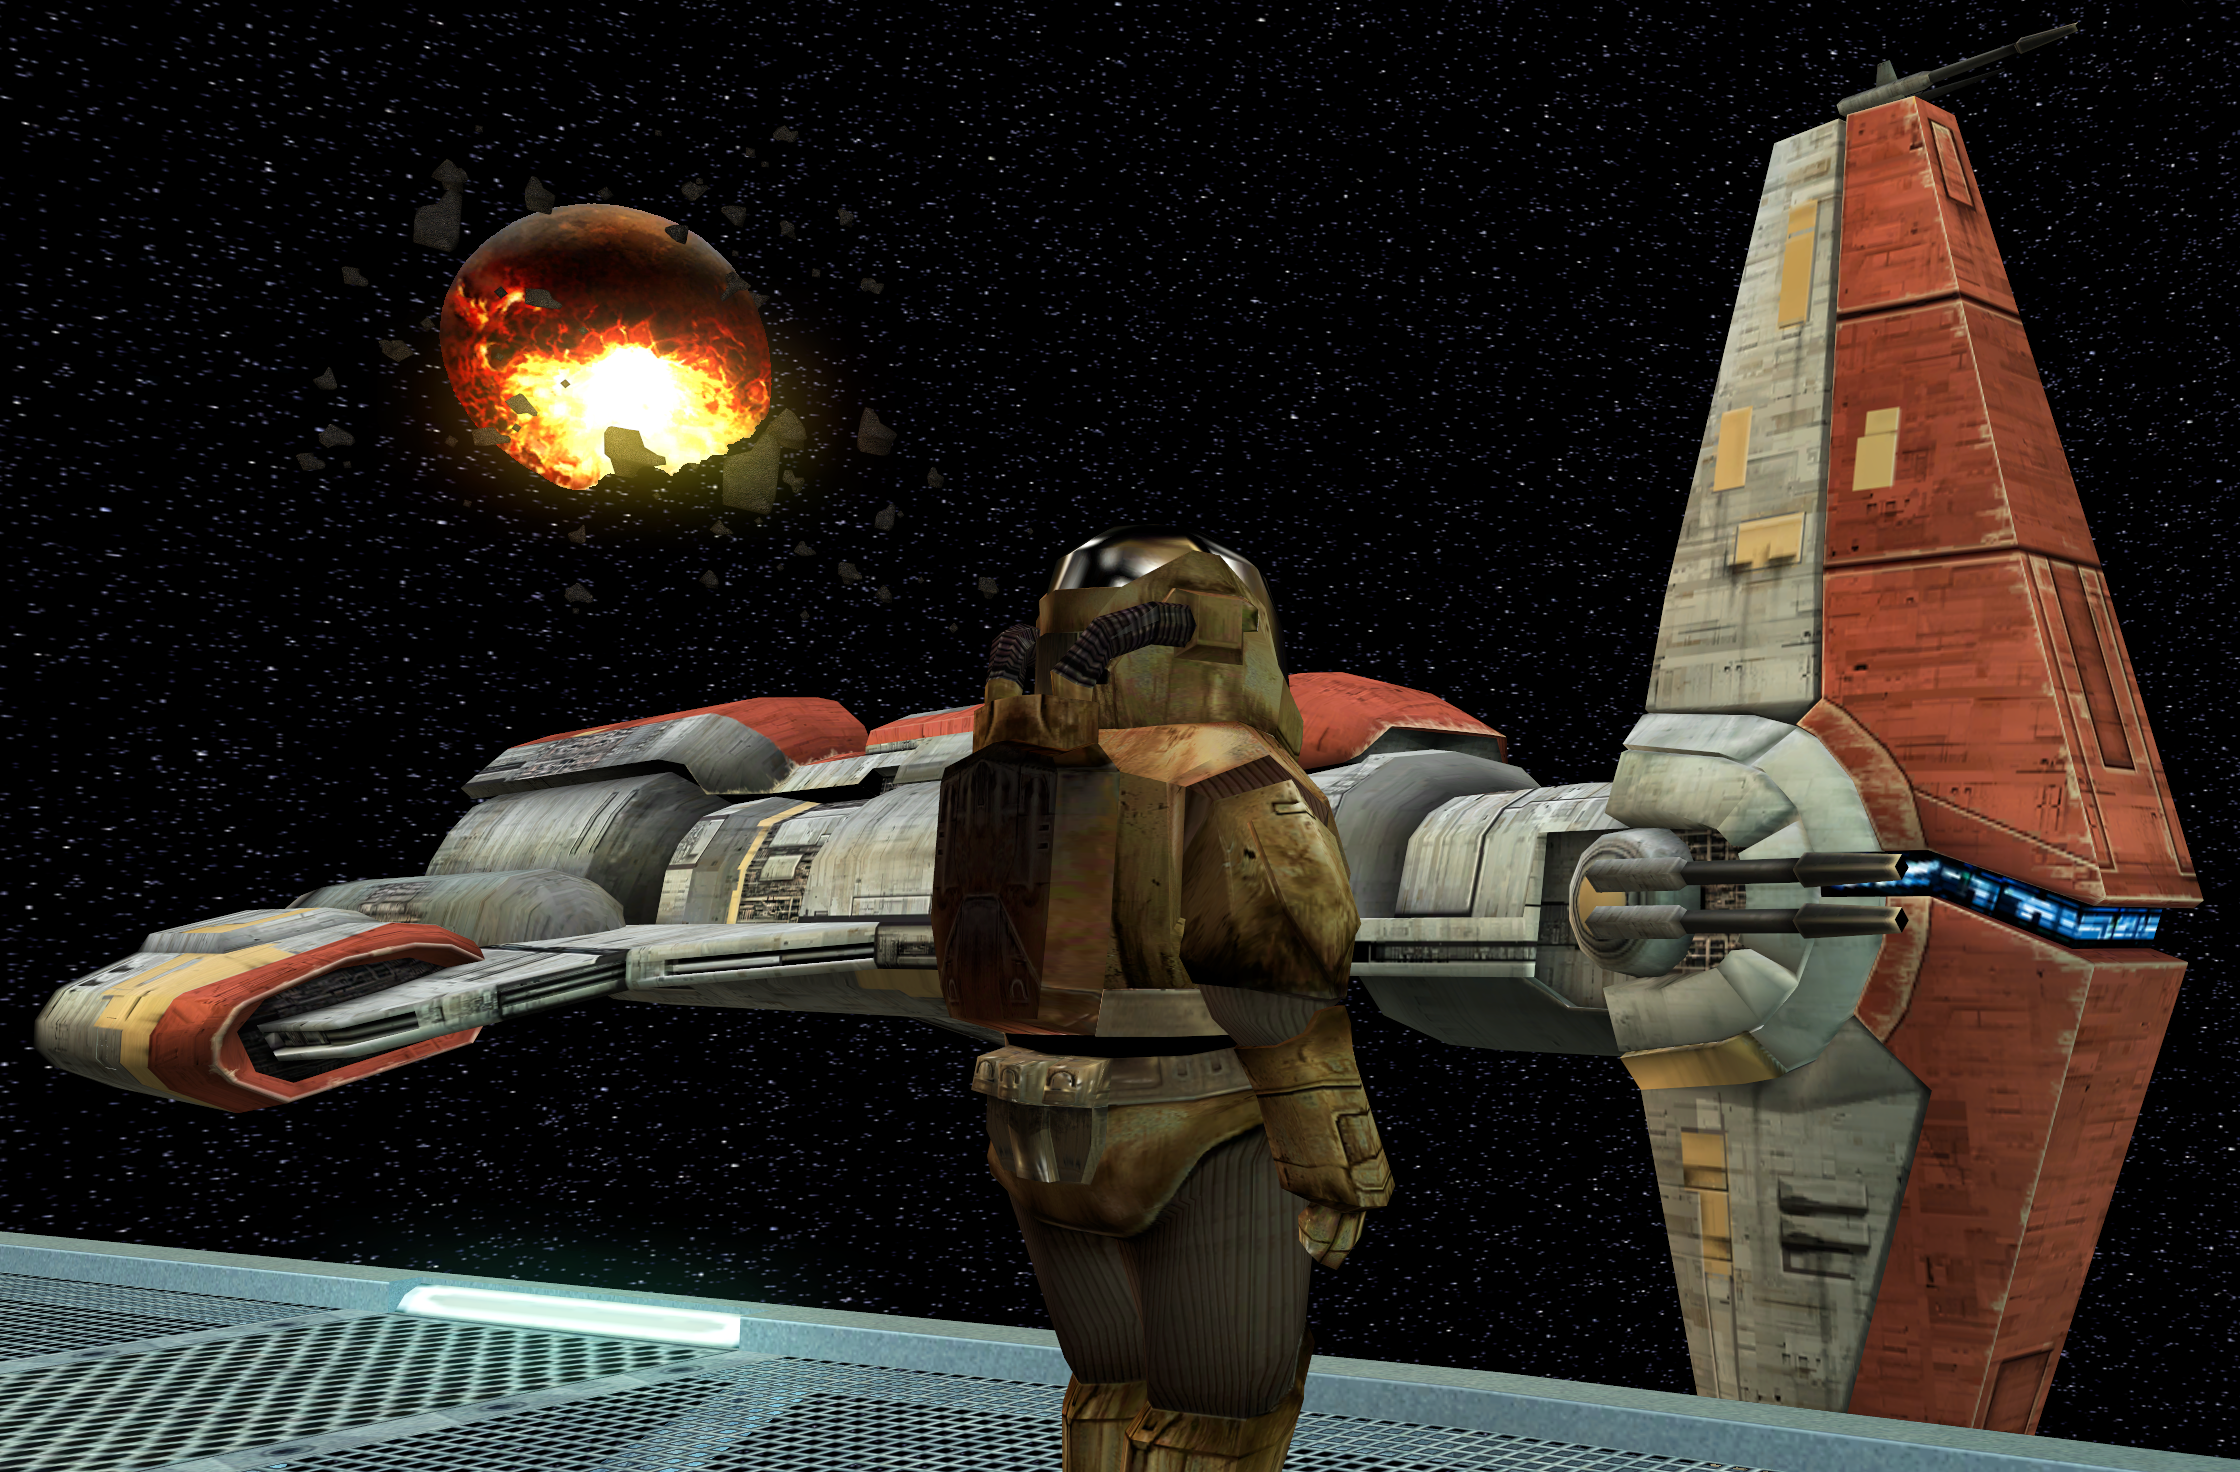
The warship, known as the Harbinger, belonged to the Hammerhead-class cruiser design. Notably, its internal layout was a mirrored reflection of another Hammerhead-class vessel, the Endar Spire. The Harbinger's exterior was predominantly white, accentuated by red and yellow markings adorning the bow and the areas surrounding the engines.
This vessel was equipped to carry a minimum of three strike teams comprised of Republic soldiers, intended for boarding operations against enemy ships. The ship had a complement of approximately three hundred crew members, all of whom perished during the Sith assault. Among the crew at the time was the vessel's captain, a female medical officer, and an HK-50 assassin droid disguised as a protocol droid. Armaments were positioned throughout the midsection of the ship, as well as on either side of the bridge and at the extremities of the "hammerhead" structure. Situated behind the hammerhead, on the ship's exterior, was a small, golden, dish-shaped component of unknown purpose. The Harbinger also featured an umbilical connector to facilitate boarding actions.
The interior hallways of the Harbinger were characterized by navy blue and gray color schemes, illuminated by panels integrated into the walls. The corridors, doorways, and the majority of the walls exhibited a curved design, and the outermost passageways incorporated viewports offering views of the surrounding space. A series of blast doors served to compartmentalize the ship's interior; following the attack, several of these doors sustained damage, rendering them inoperable, while others were sealed shut magnetically. Computer terminals were distributed throughout the ship, many bearing the insignia of the Republic.
Command deck
The command deck, situated at the ship's bow, housed the bridge and the navigation computer, the latter being positioned at the foremost point of the bridge. The bridge itself featured numerous stations arrayed along its perimeter walls, a bank of computers in the central area, and a recessed, console-lined pit in the middle containing two chairs positioned back-to-back. A large viewport provided a panoramic view of space across three sides.
Access to the command deck was gained through an airlock located directly aft of the ship's side-mounted weaponry. A briefing room was situated aft of the bridge, furnished with a conference table equipped with a computer console, as well as additional consoles lining the walls. The escape pods were also located on the command deck and could be secured if necessary.
Crew quarters and medical bay
The Harbinger contained multiple cabins to accommodate both crew members and passengers. Each cabin was equipped with a pair of beds, a pair of couches, two desks with integrated computer consoles, and storage compartments for personal belongings. The Jedi Exile was assigned to one of these cabins during her time aboard the vessel.
The medical bay was located near the ship's center, aft of the cabins. It contained twenty kolto tanks, a medical droid, and a laboratory station. Darth Sion was initially held within one of these tanks before subsequently escaping. The medical bay was also equipped with a camera system for monitoring the kolto tanks. Camera footage could be accessed via the medical console in the center of the room, which also facilitated the processing of treatment requests and the dispensing of chemicals. A maintenance room and a droid storage room were situated aft of the medical bay. The latter contained a number of deactivated utility droids and a protocol droid that had been sabotaged.
Engine deck
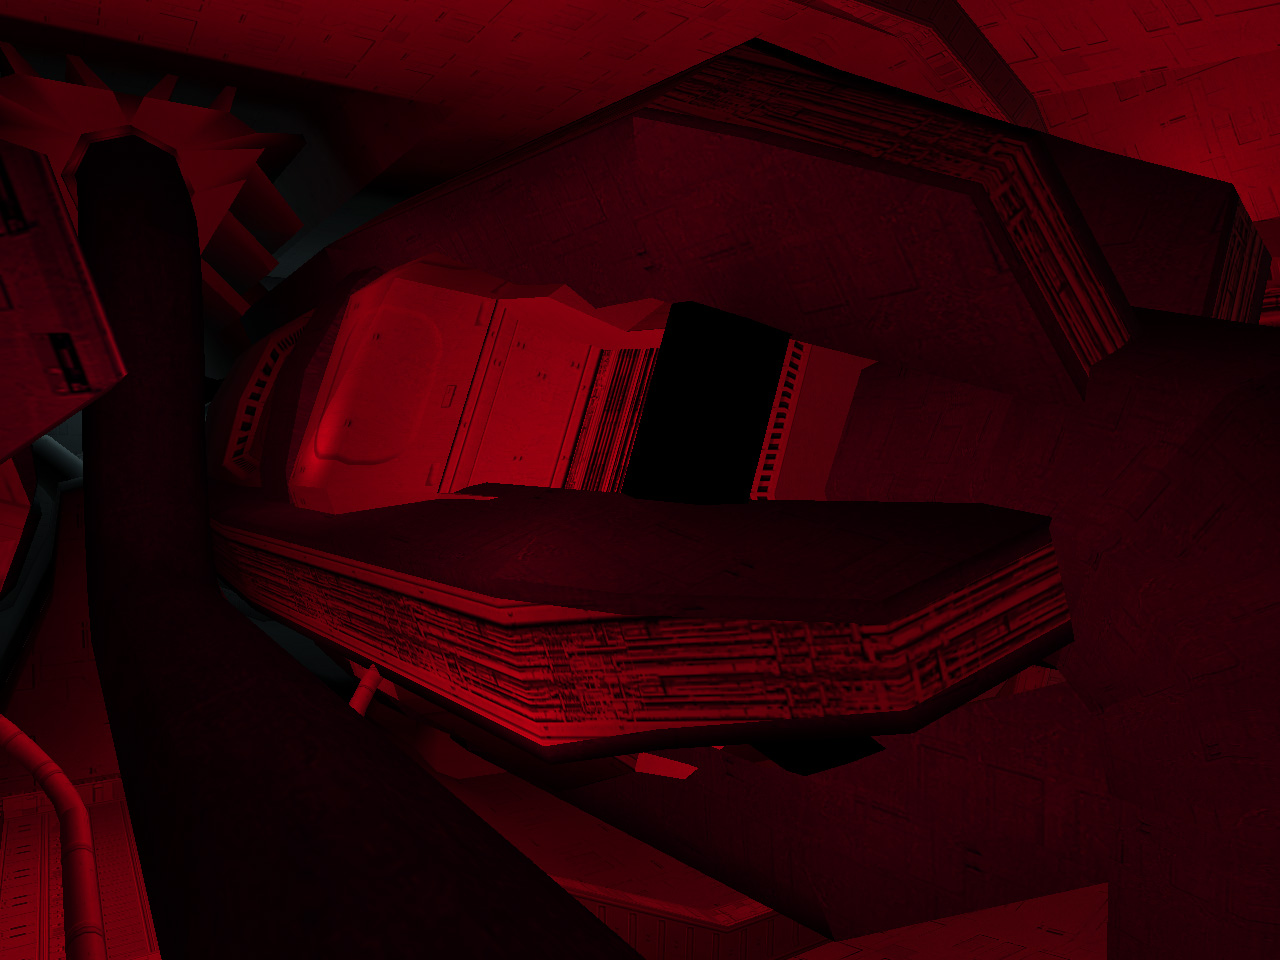
The stern section of the Harbinger housed the warship's powerful ion engines, accessible via a turbolift from the crew quarters deck. Maintenance protocols allowed crew members to enter the engine room and access the ship's fuel lines through a computer console. Another maintenance room and a storage room were also located on this level. In contrast to the rest of the ship, the engine area lacked decoration, with pipes lining the walls. Red lights illuminated the interiors of the engines. The Harbinger's fuel intake was located towards the middle section of the engines. This system was typically covered by a set of doors on the exterior of the hull, which could be opened to allow for the connection of a fuel pipe to the ship.
History
A mission from Admiral Onasi

Following the Jedi Civil War, the Harbinger was assigned to patrol various sectors of Republic space, as one of the few remaining vessels capable of doing so. In 3951 BBY, while en route to Onderon to address the civil unrest occurring there, the ship received orders from Admiral Carth Onasi to alter its course to the Outer Rim. Admiral Onasi designated this mission as top priority, and despite the captain's reservations, the Harbinger soon acquired a passenger: the Jedi Exile, recently returned from beyond Republic space. With the Exile aboard, the Harbinger set course for Telos, with an estimated arrival time of ten days, with the intention to assist in the recovery efforts underway there.
However, one of the individuals aboard the Harbinger harbored ulterior motives: an HK-50 assassin droid disguised as a protocol droid, one of many deployed throughout the Republic fleet. The captain tasked HK-50 with monitoring the Exile, and the droid complied, albeit for its own reasons. This particular HK-50, along with its counterparts, had been contracted by the crime lord Goto to capture the Exile and deliver her to him, believing her assistance was crucial in his efforts to protect the Republic from being overthrown by external forces such as the Sith.
The Sith ship and the freighter
During its return journey to Telos, the Harbinger intercepted a distress signal originating from a freighter under attack by Sith forces. Unable to verify the vessel's ID signature against their own databases, the crew of the Harbinger relayed the signal to the Republic authorities and requested permission to investigate. Admiral Onasi recognized the freighter as the Ebon Hawk, a ship he had once traveled on, and authorized the Harbinger's captain to deviate from his course. The Harbinger was instructed to investigate the Sith presence and gather any available information regarding the Ebon Hawk, after which it was to resume its original course to Telos.
Upon arriving at the scene, the Harbinger encountered the Ebon Hawk and a Sith warship. After attaching an umbilical to the Sith vessel, three strike teams were dispatched to investigate. An initial sweep yielded no results. This was due to the presence of Sith assassins onboard, possessing stealth capabilities that allowed them to infiltrate the Harbinger undetected. A subsequent search uncovered another passenger on the Sith ship: an apparent corpse exhibiting extensive fractures and scarring. The Harbinger's medical personnel were unable to determine whether the individual was alive or deceased, and consequently placed the body in a kolto tank.
The initial sweep of the freighter revealed only a T3-series utility droid and several deceased crew members. With no further discoveries, the Harbinger deployed a tractor beam to bring the Ebon Hawk aboard. This action also brought an unexpected passenger: Kreia. Meanwhile, the Sith had been actively undermining the Harbinger. Crew members began missing their shifts, communication attempts went unanswered, and some reported feeling as though they were being watched. The medical officer prepared to conduct autopsies on the bodies recovered from the Hawk.
The already-compromised Harbinger suffered another setback when HK-50 orchestrated a cascade failure in the ship's communications, weapons, and engine systems. The Harbinger was left crippled and adrift in space. Simultaneously, the Jedi Exile was administered an excessive dose of sedatives during a routine medical examination. HK-50 then concealed the unconscious Jedi in the ship's cargo hold, intending to keep her there until the reinforcements he had summoned arrived. However, Kreia boarded the Harbinger in search of the Exile, locating her in the cargo hold and taking her aboard the Ebon Hawk. HK-50, reassessing his plan, joined them.
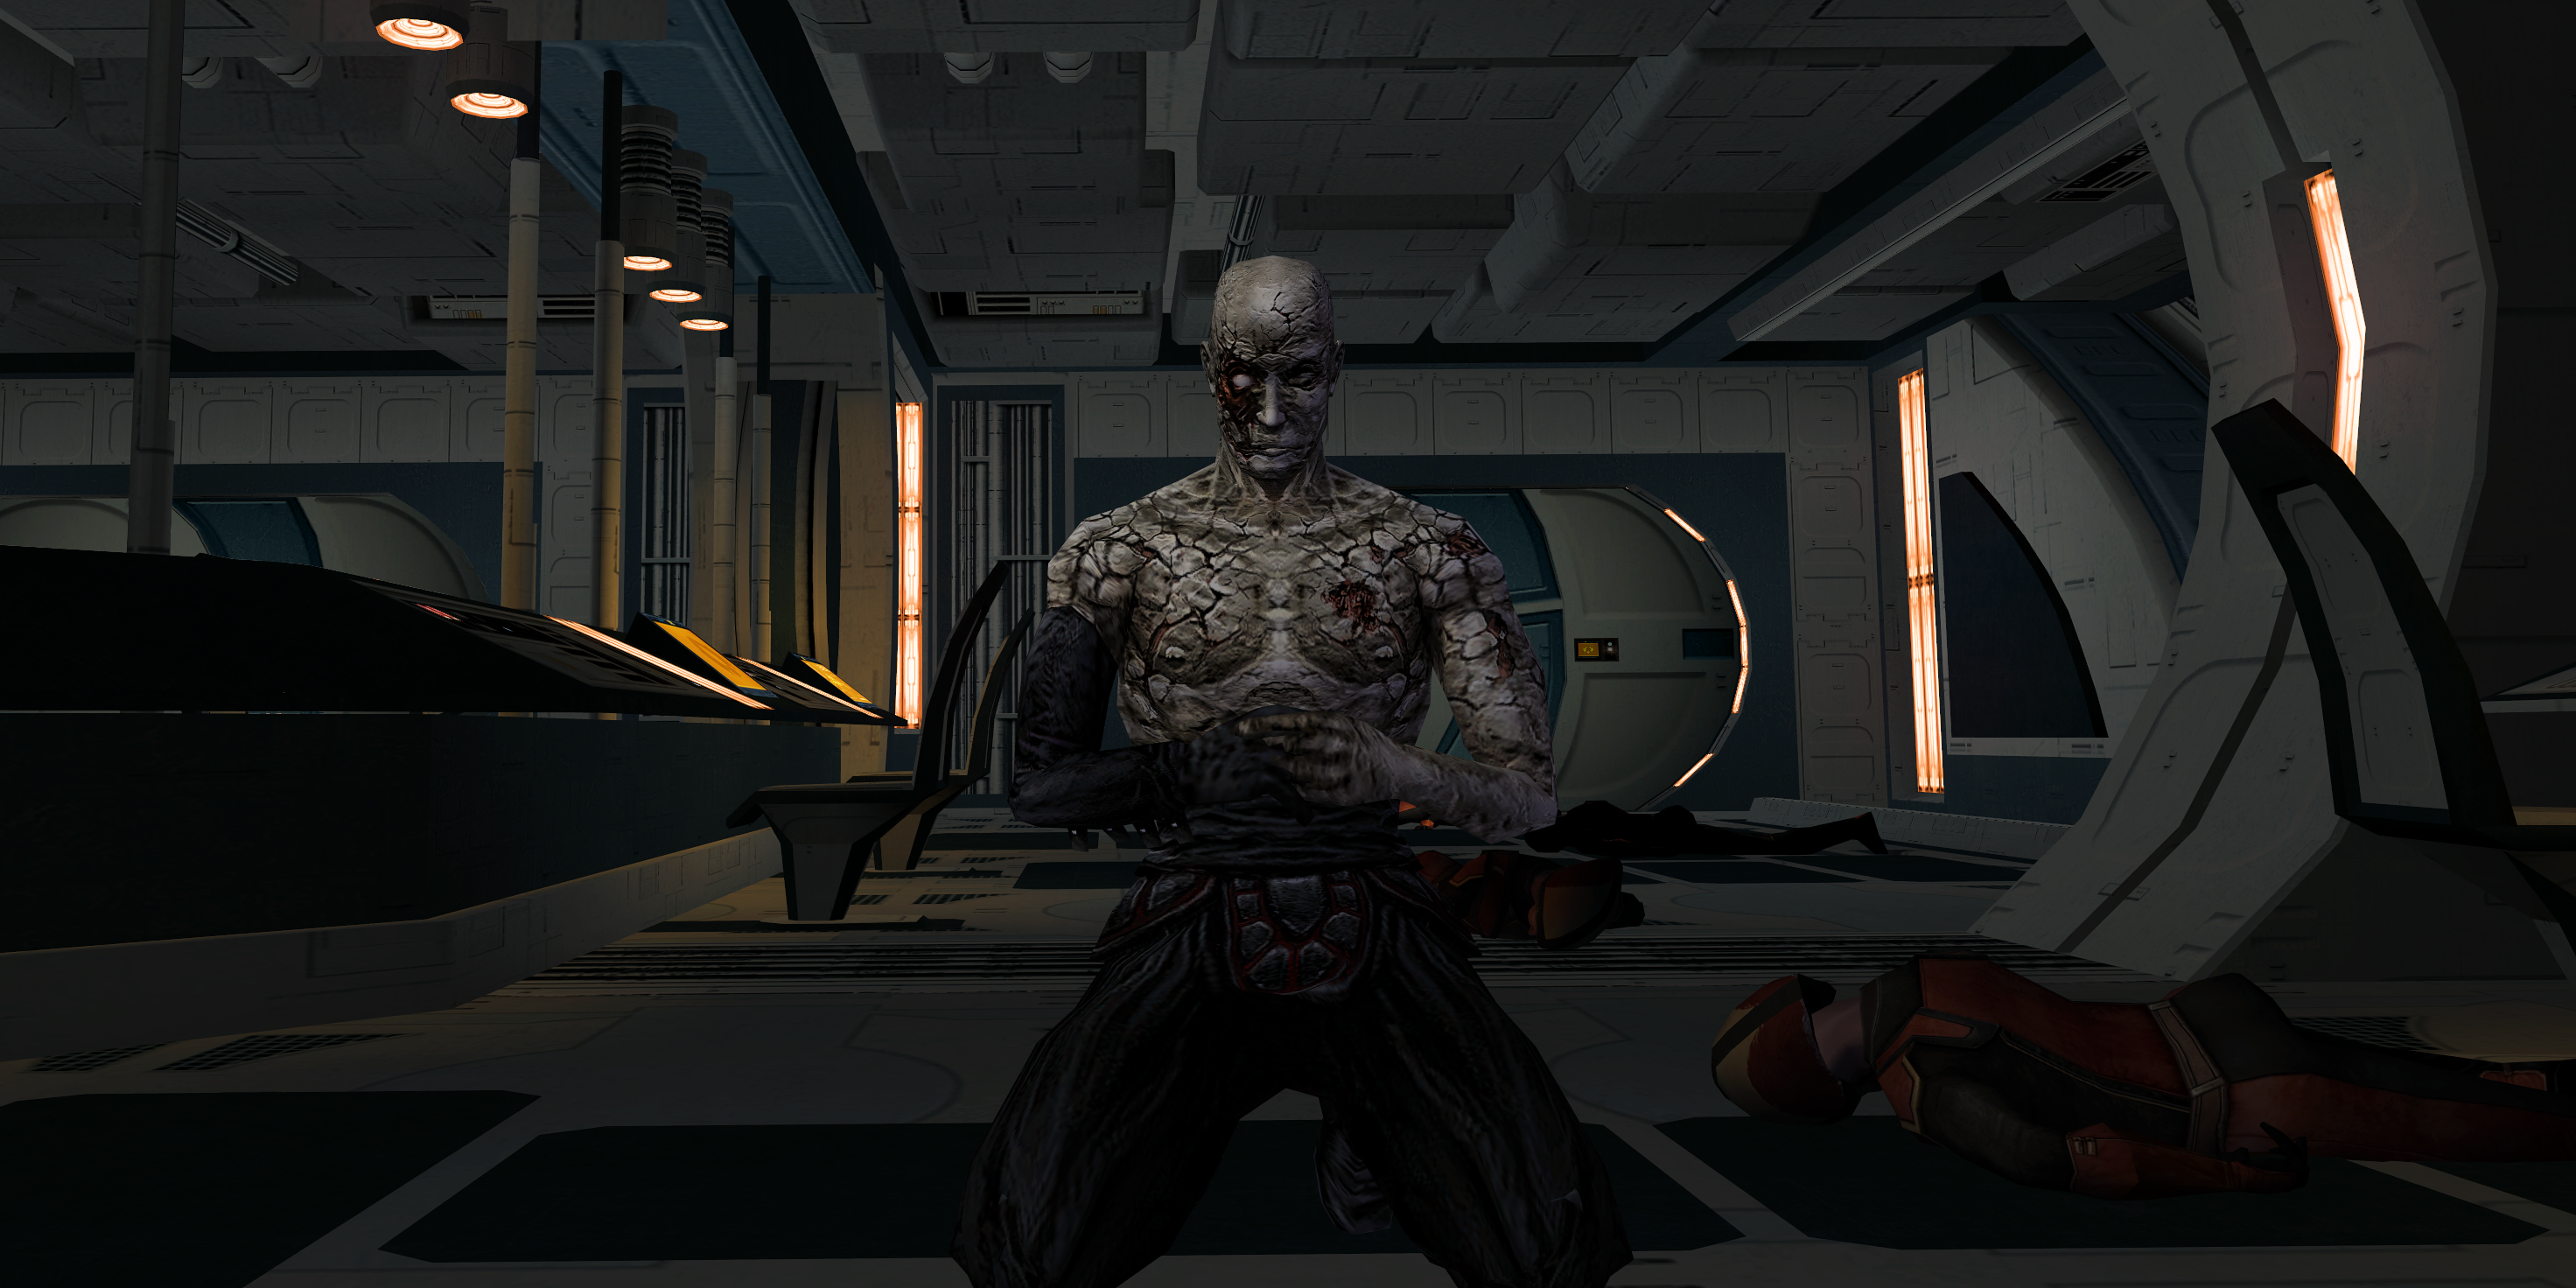
The Sith "corpse" revealed itself to be very much alive—it was, in fact, the Sith Lord Darth Sion, who emerged from his kolto tank and declared his intention to capture the Exile. The bridge crew, alarmed, dispatched a security team to the medbay, but they were swiftly eliminated. Sion proceeded to hunt down more of the Harbinger's crew, and his assassins began to decloak and join him. The Sith quickly gained control of the vessel. As the Ebon Hawk disengaged from the Harbinger and the capital ship's systems began to fail, the Harbinger fired upon the freighter, striking it as it jumped into hyperspace.
Sion comes to Peragus
Despite the systems failure, the Harbinger managed to recover and set a course for Peragus II, where the Ebon Hawk had fled. Although no living crew members were visible on the Harbinger's bridge, the ship was teeming with invisible Sith assassins, and Sion remained there in a meditative state. Using the asteroid drift charts stored in the ship's navicomputer, the Harbinger was able to dock at Peragus Mining Facility. The station's airlock extended a walkway to the Harbinger's airlock, and a fuel tube was connected from the fuel depot to the ship's engines, which were operating at minimal capacity.
Kreia sensed the arrival of the Harbinger and realized that the Sith had followed them. The Exile, Kreia, and their companion Atton Rand boarded the Harbinger through the airlock, hoping to either escape the station on the ship or reach the Ebon Hawk, which was located in the locked-down station hangar. Upon discovering the crew's slaughter, the former option became unfeasible, and they learned that the Harbinger's escape pods were also locked down. The group determined that they could reach the hangar by accessing the ship's engines and then re-entering the station through the fuel pipe. They also retrieved the drift charts from the navicomputer, essential for escaping the asteroid field. The group then navigated the ship's corridors towards the stern, battling the Sith assassins who decloaked around them. Along the way, the Exile briefly stopped at her former quarters to recover any remaining possessions.
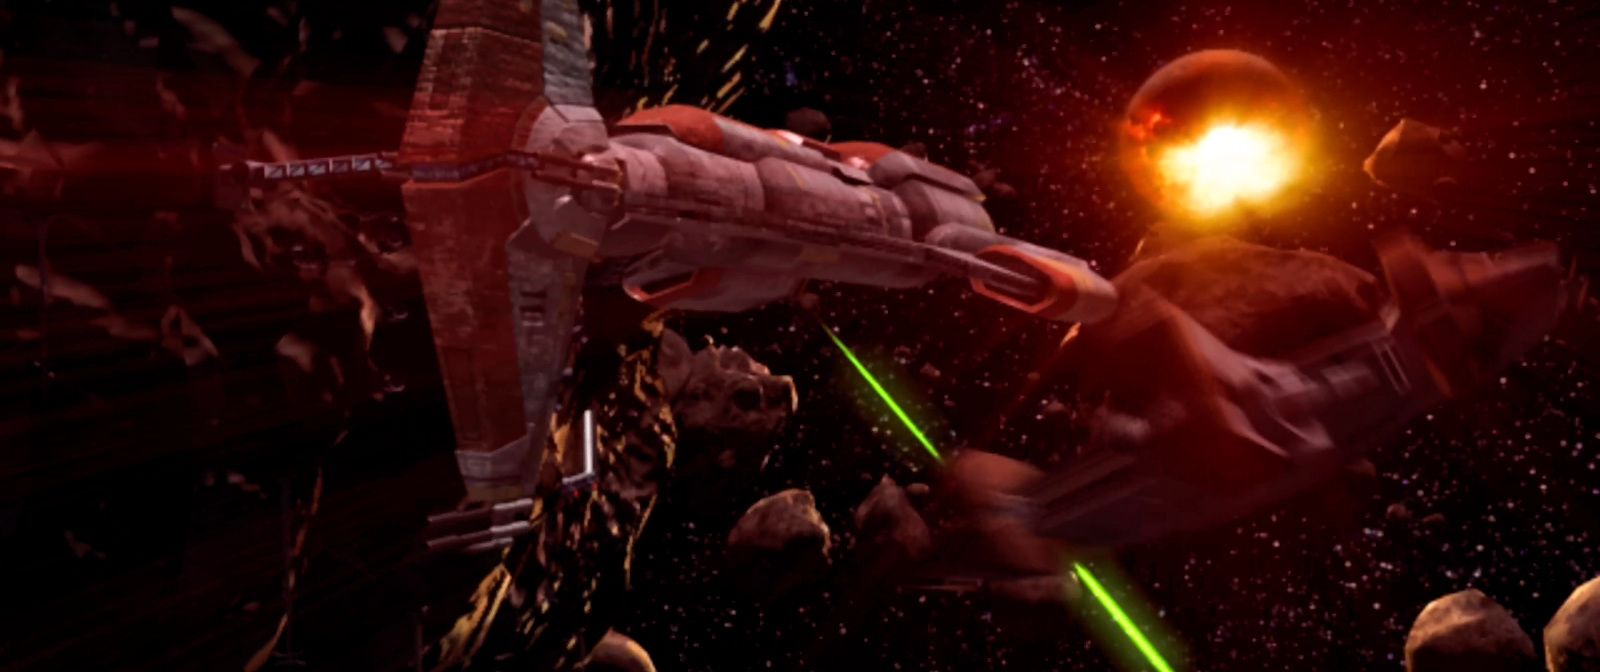
Upon reaching the stern, they encountered Sion. Kreia engaged the Sith Lord in combat, allowing the Exile and Atton to escape back into the station through the fuel line. Kreia eventually escaped the Harbinger, and the three departed the station in the Ebon Hawk. The Harbinger pursued, firing upon the Hawk. During the firefight, a stray shot struck one of the asteroids, triggering a chain reaction of volatile chemicals. The Peragus asteroid field exploded, engulfing the Harbinger, though Sion survived. The Republic later dispatched the Sojourn to search for the missing Harbinger and investigate the destruction of Peragus.
Commanders and crew
The Harbinger was commanded by a single Human male captain, who followed orders from Admiral Carth Onasi. Its complement included at least three military strike teams during its mission to Telos IV. The ship had dedicated medical, mechanical, security, and navigational crews, each headed by a Human officer reporting directly to the captain. Every crew member was provided with their own living quarters, a courtesy extended to guests as well. A fully-staffed Hammerhead-class cruiser typically had around 300 crew members responsible for its operation, all wearing standard Fleet uniforms indicating their roles as soldiers or ship staff. Regardless of rank, the entire crew of the Harbinger was killed by Darth Sion shortly after his arrival for treatment. Following this, Sion assumed command of the vessel and piloted it himself.
Behind the scenes
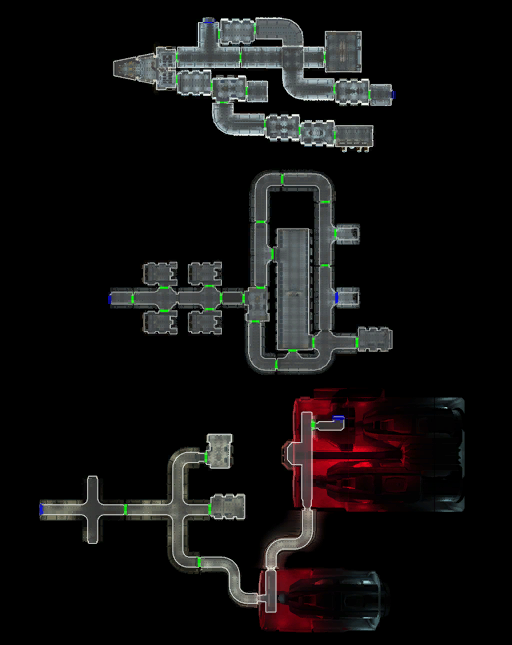
The Harbinger is featured as one of the playable levels in Star Wars: Knights of the Old Republic II: The Sith Lords. Comprising three distinct maps—the command deck, crew quarters, and engine room—it forms part of the game's introductory sequence within the Peragus Mining Facility.
During the Harbinger's pursuit of the Ebon Hawk from Peragus in The Sith Lords, players have the option to return fire, risking a strike on the unstable asteroids. Players can choose to have the Ebon Hawk fire the shot that destroys the asteroid field and the mining facility. Alternatively, players can opt for evasive maneuvers, resulting in the Harbinger destroying the field. However, regardless of the player's choice, the game's narrative remains consistent, with the destruction attributed to Sion. The only differences are the cut scenes, and, when questioned about the destruction, the player is given the option to lie, and say that it was Sion.