Star Wars: Tales from the Galaxy's Edge
Star Wars: Tales from the Galaxy's Edge represents a virtual reality action-adventure, brought to life by ILMxLAB in partnership with Oculus Quest, having launched in 2020. This interactive experience ties into Star Wars: Galaxy's Edge, specifically the area of Batuu. The timeline of events takes place between Episode VIII The Last Jedi and Episode IX The Rise of Skywalker, with a focus on Black Spire Outpost.
In a departure from ILMxLAB's prior VR endeavors, Star Wars: Tales from the Galaxy's Edge shifts its focus to storyLIVING, immersing players in a dynamic world where their decisions significantly shape the unfolding narrative, a contrast to their earlier storytelling approaches. Consequently, players gain the chance to embark on personalized, action-packed journeys while exploring different areas of the galaxy. The core narrative introduces both familiar and entirely new characters, incorporating diverse gameplay styles and adjustable difficulty settings to cater to a broad spectrum of player skill levels. A graphically enhanced version of the game was made available on PlayStation VR2 starting on February 22, 2023.
Plot
Working for Mubo

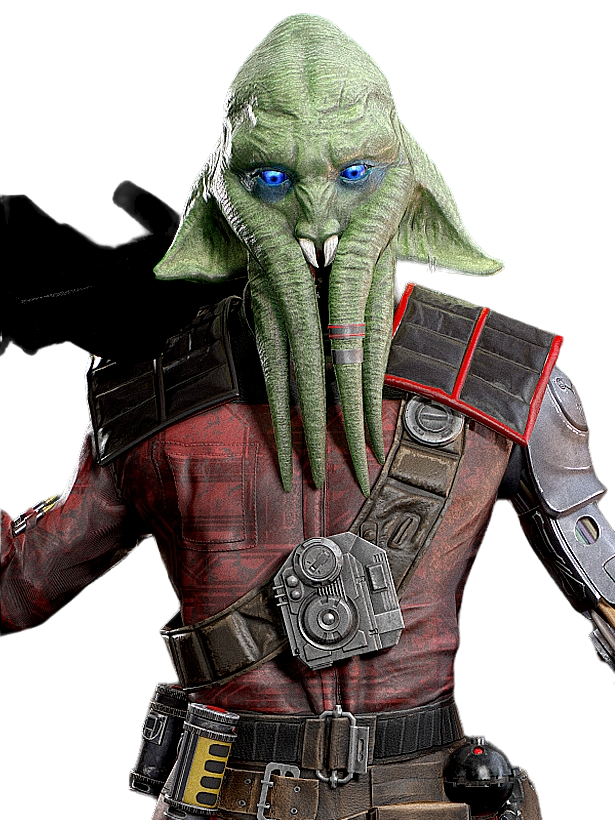
In the year 34aby, an Unidentified droid repair technician finds themself awakening aboard Mubo's Cargo Transport. Upon waking, the droid tech is greeted by a droid companion known as J-4X, who promptly directs them to begin work within the cargo bay. Proceeding to the designated cargo hold, the Droid Technician receives instructions from Mubo via their DataGrip. Following Mubo's directives, the Droid Tech proceeds to scan all the cargo within the hold, and receives a Hoverpack. Once the scanning is complete, the cargo is marked as processed, and a signal is sent to summon a transport ship for pickup. However, the arriving ship is immediately destroyed by blaster fire originating from a Guavian Ship. Subsequently, the Guavians board the freighter, prompting the droid tech to arm themself with a blaster and engage the invading Guavian Death Gang Hellions and Hunters. After successfully repelling the initial assault, the droid tech receives a communication from Tara Rashin, the Guavian Leader, who reveals that the First Order is offering a substantial reward for a specific piece of cargo Mubo is smuggling. Tara demands that the droid tech stand down and surrender, and also shoots J-4X. Continuing to resist, the droid tech battles more Guavian Death Gang members before receiving instructions from Mubo to jettison the valuable cargo. Following this order, the droid tech makes their way to the escape pods. After engaging more Guavians, they successfully escape the ship, ultimately crash-landing on Batuu.
Searching for the Cargo
The Droid repair technician then made their way to Seezelslak's Cantina, where they encountered Seezelslak. Shortly after, Mubo entered the cantina accompanied by his droid assistant, R00-8Y, and informed the technician that the jettisoned cargo had been scattered across Batuu, tasking them with locating it. The technician then traveled to the Three Suns Overlook and began the search, but they were soon confronted by more Guavian Death Gang members. During the search, they received a call from Mubo, who revealed that the shipment contained prototype Mini-droids and that it was also their responsibility to find them. The Droid Technician discovered some of the cargo, which was guarded by Guavians, leading to a brief shootout before they continued their search for the specific piece of cargo that Tara mentioned was of high value to the First Order. Along the way, they found several caches of weapons and Trainign Remotes that had also come from Mubo's cargo ship, which they used to their advantage against the Guavians. They also encountered Viper probe droids and Seeker droids that were under Guavian control. Eventually, the droid technician bypassed the Guavians and proceeded to Dead Root Refuge]] to continue their search for the cargo.
Dead Root Refuge and Hissiq Springs
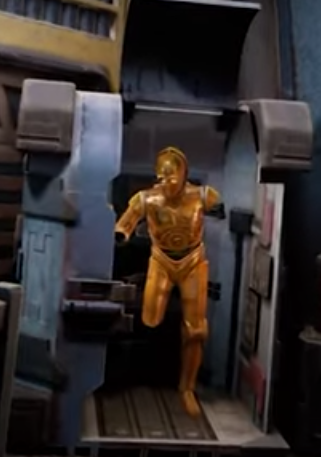
Upon their arrival at Dead Root Refuge, the droid technician engaged in further combat with Guavian Death Gang members as they continued their search for the elusive cargo. Despite discovering additional cargo, they were unable to locate the specific item that Mubo desperately needed. Consequently, they pressed onward to Hissiq Springs, where they encountered an even greater concentration of Guavian forces. A fierce firefight erupted, but the droid technician eventually managed to penetrate the caves. Emerging from the caves, they faced yet more Guavian Death Gang members before finally locating the cargo Mubo sought. Inside the crate, they discovered C-3PO, who was in a state of disrepair, with his Photoreceptor dangling and missing a leg, arm, and hand. C-3PO instructed the droid tech to retrieve his missing parts, which they promptly set out to do. After battling more Guavians to recover the necessary components, the droid tech returned and repaired C-3PO. Subsequently, C-3PO opened R2-D2's container, only to find that R2 was missing. Then C-3PO fell out of the cargo container as the door closed behind him. The Droid Technician was forced to find another way to get to C-3PO, and has to fight more Guavians, but is eventually reunited with the droid. Together, they then made their way back to Mubo's Workshop.
Fighting Tara
While at Mubo's Workshop, C-3PO intercepted a transmission from the Guavian Death Gang indicating that they had R2-D2, prompting the droid technician to embark on a mission with 3PO to rescue R2. However, while traversing Dead Root Refuge, C-3PO fell into a hole, compelling the droid tech to proceed without him. After fighting their way through Dead Root Refuge once more, they reunited with C-3PO, who had managed to escape the hole and reach the door leading to Tara. Together, they attempted to open the door, but their entrance was blocked by a TT-8L gatekeeper droid. C-3PO attempted to reason with the droid, but they were attacked during the conversation. The Droid Tech defended against the attackers while C-3PO persuaded the droid to open the door, allowing them to enter the elevator. They emerged at the Splintered Spire and initially found the area deserted. After locating R2-D2's crate and rescuing him, Tara appeared, riding an All Terrain Reconnaissance Transport. She was accompanied by several Guavian Death Gang members, whom the Droid Tech swiftly dealt with. However, standard blasters proved ineffective against the shield surrounding Tara's Walker. The Droid Tech distracted her and dodged her rockets while R2 used the central computer to release explosive barrels from their container. The barrels rolled down near the walker and detonated, causing it to lose balance and tumble down the spire, disappearing from sight. They all returned to safely Seezelslaks Cantina.
The Temple of Doom
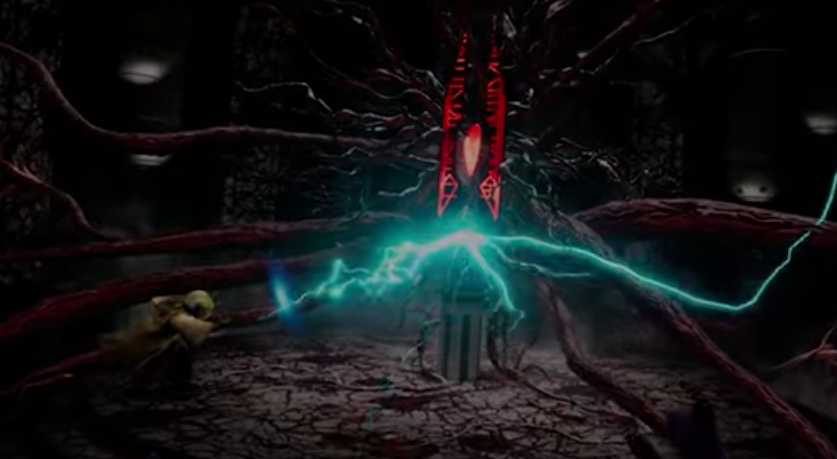
Upon their return to Seezelslak's Cantina, the Droid Repair Tech provided Seezelslak with the necessary ingredients to prepare a drink. While enjoying the beverage, Seezelslak shared a tale. He recounted that long before The Clone Wars, the Jedi established a temple on Batuu to study dark artifacts. One day, Jedi Master Sylwin and her padawan, Ady Sun'Zee, discovered one of these Dark Relic and brought it back to the Temple for research. However, the relic's immense power corrupted them all, turning them against each other. Master Sylein fought valiantly but was ultimately defeated. Ady activated the distress beacon to alert the council before losing consciousness. When she awoke, she found herself in the Temple, under attack by Demlins that had been corrupted by the artifact. She defended herself using her Lightsaber until Master Yoda arrived. He had received the distress beacon and came to offer assistance. Master Yoda revealed that three days had passed since the distress call was sent. Yoda then ventured alone to contain the relic. Despite Master Yoda's instructions, Ady followed him into the Temple. The Temple's security system activated, and Ady battled more demlins and security droids. Once finished, Ady resumed her search for the Artifact. She discovered a fake version, and when she touched it, it glowed red, creating vines throughout the Temple. Ady used her lightsaber to cut through the vines until she reached the real artifact. As she grasped it, she heard Master Sylwin's voice telling her that she would never become a Jedi. Ady continued to cut through more vines until she arrived in a room where Master Yoda sat calmly. Master Yoda informed her that it was her fault and that, under the influence of the artifact, she had killed everyone in the Temple. Demlins then emerged from the floor, dragging Master Yoda into a chasm while Ady's lightsaber malfunctioned. The walls disintegrated, revealing a swirling storm of red clouds and rock. Ady fought against more and more demlins until she heard Master Yoda's voice telling her that her weapon was not needed. Ady placed her Lightsaber on the glowing white pedestal, and everything went dark. Ady awoke to find Master Yoda using The Force to combat the artifact, but he was being overpowered. Yoda asked Ady for assistance, and together, they contained the artifact. Yoda sealed off the Temple and reassured Ady that she could overcome the darkness within her. Seezelslak concluded his tale by revealing that Ady had hidden the keys to the Temple somewhere on Batuu.