Retreat from Gallofree
The Fourth Battle of Mobetta unfolded in the space surrounding Gallofree, a Galactic Empire strike force attacked as the Rebel Alliance assisted the Airam in their retreat from the X7 factory.
The Battle
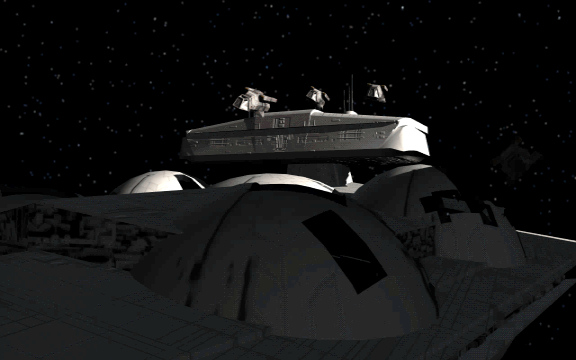
Shortly after the successful Ambush in the Derilyn system, the Rebel Alliance was alerted to a distress signal originating from the Airam factory Gallofree, where the Strike-class cruiser known as the Peregrine had undergone a refitted process.
The Rebels intentionally left behind the ruined ex-Imperial interdictor Compellor, which then exploded as planned, right in front of the Imperial strike team. These forces were elements of Admiral Senn's Task Force Vengeance as they neared the factory. The Imperial battle group then advanced to exact revenge on the factory personnel.
To evacuate the Airam from the impending destruction of the factory, Rogue and Green Squadrons, together with three Gallofree medium transports from Rescue Group, entered the Mobetta system. They were met by a substantial Imperial force, which included the Imperial I-class Star Destroyers Juggernaut and Titan, along with three Corellian corvettes. This force, supported by their extensive fighter cover, was moving to obliterate the factory.
Green Squadron swiftly eliminated the leading corvettes by unleashing a warhead barrage, while Rogue Squadron dealt with the approaching bombers. However, the quick Imperial fighters rapidly closed in on the Rogue X-wings, and the Rogues became embroiled in intense dogfights against the elite Imperial Avenger Squadron and several flight groups of TIE/IN interceptor ships.
Despite the overwhelming assault from the attacking fleet, both Rogue and Green Squadrons successfully repelled the Imperial TIE starfighters long enough for the transports to complete their evacuation mission. Once the last transport jumped into hyperspace, all Rebel fighters followed, leaving behind two slightly damaged Star Destroyers and the now-abandoned space factory.
Aftermath
Although the Airam and Rebels technically suffered a defeat (despite the significant Imperial fighter losses), this battle significantly strengthened the bond between Airam clan leader Tamaron and the Alliance. Tamaron then committed to providing a large shipment of warheads to the Alliance's sector fleet, which subsequently led to the Mission to Kuras Drift.