Ru Murleen
Ru Murleen, a Human female, distinguished herself as a starfighter pilot within the Alliance to Restore the Republic during the Galactic Civil War. Rising swiftly through the ranks, Murleen became the youngest commander and later shared her expertise as a pilot instructor at the Rebel training facility situated on Kolaador. Shortly after the Battle of Toprawa occurred in 0 BBY, Murleen spearheaded a squadron of X-wing starfighters to Tatooine, responding to an attack on Anchorhead Base by Imperial forces. She later engaged Imperial TIE fighters during the evacuation from Gamma Base on Hoth. Soon after, she relocated to the Great Temple on Yavin 4 and participated in the Battle of Yavin against the Death Star.
Subsequently, Murleen was deployed to Imdaar Alpha to observe Imperial activities on that planet. When the Alliance uncovered an Imperial scheme to develop cloaked starfighters, Murleen collaborated with a former student, Rookie One, on a daring mission. Their objective was to infiltrate the Super Star Destroyer Terror and seize a TIE Phantom. The pair of Rebel operatives not only secured one of these advanced starfighters but also utilized it to obliterate the Terror and the TIE Phantom factory on Imdaar Alpha, effectively halting the project.
Biography
Early career
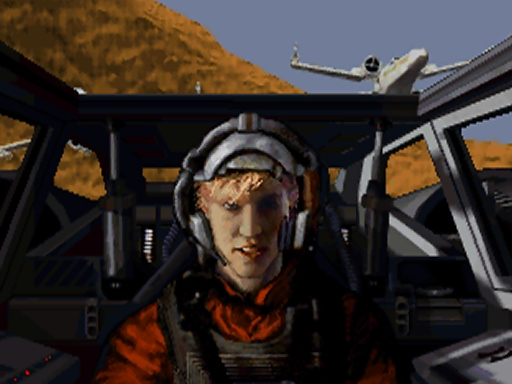
Early in the Galactic Civil War, Ru Murleen enlisted in the Alliance to Restore the Republic as a starfighter pilot. Her exceptional skill and courageous nature facilitated her rapid ascent through the ranks. By 0 BBY, she had achieved the rank of commander, making her the youngest individual to do so within the Alliance Starfighter Corps at that time. Desiring to impart her knowledge to others, Murleen accepted a position as an instructor at a Rebel training facility on the Outer Rim world of Kolaador, a role she maintained for much of the base's operational period. Murleen guided rookie pilots in R-22 Spearheads through the planet's intricate canyon systems, where crystalline spires created a challenging natural obstacle course. During her time on Kolaador, she trained numerous pilots for the Alliance, who later served across the galaxy.
On the run
Battle of Tatooine
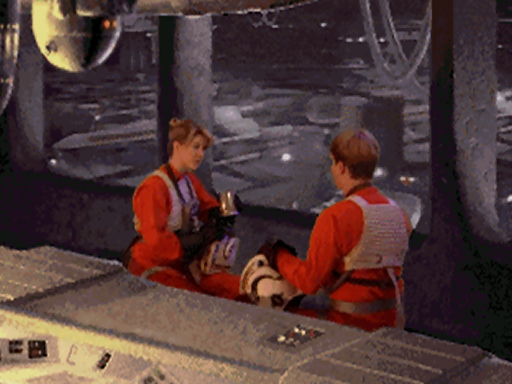
Among her trainees was "Rookie One," who completed the final phase of his training under her tutelage shortly after the Battle of Toprawa. During this battle, the Rebel Alliance successfully acquired the plans for the Death Star, a battle station possessing the capacity to destroy an entire planet. Murleen was impressed by the young pilot's capabilities. After he successfully completed his canyon run, she joined him for a celebratory drink at the Rebel base as he awaited assignment to a squadron. However, their celebration was interrupted by news that Anchorhead Base on Tatooine, Rookie One's prior training location, was under attack by Imperial forces searching for the stolen plans.
Given Anchorhead Base's limited ability to withstand the Imperial assault, Murleen assembled a flight of T-65 X-wing starfighters and proceeded to Tatooine to provide assistance. She selected Rookie One and Thurlow Harris to accompany her on this mission. Upon arriving in the Tatoo system, they discovered an Imperial-class Star Destroyer in orbit around Tatooine. Recognizing the group's limited chances of success on the surface with the Star Destroyer coordinating the attack, Murleen led her team in an assault on its command center, hoping to neutralize the threat before proceeding to Tatooine. The group engaged TIE/LN starfighters launched from the Star Destroyer, while simultaneously strafing the starship to weaken its defenses. Once the deflector shields protecting the bridge were breached, Murleen instructed Rookie One to arm his proton torpedoes and initiate an attack run on the unprotected command tower. Rookie One executed a direct hit, crippling the vessel. With the threat neutralized, the group swiftly descended to the surface to aid the Rebels below.
Relief at Anchorhead and Hoth
Upon entering the atmosphere, Murleen contacted Lieutenant Turland Hack at Anchorhead Base to obtain a status update. Hack informed the group that the base was already under attack by three TIE fighters. Despite their best efforts, the group was unable to reach the base in time, and it was destroyed moments later. The attacking TIE fighters were alerted to the presence of the Rebel reinforcements, and Murleen directed her group into Beggar's Canyon to eliminate them before they could report to their commanders. After eliminating all three, the Rebels were joined by the X-wing piloted by Captain Merrick Simms. As Imperial ground forces began to move into Mos Eisley, Murleen instructed Harris and Rookie One to join Simms in engaging the All Terrain Scout Transports and Imperial landing craft. Simultaneously, Murleen sought to disrupt the Imperial supply lines, instructing the others to withdraw once the situation became too perilous and to rendezvous with her at the fleet before proceeding to Gamma Base on the ice-world of Hoth.
All four Rebel pilots successfully reached Gamma Base. However, their respite was short-lived. Darth Vader, the Dark Lord of the Sith, determined to locate their refuge, dispatched Viper probe droids throughout the Anoat sector. When the droids discovered Gamma Base, Imperial forces launched an attack, forcing the Rebels to evacuate. Murleen led an X-wing squadron tasked with protecting the last Rebel GR-75 medium transport as it attempted to escape to hyperspace. Joined by Rookie One, who had been delayed in leaving the planet, the group engaged waves of TIE fighters, preventing them from reaching the transport until it successfully jumped out of the system. Once the Rebel pilots had cleared the Imperial fighters, they followed the transport to safety.
Battle of Yavin
Murleen and the other Rebels sought refuge at the main Rebel base located on the Outer Rim moon of Yavin 4. However, they remained in danger. Although the Alliance had managed to acquire the plans for the Death Star, the Empire had discovered the location of their base, and the superweapon was en route to Yavin. Fortunately for the Rebels, analysis of the plans revealed a weakness that would make the battlestation vulnerable to a starfighter assault. Murleen was assigned to Blue Squadron for the Battle of Yavin, alongside Rookie One and Thurlow Harris, under the command of Merrick Simms. As the squadron approached the battlestation, a Star Destroyer from the Death Star's support fleet launched TIE fighters to intercept them. However, Blue Squadron successfully eliminated the threat and proceeded through the perimeter. After joining forces with pilots from Red and Gold Squadrons, Simms led Blue Squadron toward the Death Star itself, before instructing Murleen and Rookie One to accelerate to attack speed and commence strafing runs on the Death Star's turbolaser batteries.
The battle plan involved navigating a trench along the surface to reach a thermal exhaust port. A direct hit from a proton torpedo would trigger a chain reaction, leading to the station's destruction. However, before the assault on the trench could begin, Simms dispatched Murleen and Rookie One to eliminate a heavy cannon positioned near the exhaust port. As the cannon was too heavily armored for a direct attack, the pilots created a breach in its shielding and flew into the superstructure, where they destroyed several power relays, disabling the weapon, before rejoining the others. With the threat of the heavy cannon neutralized, the path was clear for Alliance forces to initiate their trench runs. Meanwhile, Blue Squadron was tasked with attacking the Death Star's superlaser directly, both to inflict damage and to divert attention away from Red and Gold Squadrons as they attacked the exhaust port. The initial trench runs failed to hit the target, and time was running out when Luke Skywalker of Red Squadron succeeded in hitting the target, delivering the decisive blow to the Death Star.
Infiltrating the Terror
Around this time, Murleen reached the age of thirty. Sometime after the Battle of Yavin, she was assigned to the planet Imdaar to monitor Imperial activity. She observed increased Imperial fleet activity near the planet and its moon, Imdaar Alpha, leading her to suspect that the Empire was engaged in a clandestine operation in the area, although she was unable to determine its precise nature. Shortly after the Battle of Hoth in 3 ABY, Rookie One assisted the Alliance in uncovering evidence that the Empire was developing cloaked starfighters, which could potentially devastate the Alliance Fleet. When the Rebels learned that the Executor-class Star Dreadnought Terror was en route to Imdaar, they hypothesized that it was preparing to deploy a full wing of Phantom TIEs.
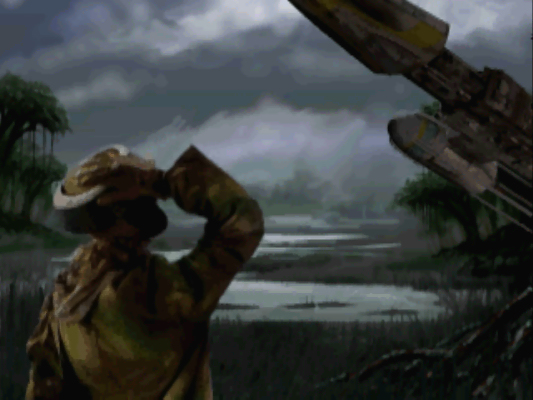
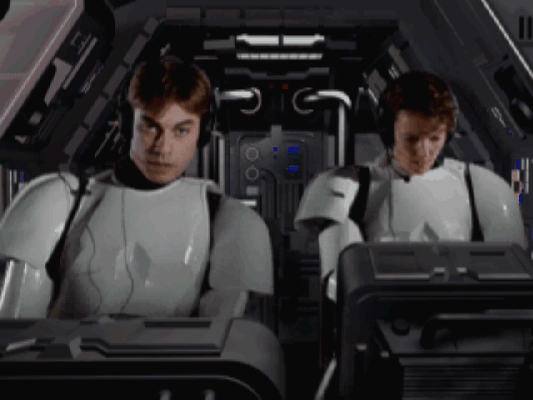
Admiral Gial Ackbar of the Alliance dispatched Rookie One to Imdaar, instructing him to rendezvous with their agent, infiltrate the Terror, and retrieve a TIE Phantom. The Rebel Alliance hoped that by studying one of these fighters, they could develop a countermeasure to the technology before it could be used against them. Rookie One traveled to Imdaar in a BTL Y-wing starfighter, navigating past Imperial defenses and meeting Murleen in a swamp on the planet. Murleen, unaware of who had been sent to join her, was surprised to see her friend emerge from the starfighter. However, they had little time to reconnect, as the Terror was expected to arrive shortly. To infiltrate the Terror, they first needed to access the planetary supply platform, where Murleen hoped to commandeer a cargo shuttle to board the Star Destroyer. The supply base's landing platform was located on the opposite side of the swamp, but Murleen provided speeder bikes, enabling them to travel quickly. Upon reaching the base, they subdued the guards and, after donning the armor of the stormtroopers, stole the Lambda-class cargo shuttle Epsilon Four.
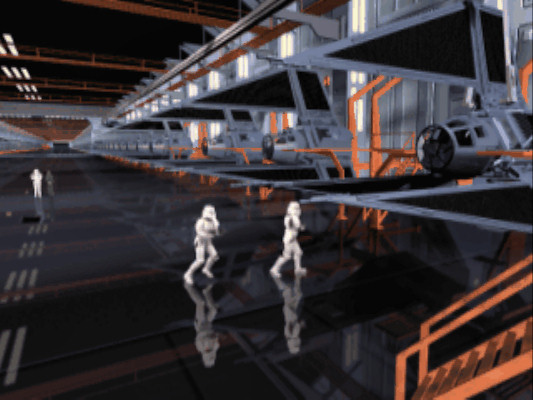
The Rebels piloted the stolen shuttle to the coordinates where they anticipated finding the Terror. When they found no sign of it, Murleen attempted to contact the vessel and received a response. After transmitting the shuttle's security code, they were granted permission to land, and the Terror, equipped with cloaking technology, materialized before them. The Rebels flew the shuttle into the Terror's hangar and, disguised as stormtroopers, began searching for the TIE Phantoms. When they attempted to enter a restricted area, their lack of security clearance drew the attention of an Imperial officer, who raised the alarm. With the Imperials alerted to their presence, the Rebels raced toward their objective but were soon halted by a sealed door. Murleen managed to force a manual override to grant them access, and the pair continued to fight their way past stormtroopers until they reached a chasm and were unable to activate the bridge. Eventually reaching a dead end, and with the Imperials closing in, they were forced to seek an alternate route through the sewer on the deck below.
Although they had temporarily evaded their pursuers, Murleen knew that the Imperials would soon find them. The pair moved swiftly through the dark sewer tunnels but were soon intercepted by an Imperial search party. Fighting through the stormtroopers, Murleen covered the rear while Rookie One engaged those in front, until they reached a freight elevator to the service hangar. After riding the elevator up, the Rebels evaded the hangar's guards and boarded one of the TIE Phantoms. Murleen took the pilot's seat in the cockpit, while Rookie One served as the gunner. Murleen managed to get the fighter operational, and they began to navigate through the Super Star Destroyer's immense hangars. However, the Imperials quickly sealed the hangar doors to prevent their escape, forcing Murleen to fly the stolen fighter through the superstructure in search of another way out—a search that eventually led them to the ship's main reactor. Recognizing the opportunity to destroy the Terror and its complement of TIE Phantoms, Murleen instructed Rookie One to target the reactor's beam focusers. As the reactor reached critical mass, Murleen flew the fighter out of the Terror as explosions began to erupt throughout the vessel.
End of the TIE Phantom
Once clear of the Terror, Murleen began to plot a course to the rendezvous point. However, they were intercepted by TIE Phantoms, which cut off their escape route, forcing Murleen to turn the fighter around and head back toward the Terror, skimming along the Star Destroyer's hull while attempting to evade fire from the incoming TIEs. Rookie One fought off waves of TIE Phantoms, but the situation appeared dire before Murleen managed to activate the cloaking device, concealing the fighter from the Imperials.
Before the Rebels could leave the system, the Terror was destroyed in an explosion that revealed the previously cloaked factory on Imdaar Alpha, to which the Star Destroyer was docked. Murleen realized that the facility was the source of the TIE Phantoms—with the factory capable of producing thousands of the fighters, the stolen one would be insufficient to aid the Rebels in combating the threat. Knowing that they needed to stop the TIE Phantoms quickly, Murleen piloted the stolen fighter into the factory, navigating the hazardous tunnels inside until the Rebels reached the main reactor. Rookie One fired at the reactor, causing it to destabilize, before Murleen took them to safety, moments before the facility was destroyed.
With the threat of the TIE Phantoms effectively eliminated, the Rebels returned to base with the stolen fighter, harboring high hopes that the technology could be adapted to provide Alliance fighters with an advantage over the Empire. However, the fighter self-destructed shortly after arrival. Despite the loss of the fighter, the mission was a resounding success, and the Rebels received a warm reception, with Admiral Krane leading the commendations. Following their return, Murleen and Rookie One began a romantic relationship.
Personality and traits
Ru Murleen was a highly skilled and courageous starfighter pilot, known for her quick thinking, intelligence, and sarcastic sense of humor. Eager to share her expertise with others, she helped train numerous new pilots and demonstrated a keen eye for talent. This, combined with her quick wit, kept her rookies sharp and helped her earn the respect and friendship of those she worked with. Recognizing that piloting was her primary skill, Murleen initially avoided activities that kept her out of the cockpit, preferring to serve the Alliance exclusively as a pilot, and her life revolved around flying. Later in her career, however, she began to undertake other assignments.
Murleen first encountered Rookie One early in his Rebel career, serving as one of his instructors during his training. She was impressed by his piloting skills, and the two became friends, sharing a drink after his assessment. Rookie One began to develop feelings for her during this time, but it was not until over three years later, after they collaborated to defeat the TIE Phantom project, that they acted on their mutual attraction.
Murleen was a Human female with fair skin, blue eyes, and brown hair.
Behind the scenes

Ru Murleen was created by Vincent Lee for the 1993 LucasArts video game Star Wars: Rebel Assault. Her in-game appearance was modeled after Collette Michaud, the director of the Art Department at LucasArts, while her name was derived from Ru Murleen, the actress who provided her voice for the game. The character's backstory was further developed in Rebel Assault's accompanying manual.
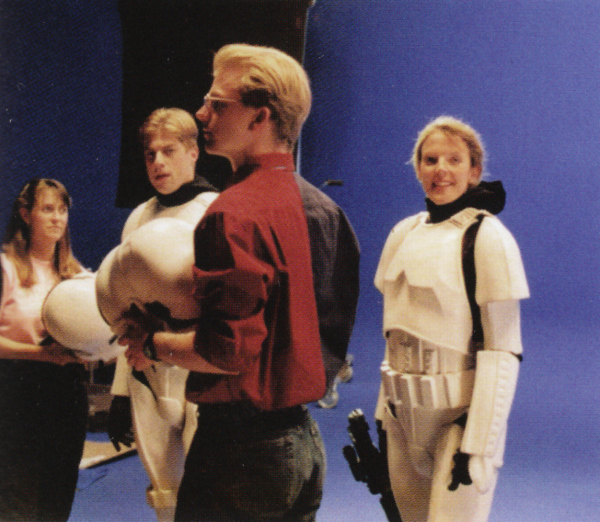
Murleen later reappeared in Lee's Star Wars: Rebel Assault II: The Hidden Empire, the 1995 sequel to Rebel Assault, where she was portrayed by actress Julie Eccles. If Rookie One is killed during the "Aboard the Terror" and "The Sewers" levels in the latter game, a "game over" cutscene depicts her mourning Rookie One, exclaiming "Kid!".
Lee's storyboards and scripts for Rebel Assault II, dated November 16, 1994, included a brief character description of Murleen. Although not included in the game or its manual, this information appeared on the LucasArts website, and the document was later printed in Rob Smith's reference book Rogue Leaders: The Story of LucasArts. Lee also noted the individuals he believed symbolized each character in the game, once again associating Murleen with Collette Michaud.
Murleen was briefly mentioned in "Excerpts from the Journal of a Rebel Pilot," a promotional article written by Sue Seserman for Rebel Assault II, published in 1995 in the twenty-seventh issue of the magazine Star Wars Insider. She was also mentioned in the 2005 reference book The New Essential Chronology, which discusses the events depicted in Rebel Assault II, but refers to Murleen and Rookie One only as "Rebel saboteurs." Murleen received an entry in the 2008 reference book The Complete Star Wars Encyclopedia.
Battle of Yavin
Rebel Assault depicts Murleen, as a member of Blue Squadron, participating in a trench run at the Battle of Yavin, which contradicts the battle as portrayed in the 1977 original trilogy film Star Wars: Episode IV A New Hope. The trench run in the game is nearly identical to that in the movie, with the only difference being the participants. The game shows Blue Squadron attempting a trench run, with Simms entering first, while Murleen, Rookie One, and Harris provide cover. As they navigate the trench, the group is pursued by three TIE fighters, including a TIE Advanced x1, presumably intended to represent the one piloted by Vader in the film. The TIEs open fire, killing Harris and forcing Murleen to withdraw, mirroring the fates of Biggs Darklighter and Wedge Antilles in the film. Ultimately, it is Rookie One's shot that is depicted as destroying the battlestation, rather than Skywalker's.
In December 2006, Leland Chee commented on the StarWars.com Message Boards that Rookie One's trench run was non-canonical. In 2012, the reference book The Essential Guide to Warfare confirmed that Blue Squadron was assigned to attack the Death Star's superlaser while Red and Gold Squadrons attacked the trench.