Rookie One
"Rookie One" served as the handle for a Human pilot who fought on the side of the Alliance to Restore the Republic during the Galactic Civil War. This identifier was initially used during his training period leading up to the Battle of Yavin, but it persisted as a common nickname, often taking precedence over his given name. Originating as a farm worker on Tatooine, Rookie One enlisted with the Rebel Alliance not long after the Battle of Toprawa. After the completion of his training at the Alliance's base situated near Beggar's Canyon, this youthful Rebel participated in the battle of Tatooine, where his squadron spearheaded an attack on an Imperial-class Star Destroyer. Later, he played a role in delaying the Imperial attack to ensure a successful evacuation from Gamma Base on Hoth. Shortly before the arrival of the Death Star, Rookie One was reassigned to the Great Temple on Yavin 4, and he was among the few Rebel pilots who survived the ensuing Battle of Yavin.
Rookie One continued his service to the Rebellion and, soon after the Battle of Hoth, was critical in exposing an Imperial scheme to create a cloaking device for the TIE Phantom. The rescue of the freighter Corellia Star located on the planet Dreighton provided the Alliance with clues about a clandestine Imperial project in the Belt of Arah. As a member of Rascal Squadron, Rookie One was responsible for the destruction of the Arah mining facility, but shortly thereafter, he witnessed the Phantom TIEs when his group was ambushed, leaving him as the only survivor. Armed with this information, Rookie One journeyed to Imdaar where, with the help of Ru Murleen, he successfully infiltrated the Super Star Destroyer Terror and absconded with one of the new starfighters. Furthermore, the two Rebel agents managed to obliterate not only the Terror, but also the TIE Phantom factory at Imdaar Alpha before returning the captured ship to the Alliance, effectively terminating the project.
Biography
Early life
Rookie One, a Human male, was born on the desolate world of Tatooine situated in the Outer Rim Territories around 18 BBY, around the time of the Galactic Empire's inception. Growing up on his family's moisture farm, the young Tatooinian began his career as a farmhand and started to harbor a dislike for the Empire, supporting the emerging Rebel Alliance. During this period, he also cultivated a fondness for flying, quickly becoming a daring civilian pilot and joining other young Tatooinians in shooting womp rats in their skyhoppers. While still in his teens, his family tragically perished in a farm-machinery accident.
Training
Shortly after the death of his family, Rookie One's involvement with the Rebellion began during a trip to Mos Eisley. In Mos Eisley, he met Lieutenant Turland Hack, a communications officer from the Alliance's nearby base, who was instructing a group of pilots in the town. Hack was impressed by the young pilot's enthusiasm for the Rebellion and eagerness to help defeat the Empire, assisting Rookie One in joining the Alliance for training as a starfighter pilot. Hack quickly became a mentor to the young recruit, guiding him and helping him develop into one of the fleet's best pilots. It was during this time that he earned the call sign Rookie One, a nickname that stayed with him throughout his career, although his piloting skills also earned him the title "hotshot" from many instructors and fellow recruits.
Rookie One's training on Tatooine culminated in trials through Beggar's Canyon and the surrounding area, shortly after the Battle of Toprawa in 0 BBY. The initial trial involved piloting a T-16 skyhopper through the dangerous canyon in close formation with two members of Green Squadron. After successfully navigating the canyon, Rookie One proceeded to the second part of the trial, navigating in formation through the rocky terrain while engaging in target practice against multiple target drones. Rookie One's piloting abilities allowed him to pass the trials comfortably and advance to R-22 Spearhead training under Commander Jake Farrell.
After launching from Tatooine, Rookie One was tasked with following Farrell through a nearby asteroid field. Rookie One's control and discipline in navigating the field, while also shooting several smaller asteroids, impressed Farrell, who cleared him to advance to Kolaador for the final phase of his training. On Kolaador, Rookie One encountered Ru Murleen, then the Alliance's youngest commander, who would be his final instructor. The challenging course required him to follow her lead in his R-22 through the planet's perilous crystalline rock formations. Again, he proved up to the challenge, not only qualifying as a starfighter pilot but also impressing the young commander so much that she offered to let him buy her a drink for his "fancy flying" while he waited for assignment to a squadron.
Battle of Tatooine

However, the two Rebels did not have much time to celebrate, as their drink was interrupted by news that Tatooine Base was under Imperial attack. Knowing that Tatooine could not hold out for long, the Rebels deployed three X-wings to assist. Rookie One was chosen to join Commander Murleen and another rookie pilot, Thurlow Harris, for the mission. The group emerged from hyperspace to find an Imperial-class Star Destroyer in orbit. Murleen, knowing that the Star Destroyer was coordinating the attack below, instructed her group to eliminate its command center before proceeding to the surface, as the Rebels would likely be defeated otherwise. In a series of strafing runs, the group weakened the ship's defenses while fending off the Star Destroyer's TIE fighters. When the deflector shields protecting the bridge finally collapsed, Murleen instructed Rookie One to arm his proton torpedoes and begin an attack run on the unprotected command tower. Rookie One scored a direct hit, crippling the vessel. With the Star Destroyer eliminated as a threat, the group descended to the planet.
By the time they arrived, the Rebel base was already under heavy attack. As they approached, the group contacted Turland Hack for a status report, and Rookie One was powerless as he heard the base's destruction in a TIE fighter attack. Yet the young pilot had little time to grieve for his friend. Acting quickly to prevent the TIEs from reporting their presence back to their commanders, Rookie One chased them through Beggar's Canyon and destroyed all three Imperial fighters. Joined by Captain Merrick Simms, the Rebels proceeded to Mos Eisley, where the Empire was deploying ground forces. While Murleen left to cut off the Imperial supply lines, Rookie One joined Simms and Harris in engaging All Terrain Scout Transports and Imperial landing craft. After inflicting as much damage as possible on the Imperial forces, and with TIE fighters approaching, the group was forced to retreat. Pursued by TIE fighters and interceptors, the Rebels fled through the nearby asteroid field, losing their pursuers before rendezvousing with the fleet and proceeding to Gamma Base on the ice-world of Hoth.
Gamma Base
However, the Rebel escape was short-lived. Darth Vader, determined to find their new location, dispatched Viper probe droids throughout the Anoat sector. While Rookie One was patrolling in a T-47 airspeeder, the Rebels detected a nearby probe droid and sent him to investigate. Rookie One confirmed the probe droid's presence and was ordered to destroy it and any others he found while the Rebels prepared to evacuate. As the probe droid disappeared into a cave, Rookie One pursued it.
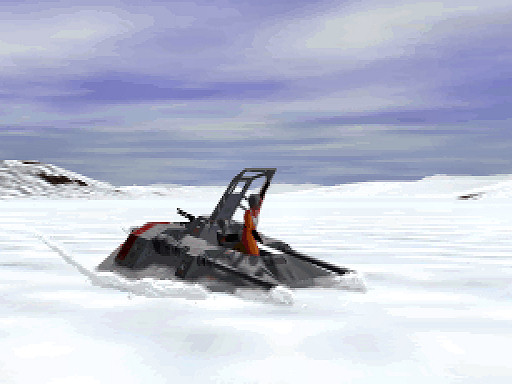
After destroying the probe, Rookie One emerged from the cave in his snowspeeder and joined other Rebel snowspeeders to assist in the defense of Gamma Base—Imperial walkers were approaching, and the Rebels needed more time to evacuate. In a foreshadowing of the Battle of Hoth three years later, the Rebels fought bravely against the heavily armored All Terrain Armored Transports, with Rookie One playing a vital role in slowing the Imperial advance, taking down one of the AT-ATs with his snowspeeder's laser cannons.
As the Rebels retreated, Rookie One's snowspeeder suffered a power loss, preventing him from staying airborne. He instructed the others to continue without him and ensure the safety of the fleeing transports while he attempted to return to base on foot. By the time he reached Gamma Base across the frozen landscape, the Rebels had evacuated, and the base was overrun by Imperial stormtroopers. Rookie One fought his way through the base, eventually reaching the hangar where he boarded the last remaining X-wing, escaping just as stormtroopers fired after him.
Rookie One's departure came just in time to assist the last transport as it attempted to escape to hyperspace. Joining Ru Murleen's group, Rookie One battled waves of TIE fighters, keeping them away from the transport until it safely jumped out of the system. Once clear of the Imperial fighters, the Rebel pilots followed the transport to safety.
Battle of Yavin
The Rebels fled to the Alliance's main base on Yavin 4 to receive dire news. The Empire had been developing the Death Star, a battle station capable of destroying a planet. Although the Alliance had obtained the plans for the superweapon, the Empire had discovered the location of their base, and the Death Star was en route to Yavin. Fortunately, analysis of the plans revealed a weakness that would make the battlestation vulnerable to a starfighter attack. With only three hours before its arrival, Rookie One participated in a hastily arranged training mission to prepare the pilots for the upcoming battle, requiring him to destroy target drones while navigating a narrow riverbed on the jungle moon. By the end of the training mission, the Death Star had arrived in the system, and Rookie One joined the other Rebel starfighters for the battle.
Rookie One was assigned to Blue Squadron for the Battle of Yavin, flying under Merrick Simms' command. As the squadron approached the battlestation, a Star Destroyer in the Death Star's support fleet launched TIE fighters to intercept them. As the group fought through the incoming TIEs, three of the Imperial fighters pursued Simms. When Harris was unable to get a lock, Rookie One acted quickly to eliminate the threat and save his commander. Once through the perimeter, Simms instructed Rookie One and Ru Murleen to begin strafing runs on the Death Star's turbolaser batteries. The battle plan involved navigating a trench along the surface to reach a thermal exhaust port—a direct hit from a proton torpedo would trigger a chain reaction to destroy the station. However, before the assault on the trench could begin, a heavy cannon near the exhaust port needed to be eliminated. Since the cannon was too heavily armored to attack directly, Rookie One and Ru Murleen created a gap in its shielding and flew into the superstructure. There, they destroyed several power relays, disabling the weapon.
With the heavy cannon neutralized, the Alliance forces could begin their trench runs. Meanwhile, Blue Squadron was tasked with attacking the Death Star's superlaser directly, both to damage it and to divert attention away from Red and Gold Squadrons as they attacked the exhaust port. The initial trench runs failed to hit the target, and time was running out when Luke Skywalker, another young pilot from Tatooine, finally delivered the killing blow to the Death Star.
Sometime in the following years, Rookie One was assigned to the Rebel base on his former training world of Kolaador and was present when Kolaador came under attack by a group of Imperial Star Destroyers, flying an X-wing against TIE fighters amid the planet's crystalline rock formations.
Search for the Corellia Star
Shortly after the Battle of Hoth in 3 ABY, Rookie One overheard members of another squadron discussing the Dreighton Triangle, an area of space where starships had been mysteriously disappearing since the Clone Wars. The next day, he learned that he would be accompanying his wing leader, Commander Kirby, on a patrol near Dreighton. Taking precautions, Rookie One practiced extensively in his base's B-wing simulator to prepare for the mission. As Rookie One and Kirby patrolled, they intercepted a distress call from the YT-1300 light freighter Corellia Star, which was under attack by Imperial fighters. The pilot claimed to be carrying vital information for the Alliance, but signal interference prevented the Rebels from hearing the entire message. Nevertheless, the two Rebels attempted a rescue, but were quickly intercepted by a swarm of TIE fighters. Despite being outnumbered, their B-wings eliminated the enemy fighters, but not before the Imperials boarded and captured the freighter. With the area clear, Rookie One and Kirby began searching for the freighter.
The Rebels suspected that more TIEs might be present, given how quickly they had reached them from the freighter. Their suspicions were confirmed when, shortly after Rookie One detected an emergency distress beacon from the Corellia Star, they were attacked by Imperial fighters. Kirby's B-wing was destroyed, and Rookie One's lost a wing, sending him spiraling towards the planet. He ejected before impact and, still tracking the distress beacon, crossed the desert in search of the freighter, eventually finding an Imperial base. With few other options, Rookie One decided to enter the base and attempt to escape in the freighter. After breaking in, he fought past stormtroopers to reach the hangar where the Corellia Star was located, nearly exhausting his ammunition against the numerous Imperial troops. After killing the guards, the Rebel boarded the ship and attempted to escape. However, the Imperials sealed the hangar, leaving Rookie One with no escape except to fly the ship into the mining tunnels of the planet. Successfully navigating the treacherous tunnels while evading fire from pursuing mine cars, he escaped through a ventilation shaft and jumped to lightspeed once clear of the planet.
Belt of Arah
After Rookie One delivered the Corellia Star to the Alliance Fleet, he reflected on the recent mission. The sudden Imperial attack concerned him, but the events had occurred so quickly that his memory was unclear. Meanwhile, the Rebels recovered the Corellia Star's mission recorders and retrieved the full distress message. The message revealed that the Empire had a secret mining facility in the Belt of Arah where it was processing oridium ore to fuel a new weapon. Six days after the Dreighton mission, Rookie One learned that Admiral Gial Ackbar planned to send a squadron to investigate the facility and volunteered for the mission. In a briefing by the admiral, Rookie One was selected to join the strike team tasked with returning to the Dreighton Nebula and searching the Belt of Arah. Upon discovering the Imperial complex, they were to destroy its production capabilities.
The mission saw Rookie One flying as part of Rascal Squadron, along with Ace Merrick and Ina Rece. When the group arrived at the Belt of Arah, they discovered that the asteroid field's perimeter was protected by a derillium minefield and had to navigate through the asteroids, destroying nearby mines before they could attack their X-wings. After passing through the perimeter, the group was attacked by a swarm of TIE interceptors. Although Rookie One performed well, he was eventually targeted by a TIE and had to be rescued by Rece.
The group finally found the mining facility, built into one of the larger asteroids. After gaining access through a transport corridor designed for shuttles and cargo drones, the group followed the corridor until Rookie One gained access to the reactor by destroying the shield emitters at an exchange junction. Evading fire from sentry guns, which mistook the X-wings for floating debris, the group destroyed the reactor's cooling system, causing it to go critical. The Rebels escaped through an exhaust vent moments before the facility was destroyed. However, just as Rascal Squadron prepared for hyperspace, they were attacked by Imperial fighters. Rookie One was the only survivor, managing to evade enemy fire long enough to jump to hyperspace.
Mission to Imdaar
Like the previous attack near Dreighton, the Imperial fighters appeared without warning. This time, however, Rookie One's X-wing's survival shed light on the mysterious fighters—flight recordings revealed them to be modified V38 assault fighters, equipped with cloaking devices that rendered them effectively invisible except when firing. Admiral Ackbar realized that a fleet of TIE Phantoms could be disastrous for the Alliance, allowing the Empire to attack with impunity. Alliance Intelligence had reported high levels of Imperial Navy activity near Imdaar in recent weeks, and with the Super Star Destroyer Terror en route, Ackbar suspected that this was the likely location for the new starfighters' mass deployment. To counter the fighters, the Alliance needed to acquire one for study. To this end, Rookie One volunteered to rendezvous with the Rebel agent on Imdaar, infiltrate the Terror, and steal a TIE Phantom.
Before the mission could commence, Rookie One needed to familiarize himself with the operation of a TIE Series starfighter. Consequently, he was dispatched for training in one of the few TIE fighters that the Alliance had managed to capture intact. Given the mission's critical nature, Admiral Krane himself oversaw Rookie One's TIE training. This training involved navigating the fragile fighter through a tight canyon. However, Rookie One's past experiences in Beggar's Canyon meant he completed the trial easily, and he was soon prepared for the mission. For the mission, Rookie One received a Y-wing and would be accompanied by Krane and Darnell Reggs as escorts. The group engaged a number of TIE interceptors in combat, successfully fighting through them to ensure Rookie One's safe passage to Ceti 597 en route to Imdaar. His escorts could not proceed further, as a lone ship would have a better chance of penetrating Imdaar's defenses.
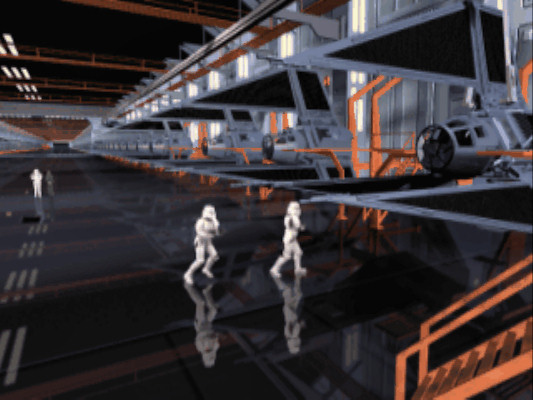
Rookie One finally made his way to Imdaar, exiting hyperspace just outside the nearby asteroid field. He skillfully navigated through the heavily mined asteroid field before descending to the planet to meet the Rebel agent. Upon reaching the designated rendezvous point in a secluded swamp on the planet's surface, Rookie One was surprised to find that the agent was his former tutor, Ru Murleen. To infiltrate the Terror, they first needed to gain access to the Empire's planetary supply platform, where Murleen hoped to find transport to the Star Destroyer. The landing platform of the supply base was located on the far side of the swamp, but the two Rebels swiftly traversed the swamp on speeder bikes. Arriving at the base, they subdued the guards and, donning stormtrooper armor, commandeered a Lambda-class cargo shuttle.
Infiltrating the Terror
By using the shuttle's security code, the two Rebel agents successfully gained permission to land on the Terror. Disguised as stormtroopers, they commenced their search for the TIE Phantoms. However, the TIEs were housed in a restricted area of the ship, and their lack of proper clearance soon attracted the attention of an Imperial officer who raised the alarm. With the Imperials now aware of their presence, the Rebels hastened toward their objective but were halted by a sealed door. Rookie One engaged the stormtroopers in combat while Ru attempted to manually override the door. After battling their way past more stormtroopers, the two reached a chasm and were unable to activate the bridge. Rookie One quickly devised a solution, firing upon the supports of the bridge above them, causing it to collapse to their level and enabling them to cross. Eventually reaching a dead end, they were left with no choice but to seek an alternate route through the sewer system below.
Knowing that the Imperials would soon be upon them, the Rebels began moving through the sewer, but they were quickly intercepted by an Imperial search party. Fighting through the stormtroopers, with Rookie One taking the lead and Murleen covering their rear, they eventually reached a freight elevator that took them to the service hangar above. After evading the hangar's guards, they boarded one of the TIE Phantoms and prepared to escape, with Murleen piloting and Rookie One serving as the gunner.
After launching, the Rebels navigated through the expansive service hangars, but the Imperials swiftly closed the hangar doors in an attempt to prevent their escape. Murleen adjusted her plan and guided the ship through the superstructure in search of another exit, which ultimately led them to the ship's main reactor. Recognizing the opportunity to destroy the Terror and its complement of TIE Phantoms, Rookie One targeted the reactor's beam focusers, causing it to become critical. The Rebels escaped in their stolen TIE as explosions began to engulf the Super Star Destroyer.
End of the TIE Phantom
Although they had escaped the Terror, the Rebels were not yet safe. As Murleen set a course for the rendezvous point, they were attacked by TIE Phantoms. With their escape route blocked, the Rebels were forced to turn back toward the Terror. Murleen flew their TIE close to the surface of the doomed Star Destroyer while Rookie One fought off waves of TIE Phantoms. Despite his valiant efforts, the situation appeared increasingly dire until Murleen finally discovered how to activate the cloaking device, concealing them from their pursuers.
However, the delay meant they witnessed the final destruction of the Terror, which had an unexpected consequence—the Terror's destruction revealed the previously cloaked factory on the moon Imdaar Alpha. Realizing that the facility was producing potentially thousands of these fighters, acquiring only the stolen one would do little to help the Rebellion combat them. Murleen knew they had to act immediately to eliminate the threat. She piloted the stolen TIE into the factory, navigating its treacherous tunnels while Rookie One destroyed the enemy turrets within. Eventually, they reached the main reactor, which Rookie One targeted, causing it to destabilize. As the Rebels made a hasty escape, the reactor went critical, destroying the facility and effectively ending the TIE Phantom project.
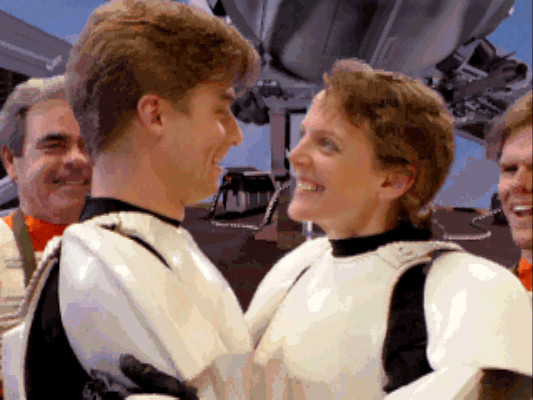
Rookie One and Murleen finally returned to base with the stolen fighter, hoping that its technology could be adapted for Alliance fighters, giving them an advantage over the Empire. However, this was not to be, as the fighter self-destructed shortly after arrival. Despite this setback, Rookie One and Murleen received a warm welcome following their successful mission, with Admiral Krane leading the commendations. It is also known that the two Rebels developed a romantic relationship after the mission.
Personality and traits
As a young man, Rookie One harbored dreams of joining the Rebel Alliance and engaging in dogfighting against TIE fighters. When he encountered Turland Hack, the Rebel recognized that the eighteen-year-old possessed qualities the Rebellion needed: he was quick, confident, and, above all, willing to risk everything for the cause. Rookie One's confidence in his abilities was evident, and he was known to show off during training by performing stunts. Although he initially lacked discipline, Rookie One's training helped him cultivate this skill to the point where he impressed Commander Farrell during his trials. Despite this improvement, he still had a tendency to showboat, performing a barrel roll in a T-16 during his trial in Beggar's Canyon. In addition to his piloting skills, Rookie One was a student of the Force.
The young pilot was dedicated to the Rebellion and willing to take risks to support the Rebel cause, volunteering for dangerous assignments like the mission to infiltrate the Terror. Similarly, when his snowspeeder crashed on Hoth, Rookie One insisted on making his own way off the planet rather than potentially slowing down the evacuation.
When he first joined the Alliance, Rookie One was pleased to have the chance to fly with such skilled pilots and accepted his nickname without complaint. However, over time, particularly after his actions at the Battle of Yavin, he wanted to shed the nickname, as he no longer considered himself a rookie.
Rookie One met Ru Murleen early in his Rebel career, when she served as one of his instructors during his training. He was impressed by her piloting skills, but it was during a celebratory drink after he completed his training that Rookie One began to feel an attraction to his instructor. However, he initially dismissed these feelings, content to be her comrade and friend. It was not until over three years later, after they worked together to thwart the TIE Phantom project, that they acted on their mutual attraction. Rookie One had brown hair and blue eyes.
Equipment
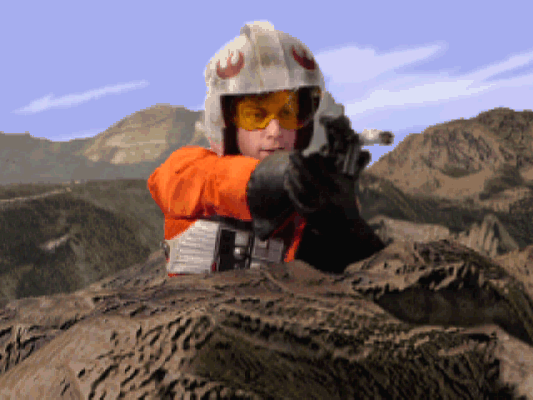
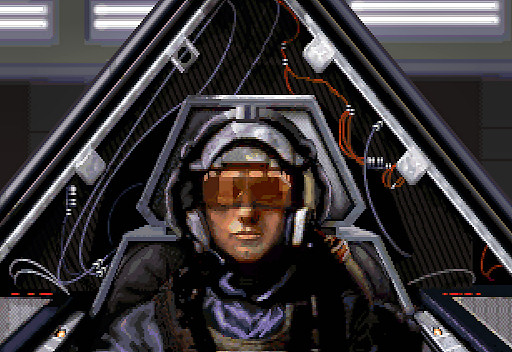
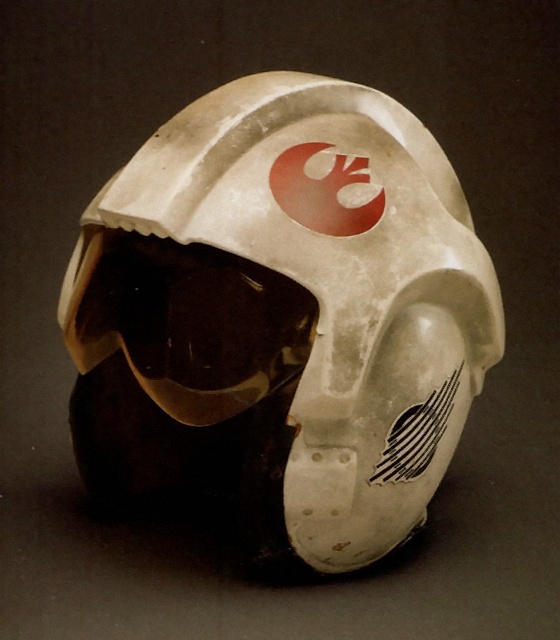
As a Rebel pilot, Rookie One frequently flew standard Rebel Alliance starfighters, including the X-wing, Y-wing, B-wing, and R-22 Spearhead. His duties also involved using repulsorcraft such as the T-47 airspeeder, T-16 skyhopper, and speeder bikes, as well as the Imperial TIE fighter and TIE Phantom starfighters. Rookie One typically wore a standard orange Rebel flight suit, helmet, and flight gloves, and he was equipped with both a blaster pistol and a comlink capable of tracking distress signals.
Behind the scenes
Character creation
Rookie One was conceived by Vincent Lee and first appeared as the playable character in the LucasArts game Star Wars: Rebel Assault (1993). The game's accompanying manual provided details about the character's backstory. He later returned as the player character in Lee's Star Wars: Rebel Assault II: The Hidden Empire (1995). "Excerpts from the Journal of a Rebel Pilot," a promotional piece for Rebel Assault II by Sue Seserman published in Star Wars Insider 27, was written as Rookie One's journal entries, further developing the character's background and detailing some events that transpired between the two games. In 2008, the character was given an entry in The Complete Star Wars Encyclopedia, while a brief mention of the events in Rebel Assault II in 2005's The New Essential Chronology simply referred to Rookie One and Ru Murleen as "Rebel saboteurs."
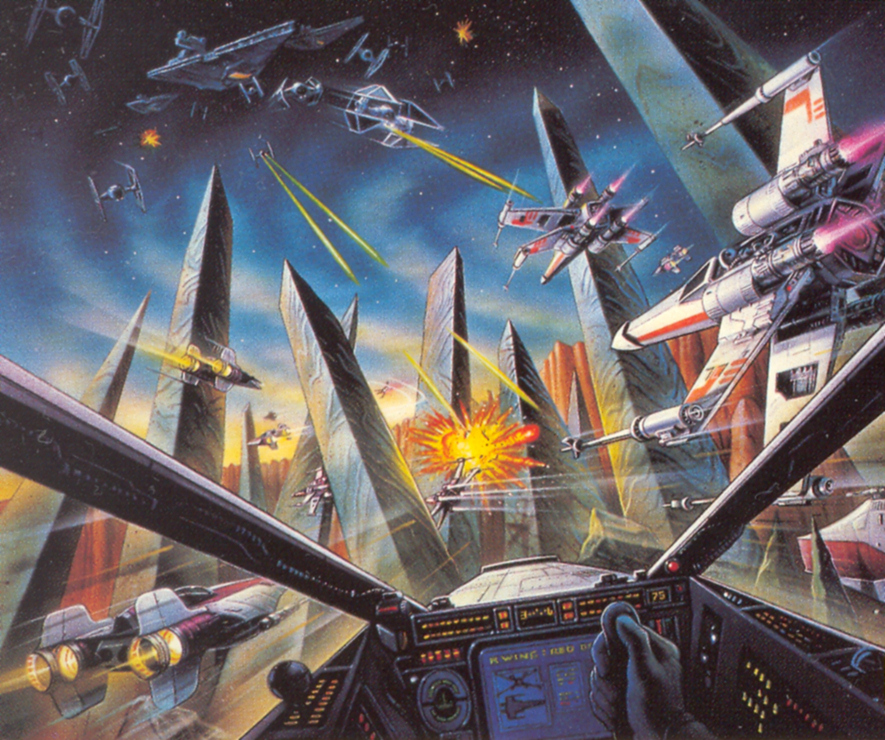
The box art for Rebel Assault depicted a battle against Imperial forces on Kolaador from a pilot's perspective. Although the game included a training mission on Kolaador, there was no indication of any Imperial presence, and the battle could not fit between missions as the pilots were immediately dispatched to Tatooine afterward. However, Greg Winters's artwork reappeared in the 1995 Topps Star Wars Galaxy Series 3 trading cards, with the image described as showing Rookie One fighting Imperial forces on Kolaador. Therefore, it is assumed that this event occurs sometime after the first game.
Rebel Assault II featured different versions of the scene where Rookie One and Ru Murleen are greeted by Admiral Krane upon their return to base with the stolen TIE Phantom, depending on the difficulty level selected by the player at the start of the game. At the lower difficulty settings, "beginner" and "novice," Admiral Krane shakes Rookie One's hand. At the "standard" difficulty level, he presents Rookie One with a medal, while at the "expert" difficulty, he presents a more elaborate medal.
Vincent Lee's storyboards-and-scripts document for Rebel Assault II, dated November 16, 1994, contained a brief description of Rookie One, mentioning that he "joined the Rebels after losing his family in a freak farm-machinery accident." This detail was not included in the game or its manual but was repeated in a short biography of the character on the LucasArts website and later in The Complete Star Wars Encyclopedia. The original document was reprinted in Rogue Leaders: The Story of LucasArts (2008).
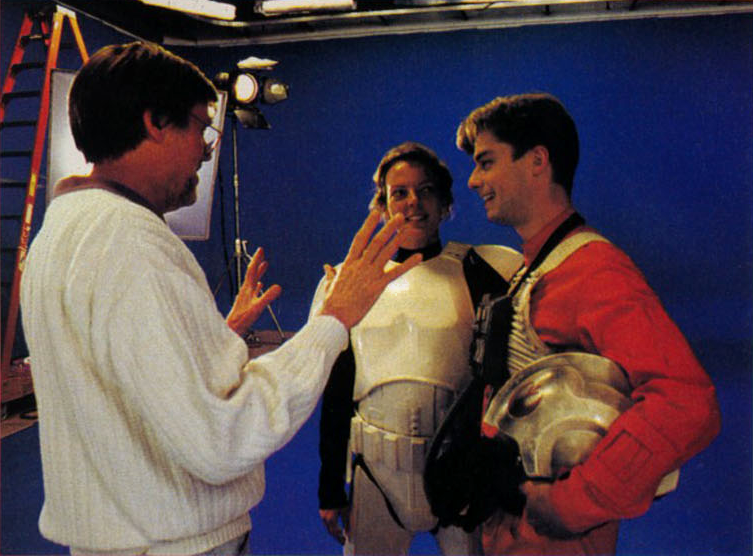
In his storyboards-and-scripts document, Lee noted the actors he felt embodied each character in the game. His initial choice for Rookie One was Michael J. Fox, but he later changed it to Tom Cruise. Among those who auditioned for the role of Rookie One was actor Jamison Jones. After waiting an hour, Jones informed the casting assistant that he had another appointment and had to leave, but he received a call-back the following day and was asked to meet the game's director, Hal Barwood. Barwood discussed the project with Jones and decided to give him the role.
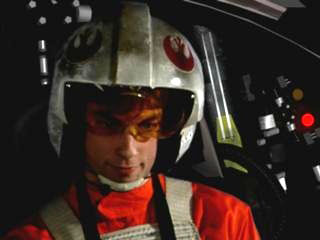
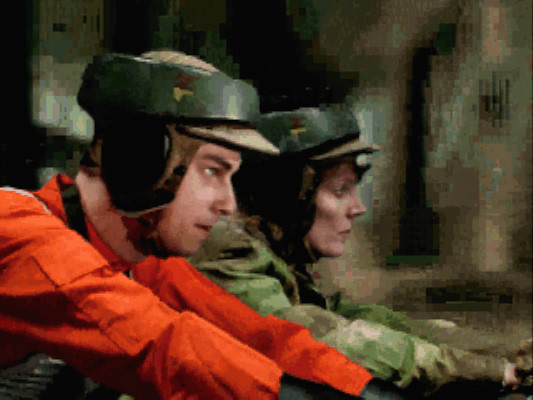
Rebel Assault II featured live-action cutscenes filmed in front of a blue screen with digital backdrops. During filming, the cast used props and costumes created for the original trilogy of Star Wars films. The flight helmet worn by Rookie One was a standard Rebel pilot helmet from Star Wars: Episode V The Empire Strikes Back.
Comparison to Luke Skywalker
Rookie One's narrative shares significant similarities with that of Luke Skywalker. Their backstories are alike, both having grown up on farms on Tatooine, where they honed their piloting skills flying T-16s in Beggar's Canyon. Even the events of Rebel Assault mirror Skywalker's actions in the original trilogy. Like Skywalker, Rookie One joins the Alliance shortly after its first major victory at Toprawa and participates in the Battle of Yavin, as well as battling AT-ATs on Hoth. These parallels are intentional, aiming to make the player feel like Luke Skywalker within a new story.
One of Rookie One's actions in Star Wars: Rebel Assault contradicts the established continuity, depicting him participating in a trench run at the Battle of Yavin, which clashes with the battle as portrayed in Star Wars: Episode IV A New Hope. The trench run in the game is nearly identical to that in the film, differing only in the participants. The game shows Blue Squadron attempting a trench run, with Simms entering first, while Rookie One, Murleen, and Harris provide cover. As they proceed down the trench, they are pursued by three TIE fighters, including a TIE Advanced x1, presumably intended to be the one piloted by Vader in the film. The TIEs open fire, killing Harris and forcing Murleen to withdraw, mirroring the fates of Biggs Darklighter and Wedge Antilles in the film. Simms reaches firing range, but his torpedoes impact the surface, leaving Rookie One to make an attempt, mirroring Garven Dreis's failed attempt. With the TIEs closing in, Rookie One appears to be in trouble when Commander Farrell's R-22 arrives and destroys the TIEs, allowing Rookie One to take his shot. This echoes Han Solo's last-minute rescue of Luke Skywalker in the film. Finally, Rookie One's shot is depicted as destroying the battlestation, unlike Skywalker's.
In December 2006, Leland Chee commented on the StarWars.com Message Boards that Rookie One's trench run was non-canonical. The Essential Guide to Warfare (2012) later confirmed that Blue Squadron was assigned to attack the Death Star's superlaser, while Red and Gold Squadrons attacked the trench. This is the only aspect of the game officially deemed non-part of Legends continuity, and the rest is considered within that continuity unless otherwise stated.
Name and gender
Neither game specified Rookie One's name, allowing players to identify with the character. From an in-universe perspective, "Rookie One" seems to be the character's call sign during training, which, for an unexplained reason, remains with him or her afterward. In what appears to be a reference to Rebel Assault, "Rookie One" is also the call sign given to Ace Azzameen during his early training missions with the Rebel Alliance in the later LucasArts game Star Wars: X-Wing Alliance.
The character's gender was customizable in Rebel Assault, and Rookie One's dialogue was recorded in both male and female voices, although the credits do not specify who provided either voice. Rookie One's face was only visible in one cutscene, albeit obscured by a helmet. Nonetheless, both male and female versions of this cutscene were included. All other cutscenes depicted the character wearing a helmet and from behind, eliminating the need for gender-specific versions.
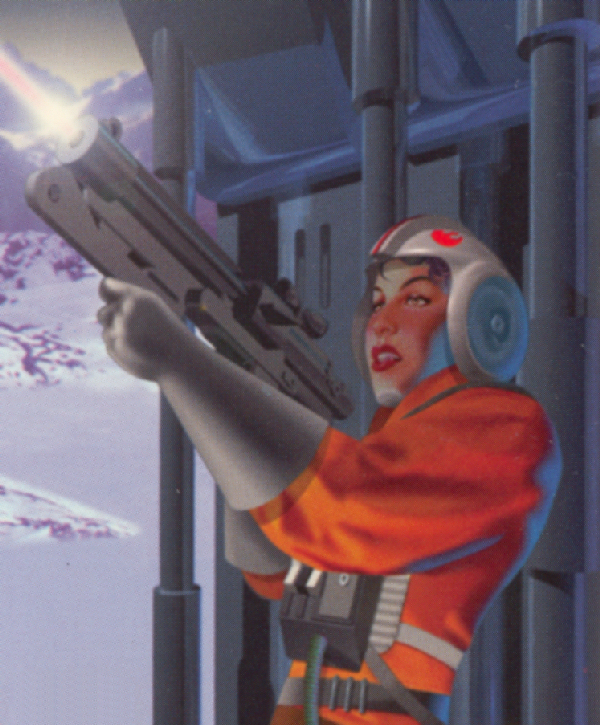
In the 1995 Topps Star Wars Galaxy Series 3 trading cards, one card featured an illustration by Keith Carter depicting Rookie One as a young female during the mission to Hoth. This image was later overruled when Rebel Assault II established the character as officially male.
Force powers
The manual accompanying Rebel Assault provided brief biographies of several key characters, including Rookie One. The manual included with the Sega CD version of the game suggested that Rookie One was Force-sensitive, stating, "Rookie One is a student of the Force." This was not mentioned in the PC or 3DO manuals, but it appears to be supported by Prima's Rebel Assault: The Official Insider's Guide, which states, "A Jedi would be able to handle this, but you're still just a rookie." Although Rookie One's potential Force-sensitivity is never mentioned in either game, this article treats him as Force-sensitive based on these sources.