Shadow of Malevolence
"Shadow of Malevolence" represents the third installment of Season One from the Star Wars: The Clone Wars animated television program. As the third episode in the entire series, it forms the second part of a narrative arc spanning three episodes. This episode was originally broadcast on Cartoon Network on October 10 of 2008.
Official description
Anakin, aided by his Padawan Ahsoka and Jedi Master Plo Koon, spearheads a daring assault on General Grievous' flagship, the Malevolence, utilizing advanced, long-range Y-wing bombers. Their mission is to neutralize its devastating weapon. As General Grievous menaces medical facilities with the Malevolence, the Jedi mobilize to safeguard Republic territories. Anakin, alongside his apprentice and Master Plo Koon, takes the lead in a bold offensive deep into enemy territory.
Plot summary
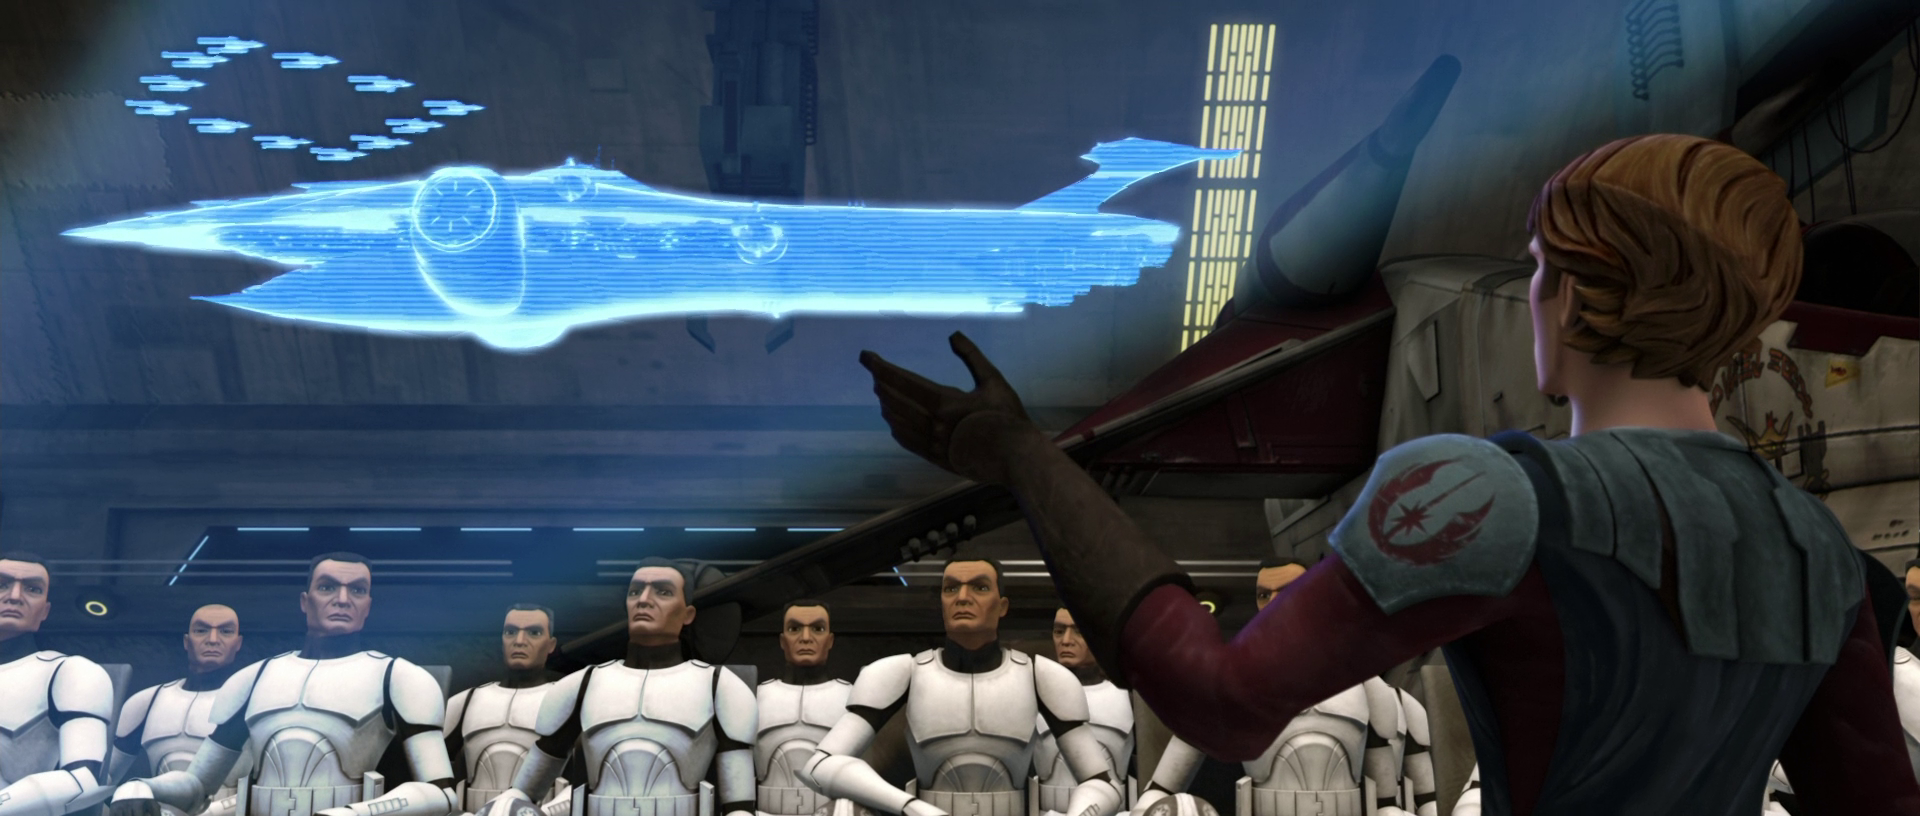
With the Malevolence relentlessly attacking the Republic's naval forces, Anakin Skywalker determines that a counterattack is essential. He formulates a strategy involving his newly formed Shadow Squadron. The plan involves deploying a group of 12 Y-wing bombers against the Separatist flagship, concentrating their firepower on the bridge to eliminate General Grievous and disable the vessel. Both Master Jedi Plo Koon and Anakin's Padawan, Ahsoka, voice their concerns, believing the operation to be overly ambitious and carrying a high risk of failure. However, Anakin confidently assures them of its success.
Onboard the Malevolence, Count Dooku informs General Grievous of a new priority target: the Republic's clandestine medical station in the Outer Rim, known as the Kaliida Shoals Medical Center, which is currently treating more than 60,000 injured clone troopers. Eliminating this facility would inflict a significant blow to the Republic's ability to wage war.
Having discerned the Malevolence's intended target, Admiral Yularen contacts Nala Se, a Kaminoan physician stationed at the Medical Center, to alert her to the impending assault. She expresses concern that there may not be sufficient time to evacuate all 60,000 patients. General Kenobi joins the conversation, informing Nala Se that transports from Naboo are en route to assist with the evacuation and that he is also on his way.
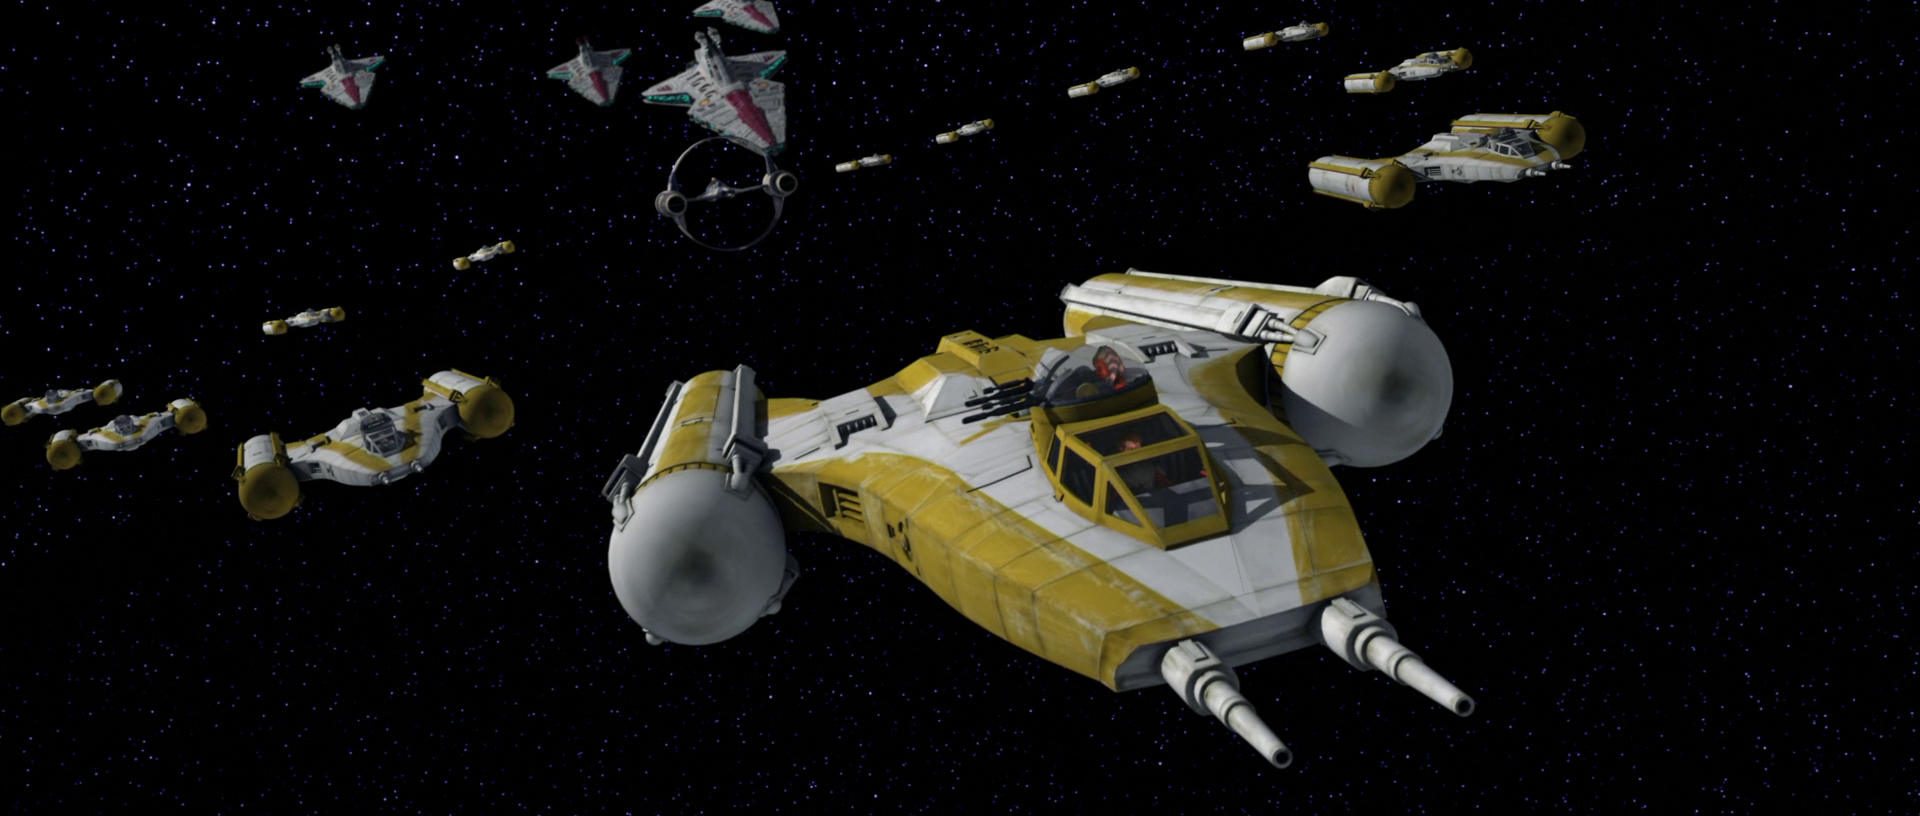
With Ahsoka serving as his gunner, Anakin leads Shadow Squadron away from the Republic fleet in their Y-wing bombers, accompanied by Plo Koon, who provides escort in his modified Delta-7B Aethersprite-class light interceptor_. In an attempt to intercept the Malevolence in time, Anakin opts to take a shortcut through the Kaliida Nebula. Midway through the nebula, Master Koon is surprised to discover that they are following the Balmorra Run, a perilous route used by smugglers. He urges Anakin to reverse course, explaining that the Balmorra is the breeding ground for the massive neebray mantas. Just as Ahsoka's sensors detect numerous large lifeforms, the squadron finds itself in the middle of a nest of these creatures. By following closely behind Anakin, Shadow Squadron manages to navigate through the swarm and exit the nebula, although Matchstick's Y-wing sustains damage to one of its engines.
Yularen informs Kenobi that half the patients at the medical station have been evacuated. Kenobi fears they won't be able to complete the evacuation before Grievous arrives. Yularen hopes that Skywalker can still intercept Grievous, and Kenobi stresses the need to be prepared in case he does.
Plo Koon notices the damage to Matchstick's ship. Matchstick assures him it's minor. Koon warns against taking unnecessary risks, emphasizing that losing even one ship could jeopardize the mission.
As Shadow Squadron approaches the medical facility, the Malevolence emerges from hyperspace. General Grievous orders the launch of their fighters and directs one of the Malevolence's two mega-ion cannon to target the medical transports fleeing the station with evacuees. The cannon fires, and the resulting energy surge disables the transports. The Malevolence then opens fire on the helpless transports.
The ion cannon then targets Shadow Squadron. Anakin instructs everyone to fly towards and over the edge of the approaching energy surge. As the Y-wings struggle to gain altitude, Matchstick's engine fails completely and explodes, destroying his and another Y-wing. Three more Y-wings are caught in the surge and disabled, eliminating almost half of Anakin's attacking force.
As Shadow Squadron continues to lose fighters to the Malevolence's turbolasers, Grievous orders the ion cannon to target the medical facility itself. Desperate, Master Koon suggests that if the squadron inflicts enough damage on the ion cannon, they might cause it to overload. Anakin orders the squadron to redirect their fire to the starboard ion cannon. As the cannon charges, Shadow Squadron launches a barrage of proton torpedoes at its base. The torpedoes explode in a massive blast, causing the ion cannon to overload and explode when General Grievous orders it to fire, just as they had hoped. The resulting explosion destroys both cannons and damages the Malevolence's hyperdrive, preventing the ship from escaping into hyperspace. Obi-Wan and Yularen arrive with the Republic capital ships and give chase as Grievous, thwarted, orders the damaged flagship to retreat to Separatist-controlled space.
On board the medical station, Nala Se expresses her gratitude to Anakin and urges him to appreciate the lives he has saved. Anakin assures her that he does, but that, despite their victory, he also mourns the loss of the members of Shadow Squadron. He and Ahsoka excuse themselves to prepare for their continued pursuit of Grievous.
Behind the scenes
The moral presented in this episode was altered from its initial version for the television broadcast, becoming "Easy is the path to wisdom for those not blinded by themselves.…" However, the original moral was restored for the director's cut of the episode, which appeared on the Season One DVD and Blu-ray.
When instructed to prepare the ion cannon to fire on the medical station, a battle droid utters the iconic Star Wars line, "I have a bad feeling about this."
During the scene where Matchstick informs Plo Koon that the damage to his ship is "just a scratch," he is depicted wearing a standard Shadow Squadron helmet instead of his custom-painted one. Moments later, he is shown wearing his personalized helmet again.
The unidentified Shadow Squadron pilot also wears a standard helmet when he is shown being killed. Later, during the discussion about the attack on the medical transport, several pilots are seen wearing Matchstick's helmet.
The scene depicting the Malevolence's attack on the Venator-class star destroyer bears a strong resemblance to the Leviathan's orbital bombardment of Taris in Star Wars: Knights of the Old Republic.
In two instances when the ion cannon is fired, the camera provides a close-up of the inner section firing the blast. Both shots are a tribute to the Death Star firing sequence, replacing Imperial technicians with battle droids.
The episode's final scene, where Anakin Skywalker, Ahsoka Tano, and R2-D2 gaze into space aboard the Kaliida Shoals Medical Center, closely mirrors the concluding scene in Star Wars: Episode V The Empire Strikes Back, where Luke Skywalker, Leia Organa, R2-D2, and C-3PO look out into space on the EF76 Nebulon-B escort frigate Redemption.
The episode garnered an audience of 2.8 million viewers.