Anakin Skywalker
Anakin Skywalker was a remarkably powerful, Force-sensitive human male. As a Jedi Knight serving the Galactic Republic, he was prophesied to be the Chosen One of the Jedi Order, destined to bring equilibrium to the Force. In his youth, he was known affectionately as " Ani", and during the Clone Wars, he gained the title "Hero With No Fear" due to his many achievements. Later, he became Darth Vader, the Dark Lord of the Sith, after embracing the dark side of the Force and pledging allegiance to the Sith Lord Darth Sidious near the close of the Republic Era.
Anakin Skywalker, a strong vergence in the Force, entered existence on the arid desert planet Tatooine, situated in the remote Outer Rim Territories, in 41 BBY. He was the offspring of Shmi Skywalker, an enslaved individual who gave birth to a child without a known father. His blood was abundant with over twenty thousand midi-chlorians, exceeding the count of Grand Master Yoda and all other Jedi within the galaxy. Qui-Gon Jinn, a Jedi Master who encountered Skywalker during the Invasion of Naboo in 32 BBY, proposed that Skywalker's conception was a result of the midi-chlorians. Following the Battle of Naboo, the Jedi High Council, despite their concerns about his age and emotional state making him unsuitable for the Jedi Code, allowed Anakin Skywalker to join their ranks as the Padawan of Obi-Wan Kenobi. Skywalker remained a Padawan as the Clone Wars began, ignited by machinations orchestrated by Count Dooku. Despite the Jedi doctrine forbidding them, Anakin Skywalker entered into a clandestine marriage with Senator Padmé Amidala of Naboo. In the initial days of the Clone Wars, Skywalker held the position of a Jedi General within the Grand Army of the Republic, leading the clone troopers of the renowned 501st Legion against the Confederacy of Independent Systems. After achieving the rank of Jedi Knight, Skywalker oversaw the Jedi training of his own apprentice, Ahsoka Tano. By 19 BBY, after Tano departed from the Jedi Order, Skywalker grappled with feelings of inadequacy towards his apprentice and the Jedi Order.
After Count Dooku's death during the Battle of Coruscant, Anakin Skywalker's belief in the Jedi was further undermined when he was appointed to the Jedi Council but denied the rank of Master. He also discovered that Supreme Chancellor Sheev Palpatine was, in reality, Darth Sidious, the elusive Dark Lord of the Sith who had masterminded the war to seize control of the galaxy. Manipulated into believing that the Jedi had failed him, combined with his terror of losing Amidala during childbirth, Skywalker betrayed the Jedi Order and sided against them, convinced that Sidious possessed the knowledge to cheat death. Overwhelmed by the Darth Vader persona, the fallen Jedi Knight commanded his legion to storm the Jedi Temple on Coruscant, where they massacred all within, including Jedi younglings, as part of Order 66 and the Great Jedi Purge. Vader was then dispatched to Mustafar to exterminate the Separatist Council on behalf of his Sith Master, who then proclaimed himself Galactic Emperor. Vader then suffered critical injuries during his duel with Kenobi, and was reconstructed into an armored cyborg, while his wife passed away from a broken heart, but not before giving birth to twins Luke Skywalker and Princess Leia Organa, who were concealed from their father and the Emperor as the Galactic Empire consolidated its authority.
As the Emperor's Fist, and later promoted to supreme commander of the Imperial fleet, Vader enforced the dictates of the New Order as the Emperor's Sith apprentice for much of the Imperial Era, thereby serving as the de facto Commander-in-Chief of the entire Imperial Military. After slaying Kenobi in a duel aboard the Death Star and the subsequent Battle of Yavin in 0 BBY, he learned of his son's existence and became determined to convert Luke to the dark side. Luke, aspiring to become a Jedi like his father, believed that Vader could return to the light side of the Force. During the Battle of Endor in 4 ABY, Luke defeated Vader, but the young Jedi refused to give into anger and strike down his father, leading the Emperor to torture Luke with Force lightning. The suffering inflicted upon his son stirred the remaining good within Vader, leading to a redeemed Skywalker sacrificing his own life to kill Sidious. With the Sith destroyed and his destiny as the Chosen One fulfilled, Skywalker reconciled with his son and became one with the Force.
Anakin Skywalker stands as one of the most formidable Jedi and Sith in galactic history. The Force ran particularly strong in the Skywalker bloodline, culminating in Anakin's grandson, Ben Solo, Organa's son who was born by the end of the Galactic Civil War in 5 ABY. Solo also succumbed to the dark side, becoming the dark warrior Kylo Ren during the rise of the First Order. But much like his grandfather, Solo found redemption by sacrificing himself for the love of another—the Jedi apprentice Rey, who, during the Battle of Exegol in 35 ABY, heard Skywalker's voice urging her to restore balance, as he once had. Solo's passing marked the end of the Skywalker bloodline, although Rey, the granddaughter of Sidious, renounced her true lineage and adopted their surname to honor their legacy.
Biography
Early life
Childhood on Tatooine
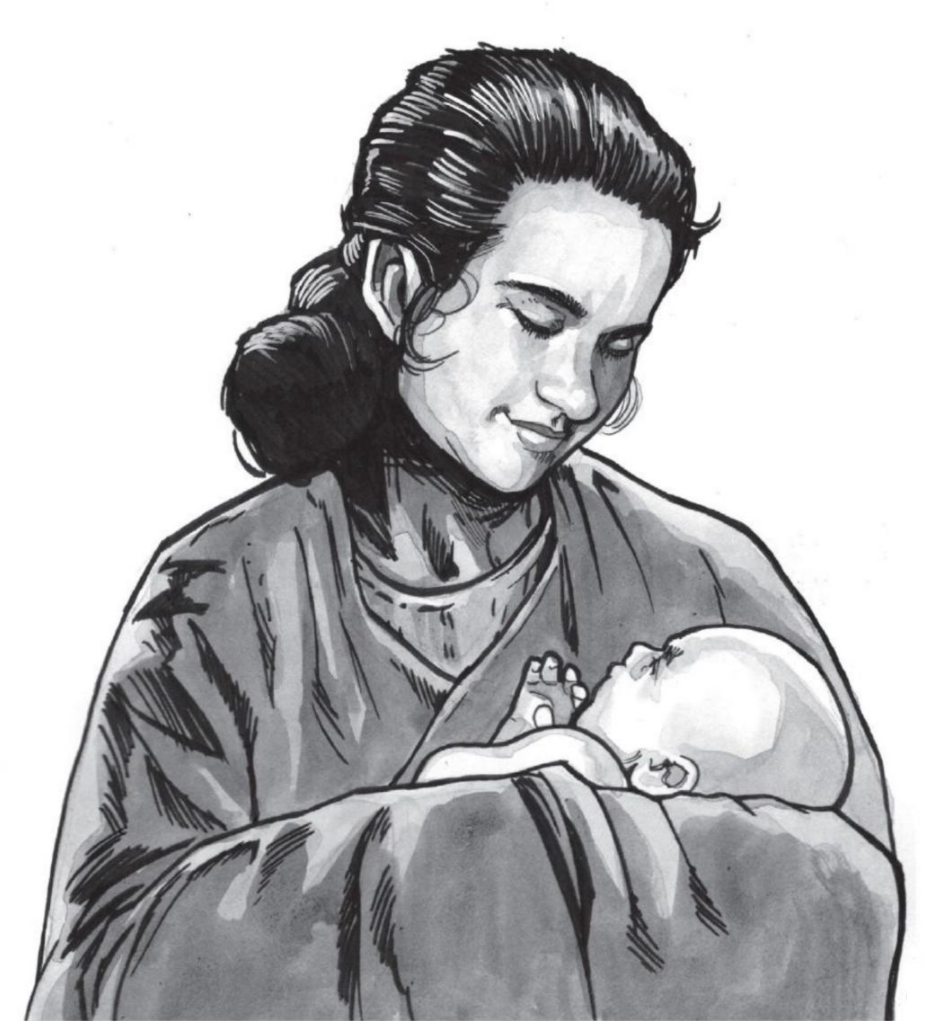
Anakin Skywalker, who was believed to be conceived by the will of the midi-chlorians, was born to Shmi Skywalker, who was a slave. Although birth records indicate that Skywalker was born on the desert planet of Tatooine, a holographic recording suggests that Shmi and he relocated to the planet when Skywalker was a very young child. Regardless, Tatooine is considered Skywalker's home world. While residing on Tatooine, Skywalker and his mother were initially owned by Gardulla the Hutt, until she lost them to Watto, the Toydarian, in a podracing wager when Skywalker was approximately 3 years old. Affectionately called "Ani", he was employed in his master's shop, which was located in Mos Espa.
Even at a young age, Skywalker demonstrated remarkable aptitude as a pilot. He also constructed C-3PO, a protocol droid that was specifically modified to endure the heat and sand of Tatooine, for his mother. On one occasion, while working in Watto's junkyard, he discovered a damaged servomotor that he believed he could repair and incorporate into the droid he was building. He requested it from his master. Watto glanced at it, deemed it worthless, and grunted that he could have it, but as Skywalker began to leave, Watto informed him that nothing was free and demanded that he work harder the following day. Once, Skywalker and his mother became disoriented in a sandstorm, but the boy refused to listen to her when she urged him to return home if he could see it. Refusing to abandon her, he struggled through the storm to reach her, promising her that they would be safe and that he would not leave her.
Skywalker obtained the photoreceptors for the droid at a market in Mos Espa. Although a Gran also desired them and pursued him through the market, Skywalker managed to escape by demolishing an Ithorian's stall, preventing the Gran from continuing his pursuit. By the time he was nine, Skywalker had ensured that 3PO was fully functional. He maintained close friendships with fellow slaves Kitster Banai and Wald, as well as Jira, an elderly woman. He also built his own podracer, which would ultimately lead him to victory in a podracing competition.
During his time on Tatooine, Skywalker never witnessed rainfall. On one occasion, Watto instructed Anakin to dispose of some scrap. While examining it, Anakin discovered an ultra power cell, exactly what he needed for his pod. Suddenly, a swoop gang including a Devaronian member attacked the streets and shot the generator for the medical center. Anakin examined the generator to see if he could repair it, he determined that it needed a power cell. So, he used his power cell to restore power to the medical center. A week later, Anakin competed in a pod race against Sebulba, who cheated, causing him to lose. Anakin mentioned that he would have won if he had used the power cell on his own pod, but he felt that it was more important for the medical center to have it.
On difficult nights, Anakin's mother would recount the tale of the sun-dragon. The myth of the sun-dragon was passed down through generations of Tatooine inhabitants, each adding their own personal significance, but Shmi's version resonated the most. The sun-dragon was a creature inhabiting the core of a star. It could endure anything because it possessed the biggest heart in the galaxy. It protected everything it loved and cherished, through fire and flame. Sometimes the story served as a celebration on good days or a lesson on bad ones. Anakin typically heard it on days when Watto was particularly cruel. However, her intention was always clear. To Shmi, Anakin was the sun-dragon. He possessed the strongest heart in the galaxy, which would always guide him to do what he needed to do, as long as he trusted in it. Anakin held this story close to his heart and shared it with very few others.
Helping a Tusken slave
One day, Anakin dreamt he was a Jedi, rescuing his mother from enslavement. His mother woke him from his dream, informing him that there were no Jedi in the Outer Rim. She stated that the galaxy would be improved with more people like him. However, she cautioned him against being too good, as it would draw unwanted attention, and she desired his safety. Then, an Otoga-222 maintenance droid entered and informed them both of the tasks Watto wanted them to complete while he was away. The Toydarian required young Skywalker to travel to the Mos Eisley spaceport to collect a shipment. The droid reminded them of the transmitter chip implanted within their bodies, which would detonate if they attempted to escape.
Skywalker went to the spaceport, but could only pay the person delivering the shipment on credit. At that moment, a landspeeder carrying a trio of slavers arrived with their new Tusken slave. Skywalker overheard one of the slavers mention that he had not yet implanted a transmitter chip in the slave, so he tampered with the speeder's wiring, causing it to drive off on its own. Once the slavers began chasing after their speeder, he freed the Tusken slave, instructing him to flee. When the Nikto slaver inquired about the slave's whereabouts, Skywalker directed them in the wrong direction. Skywalker returned home that day, content that he had been able to save someone. He assured his mother that he had avoided trouble and went to bed.
Discovery
Found by the Jedi
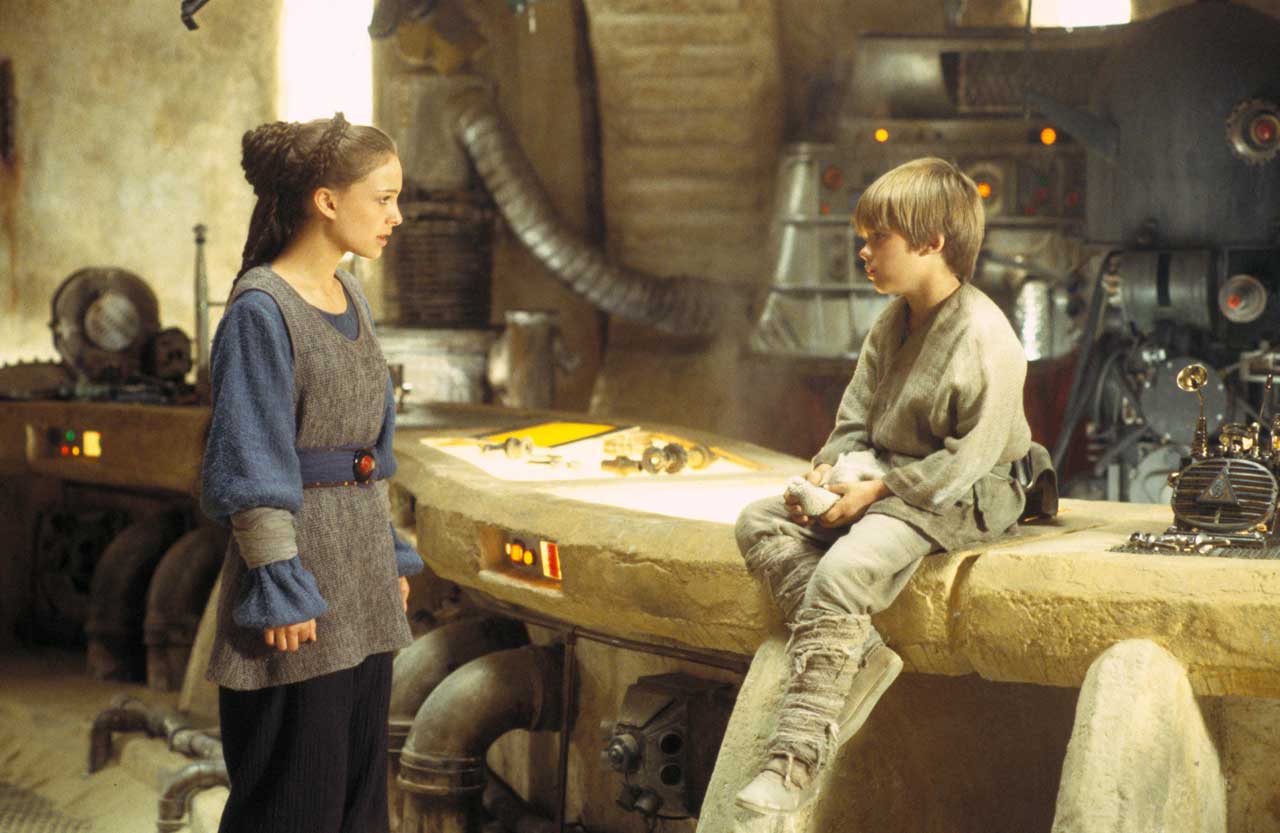
One day, at the age of nine, Watto summoned him into the junk shop, where he found a tall man, a young woman, a Gungan, and an astromech droid in conversation with Watto. Skywalker first noticed the young woman, Padmé Naberrie, when he looked up from his work, mistaking her for an angel, a species he had overheard spacers discussing from the moons of Iego. Unbeknownst to Skywalker, Naberrie was, in fact, Padmé Amidala, the Monarch of Naboo, who had exchanged places with one of her Royal Handmaidens to visit Tatooine.
Following Watto's instructions, Skywalker managed the shop while Watto led the man, Qui-Gon Jinn, into the junkyard. Skywalker was captivated by Padmé's beauty, and asked if she was an angel. Shortly after Watto and Jinn returned to the shop, Jinn informed his companions that they would be leaving.
Fortunately for Skywalker, Watto granted him permission to leave after he cleaned up the mess that Jar Jar Binks had created. As he walked home, Skywalker encountered Binks, who was being assaulted by Sebulba after the clumsy Gungan had disrupted the racer's meal. Intervening in the fight, Skywalker greeted Naberrie and the rest of her group when they arrived to investigate, and he persuaded the group to accompany him to Jira's nearby fruit stand. As he handed one of the pallies to Jinn, the boy was stunned to see a lightsaber on the man's waist when his poncho opened. When Jira warned the group about an approaching sandstorm, Skywalker insisted that the unprepared group come with him to his home.
Upon reaching his house, he introduced the group to his mother and explained about the sandstorm before leading Naberrie into his room to show her his project. Naberrie was genuinely impressed by Skywalker's work on C-3PO, prompting him to activate the droid, and he also told her about the podracer he was building. The group stayed at the Skywalkers' home as the sandstorm raged. During a meal, he began to describe life as a slave, though a brief argument between Naberrie and Shmi about slavery led Anakin to the subject of podracing. Summoning his courage, Skywalker inquired about Jinn's lightsaber, and he refused to believe the Jedi's assertion that he was not there to liberate the slaves. As the conversation shifted to the group's damaged Naboo Royal Starship, Skywalker volunteered to race in the Boonta Eve Classic podrace so that Jinn could secure the prize money. When his mother objected, Anakin reminded Shmi of her belief that people needed to help one another, convincing her to allow Anakin to race for Jinn.
The next morning, Jinn and the others accompanied Skywalker to Watto's shop, and the boy began to tell Watto about Jinn's proposal when Naberrie stopped Jinn outside for a brief conversation. When Watto asked how Jinn intended to sponsor the boy, Jinn proposed that that his ship would cover the entry fee. Watto initially suggested they split the winnings fifty-fifty, when Jinn proposed that Watto front the cash for the entry, and keep all of the winnings minus the cost of a new hyperdrive. Watto accepted the deal, and Skywalker was dismissed immediately with instructions to check out Jinn's podracer. As Skywalker worked, his friends, Banai and Wald among them, arrived, but Wald and the others were skeptical of Skywalker's chances and left to go play elsewhere, except for Banai. Despite Skywalker's warnings, Binks became caught between the podracer's energy binders, causing his face to go numb. Anakin used a power pack that Jinn had lifted from Watto's shop to start the podracer, and the group was heartened to witness the engines activating and running perfectly.
That afternoon, Skywalker sustained a cut on his arm, though he did not notice it until later that night when Jinn tended to it and took a sample of his blood. Before Skywalker could get Jinn to tell him what he was doing with his blood, his mother called him inside their house for bedtime. He then sent this blood sample to Kenobi, who found that the young boy had even more midi-chlorians than esteemed Jedi Grandmaster Yoda.
With two eopies, Naberrie, Banai, Shmi, Anakin, R2-D2, and C-3PO hauled the podracer to the arena hangars, where Jinn had gone to meet with Watto. The Toydarian angrily left the hangar just as they arrived, confusing Skywalker with a comment about Jinn and betting, but Banai unintentionally revealed to Naberrie and the others that Skywalker had never actually finished a race, causing Naberrie to lose hope in the boy's chances.
A little while later, the racers and their pods entered the arena and lined up for the race, and Shmi stopped her son to ask him to be safe before he headed out to his racer. Not even Sebulba's threats rattled Skywalker as Jinn helped him into the podracer cockpit. But to Skywalker's dismay, when the starting light turned green, the pod's engines stalled immediately thanks to Sebulba's sabotage, leaving him stuck at the starting line with only Ben Quadinaros and his stalled racer as the rest of the competitors flew off. Realizing that he had left out one step to start the pod, he rapidly flipped switches and adjusted settings to reset the engines and succeeded in starting the engines, flying out of the arena and chasing after the others.

He soon caught up to the other racers, passing two before they even noticed him, and he prepared to pass the Troiken Gasgano as they approached Arch Canyon. Gasgano blocked his first few attempts, but Skywalker overtook him as they dropped over a short mesa and proceeded to slip into Arch Canyon quickly and without any trouble. Teemto Pagalies tried to push him into the rock, but Skywalker was able to pass him with a twist. Sebulba tossed a piece of debris behind him and into Mars Guo's left engine intake, clogging the motors inside. The engine intake stopped working before the entire engine combusted. With Guo crashing into the desert sands, Skywalker was free to move ahead, going neck and neck with Sebulba as they passed the grid line into the third lap.
Going into the third lap, Sebulba still held the lead, as narrow as it was. With Skywalker close behind, and now out of surprise tricks, Sebulba resorted to sheer brutality in order to either keep Skywalker behind him or batter the boy enough to destroy his pod. Approaching the Laguna Caves, a part of the course where Tyerell had crashed earlier, Sebulba rammed Skywalker off course, forcing him onto a steep service ramp. Boosting, Skywalker sped up the ramp at an exhilarating speed, propelling himself into the sky. The boy was quick to act and adjusted his pod accordingly, leveling his podracer's nosedive as he headed back for the ground. Not only did he save himself from an explosive wreck, but his jump off of the ramp put him directly in front of a surprised Sebulba. Skywalker continued to hold the lead until they ran into a series of archways. Suddenly, Skywalker's left engine bucked and began to give off a stream of dense smoke. Sebulba's earlier sabotage was beginning to take effect as Skywalker pushed his pod to its limit. Skywalker managed to resolve his engine difficulties and quickly regained his ground, passing up several other podracers before gaining a tail on Gasgano. Although Skywalker had had issues with passing the Xexto earlier in the race, this time he swerved past Gasgano with little effort and eventually flew parallel with Sebulba as they headed for the final stretch of the course.
As they approached the arena, Sebulba blocked every attempt of Skywalker's to pass, and he finally swerved his larger racer into Skywalker's in anger at the boy's repeated attempts—only for the two racers' steering rods to be caught together. When Skywalker's rod finally snapped completely, his podracer began to shudder violently but broke free of Sebulba's racer, the engines of which shot forward and went flying out of control, slamming into rock and sand and exploding. As Sebulba's pod skidded to a halt, Skywalker shot toward the arena and across the finish line, winning the Boonta Eve Classic.
As Skywalker came to a halt, the crowd swarmed his racer. Jinn hoisted Skywalker onto his shoulders in celebration. In the hangar, Skywalker met up with his family and friends who gave him hugs and congratulations for winning the race. Jinn then beckoned Skywalker over. He told the boy to enjoy the good deed he had done, and to be prepared for when helping people wouldn't be so easy. Skywalker figured out that Jinn was talking about him becoming a Jedi. Jinn told him that path ahead would be difficult, and would require discipline and sacrifice. Skywalker wasn't dissuaded by this, saying that he wanted to help people no matter what. He then went to celebrate with Kitster and Wald.
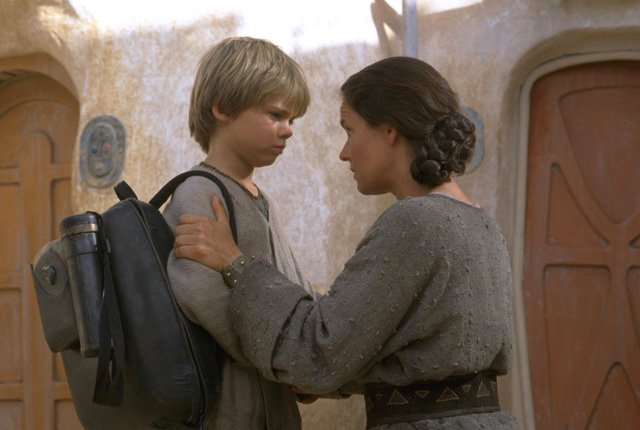
Skywalker, upon his return home alongside Jinn, eagerly presented the credits earned from his podracing endeavors to his mother. His joy intensified when Jinn revealed his freedom and invited him to journey with him to become a Jedi. Overjoyed, Anakin took several moments to realize Shmi was not also freed. He was disheartened when Shmi insisted he embrace a brighter future with Jinn, without her. After packing, Skywalker said farewell to C-3PO, but his resolve faltered as departure neared, and he rushed back to his mother, promising to return and liberate her. Despite their shared sadness, Shmi urged her son to depart with the Jedi.
As they hurried toward the starship that brought Naberrie and Jinn to Tatooine, Skywalker was abruptly commanded to drop to the ground, which he obeyed just as a dark-robed figure, the Sith Lord Darth Maul, zipped overhead on a speeder. The figure lunged at Jinn, igniting a red lightsaber and attacking as Jinn implored Skywalker to board the ship and depart. He scrambled aboard, and Naberrie escorted him to the cockpit where she informed Jinn's apprentice, Obi-Wan Kenobi, of the situation. The pilot, Ric Olié, followed Kenobi's instructions and flew toward the altercation, and Skywalker secured himself in a seat as Kenobi rushed to the landing ramp to aid Jinn's escape from the dark warrior. Skywalker and Kenobi hurried to Jinn's aid as the ship lifted off, leaving Tatooine behind. Once they were assured of Qui-Gon's safety, the Jedi master introduced Obi-Wan to Anakin, who was delighted to meet another Jedi.
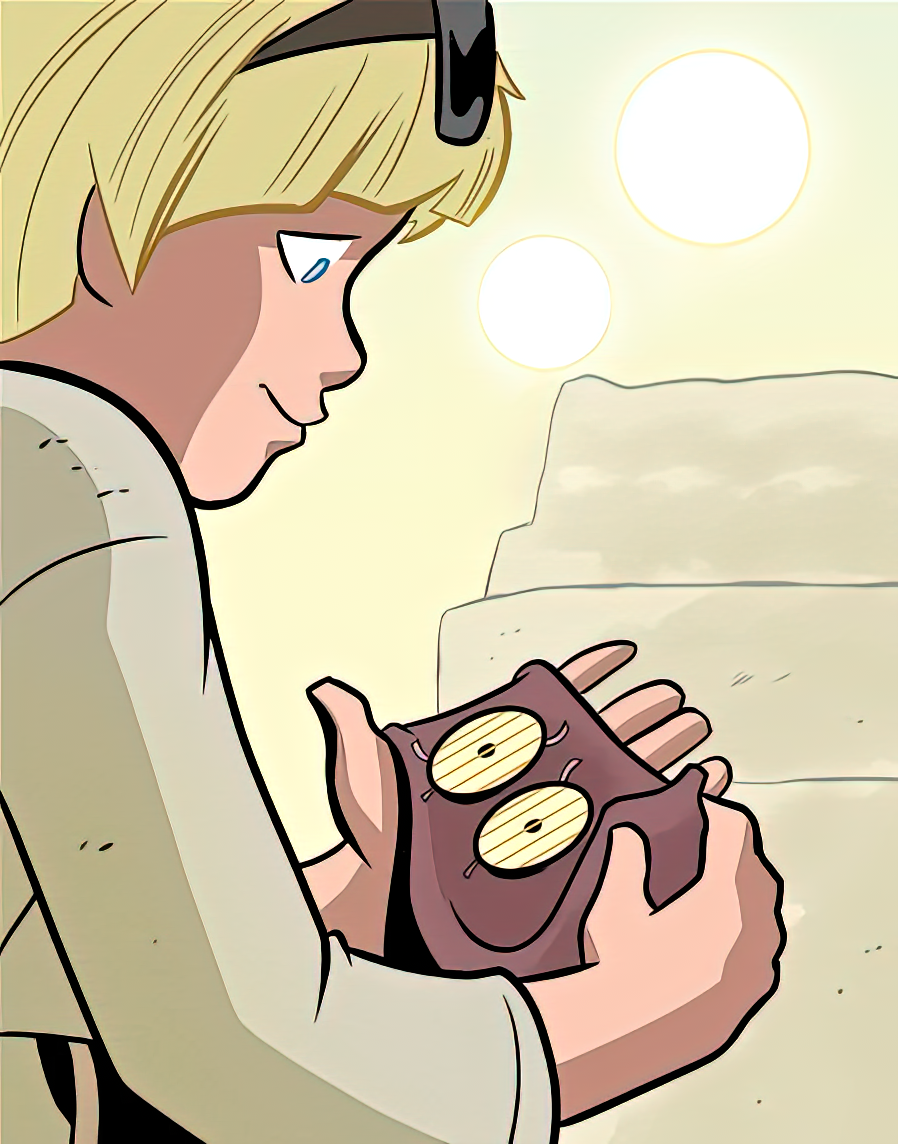
Later that evening, aboard what Skywalker discovered was Queen Naberrie of Naboo's personal starship, he struggled to sleep in the central chamber due to the stark contrast in temperature compared to Tatooine's constant heat. Huddled in silence, Skywalker observed Naberrie enter and view a recording of a plea for assistance from the Naboo official Sio Bibble. Noticing him, she offered him her blanket, and they discussed the Trade Federation's invasion of Naboo and Naberrie's hopes for the Republic's Galactic Senate to resolve the crisis. Skywalker presented her with a japor ivory wood pendant he had carved so she would remember him, and Naberrie comforted him as he remembered his mother.
Amidala gratefully accepted Skywalker's gift, wearing the japor snippet as a necklace for years to come, viewing it as a symbol of remembrance and luck. As they approached the Republic capital of Coruscant, Skywalker watched in awe from the cockpit as the ship was greeted upon landing by Supreme Chancellor Finis Valorum, Senator Palpatine of Naboo, and Senate Guards. The Queen and her handmaidens—including Naberrie—departed with Palpatine, bringing Skywalker and Binks along to Palpatine's office, leaving them outside during their discussion. Before heading to the Jedi Temple, Skywalker sought Naberrie in the Queen's chambers, but the Queen promised to relay his message in the handmaiden's absence. Unbeknownst to Skywalker, the Queen was, in fact, Padmé.
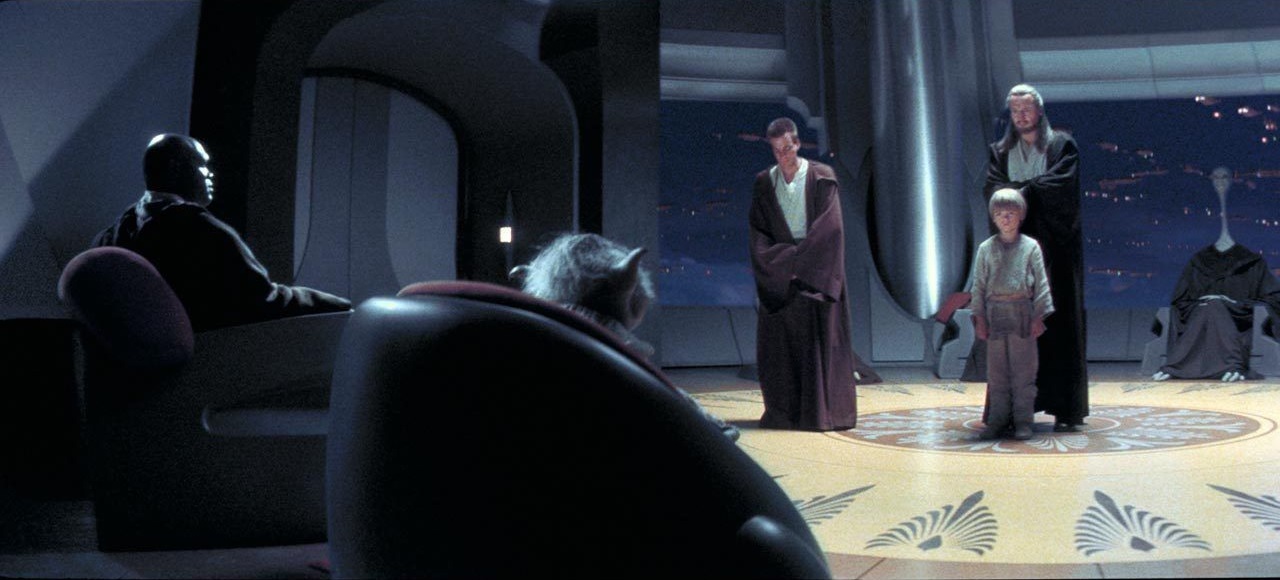
Qui-Gon Jinn, guided by strong premonitions from Tatooine, believed Anakin Skywalker to be the Chosen One of prophecy, destined to bring "balance to the Force." He revealed this belief, along with Anakin's midi-chlorian test results, to the Jedi High Council before presenting the boy for consideration as a Jedi. At the Jedi Temple, Skywalker paused to gaze across the city and at his hand before Jinn announced it was time to meet the Council. Before the twelve Jedi Masters, Mace Windu tested Skywalker's abilities by asking him to identify images appearing on a testing screen he held, unseen by the boy. Skywalker correctly identified them all. However, when Windu and Master Yoda questioned him about his feelings and his mother, Skywalker questioned its relevance. Yoda explained that fear was the gateway to the dark side, sensing much fear within Skywalker.
As night descended, Skywalker, Kenobi, and Jinn were summoned before the Council. Acknowledging Skywalker's power, the Jedi Masters refused to train him due to his age, prompting Jinn to declare he would take him as his own apprentice. The Council initially refused, as Jinn already had Kenobi, but Jinn stated that he believed that Kenobi was ready to become a Jedi Knight. However, Windu declared that the matter would be dealt with later, as the Naboo problem was more pressing. Afterward, Skywalker spoke with Binks about the Council's decision, lamenting that he might never be a Jedi. Binks shared that all Gungans miss and worry for their families, noting Skywalker's big heart for caring about his mother. The Council permitted Skywalker to accompany Jinn, and the three returned to the Queen's starship. Skywalker confided in R2 that they were going to Naboo on a secret mission, overhearing Kenobi call him dangerous. Skywalker expressed his concern to Jinn about being a problem, and Jinn reassured him about his presence on the mission. He then inquired about midi-chlorians, and Jinn explained their nature and connection to the Force. Shortly after, the Queen and her retinue departed, leaving Coruscant and heading back to the occupied Naboo to liberate the world from the Trade Federation.
En route to Naboo, Skywalker questioned Jinn about Kenobi's remark that he was dangerous. Jinn clarified that his emotions were normal but that Jedi were held to a higher standard, requiring training that Jinn would ensure he received. As they emerged from hyperspace and approached the Naboo system, Skywalker joined Olié in the cockpit, learning about the ship's controls, while Queen Amidala convened with the Jedi and her staff, announcing her intention to ally with the Gungans to expel the Trade Federation from Naboo. The group landed in the swamps of Naboo and dispatched Binks to the Gungan capital city of Otoh Gunga. Upon Binks' return, he revealed that Otoh Gunga was deserted, but he led the group to the Gungan Sacred Place, where the Gungans had likely sought refuge after the Trade Federation's invasion.
Upon being brought before Boss Rugor Nass, the Gungan leader, Skywalker was astonished to learn that Naberrie was, in fact, Padmé Amidala, the Queen of Naboo, who had been posing as her handmaiden as a safety measure. Skywalker, the Jedi, and Amidala's handmaidens joined the Queen in kneeling before Boss Nass, pleading for Gungan assistance. Nass agreed to lend his army to the Queen's cause. In the ensuing hours, Amidala and the Jedi began strategizing with the Gungan generals, leaving Skywalker to wander over to the Gungan sentries guarding against the return of Captain Panaka.
As preparations for the battle unfolded, Skywalker approached the handmaiden acting as the Queen. Inquiring about her name, Skywalker told the girl, Sabé, that he was happy to meet her and thanked her for safeguarding Naberrie. Jinn then summoned him away, leaving Sabé touched by the interaction.
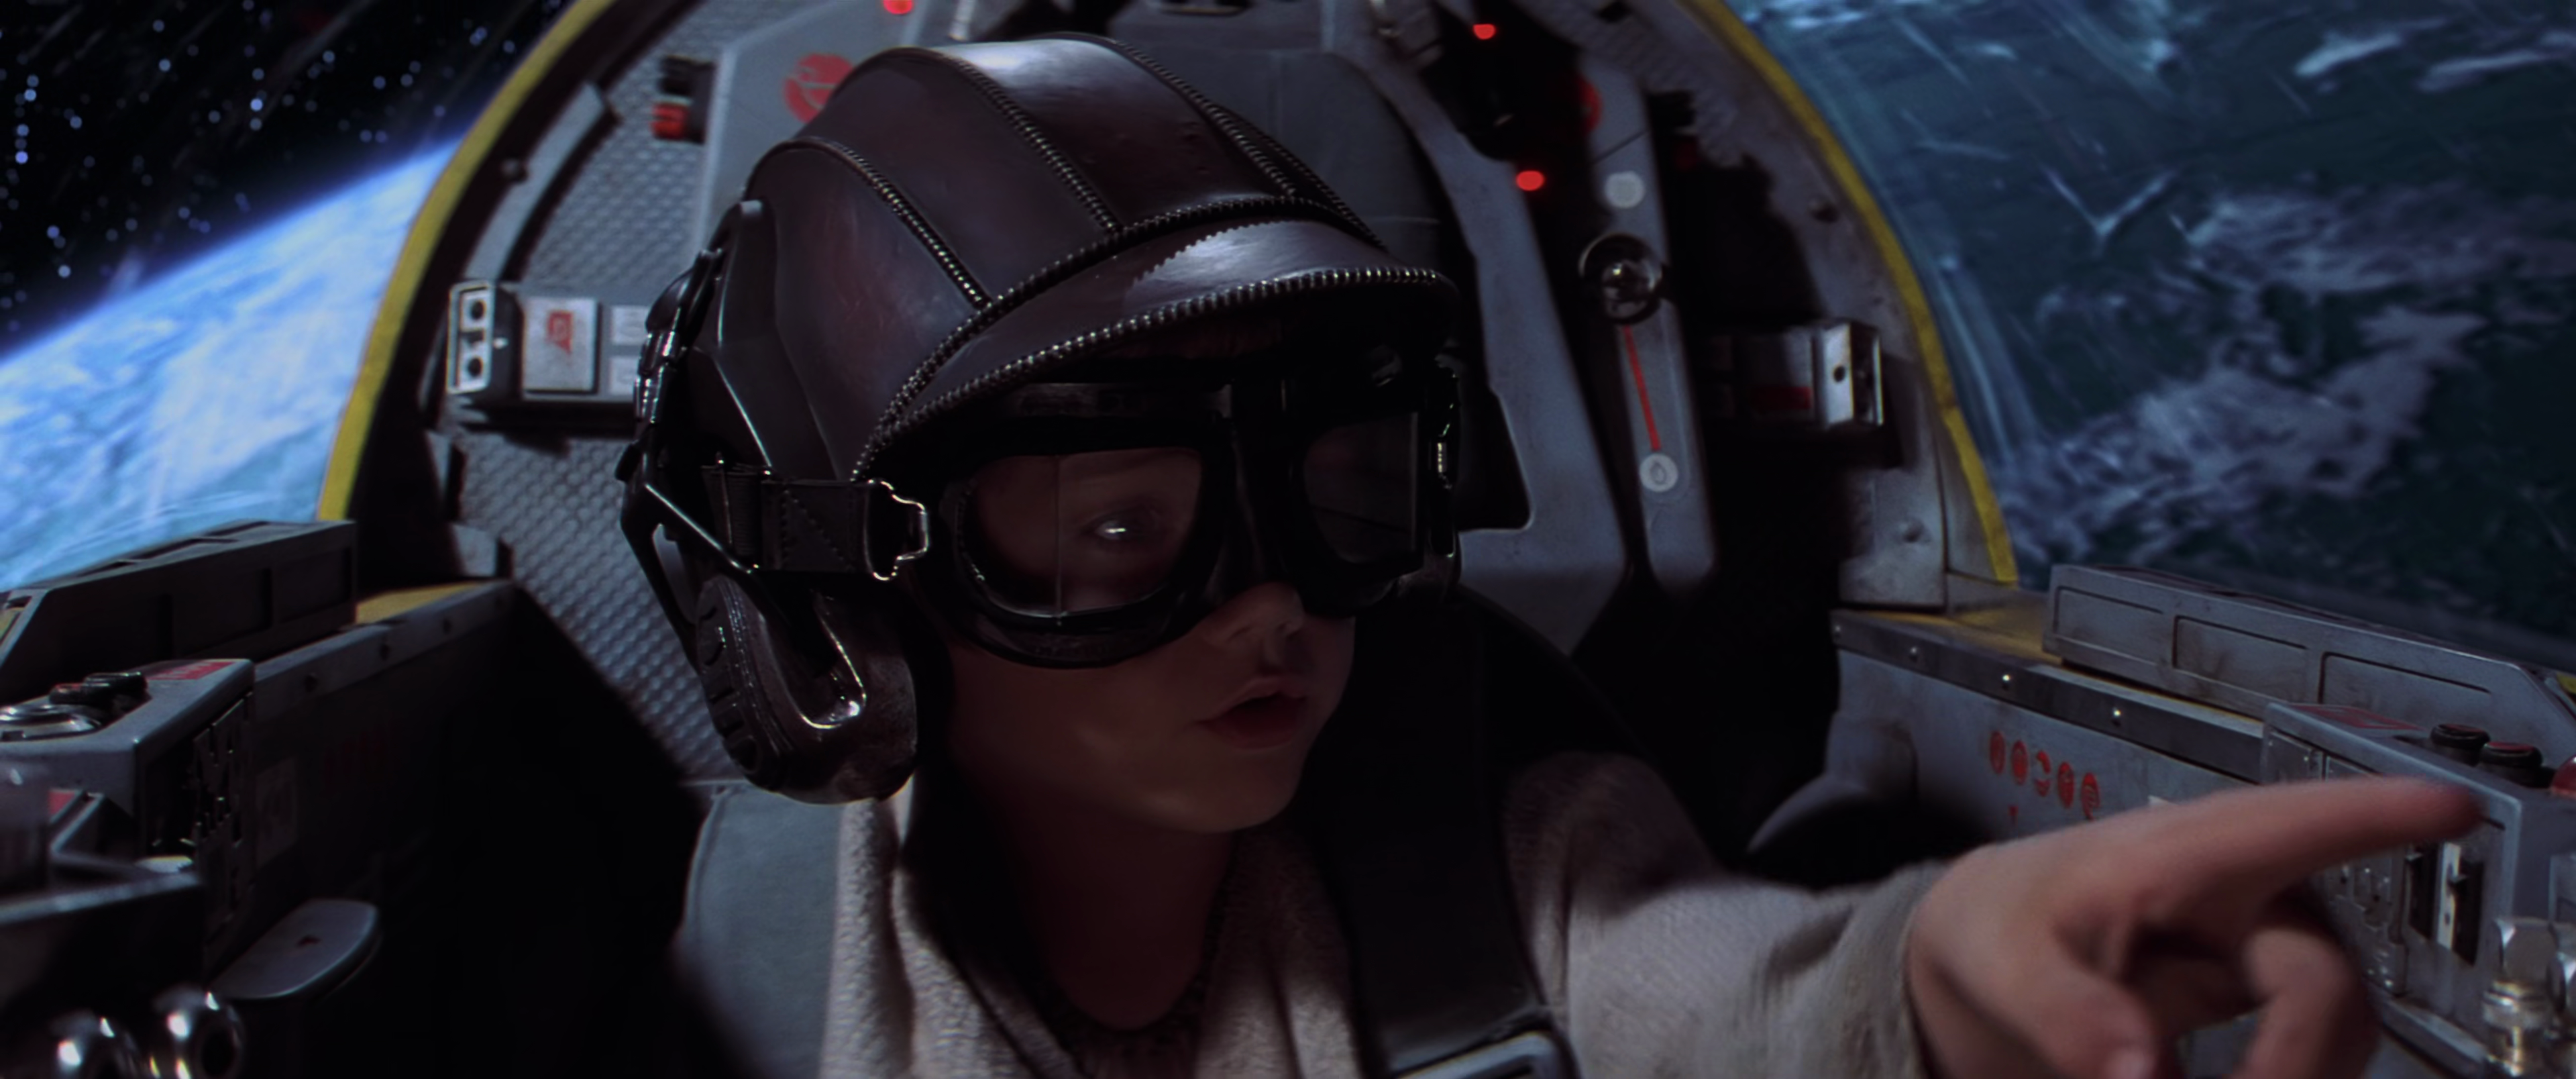
Anakin became part of the group, led by Amidala, which seized the opportunity to recapture the Theed Royal Palace. As the group entered the Theed hangar bay, Skywalker followed Jinn's order to remain concealed in the cockpit of one of the hangar's N-1 starfighters. When several droidekas cornered the Naboo personnel in a firefight, Skywalker attempted to assist them with the N1's blaster cannons, accidentally activating the ship to launch into space. Skywalker fought in the Battle of Naboo within a fierce starfighter battle above the planet, realizing how much he loved flying over the course of the battle. Having inadvertently joined the battle in orbit, Skywalker single-handedly destroyed the orbiting Droid Control Ship from within the ship, thus disabling the Trade Federation's ground forces and saving the Gungan Grand Army from destruction. After the battle Skywalker landed his starfighter in the Theed hangar and talked with a distraught Kenobi. Trying to reassure him, Kenobi told him that he just saved everyone, but Skywalker already knew that Jinn was dead. Thinking about what Kenobi said earlier about him, he started to walk away teary-eyed. Kenobi grabbed him and Skywalker admitted that Jinn was the only one who had faith in him. Kenobi told him that it was Jinn's last wish to train him, and that he was adamant about following through with that promise. Skywalker was present during the following arrest of Rune Haako and Nute Gunray. Kenobi and Skywalker were then greeted by Chancellor Palpatine, who said that everyone would be watching his career with great interest. They then greeted Ki-Adi-Mundi, but Skywalker's mind was clouded by the things Ki-Adi-Mundi had said to him before. As Skywalker watched Palpatine congratulate the Queen, his thoughts continued to be clouded with visions of his mother and of the dream he had of saving her. Kenobi grabbed Skywalker's shoulder, startling him. He told the boy that his mind was clouded, but that he, as well as Jinn, believed in him.
Joining the Jedi Order
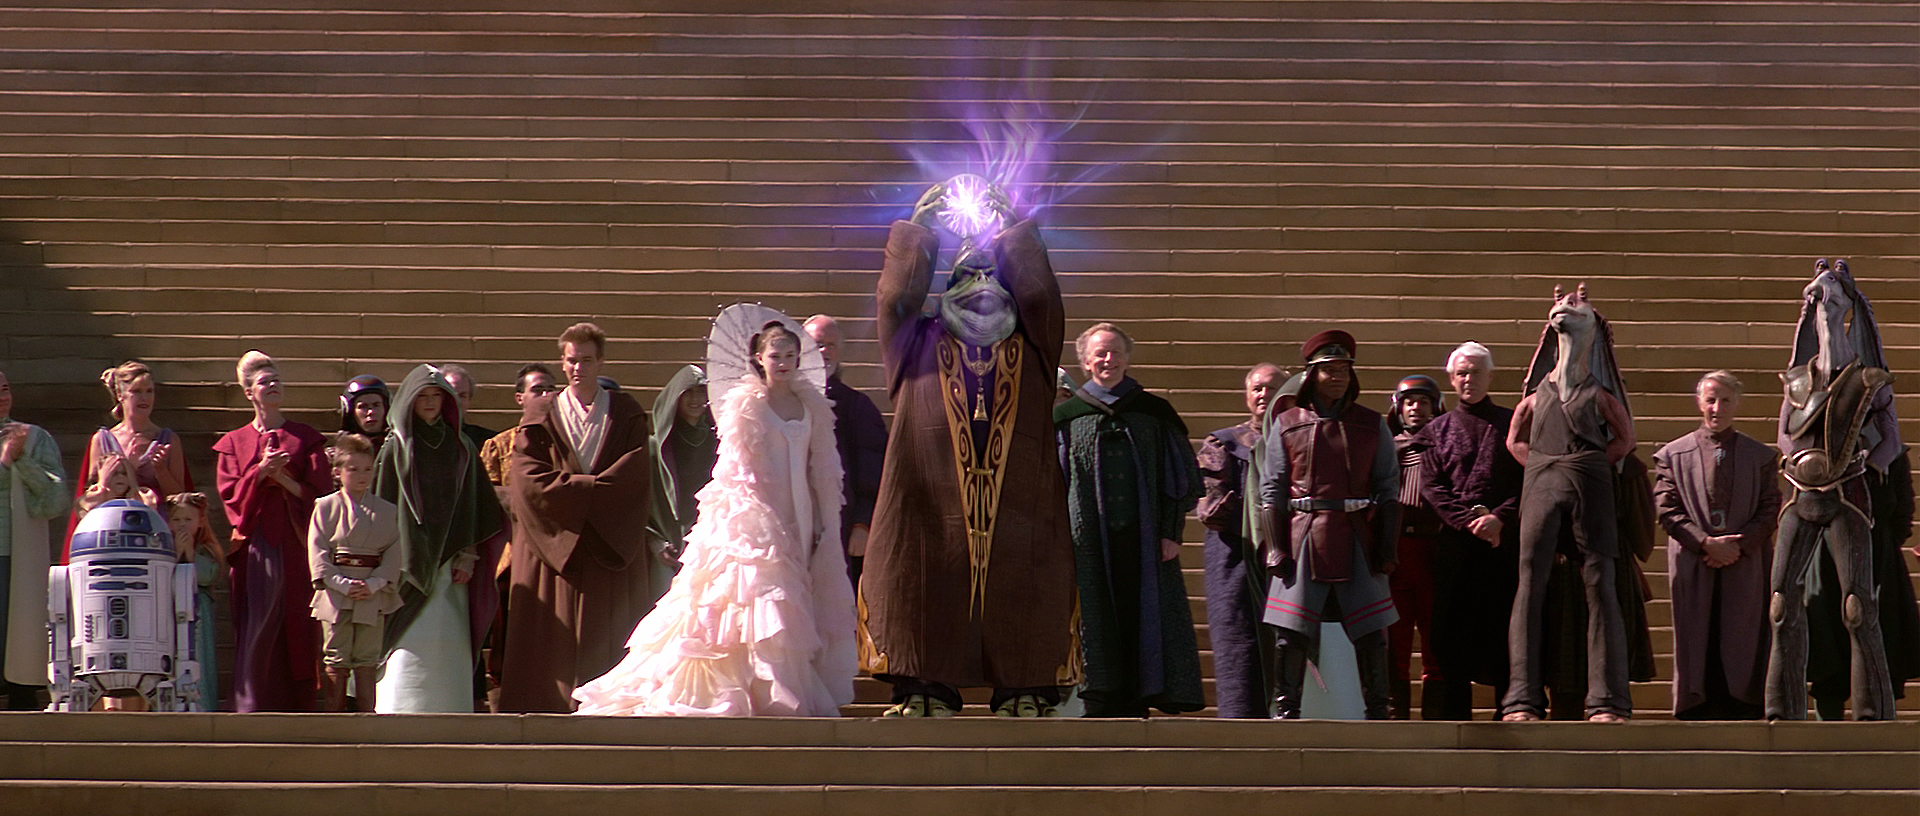
During the Master's funeral, Kenobi was informed that the Council had granted him permission to train Skywalker as a Jedi. The two remained at the funeral site until the last embers had faded, joined only by Amidala and her court. Subsequently, Skywalker and his fellow Jedi participated in a parade held by the Naboo and the Gungans in Theed to celebrate their victory and their newfound alliance. Afterward, Skywalker and the other Jedi departed Naboo, marking the last time Skywalker would see Amidala for a decade.
Kenobi's Padawan
The Chosen One trains
As he matured, Skywalker's exceptional abilities fostered arrogance, yet he idolized Kenobi, considering him unparalleled. Having relinquished his life with his mother and lost Jinn, Skywalker clung to his master, fearing his loss. During his initial year as a Padawan, he habitually slept on the floor beside Kenobi's bed, ensuring his mentor would not disappear during the night. Kenobi occasionally awoke to find him there. During one of their many adventures, he also rescued Kenobi after he fell into a nest of gundarks.
Shortly after becoming Kenobi's Padawan, a surge in overwhelming emotions shut Skywalker off from the Force entirely. This provided temporary relief from his anxieties and fears, but he soon realized that avoiding the Force was not the answer, and he reconnected to it. During his time as Kenobi's apprentice, Skywalker distrusted teachers who corrected him, questioning their motives, knowing that many had opposed his training. Nonetheless, many Jedi believed in him, recognizing his potential.
Skywalker and Kenobi were once joined by Jedi Master Shaak Ti for a complex mission to Naran-Shiv. In addition to struggling to control his emotions, he found it difficult to form friendships, as his fellow Padawans were aware of the rumors surrounding him as the Chosen One. Often lonely, he spent his free time in his quarters tinkering with machinery acquired from trips outside the Jedi Temple. He also harbored lingering resentment regarding his mother's fate.
Mission to Dallenor

Some time after his enrollment in the Order, Skywalker meditated with his master, holding pebbles together using the Force. However, when Master Tosan informed his master of a Council mission, Anakin's concentration broke, surprised by his departure. The mission involved retrieving an ancient Jedi holocron from a dig site on the planet Dallenor. Obi-Wan assured Anakin of his swift return and arranged for him to train with Yoda in the interim. Displeased, Skywalker complained about being in class with "little kids" despite being ahead in his training. Nevertheless, he complied and spent time with the younglings, though he did not enjoy himself. However, after some encouragement from Yoda, Kenobi took Skywalker along with him on the mission in a T-6 shuttle.
Skywalker expressed his delight at being in space again and requested to pilot the shuttle. Kenobi agreed, once they neared Dallenor. Skywalker inquired about Obi-Wan's life before joining the Jedi Order. Kenobi replied that he did not remember, having been taken in at a young age. Anakin sadly remarked that he had always been a Jedi and nothing else. Kenobi tried to reassure him, noting that he still needed training and was a Padawan when they met. However, Skywalker remained unconvinced, stating that his life was predetermined, unlike Kenobi's past as a slave. He concluded that this was why the Jedi Council deemed him too old to be trained. Obi-Wan tried to reassure him again by saying that the Council was not perfect and that Qui-Gon Jinn chose him just like he chose Kenobi. Skywalker, angered, proclaimed that Kenobi's master was dead and that now he was stuck with him. Before Kenobi could reassure Anakin, he walked away.
Upon arriving on Dallenor, Kenobi and Skywalker encountered a female Togruta archaeologist named Clatriffe. She was glad that they arrived so they could take the holocron away due to the fact that it was causing problems. She explained that the local pirates wanted to get it and she had to hire local guards to keep them at bay. Kenobi ordered Skywalker to stay outside to keep watch whilst he and Clatriffe went inside the facility to obtain the holocron. After they went inside, Skywalker noticed that the pirates had arrived.
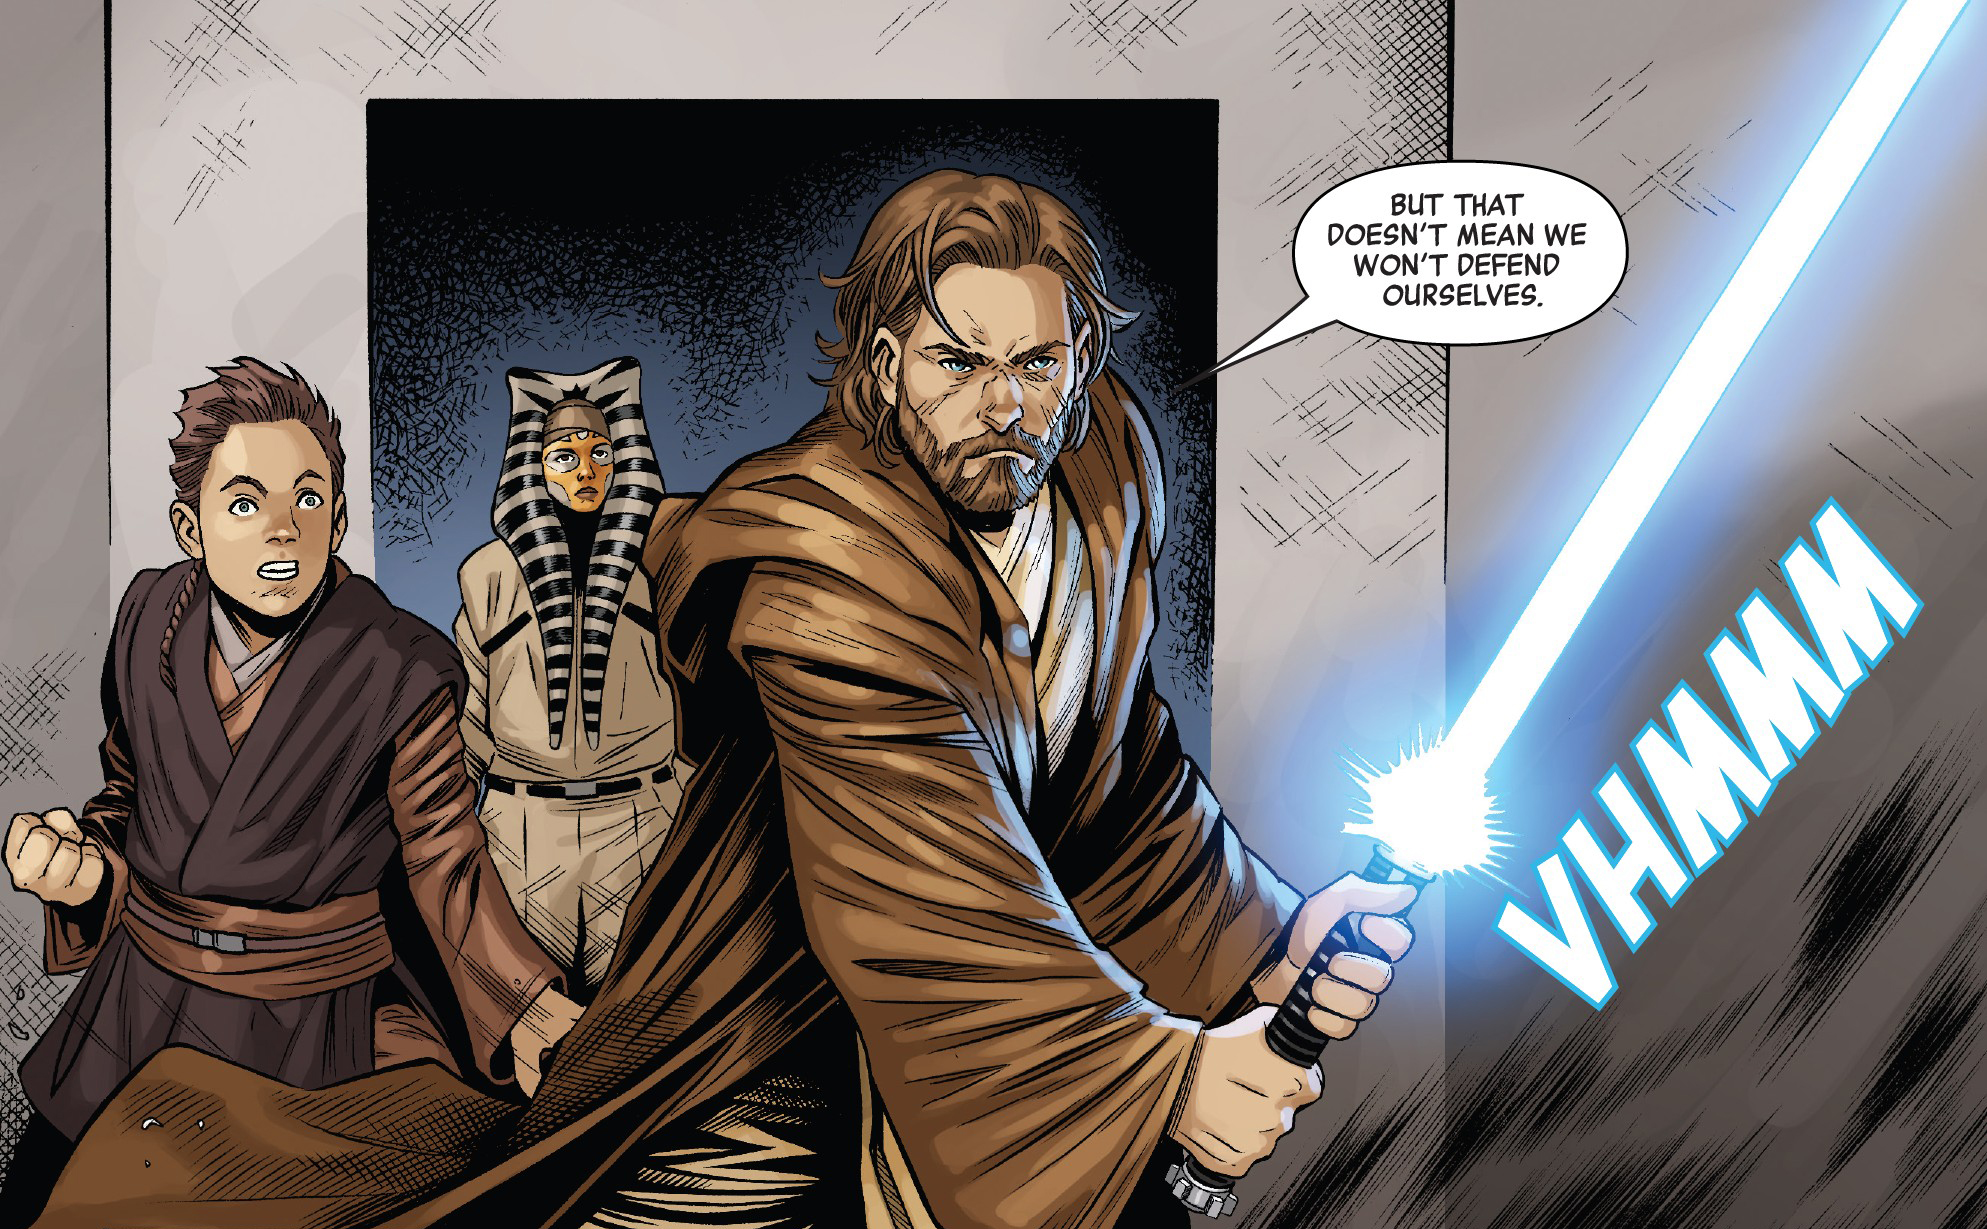
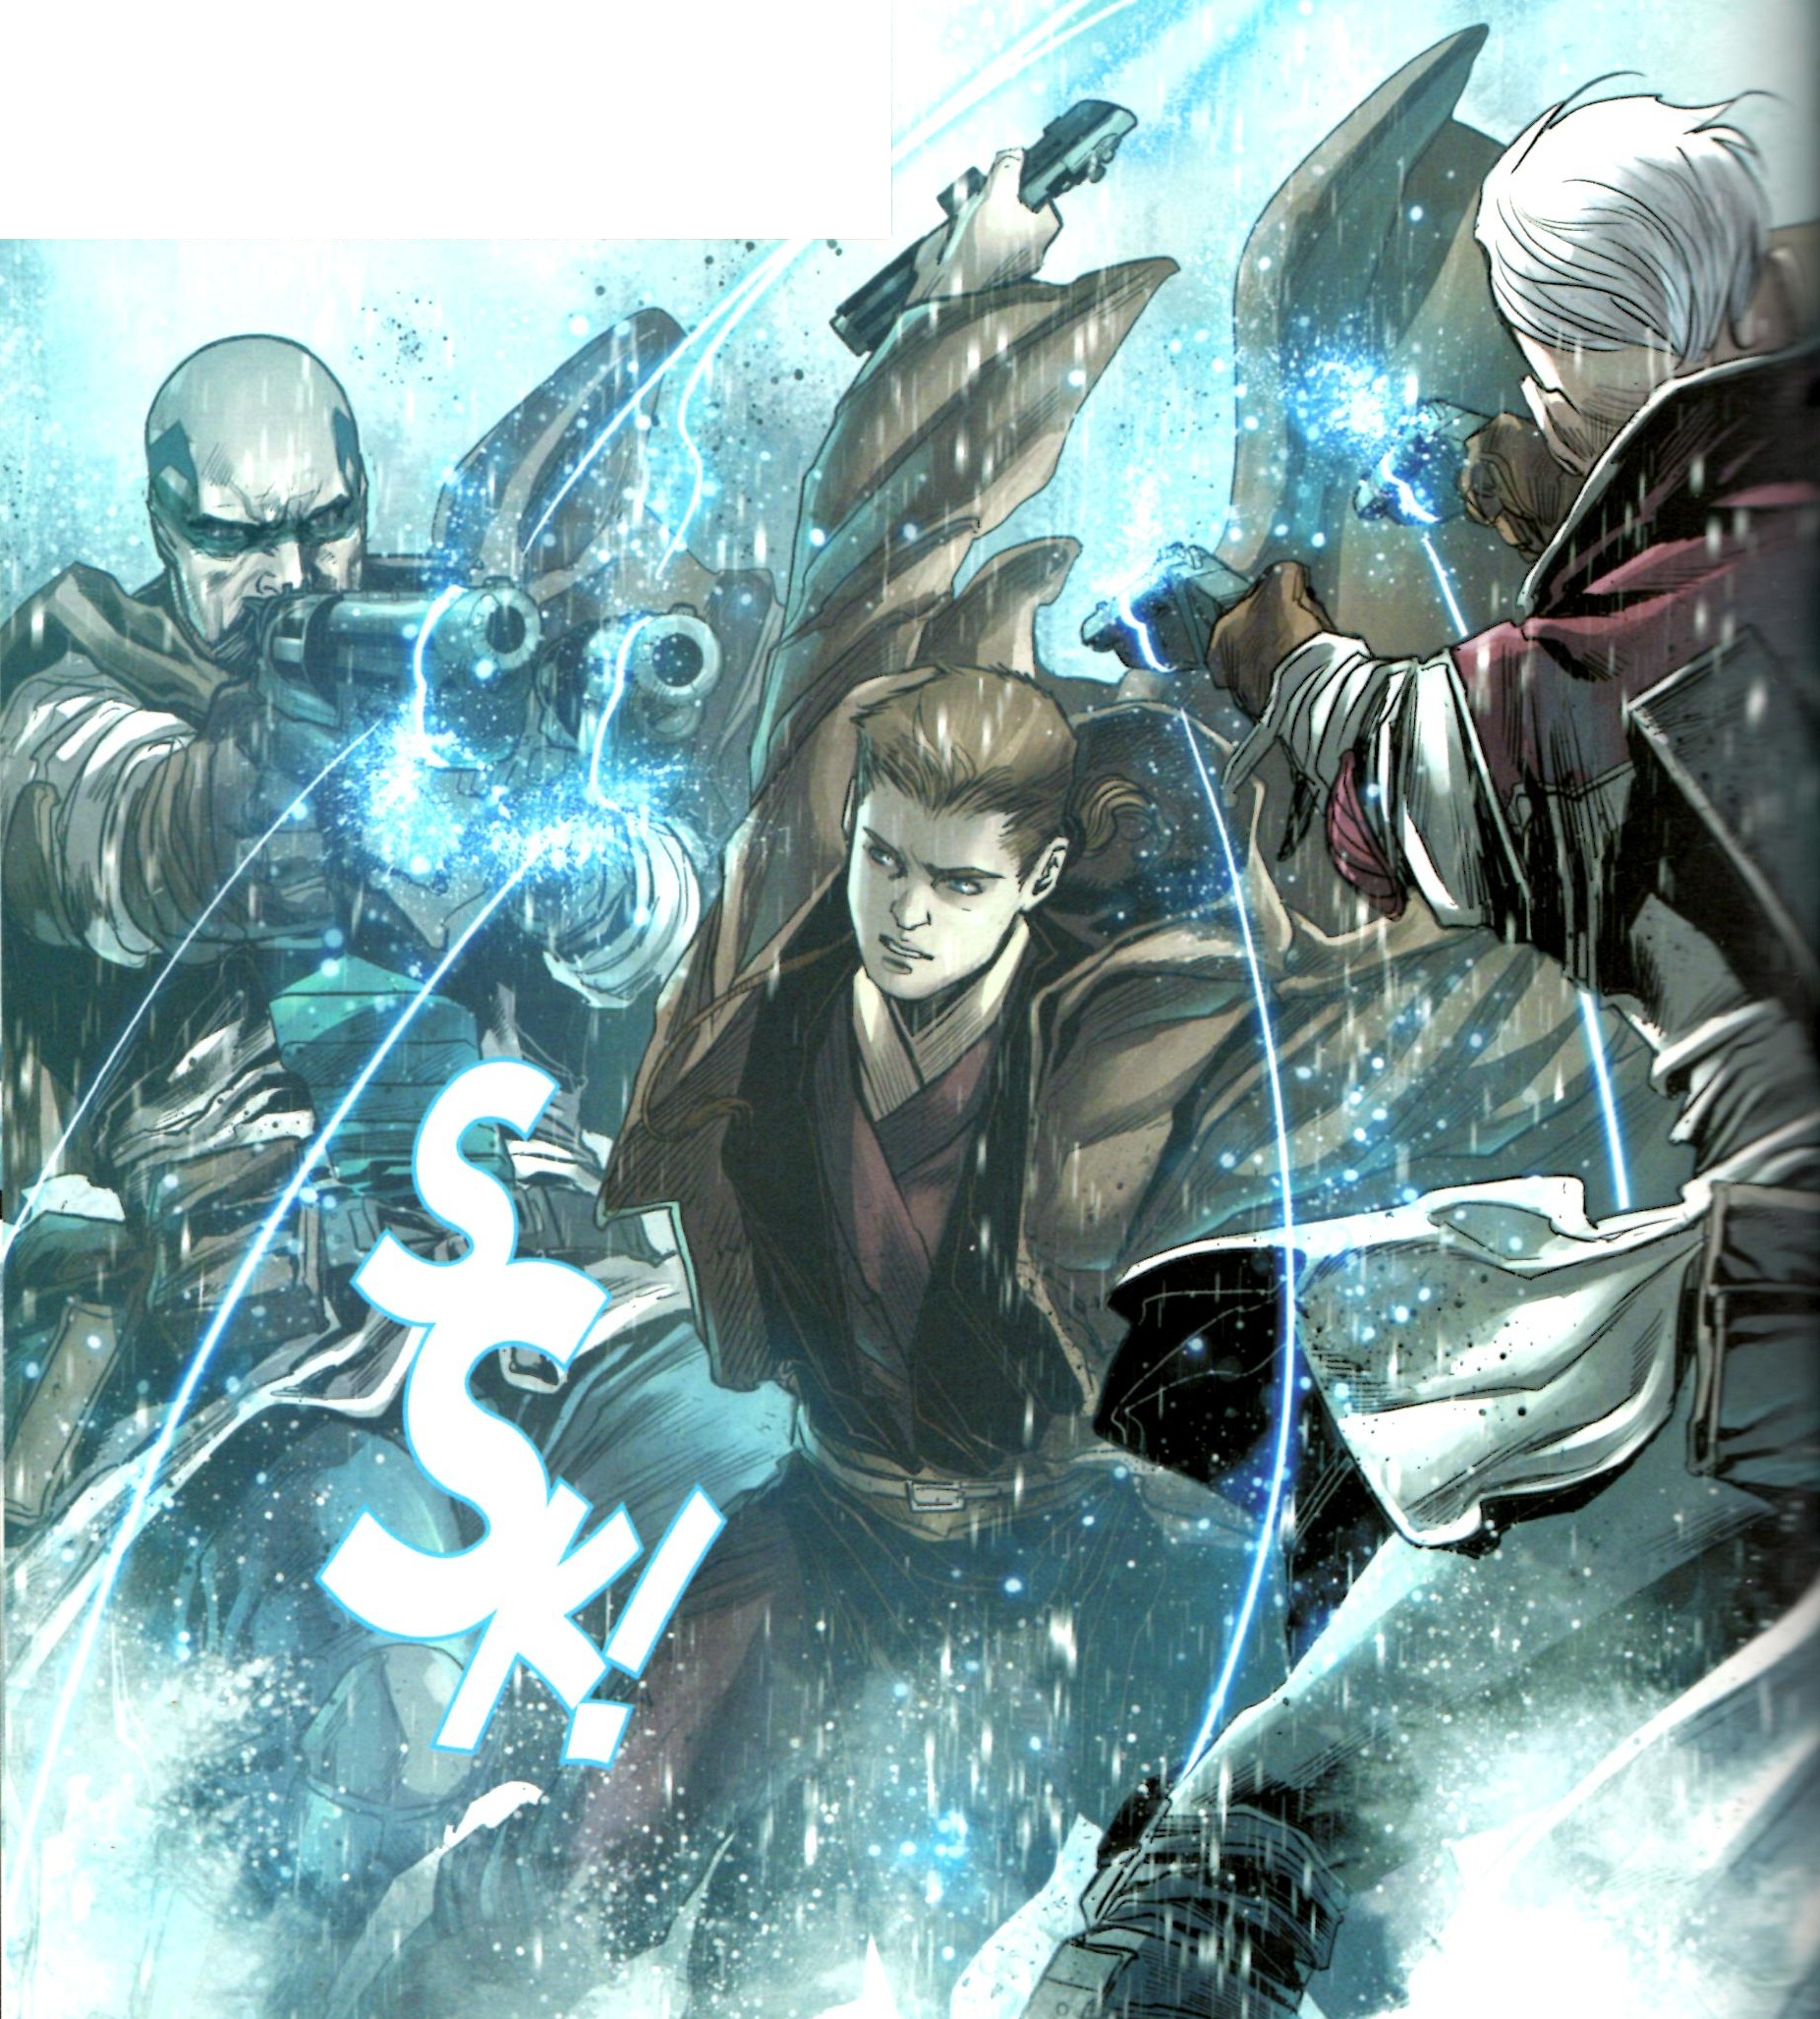
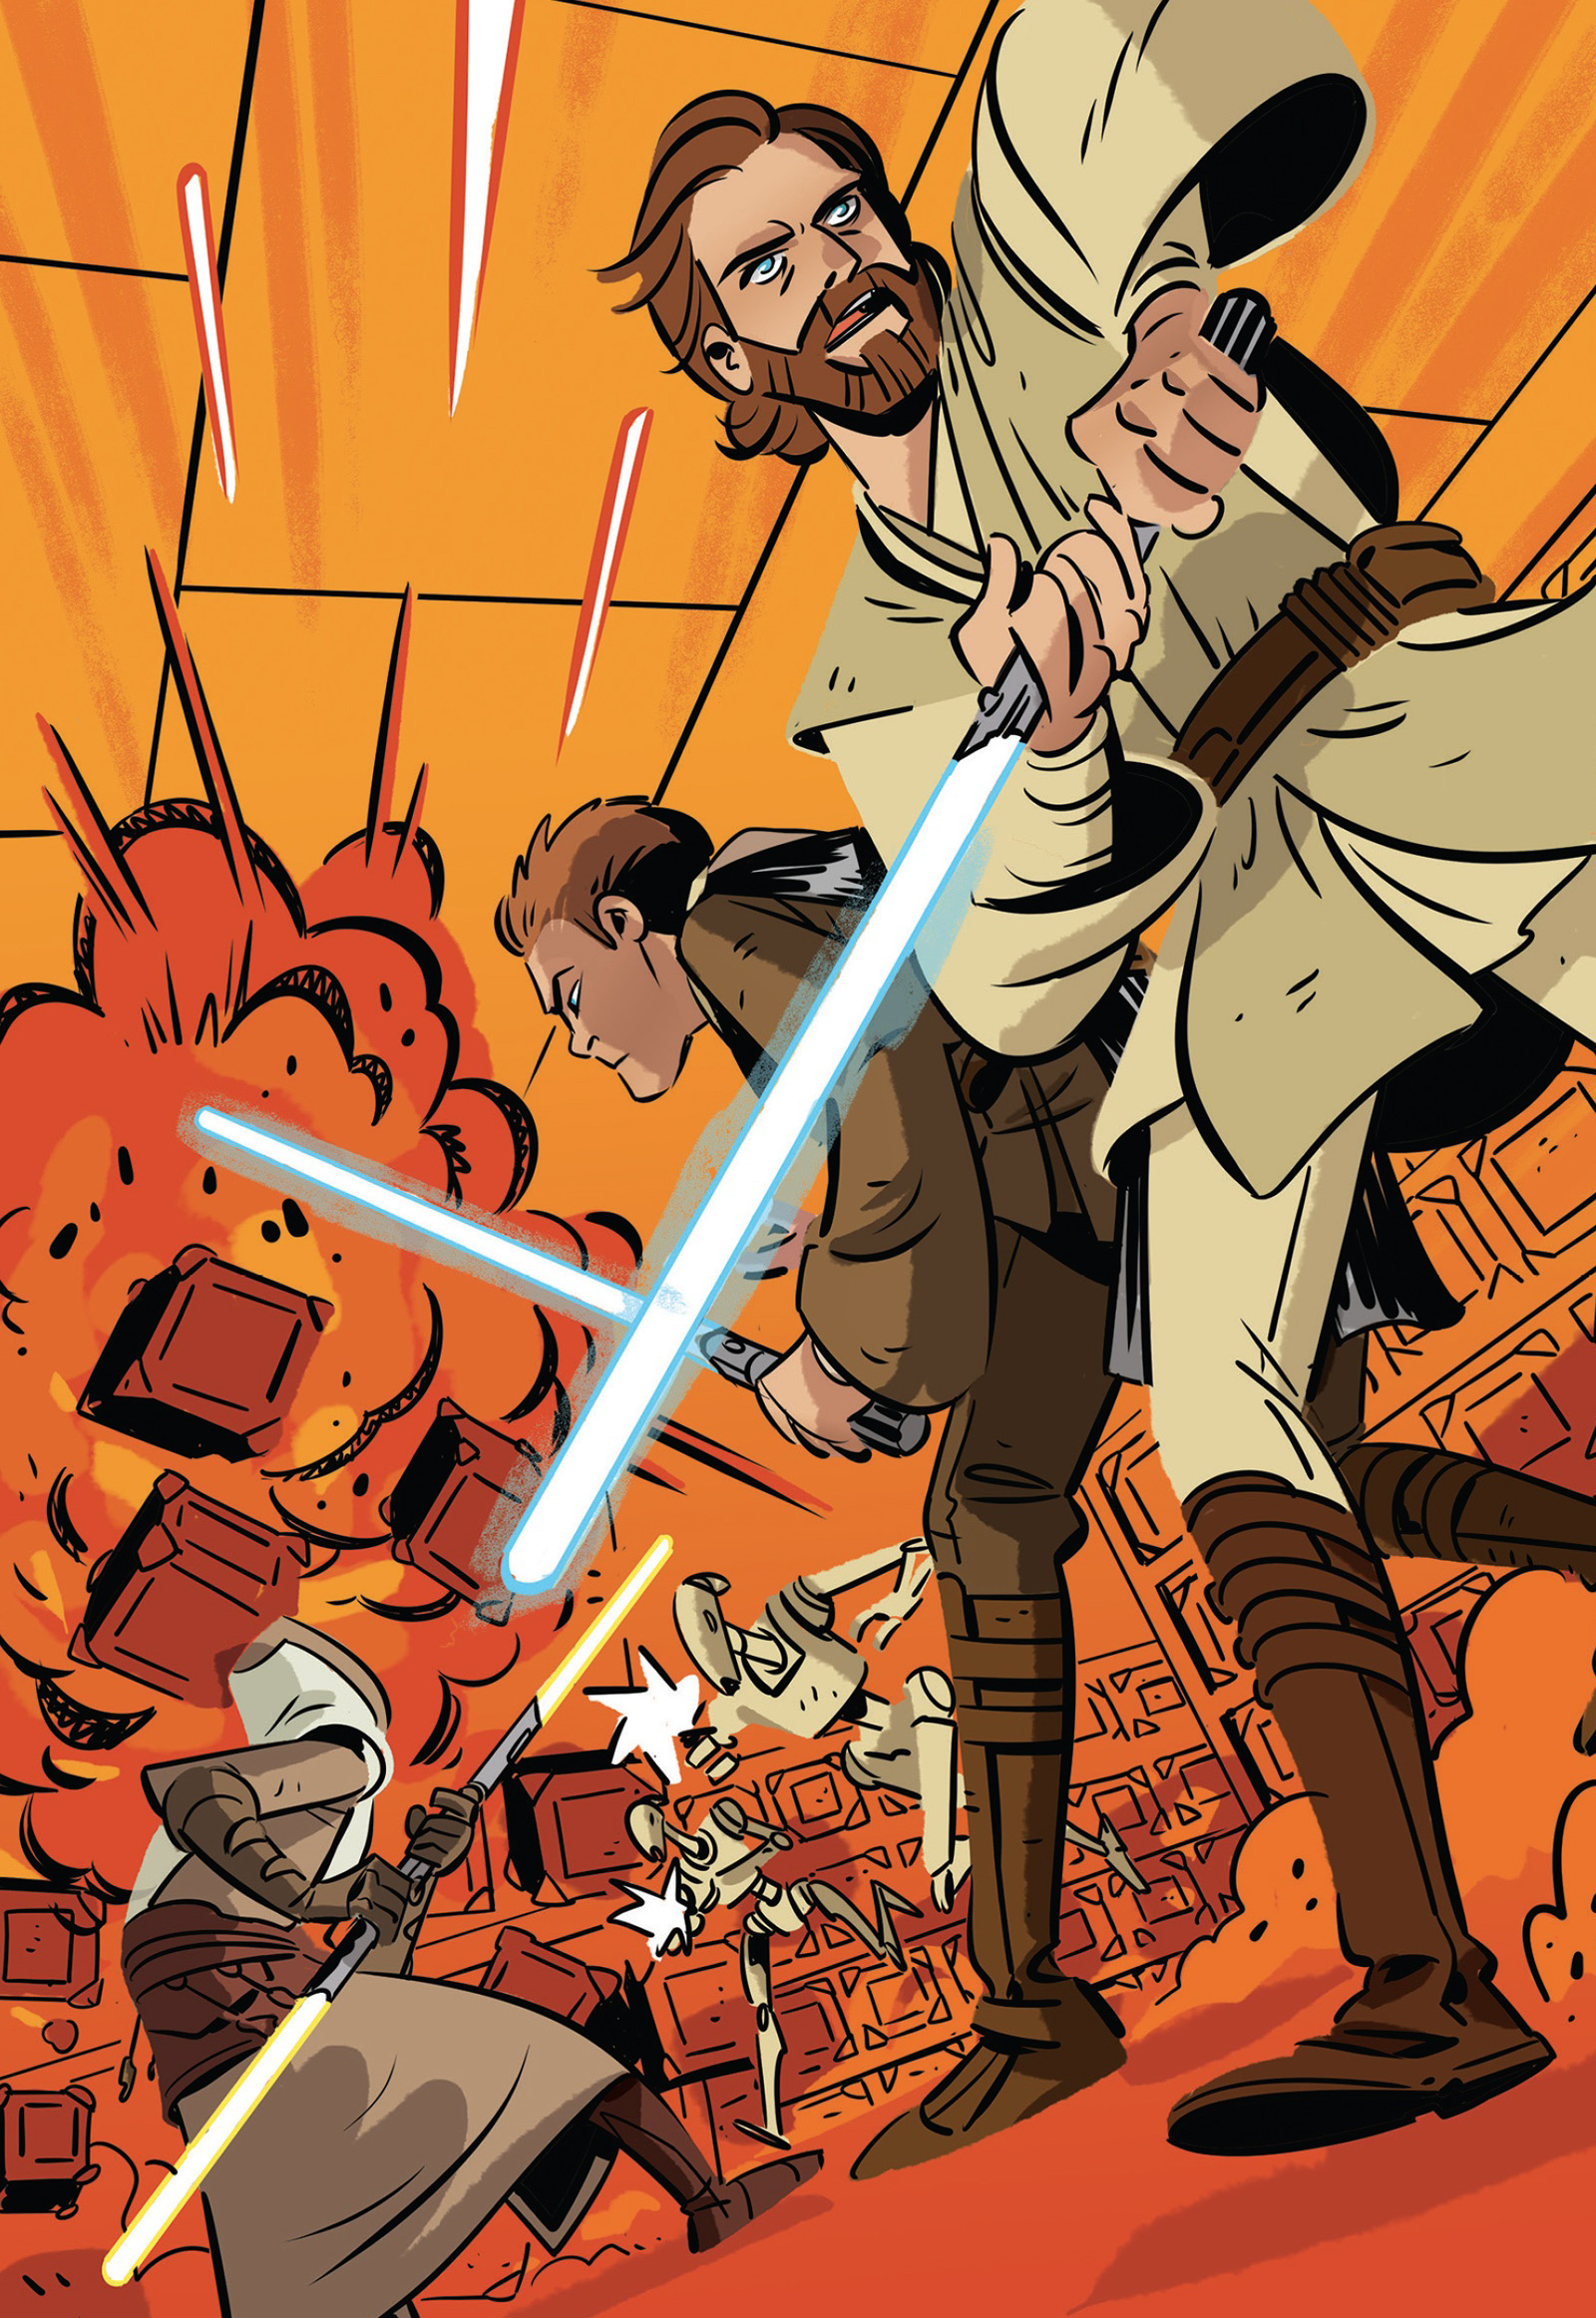
Kenobi, Skywalker, and Clatriffe went out to meet them and were introduced to the Krypder Riders and their leader Hudso Shaku, who knew that the holocron was something important due to offworlders wanting to get it. Kenobi stated that they had come in peace but were willing to defend themselves. He activated his lightsaber, whereupon Shaku ordered his pirates to attack him because he found the laser sword to be more valuable than the things that they dug up. Kenobi quickly disarmed the pirates but, while Skywalker froze up due to the suddenness of the attack, Shaku captured him by placing his sword under his chin. He ordered a trade, the boy for the lightsaber, but was taken down by Skywalker using the Force to assault Shaku with small pebbles. With Shaku knocked unconscious and the pirates' weapons destroyed, they surrendered to the Jedi.
On the shuttle home, Kenobi praised Skywalker for his great work on his first mission. Skywalker, however, exclaimed that he froze up and was not ready for a mission even though he believed otherwise. Kenobi reassured Skywalker that it was he who was not ready. He asked how he could save his Padawan if he could not save his master from dying. Skywalker, with renewed confidence, stated that they would save each other and that that was what Qui-Gon would have wanted. Kenobi agreed and then recalled that Anakin wanted to fly the shuttle. Skywalker, in response, said yes enthusiastically.
A chancellor for a friend
By the time he was 12 in 29 BBY, he had constructed his first lightsaber. After its completion, Kenobi remarked, "Anakin, this weapon is your life." Like he had assisted Kenobi previously, Jedi Battlemaster Cin Drallig aided Skywalker in lightsaber combat training, with Skywalker gaining significant knowledge from Drallig's expertise. When Kenobi was tasked with studying a dead star system orbiting a black dwarf, Skywalker joined his master without permission, but fell asleep during the journey. Upon Kenobi's discovery of his slumber, Skywalker's mentor decided to include him in the mission, showing him the dead star as an example of why the Jedi needed to avoid attachment because all things, even the brightest of stars, would pass on.
That year, three years after the Battle of Naboo, Skywalker aimed to impress his peers at the Jedi Temple. During a training session, he defeated a training droid, programmed to mimic a Sith from Naboo. Mace Windu, Kenobi, and Supreme Chancellor Sheev Palpatine observed, with Palpatine being impressed. Later, Skywalker struggled with taming creatures when Kenobi informed him of the Chancellor's request to see him. Arriving at his office, Palpatine requested Skywalker's company on an errand, declining Kenobi's presence. Left alone, Skywalker accompanied Palpatine to Club Kasakar in Level 2685, listening to Palpatine's concerns about the sub-surface levels of Coruscant, the Jedi's inefficient response, and Senate corruption, like Colandrus, subtly beginning his influence over him.
At the errand's conclusion, Palpatine inquired about Skywalker's happiness. Though Skywalker replied affirmatively, stating that "training to become a Jedi [was] all [he] ever wanted," it planted a seed of doubt. Later, at the Jedi Temple, Skywalker confided in Kenobi his desire to leave the Order, feeling uncomfortable with his life being decided at nine years old, and surrendered his lightsaber. Kenobi, though taking the weapon, pleaded with Skywalker to reconsider.
Mission to Carnelion IV
Before Skywalker could provide a definite answer, at Yoda's behest, both student and master responded to a mysterious distress signal from the supposedly dead world of Carnelion IV that specifically called for Jedi intercession. They began their journey to the coordinates, but their shuttle was damaged due to the planet's atmospheric debris field, and the two had to eject from the doomed vessel, landing below the Celadon Sea. Not too long afterward, they came to be aware of life on the planet as a sky battle raged over them, and Kenobi returned his lightsaber to him so that he could defend himself. As one of the combatant airships began to fall, Skywalker and Kenobi saved its two-person crew by delaying the crash.
The two survivors, Kolara and Mother Pran, who identified themselves as "Open," knew nothing about what a Jedi was. They were forced to take cover when a "Closed" airship, which Kenobi fell; Skywalker saved its pilot, Grecker, from falling to his death. But due to the historical feud between their factions, Grecker and Pran tried to murder each other, forcing Skywalker and Kenobi to destroy their weapons and to escort them to safety. To facilitate their journey, they used the intact parts of each of their airships to form a new one in order to fly to their destination. During the conversations that ensued, Skywalker mentioned his and Kenobi's purpose on the planet: to find the person who had sent the Jedi distress signal, which alerted Pran and Grecker to the location of "the scavenger."
During the journey, Kolara told Skywalker about the mysterious kites, before noticing that he was good at fixing things, as he made an adjustment to his lightsaber. Kolara and Pran then had Skywalker repair a bag of droid brains and, seeing his usefulness, threw away his lightsaber and abducted him when a horde of fishers attacked the ship, leaving Kenobi alone with Grecker as the airship crashed below the Celadon Sea. Skywalker was taken to one of the Open's fortresses, where he witnessed as Pran used the processors he had repaired to activate some battle droids. As they left to wage war on the mysterious scavenger (who reminded both Open and Closed of everything they had lost and how badly they had failed), Skywalker remained with the younger Open, whom he convinced to protect the scavenger and help him get back to Kenobi.
Using their help, Skywalker fixed the remaining droids and intervened in the skirmish between the Open and Closed unfolding right next to Sera's fortress. He saved his master from Mother Pran and met with Kolara and Sera, but rather than try to stop the fight, Kenobi had Skywalker repair a communications unit and called the Republic for aid. Soon enough, a task force arrived and forced the natives to cease hostilities. In the aftermath, his master offered Skywalker his lightsaber, asking if he was still adamant about leaving the Order, but Skywalker decided to remain a member.
Inquiring about lightsabers

Some time passed following Skywalker and his master's assignment on Carnelion IV. As Skywalker and Kenobi prepared for a practice duel within the Jedi Temple training grounds, Anakin inquired about the Jedi's preference for lightsabers over other weapons powered by kyber crystals. In response, Kenobi employed the Force to retrieve Skywalker's lightsaber, recounting an idea from his youth to connect two short lightsabers with a chain. After sharing this anecdote, Kenobi reiterated Qui-Gon Jinn's lesson: wielding a lightsaber signifies intent and thoughtful consideration, reinforcing the Jedi's role as protectors, not destroyers.
Rescuing Master Yoda
Sometime after the Carnelion IV mission, Kenobi put Skywalker through a trial. The Padawan had to defend himself against Marksman-H training remotes using a wooden stick instead of his lightsaber, with Yoda, Windu, and Master Bant Eerin observing. Skywalker then used the Force to seize his master's lightsaber, completing the trial with it. This sparked an argument between Skywalker and Kenobi, prompting Yoda, Windu, and Eerin to depart. As Kenobi left with a squad of Jedi Temple Guards to investigate a disturbance in the Force, he instructed Skywalker to stay and clean up.
Skywalker disobeyed Kenobi's orders, using two training remotes to navigate the Temple's ventilation system down to the storage level. Guided by the Force, he arrived at the training stores, where he encountered the source of the disturbance: a team of battle droids. Because Kenobi had taken his lightsaber after his training exercise, Skywalker was forced to use the Force and electroblades he found in a nearby box to combat the droids. However, Kenobi and the guard team quickly arrived, returning Skywalker's lightsaber and joining the fight. Skywalker then left after experiencing a Force vision about the Council chambers. Rushing to the council chambers and past a seemingly-knocked out guard, Skywalker was held back as a masked enemy, disguised as a Temple Guard, appeared to kidnap Yoda. Skywalker was unable to catch the escaping enemy on a jetpack. After being returned to the council chamber after the jetpack failed him, Skywalker reported what he had seen. One temple guard found the seemingly-unconscious guard to actually be a disguised battle droid.
Skywalker noticed a non-Techno Union logo on the droid's head, prompting him and Kenobi to visit the Temple archives. There, they discovered it was the symbol of the Nova Crime Syndicate. Disguised to avoid disrupting the Jedi's uneasy truce with Baron Administrator [Jaspara], they traveled to the syndicate's base on the Wheel space station. The two Jedi located who they believed to Grynask Sanberge, the leader of the Nova syndicate. Their mind tricks seemed effective, and the supposed criminal provided information that led them to Glee Anselm. There, they encountered aquatic battle droids and discovered the fake Temple Guard's underwater base. After finding Yoda trapped in the base within thick seaweed and defeating the fake Temple Guard, Kenobi allowed Skywalker to unmask their foe as thanks for noticing the Nova symbol on the battle droid back at the Temple.
However, upon unmasking the enemy, Skywalker and Kenobi were shocked to see it was Eerin. Their confusion was only increased when Sanberge appeared, only to reveal himself to be Force-sensitive and then remove his mask, showing himself to actually be Windu in disguise. When Skywalker realized the entire adventure had been a test, Yoda easily freed himself from the seaweed and confirmed Skywalker's theory, revealing it was a test for Skywalker and Kenobi both. The experience demonstrated their ability to collaborate effectively, fostering a brotherly bond between them. To leave the world, the two lifted their shuttle off the seabed together.
A memorable training session
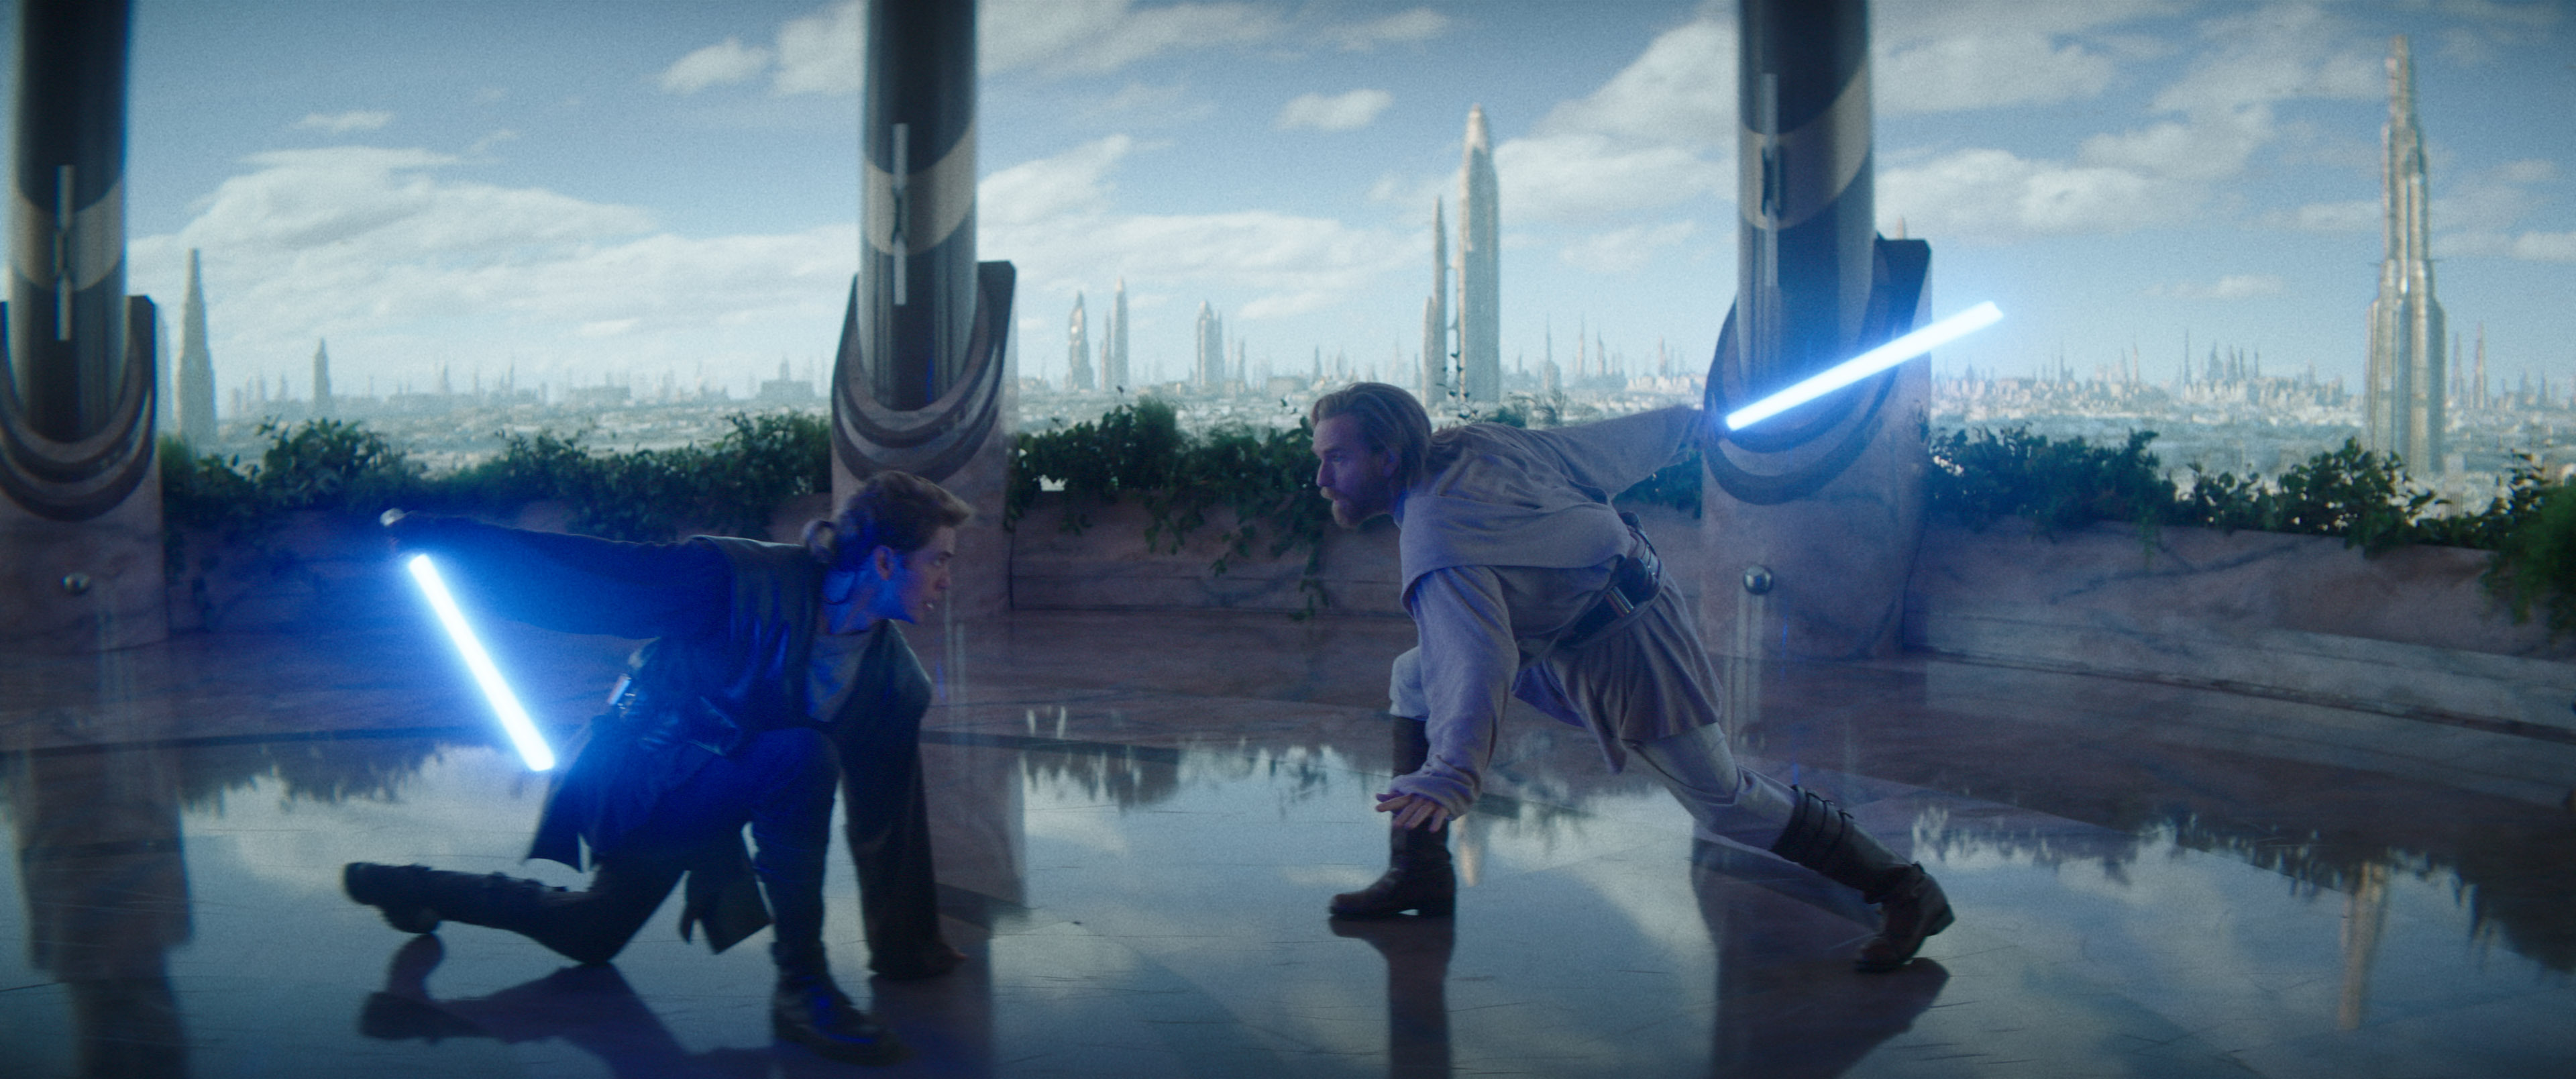
Later, Skywalker waited for his master in one of the Jedi Temple's training areas, gazing out the window until Kenobi arrived for a sparring session. After exchanging light-hearted remarks with his master, whom he had started to think would not be coming, Skywalker and Kenobi began their duel. During the duel, Skywalker displayed extreme aggression. Kenobi cautioned his Padawan that this fighting style contradicted the Jedi's mission to protect life, but Skywalker, confident his aggression would secure victory, argued that mercy was ineffective against an enemy. He continued his aggressive strikes until Kenobi was cornered. Skywalker locked sabers with his master and demanded he admit defeat. Instead, Kenobi slipped away when Skywalker raised his blade and inadvertently created an opening. The duel continued, with Skywalker pushing Kenobi back until he disarmed his master. Skywalker interpreted this as the end of the duel.
However, Kenobi, observing his Padawan's blinding desire for victory, pointed this out before resuming the duel without a lightsaber. Kenobi managed to get behind Skywalker and use the Force to claim his lightsaber as his own. He used this as evidence that Skywalker's need to prove himself would always hold him back. While acknowledging his Padawan's skill as a warrior, he told his apprentice he would never advance to become a Jedi Knight if he failed to overcome his need to show his worth. Skywalker was given back his lightsaber by Kenobi, who smiled at his apprentice after his warning. Skywalker then followed Kenobi out of the room. Both men remembered the training session for years to come. At some other point, Skywalker and Kenobi were also involved in a mission to Taris, during which Skywalker worked on a RazBohan high-encryption comlink.
Protecting Padmé Amidala
Reuniting
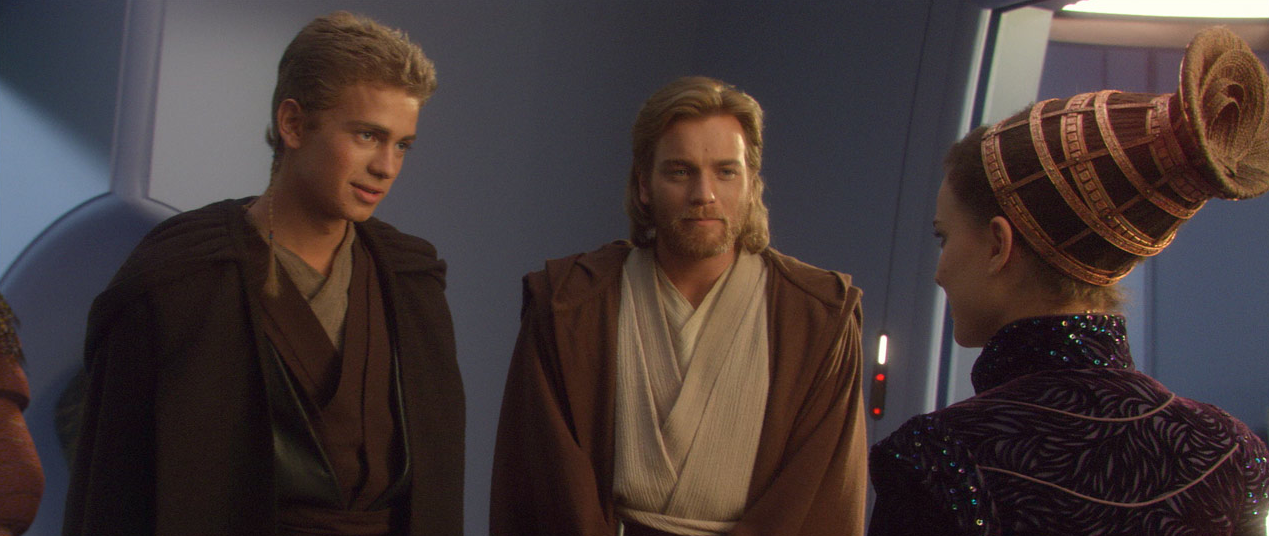
In 22 BBY, a decade after the Battle of Naboo, the Separatist Crisis threatened the Galactic Republic. The 19 year old Skywalker and Kenobi were involved in a mission to settle a border dispute on Ansion. Upon their return to Coruscant, an assassination attempt on Padmé Amidala, now Senator of Naboo, led the Jedi Council—at Chancellor Palpatine's request—to assign Skywalker and Kenobi to protect Amidala from future attacks. Anakin was overjoyed to see her after so many years, having thought of her daily since their separation. During her early years in the Senate, Amidala occasionally thought of the boy she had met on Tatooine, such as when she passed the Jedi Temple. She also dispatched Sabé to free slaves on Tatooine, specifically to free Shmi, feeling obligated to fulfill an unofficial promise, but Sabé could not locate Skywalker's mother. When Padmé expressed her desire to identify her would-be killer, Obi-Wan explained their role was solely to protect her, not investigate. Anakin then promised Padmé to find who was responsible, annoying Obi-Wan. When Padmé retreated to her chambers, Anakin was disappointed, claiming that Padmé hardly even recognized him.
However, Jar Jar, a representative in the Senate at the time, assured him that Padmé was very happy to see him as well. That night, Anakin and Padmé devised a plan to use her as bait to capture the assassin, much to Obi-Wan's disapproval. Anakin assured him that despite Padmé covering the cameras in her bedchamber, he would sense any danger in the room. Kenobi doubted his Padawan's abilities. Soon after, when his master noticed that Skywalker was tired, he admitted that he had constant nightmares about his mother and revealed his strong feelings for Amidala. Obi-Wan cautioned him to control his emotions, reminding him that Padmé was a politician and could not be fully trusted. This led to a debate about the corruption of politicians, including Amidala and Palpatine. As Skywalker expressed his faith in Palpatine's benevolence, he sensed something in Padmé's room. He arrived in time to bisect two venomous kouhuns inches from the senator's face. Obi-Wan spotted the assassin's droid at the window and jumped out, grabbing it.
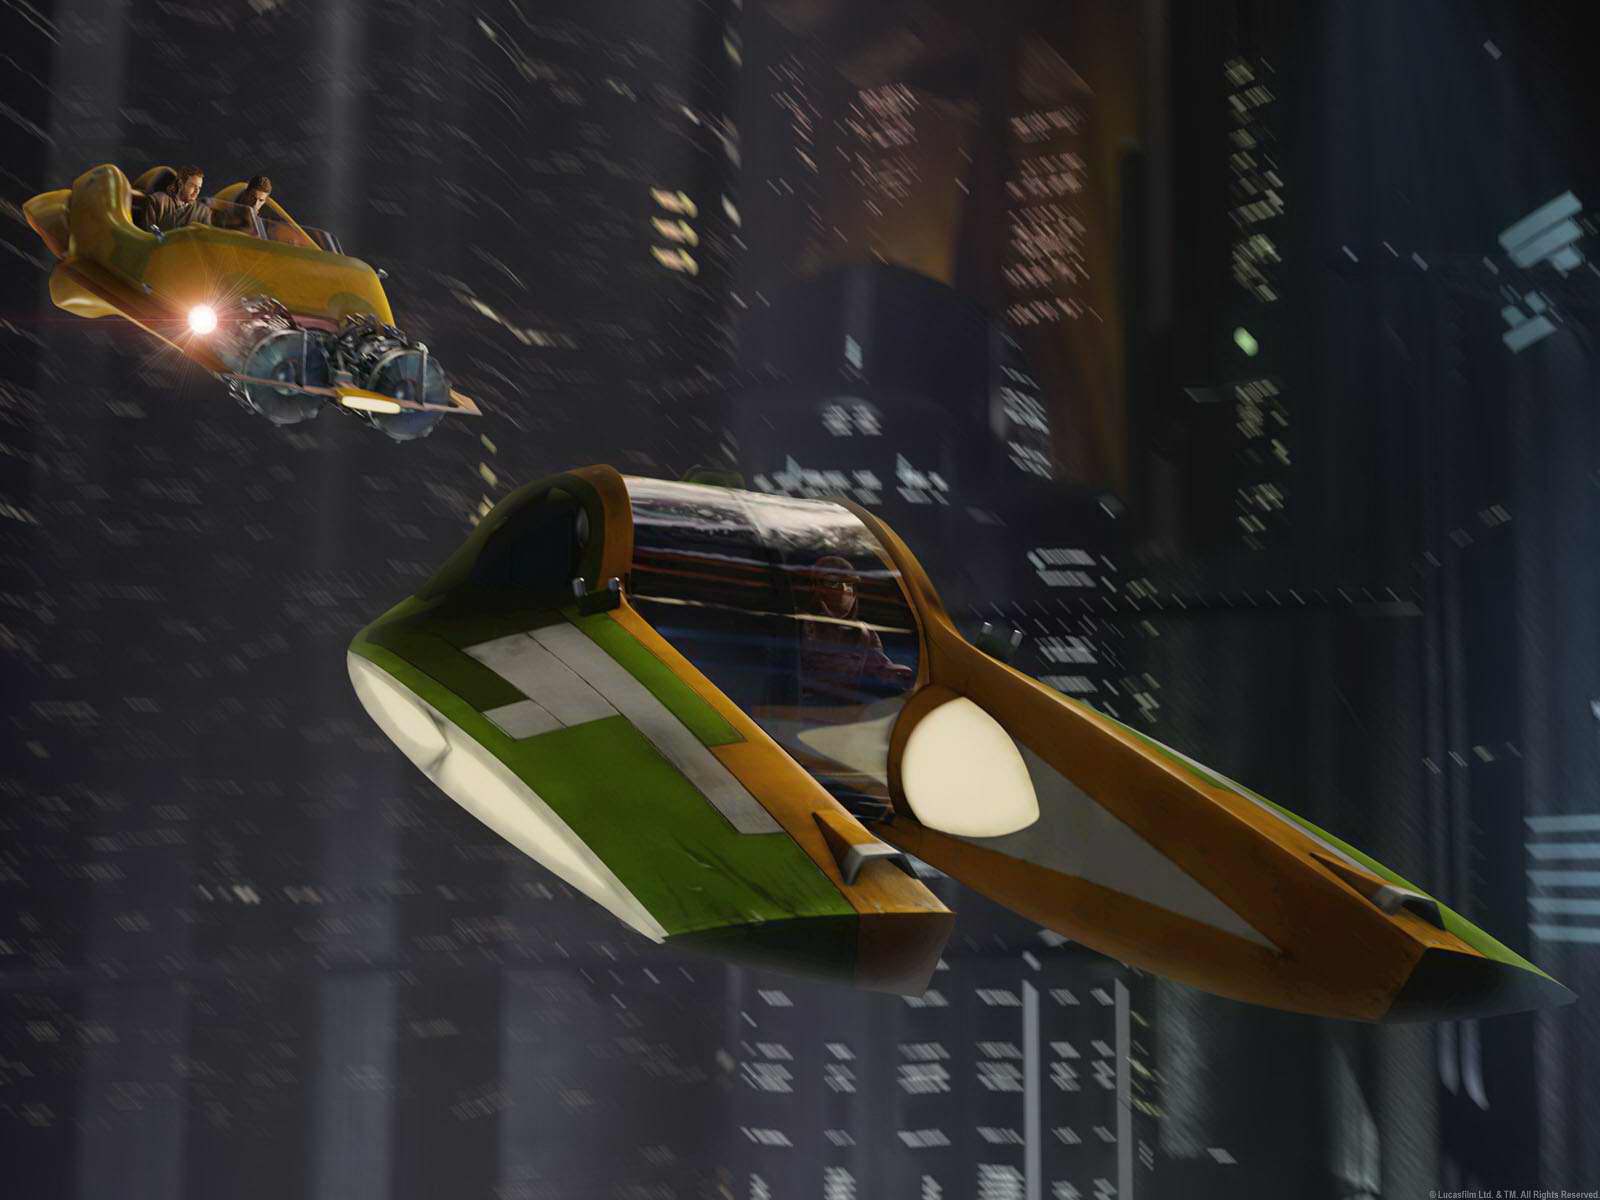
Anakin rushed to a row of speeders parked near Padmé's apartment. When the bounty hunter Zam Wesell shot her droid down, Skywalker arrived upon the scene as his Master was in free fall. Catching Kenobi, the Padawan continued the pursuit of Wesell's airspeeder. Spotting the Jedi, Wesell took her speeder on a nosedive—plunging several meters toward the lower levels of Coruscant. With the Jedi relentlessly pursuing her, Wesell flew through the exhaust flames of the Kerdos Company recycling plant, hoping that the flames would scorch her adversaries in the open-top speeder. Seeing the pair still chasing her and unharmed by the flames, Wesell fired at the couplings of a nearby electrical plant, causing the Jedi's speeder to be inundated by electrical shock.
Skywalker, an expert pilot himself, quickly caught up to Wesell. The bounty hunter steered her craft into a network of skytunnels, aiming once again to lose the pursuing Jedi. Skywalker did not chase directly into the tunnel but opted to travel an alternate route. Wesell wove through the local network of tunnels. Anakin and Obi-Wan thought they lost her, but just a few minutes later Anakin noticed the bounty hunter's airspeeder below, and jumped out, let his body drop the intervening distance through the air, then latched a firm hand-grip to its rear canopy handle. He ultimately was forced to let go when she shot at him, although not before getting a good look at her, wherein he deduced that Zam was not only a female but also a changeling (he'd briefly glimpsed Wesell's true form when she looked up). The Jedi ignited his lightsaber and sliced at the windscreen, knocking out the guidance systems. Wesell shot the lightsaber out of Skywalker's hand, but the ensuing struggle caused Wesell to misfire her blaster pistol, damaging the control pipes. Meanwhile, Kenobi, who was behind Wesell at this point, caught Skywalker's lightsaber. The airspeeder began to plummet toward the surface, crashing near the Outlander Club. Wesell crawled from the crash site and fled into the club.
Anakin was about to follow Zam into the building when Obi-Wan stopped him, returning to him his lightsaber, reiterating, "this weapon is your life." As they headed to the Outlander, Kenobi said he had the feeling his apprentice would be the death of him. Anakin indignantly responded that Obi-Wan was like a father to him. Inside the Outlander Club, Anakin was instructed by his master to search the premises while he went for a drink at the bar. Wesell hid until the two Jedi separated, then slowly approached the seemingly vulnerable Jedi at the bar. To secure the accuracy of her shot, she continued approaching the Jedi with her weapon drawn while Kenobi, through the Force, sensed the bounty hunter's intentions. In an instant, Kenobi ignited his lightsaber, spun around, and severed Wesell's arm below the elbow.
Skywalker and Kenobi took the wounded bounty hunter and dragged her from the club, setting her in an alley behind the club for interrogation. Wesell was initially reluctant to give any information about who had hired her, replying that it had simply been a job. As Skywalker pressed her, however, Wesell prepared to divulge the information. Suddenly, a mysterious figure fired a toxic dart into Zam's neck.
Return to Tatooine
Subsequently, the Council sent the Master and Padawan on separate missions—Skywalker, on his first solo mission, would protect Amidala on Naboo, whereas Kenobi continued an investigation into Amidala's aggressors that took him to Kamino. Joined by R2-D2, Skywalker and Amidala departed for Naboo aboard the Jendirian Valley, a refugee ship leaving from the western spaceport. On Naboo, the two visited Amidala's family home, and Skywalker noticed how much she loved the flower garden maintained by her father, Ruwee Naberrie.
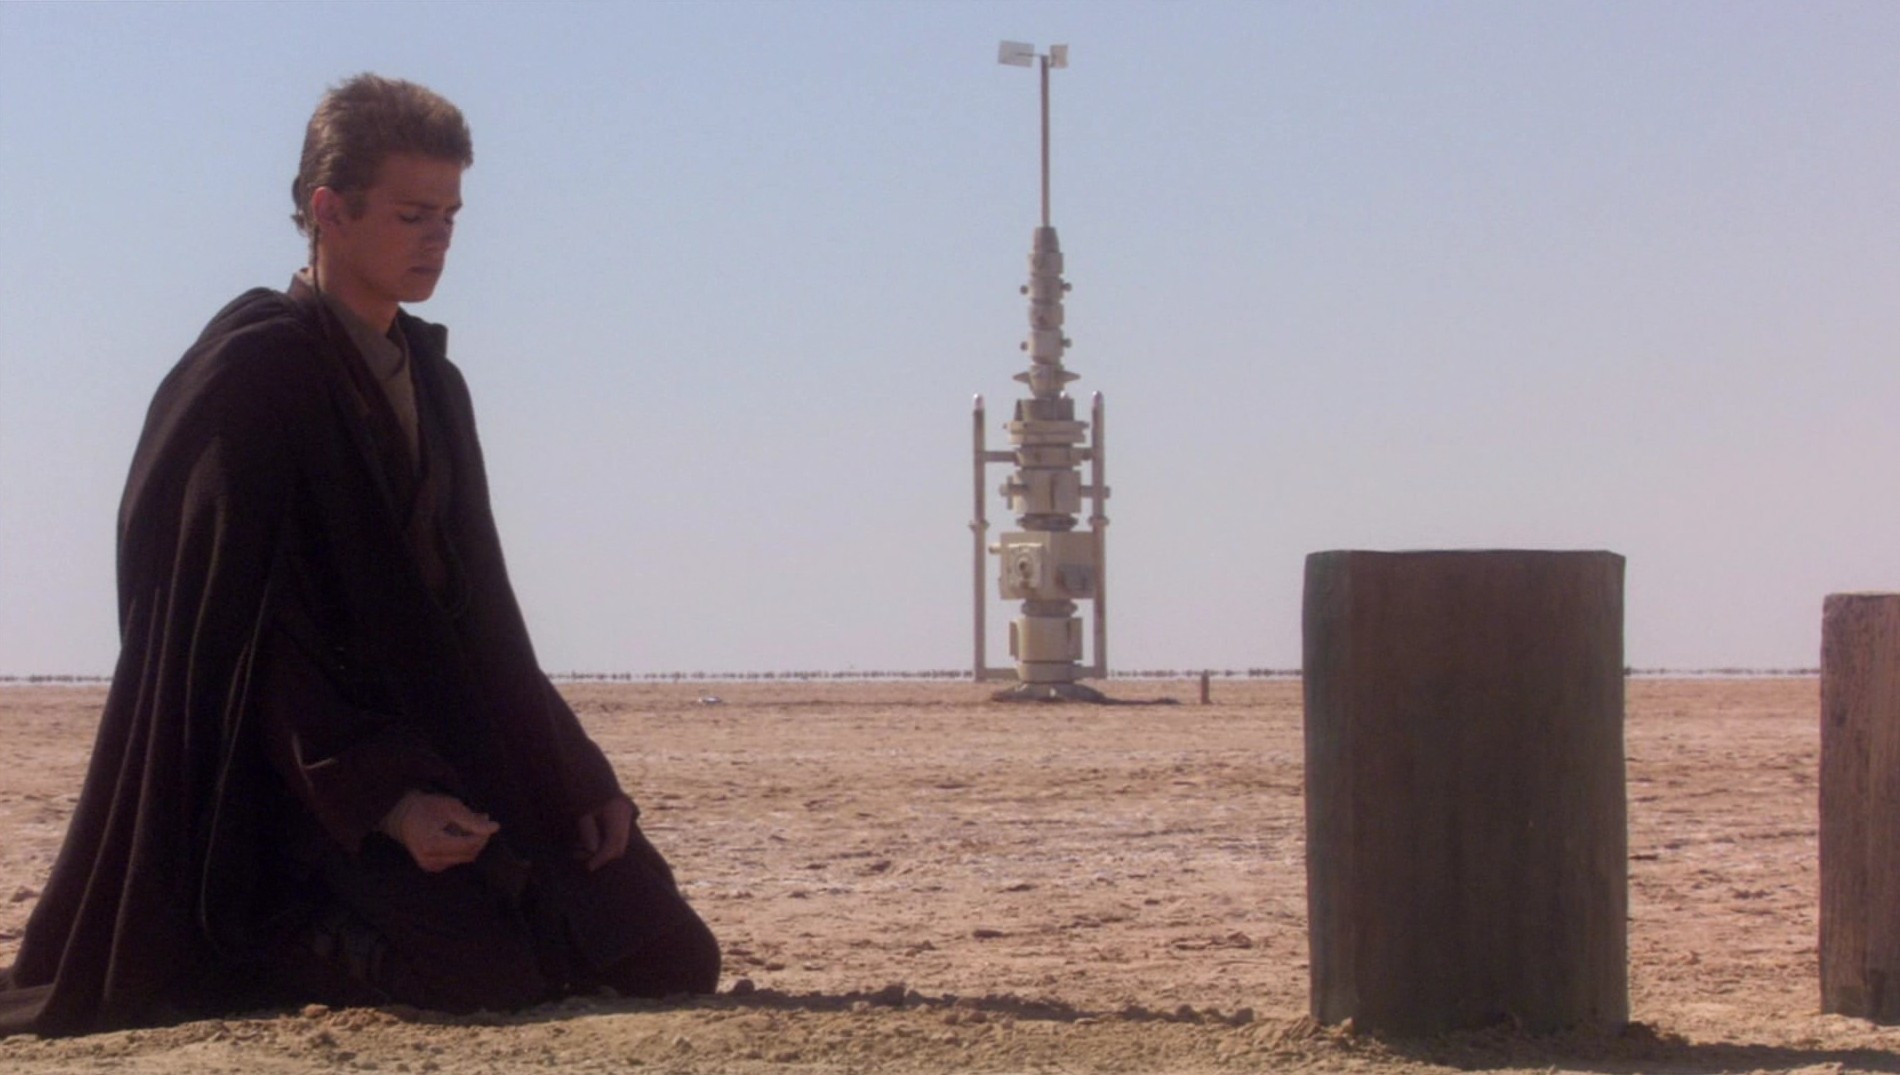
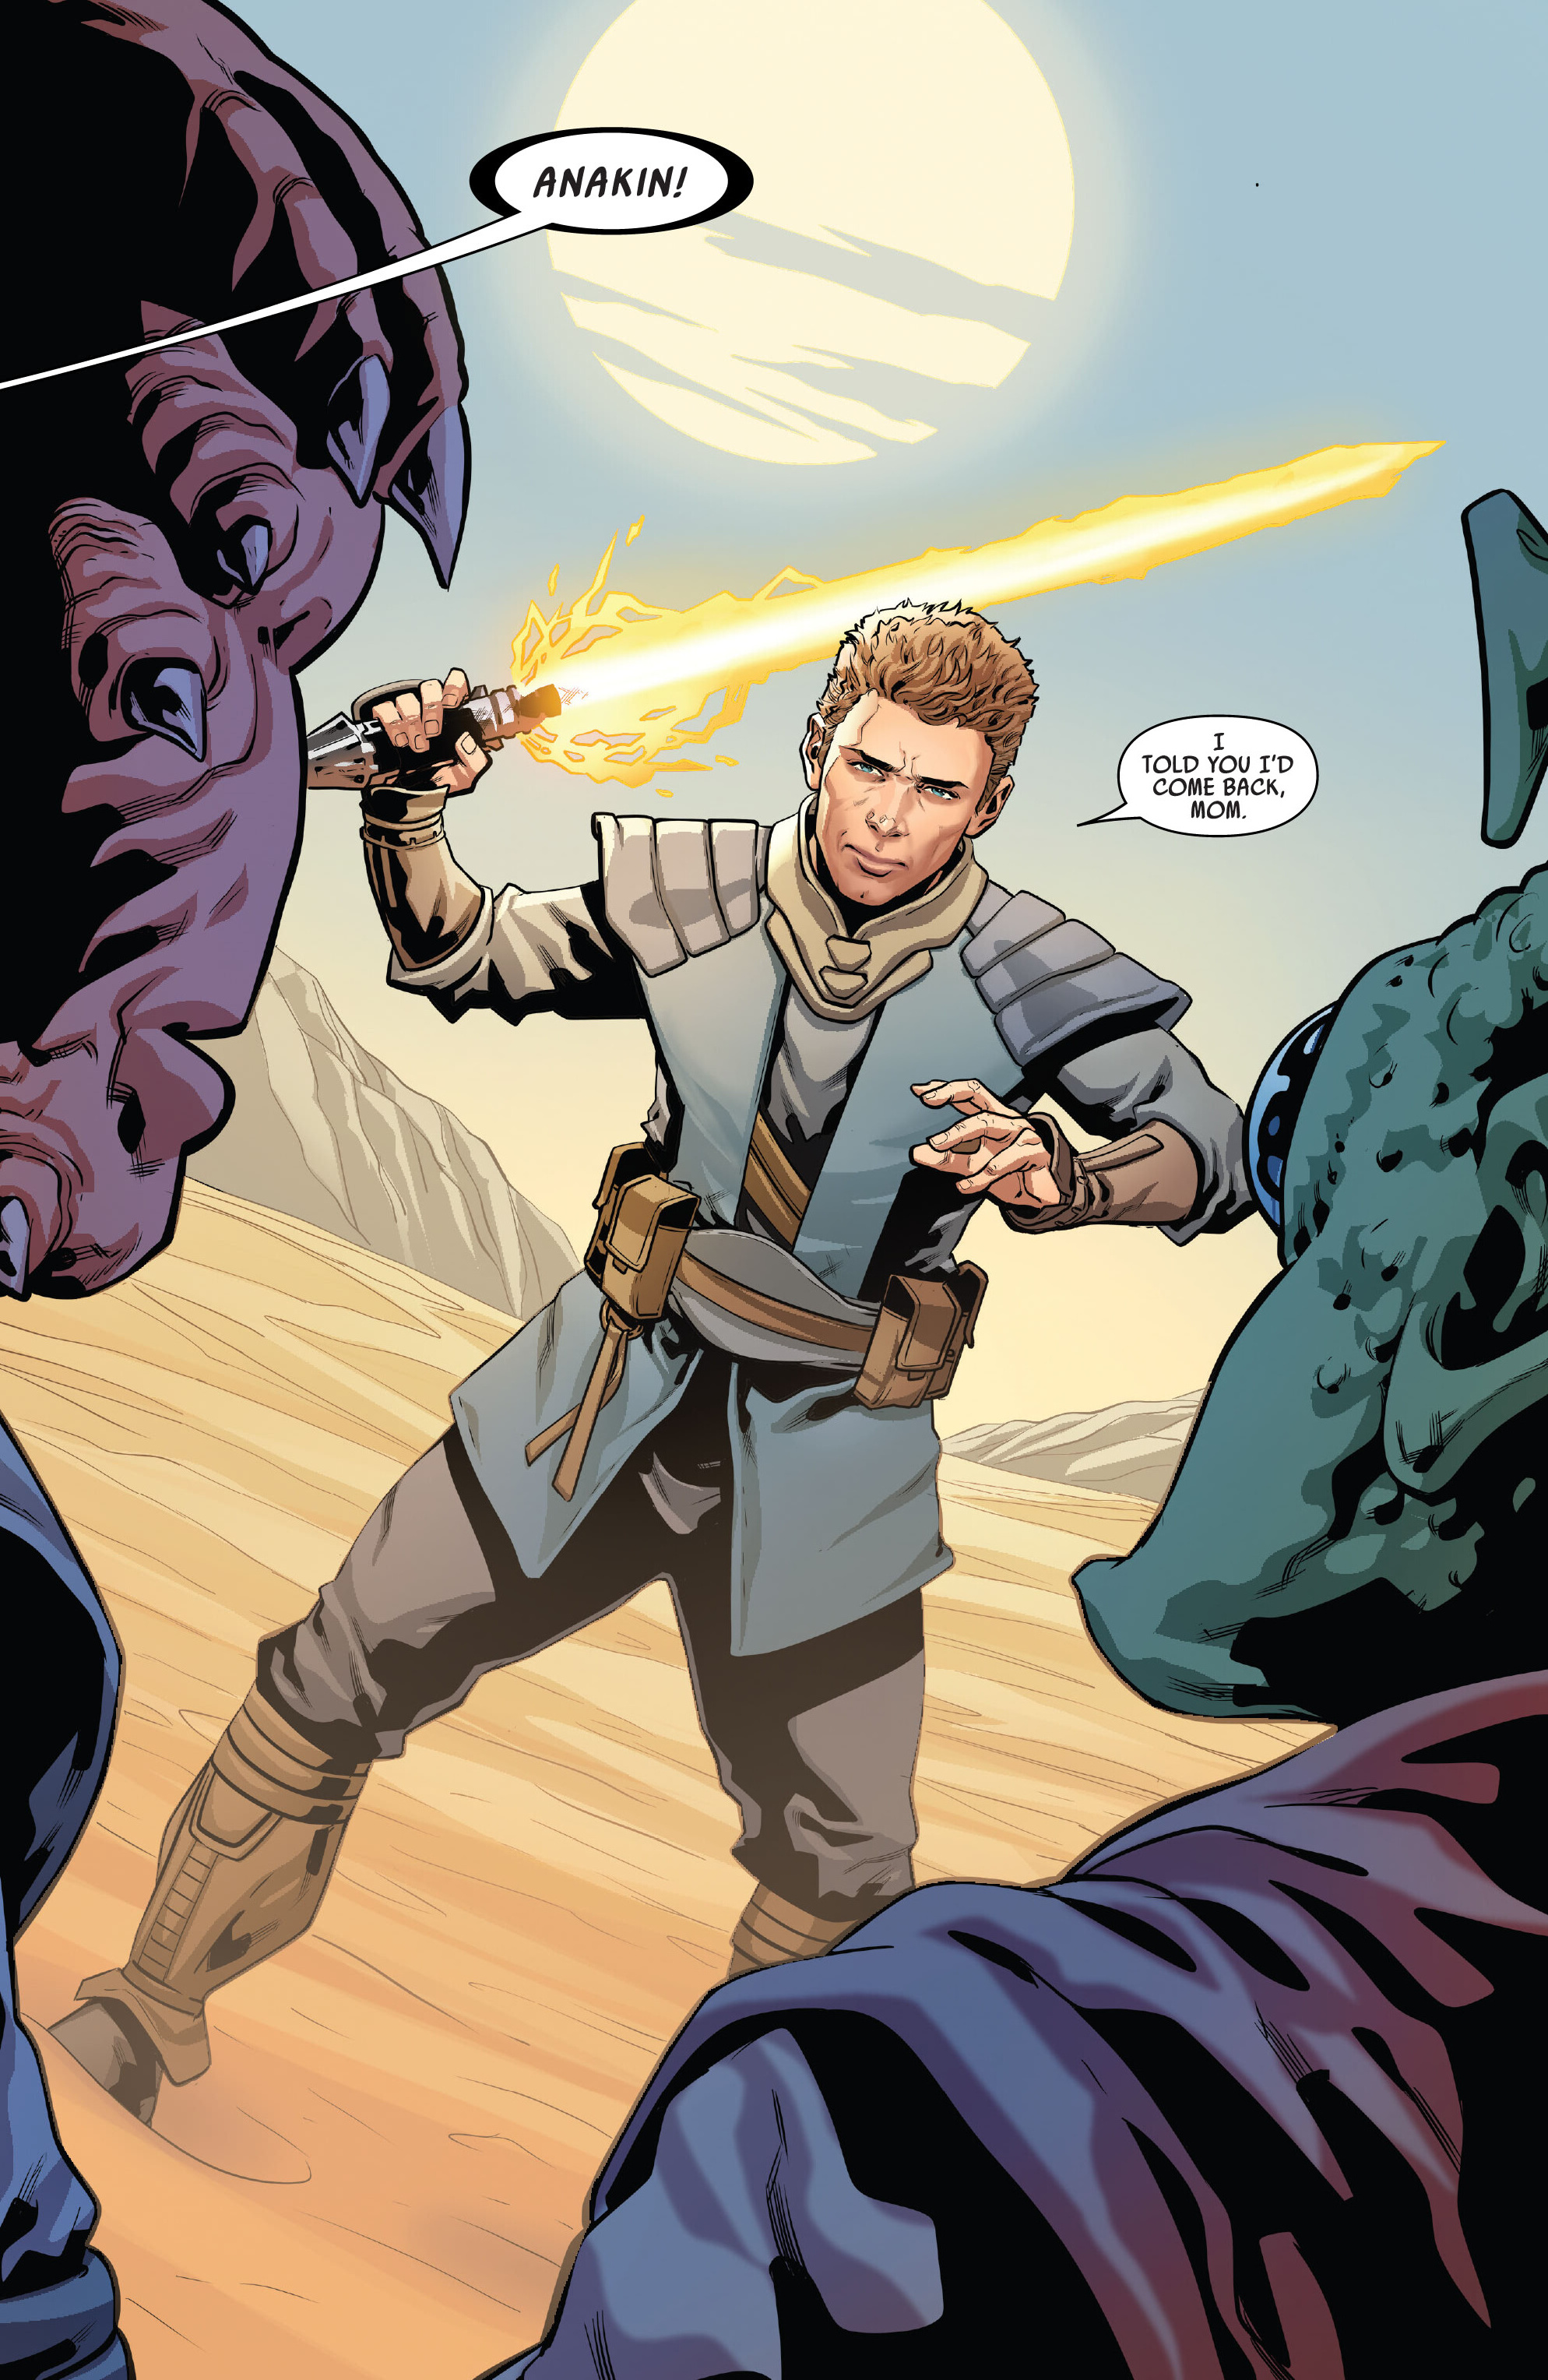
While on Naboo, as he experienced inner conflict between his strong desires for her and his duties as a Jedi, Skywalker revealed to Amidala his love for her, but she refused since Skywalker was not supposed to form attachments as a Jedi, even though she felt the same for him. Skywalker was also troubled by dreams of his mother suffering, which prompted him to return to Tatooine and rescue her, to which Amidala agreed to accompany him. On Tatooine, the two located Watto, who revealed that he had sold Shmi to a moisture farmer named Cliegg Lars. The couple then visited the Lars farm only to discover that Shmi had been abducted by Tusken Raiders about a month before their arrival, and was feared to be dead. Determined to save her at all costs, Skywalker took the swoop bike of his stepbrother, Owen Lars, and searched for his mother.
Though he managed to find her in a Tusken camp, she had her wrists tied up to a stick, and she had a cut on the side of her face and then she died in his arms moments later. Consumed with grief and rage, Skywalker slaughtered the entire village of Tusken Raiders—men, women, and children. Only then did Skywalker bring his mother's body back to the homestead, where her funeral was held, and when he claimed he would become so powerful in the Force he could stop the people he loved from dying. The event left him full of pain and guilt, for failing her and failing as a Jedi, as well as haunted by the prospect of letting go of the people he loved.
First Battle of Geonosis

It was then that Skywalker received a message from Kenobi telling him of Separatist presence on Geonosis, which they retransmitted to Coruscant so that the Jedi Council could see it for themselves. Upon learning he had been captured, Skywalker and Amidala departed for the planet, where they entered one of the factories (where his lightsaber was destroyed) but were subsequently captured and placed with Kenobi into the Petranaki Arena to be executed by beasts. However, the trio managed to avoid the creatures (in Skywalker's case, a reek), only to be surrounded by droidekas on Count Dooku's orders.

However, a Jedi assault team, led by Mace Windu, arrived to rescue them. Anakin was given a green-bladed lightsaber lent to him by another Jedi named Nicanas Tassu. Nevertheless, they fought a losing battle against an overwhelming amount of battle droids, including droidekas, B1-series battle droids, and B2-series super battle droids, until Master Yoda arrived with the newly established Grand Army of the Republic and safely boarded the survivors of the arena onto LAAT/i gunships. As the battle raged between the clone troopers and the Separatist Droid Army, they caught sight of Dooku. When Amidala and a clone trooper were knocked from the troop bay by a cannon blast, Skywalker argued with Kenobi about going after her. After he proclaimed he did not care if he would be expelled from the Jedi Order if it meant saving her, Skywalker only agreed to continue when Kenobi reminded him Amidala would continued on her duties if she had been in a similar crisis. Skywalker then looked back at where she had fallen as they continued to race after Dooku.
Kenobi and Skywalker pursued the Count to a secret hangar, where they engaged him in a duel. Both were defeated, and though Kenobi suffered minor wounds, Skywalker lost his right forearm. It was then that Yoda arrived and fought Dooku until the Sith Lord made his escape on his solar sailer. The battle marked the start of the pan-galactic Clone Wars, and Skywalker received a cybernetic replacement for his lost arm.
Marriage to Padmé Amidala
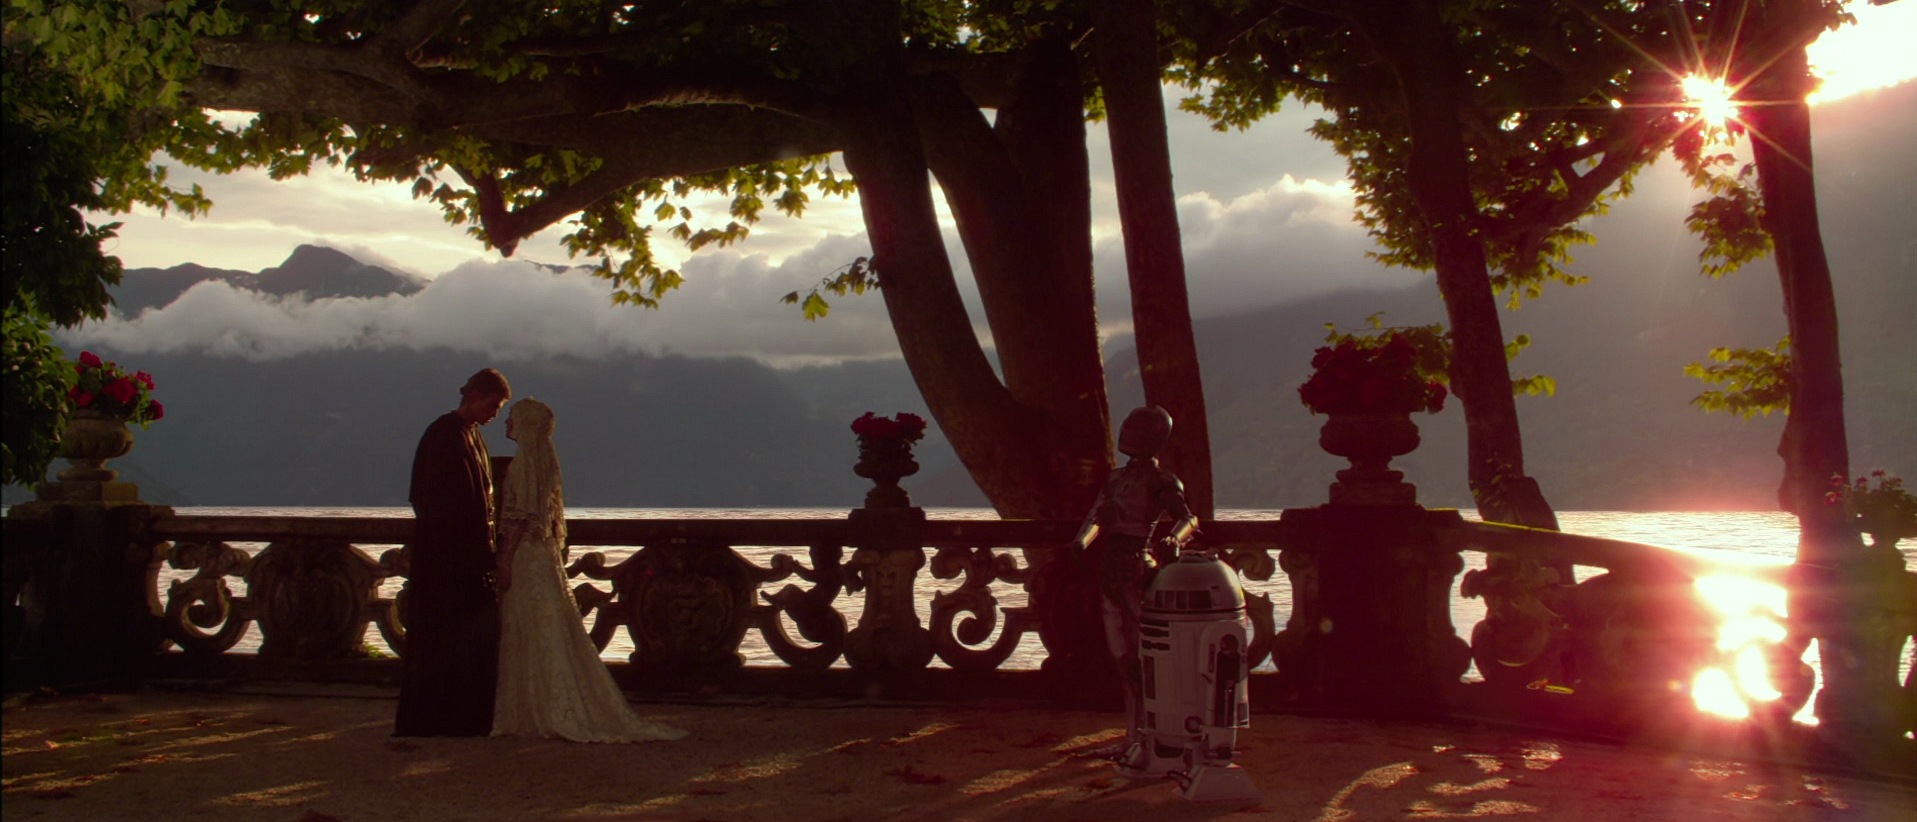
While Kenobi returned to Coruscant, Skywalker accompanied Amidala to Naboo, where they were secretly married, their sole attendants being their faithful droids R2-D2 and C-3PO. As he still needed to recover from the Battle of Geonosis, Skywalker was able to remain on Naboo for several days, enjoying his honeymoon and time after it with Amidala.
The Clone Wars begin
Serving as a Jedi Commander
Following the engagement on Geonosis, Skywalker built a new lightsaber to replace the one he lost. Early in the war, Skywalker quickly came to have encounters with Dooku's personal agents. Later, Skywalker served with his Jedi Master as a Jedi Commander, participating in battles on a rocky planet alongside Kenobi's 7th Sky Corps and Clone Marshal Commander Cody. Afterwards, Skywalker encountered the clone trooper known as "Sister," who was arranging the helmets of her fallen brothers beneath a tree as a memorial.
Skywalker spoke with Sister, and she explained that she was saddened by her brothers' deaths, as well as the origins of her name and the camaraderie her clone brothers had shown for her and her gender identity. Skywalker shared that the Jedi supported such identity and the belief of rising above things, such as Sister's transcendence of the concepts of gender. Sister agreed, and both moved to rendezvous with Kenobi at his location. A short time later, Skywalker was promoted to the rank of Jedi Knight. This was initially done informally as a result of the increased need for Jedi in the battlefield. Though the Jedi were not yet formally integrated within the Grand Army of the Republic, his appointment to Knighthood made Skywalker an acting Jedi General.
Business on Cato Neimoidia
Skywalker's knighthood was soon legitimized by a Knighting Ceremony. Skywalker spent the night after his Knighting ceremony with Amidala in which he presented her with a Padawan braid pendant he had made for her after his Padawan braid was cut. Shortly after his knighting ceremony, the Purse World of Cato Neimoidia, the headquarters of the Trade Federation, was rocked by a destructive explosion that was blamed on the Republic. Kenobi, now a Jedi Master and an acting Council member, was selected to travel to Cato Neimoidia to investigate the explosion. Wanting to clear any Separatist involvement, Dooku sent his own agent to Cato Neimoidia as well, which was later revealed to be the Dark Acolyte Asajj Ventress.
Skywalker expressed his desire to accompany Kenobi on this mission but was instead assigned to instruct a group of younglings, passing on what he had learned as a Padawan, much to his dismay. Before Kenobi left for Cato Neimoidia, Skywalker gave him a RazBohan high-encryption comlink so they could remain in contact. He later accompanied the younglings on an aid mission to Langston in which he was given command of the 302nd Battalion, with Clone Commander Theo serving as his second-in command. While enroute to Langston, Skywalker became acquainted with the youngling Mill Alibeth, a Zabrak girl who was experiencing nausea as a result of a unique connection to the Force. Empathizing with her struggles as a mirror to his own, Skywalker chose to guide and instruct Alibeth as she grew to accept the Force and her connection to it. Kenobi eventually contacted Skywalker, asking him to analyze data he found that incriminated the Republic in the bombing. When he lost contact with Kenobi, Skywalker disobeyed orders to rescue his former master with Alibeth by his side.
Shortly after their arrival on Cato Neimoidia, Skywalker and Alibeth discovered a series of explosive devices strategically positioned throughout significant Neimoidian sites. These were later attributed to Ketar Nor, who used them to convey a message directed at the Republic. Subsequently, they learned that Kenobi was being tried for allegedly conspiring against Cato Neimoidia, an accusation stemming from data discovered by Ventress that implicated the Republic. In a dramatic rescue, Skywalker intervened just as Neimoidian guards were about to open fire on Kenobi. With assistance from Ruug Quarnom and Amidala, the Republic was exonerated of any involvement in the bombing. The investigation revealed that an external entity had orchestrated the bombing to cast suspicion on both the Republic and the Separatists, exploiting the escalating fears on both sides of the burgeoning conflict.
Upon their return to Coruscant, Palpatine enacted the Jedi Military Integration Act, formally incorporating the Jedi into the Grand Army of the Republic, an event that marked the formal beginnings of Generals Skywalker and Kenobi. Seeking to soothe Alibeth's emotional state, Skywalker shared a childhood legend about the sun-dragon of Tatooine. Choosing to avoid direct combat roles, Alibeth became an apprentice to Rig Nema, focusing on specialized medical and spiritual aid. Before departing, she bid farewell to Skywalker and Kenobi, expressing gratitude to Skywalker for his guidance and suggesting that he didn't always need to emulate the sun-dragon of his story. Her words left Skywalker contemplating their deeper meaning. Skywalker frequently cited this particular mission as one of the many occasions he had saved Kenobi's life, a claim Kenobi contested, asserting that "the business on Cato Neimoidia" did not qualify. Skywalker also believed that the operation marked his initial encounter with Ventress, as he recognized her Ginivex-class fanblade starfighter and she was already familiar with his identity. Furthermore, Skywalker and Kenobi undertook a rescue of Ruug Quarnom who was being pursued by battle droids.
Rescue at Staggec
Following the implementation of the Military Integration Act, Skywalker and Kenobi, along with all Jedi, were given the option to wear body armor, though neither immediately adopted it into their regular attire. When Senators Amidala and Yarua were ambushed by General Grievous on the Moon of Staggec, Kenobi volunteered himself and Skywalker for the mission to assist them. Shortly after arriving on the moon, Skywalker followed a trail of footprints that led him into a nearby forest. Within the forest, he and Kenobi located Yarua's daughter, Viiveenn, who presented Skywalker with a flower and subsequently guided the Jedi to the ship where her father was being held captive. As Viiveenn approached the ship, Kenobi pursued her, resulting in his capture by the surrounding battle droids. Skywalker engaged the battle droids in an attempt to prevent the capture of Kenobi and Viiveenn, but his efforts were unsuccessful.
As the Separatist ship departed, Skywalker expressed frustration at not having disabled any droids for interrogation purposes. He then calmed himself and meditated to formulate a plan. Skywalker then used the Republic shuttle they'd arrived in to sneak onto the Providence-class Dreadnought commanded by Grievous. Working alongside Kenobi, Skywalker eliminated the remaining droids and rushed to locate Amidala, only to discover that the senator had already orchestrated her own rescue along with her associates. Skywalker then escorted the group back to the Republic shuttle. Kenobi arrived soon after with Viiveenn, conveying the tragic news that Yarua had perished while saving his daughter. After evacuating the ship and entering hyperspace, Kenobi briefed Yoda on the situation, while Skywalker comforted Amidala, who was consoling Viiveenn in her grief.
Lesson on Naboo

While stationed on Naboo with Kenobi, Skywalker impulsively attacked Ventress, who was concealed within the crowd. Despite Kenobi's instruction to remain patient, Skywalker disregarded his master's advice and pursued her. After Skywalker lost track of Ventress, Kenobi caught up to him and imparted a lesson on the importance of patience and trust. Overhearing their conversation, Ventress overheard Kenobi expressing his concern for Skywalker's safety. Initially interpreting this as a weakness, Ventress later intentionally sabotaged her mission, realizing that Dooku did not have the same level of care for her as Kenobi had for Skywalker.
General of the 501st
The 501st Legion operated under Skywalker's leadership throughout the war, with Clone Captain CT-7567, also known as "Rex," serving as his frequent "first-in-command". Sometime prior to receiving a scar over his right eye, Skywalker participated in the Battle of Arantara alongside his troops. During the battle, Rex sustained injuries and lost consciousness. Upon being discovered by Skywalker, Rex expressed surprise that the Jedi had returned for him. Skywalker responded that he believed he should have been in Rex's position, emphasizing that a true leader always leads from the front.
Following this event, Skywalker and Rex cultivated a relationship of mutual respect and even friendship. While Rex initially struggled to adapt to his unconventional Jedi General due to his adherence to regulations and seriousness, he eventually came to admire and occasionally emulate Skywalker's willingness to bend the rules and his talent for improvisation. Ultimately, Skywalker and Rex became close friends.
His personal flagship was the Venator-class Star Destroyer Resolute, under the admiralty of Wullf Yularen. Skywalker engaged and destroyed the B1 battle droid R0-GR on multiple occasions during the war. Years later, after R0-GR encountered C-3PO and discovered that Skywalker had built the protocol droid, he considered himself and the 3PO unit to be practically family.
Siege of Hisseen

At a later point, the Jedi Council dispatched Skywalker, along with Kenobi and Jedi Master Plo Koon, and their respective battalions to the besieged planet of Hisseen in order to prevent a Separatist victory there. While clones were protecting a village from approaching droid forces, they required reinforcements before Skywalker, Kenobi, and Koon arrived to provide assistance. The three Jedi engaged in combat, with Koon utilizing the Force to propel several droids into each other, resulting in their destruction. Following a brief skirmish with the droids, the Republic forces emerged victorious in that particular engagement. Subsequently, Skywalker deactivated his lightsaber and convened with Cody, Clone Commander CC-3636, as well as Clone Captain Rex regarding the Hisseenian parliament and a Hisseenian premier who was scheduled to meet with Count Dooku and Asajj Ventress, which could potentially result in Dooku dissolving the government on Hisseen and seizing control of the planet.
Following this, Kenobi informed the clones that they needed to maintain their position while the three Jedi pursued Dooku and Ventress. Subsequently, the three Jedi departed to confront Dooku and Ventress. Meanwhile, Rex shared a story about him and Skywalker during a mission on Benglor. Eventually, the trio located Dooku, leading Skywalker to engage him in a duel while Koon contacted trooper Boost requesting immediate assistance. As Skywalker and his fellow Jedi pursued Dooku and Ventress, they received a distress call from Rex, prompting the Jedi to abandon their pursuit in order to assist their soldiers. Upon rescuing their clones, it became evident that the Republic had secured a victory for the day because the soldiers had rescued the Hisseenian parliament from Dooku's droids. Skywalker and his allies then departed Hisseen to return to Coruscant.
Battles at Corvair sector and Kudo III
Skywalker later commanded a squadron of bombers and fighters against the Separatists in the Corvair sector. Following the defeat of the Separatist fighters, Skywalker conferred with Admiral Yularen aboard the Resolute. Yularen verified that the Separatist forces originated from the droid foundry located on Kudo III. Skywalker concurred with the need to swiftly attack the foundry before Separatist reinforcements could arrive. However, Skywalker voiced his disapproval of the high casualty rate associated with the attack, which included the Kudon. Yularen proposed the idea of conducting a surgical strike on the foundry's generator.
Skywalker discussed his proposed attack plan with Master Kenobi, who advised Skywalker to have faith in his instincts and the Force. Skywalker, accompanied by R2, boarded his interceptor and proceeded to Kudo. Upon landing, Skywalker infiltrated the foundry and witnessed the Kudon being exploited as slave labor. Skywalker fought the battle droids and liberated the Kudon. Skywalker successfully persuaded the Kudon to arm themselves and engage the battle droids. The mission proved to be successful, and Skywalker returned to the Resolute.
Battle of Christophsis
Several months into the conflict, Skywalker and his former mentor, Kenobi, were assigned by the Jedi Council to break the Separatist blockade of Christophsis and provide assistance to Alderaanian Senator Bail Organa in his relief efforts on the planet's surface. Initially facing overwhelming odds, Kenobi presented Skywalker with a Republic stealth ship prototype equipped with a cloaking device and tasked him with piloting it past the blockade to deliver supplies to Organa. Accompanied by Yularen, Skywalker chose instead to directly engage Separatist Admiral Trench and divert his attention away from Organa on the surface.
After de-cloaking his stealth ship, Skywalker launched torpedoes at the dreadnought Invincible, but his missiles were deflected by the ship's powerful thermal shields. Following his successful evasion of Trench's retaliatory fire, Trench transmitted a message over an open channel, warning that he had encountered this type of ship before and advising them to retreat before being destroyed. Utilizing the information provided by Kenobi, Skywalker deduced that Trench would target the ship's magnetic signature to destroy it. Consequently, Skywalker de-cloaked once more, launching another volley of missiles at Trench's dreadnought. Trench fell for the deception and locked onto the stealth ship's magnetic signature, firing several tracking torpedoes. Skywalker steered the ship directly towards the Invincible, narrowly scraping past its hull just before Trench's missiles struck the bridge. Because Trench had just launched the missiles, his ship's shields were still in the process of recharging, resulting in the dreadnought's destruction. Following his victory over Trench, Skywalker delivered the supplies to Organa.
After breaking the blockade, Kenobi joined Skywalker and the remaining Republic forces on Christophsis's surface. Together, they formulated a strategy to ambush the approaching droid army; however, they themselves were ambushed and forced to retreat. Suspecting the presence of a traitor within their ranks, the Jedi duo decided to venture behind enemy lines to gather intelligence, leaving Rex and Cody to uncover the identity of the traitor. Inside the deserted Separatist headquarters, Skywalker and Kenobi encountered Asajj Ventress, engaging her in a duel before commandeering two STAPs to return to base. They arrived to find Rex and Cody apprehending Sergeant Slick, the double agent.
As the battle intensified, Skywalker's squad and the rest of the Republic forces managed to force the Separatists into a temporary retreat, but the need for reinforcements was obvious. Instead, a young Togruta girl, Ahsoka Tano, arrived to relay Master Yoda's message for them to return to Coruscant for a new mission, presenting herself as Skywalker's new Padawan, much to his dismay. The imminent Separatist threat made it impossible for them to abandon their position, so Skywalker and Tano (whom Skywalker nicknamed "Snips") infiltrated enemy territory to destroy their droids' deflector shield generator while Kenobi stalled for time by holding a fake surrender negotiation with General Loathsom. Despite encountering a few droids guarding the generator, the two succeeded in destroying it, enabling the Republic army to eliminate the droids and secure victory in the battle. Only then did Skywalker and Tano discover common ground, and he accepted the responsibility of mentoring her.
Battle of Teth
As Yoda arrived with reinforcements, Skywalker, Kenobi, and Tano received word that Jabba Desilijic Tiure's son, Rotta had been kidnapped, and Skywalker and Tano were assigned to travel to Teth to locate the Huttlet, while Kenobi would confer with Jabba on Tatooine.
With a deadline of only one planetary rotation to deliver Rotta, Skywalker and his Padawan landed on Teth, where they were ambushed by battle droids. Fighting their way up a cliffside, they entered a monastery; inside they found that Asajj Ventress was the one who had kidnapped the Huttlet. With considerable effort, the Master-Padawan team secured Rotta and escaped aboard an abandoned G9 Rigger-class light freighter, the Twilight. They observed that assistance had arrived and planned to transport the Huttlet to one of their Star Destroyers for medical attention, as he had become ill. Unfortunately, the cruiser was destroyed, compelling them to transport Rotta to his father independently.
Missions in Hutt territory

Upon arriving on Tatooine, they were attacked by MagnaGuards and, although they defeated them, the Twilight crashed, requiring them to traverse the desert. Opting to separate in the Dune Sea, Tano transported Rotta to Jabba's Palace, while Skywalker was confronted by Count Dooku. Following a brief duel, Skywalker commandeered Dooku's speeder bike, aware that his Padawan was in danger and arrived at Jabba's Palace, where he was informed that Rotta had not been delivered and that he would be executed. At that moment, Senator Amidala contacted the Hutt crime lord and revealed that his uncle Ziro was complicit in the kidnapping, just for Tano to arrive along with Rotta, resolving matters to Jabba's satisfaction.
Sometime after the treaty between the Republic and Hutt Clan was finalized, Skywalker and Amidala were dispatched to meet with Lannik senator Zast Tri'vak on the luxurious MPO-1400 Purgill-class star cruiser Halcyon to ensure that he would not influence Lannik to align with the Separatists and sever Republic supply lines. After assisting a Logistics droid named D3-O9, Skywalker and Amidala observed Tri'vak as he hastily returned to his quarters. Aware that Kenobi had established the ship's destination with a unit of clones due to reports of Separatist operatives, the couple decided to enjoy their time together on the Star Cruiser. They engaged in playful dueling in the sparring room and observed a local puffer pig before it expanded and obstructed their path. As they relaxed in the Climate Simulator, Skywalker suddenly detected Ventress on the ship and realized that she was there to extract Tri'vak. He and Amidala then forced their way into the senator's cabin and discovered a hole cut into the floor. Following the trail, they quickly located Tri'vak being escorted by Ventress.
As Skywalker dueled Ventress, he and Amidala were threatened by a few guards before Amidala stunned them with the help of a young Tholothian boy named Shorr Komrrin. At that moment, the fighting was halted by a Hutt who had surrounded the combatants with security. When the Hutt threatened to terminate the Hutt Clan's treaty with the Republic, Amidala explained that they were there to uncover a traitor and reminded him of the Mid Rim trade routes from which they both benefited. While Tri'vak pleaded with the Hutt for mercy, Ventress stabbed the senator in the back and used her lightsabers to shatter a nearby window, leaping out into space and escaping in her fanblade starfighter. Amidala held onto Shorr's hand as Skywalker sealed the opening with the Force. She then commended the boy for his bravery while Skywalker watched as Ventress flew away.
Following the Battle of Hypori, Kenobi, Cody, and the 212th Attack Battalion were dispatched to assist Commander Mekedrix and his forces from Roon at a battle on Abrion Major. As he prepared to meet with Yularen, Kenobi contacted Skywalker and the Jedi wished each other luck before Kenobi departed for his mission.
The Malevolence
Upon receiving news of the destruction of Jedi Master Plo Koon's fleet in the Abregado system, Skywalker and his Padawan set out to rescue him and any survivors, despite being ordered to rendezvous with Kenobi's fleet. Although he dispatched his ships and the majority of his men, Skywalker and Tano personally used the Twilight to rescue Koon and three other clones, who informed them about a new Separatist superweapon, the Subjugator-class heavy cruiser Malevolence, commanded by Grievous.
Following another attack by the Malevolence, Skywalker decided to lead the Shadow Squadron in an attack against the heavy cruiser, only to narrowly evade the Malevolence's ion cannon, which resulted in the destruction or incapacitation of numerous bombers. Forced to alter their plan, Skywalker and the bombers dropped their payload on the ion cannon, causing it to overload, damaging the ship and forcing the Malevolence to retreat from its attack on a Republic medical station. While attempting to escape, Grievous captured Senator Amidala, who had entered the system believing she had been sent to negotiate with the InterGalactic Banking Clan Supreme Executive, rather than falling into a trap. Ordering their ships to cease fire, Skywalker and Kenobi boarded the Malevolence to rescue her. While on board, Skywalker sabotaged the ship's navigation system to ensure that the ship would crash into a moon if the hyperdrive was engaged, before escaping the ship alongside Amidala and Kenobi.
Following the battle in which a group of clones from Rishi Station averted a surprise attack on Kamino, Skywalker and Kenobi awarded medals to two of its survivors, newcomers Echo and Fives, with Skywalker welcoming them into the 501st Legion.
R2-D2 lost
Following several Separatist victories led by General Grievous, and the defeat of the Falleen battle group, Skywalker attempted to prevent the cyborg from seizing his sector and orchestrated an ambush for the Separatist forces as they traversed Bothawui's asteroid field. Positioning AT-TEs on the nearby asteroids, he successfully destroyed the Separatist frigates and compelled Grievous to retreat in the Soulless One, prompting Skywalker to pursue him. However, debris from the destroyed Separatist frigates damaged his ship, requiring Rex to rescue him at the cost of losing R2-D2. Although he was provided with a new astromech droid, R3-S6, Skywalker was saddened by the loss of his friend and did not warm up to the new droid, suspecting its true allegiance. Instead, he initiated a search, scouring the battlefield; unable to locate R2-D2, they boarded a nearby scavenger ship, the Vulture's Claw, only to depart empty-handed as Gha Nachkt delivered R2-D2 to Grievous.
With all hope seemingly extinguished, Skywalker tried to go on without his droid, searching for a potential Separatist listening post, until R2-D2 transmitted a message that revealed his location at Skytop Station. Once there, Skywalker instructed Tano and Rex to carry out the mission—the station's destruction—while he sought out his missing droid. Skywalker fought multiple MagnaGuards, eventually locating R2-D2 and encountering Rex and Denal, who informed him that Tano had departed alone to distract Grievous so they could complete the mission. It was at that moment, as Anakin had already suspected regarding R3-S6's true loyalty, that R3 exposed himself as Grievous' spy, unleashing vulture droids and super battle droids upon them. While they fought back, Tano returned to the group, receiving a scolding from her master for engaging the droid general by herself; R2-D2, in turn, opened the hangar doors, defeating R3-S6 in the process, and was retrieved by a joyful Skywalker, happy to have his longtime companion back safely.
Following Viceroy Nute Gunray's capture on Rodia by Amidala, Skywalker separated from Tano, who then served as Gunray's escort alongside Luminara Unduli. Despite their failure in that endeavor, Skywalker and Tano were reunited at the designated meeting point.
Captured on Florrum
Alongside Kenobi, Skywalker spearheaded an effort near Vanqor to apprehend Count Dooku, during which Skywalker allowed himself to be captured aboard Dooku's Munificent-class star frigate and imprisoned, only to be rescued by Kenobi. Subsequently, the two Jedi pursued Dooku, who fled in his solar sailer, utilizing a Sheathipede-class transport shuttle. After their shuttle sustained direct hits, they were compelled to crash-land on the planet. In a nearby cave, the two Jedi started hunting for Dooku, but the Sith Lord ambushed them by triggering a cave-in. While Dooku managed to escape, they had to subdue a gundark, only to nearly be overcome by poison gas released from a trapped pocket within the cave. They were rescued just in the nick of time by Tano and a detachment of clone troopers.
Later, after Supreme Chancellor Palpatine and his representatives were contacted by Hondo Ohnaka to receive payment for capturing Count Dooku, Skywalker and Kenobi were tasked with confirming the pirate gang's possession of Dooku, agreeing to the pirates' condition to arrive unarmed. The Jedi were greeted at gunpoint aboard the Twilight and escorted to Ohnaka, who facilitated a meeting with their captive. The Jedi mocked Dooku's capture, and the Sith Lord cautioned them against underestimating the Weequay. Skywalker and Kenobi were invited to a "party" by the pirates, only to awaken unconscious in a cell, chained together with Dooku. Despite the Jedi and Sith's individual escape attempts, Representative Binks ultimately rescued them, although the mission resulted in the death of Senator Kharrus and Dooku's escape. Obi Wan instructed Anakin not to harm Hondo and departed peacefully.
Later, Skywalker learned of the situation on Ridlay, where all communication from the planet had ceased for an unusually long time. He contacted Windu, who was already investigating the situation. He offered his and Tano's help, but Windu declined their involvement.
Quell and Maridun
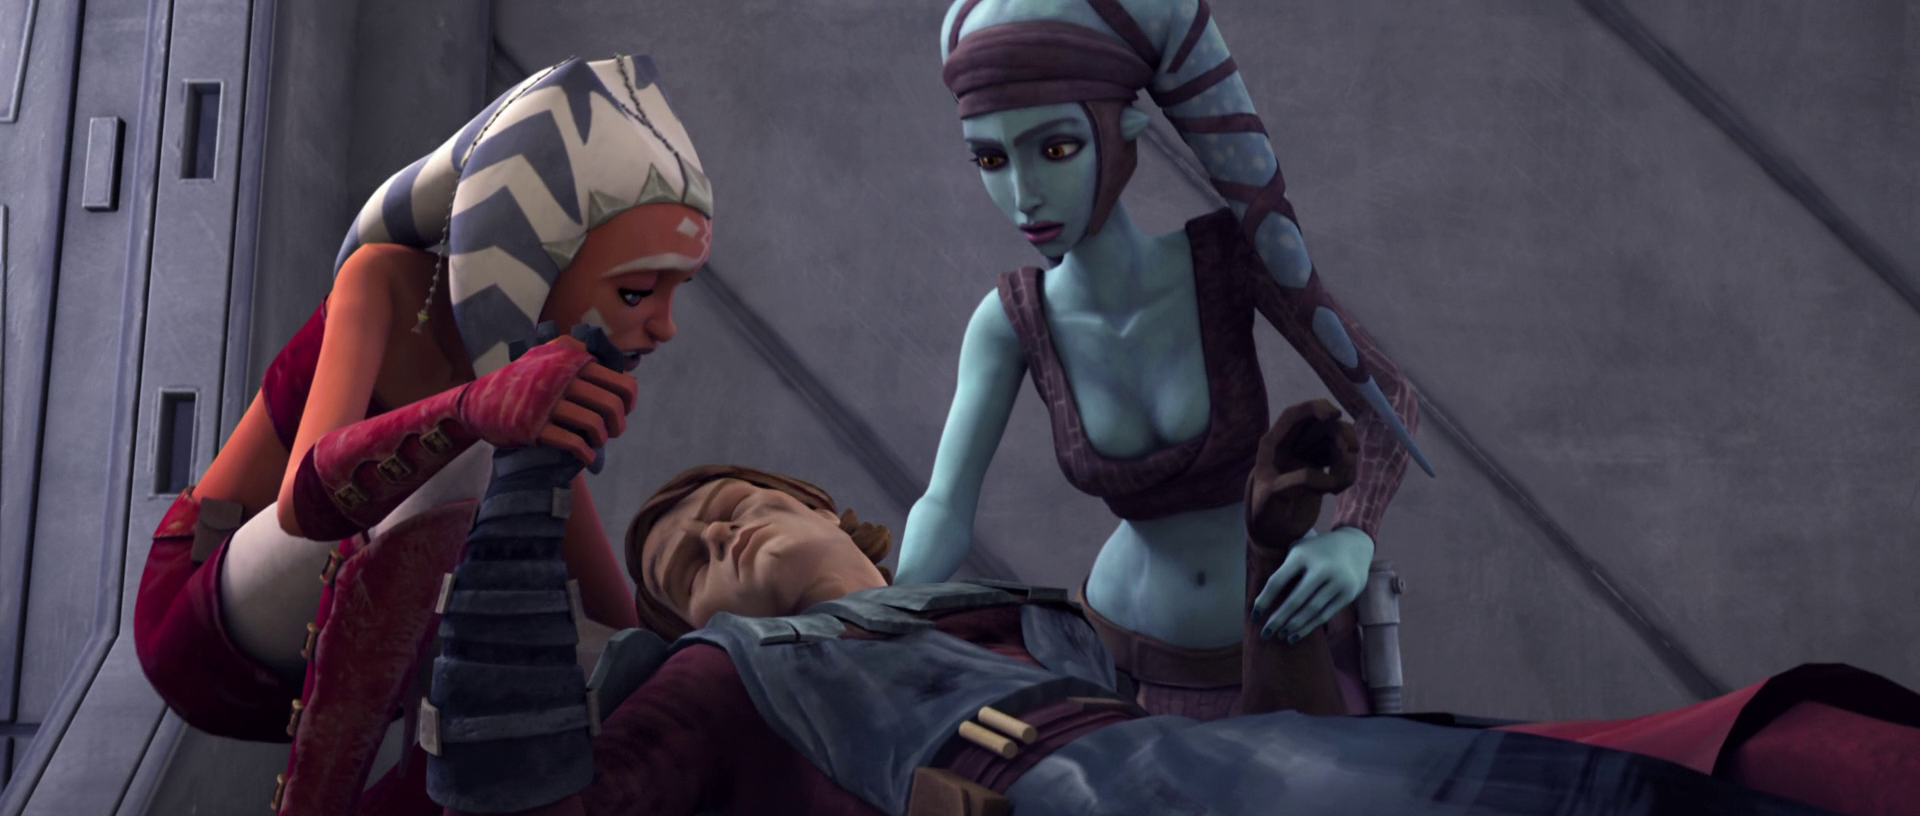
Dispatched as reinforcements for Jedi Master Aayla Secura's and Commander Bly's forces, which were significantly outnumbered and outmatched during the Battle of Quell, Skywalker, Tano, Rex, and their troops aided in the evacuation of Secura's cruiser as it came under heavy Separatist fire. Upon meeting with Secura amidst the raging inferno engulfing the cruiser, Skywalker risked his life to save the others, sustaining severe injuries in the process. Tano and Secura carried Skywalker onto the evacuation frigate, where he received medical attention for his wounds. As they prepared to dock with the Resolute, an ambush by several vulture droids triggered the ship's hyperdrive, sending them into deep space. After narrowly avoiding an approaching star, they crash-landed on Maridun, where Skywalker was left in Rex's care while Secura, Tano, and Bly ventured out to seek medical assistance from the natives. Rex defended Skywalker from several ferocious mastiff phalones until Tano returned with Bly and Lurmen healer Wag Too, leading to a final confrontation with the vicious attackers.
Shortly after their arrival, Separatist forces landed on the planet, and the Lurmen leader Tee Watt Kaa blamed the Jedi for bringing the war to their peaceful world, demanding their immediate departure. Despite complying, the Jedi returned to the Lurmen village after discovering the Separatists' malevolent plan—to test their new superweapon, the defoliator, on the Lurmen. The group established a shield generator to protect the village from the weapon's blast, as well as from the oncoming waves of battle droids. As their shield failed and the defoliator was being reloaded for another shot, Skywalker disabled the weapon before capturing Separatist General Lok Durd. The Jedi then departed the now-peaceful planet aboard Republic cruisers sent by Yularen.
Orto Plutonia

Following the loss of communication with a Republic outpost on Orto Plutonia, Skywalker, along with his droids C-3PO and R2-D2, and Kenobi, was dispatched to investigate with a squad of cold assault troopers under Captain Rex's command, accompanied by Pantora Senator Riyo Chuchi and Chairman Chi Cho. Skywalker and Kenobi examined the outpost after the mysterious deaths of all the clone troopers stationed there, deducing that they had been killed, but not by battle droids, as a nearby Separatist base had also been attacked. Skywalker and Kenobi followed the clues to a nearby canyon, where they discovered a village inhabited by Talz, who explained, through C-3PO's translation, that they were merely defending their home. Kenobi, acting as a mediator, proposed a peace meeting between the Talz and Chairman Cho, but the latter refused to share the moon with the Talz and declared war, despite the Jedi's attempts to foster peace. As a battle erupted between the clone troopers and the Talz, Senator Chuchi convened with the Pantoran Assembly and deemed Cho out of order. The conflict ended with Cho's death, and Chuchi proposed sharing the moon with the Talz.
Blue Shadow Virus
Following Amidala's request to dispatch Skywalker and Kenobi to assist in locating suspected Separatist activity on Naboo, Skywalker, Kenobi, and Tano arrived to find that Amidala and Binks had already begun investigating the eastern swamps. Sending the young Padawan with Peppi Bow to locate them, the two Jedi were informed by Captain Gregar Typho that Amidala, before communication was lost, had reported the location of the laboratory and Dr. [Nuvo Vindi]'s intention to release the dangerous Blue Shadow Virus into the galaxy. While Tano launched an attack on the southern entrance, creating a distraction for Kenobi and Skywalker to enter undetected through the hatches, Skywalker confronted Vindi, who used electricity on Amidala and Binks to facilitate his escape. After rescuing the Senator, Skywalker pursued the scientist, capturing him with the assistance of Peppi Bow and Kenobi in the swamp above.

Preparing to transport Vindi to Theed for his trial, they heard an alarm and Skywalker contacted Tano, who informed him that Vindi's servant droid had activated a viral bomb, releasing the virus, and that she and the clones were trapped in the laboratory, just as Amidala had been. Once in Theed, Captain Typho told the two Jedi that they had discovered a potential antidote for the virus, a reeksa root, but that it could only be found on the planet of Iego. Despite Typho's warnings that it was suicide, Skywalker, accompanied by Kenobi, departed aboard the Twilight.
Upon arriving, Skywalker and Kenobi were met by a group of harmless B1-series battle droids that had been reprogrammed to serve a local boy, Jaybo Hood; he informed the Jedi that the planet was protected by a deity known as Drol, who would not allow anyone who arrived to leave, but also provided instructions on how to retrieve the reeksa roots. Despite being attacked by the plant, they obtained the root and bid farewell to Hood before taking off, only to be forced to return after encountering a laser web, the work of the Separatists. On their second attempt, however, they utilized Hood's reprogrammed vulture droids, and Kenobi successfully destroyed the laser generator, freeing the inhabitants of Iego. Skywalker and Kenobi then arrived in time to rescue their friends on Naboo.
Battle of Ryloth
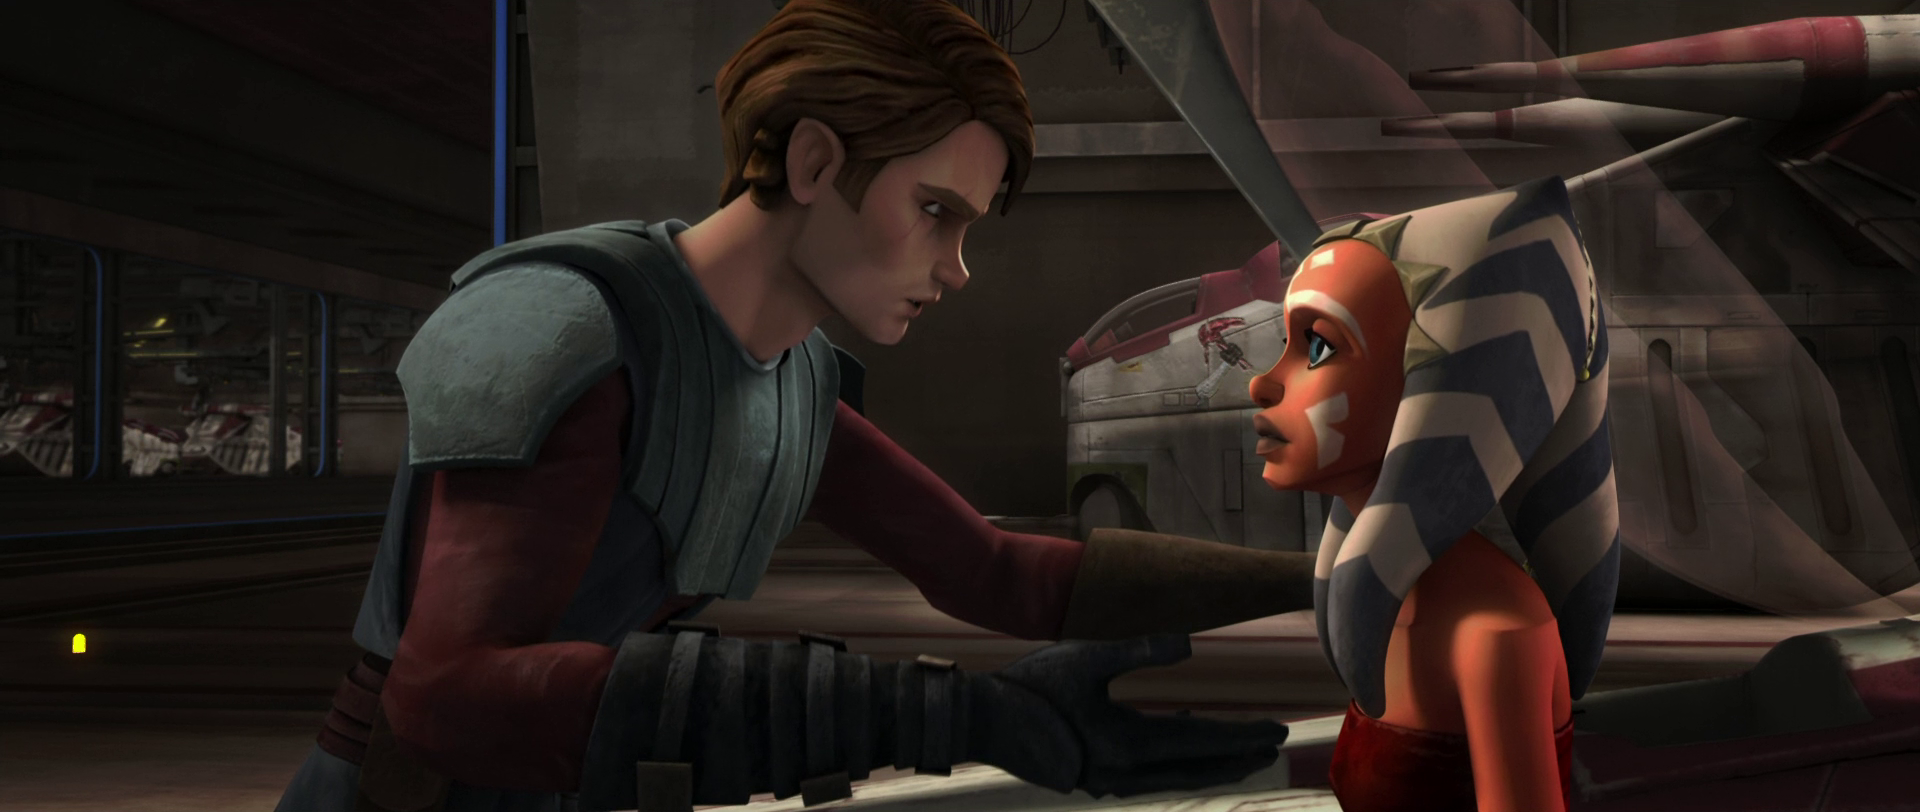
During the Battle of Ryloth, Skywalker placed Tano in command of a squadron to repel Mar Tuuk's blockade in order to clear the path for Kenobi's ground assault, encouraging Tano to overcome her anxiety about leading her first squad. However, she disobeyed her master's orders during the battle, resulting in significant losses, for which Skywalker reprimanded her upon her return to the Resolute, while still acknowledging her good intentions. Skywalker then reported the losses to Windu and Kenobi. He allowed her some time to recover but informed her of the need to proceed with the attack on the blockade, which upset Tano as she felt he was rushing the plan despite their recent setbacks. Although he instructed her to take some time to cool off, Skywalker devised a plan—he evacuated the damaged Defender, which he would pilot alone into the Ryloth system to divert the Separatists' attention, while placing Tano in full command of the attack operation. By the time Turk realized the deception, it was too late, as Skywalker had already escaped in an escape pod and allowed the Defender to collide with Tuuk's control ship; though Tuuk escaped, Tano destroyed the Confederate fleet, and Skywalker was rescued from his escape pod.
After Kenobi and his forces managed to eliminate the proton cannons, allowing the transports to land, while Windu advanced towards Lessu with his troops, Skywalker and his forces secured the space surrounding Ryloth, compelling the remaining Separatist cruisers to retreat. He reported this in a holographic conference with Chancellor Palpatine, Yoda, Admiral Yularen, Senator Orn Free Taa, and Windu. However, Separatist General Wat Tambor soon deployed Hyena-class Droid Bombers to destroy Ryloth's villages, and Skywalker engaged them in his interceptor, accompanied by Tano and the clones. Before Lessu was destroyed on Count Dooku's orders, Skywalker and Tano shot them down. Subsequently, Tambor was captured, and the Republic achieved victory: Ryloth was finally liberated.
Holocron heist
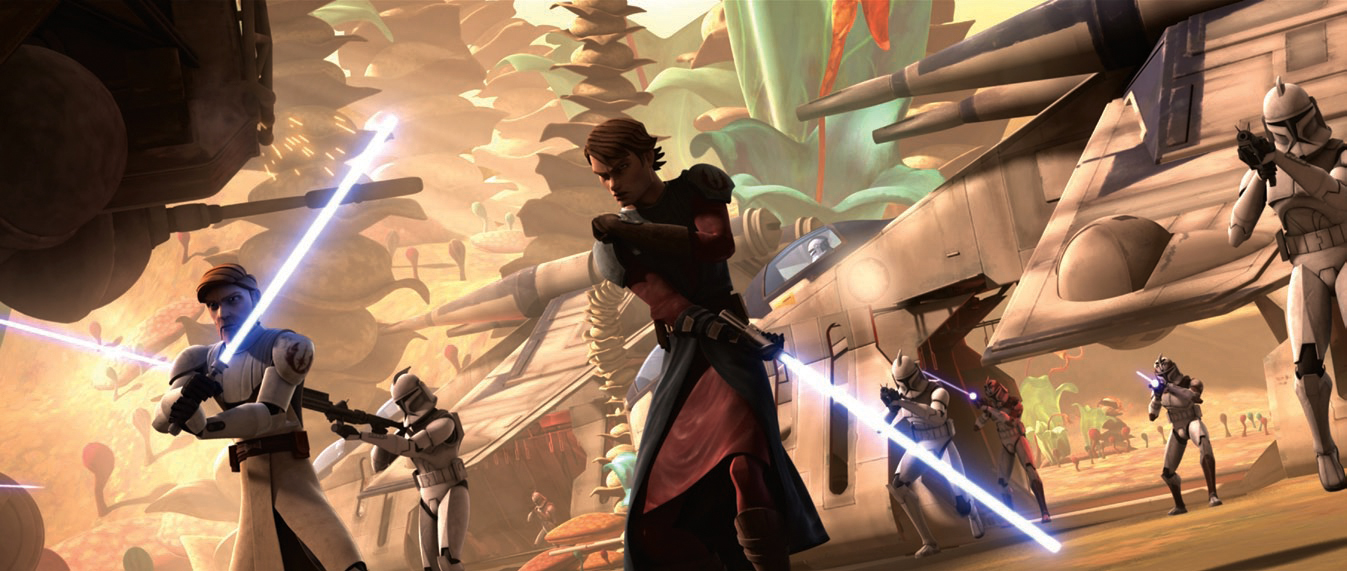
Skywalker and Clone Commander "Wolffe" fought side-by-side during the Battle of Khorm, where the Clone Officer lost his right eye to Ventress. Some time later, during the First Battle of Felucia, Skywalker, Tano, and Kenobi fought against the Droid Army, but while Tano was away on a jungle patrol, Skywalker, Kenobi, and their clones were encircled. However, a Republic fleet led by Wolffe managed to break through the Separatist blockade, allowing Skywalker and the others to be evacuated by Master Plo Koon. Tano, however, refused to retreat, and Kenobi and Skywalker went to retrieve her before her forces were overwhelmed by droids. While Skywalker and Tano argued about the retreat, as Tano believed the droids were retreating, she boarded the gunship just in time, and the three Jedi watched as her abandoned vehicles were destroyed. Back at the Jedi Temple, Skywalker attempted to take responsibility for her disobedience, explaining that he had granted her more freedom due to her abilities. Nevertheless, the Council assigned her to guard duty in the Jedi Archives to reflect on her actions.
When Yoda sensed that thieves would arrive at the Temple, Skywalker and Kenobi incorrectly assumed that their enemies were after their transmission codes and went to secure them, only to be proven wrong when they located the intruders' position in the ventilation shaft. They were then misdirected to the communication center, where they narrowly avoided an exploding Todo, and realized too late that Cad Bane had stolen a holocron from the Vault. Furthermore, the bounty hunter assisting Bane, Cato Parasitti, revealed that Bane's next target was Bolla Ropal, the keeper of the Kyber memory crystal, which contained a list of all known Force-sensitive children in the Republic. Skywalker then volunteered himself and Tano to meet with Ropal, arriving in the Devaron system to cut off the Separatist fleet assisting Bane, who had already captured Ropal and tortured him to death within a containment field after he defiantly refused to open the holocron.
Skywalker, Tano, and Rex boarded Bane's Munificent-class frigate and stormed the bridge, where R2-D2 accessed the ship's computer to locate Ropal, or rather, his dead body. After an explosion rocked the ship, the Jedi spotted Bane and pursued him into a trap. Following a duel with Tano, the bounty hunter took her hostage, and Skywalker was forced to comply with Bane's demands and open the holocron. Despite doing so, Skywalker also summoned his and Tano's lightsabers to himself and attacked Bane. However, Bane distracted him by opening the airlock on Tano's cell and escaped, while Skywalker rescued his Padawan and they made their way to the hangar, where troopers had stolen a shuttle to escape the exploding Separatist ship back to the Resolute, but not before allowing Bane to enter, disguised in trooper armor. After landing on the Resolute, Rex later discovered Duros blood in the shuttle and pursued Bane, who nevertheless managed to escape in a V-19 starfighter. Skywalker and Tano returned to the Jedi Council to report their failure.
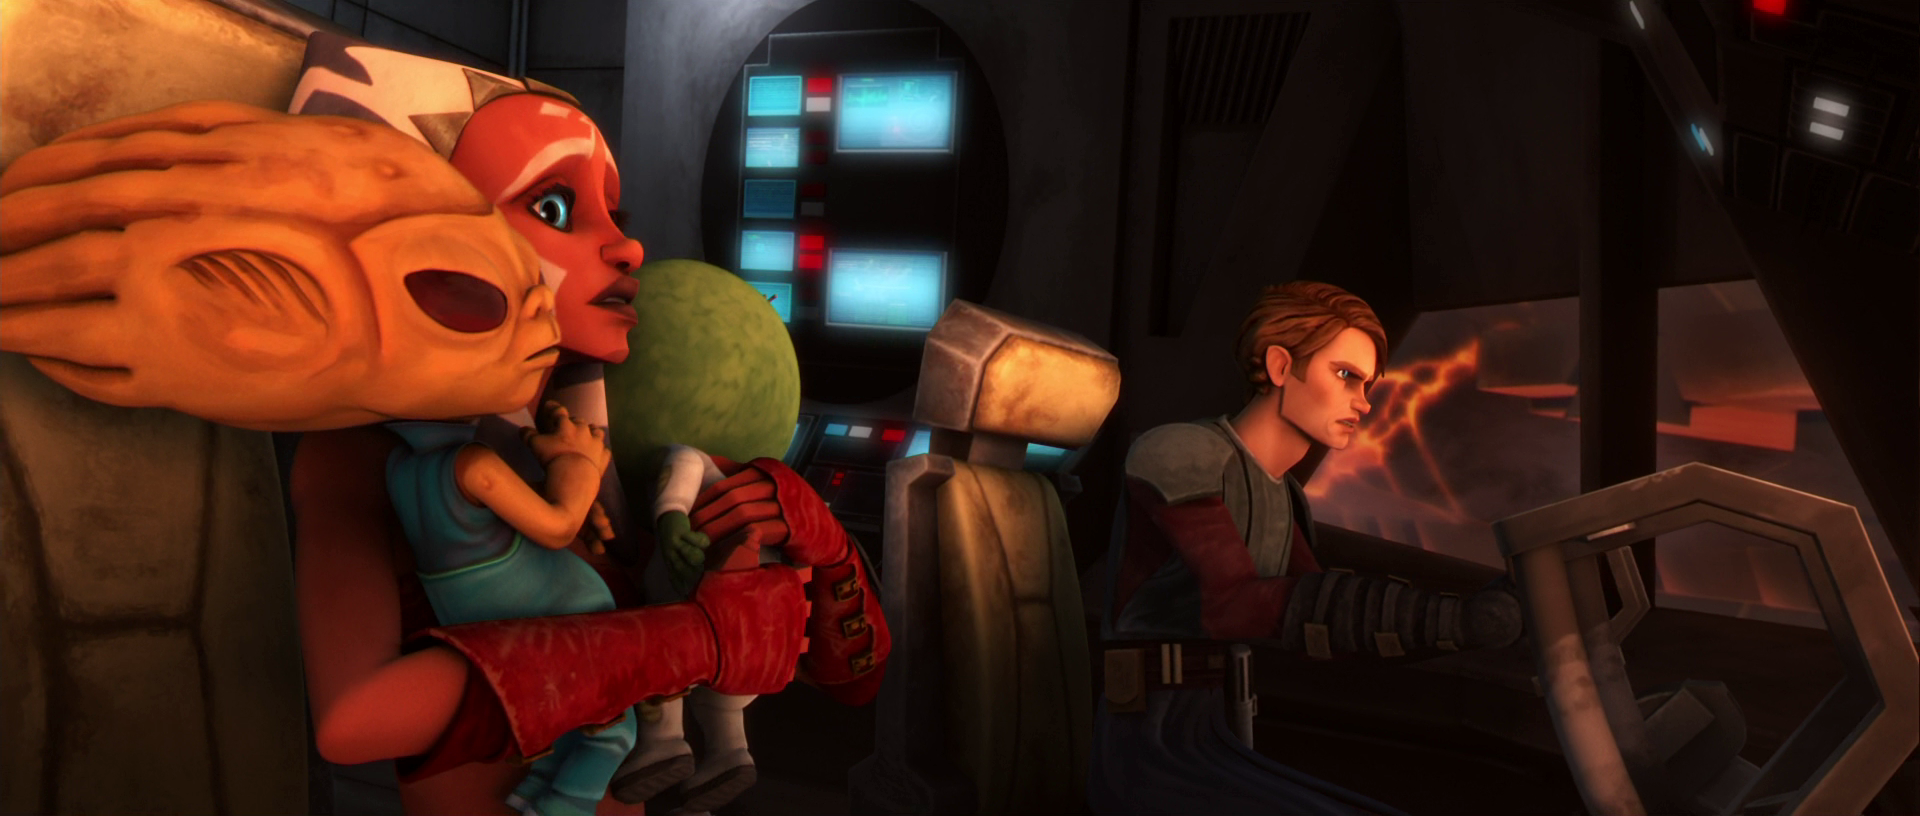
Skywalker, along with Kenobi, Windu, and Yoda, meditated in hopes of locating the children Bane was after before he could kidnap them. Sensing the future, Skywalker and Tano were assigned to Naboo to set a trap for Bane in Jan-gwa city, capturing him as he attempted to kidnap Roo-Roo Page. With the real child secure, the two Jedi took Bane to the Resolute, where Skywalker, Windu, and Kenobi interrogated the bounty hunter using a combined mind trick; exhausted, Bane provided coordinates that Kenobi and Windu were to follow, while Skywalker reported the details to Palpatine on Coruscant. Soon after, he reunited with his Padawan and R2-D2 and began to examine Bane's Starfighter, from which Skywalker and Tano deduced from the ashes and its refueling record that Bane had been to Mustafar. With no other leads, the Jedi pair departed on the Twilight for the planet, where they located the children. Although one of the droids set the building to be destroyed in the lava on Sidious's orders, Skywalker and Tano rescued the children and returned to Coruscant. Skywalker admitted to the Council that they were unable to determine who was behind the kidnappings, to which Yoda advised caution regarding the path ahead.
Battle of Felucia
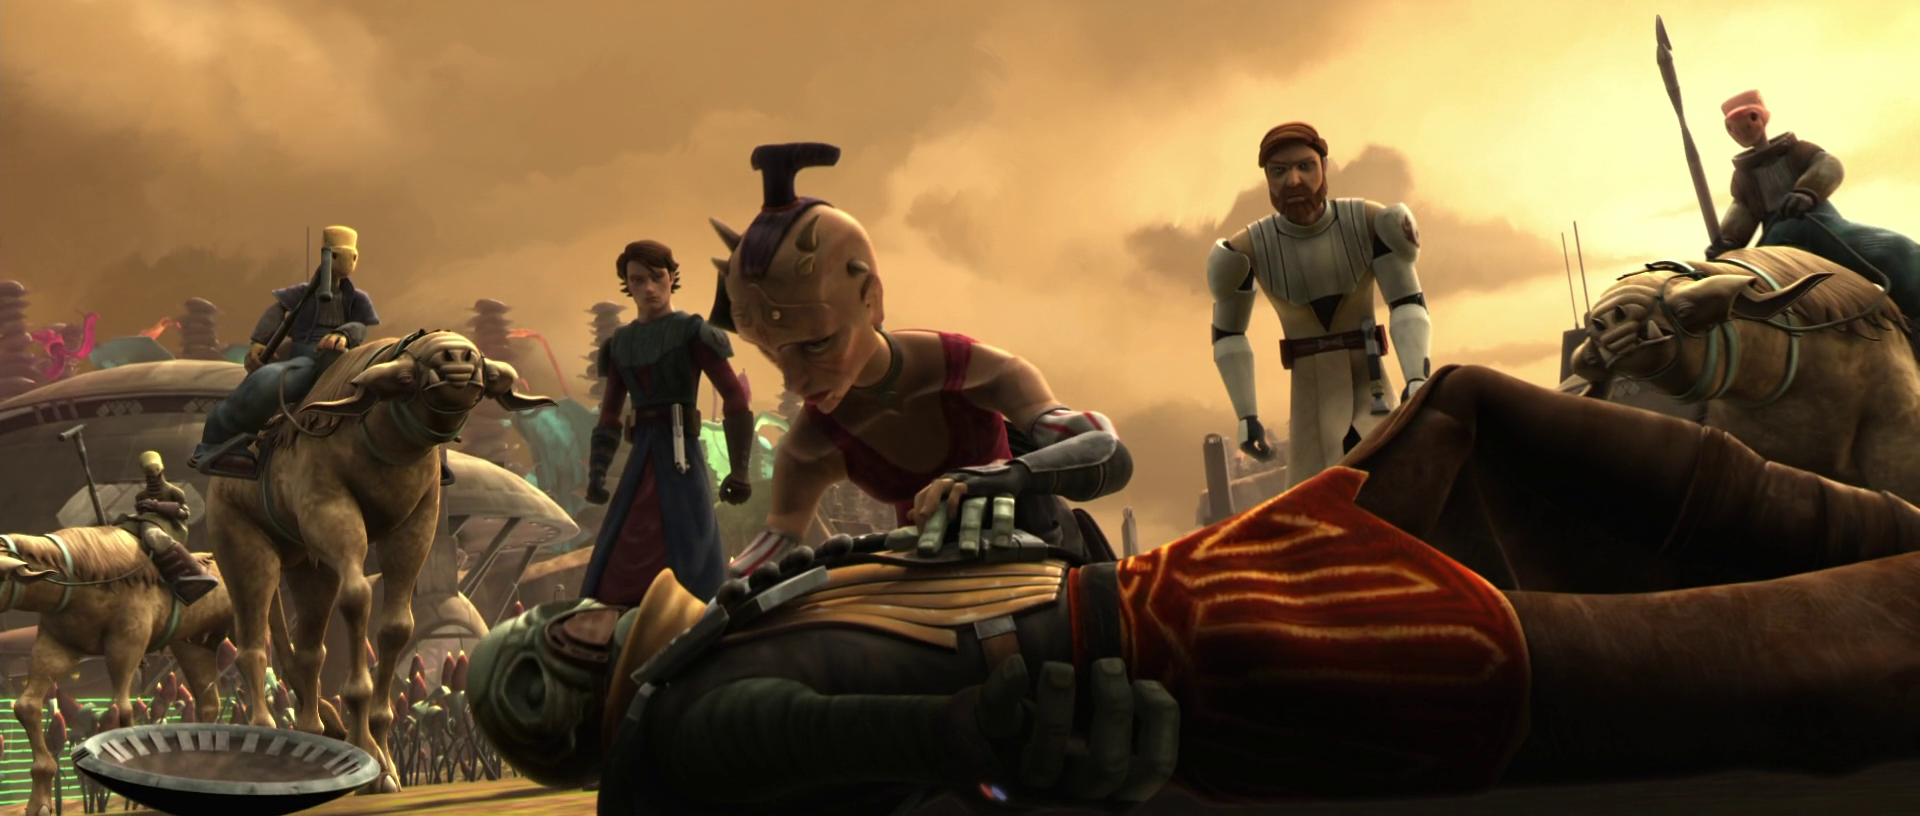
While on a mission to investigate the disappearance of Felucia Medical Station HCTFF2 that was orbiting over Felucia, their shuttle was attacked by a group of six vulture droids deployed from an automated deployment station, forcing them to crash-land on Felucia. Stranded on the planet, they stumbled upon a nysillin farm village after searching for some time. They quickly discovered that the Felucian villagers were being protected by a group of bounty hunters led by Sugi—Embo, Rumi Paramita, and Seripas. The village elder, Casiss Midagatis, explained to the Jedi trio that they had hired the bounty hunters because pirates had been stealing their crops. Following some discussion, Skywalker, Kenobi, and Tano decided to assist the farmers in defending themselves.
That night, they were visited by the pirates, Hondo Ohnaka's gang, who were familiar to Skywalker and Kenobi. Ohnaka then informed the group that he would return, but by that point, Skywalker had taught the Felucians how to fight with staffs—although they were initially slow, they eventually mastered the technique. After a few days, the Ohnaka Gang returned as promised, and a skirmish broke out between the two sides. During the confrontation, Skywalker dueled Ohnaka and his electrostaff, leaving him dangling from a cliff and begging for mercy, at which point the Jedi Knight pulled him up. Ohnaka then realized that their efforts were no longer profitable and departed on his ship. Alongside the bounty hunters, the Jedi also left soon after, heading for the nearest Republic outpost.
The Zillo Beast
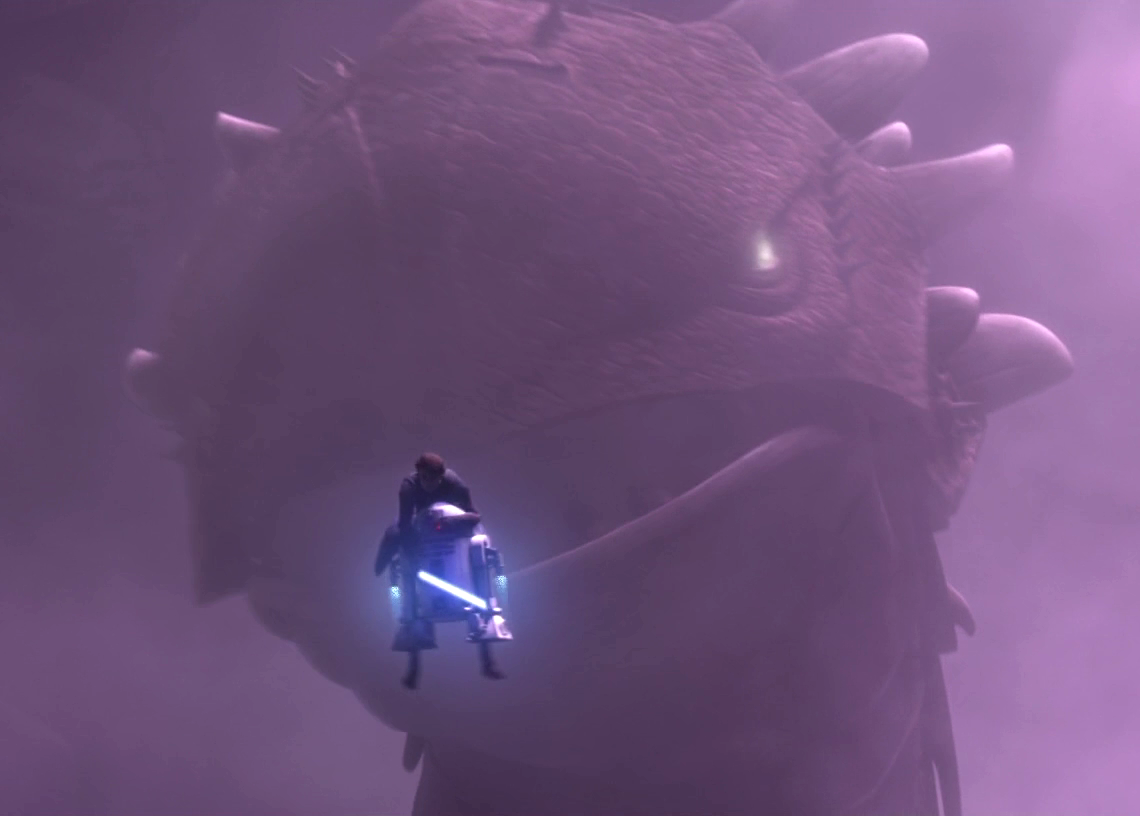
During the protracted campaign fought on Malastare, Skywalker, connected via hologram, conferred with both Palpatine and Windu concerning the impact of the newly developed electro-proton bomb. Simultaneously, the Separatist Droid Army was gearing up for another offensive, even as the Republic anticipated a successful defense of the Dugs and the procurement of a treaty for their fuel resources. Despite its considerable effectiveness, the bomb left behind a massive crater. Windu proceeded to investigate it, while Skywalker was tasked with securing the treaty with Doge Urus. However, Windu summoned Skywalker to assist in reconnaissance. The pair soon stumbled upon an immense creature, the Zillo Beast, whose armored hide proved impervious even to lightsabers. They fled, only to learn from Urus that they desired its demise, although it had been presumed extinct. Employing RX-200 Falchion-class assault tanks, Republic forces induced a state of sleep in the creature, thereby convincing the Dugs of its death. With the treaty finalized and Malastare integrated into the Republic, Palpatine, despite Windu's reservations, issued an order to transport the beast to Coruscant for research.
Following the Zillo Beast's arrival in the Republic capital, Kenobi and Amidala requested that Skywalker engage Palpatine in a discussion regarding the creature's fate. He reluctantly consented. During a meeting between Skywalker, Amidala, the Chancellor, and Vice Chair Mas Amedda, Palpatine and Amedda attempted to rationalize the killing of the beast as being for the greater good. Amidala voiced her objections to these justifications, but Skywalker opted to remain neutral, refraining from opposing either Amidala, his wife, or Palpatine, his friend. Despite Palpatine's assertions of wanting to eliminate the beast, his true intention was to study it, fascinated by the resilience of its armor. Nevertheless, the beast escaped from its confinement within Dr. Boll's laboratory and directly targeted the Chancellor himself, seeking retribution for his attempts to kill it. Trapped by the beast, Skywalker and the others evacuated Palpatine's office aboard his executive shuttle, only for the creature to seize it during takeoff. Their escape was facilitated when Skywalker bisected the shuttle, causing everyone to fall out. Skywalker rescued Amidala from plummeting from the Senate Building's roof. Ultimately, the Beast met its end when gunships, acting on Palpatine's command, discharged gas into its mouth.
The Seemingly Endless War
A New Mission on Cato Neimoidia
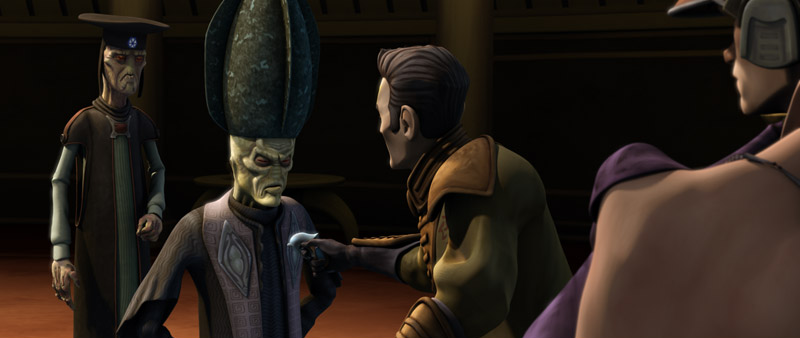
Even with the Clone Wars showing no signs of abating, Skywalker was granted leave after a prolonged period of service. Upon returning to his wife's apartment for a romantic evening, the Jedi Council summoned him back to the Temple. Suspecting Senator Rush Clovis of being a Separatist sympathizer, they determined the need for an informant—specifically, Senator Amidala, an old acquaintance of Clovis. The following day, Skywalker encountered Amidala in the Senate and inquired about Clovis. Initially hesitant, she agreed upon learning of Clovis's potential Separatist affiliation. Skywalker accompanied her to the Jedi Council, where the Masters encouraged her to investigate his possible treachery. Upon discovering his plans to travel to Cato Neimoidia, Skywalker assumed the guise of Padmé's starship pilot and accompanied them, thwarting Clovis's advances toward his wife.
During the mission, Skywalker and R2-D2 awaited Amidala's signal. Once received, Skywalker surreptitiously entered her quarters, where he witnessed Amidala and Clovis embracing. Despite experiencing a surge of anger and jealousy, Amidala discreetly revealed the stolen disk from Clovis and handed it to Skywalker, who then retreated. Shortly thereafter, the poison administered to Amidala by Lott Dod began to take effect, causing her to lose consciousness. After Dod disclosed to Clovis that she was a spy, he assisted Skywalker in transporting her back to their ship and to Coruscant, compelling Dod to provide the antidote. Skywalker then abandoned Clovis, marooned on the planet.
The Second Conflict on Geonosis
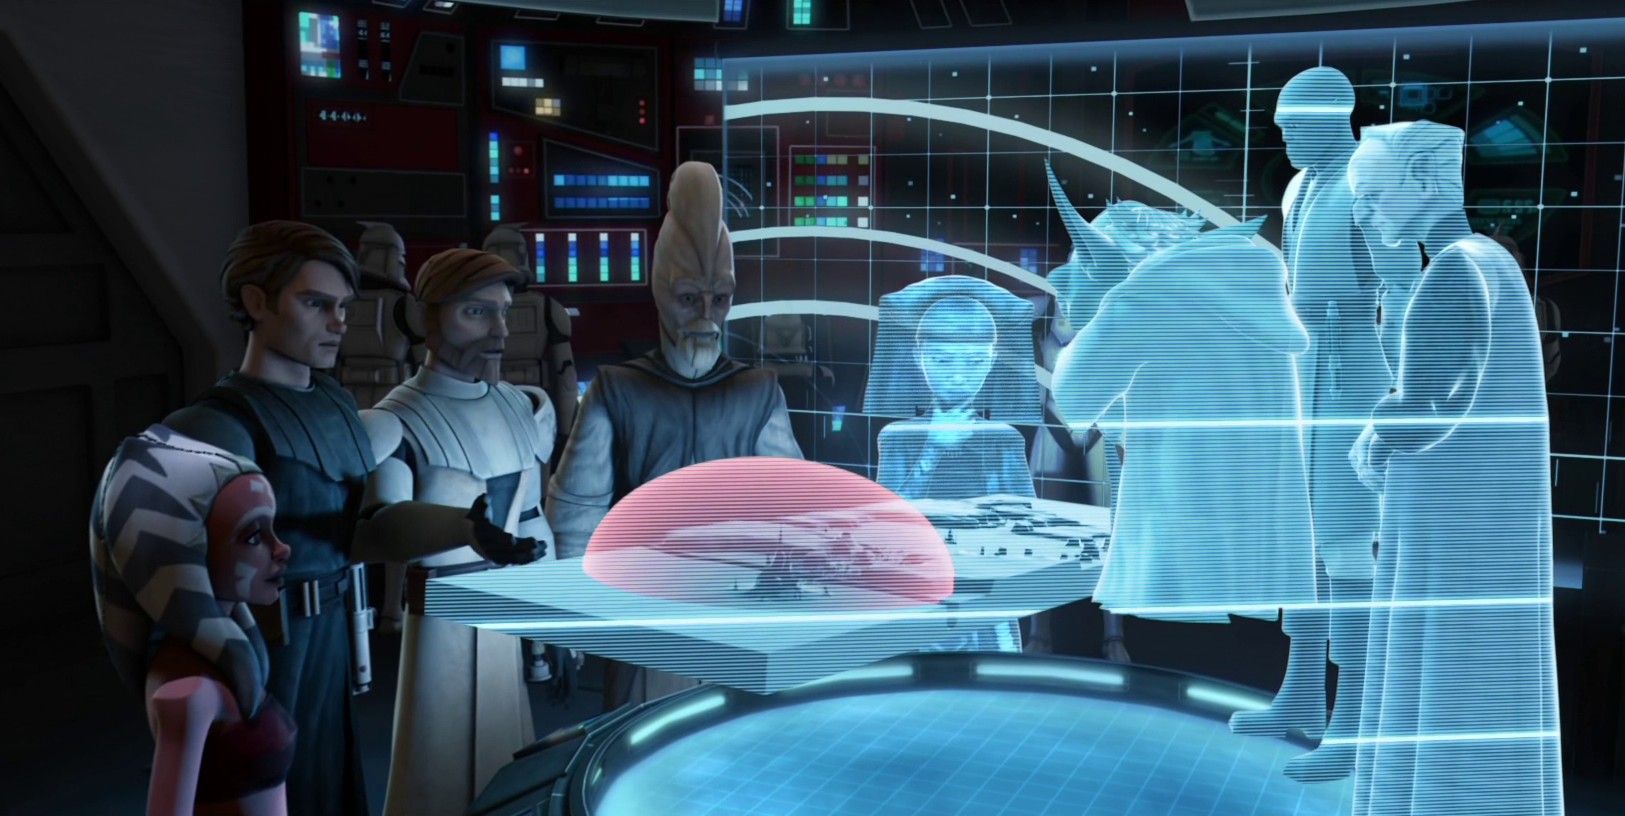
Immediately following the routing of Separatists in proximity to Dorin, Skywalker and Tano were deployed to participate in the Second Battle of Geonosis, alongside Kenobi and Ki-Adi-Mundi, as the Republic returned to dismantle the Geonosian primary droid factory. With the intention of launching a three-pronged assault against the shield generator, Skywalker, Tano, and the 501st Legion embarked on an attack against the Separatist defense lines from the south to reach the designated rendezvous point. However, only Kenobi's forces arrived at the landing zone, as both Mundi's and Skywalker's transports were shot down, forcing them to proceed to Kenobi's position on foot. Despite encountering resistance, Skywalker's team converged with Mundi's forces. After contacting Yularen to request the deployment of a squadron of BTL-B Y-wings for support, they reunited with Kenobi and his company, where they devised a plan to assault the shield generator.
Subsequently, they adapted their strategy. Leading the charge, Skywalker and Tano neutralized the enemy cannons using EMP grenades, enabling the AT-TEs to destroy the shield generator. As the gunships arrived, the Geonosians in the area surrendered. While Mundi and Kenobi departed for medical treatment, the Republic forces continued their advance toward the massive droid foundry. Skywalker and Tano were joined by Luminara Unduli and her Padawan, Barriss Offee, who met as Skywalker and Tano engaged in a heated discussion regarding Skywalker's lack of faith in Tano's reliability. As Offee and Tano were dispatched into the Geonosian catacombs beneath the factory to plant explosives, Unduli recognized that Skywalker was unable to relinquish his attachment to Tano and was placing her at risk, rather than simply distrusting her. Nonetheless, the two Jedi generals proceeded to distract the droid army by advancing directly toward the factory and engaging the enemy.
As Poggle the Lesser deployed his super tanks, Skywalker and Luminara abandoned their men and destroyed the bridge, only to realize that their Padawans had not yet returned. Surrounded by droids emerging from the factory, Skywalker received a communication from Tano, who apologized, uncertain of whether she and Offee would survive their ordeal, before utilizing a super tank to destroy the factory. Refusing to allow his Padawan to perish, Skywalker ordered a search for them. However, Unduli cautioned him that he needed to release his attachment to her if she were indeed dead. Fortunately, Skywalker was contacted by Tano. After locating them, they rescued the two Padawans.
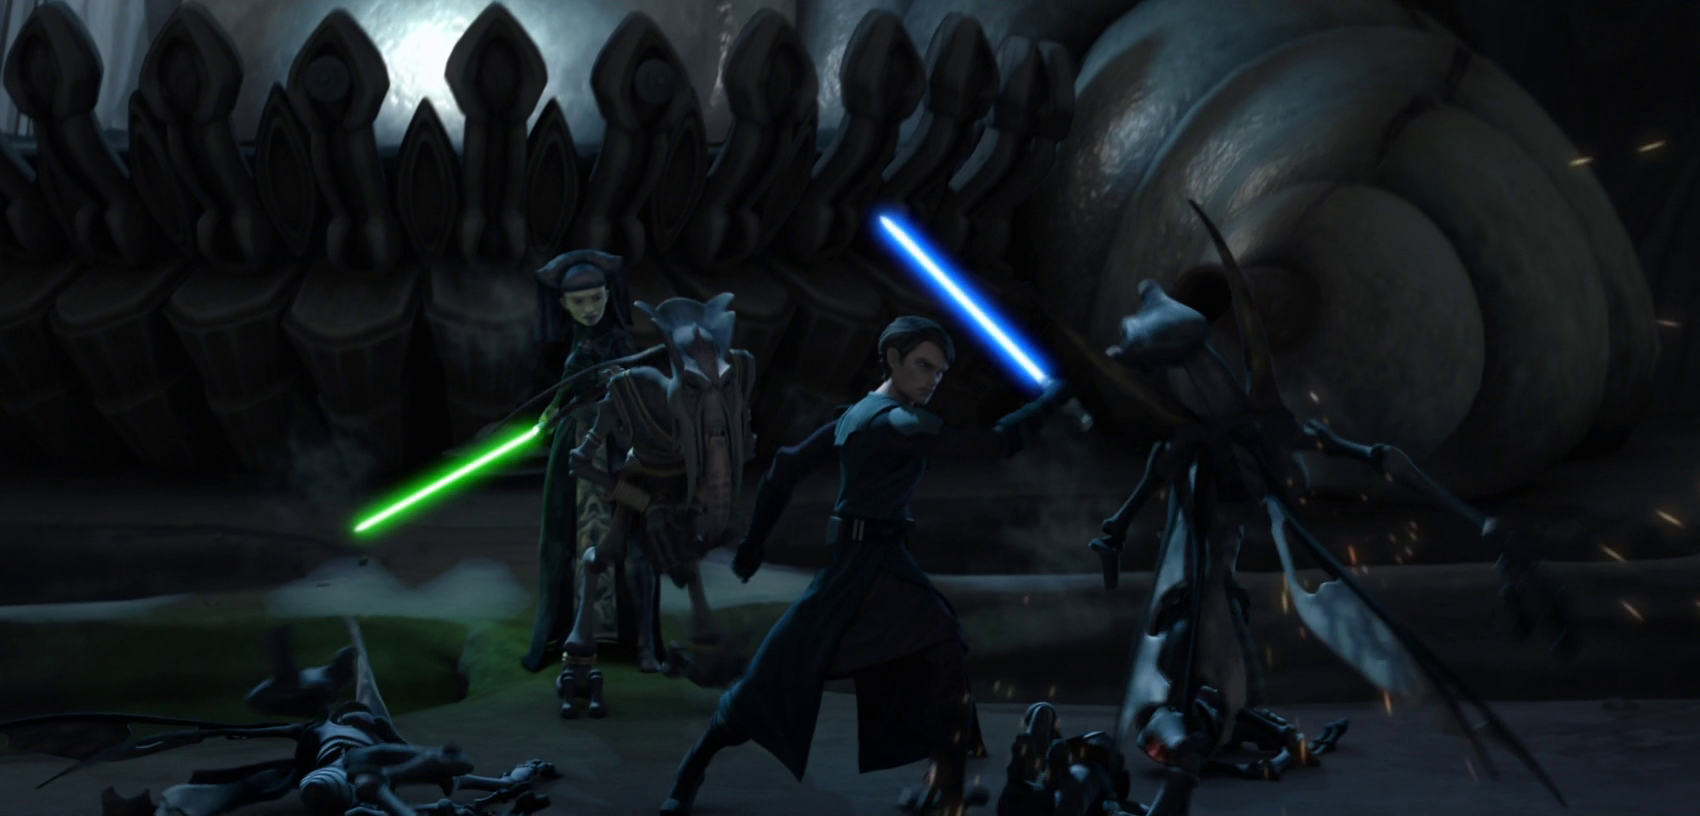
After dispatching Tano and Offee to recover from the battle, Kenobi and Mundi returned to participate in the cleanup of Separatist forces. Meanwhile, Unduli departed in pursuit of Poggle, aiming to capture him before he could escape, when a sandstorm erupted. Forced to wait until the storm subsided after her last communication, Skywalker and Kenobi traveled to Unduli's last known location, the Progate Temple. Upon entering the catacombs below, they not only encountered undead Geonosian warriors, but also discovered the captive Unduli, Poggle, and the Geonosian Queen, Karina the Great. Positioning their men to encircle the Queen and her brethren, Skywalker and Kenobi attempted to negotiate with Karina, as Kenobi sought to understand the creation of the undead warriors. After uncovering her use of parasitic brain worms, they liberated Unduli, captured Poggle, and fled from the Queen, with Rex and Cody entombing the Queen within her lair.
With Poggle in Republic custody, the four Jedi generals prepared to transport him to Coruscant, while dispatching Tano and Offee on a mission to transport medical supplies from a medical station near Ord Cestus to Mace Windu on Dantooine. Unbeknownst to them, one of the troopers, Scythe, was infected with a brain worm from the Queen and boarded their Pelta-class frigate, the TB-73, compelling the two Padawans to fend off the infected clones. When the ship failed to report in as scheduled, Skywalker suspected a complication, which was confirmed when Tano contacted him to inform him of the situation.

Enraged, Skywalker proceeded to Poggle's cell alone, instructing the guard troopers to leave them unattended. He demanded that Poggle answer his questions using a mind trick, but the archduke informed him that it would be ineffective on a Geonosian like himself. At that point, Skywalker resorted to physical violence, assaulting the captive Geonosian. When Poggle remained unwilling to speak, Skywalker succumbed to his anger and began to Force choke him. Only then did Poggle reveal to the Jedi Knight, through a translator droid, that the worms were susceptible to cold. Skywalker relayed this information to his Padawan, instructing her via her comlink to rupture the cooling system. Thanks to his advice, Tano was able to defeat the worms as they reached the medical station. Skywalker rushed to her encounter, where he consoled Tano regarding her doubts about sparing her friend's life.
The Saleucami Incident
Following the capture of Jedi Master Eeth Koth in the Outer Rim, General Grievous transmitted a holo-message to the Jedi Council, stating that he was indifferent to the Jedi's politics or their Republic, and that his sole purpose was to witness their demise. As Kenobi deciphered Koth's hand signals, revealing their location within the Saleucami system, Skywalker, Kenobi, and Adi Gallia were dispatched on a rescue mission. As a diversion, Admiral Yularen and Kenobi engaged Grievous's forces over Saleucami, with Kenobi allowing Grievous to board the Surrogator. Meanwhile, Skywalker, Gallia, Rex, and a squad of clone troopers would execute a hyperspace jump into the system aboard an ambassador shuttle, positioning them alongside Grievous's cruiser.
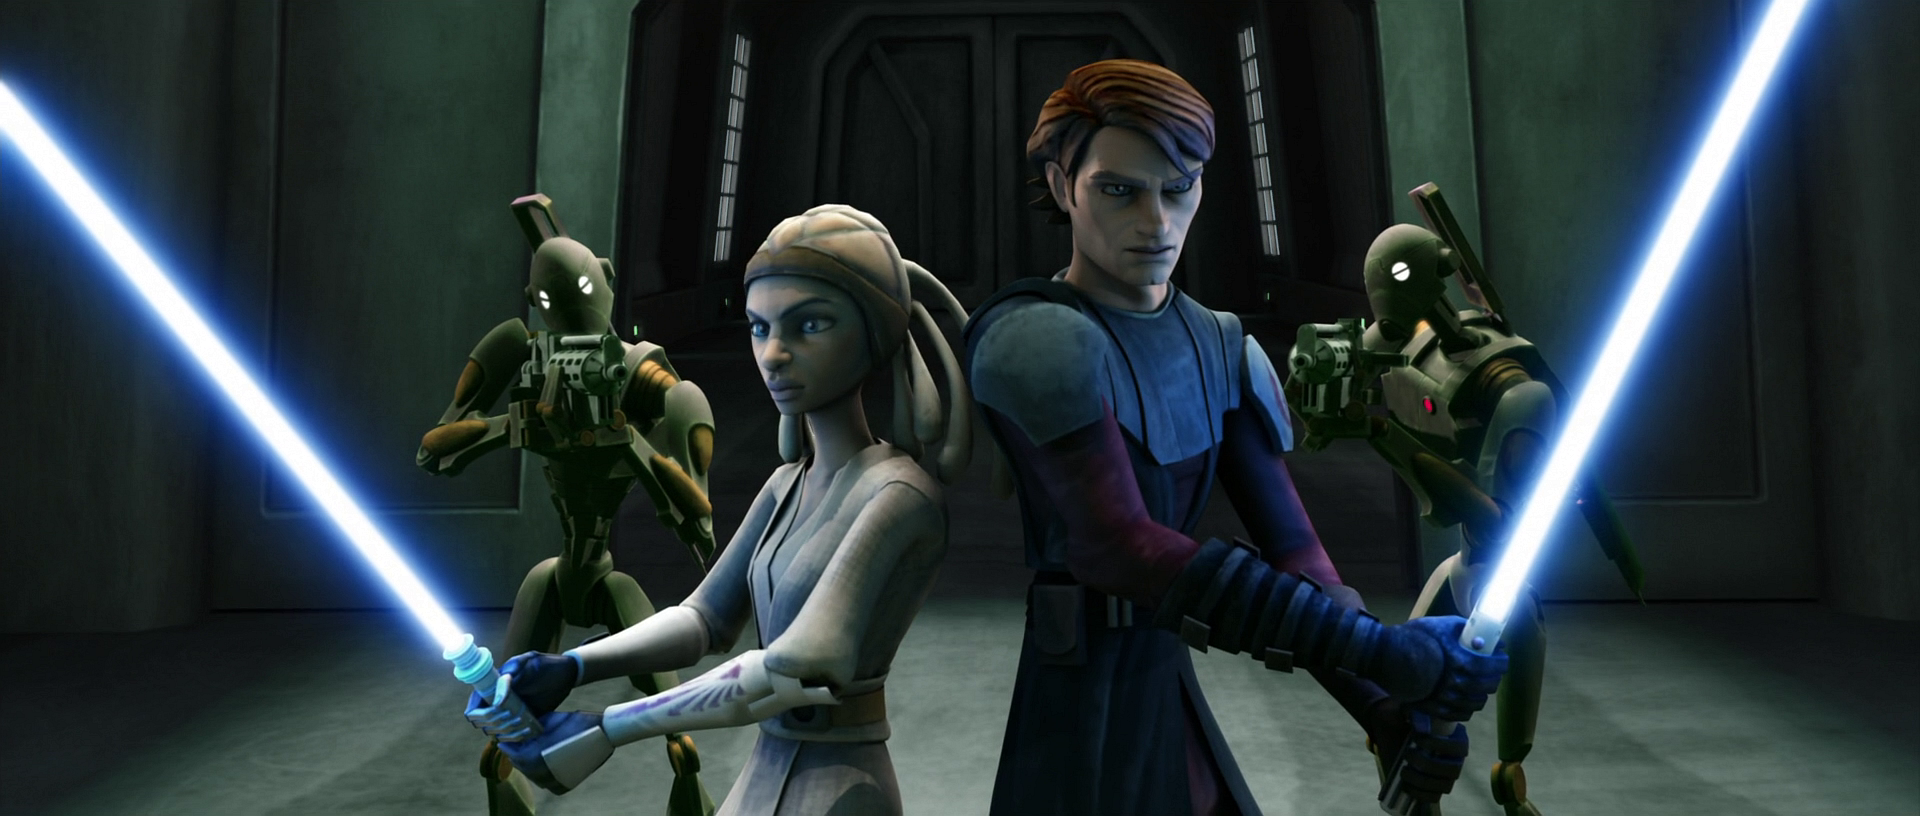
Upon boarding the cruiser, Skywalker and Gallia proceeded toward the stern, where they encountered a T-series tactical droid accompanied by a group of BX-series droid commandos. The two Jedi destroyed all the droids and rescued Koth, with Skywalker escorting the injured Koth back to the shuttle. When Kenobi reported that Grievous had defeated him and escaped, Gallia departed to assist Kenobi in flanking Grievous and capturing him once and for all. Unsuccessful in their endeavor, Skywalker retrieved the two from the hangar with their shuttle, before departing for the Resolute, where he awaited Kenobi's search mission for Grievous on the planet below, alongside Cody, Rex, and other troopers.
Some time later, Skywalker and his Padawan spearheaded a mission to Coruscant's underworld to apprehend Car Affa, an arms dealer who was selling Republic weapons to the Separatists. Upon arriving at a cantina where Affa was hiding, Skywalker instructed Tano to remain outside while he apprehended the fugitive. However, the confrontation caused a mass exodus from the bar, during which Tano lost her lightsaber. This prompted her to seek the assistance of Jedi Master Tera Sinube upon returning to the Temple, as she wished to conceal the loss of her weapon from Skywalker.
Events on Mandalore
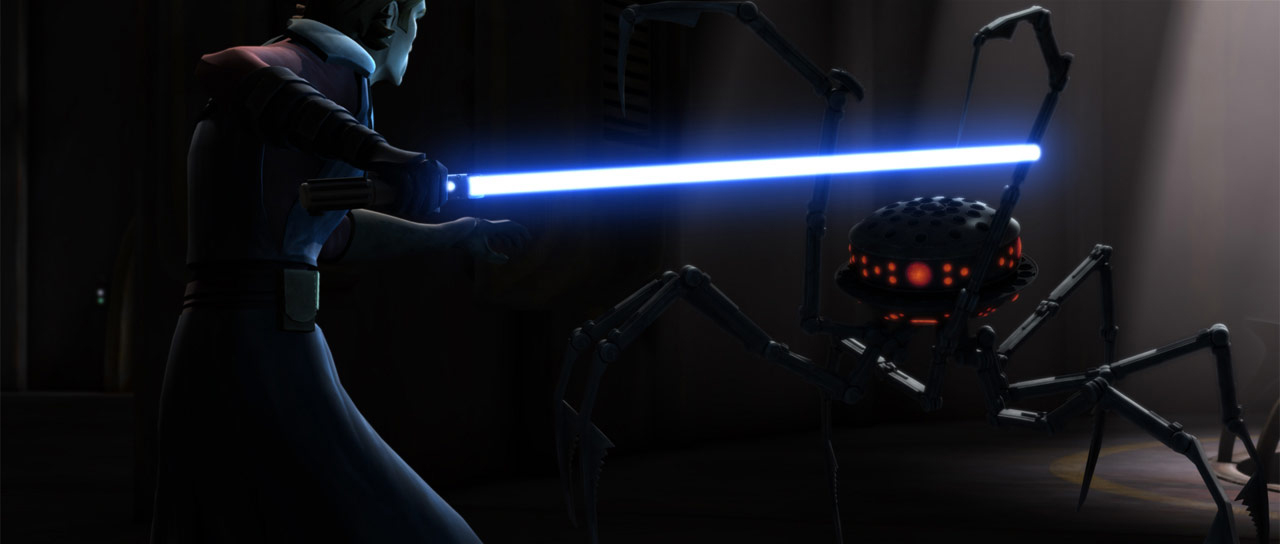
Following allegations that Mandalore had allied with the Separatists, and Kenobi was dispatched to the planet to speak with his old friend, Duchess Satine Kryze, Skywalker joined them to escort the Duchess on her journey to Coruscant aboard the Coronet. On the ship, Skywalker and Kenobi instructed their men to be vigilant. When Kryze requested their presence, Skywalker correctly deduced that Kenobi harbored strong feelings for her, as his former master confided in him regarding their past relationship. When R2-D2 detected readings in the cargo hold, Rex informed the two generals. Skywalker went to investigate, only to be attacked by assassin probes. After destroying two of them, Skywalker informed Kenobi that a traitor might be aboard the ship, and Skywalker returned to sweep the hold in search of more.
After Kenobi exposed the traitor, Tal Merrik, and Skywalker destroyed another probe, he assisted in searching the Coronet for Merrik and Kryze, who was now his hostage, until several B2 super battle droids dispatched by the Death Watch boarded the ship. Leaving Kenobi to rescue his "girlfriend," he destroyed the droids and then went to find Kenobi, who, like Kryze, hesitated to kill Merrik. However, Skywalker had no such reservations and impaled Merrik, branding himself a "cold-blooded killer," in order to retrieve the Senator's detonator before he could destroy the ship. With no further complications, they arrived at Coruscant. As Kryze complimented Kenobi, Skywalker remarked that she was quite the remarkable woman. Following the Mandalore Defense Resolution, Skywalker and Kenobi escorted Amidala to a meeting with the Chancellor, who thanked her but also apologized to Kryze, before leaving Kenobi and Kryze alone.
Stranded on Vanqor
As Skywalker and Mace Windu prepared to rendezvous with a Republic frigate, they traveled aboard the Endurance, where they greeted a squad of clone cadets, including an infiltrated Boba Fett. After Fett sabotaged the ship, everyone had to evacuate in escape pods, including Fett himself, before being rescued by Bossk and Aurra Sing on the Slave I. Skywalker and Windu rescued the damaged pod of the missing cadets. As the survivors were being transferred to a medical frigate, the two went to the Endurance's crash site, where they searched for Admiral Kilian and any other survivors. As the bridge appeared relatively intact, they decided to enter the wreckage, despite R2-D2's misgivings, prompting Windu to reprimand Skywalker for encouraging individuality in his astromech.
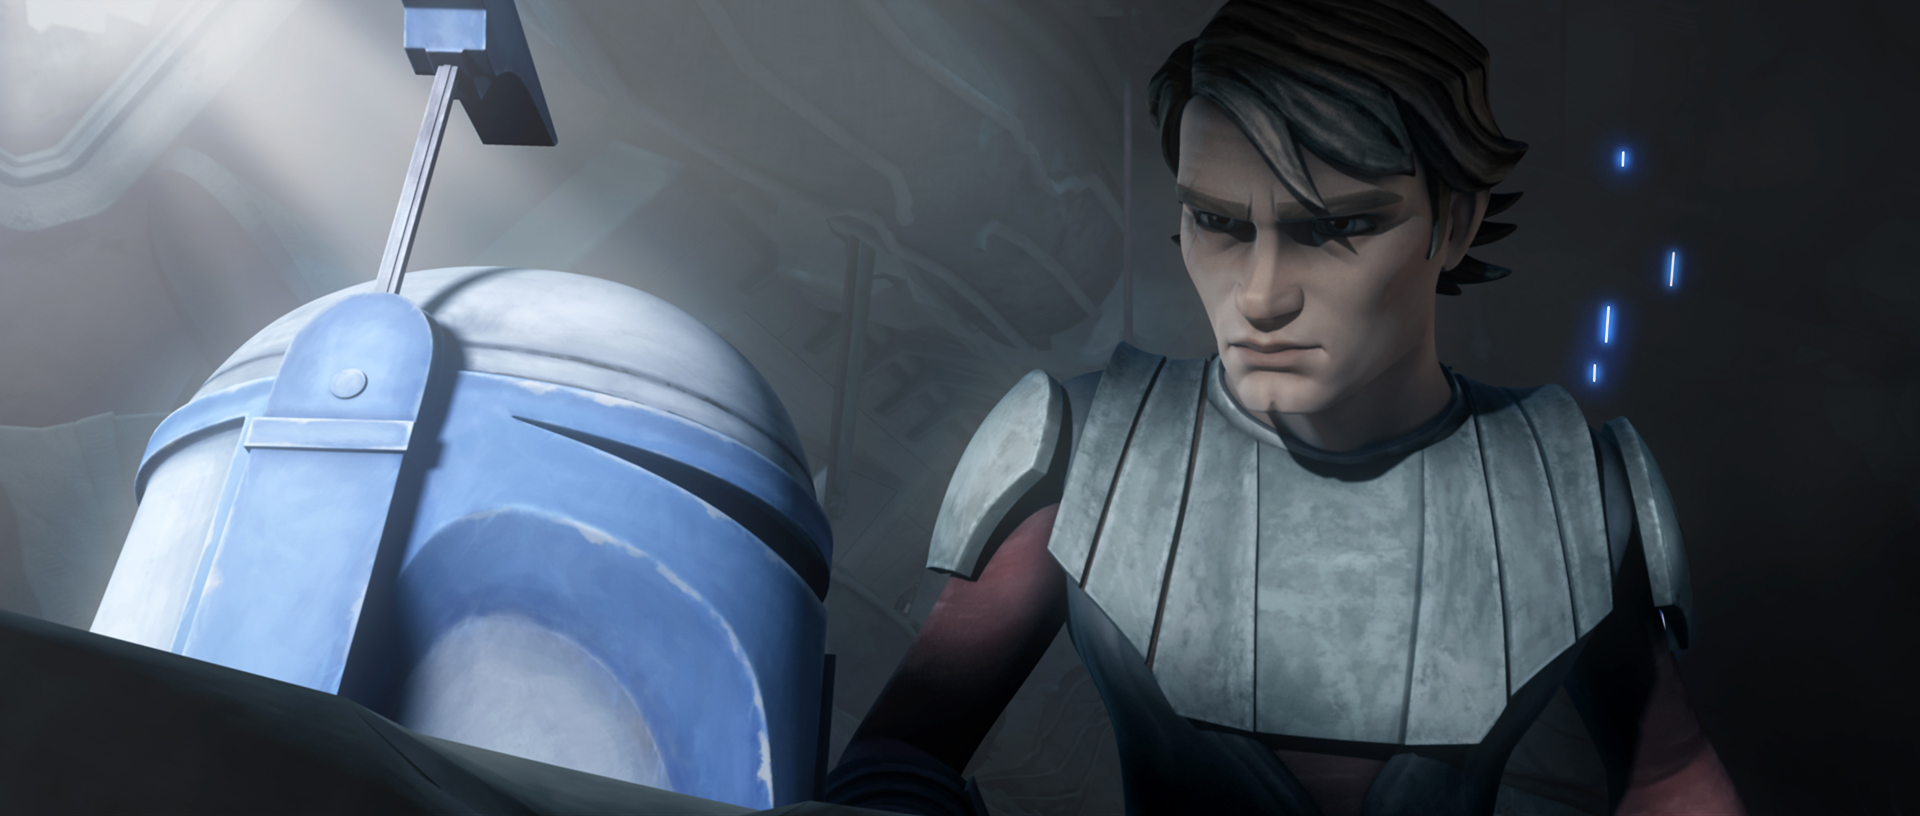
Leaving R2-D2 and R8-B7 to scan for life forms, Skywalker and Windu entered the bridge, discovering the survivors had been executed. Skywalker noticed a Mandalorian helmet. Windu correctly surmised that it was bait set by Boba Fett and saved Skywalker from the brunt of the explosion triggered by touching the helmet. Now trapped under the rubble, the wounded Skywalker and the unconscious Windu were soon found by R2-D2, whom Skywalker instructed to contact the Temple for assistance. As they awaited the astromech's return, Windu explained to Skywalker that Fett sought revenge for the death of his father, Jango, during the first battle of Geonosis.
As the Endurance began to collapse, Tano, Plo Koon, and a clone squad rescued them, thanks to R2-D2 delivering the message to the Temple. After spending time in a bacta tank at the Temple, Skywalker urged Windu to track down Fett and bring him to justice. The Jedi Master initially disagreed, until Koon and Tano presented them with a message from Fett and Sing, holding hostages, with Sing killing one of them, Ponds, in cold blood. Although Windu resolved to go, Koon volunteered to take the mission, alongside Tano, as both Windu and Skywalker were still recovering from their injuries. As they arrived on Coruscant with Bossk and Fett in custody, Skywalker was present as Fett apologized for causing so much destruction, but declared that he would never forgive Windu for killing his father, before they were taken to the Republic Judiciary Central Detention Center.
The Balith Situation
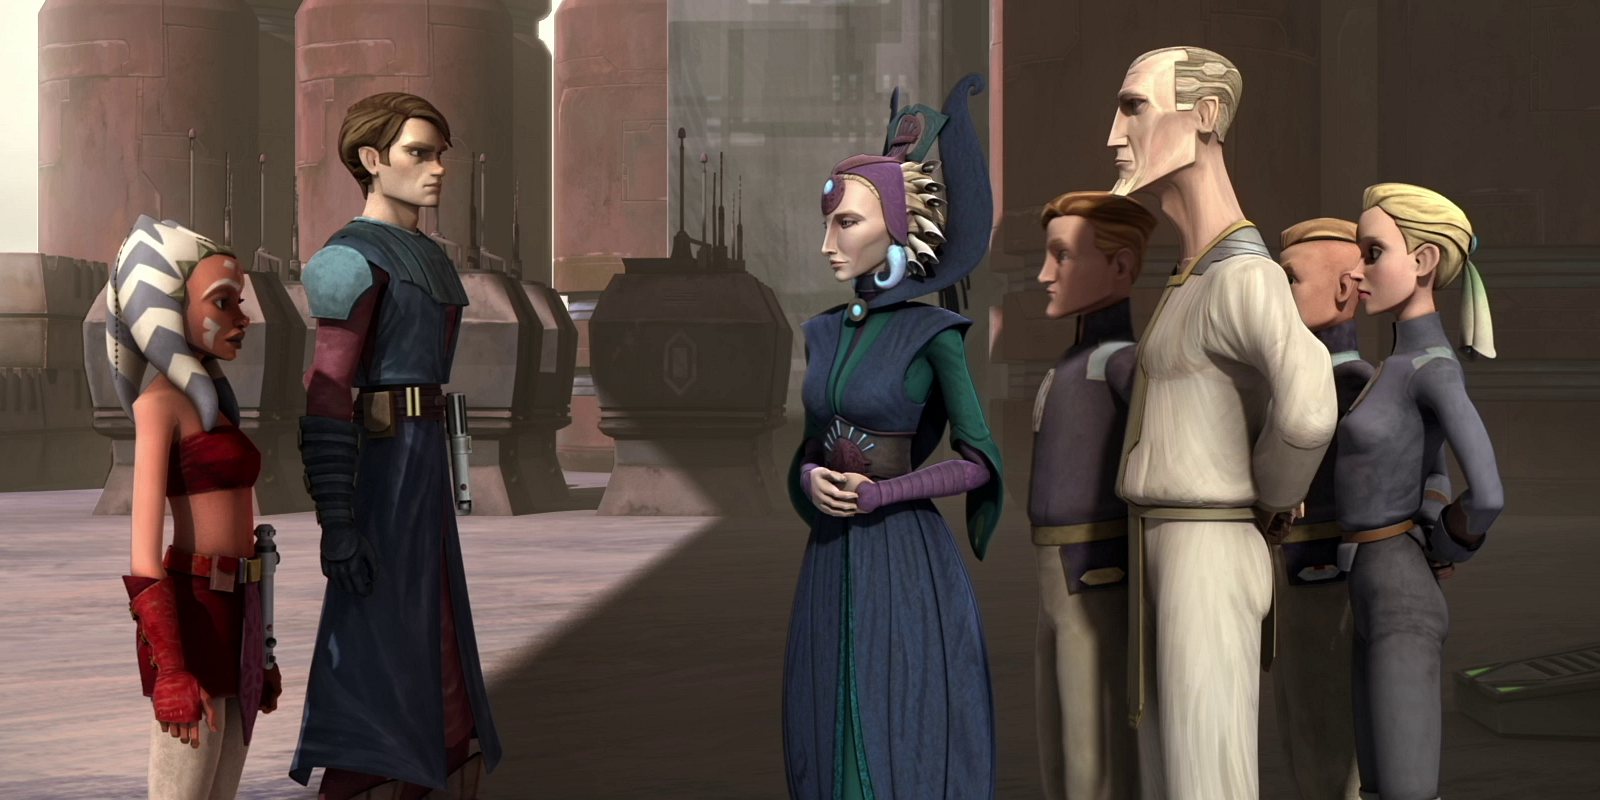
Following his wife's mission to uncover a conspiracy on Mandalore, Skywalker and Captain Rex escorted Tano to her solo mission on Mandalore to instruct cadets at the Royal Academy of Government at the request of Duchess Kryze and the Jedi Council. Upon arriving at Sundari, Skywalker introduced Tano to the Duchess and Prime Minister Almec. Before departing to join Kit Fisto, Skywalker took his Padawan's lightsaber to comply with Mandalore's laws. After Tano exposed Almec's black market operation, Skywalker reunited with his Padawan, returning her lightsaber.
Back at the Jedi Temple, the Jedi Council commended Tano for her courage and strength, but also tasked Skywalker with commanding the Third Legion on Balith to provide assistance in their civil war. Instructed by the Council to remain behind to provide her full report, Tano pleaded with Skywalker to allow her to accompany him. However, he told her that she should use this time in the library to prove him wrong about his assertion that she learned more on the battlefield than in the Temple, before leaving for Balith with Rex.
Skywalker returned to Coruscant to greet, along with Yoda, his Padawan, Amidala, and Bail Organa after the Alderaan Refugee Conference, during which Tano captured Aurra Sing. Wondering who would pay for Amidala's assassination, Yoda had Tano use her improved precognitive abilities to find out who was behind the assassination attempt. With her description, Amidala realized it was Ziro the Hutt. Skywalker and his Padawan then went to the Judiciary Detention Center to question Ziro, who was tricked by Tano into confessing that he had hired Sing for the job. Satisfied, Skywalker and his Padawan then left the Hutt to his misery.
The Battle of Kamino
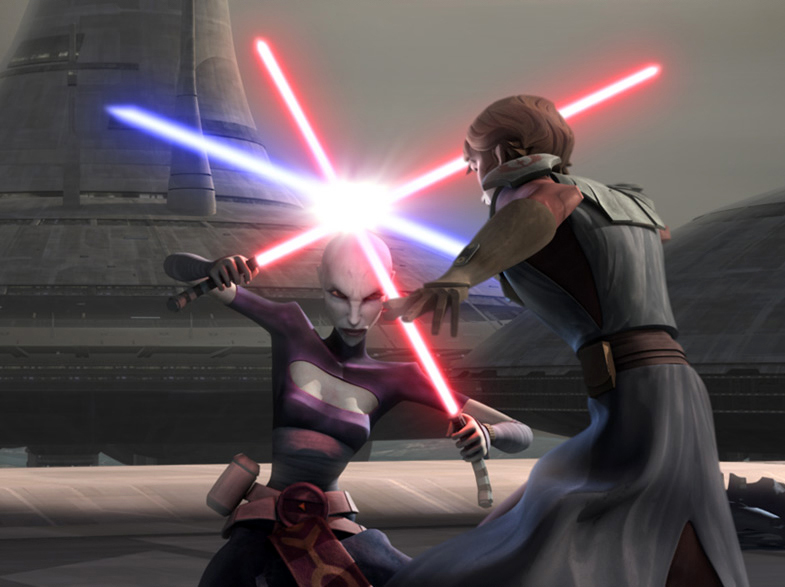
Forewarned by the destruction of Rishi Station and an intercepted transmission between Asajj Ventress and General Grievous, Skywalker and Kenobi traveled to Kamino to warn Shaak Ti and Prime Minister Lama Su of an upcoming Separatist attack, with Rex, Cody, Echo, Fives, and the rest of the 501st Legion in their company. Shortly, Grievous's fleet arrived and Skywalker led the Republic space forces, scoring several serious hits against the enemy. On the planet below, Tipoca City was attacked by Trident-class assault ship and AQ-series battle droids, prompting Kenobi to recall Skywalker to the city. Soon after returning, Skywalker engaged Ventress, who had stolen the prime DNA sample of the clones' template, Jango Fett. With the aid of clone trooper platoon, Skywalker recovered the sample from Ventress, but she, like Grievous, managed to escape yet again.
The blockade of Pantora
Skywalker was later informed by his apprentice that Pantora Chairman Papanoida's daughters had been kidnapped. Knowing that the Jedi could not get officially involved, he slyly gave her permission to rescue them due to "personal concerns"; this turned out to be successful, with both daughters being safely returned to their father.
Crisis in the Senate
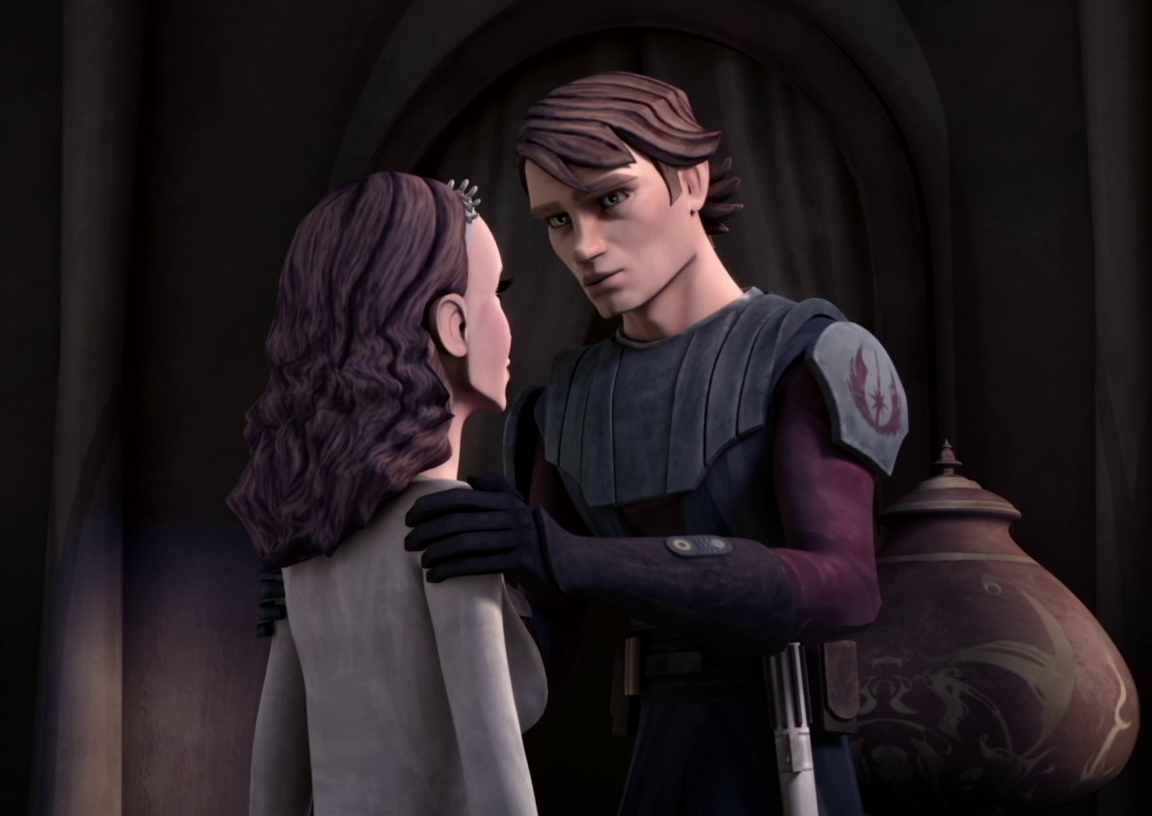
While ostensibly on a meditative retreat, Skywalker spent time with his wife at her apartment, observing as Amidala anxiously organized a party for Senator Aang, who held the decisive vote on the Military Oversight Committee. Skywalker attempted to reassure her, predicting that the party would be successful and that she should relax, when they noticed C-3PO's confusion regarding the arrangements. At Amidala's request, Skywalker dispatched the protocol droid and R2-D2 to purchase the jogan fruit that the latter had neglected to buy for Aang's favorite dessert, jogan fruitcake. Despite facing delays, Amidala proceeded with hosting the party, with her and Skywalker awaiting the droids' return, who arrived just in time to present the cake to Senator Aang.
Shortly thereafter, Skywalker went to the Senate Building to persuade Amidala to embark on a two-week vacation together, to a remote destination where they would be unrecognized, allowing them to be husband and wife instead of Senator and Jedi. However, Amidala declined, as she was preparing an important bill for the Senate. Skywalker retorted that the bill seemed more important than their love, but Amidala countered that it was not, just that they both lived to serve the Republic. Nevertheless, Skywalker asserted that nothing was more important than his feelings for her, and demonstrated this by giving Amidala his lightsaber, which, Kenobi had once told him, was his "life." Although she initially believed he was teasing her, Skywalker was sincere about his feelings, and the two shared a kiss.
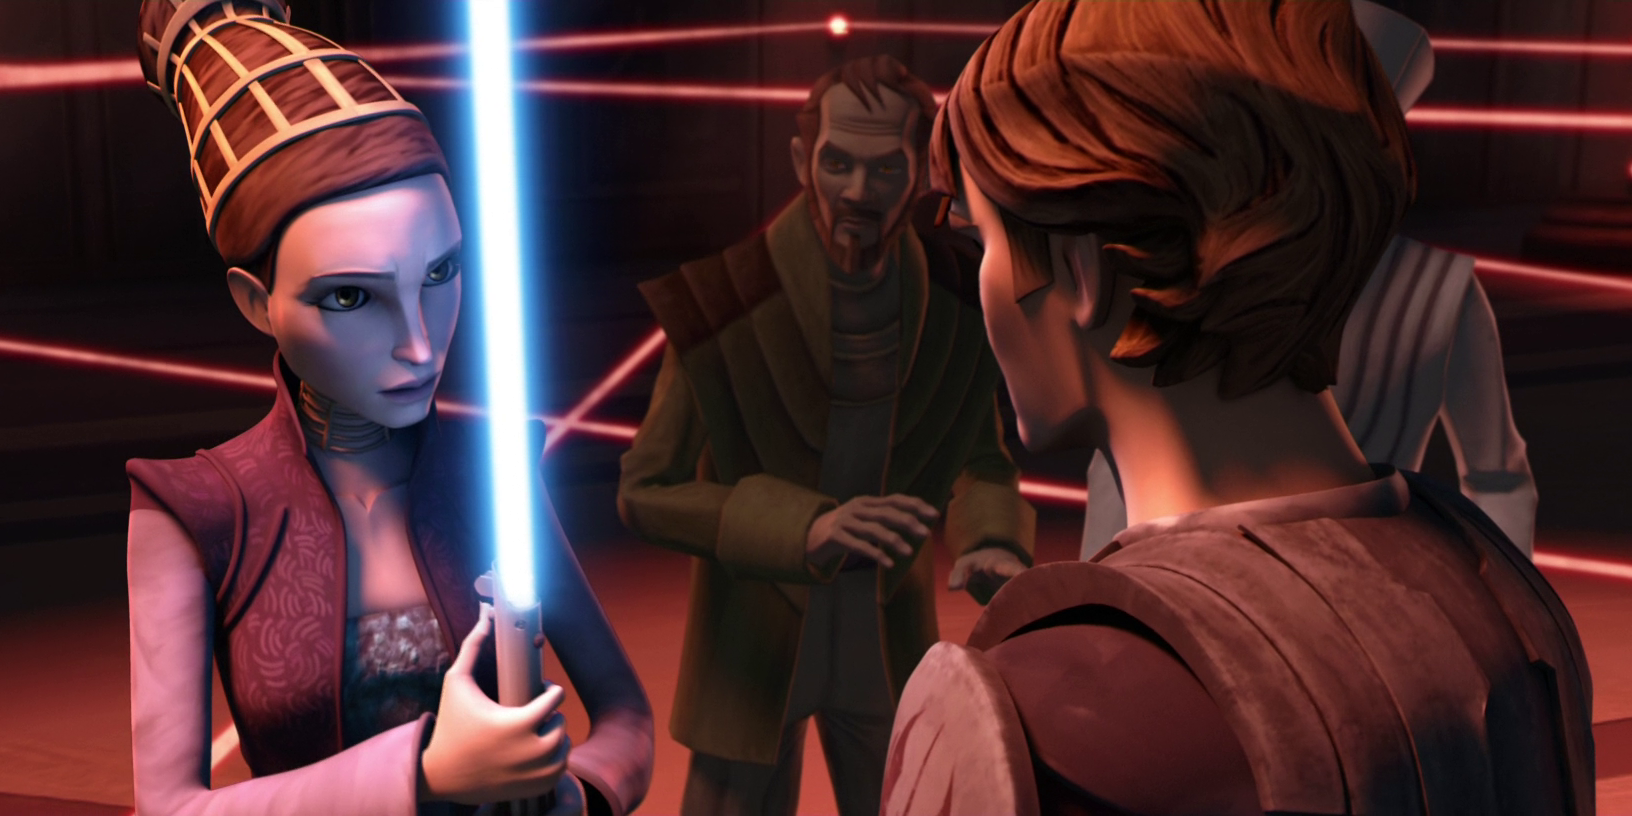
They found themselves interrupted by the voices of C-3PO and Senator Organa, causing Skywalker to duck beneath her desk, while Amidala concealed his lightsaber within the folds of her sleeve. As she proceeded towards the lobby to attend a discussion regarding the controversial Enhanced Privacy Invasion Bill, she was taken hostage, along with several other Senators, by Cad Bane and his squad. Skywalker, trailing her, observed the unfolding situation. Bane noticed him and dispatched his lackeys to apprehend him. However, Skywalker evaded them long enough to establish contact with Palpatine and single-handedly vanquish an IG-86 sentinel droid. Before he could do anything else, Robonino and Aurra Sing shocked him into unconsciousness and brought him before the captive Senators. Subsequently, the bounty hunters set up explosives that would detonate upon laser detection and vacated the premises. Skywalker regained consciousness, and Amidala returned his lightsaber. He then utilized it to create an opening in the floor, allowing all the senators to drop to safety one level below, just before Bane triggered the bombs and made his escape alongside the newly liberated Ziro.
Meeting Madam Synata
In the wake of the hostage situation, Skywalker accompanied Amidala to Caamas to embark on the private ship belonging to the celebrated actress Madam Risha Synata. Regrettably, they arrived late for Madam Synata's theatrical production centered around Darth Krist-Ov. Upon their arrival, Skywalker and Amidala were introduced to Synata. Despite Amidala's reservations, Skywalker expressed his eagerness to visit her museum. Skywalker then escorted Amidala to her designated chamber. The following day, Skywalker and Amidala explored the museum. Within its exhibits, Skywalker and Amidala encountered a display pertaining to Varykino, the location where they had exchanged their marital vows. Unexpectedly, Skywalker and Amidala found themselves under attack by a swarm of robots originating from the displays. Skywalker successfully repelled the robotic assailants and facilitated Amidala's escape. Subsequently, Skywalker and Amidala stumbled upon a Separatist banner and a holographic projection of Count Dooku.
Skywalker and Amidala discerned that Synata was in league with Dooku and the Separatists. Skywalker then apprehended one of the Separatist operatives, while Amidala unearthed a roster of senators who opposed the Separatists. Skywalker and Amidala came to the realization that Synata's scheme involved assassinating them, along with Amidala, through the deployment of Dioxis gas. Skywalker and Amidala engaged in combat with several LEP servant droids in an attempt to thwart Synata's plot to eliminate the senators. Aided by R2-D2, Skywalker and Amidala managed to reach the theater.
As Amidala alerted the audience to evacuate, Skywalker donned a mask and helmet borrowed from an actor before confronting Synata, who brandished her own lightsaber. Skywalker engaged Synata in combat until he had her pinned at the tip of his lightsaber. Following the confrontation, Skywalker and Amidala reported the events of their trip to the Jedi Council.
Intense training
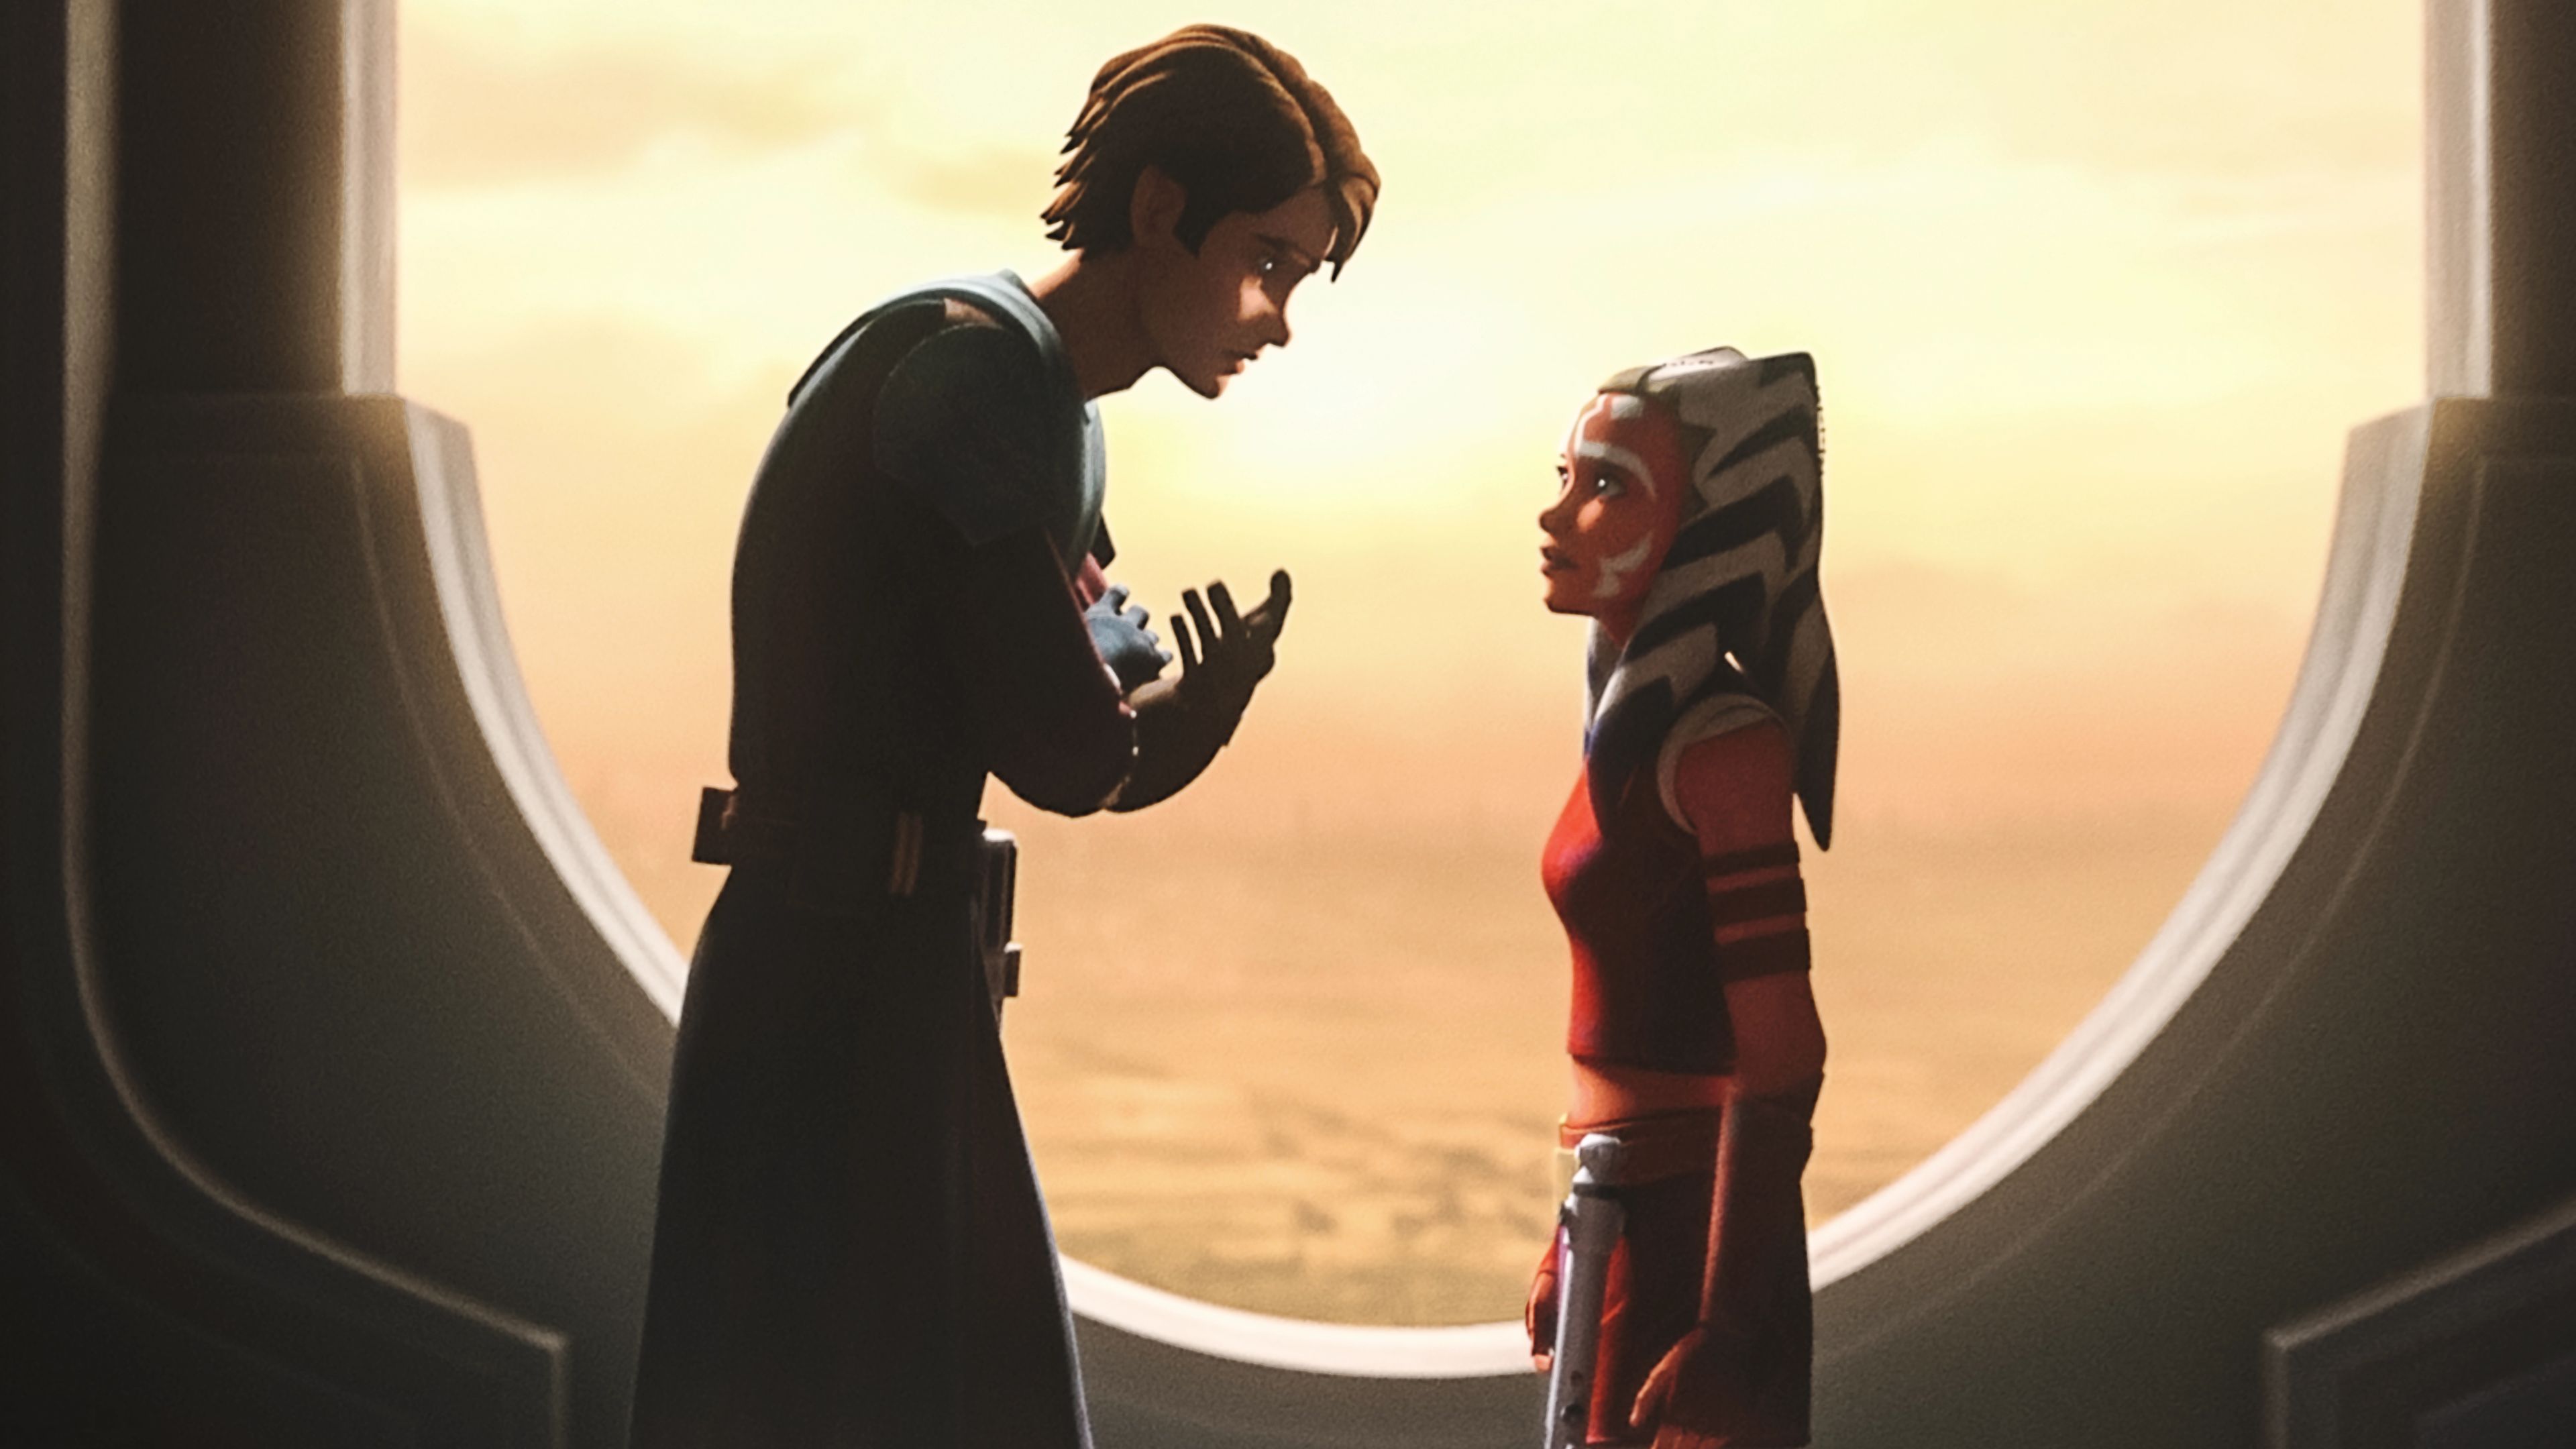
After arriving tardily to one of Tano's training sessions, Skywalker voiced his dissatisfaction with the simplicity of the drills. Consequently, he instructed her to meet him later for a more rigorous training session. Subsequently, Skywalker transported Tano to a secluded location accompanied by Rex and the 501st. He then instructed the clone troopers to encircle Tano and unleash stun bolts upon her. These sessions persisted for hours until Tano remarked to Skywalker that the battle droids were far less formidable than the clones. Skywalker elucidated that this was precisely the objective, emphasizing his desire to subject her to challenging training so that she would acquire the skills to defend herself effectively. Tano continued these training sessions with Rex and the 501st throughout the duration of the war. At a later time, Skywalker engaged in sparring with Tano, instructing her in the art of fighting with two lightsabers. She encountered difficulty in consciously coordinating the second lightsaber, but Skywalker offered her reassurance. Upon Master Yoda's arrival to spar with her, Skywalker observed as she struggled against Yoda, ultimately gaining a more proficient understanding of how to utilize Jar'Kai.
Unexpected Company
At a later point, Skywalker received orders for a mission with Amidala to Alderaan. Securing the mission alongside her had required considerable effort on Skywalker's part, but they were both pleased at the prospect of spending some time alone together. However, their plans were disrupted when Tano approached them, claiming that Kenobi had encouraged her to assist with the mission. They subsequently boarded a T-6 shuttle, where Skywalker charted a more direct route to expedite the mission. Tano cautioned him that Separatist fleet activity had been detected along that flight path and advised against taking it. Unfortunately, it was too late, and Skywalker's ship emerged from hyperspace amidst the Separatist fleet. Skywalker assumed control of the vessel and attempted to maneuver around incoming fire, while Amidala and Tano manned the laser turrets. Despite their valiant efforts, stray laser fire struck Amidala's side of the ship. Skywalker instinctively moved to shield Amidala, resulting in an embrace. Tano managed to regain control of the ship and initiated a jump to hyperspace. Upon their arrival on Alderaan, Skywalker expressed his gratitude for her presence. Amidala remarked that she and Skywalker made a formidable team, with Tano reciprocating the compliment.
Trouble with Tomarian
The entertainer Tomarian subsequently requested Skywalker's presence as a Jedi escort for his Annual Festival of Light Gala. Skywalker anticipated a genuine threat at the event, but in reality, Tomarian had sought his presence to impress his guests. Skywalker was then taken by surprise upon seeing Senator Amidala dressed elegantly for the occasion. They engaged in conversation, expressing their mutual delight at seeing each other. Amidala suggested that he endure Tomarian's typically lengthy speech while she excused herself to freshen up. Skywalker, along with Tomarian, entered the theater where the gala was being hosted. Suddenly, the room was plunged into darkness, prompting Skywalker to ignite his lightsaber. He inquired of Tomarian whether this was part of the performance, to which Tomarian responded negatively and donned a gas mask. Skywalker, along with everyone else present, succumbed to unconsciousness as the room filled with a noxious gas.
As he began to regain consciousness, he overheard Telsla threatening Tomarian over a promised crate of beskar. Tomarian attempted to talk his way out of the situation, but Telsla instructed Fleecs, a member of his crew, to restrain him. Telsla then detonated a bomb within the venue, the ensuing chaos allowing Skywalker to slip away unnoticed. He managed to catch up with Amidala, who had evaded the gas attack and pilfered a blaster from one of Telsla's goons. He approached her stealthily, startling her, before offering to escort her to safety. She declined his offer, expressing her unwillingness to abandon anyone still inside the building. Following an exchange, they agreed to conceal themselves within the scaffolding to formulate a plan. Amidala attempted to contact "Checker", but received no response. As more explosives detonated, she attempted to contact him again, but intense feedback revealed their location. They fought off Telsla, causing him to flee. They descended and eliminated Fleecs before pursuing Telsla. Just as Telsla was about to detonate explosives in the music hall where the majority of the guests were gathered, Skywalker intervened. He proposed a bargain to Telsla, offering to persuade Tomarian to cooperate in exchange for a single bar of beskar. Meanwhile, Amidala approached Telsla from behind and pressed her blaster against his back. He retaliated, dropping the explosive detonator. Checker managed to catch it, and Amidala confidently placed Telsla under arrest, causing Skywalker to fall even more deeply in love with her. After everyone had regained consciousness, Skywalker commended the senator on her performance. Tomarian expressed his gratitude, and upon being questioned, stated his intention to utilize the beskar to repair the theater. After Skywalker glared at him, he recanted and added that he would also donate a significant portion of it to charity. Amidala wished him luck, and Skywalker invited her to dinner, an offer which the senator accepted.
Jedi Ceremony
One day, Skywalker was waiting alongside Master Yoda in the Jedi temple grounds for Tano. Upon her arrival, Skywalker scolded her for her tardiness, but Yoda praised her for her assistance and proceeded to extend her Padawan braid. Following a debate in the senate concerning a financial reform bill, Amidala requested that Skywalker persuade the Jedi Council to engage in discussions with Palpatine regarding the cessation of the war. Skywalker permitted Tano to accompany Amidala in order to broaden her understanding of politics. Following an apparent Separatist attack, Skywalker confronted his apprentice regarding her and Amidala's meeting with Onderon's senator Mina Bonteri on Raxus Secundus and deemed it foolish. Despite this, Skywalker's apprentice came to realize that politics were not as clear-cut as she had previously believed.
Dathomirian threat
Skywalker and Kenobi led Republic forces in a battle against Asajj Ventress's fleet within the Sullust system. Directly involved in the conflict with their respective starfighters, Kenobi became a target of Ventress, whose Ginivex-class fanblade starfighter was subsequently disabled by Skywalker. As Kenobi and Ventress crash-landed in the Separatist command ship's hangar, Skywalker promptly landed to aid his former master. Together, the two Jedi engaged Ventress in a duel. Their confrontation, however, was cut short by the vessel's destruction, secretly orchestrated by Count Dooku. The two Jedi made their escape in their interceptors, presuming Ventress to have met her demise.
Following the massacre on Devaron, Skywalker and Kenobi were dispatched to Dathomir, as surveillance footage had brought to the Council's attention the involvement of a Dathomirian's in the assault on Devaron. Upon arriving on Dathomir, they journeyed to a village, where they were ambushed by the Nightbrothers until Skywalker seized their leader as a hostage. The Zabrak then informed the Jedi that a Nightsister had transported one of them to their fortress, prompting the Jedi to proceed there. Skywalker and Kenobi questioned Mother Talzin, who identified him as Savage Opress and provided information on his whereabouts. The two Jedi then made their way to Toydaria where they confronted Opress, but were unable to prevent him from killing King Katuunko. Utilizing the king's vessel as their own had been destroyed, Skywalker and Kenobi intercepted their target on Dooku's Separatist flagship. However, Opress managed to overpower them, compelling the two to retreat and abandon the ship.
Killing a defector
Following their encounter with Opress, Skywalker and Kenobi were summoned away from a blockade at Herdessa to meet with Yularen. The admiral informed them that Mekedrix had disappeared. Furthermore, an execution squad known as the Death Wind had been attacking both Republic and Separatist targets. The group's namesake, the Death Wind Corridor, also passed near Mekedrix's home planet of Roon, suggesting a possible connection. Yularen further stated that the Death Wind might have established a clandestine position on Ando. Consequently, Skywalker and Kenobi were tasked with locating the Death Wind and eliminating Mekedrix if he was found to be associated with them. Skywalker initially objected, believing that killing a potential ally would make the Jedi resemble the Separatists. Kenobi assured Skywalker that they would attempt to find a peaceful resolution before they departed for Ando. Upon arriving on the planet and navigating through the local swamplands, the Jedi came across empty sets of clone armor being used as effigies. Upon reaching the end of a river, they discovered an outpost constructed from the remnants of a Sith temple. They were then confronted by the Death Wind, who granted the Jedi access to their leader in exchange for their lightsabers. Entering the outpost, Skywalker and Kenobi encountered Mekedrix, seated on a throne and wielding a sword. Mekedrix asserted that he had rescued his victims by revealing to them the truth; that the purpose of existence was to kill and die. When Mekedrix revealed that his sword was crafted from the bones of a clone trooper, Kenobi inquired about the clone's name. Kenobi proceeded to argue that life imbued the galaxy with meaning and that death had no need for a sunrise, a name, a home, or a friend. Mekedrix then lunged at Kenobi, but Skywalker retrieved his lightsaber and pierced Mekedrix through the chest. Skywalker expressed remorse over killing him, but Mekedrix reassured him that this was the quickest path back to the sunrise before he succumbed to death.
Personal and wartime conflicts
The Destiny of the Chosen One
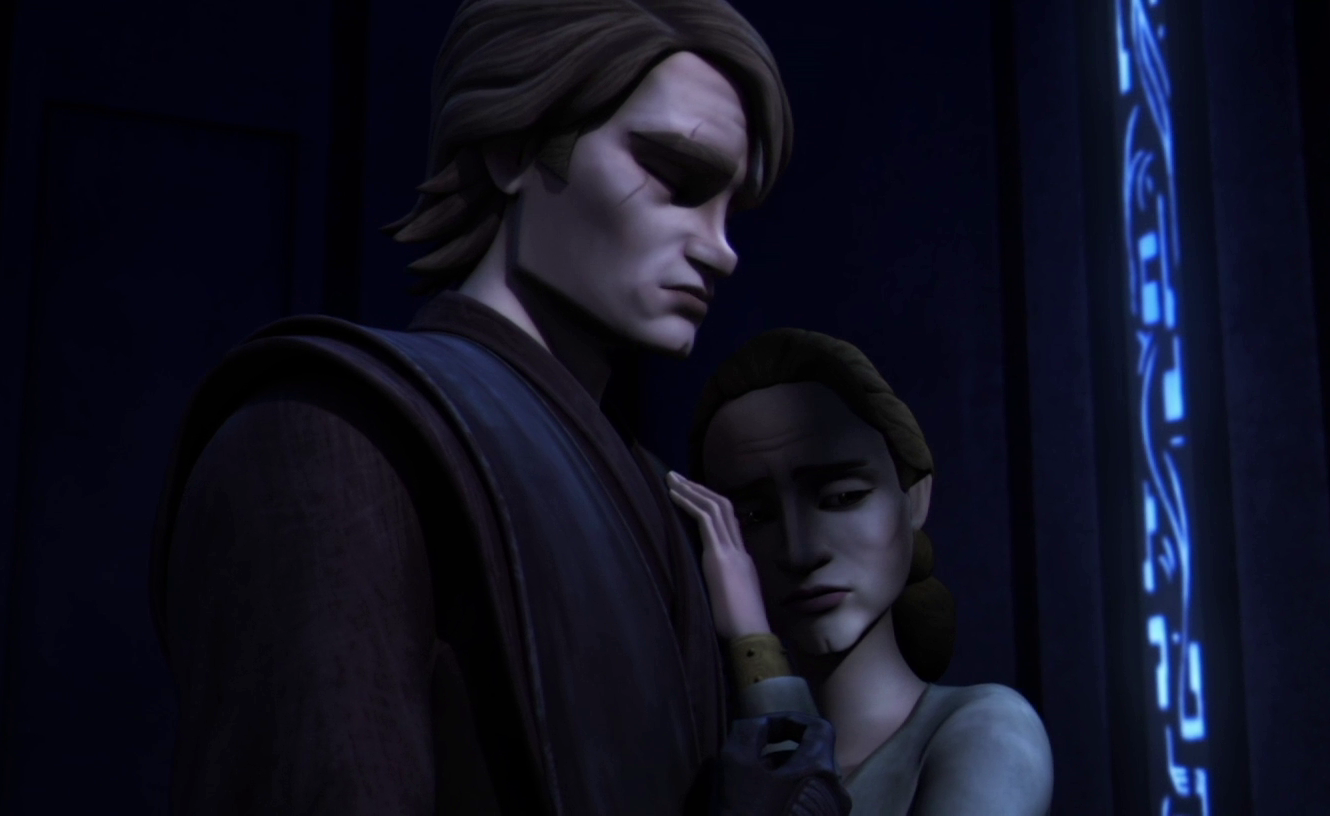
Upon the Jedi Council receiving a 2,000-year-old Jedi distress signal, the High Council sent Skywalker, Kenobi, and Tano to the Chrelythiumn system, where they were supposed to link up with Captain Rex and an armed cruiser. While both parties reached the designated rendezvous point, neither Rex's nor the Jedi's ship could establish visual contact with the other. Instead, the Jedi's ship was guided to a mysterious planet, Mortis, where they were met by a mysterious figure known as the Daughter, who questioned Skywalker regarding whether he was "the one" and who desired to lead them to the Father. Subsequently, Skywalker became separated from Kenobi, Tano, and the Daughter.
Skywalker attempted to follow her, only to arrive at the monastery, where he encountered the Father and was provided with shelter for the night. As he attempted to sleep, the apparition of his mother, Shmi, materialized before him and urged him to share his pain and guilt—that he had been too late to rescue her, and that he had failed as a Jedi and had failed her, having experienced only vengeance when he slaughtered so many to avenge her death. However, upon mentioning his wife, whom he described as "everything" to him, the apparition finally revealed itself to be the Son, briefly assuming a monstrous form before vanishing.
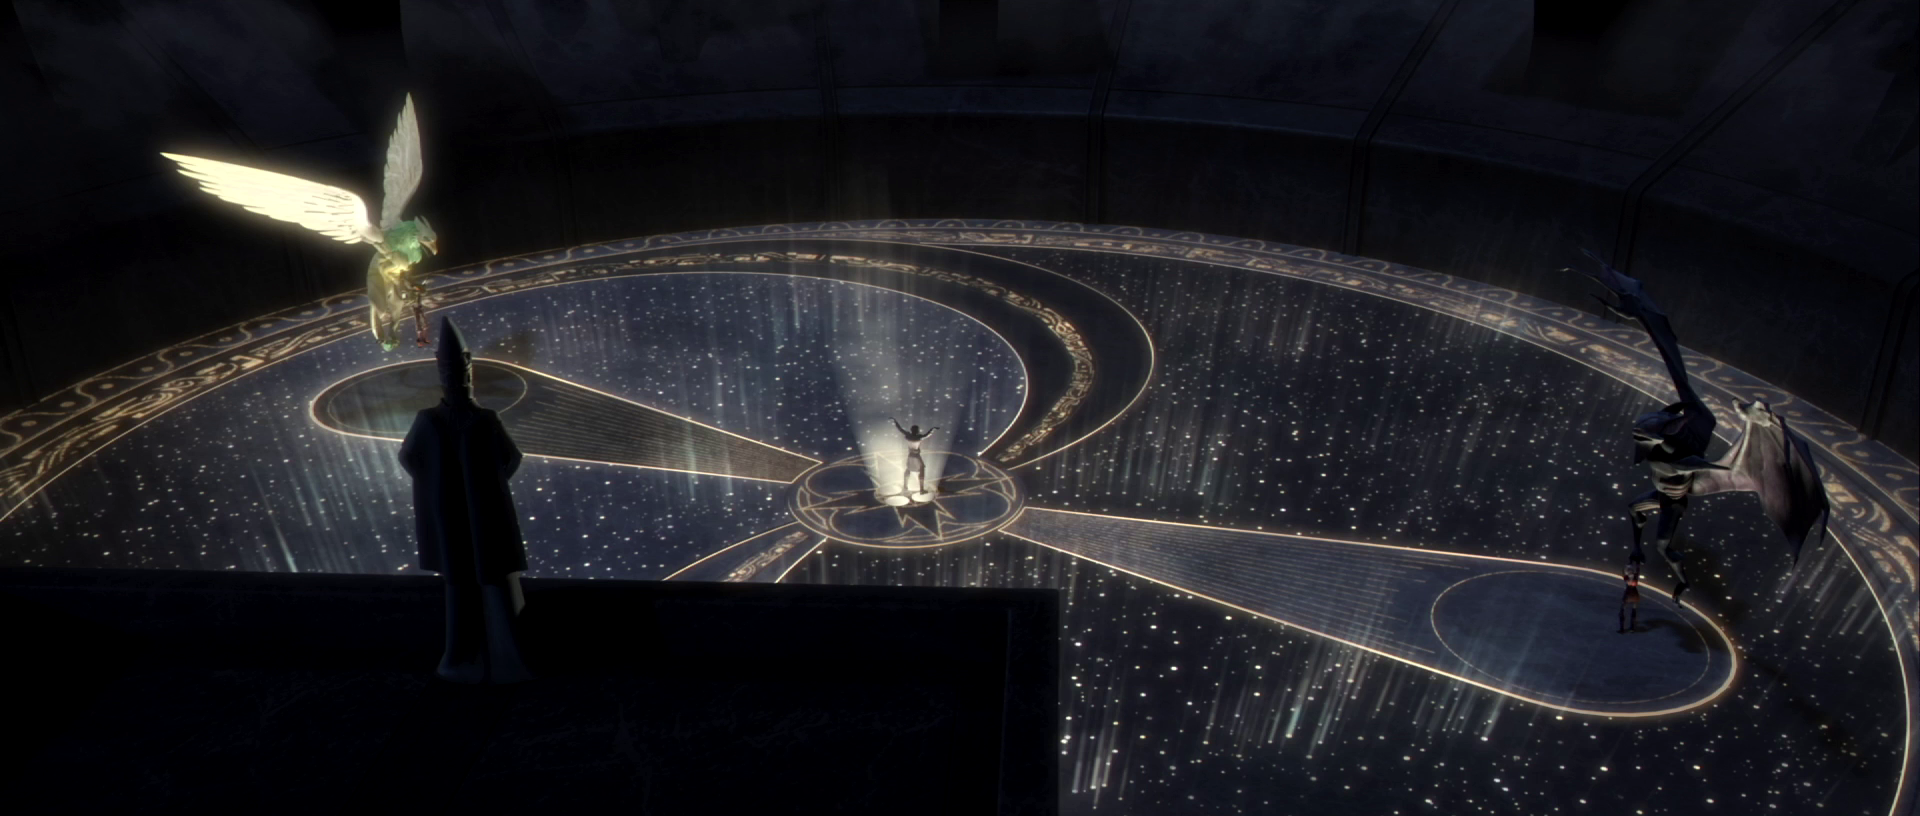
Disturbed by the encounter, he confronted the Father, who recounted his family's history and questioned whether he was truly the Chosen One. Although Skywalker dismissed the prophecy as a myth, the Father arranged a test to ascertain whether the Jedi Knight was worthy of fulfilling his destiny. Ordering his children to kill Tano and Kenobi, the Father provoked Skywalker into choosing between his master and his apprentice, but Skywalker instead controlled the two beings, forcing them to their knees. Having demonstrated himself to be the Chosen One, the Father pleaded with him to remain, but Skywalker refused, departing with Tano and Kenobi on their shuttle.
They were interrupted when the Son abducted Tano, prompting Skywalker to pursue him, at the expense of damaging their ship near the Son's cathedral. Despite Kenobi's reservations, Skywalker went after his Padawan and ascended the tower to locate Tano, who had been corrupted by the dark side. Skywalker engaged her in combat, soon joined by Kenobi, only to be interrupted by the Father's arrival. Kenobi attempted to pass the Dagger of Mortis to Skywalker, but Tano seized it and gave it to the Son, who killed her, as she was no longer of use. The dark side user then mortally wounded his sister as she intervened to protect her Father. Skywalker implored the Father to save Tano, and the dying Daughter utilized Skywalker as a conduit to channel the last of her life force into Tano, resurrecting her. The Father instructed them to depart from the planet before the Son utilized their ship to do so.
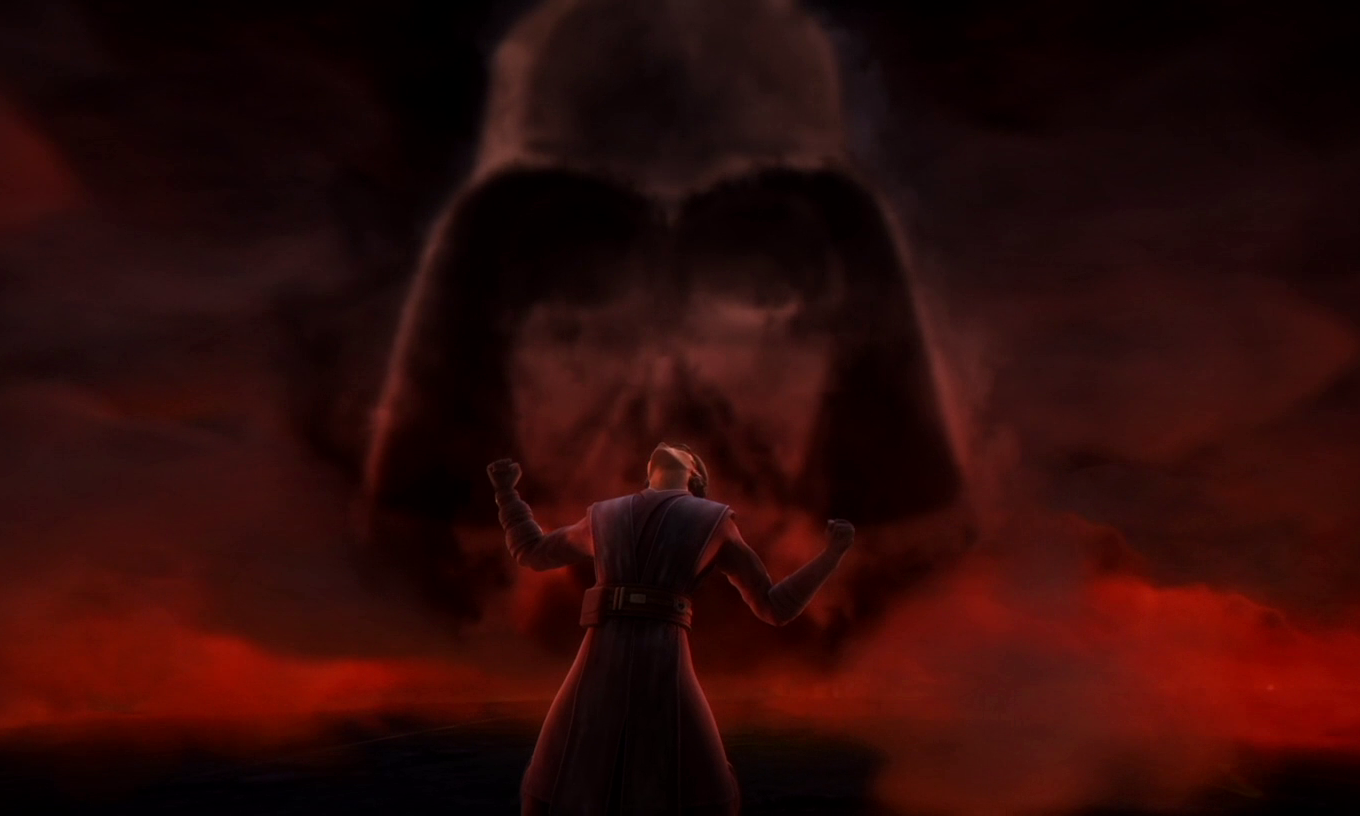
The ship's repairs necessitated a longer stay, and Skywalker sought guidance from the Father. During their meeting, the Father expressed his determination to kill the Son, but declined Skywalker's offer of assistance, instructing the Jedi Knight to search within himself for the answer to what must be done. As he departed, Skywalker encountered the Force spirit of his first mentor, Qui-Gon Jinn. Although Skywalker sought his counsel, Jinn advised him to remember his training and trust his instincts, and to journey to the Well of the Dark Side to confront his most personal challenge. There, the Son forced Skywalker to confront his future, one consumed by the dark side. Horrified, Skywalker yielded to the Son as he promised him the power to avert this destiny. Soon, Kenobi arrived, and Skywalker left him trapped at the well, asserting that he had seen the truth—that it was the Jedi who would impede peace.
Skywalker arrived as his Padawan disabled the ship and went to rescue Kenobi, while the Son went to steal the Dagger. As Skywalker waited, the Father appeared before him and recognized that his son had violated the laws of time. He erased Skywalker's memory of these future visions, rendering him unconscious, and transported him to his monastery. Skywalker awoke to find the Father, Kenobi, and Tano, moments before the Son arrived with the Dagger. To end the conflict, the Father impaled himself to distract his Son, while Skywalker killed the Son with his lightsaber. As the Father also perished, he cautioned Skywalker to be wary of his feelings, as they could lead to his downfall. As noted by the Father, Skywalker had restored balance to the Force on Mortis through the deaths of the Force wielders, and he still possessed the opportunity to do so for the entire galaxy.
Following the Father's death, the three Jedi were transported back to the galaxy to finally rendezvous with Rex. Surprised to learn that, according to Rex and the others, they had only been gone for a moment, they returned to the Star Destroyer. They later reported this encounter to the Council, with Skywalker even mentioning that he had spoken with Jinn to Yoda. Despite Skywalker's lingering doubts, they ultimately concluded that it had merely been an illusion of the old mentor. In reality, it had truly been the spirit of Jinn.
The Citadel
More than one year and nine months into the war, subsequent to the capture of Jedi Council member Even Piell by the Separatists, Skywalker and Kenobi were briefed by Master Plo Koon and dispatched, along with their team—comprising Rex, Cody, Echo, and Fives—to infiltrate the Citadel on Lola Sayu in order to retrieve Master Piell, who possessed information regarding the Nexus Route. Refusing to allow Tano to risk her life on such a perilous mission, Skywalker devised a strategy to circumvent the prison's lifeform scanners. The entire team underwent carbon-freezing and were transported to the Citadel by Commander R2-D2 and his reprogrammed battle droid squadron.
Upon landing, Skywalker was thawed out and discovered, to his astonishment, that Tano had disobeyed orders and followed him. Compelled to take her along, the team proceeded towards the facilities, leaving the astromech to guard their shuttle. After free-climbing to the entry point through a cliff wall battered by a strong gale and strewn with electro-mines, and after Tano deactivated the ray-shield on the entrance, the team was able to enter, except for Charger, who plunged to his death and alerted the prison staff, led by Osi Sobeck, of their presence. Inside, they lost Longshot, but ultimately reached Master Piell, whom they liberated and who informed them that they needed to rescue his officers.

Despite the numerous traps laid throughout the fortress, the team successfully rescued the officers, at which point they encountered the other carrier of the Nexus Route coordinates, Captain Wilhuff Tarkin. The team was divided into two groups—while Kenobi's team created a diversion, Skywalker would lead the others away. In Tarkin's company, Skywalker and his team escaped through the cavern system beneath the prison, when Tarkin expressed some skepticism about the Jedi's plan, to which Skywalker told Tarkin that he reserved his trust to those who understood gratitude. However, they soon discovered common ground, as they both believed the Jedi Code prevented the Order from going far enough to achieve victory in the ongoing war, and Tarkin developed a grudging respect for Skywalker.
As they navigated out of the fuel line to rendezvous with R2-D2 and the shuttle, they were ambushed by droids and forced to join Kenobi at their pick-up point, with the shuttle heavily guarded. During the skirmish, Echo attempted to defend the shuttle, but its destruction and subsequent explosion seemingly killed him. As they retreated into the cave system, Skywalker and Kenobi contacted the Council, informing them of their need to escape, and Koon immediately departed to retrieve them. They contacted the Council again to be informed of the extraction point. As they proceeded to the location, Sobeck dispatched anoobas after them. The creatures claimed Master Piell's life, who passed his intel on to Tano, and the group paused to honor his death. Ultimately, they reached the extraction point on time, and fled on Plo Koon's rescue shuttle, with Saesee Tiin's fleet covering them to allow their escape back to Coruscant.
Padawan lost
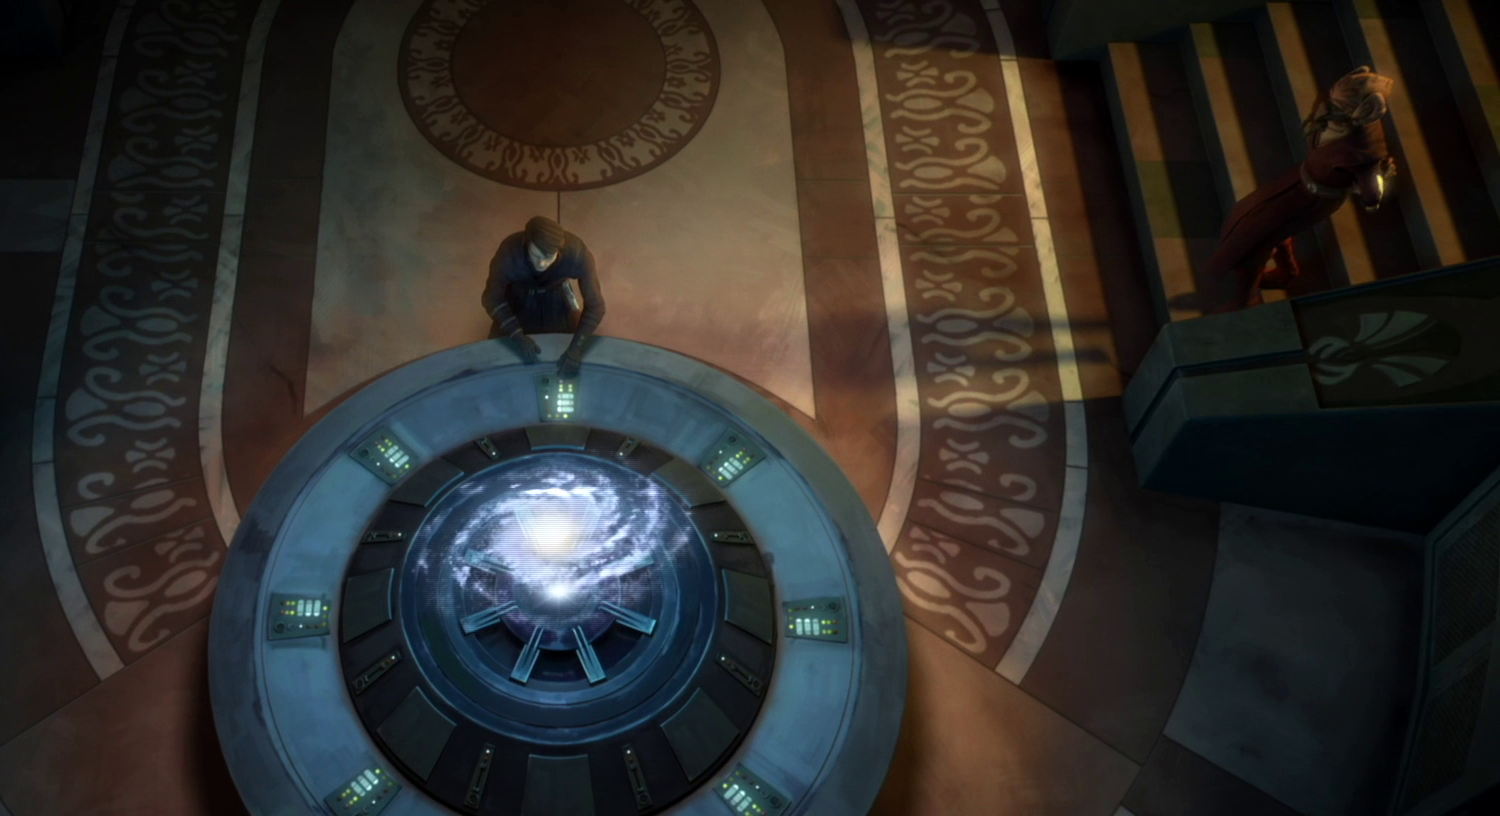
Skywalker, Tano, accompanied by the 501st Legion, joined forces with Plo Koon and his clone troopers on Felucia. Their mission was to eradicate a heavily fortified Separatist base. Dividing their forces into a trio of assault teams, Skywalker and Rex's group took on the responsibility of breaching the main gate and neutralizing the tactical droid, designated TZ-33. Together with the contributions of Koon and Tano's units, they secured the outpost.
Following the successful operation, Skywalker realized Tano was missing during the battle, prompting him to initiate a comprehensive search of the surrounding area. Despite Skywalker's repeated attempts to find her, his men returned empty handed. Master Koon then stepped in, reporting that he had alerted all available forces in the Outer Rim and assured Skywalker that Tano would eventually be located. However, Koon also firmly stated that their mission on Felucia was complete and that they were required to return to Coruscant. Refusing to abandon Tano, Skywalker's resolve was met with Koon's observation that his emotions were impairing his judgment. Skywalker retorted, "I won't leave her fate in others' hands." Koon insisted, "It's time to leave." Skywalker finally relented and ordered the evacuation of the planet.
Once back at the Jedi Temple, Skywalker immersed himself in the star charts, desperately seeking any clue to Tano's whereabouts. Koon advised him to have faith in Tano's capabilities. After the events that transpired on Wasskah, Skywalker's search concluded when Tano arrived at the Temple aboard the Halo, accompanied by her Wookiee allies and the younglings O-Mer and Jinx. Overwhelmed with relief, Skywalker profusely apologized for everything that had happened, taking full responsibility for his perceived failure to protect her. Tano reassured him that his training had equipped her with the skills she needed to survive and expressed her gratitude for his guidance. Master Yoda observed the scene with delight as the two bowed to each other, signifying a renewed sense of mutual respect.
Horain Combat
At a later time, Skywalker participated in the Horain conflict alongside Kenobi and Rex. Rex contacted Skywalker, seeking reinforcement, but Skywalker was already engaged with Vulture Droids. Skywalker later encountered Kenobi and Rex, astonished to see they had commandeered an AAT with the malfunctioning battle droid Bats.
Retta Skirmish
On Retta, Skywalker, in conjunction with Grand Master Yoda, launched a surprise attack on a B1 battle droid patrol. Soon after, Kreeda, a Segredo warrior, assaulted Skywalker, attempting to drive the Jedi away. However, Kreeda befriended the Jedi, as she was an old acquaintance of Yoda. When Skywalker attempted to recruit Kreeda into the Republic's service as a spy, the Segredo declined and departed, after which Skywalker and Yoda were attacked by battle droids. After being separated from Yoda, Skywalker reunited with the Jedi Master and Kreeda, who explained that she was safeguarding refugees from the Clone Wars. Donning a hat taken from one of the refugees, Skywalker feigned the use of a "cloaking cap" to distract General Flebek, allowing Yoda to eliminate a B1 battle droid. Convinced that there was no actual cloaking device and that she had been tricked, Flebek retreated and boarded her ship. When Skywalker inquired about the contents of his report, Yoda stated that he would inform Mace Windu that there was nothing of interest on Retta.
Mon Cala Battle
Following the assassination of King Kolina of Mon Cala and renewed conflict between the Mon Calamari and the Quarren, Skywalker and Amidala, representing the Republic, arrived on the planet at the invitation of Captain Gial Ackbar of the Mon Calamari Guard and protector of young Prince Lee-Char. Simultaneously, Riff Tamson, Separatist ambassador, also arrived. Despite Skywalker and Amidala's attempts to mediate, the Quarren delegation left the council hall, dissatisfied with Mon Calamari rule. Teaming up with Ackbar, they reached out to Yoda and Windu, who dispatched a company of clone troopers equipped for underwater warfare under the leadership of Kit Fisto and Tano.

During the Quarren offensive, supported by Separatist aqua droids, Skywalker and Amidala accompanied Lee-Char, who was protected by Ackbar. Ackbar engaged the Quarren soldiers until his wife summoned him to aid Senator Meena Tills, leaving Tano to safeguard the prince and rescue him from Tamson. After the initial Separatist/Quarren assault concluded, Skywalker reunited with Amidala, Tano, Fisto, Ackbar, Lee-Char, and Tills to prepare for the second wave, which included the Hydroid Medusas, proving highly effective against the Republic-Mon Calamari forces. Forced to retreat into the subterranean caves, they regrouped to determine their next course of action—to return to the surface, only to be forced back to the sea floor when their frigate was destroyed and they were attacked by more enemies.
They divided into two teams: Skywalker accompanied his wife, Ackbar, and Tills, while Fisto, Tano, and two troopers escorted the Prince. Anticipating the arrival of Republic reinforcements, Skywalker and his group advanced towards the Mon Calamari central planetary scanner facility. Using the Force, the Jedi Knight brought down the entire structure, rendering planetary defenses incapable of detecting the approaching Republic forces—the Gungan Grand Army, along with Representative Binks, dispatched at the request of the High Council. However, Tamson utilized a Trident-class assault ship to generate whirlpools, disrupting the Republic-Gungan forces. Though Skywalker managed to destroy one of the ships, everyone except Tano and Lee-Char were captured.
Taken before Riff Tamson, Skywalker and Fisto were restrained by electric eels, while Amidala and Jar Jar Binks were confined within containment devices. Tamson interrogated the two Jedi, demanding to know the whereabouts of Prince Lee-Char. During the interrogation, Tamson attempted to coerce them by creating a small breach in Amidala's helmet, allowing her suit to flood with water. However, Tamson departed to personally oversee the capture of the Prince. Skywalker and Fisto then used the Force to expel the water from her helmet, while Binks sealed the hole with his saliva, saving her from drowning. The four were then taken to witness Prince Lee-Char's execution, during which Nossor Ri, the Quarren leader, intervened at the critical moment, saving the prince and turning his people against the Separatists, resulting in the Mon Cala victory. With peace restored, Skywalker and his companions attended the coronation of Lee-Char, now recognized by both Mon Calamari and Quarren as their new ruler.
Naboo Incident
Following rumors that the Gungans intended to assist the Separatists in an attack on Theed, Skywalker accompanied Amidala to Theed and later, to the Gungan territory near Lake Paonga, where they met with Binks, who confirmed the disturbing rumors. He led the couple to Otoh Gunga, where they spoke with Boss Lyonie and discovered that he was being controlled by a mind-altering necklace, which Skywalker telekinetically removed, restoring his senses. Lyonie revealed that the new minister, Rish Loo, had given it to him.
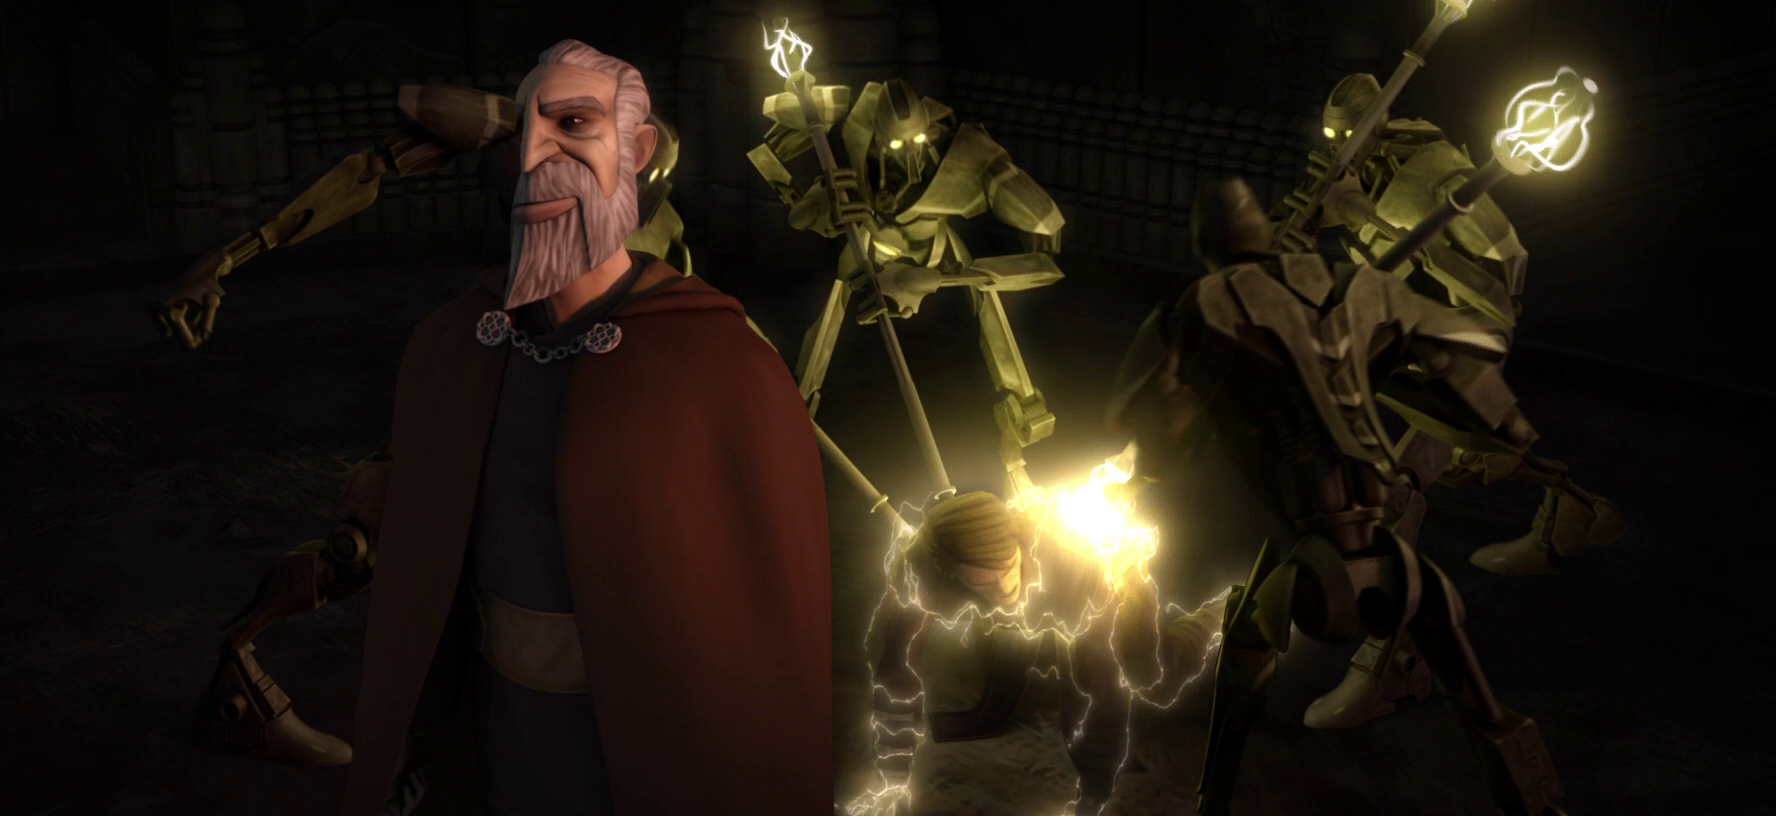
Skywalker, Amidala, and Binks assisted Lyonie in confronting Loo, only to be met with droid commandos and Loo stabbing Lyonie before fleeing. After taking the Boss to an infirmary, the couple noticed the striking resemblance between the unconscious Lyonie and Binks, whom they convinced to impersonate Lyonie and cancel the Gungan assault on Theed. As Binks carried out his impersonation, exposing Loo's deception to the army, Skywalker pursued the fugitive minister to a trap orchestrated by Count Dooku in Loo's laboratory. Dooku killed Loo and revealed his secret involvement in the Battle of Naboo, Skywalker engaged the Count in a duel, but was overwhelmed by Dooku's powers and his four MagnaGuards.
Dooku then contacted Amidala, proposing an exchange—the Jedi Knight for General Grievous, who had been captured by the Gungan Grand Army, thanks to Gungan General Tarpals's sacrifice. An hour later, Skywalker was handed over to Amidala, Queen Neeyutnee, and the Gungans, while Grievous was allowed to go free.
Umbara Combat

During the campaign on Umbara, Skywalker and Kenobi strategized their assault on the Umbaran capital city, defended by Confederate forces and local militia. Together with Rex and Fives, Skywalker prepared to counter enemy reinforcements targeting Kenobi's joint operation with Jedi Masters Saesee Tiin and Pong Krell, who would support Kenobi from the south, while Skywalker and the 501st Legion advanced from the north.
Under heavy fire, Skywalker and his battalion reached the landing zone, and then a ridge they used as a staging area. As he and Rex waited for the rest of their men, hoping to reinforce General Kenobi's battalion soon, Dogma reported that all platoons had arrived. Skywalker instructed him to rest. Dogma replied that he was fine, but Rex told him it was a direct order, and Dogma complied. Rex remarked that Dogma was "wound tight but loyal," Skywalker joked that he reminded him of Rex, who disagreed, claiming that was him in the past.
Shortly after, the Umbarans ambushed Skywalker and his troops, but Master Krell and Odd Ball saved them with an airstrike. Krell then approached Skywalker with disconcerting news: the Council had ordered Skywalker back to Coruscant, effective immediately, at the request of Supreme Chancellor Palpatine, for unknown reasons. Though hesitant to leave his troops mid-battle, Skywalker was compelled to relinquish command to Master Krell and return to Coruscant. Despite Krell's attempts to sabotage the Republic effort by manipulating the 501st and 212th battalions into fighting each other, Kenobi successfully captured the capital and defeated the remaining Umbaran forces, securing all sectors of the planet for the Republic.
Kiros Incident
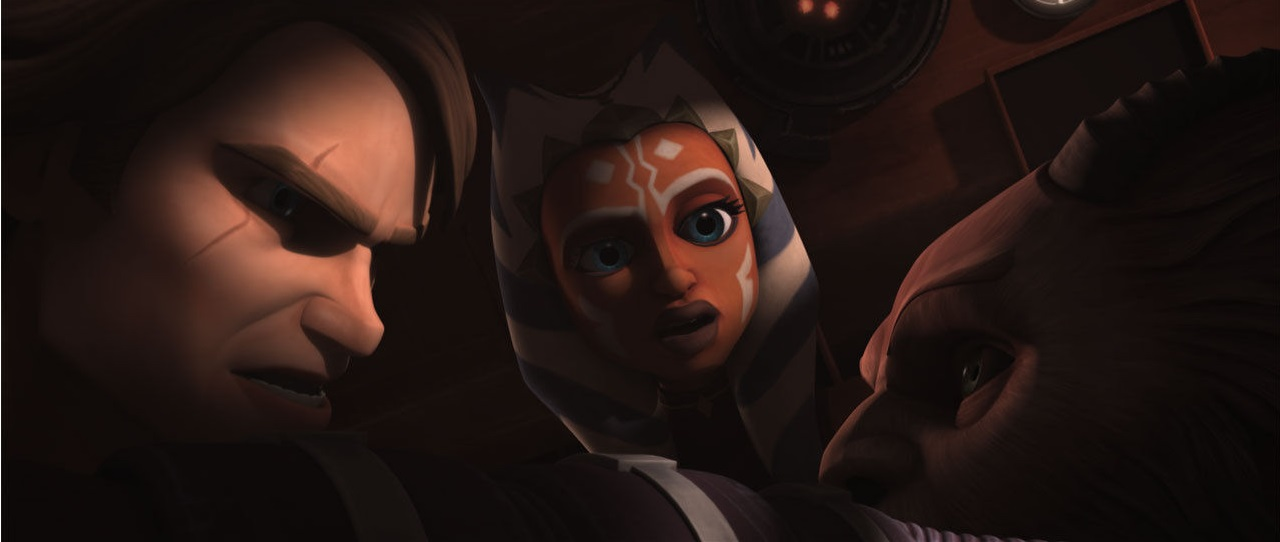
Ten rotations after Yoda's last contact with the Togruta colonists on Kiros, Skywalker, Tano, Rex, Cody, Kenobi, and their forces arrived on the world to investigate the silence, with Skywalker particularly concerned that they might be too late. Upon landing, suspicious of the absence of colonists in the town, they used BARC speeders to break through the city and surround the governor's tower, which served as the Separatist Headquarters. The enemy commander, Darts D'Nar, sent a message to Kenobi to discuss surrender terms. Skywalker grabbed the holoprojector from Cody and called D'Nar "Zygerrian scum." Although Skywalker wanted to confront the slaver himself, Kenobi instructed him to locate the missing colonists while he negotiated. Skywalker contacted Admiral Yularen to conduct a planetary bioscan to find them, while Kenobi explained Skywalker's behavior to Tano.
Hearing from Kenobi's negotiations that D'Nar had planted bombs throughout the city, Skywalker and Tano set out to disarm them. Despite the presence of sniper droids, they destroyed the bombs just in time, only to be informed by Kenobi that D'Nar was escaping on the Tecora. With effort, they boarded the ship, where D'Nar unleashed a blixus against them. Skywalker threw it off the ship, while Tano defeated D'Nar in the cockpit. Skywalker joined her and threatened the Zygerrian with frightening intensity, demanding the colonists' location, surprising Tano. D'Nar revealed that his Queen would hold the Royal Slave Auction.
Zygerria Adventure
After Skywalker, Kenobi, Yularen, and Tano informed the Jedi Council of their findings, they were tasked with finding the colonists. Disguised as Zygerrians, they landed on the capital city of Zygerria aboard the Tecora. Splitting into two teams, Kenobi and Rex went to locate the colonists, while Skywalker and Tano met Queen Miraj Scintel. Skywalker, posing as "Lars Quell," delivered news of Bruno Denturri's supposed death and presented Tano as a gift. He gained Scintel's favor, and the Queen invited him to accompany her during the slave auction, where she intended to have Skywalker prove himself a slaver by torturing Kenobi.
Instead, he freed Kenobi and tried to escape. R2-D2 returned their lightsabers, Rex provided cover fire, and Tano confronted the Queen. Despite their efforts, they were subdued, but Scintel saw Skywalker's determination, requiring five electro-whips to restrain him. Despite Dooku and half her kingdom demanding his death, Scintel had Skywalker brought to her quarters. He woke up and interrogated Scintel about his friends' whereabouts, throttling her with the Force. Scintel revealed that his friends would die unless he obeyed her. Skywalker was forced to comply, becoming her bodyguard and escort, as she became infatuated with him.
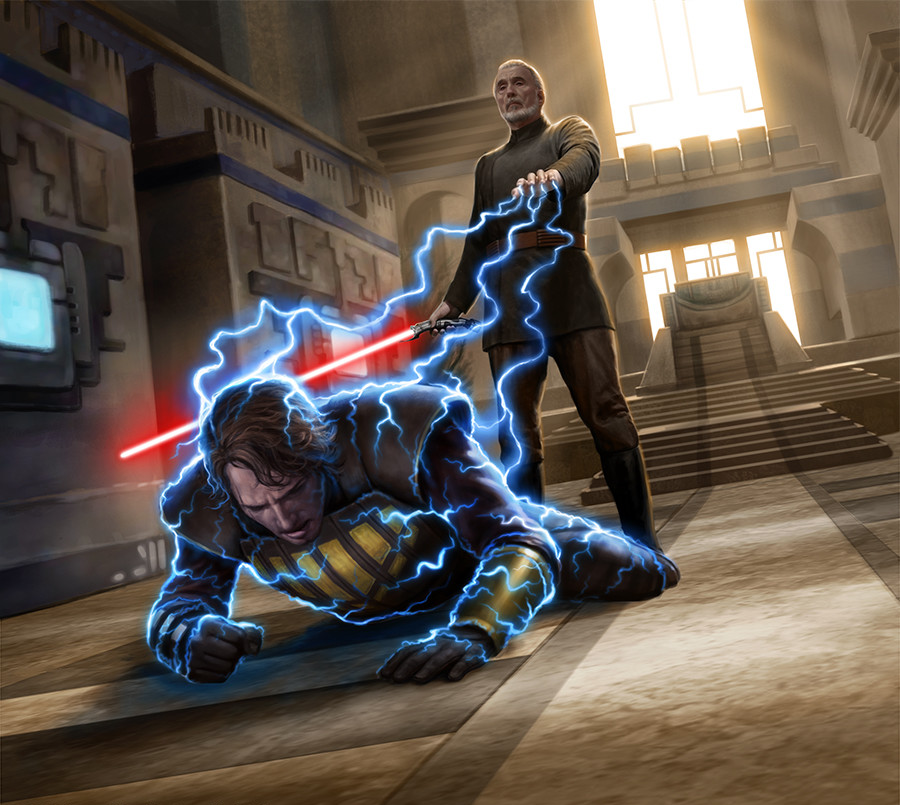
After a few days, Dooku arrived, and Skywalker realized that she was also a slave to the Count. With R2-D2's help, he escaped his guards and freed Tano from her cage, sending her to prepare the ship. He interrogated Scintel to learn Kenobi and Rex's location, but found himself before Atai Molec, who had betrayed Scintel, and Dooku. Skywalker futilely dueled Dooku before Dooku blamed him for killing Scintel. Skywalker took Scintel and escaped to the Tecora, where she told him Kenobi was in the Kadavo system and that she, like Skywalker, was a slave, before dying.
After contacting Plo Koon for reinforcements, Skywalker and Tano reached Kadavo and entered the slave-processing facility. During the battle, Skywalker disabled the turrets attacking Koon's forces, while Tano saved the Togruta colonists from falling to their death (caused by Keeper [Agruss]) by placing Admiral Barton Coburn's Arquitens-class light cruiser Hand of Justice beneath the facility. Skywalker, Rex, and Kenobi evacuated the facility before it was destroyed on Koon's orders, before returning to Koon's fleet.
Palpatine Kidnapping
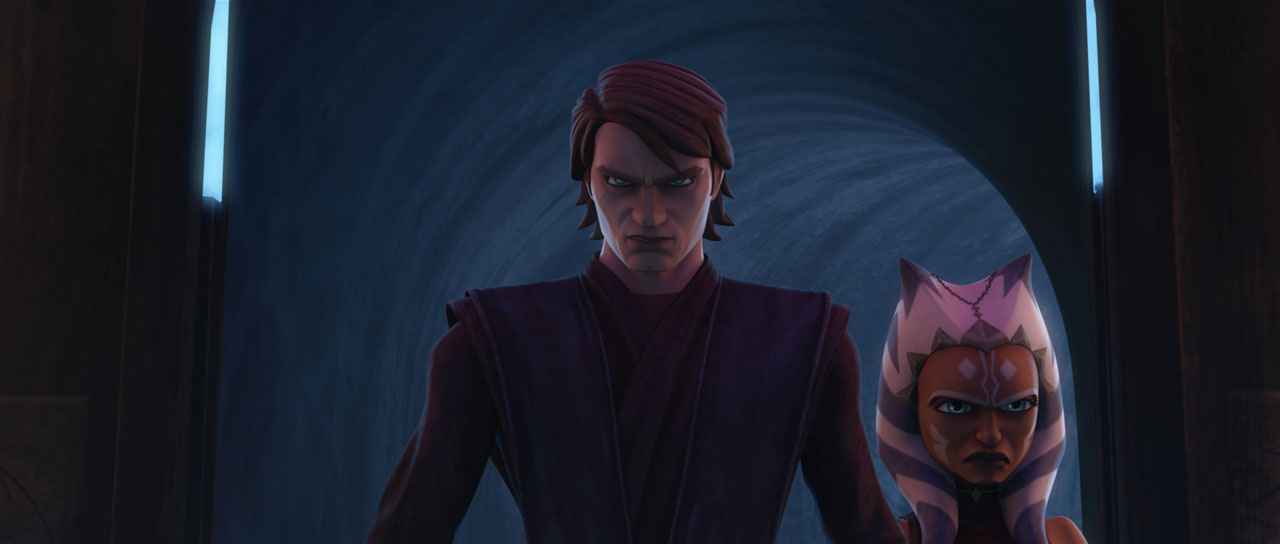
Following the capture of Moralo Eval, rumored to be the mastermind of a plot to kidnap Supreme Chancellor Palpatine, Skywalker, Tano, and Kenobi were summoned to an emergency meeting by the High Council while walking through Coruscant at night. On their way to the Temple, a sniper opened fire, prompting the three Jedi to chase their attacker. The sniper killed Kenobi before escaping on a speeder. Skywalker returned to his master, finding Tano crying and his old master dead. He called out to him repeatedly, trying to get him to respond. Withdrawn and grim, Skywalker remained silent until after the [funeral](/article/funeral_of_obi-wan_kenobi] held to honor Kenobi. He then embarked on a self-imposed mission to find his murderer, Rako Hardeen, at Trueping's. Though Skywalker wanted to kill him, he arrested Hardeen and took him to the Republic Detention Center.
After learning that Hardeen had escaped from jail, Skywalker met with Palpatine, when Windu informed the Chancellor that they would remove the bounty on Hardeen and the two other escapees, Eval and Cad Bane. Skywalker disapproved. Palpatine suggested that the Council might not trust him to control his feelings, and Skywalker felt the Council was doing nothing to catch his master's murderer. Exploiting this, Palpatine told him not to deny his feelings, for they made him special, and deliberately sent Skywalker and Tano to Nal Hutta. The two Jedi harshly interrogated locals for information, leading them to Orondia, the fugitives' last known location.
Spotting their quarry preparing to leave, Skywalker rammed their ship and boarded it midflight, but was thwarted by Bane and a subsequent crash-landing. Surrounded by smoke, Hardeen left the ship, and Skywalker confronted him, ready to kill Hardeen when Bane interrupted. Hardeen wrestled with Skywalker, whispering, "Anakin, don't follow me." Sensing a connection, Skywalker passed out, and Tano protected him from Bane's attempts to execute him. Returning to Coruscant, Yoda revealed the truth to Skywalker—that Kenobi was "Rako Hardeen."
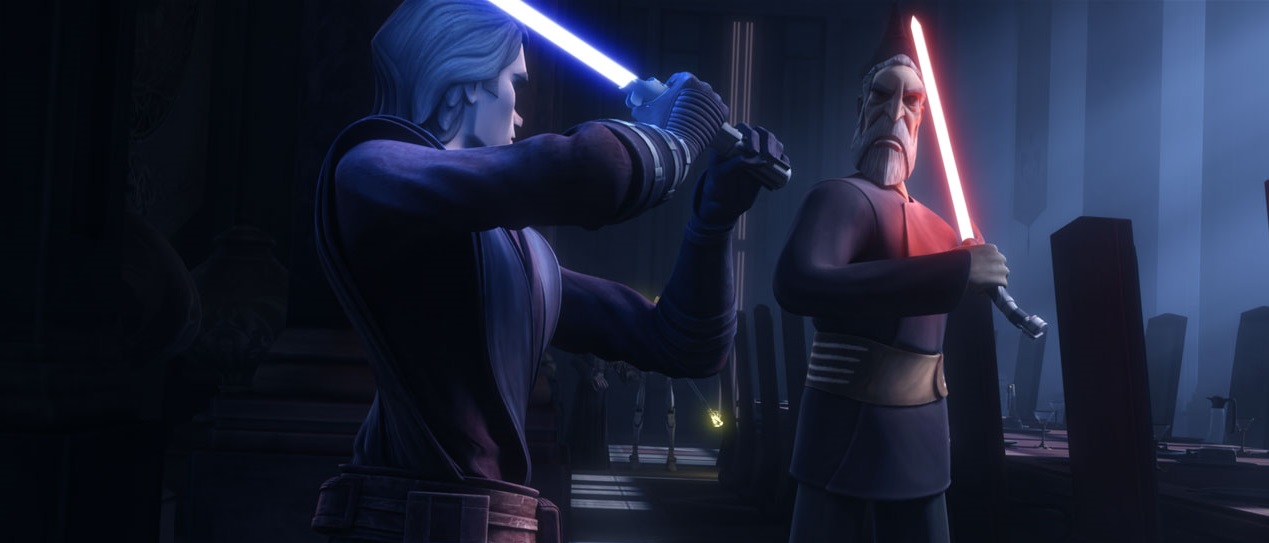
Afterwards, Skywalker and his Padawan were briefed on the security plans for the Chancellor during the Festival of Light on Naboo. Skywalker, Tano, and Windu escorted Palpatine and Mas Amedda to Theed, where Skywalker was greeted by his wife. At the festival, the abduction was initially successful, with Cad Bane and Moralo Eval spiriting Palpatine away. Skywalker and Windu captured Embo and Twazzi, but Kenobi stopped Eval and Bane, allowing Windu and Skywalker to arrive and take the two into custody.
Reuniting with his old master, he resented the Council's lack of trust and Kenobi's decision to hide the truth. Wondering how many other lies he had been told, he set out to bodyguard Palpatine, who continued to sow seeds of doubt in Skywalker until they were greeted by Dooku. Destroying two of his MagnaGuards, Skywalker dueled the Count ferociously, until Kenobi arrived to help him rescue the Chancellor, and Dooku fled.
A Hidden Threat
Later, while en route to meet a cruiser, Skywalker and Tano landed at the Stobar Spaceport because Skywalker was hungry. They entered Plop Dribble's, finding police droids and an unconscious waitress. Despite their investigation, the police and owner, Loubo, told them not to worry, offering them a free meal. However, Skywalker sensed a disturbance in the Force, something sinister and familiar—heralding the return of the renegade Sith Lord Maul.
Onderon Rebellion
Following a plea from a rebel cell on Onderon, the Jedi Council considered helping them fight the Separatists. Skywalker suggested training the rebels in subversive combat tactics. Though it bordered on terrorism, the High Council sent advisors to the rebel cell for the upcoming battle. On the Nu-class transport Valkyrie 2929, Skywalker, Tano, Rex, and Kenobi reached the planet and met Steela Gerrera, who guided them to the rebel base, where they met her brother, Saw. The team trained the rebels to combat droids, until Separatist probe droids discovered their outpost and attacked, prompting the cell to enter Iziz.
After successful operations, Skywalker, Kenobi, and Rex returned to Coruscant to report to the Council, while Tano stayed as a liaison to the rebels, without revealing herself as a Jedi. They communicated with her to provide guidance and hired Hondo Ohnaka to deliver missile launchers to the Onderon rebels for the final assault. Skywalker attended the funeral service for Steela Gerrera.
Loss of Satine, Rescue of R2
Skywalker was present when the Jedi High Council discussed Maul's return with the chancellor, deciding to leave him alone even though they knew he was alive. Skywalker lent the Twilight to Kenobi, who used it to travel to Mandalore to rescue Satine Kryze. After landing on Mandalore, Kenobi vowed not to borrow another ship from Skywalker. However, the ship was shot down by Mandalorian commandos and destroyed as he escaped, moments before Kryze was murdered by Maul during the Mandalorian civil war. Skywalker was waiting for Kenobi when the Jedi Master returned to the Temple hangar, where Skywalker saw through Kenobi's attempt to hide his sorrow. Kenobi explained he had lost someone important to him and that he had struggled with his rage, something Skywalker knew all too well. Skywalker offered to come with him for a report to the Council, which Kenobi happily accepted.
Skywalker was later present when the Jedi Council sent Meebur Gascon and a team of Republic droids to steal an encryption module from the Separatists. Later, Skywalker participated in the Republic strategy conference on the space station [Valor](/article/valor_(space_station)]. On the station, he noticed the Renown was going too fast. Tarkin told Skywalker that they were scanning Rhydonium on the ship. Skywalker instantly realized it was a bomb. Skywalker was later contacted and informed by Gascon of R2's sacrifice. However, Skywalker refused to believe that his friend was gone and sent out salvage teams to scour the wreckage, retrieving R2's remains and repairing him. The two reunited, and Anakin was happy to have him back.
Approaching the Conclusion
Trial of Tano
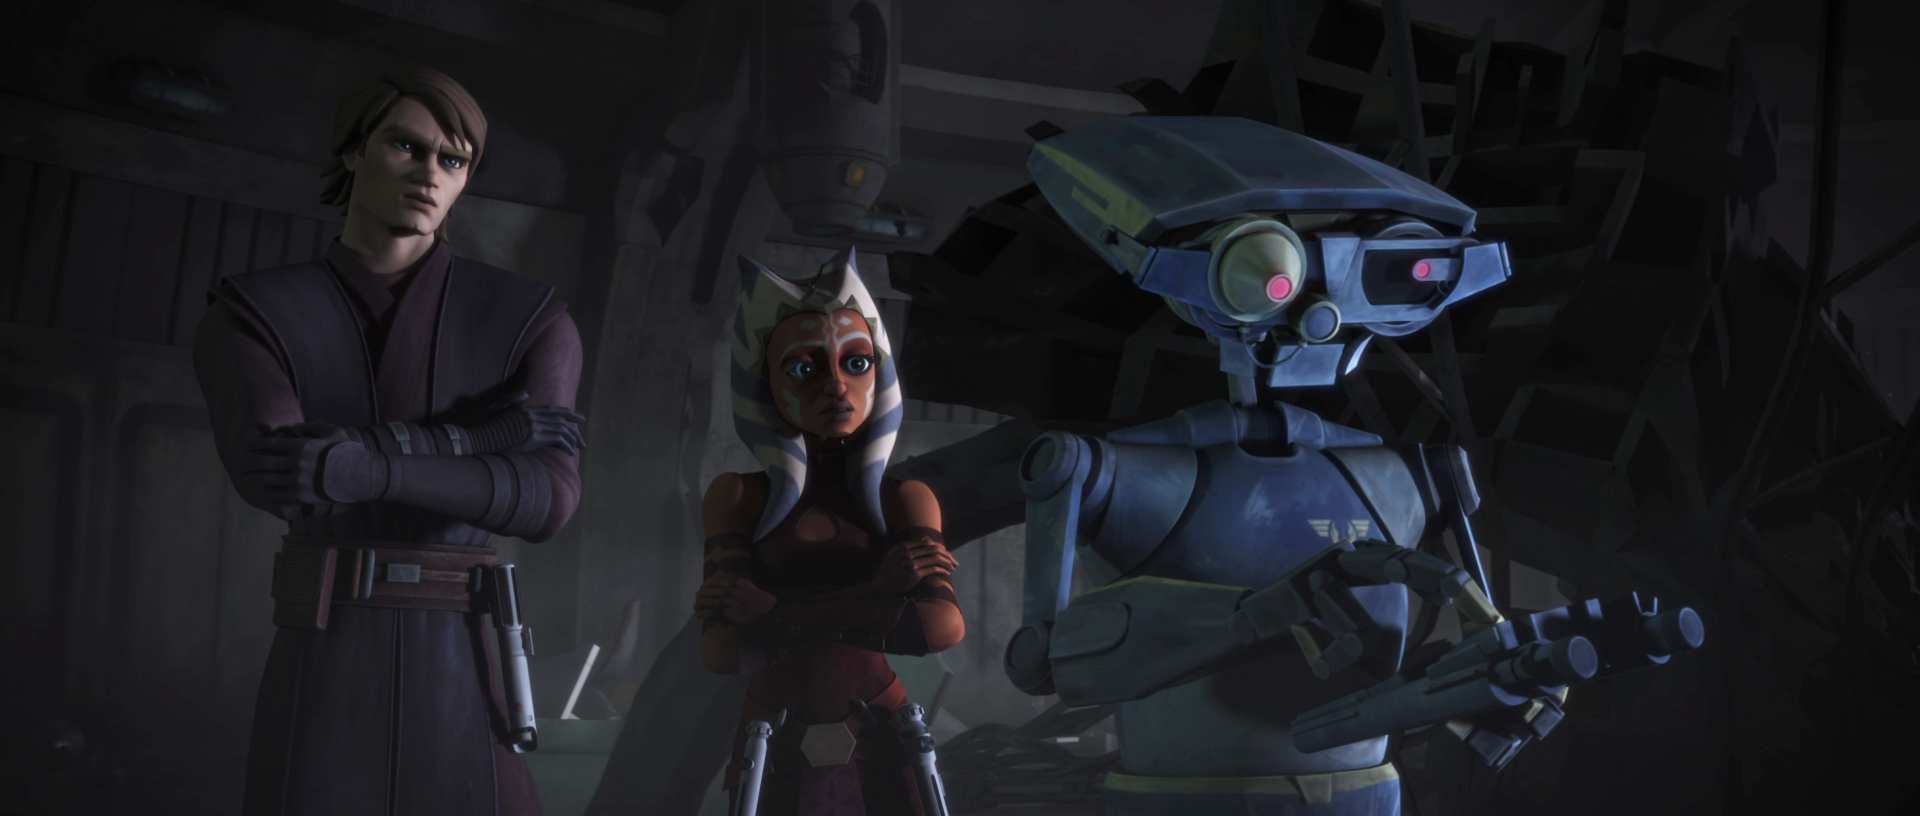
During the events known as the defense of Cato Neimoidia, Skywalker and Tano battled the Separatists using their respective Eta-2 Actis-class interceptors. However, they were urgently summoned back to the Jedi Temple due to the bombing of its hangar. As they were away when the explosion occurred, Skywalker and Tano were tasked with leading the investigation to identify the perpetrator, who was believed to be a Jedi. Upon arriving at the scene of the crime, they encountered Russo-ISC. Skywalker instructed Russo-ISC to accompany Tano in interviewing witnesses, while he himself entered into a meditative state within the hangar. After failing to gain any insight through meditation, Skywalker rejoined Tano, who informed him of their missing suspect, Jackar Bowmani. This information subsequently led them to Bowmani's wife, Letta Turmond, who eventually confessed under duress that she had been supplying Bowmani with nano-droids, although she refused to disclose her motivation.
Skywalker attended Yoda's eulogy for the six Jedi who perished in the explosion, and later took the opportunity to speak with Tarkin. Subsequently, Skywalker and his Padawan were called to the war room, where they received a briefing about a Separatist attack on Saleucami. During this briefing, Tarkin informed them that Turmond had requested to speak with Tano. When Tano was framed for Turmond's murder and subsequently imprisoned, Skywalker was prohibited from visiting her. He eventually tracked her down during her escape, following her into the pipelines.
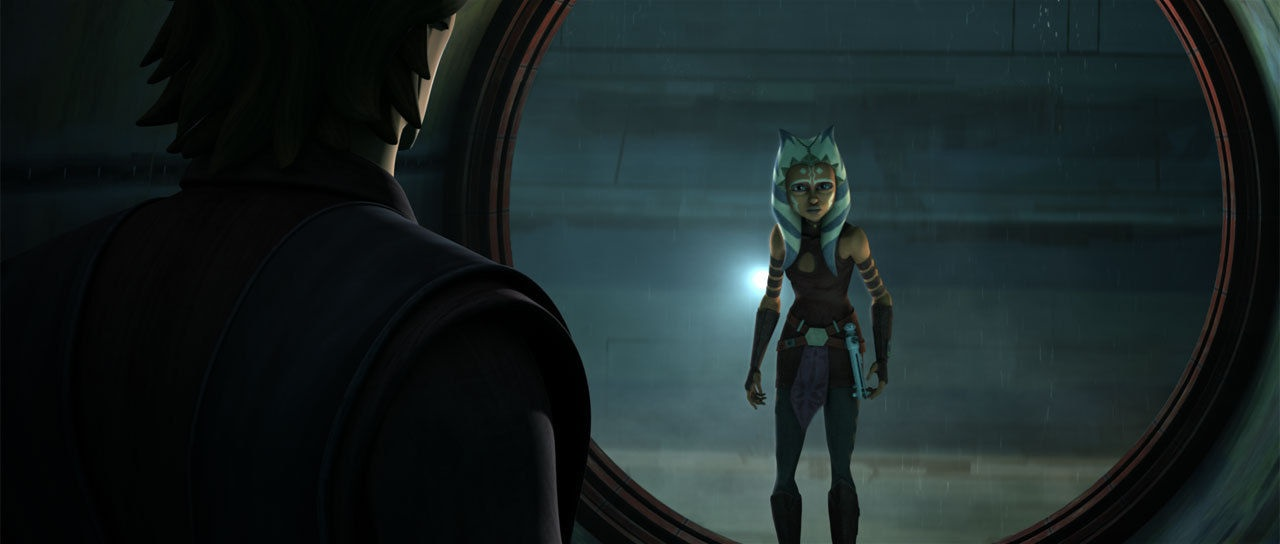
In private, they acknowledged their unwavering trust in each other. Skywalker implored Tano to surrender and present her case to the Council, but she refused to accept responsibility for an act she did not commit. She asked Skywalker to trust her, and then jumped onto a passing ship, escaping into the Coruscant underworld.
After Tarkin accused Tano of sedition, Yoda assigned Skywalker and Plo Koon to locate her, despite Windu's reservations, who believed Skywalker was too emotionally invested to make objective decisions. Nevertheless, after she was captured, Skywalker escorted her back to the Temple. He was later summoned to the Chamber of Judgment along with Tano. He was angered to discover that the Council had already reached a verdict, rendering the meeting a mere formality, and they proceeded to expel her from the Order. Resentful towards the Council, he enlisted his wife, Amidala, to defend Tano at her trial before departing to capture Ventress himself.
Skywalker soon located and interrogated Ventress. She admitted that she had intended to turn Tano in to the authorities, but changed her mind when she realized that Tano had been abandoned by Skywalker and the Jedi Order, just as she herself had been abandoned by Dooku. She also mentioned that the person who attacked Tano had stolen her lightsabers and that Tano had contacted Barriss Offee for assistance. After threatening to kill Ventress if she lied, Skywalker traveled to the Temple, where he questioned Offee in her quarters, ultimately engaging her in a duel. After defeating her, Skywalker brought Offee to the Republic military base where Tano was being judged. The Mirialan Padawan confessed, resulting in the dismissal of all charges against Tano.
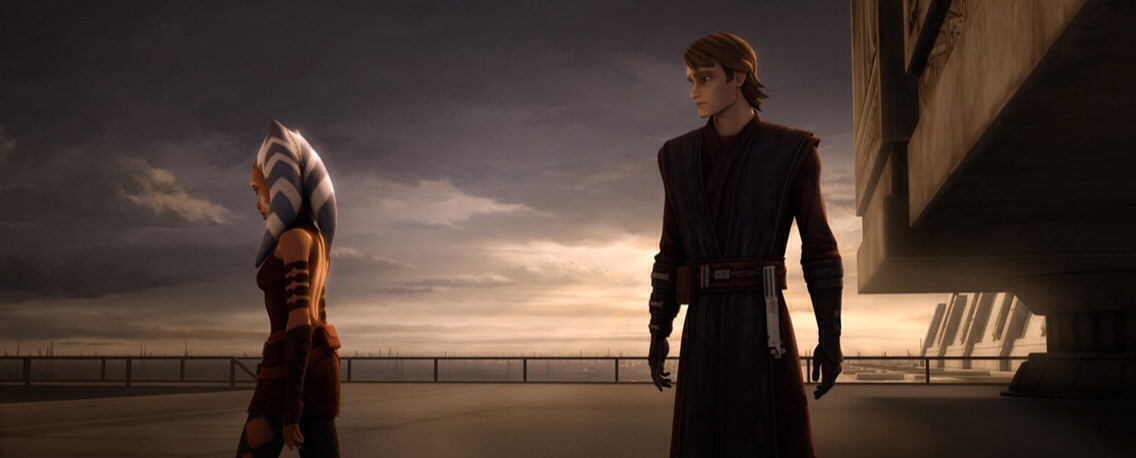
Back at the Temple, Skywalker and the Council offered Tano an apology and invited her to rejoin the Order, with Skywalker presenting her with her severed Padawan braid. However, Tano declined the offer, leaving Skywalker with her braid and expressing her apologies. As she left the Temple, Skywalker followed her, urging her to reconsider. Tano, however, declared that she felt she could no longer remain with the Order because of their lack of trust in her. Despite Skywalker's passionate pleas and his mention of his own past contemplation of leaving the Order, she chose to leave. Tano's departure had a profound impact on Skywalker, intensifying his feelings of isolation as he bore the burden of being the prophesied Chosen One. The circumstances surrounding her departure also heightened his frustration with the High Council, whom he felt had betrayed her by not supporting her innocence. With Tano no longer present to balance his worries and passions, Skywalker's attention increasingly focused on Amidala.
Kamino conspiracy
Shortly after Tano's departure from the Jedi Order, Skywalker, along with Jedi Generals Tiplar and Tiplee, and the 501st, were dispatched to take control of Ringo Vinda's planet-wide station from Admiral Trench. After an extended period of stalemated combat, they managed to push Trench's forces to the brink of collapse. However, one of Skywalker's troopers, Tup, intentionally murdered General Tiplar, forcing Skywalker to order a retreat for his and Tiplee's troops. He then had Tup examined to determine if he had been brainwashed by the Separatists, but no evidence of such manipulation was found. Despite this, Tup continuously repeated the phrase "Good soldiers follow orders" and exhibited signs of amnesia. Despite not finding anything conclusive, Skywalker sent Tup to Kamino for further investigation.
After Tup's shuttle was destroyed and he was taken prisoner by Trench, Skywalker investigated the wreckage. Realizing that Tup was not among the dead, Skywalker decided to infiltrate the Separatist lines. Accompanied by Rex and Fives, Skywalker reached the Separatists' hangar and discovered that Commander Kraken had Tup aboard his shuttle. Skywalker and the others boarded the shuttle and eliminated Kraken's crew, including Kraken himself, who refused to reveal the reason for Tup's abduction. Skywalker then arranged for Tup to be transported to Kamino with Fives and Rex as escorts.
Following the conclusion of Skywalker and the 501st Legion's involvement on Ringo Vinda, and the death of Tup, Skywalker and the High Council were informed by Shaak Ti that Fives had attempted to kill the Chancellor. Windu, aware that the Jedi had not been asked to participate in the manhunt, allowed Skywalker and Rex to secretly search for the clone. They were soon contacted by Kix, who informed them that Fives wanted to meet with them at a warehouse in Level 1325. Upon entering the warehouse, Anakin and Rex complied with Fives' request to drop their weapons. Subsequently, they were surrounded by a ray shield, prompting Skywalker to question Fives' motives. However, he and Rex listened to the fugitive's account of the situation. Skywalker refused to believe that the Chancellor was involved in the conspiracy surrounding the inhibitor chips, but their conversation was interrupted by the arrival of the Coruscant Guard. Skywalker witnessed them gun down Fives, who died in Rex's arms.
He would report the event to Yoda, Windu, Ti, and the Chancellor, who was swift to lie to the Jedi that all had been the product of a parasite from Ringo Vinda, one that had caused the decay of Fives and Tup's chips; Palpatine urged the Jedi to leave the matter behind, for each day, they grew "closer and closer to victory." From that point onward, Skywalker was faced with the fact that Tup and Fives, two of his best men, had died under mysterious circumstances, which became another weight on his emotional health.
Clovis returns
Upon his wife's mission to Scipio and subsequent reencounter with Rush Clovis, when she was accused of sabotage and her aide Teckla Minnau was killed, Skywalker was sent to protect Amidala, but was upset to hear that Clovis was involved. Nevertheless, he agreed to help her, and together, they went to Clovis's residence to assist in exposing the Banking Clan's corruption. As they were about to depart along with Clovis, Skywalker defended both Senators from the bounty hunter Embo and his pet anooba, Marrok. The trio were able to escape Embo, thanks to R2-D2, and make their way to Coruscant. Escorted by Yoda, they met with Palpatine and other members of the Jedi Council, and Senator Bail Organa, during which Skywalker's animosity towards Clovis was perceived by Yoda.
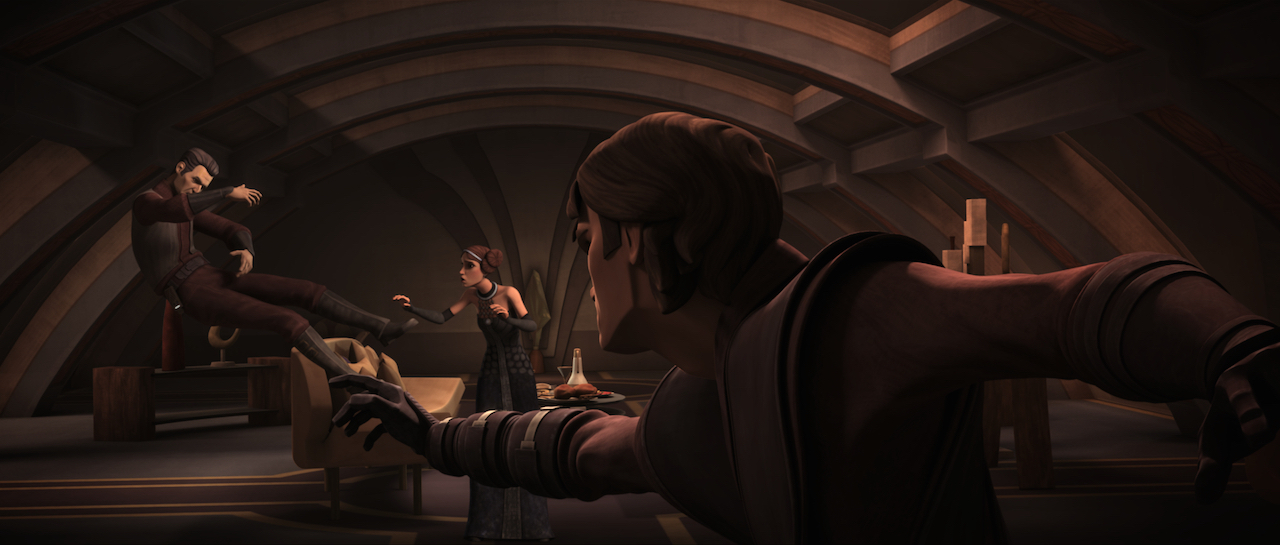
As Amidala was appointed by the Chancellor to work closely alongside Clovis to investigate the Banking Clan, Skywalker questioned her decision, as he wanted her away from Clovis, whom he greatly distrusted. Though he demanded that she step away from her assignment, she refused and left with Clovis. Frustrated, Skywalker went to his quarters, where Kenobi (at the behest of Yoda) spoke to him, revealing that he was well aware of Skywalker's feelings for Amidala, and asked his former apprentice not to let himself carried away by them before leaving. Later that night, Skywalker went to his wife's apartment, where he found Clovis about to kiss her, for which Skywalker briefly Force choked him—before giving him a one-sided beatdown despite Amidala's protests, willing to kill Clovis in his jealousy.
Before it was too late, he realized his mistake and stopped, only for Captain Typho to enter. Much to his surprise, Clovis lied about the attack. As they carried Clovis to Amidala's bedroom, Skywalker tried to apologize to his wife, but she told him to stay away from her. Only when they were alone afterward, she questioned their marriage, too steeped in lies and deception, and decided that they take a break from one another after admitting to not feeling safe around Skywalker—who, in turn, admitted to being unable to control himself, even though he did not know why.
Clovis was accepted as the new head of the Banking Clan by the Senate, and Skywalker confided to the Chancellor of his distrust in Clovis, which Palpatine shared. Soon, when Clovis apparently joined the Separatists the day after (which Skywalker found strange), and Scipio was occupied by Separatists, Skywalker was then sent to retake Scipio. After landing, Skywalker went to Clovis's office and tried to reason with Clovis to make him let go of Amidala. At that very moment, though, a vulture droid crashed into the office, making it unstable and causing Amidala and Clovis to fall, but Skywalker grabbed them both, each with one hand. As he could not hold the two, Clovis told Skywalker to let go of him, but he would not; Clovis apologized to Amidala and then let go of Skywalker, falling to his death. Though Skywalker and Amidala reconciled, the Banking Clan came under the control of the Chancellor.
Sifo-Dyas' secret
After Jedi Master Plo Koon intercepted a distress call from a lost shuttle and discovered Sifo-Dyas's lightsaber, its late owner being responsible for the secret creation of the Clone Army, the investigation into Sifo-Dyas's death was reopened. Skywalker and Kenobi were dispatched to Felucia, where they interviewed tribal leaders to uncover the circumstances surrounding the Jedi Master's demise. Kenobi learned that the Felucians had cremated his body and that another Jedi had been with him when he was killed and reported their findings to Master Yoda.
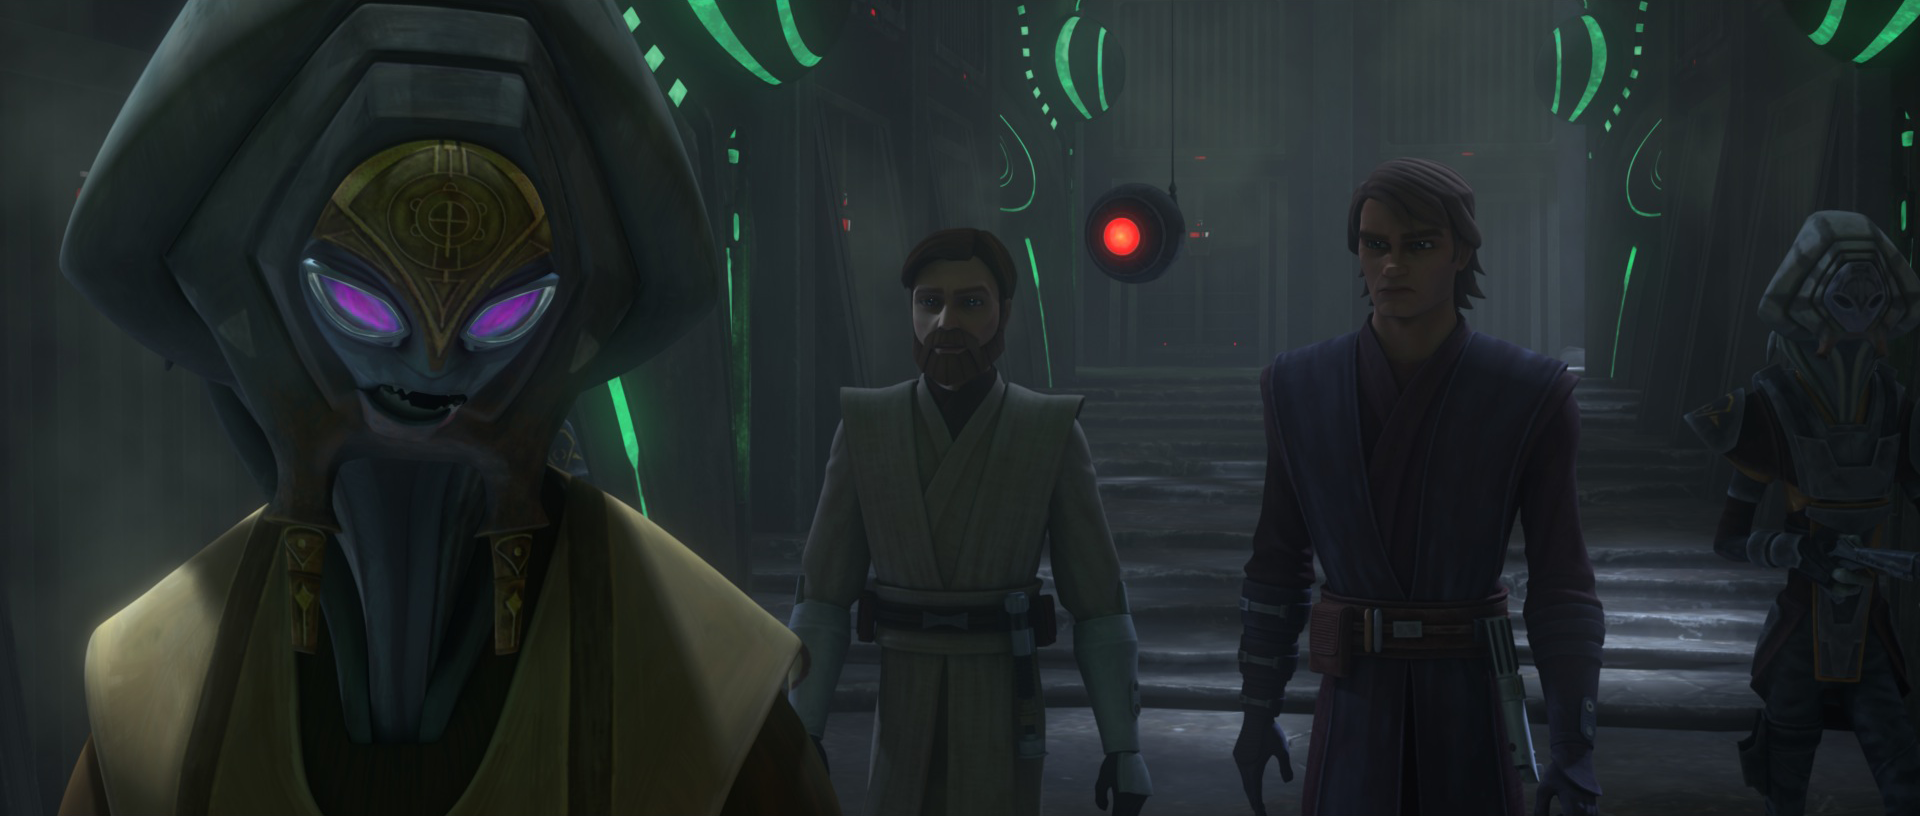
Subsequently, the two were sent to Oba Diah after former Chancellor Finis Valorum informed Yoda that Sifo-Dyas had been sent to negotiate with the Pyke Syndicate to prevent an underground war. However, Valorum stated that no other Jedi had accompanied Syfo-Dyas, only his personal aide Silman. On Oba Diah, Kenobi and Skywalker encountered Lom Pyke, who initially denied any involvement. However, Kenobi noticed that he was wearing Valorum's crest, prompting Skywalker to seize the necklace and demand that the Pyke cease his deception. Lom finally relented and revealed that they had been paid by a man named Tyranus to destroy Sifo-Dyas's shuttle. Fearing the individual who had commissioned the death of a Jedi, they had kept Silman imprisoned for ten years as insurance.
Upon meeting Silman, they realized that he had become mentally unstable after his prolonged confinement. They were unable to extract much information from him before Dooku arrived and killed him before Skywalker and Kenobi's eyes. After engaging Dooku in combat, they discovered that the man called Tyranus was, in fact, the Count. Although Skywalker pursued the count after he tried to escape on a Coruscant Freighter, Dooku escaped aboard his solar sailer, leaving the Jedi without the chance to learn more about the clone army. Nevertheless having learned the identity of Tyranus, they informed the Council of their findings, only for them to question why Dooku had been behind the creation of the clone army, and what the game of the yet-unidentified Dark Lord of the Sith was playing.
Yoda's journey
Following Yoda's brief contact with Qui-Gon Jinn, Yoda asked Skywalker to meet him on the Temple's training grounds to discuss their experiences on Mortis, where both he and Kenobi had spoken to Jinn. Skywalker, too, was doubtful about the possibility of an individual retaining their identity after death, so Yoda left him to rest. Later, when Yoda submitted himself for medical examination by Rig Nema, Skywalker informed them that Chancellor Palpatine wanted to hold an emergency meeting with Yoda, to which Windu responded, leaving the Grand Master free to undergo a deprivation ritual. Skywalker, Mundi, Kenobi, Koon, and Nema watched over the old master until Kenobi interrupted it before it was too late, and Yoda claimed to have spoken with the dead.
With the Council concerned about his health, Yoda was placed under the surveillance of guards, so the Jedi Master asked to Skywalker to see him. Yoda asked Skywalker to help him escape, which Skywalker did. Accompanying Yoda to his fighter, Skywalker even lent R2-D2 to Yoda to accompany him on a journey that would take him to Dagobah, a mysterious planet and Moraband, to learn that the Jedi Order would not win the war, and that there was "another Skywalker."
An Excuse to Fight
Following a skirmish against Tofen's Raiders, during which Kenobi's starfighter malfunctioned, a Republic fleet came under attack by Separatists. Skywalker and Kenobi, along with the young Wookiee Viiveenn, were present during the assault. They debated over who should engage in combat and who should ensure Viiveenn's safety. When a missile entered the hangar bay and detonated near the three, Skywalker and Kenobi were separated, leaving Kenobi with Viiveenn. Skywalker used the debris blocking his path as justification to join the battle. As another explosive entered the hangar, Kenobi reluctantly brought the Wookiee aboard his starship, remarking that Skywalker frequently acted in such a manner.
Mission to Batuu
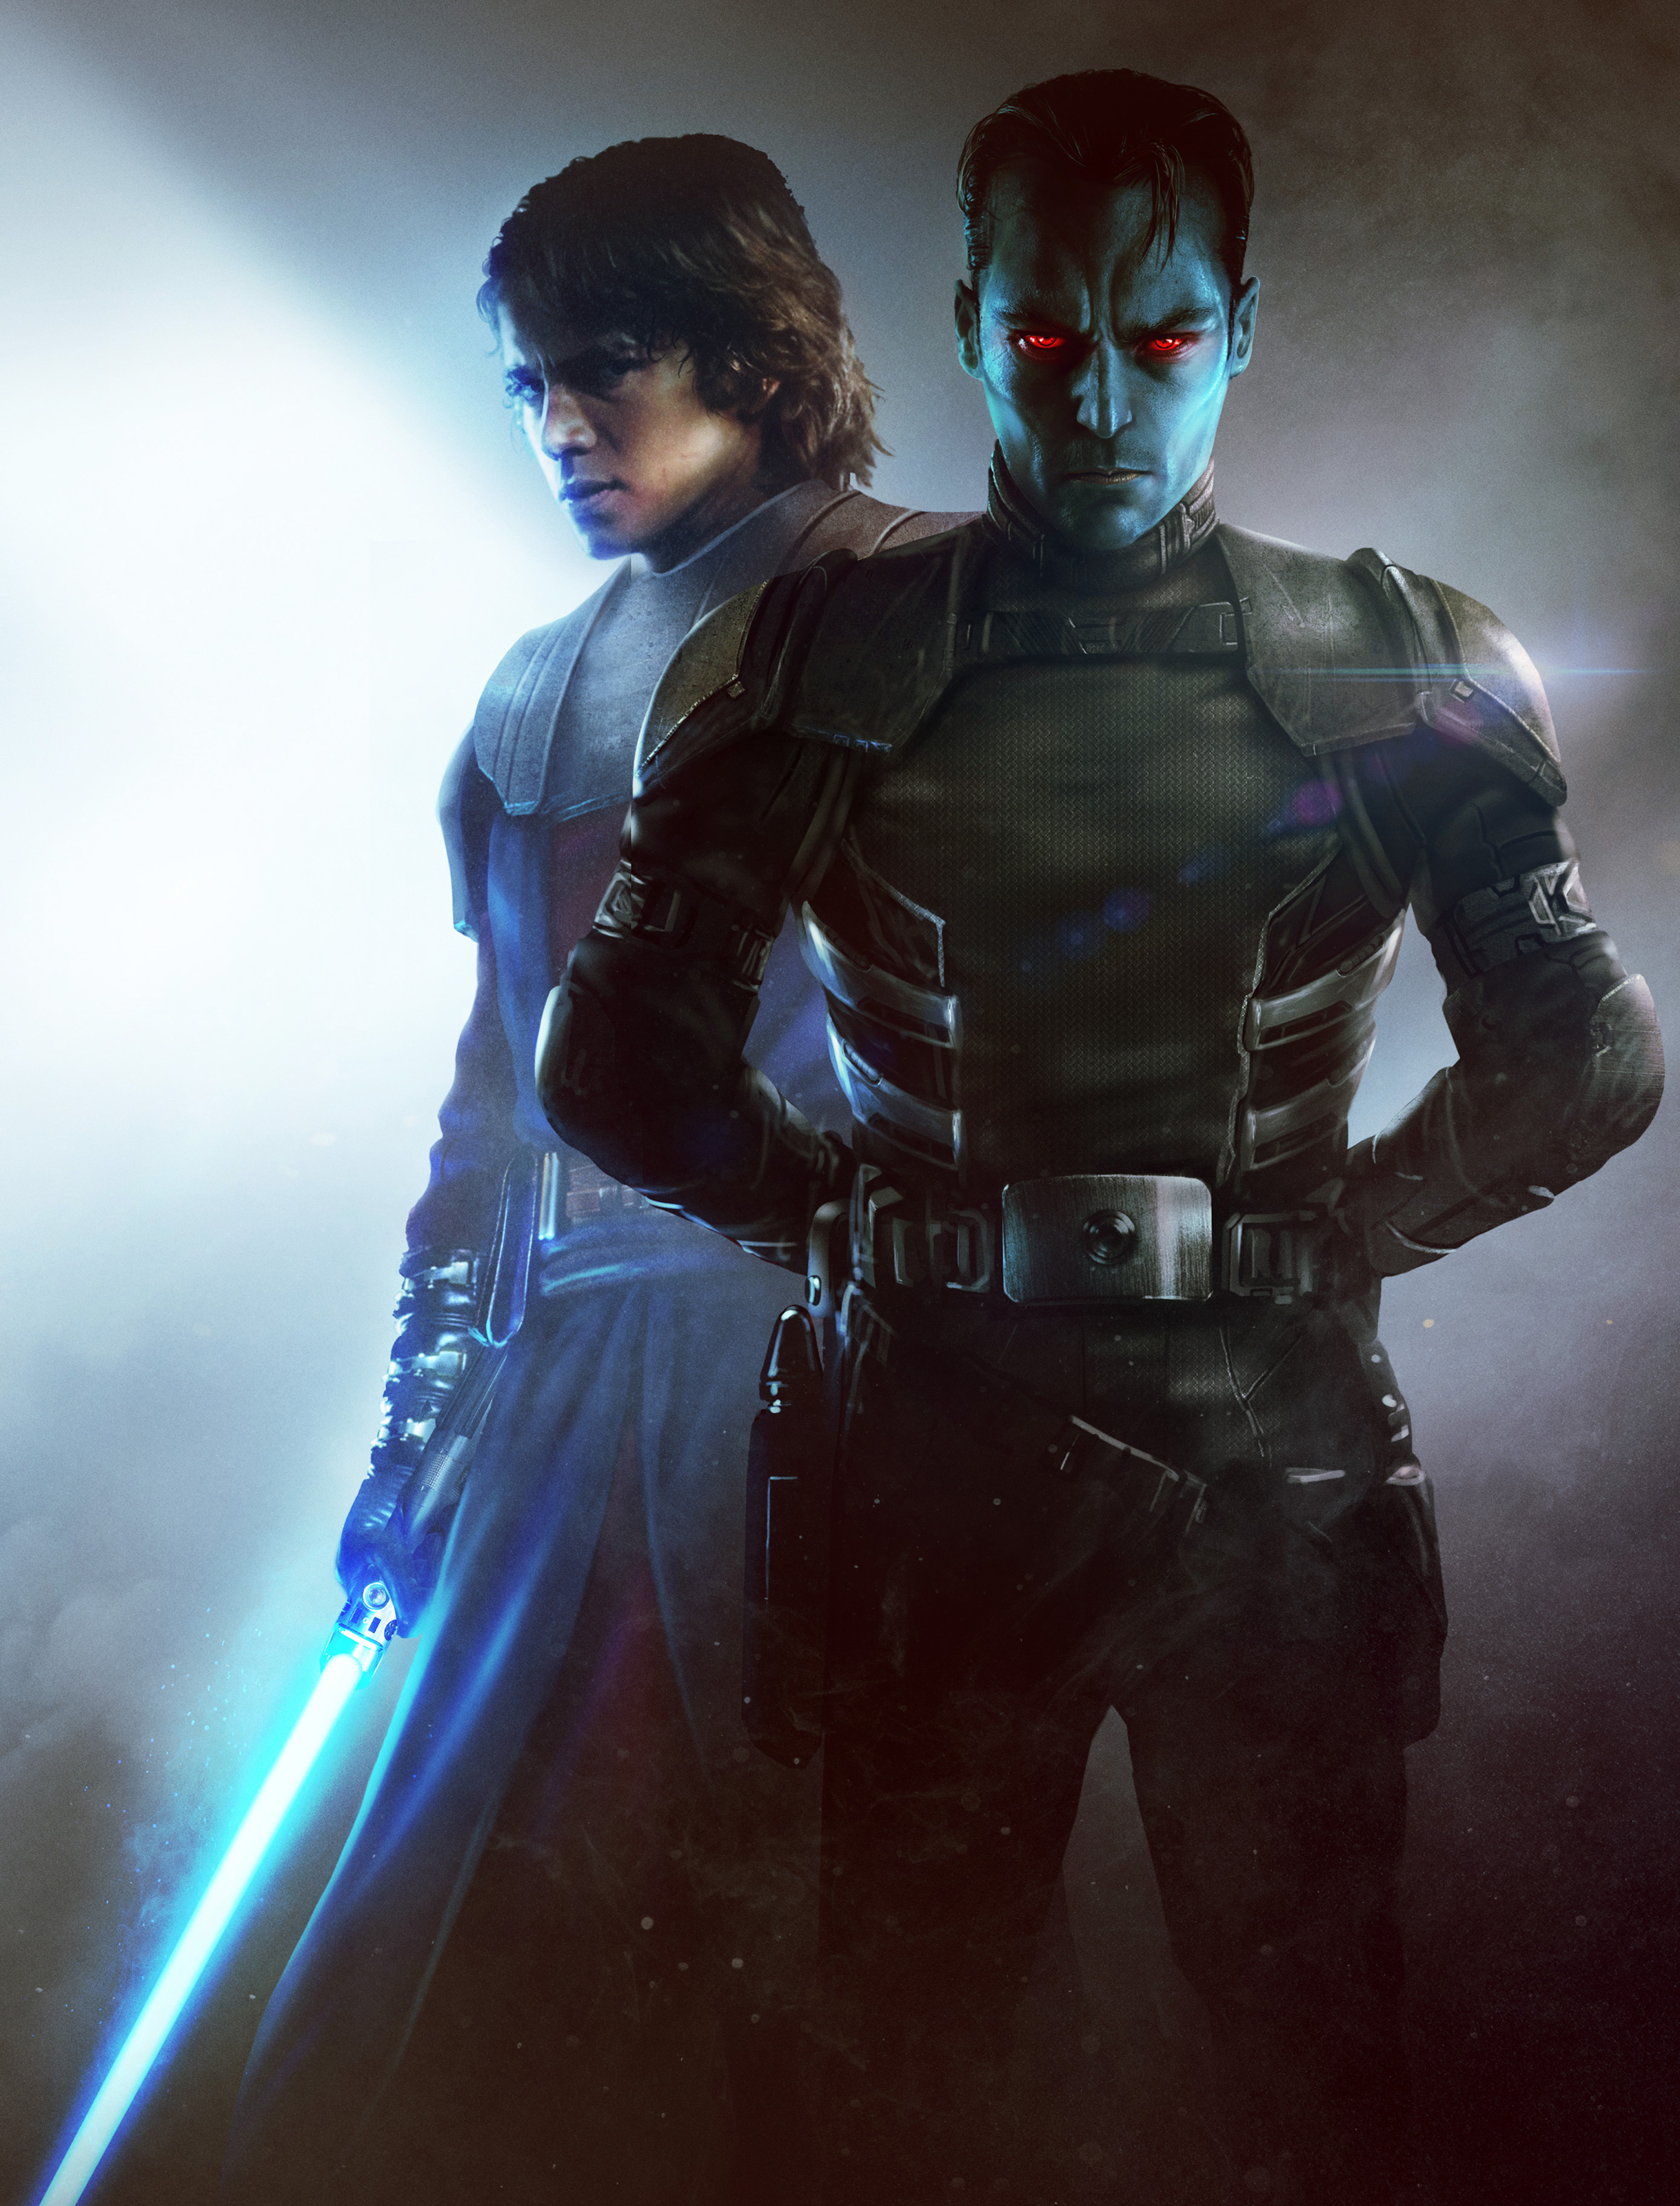
Senator Amidala informed Skywalker that one of her former handmaidens, Duja, had discovered something near Batuu that warranted investigation by both of them. Unfortunately, Skywalker was unable to accompany her due to being deployed to battle. Skywalker permitted her to travel to Batuu alone. Upon returning to Coruscant after the battle, Skywalker was unable to locate any records of Amidala's travels in the Outer Rim. After another battle, Skywalker received a message that Amidala's ship had been located on Batuu. Skywalker, along with R2-D2, took his interceptor to Batuu. En route to Batuu, Skywalker encountered a freighter. Skywalker spoke with the freighter's captain, Chiss Defense Fleet Commander Mitth'raw'nuruodo, known simply as Thrawn. Unknown to Skywalker, Thrawn was actually a Senior Captain. Skywalker accepted Thrawn's assistance in finding Amidala and Duja.
Skywalker located Amidala's ship near Batuu's Black Spire Outpost. There, he intervened in a dispute between a group of smugglers who were angered by the ship's presence in their landing spot. Skywalker engaged them in combat until Thrawn intervened to stop the fight. Together, they examined Amidala's ship and learned about Duja's ship, Nomad Four. The two then went to a nearby cantina. After speaking with the bartender, Skywalker and Thrawn were attacked by four assailants. They managed to eliminate the assailants. Thrawn suspected that the assailants had been sent to assassinate Skywalker and that there was a fifth assailant nearby. Skywalker and Thrawn devised a plan to capture the remaining assailant. After Skywalker took one of the assailant's body, he pretended to suffer engine damage in his interceptor. After landing, Skywalker was attacked by an assassin droid but was able to destroy it. Thrawn captured the assailant and discovered his freighter, which belonged to the Separatists.
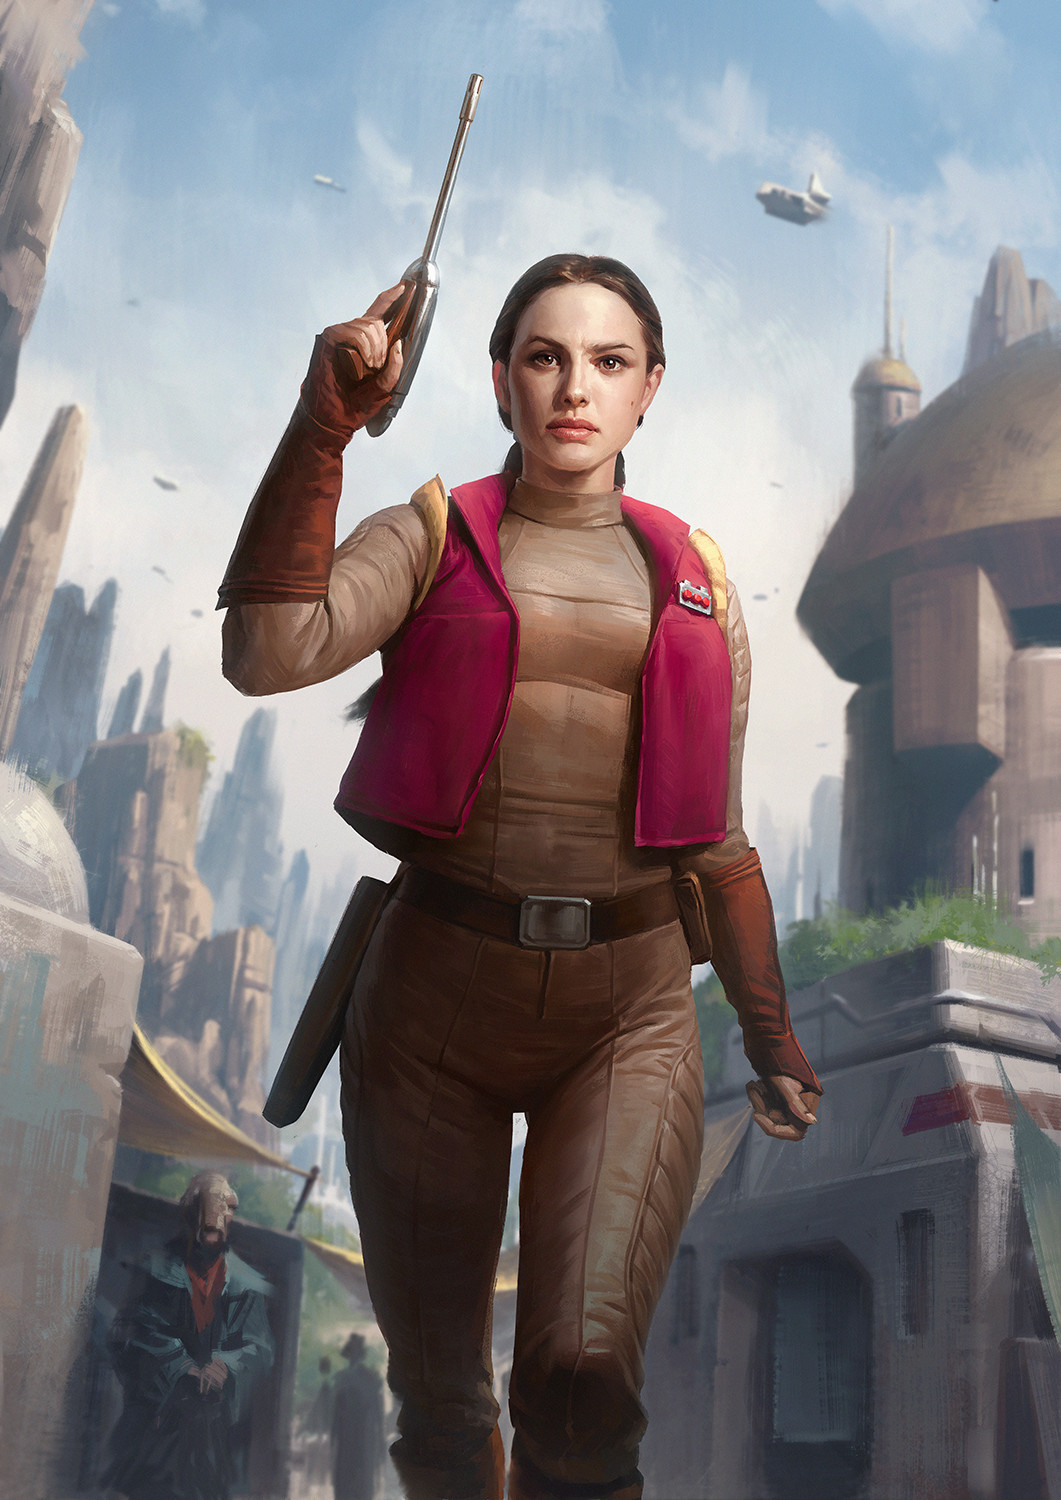
Skywalker and Thrawn eliminated the robotic sentinels guarding the transport ship. They then discovered its destination was Cermau. On their return to Black Spire, a group of criminals ambushed them. Thrawn, utilizing the speeder's capabilities, successfully apprehended the thugs. Skywalker and Thrawn then interrogated cargo inspector Oenti, who disclosed that the cantina's proprietor, Janott, had connections to the Separatist leader Duke Solha. They discovered that supplies were being sent to a droid factory. After learning of Duja's demise, Skywalker shared his insights on the Clone Wars' political complexities with Thrawn. Skywalker and Thrawn then journeyed to Mokivj, where they uncovered the Separatist's Cortosis mining operation and the associated factory.
Following the discovery of the factory by Skywalker and Thrawn, and their subsequent change of attire, Skywalker contacted the duke. He informed him of his plan to infiltrate the factory, reporting Captain Boroklif's incapacitation, the issues at Black Spire, and the Separatist's impending defeat. The Serennian was taken aback by this information, inquiring about the fate of the Separatist captain and his allies. Skywalker replied that he could not confirm their status, as he was not present at the battle's conclusion.
The Jedi Knight proposed delivering the lost cargo to the Separatist's factory. Solha accepted, stating he would activate the shield upon their arrival at the courtyard's coordinates, emphasizing his caution and intention to only open it when absolutely necessary, just as they were in position to land. Upon landing, the Serennian duke, accompanied by two B2-series super battle droids and two squads of B1-series battle droids, greeted the Jedi Knight and the Chiss commander, inquiring about their possession of the Republic astromech droid, R2-D2. The Jedi responded that he had found the droid and considered it a valuable asset for purchase.
The Chiss commander and the Jedi Knight questioned the Serennian regarding the fate of Amidala's former handmaiden, Duja. They also explained how they acquired Boroklif's ship, the Larkrer, and that the ship's preset hyperspace course led them to Mokivj. The Serennian asked who had programmed that course, to which they responded that they assumed it was the Separatist captain. The duke then warned the pair that they had no further bargaining chips and that he could order their execution. However, the pair revealed another preset hyperspace course, locked beneath the current one by a two-stage encryption passcode, with each of them possessing one half. Skywalker then introduced his Chiss companion as "Brix." The Serennian commanded his droids to lower their weapons and escort them into the factory. As the group entered the building, the lights went out. The Jedi swiftly dispatched a droid squad and projected his lightsaber to the building's apex, concealing his Jedi identity from the duke. Subsequently, two B2s sealed the courtyard's entrance, preventing any potential escape.
Solha was aware of a Jedi presence within the factory, but he was unaware of Skywalker's identity. He then directed Thrawn and Skywalker towards makeshift prison cells. Denouncing the Jedi as a thief, the Serennian aimed his blaster at Skywalker from the corridor opposite his cell, stating that the Jedi's presence was Skywalker's fault and thus deserving of execution. He then declared himself as Duke Solha of the Free System of Serenno, to which the Jedi Knight questioned if he should be impressed. Solha replied that he should be, and that he would be at some point. A B2-series super battle droid confiscated all their weapons and communication devices, including Thrawn's concealed hold-out blaster hidden in his boot. Solha and the droids departed with R2, who strategically leaked oil to mark their path for Skywalker. They exited and secured the cell doors.
The pair decided to conduct an experiment to determine if Skywalker's wife had been captured, was free, or was not present at the factory. They would wait two hours as Amidala, and if she did not join them in the detention block, they would attempt to escape and locate her. Thrawn inquired if the Jedi recognized the ship in the courtyard, identifying it as an ore carrier loaded with ore. This indicated that the location was not a mere staging ground but a manufacturing facility. He also pointed out areas of higher and lower activity, as Chiss possess superior infrared vision compared to humans, allowing him to discern heat signatures. He noted that their current location was the most active section.
Following their self-imposed test, the Chiss fashioned a cord from the clothing acquired from the Larkrer and unlocked their cells from within. Meanwhile, the senator had infiltrated the building, accompanied by a group of local factory maintenance workers: Cimy, Huga, and LebJau. They had gained access through the service level, a typically unguarded route known only to them and the Separatists. Amidala had promised the group a substantial reward, to be provided by her Uncle Anakin, in exchange for their assistance in accessing the factory. The group eventually reached the detention block, subdued the droid guards, and discovered the Chiss and Jedi Knight inside.
After Skywalker introduced the Chiss to the newcomers, the group devised a plan to retrieve Skywalker's lightsaber. This involved Thrawn and the senator venturing alone to the roof. Despite the Jedi's apprehension about her going alone with the Chiss, he ultimately agreed. After the Chiss and the senator departed, the Jedi began exploring the factory, discovering a section dedicated to the production of cortosis B2 super battle droids, guarded by the duke, his relatives, and droid sentries. The Serennians were protected by clone trooper armor reinforced with cortosis. Skywalker's attempt to confuse Solha's droids only alerted the Serennians to his presence. Skywalker then retreated and resumed his search for the senator.
On the building's roof, Amidala and Thrawn successfully retrieved Skywalker's lightsaber. They also observed spheres descending onto the factory, which were part of a Chiss operation to recover a deflector shield generator. The senator requested the Chiss commander's continued assistance, but he insisted that his mission took precedence. Meanwhile, the disarmed Jedi used the Force to anticipate the movements of Solha and his droid sentries, avoiding direct confrontation as he navigated the factory's maze of rooms and corridors. He eventually reunited with his wife, who returned his lightsaber and informed him of Thrawn's abandonment. Their meeting coincided with the Chiss Ascendancy's raid on the factory to secure the shield generator. Skywalker engaged several B2s, discovering that their armor neutralized lightsabers and deflected blaster bolts. However, he utilized the Force to disable them.
In the meantime, Amidala evacuated the workers with LebJau before the factory's destruction. Thrawn rejoined the senator and the Jedi Knight, who revealed that the ore was cortosis, capable of deflecting blaster bolts and neutralizing lightsabers due to its high energy absorption rate. They learned that the ore was mined in the adjacent river and used to fortify the battle droids' armor, rendering them nearly invulnerable, a development that could drastically alter the course of the Clone Wars. Thrawn then consented to the factory's destruction after the Chiss retrieved the shield generator.
Amidala confronted the duke, who was clad in clone trooper armor reinforced with cortosis, which shielded him from her husband's lightsaber. He declared that the factory would solidify his position within the Confederacy. Recognizing Skywalker and the senator, he dismissed Amidala's demand for surrender, asserting his confidence in his survival and his unwavering resolve.
In another area of the factory, the Jedi and Chiss discovered the Separatists were also manufacturing clone trooper armor reinforced with cortosis. The Jedi speculated that they intended to infiltrate the Republic by deploying Serennian troopers disguised as clone troopers to Coruscant. After Skywalker and Thrawn defeated the battle droids guarding the room, and the senator incapacitated the Serennian duke with her grappling hook, they exited the factory and initiated its destruction. Skywalker resolved to destroy the mine as well, preventing the Separatists from reestablishing their operations on Mokivj. Despite Amidala, Thrawn, and LebJau's pleas, he disregarded their objections and destroyed the mine, incurring the wrath and devastation of the already ravaged Mokivj, as the resulting explosion, amplified by the cortosis, triggered widespread volcanic activity and environmental degradation.
The mission concluded with a catastrophe for Mokivj and the downfall of Solha's ambitions. In an attempt to thwart the Separatist's efforts to produce cortosis battle droids, Skywalker inadvertently unleashed lava, ash, and smoke upon the planet's prime agricultural land and water sources. Unbeknownst to Skywalker, the cortosis within the mine redirected the explosions' thermal energy deep into the planet's crust, triggering volcanic activity and leading to widespread devastation, deforestation, and desertification on Mokivj. The explosive force had far exceeded the mere collapse of the mine's tunnels.
The catastrophe compelled LebJau to relocate to another planet, as the population ostracized him for collaborating with those responsible for Mokivj's ruin. Thrawn had cautioned Amidala that Skywalker's plan appeared reckless, yet she recognized his unwavering determination, leaving the Jedi and Senator to lament their actions as they surveyed the devastated world. Thrawn had also expressed doubt to Skywalker regarding his theory about the clone armor being used to infiltrate the Republic, citing the high risk of detection. Despite Skywalker's ill-conceived plan, Thrawn maintained his respect for the man and continued to regard him as a formidable warrior.
Bombing of the Temple
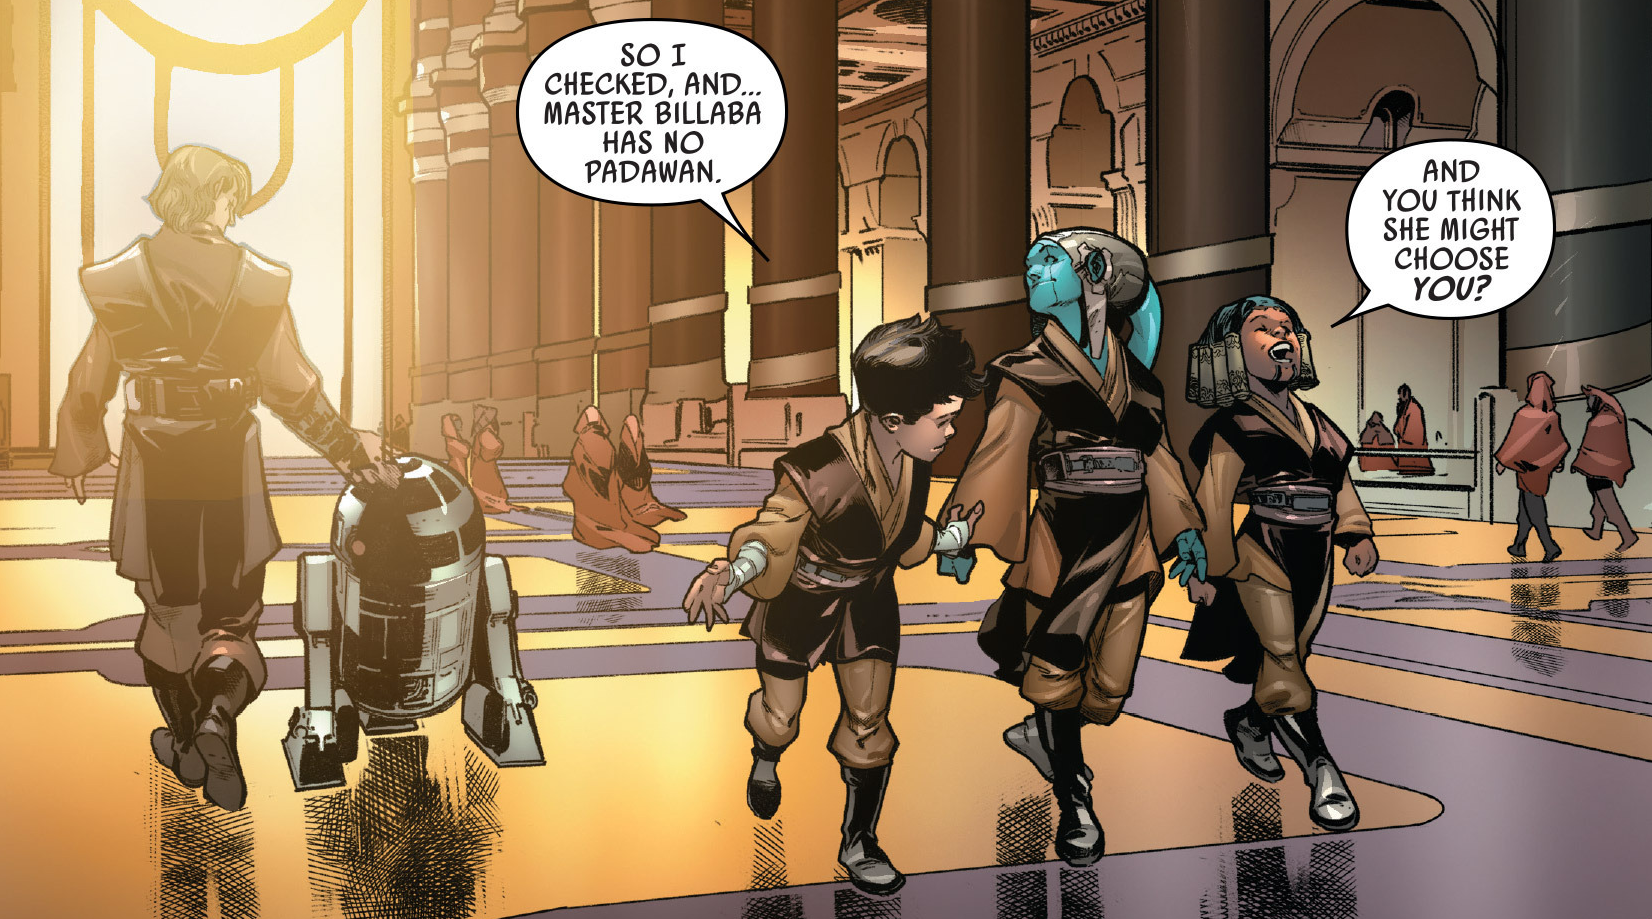
Prior to the Separatist captain Rackham Sear's bombing of the Jedi Temple, Skywalker and R2-D2 were present. Depa Billaba and Caleb Dume successfully thwarted the bomber's plan.
Amidala's departure
As Amidala prepared for a mission to Clabron, Skywalker insisted on accompanying her, believing it to be a diplomatic endeavor to Duro. After Amidala's reassurance, Skywalker consented to remain on Coruscant, sharing a kiss with her. He was surprised to find Amidala's handmaiden, Moteé, witnessing their intimate moment, though Amidala assured Skywalker that Moteé was discreet.
Crystal crisis on Utapau
During the final months of the war, Kenobi and Skywalker were dispatched to Utapau to investigate the perplexing death of Jedi Master Tu-Anh. Upon arriving in Pau City, Inspector Jen June escorted them to the morgue to examine the deceased. After inspecting the body, they visited the location where she was discovered, concluding that she had been struck in the optic nerve by a sniper using a precision laser dart. Locating the sniper's vantage point through the building's owner, Garri, the two Jedi learned of MagnaGuard involvement and suspected General Grievous's participation. They also instructed Inspector June to analyze a slimy substance they had found, identified as the secretion of an Amani's skin.
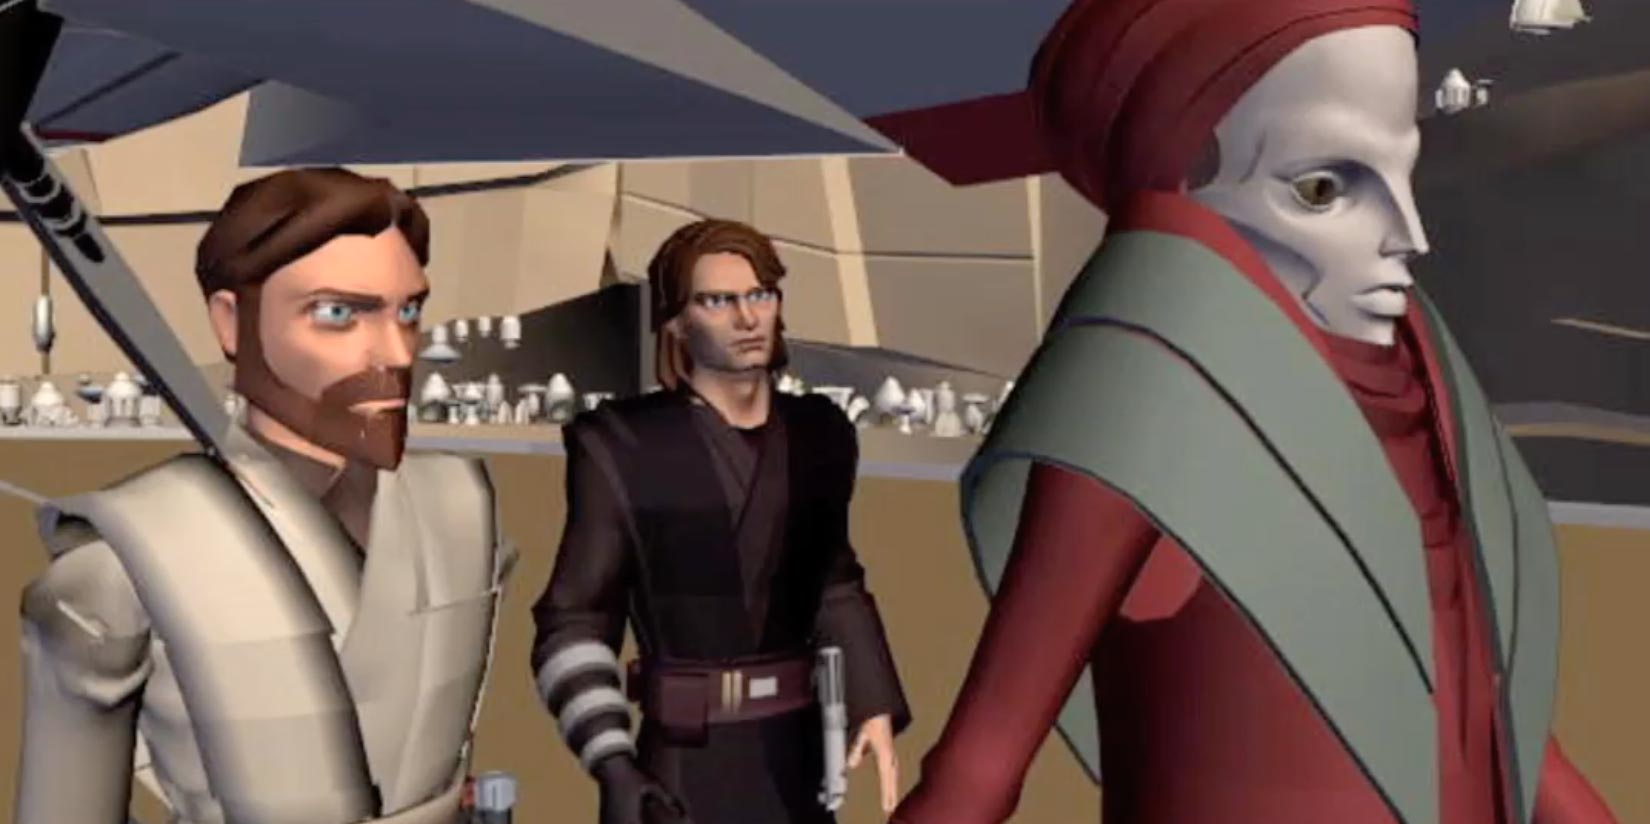
Despite Governor Torul Blom's urging to leave Utapau, Kenobi and Skywalker persisted, renting two dactillions to consult with the leader of an Amani tribe. The leader revealed that an Amani outcast had entered one of the caves. The two Jedi ventured inside, encountering MagnaGuards. Despite resistance, they coerced the droids into revealing the involvement of the Sugi and promptly returned to Inspector June. Soon after, the pair attended the funeral for Tu-Anh.
Upon reaching the Amani settlement they sought, the Amani dispersed, prompting Skywalker and Kenobi to pursue the tracks of one who appeared to be their leader. During the pursuit, Skywalker mentioned Tano for the first time since her departure, and Kenobi inquired if he wished to discuss it, but Skywalker declined. Kenobi then suggested establishing a camp and resting. However, he persisted on the subject, leading Skywalker to express his longing for Tano and his resentment towards the High Council for abandoning her. To Skywalker's dismay, Kenobi defended the Council's authority, asserting that Tano had chosen to leave and had allowed her emotions to cloud her judgment, a violation of the Jedi code. Kenobi then suggested he rest, but Skywalker refused so that he could keep the first watch. Finally, he questioned Kenobi on what would happen if he had turned out to be a "major disappointment," but Kenobi wanted to believe it would never happen.
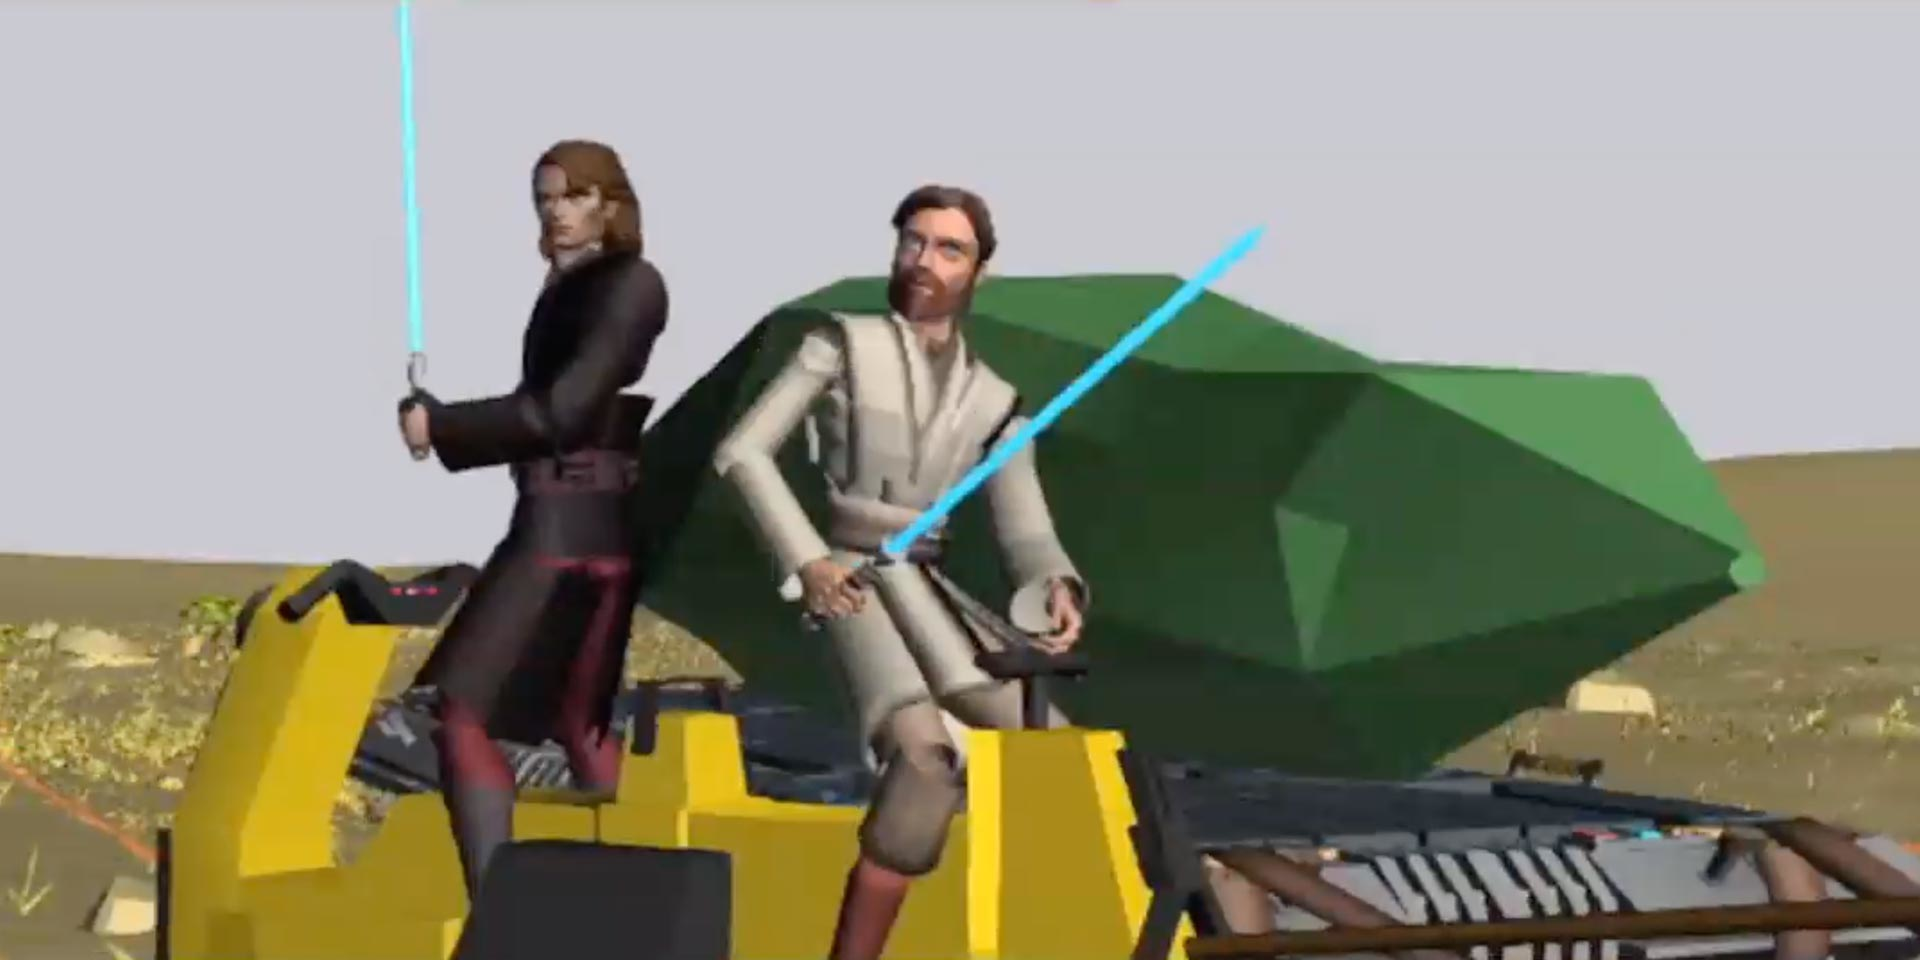
However, they both succumbed to sleep and were captured by a group of Sugis led by Chong, who presented them before Endente as Kenobi told Chong of their "intention" to buy weapons. They discovered Endente was, in fact, selling a kyber crystal, and Skywalker prompted him to display it before finalizing the deal. Escorted to the starship where the crystal was stored, they broke free from their captors, and Skywalker eliminated all the Sugi, except for Endente, who fled. After uncovering the enormous kyber crystal within the ship, the two Jedi managed to transport it across Utapau's plains to Pau City, where Blom surrounded them with his men and Grievous's droids. As the kyber crystal was loaded onto a shuttle and dispatched to a ship in orbit, Kenobi and Skywalker commandeered a freighter to reclaim the crystal.
During the pursuit, Grievous damaged their ship, compelling them to execute a number five special. They crashed the ship to disable the hyperdrive and, using their escape pods, boarded the ship housing the crystal. Separated during the boarding, Kenobi was captured by Grievous, while Skywalker retrieved his lightsaber, located the crystal, and freed Kenobi. Working together, they navigated to the kyber crystal in the vault, where they were briefly trapped until a squad discovered them. Utilizing the crystal and the Force to incapacitate the squad, he reached a hangar, where Skywalker commandeered a shuttle to escape. Meanwhile, Kenobi reprogrammed several AATs to fire upon and overload the crystal, destroying both the crystal and the ship, while they narrowly escaped the explosion and returned to Coruscant to report to the Council.
Stationed on Coruscant
At a later time, while aboard a Venator-class Star Destroyer, Skywalker detected an unidentified ship, the Silver Angel, in restricted military airspace. Skywalker then inquired with Admiral Yularen about the transport's occupants. After closing his eyes and sensing Ahsoka Tano's presence through the Force, he chose not to dispatch a detachment to apprehend the crew, allowing Ahsoka and her companions to depart unhindered.
Vos and Ventress
Jedi Master Quinlan Vos was tasked by the Jedi Council with assassinating Dooku, aided by Asajj Ventress. However, during a mission to Raxus Secundus, the Jedi succumbed to the dark side due to Dooku's manipulations and Ventress's training. Ventress orchestrated a rescue mission, which failed, prompting her to contact the Jedi Council. Upon arriving at the Jedi Temple, Skywalker and Kenobi escorted her to the Council Chamber, where, despite Mace Windu's disapproval, Yoda dispatched Skywalker and Kenobi to accompany Ventress on a rescue mission for Vos above Taris. Soon, Kenobi, Skywalker, and Ventress were in the cockpit of her ship, the Banshee, to infiltrate the Separatist dreadnought from which Vos, or rather "Admiral Enigma," was issuing orders.
Stealthily, the three boarded the ship and made their way to the bridge, where they encountered Dooku instead of Vos. Skywalker engaged the Count in a duel, distracting him while Kenobi and Ventress located a captive Vos. Despite recognizing Vos's immersion in hatred, they escaped to the Banshee, and Skywalker joined them to flee the enemy ship and return to Coruscant. Back at the Jedi Temple, Skywalker witnessed the Council welcome Vos and pardon Ventress. That same night, Skywalker reunited with his wife, Amidala, for a moment of respite, during which Skywalker recounted the ordeal. Amidala suggested that Ventress's love might be Vos's path back from the dark side, leaving Skywalker speechless.
A month later, Skywalker was dispatched alongside Kenobi, Vos, and Akar-Deshu on a mission to seize a Separatist supply storage base and redistribute the supplies to those in need. However, their mission was compromised when Vos, unbeknownst to them, arranged the base's destruction. Following another failed mission attributed to Vos, he was suspected of treason. Skywalker and Kenobi were sent to monitor Vos and Ventress as they were deployed to assassinate Dooku during the second battle of Christophsis. When they observed Vos attempting to force the Count to reveal his master, Darth Sidious, rather than kill him, Skywalker and Kenobi intervened, surprising and apprehending them.
However, Vos and Dooku soon escaped from the Vigilance, resulting in the deaths of Akar-Deshu and Kav Bayons, and boarded Ventress's ship, Banshee, to flee Christophsis. Skywalker ordered the Banshee to be fired upon, forcing the renegades to land on the planet below. He and Kenobi pursued the three injured fugitives to a Separatist-controlled tower, where they surrounded them. There, Skywalker and Kenobi witnessed what appeared to be Ventress's final moments, sacrificing herself to save Vos from Dooku's lethal Force lightning. After her death, Skywalker and Kenobi were joined by the redeemed Vos, and they attempted to capture Dooku, but to no avail. They then transported Ventress's body and Vos to Coruscant, where the fallen Jedi confessed his crimes and Kenobi defended Ventress.
A New Droid Army
After confiscating a Munificent-class star frigate with Squad 326, Skywalker was joined by Grand Master Yoda and informed about the mysterious Separatist project, Operation: Titan. Hacking into the frigate's datacore, they were able to discover that Operation: Titan was being overseen on the planet Enthenium. Together, Yoda and Skywalker traveled to a Separatist base on Enthenium to uncover more information about the supposed "weapon" that was being developed under Project: Titan. Once they snuck onto the base, Yoda climbed through the vents, found information on the "weapons", and confronted Grievous, who was stationed on the base. Meanwhile, Skywalker and Squad 326 were battling battle droids as the base went on alert. After Yoda came back and aided in the fight, the team escaped before reinforcements arrived. On the frigate once again, Skywalker was informed by Yoda that on Golatha the weapons being developed were a new army of megadroids four times taller than a human. Skywalker quipped that they should have expected the Separatists to eventually make their droids bigger.
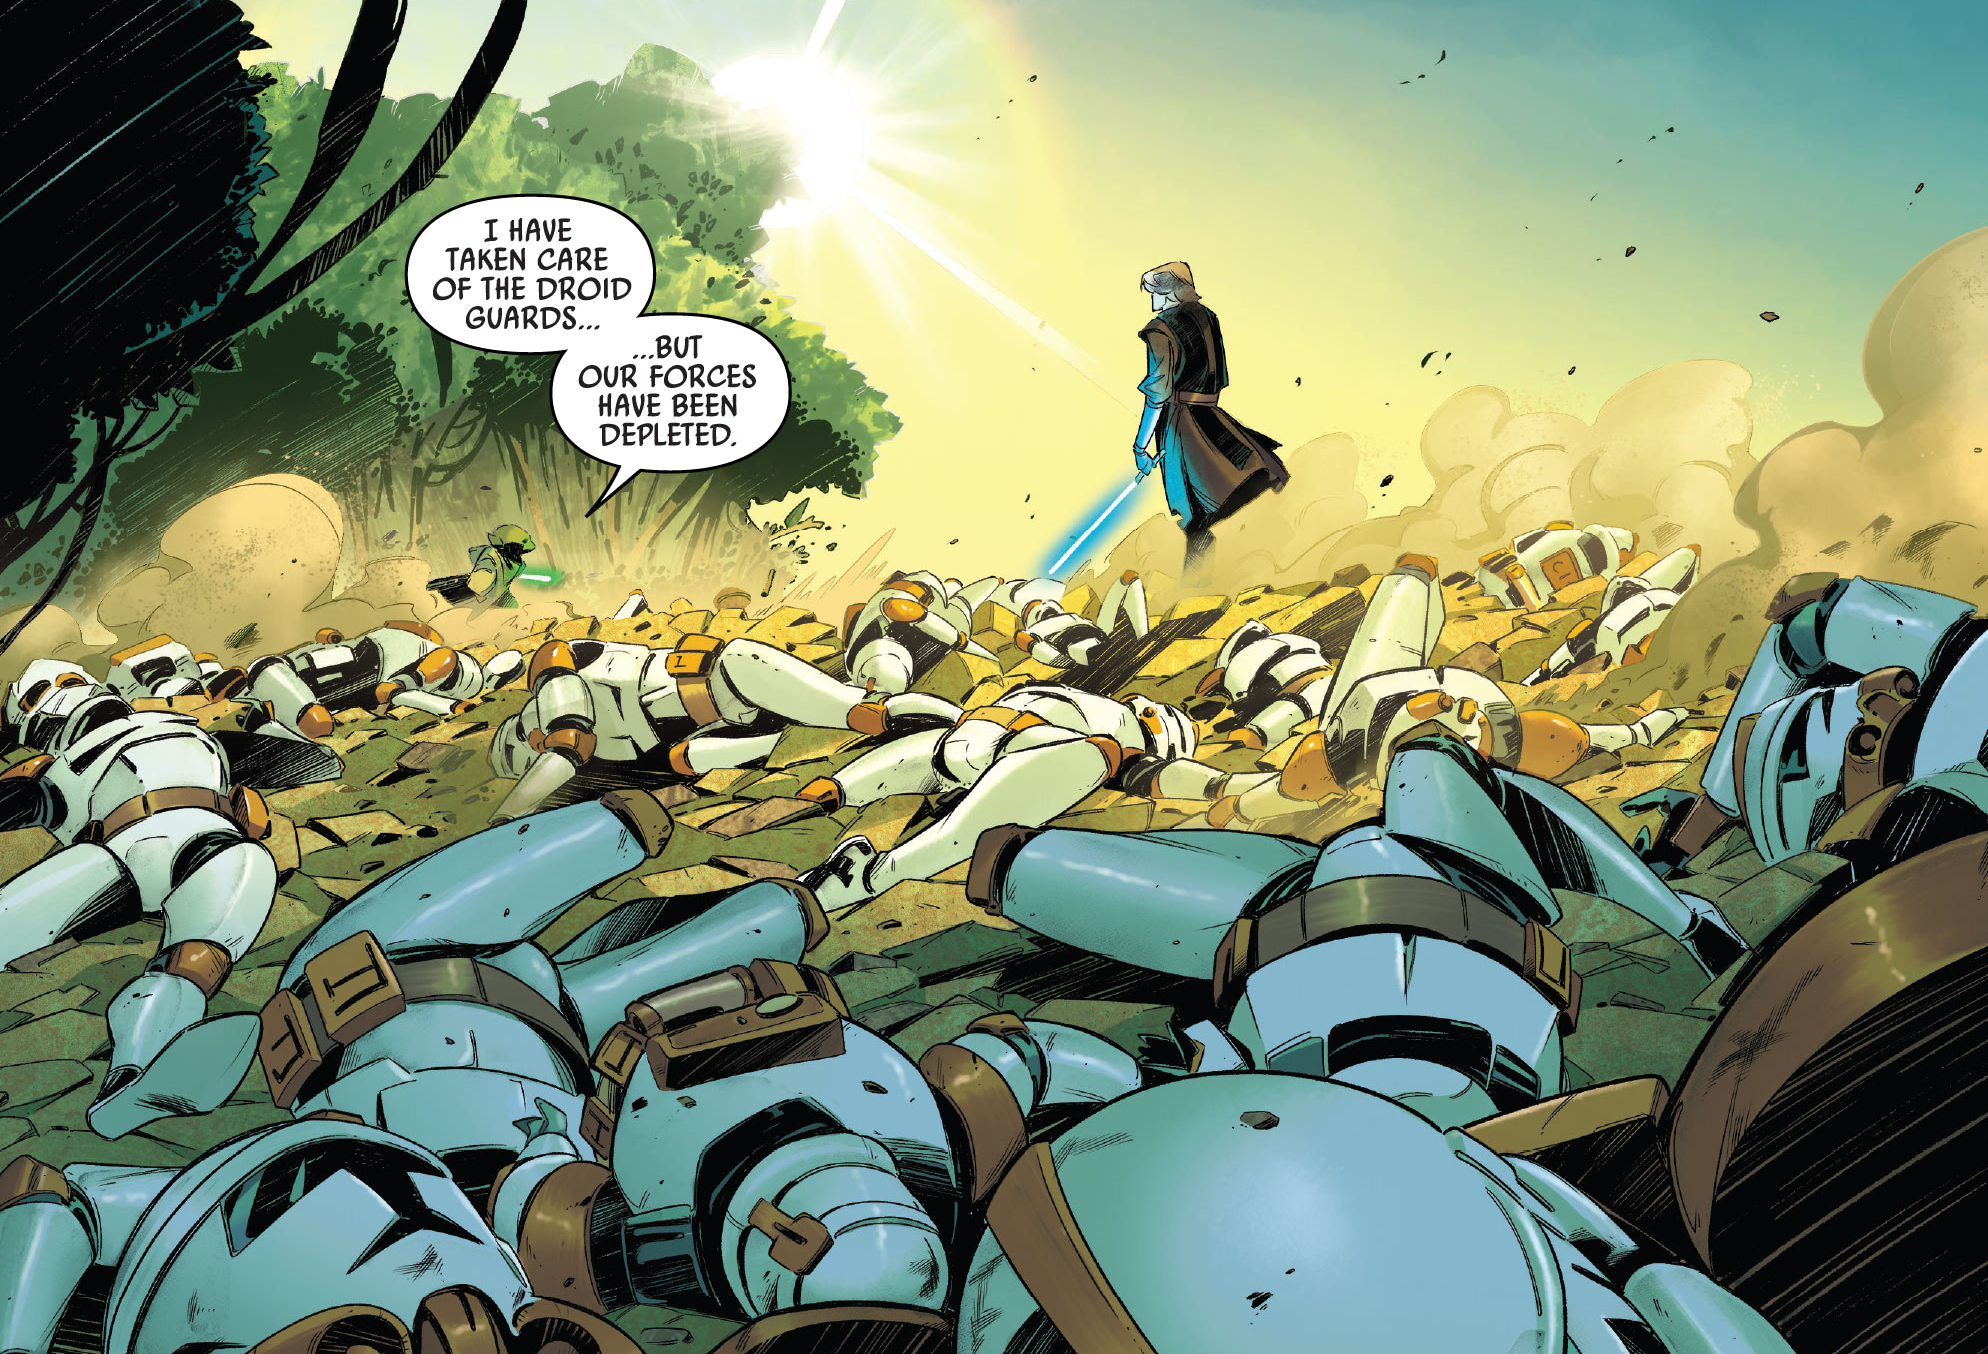
Skywalker and Yoda then informed the Jedi High Council via hologram about their planned mission to Golatha. Skywalker believed that, because the planet was small, the forces guarding the droid factory would also be small. Yoda warned against being overconfident, and suggested being more cautious. Master Windu agreed with Yoda and wished them luck, ending the transmission. Skywalker was offended by the idea that his plan was overconfident, doing an impression of what Yoda had said to mock him. Clone Captain Cesar interrupted their brief argument and informed them that they had arrived. On the planet's surface, Yoda and Skywalker surveyed the valley where the factory was, but found no above-surface structure. They determined that the factory was fully underground and that an access point must be in the valley. Yoda and Skywalker, along with Company 326 descended into the valley, and found no droid guards. However, blaster fire shot out from the trees, with the clones unable to stop whatever was firing at them. Yoda was able to stop the droid guards firing on them and find the hidden access point, but only after Cesar and rest of the company were all killed.
They entered the facility alone, with Skywalker noting that the size of an attacking army didn't matter anyways. After taking out more droids, Skywalker mentioned to Yoda that he only had eight thermal detonators, and hoped that would be enough. Upon entering the main area of the factory, they saw a massive assembly line manufacturing hundreds of megadroids. Skywalker didn't think they could destroy the whole thing, but Yoda pointed out the central column holding up the factory. Skywalker asked if he thought taking out the column would take out the whole facility. Yoda cheekily responded with an impression of what Skywalker had said earlier, with Skywalker having to admit that the impression was pretty good. They set the charges and escaped just in time for the factory to explode. However, a sound erupted that wasn't just the factory caving in. A single megadroid shot out from the explosion, and landed right in front of Skywalker and Yoda. Skywalker mentioned that it seems to big, to which Yoda replied that size was only a matter of perspective. They try attacking it, but its durasteel coating was stronger than normal, leaving it immune to lightsaber attacks. Yoda climbed inside the megadroid, but just as the door closed, the droid shot itself into space. Skywalker, terrified for the Grand Master's safety, got into his interceptor and chased after the droid. To his relief, Yoda responded to his calls. Skywalker had to stop the rotation of the droid so he could attach his ship to it, but the droid was too big and heavy. He tried asking Yoda to do it, but since the droid was disabled and the cold vacuum of space weakened Yoda, he could not. Yoda instead instructed Skywalker to do it, reminding him that there was no heavy, nor big or small, just light. Calmed down, Skywalker was able to stop the droid. Yoda then cut his way out from the inside and jumped to Skywalker's ship, and he was able to get Yoda to safety. On the ship Aspirant, Skywalker told Yoda that their destruction of the Golatha factory had put the Separatists back years at least. He then asked Yoda if he really was too weak to stop the rotation of the droid on his own. Yoda said he'd never tell him.
Anaxes

Following the Cato Neimoidia assault, Skywalker and Windu were deployed to Anaxes to participate in the Battle of Anaxes, tasked with defending the Republic shipyards. As Republic casualties increased, Captain Rex shared his suspicion with Skywalker and Windu that the Separatists had obtained knowledge of his strategies. In response, Windu tasked Rex and Commander Cody with leading a squad, including Clone Force 99, on a covert mission behind enemy lines to infiltrate a Separatist Cyber Center, while he and Skywalker maintained their position. The possibility of a mission to Skako Minor was discussed with the general staff, a mission Skywalker anticipated the Jedi High Council would sanction. Clone Sergeant "Hunter" confirmed that The Bad Batch would accompany them. Despite Rex's eagerness to proceed, Skywalker informed him of a prior commitment, and despite Rex's urgency, they both proceeded to the barracks.
Skywalker entered the barracks, holding Rex's helmet, to contact Amidala, while Rex kept watch outside. Skywalker apologized for his absence, and as they spoke, Obi-Wan Kenobi approached Rex. The Clone Captain knocked on the door to hasten Skywalker's departure. Skywalker confided his concerns about Rex, fearing that personal feelings were influencing his decisions on the mission, a trait Amidala humorously attributed to Skywalker himself. Outside, Rex attempted to conceal Skywalker's activities. However, Skywalker and Amidala concluded their conversation, and both departed for Skako, but not before Kenobi revealed his awareness of the conversation with Amidala, jokingly hoping Skywalker had greeted Padmé on his behalf. Startled, the Jedi halted, realizing his attempt at secrecy was unsuccessful, and responded with a knowing glance to his master before walking away.

Upon arriving on Skako Minor aboard the Marauder, Skywalker was seized by the Poletec riding their keeradaks, prompting Rex and the Bad Batch to pursue them to their village to rescue the Jedi General. After apologies and explanations, the chief assisted them in reaching Purkoll, which they infiltrated with some difficulty. Upon reaching the antechamber, Foreman Wat Tambor transmitted a message accusing them of violating the Techno Union's neutrality and deployed droid reinforcements. While Skywalker, Hunter, Wrecker, and Crosshair engaged the droids, Rex and Tech discovered Echo—alive, but transformed into a cyborg.
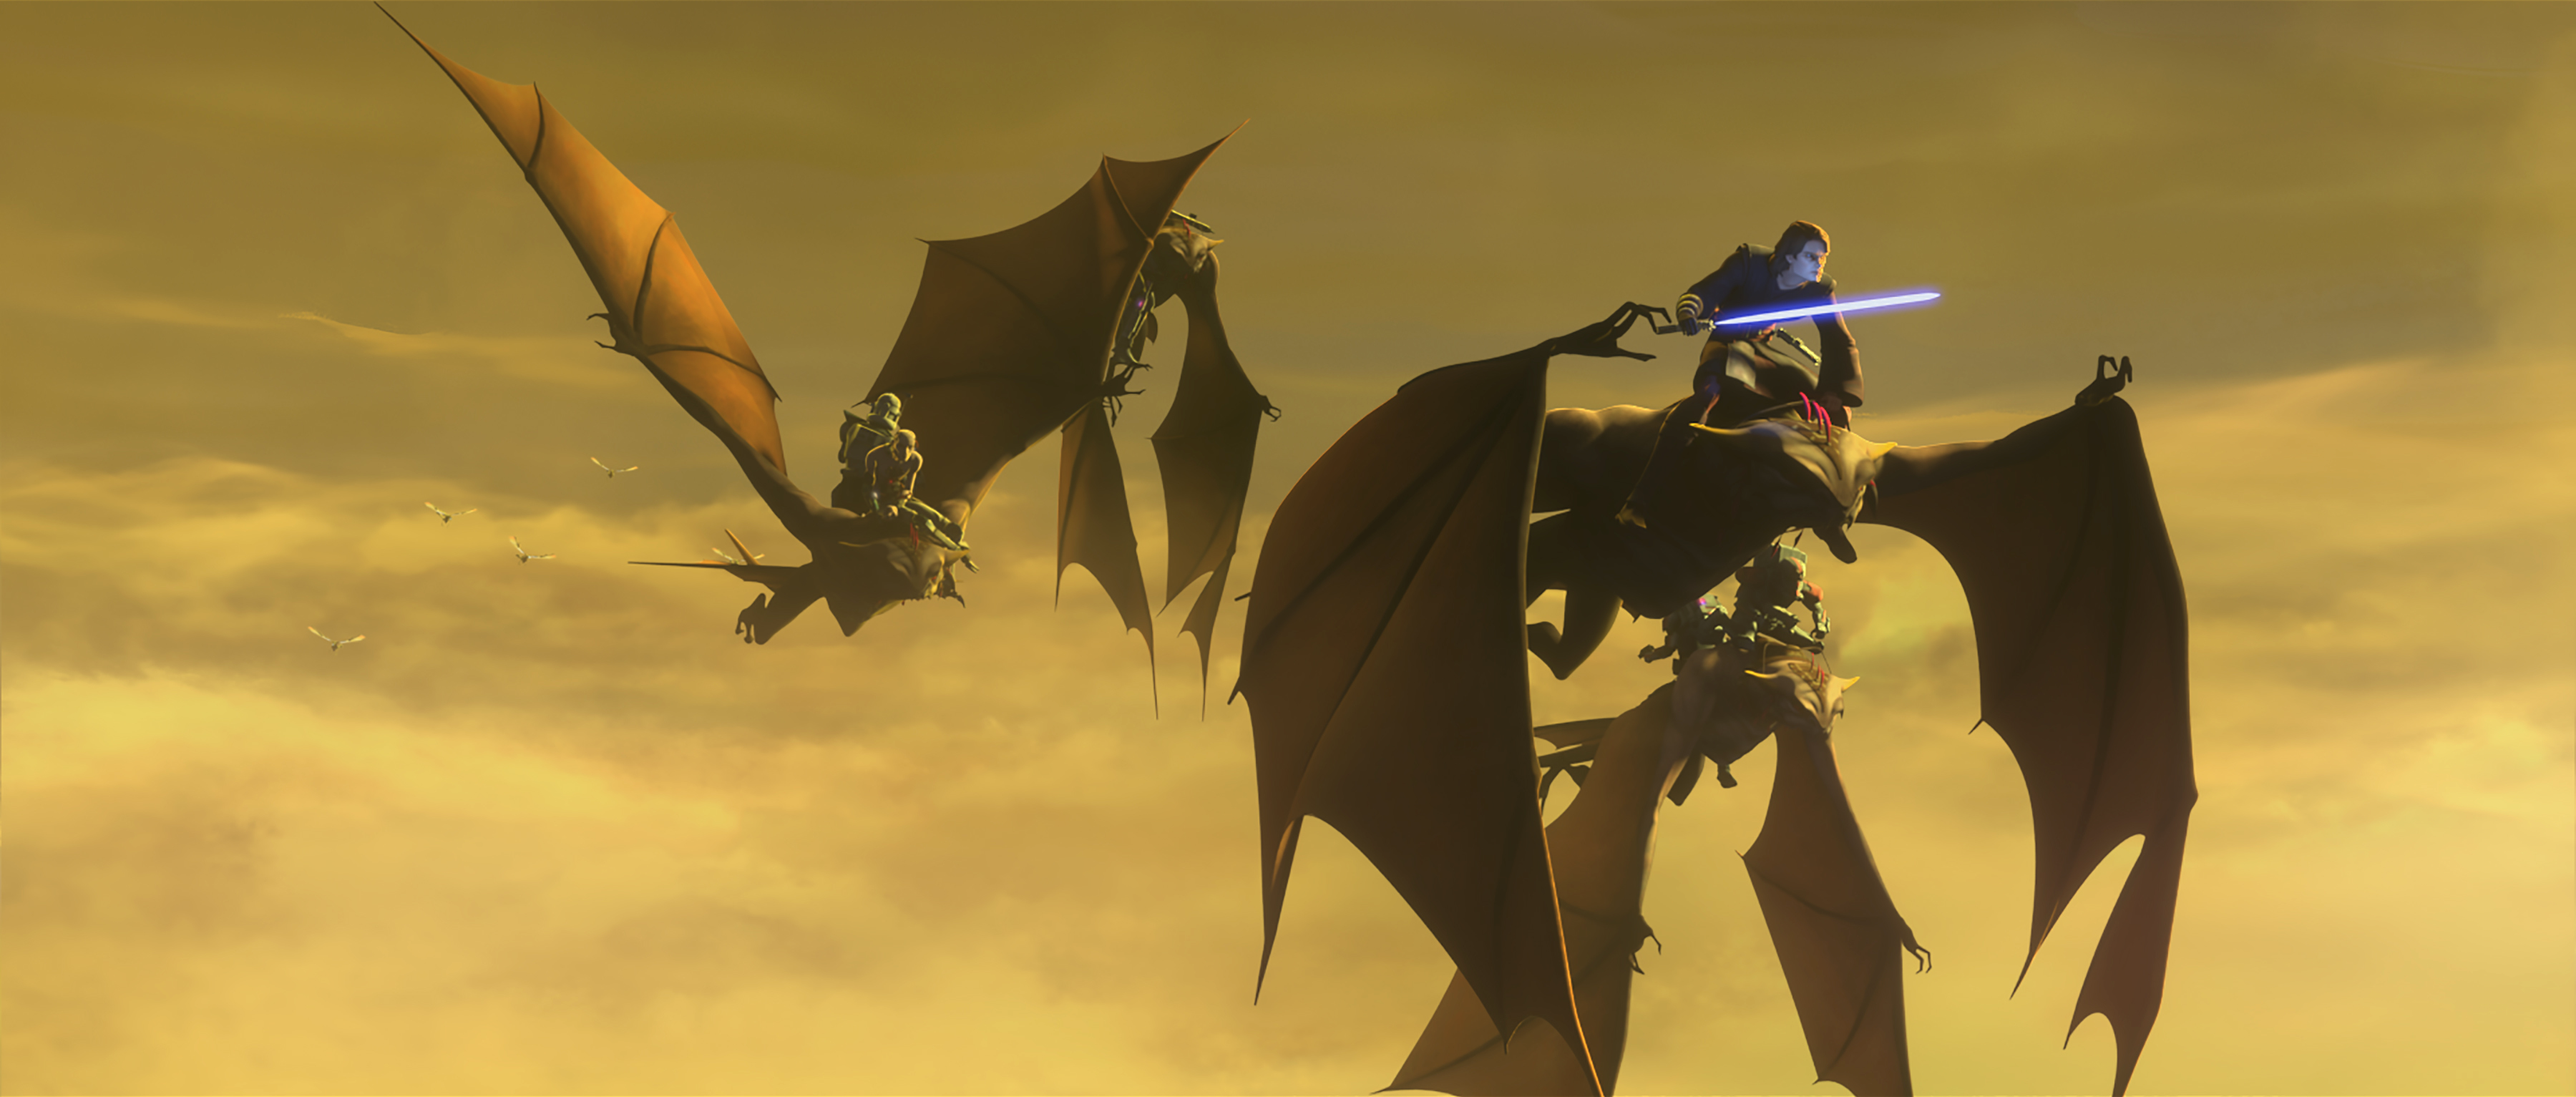
Tech managed to disconnect Echo, and they fled into the ventilation system to avoid being destroyed by Tambor's Decimator, after which Wrecker destroyed the Foreman's main computers using explosives. During their escape, they were surrounded by his D1-series aerial battle droids, but Tech's skills allowed them to ride keeradaks to the Poletec village. There, they persuaded the natives to aid them against the Techno Union's forces, including their octuptarra tri-droids, with Skywalker destroying two of them.
After the skirmish, Skywalker, Rex, and Clone Force 99 returned to Fort Anaxes, where Windu and Kenobi were preparing to attack the Separatist assembly complex by air. Echo was to be escorted by the Bad Batch, Skywalker, and Rex to Trench's communications vault aboard a dreadnought in the planet's orbit. There, he would connect himself to the dreadnought to transmit the Separatist's strategic movements. After Echo did so and deactivated the droids attacking the assembly complex, he discovered that Trench had initiated a countdown for an explosion that threatened to destroy most of Anaxes. While Kenobi coordinated the evacuation efforts, and Windu worked to deactivate the bomb, Skywalker confronted Trench on the dreadnought's bridge, eliminating his droid bodyguards. Trench refused to provide the final sequence number, believing Skywalker would not harm him. Skywalker severed Trench's prosthetic attachments, leading the Harch to immediately surrender the code. After relaying it to Windu, who deactivated the bomb, Trench attempted to electrocute him; in response, Anakin impaled the Harch with his lightsaber, killing him. He then retrieved the self-destruct detonator for the dreadnought and rejoined his team.
As they departed on the Marauder, Skywalker permitted Wrecker to destroy Trench's flagship, the Invulnerable, damaging the nearby Separatist fleet, before returning to Fort Anaxes. Following the victory, the Republic arranged for medals to be awarded to the team, and Corporal Echo was integrated into "The Bad Batch."
The Genesis of Darth Vader
Conflict on Yerbana
Prior to the Battle of Coruscant, Skywalker encountered Dooku again on Tythe, yet he failed to emerge victorious. Skywalker and Kenobi, accompanied by the 501st and 212th, were dispatched to Yerbana with the aim of dismantling the Separatist forces stationed on the planet. This engagement led Skywalker and Kenobi to divide their respective battalions into two independent fronts.
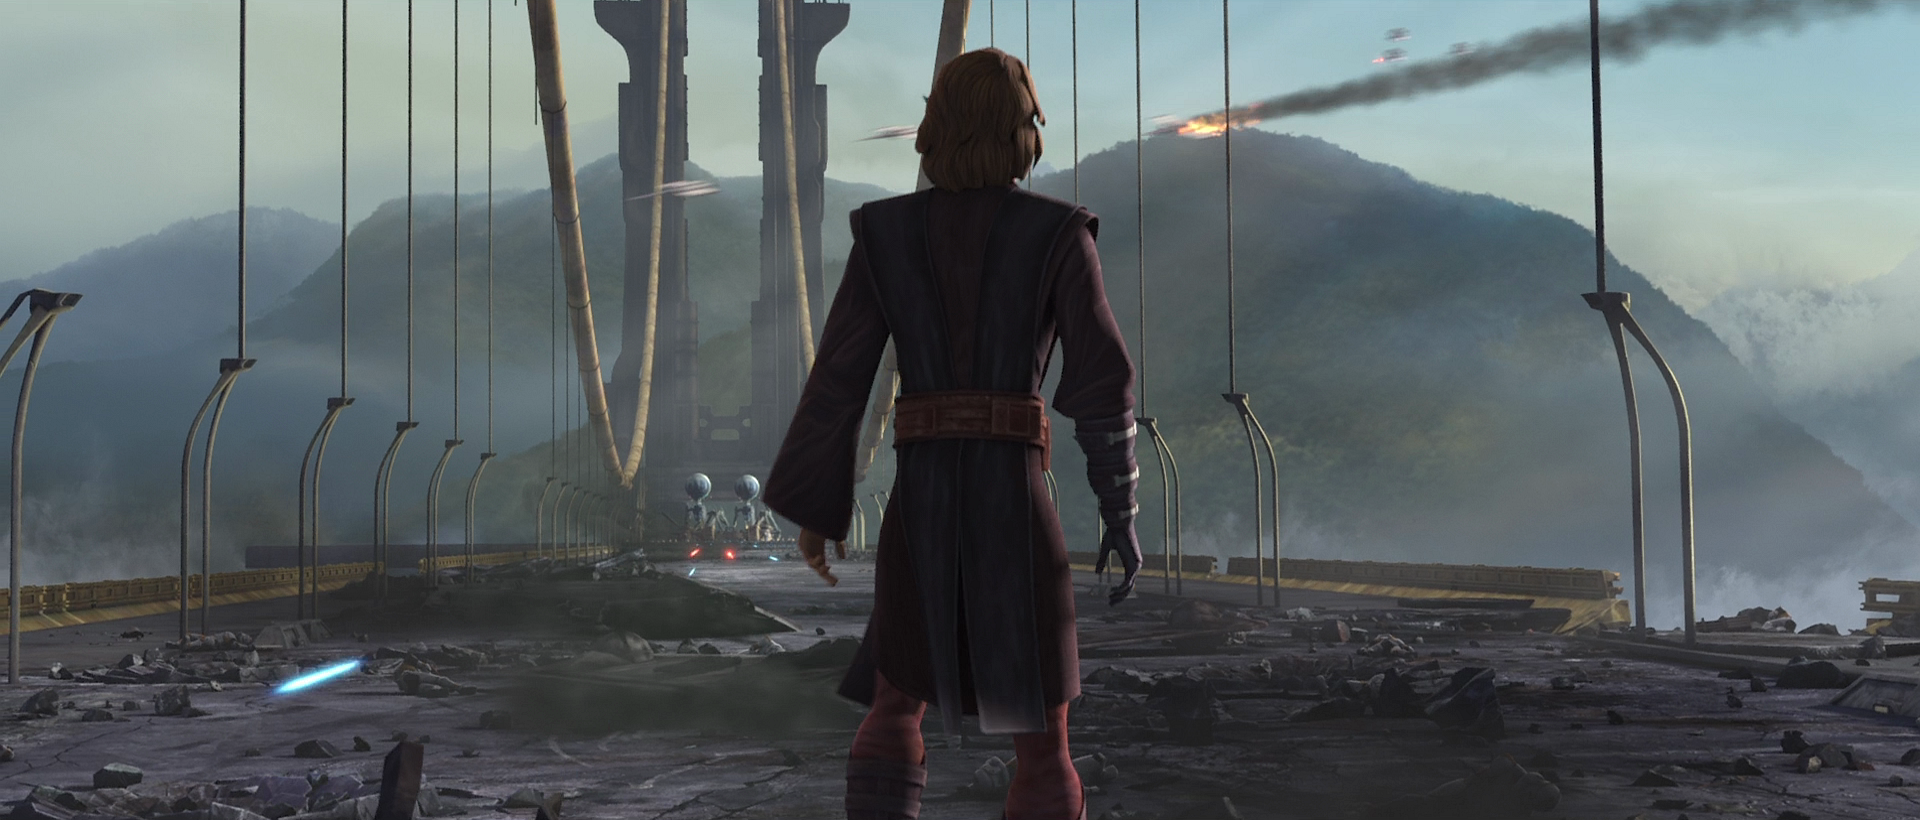
Skywalker, Rex, and the 501st Legion achieved victory against the Separatist Droid Army on their designated front, prompting them to redeploy and assist Kenobi and his 212th Attack Battalion, which was enduring substantial casualties in their ongoing conflict. While Kenobi and Commander Cody sought cover from the relentless bombardments, Skywalker instructed his troops to seek refuge beneath a bridge, with R2-D2 providing the signal for their assault. Subsequently, Skywalker entered the fray and persuaded his Master to adhere to his strategic plan. Skywalker feigned surrender in an attempt to lure out the droid commander, who swiftly recognized the Jedi Knight's deception; however, it was too late, as Skywalker employed his Force abilities to neutralize the droid commander, enabling his 501st Legion, led by Captain Rex, to execute a surprise ambush on the remaining droid forces, effectively concluding the conflict.
The 212th Attack Battalion proceeded to support the 501st, while Skywalker was approached by Kenobi, who offered his commendations, which Skywalker acknowledged by expressing gratitude for Kenobi's contribution to their triumph. The two were promptly contacted by Admiral Wullf Yularen, who informed them of an imminent transmission designated under the code "Fulcrum," and while the two Jedi speculated it might involve Saw Gerrera, Yularen confirmed otherwise, asserting the necessity for the generals' personal attendance on the call.
The Ultimate Farewell of a Friendship
Aboard Yularen's vessel, Skywalker and Kenobi were taken aback to discover that Ahsoka Tano and Bo-Katan Kryze were the originators of the transmission. Emotionally moved upon reuniting with his former apprentice after a prolonged separation, Skywalker managed to maintain his composure and engaged in conversation with Tano, who emphasized that the occasion was not a reunion, as Maul's location had been pinpointed on Mandalore, presenting an opportunity for his capture.
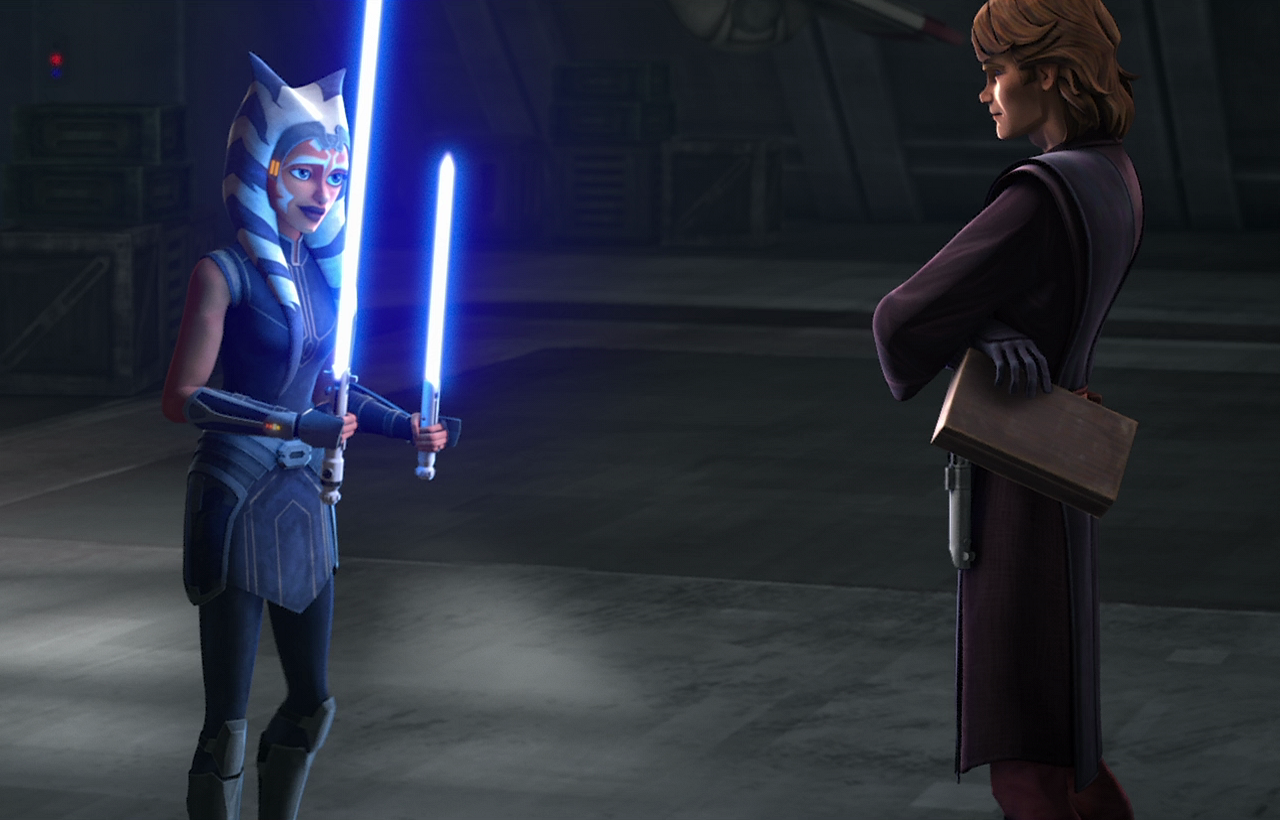
Tano expressed her aspiration for Skywalker and Kenobi to unite forces with her in order to confront him. Tano, Kryze, and her Mandalorian contingent boarded the vessel, where they were received by Skywalker and Kenobi. The former attempted to greet Tano, but his former apprentice declined, stressing the urgency of immediate action to apprehend Maul. The group convened to deliberate on the potential assault, but Kenobi hesitated to provide assistance to Tano and her allies without the express consent of the Jedi Council, eliciting a subtle frown from Skywalker. While Kenobi contacted the Council, Skywalker escorted Tano through the complex. Skywalker guided Tano to a chamber occupied by the 501st clone troopers, including Rex, who had adorned their helmets with personalized markings as a gesture of honor toward their former Commander. Skywalker then prepared to present Tano with her refurbished lightsabers, but before he could do so, the ship's alarm system was suddenly activated.
Kenobi rushed in and informed Skywalker and Rex of their immediate hyperspace jump. When Skywalker inquired whether this implied approval for the assault on Mandalore, Kenobi clarified that they were en route to Coruscant, where a critical situation had unfolded: General Grievous had launched a full-scale assault on the Republic's capital, and the Jedi Council had lost contact with Shaak Ti, Chancellor Palpatine's designated protector. Skywalker exhibited visible unease upon hearing this news, but Kenobi reassured him that their fleet would arrive at Coruscant imminently.
Tano, however, expressed her displeasure at her former Masters' decision to abandon Mandalore. Kenobi emphasized that they were entering a pivotal juncture in the Clone Wars, but Tano countered that Kenobi was engaging in political maneuvering and that the Jedi Order had strayed from their core mission of assisting individuals rather than politicians, resulting in a loss of faith among the populace, including Tano herself. Skywalker listened to the exchange and offered his perspective; in order to assist Tano in the forthcoming siege while concurrently participating in the mission to rescue the Chancellor, Skywalker promoted Rex to Commander, tasking him with leading a new formation of the 501st designated as the 332nd Division, and assigning Tano as an advisor due to her inability to hold an official military rank. Upon Kenobi's agreement, Tano accepted the proposition. Kenobi departed the room to prepare their troops, leaving Skywalker and Tano behind. Skywalker presented Tano with her new lightsabers, complimenting their improvements.
Skywalker then proceeded to rescue the Chancellor, anticipating that the defeats of Maul and Grievous would signal the end of the war. As he prepared to depart, Tano wished him success in his mission. Pleased to have reunited with his apprentice, Skywalker smiled, and they parted ways. Unbeknownst to either of them, this encounter would mark the final instance of their friendship.
Clash Aboard the Invisible Hand
Following months of absence from Coruscant due to engagements in the Outer Rim Sieges, Skywalker and his Master ultimately returned to the planet after leaving Tano, with the mission of rescuing the Chancellor from General Grievous before the cyborg's fleet could escape the besieged Capital. Aided by a squadron of ARC-170 starfighters led by Clone Commander Odd Ball, the two Jedi navigated through a dense formation of Vulture and tri-fighter droid starfighters safeguarding the Invisible Hand, General Grievous's command ship. Skywalker and Kenobi proceeded toward the ship while the clones diverted the droids' attention, but Kenobi's vessel sustained damage and partial impairment from Buzz-droids. Despite Kenobi's suggestion that Skywalker abandon him to complete the mission, the younger Jedi refused and cleared his former master's ship of droids before escorting him to the Invisible Hand's hangar. Following a crash landing, the two Jedi eliminated the remaining droids in the hangar while R2-D2 located the Chancellor.
Upon discovering that he was being held at the apex of the ship's observation spire, they deduced that they were entering a trap when Skywalker sensed the presence of Count Dooku. Shortly after their arrival at the spire's summit, the Sith Lord materialized before them, and the two Jedi engaged him in combat. Dooku managed to gain the upper hand and incapacitated Kenobi, but his taunts, intended to undermine Skywalker's morale, instead ignited his fury. Skywalker unleashed his rage upon the Sith Lord, overwhelming him with brutal force and severing both of his hands. Seizing Dooku's lightsaber, he positioned both his and the Count's blades at the Count's throat, and Palpatine urged him to eliminate his helpless adversary. Skywalker initially hesitated, but after the Chancellor's persistent insistence, he succumbed to his hatred for his nemesis and beheaded Dooku. He subsequently expressed remorse, asserting that it was not the Jedi way, but the Chancellor assured him that he had acted justly in killing the Count.
Despite the Chancellor's pleas, he carried Kenobi on his back to facilitate their escape. However, the elevators providing egress from the spire had been deactivated. With assistance from R2 and the ongoing assault on the Invisible Hand by a neighboring Republic cruiser, they managed to escape through the elevator shaft until the ship's crew regained control, restoring gravity and transforming the shaft back into a well. Kenobi regained consciousness while they were suspended within the shaft, and together, he and Skywalker managed to evade the shaft just as a reactivated elevator threatened to crush them. However, their fortune waned, and they were ensnared by a ray shield and apprehended, along with R2, by battle droids. The two Jedi and the Chancellor were brought before Grievous in the Invisible Hand's control room. The cyborg personally mocked them, derisively commenting on Skywalker's youth in light of his reputation. Skywalker retorted with a taunt about the General being shorter than he had anticipated.
Ultimately, R2-D2 created a diversion, allowing Kenobi to summon his lightsaber to him through the Force, liberating himself and subsequently Skywalker. Once the younger Jedi had also summoned his weapon, they engaged and swiftly dispatched Grievous's MagnaGuards and the battle droids holding them and the Chancellor. However, as they attempted to apprehend Grievous, he utilized one of the MagnaGuards' electrostaffs to shatter the viewport, depressurizing the bridge and allowing the vacuum to engulf him. Skywalker and Kenobi clung to nearby command consoles until security protocols allowed the bridge to repressurize. Before they could reach him, however, Grievous escaped, jettisoning all the escape pods to prevent their escape. With the command crew having fled, Skywalker assumed control of the damaged flagship, which had begun to enter Coruscant's atmosphere. Although he briefly managed to decelerate the ship's descent, the damage it had sustained proved insurmountable, and the Invisible Hand fractured in two, accelerating rapidly as it hurtled toward the Republic capital. Skywalker ultimately succeeded in crash-landing the Invisible Hand on a deserted landing strip, returning the once-captive Chancellor to Coruscant unharmed.
Approaching Parenthood
Following the ordeal, the two escorted the Chancellor to the Senate building, where they separated—Kenobi returned to the Jedi Temple to provide a report to the Council, while Skywalker remained with the Senators who had gathered to greet the returning Chancellor. He briefly engaged in conversation with Senator Organa, who expressed optimism that Count Dooku's demise could expedite the war's conclusion. Skywalker disagreed, asserting that the war would persist as long as General Grievous remained at the helm of the Separatist armies. At that moment, he noticed Amidala concealed behind one of the columns, excused himself from the Senator, and reunited with his wife for the first time in months. Having been occupied with fighting in the Outer Rim Sieges, Skywalker's sole focus was reuniting with Amidala. Amidala then disclosed to her husband that she was expecting a child. Despite their shared concerns that this revelation might expose their secret, particularly for Amidala, Skywalker was overjoyed and reassured her, declaring it the happiest moment of his life. The couple returned to Amidala's apartment, where they began formulating plans for the child's birth, deciding that their offspring would be raised on Naboo, in the Lake Country. Amidala also intended to relocate there prior to the birth to prepare the nursery.
However, that same evening, Skywalker's elation was marred by a nightmare in which his wife perished during childbirth, mirroring the visions he had experienced of his mother before her death. Despite Amidala's attempts to reassure him that it was merely a dream, he was consumed by terror at the prospect of losing her, as he had lost his mother. Amidala attempted to persuade him that they required assistance and suggested seeking Kenobi's counsel. Skywalker declined, asserting that their baby was a blessing, not a curse. The following day, at the Jedi Temple, he sought Yoda's guidance regarding these dreams, but the Grand Master informed Skywalker that death was an intrinsic aspect of life and urged him to relinquish all that he feared to lose.
Strained Allegiances
Concurrently, tensions were escalating between Chancellor Palpatine and the Jedi Council, who were increasingly concerned about his growing authority. Matters were exacerbated when the Senate announced their intention to grant him additional executive powers to facilitate the war's conclusion. Upon being informed of this by Kenobi, Skywalker expressed support for the measure, despite the Council's reservations and Kenobi's warning to remain cautious of Palpatine. He then informed Kenobi that the Chancellor had requested his presence for unspecified reasons, without informing the Council. Consequently, Skywalker met with Palpatine at his office, where he revealed that he was appointing the young Jedi to serve as his personal representative on the Council, a decision that Skywalker believed the Jedi Masters would never accept.
Upon being informed of this, the Council permitted Skywalker to sit on the Council, yet they declined to grant him the title of Master, a decision that greatly angered Skywalker. Skywalker turned to Kenobi, who remained silent. Further angered by this, Skywalker reluctantly accepted his position and assumed his seat on the council. At the conclusion of the meeting, Kenobi acknowledged to Skywalker that his appointment had been accepted so that, on behalf of the Council, he could monitor the Chancellor, a task that Skywalker was reluctant to undertake. In recent weeks, Amidala and other senators concerned about Palpatine's expanded powers had also drafted the Petition of 2,000 in the name of safeguarding democracy, requesting that he return his emergency powers to the Senate and initiate cease-fire negotiations to end the war. Skywalker was manipulated by Palpatine into believing Amidala could have ulterior motives that she was keeping hidden.

At the Galaxies Opera House in the Uscru District, Skywalker joined Palpatine in his private box during a performance of Squid Lake. During the performance, the Chancellor informed Skywalker that Clone Intelligence had located General Grievous in the Utapau system. He began to sow seeds of distrust in the Jedi council, claiming that the Jedi were plotting to seize control of the Republic and betray him. Skywalker felt conflicted — despite the Jedi's mistrust in the Chancellor, he still regarded Palpatine as a good man. He confided in the Chancellor that he had lost faith in the Jedi. Palpatine correctly surmised that it was because they had tasked Skywalker with spying on him, which made him feel dishonest. Skywalker was at a loss for words. The Chancellor asserted that the Jedi were only perceived as good because "good is a point of view," suggesting that the Jedi and the Sith were not so dissimilar. Skywalker countered by stating that the Sith were selfish, while the Jedi were selfless. Palpatine then recounted the Tragedy of Darth Plagueis the Wise to Skywalker, presenting it as an "old Sith legend." In reality, the tale concerned his Sith Master and his assassination of him. Palpatine strategically shared the story, aware of Skywalker's recurring nightmares about his wife's death. The revelation that he might need to disobey the Jedi Order to save Amidala opened Skywalker's mind — he desired to acquire this power. Subsequently, Skywalker bid farewell to Kenobi, expressing gratitude for his teachings, and they exchanged the traditional farewell, "May the Force be with you," before parting ways.
Descent into Darkness
Shortly thereafter, Anakin and Windu attended a hologram meeting with Yoda, Ki-Adi Mundi, and Aayla Secura in the Temple's war room. During the meeting, Cody joined and informed the group learned that Obi-Wan had engaged Grievous on Utapau. Windu then tasked Anakin with informing the Chancellor and assess his reaction to discern his true intentions. Skywalker informed the Chancellor of Kenobi's forces engaging Grievous's, but during the meeting, Palpatine revealed his knowledge of the dark side of the Force, leading Skywalker to realize that he was the Sith Lord they had been seeking. Palpatine informed Anakin that if he turned him over to the Jedi, he would be unable to assist in saving his wife, Amidala, from her "fated" death that Anakin had been dreaming of.
Despite his confusion, Skywalker remained loyal to the Jedi Order. He reported his findings to Mace Windu, who, accompanied by Kit Fisto, Saesee Tiin, and Agen Kolar, proceeded to arrest Palpatine, leaving Skywalker behind. Recalling Sidious's words, Skywalker made his way to Palpatine's office. During the ensuing duel, Sidious swiftly eliminated three of the four Jedi with ease but was disarmed by Windu just before Skywalker arrived in his office. Skywalker implored Windu not to kill Sidious, arguing that he should be left for the Senate to judge, but Windu believed that Sidious was too perilous to be left alive, as he effectively controlled the Senate. Disregarding Skywalker's pleas, Windu prepared to execute the Sith Lord, but a desperate Skywalker, who needed Sidious alive to save Padmé, drew his lightsaber and severed the unsuspecting Windu's right hand, causing Windu to drop his lightsaber and allowing Sidious to send him plummeting out of a shattered window with a blast of Force lightning, all of which was sensed by Tano.
Though appalled by his betrayal and role in Windu's demise, Skywalker viewed this as the point of no return, cementing his break with the Jedi Order. Driven by a desperate desire to rescue Padmé, he reluctantly turned against the Jedi and swore allegiance to Darth Sidious, his newly appointed Sith Master. The title "Darth Vader," bestowed upon him by Sidious, was not given lightly. After Sidious declared all Jedi enemies of the Republic, Vader was commanded to massacre the Jedi at the Temple and to eliminate the Separatist Council on the Mustafar System. Subsequently, Sidious initiated Order 66, a scheme by which clone troopers, having been subjected to forced brainwashing, turned on their Jedi Generals, executing them without hesitation, while Vader led the 501st Legion in an assault on the Jedi Temple. During this brutal attack, Vader entered the council chamber and discovered a group of younglings seeking refuge. Mistaking Vader for a Jedi Knight, one child inquired about what they should do, only for the newly christened Sith Lord to slaughter him and the other younglings.
Likewise, as he steered a battalion of clones deeper into the Temple, he stumbled upon a collection of younglings who presumed he had come to their aid. But instead, he mercilessly struck down the children, leaving only one survivor; after Vader pierced her and peered into her eyes, the human youngling Reva Sevander, eventually consumed by wrath, lived only because she feigned death amidst the corpses of her peers. Also during the onslaught, Vader extinguished the lives of numerous Jedi, including Master Cin Drallig, before conferring with Sidious, who then dispatched him to Mustafar. After the attack concluded, he returned to Amidala and informed her that the Jedi Order had attempted to overthrow the Republic, a claim she vehemently disbelieved, and that he was about to depart for the Mustafar system, the location of the Executive Separatist Council. After telling her he would end the war, they shared a kiss, and he departed aboard his green Eta-2 Actis-class light interceptor, which replaced the interceptor he had lost in the Battle of Coruscant.
Upon arriving on Mustafar, Vader proceeded to exterminate the entire Separatist Council, including Wat Tambor, Poggle the Lesser, and Nute Gunray, along with their assistants, his eyes now burning with a furious yellow and red. Concurrently, Sidious, during an emergency session of the Senate, executed the proclamation of the New Order, asserting that the Jedi Order had committed treason against the Republic, and restructured the Republic into the inaugural Galactic Empire with himself installed as its Emperor. During this period, Vader was stalked by Kakan, who mistakenly identified him as a Jedi. Vader revealed his face, eyes to Kakan and pursued him to ensure there would be no witness. During his chase, Vader ran into a cloud of Lava fumes. The fumes caused Vader to see hallucinations his fellow Jedi such as Windu, Jinn, Koon, Billaba, Yoda, and his former apprentice Tano. Vader was able to push the fumes away from himself and dismissed the hallucinations. Shortly thereafter, Vader communicated the completion of his mission to Sidious; on his instructions, Vader transmitted a shutdown command to the Confederate navy and army, thereby bringing the Clone Wars to a close. With his task fulfilled, and the Separatists eliminated, Vader gazed out from a balcony, shedding a tear for the person he had become, recognizing that there was no possibility of returning to his former self.
The Transformation into Darth Vader
The Duel on Mustafar
Soon after, Vader observed Amidala's star skiff landing and rushed to meet her. She confided in Vader that Kenobi had discovered their secret and had also revealed to her that Vader had embraced the dark side, hoping that he would refute Kenobi's claims. However, Vader only affirmed the truth. Consumed by the Dark Side and declaring the galaxy was at peace, Vader, driven by a lust for power, attempted to persuade her that they could find happiness together as rulers of the new Empire, promising to overthrow Sidious. In Vader's envisioned reality, Amidala would have accepted his hand, believing that the man before her was still her husband. However, Vader's proposals and actions filled his wife with dread, and she implored him to abandon the dark side.
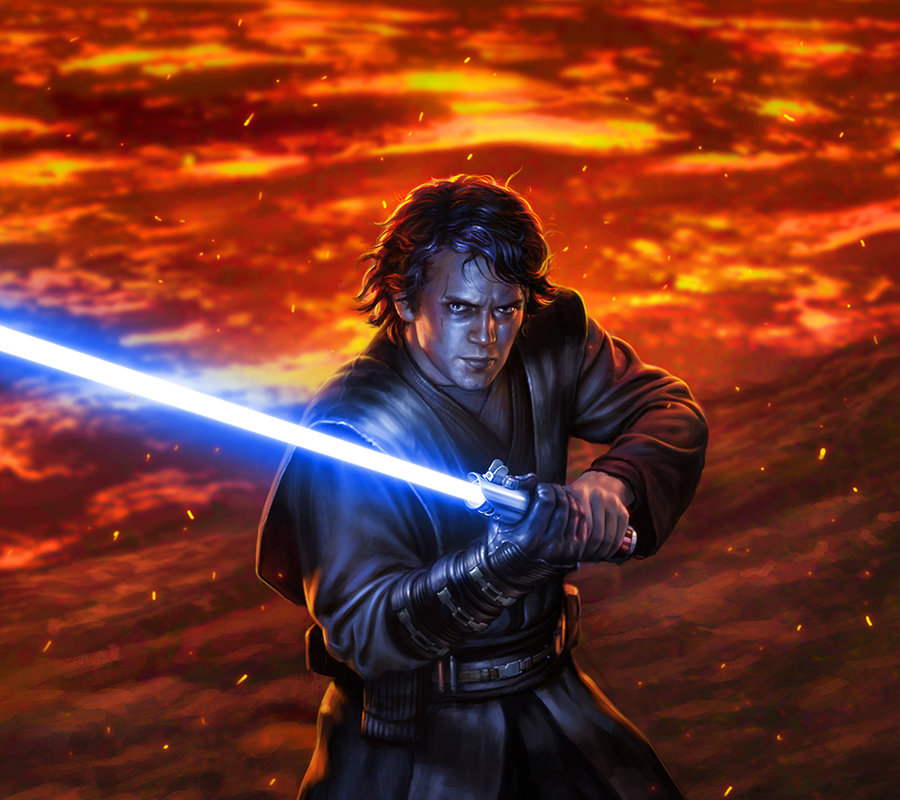
At that moment, Vader noticed Kenobi emerging from Amidala's ship, having secretly boarded as a stowaway. Convinced that his wife had betrayed him to give his old master an opportunity to kill him, Vader, disregarding her attempts to explain, used the Force to choke Amidala until Kenobi demanded that he release her, at which point she had already lost consciousness. Although he was horrified by what he had just done, Vader lashed out at Kenobi, blaming him for the situation. Despite Kenobi's attempts to reason with his former pupil, Vader remained deaf to his words, as the new Empire represented everything he desired for the galaxy. Unable to reach a mutual understanding, with each believing in the righteousness of their cause, the two former comrades engaged in a ferocious duel, which tore through the Separatist facility. As their battle raged through the Separatist war room, their conflict damaged the computers, causing the facility shields to fail and leading to the building's collapse into the lava river below.
After battling across the crumbling structure and over a river of lava, the duel came to an end on the riverbanks, where Kenobi secured the high ground and cautioned Vader against attacking. Blinded by rage and arrogance, Vader leaped to continue the duel, only to have his remaining limbs severed by his former master's lightsaber, leaving only his cybernetic arm intact. Crippled, Vader slid down to the riverbank, screaming his eternal hatred for his former master. Kenobi, retrieving Skywalker's lightsaber, expressed his brotherly affection for him and regretfully left him for dead as a piece of Vader's clothing caught fire and he began to burn. Kenobi then departed the planet with Amidala, C-3PO, and R2-D2, leaving Vader to scream and burn on the riverbank.
Rebirth
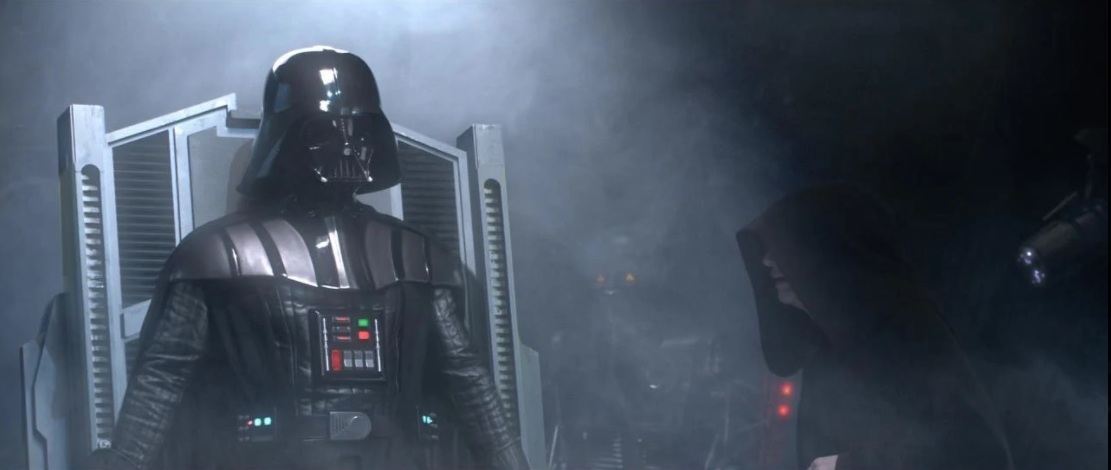
Although Vader survived, he suffered horrific physical and mental scars and sustained lung damage due to the presence of hot ash in the air. Shortly thereafter, the Emperor (having sensed his apprentice's peril) arrived on Mustafar, discovered the severely wounded Vader, and transported him back to Coruscant in a medical capsule. As the Emperor could not afford to lose Vader, he sought the expertise of the Republic's foremost scientists, including Cylo, who, in doing so, gained exclusive access to Vader's cybernetics. Under the Emperor's command, Vader was placed within a life-sustaining black suit of armor and equipped with three new robotic limbs by numerous droids skilled in both cybernetic reconstruction and medical surgery. Among the droids involved in Vader's care was FX-6, an FX-9 surgical assistant who had previously worked on Grievous's armor. After two days of continuous labor, he was finally sealed within his new armor. His eyes briefly reflected fear before his mask and helmet locked into place, and he took his first breath. Vader's rebirth was complete.
Upon regaining consciousness, Vader inquired about the fate of his wife, and the Emperor informed him that he had killed her in his anger. Unbeknownst to either Sith, Amidala had given birth to twins, Luke and Leia, before her death. Overwhelmed by despair at the belief that he had killed Amidala and their unborn child, fulfilling his prophetic dreams of her death, Vader inadvertently destroyed the medical droids and severely damaged the entire room through the Force. He broke free of his restraints on the operating table and, despite struggling to walk under the immense weight of his new prostheses and armor, released a cry of anguish at the loss of everything he had cherished.
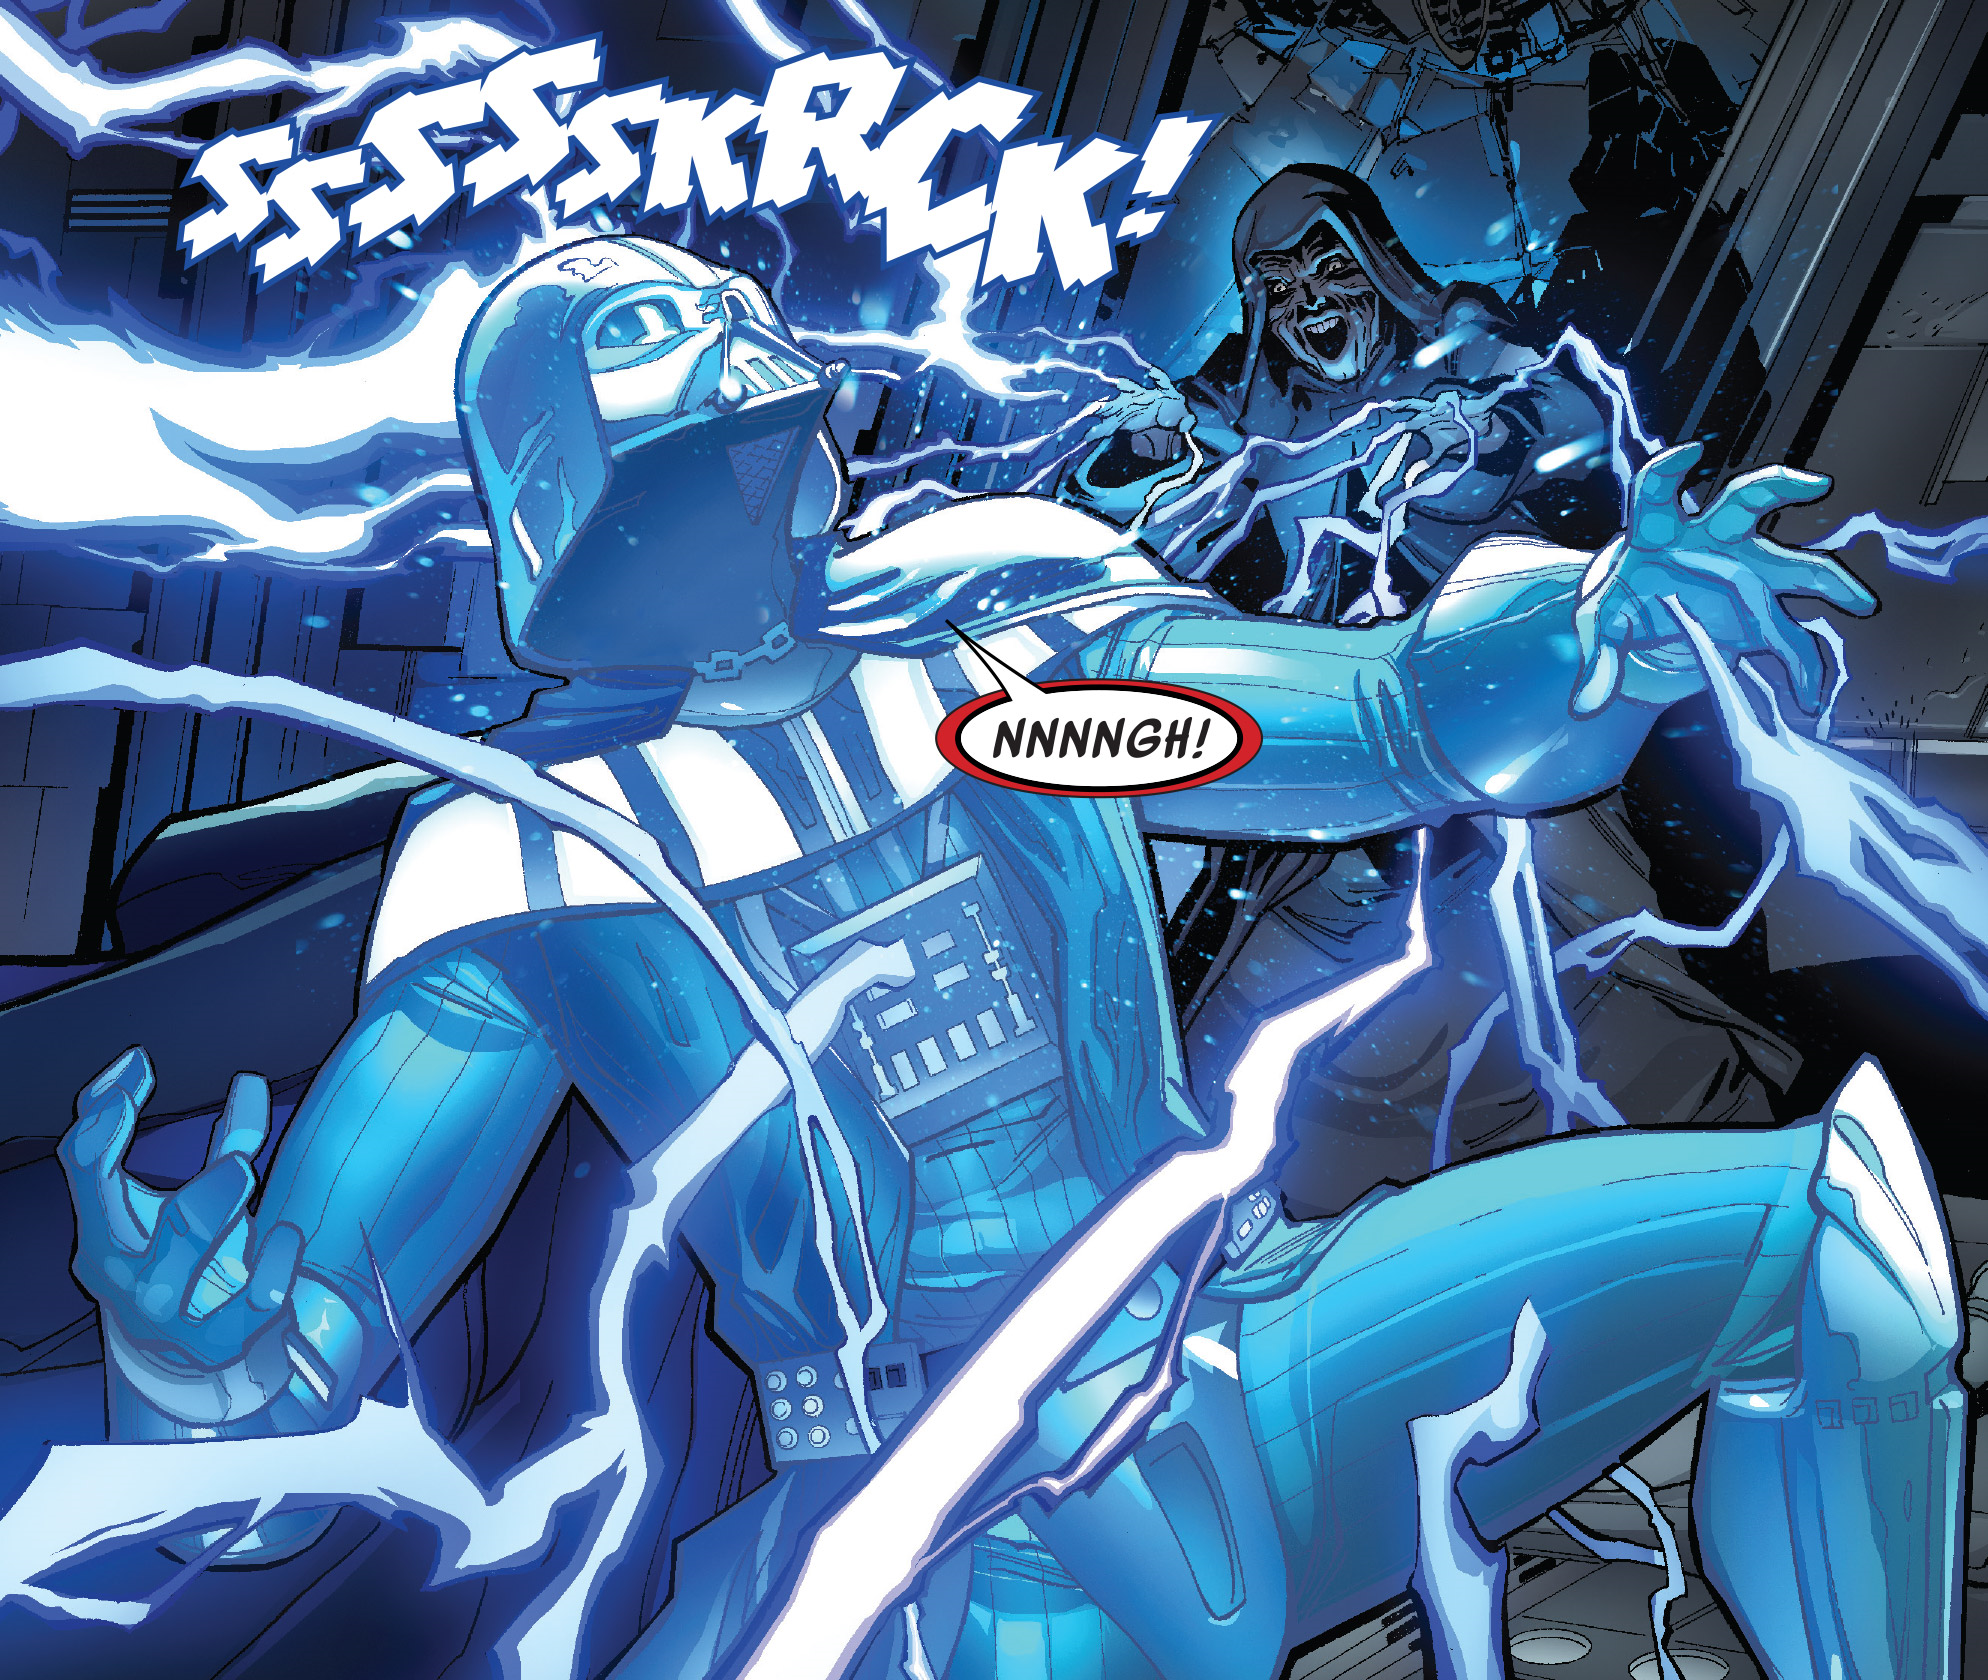
Vader's despair then morphed into rage, and he telekinetically slammed the Emperor against a wall in the surgical bay, snarling that his master had promised to save Amidala. The Emperor, as Vader attempted unsuccessfully to strangle him with the Force, responded that in death Amidala had provided Vader a gift: Pain. The Emperor continued by giving Vader a choice; to either accept and use that gift or to die. After a moment, Vader replied that he would live. The Emperor then immediately launched a barrage of Force lightning at his apprentice, and rhetorically demanded that Vader use the power of his lightsaber to defend himself, but Vader replied that his lightsaber had been taken by Kenobi at the conclusion of their duel.
As he continued his barrage, the Emperor angrily shouted that the weapon Vader spoke of was not his. Rather, it had belonged to a Jedi, and Vader was now a Sith. Ceasing his Force-based assault, the Emperor drew his own lightsaber. He put the blade to Vader's throat and stated that he understood how traumatic the last few days had been for his apprentice, but warned that should Vader ever use the Force against him again, he would finish what Kenobi could not. The Emperor then deactivated his weapon and stated that, as friends, he hoped that the two of them would never find themselves in a similar situation. He instructed Vader to put aside his rage and lust for revenge against the Jedi for the time being, for the two of them had a great deal of work to accomplish.
The Hunt for a Kyber Crystal
Immediately following his surgery, the Emperor escorted Vader to a balcony overlooking the former Jedi Temple. There, they observed Mas Amedda overseeing a ceremonial burning of the lightsabers of all the Jedi who had perished in the Temple. As they listened to Amedda's speech, the Emperor inquired whether his apprentice knew how or why Sith lightsaber blades were red in color. Vader responded that he did not, as the Temple's information on the subject had been "incomplete." The Emperor chuckled and contemptuously remarked that the Jedi had been uncomfortable with the information and had deliberately concealed it. He then explained that kyber crystals, like living beings, were capable of feeling pain and could be made to "bleed" by infusing them with rage, pain, and hate. He asked Vader if he understood, to which Vader replied that he did, stating that he could have given him any of the burning Jedi lightsabers to corrupt, even Yoda's. But he had not, as Vader realized that the crystal of a Sith's lightsaber should be taken directly from a Jedi by that Sith.
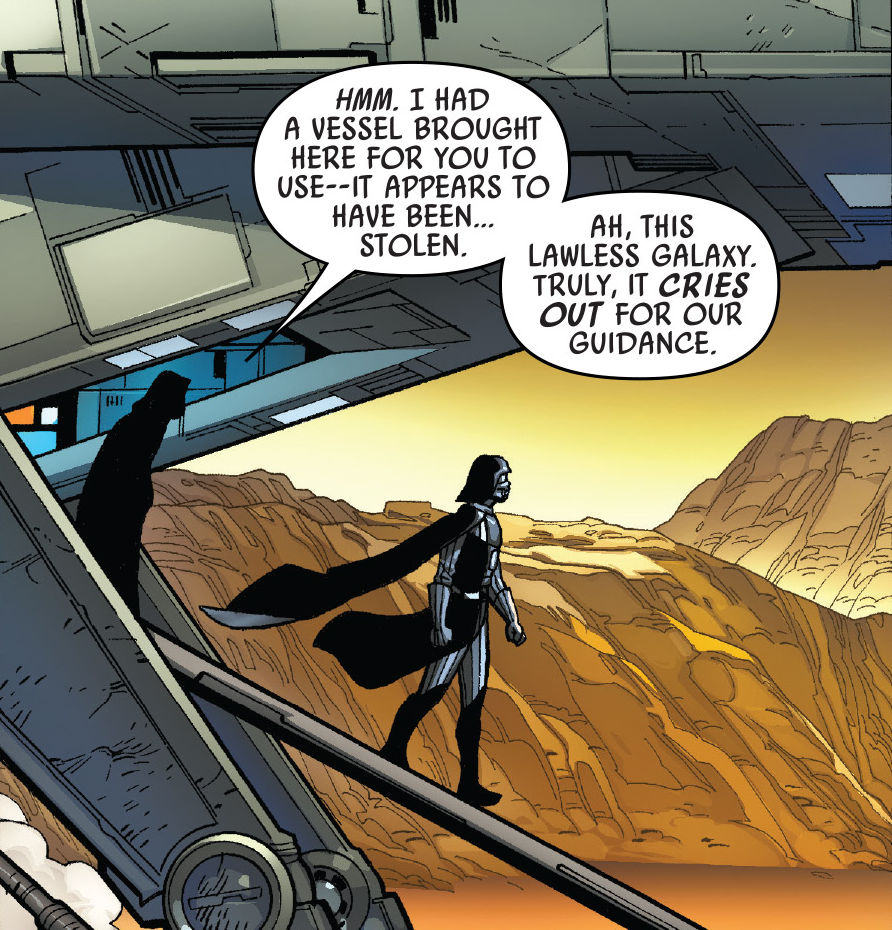
As the ceremony progressed, the clone troopers attending the vent threw a basket full of various lightsabers into the incinerator, including Yoda's. The lightsabers caught on fire and a moment later, a powerful blast of energy was released into the air as the kyber crystals were destroyed. Afterward, the Emperor brought Vader to Gattering in the Mid Rim and assigned him the task of hunting down a Jedi to take a kyber crystal from. The Emperor took his apprentice to a site where he had arranged for a starship to be delivered for Vader's use, but the ship had been stolen by a group of pirates. Leaving Vader to reclaim the vessel, the Emperor departed, and Vader struck out for the planet's nearest settlement on foot. Once there, he eliminated the group of pirates who had stolen the ship and traveled to the Jedi outpost Brighthome. The station was garrisoned by a group of clone troopers, who noted Vader's approach and hailed him.
Instead of providing the security codes necessary to enlist the clone troopers' assistance, Vader chose to simply kill them. During the ensuing battle, Vader summoned a green-bladed lightsaber from the wall to dispatch most of the clone troopers. After exterminating the garrison, Vader instructed the droid co-pilot of his ship to search the station's archives for information on any Jedi who had taken the Barash vow prior to Order 66. Vader's reasoning was that any Jedi who had taken the vow, which involved complete non-interference in all Jedi affairs, would have been both out of harm's way when Order 66 was issued and would have disregarded its occurrence in accordance with the vow. The search identified Jedi Master Kirak Infil'a, a Jedi who had dedicated himself entirely to combat, excluding all else. When a grenade was thrown at him by two surviving clones, "Ding" and "Kicker," he managed to contain the explosion, which the clones believed would make him unable to do anything else as all his concentration was diverted on freezing the explosion.
As they discussed how they would restrain and bring in what they believed was just another Jedi survivor before the Emperor in the hopes of being rewarded, Vader proved their beliefs that he was too preoccupied with the explosive to be false by telekinetically throttling the clones and breaking their necks, before walking far enough away from the explosion to release it. Vader quickly located the Jedi on the river moon of Al'doleem and sensed as he disembarked his ship that Infil'a was waiting for him. The Jedi Master immediately confronted Vader, and was seized in a Force choke by the Dark Lord. However, Infil'a quickly released a Force blast at Vader which staggered him and disrupted his concentration. Infil'a declared his Barash to be complete and began to ascend the mountain upon which he lived, calling out to Vader to follow if he could. One of the Jedi Master's training droids, Arex, then opened a sluice gate which sent a river of water crashing down upon Vader.
The Sith Lord was visibly battered by the rush of water, but managed to telekinetically part the river and walked to the shore. He was then set upon by a group of gigantic carnivorous birds, which damaged one of his cybernetic legs. Vader eventually crushed them all with the Force and made his way to the peak of the mountain. There, he found Infil'a and Arex awaiting him. Vader quickly unleashed a Force push that blasted Infil'a off his feet and dazed him long enough for Vader, who was unarmed, to destroy Arex and take the droid's training saber. He threw the droid off the mountain and engaged Infil'a, who sensed that Vader not only wanted to kill him but wished to take his lightsaber as well. However, Vader's previously damaged leg broke apart at the knee a short time into the duel, rendering him unable to continue the fight. Infil'a then declared his intention to seek out Sidious and kill him, and blasted Vader off the top of the mountain with the Force.
Regaining consciousness, Vader used the Force to reassemble his cybernetic limbs with the dismembered pieces of Arex, who coincidentally had landed near where Vader had fallen. He then tracked Infil'a to Am'balaar City, where he reengaged the astonished Jedi Master. Fighting atop the Am'balaar city dam, the two crossed blades until the duel was interrupted by a trio of security guards. Annoyed, Vader telekinetically flung the guards from the top of the dam, but Infil'a caught them and used the Force to lower them to safety. Infil'a then shouted at Vader not to involve anyone else in their duel, but Vader instead took advantage of Infil'a's concern for innocents by ripping apart a building-sized water storage tank situated in the city below. As Infil'a attempted without success to use his own powers to stop the destruction, Vader telekinetically removed the Jedi's lightsaber from his belt and claimed it for his own. He then grabbed Infil'a in a Force choke and lifted him from the dam. Infil'a pleaded with Vader to spare the civilians below the dam, but Vader ignored him.
As the enormous tank burst completely, flooding Am'balaar City, Vader crushed Infil'a's throat with the Force and tossed his body into the wreckage below. After obtaining a Jedi lightsaber and the kyber crystal within, Vader reboarded his ship, whereupon the droid co-pilot seized control of the vessel and jumped to hyperspace. The droid then began to play a pre-recorded message from the Emperor to Vader. The message stated that, per the Emperor's instructions, the droid had plotted a course to the planet Mustafar, where Vader would find a dark-side locus which he could use to help him corrupt the kyber crystal. As the message concluded, Vader touched down on Mustafar and quickly found the locus the Emperor had spoken of, an ancient Sith shrine within a shallow cavern. There, he disassembled Infil'a's lightsaber on a small, flat rock formation and removed the kyber crystal.
However, when he attempted to corrupt it, the crystal resisted and used the Force to send Vader careening into one of the cavern walls. The crystal then caused Vader to experience a vision wherein he rejected the dark side, journeyed to Coruscant, and killed Palpatine. In the vision, Vader then found Obi-Wan and begged for his forgiveness. As he knelt in contrition in front of his former master, Obi-Wan called out to Vader by his former name, Anakin. Upon hearing this, Vader snapped out of his vision and firmly rejected the possibility shown to him by the crystal, declaring that a life as a Sith was all he could be after everything he had done. He then began to pour his hatred, pain, and rage into the crystal. As the planet around the cave was consumed in a violent storm, Vader succeeded in corrupting the crystal.
Afterwards, Vader returned to Coruscant and stormed into the Emperor's office during the middle of a discussion between Tarkin, Mas Amedda, and the Emperor regarding the construction of the Death Star. As Vader was completely unknown to anyone other than Palpatine at the time, the Royal Guards in the Emperor's office attempted to intercept him, only to be blasted back into the office's large window. Seeing Vader, the Emperor dismissed both Tarkin and Amedda, the former of whom expressed concern for his safety. Reassuring Tarkin, the Emperor repeated his command, and the two Imperial officials departed, leaving Vader to display Kirak Infil'a's lightsaber, emitting a crimson blade, to the Emperor in triumph, thereby affirming his status as a Sith apprentice.
Training the Inquisitorius
Shortly after returning to his master, Vader retired to a medical chamber so his damaged cybernetic components could be repaired. As Vader floated within a bacta tank, the Emperor congratulated him for taking his first step to mastery of the dark side, although Vader was angered when he learned a group of droids would be fixing his suit. Sensing as such, the Emperor allowed Vader to repair his armor on his own and informed him there was a new mission to undertake once his convalescence was complete. From his bacta tank, Vader guided the service tools with the Force to repair his armor to his liking. At least one of Arex's pieces would remain in Vader's armor for years to come, filling in part of his knee joint. As a residence, Vader was given a personal suite on Coruscant, where he was served by a cloaked assistant.
As he repaired his helmet, having repaired and donned the rest of his suit by then, Vader was informed of an intruder in the Jedi Temple Archives. He promptly confronted the intruder, who wielded a red lightsaber. As the two fought each other, the intruder appeared to take the advantage, but after a time Vader revealed that he had simply been testing the modifications that he had recently made to his armor, and promptly destroyed the intruder's lightsaber. As Vader went in for the kill, the Emperor arrived and told him that the intruder, titled the Grand Inquisitor, was part of the Inquisitorius. Vader was then taken to The Works, where Vader saw the rest of the Inquisitorius training themselves. Vader was told that most of the Inquisitorius were Jedi who converted to the dark side in the wake of the Order's destruction in order to save themselves. As they overlooked the dark side agents, Vader inquired if the Grand Inquisitor would have taken his place as a Sith apprentice should he have lost the duel but soon declared there had been no chance of the lesser agent winning.
Vader and the Inquisitorius were given the mission to hunt down and finish off surviving Jedi of the Emperor's Purge. Given the mission to train the Inquisitorius and agreeing to do so right away, Vader dueled the Sixth Brother in a training session and cut off his arm in order to teach him about loss. Vader then spoke with the Grand Inquisitor about improving the Inquisitorius' training methods. They began to search for other Jedi that survived the purge. Vader saw the Inquisitors' target list and noticed the Jedi Archive's Chief Librarian, Jocasta Nu, on it. He asked the Emperor what was so important about her. The Emperor explained that she had knowledge of the Sith that she and the Jedi council had kept secret. The Emperor told Vader to find Nu and bring her to him. Vader assigned the Grand Inquisitor to search the Archive for information on her.
Hunt for Jocasta Nu
At that time, Nu had returned to Coruscant and sneaked into the former Jedi temple to search for a list of young Force-sensitives in her secret archives. As she roamed the ruins, her droid, Beetoo, informed her that her ship was about to be discovered. She informed the droid that she would adjust her plans accordingly. As Coruscant Security Forces came into the hanger, Beetoo detonated Nu's ship and killed the three security officers. As Nu made for a secret archive vault, she noticed the Grand Inquisitor reading through the Jedi knowledge. She continued, only focusing on the mission at hand.
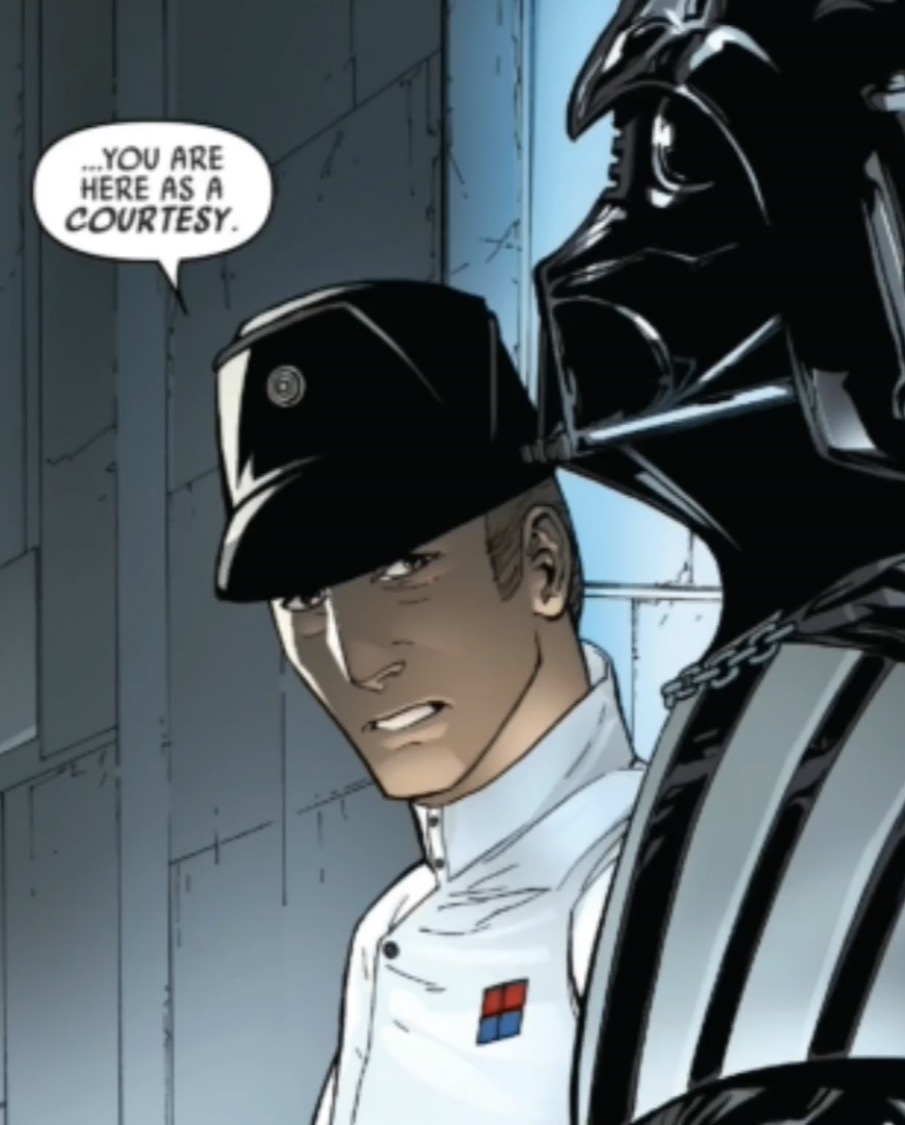
An Imperial Security Bureau major made contact with Vader, informing him of a Jedi symbol discovered among the wreckage of Nu's spacecraft, prompting Vader to journey to the Imperial Security Bureau headquarters for inspection. Upon Vader's arrival, the major inquired about the appropriate form of address, to which Vader responded, "lord." The major then voiced concerns that the explosion might have occurred prematurely, suggesting the Jedi symbol was merely "rabble-rousing graffiti" used as a form of identification. Vader refuted this claim, and as the major elaborated on his intelligence background, Vader employed the Force to reconstruct Nu's ship, thereby demonstrating the major's error regarding the explosion's cause. Subsequently, Vader commanded the major to conduct a thorough search of every level of Coruscant, with explicit instructions to avoid the Jedi Temple.
Simultaneously, Nu was preparing to leave the temple when she overheard the Grand Inquisitor making disparaging remarks about the Jedi knowledge he was examining. Overwhelmed by his comments, she confronted him with her lightsaber. Vader reached the temple's entrance, finding it already sealed by Clone Commander Fox. When Fox questioned the anticipated events, Vader revealed that they had overlooked a Jedi during Order 66. Upon Vader's entry into the temple, he found Nu restraining the Grand Inquisitor with her lightsaber, issuing threats. The Grand Inquisitor questioned her memory of him, referencing instances where she had denied him access to the Jedi knowledge he sought. Nu launched an attack, initiating a brief duel in which the Grand Inquisitor swiftly gained the upper hand. The Grand Inquisitor's attempt to kill Nu was thwarted by Vader's timely intervention. As Vader prevented the Grand Inquisitor from executing the Jedi, Nu utilized the Force to unleash a barrage of Jedi books upon them, before fleeing the scene.
Vader pursued her, and as Nu followed her escape route, she arrived at the archive vault and used a terminal to erase the entire library's knowledge. Upon Vader's entry into the vault, he encountered the droid guard, Cator. Cator identified Vader as Anakin Skywalker and declared his unauthorized presence. Vader hurled his lightsaber at the droid, but Cator, designed to defend against potential Force-sensitive threats, intercepted the weapon. Vader then struck Cator's arm off, prompting the droid to seize his wrist and constrict it with its robotic hand. Vader retaliated by driving his fist through Cator's face before the droid could inflict further damage. As Cator collapsed, Vader detected a powerful shot directed at him and deflected it with his lightsaber. The shot, fired by Nu using a lightsaber rifle, propelled Vader backward as it tore through a bookcase. Nu stood at the vault's entrance, confronting Vader.
Upon regaining his footing, Vader attempted to persuade Nu to relinquish her weapon. Nu disregarded his plea and fired again. Vader evaded her shot, and she fired a third time, causing further destruction to the vault. As she continued firing, she endeavored to convince Vader that he was merely a tool of the Emperor, asserting that he could never eliminate the light side of the Force, as it would always find new hosts. Nu's rifle then malfunctioned, ceasing to fire, and Vader deactivated his lightsaber, assuring her that she would not be harmed. Subsequently, Nu's rifle began emitting beeping sounds, and she hurled it towards Vader. He used the Force to divert it, resulting in an explosion that threw both of them to the floor and breached the temple's side.
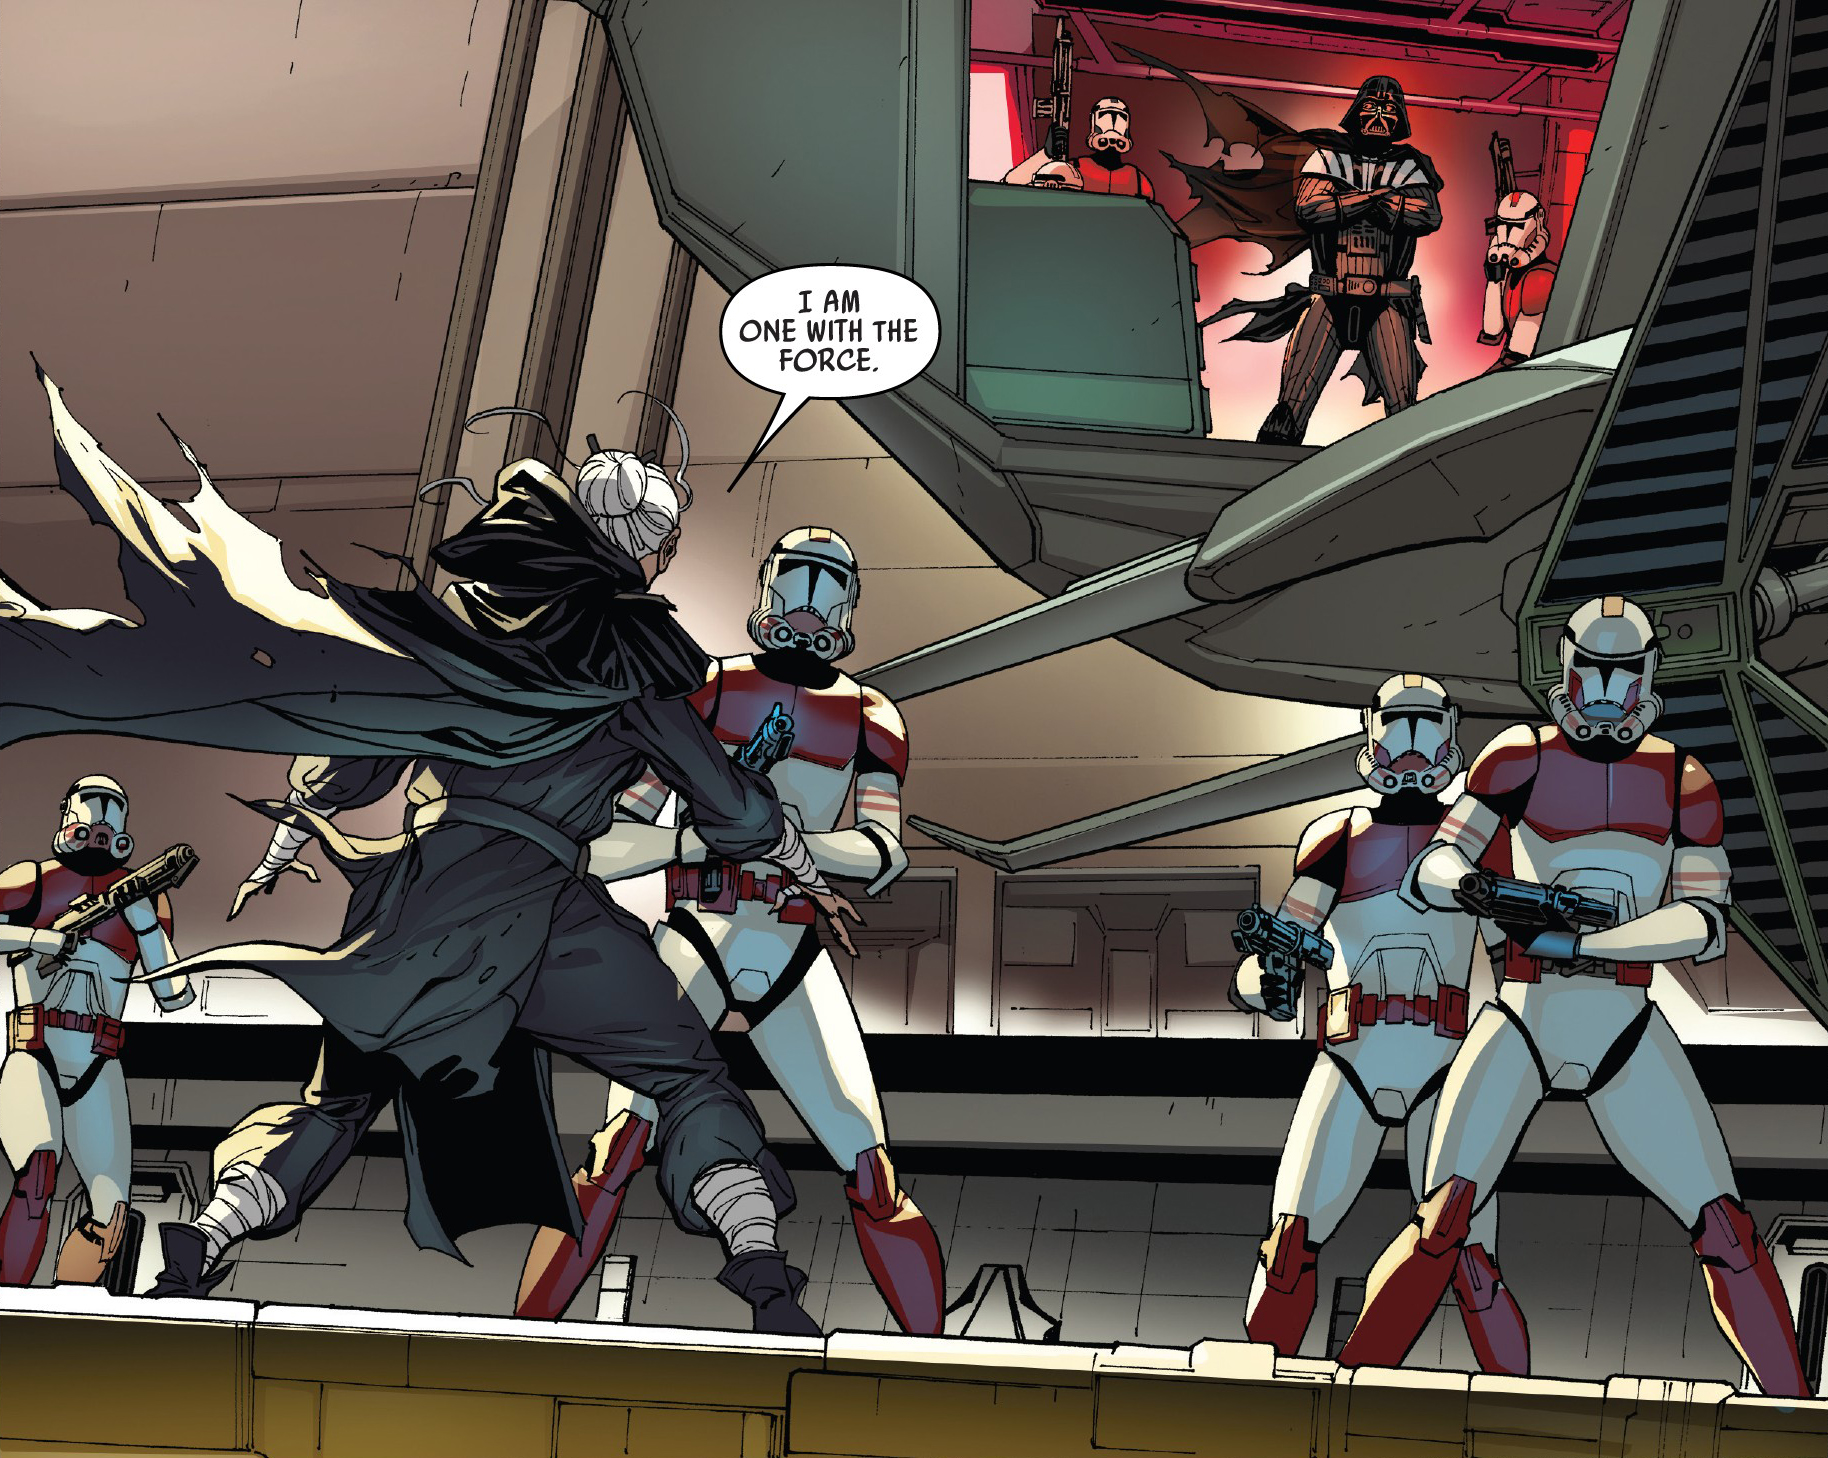
Nu escaped through the newly created opening in the wall, encountering recently alerted clone troopers surrounding the perimeter. They opened fire on her, and she leaped down, redirecting their shots back at them. As the clones intensified their assault, she used the Force to push them over the ledge behind them. Vader then emerged through the wall, and the clones, mistaking him for a Jedi, began firing upon him. At that moment, Commander Fox arrived at the scene aboard an Imperial Patrol Ship and realized that they were targeting Vader. He directed his ship to approach Vader and ordered his units to cease fire. Vader boarded the ship, and when Fox attempted to explain the misunderstanding, Vader used the Force to break his neck.
The clones on the ground persisted in firing at Nu, eventually disarming her. Cornered by Vader and the clones, she attempted to jump off, only for Vader to use the Force to restrain her. He brought her aboard his ship, where she revealed to the clones that he was the Jedi Knight Anakin Skywalker. Vader used the Force to expel the clones from the ship, and when Nu inquired about her fate, he killed her. Vader then crashed the ship and contacted Sidious, reporting that Nu had died during an escape attempt. With Nu having revealed that Sidious would create more dark side agents with the list and questioning what it was that Vader truly wanted before her death, Vader then crushed the list of Force-sensitive children that she had with her.
The Sith's Arsenal
Vader accompanied his master to The Works district on Coruscant, where they prepared for a sparring session intended to impart a lesson to Vader by Sidious. Sidious activated one of his lightsabers and instructed Vader to engage him in combat, prompting Vader to ignite his own saber before his master initiated the attack. As their lightsabers clashed, Vader was swiftly overwhelmed by Sidious, who disarmed him and subsequently used the Force to push him away.
While Vader was on the ground, Sidious seized his saber and informed him that he still fought like a Jedi. His master emphasized that the lightsaber was not his sole weapon, and that the Dark Side of the Force was his true arsenal, capable of influencing everything. Vader was then struck by multiple pieces of debris levitated by Sidious using the Force, as he declared that the lightsaber was merely a symbol of the inferno that consumed all who opposed the Dark Side. Kneeling, Vader affirmed his understanding of the lesson.
Defiance within the Imperial Ranks
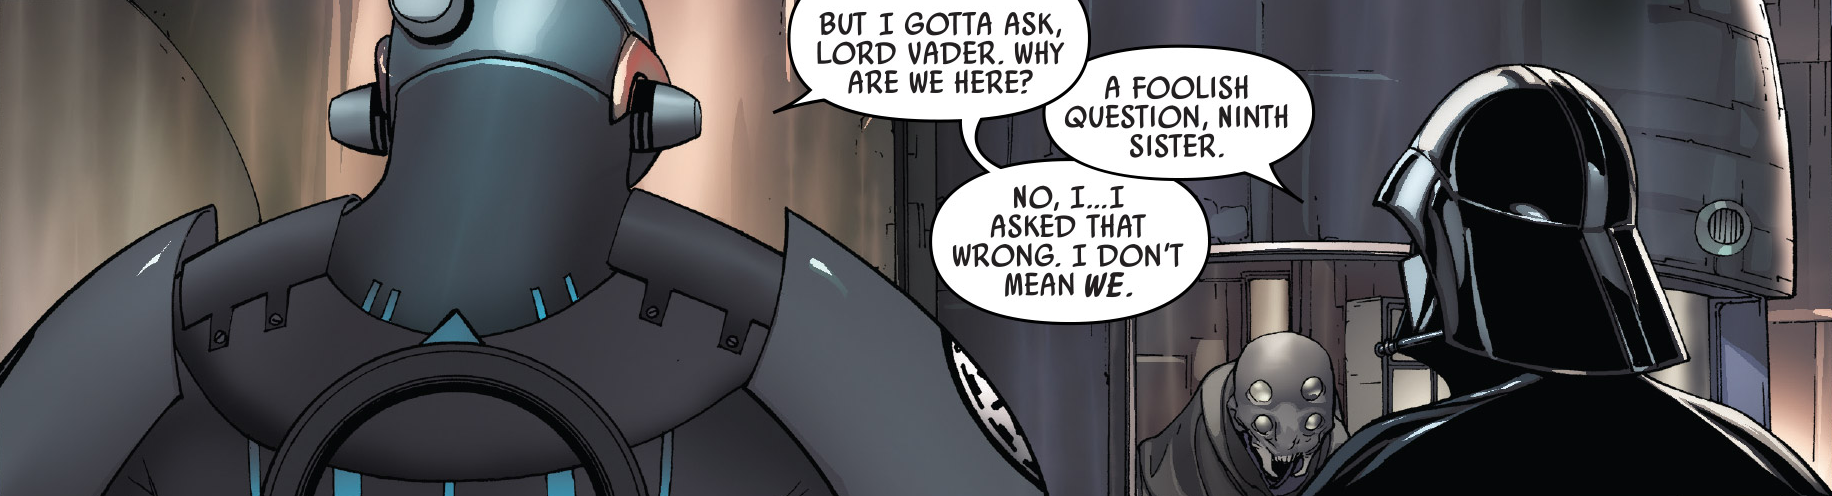
Convinced that he had lost everything he valued due to his own actions, Darth Vader fully embraced his role as the Emperor's primary enforcer. Few recognized his true identity, and even fewer suspected that he had once been Anakin Skywalker. Rumors circulated, suggesting that Vader was either a counterpart to the deceased Separatist warlord General Grievous, held in reserve by Palpatine, or a technologically enhanced warrior trained in the forbidden arts of the Force. His presence at the Imperial court and the favor he enjoyed from the Emperor engendered distrust among Imperial officers. They resented his sudden emergence and the authority he wielded over them due to his connection with his Master. They also resented his harsh treatment, exemplified by his use of the Force to choke Colonel Barokki in the presence of his Master. Secretly, Barokki and another Imperial officer conspired to assassinate Vader, questioning his position within the new Empire.
The situation reached a critical point for Vader when he investigated a Jedi sighting on Cabarria. Accompanied by the Ninth Sister, he proceeded to the bar where the sighting had been reported. Although the Ninth Sister had initially intended to investigate alone, Vader intervened, asserting that she was not yet prepared to confront a Jedi in combat, but secretly because he wanted to fight another Jedi. The Ninth Sister discerned his true motive, utilizing her empathic abilities to perceive him clearly. Consequently, Vader instructed her to remain outside while he conducted the investigation. Upon entering the bar, the Dark Lord was ambushed by a family of bounty hunters consisting of Bhada, Ramat, and their twelve-year-old daughter Chanath Cha. Employing ion grenades, they disabled all the weapons within the bar, while Chanath attempted to seize Vader's lightsaber using a tractor rifle. However, he employed the Force to intercept the lightsaber mid-air, causing the hilt to shatter under the strain of the opposing forces, leaving only the red kyber crystal.
The Chas informed the assembled patrons that they had come solely for the "Jedi" and had no intention of harming anyone else. However, a disarmed Vader contested this claim and used the Force to transform the patrons into projectiles aimed at the Chas. Taken by surprise, the bounty hunters activated their shields for protection. As they attacked him, Vader also utilized the patrons and the bar's furniture as shields. Eventually, the hunters realized their inability to defeat him and attempted to flee. Reclaiming his crystal with the Force, Vader pursued them. Emerging from the bar, Vader initially suspected the Inquisitors of orchestrating the attempt on his life and threatened the Ninth Sister with her own lightsaber. The Inquisitor's denials failed to sway the Dark Lord, nor did they prove her guilt. Determined to uncover the identity of the individual who had placed a bounty on his head, he continued his pursuit of the Chas. They evaded him for a time until he crashed a massive vehicle into their path, causing their speeder to crash. Seizing Chanath in a Force choke, he demanded that they reveal the identity of the person who had ordered his death.
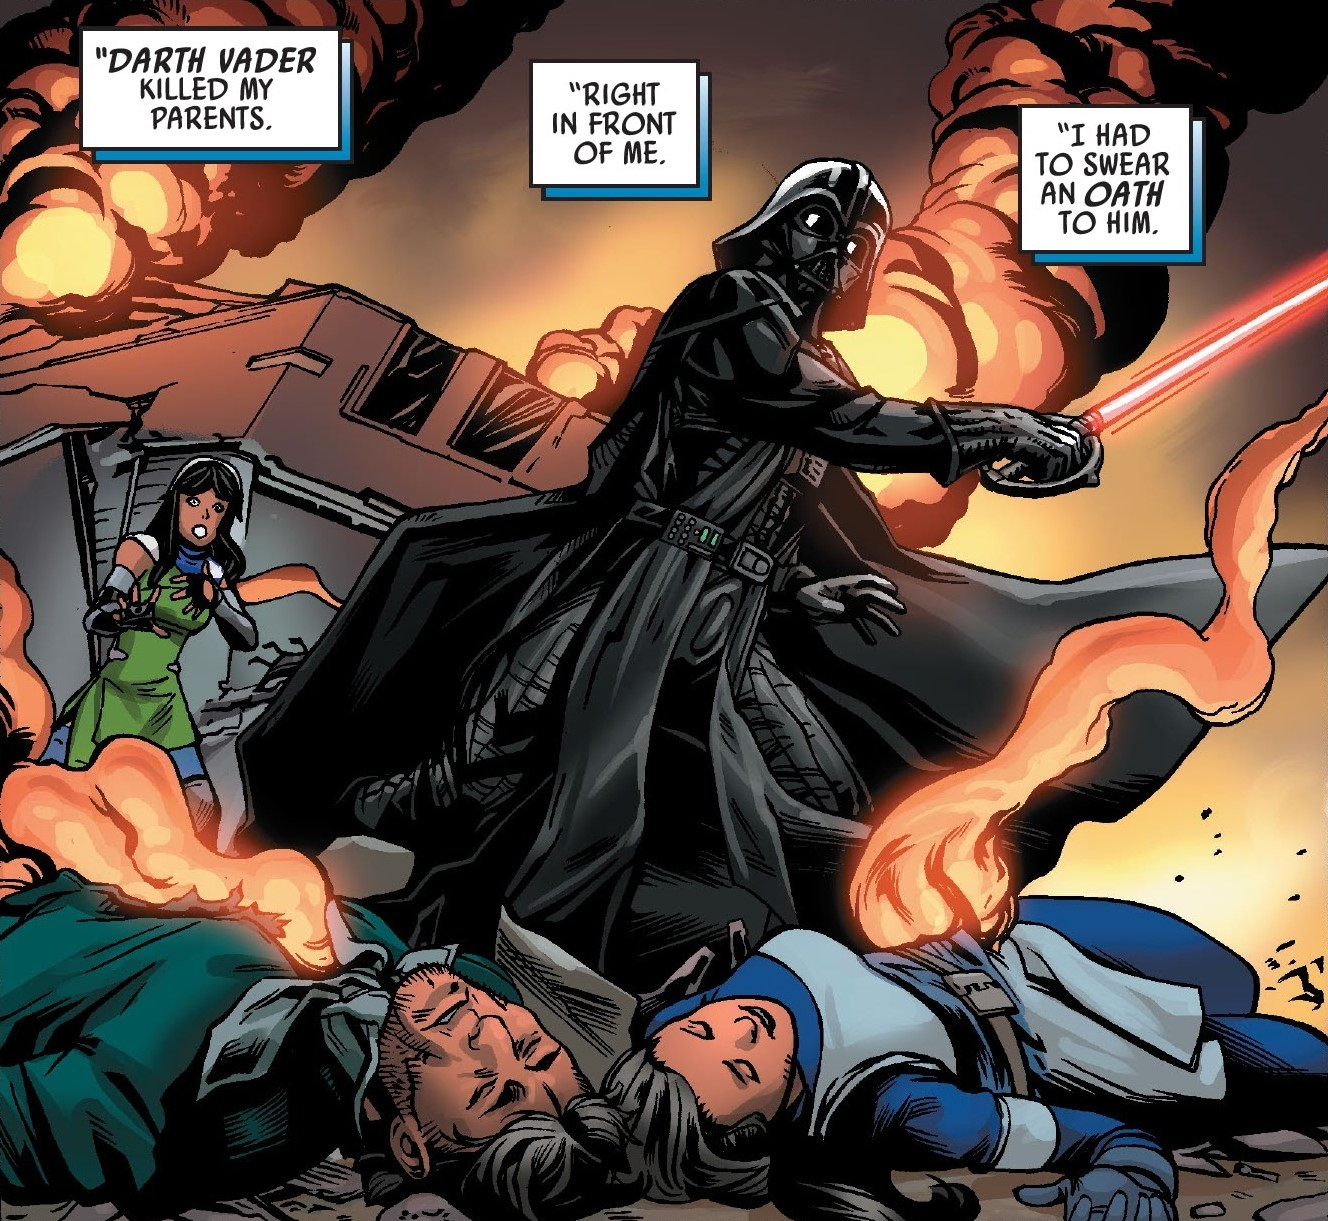
Realizing the danger to themselves and their daughter, they disclosed the existence of an anonymous bounty with an exorbitant price posted on the Hunter Net. Ramat Cha, a skilled slicer, offered to uncover their employer in exchange for their daughter's life. When they insisted on the prior release of Chanath, Vader refused. However, the Chas refused to cooperate if their daughter was killed, further declaring their willingness to die alongside her. Reluctantly impressed, the Dark Lord demanded proof of Ramat's ability to fulfill her side of the agreement, which she demonstrated by tracing the bounty's signal back to Coruscant. Vader released Chanath as agreed, at which point the bounty hunters made their daughter swear that she would seek no vengeance against the Dark Lord, a deal Vader chose to honor. To complete the deal, Ramat provided Vader with the information he had requested and gave him the source of the bounty on him: the Imperial Executive Building on Coruscant, specifically the Emperor's office.
Vader then executed both Cha parents in front of their daughter, who was consumed by rage. Despite her oath to refrain from seeking revenge, she disregarded her promise and dedicated her life to hunting the Dark Lord. Eventually, as the years passed, the Sith Lord himself simply forgot the murders he carried out on Cabarria. Cha, however, never forgot and became a skilled bounty hunter, studying every report she could and speaking to anyone she could find who had witnessed Vader in battle. She trained herself to counter Vader's abilities, eventually enlisting a team of fellow hunters as "the Orphans" to help her in her quest. Cha's skills rose to a level that even Palpatine took notice, becoming a bounty hunter the Emperor could trust all in the name of possibly getting close to Vader, only to never see him. In effect, Vader had completely upended Cha's life, only for the crusade her life turned into to not impact Vader at all.
Having concluded their business on Cabarria, Vader and the Ninth Sister departed the planet and returned to Coruscant. Suspecting that the Emperor had placed the bounty on his head, the Dark Lord planned to confront his Master regarding his intentions. As the Ninth Sister piloted the ship through hyperspace, Vader worked on creating a new lightsaber. Meanwhile, his droid investigated the origins of the kill contract placed on him and confirmed that the order could have originated from the Emperor's office, with no evidence of slicing to indicate foul play. However, upon the ship's arrival in orbit over Coruscant, its attempt to transmit clearance codes for landing was jammed, and the ship itself was identified as belonging to a Separatist splinter cell. The Imperial capital's orbital defenses targeted Vader's ship. Only the Dark Lord's piloting skills prevented its destruction, although the ship sustained damage and was forced to crash land on Coruscant. Weary of the repeated attempts on his life, the Dark Lord proceeded to the former Jedi Temple to confront the Emperor.
The Emperor was examining the collection of artifacts that Jocasta Nu had gathered and stored in the Jedi Archives when Vader arrived. The Emperor sensed that his apprentice was reluctant to discuss his recent discovery, though he commended him for locating the Librarian's stash. Vader informed his master of the events on Cabarria and his investigation into the kill order against him, before directly inquiring whether his Master had placed it on his head as a test. Noticing Vader's new lightsaber, the Emperor requested to examine it, approving of its design. He also rebuked his apprentice for believing that he would resort to placing a bounty on his head if he desired his death, asserting that he did not "test," but rather "taught." He further stated that identifying the assassins was Vader's responsibility, not theirs. This echoed a previous lesson he had imparted to Vader when he had "disciplined" Colonel Barokki: that they must not kill everyone in the galaxy, but that having power meant they could, and that they would never lack for people to destroy.
Vader returned to his quarters, where he meditated on the past events and his Master's words. Reflecting on all that had transpired, he eventually concluded that the conspiracy against him stemmed from the concern and fear his sudden elevation had engendered among the ranks of Imperial officers, who recognized his "strength" but not his possession of the Emperor's "power." Despite the lack of evidence, Vader became convinced that Colonel Barokki, who had so suddenly incurred his displeasure, must be involved in the conspiracy. The Dark Lord met with the Emperor and shared his conclusions, requesting public recognition and the opportunity to demonstrate the consequences of opposing him. The Emperor inquired about his certainty, and Vader affirmed his resolve: he would not kill them all unless necessary, but he would not allow them to act against him with impunity. The Emperor approved Vader's plan, but forbade him from killing Tarkin, as he was essential to his plans.
The Emperor convened the elite officers of the burgeoning Imperial Military to clarify the new hierarchy. He formally introduced Vader as his emissary, whose voice was his own and whose commands were to be obeyed as if they originated from the Emperor himself. The Emperor then stepped aside, allowing Vader to address the assembly: the Dark Lord summoned five officers before him: Corin Ferro, Zorta Bingan, Joon Strephi, Tomas Azoras, and Barokki. Informing them that the two attempts on his life had originated from within the Officer Corps and that he harbored suspicions regarding the responsible parties, he instituted a new rule: for each assassination attempt he survived, and he cautioned them that he would always survive, five officers chosen at random would be executed. He instantly executed the five designated officers with a Force choke before departing, leaving the remaining officers stunned and fearful. With his position in the hierarchy firmly established, Vader held no official military rank but functioned as the de facto Commander-in-Chief of the Imperial Military, recognized as a member of both Imperial High Command and the Imperial Ruling Council. Subsequently, Vader returned to his personal suite and meditated, cracking the window in his anger that positive thoughts still came.
The War on Mon Cala
In 18 BBY, one year into the Empire's rule, Vader was immersed in a meditative recollection of his duel on Mustafar. Within his vision, he was already encased in his cybernetic suit, employing the Force to hurl lava at Obi-Wan. Obi-Wan leaped to evade the molten assault, but Vader ensnared him in a Force choke and hurled him against the rocks. Vader observed Obi-Wan's immolation before awakening in his meditation chamber as the Emperor summoned him via comm. Within his throne room, the Emperor declared that a year after his ascension, it was time to demonstrate that his voice was the only voice within the Empire. Vader inquired as to how, and the Emperor proposed that Mon Cala would serve as a potent example of the price of defiance. He further suggested that King Lee-Char might have an advisor assisting him in negotiations with the Empire. Vader questioned whether this individual could be a Jedi, to which the Emperor conceded the possibility. He instructed Vader to assemble a team to investigate, while the military aspects of the operation would be entrusted to Moff Tarkin.
Vader arrived at Mon Cala aboard the Zeta-class shuttle Infernum. Accompanying him were three Inquisitors—the Sixth Brother, Ninth Sister, and Tenth Brother—as well as a death squad of Purge Troopers. At that moment, the Imperial ambassador Telvar had just concluded another meeting with Lee-Char and was en route to his shuttle when he witnessed Vader descending from the ramp of his vessel. The Ninth Sister encountered resistance from the king's Chief of Security, Gial Ackbar, and Vader confronted the Mon Calamari, inquiring whether he had reviewed the writ delivered by the Ninth Sister. Ackbar confirmed his review but demanded to know their purpose, asserting that he had his duties to perform, as did Vader. Vader complied, explaining the potential presence of an enemy of the Empire on Mon Cala. As he spoke, Telvar's shuttle departed and headed toward Tarkin's Star Destroyer, the Sovereign, which was positioned in orbit above Mon Cala. However, as Ackbar dismissed the possibility of an enemy of the Empire on Mon Cala, Telvar's shuttle exploded.

Telvar's assassination prompted Tarkin to initiate a full-scale invasion of Mon Cala. His forces landed at Dac City, where Vader had arrived, and laid siege to the Mon Calamari and Quarren defenses. Vader and his team sprang into action, swiftly securing the landing pad where the Infernum was stationed. He then led them to the Dac City palace in search of Lee-Char, intending to question him about the potential Jedi. They fought their way through the palace guards and gained entry, where the Ninth Sister began torturing Lee-Char to ascertain the Jedi's location. However, another threat loomed. A massive tidal wave had suddenly erupted as part of Lee-Char's defensive strategy. The Sixth Brother alerted them to the impending wave, and he and the Tenth Brother began using the Force to shield Vader and the Ninth Sister. As their efforts faltered, Vader joined them, but their combined strength proved insufficient. The group was swept away by the wave, leaving Dac City in ruins.
Vader regained consciousness at the bottom of the Great Ungeness Trench. As his oxygen supply dwindled, he employed the Force to create an air bubble around himself. Suddenly, he was attacked by a squid-like creature, which he subdued and killed with the Force after a struggle. Vader then commandeered its body, using the Force to propel it, and eventually intercepted a transmission from the Inquisitors. Vader requested their presence at his location, and they responded in an Imperial submarine. Upon their arrival, he inquired about the Jedi, and the Inquisitors reported that he was still alive somewhere. Vader then asked about Lee-Char, and the Ninth Sister revealed that they did not know his whereabouts but had extracted the Jedi's location from him. Knowing their target's precise location, they set course for the Jedi.

Vader and his team arrived at the Jedi's location, discovering that the individual and his disciples were in the process of evacuating. The Jedi, an Iktotchi Padawan named Ferren Barr, had been alerted by Lee-Char after his rescue following the events at Dac City. The group immediately scattered, but one of the disciples instead launched a frontal assault on the submarine with his blaster. The shots deflected off the window, and Vader used the Force to crush his helmet. The others fled in the direction of Bel City, and as Vader pursued them, another disciple turned to attack them. He too perished in the process but managed to slow Vader's submarine, allowing the rest of the group to follow Barr to Bel City. Vader and the Inquisitors arrived at Bel City and marched down the hallway, reinforced by the Inquisitors and the Purge troopers. Vader was then contacted by Tarkin, who was struggling to manage the grueling conflict on Mon Cala. Vader informed Tarkin that he was occupied, but Tarkin acknowledged this and requested an alternative task: the capture of Lee-Char. Vader asserted that he did not answer to him, but Tarkin countered that capturing Lee-Char was the only way to swiftly end the fighting on Mon Cala, and he pledged to owe Vader a favor if he complied. Vader agreed and instructed the Inquisitors to continue the hunt as he departed.
Vader arrived at Lee-Char's Royal Command Bunker and eliminated his guards. He then disarmed Lee-Char and contacted Tarkin, who instructed him to position Lee-Char at a window and transmit his exact location. Vader inquired whether Tarkin intended to dispatch a shuttle, to which the man replied not yet. Once Vader fulfilled his request, Tarkin initiated a bombardment of Mon Cala. Lee-Char watched in horror but refused to surrender. The two were interrupted by Barr, who had outmaneuvered and scattered Vader's team. Barr confronted Vader, and the two engaged in a duel. As they fought, Barr revealed that he had assassinated Telvar to instigate war on Mon Cala. Lee-Char overheard this and realized his error in trusting Barr. He rushed to his terminal and transmitted a message to the Mon Calamari and Quarren forces, ordering them to cease fire. Lee-Char then contacted Tarkin, informing him of the surrender. Tarkin dispatched a shuttle to retrieve him but continued the bombardment.
Vader and Barr continued their duel, and Barr began to laugh. Lee-Char questioned this, and Barr explained that he had accomplished his objective. Barr prophesied that the Mon Calamari vessels would be at the forefront of a great rebellion decades hence, and decades after that. Vader declared that Barr was no longer a Jedi, to which Barr retorted that that made two of them, asserting that he had still defeated the Sith. Vader then slew him, and the shuttle arrived to collect Lee-Char. The king vowed that Mon Cala would rise again, but Vader countered that there was no Mon Cala, only the Empire. Sometime after the mission, Vader ordered the imprisonment and torture of the people of Mon Cala.
Investigation on Geonosis
Vader soon became aware of a project that was consuming significant resources. He initiated an investigation, leading him to the data vault on Scarif. There, he discovered Project Stardust, a project involving a massive battle station the size of a small moon. Vader scrutinized its design before being interrupted by Tarkin, who expressed his displeasure at Vader's intrusion. Tarkin asserted that he was unauthorized to be there, and Vader countered that the Force was all the authorization he required. Vader denied being Tarkin's beast, but Tarkin dismissed this claim and taunted Vader, stating that he did not need the Force to discern his anger. Tarkin then presented a hologram of the Emperor, who informed Vader that he did not recall dispatching him to Scarif. Vader apologized and explained that he merely sought to study the means by which the Empire would extend its dominion over the galaxy. The Emperor informed Vader of a new mission he was to undertake. Instances of sabotage had occurred during the Death Star's construction, and Vader was tasked with identifying the source before the situation worsened. The Emperor further stated that Tarkin had full authority over him and that failure to satisfy Tarkin would displease Palpatine.
Vader journeyed to Geonosis, where he encountered Commander Orson Callan Krennic. As their meeting began, a nearby rock formation exploded, causing debris to fall upon them. Vader shielded both himself and Krennic before they proceeded to Krennic's office to address the incident. Krennic alleged that Tarkin was attempting to undermine his work in order to eliminate him and seize control of the project. Vader inquired about evidence, but Krennic was unable to provide any. Krennic then detailed the series of events that had transpired over the past three months. Vader shared his insights on the situation with loyalty officer Sid Uddra, who awaited him at the Petranaki Arena to discuss her suspicions. She informed Vader that while tension existed between Tarkin and Krennic due to their rivalry, it was improbable that either was responsible. She then suggested another individual for Vader to investigate: the scientist Galen Walton Erso. Vader investigated Erso's office, discovering numerous kyber crystals that he bled for his own use without difficulty. He also found a recording of Erso and his family. Vader also noted that Erso referred to his daughter as "stardust," which was the code name for the Death Star project. Lastly, Vader located an ootheca egg within a box. Knowing that Geonosians were enslaved and prohibited from reproducing freely, he confronted Krennic about this. Krennic denied involvement, suggesting that some slaves might have sent it to Erso as a distress signal. Vader then determined the identity of the saboteurs.
Accompanied by a squad of death troopers, Vader infiltrated a Geonosian hive, locating the queen and her minions. A battle ensued, which Vader quickly dominated, ultimately killing the queen. Following the engagement, he returned to Tarkin aboard the Carrion Spike to report his findings. Tarkin questioned Vader about how he knew the queen's hive had orchestrated the sabotage, and Vader explained that their slicers had confirmed that the hive had installed corrupted technology into production, causing accidents. Tarkin then inquired about Vader's handling of the situation, to which Vader responded that they were animals and were therefore slaughtered as such. Tarkin then asked Vader if there was anything else and he stated to Tarkin that his project, the Death Star, was able to destroy a planet. Tarkin questioned how he had come to know this, and he cited the kyber crystals he had observed in Erso's office. Tarkin then asked Vader why he was not happy for this revelation, and Vader said that he distrusted his reliance on technological aberration. Tarkin then told Vader that he was one of those before realizing that Vader wanted to be the only technological aberration. Vader cautioned Tarkin that the Death Star could become his tomb, and when Tarkin asked if that was a threat, Vader clarified that it was merely a prediction.
Embracing the Dark Side
The Emperor's Representative
Throughout the Empire's two-decade reign, Vader remained among the select few with unrestricted access to Palpatine. He served as Palpatine's favored representative for matters of direct interest to the Emperor. With Palpatine largely occupied with governing the galaxy, Vader was tasked with directly confronting the Empire's adversaries, earning the moniker "Emperor's Fist" among both Imperials and criminals alike. These tasks encompassed suppressing rebel uprisings and continuing the construction of the Death Star. One of Vader's initial assignments on the Emperor's behalf involved executing an order on Murkhana. He was indeed informed of the secret construction of the Death Star, under the supervision of Wilhuff Tarkin. Vader's elevated status also granted him the authority to modify Imperial records through the unofficial Directive 081-Omega.
An Imperial captain who served under Vader shortly after the Clone Wars recounted to a later subordinate, Yrica Quell, that Vader had "matured" over the years: initially, Vader would simply kill out of irritation, but he later waited for subordinates to make mistakes, even minor ones, to justify his actions. Imperial officers remained cautious of Vader, his power, and his unwavering devotion to the Force, but none dared to challenge him without suffering the consequences.

Despite the mistrust and even animosity he inspired among officers, Vader was highly regarded by the Stormtrooper Corps, as he frequently fought alongside them on the front lines rather than remaining in command centers. As the Emperor's enforcer, Vader retained command of the unit he had led during the Clone Wars as Anakin Skywalker: the 501st Legion. When the Emperor phased out clone troopers, the 501st's ranks were filled with recruited stormtroopers, some of whom received lightsaber combat training from Vader himself, such as Sergeant Kreel, an undercover agent. Through their missions for Vader, the 501st became known as "Vader's Fist." On one occasion, the stormtrooper Terex encountered Vader, experiencing both terror and respect. Vader also enjoyed strong support from pilots within the newly formed Imperial Navy.
At some point, Vader was dispatched to quell resistance on the mineral-rich world of Bandomeer, where miners were rebelling against Imperial exploitation. Vader punished them for their defiance. Apparitions of Vader and other dark siders were once confronted by surviving Jedi Vanzell Mar-Klar and Nedriss Narr, who were attempting to train a new generation of younglings after Order 66. Having eliminated Tambor along with the rest of the Separatist Council during his mission to Mustafar, Vader was also sent to Skako Minor to eliminate the Techno Union Foreman's remaining loyalists by wiping out the planet's Ruling Council. After massacring the council officials, including Tambor's son Wat Tambor II, Vader established a new Imperial-loyal regime on the planet, which also became subject to Imperial occupation.
The Shadow of Death
Once, a person had a nightmare where Vader pursued and killed them. On Torku, Vader pursued Davgar Llian, a scientist who sided with insurgents who had sabotaged an Imperial weapon. Vader, aware of Llian’s role in the sabotage, attacked once the scientist brought the weapon online to target local Imperial base, killing the soldiers and confronting the scientist. Noting that only Llian was capable of reversing the sabotage, Vader mockingly thanked him for doing so before strangling him with the Force.
Vader surveyed Uokara, a planet in the Unknown Regions, searching for life on behalf of a director who desired to initiate a mining operation. At some point, Vader unknowingly inhaled Ghymnon, a sentient pathogen native to Uokara that had existed there for millennia. After reporting the world as uninhabited, Vader was quarantined in a bacta tank upon his return by a 2-1B medical droid in accordance with standard procedure following contact with a class IV planet, much to the Sith Lord's displeasure. Within his mind, Vader confronted and defeated Ghymnon. Vader instructed the droid to catalog Uokara’s lone, former inhabitant, subsequently ordering and leading a cleansing of the world by range troopers equipped with mobile bacta units. During the purge, Vader spotted a remaining trace of Ghymnon and destroyed it with his lightsaber.
The Ultimate Act of Mercy
Doctor Sera Lemare, formerly employed by the Tagge Corporation and an admirer of Kaminoan science, stole a cache of genetic specimens and secretly developed bioweapons research, supposedly creating the perfect killing machine. Aboard the Phial-class heavy transport Endless Mercy, Vader led a squad of stormtroopers in pursuit, instructing his men to remain vigilant and secure the area. Vader's team was immediately ambushed by the Z'Rakkon, creatures created from Lemare's research. Outnumbered and overwhelmed, the Sith Lord struck at the abominations with his lightsaber but lost his helmet in the process, swearing to take down his attackers down with him.
After being dragged away by the creatures, Vader awoke to find himself and his sergeant confined within the Z'Rakkons' lair. The sergeant, believing they were to be eaten, expressed his dissatisfaction with such a death, prompting Vader to summon his lightsaber and vow vengeance. Vader freed himself and killed several of the beasts, lecturing them on their errors before proceeding to eliminate their queen.
The queen Z'Rakkon—in reality, Lemare herself—recounted how she had willingly joined the creatures and become their ruler. After stabbing Vader through the chest, Lemare revealed that she had integrated the Sith Lord into the Z'Rakkon hive mind. However, Vader escaped Lemare's snare and, despite her pleas, annihilated her. Lemare explained that she had only tried to bring Vader peace, a favor Vader returned by killing her and guiding the Endless Mercy to crash down on to the surface of an astronomical object below. After departing the decimated starship, Vader remarked that the only peace was death and that the dark side would always endure.
Remnants of the Clone Wars
Around 17 BBY during the early Imperial era, approximately two years after the skirmish aboard the Tribunal during Order 66, Vader traveled to the snowy moon that housed the crash site of the Venator-class Star Destroyer. Accompanied by a contingent of snowtroopers, Vader investigated the wreckage, discovering a memorial to the clone company that perished in the crash, as well as a lightsaber, partially frozen but still functional, that had belonged to his former apprentice, Ahsoka Tano.

Activating the lightsaber's blue blade, Vader heard a squawking sound and looked up to see a strange bird flying through the air. Deep down, he realized his former Padawan was alive, but he possessed no concrete evidence and did not sense her presence. Therefore, he attempted to convince himself that she was dead, suppressing the painful memories she represented, despite subconsciously knowing she was still alive. After observing the bird for a moment, Vader deactivated the lightsaber, turned away from the crash site with the saber in hand, his reflection visible in an abandoned clone trooper helmet.
Confrontation with the Benathy
Circa 15 BBY, Vader and his forces engaged the Benathy in Wild Space. The Imperial army comprised at least several thousand stormtroopers, AT-AT walkers, AT-STs, TIE fighters, and TIE bombers. Although thousands perished on both sides, Vader successfully killed the king of the Benathy. Vader commanded his troops to attack relentlessly, and despite the heavy casualties, he refused to retreat. The offensive was only halted by a Zillo Beast that the Benathy revered as their god. Nevertheless, Vader managed to subdue the Benathy.
Insurrection on Ryloth
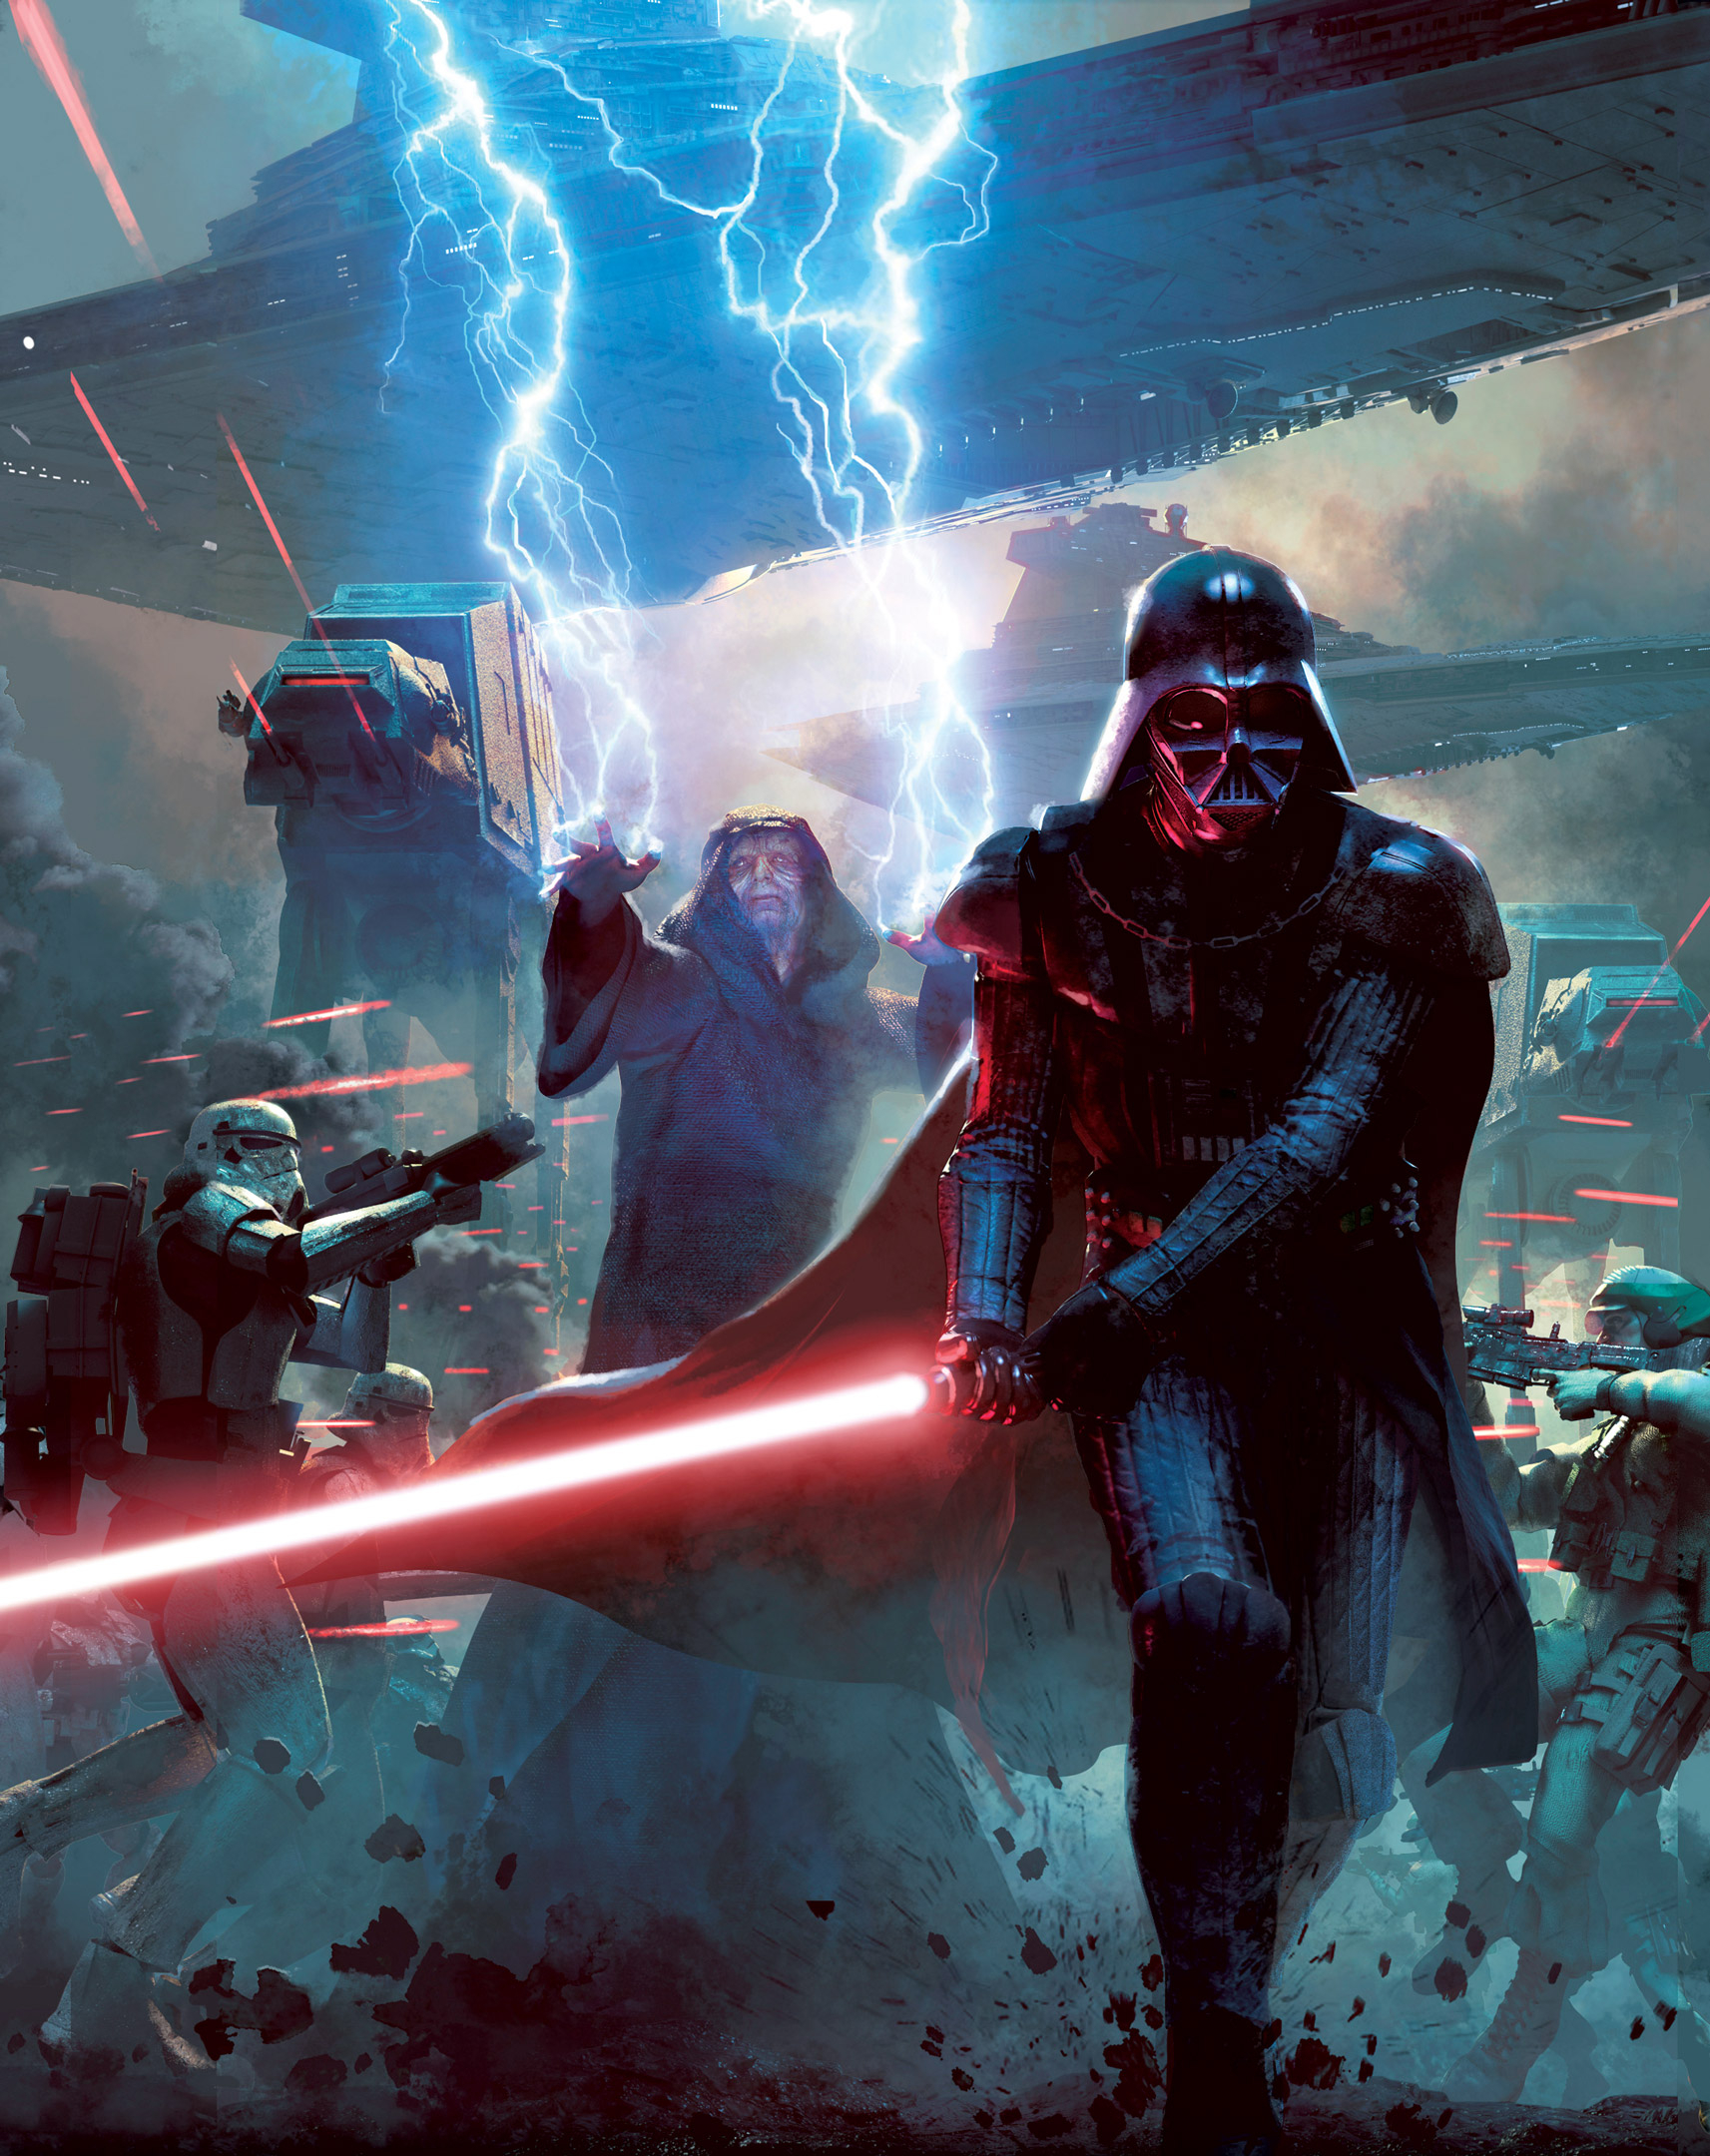
Five years into the Age of the Empire, Vader, while meditating aboard the Perilous, was alerted by Captain Luitt to an attack on the Yaga Minor shipyards. The assault had been carried out by several dozen members of the Free Ryloth Movement, a predominantly Twi'lek insurgency dedicated to liberating their homeworld from Imperial rule. The insurgents hijacked an Imperial weapons transport, and Vader led a squadron of V-wing starfighters in pursuit. Following a prolonged chase, during which the transport fled through hyperspace to multiple systems, its engines overloaded while attempting another jump, allowing Vader's squadron to finally engage. The squadron breached the transport's shields with minimal losses, while Vader crippled its engines.
Although the squadron commander suggested allowing the Perilous to tractor the transport into one of its hangar bays upon arrival, Vader correctly surmised that the insurgents intended to destroy the transport by detonating the heavy ordnance within its cargo bays. To prevent this, Vader crashed his black Eta-2 Actis-class light interceptor into one of its gun bubbles and ejected just before the collision. He then entered the ship through the damaged gun emplacement and proceeded to kill all of the insurgent Twi'leks on the ship. After eliminating the insurgent leader Pok, Vader noticed an active comlink on the bridge. Suspecting that another rebel ship was nearby, Vader had his V-wings fan out in a search pattern, but the rebel ship evaded detection by shutting down nearly all of its systems and hiding in the rings of a nearby planet. Finding nothing, Vader had the Perilous collect the transport, and returned to Coruscant.
In the Imperial Palace, Vader reunited with his master. There, he and Sidious met with Ryloth's Senator Orn Free Taa regarding the nuisance posed by the Free Ryloth Movement. The movement, though relatively small, had been conducting raids on Imperial shipping facilities and transports, significantly disrupting the flow of Spice from the planet. Consequently, Sidious believed the situation warranted his personal attention and decided that he, Taa, and Vader would travel to Ryloth for a state visit. After informing the Senator of the planned journey and dismissing him, Sidious informed his apprentice that Taa almost certainly had a traitor among his support staff who was providing the movement with classified information about Imperial activities.
While Vader understood his master's intention in acting as bait alongside himself and Taa, he saw no reason why the Emperor should potentially jeopardize his own safety over such a minor issue. Instead, Vader advocated for simply killing Taa and his entire staff, guaranteeing the elimination of the traitor. However, Sidious desired to eradicate the root causes of the treachery, not just the single traitor within Taa's staff. To that end, Sidious ordered Moff Delian Mors to be informed that Taa would be arriving for a state visit, but stipulated that she should not be told that either he or Vader would be accompanying the Senator. Sidious hoped this would further encourage the movement to attack, assuming they would discover his and Vader's plans through their spies. Ten days later Vader, the Emperor, Taa, and a contingent of Royal Guards traveled to the Ryloth system aboard the Perilous.
During the journey from Coruscant to Ryloth, the Emperor ordered the Perilous to stop in the Denon system to consult with several navy chiefs on how to better integrate disparate naval academies into one Imperial Naval Academy. The Emperor instructed Vader to oversee a training session conducted by Commandant Pell Baylo on the Defiance while the Emperor met with his naval chiefs in Baylo's office on the training ship. It was during this training session that Vader began to suspect that Sidious was treating him in a similar manner to the Jedi Council: acting as if he knew better, withholding information, and assigning him "busywork." Baylo ordered the Defiance to enter hyperspace on a course for Christophsis. Cadet Rae Sloane entered the coordinates, only to have her hyperspace path overridden by Baylo, who claimed she was sending them too close to a singularity.
Sloane examined the path, suspecting that Baylo was incorrect in his adjustment. Vader and Sloane discovered that the altered hyperspace route would cause the Defiance to crash into Christophsis' sun, killing everyone on board. Vader ordered Sloane to correct the problem, and without revealing his knowledge of Baylo's treachery, Vader and Baylo went to see the Emperor. The Emperor ordered Baylo to relinquish command of the Defiance and take a position at the training center on Corellia. Baylo, however, remained loyal to the Republic and considered the Empire a hostile power. Instead of relinquishing his command, Baylo offered his resignation from the navy. Vader then revealed that he knew of Baylo's plan to crash the Defiance, and the Emperor congratulated Vader for handling the "petty problem," which annoyed him.
As Baylo denounced the Emperor, Vader Force-choked him to death, drawing the Emperor's ire, who had wished to see Baylo suffer and force him to witness his beloved Navy transformed into something he despised and have the Defiance be melted down into cafeteria trays. Above all, he wanted to use Baylo for his own ambitions since the old man was willing to kill his own students for a cause. Vader tried to explain that his way was more efficient, but the Emperor refused to listen, as he had not ordered him to kill Baylo. Later, he ordered Sloane to rename the Defiance the Obedience as a subtle final jab at Baylo and a not-so-subtle reminder toward Vader to learn his place.
Shortly thereafter, Vader and the Emperor reboarded the Perilous and resumed their course to the Ryloth system. However, upon exiting hyperspace, the ship immediately began colliding with spacial mines planted by Cham Syndulla's rebels. Concealed among these mines were specialized devices designed to drain the ship's shields, which began to weaken under the constant assault. As the shields neared failure, a swarm of several hundred reprogrammed Vulture Droids attacked the Perilous from the system's asteroid belt. Vader boarded his personal interceptor and led several squadrons of Imperial pilots to destroy the droid fighters and mines, but quickly discovered that each Vulture Droid carried a payload of explosive buzz droids.
Realizing that the Vultures themselves were merely delivery systems intended to deploy the buzz droids near or inside the Star Destroyer, Vader ordered his squadron to concentrate fire on them, as they posed a far greater threat than the mines. However, between the mines and the Vultures, there were simply too many targets for Vader and his squadrons to handle, and the Perilous sustained severe damage. The second wave of Vultures was detected immediately after the first had been destroyed, further exacerbating the already dire situation. Captain Lewitt of the Perilous informed Vader that the ship could sustain virtually no more damage without being destroyed.
Vader moved to intercept the second wave alone, ordering his squadrons to remain near the Perilous to destroy any droids that managed to evade him. Despite their disbelief, the squadron commander obeyed, and Vader used the Force to begin tearing apart the compartments on the Vulture droids that housed the explosive buzz droids. He then used the Force to begin flinging the buzz droids at other incoming fighters and repeated this process until the vast majority of the Vulture Droids had been destroyed. The remaining fighters were annihilated by Vader's squadrons, and he himself returned to the Perilous. Vader marched to the Star Destroyer's bridge and Force choked Taa briefly, informing him of the traitor within his staff who had been responsible for the assault on the Perilous. Utterly terrified, the Senator vowed to find the traitor, but the Emperor had Taa and his staff confined to their quarters. An order was then broadcast from the Imperial headquarters on Ryloth for any and all repair ships to assist the Perilous as it sped, badly damaged, towards the planet.
Unbeknownst to the Sith Lord, some Twi'lek teams assigned to repair work were secretly members of the Free Ryloth movement. A specific group within these teams had been tasked with sabotaging the Perilous by planting explosives on its hyperdrive core. Soon after the Twi'leks arrived, one Free Ryloth cell initiated combat with Imperial stormtroopers. Upon learning of this conflict, Vader commanded the execution of all Twi'lek repair personnel, numbering over 100, regardless of their involvement. He then made his way to Deck 17, the site of the reported skirmish. En route, he eliminated a group of Twi'leks who appeared to be uninvolved before proceeding to the hyperdrive chamber. The saboteurs, under the leadership of Cham's second-in-command, Isval, had successfully sealed the hatch to the hyperdrive core, preventing Imperial interference, prompting Vader to use his lightsaber to begin cutting through the barrier.
By the time Vader had breached the hatch, the saboteurs had completed their mission and made their escape. The hyperdrive core was now rigged with timed explosives designed to detonate if tampered with. Concluding that the Star Destroyer was doomed, Vader ordered an immediate evacuation. Vader then communicated with Sidious, who instructed him to rendezvous aboard his shuttle. Before leaving, Vader made a final attempt to eliminate the saboteurs, but they narrowly evaded him and escaped in an Imperial escort vessel. Following this, Vader met with the Emperor and departed on the shuttle, just moments before the Star Destroyer exploded. Shortly thereafter, Imperial defector Belkor Dray provided Cham with the Emperor's shuttle's transponder code, leading him to task Isval and her team aboard the escort boat with attacking it.
Vader's exceptional piloting skills allowed him to evade the escort boat, then maneuver his shuttle upside down, placing its cockpit within direct visual range of the pilots. He then used the Force to choke both Isval and her co-pilot; however, before losing consciousness, Isval rammed the shuttle with the escort boat. The collision disabled the shuttle's primary power systems, forcing Vader to rely on a nearly depleted backup battery to attempt an emergency landing on Ryloth. As he navigated the ship through the atmosphere, he experienced flashbacks of past events and individuals. Despite this distraction, Vader successfully landed the ship in Ryloth's equatorial forest; however, the Emperor noticed the poor landing and recognized that Vader was not at his best.
Shortly after this crash, the Twi'lek insurgents continued their attacks on freighters, which prompted Vader and the Emperor to intervene and destroy the attacking ships, before leaving their downed shuttle. At night, they paused to rest, where the Emperor questioned Vader's doubt and devotion, but Vader reaffirmed his loyalty. They were soon attacked by a horde of lyleks, which forced them to retreat into a tunnel, unknowingly entering the lyleks' nest. They defended themselves against hundreds of lyleks and their particularly dangerous queen, eliminating them all before exiting the tunnel and encountering a young Twi'lek girl, Drua. When the Emperor attempted to kill her, Vader intervened, intending to use the girl to guide them to her village, where they could acquire a communicator to contact Moff Mors.
After providing their coordinates, they were eventually surrounded by Syndulla's forces, but were also met by Mors's troops, who aided them in suppressing the rebellion. As the stormtroopers slaughtered the Twi'leks, Vader noticed a trio of Twi'leks—Syndulla, Isval, and Goll—observing from a distance, and moved to eliminate them; however, Goll and Syndulla escaped, leaving Vader to capture Isval and present her to the Emperor. The Emperor mocked her, asserting that her people had accomplished nothing, after which Vader executed her. On the Emperor's command, Vader then killed the villagers to eliminate any witnesses, thus concluding their mission.
Teller's campaign
When Moff Tarkin's Sentinel Base came under attack, Vader was at the Imperial Palace on Coruscant, presiding over a court with the Deputy Director of the ISB, Harus Ison, reprimanding Coruscanti criminals and Prefect Phoca Soot of Level 1331 for disregarding the Emperor's edicts. Instructing them to relocate their operations away from Coruscant, Vader then made an example of Soot for his disrespect by crushing his heart with the Force, before adjourning the court to meet with Tarkin and Grand Vizier Mas Amedda. Amedda politely requested that Vader refrain from killing everyone who displeased him, to which the Sith Lord responded that he would consider the matter, before greeting Tarkin and discussing the latest developments in the Death Star's construction.
The two parted ways when Vader left Tarkin, who then met with the Emperor in private. Subsequently, Vader (along with Tarkin and Amedda) participated in a meeting of the Imperial Ruling Council, alongside leaders from the Imperial Security Bureau and Naval Intelligence Agency in the palace's audience chamber, overseen by the Emperor. He then assigned Tarkin and Vader to a mission on Murkhana to investigate newly discovered Shadowfeed technology and its connection to the attack on Sentinel Base. The pair traveled to the planet aboard the Carrion Spike, which Vader had modified to include his meditation chamber.
Upon arriving at Murkhana, the Spike was stolen by unknown dissidents, which led Vader and Tarkin to eliminate the Sugi crime lord Faazah and commandeer his ship, the Parsec Predator, to pursue the stolen vessel, which was concealed by cloaking technology. Utilizing his connection to his meditation chamber, Vader pinpointed the rebels' location in the Fial system and later, the Galidraan system, where they engaged the Spike before the rebels jettisoned his meditation chamber and escaped to Lucazec. With the Predator disabled, Vader and Tarkin boarded the Liberator, from which Vader requested his black Eta-2 interceptor to be transported on the Goliath from Coruscant.
While aboard the Goliath, Tarkin suggested to Vader that the insurgency was likely supported by someone in a high position within the Imperial Military, and predicted that the insurgents would travel to Phindar to refuel the Spike. Subsequently, Vader led a squadron to attack the stolen corvette in the Phindar system. Although they inflicted significant damage to the ship, it escaped, prompting Tarkin and Vader to calculate its trajectory to the Obroa-skai system. Teller transmitted false intelligence indicating that the insurgents were heading to the Obroa-skai system. Hoping to capture the Carrion Spike, Tarkin and Vader deployed substantial Imperial resources including three Interdictor vessels. The prototype Immobilizer 418 cruiser malfunctioned, pulling several ships out of hyperspace and causing a massive accident.
Despite failing to capture the Spike, the Imperials successfully captured the YT-1000 light freighter Reticent, which Teller had deployed as a decoy to mislead the Imperials. While Vader interrogated its Koorivar captain aboard the Executrix, Tarkin accessed Imperial databases and uncovered the identities of the insurgents, including their leader Berch Teller. Vader also interrogated the Reticent's Sy Myrthian navigator, who suffered a heart attack during the interrogation. However, Vader learned from a contact within the Crymorah Syndicate that a lieutenant had negotiated a deal with the Sugi crime lord Faazah for a supply of custom fuel cells. These fuel cells had arrived on Murkhana shortly before Tarkin and Vader's arrival, confirming Faazah's collusion with the insurgents.
Following a private holo transmission with the Emperor, Vader informed Tarkin that Vice Admiral Dodd Rancit was convinced the insurgents would target the Imperial academy at Carida next. Vader then separated from Tarkin to meet with Rancit, but not before inquiring about the meaning behind the Carrion Spike's name, leading Tarkin to recount his test in Eriadu's Carrion Plateau. Arriving in the Carida system, Vader boarded the Secutor-class Star Destroyer Conquest and met with Rancit just as the Spike reverted to realspace, navigating on autopilot. Aware of Rancit's treachery as a co-conspirator with Teller, Vader had Lieutenant Crest place Rancit aboard an escape pod and forced Rancit to give himself the command to issue the fire order that destroyed it. Elsewhere, Tarkin dealt with the rebels, effectively ending the insurgency.
After the defeat of Teller's insurgents, Vader dedicated the subsequent three weeks to assisting Tarkin in interrogating the captured rebels, with the exception of Teller, who managed to escape. While none of the insurgents perished during questioning, the Emperor had them executed in secret. Vader also spearheaded a crackdown on the warehouse workers and salvagers who provided supplies to Teller's insurgents, as well as several scientists at Desolation Station who had furnished Teller with information. Vader also took action against the Tenloss Syndicate and lower-level members of the Crymorah Syndicate who had assembled Berch Teller's warship, a modified Providence-class Dreadnought.
Hunt on Chandar's Folly
Tarkin still owed Vader a debt for capturing Lee-Char on Mon Cala. After some time passed, Vader approached Tarkin with his request. Learning of Tarkin's passion for hunting, Vader requested that Tarkin hunt him. Vader instructed Tarkin to push him to his limits, even to the point of killing him if necessary. This request shocked Tarkin, who began to ponder Vader's motives. Reviewing reports from the Inquisitorius, Tarkin observed that Vader's pursuit of the Jedi had become devoid of challenge. Tarkin concluded that Vader desired a renewed sense of challenge and was flattered that Vader had chosen him for this task.

The hunt was staged on the Outer Rim planet Chandar's Folly, and Tarkin immediately began his efforts to challenge the Dark Lord of the Sith. Aware of Vader's formidable abilities, Tarkin equipped his hunters with slugthrowers and flamethrowers to prevent Vader from deflecting their projectiles. On the second day, they cornered Vader within a grove of Thurian trees, and four hunters unleashed their flamethrowers upon him. As Tarkin observed Vader being engulfed in flames, he momentarily perceived a flicker of fear in his posture. However, Vader quickly targeted the hunters' flamethrowers, incinerating the four hunters. In the days that followed, Tarkin noticed that Vader was deliberately leaving a trail, making himself easy to track. They soon discovered that Vader was using this tactic to ambush them on multiple occasions. In one instance, Tarkin and his hunters were tracking Vader near a cliff when he suddenly revealed himself and killed one of the hunters. Two others fired upon him, but their shots failed to penetrate his armor.
Tarkin came to the realization that Vader was unbeatable as long as he possessed his lightsaber. Therefore, over the next four days, he focused his efforts on stealing Vader's weapon. After six men had died, one of Tarkin's hunters successfully snatched the lightsaber from Vader's grasp during a fight. Following this, Tarkin noticed that Vader not only adopted new tactics but also displayed increased anger. Tarkin knew that enraged prey was typically easier to subdue, but he acknowledged that this rule did not apply to Vader. Shortly thereafter, Vader confronted five of Tarkin's hunters as they fired upon him, striking him multiple times and scarring his armor. From a hilltop vantage point, Tarkin watched as Vader approached the hunters and used the Force to break one's neck. The remaining hunters retreated, and Vader Force-choked another to death. Understanding Vader's mastery of the Force, Tarkin initially believed that the hunt would soon conclude. However, Tarkin soon realized that Vader's obsession with retrieving his lightsaber meant that as long as Tarkin's team hunted him, he would hunt them.
By the ninth day of the hunt, Tarkin was down to his last seven hunters. Vader managed to kill a Valath, the apex predator on the planet, and fashioned its hide into camouflage. One of Tarkin's Chadra-Fan hunters, Sissian, spotted Vader northwest of Tarkin's camp, and the hunter Yerga informed Tarkin of this sighting. Tarkin used his binoculars and saw Vader atop a peak, wearing the Valath hide. Tarkin instructed his hunters to form a group around him, and they advanced in Vader's direction. Vader lured them into a ravine filled with blue crystals, where the echoes of his breathing would mask his location from Sissian and his grandfather, Hardhear. Hardhear detected Vader's breathing, but he could not pinpoint its direction. Vader loomed above them at the edge of the ravine, watching as Tarkin ordered his team to run. As the group descended into the ravine, Vader made his move, using the Force to hurl one of the hunters into the ravine wall. Vader then Force-choked Hardhear before leaping down, concealed by his Valath hide, and attacking the droid hunter.

Tarkin directed the remainder of his team to seek refuge in the Stormlands, where the terrain was open and exposed. They established a camp, and Sissian attempted to listen for Vader's breathing. However, Vader had deactivated his suit's life support systems, preventing his breathing apparatus from giving him away, and he quietly approached the camp before Force-choking Sissian. Yerga attempted to attack Vader, but he seized her by the neck and killed her. The last two hunters opened fire, and Vader used the Force to reclaim his lightsaber. Tarkin then lunged at the two hunters and slaughtered them. Tarkin fled from Vader, but realizing that he could not outrun him, he stopped and fell to his knees. Vader towered over him, unaware that his elevated position made him more vulnerable to the lightning in the Stormlands.
Without warning, Vader was struck by lightning and collapsed to the ground. Tarkin rose to his feet and contacted his flagship, the Carrion Spike, to arrange for their extraction. Tarkin sat beside Vader and remarked that whatever lesson Vader had hoped to gain from this ordeal, he hoped he had learned it. Tarkin then assured Vader that he would get him to a repair bay as soon as possible. However, Vader was not yet defeated, and he used the Force to choke Tarkin, demonstrating that he had not completely lost. Tarkin scrambled out of Vader's reach, while Vader remained motionless on the ground.
Hunt for Eeth Koth and rogue Inquisitors
Vader, accompanied by the Fifth Brother, Tualon Yaluna, and the Thirteenth Sister Inquisitors, successfully tracked down former Jedi Master and Council member Eeth Koth to a planet where he served as a priest of the Church of the Ganthic Enlightenment. Vader confronted Koth shortly after the birth of his daughter. Recognizing that he posed no threat to anyone, Koth offered Vader codes, secret contact frequencies, and information to locate other Jedi purge survivors. As Koth's wife and child fled, Vader engaged Koth in combat. Vader then dispatched the Fifth Brother and the other Inquisitors to pursue Mira and Koth's daughter, while he continued his duel with Koth. After the Inquisitors captured Koth's daughter, Vader killed Koth, then held the child.
Vader and the Inquisitors transported the child to Coruscant, where Vader met with the Grand Inquisitor and entrusted the child to two nursemaids associated with Project Harvester. Vader then discussed his next target with the Grand Inquisitor, who informed him that while some Jedi remained, they had vanished without a trace. He advised Vader that they would have to wait.
Vader confronted the Twi'lek Inquisitor and Thirteenth Sister at the Inquisitorius Headquarters. Sensing a connection between the two Inquisitors due to their previous mission with him, Vader hunted them down without the assistance of the other Inquisitors. Vader and two Coruscant Guards searched for the two Inquisitors. After Vader's speeder was destroyed, he continued his pursuit through the skylanes until they all landed on a platform. When the Inquisitors refused to kill him, Vader used the Force to activate their lightsabers and turn them against each other, resulting in their deaths.
Building Fortress Vader
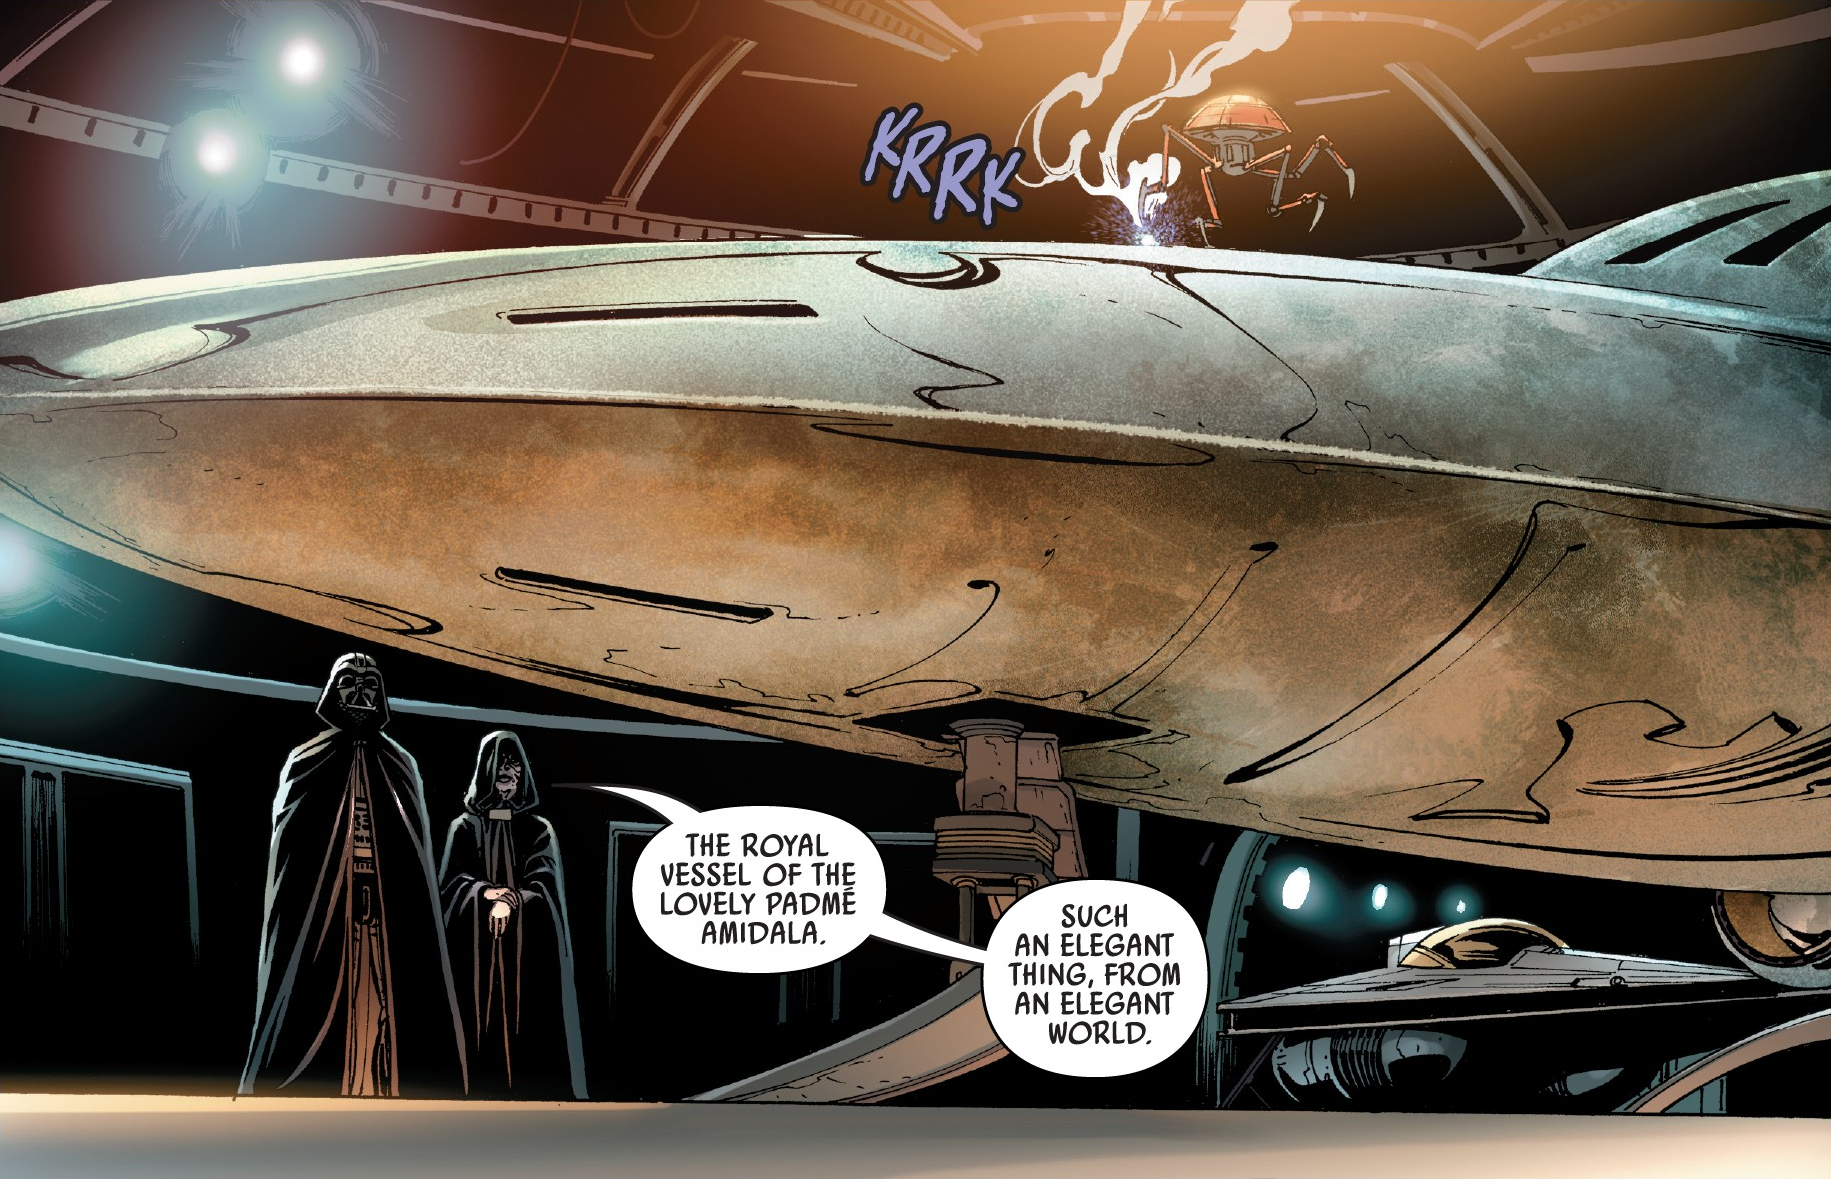
Vader then informed the Emperor of the two Inquisitors' treachery, explaining that the female Inquisitor had allowed Mira and Koth's daughter to briefly escape, only recapturing the child because she was spotted. He also suggested that they were forming a coalition against him and the Emperor. Despite this, the Emperor expressed displeasure with Vader's pursuit across Coruscant, which had resulted in the death of a senator. The Emperor decided to relocate the Inquisitors to another world. The Emperor then inquired about how Koth had attempted to conceal himself. Vader replied that he had posed as a priest, which was the closest thing to a Jedi. Vader was then given a reward: Padmé Amidala's Naboo Royal Starship, which a P-100 pick-up droid reported was in working order inside and only needed around two more days for repairs to the hull to be finished up. Desiring the exterior of the craft to retain a damaged appearance, Vader was satisfied with the current state and promptly destroyed the droid.
Vader was then ordered by the Emperor to travel to Alderaan to confront Senator Bail Organa. However, to his master's surprise, Vader refused. Having carried out Palpatine's will for so long, Vader was willing to continue doing so, but first he demanded a world of his own. Rejecting Sidious's offers of Tatooine or Naboo, Vader requested Mustafar, the world where he had been defeated by Kenobi. The Emperor granted his request and promised to send Colonel Alva Brenne to construct a facility for him there. Before departing for Mustafar, Vader was shown the Mask of Darth Momin, which Sidious gave him to aid in the construction. When Vader questioned how his master had learned of a Sith Lord not mentioned in any Sith nor Jedi holocron he had studied, Sidious vaguely replied that the mask itself had told him about Momin.
Vader, accompanied by Colonel Brenne and her aide, Lieutenant Roggo, took Vader's Naboo starship to Mustafar. During the flight, Vader experienced a vision of his younger self with a face resembling his mask. Upon entering the planet's atmosphere, Vader deactivated the starship's shields and allowed it to burn as they landed. Once on the planet's surface, Vader commented that the ship looked better burnt. He then told Brenne that he was there to understand a great mystery. While Brenne and Roggo began designing Vader's castle, Vader returned to the cave where he had bled his kyber crystal. As he reached out to the power within the cave's locus, he was presented with a design for the castle from Brenne, which Vader rejected. However, shortly after leaving, Vader heard Brenne scream and returned to the starship to find her dead. He also discovered that Roggo had donned Momin's mask. Vader attacked Roggo, but stopped upon seeing that he had created a new design for the castle. Removing the mask from Roggo's corpse, Vader took the mask into the cave and placed it upon the locus. He then asked the mask who he was, to which it replied "I am Momin".

Momin proceeded to show Vader his entire life, from creating morbid works of art from the deceased to being trained in the ways of the Sith by Darth Shaa. After killing his master and studying the lore of the dark side, Momin constructed a weapon which, along with his use of the Force, would freeze a city's population forever at the moment of their deaths. However, an attack by the Jedi caused him to lose control, destroying both the city and himself in the process. As a result, Momin's essence became trapped within his mask, forcing him to take on host after host in order to create his art. Vader placed the mask upon his head, but quickly cast it aside and then departed with it from the cave. Once outside, he engaged in a fight with two Mustafarians, one of which he killed and the other he placed the mask upon. With his new body, Momin explained that his design for the castle was actually a key to open a door to the dark side, which Vader could use to reunite with Padmé Amidala. Vader threatened Momin not to offer him things he could not provide and Momin responded that he only wanted another chance to create. Vader accepted Momin's offer, but warned the ancient Sith not to betray him.
Under Momin's guidance, Vader used his Imperial resources to begin construction of his castle. With each new design, Momin insisted that this would be the one to open the door. Though each attempt to do so would subsequently end in failure. And with each failure, Vader would cut down Momin's current body in frustration and place his mask upon a new host. Each new attempt to open the door would also bring ruin to Mustafar itself, prompting the Mustafarians to attack in retaliation. The cycle of creation and destruction carried on for two years. Vader did not remain on Mustafar for that entire time but always returned to test Momin's latest design.
Vader controlled the entire Mustafar system. Concurrent to the construction of Fortress Vader, the Inquisitors, due to Vader's destruction caused when he chased the rogue Inquisitors on Coruscant, moved to a similarly designed Fortress on the ocean moon of Nur in the Mustafar system. In 14 BBY, Vader journeyed to the Fortress Inquisitorius to retrieve a holocron containing a list of Force-sensitive children, which the Second Sister had been hunting for. Instead, he found that the Second Sister had failed to stop surviving Jedi Cal Kestis and Cere Junda, who was pleading for the Inquisitor to return to the light and apologizing for failing her; during the early Jedi purge, Junda, while under torture by Vader, had revealed the hiding location of Trilla, who became the Second Sister, and a number of younglings under her protection.
As Junda and Trillia conversed, the Second Sister was filled with dread at the sound of Darth Vader drawing near, his labored breathing a terrifying prelude to his arrival. Junda, too, instantly recognized Vader, and warned a concerned Kestis that his fear was justified. Vader, showing no mercy, executed the Second Sister for her failings, preventing any chance of her returning to the Jedi Order. With a mere gesture, Vader effortlessly hurled Junda into a deep pit using the Force, before suggesting Kestis consider surrendering. Undeterred, Kestis launched a series of lightsaber attacks against Vader, but each was easily deflected. Vader then used telekinesis to choke Kestis. Realizing he was outmatched, Cal made a hasty retreat, narrowly escaping by using the Force to direct a piece of machinery towards himself and Vader. Vader was forced to defend against the debris, allowing Cal to escape, though Vader was soon in pursuit.
Even though Cal managed to evade Vader just before the elevator doors closed, Vader swiftly caught up to him as he was on the verge of escaping the fortress, launching an immediate assault. Vader quickly dominated Kestis, overpowering him in a fierce blade-lock. In a desperate attempt to aid his friend, Cal's droid, BD-1, tried to disrupt Vader's life-support system with a short-circuit, forcing Vader to break off the attack and deal with the droid. Before Vader could crush BD-1, Cal seized the opportunity and impaled Vader in his midsection. Vader retaliated, using the Force to fling Cal away once more. As Cal struggled to fight back and summon his lightsaber, Vader intervened, halting the weapon's return. Vader repeated his offer for Cal to surrender the holocron. When Cal refused, Vader callously activated the lightsaber, driving it into Cal's midsection, mirroring Cal's earlier attempt to defeat him.
Moments later, Junda returned to assist Kestis, only to be swiftly defeated after a brief exchange of blows and sent flying away. Remarking on the intensity of Junda's hatred, Vader expressed his surprise when Junda briefly forced him to his knees using the dark side of the Force, noting that he could feel its power within her. After Junda resisted his attempts to lure her further into the darkness, Vader moved to eliminate both Junda and Kestis. However, Junda managed to create a Force barrier, holding Vader at bay long enough for Kestis to shatter several surrounding windows with the Force. The resulting flood of water into the complex forced Vader to use his powers to contain the deluge, allowing Kestis to grab Junda and escape through the breach.
Sometime between 13 BBY and 10 BBY, Vader engaged in combat within the Mid Rim, where a number of stormtroopers, including Beilert Valance, the future bounty hunter, were trapped under heavy enemy fire. Employing the Force, Vader disarmed the enemy soldiers, then used their own weapons to eliminate them. With the troops visibly confused, Vader emerged from a fiery explosion and commanded them to continue their advance.
In 12 BBY, the construction of Momin's ninth design for Fortress Vader was completed, which Vader declared would be his final opportunity. Upon activating the fortress, Vader discovered that he could finally open the door. However, before he could proceed, he received news of another attack by the Mustafarians. While Vader dealt with the attackers, Momin seized the chance to open the door himself. He then summoned his younger self from the past and placed his mask upon him, ultimately creating his masterpiece: himself.
After leaving the battle, Vader reentered the fortress as the Mustafarians continued their assault. Upon returning to the locus, he unleashed a devastating Force attack, eliminating the remaining Mustafarians. Vader was then confronted by Momin, who mocked Vader for believing he could control the dark side. As Momin criticized the Dark Lord's ignorance of the Force, Vader used the Force to hurl a large rock at Momin, crushing his new body and killing him. With Momin defeated, Vader finally opened the door and stepped inside.

Vader shed his physical form and entered a spiritual realm, where he was confronted with visions spanning his past, present, and future. He witnessed himself as a child haunted by the specter of his future self. Reverting to childhood, he relived his upbringing, experiencing the memories of his youth. Following a vision of his duel with his former apprentice, Ahsoka Tano, Vader entered another vision of the Jedi Temple, where he battled against spectral Jedi. After defeating them, Vader ventured deeper into the Temple, where he encountered apparitions of Sheev Palpatine and Obi-Wan Kenobi, both claiming to be his father. After killing Kenobi, the vision of Palpatine gestured for Vader to stand down, to which Vader responded with a surge of Force lightning that obliterated the specter.
Finally, Vader found himself on a balcony with a vision of Amidala standing before him. Vader, now in the guise of Anakin Skywalker, asked Amidala to join him. However, Amidala simply stated that Anakin Skywalker was dead before leaping from the balcony. Vader cried out in agony as the specter of Amidala was destroyed by a bolt of lightning. He then saw a beacon of blue light in the distance. Within the beacon was a figure who activated a blue lightsaber, pushing Vader back and returning him to his body. Upon awakening in the fortress and retrieving his lightsaber, Vader destroyed the dark side locus, sealing off the door, unable to restore his wife.
Later, Vader contacted his master, informing him that he was still alive. The Emperor inquired whether Vader would return to Coruscant, to which Vader replied that he soon would. The Emperor then asked Vader if the truth he had discovered on Mustafar was what he needed. Vader ended the transmission and, standing before the completed Fortress Vader, replied "Yes". Vader then returned Momin's mask to Sidious, who placed it within his personal yacht, the Imperialis, under the watch of two Royal Guards.
Hunting Kenobi
Duel on Mapuzo
In 9 BBY, Vader finally had the opportunity for a long-awaited rematch with Kenobi. This was orchestrated by an Inquisitor known as the Third Sister. She was obsessed with finding Kenobi, as she was actually the youngling Reva. Reva sought to use Kenobi as bait to get close to Vader and enact revenge for his slaughter at the Jedi Temple years before. She arranged for the kidnapping of Leia Organa to draw Kenobi to the planet Daiyu. Despite Kenobi's escape with Organa, the Third Sister revealed to Kenobi that Skywalker had survived his injuries. Overwhelmed by this news, Vader awoke in his bacta tank within Fortress Vader on Mustafar. Donning his suit, Vader proceeded to his throne room and addressed the Third Sister via hologram, demanding to know Kenobi's location. Dismissing the apparent death of the Grand Inquisitor, whom Reva had stabbed in her ambition to claim credit for Kenobi's capture, Vader ordered her to prove her worth. The position of Grand Inquisitor would be her reward if she succeeded. In reality, Vader knew the Third Sister was the youngling Reva and that she intended to betray him, but Vader kept her alive so long as she was useful.
Vader also warned the Third Sister that failure would be met with a swift death. Later, Vader received information that Obi-Wan was on Mapuzo. Vader, accompanied by his three Inquisitors and a squad of stormtroopers, arrived and marched through the settlement, terrorizing and killing innocent civilians to provoke Obi-Wan. Vader pursued the Jedi Master into the quarry. Horrified by his former apprentice's transformation, Obi-Wan attempted to escape, but Vader ambushed him. Vader mocked Obi-Wan's diminished strength, prompting Obi-Wan to try to flee again. Vader caught up to Obi-Wan once more, lifting him with the Force and igniting flammable rocks with his lightsaber. Promising to inflict suffering upon Obi-Wan, Vader lowered him to the ground and dragged him through the flames, burning him. Vader extinguished the flames as a squad of stormtroopers arrived. Vader ordered Obi-Wan brought to him, but before the stormtroopers could comply, Tala Durith, who was hidden, opened fire, killing several stormtroopers and reigniting the flammable rocks. This allowed NED-B to retrieve Obi-Wan and Tala to escape with the injured Jedi.
After Leia's successful rescue from Fortress Inquisitorius, Vader, enraged, moved to kill the Third Sister. He lifted her into the air with the Force, choking her and reminding her of the consequences of failure. Vader allowed her to speak, during which she revealed that she had placed a tracker on Leia's droid, Lola, which would reveal the location of the Hidden Path network. Vader acknowledged that he had underestimated the Third Sister and spared her life, but warned her against any further mistakes.
Attacking Jabiim
Aboard the Devastator, Vader reflected on a past training duel against Kenobi in the Jedi Temple when he was the Jedi's Padawan. His captain then alerted him to the Third Sister's arrival. Cutting through the pleasantries, Vader demanded to know Obi-Wan's location. The Third Sister reported that he had been tracked to Jabiim. Satisfied, Vader ordered the Third Sister to kneel before him and promoted her to the rank of Grand Inquisitor. He then instructed the bridge captain to set course for Jabiim.
While en route to Jabiim, Vader ordered the Path's base to be locked down. The Third Sister cautioned Vader that trapping them could allow their opponents to hold out for several days. Vader responded that he did not intend to break their enemies. After the Third Sister and her forces secured the Path's hangar, Vader arrived on the surface. The Third Sister informed him that Kenobi was inside, but Vader stated that he wished to bring him in himself. Vader forced his way into the hangar and found a transport attempting to leave. He used the Force to ground it and rip it apart, only to discover that it was a decoy and the real transport with the Path—and Kenobi—aboard took off successfully. The Jedi Master had remembered the old training duel where his Padawan had shown shortsightedness because of his anger, which inspired him to exploit Vader's ruthlessness and single-minded focus.
The Third Sister attempted to use that moment as a distraction to stab Vader, but Vader used the Force to stop her blade, stating that Kenobi was wise to use her against him. Vader hurled her aside, but she charged at him again, and he used the Force to deflect her blade and throw her. The Third Sister activated her lightsaber's twin blade spinning mode, but Vader used the Force to stall the blades rotation, and then ripped her saber from her grip. Vader detached her lightsaber into two singular hilts, and tossed one on the ground at the Third Sister's feet, taunting her. She retrieved the weapon and continued to attack Vader, but the Sith Lord quickly disarmed her again, before stabbing her in the abdomen. As she collapsed, the Grand Inquisitor arrived, revealing he had survived, and Vader stated that he had known her intent for some time, but had decided to allow it because it was useful in the hunt for Kenobi. Vader declared that the Third Sister was no longer useful, and he and the Grand Inquisitor left her to die.
The second rematch

Vader returned to the Devastator as it pursued the Path's freighter. Kenobi left the Path's freighter on a drop ship with Lola. Against the advice of the Grand Inquisitor, who stated that he should continue the pursuit of the Path's ship, Vader ordered the Devastator after Kenobi to a rocky moon. Vader departed the Devastator alone aboard a shuttle and chased Kenobi above the moon's moon's dry lands before landing in those dry lands, where he confronted Kenobi and asked if his former master was there to destroy him. Kenobi replied that he will do as he must before igniting his lightsaber. Vader vowed that Kenobi would die and the two engaged in a lightsaber duel, with Vader utilizing a combination of one-handed and two-handed combat, that passed from the dry lands into a labyrinth of rock pinnacles. During the duel, Kenobi attempted to collapse a pinnacle on Vader, who stopped it with the Force. Remarking that Kenobi's strength had returned since their last duel but that his weakness remained, Vader hurled the pinnacle at Kenobi before resuming their duel.
Vader collapsed the ground beneath Kenobi and hurled rocks to keep him down there. Before leaving, Vader taunted Kenobi for thinking that he could win against his former apprentice. However, Kenobi, drawing on his desire to protect Anakin's children, managed to break free and charged at Vader again. On the offensive, Kenobi used his superior use of Soresu and the more aggressive Ataru utilized by his late master, Qui-Gon Jinn to overwhelm the Sith Lord before using the Force to hurl Vader against a rock. With Vader stunned, Kenobi then pummeled him with a maelstrom of rocks. Kenobi then resumed his lightsaber duel with Vader, critically damaging Vader's chest plate with multiple strikes from his lightsaber's pommel and slashing him across the back before pushing him back with the Force again, and then leaping at him, striking the left side of Vader's helmet with his lightsaber and revealing the scarred face of Anakin beneath. Kenobi addressed him as Anakin Skywalker, prompting Vader to respond that Anakin was gone and that he was what remained.

Kenobi was visibly distraught and apologized to Anakin. Vader replied that he was not Kenobi's failure and that Kenobi did not kill Anakin: instead, Vader replied that he killed Anakin and vowed to destroy Kenobi as well. With that, Kenobi was left to believe his friend was truly dead before bidding Vader, whom he simply called "Darth," farewell. As Kenobi left, Vader called out to him while trying to rise to his feet, unable to catch Kenobi before he slipped through his grasp once more. Vader was left with the belief that he had been but a learner in their latest duel, convincing him to increase his strength to cement his power over Kenobi for whenever their next encounter came. Vader's suit was repaired and he returned to Fortress Vader, where he conferred with the Emperor via hologram, stating that he had dispatched probes along all possible routes and that Kenobi would not escape him again. The Emperor noticed Vader's agitation and suggested that Vader could not move beyond his past. Vader, seeing the threat hidden in Palpatine's reply, affirmed that Kenobi meant nothing to him and that he only served the Emperor.
Attack on the Archive
Following Bode Akuna's betrayal, secretly a Jedi Purge survivor, he informed the Empire of the location of the Archive on the sacred moon of Jedha. Vader launched an assault, taking action far in advance of Lank Denvik of the ISB, Akuna's superior, who had planned to attack. During the assault, he stormed the burning Archive and confronted Cere Junda once more, leading to a fierce duel between the Sith Lord and the prepared Jedi Master. Junda's skills had significantly improved since their battle on Nur; having overcome her fear, she proved to be a formidable opponent for Vader during their duel, in which Vader used Jedi texts as projectiles. As the battle raged, Vader cornered Junda against a shelf, but she evaded his next strike and sent the entire shelf collapsing onto him. After a moment, a damaged Vader emerged from the flaming wreckage and re-engaged Junda. The duel concluded after Junda used the Force to push Vader against another shelf and rushed to stab him, but Vader managed to strike her through the chest, ending the conflict with injuries but leaving Junda dead. Vader later traveled to the II-0810 Satellite Station, where he executed Denvik for treason.
Chase over Ryarten
In 6 BBY, two starships were desperately fleeing above Ryarten after trespassing on Imperial property. Vader, along with a squadron of TIE fighters, pursued them relentlessly. In a sacrifice, one of the starships deliberately allowed itself to be destroyed by TIE fire, enabling the other starship to escape. The destroyed starship was piloted by Rone, the partner of Chio Fain, who piloted the escaping starship. This event fueled Fain's deep-seated hatred for the Empire, particularly targeting Darth Vader himself.
War with the Rebellion
Lothal
Vader continued his search for Kenobi, but now with a measured approach that did not compromise his service to the Empire, as instructed by Sidious. In 5 BBY, Sidious informed Vader of a new threat: the "children of the Force" emerging against them. Vader then contacted the Grand Inquisitor via hologram, relaying the Emperor's vision and ordering the Grand Inquisitor to hunt down these children, either to recruit them into Imperial service or eliminate them. The Grand Inquisitor assured Vader that the mission would be accomplished. The Grand Inquisitor's focus eventually centered on the Spectres rebel cell, primarily operating around Lothal. This cell included two Jedi: Kanan Jarrus, an Order 66 survivor who had gone by the name Caleb Dume during the Clone Wars, and his Padawan Ezra Bridger. The Grand Inquisitor and other Imperial leaders failed to defeat the Spectres, leading to Tarkin's deployment in 4 BBY to resolve the issue.
After Imperial forces under Tarkin captured Jarrus during the Spectres' raid against the Lothal Communications Center, he was scheduled to be taken aboard Tarkin's Star Destroyer Sovereign to Mustafar, where he would be taken to Fortress Vader. By that point, Jarrus had indeed heard rumors that Mustafar was where Jedi went "to die," which he told to his fellow rebel Hera Syndulla. However, over Mustafar, the union of multiple rebel cells into a growing rebel alliance was revealed when the Spectres were rescued by the Phoenix Squadron, with the Grand Inquisitor also being killed aboard Tarkin's crippled Star Destroyer. As rumors of what had happened over Mustafar became known, riots and uprisings began to occur on several worlds, including Lothal. The Emperor, concerned at the rise in rebel activity, sent Vader to Lothal with Tarkin to end the growing rebellion. Vader also made sure the Grand Inquisitor's service was not yet finished: Vader prevented the Inquisitor's spirit from passing into the Netherworld of the Force and forced him to stand guard over a Jedi outpost on Tempes as a trap for any would-be Jedi searching for artifacts. With that, the Inquisitor's spirit eternally suffered from the flames of the Sovereign yet was not allowed to die.
Upon arriving on Lothal, Vader disembarked from a Sentinel-class landing craft alongside Tarkin, passing the high-ranking ISB Agent Alexsandr Kallus. Shortly afterward, Kallus was assigned to report directly to the Sith Lord. Seeking to identify the source of the rebellion, Vader devised an elaborate trap to track the Spectres back to their main base. During the siege, Vader, Kallus, and Minister Maketh Tua met to discuss Vader's plans for dealing with the Spectres. During this meeting, he informed Tua that Tarkin held her accountable for her failure to suppress the rebels. Fearing for her life, Tua contacted the Spectres, offering information in exchange for smuggling her off Lothal before her meeting with Tarkin. The rebels agreed and returned to Lothal. However, Vader had intended for Tua to contact the rebels to lure them back to Lothal and arranged for a bomb to be planted on Tua's shuttle. As the rebels attempted to escape the planet with Tua in her shuttle, the bomb detonated as Tua boarded the ship, killing the Minister.
Immediately following the incident, Vader broadcasted across the planet that the rebels had assassinated Tua to discredit them. Vader then ordered Kallus to lock down the planet's spaceport and publicly announce that any ship attempting to reach orbit would be destroyed. Vader knew that the lockdown, combined with the populace's distrust of the rebels, would essentially guarantee that they would need to steal a ship in order to escape. As such, he provided a tempting target at the local Imperial garrison; a shuttle capable of hyperspace travel. When the rebels attempted to steal it, Vader confronted them with a small group of stormtroopers. Vader engaged the rebels' Jedi members, Jarrus and Bridger, while his troops engaged in a small scale firefight with the other rebels. As his intent was for the rebels to escape, Vader lazily toyed with the two Jedi while their cohorts attempted to launch the shuttle.
The confrontation came to an end when two of the rebels threw thermal detonators at a number of walkers on the landing pad, damaging their legs and scattering the stormtroopers underneath them. When Vader glanced up at the collapsing walkers, Ezra and Kanan combined their power to telekinetically push him into the path of the falling war machines. Believing him to be dead, the two rebels were instead astounded to see Vader, completely unharmed, use the Force to lift both of the walkers off of himself and drop them behind him. Recognizing that they were hopelessly outmatched, Kanan ordered Ezra to run with him to the commandeered shuttle. Hoping to prevent Vader from pursuing them, Sabine Wren fired a number of blaster bolts at Vader. He reflected two of them back into her chest and helmet but made no attempt to board the shuttle or otherwise stop it. After the shuttle successfully launched, one of the stormtroopers who had been present for the confrontation assured Vader that he would scramble fighters immediately to intercept it.

title: Darth Vader
However, Vader dismissed the idea, expressing his belief that the rebels would remain on the planet for a while longer. Later, Vader instructed Kallus to obliterate Tarkintown, hoping to either expose the rebels or crush their morale. Soon after, the rebels commandeered a shuttle and fled the planet, linking up with the rebel fleet. Unbeknownst to them, Vader had surreptitiously planted a tracking beacon on the shuttle. A few short moments after their arrival, Vader's TIE Advanced x1 materialized from hyperspace and initiated an assault on Phoenix Squadron. The rebel commanding officer deployed the A-wing interceptors from Phoenix Squadron, only to witness their swift and unexpected annihilation at Vader's hands. Cutting through the rebel fighters, Vader targeted the rebel command ship, Phoenix Home, swiftly crippling it.
The Apprentice Lives
The Spectres quickly boarded their vessel, the Ghost, and began to fight back against the Sith Lord. Despite their efforts, neither the Ghost nor any other member of Phoenix Squadron managed to inflict any damage to Vader's fighter, and he continued to relentlessly attack the crippled Phoenix Home, while simultaneously eliminating any fighters that attempted to interfere. With its fighter support almost completely gone and its weapons, shields, and engines disabled, the rebel command ship seemed destined for destruction as Vader prepared to deliver the final blow. However, aboard the Ghost, Ahsoka Tano made the decision to combine her abilities with Kanan's in order to use the Force to probe Vader's mind. The probe allowed Ahsoka to see far enough into Vader's psyche to recognize him as her former mentor, and for Vader to recognize the individual probing him as his former student. Ahsoka immediately lost consciousness due to the intense psychic feedback from the probe, but Vader remained unaffected.
Upon realizing Ahsoka's presence on the rebel ship, Vader's objectives underwent an immediate shift. In a stroke of unexpected luck for the rebels, Vader ceased his attack on Phoenix Home, which would have been a guaranteed kill, and instead focused his attention on engaging the VCX-100 light freighter. While Vader bombarded the Ghost with blaster fire, Kanan and Hera Syndulla successfully convinced Jun Sato to evacuate Phoenix Home as Admiral Kassius Konstantine arrived with three Star Destroyers. The Admiral contacted Vader for instructions, and Vader commanded Konstantine to prevent the Ghost from escaping, but to avoid firing upon it, as he desired the rebels aboard to be captured alive. Meanwhile, the crew of Phoenix Home abandoned the crippled command ship and fled the system with the remaining remnants of the rebel fleet. As Vader closed in on the Ghost, it jumped to hyperspace just as the Destroyers activated their tractor beams, ensnaring Vader instead of the Ghost.
After his triumph, Vader boarded Konstantine's Destroyer and contacted the Emperor. He informed his master that he had "broken" the rebels, but the elder Sith Lord detected unease in his apprentice's emotions. Vader then disclosed to the Emperor that he had discovered Tano was still alive, and expressed his belief that she was allied with the rebels. Delighted by this information, the Emperor declared that she could potentially lead the two Sith Lords to other Jedi who had survived Order 66. Vader immediately suggested that Kenobi might be among them, to which the Emperor agreed, assuming Kenobi was still alive. The Emperor advised Vader to remain patient, and instructed him to dispatch another Inquisitor to hunt down the rebels.
Following his master's directives, Vader assigned the Fifth Brother to the task, with the Seventh Sister also joining the hunt under Vader's orders. He made it explicitly clear to both that failure was not an option. After several unsuccessful attempts to capture the rebel Jedi, the Fifth Brother and Seventh Sister tracked Jarrus, Bridger, and Tano to a still-standing Jedi Temple on Lothal in 3 BBY. Despite the rebels managing to escape, the Inquisitors informed Vader of their discovery. Vader arrived to inspect the site, informing them that the Emperor would be most pleased by their discovery. The Inquisitors cautioned Vader that the Jedi were growing stronger, but he retorted that it would ultimately lead to their downfall.
Duel on Malachor
Subsequently, Vader sent the Fifth Brother, the Seventh Sister, and the Eighth Brother to pursue Maul, who had been marooned on Malachor and had spent years studying its Sith temple. Vader himself arrived after Bridger had activated the superweapon using the Sith holocron. With his Inquisitors all having been killed by Maul, Vader decided to personally retrieve the holocron and seize control of the superweapon. Standing on the roof of his TIE Advanced x1, he jumped from the fighter and landed in front of Bridger. Following a brief exchange of words, Vader swiftly disarmed the young Jedi by destroying his lightsaber and prepared to execute him, but before he could, Ahsoka Tano intervened.
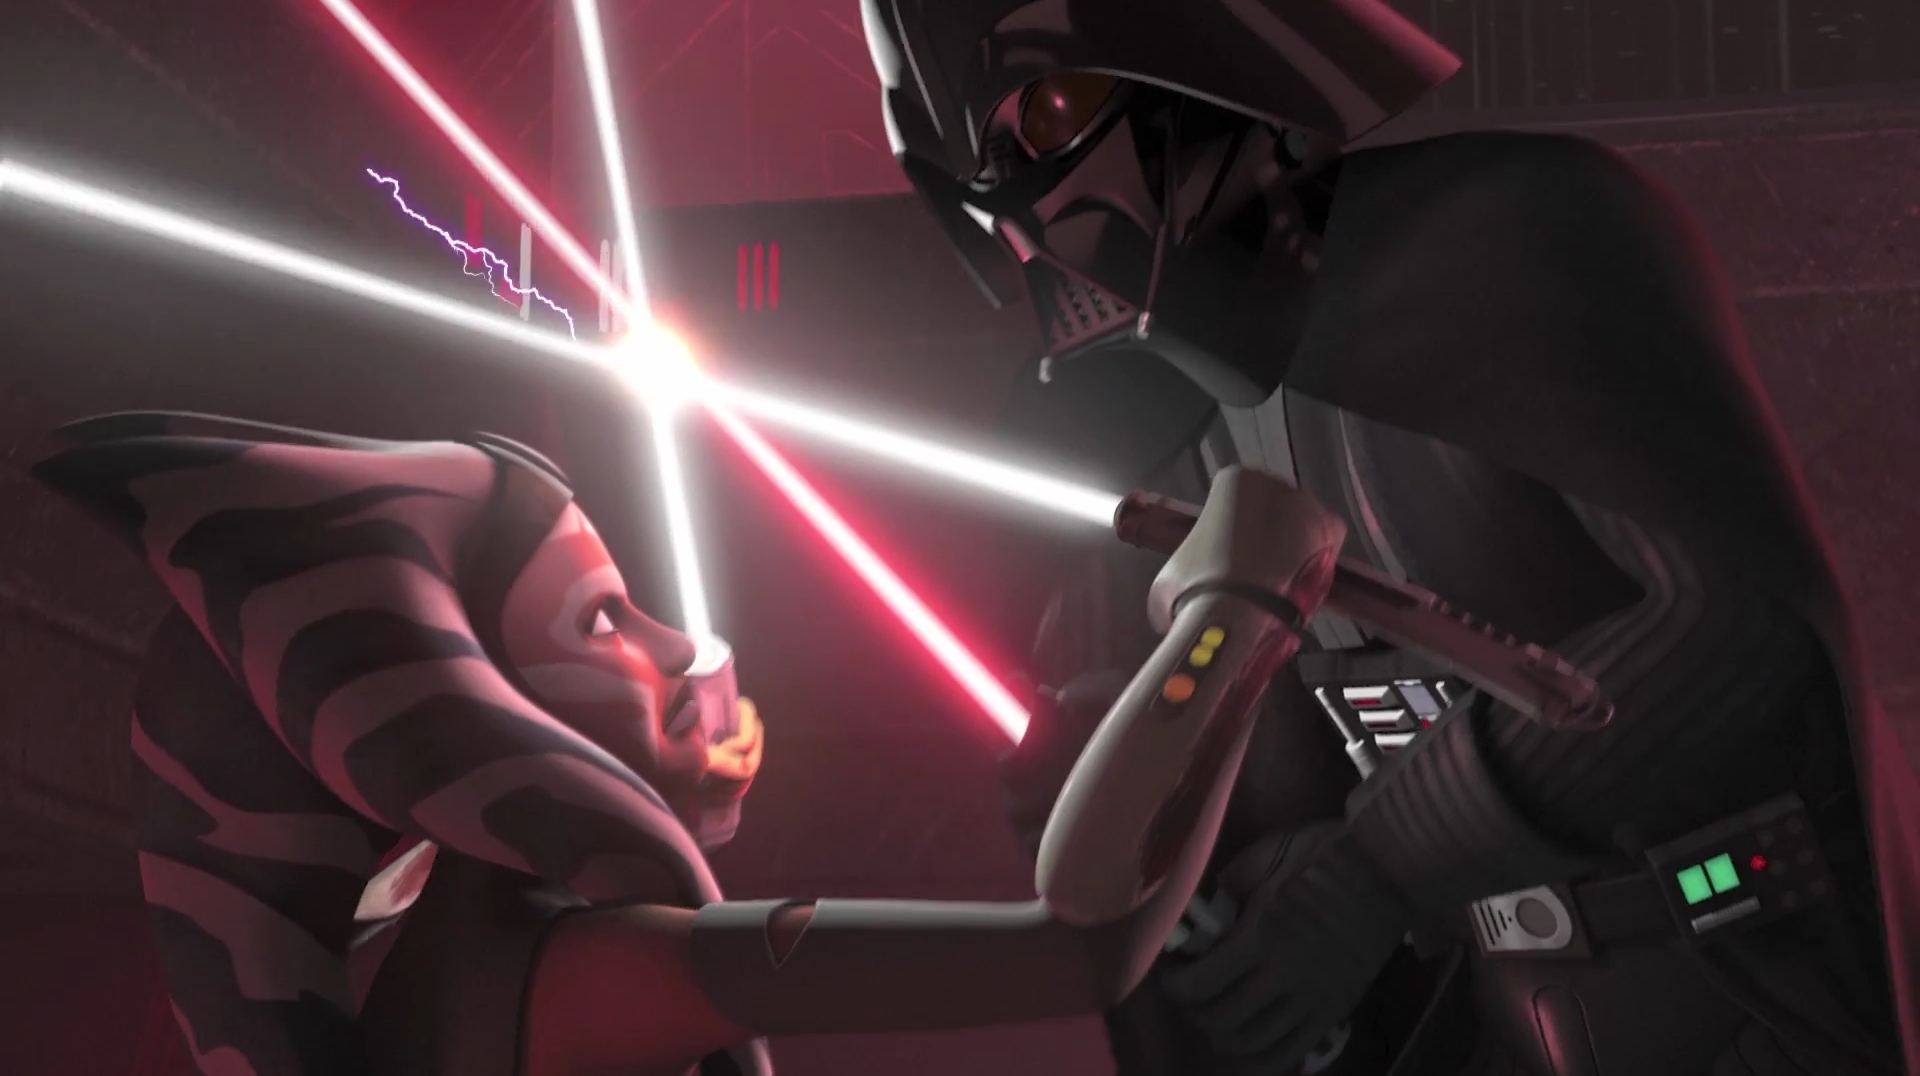
Vader offered his former apprentice mercy in exchange for the location of any surviving Jedi, but Tano claimed that there were no more Jedi; that Vader and his Inquisitors had killed them all. Unconvinced by her statement, Vader subtly threatened to extract the information from Bridger through torture instead. This prompted Tano to express her disgust, stating that while she had begun to suspect that Vader and her former master were the same person, she could no longer believe it due to Vader's cruelty. Vader responded that Skywalker had been weak and that he himself had destroyed her former master. Tano then vowed to avenge Skywalker, but Vader reminded her that revenge was not the Jedi way. Tano, however, no longer considered herself a Jedi, and after informing Vader of this, she attacked him. Nevertheless, she ultimately proved to be no match for her former master who, after an intense duel lasting several minutes, used the Force to blast Tano off a ledge. Assuming she had been neutralized, Vader proceeded to retrieve the holocron.
Vader caught up to Jarrus and Bridger before they could board their ship, and used the Force to begin pulling both the holocron and the two Jedi towards him. However, before he could grab it, Tano ambushed Vader and managed to slice off the upper right portion of his mask with her lightsabers. With his mask damaged, Vader's voice filter began to malfunction, causing him to wheeze, and when he spoke again, calling out to his former apprentice, it was a distorted combination of his real voice and the mechanical baritone produced by the filter. This and his partially exposed face confirmed to Tano that Vader was indeed her former master. As the Temple locked down, Tano declared that she would not abandon him as she had before. Vader paused and stared silently at Tano, appearing conflicted about how to respond to his former Padawan. However, he quickly regained his composure and snarled that she would die for her choice. The two engaged in combat once more, while Jarrus and Bridger escaped from the chamber enclosing Vader and Tano.
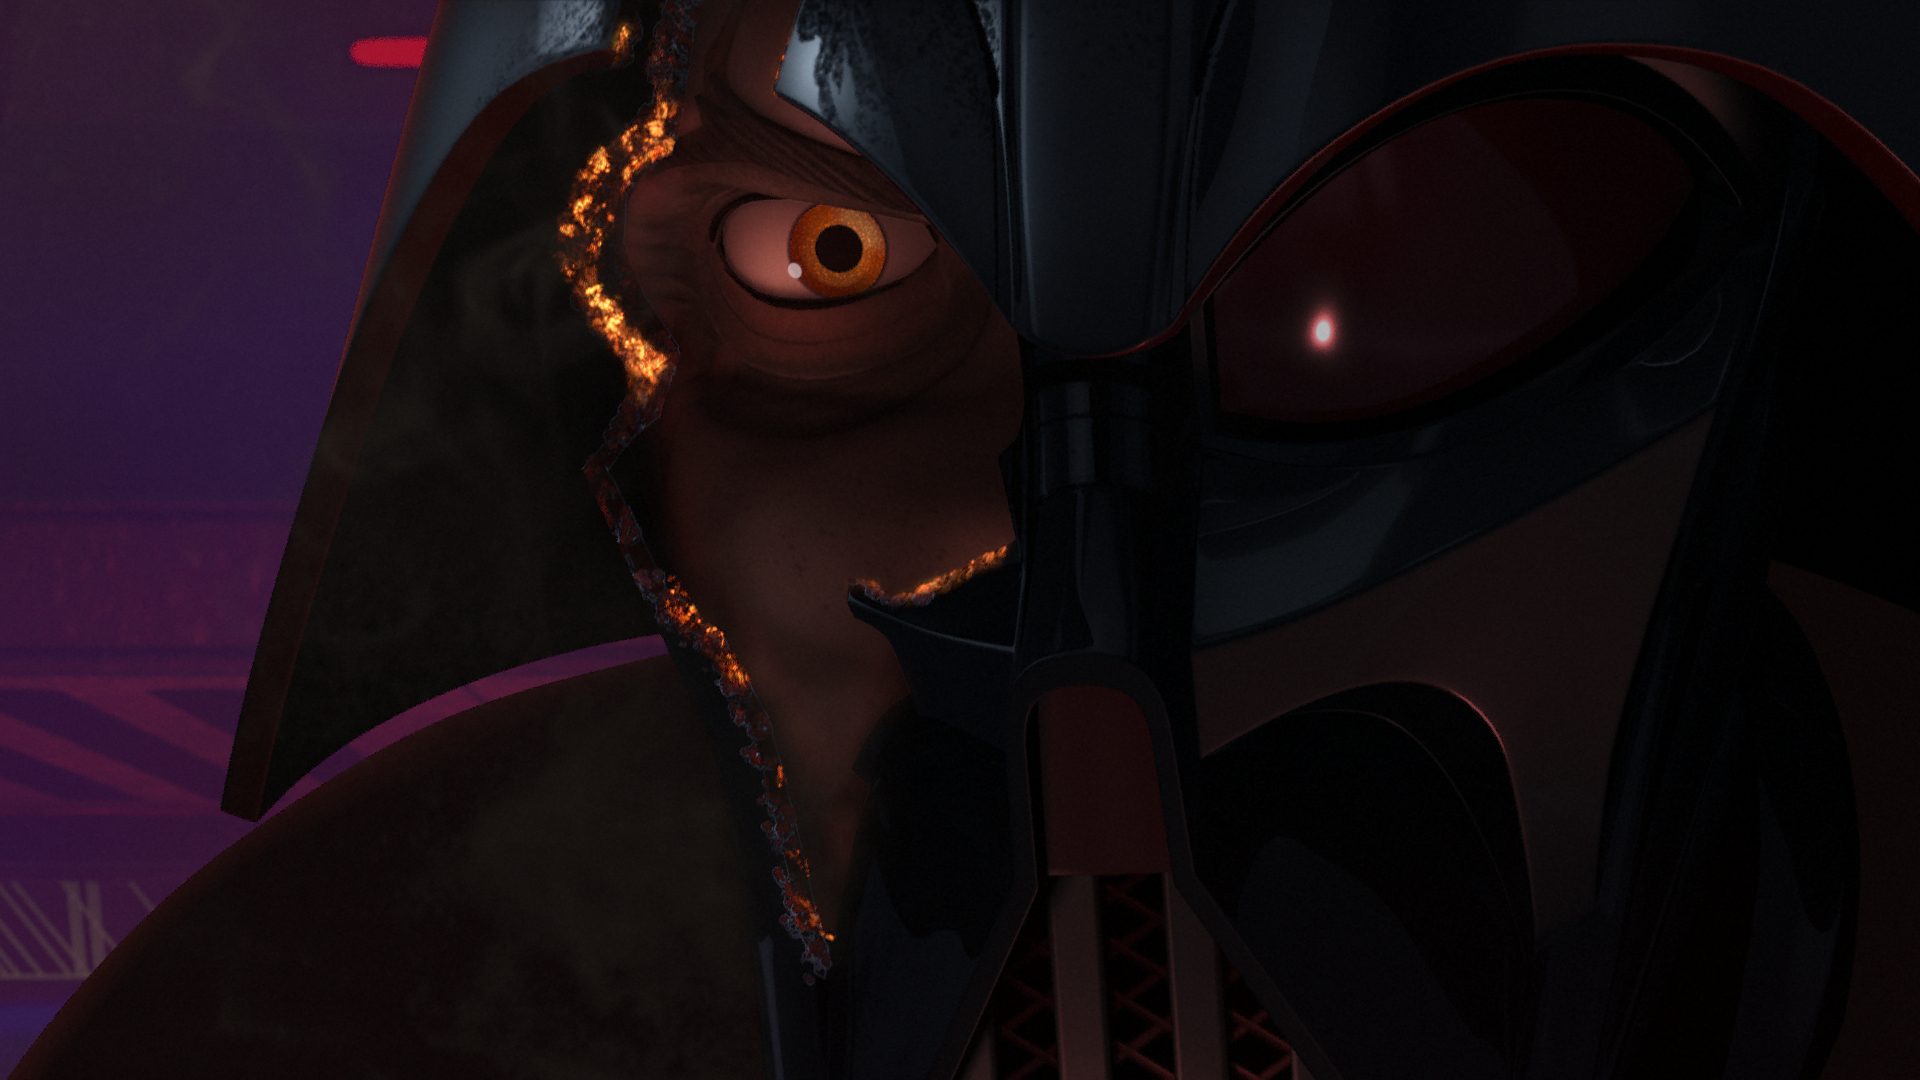
After a few moments of battle, Vader locked his blade with Tano's and began to overpower her. As he prepared to kill her, the energy discharges from the overloading holocron stand suddenly intensified, and Vader glanced up. At that moment, a massive burst of energy struck the ceiling of the chamber, and Tano used the distraction to push Vader back a step with the Force. She then plunged both of her lightsabers into the ground at her feet, causing the floor of the chamber to begin collapsing. Vader quickly recovered from his distraction and aimed a killing blow at Tano. Unbeknownst to the two combatants, two years later, Ezra Bridger entered the temple on Lothal and found himself in the World Between Worlds realm, where he was guided to a portal, which exited at the Sith temple in 3 BBY, by the convor Morai, the same bird Vader had seen on the snowy moon outside Tano's crashed Venator. Bridger witnessed the conclusion of Vader's battle with Tano even as his younger self was locked out of the holocron chamber. As Vader swung his lightsaber at Tano, Bridger reached through the portal and yanked her backward into the temple. Consequently, Vader's strike missed, and the temple floor crumbled, sending Vader plummeting into a pool of light.
From Vader's perspective, a hand had emerged from a portal out of nowhere to save Tano. Vader survived the fall and managed to return to the surface, where he was watched by Morai. After Morai guided Tano—who escaped back to her place in time after Sidious reached into the World Between Worlds—through the depths of the temple to reach another portal to the World Between Worlds, the convor exited the temple and flew away, with Vader observing the bird from the surface. Believing Tano to be dead, Vader left Malachor and resumed his duties in the Empire. Tano's supposed demise marked the end of the Great Jedi Purge.
Continued Rebellion
In 2 BBY, shortly after the Empire's victory over the Batonn sector insurgency, Vader arrived at the Imperial Palace on Coruscant and was introduced to the newly promoted Grand Admiral Thrawn, the same Chiss officer he had encountered during the Clone Wars, by the Emperor. When Thrawn expressed his pleasure at finally meeting the Dark Lord, Vader claimed to feel the same. A short time later in 2 BBY, amidst Thrawn's ongoing campaign to eliminate the growing rebel threat, the rebellious senator of Chandrila, Mon Mothma, officially united numerous rebel cells under a single banner, the Alliance to Restore the Republic. Confirming the fears of Imperials like Tarkin and Thrawn, these previously disconnected rebel cells began to operate as a unified force, marking the official start of the Galactic Civil War, although full-scale warfare would not erupt for some time.
During or after 2 BBY, at some point after the Alliance was formed, Darth Vader was lured to HS-197, an abandoned ore-mining moon in the Horox system, by Cyn, the son of Sig Sendvall, a cyberneticist who had worked on Vader’s suit. Also during that time, on an unidentified astronomical object, Vader accompanied stormtroopers in their search for a Rebel fugitive. As the troopers destroyed a village to intimidate its inhabitants, the Sith Lord interrogated Noegaud, a local bully. A youngling named Niko, whom Noegaud often harassed, witnessed this interaction, leading him to conclude that Noegaud was correct in his belief that the only thing that mattered was power.
Vader once annihilated Blue Squadron, a diaspora of X-wings and A-wings, in his TIE Advanced x1. The Sith Lord then landed, engaging DF.9 turret emplacements and Rebel infantry before destroying the Vellus, the GR-75 medium transport that the starfighter escort had been protecting. Only one Rebel remained, whom Vader swiftly killed.
Investigating a Disturbance
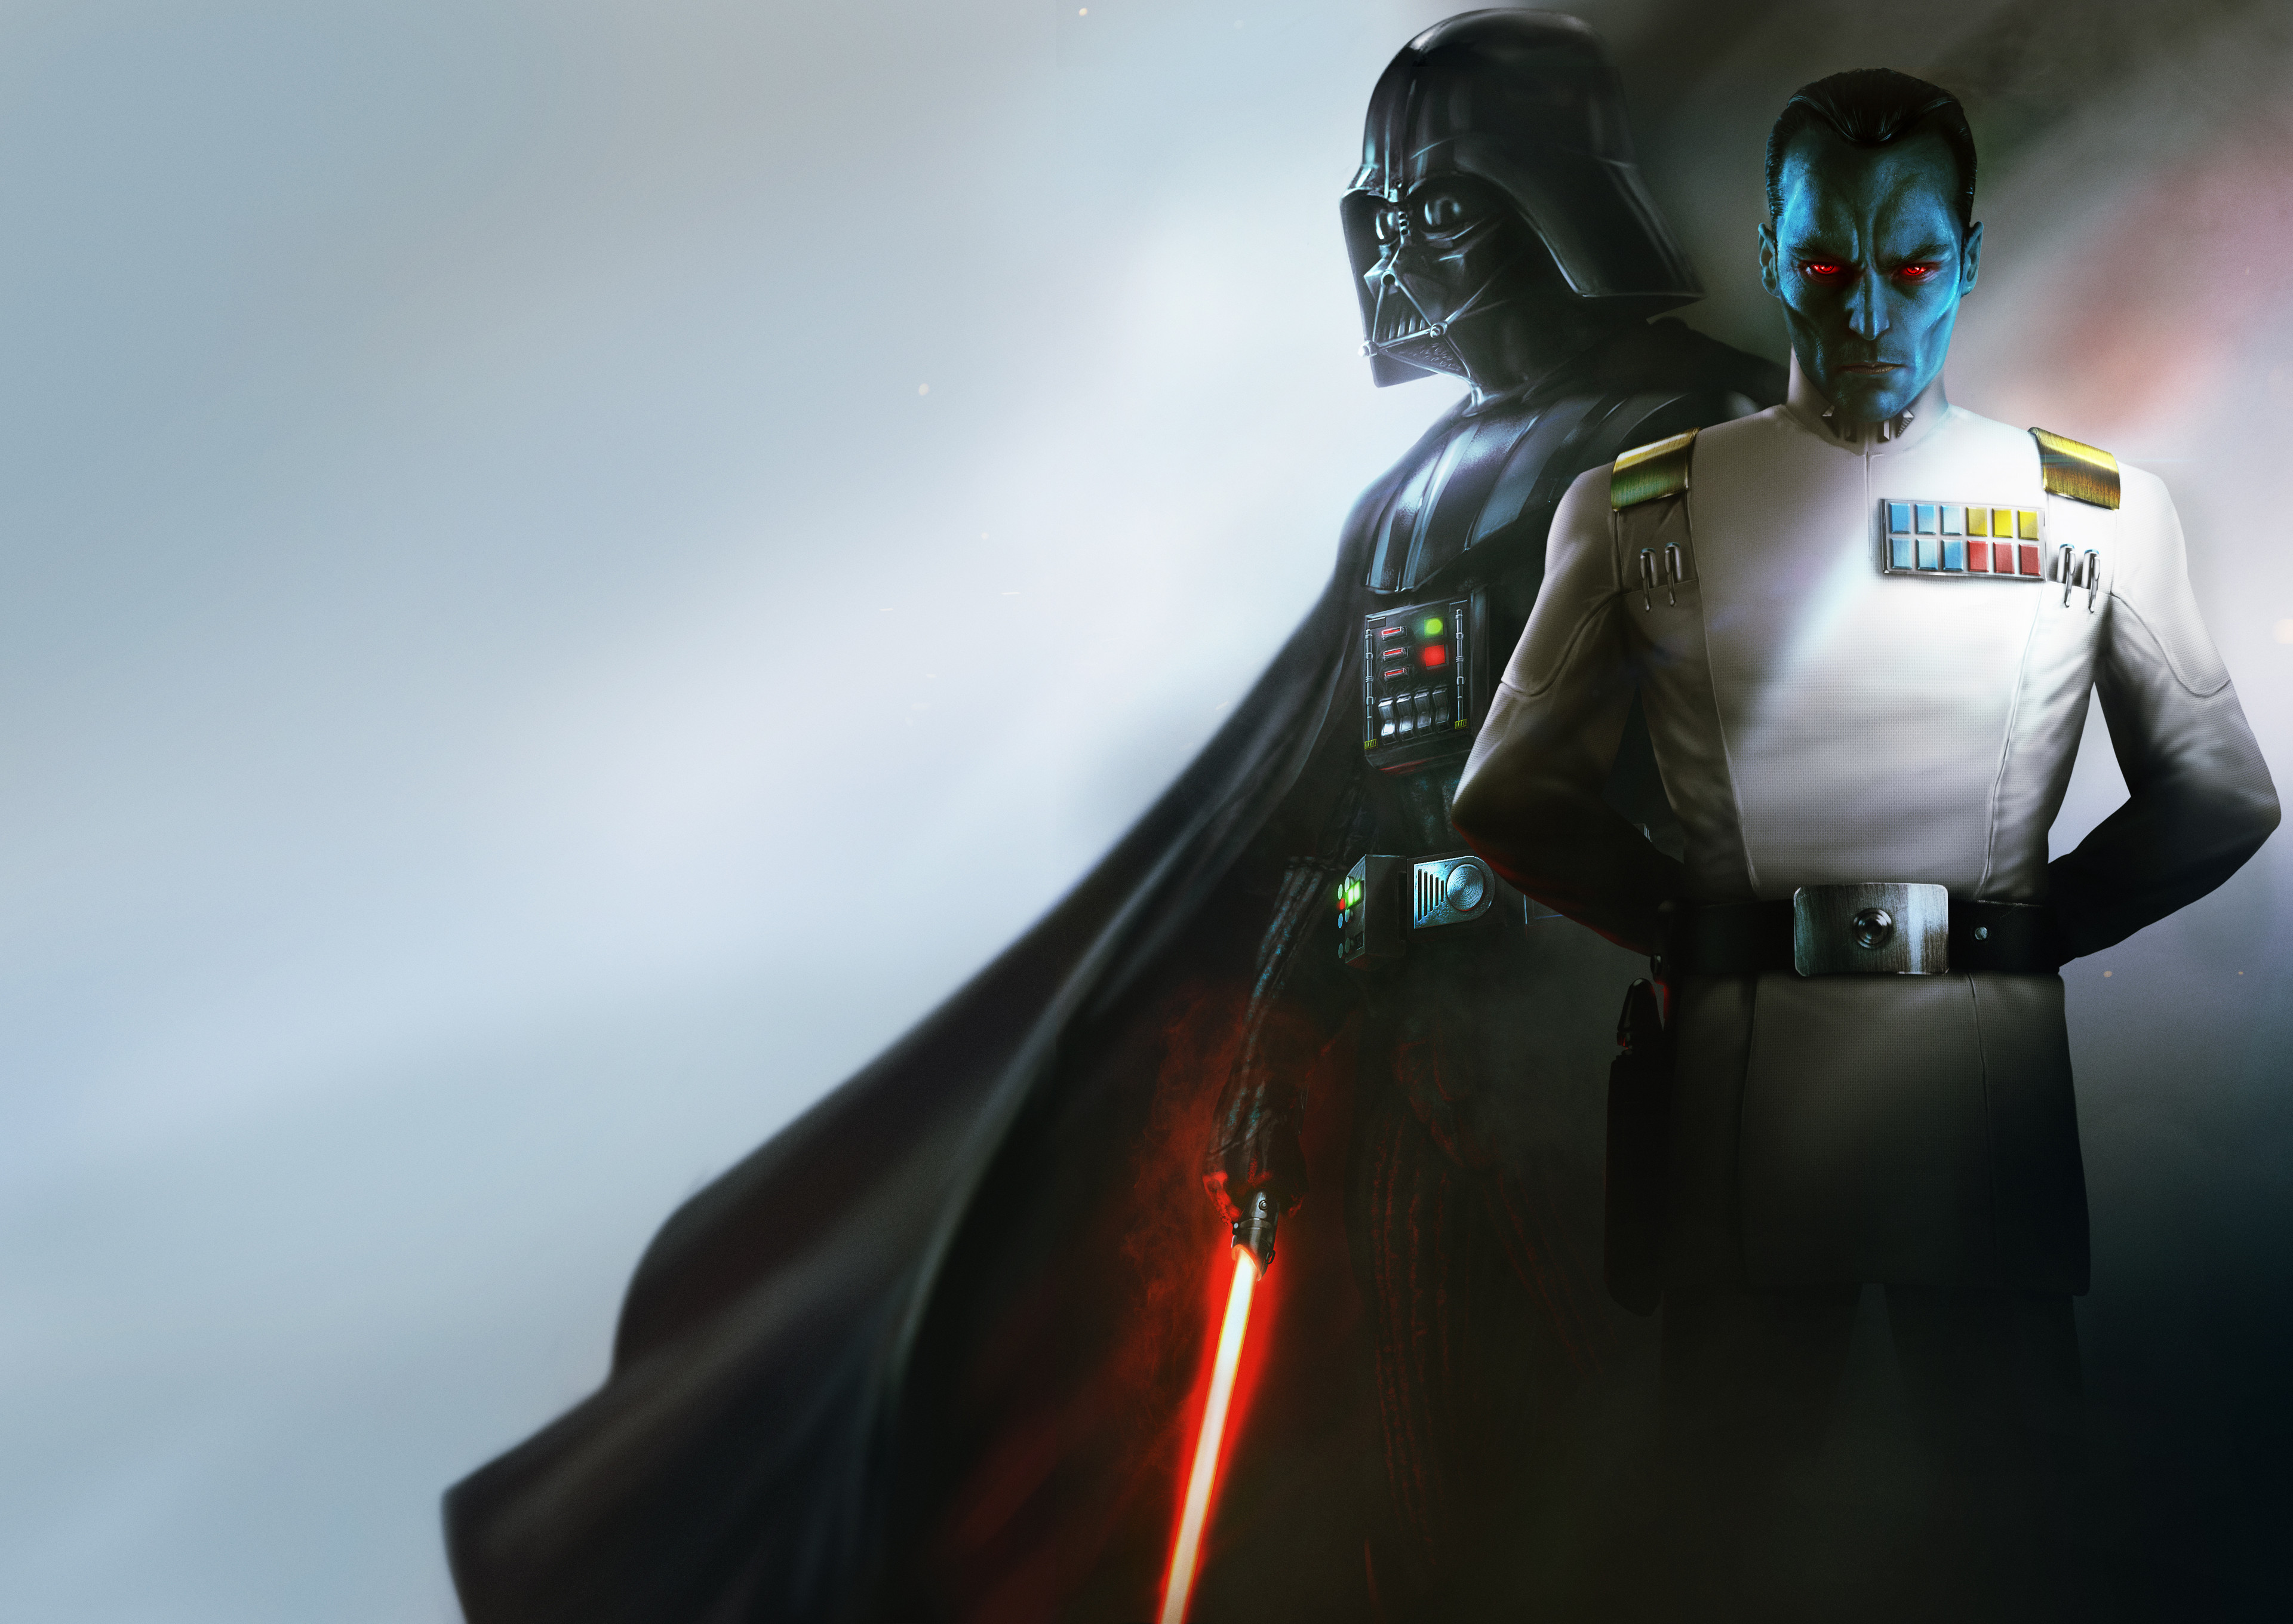
Vader and Thrawn met again on Coruscant after Thrawn suffered a strategic defeat on Atollon. Although the battle had been a tactical victory, several rebels had escaped the Grand Admiral after the Bendu appeared. As a consequence of allowing the rebels to escape, Vader now harbored disdain for the Grand Admiral. During this meeting, the two were ordered by the Emperor to travel to the planet Batuu to investigate a disturbance in the Force that the Emperor had sensed. While Thrawn brought his own forces on board his Star Destroyer, the Chimaera, Vader brought a contingent of his personal stormtroopers from the 501st Legion, the 1st Legion, to assist in tracking down this disturbance at the edge of known space.
During their mission, they fought the Grysk species and discovered that the disturbance was caused by a group of young Chiss Force-sensitives known as, much to Vader's surprise, the "Sky-walkers." Afterward, Vader began to doubt Thrawn's loyalty to the Empire due to the growing threats against the Chiss in the Unknown Regions. While Thrawn managed to deduce that Skywalker and Vader were the same person, the Grand Admiral came to regard Vader as a separate entity mentally and that his former ally Skywalker was dead. After instructing Thrawn to ensure he kept his promise to the Emperor by ordering him to remain in Imperial space instead of leaving to save his people, Vader came to admire Thrawn's TIE/d "Defender" Multi-Role Starfighter project, stating that he would speak on its behalf to Palpatine and suggesting improvements for the craft. On Batuu, Vader's presence near Black Spire was discussed by locals, with rumors of the legendary Imperial enforcer's visit to Batuu being spoken of for years to come.
Submission to Ahr
During the Empire's efforts to subdue anti-Imperial forces in a Mid Rim sector under Imperial Governor Ahr, Vader participated in an attack on the planet Namzor, where he eliminated a group of insurgents. In the process, he destroyed the rebels' stores of coaxium, defying the command of Ahr, who was tasked with securing the hyperfuel. The governor voiced his frustrations to the Emperor. Sensing Vader's anger, the Emperor commanded his apprentice to obey any and all orders from the governor until Vader had learned his lesson.
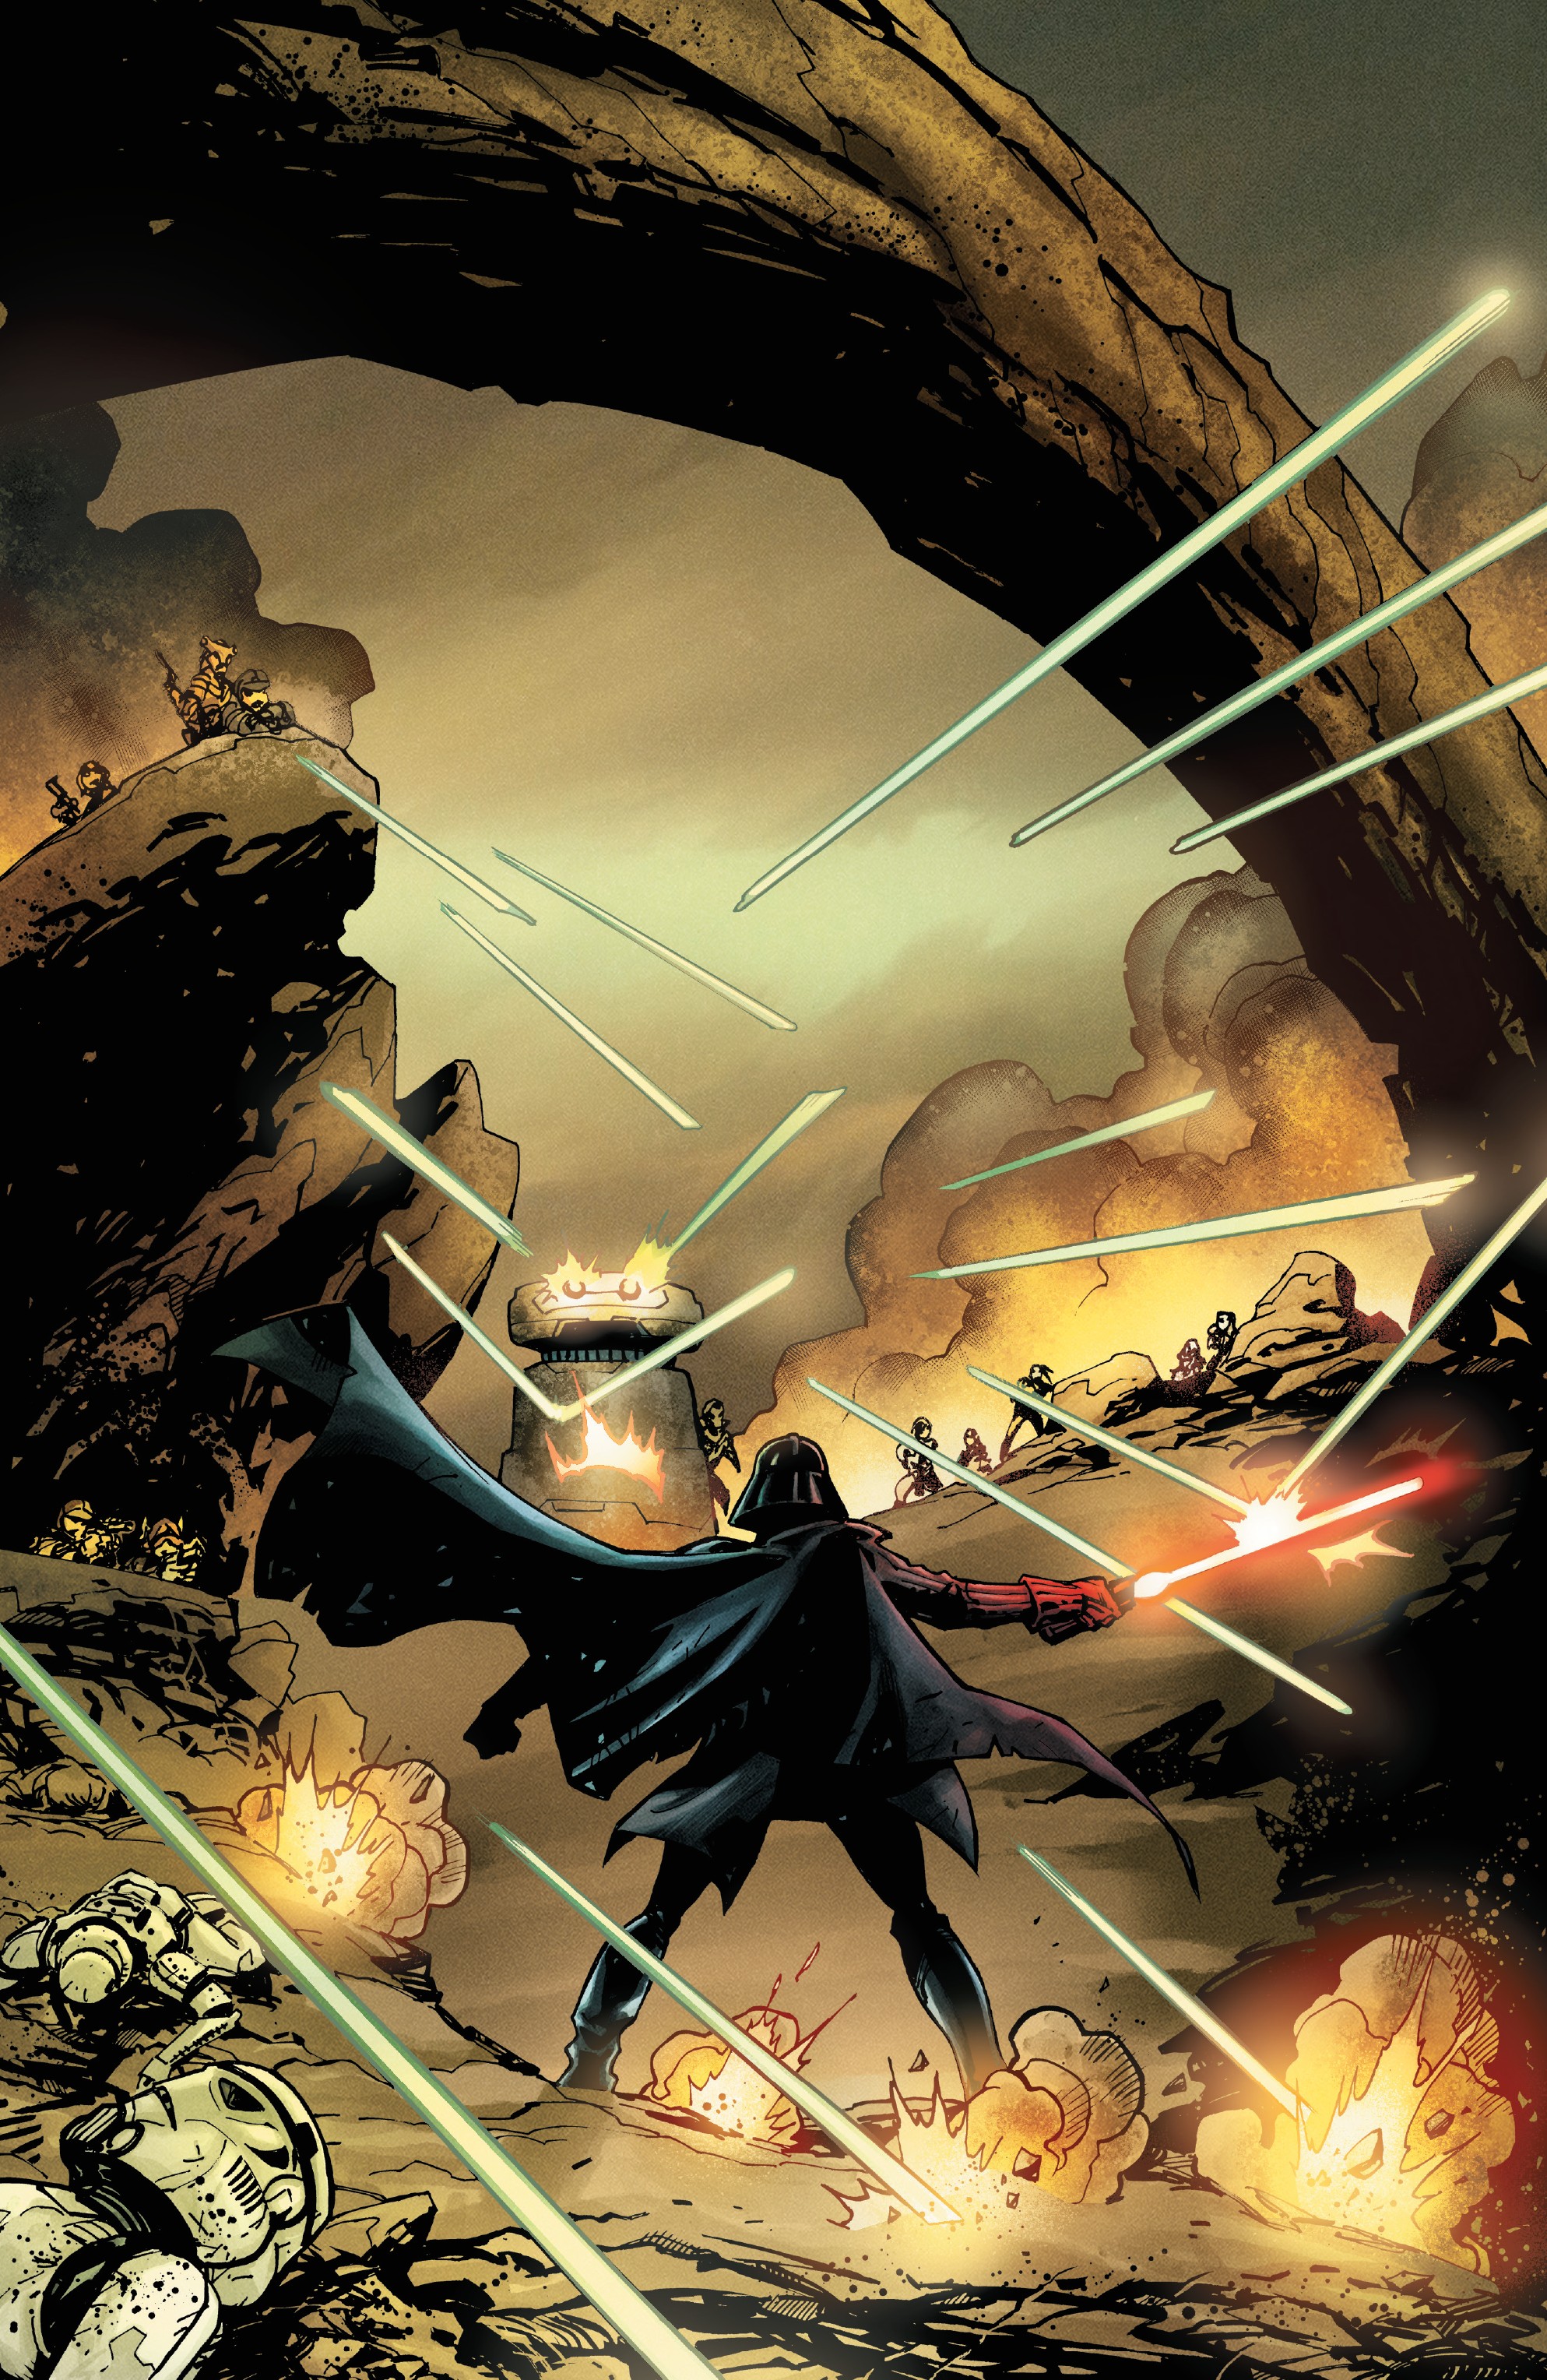
Ahr reveled in his newfound authority, sending Vader on increasingly perilous missions throughout his sector. He sent Vader to fight alone against the renegade droids of Ahn Krantarium, and later withdrew his forces on Phelzepham, leaving Vader to battle the moon's insurgents by himself. Despite his desire to kill the governor, Vader continued to obey Ahr's commands.
Governor Ahr brought his ship to the Kankalo Belt Containment Zone, an asteroid field inhabited by a great creature. He ordered Vader to eliminate "the greatest threat" he could find. Seeing an opportunity, Vader confronted Ahr, identifying him as the true threat. Before Vader could strike, Ahr commanded the Dark Lord to kneel before him. Vader complied, but the creature attacked the vessel, pulling the governor into the vacuum of space and freeing Vader from his submission.
Cianap
Vader commanded Imperial forces at Cianap during a battle against the rebels. During the engagement, Vader was targeted by multiple X-wings but managed to eliminate them. However, his TIE sustained damage when one intentionally collided with him, forcing him to crash land on Cianap. Vader then exited his TIE and awakened an Ender from its Slumber. The Ender attempted to kill Vader, but he stabbed one of the Ender's eyes out and tried to cut its back open, only for the Ender to grab him. Vader began slicing the Ender's fingers, but the Ender threw him into a building and dropped him. The Ender then pursued a native, but Vader rode a creature and saved the native from the Ender. Vader then decapitated the Ender, finally killing it. The native thanked Vader, who then returned to his TIE and was transported aboard a Star Destroyer via tractor beam.
An Unwelcome Romance
At some point, Vader arrived at the Death Star and proceeded to his personal medical bay. As he made his way, he disrupted a medical cart being attended to by a nurse, who was flustered due to her infatuation with Vader. Vader received treatment from a doctor while in the medical bay but became enraged when the nurse from the previous encounter entered the medical bay as Vader was putting his helmet back on. In his anger, Vader used the Force to push the doctor into the wall, demanding that he control the medical bay or be replaced. The nurse, however, misinterpreted Vader's anger as reciprocation of her feelings for him, believing his actions were protective of her. After his outburst, Vader left the medical bay, scolding the doctor as he attempted to explain why the appointment had taken so long. The nurse, upon being instructed to clean up the medical bay, instead stole pieces of Vader's armor as a keepsake, storing it among other discarded pieces of Vader's armor, as well as a vial of his blood.

A subsequent incident resulted in Vader crash landing on the Death Star in his TIE Advanced x1. Vader returned to the medical bay, demanding the nurse to summon the doctor. The nurse briefly assisted Vader, perceiving the moment as intimate, before the doctor himself returned, ordering the nurse to leave as he tended to Vader instead. Vader, impatient, cut his appointment short, leaving to rejoin his previous battle. However, Vader left his cape behind, which the nurse proceeded to steal and take to her quarters. After the doctor discovered her, he dumped the bits of Vader's armor into the trash compactor. Driven mad, the nurse entered Vader's quarters, which he had left unlocked out of a belief that no one would enter. Upon seeing the nurse enter his chambers, a helmetless Vader simply stared at her as she confessed her infatuation with him. Moments later, Vader stabbed the nurse with his lightsaber, killing her. Vader then put his helmet back on and left his quarters, contacting the bridge and ordering them to remove her corpse.
Hunting the Hidden Hand
Under the Emperor's orders, Vader attacked and killed three lower-level clans working for the Hidden Hand, a crime syndicate known for selling weapons to the Rebellion. He then attacked the Lower Bay Docks on Fikari, killing most of the people there and questioning the Weequay Holaq about the Hidden Hand's whereabouts. Holaq told Vader that none of them would know where the Hidden Hand was. Explaining their methods of maintaining secrecy, he pleaded with Vader to believe him. Vader replied that he did and detonated the docks, killing him. He then reported the failure to Palpatine via hologram, who reiterated the importance of eliminating the Hidden Hand. The Tarsunt Gwi, who worked for the crime syndicate, overheard this conversation and hired a team to hunt down and kill Darth Vader. At some point, Vader learned of this plot and traveled to the Dark Quarter on Yuw to kill bounty hunters and find answers. Later, the captain of the bounty hunter team, Beilert Valance, amplified a signal near Arvina, disguising it as a Hidden Hand signal. Vader arrived on a Star Destroyer in response, and it fired on the city below. He then entered his TIE fighter and pursued Valance's team. Their sniper, the Rebel agent Gita, currently disguised as the Tusken Raider "Urrr'k", managed to shoot down two of Vader's support TIEs. This gave the team enough time to escape, leaving Vader to investigate the damage in the city below. Valance had planned to leave data banks behind that would reveal the Hidden Hand's secret outposts, allowing him to get the jump on Vader. However, an informant of Vader's within the crew revealed the bounty hunters' next destination.
Vader followed them to a Hidden Hand outpost on Heva aboard the Formidable. Upon arriving, an Imperial general informed Vader that Valance's ship, the Broken Wing, had been located and that their informant had gone silent. Vader abruptly told the general to scramble all fighters, much to the general's confusion. Valance's crew had begun remotely piloting a fleet of bot-drones towards the Formidable. Vader entered his TIE fighter and pursued the drones as well as the Broken Wing. He shredded the drone fleet, but the drones started to pull away. Vader told his pilots to stay on the leader, as he took out its laser cannons. The drones then formed a large cannon that fired, destroying the Formidable. Despite this, Vader stayed locked on the Broken Wing, taking out its engines and causing it to crash-land. Vader landed his TIE fighter and entered the ship, lightsaber drawn. After finding the ship empty, he stood on the roof. Dengar and Honnah, both members of Valance's crew, fired on the TIE fighters near Vader's ship and destroyed them. Vader looked in their direction as the bounty hunters took aim. However, Valance had a plan that involved an electro-pulse, an E.M.P. device that only worked on contact, so they withheld their fire. Vader used the Force to kick up dust around him so that the bunty hunters didn't have a straight shot. One of the bounty hunters, Chio Fain, charged and shot at him. Vader blocked his fire as well as fire from the other bounty hunters. Fain continued to fight Vader, intent on avenging his partner Rone. As the Ardennian taunted him, Vader chopped his arms off. Fain then asked Vader how good he was against a Gamorrean battle-ax, to which Honnah started to attack. Dodging the Gamorrean's swings, Vader took a hit from Fain, using his last remaining arm to fire at him. Vader then used the Force to push Fain into Honnah's battle-ax, killing him. After taking a shot from Gita, Vader incapacitated her and killed Honnah. Valance took the opportunity and tried to stick the electro-pulse to Vader but was unable to. He was then shocked by Dengar, who had in actuality been working for the Empire and had been Vader's informant.
Vader, accompanied by Dengar, brought Valance aboard his Star Destroyer, the Vengeance. After rewarding the bounty hunter, he inquired about the Hidden Hand. Dengar responded that he had shared all his knowledge with Vader, and Valance remained uncooperative. Vader dismissed Dengar, assuring him that the Empire knew how to reach him should his services be required again. Valance endured relentless questioning for days in the interrogation chamber, all without yielding any information. Vader then entered, dismissed the interrogation team, and began torturing Valance to extract answers, continuing until Valance lost consciousness. Upon regaining consciousness, Valance broke free from his restraints and eliminated two guards. Donning their armor and arming himself with their weapons, he exited, only to be met by his ship and Vader. Vader then transported him to Chorin, where Valance explained how both he and the Empire had failed to protect Chorin, inadvertently creating the Hidden Hand. Vader reassured him that the remaining members of his people would be safe. Recalling Valance's past as an Imperial cadet, Vader welcomed him back into the Empire.
Valance successfully located the Hidden Hand's hideout, leading Vader and his forces to the location. Vader battled his way through the Hidden Hand's defenses until he confronted their leader. Gwi, the Tarsunt who had originally hired Valance to assassinate Vader, found himself held at gunpoint by Vader. Using the Force, Vader levitated Gwi to safety, instructing his troops to take the Emperor's prize alive. As stormtroopers escorted Gwi away, Vader coldly informed the Tarsunt that he and every member of his organization would be hunted down and killed. He then requested a stormtrooper to bring him Valance. Upon learning that Valance was missing, Vader Force-choked the trooper and dispatched troops to Chorin with orders to destroy Valance's settlement and execute all its inhabitants. However, when the troops arrived, they discovered that all the inhabitants had been evacuated. Valance had successfully evaded Vader and saved his people.
Another attempt to resurrect Padmé
Despite his earlier unsuccessful attempt to revive his wife, Vader found himself tempted once more upon discovering the Aeon Engine and the legend of Lady Corvax. Corvax had tried to resurrect her fallen husband using the most sacred artifact of Mustafar, Bright Star, to power the Engine. Though her attempt failed, Vader, convinced that Corvax's failure stemmed from insufficient power, believed he could succeed with the Bright Star. He began his search for the Bright Star, only to discover that Lady Corvax had secured her devices, granting access solely to those of her bloodline.
Undeterred, Vader initiated a search for any surviving members of Lady Corvax's lineage. With the assistance of Imperial Admiral Gable Karius, who deployed an Interdictor vessel to extract a starship called Windfall from hyperspace above Mustafar, Vader captured the smuggler who was the descendant he had been seeking. Vader then demanded that the smuggler unlock a configuration box to verify their connection to Lady Corvax. After the smuggler succeeded, Vader departed, reminding them that he would require their services later. He then contacted the Black Bishop, his ally in the search for the Aeon Engine, and they discussed how the Bright Star would bestow upon Vader the extraordinary powers necessary to resurrect the dead. With Corvax's descendant in his grasp, Vader believed that the final element required to achieve his goals was now within his reach. Dismissing the Bishop after sensing Padmé's soul echo through the Aeon Engine, Vader unleashed a cry of anguish and sorrow when she vanished moments after revealing her pregnancy. Intercepting the smuggler and ZO-E3 as they attempted to escape, Vader cast aside the droid before forcing the smuggler to unlock the sanctum beneath his fortress. Successfully activating the lift to access the lower levels of Fortress Vader, where his ultimate prize awaited, his Stormtroopers were killed by a number of ancient droids, but Vader and the smuggler swiftly cut down the droids before he confiscated the smuggler of their lightsaber and telling them that they had handled their own well. Recognizing the smuggler's need for training in the ways of the Force, Vader resolved to provide instruction to the smuggler.
Upon reaching the inner sanctum of Corvax Fortress, Vader demonstrated the power of the Force on a nearby shattered statue, declaring the Force as immeasurably powerful, capable of "revealing the mysteries that will cause the fragile and broken to turn away in horror and agitation," and granting access to the secrets of both life and death. He acknowledged that the smuggler possessed power, but would need further training in the Force to overcome the challenges ahead. He then tasked them with placing nearby activation stones into the two pedestals to open the gate to the next room as the first lesson, and inside the passageway, proclaiming the smuggler had promise but much to learn, he proceeded to teach them how to telekinetically defend themselves by throwing and having them push aside rocks. Observing that the smuggler had glimpsed the power of the Force, Vader decided to resume their training later and viewed a message left behind by Lady Corvax for one of her descendants, dismissing Lady Corvax's plea to fix her mistake as her never understanding the true extent of that which she had created. Advancing down the pathway, the third test for the smuggler arose when they entered a vast chamber filled with nests of Lava nymphs, Vader demanding them to tap into the dark side and exterminate the vermin. Unimpressed by their difficulties in doing so, Vader stated their abilities were hardly acceptable and lacking in much regards. but before he could work on the Smuggler more, activating the pedestal with a key caused a large portion of the floor begins to break apart, and despite Vader's efforts to keep the Smuggler under his watch, lifting up the floor, a darkghast attacked him, forcing him to let go of the Smuggler to fight the creature. Despite the separation, Vader caught up to the Smuggler just as they had retrieved the Bright Star with a tipoff from the Mole. Realizing that the Smuggler intended to betray him, Vader acted first, seizing the Bright Star and abandoning them and their companions in the cave, coldly stating that their betrayal was insignificant as they had outlived their usefulness.
Placing the Bright Star on the Aeon Engine, Vader initiated the ritual to resurrect Padmé, determined to save his wife regardless of the cost, even if it meant sacrificing other planets. Padmé's face began to materialize, her voice echoing the same words she had spoken long ago, suggesting that the ritual might succeed. However, the Smuggler reappeared to halt the ritual, aware of the potential catastrophe that the device could unleash. Though surprised by the smuggler's survival, Vader dismissed it as irrelevant and engaged his former apprentice in a duel, vowing to succeed where Lady Corvax had failed. As the smuggler resisted Vader's attacks, the Bright Star's energies coalesced, finally causing a bluish projection of Amidala in full-bodied form to appear, as she began to utter some of the last words that Vader had heard her tell him long ago. Vader then paused the duel in its tracks, holding the smuggler in a choke hold, as he realized that their presence was affecting the Aeon Engine. However, it was too late as her projection faded. Realizing the ritual had failed, Vader became furious, blaming his failure on the smuggler, and proceeded to easily overpower him. However, before he could kill his opponent, the Black Bishop intervened, stopping Vader temporarily and giving the smuggler the opening needed to destroy the Aeon Engine. By the time Vader was free, he could only beheld the Engine's destruction in horror, and before he could strike down the smuggler, the Engine exploded, sending the two far away from one another.
Downed by Red Four
During a battle, Vader's craft was brought down when an X-wing deliberately collided with it. Micha, using the callsign Red Four, sacrificed himself, leading to the momentary belief that the Dark Lord had perished, until Vader emerged from the wreckage, lightsaber ignited, ready to confront the Rebel troops.
Visit on Mustafar
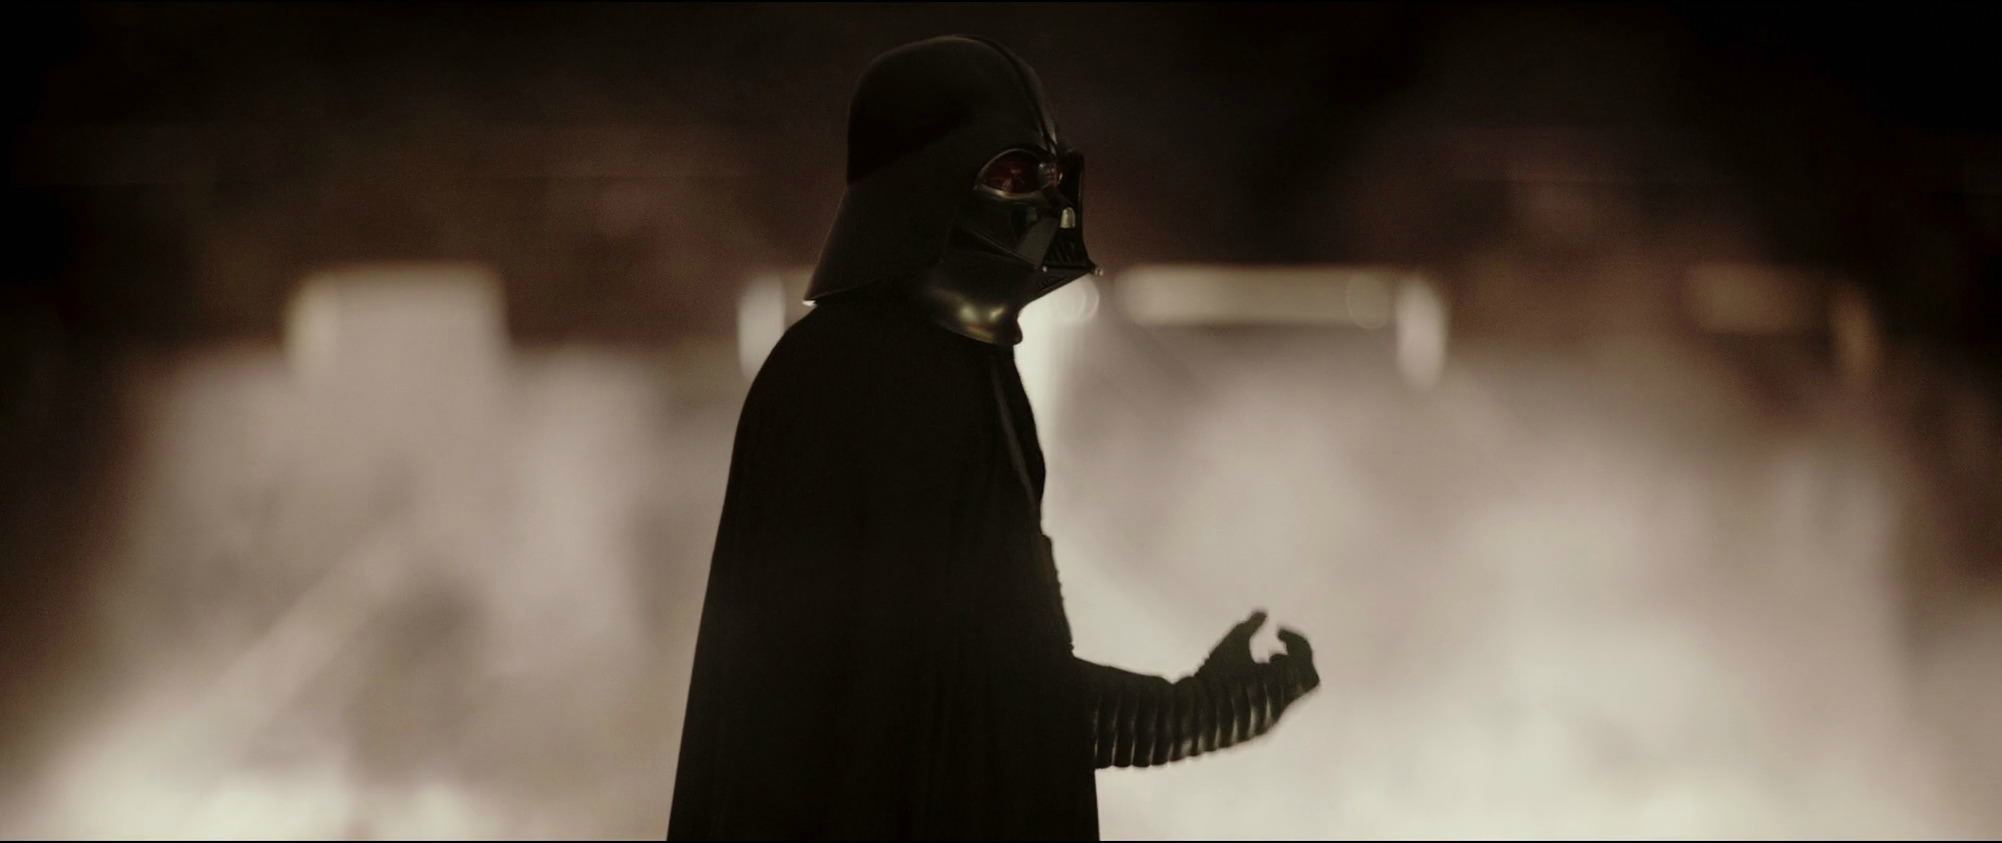
When Ezra Bridger managed to access the World Between Worlds, he heard Anakin Skywalker's voice from his time on Christophsis. Subsequently, Vader's voice was heard cautioning someone not to underestimate the power of the dark side. As suggested by Grand Admiral Thrawn prior to his, the Chimaera's, and Bridger's disappearance during the Liberation of Lothal, Vader participated in the Death Star project despite his personal reservations about the battle station. Thrawn noted that Vader was uniquely capable of identifying and addressing any threats to the station. Thrawn also leveraged this appointment to compel Assistant Director Brierly Ronan to join the Chiss Ascendancy, as the Imperial official would have been unable to conceal his disdain for the Emperor from the Sith Lord.
Shortly after the destruction of Jedha City, Vader was in his tank when his servant Vaneé approached him. Vaneé informed Vader that Director Krennic, the Imperial in charge of the Death Star's construction, had arrived as summoned to provide an explanation for recent issues surrounding the battle station. The most pressing issue was the discovery that Galen Erso, an engineer instrumental in creating the Death Star's superlaser, had been a traitor and may have leaked information about the weapon to the Rebellion.
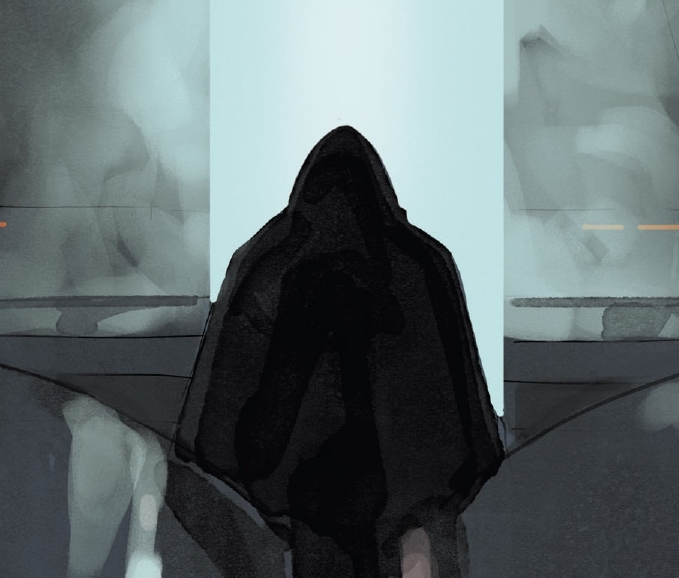
Krennic, recently informed by Governor Tarkin that he was no longer in command of the Death Star project, sought to impress upon Vader the urgency of an audience with the Emperor, ostensibly to discuss the weapon's destructive capabilities. Instead, Vader reprimanded Krennic for the destruction of Jedha City, the source of the kyber crystals essential for the Death Star's primary weapons systems. Krennic attempted to shift the blame for the city's destruction onto Tarkin, but Vader remained unmoved. He informed Krennic that the Imperial Senate had been told that Jedha had been destroyed in a mining disaster and that the Death Star did not exist. He then made it clear that Krennic was to ensure that Galen Erso had not compromised the Death Star in any way. Taking this as confirmation from Vader that he was still in command of the project, Krennic began to ask Vader if he would speak to the Emperor on his behalf. But before he could finish his question, Vader cut him off by telekinetically closing his throat, with a sardonic warning to not "choke" on his aspirations.
Stolen plans
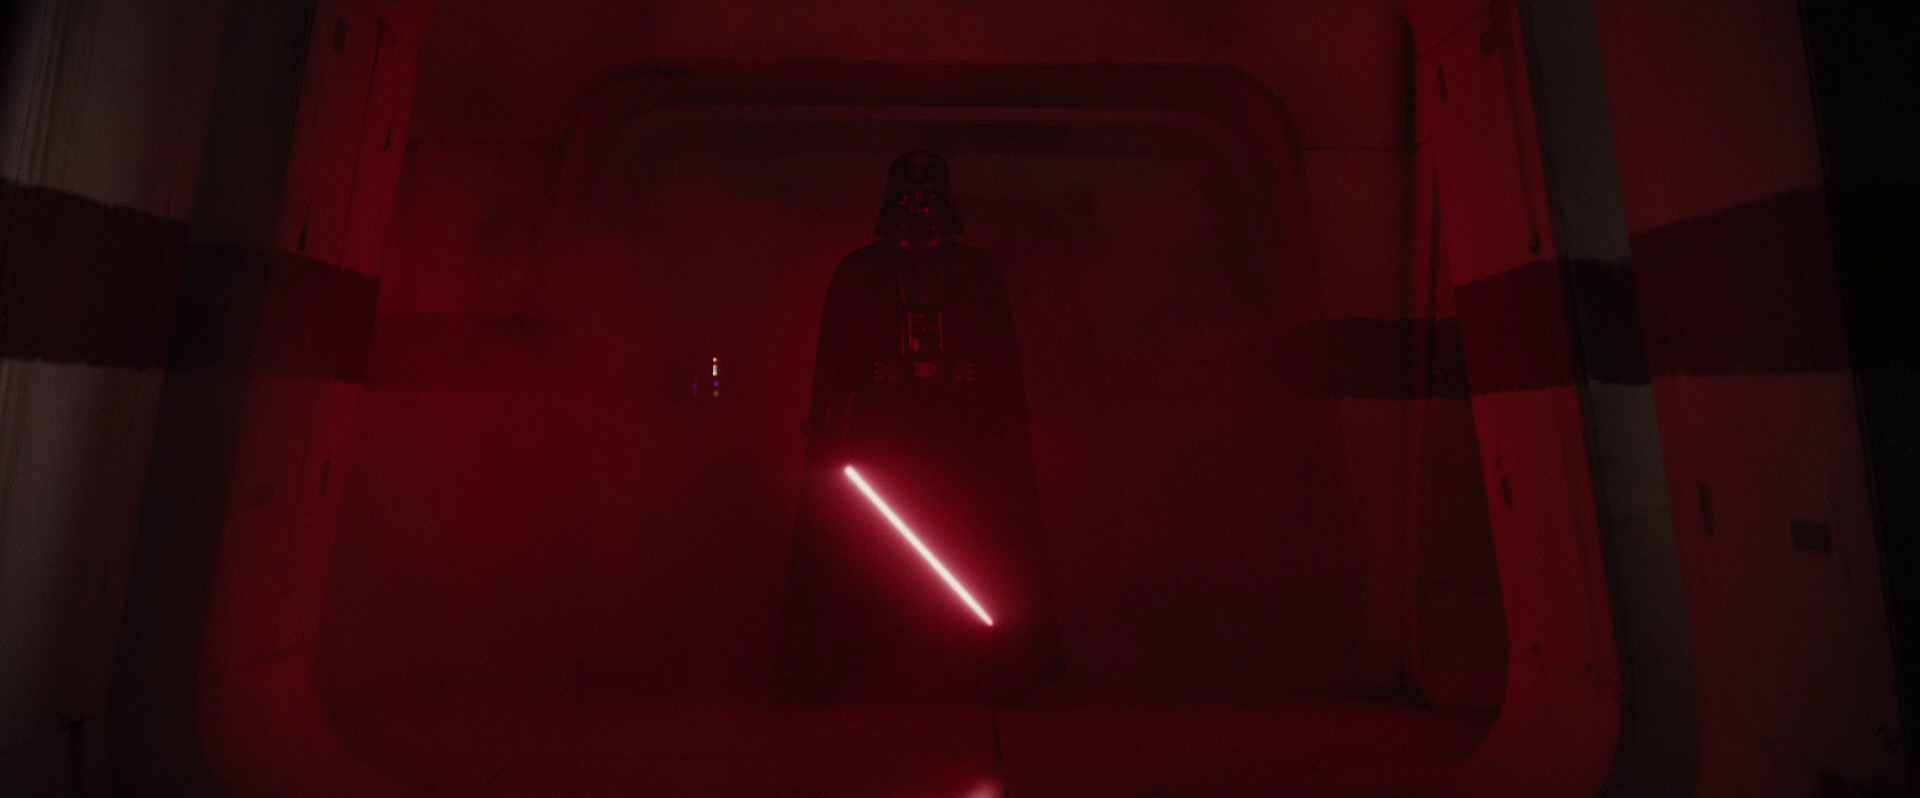
Shortly thereafter, Rebel spies attacked the Imperial security complex on Scarif, stealing the technical readouts of the Death Star and transmitting a copy to the Rebel flagship Profundity. As the Rebels attempted to escape to hyperspace, Vader arrived at the battle scene aboard the Star Destroyer Devastator and swiftly disabled the already damaged Rebel flagship. He and a small squad of stormtroopers then boarded the vessel to search for the plans. As the Rebel crew evacuated the Profundity, a small group of Rebel troopers copied the Death Star schematics onto a data disk and tried to board the Corellian corvette Tantive IV to escape. Just meters from one of the corvette's airlocks, the Profundity suffered a power failure, jamming an automatic door in the path of the Rebel soldiers.
Unable to open the door more than a crack, the Rebels were intercepted by Vader, who unleashed his fury in the confined space, slaughtering the helpless Rebels. As Vader approached the trooper carrying the plans, the Rebel managed to pass the data disk to a compatriot behind the door before Vader impaled him and telekinetically forced the door open. While Vader finished off the remaining soldiers, the trooper who received the plans dove through the open airlock onto the Tantive IV, and the Rebels launched the ship moments before Vader could board it. Once the ship was away, the plans were given to Vader's estranged daughter, Princess Leia Organa, who had been tasked by her adoptive father to find Obi-Wan Kenobi on Tatooine.
Pursuing the plans
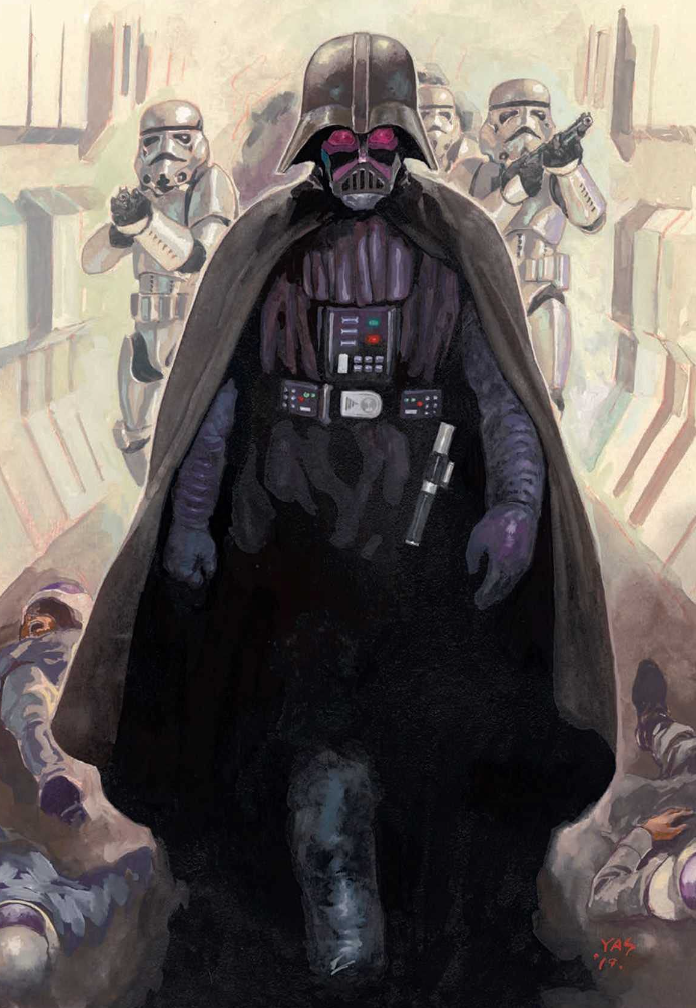
Despite their daring escape, the Rebels aboard the Tantive IV did not get far. After failing to secure the plans aboard the Profundity, Vader immediately re-boarded the Devastator and pursued the Rebel corvette. The Devastator intercepted the Tantive IV in orbit above Tatooine, quickly disabling and capturing it. Vader and his troops boarded the ship, killing many Rebel troopers and seizing complete control of the blockade runner. Vader interrogated its captain, Raymus Antilles, before executing him for refusing to reveal the location of the plans. Vader's troops captured the princess, but not before she placed the plans inside R2-D2 and sent him in an escape pod to the planet's surface. Although the Princess attempted to invoke her diplomatic immunity as a member of the Imperial Senate, Vader had her arrested as a rebel and traitor.
As she was escorted to the Devastator, Vader was informed that an escape pod had been jettisoned during the fighting, but that no life forms were aboard. Believing that the Princess had hidden the plans there, Vader dispatched a battalion to Tatooine to recover the plans while he took the Princess to the Death Star for interrogation. In hyperspace, Vader would catch Organa when she had escaped her guards and made her way to one of the Devastator's shuttles, and announced that the Emperor was disbanding the Senate as they spoke, leaving her defenseless. Vader then had her follow him to the ship's bridge shortly before arriving at the Death Star, where he had her sent to her cell in Detention Block AA-23.
Meanwhile, Vader accompanied Tarkin to a meeting with the Joint Chiefs, including General Cassio Tagge and Admiral Conan Antonio Motti, who mocked Vader's reliance on an "ancient religion," prompting Vader to Force-choke him. Before he could kill him, Tarkin intervened, instructing Vader to extract the location of the Rebel base from Organa. Subsequently, Vader subjected her to torture using a mind probe-equipped interrogator droid. When she resisted, he and Tarkin resorted to coercion, bringing the Death Star to the Alderaan system and threatening to destroy her homeworld if she refused to disclose the location of the Rebel base. Eventually, she revealed that the Rebels were on Dantooine, yet Tarkin ordered Alderaan to be destroyed anyway, to make an effective demonstration of the Death Star's power. Vader restrained the Princess as the Death Star's superlaser destroyed her planet. Vader then returned Organa to her cell to await her execution.
Enter Luke Skywalker
Duel on the Death Star
After scout ships sent to Dantooine found the base abandoned, Tarkin ordered Vader to kill her immediately, but the Millennium Falcon was captured in the ruins of Alderaan by the Death Star's tractor beam. Identified as a suspicious ship from Mos Eisley, Vader concluded that they were attempting to return the stolen plans to the Princess and went to inspect the freighter himself. Informed that the crew had apparently abandoned ship after take-off, Vader ordered the ship to be scanned to ensure this was the case. At the same time, Vader sensed the presence of his old master, Obi-Wan Kenobi. Upon learning that the Princess had been released from her cell, Vader decided to confront Kenobi alone.
Vader located Kenobi after he had deactivated a tractor beam terminal to facilitate the Falcon's escape from the battle station, and the two engaged in a final duel. During the fight, Vader commented on Kenobi's weakness due to age. However, Kenobi told his former apprentice that he would not win, as Kenobi would become more powerful than Vader could ever imagine, even if he succeeded in killing him. As they fought, they reached Bay 327 just as Kenobi's companions and the Princess reunited to board the Falcon, only for Kenobi to see his latest apprentice, Luke Skywalker, Vader's son.
With a knowing smile, his former master raised his blade in surrender, and Vader struck him down. To Vader's astonishment, Kenobi's body vanished, his spirit becoming one with the Force. Vader searched his robes for remains, but found none. General Moradmin Bast inquired about Kenobi's identity, and Vader replied, "An old man who thought he could help gifted children. He was mistaken." Vader then attempted to prevent the Rebels from escaping but was thwarted by Luke's shot, which closed the hangar doors. After the Falcon's escape, Vader met with Tarkin and confirmed that a homing beacon had been placed on the ship, allowing them to track it to the Rebel base.
Kenobi's warning to Vader proved true; his consciousness survived his death, becoming a Force spirit. Meanwhile, Yoda, still hidden on Dagobah, sensed Kenobi and Vader's duel through the Force, noticing for the first time the loneliness within the man who had once been Anakin Skywalker. Yoda observed that Vader's loneliness intensified after he struck down his former mentor, nearly prompting Yoda to pity the former Jedi and wish he could counsel him. As he continued his journey, Yoda reflected on his past, blaming himself for failing to recognize Skywalker's path to the dark side.
Yavin 4
Vader's plan succeeded, and the Death Star followed the Falcon to the hidden Rebel base on Yavin 4. In the Death Star's conference room, Vader awoke Tarkin from a vision about his father just as the battle station approached Yavin Prime, with an officer informing them that Yavin 4 was located on the far-side of the planet. As the Death Star prepared to destroy the moon, Rebel X-wings and Y-wings starfighters attacked the Death Star, having identified a weakness: a thermal exhaust port leading to the reactor systems. A direct hit on the port would trigger a chain reaction, destroying the station. Although Tarkin remained confident in the station's invulnerability, Vader was informed by Lieutenant Tanbris that the thirty attacking Rebel starfighters were small enough to evade the turbolaser defenses. Consequently, Vader ordered fighters to launch. When Gold Squadron broke off from the main group and initiated a trench run toward the exhaust port, Vader boarded his TIE Advanced and, escorted by two TIE fighters, eliminated three of the last four Gold Squadron pilots. He then proceeded to destroy most ships of Red Squadron, killing Red Leader Garven Dreis.
As the remaining members of Red Squadron engaged in a trench run while the Death Star prepared to destroy the moon, Vader damaged Wedge Antilles's X-wing, forcing him to break off formation, and killed Biggs Darklighter, leaving only the leader of the group, Luke. Vader quickly sensed the Force was strong in the young pilot, but nevertheless moved to engage him. Just as Vader was about to destroy the young pilot, the newly arrived Millennium Falcon intervened and destroyed one of Vader's escorts. Before the Falcon could destroy Vader, his other escort accidentally collided with Vader's craft, destroying the escort and sending Vader's craft spiraling into space. This prevented him from stopping the Death Star's destruction, which resulted in Tarkin's death and a major defeat for the Empire.
Right after the conflict, Darth Vader transmitted an urgent message to the Devastator, requesting immediate transport from the Yavin system back to the Star Destroyer. Some time passed, and he found himself flying just outside the ever-growing remnants of what had been the Death Star. It was then that Imperial pilots Ciena Ree and Berisse Sai arrived in a Gozanti-class cruiser. Vader docked his TIE Advanced x1 with the approaching freighter, stepped through the airlock door, and encountered Ree. He then instructed Ree and Sai to stay in the hold for the duration of the journey, taking command of the freighter himself until their return to the Devastator. As the rebels undertook a swift abandonment of their base following the battle, Vader actively participated in the subsequent Imperial counterattack, though the rebels largely managed to evade capture. At one point, Vader issued the command to initiate a blockade of the Yavin system.
Activities Following Yavin
At a later time, an Imperial officer managed to acquire one of two lightsabers previously wielded by the Sith Lord Darth Atrius. Vader traveled to Hradreek, where the officer, flanked by a complement of stormtroopers, greeted him. Vader examined the lightsaber, inquiring about the whereabouts of the other. The officer expressed confusion at the question, prompting Vader to use the Force to choke him. As the officer gasped for air, he stammered that he had purchased the lightsaber from a smuggler, suggesting she had deceived him. Vader commanded a stormtrooper to redirect all units to locate the smuggler and the missing lightsaber. Vader then executed the officer as the stormtroopers dispersed to commence the search.
A squad of stormtroopers located the smuggler, Sana Starros, and pursued her through the streets. Starros bribed a group of Aqualish to impede their progress, and they obstructed the stormtroopers' path. However, Vader appeared and swiftly eliminated them with his lightsaber and Darth Atrius' lightsaber. Vader then followed Starros' trail to a cargo bay, utilizing the Force to manipulate crates, blocking her escape route. Starros retaliated by firing at Vader, who deflected the plasma bolts using the Force. Starros then set a trap, rigging one of the crates to explode as Vader approached, causing him to be thrown aside and buried. Vader quickly freed himself and proceeded to a nearby podracing track. Vader entered the seating area, causing the audience to scatter in fear. Vader noticed one of the podracers, who was drawing the attention of the announcers. The human, despite lacking the biological adaptations for such a race, was winning. Vader used the Force to induce a malfunction in one of the engines, causing the podracer to crash. The pilot of the racer was none other than Luke Skywalker, who had acquired the other of Atrius' lightsabers. Luke chose to destroy the lightsaber, finding that it filled him with anger whenever he used it. Vader watched him escape in his X-wing, and he decided to crush Atrius' other lightsaber.
According to a story later recounted by Vaneé, sometime after the Battle of Yavin, Vader's Star Destroyer received a communication from Cranwell, the assistant of Tarkin Initiative scientist Restin, warning them that Doctor Restin had betrayed the Empire. Restin, seeking a weapon to use against Vader in retaliation for the destruction of Alderaan, had developed a genetic serum that would transform those injected with it into rampaging Gamorreans, who could then spread the infection through physical contact. Vader resolved to confront Restin personally, arriving at Restin's base of operations with two stormtroopers and feigning ignorance of his treachery. After witnessing the doctor transform Cranwell into a Gamorrean using the serum, Vader suggested that the serum could be used against the Rebellion. When Restin turned the infected Gamorrean against the Sith Lord, he effortlessly levitated it and his infected stormtroopers into the air using the Force. He did the same with Restin, compelling the scientist to confess his treachery before revealing that he was already aware of it. Determined to witness his demise firsthand, Vader forced the three Gamorreans and Restin to touch, transforming the doctor into one of his creations. Leaving the infected scientist to the mercy of the Gamorreans, Vader departed aboard his Lambda-class shuttle. He had never feared Restin's experiments, as Vader already considered himself a different kind of monster.
Cymoon 1
Several weeks following the Battle of Yavin, Darth Vader was summoned to Weapons Factory Alpha on Cymoon 1. His mission was to negotiate, or rather, impose an agreement with an envoy of Jabba the Hutt regarding the supply of raw materials through Hutt-controlled space to the factory. Vader arrived shortly after the envoy (secretly the Millennium Falcon's captain, Han Solo) and landed on a platform. As he prepared to enter the facility, Vader was targeted by a sniper, Chewbacca, but he deflected the blaster bolt and used two stormtroopers as human shields as the Wookiee unleashed a barrage of shots upon him. Unharmed, Vader located Chewbacca's position and used the Force to collapse his vantage point, though the Wookiee survived.
Vader then instructed the arriving stormtrooper reinforcements to pursue him. One of them informed the Dark Lord that Overseer Aggadeen was out of contact and the factory's main reactor was experiencing a meltdown. Deducing that these events were the work of Rebels, Vader placed the entire moon on alert but also sensed the presence of the pilot who had destroyed the Death Star, Luke Skywalker. Though unaware of the boy's identity, Vader immediately entered the factory and confronted the Jedi apprentice. Vader quickly realized that the boy had received rudimentary training from Kenobi, and after a brief duel, seized Luke's lightsaber. As he prepared to execute Luke for refusing to provide information about the Rebellion, he recognized that the boy's lightsaber had once been his own. Before he could question Luke further, the foot of a Rebel-hijacked AT-AT walker crashed down into the middle of their confrontation, separating them.
Amidst the ensuing chaos, Vader sought to prevent the Rebels' escape and mercilessly cut down the factory's fleeing slaves, commanding his stormtroopers to execute all escapees. After Luke escaped on a stolen 74-Z speeder bike and attacked Vader's troops (leading the Dark Lord to reconsider his initial dismissal of the boy and wonder exactly what Kenobi had been up to before his death), Vader personally oversaw the walker's defeat. Solo and Organa, piloting the AT-AT, attempted to crush him, but Vader used the Force to suspend the walker's descending foot several meters above his head, nearly tearing it apart.
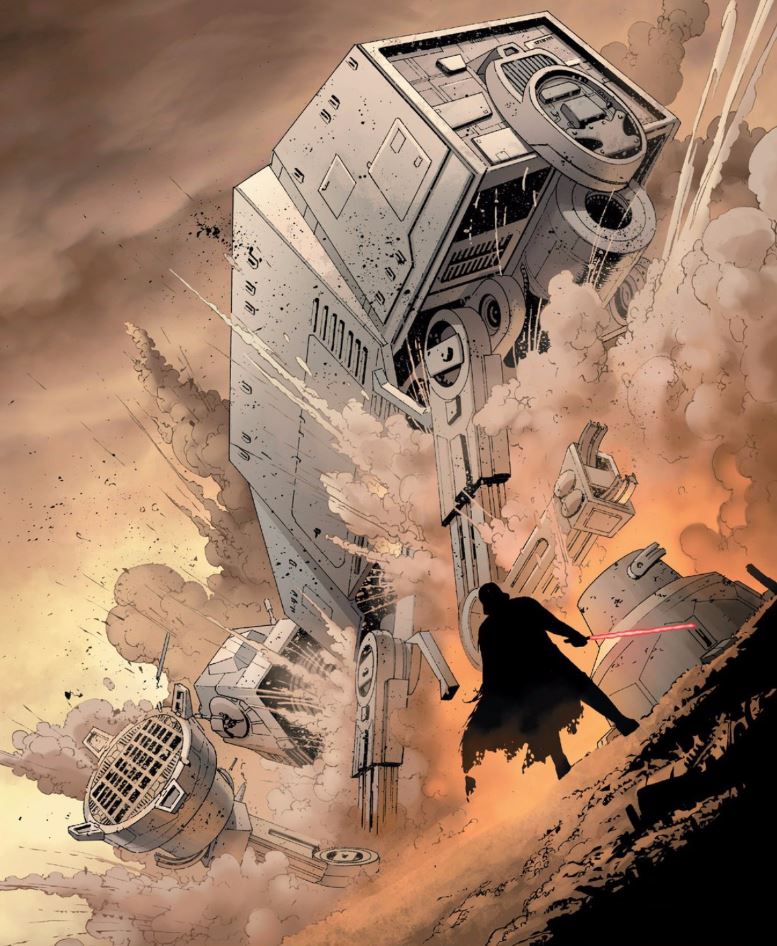
He was thwarted, however, when Solo and Organa unleashed a barrage of the AT-AT's laser fire upon him, causing him to lose his old lightsaber (which the current owner retrieved), and his mask and helmet. Emerging from under a pile of rubble, a stormtrooper approached; upon seeing Vader's scarred face, he attempted to apologize. However, Vader killed him by twisting his head around using the Force, right before Aggadeen reached him via comlink and asked for the facility's evacuation. Vader vetoed his request, instructed him to repair the core, and ordered to kill all the Rebel invaders, except for the boy, whom Vader would deal with personally. As Aggadeen informed him that they had successfully defused the reactor, Vader personally felled the Rebel walker by slashing its legs with his lightsaber.
As reinforcements arrived, Vader dispatched them after the Rebels in the trash fields, while he pursued the lone Rebel who was returning to the factory, Luke. Aboard a combat speeder, Vader chased Luke into the facility, but the Rebel managed to destroy the power core with the speeder bike, leaving Vader as the sole survivor amidst the factory's rubble following its explosion. The Sith Lord then noticed Luke's abandoned speeder and the fleeing Millennium Falcon; as the Adjudicator's captain, Kronn, informed him that they had been unable to apprehend the freighter, Vader Force-choked the captain to death. Then, as if addressing Kenobi, Vader vowed to uncover the boy's identity and to turn him to the dark side, transforming him into his weapon, rather than Kenobi's.
Aftermath of Yavin
Subsequently, Vader returned to the Imperial Palace on Coruscant to report to the Emperor, bringing Aggadeen with him. The Emperor requested Vader to explain the events at Weapons Factory Alpha, which, along with the Death Star's destruction, had brought the Empire dangerously close to disaster. While Vader considered Aggadeen responsible for the failure on Cymoon 1 (and the Overseer was tortured accordingly), the Emperor asserted that much of the responsibility lay with Vader, reminding him that he was the sole survivor of the greatest catastrophe in the Empire's history—one partially caused by his idea to tag the Falcon with a homing beacon and let it escape with the Death Star plans. He then informed Vader that Cassio Tagge, now Grand General of the Imperial Army, would be his commanding officer for some time.
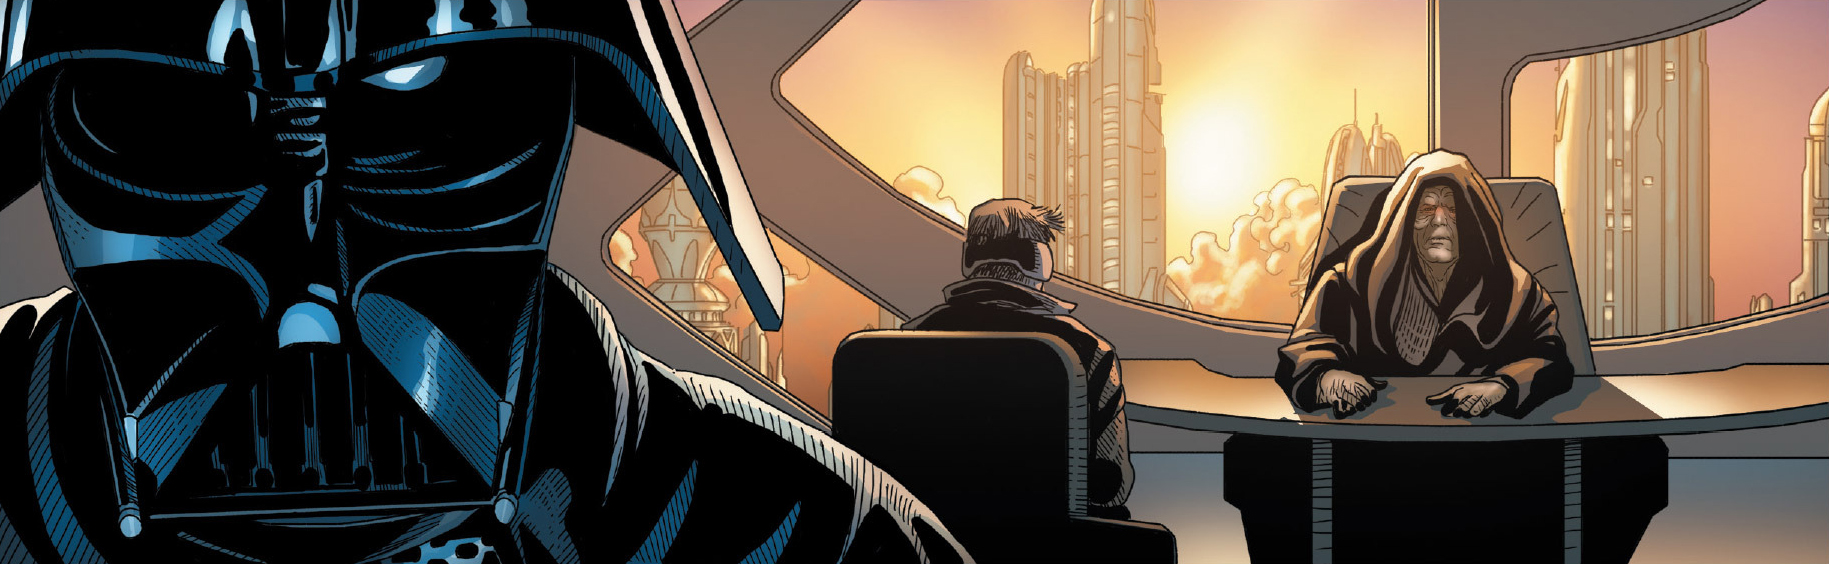
The Emperor then instructed Vader to resume the unfinished Cymoon 1 negotiations with Jabba the Hutt on Tatooine, before reporting to Tagge. As they returned to his office, Sidious greeted one of his agents, Cylo, and Vader inquired about his identity, but the Emperor withheld the information. Instead, he asked Vader if there was anything else to report, but Vader chose not to reveal Kenobi's mysterious disappearance, nor the Force-sensitive Rebel pilot who had destroyed the Death Star and left the office and palace altogether. He boarded an Imperial Star Destroyer and immediately departed for Tatooine, dispatching the Imperial vessel back to collect the trade goods for the meeting.
Negotiations on Tatooine
Vader soon arrived at Jabba's Palace where, during the meeting, he requested the Hutt to dismiss his court. However, Jabba opted to claim the bounty on Vader's head and ordered his people to attack him, but Vader swiftly eliminated them and compelled Jabba to reconsider his position. After being Force choked, the Hutt conceded that he found it difficult not to respect him. The two then reached an agreement: Jabba would provide Vader with two of his best bounty hunters. Vader departed the Hutt's palace and sought out a Tusken Raider camp, where he mercilessly slaughtered its inhabitants. He was then approached by Jabba's envoys: Boba Fett and Krrsantan. While he tasked Fett with finding and capturing the Rebel pilot from Yavin alive, Vader assigned the Wookiee to bring Palpatine's agent to him. Both mercenaries agreed, and Vader departed Tatooine for his Star Destroyer.
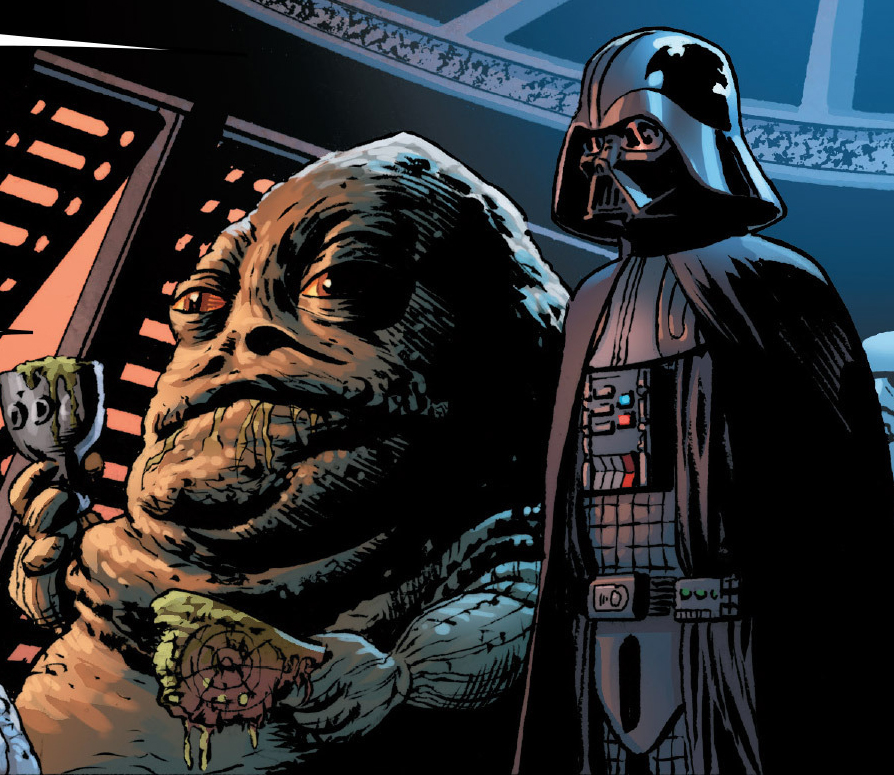
The following day, Vader returned in his official capacity as the Emperor's envoy to negotiate as if nothing had transpired the day before. Jabba welcomed Vader and asserted that his resources belonged to the Empire as long as he was compensated. Vader then prepared to leave, leaving his stormtroopers to communicate the requirements to Jabba, but the Hutt invited him to a feast and entertainment in his honor, as he enjoyed sealing his business ventures by watching someone die. Aboard the sail barge Khetanna, Vader and Jabba watched as the latter's guards killed wild banthas for sport until Jabba's court jester, Salacious B. Crumb, emitted a loud cackle. Vader warned the Hutt not to allow the Kowakian monkey-lizard to repeat that in his presence if he valued Crumb's life; Jabba merely laughed and told Vader he now regarded him as a "good friend." The Hutt then inquired whether his bounty hunters were adequately serving his needs; though Vader reprimanded him for raising the private matter, he also informed the Hutt that their missions were simple enough: to capture an Imperial agent and a boy. Jabba argued that the "boy" had destroyed the Death Star, and had possibly been trained by Kenobi. The name prompted Vader to request that Jabba share all he knew of Kenobi's exile on Tatooine.
Jabba first required someone screaming, though, so he ordered his guards to pilot the Khetanna to the Great Pit of Carkoon. He expected Vader to be impressed by the sarlacc, which he believed was one of the few treasures that Tatooine had to offer, and said he found it hard to believe that anyone of note (like the Yavin pilot) could have ever been born on Tatooine. In silence, Vader watched his homeworld's sunset.
Under Tagge's Command
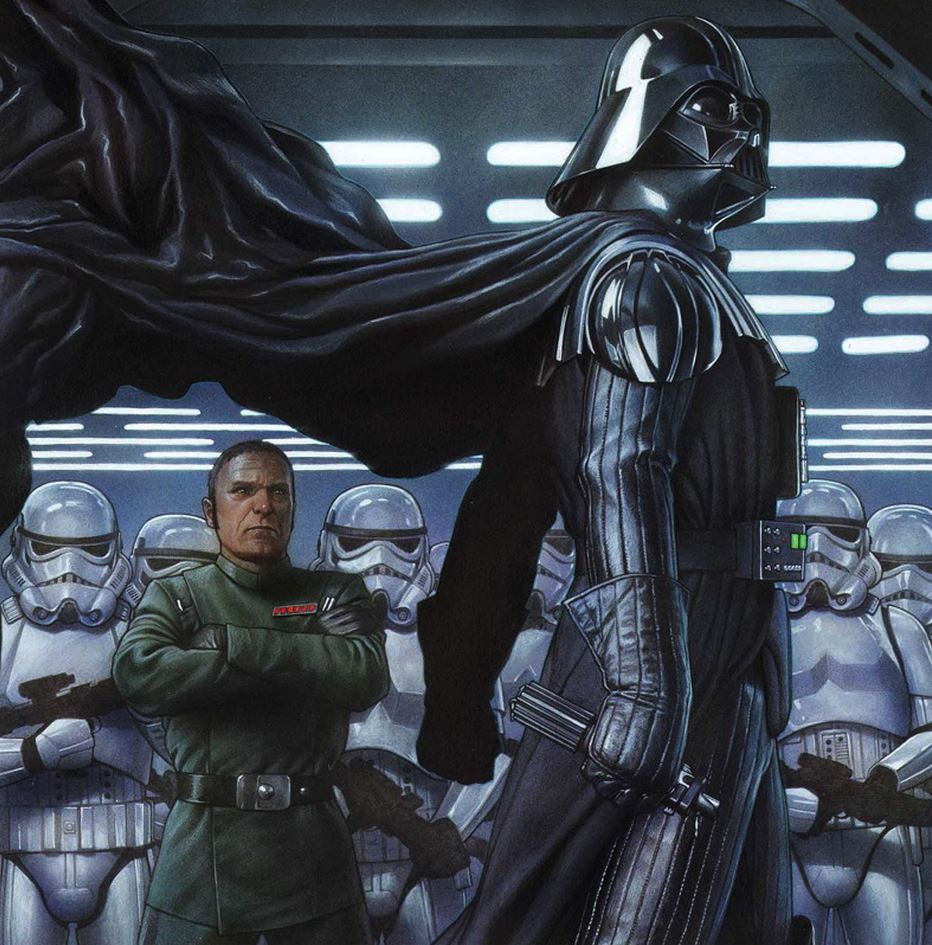
After departing Tatooine, Vader met with Tagge aboard his Executor-class Star Dreadnought, Annihilator. Amidst numerous raids targeting ships transporting Jabba's weapons and equipment supplies, Vader was dispatched to protect an Imperial shuttle, CZ-246, from a pirate attack. Piloting his TIE Advanced, Vader, alongside Black Two and Black Three, successfully disabled the automated CR90 corvette attacking the shuttle. Upon returning to the Annihilator, Vader reported to Tagge that the pirate vessel had been captured and that he suspected a security breach.
Tagge disagreed, attributing the raids to predictable piracy, and admitted to viewing the Death Star as "Tarkin's folly." Vader countered that Tarkin at least possessed a vision, prompting Tagge to acknowledge that his plans were not as grandiose as Tarkin's or Vader's, but they were nonetheless effective; he believed that the Empire could not rely on a single asset, such as the Death Star or Vader himself. Tagge then informed Vader that he intended to repair the corvette and use it to attack its base of origin, assigning Vader to lead the attack, albeit with an adjutant, Lieutenant Oon-ai.
Vader departed to prepare for the mission and oversee the repairs on the corvette. Oon-ai followed, requesting permission to examine Vader's personal communications to provide information to Tagge. Though annoyed by the request, Vader, bound by the Emperor's command to serve under Tagge, granted it and left. He then planted treasonous evidence into a black astromech to incriminate Oon-ai during the mission. Soon thereafter, Vader, Oon-ai, and six stormtroopers boarded the corvette and located the pirate base, docking with the station. Greeted by a Twi'lek pirate, whom he killed, Vader ordered the troopers to secure the core, while his astromech proceeded to the command center to plant the false evidence.
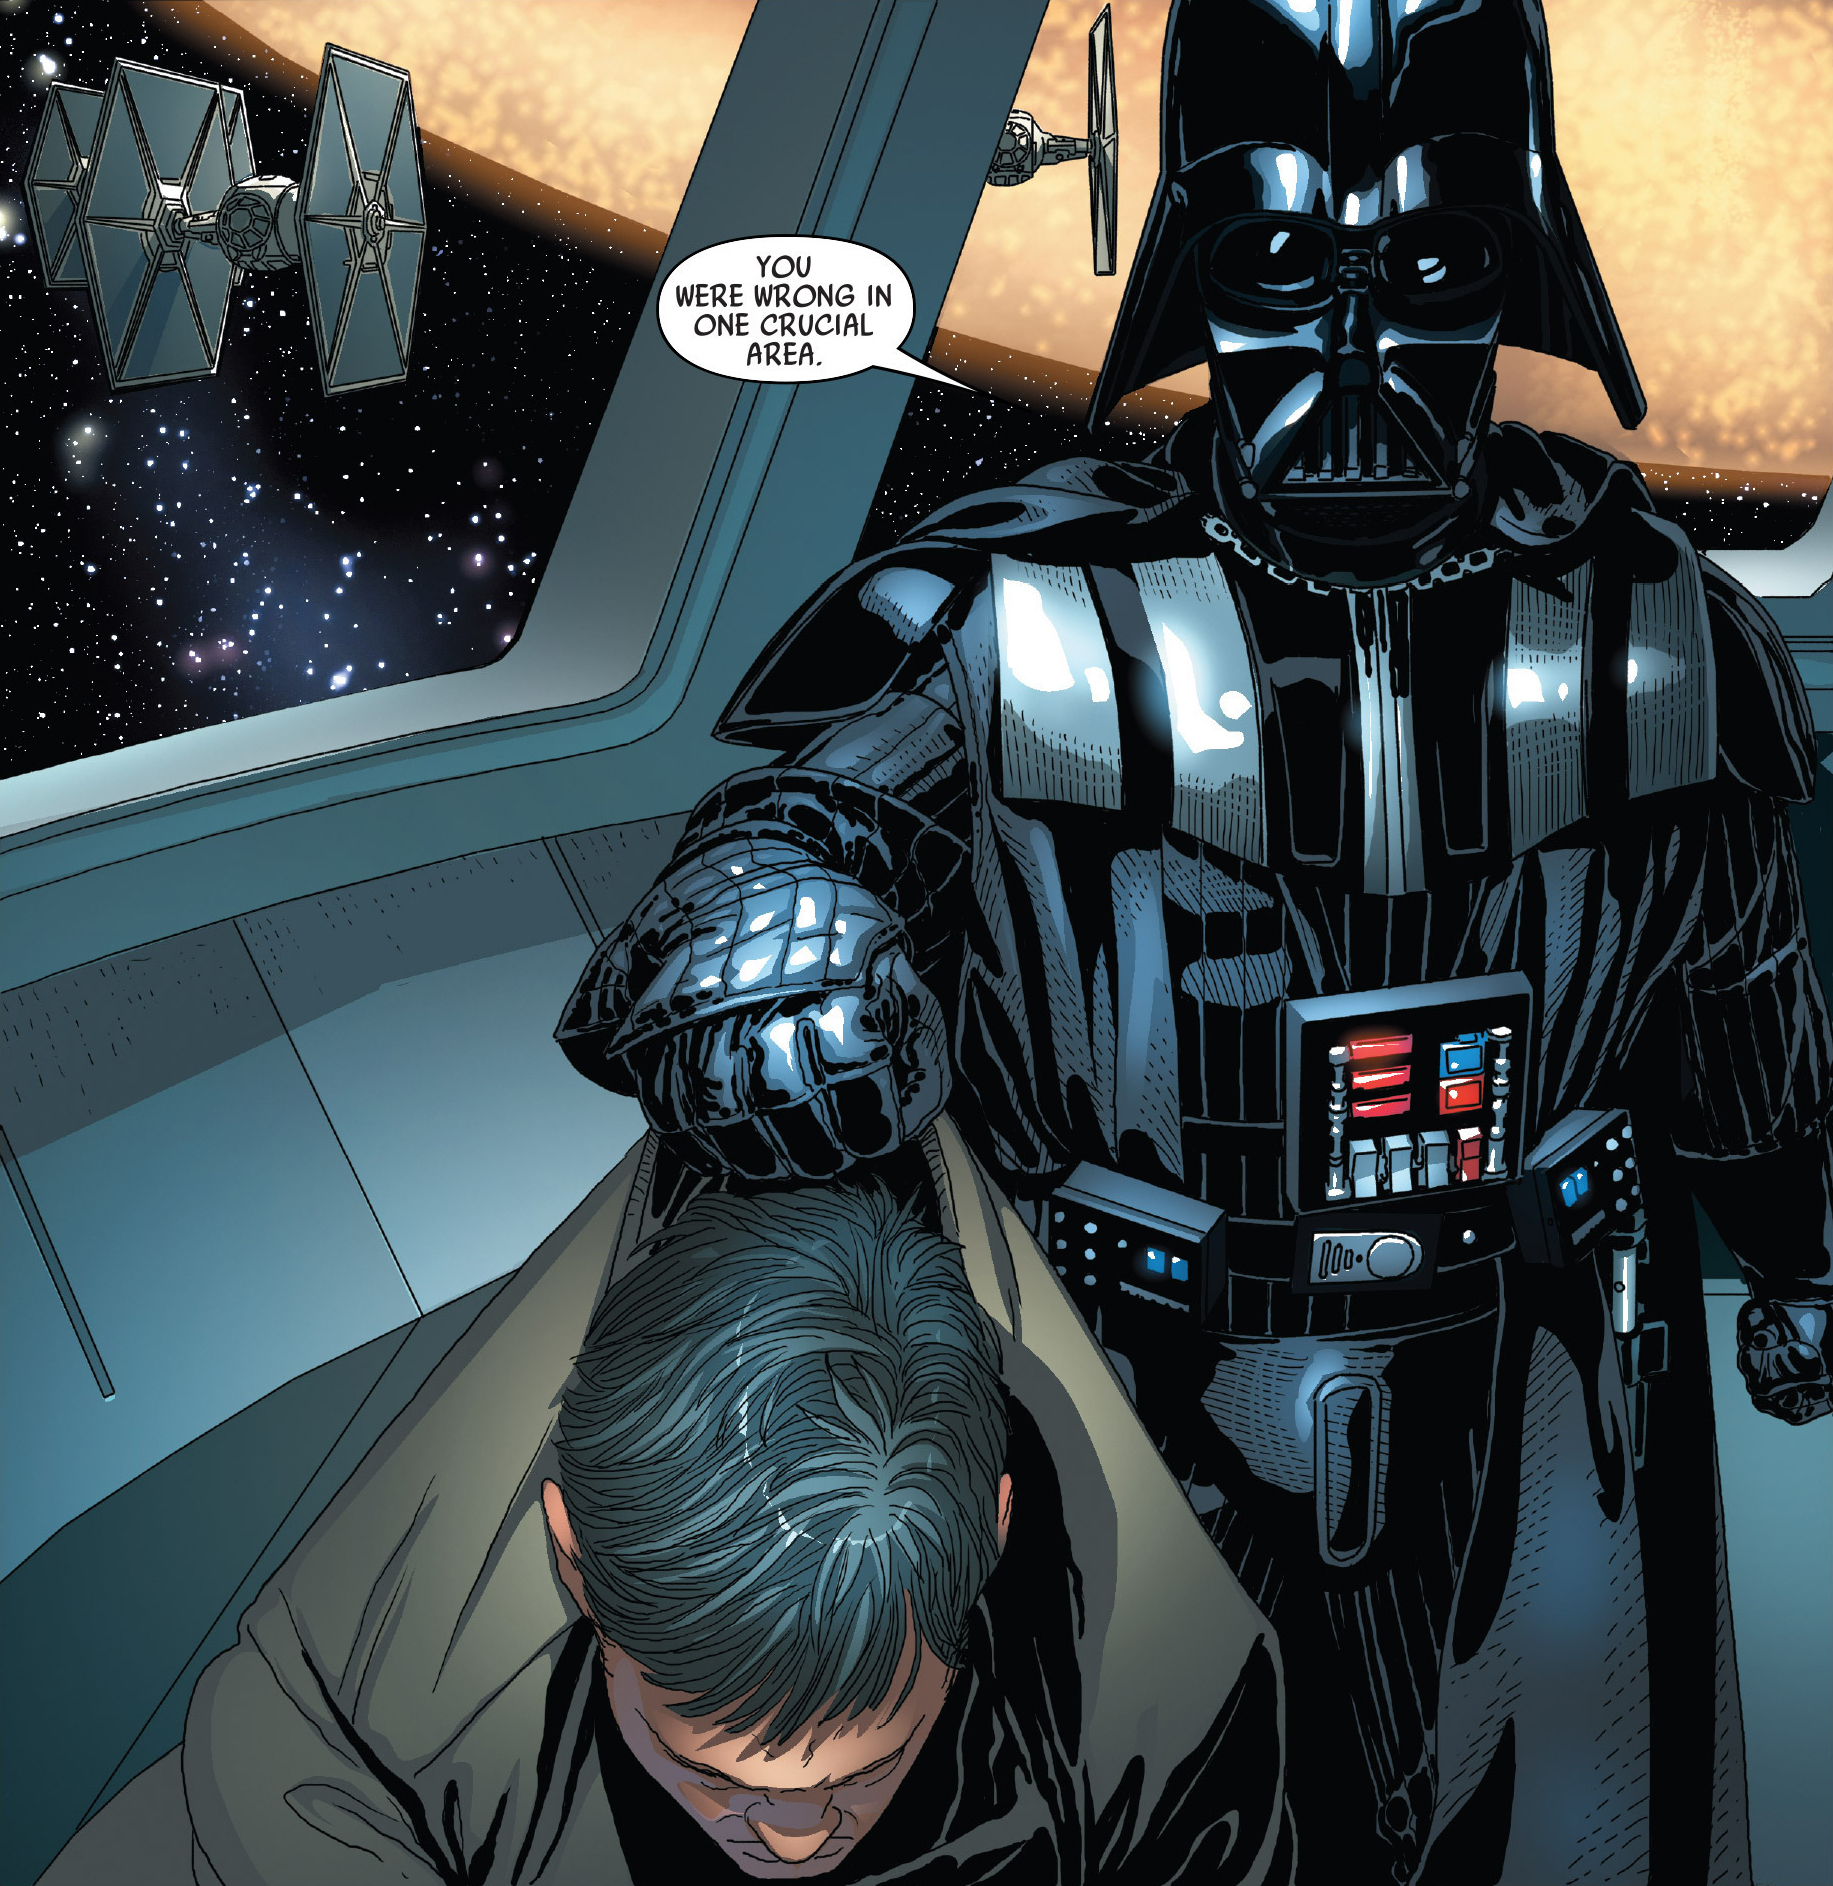
They encountered an attack from two customized droidekas equipped with missile launchers, prompting Vader to use the Force to redirect the incoming missiles back at the attackers, destroying the droids and fatally wounding the pirates. A Mon Calamari pirate survived long enough to activate the self-destruct, and Vader ordered the surviving troopers to return to the corvette and prepare for launch as soon as he returned. Accompanied by Oon-ai, Vader ventured deeper into the station to retrieve the false evidence. They returned to the corvette just before the station exploded.
Back on the Annihilator, Vader reported to Tagge, expressing his satisfaction with the results of his plan (the intelligence he had gathered confirmed the raiders were being backed by the Crymorah Syndicate), but also claiming Oon-ai was the leak, advising Tagge to be more cautious of those in his inner circle. Shortly after, Vader isolated the black astromech under the guise of a private discussion; the Dark Lord ensured the droid had erased all records of its data uploads on the station, before ejecting the droid through an airlock and into space, where it exploded.
Following a Imperial-Rebel confrontation, Vader went to the Palace of Grakkus the Hutt to meet with Sergeant Kreel. A covert operative of his battalion "Vader's Fist," Kreel informed him that his mission to dismantle Grakkus' operations had succeeded, but that the Yavin Rebel pilot had once again evaded them. Vader inquired if he had mentioned his name (which he had not), and requested him to recount everything he had learned about the boy.
A Droid Army
From the information gleaned from the pirate base, Vader discovered that Doctor Chelli Lona Aphra had provided the pirates with the customized droidekas. Desiring similarly effective units for the personal army he sought to assemble, Vader embarked on a manhunt for Aphra, scouring numerous locations, gathering intelligence, and eliminating witnesses, until he finally learned of her presence on Quarantine World III in Kallidahin Space. He landed there just as Aphra was being apprehended by Utani Xane and a squad of B2 super battle droids; despite Xane's warning that he was violating treaties, Vader began destroying her droids and rescued Aphra as she tumbled over a ledge. Vader impaled Xane through the back with his saber before informing the doctor that he required her services. He helped her up and she agreed.
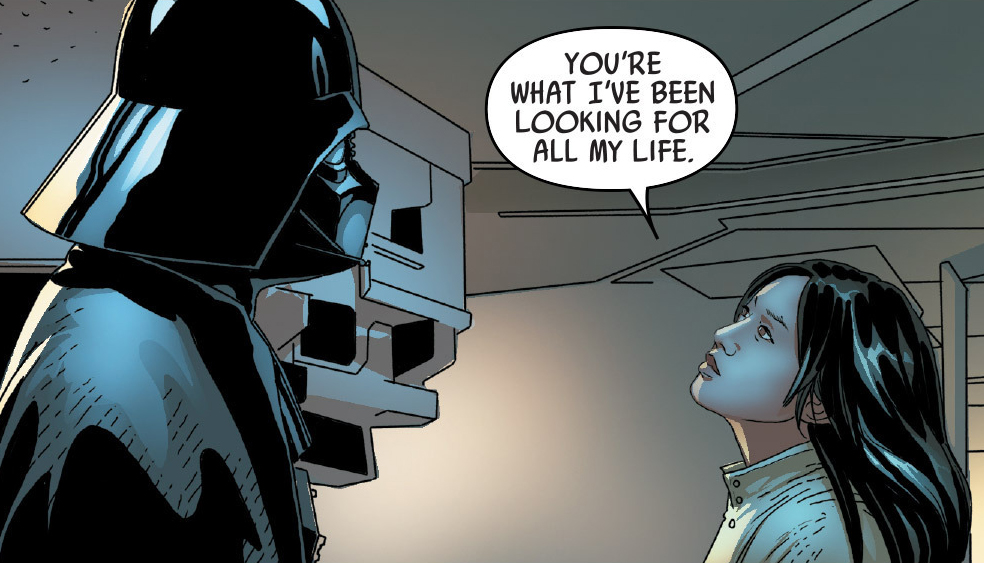
Together, they boarded Aphra's ship, the Ark Angel II, where she confessed to being an admirer of his. The rogue archaeologist also introduced Vader to the Triple-Zero protocol personality matrix and estimated that it would take hours to unlock the matrix's codes that were restricting it. Vader unlocked it in a matter of seconds, allowing Aphra to immediately install the personality matrix into a protocol droid's body. As the droid introduced himself as 0-0-0, she imprinted herself and Vader as his masters, and used him to awaken BT-1, a blastomech prototype. However, as it displayed hostility towards his new masters, 0-0-0 deactivated it before it could cause any harm.
Vader then revealed that the reason he had sought her out was to secure his own private resources, which only she could help him obtain. Aphra (who had originally acquired the two droids for the Gotra) instead gave them to Vader after realizing Vader was probably going to be her employer for the foreseeable future. She inquired about his other needs, and he responded that he desired troops of unquestionable loyalty: battle droids. Aphra then suggested that they acquire an unusual droid foundry on Geonosis, one in possession of Queen Karina, who had survived the Clone Wars and the planet's sterilization. As they landed the Ark Angel, and she sent 0-0-0 and BT-1 to map the cave route to the queen so that she and Vader could follow, Aphra asked Vader if he had ever been to Geonosis before. Her questioning evoked the memory of his first kiss with Amidala, shortly before the First Battle of Geonosis.
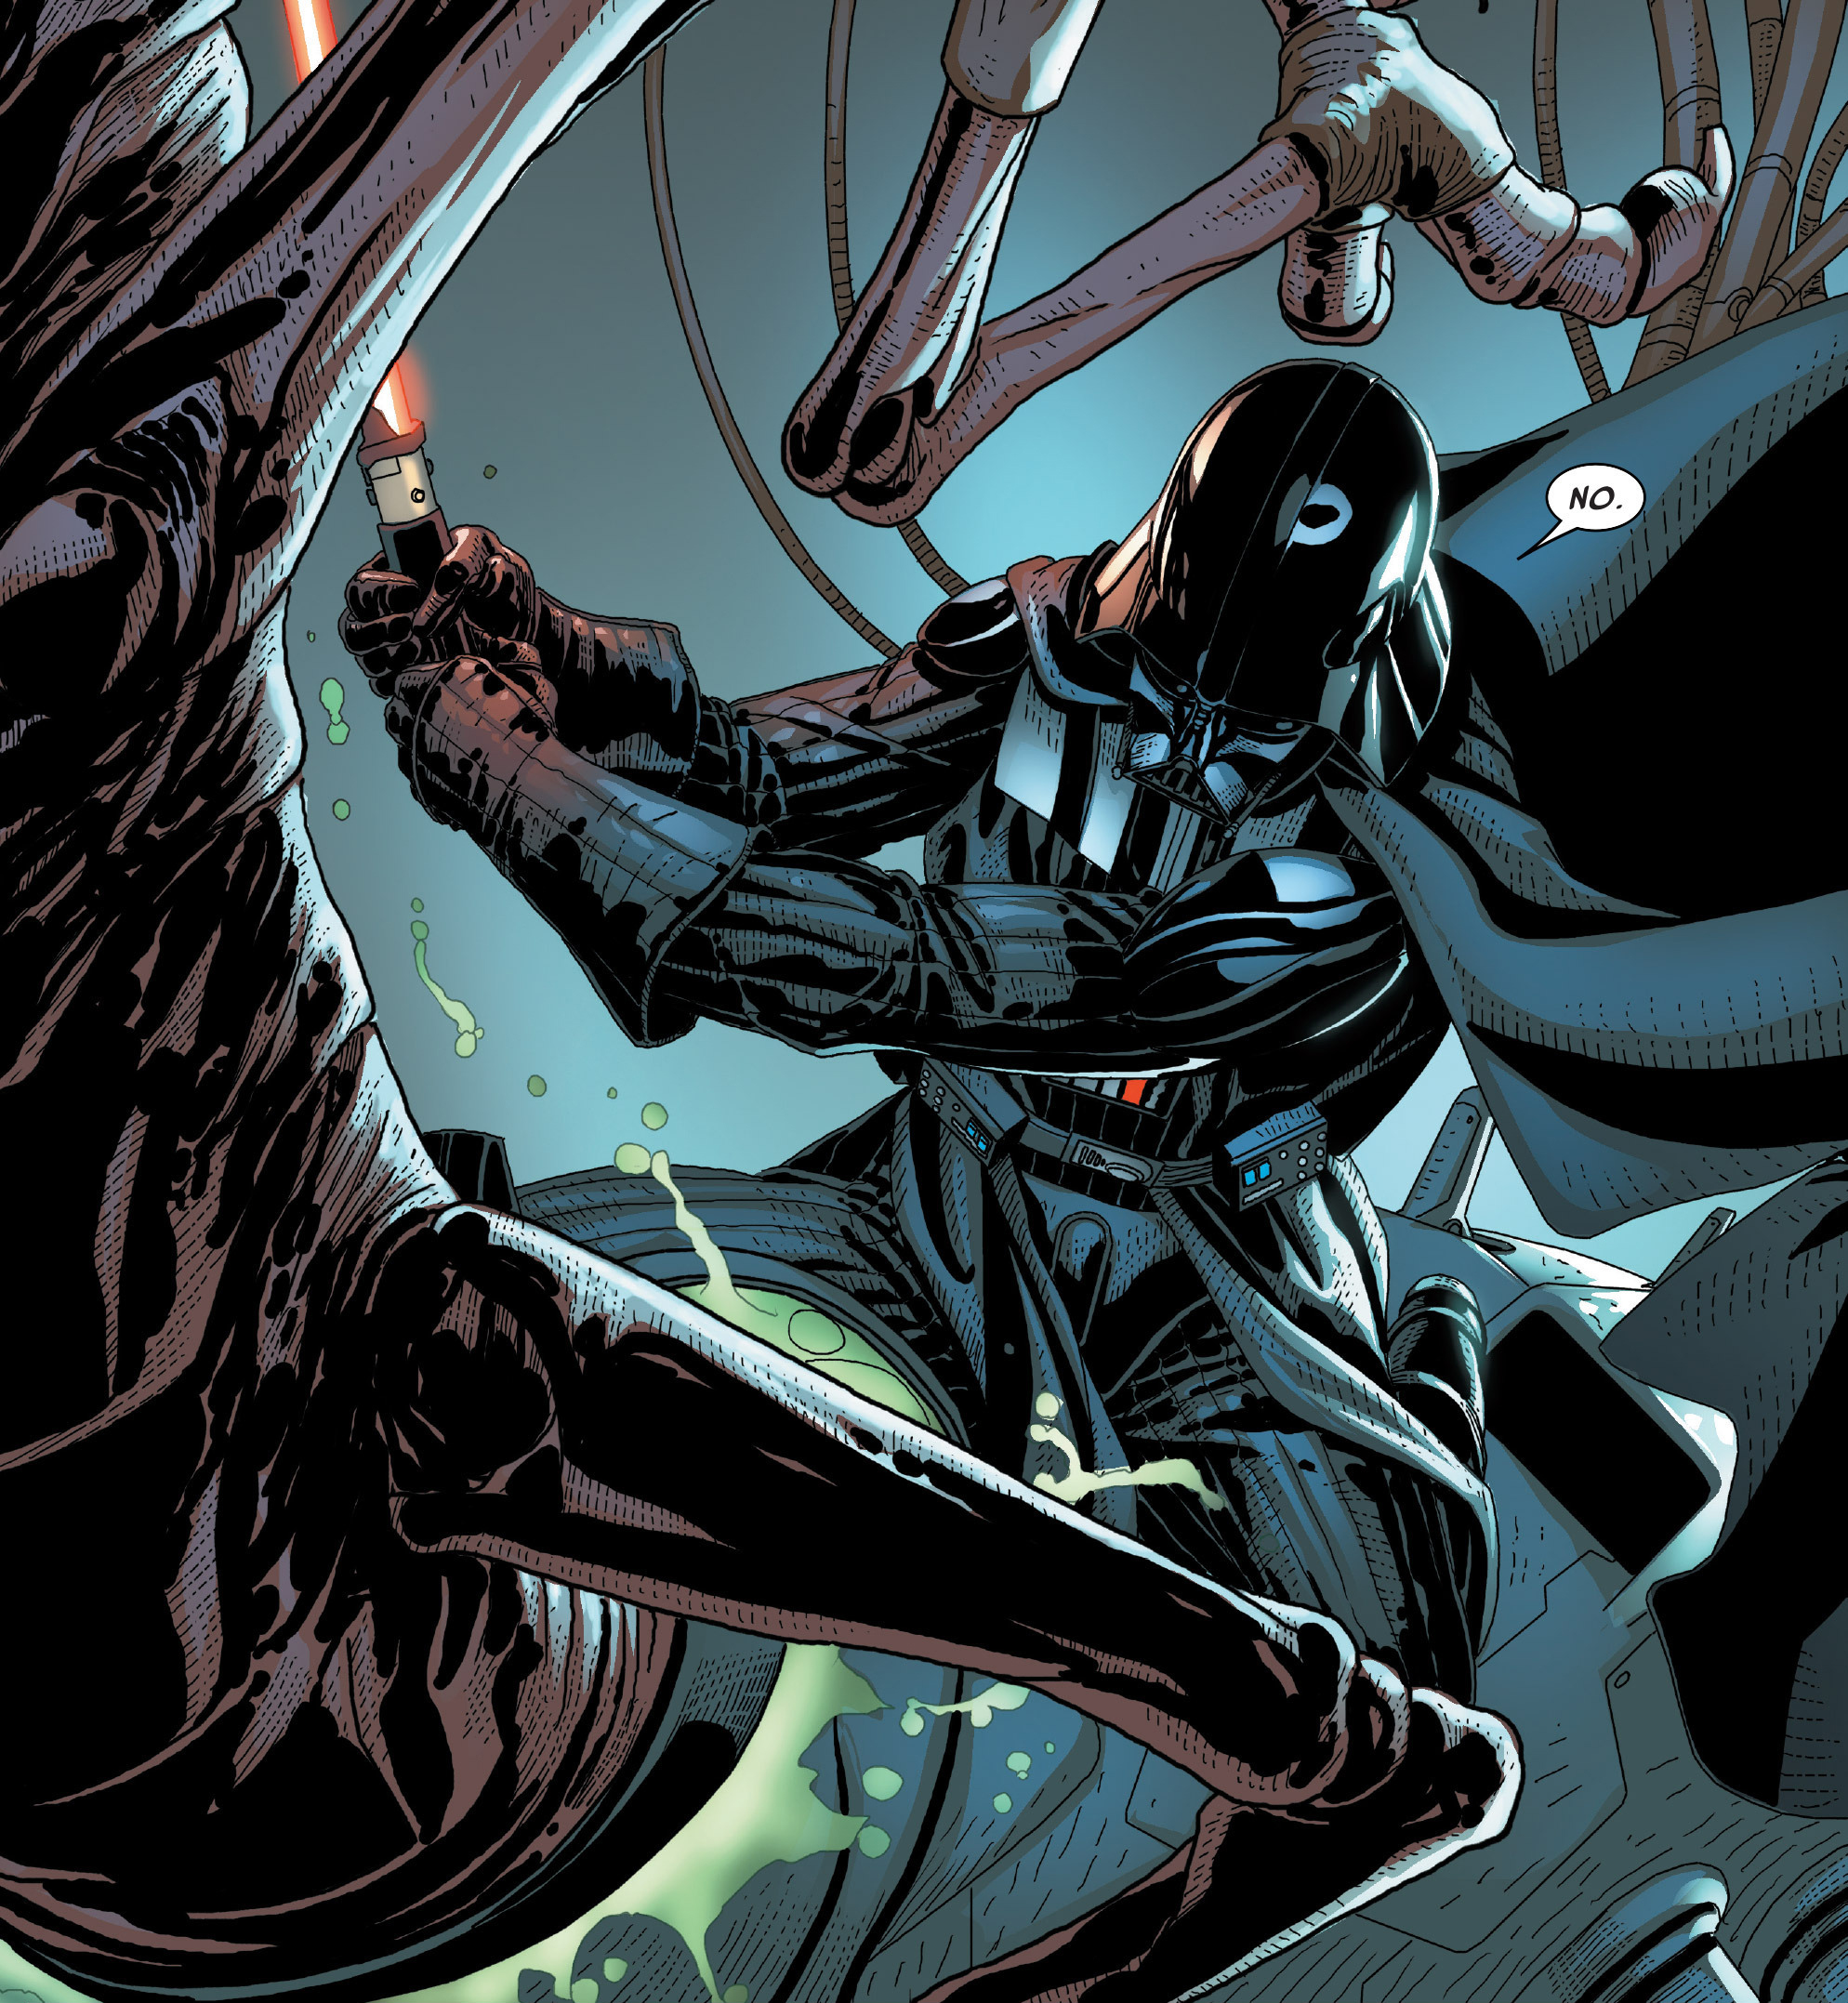
Vader ordered Aphra to cease her probing and entered the catacombs; she followed him. They reunited with BT-1 and 0-0-0 and encountered the queen. Vader immediately severed her from the womb droid factory. The queen, injured but alive, commanded her "children" to stop the intruders; at Vader's command, BT-1 opened fire on the droids, and he and Vader began to overwhelm her forces. Meanwhile, Aphra set a beacon on the ceiling with Vader's help and ordered her Ark Angel to barrage the locator to make a hole in the roof. Vader protected himself and Aphra by creating a Force barrier. His J-Type 327 Nubian then lowered a crane-platform, which Aphra attached to the factory while Vader fought off the advancing droids, and the ship carried them and the factory to the skies.
They would later board the Ark Angel, where Aphra successfully activated the factory and told him he would have his private droid army. She then asked Vader if he would kill her then or later, and said that if he did, she wanted a lightsaber right through the neck, with no warning. Vader finally told her she had proved resourceful and would be safe as long as he had use for her, unless she tried to blackmail him. It was then that 0-0-0 interrupted them to inform Vader that he had a signal from Black Krrsantan: he was bringing the Emperor's agent to him.
Cylo's Enforcers
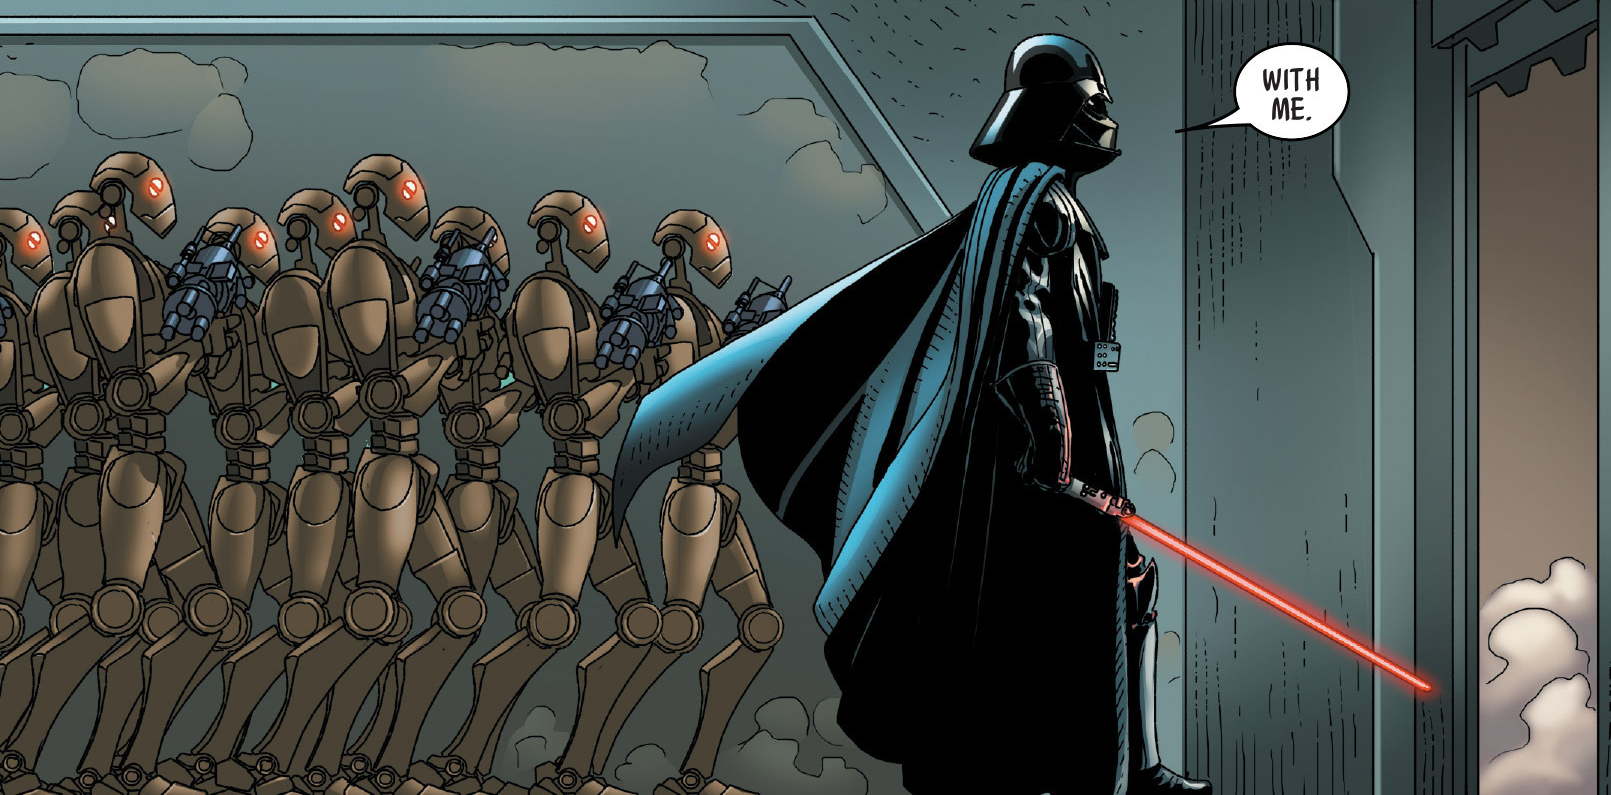
As Krrsantan arrived, Vader confronted the Emperor's agent, Cylo-IV. Vader demanded that he reveal his name, his commission from the Emperor and the location of his headquarters. Upon his refusal, Vader tasked 0-0-0 with extracting all relevant information from him. Following an interrogation that resulted in the agent's death, 0-0-0 reported to Vader that he was Dr. Cylo-IV, that his research base was situated in an Outer Rim nebula, and that his commission was to create replacements for Vader. Upon learning this, they immediately departed for the base, aboard his J-type 327 Nubian. While Aphra remained on the ship, Vader and two platoons of droid commandos infiltrated it. Vader dispatched one platoon to "the dojo" and directed the other to follow him to the barracks. As they eliminated the soldiers within, Aphra reported that they had lost contact with the other platoon, prompting Vader to proceed to the dojo, where he encountered the twins Morit and Aiolin Astarte.
They soon engaged in combat, but before any of the parties could inflict harm on each other, Cylo-V appeared and instructed the twins to stand down. He explained to Vader why he was still alive after his previous body was destroyed, and that he was not creating apprentices for the Emperor but enforcers, as he deemed the Force to be obsolete. Considering him blasphemous, Vader attempted to strike Cylo down when the scientist asserted that they were, in many ways, Vader's children and successors. The Emperor then revealed his presence to Vader and intervened, stating that he wished to witness Cylo's demonstration without delay.
Vader was immediately forced to battle the Astarte twins, Tulon Voidgazer, the Mon Calamari Karbin, and a Trandoshan. As neither party sustained injuries, the Emperor ordered the fight to become a battle to the death. Consequently, Vader fought the Trandoshan, but its ferocity threw him off balance, prompting Morit to intervene and kill his fellow enforcer. The Emperor then commanded the fighting to cease; Vader warned Morit that his transgression would not be forgotten, as the Trandoshan's life was his to take. The Emperor then informed the enforcers and Vader that their mission was to eliminate all who opposed the Empire and that they were not to slay each other. In accordance with his master's orders, Vader followed him.
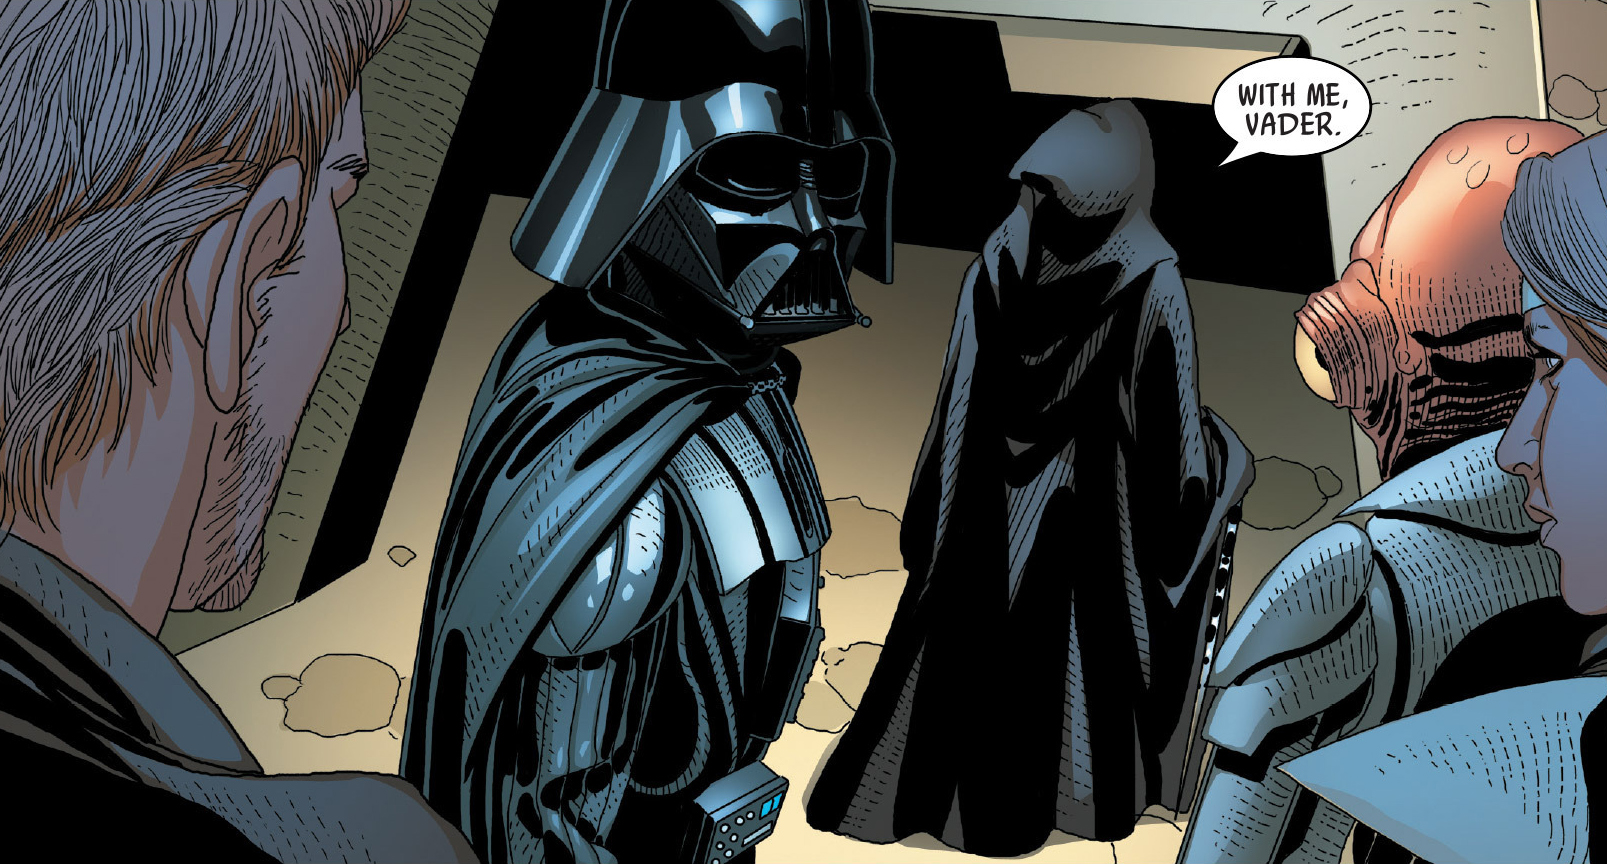
In a moment of privacy, the Emperor, having come across the remnants of Vader's commando droids, revealed his surprise at Vader's remaining autonomy after so much time, suggesting that he might even be able to overcome the enforcers. Vader expressed his disapproval of the Emperor's interactions with Cylo, viewing his enforcers as an affront to the Force, but the Emperor rebuked him for his disrespect, reminding him that it was Vader's failure on Mustafar that led him to seek out Cylo in the first place. As Vader departed, the Emperor remarked that perhaps Vader would eventually prove himself worthy of the title he had bestowed upon him long ago.
Parenthood
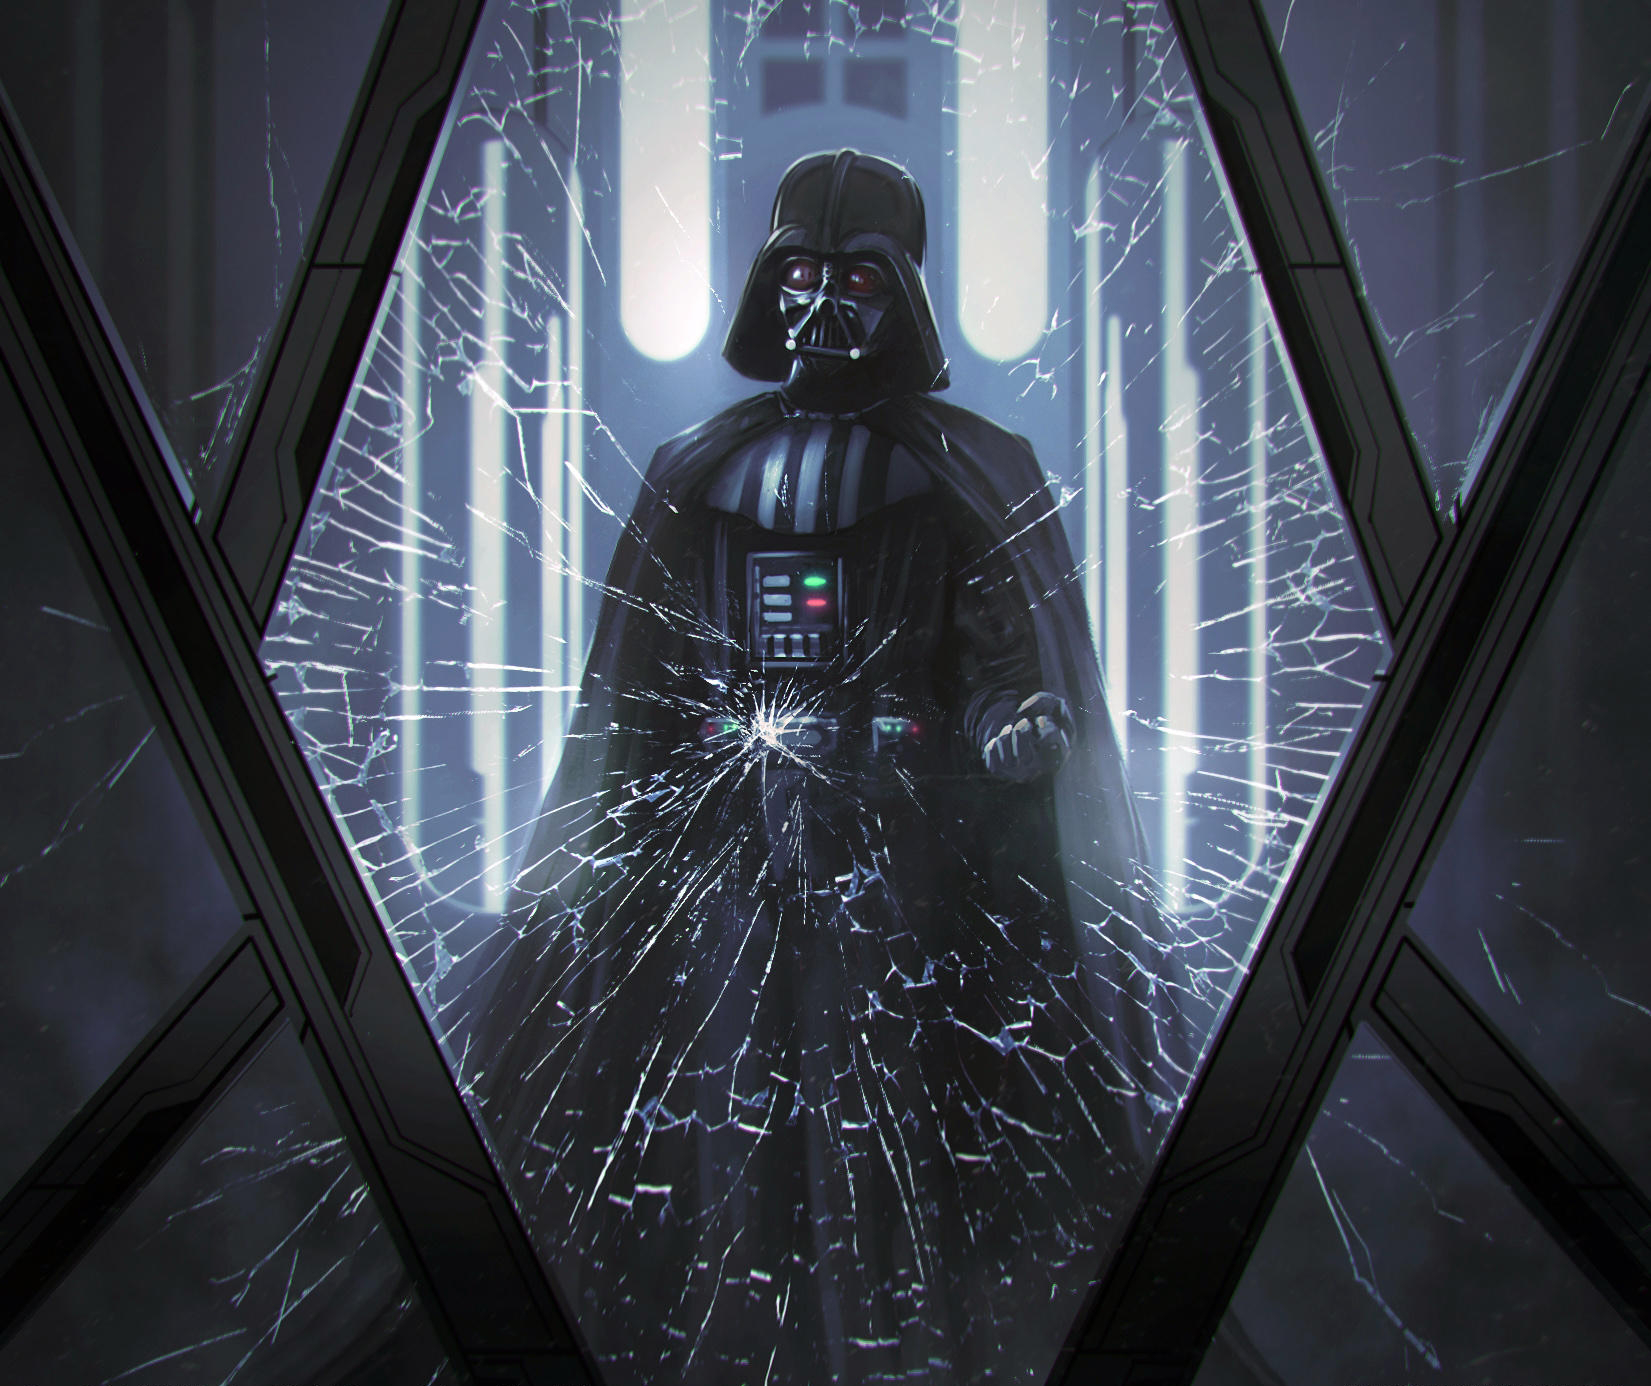
Disturbed by this revelation, Vader made his way back to his ship. While aboard the Nubian, Aphra informed him that Fett had requested to check in while Vader was away. Following this, Vader journeyed to a Star Destroyer to meet with the bounty hunter and hear his report. The Dark Lord voiced his disappointment upon learning that Fett had lost the boy, but before his departure, Fett revealed the boy's name: Luke Skywalker. Alone with his thoughts, Vader recalled Amidala's disclosure of her pregnancy and Palpatine's partial lie, causing him to shatter the viewport in a fit of rage. Immediately thereafter, he utilized his meditation chamber's holoprojector to contact his master, opting to remain silent about his son; instead, Vader reassured him of his unwavering commitment and ended the transmission. Regardless, he embraced Luke as his son and pledged that the boy would belong to him.
Driven to uncover more about Luke, Vader made his way back to Tatooine aboard the Ark Angel, accompanied by Aphra, 0-0-0, and BT-1. They touched down at the Lars homestead, only to discover it abandoned following an assault by Imperial troops, leading Vader to search for any indication of Luke's presence. Finding nothing of significance, Vader left the moisture farm and proceeded to Kenobi's home, where he detected remnants of Luke's Force usage during his confrontation with Fett, but nothing beyond that. As they departed, Aphra activated a molecular purge bomb to erase any trace of their presence, and Vader dismissed Aphra, as he needed to resume his official duties.
Anthan Prime
As part of Tagge's initiative to suppress Outer Rim criminal elements that had previously operated unchecked, Vader participated in a mission aimed at dismantling a criminal syndicate known as Son-tuul Pride. He and his forces obliterated the Pride's headquarters and seized its accumulated wealth, intended for transport on an Imperial light cruiser, but he also covertly provided Aphra with all the necessary details to pilfer the cargo of credits. Following the theft, Vader rendezvoused with her on Anthan 13, where he dispatched her to verify certain information regarding Commodex Tahn.
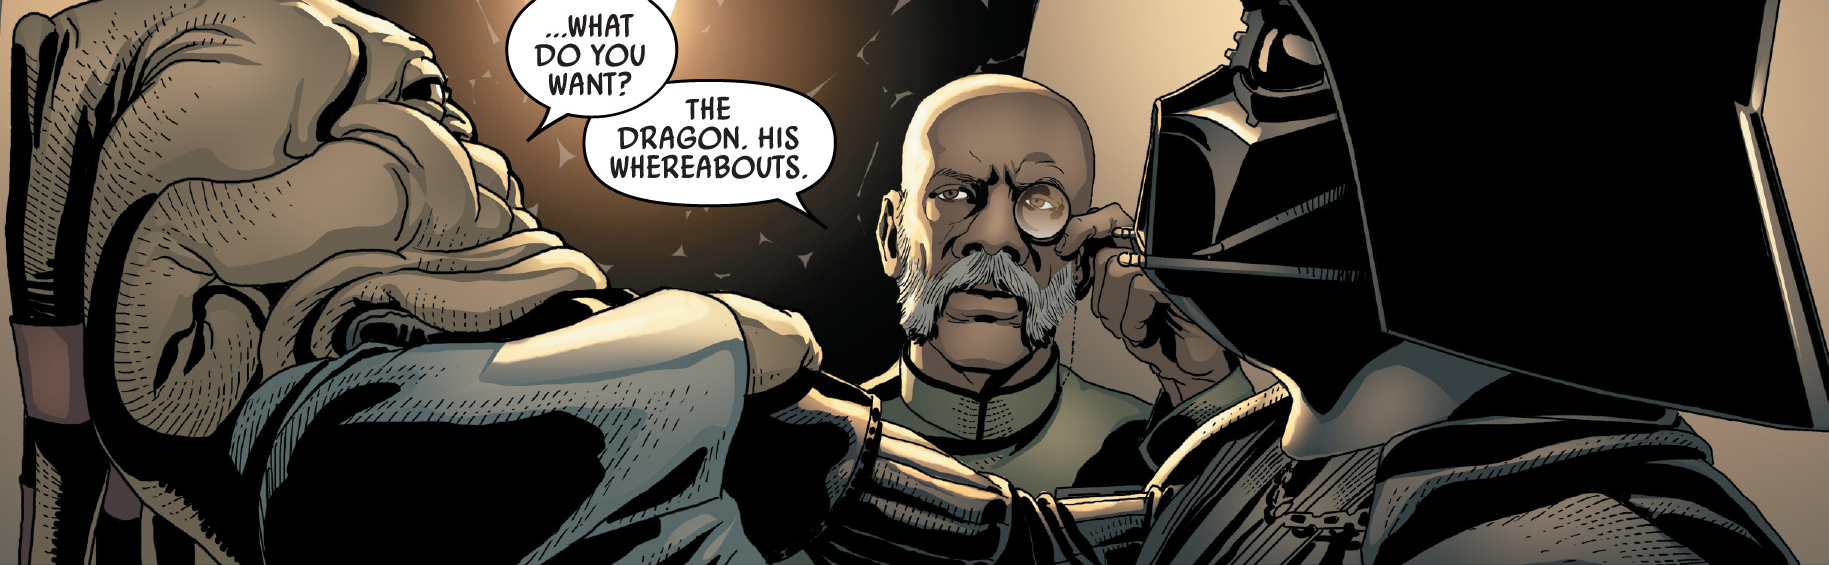
Vader subsequently attended a meeting involving Tagge and Cylo's enforcers, during which the Astarte twins were tasked with addressing the Plasma Devils, and Vader conveyed to Tagge his desire to oversee the mission of locating the Yavin Rebel pilot (which was Karbin's responsibility). Tagge, deeming him too emotionally involved, instead assigned Vader to punish those responsible for the theft of the Son-tuul Pride's fortune within the Anthan system; he also informed Vader that Inspector Thanoth would be his new adjutant. While Thanoth journeyed to the Anthan Prime Orbital Dockyard to investigate the circumstances surrounding the theft, Vader returned to Anthan 13 and eliminated an entire small Rebel cell to conceal his involvement. He later reunited with Thanoth on Anthan Prime, where they sought out Doowan, an employee of "the Dragon"—an arms dealer suspected of supplying the explosives used in the theft—and interrogated him. The Nautolan swiftly divulged the Dragon's location in his mansion, before the twins executed him in a display of force.
Thanoth then took note of Vader's lack of involvement, but Vader brushed it aside, claiming he was simply assessing whether Thanoth posed a threat or was a traitor. The pair then proceeded to the Dragon's mansion, which Vader entered alone, eliminating the occupants until he reached the Dragon himself. Despite the Dragon's attempts to divulge information in exchange for his life, Vader killed the Ortolan, asserting that he would have detonated the building once Thanoth arrived at the office. The inspector then opened the Dragon's vault to access his records and requested Vader to prepare a strike force once he had identified the suspects.
Vader then seized the opportunity to meet with Aphra, who had just returned from a raid on Commodex Tahn's villa on Naboo. She confirmed his suspicions: Amidala had indeed passed away but had given birth to a healthy son, who was taken away by the Jedi. Vader then tasked Aphra with locating Luke before Karbin could; subsequently, she turned to The Ante. Vader then returned to the Star Destroyer, where Thanoth they would travel to the Spire to find The Ante. Upon locating him, he provided them with the location of the Plasma Devils as a sign of cooperation and identified Aphra as the one responsible for the theft. Before the Givin could reveal her name, Vader telekinetically manipulated a stray shot to eliminate him. Vader then set out to find Aphra before anyone else.
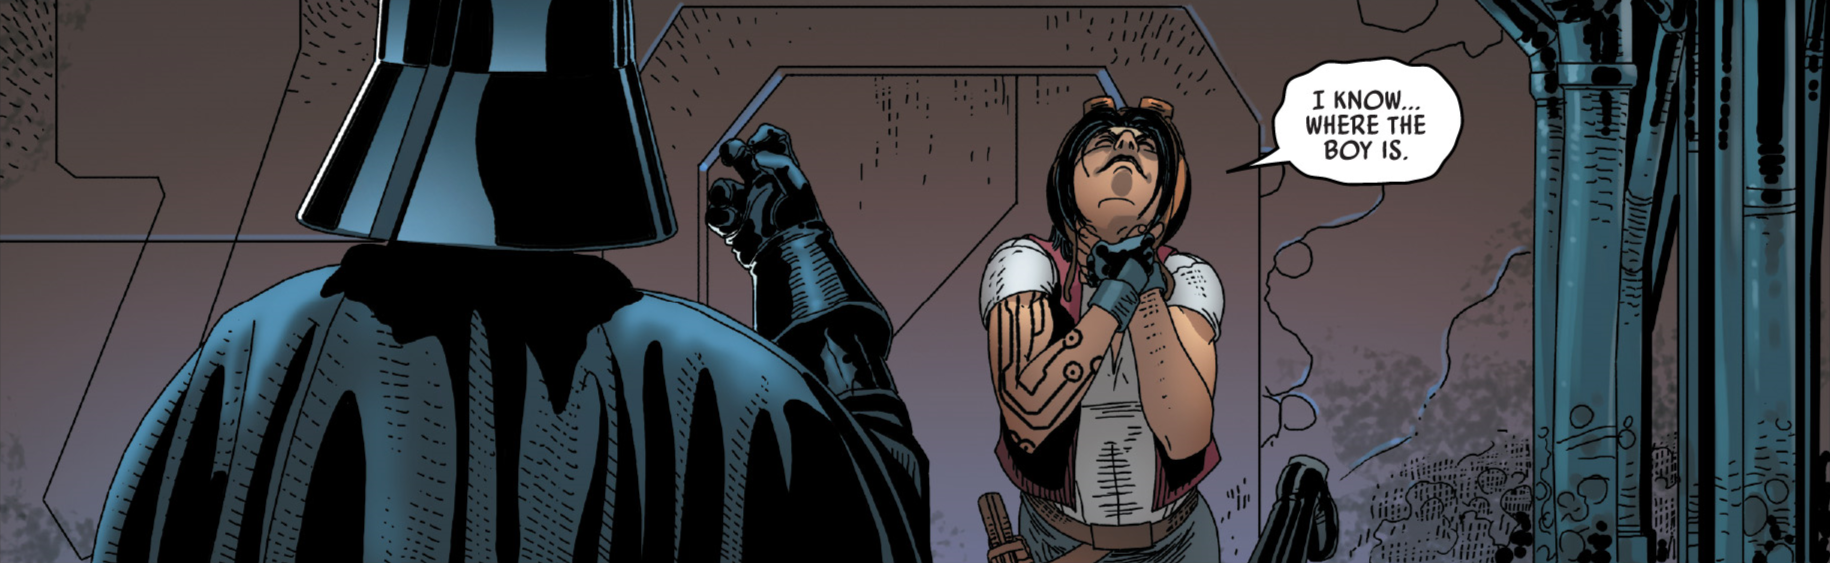
Upon encountering her, Vader commanded her not to resist and initiated a Force choke, but Aphra claimed to possess knowledge of Luke's whereabouts. Vader released her and demanded she disclose the information, but she refused, stating she would reveal it later. He then allowed her to escape, using the Force to bring down debris above him as she fled on the Ark Angel. He emerged from the rubble as Thanoth and the stormtroopers arrived, claiming he had fallen into her trap. To pursue her, Vader and Thanoth boarded their Arquitens-class light cruiser. As they awaited the arrival of their TIE/sa bombers to intercept Aphra, Vader and Thanoth agreed to utilize their ready strike force to eliminate the Plasma Devils before they could escape.
The two directed their light cruiser to the Thanteen Substrata on Anthan 1, the location of the Rebel cell. As per their plan, their light cruiser bombarded and sealed the westernmost tunnels, while Vader took the eastern route, destroying incoming Rebel ships by hurling his lightsaber until the cell was eradicated. He then retrieved three of the Plasma Devils' flight helmets and, alongside Thanoth, presented them to Tagge, who approved of their actions given the circumstances. As Karbin reported that the Yavin Rebel pilot had escaped, Vader and Thanoth departed, with the Inspector expressing his honor in serving alongside him.
Shu-Torun
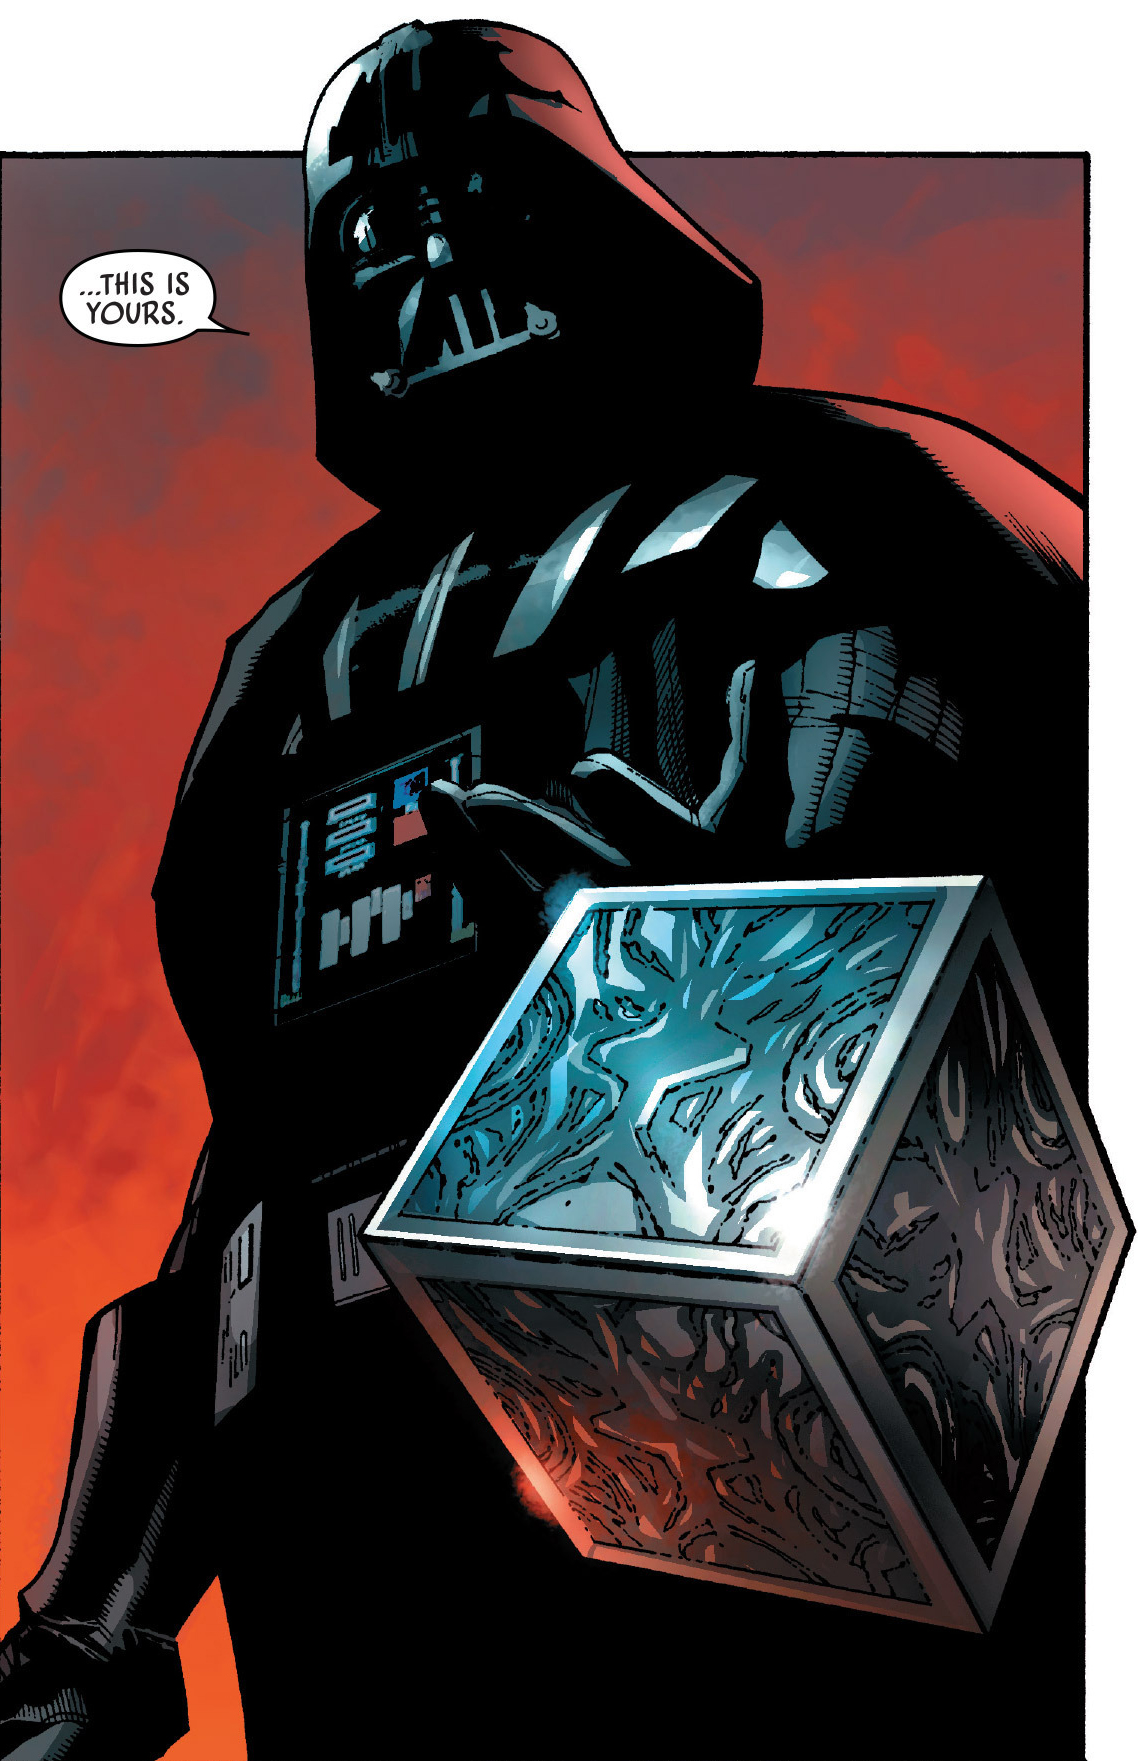
Vader journeyed to Shu-Torun with a message to reinforce their alliance and compel its government to meet its quotas, while 0-0-0 and BT-1 assassinated the king and his closest advisors. Expecting to meet the King of Shu-Torun, he was instead greeted by Princess Trios upon arrival, who was to escort him to the ball, a small celebration intended to showcase their culture. Shortly after their arrival, however, Shu-Torun assassins attempted to kill the Empire and the king, but Vader successfully repelled them and demanded to see the king immediately. Trios complied and led him through the tunnels as the main elevators were under surveillance by the traitorous dukes, according to her. Vader recognized Trios as admirable for her willingness to sacrifice herself for the greater good, as lava poured into the tunnels.
However, he employed his lightsaber to create a circular platform to levitate above the lava and reach one of the exits above. Carrying an unconscious Trios, Vader reached one of the corridors where he eliminated the guards. Trios awoke, only to aim a blaster at Vader. He, however, severed her hand and entered the king's chambers to discover the monarch, his other children, and guards slain by Vader's assassin droids. With Trios as the new Queen of Shu-Torun, he delivered the Emperor's message: a fragment of Alderaan, serving as a reminder of the fate that awaited worlds that defied his rule. Vader then informed her that he would pacify Shu-Torun, but that she should not forget whom she served.
Vrogas Vas
Vader convened with Aphra and the droids, demanding she reveal Luke's location: Vrogas Vas. She continued by saying she did want to work for him and show that she was trustworthy. After a moment, he conceded that his work alongside Thanoth had given him an appreciation of talent, and told her not to make him regret his decision. He departed, stating it was a task for him alone. Unbeknownst to him, a probe droid dispatched by Karbin trailed him. Aboard his TIE Advanced, he traveled to the planet's system where, upon exiting hyperspace, he encountered three Alliance starfighter squadrons orbiting the planet. Sensing Luke's presence, he remained and engaged the starfighters, who dismissed his TIE as a mere Imperial scout.
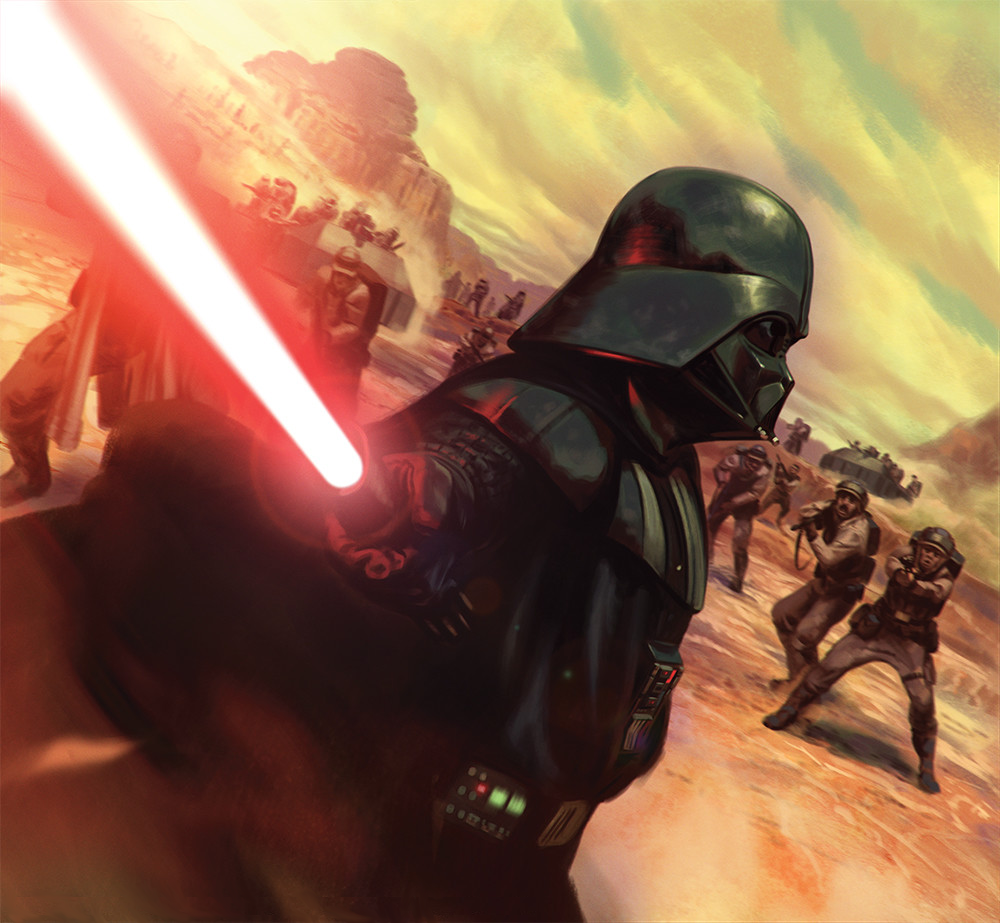
During the battle, Vader clashed with the X-wing starfighters, successfully eliminating both Blue Squadron and Yellow Squadron, while losing contact with Aphra. Vader was then confronted by Luke, piloting Red Five, who rammed his X-wing into Vader's starfighter in an attempt to kill him. The collision damaged their stabilizers, causing both craft to crash on the planet's surface. There, Vader was pursued by Alliance forces, starting with Gray Squadron, whom he promptly annihilated using the Force. Subsequently, a company of Rebel commandos moved in to attack him, but he activated some of their thermal detonators before they could be deployed, neutralized a tank by deflecting its shot, and continued to decimate the Rebel forces.
Vader also repurposed the blaster array from his downed TIE Advanced x1 to destroy additional ships, this time from Cyan Squadron. Shortly thereafter, another platoon was deployed to engage him, this time led by Organa herself. Vader, choking her two companions, confronted her but sensed an impending ambush. When he released her so she could contact Luke, Organa seized the opportunity to coordinate an airstrike on her and Vader's location. Instead, Commander Karbin arrived with a task force, seeking to claim his victory—both the capture of his son and the princess' execution—from Vader. Subsequently, Vader engaged the enforcer in a duel, during which Organa escaped, and during which they entered the ruined Jedi Temple.
Inside the temple, he was momentarily distracted by echoes of his past (the voices of Jinn, Kenobi, and Yoda), but continued the duel. Aphra then contacted him from aboard the Ark Angel and informed him that Luke had been captured by Karbin's guards. So Vader had her crash her ship against Karbin and confronted the mortally wounded Karbin, who realized there was more to the Yavin pilot and Vader's relationship than met the eye. Vader then finished him and contacted Aphra to tell her that her "pardon" depended on Luke's capture. With the Force, he brought down the shuttle transporting Luke, and Aphra tried to capture Luke only to be captured herself by the Rebels, leaving Vader to watch as his son on the Millennium Falcon fled from Vrogas Vas.
Shu-Torun War
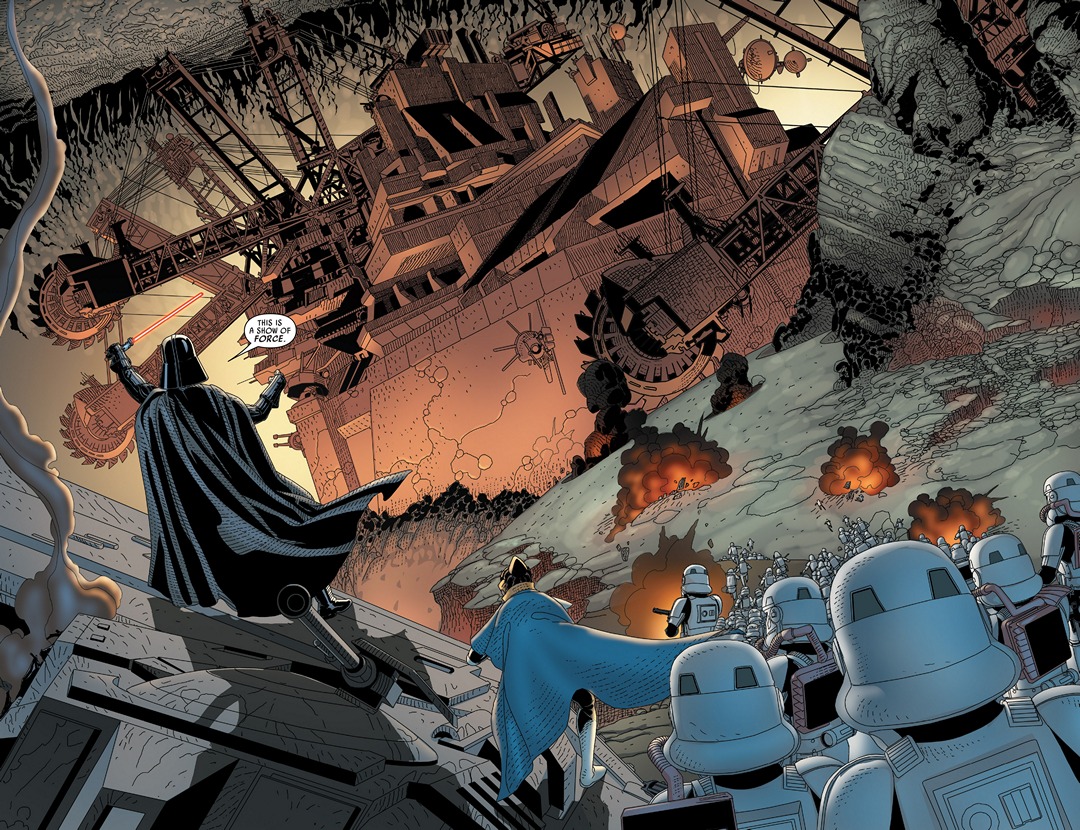
Vader then returned to the Imperial Palace, presenting Karbin's body to the Emperor and demanding a challenge worthy of his abilities. The Emperor then instructed Vader to return to Shu-Torun, where the ore-barons were rebelling, requiring a full military intervention, and that Cylo (at Tagge's request) would accompany him. Consequently, Vader returned to Shu-Torun, alongside Cylo, the Astarte twins, and Voidgazer. Accompanied by Queen Trios, Vader spearheaded an assault against a rebellious delving citadel, obliterating it as a demonstration of force. He also feigned respect for Trios and secretly tasked a group of bounty hunters with locating Aphra and delivering her to him, dead or alive.
After broadcasting a message to the barons, Vader, Trios, and Cylo and his enforcers traveled, at the queen's suggestion, to the ancestral retreat of the Shu-Torun royalty. There, they were promptly attacked by Baron Rubix's Lava Leviathan, and Vader utilized Trios' escape vessel to reach the Leviathan and dared the twins to follow him. With their lightsabers, they boarded it, and from the inside, the three cut large holes that allowed the ship to flood with magma and be destroyed. Upon returning, Trios suggested that they attack Rubix next (as she had identified the ship's owner) and so, Vader told Cylo to prepare his enforcers. In the meantime, he killed Beebox for trying to deceive him with a stranger's disintegrated body, and refused Aiolin's request to train her.
Soon enough, they carried out the siege to Rubix's delving citadel, using the Shu-Torun Loyalist/Imperial Delving Fleet's combat drills, with Vader heading the first wave alongside the Astarte. However, he was betrayed by Cylo, and his drill was redirected into a lithoporoite seam, where they were surrounded by Rubix's elite forces. With their outbound communications jammed, Vader left his troops as well as droid platoons to protect the drill and had the Astarte twins follow him as to use the enemy's lines to tell the rest of the assault fleet to resume the attack. On the way there, the twins attacked him, but Aiolin saw they could not win against Vader and destroyed the pathway between them. She was then betrayed by her brother who pushed her into the lava and fled back to Cylo; Vader then took the dying Aiolin out of the lava and had her reveal Cylo's deceit before finishing her off.
Vader then returned to his forces, who had secured the enemy lines thanks to 0-0-0's stratagem, and was surprised to find that Trios' assault to the delving citadel was already underway. With no opposition, Vader's combat drill resumed his way to citadel, and Vader himself cut off Rubix's escape way. Trios soon went to their encounter and Rubix formally surrendered; she then had the baron executed, and appointed his daughter as his successor, thus ending the rebellion. Vader then left the planet and informed the Emperor of Cylo's treachery, and the Emperor simply summoned him. He also received a message from Inspector Thanoth saying that he had located Aphra and that they needed to talk.
Hunt for Cylo
At the shipyards of Kuat, Vader conferred with Sidious aboard an unfinished Executor-class Star Dreadnought, the Executor. The Emperor revealed that to save Vader following Mustafar, he had been compelled to enlist scientists who shared philosophical similarities with the Sith, including Cylo. Cylo ultimately became excessively influential within the Tarkin Initiative, prompting Sidious to force his hand. Now exposed as a mere traitor, he could be eliminated. After the meeting, Vader met with Thanoth on Anthan 13; the Inspector, aware of Vader's real identity, revealed that he would support Vader's treason against the Emperor and that he would reveal Aphra's location on the Cosmatanic Steppes. However, Thanoth understood that Vader would not rest until he silenced a possible loose end, so he had elected to tell the Sith Lord in person so Vader would not waste time looking for him. When Thanoth revealed Aphra's location and thanked "Anakin" for their work together, Vader killed him with his lightsaber.
Outside and ignoring the droids' request to dispose of Thanoth's corpse, Vader ordered 0-0-0 and BT-1, who were joined by Krrsantan and his commando droids, to return Aphra to the Executor or kill her as their priority orders. Vader also made it clear to wipe out anyone else they found at the Cosmatanic Steppes to eliminate all witnesses present, ensuring that, if Aphra had told anyone about her work with Vader, they were silenced. Vader then departed aboard his TIE Advanced x1, with 0-0-0 realizing he would not be taking Cylo back alive, and returned to the Executor. Aboard, he confronted Professor Thlu-Ry, a colleague of Cylo's, whom he threatened to learn the traitor's location in the Crushank Nebulae. Vader took the Devastator to the nebulae, where his crew confirmed Cylo's whale fleet was present. After ordering that Thlu-Ry be thanked and then, for fraternizing with a traitor, executed, Vader led the assault on Cylo's fleet from his TIE Advanced. After Cylo's flagship fired an ion pulse to disable the Devastator and moved to escape, Vader fired into the whale ship and crashed into the opening he'd made, boarding the enemy ship just before it jumped to hyperspace
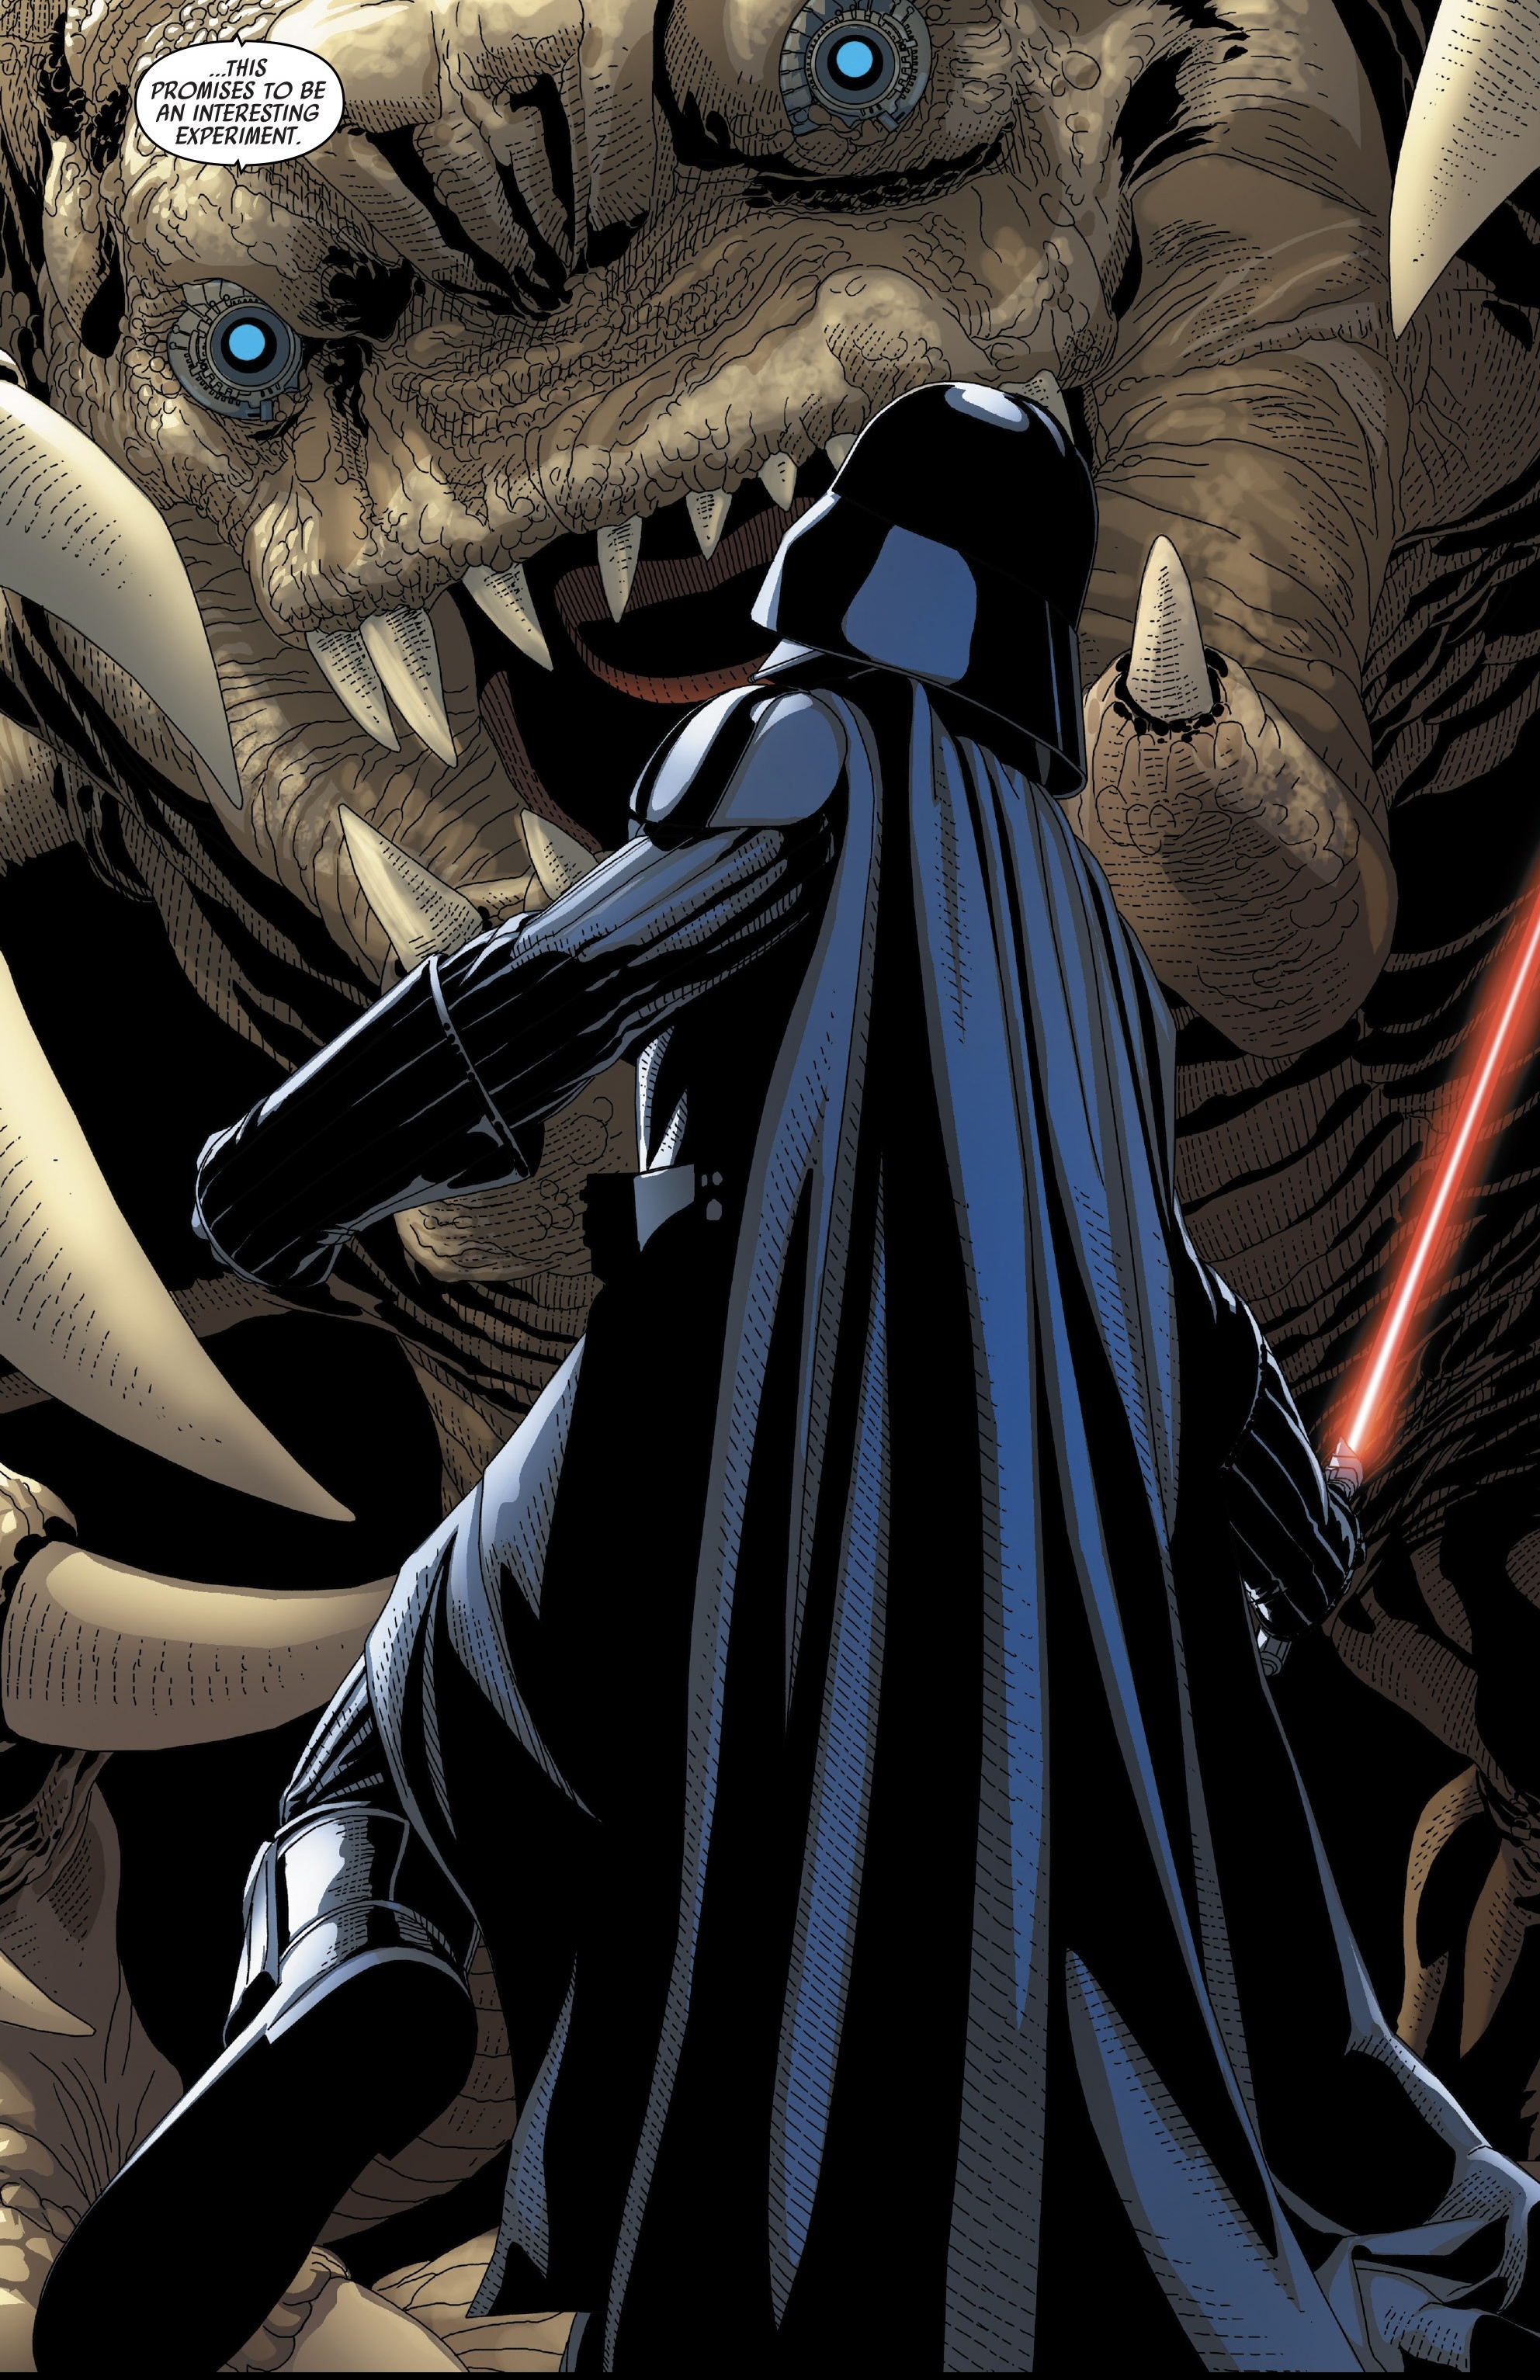
Navigating past the personnel he'd left to be sucked into hyperspace and entering the labs, Vader was confronted by Voidgazer, who pitted him against a cyberanimate rancor as a test of her technology just as Cylo's fleet arrived at Kuat. Although the creature posed a challenge, Vader killed it by throwing his lightsaber through its skull, severing the neural link, and turned one of Voidgazer's defense droids against her, fatally wounding her. As she lay dying, Voidgazer revealed that she had tampered with the Executor's systems to incapacitate the crew; Vader finished her off and went to the empty bridge, which had been abandoned by Cylo and Morit as they had fled in the escape pods, to find that Cylo's flagship was to collide with the Executor. Before it did, he ejected and landed on the Executor's outer hull, where he soon encountered Morit. He easily killed him and then made his way to the Executor's bridge, where he confronted Cylo. The scientist simply disabled Vader's cybernetics with a device he had kept for twenty years, forcing Vader to kneel and drop his lightsaber.
While Vader was incapacitated, he received visions of his duel with his former master, Obi-Wan Kenobi. This time, however, Kenobi threw him into the lava. Vader then rose out of the river in his life suit and struck down his old master. However, like their duel on the Death Star, Kenobi's body disappeared. Vader then encountered a vision of his younger self. The two versions of Skywalker fought until Vader came out victorious, throwing his counterpart in the lava. After his counterpart yelled that he hated him, the Dark Lord met a vision of his deceased wife, Padmé Amidala. Vader then found himself chained to the same table where he first received his suit. The vision of Padmé pleaded with him, asking him to stay with her. Vader, however, choked the illusion while at the same time regained control of his body. After he told the vision that her husband was dead, Vader used his lightsaber to impale Cylo, who was astounded that Vader was moving while his suit was deactivated. Thus, Vader had regained the ship from his control. The Dark Lord then informed his master of his success. The Emperor then ordered Vader to finish his mission then return to him, stating there was much to discuss.
Vader took control of his TIE Advanced, flying into Cylo's command ship. After cutting his way through Cylo's forces, the Dark Lord found his way to the doctor's cloning room. After destroying Cylo's spare bodies, Vader made it to the command bridge. Vader then confronted the doctor one last time. He mind-tricked the whale-ship into flying into a nearby star, destroying Cylo once and for all. After returning to the Executor, Vader met with his master, whom had been awaiting a full report, only to reveal it was no longer needed because Aphra was present: while 0-0-0 and BT-1 had successfully brought Aphra to the Executor and were planning on giving Vader suggestions on how to kill the doctor, should they have found his planned execution too boring for their tastes, Aphra realized Vader's priority order only mandated the droids bring her to the Executor. As she realized as such and was dragged away by two stormtroopers to await Vader's wrath, she gave a new priority order: help her escape. Reaching Palpatine's chamber, Aphra told Palpatine all of Vader's secret missions and plans, although she did chose to leave out the details surrounding Luke Skywalker.
Vader executes Tagge"
Instead of expressing anger towards Vader, the Emperor was, in fact, delighted with his apprentice's skill in operating covertly, declaring that Vader embodied everything he had hoped for. Subsequently, the Emperor entrusted Aphra's fate entirely to his apprentice's discretion. Vader then commanded Aphra to accompany him. Despite her earnest requests for a swift demise, Vader propelled her out of the airlock, although she secretly survived. Having correctly anticipated that Vader would not honor her request to avoid execution via airlock, she was rescued in the nick of time by Krrsantan, 0-0-0, and BT-1. Proceeding to the bridge, the Emperor informed Vader that Grand General Tagge would be demoted, and command of the Executor along with the entire fleet would be transferred to Vader, whom Palpatine designated as supreme commander of the Imperial fleet. Following this announcement, the Emperor left his apprentice to "educate" his subordinates about this new era. Vader then carried out Tagge's execution and instructed Admiral Kendal Ozzel to have the ship prepared within a fortnight. Finally, Vader contemplated his son, feeling assured that he would soon be in his grasp.
Eliminating the Unworthy
As the rebellion began to encroach upon the Mid Rim, The Emperor unleashed Vader, reasoning that the destruction of the Death Star was due to incompetence at the highest echelons of command, thus authorizing him to eliminate Imperial officials, including Moff Coovern and Minister Khemt.
Sometime after the Executor became his flagship, Vader summoned Lieutenant Sulaco to the bridge and directed her to accompany him to a hangar bay. There, he instructed her to pilot his Lambda-class shuttle on a diplomatic mission to Sarjenn 3, the third moon in the Sarjenn system and Sulaco's own homeworld. Upon landing at the moon's sole port, the two Imperials proceeded towards a nearby Rebel outpost, with Sulaco questioning the nature of their mission, pointing out that Sarjenn 3 had no diplomats. Vader was promptly ambushed by a sniper, whom he swiftly dealt with, before approaching the stronghold’s outermost wall. Using telekinesis, he disarmed the Rebels and proceeded to slaughter them. Venturing inside, Vader deflected a shot from a missile launcher, strangled the gunner, and used the Force to bring down a massive building. Arriving at Sulaco’s residence, Vader identified the officer as a Rebel spy. Forcing her to become a double agent, Vader instructed her to say what she needed to before they departed, implying that they had tasks ahead.
Confrontation on the Scorca Retreat
At a later point, Aphra initiated an auction for a sizable kyber crystal, which contained a copied conscience from an ancient Jedi named Rur, on the Sorca Retreat. However, Vader received information about the criminal gathering and the artifact from 0-0-0, who deliberately omitted Aphra's involvement as a means of blackmail: if she refused to remove the programming that compelled him and BT-1 to obey her will, they would inform Vader of her continued existence. By the time Vader arrived aboard an Imperial-class Star Destroyer, the auction had devolved into a massacre orchestrated by 0-0-0, who had permitted a droid from the Cyban Front to be possessed by the conscious kyber crystal, causing it to hunt down the various factions present on the space station. While Vader traversed the corridors, he encountered another Cyban Front droid, which had noticed him and his stormtroopers moving about. The droid attempted to flee, but Vader employed the Force to obliterate it. Vader instructed his troopers to eliminate all individuals they encountered within the space station.
Following the escape of the liberated 0-0-0 and BT-1, and as some stormtroopers encountered the droid controlled by Rur, Vader struck down a member of the Dominion of the Ezaraa. Some of his stormtroopers approached him, reporting resistance in the top dome and the droid. Vader walked down the halls and found the droid standing over a pile of dead stormtroopers. The droid had two blue-bladed lightsabers, generated from the kyber crystal inside it, erected from its arms. The two declared themselves to each other and clashed. As they fought, Vader deduced that Rur was not a Sith. Rur claimed to be the last of the Ordu Aspectu and a Jedi. As they deduced more about each other, Vader Force-pushed Rur into a stone slab. Rur got up again, but Vader charged at him, and as they clashed, he cut the droid's right hand off.
Vader Force-pushed him again into a wall, but the droid began laughing and declared that he was a boundless god of machines. Rur quickly took control of the defensive guns in the ceiling and used them on Vader. Rur then tried to take control of Vader's suit and stalled his defensive moves. Vader told him that he was not the first to attempt that and used the Force to repeatedly smash Rur against the walls. The three collisions with the walls demolished the droid and Vader took the crystal. After the duel, a stormtrooper reported to Vader that some small ships had slipped his blockade. Vader sensed Aphra's presence, which was an annoying presence to him, but elected to hold the blockade. Vader took the crystal back to Sidious on Coruscant and then archived it with the rest of his master's collection.
Tureen VII
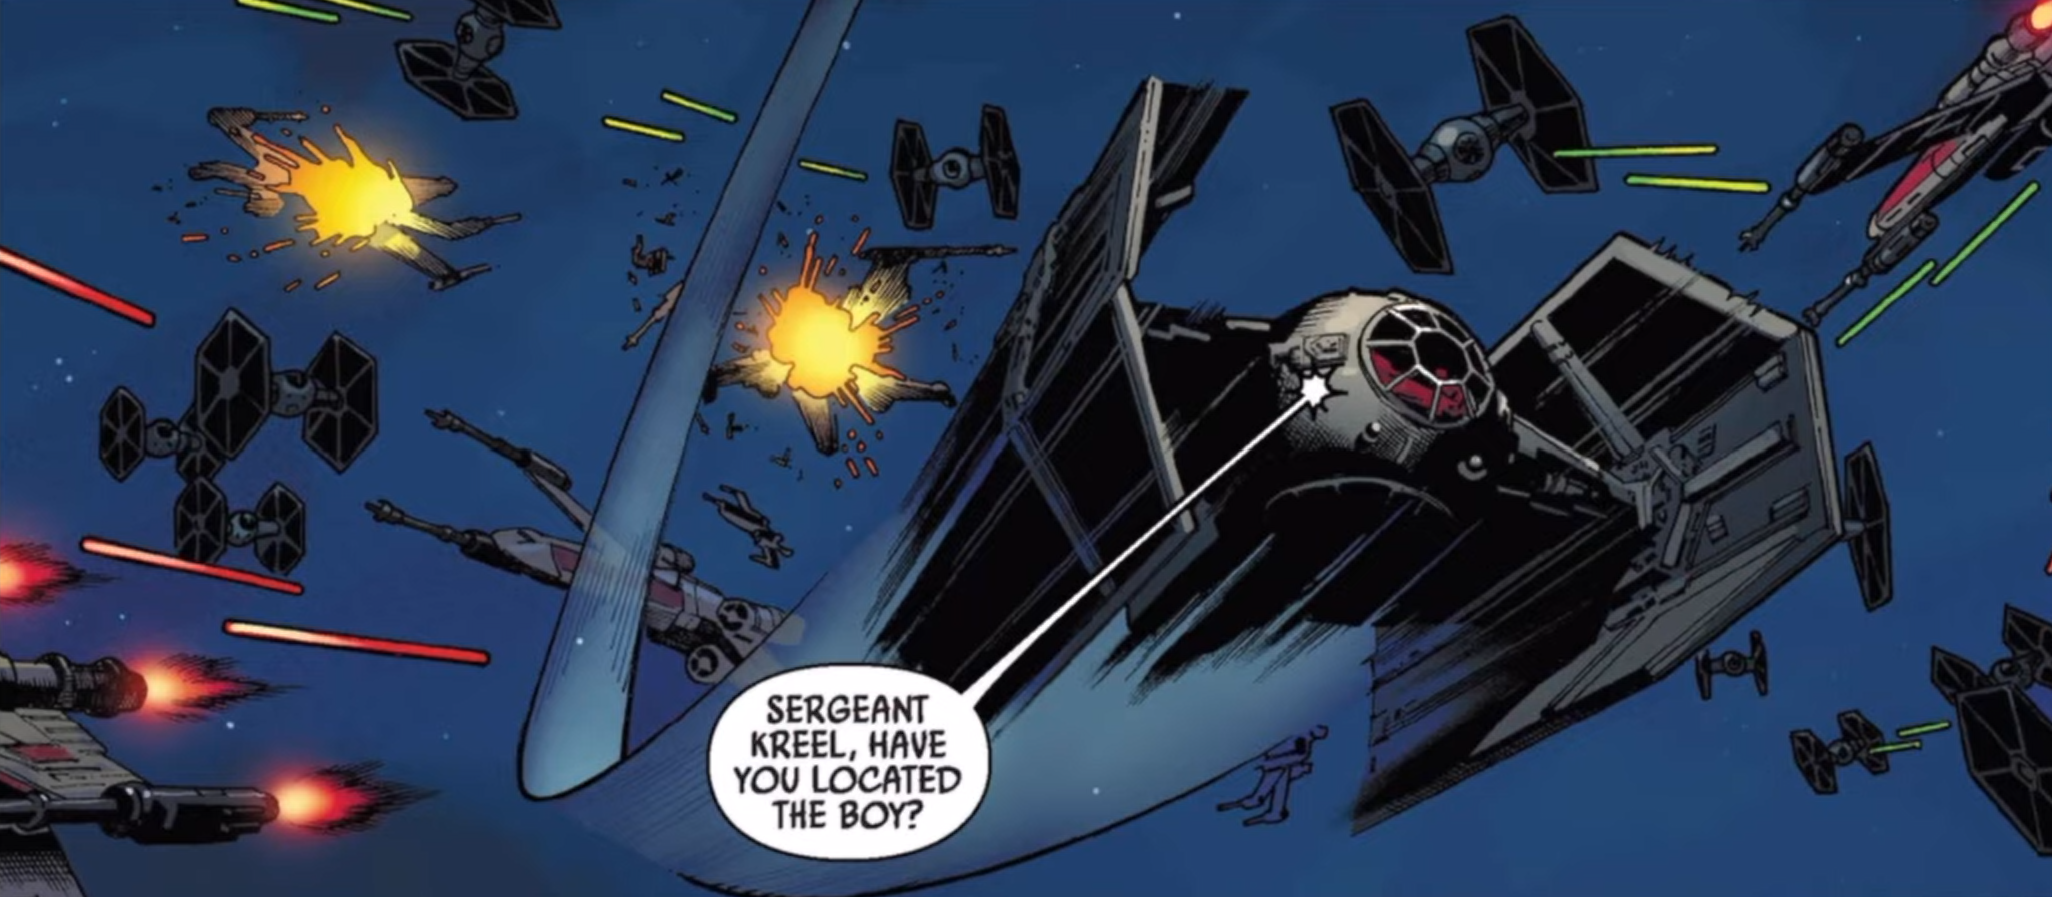
Following Cylo's demise, Vader tasked Sergeant Kreel and his SCAR Squadron with the pursuit of Luke Skywalker. They eventually located him and his allies hijacking the Imperial-class Star Destroyer Harbinger. The vessel then proceeded towards the blockaded planet Tureen VII with the intention of providing assistance to the inhabitants. Vader and his TIE forces engaged the attacking rebel X-wings. While engaged in combat with the rebel fighters, Vader inquired of Kreel whether he had located Luke. At that moment, Kreel was engaged in a lightsaber duel with the rebel. The Dark Lord then cautioned the stormtrooper against harming his "prize." However, Luke utilized the Force to incapacitate Kreel, much to Vader's displeasure. Ultimately, the rebels succeeded in breaking the siege and providing relief to the people of Tureen VII. SCAR Squadron, however, did manage to capture the protocol droid C-3PO.
Shortly thereafter, Vader was contacted by Kreel, who informed him that C-3PO had divulged all the information they required and that they were unable to stop him from talking. Vader then informed him that the droid was a worthless piece of junk and should be disposed of. Soon after, R2-D2 managed to infiltrate the Star Destroyer where C-3PO was held and broke the droid out. Vader was notified of this and intercepted their X-wing in his TIE advanced. R2-D2 knew they could not escape alone and sent out a distress call to their friends. To Vader's frustration, R2-D2 gained the support of Luke, the Millennium Falcon and the Volt Cobra, who gave enough covering fire to help them all escape.
Confronting Kreel
Subsequently, Vader approached Kreel, who was engaged in training with a half-dozen training droids. Vader informed him that despite his efforts, he would never become a Sith. Kreel responded that he had no such aspirations, stating that it was not a Sith who had saved him from the pits of Chagar IX, but rather the 501st Legion. He declared himself a stormtrooper at heart and expressed his appreciation for the value of a lightsaber. Vader then seized his lightsaber and threatened to eliminate him and his squad for their failure aboard the Harbinger. Kreel retorted that if he failed him again, he would kneel down to Vader and bury that lightsaber in his chest himself, after killing his men with it. Vader tasked Kreel with a mission to destroy a possible rebel outpost on Horox III, with instructions to bring back Luke if he was present. Vader then returned Kreel's lightsaber and instructed him to prove himself worthy of it. Sidious then entered the room and summoned Vader. Kreel knelt down and in honor of Sidious's presence and he thanked him. Sidious then brought Vader out of the room. Kreel then traveled to the Horox system and destroyed the rebel outpost there, killing all rebels present.
Constructing a Trap
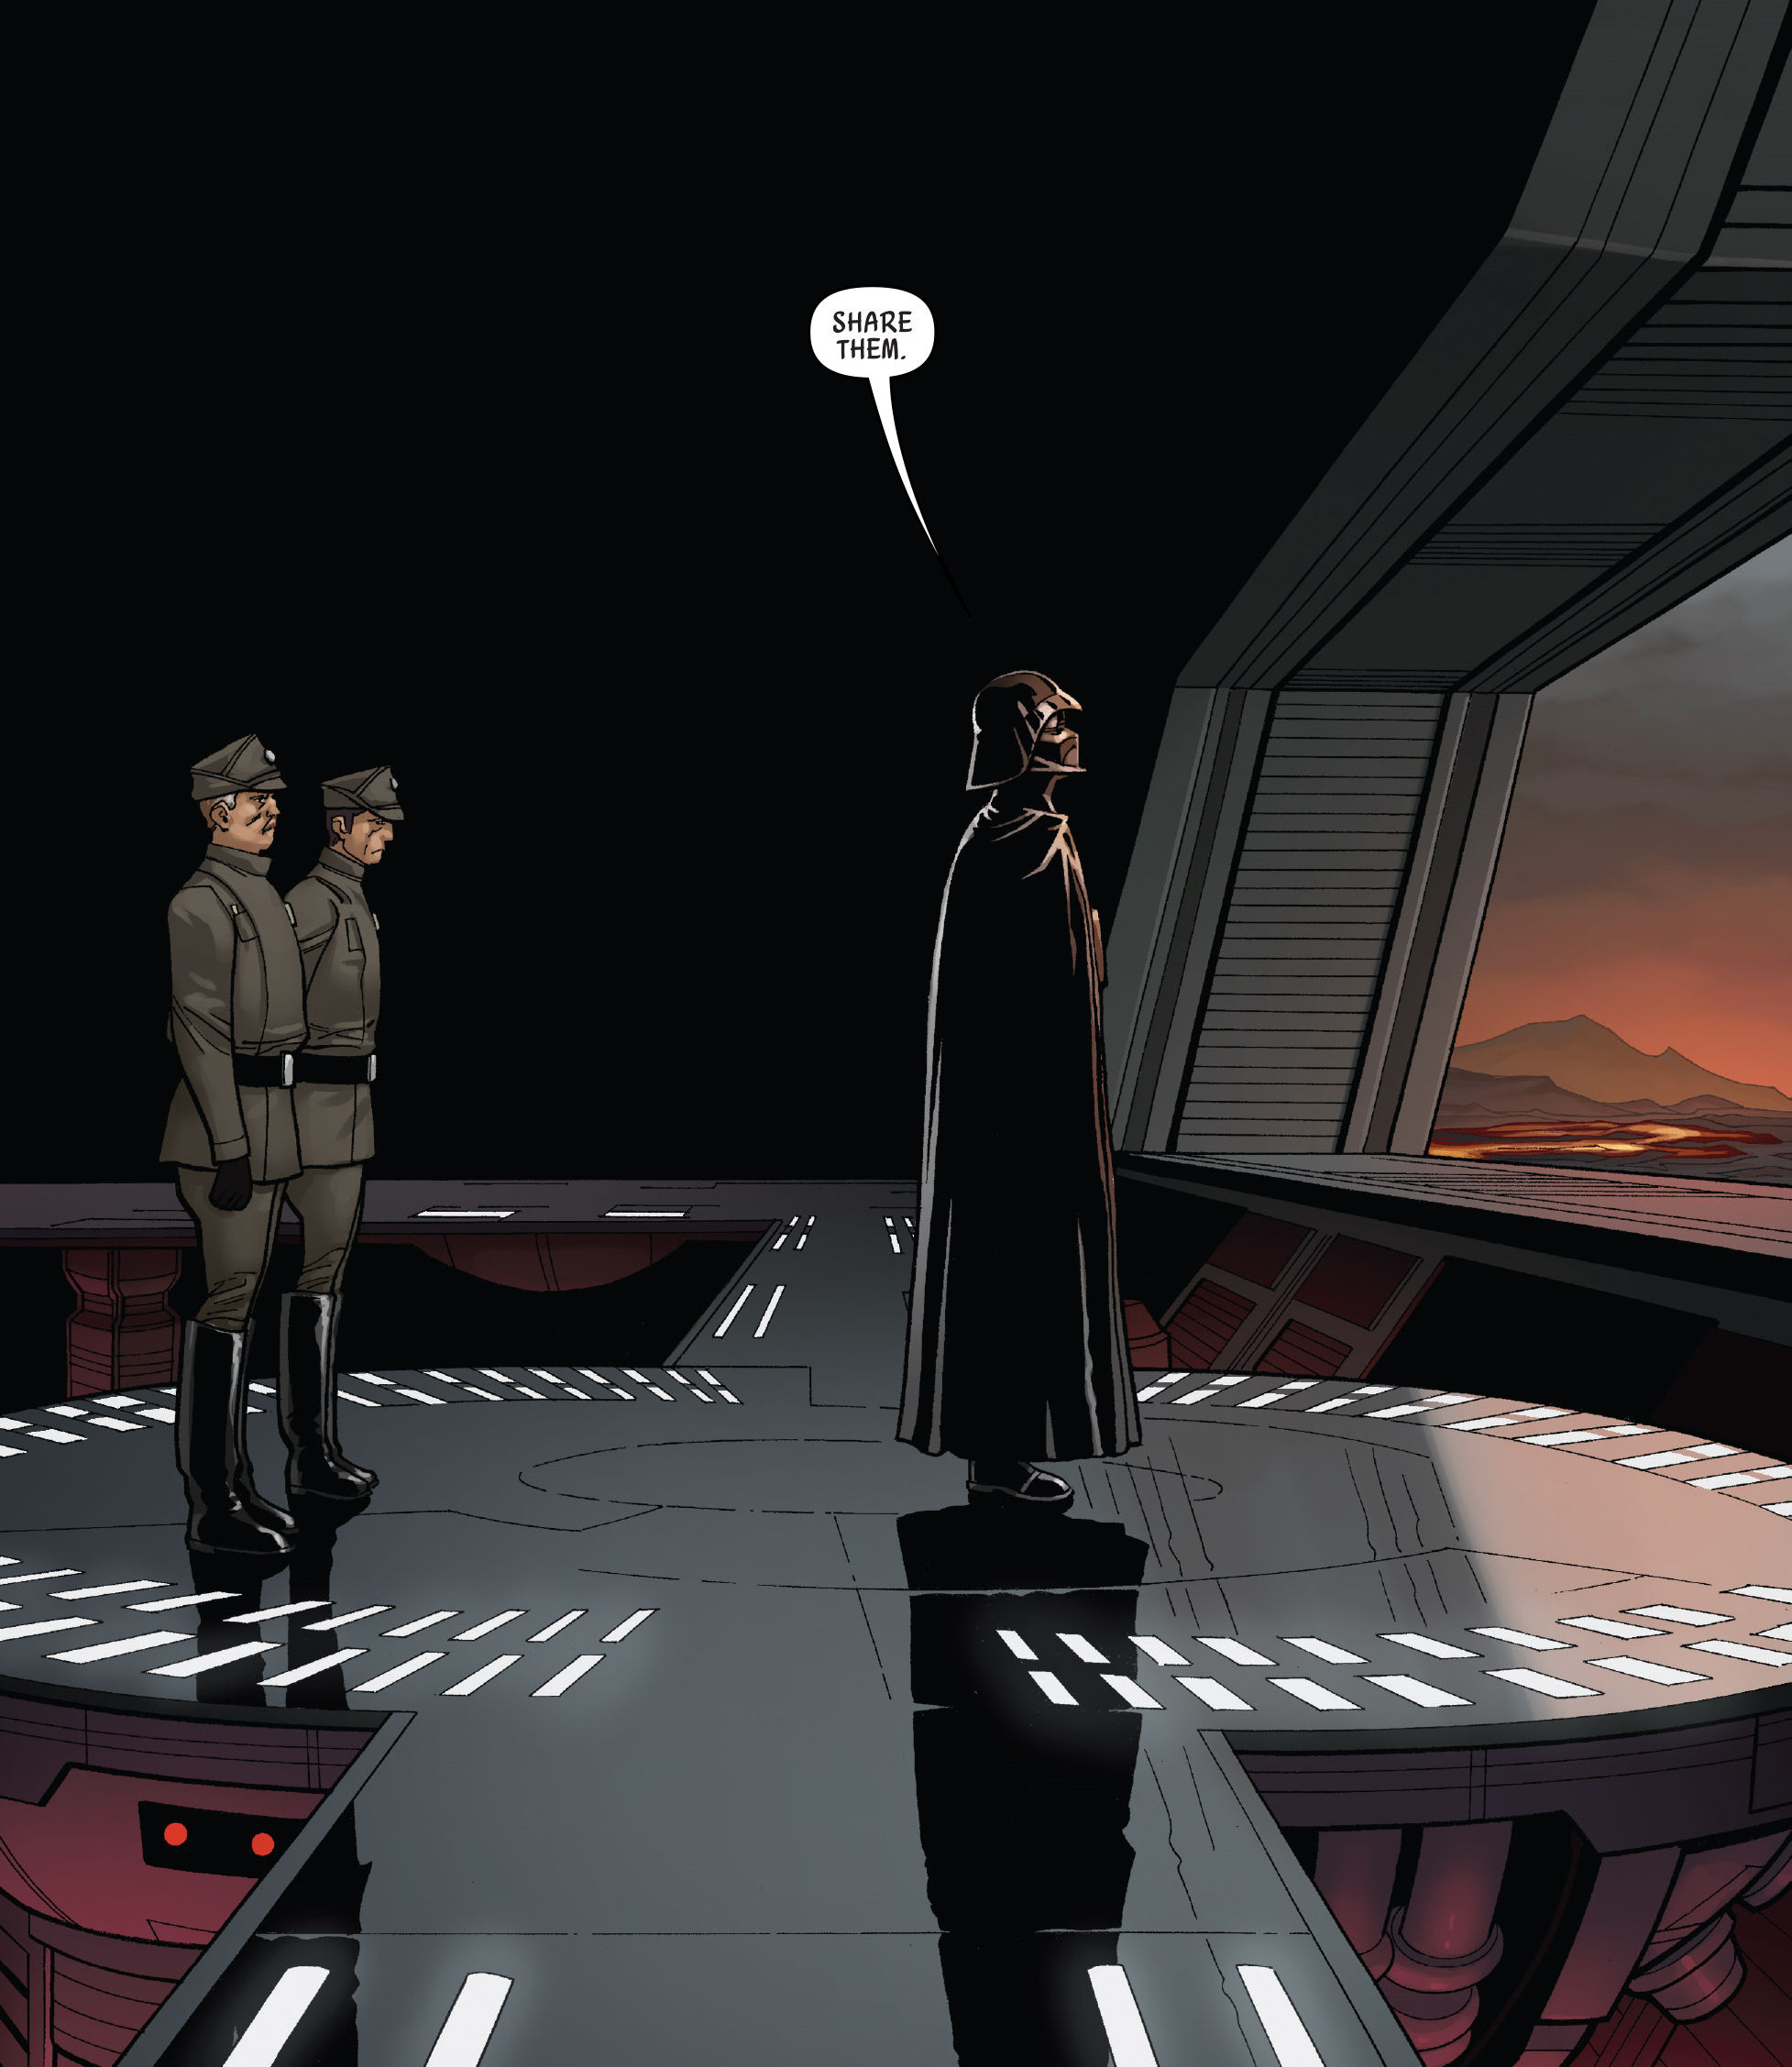
At a later time, Vader convened with Admiral Kendal Ozzel and General Maximilian Veers at his castle. There, he demanded an explanation from Ozzel regarding the slow progress of Imperial projects, which Ozzel attributed to the growing resistance. He contended that, while retaliation was possible, the rebels were too dispersed. Ozzel proposed targeting more worlds with constant bombardments using Vader's new Death Squadron, but Veers intervened and presented an alternative theory. Veers likened the rebellion to weeds, while the Empire was akin to a storm; after a storm, weeds would bend and emerge unscathed, whereas a tree might not withstand the onslaught. Veers argued that until the rebellion coalesced into a unified entity, it would continue to elude their grasp. This prompted a recollection in Vader of Leia Organa's words to Tarkin: "The more you tighten your grip, the more star systems will slip through your fingers." Vader informed his subordinates that Veers had raised a compelling point and outlined a new strategy: allow the Alliance time to consolidate its forces and assemble its might in a single location, where they could be decisively crushed.
Vader journeyed to Shu-Torun and approached Queen Trios in her meeting room. She was surprised at his arrival and assumed it was not on good terms. She pleaded that she had done nothing against him and that she had been a loyal servant. She then told her guards to lower their weapons. Trios asked Vader how she could help him. Vader revealed his plan for her specialists to mine the ruins of Jedha. After she was to supply information to the rebels that would be sufficient to entirely sabotage the mining efforts. Finally, she had to infiltrate the rebellion, which was trying to build a fleet, and do everything she could to help them. Vader said to her that when they had built their armada, and before they hid it, he would show them how weak they truly were. Vader then threatened her that he'd make Alderaan look like a dream to Shu-Torun if she tried anything. A Shu-Torun guard stepped forward and told Vader that he could not threaten Trios like that. Trios shot him as Vader was their honored guest. She then allowed Vader to kill the rest of the people in the room.
Vader's Masterstroke
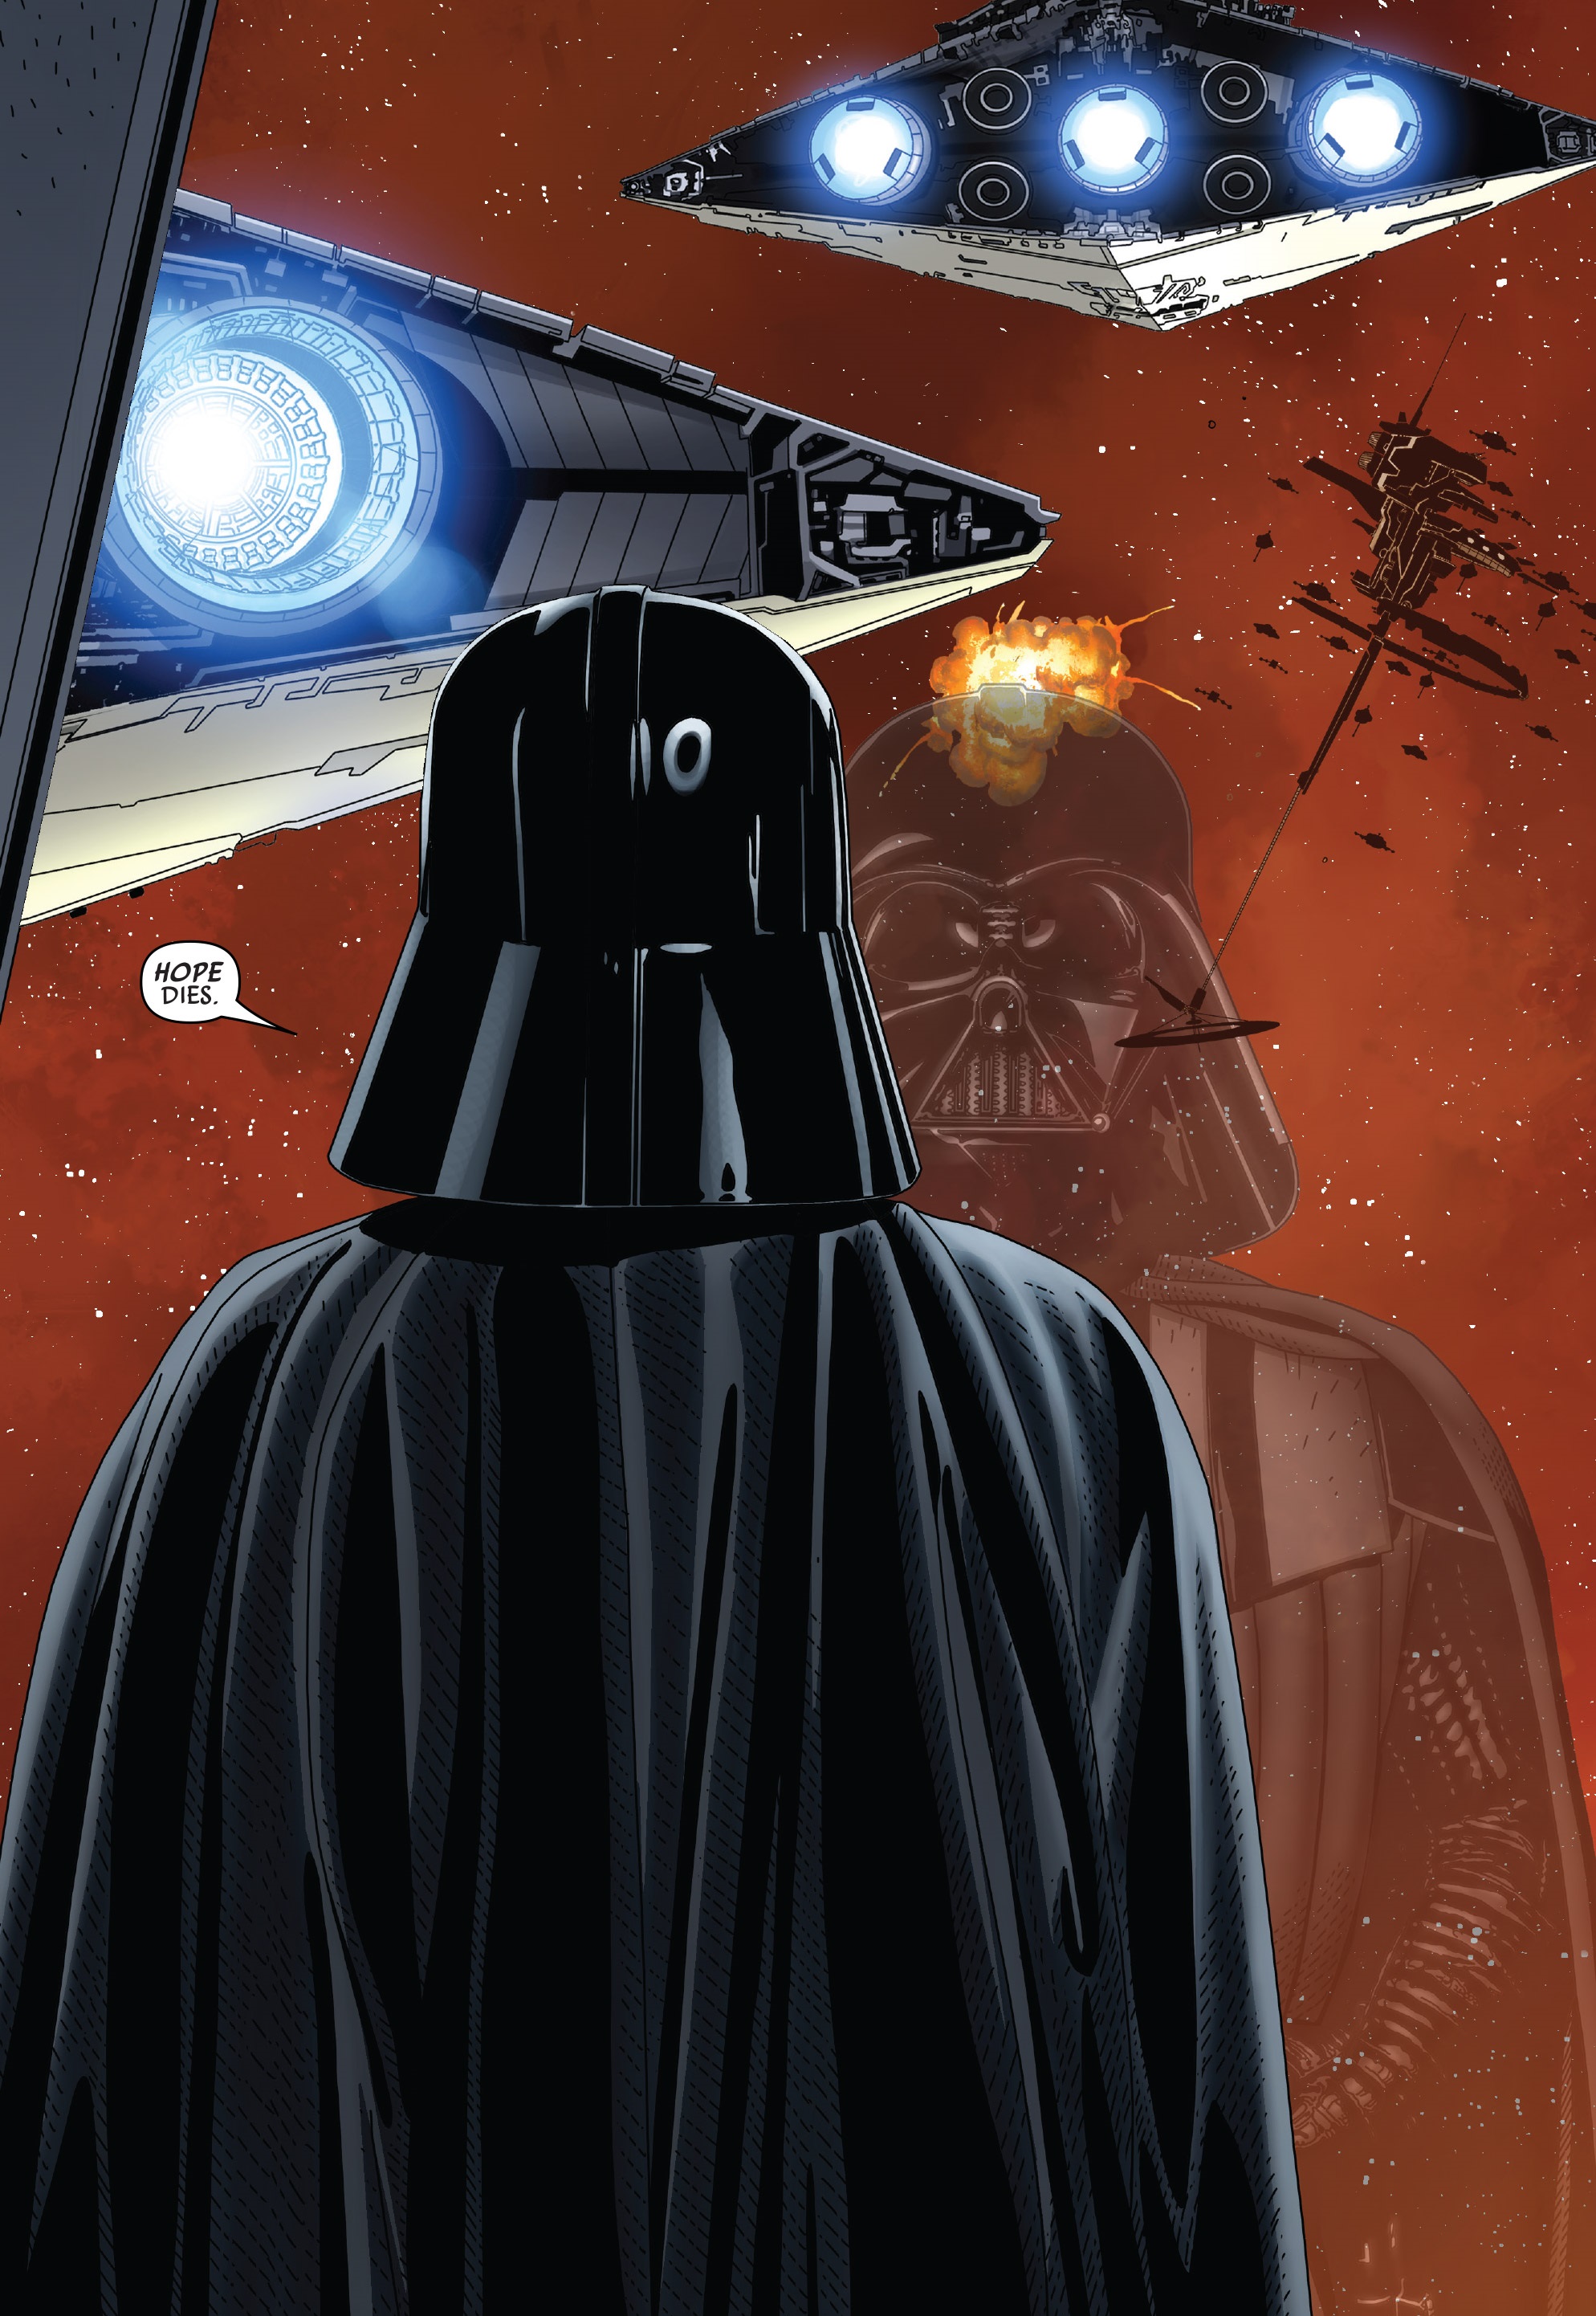
Much to Vader's satisfaction, Trios proved successful in her mission, gaining Leia Organa's trust on Jedha and instigating a mass mutiny among Mon Calamari merchant ships. As the rebels armed their new cruisers at the Mako-Ta Space Docks, she signaled Vader to initiate the attack, assuring him that they were completely unprepared. Just as the rebels were about to disperse their newly formed fleet, their hyperdrives malfunctioned, rendering the cruisers immobile within the system. Vader arrived shortly thereafter with Death Squadron, and Ozzel inquired whether they should commence a bombardment. Vader instructed him to wait, stating that he sensed their fear, but it was insufficient. He instructed Ozzel to allow them time to comprehend their situation. As the rebel fighters prepared to deploy, they discovered that not only were the hangar doors inoperable, but the defense turrets were unable to fire, and their engines could not be activated. This was due to Organa's decision to equip the cruisers with Shu-Torun technology, enabling Trios to sabotage them. The cruisers were defenseless against Vader's fleet, and Vader ordered the destruction of the nearest cruiser. The fleet subsequently targeted General Vanden Willard's flagship Yavin's Hope, destroying it with ease and killing Willard. Ozzel then inquired about their next target, and Vader responded, "Hope."
The Star Destroyers began engaging the other Mon Calamari cruisers, and Trios attempted to get off the spacedocks on her ship. However, rebel forces boarded the vessel, and she was forced to escape in an escape pod. The rebels discovered they could get the cruiser's hangar doors to open by flying a ship towards it. Bandwin Cor volunteered to do so and flew a shuttle towards the cruisers. The shuttle was reported to Vader, but the TIE fighters dealt with it before Vader could make any decisions. Vader's fleet soon destroyed another cruiser, sending it into a fireball. The Millennium Falcon then arrived at the system, and Han Solo was told to attempt the same thing by Organa. Vader was notified of the Falcon's arrival and quickly went to his TIE advanced. Solo flew the Falcon through the fleet and took on TIEs before flying towards General Jan Dodonna's Republic. Vader then engaged the Falcon and hit the ship's stabilizer, sending it spiraling. Solo set it to manual, and Vader prepared to fire on the Falcon when it got back on course.
Vader fired missiles at the Falcon as Solo attempted to land on Commander Lajaie's cruiser. Vader was to force Lajaie's crew to abandon ship and ordered the Executor to destroy the escape pods. He continued to pursue the Falcon until his TIE was disabled temporarily in a nearby asteroid field. Vader was able to resume his attack on the rebel fleet's starfighters. Vader then ordered the Imperial fleet to close in on the Rebel fleet. After being informed that Trios was returning to the Executor, Vader returned to the ship where he intended to meet her. However, he learned that rebels had boarded the Executor by using Trios' shuttle.
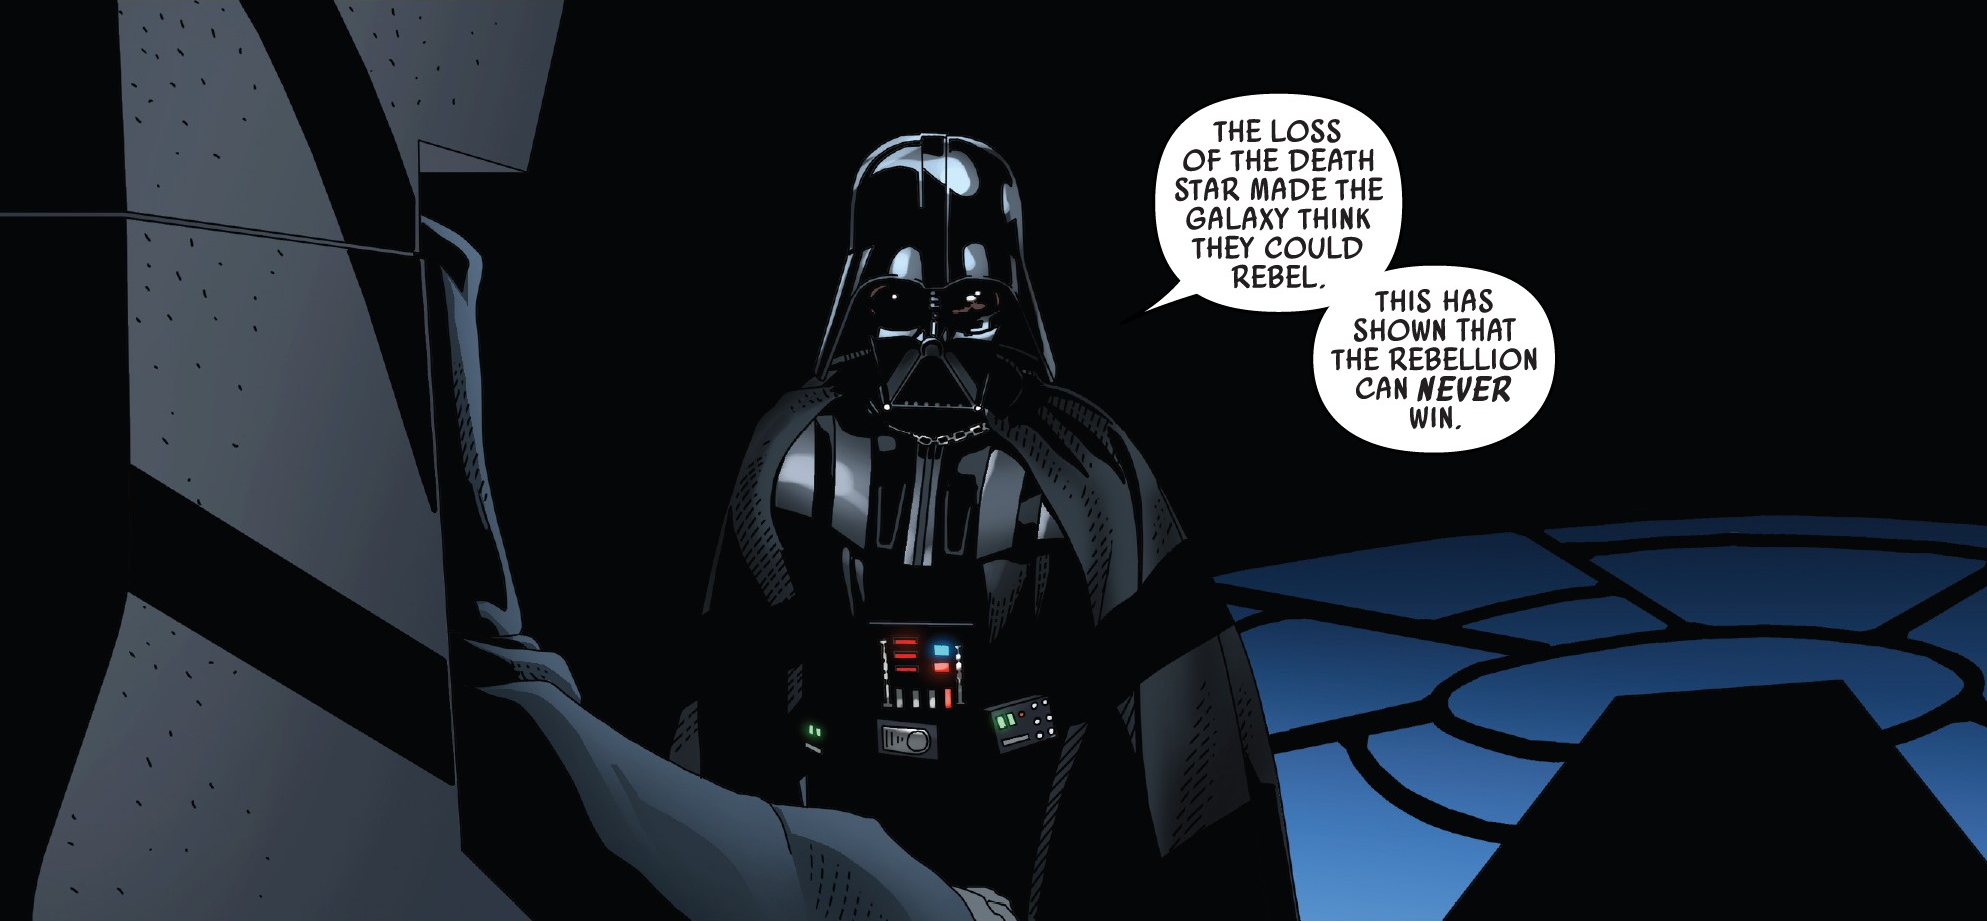
He pursued the rebels until he found several led by General Davits Draven and killed all of them. However, their mission was just to slow Vader down and Vader Force choked Draven. Vader caught up with Organa but was unable to stop her from escaping the Executor via a TIE fighter. As one rebel cruiser left, Vader ordered the Imperial fleet to destroy the remaining rebel vessels. Vader continued to oversee the destruction of the remaining rebel ships. Despite the return of a rebel cruiser, Vader pushed the attack. The rebels capital ships were eventually able to retreat and disperse in order to reorganize. Vader informed the Emperor of the rebels' defeat and assured him that the Rebels could never win.
Unveiling the Truth
Project Swarm
Three years following the Battle of Yavin, Vader retained command of the Executor, with Ozzel serving as admiral, and Death Squadron remaining under his authority. At Vader's instigation, Lieutenant Commander Ciena Ree was transferred from the Devastator to the Executor; Ree perceived Vader's request as more of a veiled threat than a reward, as she remained perpetually vulnerable to him due to witnessing him in the immediate aftermath of Yavin. Consumed with the desire to locate Luke, Vader deployed thousands of Viper probe droids as part of Project Swarm into the far reaches of space in an attempt to discover the rebel base and, by extension, his son. The Executor also housed a contingent of archaeological consultants, brought in due to the rebellion's history of concealing themselves in historical sites. The archaeological supervisor, Professor Rupo Ud, secretly viewed the operation merely as an opportunity to study historical sites and harbored a dislike for the Sith Lord, but he understood the importance of remaining silent, having witnessed Vader execute gifted individuals on flimsy pretexts. Imperial forces also apprehended 0-0-0 and BT-1 on the Ring of Kafrene and installed restraining bolts on both, suppressing their memories and reinstating them into Vader's service. Both were stationed on the Executor as interrogation specialists.

When Doctor Aphra exposed propaganda Minister Pitina Mar-Mas Voor's plot to assassinate Emperor Palpatine in an effort to secure a pardon for herself, which she hoped would also keep those she loved safe by stopping the Imperial hunt for her, Vader traveled to Coruscant's moon Centax-3 to execute Voor for her treason. Breaching Voor's room with two stormtroopers, Vader decapitated the rogue minister, with his appearance scaring Aphra, who believed Vader would kill her despite her role in saving Palpatine. Vader, however, simply demanded she stand and recruited her into Project Swarm as one of its archaeological consultants. Aphra and her ward Vulaada Klam were assigned a quarters on the Executor, where Klam was assigned a cleaning job and Aphra experienced regular nightmares of the ways Vader could hurt her, the worst of which being thrown from an airlock and losing an air mask thanks to his Force powers. It was also Aphra's belief that, while she was somewhat protected by her actions against Voor, Vader was waiting for any good excuse to kill her, thereby finally silencing an old loose end. Eventually, the progress on Project Swarm became too slow for Vader's liking, so he executed project supervisor Yaltza.
After General Veers was assigned oversight and introduced himself to the project's archaeological consultants, Aphra caught sight of Vader walking past and followed him past a mouse droid before speaking, pleading for her life but being thrown into a wall when she mentioned Skywalker's name. Vader left her on the floor as he departed, leaving Aphra to devote herself to finding the rebel base to secure further Imperial favor, thereby saving her from Vader's wrath. After Ud found a possible lead on the rebel base after a probe droid was shot down on Ash Moon 1, Aphra joined the ground mission to stay out of Vader's sights, further using the opportunity to kill Ud, thereby taking the position of supervisor for herself, and abandon Klam to keep her out of her dangerous life. While there was no sign of rebel activity at the site, Imperial forces did pick up a masked figure, who claimed to know Jedi mind tricks and carried rebel rations, they took prisoner. On Veers's orders, Aphra was sent to inform Vader of the prisoner, with Aphra noting the individual could be Skywalker; not realizing the Sith Lord was passing her to exit the room, Aphra fell to her knees as Vader approached and promised she had not revealed any of Vader's secrets.
Joined by Aphra when he demanded she accompany him, Vader Force choked and then physically choked the masked individual in an interrogation cell for the location of the rebel base, promising to kill him slowly if he refused, but was met by a Jedi apothegm about the power of the light side. Vader quickly ordered Veers seal the room and bring in 0-0-0 before removing the individual's mask, revealing Aphra's father Korin. Vader ignored Aphra's pleas to spare her father from torture, citing his knowledge of the Jedi, and left the arriving 0-0-0 and BT-1 to extract everything Korin knew, with the protocol droid specifically hoping Vader would let him use the new tooth wrenches in his torture. Due to his bias against the Rebellion for its exploitation of ancient temples, Korin, however, would quickly reveal everything he knew, which was relayed to Vader by Veers and Aphra after they departed the cell. Now pointed in the direction of a rebel cell using a temple on Asteroid Helix 13-v, Vader personally ventured to the asteroid with an Imperial force, BT-1, and the two Aphras, intending to see which of the two was more useful to him.
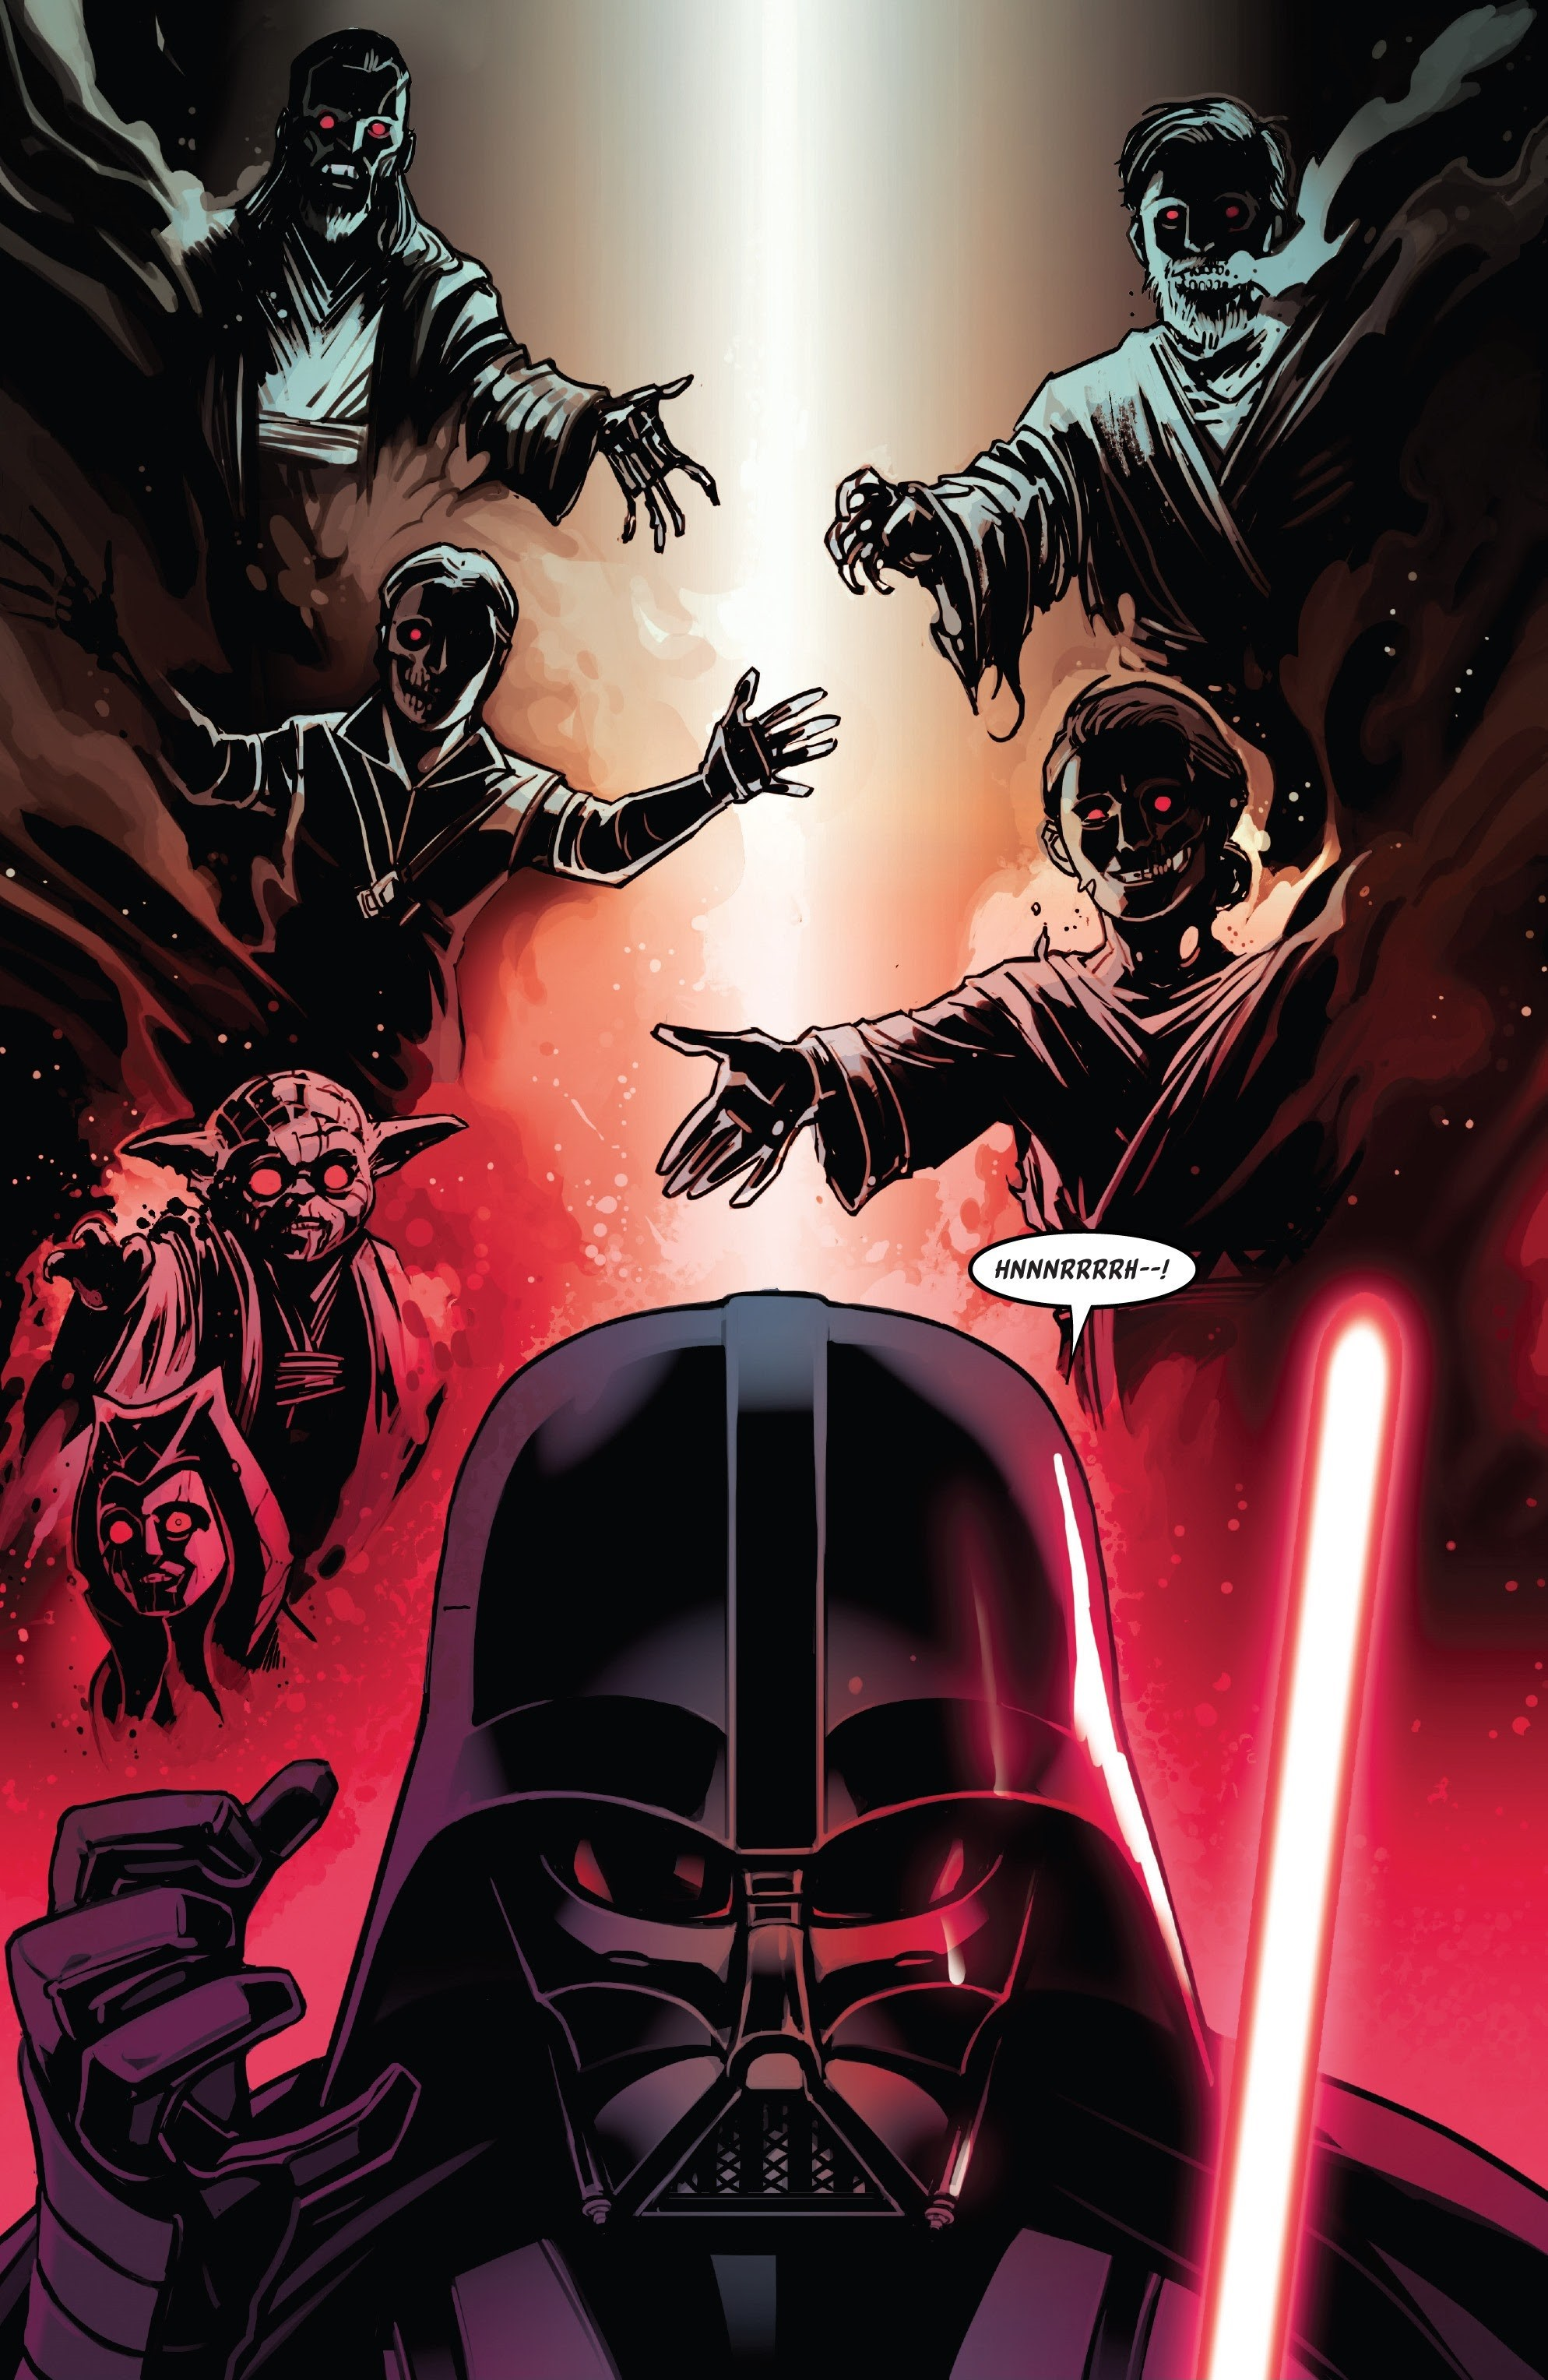
After his ship touched down on Asteroid Helix 13-v, Darth Vader sensed a powerful Force presence, leading him to leave his squad of stormtroopers outside. This decision filled Chelli Aphra with dread; she was convinced Vader was deliberately setting up a private encounter with no witnesses, aside from BT-1, to deal with her. To her surprise, however, Vader's attention was entirely consumed by the presence he had sensed. He instructed BT-1 to harm Aphra if she disobeyed him, then departed to investigate. Unbeknownst to Vader, the rebels had installed hidden cameras within the atrium, providing several views of him to the Unnamed under Chelli's former love, Magna Tolvan. As Vader delved deeper into the shrine, unknowingly followed by Aphra who had discovered rebel trails pointing to a frigid location, he ignited his lightsaber. He demanded the presence reveal itself, only to be assaulted by visions and mental manipulations rooted in his past. Vader, declaring he was no longer a naive youth susceptible to such illusions, obliterated the source of the presence: an altar saturated with the collective wills of past worshippers. He then left, unaware that Aphra had overheard his declaration.
Determined to analyze survey reports aboard the Executor, Vader issued an order to a bewildered stormtrooper sergeant to immediately cease exploration of the shrine, despite the minimal progress made. Further, he instructed BT-1 to signal Death Squadron to deploy TIE/sa bombers, confirming his belief that the rebels had departed. Korin, objecting to the destruction of a historical site, pursued Vader as the Sith Lord made his way to a Lambda-class T-4a shuttle. Vader used the Force to hurl Korin aside before commanding BT-1 to eliminate one of the Aphras, giving them only the return trip to the Executor to decide who would die. Before reaching the Super Star Destroyer, their Lambda was intercepted by Strike Team Misericorde under Tolvan's command. Chelli manipulated Tolvan into revealing the location of the new rebel base: the icy planet Hoth in the Outer Rim. After launching her unconscious father away in the Lambda on a course to Ash Moon I, where he would meet with Klam, with Tolvan in pursuit, Aphra ensured her loved ones would unite and form their own group. Aphra then directed BT-1 to contact 0-0-0 aboard the Executor, promising to remove their restraining bolts as part of her plan to escape Vader and disrupt his search for the rebel base, where her loved ones would be stationed as part of the Alliance.
Aboard the Executor, Vader was in his meditation chamber when 0-0-0 interrupted him, testing the Sith Lord's patience with comments about Vader's injured appearance, and a private message. Vader, beginning to crush the protocol droid with the Force and suspend him in the air, demanded the message. He learned it was from Chelli Aphra, who claimed to know the location of the rebel base on a world of ice. Instead of leading him to Hoth, however, Aphra directed Vader and a contingent of Imperial forces to the Meridional Ice Cap on the ancient Jedi planet Tython. She knew the Martyrium of Frozen Tears, supposedly containing a kyberite confessional, was located there, a fact she learned from her father. Having witnessed Vader's brief vulnerability to his past at the Helix temple, she intended to burden him with his regrets on Tython as well. Her hope was that the confessional would overpower his Force abilities, allowing her to proceed with her plan.
Vader arrived at the Meridional Ice Cap in his personal TIE Advanced, while a group of cold-weather assault stormtroopers, at least one officer, and 0-0-0 under Colonel Bryce landed in two TIE/rp Reaper attack landers. Outside the Martyrium of Frozen Tears, Aphra greeted Vader and assured him the rebels were secretly preparing a base deep underground, subtly hinting that Skywalker might be present. Inside, Vader ordered his troops to scan for the supposed rebel presence and revealed 0-0-0 was present, a fact Aphra feigned surprise at. Sensing Aphra's deception through the Force, Vader threatened to kill her if she lied. The colonel reported no signs of activity within the temple, prompting Vader to immediately order 0-0-0 to kill Aphra. However, BT-1 intervened, separating 0-0-0 and Aphra from the Imperials just in time. Aphra kept her promise to remove their restraining bolts and persuaded them to keep her alive as Vader began his pursuit, knowing the temple's secrets.
Vader smashed through a wall into Aphra and the droids' hiding place, accompanied by several snowtroopers, including members of First squad. He instructed them to move eastward but to leave Aphra to him. However, Aphra triggered a trap that unleashed a torrent of flame, which Vader deflected but engulfed several surrounding troops. Contacting Bryce, he ordered a withdrawal, only for 0-0-0 to kill Bryce before the colonel could issue the retreat order. Vader continued his hunt alone, despite a few snowtroopers remaining nearby. He tracked Aphra to the opposite side of another wall, which he began to cut through until BT-1 activated another trap, isolating Vader from his troops. All of them were swiftly massacred by the droid. Vader quickly freed himself from the trap and confronted Aphra, demanding she kneel before he struck her down. When 0-0-0 suddenly attacked, Vader destroyed the droid, but the distraction allowed several explosive darts to strike his armor, knocking him backward. With Vader trapped beneath the kyberite confessional, Aphra activated it, imprisoning him within. Under the weight of centuries of confessions and regrets, Vader was forced to endure visions of his own past, similar to his reaction to the altar at the Helix temple.
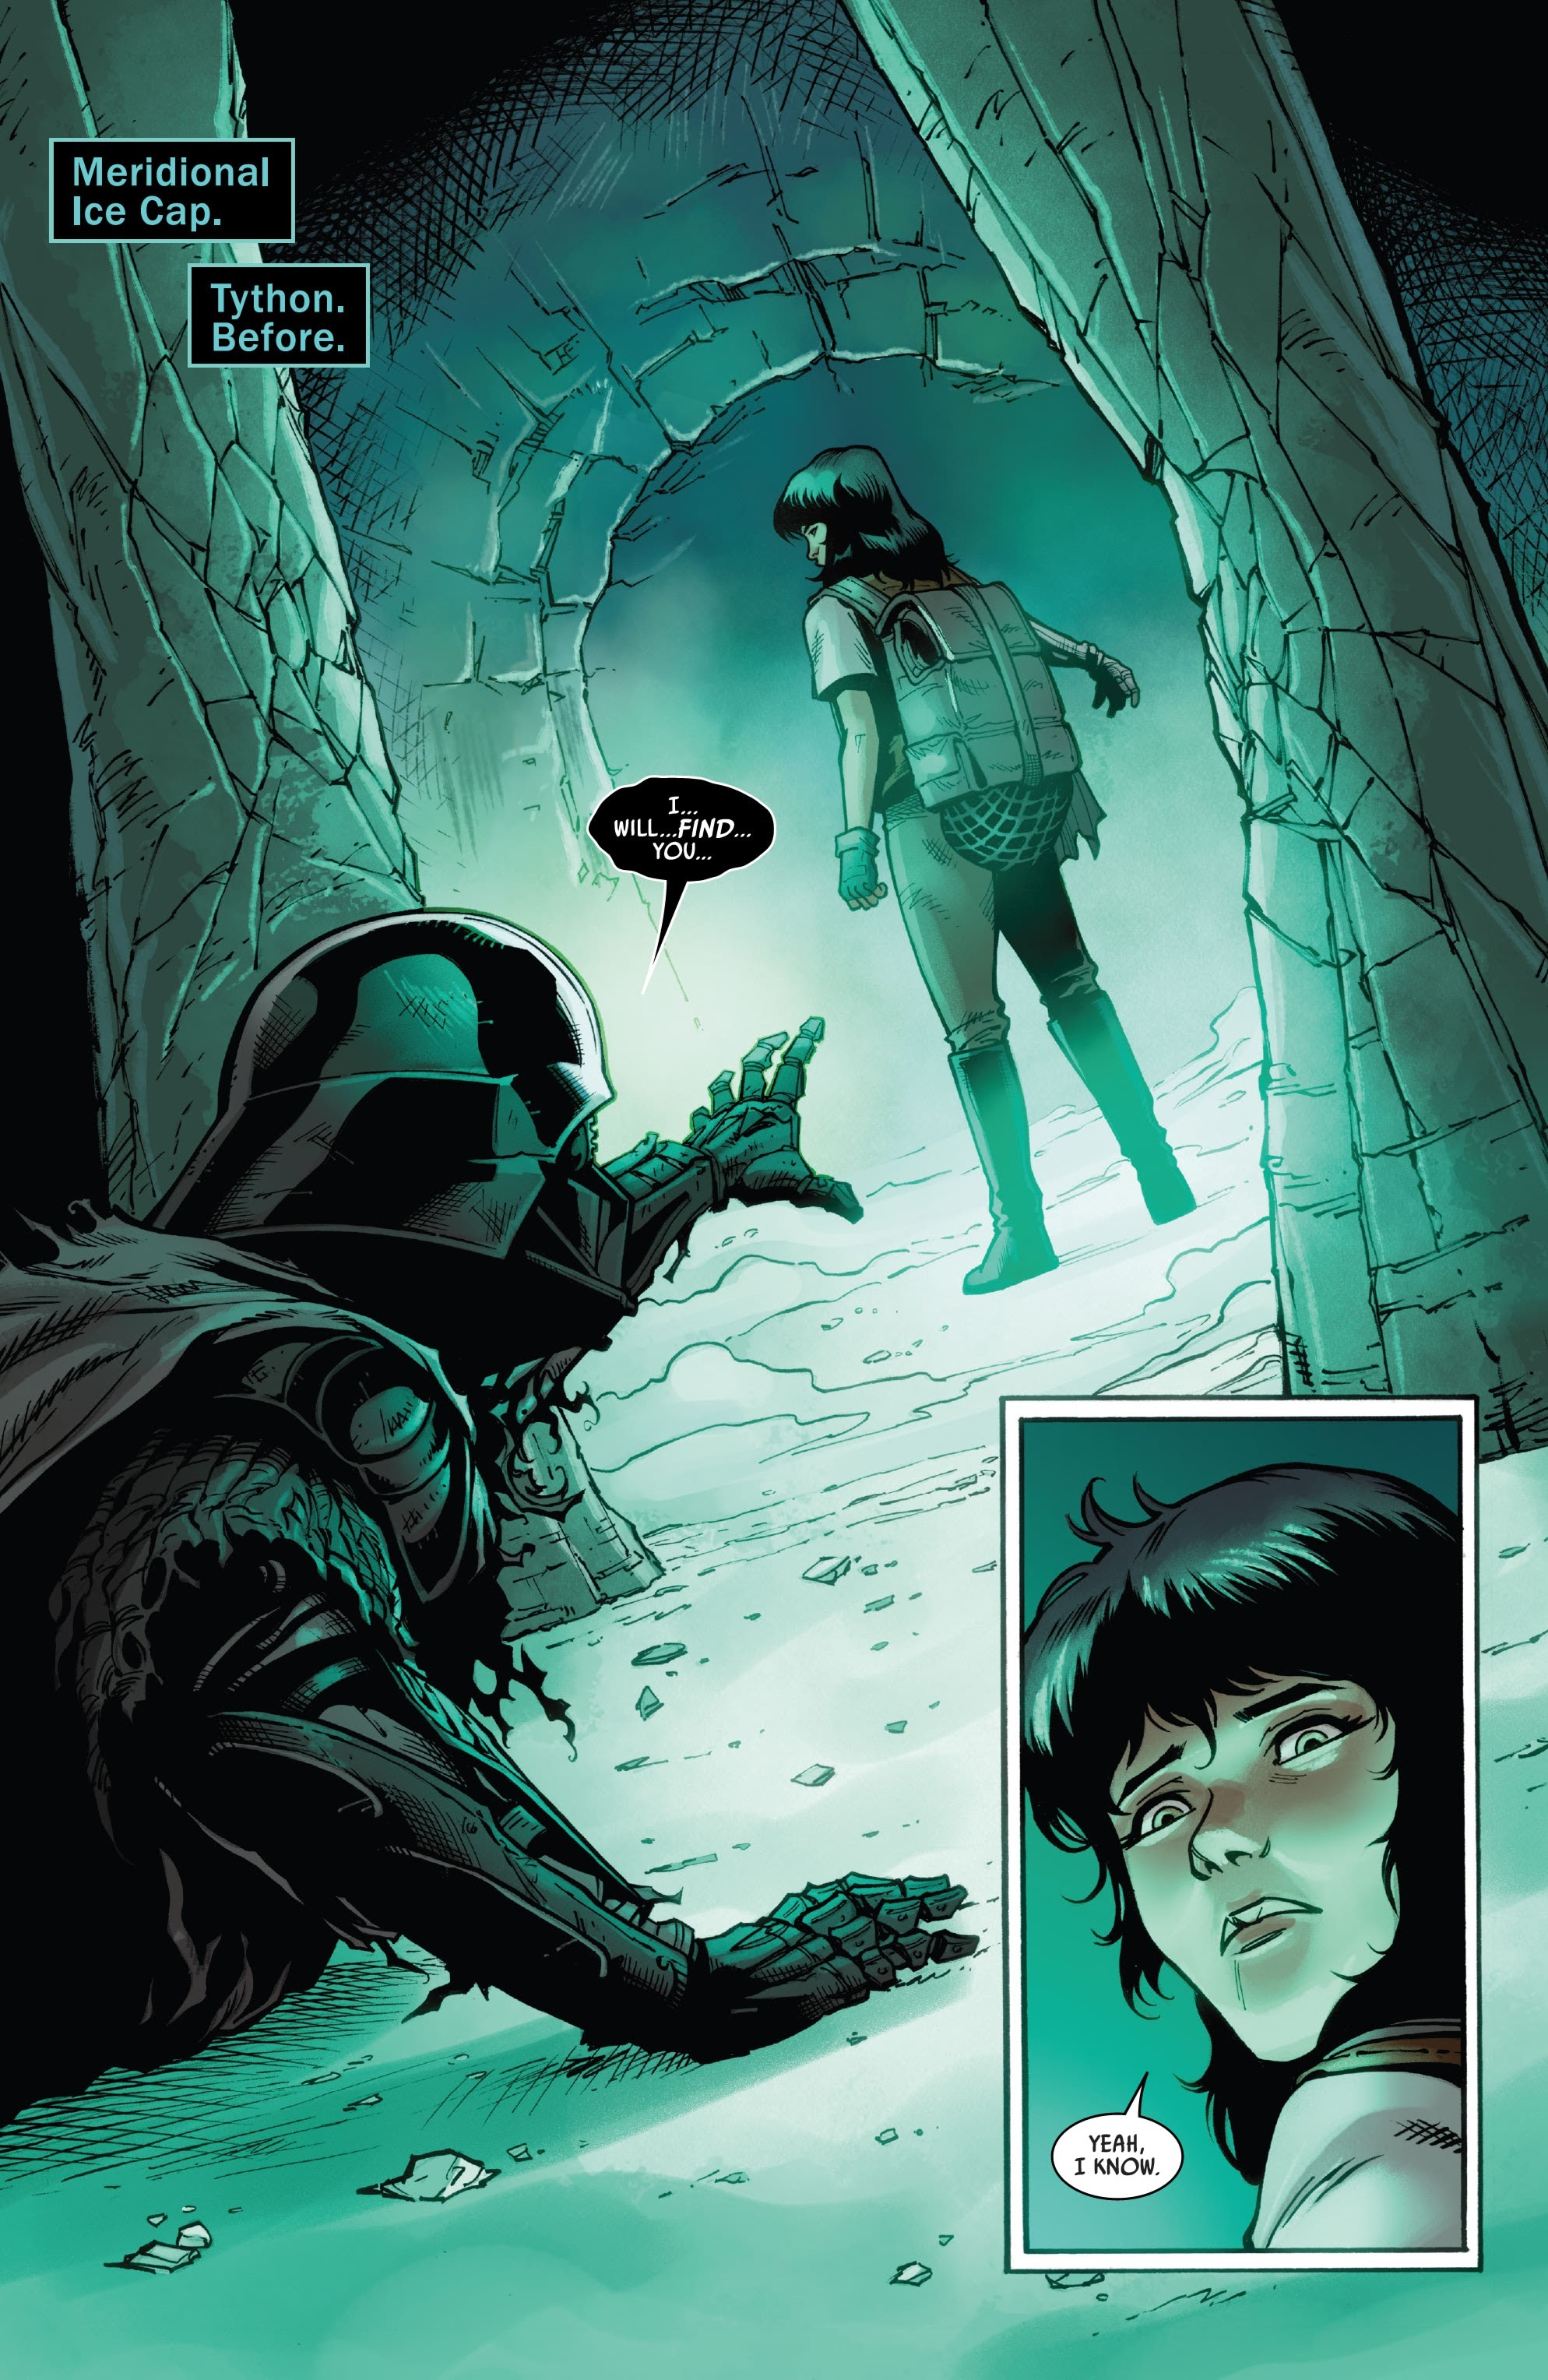
After a moment of silence, overwhelmed by his own guilt, Vader reacted with fury and hurled his lightsaber at Aphra. She evaded the blade and ordered BT-1 to fire on Vader's legs to force him back down. Much of Vader's already damaged armor was torn apart by the droid's barrage, including his legs, but the crawling Sith Lord used the Force to rip BT-1 apart, demonstrating to Aphra that the shrine would not suppress his powers as much as she had hoped. Unable to escape the confessional and with his cybernetics failing, Vader fell to the ground as Aphra spoke to him about regrets. Vader turned to Aphra and vowed she would never succeed in killing him. Aphra, however, had no such intentions and remained outside the confessional, avoiding Vader's limited range. Struck by a wave of regret when Aphra called him the "lost boy," Vader was hit by a cord fired by Aphra, who used it to hack into Vader's suit and contact a comms jockey on the Executor. Using Vader's voice, she intimidated the officer and ordered him to alter and delete numerous probe droid records, hoping to delay Vader's search for Echo Base by several weeks.
While Aphra was certain Vader would eventually find the rebels, she believed she had accomplished something significant and bid farewell to Vader, who promised he would find her again. Though still terrified of him and knowing he would never cease his pursuit, Aphra left Vader with the hope that he, too, would one day "do something good," declaring that, from a certain perspective, he had been the best thing to ever happen to her. Aphra escaped Tython aboard one of the TIE/rp Reaper attack landers with the remains of 0-0-0 and BT-1, both of whom would be rebuilt and abandoned by Aphra on the planet Birukay without Imperial detection. As Aphra fled, Vader broke free from the confessional, destroying it in a surge of rage. The Empire issued an arrest warrant for Aphra and attempted to conceal the damage she had inflicted on their search, but the chaos she created was destined to keep Vader from his son and the rebels long enough for the rebels—Tolvan, Korin, and Klam among them—to finalize their defenses and establish an escape plan.
Hoth
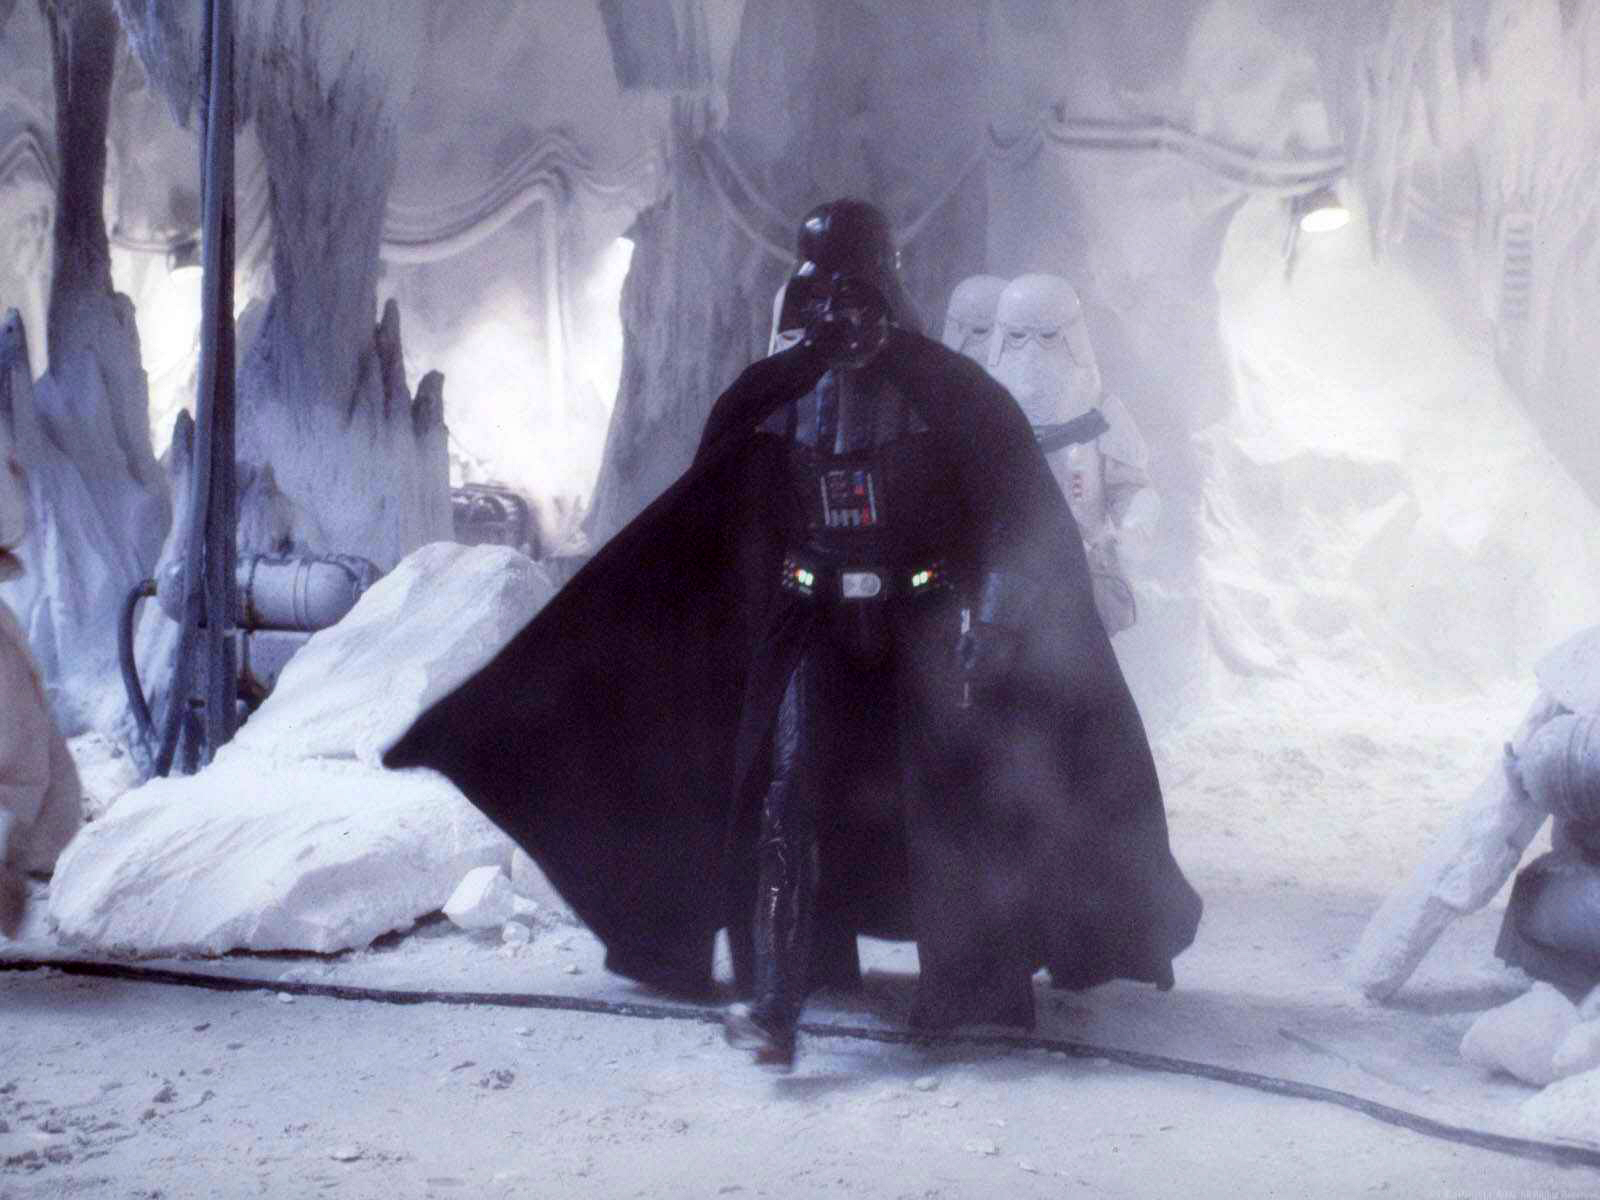
Later, while the Executor and the rest of Death Squadron were stationed in the Juris sector, the flagship received an incomplete transmission from probe droid XJ9-CS14, dispatched to the Hoth system. Despite Admiral Ozzel dismissing the information as unreliable, both Vader and Captain Firmus Piett concurred that they had located the Rebel base. Vader then commanded the fleet to proceed to the system. Upon exiting hyperspace near Hoth, Vader was informed by General Veers that orbital bombardment was impossible due to an energy shield protecting Echo Base. Vader deduced that the Alliance was aware of their arrival because Ozzel had brought the fleet out of hyperspace too close to the system. He ordered Veers to prepare his troops for a ground assault, then executed Ozzel for his incompetence, promoting Captain Piett to Admiral in his place, and directed him to position the fleet to prevent any Rebel ships from escaping the system.
As the Imperial ground forces, led by Veers, engaged the Alliance, Vader spearheaded an assault into the Rebel base, breaching their defenses. However, they discovered it was largely abandoned, as General Carlist Rieekan had preemptively ordered an evacuation. Vader entered the base and soon encountered a group of Rebels carrying their unconscious captain toward a hangar. They opened fire, and Vader deflected their shots before leaping and striking down a Rebel trooper named Beak. Another trooper, named Roja, threw a grenade at Vader, who used the Force to redirect it. The explosion incapacitated their sergeant, Hazram Namir, and Roja was killed shortly afterward. The last Rebel was the former Imperial governor of Haidoral Prime, Everi Chalis. She had been pursued by Imperial forces since her defection and assumed Vader was there for her. Vader only inquired about Luke's location, and when a trooper informed him that they had located the Millennium Falcon, he brushed her aside and proceeded toward his target.
Only the Millennium Falcon remained in the base's hangar, but the light freighter managed to escape before Vader could capture it. With the Alliance's forces on Hoth in full retreat and the various transports scattered throughout the galaxy, Vader and his troops had secured a significant victory for the Empire. Instead of pursuing the Rebel transports that had escaped, Vader redirected Death Squadron's efforts to capturing the Millennium Falcon, which had evaded Imperial forces in the Hoth asteroid belt due to its malfunctioning hyperdrive. Despite Piett's reservations, Vader ordered the fleet to pursue the ship into the asteroid field, instructing the Executor's crew to tow the freighter aboard and capture its passengers alive. Even though the asteroids caused extensive damage to the Star Destroyers, Vader commanded every ship to sweep the field until the Falcon was found.
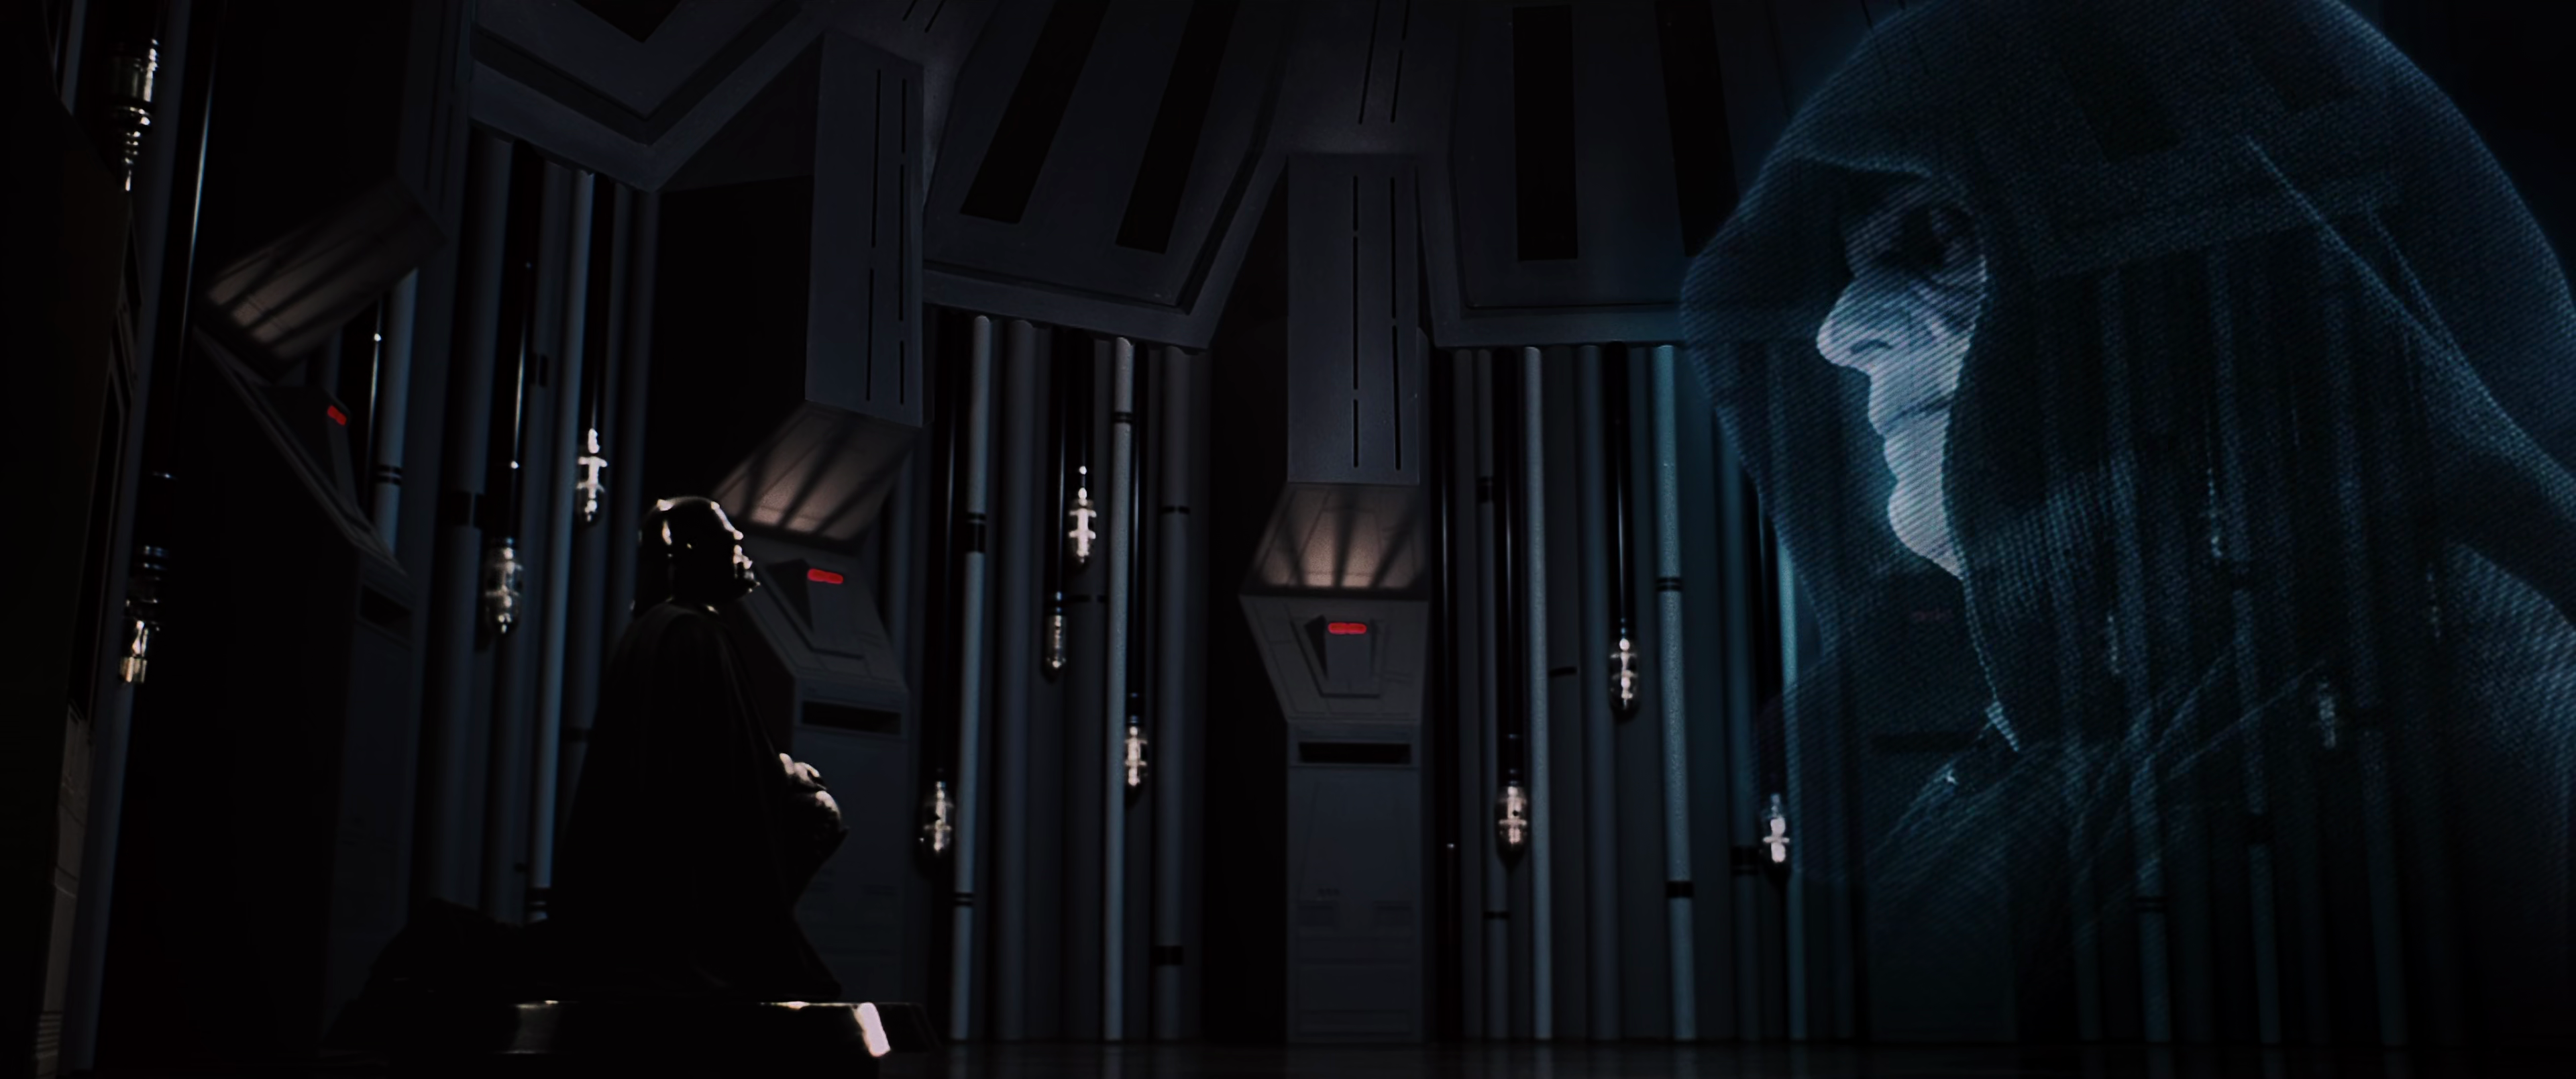
Piett then informed him that the Emperor wished to speak with him, and Vader had the Executor move out of the asteroid field to establish a clear transmission. Vader contacted his master; the Emperor revealed that he had sensed a new threat in the Force: Luke Skywalker, who he feared could destroy them if he became a Jedi. He also revealed that Luke was Anakin's son. Feigning surprise at the Emperor's revelation, Vader believed Luke could be turned to the dark side and become a powerful ally. Although the Emperor was skeptical, Vader assured him that Luke would either join them or die.
Determined to find his son before the Emperor, Vader summoned several bounty hunters—4-LOM, Bossk, Zuckuss, Dengar, IG-88, and Boba Fett—to the Executor, promising a substantial reward to the hunter who captured the Falcon's crew alive. As he briefed the hunters, Piett informed Vader that the Avenger was tracking the Falcon. Vader requested an update from the ship's commander, Captain Lorth Needa, who reported that he had lost the Falcon and accepted full responsibility. Vader accepted his apology with a fatal Force choke, then ordered Piett to alert all commands to the Falcon's disappearance.
Cloud City
As the Falcon traveled through realspace to repair its hyperdrive on Bespin, Fett tracked and predicted Solo's movements, and also contacted Vader, whose Executor reached Bespin before the freighter. Vader, along with a small strike team, departed the Executor for Cloud City, leaving the crew to wait in hiding. In the city, Vader contacted its Baron Administrator, Lando Calrissian, who was a friend of Solo, to negotiate a deal. Calrissian, eager to avoid Imperial scrutiny of his tibanna mining operation, agreed to help capture the ship in exchange for the Empire leaving his people and interests undisturbed.
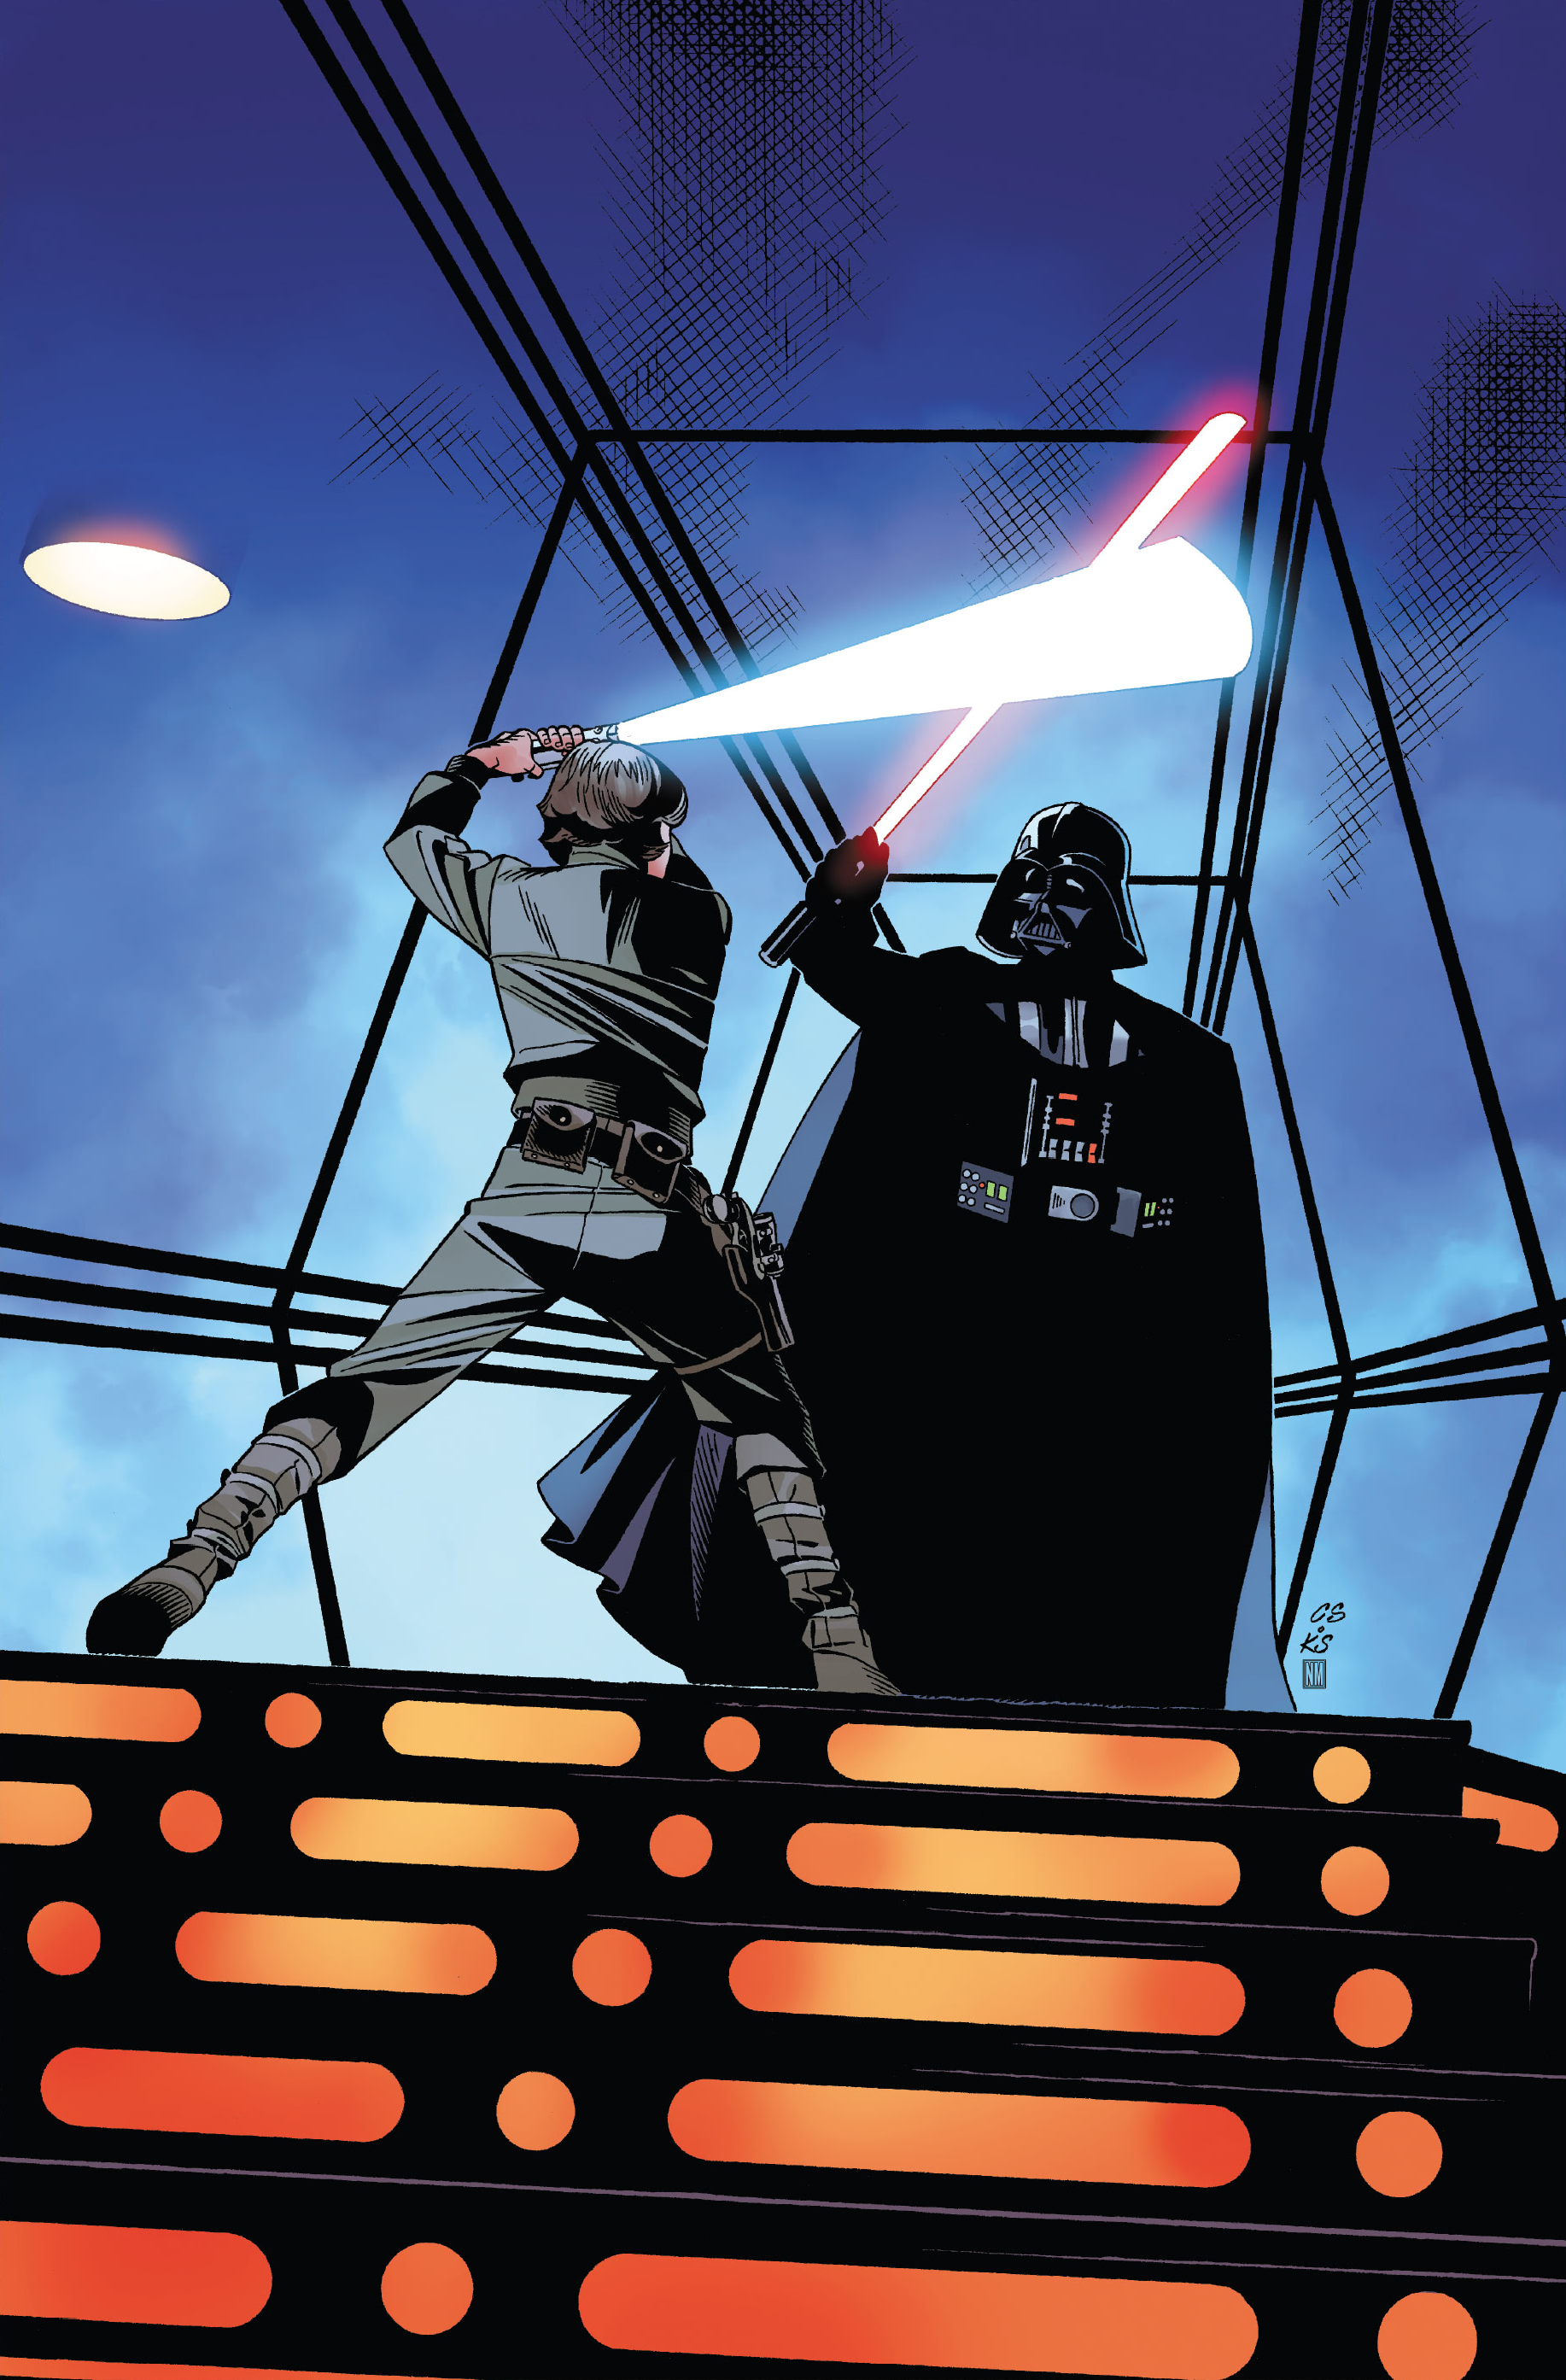
When the Falcon arrived, Luke was not among them, but Vader intended to use his friends to lure his son to Bespin. Escorted by Fett, Vader awaited Solo, Organa, Chewbacca, and Calrissian. While waiting in the Rinetta dining room, he was briefly interrupted by the Lepi smuggler Jaxxon T. Tumperakki, who quickly departed after a brief stare-down with the Dark Lord. A team of stormtroopers was dispatched to arrest Tumperakki. When the Rebels arrived, Vader had them surrounded by stormtroopers and imprisoned—and, in the case of Captain Solo, tortured. To Calrissian's dismay, Vader altered their agreement, allowing Fett to take Solo and collect Jabba's bounty on him. Afterward, he inspected one of the city's carbon-freezing chambers, deeming it adequate, if crude, to freeze Luke for his journey to the Emperor, but recognizing the risk of fatality, he had the facility tested on Captain Solo.
On his orders, Solo was frozen in carbonite. Since Solo survived, Vader handed him over to Fett and ordered Organa, Chewbacca, and C-3PO taken to his ship, while he awaited Luke at the facility. Once his son was separated from R2-D2 and made his way to the carbon-freezing chamber, Vader appeared before him, and the two dueled. Luke held his own for much of the duel, but he was ultimately outmatched by Vader. As they moved to a reactor shaft and a catwalk, Luke managed to cut Vader's shoulder, only for Vader to sever Luke's right hand, which, along with his old lightsaber, fell through the shaft.
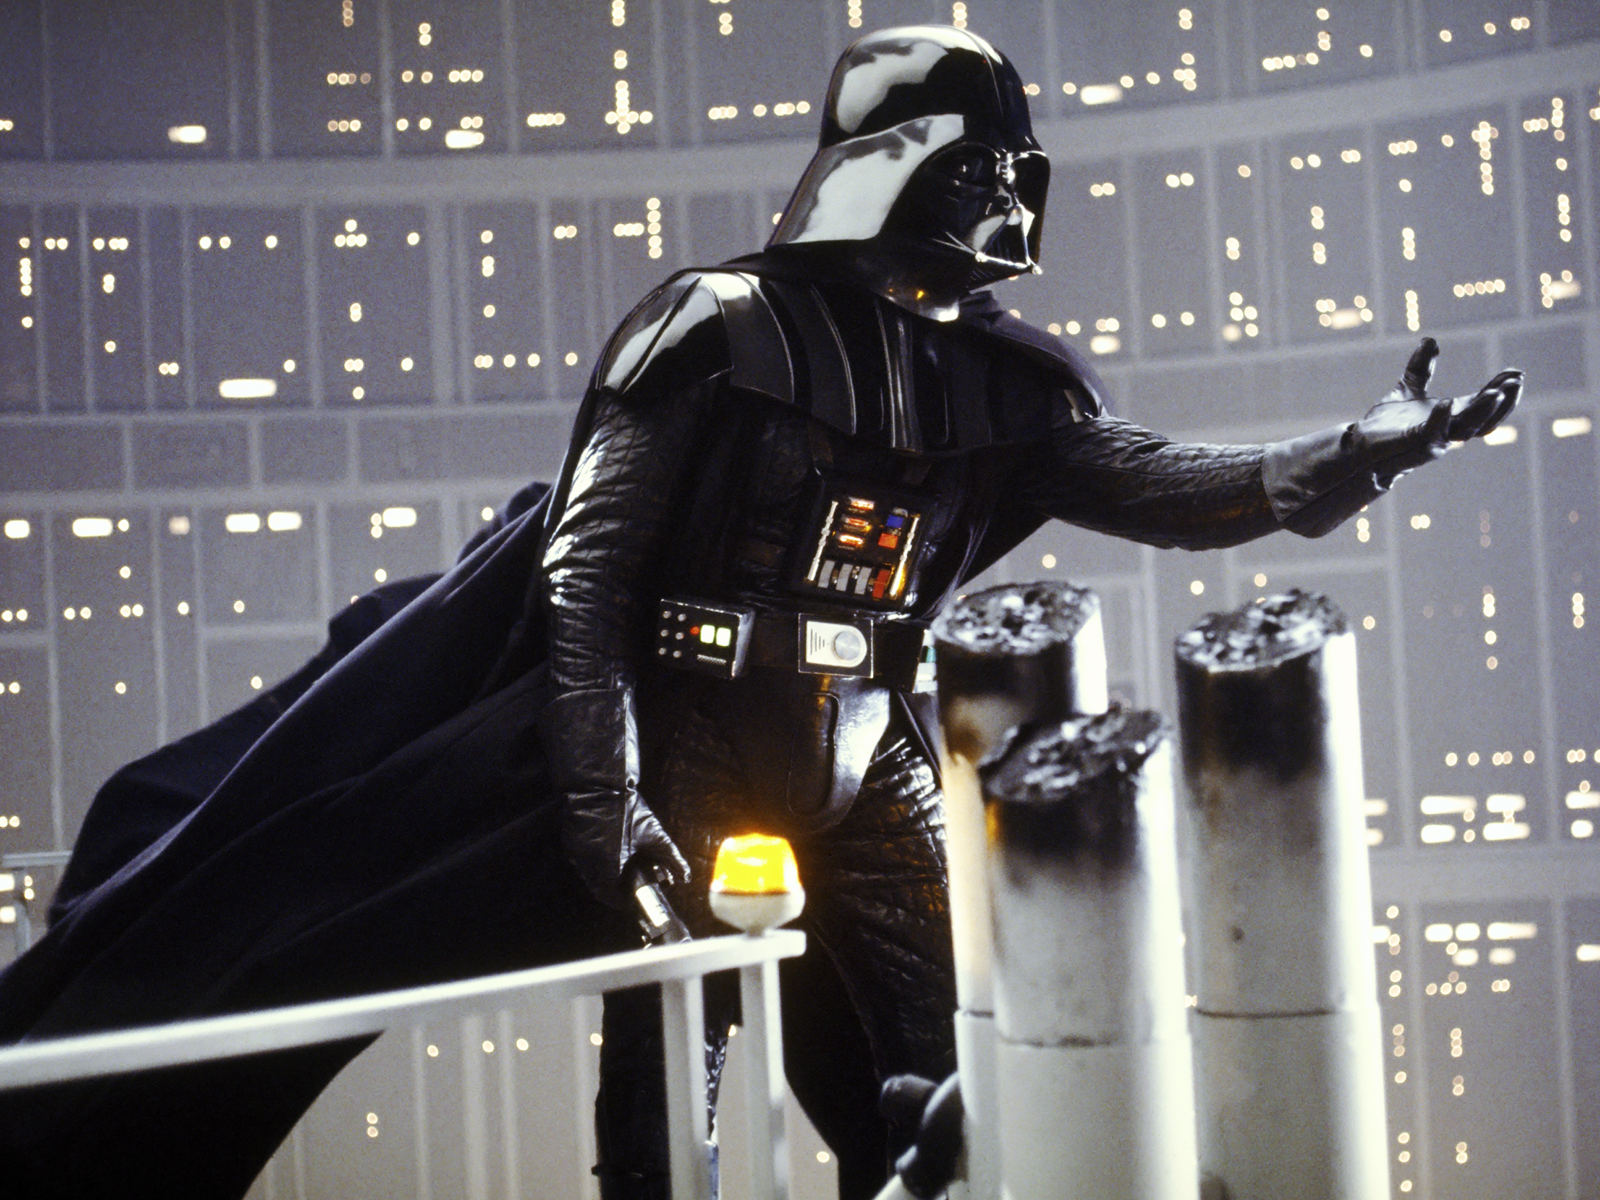
Vader beckoned Luke to join him on the dark side, but Luke vehemently refused. Vader then revealed that Kenobi had concealed the truth about his father, Anakin Skywalker, before declaring that he was, in fact, his father. Luke refused to believe the truth, but Vader persisted in tempting his weakened son, offering Luke the opportunity to overthrow the Emperor and "bring order to the galaxy," just as he attempted to do with Padmé on Mustafar. He even pleaded with his son to come with him. In Vader's vision, his son would have taken his hand, accepting him as his father. However, Skywalker chose to throw himself into the shaft, possibly facing death to avoid joining Vader.
While Luke was rescued by his friends aboard the Millennium Falcon, Vader returned to the Executor. As the freighter was unable to escape due to its deactivated hyperdrive, Vader and Piett waited for the Falcon to enter tractor-beam range. During the pursuit, Vader reached out to Luke through the Force, telling him it was his destiny to join him, calling him "son." Yet, the Falcon made the jump to hyperspace, thanks to R2-D2 reactivating the hyperdrive. Although Piett feared Vader would kill him for his failure, Vader merely turned away from the viewport, not in anger, but in sorrow.
Upon learning that Vader had permitted Fett to take the carbon-frozen Solo back to Jabba, ISB agent Andressa Divo was frustrated that the smuggler would not be brought to Imperial imprisonment, although she also decided she had no authority to question Vader's decisions.
Search for answers

Following the Falcon's escape, Vader embarked on a mission with several death troopers and a forensics droid named ZED-6-7 to uncover who had hidden his son from him. After modifying ZED's motivator, he took a shuttle to Tatooine. There, he met with Lieutenant Ardo Banch and his stormtroopers. Vader proceeded to the Lars Moisture Farm to find clues about Skywalker's early life. Vader also reflected on the attempted rescue of his mother and her funeral. Vader was informed by Lieutenant Banch of several transmissions but came under attack by gangsters who wanted his shuttle. Vader and his death troopers eliminated the gangsters before he took his shuttle to Coruscant and returned to Amidala's apartment. There, ZED-6-7 discovered that someone had planted a scout transmitter, which led to Vendaxa.
At some point, Vader also returned to the Imperial Palace and met with Palpatine, who ordered him to hunt down the remnants of the Rebel fleet while it was scattered, believing he may be the only officer in the Empire who could lead such a hunt despite it interrupting his quest to find his son. Unwilling to abandon that search, Vader instead proposed they give the mission to Tarkin's protégé, Ellian Zahra. Contacting her via hologram, Vader granted her permission to return to active duty to try and redeem herself for a past failure under Tarkin, making it clear she had no room to fail him and the Emperor. Shortly after the Falcon's escape and its vital role in the Battle at Rendezvous Point Delta-Three, Vader chastised Zahra for attempting to destroy the vessel during the engagement, stating that while Leia Organa would be an acceptable casualty, another passenger was of value to him. Vader further threatened consequence to Zahra should she report further of "partial success" before dismissing her.
Before journeying to Vendaxa, the Sith Lord traveled to a cantina and confronted a man who claimed to be his son Luke Skywalker. Vader quickly discerned that the man was a fraud, telling him that his identity was irrelevant. By the following day, no one would remember that he had ever existed. Vader then killed the impostor and declared to the onlookers that he would spare their lives, so they would bear witness to the man's deception. The Sith then proclaimed that anyone who claimed the name of Luke Skywalker would also bear the responsibility for the crimes he had committed against the Empire. After leaving the cantina, Vader rebuked the Imperial officer who had provided him with the information on the alleged Luke Skywalker, deeming his information worthless and a waste of his time.

When Luke Skywalker met Verla on Serelia, she recounted the events of Order 66 and the Imperial Inquisitors, describing Vader as the embodiment of pure evil. Shortly thereafter, she sensed through the Force that Vader was Luke's father, but Skywalker demonstrated that he was unlike his forebear. Before Vader continued his personal mission, he sensed through the Force, during a conversation with Zahra, that the trap he had set within a Jedi outpost on Tempes had been triggered. He ordered his pilot to set course for Tempes, but upon arrival, he found only the spirit of the Grand Inquisitor, who had recently been defeated by Luke Skywalker. When the Grand Inquisitor inquired if he would ever be released from Vader's service, the Sith Lord refused, stating that the Inquisitor was merely a tool. Vader then abandoned his cursed servant, who was slowly consumed by the ghostly flames surrounding his body.
Upon arriving on Vendaxa, Vader was confronted by "Padmé Amidala." This Amidala, revealed to be former Naboo Royal Handmaiden Sabé, was briefly choked by Vader before they were attacked by several Vendaxan land squids. Working together, they eliminated the squids, allowing Sabé to provide her fallen soldiers with a proper burial. Sabé also revealed her true intentions: to investigate the death of her former queen. Vader agreed to aid her in her mission, provided she obeyed his commands.
Guided by Sabé, Vader returned to Naboo to retrieve security recordings stolen from Amidala's quarters on Coruscant. Upon entering the Naberri Lake Retreat, they were greeted by Gregar Typho and Tonra, who agreed to assist them in recovering the stolen recordings. Taking a submarine, the four of them departed for the recordings' location, while Sabé expressed regret for her inability to save either her queen or Anakin Skywalker's mother. After surviving an attack by a colo claw fish, they reached their destination and located the recordings, which depicted Sabé forming the Amidalans and vowing to find and destroy their queen's murderers. She then accused Vader of murdering Amidala himself, to which Vader admitted before attacking the Amidalans.

However, a sudden assault by a sando aqua monster disrupted the conflict. The creature's attack on Vader gave the Amidalans an opportunity to flee. After Vader and his death troopers dispatched the monster, they tracked the Amidalans to Naboo's jungles, where Ric Olié was leading them. In the ensuing battle at Padmé's tomb, Vader and his death troopers decimated the Amidalans and subdued Olié, before advancing towards their target: the Tomb of Padmé Amidala. Before they could breach the tomb, Sabé and the surviving handmaidens of Amidala, including Eirtaé, Rabé Tonsort, Saché, and Dormé, surrounded them. Despite their valiant efforts, Vader easily defeated the handmaidens and opened the tomb's entrance. The handmaidens were aware that victory against the Sith Lord was impossible. Their true aim was for Eirtaé to use her staff to interface with Vader's armor. This allowed Eirtaé to acquire an incomplete set of code, which the handmaidens hoped would eventually lead to the Executor's self-destruct codes.
Meanwhile, Vader, disregarding Sabé's objections and unaware of Eirtaé's success, entered the tomb and instructed ZED-6-7 to scan Amidala's sarcophagus. The droid discovered a med implant and traced it back to the asteroid field of Polis Massa. Upon arriving at the asteroid field, they entered the Polis Massa Base, where they found data revealing that Obi-Wan Kenobi had transported Amidala to the base in an attempt to save her life. However, the Amidalans launched another attack on Vader and his forces, but he defeated them for good. Vader, accompanied by ZED-6-7, entered the base's maternity ward and had the droid access the memory bank of a damaged Chroon-Tan B-Machine. He then watched a recording of Amidala's final conversation with Kenobi. When ZED-6-7 suggested that Kenobi must have been significant to her, Vader destroyed the droid instantly. The recording concluded with Amidala expressing her belief that there was still good within Vader, leaving the Sith to contemplate his wife's last words.
Test on Mustafar

After learning about Vader's personal quest, the Emperor summoned his apprentice to the Imperial Palace, sensing that he was consumed by grief rather than hatred. Intent on reinforcing the dark side within him, Sidious began to assault him with Force lightning. Vader retaliated against his master, but he was once again overpowered by two Royal Guards led by Mas Amedda. Though Vader managed to choke all three of them using the Force, the Emperor then choked Vader in turn, mocking the Jedi title of "Chosen One" before commanding him to erase his past and ravaging his body, leaving only one of his hands unharmed. The Emperor then transported his apprentice to Mustafar, abandoning him on the very shore where Kenobi had left him after their duel. The Emperor instructed Vader to rebuild himself without relying on the Force before departing with Mas Amedda.
Remembering both Kenobi's abandonment on that same shore and his subsequent defeat of the Jedi Master on the Death Star, then replacing Kenobi with Sidious in the latter memory, Vader resolved to crawl from the shore towards the facility where he had murdered the Separatist leaders years prior, recalling the time his master had sent him to the base to eliminate the Separatist leadership. Vowing to inflict suffering upon the Emperor upon his recovery and noticing a figure laughing at him in the distance, he entered the base. After spotting Nute Gunray's corpse and reflecting on his actions against the Separatists and Jedi younglings, he discovered several mouse droids, which he reprogrammed to attach old battle droid limbs to his body. However, he was then confronted by the figure he had seen: Ochi of Bestoon, a Sith assassin dispatched by the Emperor to evaluate his apprentice. Using his new limbs, Vader engaged the assassin in combat and triumphed. He demanded to know his master's grand scheme before a distant voice interrupted him. Vader followed the voice into a cave, where Ochi trapped him after stealing his lightsaber.
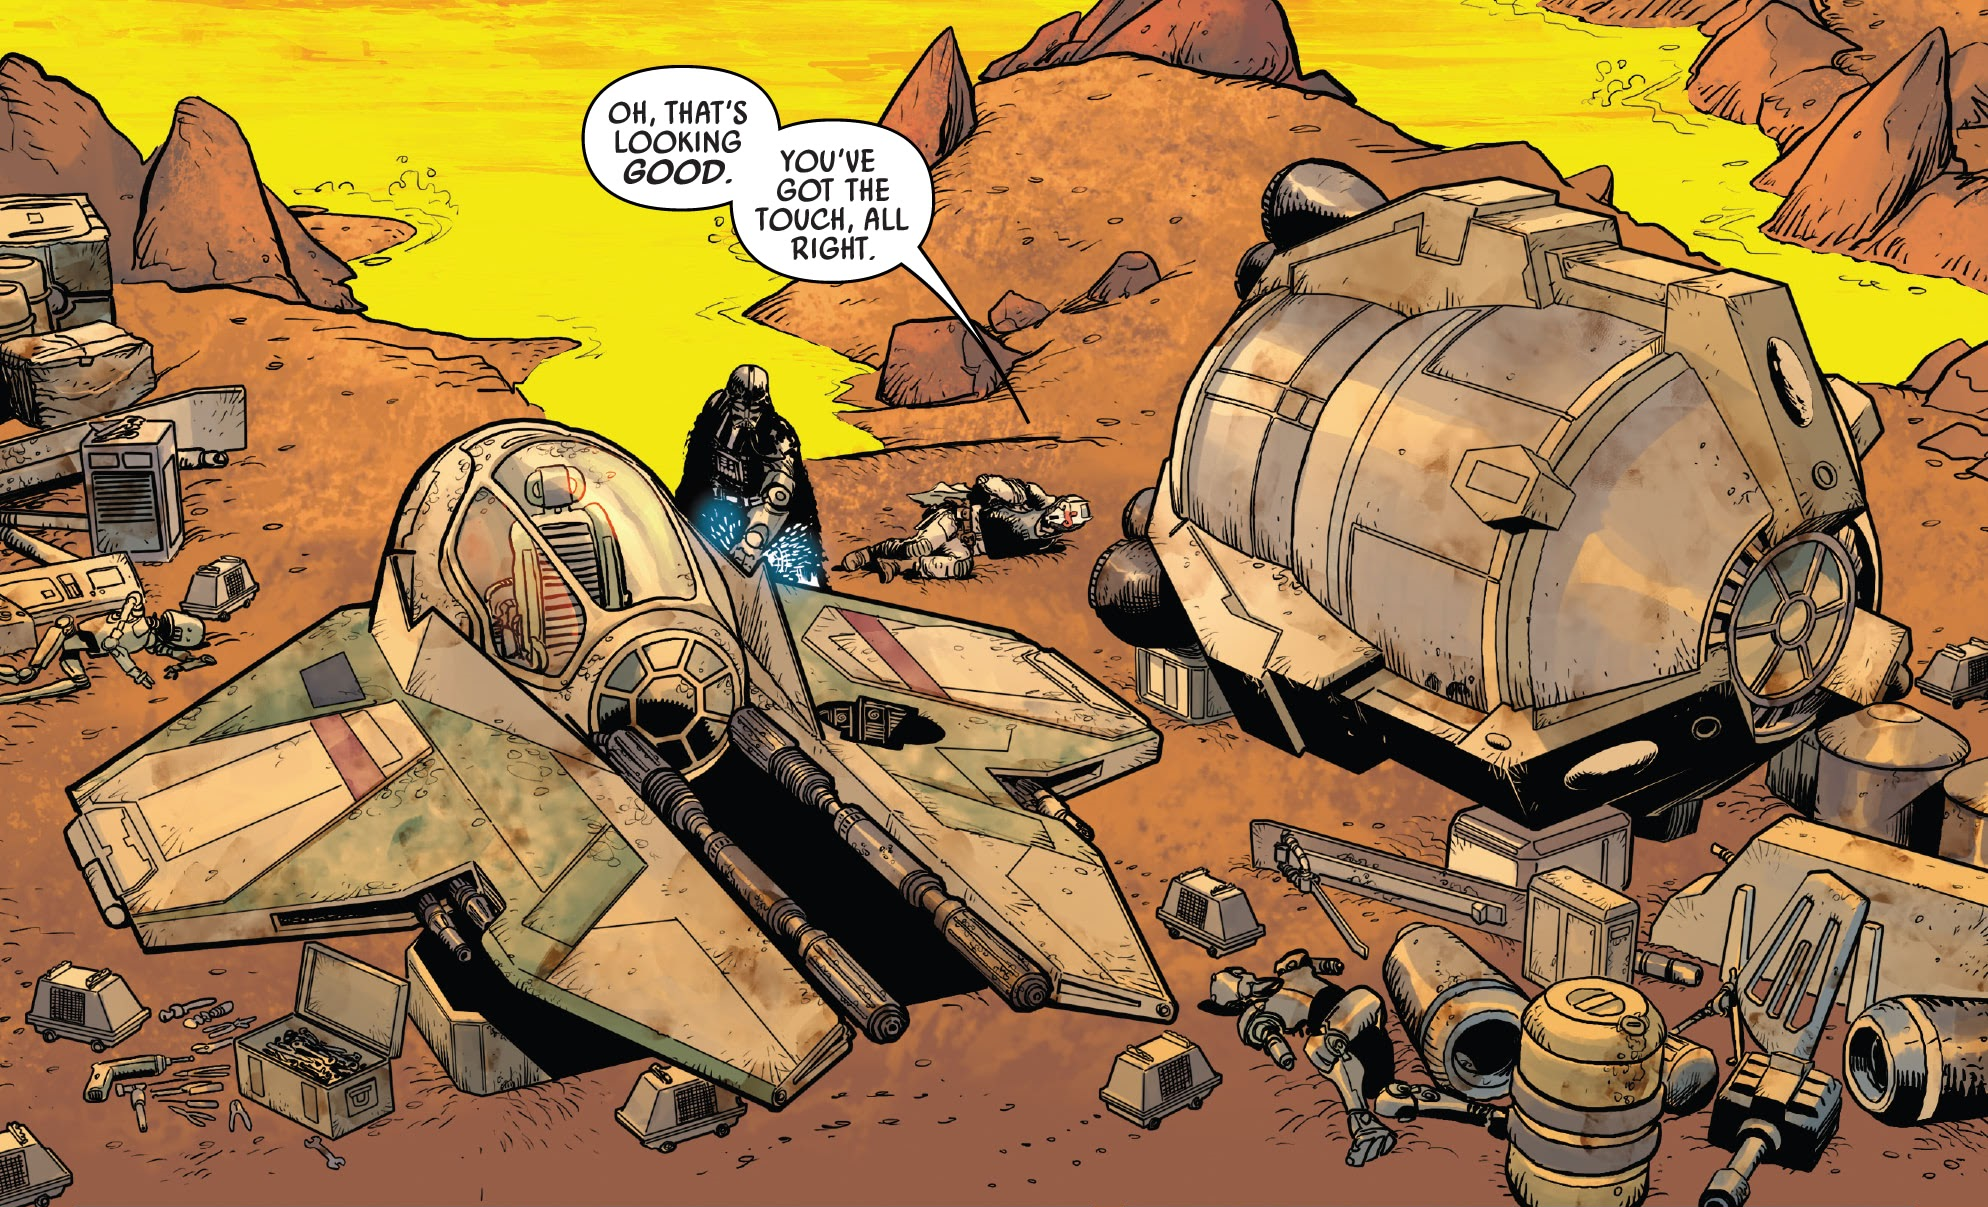
As Vader navigated the cave, the voice tormented him with riddles concerning his desires and true identity. Eventually, Vader located the source of the voice: an ancient entity known as the Eye of Webbish Bog. Vader demanded answers to his questions about his master. The Eye granted him a Sith wayfinder. Upon exiting the cave, Vader discovered his old Jedi interceptor, where Ochi and his Droid Crush Pirates awaited him.
While battling the pirates, Vader cornered Ochi, knocking him unconscious and retrieving his lightsaber. He then eliminated the pirates and used their components to repair the damaged interceptor. With the ship repaired, Vader used the captured Ochi to activate the wayfinder, revealing the path to a planet named Exegol. With Ochi imprisoned in a capsule beneath the ship, Vader piloted the interceptor away from Mustafar and employed a hyperspace transport ring to travel to his next destination.
Finding Exegol
After exiting hyperspace, Vader and Ochi found themselves in the Red Honeycomb Zone as the Sith attempted to pinpoint Exegol's location. However, they were intercepted by a colossal, tentacled space-faring creature related to the Summa-verminoth. Before Vader could react, a fleet of Star Destroyers led by Sly Moore and Admiral Corleque attacked him. Vader engaged the fleet's TIE fighters until he conceived a plan. Altering his course, he flew towards the massive creature, allowing the TIE fighters to follow until the creature's tentacles crushed them. As Vader flew past the creature, Moore warned him that it would shatter his mind. Ignoring the Umbaran's warning, he persisted until both he and Ochi were subjected to mental attacks. Vader experienced a series of traumatic visions from his past, culminating in a vision of his son killing him in battle and usurping his position alongside the Emperor.
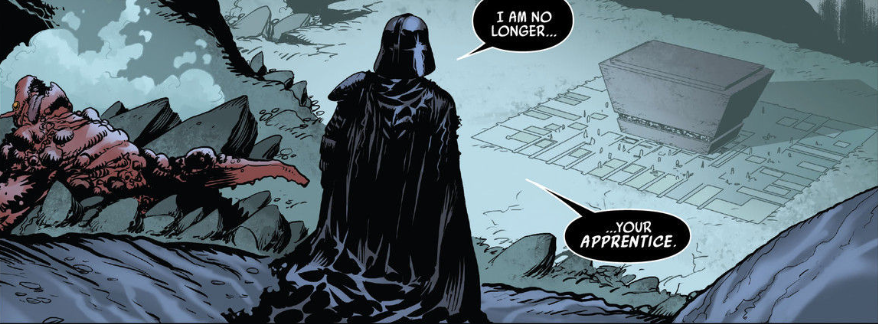
After escaping the Red Nebula, Vader finally arrived at the planet Exegol, where he and Ochi crash-landed. Upon emerging from the wreckage, they were confronted by the creature once more. This time, however, Vader did not flee. Defying his master's command, he reached out with the dark side and used it to subdue the creature, allowing him and Ochi to proceed towards the Emperor's Sith Citadel. Standing atop the creature, Vader challenged his master to reveal himself. Once the Emperor appeared, Vader rode the creature into battle. In response, the Emperor summoned two crustaceous monsters to attack the creature, but they were swiftly crushed. When Vader declared that he was no longer his apprentice, the Emperor merely scoffed and used the Force himself, twisting and contorting the creature until it disintegrated. Forced to return to the ground, Vader followed the Emperor into the Citadel, where his deepest secrets awaited.
Inside, Vader was greeted by a collection of horrors created by his master. All around him were large vats containing bioengineered organisms strong in the dark side of the Force. Accompanying these organisms were large Sith statues, numerous Tanker guards, Sith cultists, and a jar containing a severed hand. Vader was quickly attacked by the guards and cultists, but he defeated them all before venturing deeper into the Citadel. Ochi caught up with Vader and attempted to dissuade him, but the Sith continued until he reached a level beneath the Citadel. This level was lined with hundreds of Star Destroyers, each equipped with a planet-destroying cannon. Undeterred, Vader proceeded into a massive chamber, which housed a dome filled with red light and piercing screams. Despite Ochi's continued attempts to dissuade him, the Sith entered the dome and stepped into the burning light.
Within the dome was a subterranean mountain of Kyber crystal, bled red by the Sith cultists who subjected it to constant pain. The Emperor explained that he did this to power the cannons of his fleet. When the crystal was cut, it screamed in pain again, emitting a wave of power that knocked off Ochi's helmet and burned his unprotected eyes. Vader also suffered as his master mocked him for attempting to claim his power. The Emperor told his apprentice that choosing to walk with him meant never escaping his pain, but it was the only way to share his power. The Emperor then asked his apprentice if he had chosen. Darth Vader replied that Sidious was his master. Although he experienced a vision in which Luke Skywalker told him that he would one day kill the Emperor, Vader had witnessed the power Sidious commanded on Exegol, so he made the full decision to return to his master's service, departing Exegol with Sidious, Ochi, Mas Amedda, and Sly Moore.
Hunting Luke Skywalker
Upon returning to Coruscant, Vader was taken to the same facility where he had been transformed to undergo repairs. A medical droid instructed him to prepare for shutdown, but Vader refused, choosing to remain conscious throughout the procedure. Once fully repaired, Vader inquired about the Emperor's will, to which his master responded that he should decide for himself. Vader then summoned Ochi, who had just received a cybernetic visor to restore his sight. Accompanied by Ochi, Vader departed Coruscant in a Lambda-class shuttle, resolving to hunt down and kill his son, believing that the power he had witnessed on Exegol left no room for him as an apprentice. However, Vader secretly still wished that Skywalker had joined him on Cloud City. Traveling to a remote outpost in the Outer Rim, Vader and Ochi met with a Hutt named Bokku. When Ochi inquired about Han Solo's location, Bokku reported that he had been stolen, assuring the assassin that Jabba would retrieve him. However, Ochi then offered to recover Solo himself in exchange for power. Bokku asked Ochi if he served the Emperor, to which Ochi replied that they both now served Vader.
Vader was then attacked by a group of Gamorrean guards, whom the Sith Lord easily dispatched. Bokku quickly apologized for failing to recognize Vader and reiterated that he did not know Solo's whereabouts. From this, Ochi deduced that Jabba had likely hired someone to find Solo and asked Bokku for their identity. Bokku expressed fear at the idea of betraying Jabba until Ochi probed Bokku's ambition to take over the Grand Hutt Council. Bokku then revealed that he had been tracking the hunters who had taken Jabba's bounty and that one crew of droids had gone in a different direction from the others. Bokku told Vader that the droids were deep in the heart of Hutt Space and that it would be safer to travel in Bokku's barge to avoid alarming them. En route to the droids' location, Bokku inquired about his compensation for his assistance, to which Vader assured him that he would be rewarded. Piloted by Bokku's nav droid Gak-Sixtoo, they arrived at Zee-Nine City Seven while Vader and Ochi boarded their Lambda shuttle. But as they approached the city, their ship's engines failed, causing them to crash.
After escaping the wreckage, Vader and Ochi were confronted by the Droid Crush Pirates, who expressed surprise at Ochi's service to Vader. When Ochi claimed he had chosen the winning side, the droid captain told him he had chosen poorly as IG-88 revealed himself and opened fire on both Ochi and Vader. As Vader deflected IG-88's attacks, the droid reminded his target that he had sustained damage while IG-88 himself had not. Vader informed the droid that he required information from him and ordered him to surrender his weapons, to which IG-88 replied that Vader could only access his information by downloading it from his severed head. Vader moved to attack IG-88, but the droid then produced a remote and used it to breach Vader's armor, seizing control of the Sith Lord. As IG-88 forced Vader to hold his own saber to his head, Vader demanded to know who had provided the droid with the code to bypass his armor.
IG-88 responded that the terms of his employment prevented him from disclosing that information. While the droid was distracted, Vader used the Force to seize the device from him, turning it against his attacker. Vader then forced IG-88 to hold his own blaster to his head and pull the trigger, incapacitating him. Vader resumed his fight against the pirates until Bokku's barge fired upon him. Vader blocked the blasts with his lightsaber and redirected the energy at the pirates, knocking them back along with Ochi. As the pirates retreated, Vader took IG-88's hand and used it to access a terminal he had been using earlier. Upon activating the terminal, Vader and Ochi discovered various dead ends that the droid had been pursuing, as well as the symbol of crime syndicate Crimson Dawn. After acquiring IG-88's information, Vader returned to Bokku's barge and confronted him over his betrayal. When Vader asked the Hutt what he had learned, Bokku conceded that the Sith Lord could not be defeated.
Investigating Crimson Dawn's involvement, Vader dispatched Ochi to Arkanis to gather information on the syndicate. As Ochi prepared to sneak into a bar, Vader instructed him to enter through the front door instead. After a brief altercation, Ochi obtained an invitation issued by the syndicate and presented it to Vader. He and Vader then returned to Bokku's lair to interrogate him about the invitation. The Hutt revealed that Crimson Dawn was holding an auction for Solo and that Jabba intended to repurchase him. However, Vader informed Bokku that he would bid against Jabba and lose. This would humiliate Jabba and eliminate his fear of Bokku, allowing Bokku to betray him. Once Bokku agreed, Vader and Ochi returned to the Lambda-class shuttle and prepared for takeoff. But before they could leave the planet, Vader grabbed Ochi and dropped him from the ship. Once Ochi landed, Vader ordered him to discover who else Bokku was working for. Later that night, Vader observed as a group of assassins offered Ochi a place in Crimson Dawn. However, Ochi rejected their offer and eliminated them.
Vader then approached Ochi, who quickly realized that Vader already knew that Bokku was working with Crimson Dawn. He had only wanted to test Ochi's loyalty. As more assassins surrounded them, Ochi reaffirmed that he would always obey Vader as long as he remained the most powerful. Vader assured Ochi that he always would be as the two of them set about eliminating the assassins. After discovering that Sly Moore had hired IG-88, Vader and Ochi returned to Coruscant to find her, her court and the rebuilt droid bounty hunter in Administrative Temple Garden 313A. As Vader struck down IG-88 once more, Moore and her court fled into a nearby temple. As they attempted to escape into the streets, Vader used the Force to seal the door in front of them. However, Moore then produced another remote and used it to freeze Vader in his own armor, allowing her and her court to open fire on the Sith Lord. But this did not last as Vader overcame the Umbaran's control and slaughtered her entire court. Moore attempted once more to control Vader, but Ochi revealed that Vader had fixed that vulnerability in his armor. Vader then knocked the remote out of Moore's hand and told her that she could not bend his will.
Moore responded that she only wanted to see if Vader was still plagued by fear, to which Vader said that the only fear in that place was hers. Moore conceded that he could kill her effortlessly, but also pointed out that doing so would do nothing to save him from Luke Skywalker. When Vader asked the Umbaran what she knew of Skywalker, she stated that the key to finding him, his friend Han Solo, was currently being sold by Crimson Dawn. She also pointed out that if she secured Solo for Vader, then the Emperor would not learn of his plans. When Ochi asked Moore why Vader should trust her, the Umbaran answered that she would be delighted to reunite Vader with the only person who could kill him, to which Vader agreed.
Shortly after, Ochi and Sly Moore departed with a few Imperial officers to attend the Auction for Han Solo. However, this was simply a ploy to humiliate the Umbaran in the Emperor's eyes. Amidst the bidding, Vader himself arrived at the auction on Jekara along with a pair of death troopers. After cutting down a few Crimson Dawn guards, Vader infiltrated the Vermillion just as Crimson Dawn's leader, Lady Qi'ra sold Solo to Jabba the Hutt. Vader then declared that Solo belonged to him. Vader's presence sent Doctor Aphra, who had infiltrated the auction on behalf of the Tagge Corporation with the smuggler Sana Starros, falling to the ground in a brief panic attack, but she managed to escape the room with Starros before the preoccupied Sith Lord could spot her. After his attention was briefly diverted to the sounds of Aphra's panicked fall, he turned his attention back to his mission at hand.
As Vader ordered the death troopers to transport Solo to his flagship, Jabba pointed out that he had already claimed the smuggler. Moore attempted to explain the situation, but Vader chastised her for her failure and warned her that the Emperor would hear of it. The Sith Lord then told Jabba that he and everyone else within the Empire belonged to the Emperor, to which Jabba feigned amusement. Vader went on to point out that the Empire could easily replace the Hutts, while also pointing out the fear he could sense in Jabba and the rest of the attending Hutts. When Bokku angrily interrupted, Vader asked Jabba who he was, to which Jabba said that he was no one. Jabba then finally conceded and allowed Solo to be taken with his compliments and regards to the Emperor. As Vader approached Solo, Lady Qi'ra informed him that she would not get in his way, but also still required the one million credits she was promised. When Vader told her she was owed nothing, Qi'ra inquired if the Empire was too poor or cheap to pay its debts. Out of patience, Vader drew out his lightsaber, to which Qi'ra bared her own pair of blades.
As they dueled, Vader recognized that she posed no threat to him, yet he found her level of skill, which included knowledge of the Teräs Käsi fighting form, notable, and recognized Qi'ra's fighting style as that of his master's. When Vader asked her who had trained her, Qi'ra only replied that she had been trained by someone who knew quite a bit about both Vader and his master; in truth, she had been trained by Maul as part of his revenge plot against the Sith. Vader then pointed out that she did not have the Force and warned that her skill would not save her. After a brief struggle, Vader pushed Qi'ra back with the Force, knocking her into Solo. Stating she would pay the price for her foolishness, he raised his lightsaber and prepared to strike her down. But he was suddenly distracted the arrival of Luke Skywalker, whose presence he sensed through the Force.
While Qi'ra retreated, Vader was informed by General Romodi that Piett had established a secure channel to Skywalker's starfighter. Accessing the channel, Vader told Skywalker he had Solo in his possession. He then warned his son that if he did not come to him, then he would cut his friend in half. Skywalker refused however, telling Vader to come to him. Vader conceded to this, ordering Romodi to bring Solo aboard his Star Destroyer and to prepare his fighter.
After boarding his TIE Advanced, Vader took off in pursuit of his son. During the chase, Skywalker used his X-wing to kick up a wave of water, which instantly froze and collided with Vader's fighter. Though Vader crashed, he was able to lift his ship out of the water with the Force and resume his pursuit. After freeing his X-wing from a group of pirates, Vader fired at Skywalker, damaging one of his ship's stabilizers and causing him to crash back down onto the planet below. As Vader closed in on Skywalker, he was contacted by Sly Moore. When Vader stated that he did not require her assistance, Moore informed him that she was not helping him. Vader was then attacked by the Droid Crush Pirates, who landed on his ship and began to tear it apart.

After causing some damage to the Sith's fighter, the pirates fell onto Skywalker's X-wing and quickly repaired it for him, allowing him to take off from the planet. As Vader continued his chase while fending off the pirates, he was informed by Ochi that the Hutts were going after the Imperial shuttle transporting Solo. Vader was then contacted by Admiral Piett, who informed him of the Hutts' attack on the Executor. However, Vader chastised Piett for disturbing him, claiming that the activities of the Hutts were irrelevant to him. He then warned Piett that if Solo was not aboard his flagship by the time he returned, he would require an explanation in person. Later in the fight, Piett contacted Vader again and told him that he had appraised the Emperor of the situation. Since the Emperor considered the Empire's arrangement with the Hutts to be valuable, he wished for it to be preserved by having Vader eliminate the Grand Hutt Council. Vader conceded to the Emperor's wishes and abandoned his pursuit of Skywalker, reminding his son that he was no Jedi.
Though the boy then claimed that the next time they met, he would be. Vader then boarded the Hutt Council's ship and summarily slaughtered them all, including Bokku. Before his death, Bokku revealed his allegiance to Crimson Dawn and had Gak-Sixtoo blow up their own ship in an attempt to kill Vader, which the Sith survived. With the Hutt Council eliminated, the Hutts ceased their attack on the Executor while Fett reclaimed Solo from the Empire and delivered him to Jabba on Tatooine. Shortly after, Vader was informed by Lieutenant Jyala Haydenn that Beilert Valance had infiltrated the Executor. He then found Valance trying to escape on a ship and used the Force to pull him from space, rendering him unconscious and taking him prisoner.
Killing the Dawn
Hunting the new menace
With the Hutts dealt with, Vader returned to the Executor to confront Sly Moore, who had been captured by Ochi during the battle for trying to help in Skywalker's escape. When Moore revealed that the Emperor had wanted Skywalker alive, Vader revealed that the boy had fled from him, declaring that he was not who the Emperor believed he could be. When Moore pointed out that Skywalker was still free and could still fight, the Sith Lord choked her and stated that his hope would not be enough. Vader was then contacted by Darth Sidious, prompting him to release the Umbaran and kneel before him. After restating his loyalty to his master, Vader was instructed by Sidious to hunt down and eliminate Crimson Dawn's agents within the Empire. Shortly after, Vader was met on the Executor by Romodi, who presented him with all of the troops he would need to destroy Crimson Dawn. Vader then instructed Ochi to meet with the Assassin's Guild and inform them that they would be serving him now.
Ochi secretly pledged his allegiance to Qi'ra upon arriving at the Assassin's Guild headquarters. However, he would later assert that he was operating as an Imperial double agent. Following Ochi's departure, Vader oversaw Valance's repairs and awaited his recovery. Upon awakening, Valance was astonished to find his original appearance restored. When Valance questioned Vader about the changes, Vader clarified that he had Valance repaired because he would now serve him. Valance then noticed the absence of his heart, prompting the Sith to reveal its removal and replacement with cybernetics, along with additional enhancements to his physique. Valance launched an attack on Vader, but Vader bisected him before departing and instructing a medical droid to reassemble him. Once Valance was reconstructed, Vader, accompanied by Haydenn, informed him that he would be tasked with assassinating Crimson Dawn's operatives within the Empire. Failure to do so would result in the Empire targeting his loved ones.
Aboard the Executor, Vader meditated when Haydenn informed him that Valance had successfully completed his initial assignment by eliminating Tarl Sokoli, who was suspected of being a Crimson Dawn mole. Vader then disclosed that Sokoli had no connection to Crimson Dawn. Sokoli had voiced public dissatisfaction with the Empire, and Vader determined that eliminating someone from Valance's past would serve as a suitable test for the bounty hunter. The Sith instructed Haydenn to notify Ochi that Valance was prepared to join them. Vader also discerned that Ochi had aligned himself with Crimson Dawn but, recognizing the potential to exploit this in his pursuit of the syndicate, kept his discovery concealed.
Confronting the Knights of Ren
Vader became aware that Zahra's campaign against the Rebellion had failed during the Battle of Panisia. Subsequently, Vader investigated the assassination of the Emperor's Royal Guard on Coruscant, which was partially orchestrated by Ochi in secret. During the investigation, Vaneé informed him that a group of thieves had infiltrated Fortress Vader. The Dark Lord swiftly returned to Mustafar and confronted the intruders in his castle: a band of dark side marauders known as the Knights of Ren, who were secretly collaborating with Crimson Dawn. After Vader used a Force choke to kill one of them, Fyodor, their leader engaged him in combat with a lightsaber, while the others retreated. The leader claimed he had acquired the blade from his predecessor, from whom he had also inherited his name: Ren.
Vader expressed disdain for the Knights of Ren's decline before Ren jumped out of a window with a device called the Screaming Key. As Ren boasted from below, Vader used the Force to retrieve the key, prompting the knights to open fire on him. Ren then retrieved the key before escaping with the knights on speeders. As the knights sped away, Vader stepped outside to examine the remains of his slain troops.
Rooting out the Dawn
While meditating, Vader reflected on his promise to his son on Cloud City to bring order to the galaxy. Vader concluded that his master had only created chaos and resolved to embark on a new quest to establish order, regardless of his son's presence. Determined to destroy Crimson Dawn as the initial step, Vader departed with Ochi to assist the Empire in tracking down Dawn operatives on various planets, including Vincorba and Calior. On Vincorba, they fought alongside a group of mercenaries known as the Revengers. With Vader's crew assembled, Ochi remarked that they would serve as expendable assets, to which Vader reminded him that he too was expendable. After completing their mission on Calior, Vader, Ochi, and the Revengers met with Valance and other assassins on Laecor to continue their pursuit. When Valance questioned Vader's presence instead of leading Dark Squadron, the Sith Lord simply instructed him to obey. As stormtroopers attempted to relocate a group of civilians, the civilians resisted, prompting the stormtroopers to open fire. However, Vader intervened, deflecting their blaster bolts and slaughtering them. When Ochi expressed confusion at his master's actions, Vader revealed that the stormtroopers were Crimson Dawn operatives. As the group proceeded, Vader discovered a statue, which the locals identified as their village guardian who had died fighting Crimson Dawn.
Upon locating more of the Dawn's operatives, Ochi suggested using the Revengers as bait to draw them out of their stronghold. Vader then used the Force to seize Ochi and hurl him towards the Revengers, using him as additional bait. As the operatives surrounded them, Ochi requested that Vader bomb the stronghold. However, Vader refused and instead mounted Gee-Ninety, balancing himself atop the droid as they rolled towards the stronghold's entrance. Vader then stormed the stronghold alongside Ochi, whom the Sith prevented from killing all of the operatives inside. When Ochi expressed further confusion, Vader explained that Crimson Dawn was merely a symptom and that he intended to eradicate the disease. He then discovered a layout of every Dawn operative within the Empire, which Ochi and Valance noted extended to the highest levels. Subsequently, Vader and his followers returned to Coruscant. Valance, the assassins, and the Revengers departed for the Zanchal Estate, while Vader and Ochi headed for the Imperial Palace.
Upon entering the Palace, they struck down all of the Royal Guards and aides in the Emperor's throne room, except for Sly Moore. Unfazed, Sidious remarked that Vader should have spared one for interrogation. When Vader inquired about their loyalty, Sidious replied that they were loyal to strength, which Vader had demonstrated. However, only one of them was affiliated with Crimson Dawn, indicating that Vader's list was flawed. When Sidious questioned whether his apprentice was already aware of this, Vader hesitated before assuring his master that he would bring him order. Vader and Ochi then departed for the Zanchal Estate to confront Baron Espis Zanchal regarding his loyalty to the Dawn. Upon arriving, Vader was thanked by two hostages whom the Revengers had rescued from the Baron. As he returned to his shuttle, Vader informed Ochi that the list was a fabrication, which Vader had deduced when Ochi could only confirm that half of the names on it were Crimson Dawn. Vader instructed Ochi to identify the connection between the remaining individuals on the list to uncover who had planted it and their motive.
Hidden enemy
Later on the Executor, Vader was informed by Ochi that Romodi and his soldiers were not affiliated with Crimson Dawn. However, Ochi cautioned him that Romodi did not understand the Sith and would eventually seek to confront Vader. Emerging from his chamber, Vader asked Ochi about the connection between the false names on the list. Ochi revealed that they had all participated in a mission for Romodi to eliminate the Amidalans on Naboo. Following this revelation, Vader and his team of assassins traveled to Tranchar to capture and interrogate Lieutenant Grapa about the mission. After battling through stormtroopers and DT-series sentry droids, the assassins discovered civilians being tortured by the Imperials. Gee-Ninety abandoned the mission to liberate the civilians, prompting Vader to destroy the droid as punishment. Vader proceeded to interrogate Grapa about her mission to kill the Amidalans.
As she insisted to Vader that they were all deceased, Tanka fatally shot her in the head in retaliation. Vader then realized that the Imperials had anticipated their arrival. When Vader inquired with Valance about who had dispatched the droids, Valance confirmed that they were from Romodi's command. Vader then recalled that Ochi had spoken with Romodi before their departure. When confronted with this information, Ochi stammered an explanation before fleeing while Valance fired at him. After commandeering a spare ship, Ochi escaped from Tranchar and eventually arrived on Naboo to meet with Sabé. Vader pursued the assassin in his TIE Advanced. As soon as Ochi exited his ship, Vader revealed himself and destroyed it with his TIE. After landing in front of Ochi, Vader revealed that he had known of his allegiance to the Dawn and offered the assassin a way out by commending him for leading him to Sabé, which Ochi went along with and claimed was his plan all along. As Vader confronted Sabé, he seized her Crimson Dawn badge and declared that he was the Dawn.
Recruiting Sabé
Subsequently, Vader transported Ochi, Sabé, and ZED-6-7 to the remains of the sando aqua monster he had slain. He then ejected Ochi and Sabé from the shuttle and observed as they were attacked by a pack of ravenous creatures. Ochi attempted to reassure Vader of his loyalty, but Vader silenced him and questioned Sabé about her belief in Crimson Dawn. As she defended herself, she claimed she had merely infiltrated the syndicate. Ochi fought alongside her and asserted that he had done the same for the Empire. When Vader asked Sabé if she also intended to serve the Empire, Sabé replied that she did not as long as the Empire served chaos. Sabé went on to claim that she and Vader shared the same objective: order.
After another battle against the Dawn, Darth Vader learned that Sabé has deduced his past identity."
In response, Vader levitated the creatures with the Force and informed Sabé that for every monster she eliminated, a thousand more would emerge. He then explained that one would have to either negotiate with the monsters or confront them all. With that, Vader hurled the creatures at a group of long-necked beasts as they sprouted from the ground. Comprehending Vader's plan, Sabé led him to a Crimson Dawn outpost, while Ochi returned to the Executor to confer with Romodi. Upon arriving at the outpost, Sabé informed the Dawners there that they now served Vader. In response, the Dawners attacked Vader and were easily defeated by the Sith Lord. Vader then instructed Ochi to use Valance and the assassins as bait to lure the remaining Dawners and Romodi's forces to Oro Sankeria. As the Dawners and Imperials engaged in combat, they were suddenly obliterated by a pulse bomb, eliminating many of Vader's adversaries. Vader informed Sabé that Crimson Dawn and Romodi now feared him. When he asked Sabé if she was frightened, Sabé questioned why she should fear his true self, Anakin Skywalker.
Vader retorted that Anakin Skywalker was deceased. However, Sabé revealed that she had deduced Vader's identity from his obsession with order, his investigation into Padmé's death, and Padmé's final words at Polis Massa. When Vader ignited his lightsaber and asked Sabé what she desired, she claimed she wanted to assist him in achieving order. She proceeded to explain that when Skywalker never returned to Tatooine to liberate his mother, she and Tonra secretly worked in her honor to free enslaved individuals and smuggle them from Tatooine to a colony on Gabredor III. Now, the colony was being exploited and neglected by the corrupt Governor Tauntaza, who was allied with Crimson Dawn. Sabé told Vader that if he helped her save the refugees, he would have the opportunity to destroy another Crimson Dawn cell and prove that Padmé was correct about him. In response, Vader deactivated his lightsaber and accepted Sabé's proposal. He then cautioned her that she alone was responsible for the consequences of her choices before they silently boarded the shuttle and departed for Gabredor III.
Familiar faces
As they approached the planet, they were intercepted by Tauntaza's flagship. When Vader inquired with ZED-6-7 about whether the ship's crew had detected them, the droid replied that they had not yet. Vader then instructed him to transport them to the planet's surface. Sabé suggested summoning the Executor, but Vader stated that they would first visit the colony to verify her claims. Upon landing at the colony, they disembarked from the ship as ZED-6-7 introduced Vader to the refugees and requested to see their protocol droid. As their protocol droid had long been inoperable, ZED-6-7 instead communicated with their astromech droid Em-Sevenbee. The droid and two of the refugees then corroborated Sabé's story. The pair of refugees then displayed a terrestrial vehicle they had constructed, inspired by their earlier lives on Tatooine. When Vader asked the refugees for their names, they introduced themselves as Kitster and Wald; Skywalker's childhood companions.
When Kitster asked Vader if they could assist him in any way, Vader stated that they could not. He then sensed a disturbance in the surrounding land, to which ZED-6-7 explained that it was currently experiencing a drought. When another refugee claimed that conditions would improve once the clouds returned, Vader asserted that they would only worsen as they were attacked by a pack of clawed beasts. While Vader and Sabé fought off the creatures, a few of them surrounded Kitster and Wald. Vader then intervened, eliminating them and saving the refugees. Kitster expressed his gratitude to Vader as the Sith Lord silently walked away. Sabé then inquired with Vader if he had seen enough and informed him that it was time to eliminate Tauntaza. However, Vader told Sabé she was not prepared, as the refugees had disregarded her instructions to stay back and had endangered themselves. He then told her that if she wanted them to survive, they would have to obey her. Afterwards, Vader had Sabé wear a set of Imperial equipment and recruited her into the Imperial Military under the rank of Lieutenant Commander, granting her authority over all the forces he gathered.
He then instructed an Imperial officer to establish a communication channel with the Executor. When the officer reported that Tauntaza's ship was obstructing their communications, Vader ordered for his shuttle to be prepared. He and his team then traveled to the governor's facility and proceeded to fight their way towards the governor. After eliminating a few repurposed battle droids, Vader was confronted by Tauntaza, who briefly incapacitated the Sith Lord with a life-draining weapon. Vader's team was then attacked by more battle droids and a few Crimson Dawn assassins. Once Vader recovered, he Force-choked Ochi for allowing the governor to escape. Ochi explained that he was assisting Vader, to which Vader asked Ochi if he thought Tauntaza's weapon could destroy him. Sabé then told Vader that it might have, prompting Vader to release Ochi and meet with one of the weapon's designers, Doctor Aira. Aira explained that the technology had been used to devastate the planet Karolia and expressed remorse over not having known what the technology would be used for. As Sabé reassured the rest of the regretful designers, Vader seized Ochi's speeder and left to find the governor.
Catching up to Tauntaza and her escorts, Vader blocked a blast from one of her battle droids before reaching her at her escape ship. As the ship took off, Vader used the Force to hold it and destroy its interior controls. However, the ship's powerful engines ultimately allowed the governor to make her escape. Using a pair of Imperials as a diversion, Vader boarded Tauntaza's flagship and fought off more battle droids and Imperials before confronting the one in charge. When Vader asked where Tauntaza was, the Imperial claimed there had been a misunderstanding and recommended that the Sith reconsider his "hostile stance". Vader then had the ship's crew open a channel to his own ship and ordered Piett to lock onto the governor's flagship. After giving Piett the order to destroy the ship unless countermanded, Vader asked the Imperial again for the governor's location. Upon learning the location, Vader returned to his shuttle and flew toward the facility where she was hiding, only to be met by a sandstorm generated by the facility.
Despite the pilots' warnings, Vader told them to continue approaching the facility while he held the ship together with the Force. A lightning bolt then struck the ship, causing it to crash into the forest. Once Vader stepped out of the wreckage, he was met by Ochi, who he asked for Sabé's location. Ochi reported that the storm had taken her and a colonist claimed that the storm would kill them all. When Vader asked the colonist if they had any ships, he said the only ship that had not been confiscated or destroyed was Kitster's racer. When the colonist said that only Kitster could drive it, Vader said they would see as he approached the racer. ZED-6-7 told Vader that he could not trace Sabé or the other colonists, to which Vader told the droid he would command his assistance if he required it. Faced with numerous flashbacks to his past, Vader then boarded the racer and sped off into the storm. While deflecting debris with his lightsaber, Vader located Kitster on the ground alongside a large tank. Landing next to him, Vader asked Kitster where Sabé was. Kitster explained that she was trapped beneath the tank and that he had been trying to move it. Once Vader lifted the tank off of Sabé, the three of them were overwhelmed by the surrounding storm. Vader then contacted Piett and ordered him to have the Executor fire on his location.

When Piett warned that would incinerate everyone and everything within range, Vader choked him with the Force, prompting him to open fire. The resulting bombardment destroyed the tank and dissipated the storm. After cutting himself out from the remains of the tank, Vader took Sabé from Kitster and carried her into the distance. Eventually, the three of them returned to the colonists and Vader ordered Piett to open fire on Tauntaza's facility. However, the blasts were deflected by a shield, which ZED-6-7 explained was drawing energy from the planet. Despite Ochi's doubts, Vader remained certain the fortress possessed a weakness and, when ZED-6-7 revealed that the facility's underside was unshielded, took Em-Sevenbee with him to the facility. While he defeated more monsters on his way there, Vader placed his lightsaber within the astromech's dome. Once they arrived at the facility, he had the droid fire the lightsaber upwards into the unshielded underbelly. Vader then used the Force to guide the lightsaber through the facility, disabling the weapon and carving an entrance for himself. With the shield down, Vader entered the facility and struck down Tauntaza's soldiers.
However, he was then met by Tauntaza herself, wearing a suit of powerful armor. Tauntaza used the suit's arm cannon to fire at Vader. As he blocked the beam with his lightsaber, Vader told the governor she could not contain the power she was wielding. To this, Tauntaza accused Vader of having no control over his own power before he destroyed her arm cannon. Tauntaza then flew away as the facility exploded, leaving Vader severely injured without any power left in his suit. Sabé soon found Vader and begrudgingly restored his suit's power, allowing them to walk back to the colony. Once they returned, they learned from ZED-6-7 that Tauntaza had been receiving her orders from the Emperor himself. When Vader asked Sabé why she was smiling, she said she now knew why she had saved him. Returning to his fortress, Vader healed in his bacta tank, but broke it in anger upon remembering Sabé's words about the good still in him.
Later, Vader boarded the Executor and was met by Valance, Haydenn, and the Revengers. Vader chastised them for being early, to which Valance demanded to know why they were there. Vader then used the Force to fix Valance's collar, saying he expected those who served him to be held to a certain standard. Haydenn claimed that Valance had the team operating at peak efficiency. To this, Vader said they would get a chance to prove their loyalty and advised Valance to channel his energies in a less self-destructive manner. When Valance asked what their mission was, Piett explained that they had been selected to protect a medicine shipment to Bestine IV from Crimson Dawn. Vader warned the mercenaries not to disappoint him as he would be watching before they left for their mission. Vader then met with Sabé and asked her about Tauntaza's location. When she said Ochi was searching for the governor, Vader asked her what she advised they do. To this, Sabé told Vader he should do what he always did: directly confront the problem.
Return to Skako Minor
Following Sabé's counsel, Vader and Sabé arrived at the Imperial Palace on Coruscant aboard a Lambda-class shuttle to confront Sidious. As the two were unexpected, one of Palpatine's advisors tried to stop the Dark Lord, but Vader only reacted by throwing the advisor against a wall before making his way into the Emperor's throne room. Although his two present Royal Guards pointed their Force pikes at Vader, Sidious reacted by calmly asking Vader what his heart told him. Vader proceeded to hold Sabé in the air with the Force as Sidious laughed and claimed to her that she had only reminded Vader, who was remembering moments of his past at the same time, of his weakness. Dropping her, Vader refused to assist Sabé as the Emperor had his Royal Guards attempt to destroy her. Once she outwitted them in combat, Sidious killed the guards in anger and, seeing her worth as an agent, allowed Sabé to continue working with Vader.
As they returned to their shuttle, Vader and Sabé were informed by ZED-6-7 of their next mission. Jul Tambor, the grandson of Wat Tambor, was working to overthrow the pro-Imperial regime on Skako Minor through a nationalist uprising. According to Imperial intelligence, Tambor had also enlisted pirates to blockade the planet and stockpile technology to be used against the Empire. As such, their mission was to end the Skakoan's uprising and restore Imperial control over Skako Minor. In truth, Tambor had known he would have to face Vader as part of his crusade. Over the course of the last six years, the Skakoan had worked to collect and reassemble droids who had been killed by Vader, thereby allowing him to analyze their databanks to study Vader's moves. Amongst the droids he reassembled were B1 battle droids, B2 super battle droids, and Gee-Ninety. Tambor was very confident that he would be able to kill Vader.
Upon reaching the planet, Vader and Sabé discovered a crashed commercial transport from Corellia. ZED-6-7 explained that the ship had been boarded and those inside were killed by the planet's poisonous atmosphere. As they traversed the terrain, Vader killed a pack of cliff worms, saving a group of pirates. When he noticed a pile of corpses on the ground, he struck down the pirates, while Sabé hesitated and allowed one of them to escape. When Vader asked her if the pirates deserved mercy, Sabé admitted she didn't know who did anymore. Vader reminded her that she was his shadow now and she said they would need one of the pirates alive in order to locate Tambor. To this, Vader instructed Sabé to follow the surviving pirate and find Tambor while he took care of the rest.
Confronting Valance
---
title: Darth Vader (Comic Series)
---
After discovering Valance's treachery against the Empire, Vader embarked on the _Righteous Fist_, with Haydenn in tow, and descended upon the surface of [Bestine IV](/article/bestine_iv) via his personal shuttle. Upon landing, Vader and Haydenn confronted Valance alongside the other members of the _Edgehawk_'s crew. Igniting his lightsaber, Vader informed Valance that such disloyalty would not go unpunished. In response to Vader's accusations, Valance charged into the fray, declaring his regret for ever having been a part of the Empire. As they engaged in combat, Vader observed Valance's strength, deeming it evidence of wasted potential. Once Valance was defeated, he asserted that the inhabitants of the planet would remain free from Imperial control. However, Vader revealed that Valance's actions had sealed their fate, as his forces commenced bombing both the local populace and his own troops.
Disregarding Valance's condemnation of his disregard for his own soldiers, Vader prepared to deliver the final blow, but Haydenn insisted on completing the task herself as recompense for her past failings, a request Vader granted. Valance attempted to persuade Haydenn to abandon the Empire with him, but Haydenn responded by shooting him in the face, causing him to plummet off the cliff. Before departing the planet, Vader contacted Haydenn and instructed her to dispatch a team of Imperials to pursue Valance should he have survived. For this mission, Vader personally selected [Inferno Squad](/article/inferno_squad).
#### Unmasking the Dawn
While Sabé searched for Jul Tambor, Sidious summoned Vader to the Imperial Palace. During their meeting, Sidious informed Vader of a threat to the Sith, asserting that recent attacks were part of a carefully orchestrated diversionary tactic. Sidious then called upon ISB Director [Sliro Barsha](/article/sliro_barsha) to present his current findings. Barsha reported that his division within the ISB—the clandestine criminal organization [Zerek Besh](/article/zerek_besh)—had intercepted a rumor suggesting that major crime syndicates were competing to usurp the Hutts' established agreement with the Empire. However, this rumor originated from a single source: Crimson Dawn. As they traversed the Palace corridors, Vader concurred that Crimson Dawn had instigated the Syndicate War but questioned the extent of its influence.
<InsImage
src="https://static.wikia.nocookie.net/starwars/images/c/cf/Vader-Palpatine-discuss.png"
alt="Darth Vader and his Sith Master discuss the secret war Crimson Dawn had waged."
alignment="left"
height="204px"
width="270px"
>
Darth Vader and his Sith Master discuss the secret war Crimson Dawn had waged.
</InsImage>
Sidious further stated that Crimson Dawn had orchestrated the other attacks, claiming they had specifically targeted the Sith. He then inquired about the syndicate's leader, Qi'ra, whom Vader had previously encountered and failed to capture Solo from. Vader informed Sidious that, while Qi'ra did not pose a significant threat to him, she was trained in Teräs Käsi and possessed a fighting style reminiscent of his master's. From this, Sidious and Vader concluded that Maul must have trained Qi'ra, given her involvement in the criminal underworld. Sidious further speculated that Maul had trained Qi'ra to use her as an instrument of revenge and wondered what else he had imparted to her. With the Sith now aware of Crimson Dawn's involvement in recent events, an alert was issued to the Imperial Military to locate the _Vermillion_, prompting Qi'ra to instruct her assets within the Empire and other major factions to create chaos across the galaxy as a further distraction to the Sith. Meanwhile, utilizing the Screaming Key stolen from Vader, the Knights of Ren, on Qi'ra's orders and accompanied by "[the Archivist](/article/the_archivist)," journeyed to a location unknown to Vader and Sidious, referred to as the [dark side hellscape](/article/dark_side_hellscape), to retrieve an artifact known as the [Fermata Cage](/article/fermata_cage).
#### Dealing with Zerek Besh
After Director Barsha and Zerek Besh failed to capture even a single member of the Rebel Alliance, Vader confronted him aboard the ISB space station [Derosha Six](/article/derosha_six). There, Barsha attempted to defend himself by highlighting the successes of Zerek Besh, but Vader countered that the criminal syndicate's inability to apprehend any rebels rendered both Zerek Besh and Barsha failures. Barsha continued to boast about the extensive network the ISB had established under Zerek Besh and insulted Vader regarding his and the Imperial army's setbacks on Hoth. Enraged, Vader used the Force to shatter a glass display behind him, surrounding Barsha with shards. Forced to his knees, Barsha pleaded with Vader, claiming he was close to a breakthrough. Vader simply responded that he needed to find rebels then.
<InsImage
src="https://static.wikia.nocookie.net/starwars/images/d/de/Vader_confronts_Sliro.png"
alt="Darth Vader asserted his dominance over Sliro Barsha after he insulted Vader."
alignment="right"
height="174px"
width="270px"
>
Darth Vader asserted his dominance over Sliro Barsha after he insulted Vader.
</InsImage>
Shortly after his departure, thieves [Kay](/article/kay_vess) and [Riko Vess](/article/riko_vess) successfully [stole access codes](/article/infiltration_of_derosha_six) to [Director Barsha's palace](/article/westhill_palace) vault on [Canto Bight](/article/canto_bight). Subsequently, [Kay Vess' crew](/article/kay_vess%27_crew), operating under Barsha's brother [Jaylen Vrax](/article/jaylen_vrax), were able to [steal a secret codex](/article/heist_on_canto_bight) that Barsha possessed, containing sensitive information about nearly all ranking Imperial officers. Vrax contacted Vader and informed him of the database and his intention to seize control of Zerek Besh. They reached an agreement: in exchange for the codex and the coordinates of a Rebel base on [Akiva](/article/akiva), Vrax would be granted control of Zerek Besh. Later, Vader summoned Barsha to the bridge of the _Revelator_, where he condemned Barsha for allowing such critical Imperial intelligence to be compromised. Vader then turned to Vrax and confirmed that the Empire had accepted his terms. He ended the call and relinquished Barsha to the mercy of Vrax and his associates.
#### Finding the Fermata Cage
Vader served as one of Palpatine's tools in the campaign to eliminate Dawn operatives throughout the Empire. During his efforts to dismantle the Dawn, Vader bisected a treacherous stormtrooper within an industrial setting. At one point, Vader returned to his castle on Mustafar, where he received a summons from the Eye of Webbish Bog. Upon entering the Eye's cave, the Eye presented Vader with a scene from the Clone Wars, depicting him, Yoda, and their clones battling B1 battle droids, as well as glimpses of the future, including a confrontation with Amidala's surviving handmaidens. Vader then realized that he had been lured there as a test before being attacked by Mustafarians. After eliminating them, Vader accused the Eye of wasting his time with riddles. In response, the Eye explained that the visions were warnings of the end of everything. When Vader questioned why he should care, the Eye reminded Vader that he was an integral part of everything, but if he refused to acknowledge this, he could not be helped. As the Eye had foreseen, Vader, his helmet slightly damaged, returned to his fortress and, after sensing a significant disturbance in the dark side, was contacted by Sidious to discuss the event.
Informed by Sidious that Qi'ra claimed to possess the Fermata Cage, Vader was instructed to locate the artifact and eliminate anyone with knowledge of it. Sidious also relayed Qi'ra's claim about the artifact: that it contained an ancient [Sith Lord](/article/unidentified_sith_lord_(fermata_cage)) of such immense power that they had to be imprisoned. In reality, no such Sith Lord existed; Qi'ra simply needed a claim that would lure both Sith to the Cage, allowing her to trap them within and liberate the galaxy from their rule. However, her initial attempt to open the cage resulted in the Knights of Ren abandoning Crimson Dawn, driven by anger at being harmed in the attempt and fear of the resulting ripple effect. Vader traveled to the site of the disturbance, where he discovered only wreckage from the experiment. Although he was convinced it was the source of the disturbance, he concluded, based on the absence of bodies, that no Sith Lord had been released. Vader then returned to the _Executor_ and reported his findings to Sidious via its holoprojection chamber.
<InsImage
src="https://static.wikia.nocookie.net/starwars/images/0/06/HE2-VaderReport.png"
alt="Darth Vader reports that the Fermata Cage was not at the site of the disturbance."
alignment="left"
height="124px"
width="250px"
>
Darth Vader reports that the Fermata Cage was not at the site of the disturbance.
</InsImage>
Vader inquired of Sidious whether an ancient Sith truly resided within the Cage, to which Sidious responded that it was possible: constructed by Darth Momin himself, the Cage could imprison individuals and locations outside of time and had never been used lightly. Sidious further cautioned Vader that, given the inherent desire for domination within every Sith, the mere possibility posed the greatest threat to everything they had built together. During their conversation, they both suddenly sensed the Cage beginning to open once more as the Archivist and her assistant, archaeologist [Kho Phon Farrus](/article/kho_phon_farrus), attempted to focus nearby dark side energy into it using [Ascendant](/article/ascendant)-designed [technology](/article/kho_phon_farrus%27_machine). Although Farrus deactivated their technology as the Cage began to drain life energy from them, the experiment had continued long enough for Sidious to trace the disturbance to the [planet](/article/unidentified_planet_(fermata_cage)) they were on. Consequently, Sidious dispatched Vader to retrieve the Cage and eliminate those present.
#### The Orphans
<InsImage
src="https://static.wikia.nocookie.net/starwars/images/c/c1/HE2-Darth-Vader-quote.png"
alt="Darth Vader approaches the Orphans."
alignment="right"
height="337px"
width="250px"
>
Darth Vader approaches the Orphans.
</InsImage>
Upon the _Executor_'s arrival at the planet, Vader, intending to handle the situation personally, instructed Piett to prepare his _Lambda_-class T-4a shuttle and landed at the seemingly deserted location with two stormtroopers. In the vicinity of the artifact, where he could not discern the presence of the alleged ancient Sith, Vader detected a significant amount of dark side power emanating from the Fermata Cage. Vader discovered the Archivist and Kho Phon Farrus attempting to conceal themselves beneath the wreckage of their machine. In Vader's presence, the Archivist sensed a dark energy radiating from the Sith Lord. While Farrus, having been warned of Vader by their rival Doctor Aphra, promptly surrendered, the Archivist refused, prompting Vader to begin Force-choking the agents. However, he was interrupted by the arrival of Chanath Cha and her [Orphans](/article/orphans), consisting of [Sear](/article/sear), [Ladybright](/article/ladybright), and [Imara Vex](/article/imara_vex). When Cha asked Vader if he remembered her, Vader simply stated that he would kill her as he ignited his lightsaber.
Cha introduced herself, explaining that Vader had murdered her family and that she had dedicated every day since then to plotting her revenge. Vader quickly forgot her name once more before the Orphans launched their attack. After being electrocuted by Ladybright and burned by one of Cha's acid bombs, Vader pushed the Orphans back and retreated into the ocean to recover. Upon his return to the shore, he observed Ladybright, Vex, Pharrus, and the Archivist fleeing towards the _Siroto_. When Vader mentioned Qi'ra's death to Cha and Sear, he sensed their confusion and lack of fear, indicating that Qi'ra was still alive. As he battled Cha and Sear, he rebuked them for their arrogance and prepared to strike Cha down, only for Vex to snipe off one of his hands, causing him to use the Force to tip over the _Siroto_ and hurl Vex into the forest. With Vex severely injured, Ladybright, Pharrus, and the Archivist fled in the _Siroto_ before returning to assist Cha and Sear. However, the _Siroto_ then reversed course and departed the planet, much to Cha's relief. With Sear and Vex defeated, Vader twisted Cha's introduction of herself by re-introducing himself and impaling her through the chest.
With Cha dead, Vader departed the planet to locate Qi'ra and reunited with his master. They traveled to a dark, smoky location, where Sidious asked Vader if he had truly sensed the presence of an ancient Sith Lord within the Cage. When Vader admitted that he had only sensed intense dark side power, he engaged Sidious in a sparring duel, the first they had engaged in in some time, at his master's request, allowing Sidious to explain how he would enforce the Rule of Two if another Sith Lord indeed existed. After Sidious pushed back Vader with a final strike and declared the duel over, Vader made one last rush at his master before stopping when his master repeated himself. Sensing they had no choice but to follow the ripple in the Force caused by the next Cage opening, Sidious used the moment to admit Qi'ra would be missed as he and Vader surveyed the location.
<InsImage
src="https://static.wikia.nocookie.net/starwars/images/e/e5/HE4-Sparring.png"
alt="Prior to the final battle against Crimson Dawn, Darth Vader sparred with his master for the first time in some time."
alignment="left"
height="189px"
width="300px"
>
Prior to the final battle against Crimson Dawn, Darth Vader sparred with his master for the first time in some time.
</InsImage>
Qi'ra attempted to bolster her chances by contacting the Knights of Ren, reminding them that they had attacked Vader's fortress and would therefore be hunted by the Sith if they did not assist her in destroying Vader and Palpatine. Around the same time, the [Spark Eternal](/article/spark_eternal) artificial intelligence, created millennia ago for use against the Sith by the Ascendant cult, resolved to hunt down Vader. The AI had taken control of Doctor Aphra's body to carry out its mission, further enlisting 0-0-0 and BT-1 to aid in its quest. When Aphra used a virus she had installed into the two droids to regain control of her body, the Spark introduced, much to Aphra's horror, their Sith hunting mission against Vader. By possessing Aphra, it had access to her memories of Vader and saw how she considered the Sith Lord a monster, but the AI believed itself ready to take on the Sith Lord and his master. Because Aphra had once outmaneuvered Vader, the overconfident Spark thought itself skilled enough to engage him in one-on-one combat. In fact, Qi'ra contacted the Spark to request its help in destroying the Sith.
#### Destroying the Dawn
The Archivist relocated the Fermata Cage and the equipment required to finally open it to an ancient [Amaxine Space Station](/article/amaxine_space_station) in the Outer Rim, where the Cage could draw upon the plant life and dark side energy left behind by the ancient [Drengir](/article/drengir) beings. Sensing the disturbance in the Force caused by the opening of the Cage, Sidious and Vader, as Sidious had stated they would need to in the name of enforcing the Rule of Two, followed the disturbance aboard the _Executor_ with a fleet of Star Destroyers in tow. The Sith Lords and their forces arrived at the station shortly after the opening process began. Overseeing the station from the _Executor_'s bridge, Vader was overcome with an intense desire to board the station and confront the possible Sith, eager to test himself against that Sith Lord's power, regardless of the outcome. Sensing his apprentice's desire, Sidious shared the sentiment but deemed it a foolish ambition and ordered the _Executor_ to destroy the station.
Before the _Executor_ could fire, the warship's crew detected an entire enemy fleet emerging from hyperspace. While Vader initially assumed it was the Rebel Alliance, the force was Qi'ra's secret [Dawn Fleet](/article/dawn_fleet), which targeted the _Executor_'s long-range weapons, forcing the _Executor_ to divert power to its shield batteries and delay the Emperor's order to destroy the station. With his master unwilling to take any chances, Vader boarded a _Lambda_-class T-4a shuttle with Sidious and an escort of death troopers and Emperor's Royal Guards, navigating through the space battle under the protection of [crimson TIE interceptors](/article/unidentified_crimson_tie/in_interceptor_variant). As their troops engaged with Dawn soldiers who had established a perimeter in the hangar, Sidious and Vader disembarked from their shuttle into the station, which was saturated with dark side energy that Sidious could discern was not solely related to the Fermata Cage. Unsure of what they would encounter, the two Sith Lords led the charge with the objective of completely annihilating the Dawn.
<InsImage
src="https://static.wikia.nocookie.net/starwars/images/7/74/Aphra30-Vaderapproaching.png"
alt="Darth Vader approaches the Spark Eternal, an AI designed centuries prior to destroy the Sith Order, while it possesses the body of Doctor Aphra."
alignment="right"
height="259px"
width="250px"
>
Darth Vader approaches the Spark Eternal, an AI designed centuries prior to destroy the Sith Order, while it possesses the body of Doctor Aphra.
</InsImage>
Leading from the front, Vader and Sidious battled their way through the station. As the two Sith deflected blaster bolts with their lightsabers, Dawn [Squads Two](/article/squad_two_(crimson_dawn)) and [Three](/article/squad_three_(crimson_dawn)) attempted to engage Sidious and Vader with electrified melee weapons, but both Sith effortlessly overcame the guards. Still, Vader toyed with one soldier until Sidious ordered him to cease and simply kill them. As they advanced closer to the Cage, they were confronted by the Spark Eternal-possessed Aphra, who mocked the two Sith. Vader quickly deduced that Aphra was under some form of possession and remained behind to deal with her while Sidious continued onward. Believing she could weaken him, the overconfident Spark engaged Vader with the cortosis alloy-based [Null Blade](/article/null_blade), which would temporarily disable lightsabers. To the Spark, the battle represented an opportunity to finally realize the dream of its long-dead creator, [Miril](/article/miril), by destroying the Sith Order, even if the battle proved too much for Aphra's body.
The blades of Vader and the possessed Aphra clashed repeatedly, causing the Sith Lord's lightsaber to short circuit. While the Spark believed it was poised to destroy Vader and lunged at him, Vader effortlessly excised the Spark from Aphra's body with a Force push as a group of new arrivals watched: Aphra's former lover [Sana Starros](/article/sana_starros) had assembled a [crew](/article/sana_starros%27_crew) of Aphra's friends and loved ones to rescue her from the Spark. Having abandoned the Dawn in fear after their encounter with Vader, Farrus was also among the group. Unbeknownst to Vader, who declared the Spark a weak enemy, he had effectively ended the dream of the Ascendant cult by defeating its primary weapon with minimal effort. After a terrified Aphra awoke beneath Vader and escaped as the opening Cage emitted a ripple, Vader chose to rejoin his master rather than pursue his former ally. With Vader out of sight, the Spark attempted to possess Aphra once more, but the intervention of Farrus, Starros, and another of Aphra's ex-lovers, Magna Tolvan, saved her.
Vader took his place at an eager Sidious's side as the Cage finally opened. However, only a [small disc](/article/unidentified_droid_(fermata_cage)) without any connection to the Force emerged: inside, there had been no secret Sith Lord after all, and Sidious believed the disc was insignificant. Unbeknownst to both, the disc was actually a droid locked away by the ancient Sith. Observing from afar aboard their respective starships, the Archivist and Qi'ra remotely re-activated the Cage, encasing Vader and Sidious in a time-lock. Qi'ra intended to retrieve the Cage with the two Sith trapped inside and cast their prison into a star. However, at that moment, cannon fire from beyond the space battle suddenly pierced the station and destroyed the Cage: while it remained physically intact, the Cage's time-lock collapsed, freeing the two Sith from its grasp but sending a [Force Wave](/article/force_wave) across the galaxy. The cannon fire originated from the _Night Buzzard_, the personal transport of the Knights of Ren: although Ren had observed Vader and Sidious fall victim to Qi'ra's plan from a distance, he believed Sidious would ultimately escape the Cage and thus concluded that the only way to save his crew was to align themselves with the Sith.
<InsImage
src="https://static.wikia.nocookie.net/starwars/images/0/00/HE5-Almost-locked-away.png"
alt="Before the arrival of the Knights of Ren, Darth Vader and his master were nearly defeated once and for all by the Fermata Cage."
alignment="left"
height="415px"
width="270px"
>
Before the arrival of the Knights of Ren, Darth Vader and his master were nearly defeated once and for all by the Fermata Cage.
</InsImage>
The wave unleashed by the collapse of the Cage decimated much of the Dawn Fleet, allowing the Imperials to eliminate the Dawn forces as the escaping Qi'ra issued a retreat order. As they retrieved the destroyed but intact Fermata Cage, Sidious and Vader sensed a significant rending in the Force caused by its collapse, with Sidious admitting that it made his connection to the Force tenuous. Sidious and Vader then came face-to-face with the Knights of Ren, who revealed themselves in exchange for mercy. Sidious, however, responded with a blast of Force lightning to punish the Knights, promising that whatever remained of the group would be put to good use. Still, Sidious declared the Knights' future insignificant and ordered Vader to depart with him. In the aftermath of the Crimson Dawn war, the syndicate was shattered, and the defeated Qi'ra fled into hiding. The effects of the Force Wave varied at different times: Force-sensitives could experience a limited connection to the Force at one point but could wield great power when the Wave returned. Vader came to fear the immense energy provided by the Force Wave because he could not control it.
### Fighting the past and the Force
#### Reunion with the Handmaidens
<InsImage
src="https://static.wikia.nocookie.net/starwars/images/2/20/DV29-Vader-and-failed-troopers.png"
alt="Darth Vader threatens the lives of stormtroopers KA-336 and KV-222 as a test to see if the woman before him is really Sabé."
alignment="right"
height="171px"
width="270px"
>
Darth Vader threatens the lives of stormtroopers KA-336 and KV-222 as a test to see if the woman before him is really Sabé.
</InsImage>
As the Force Wave temporarily subsided, Vader returned to the _Executor_ and meditated, reflecting on Kenobi's statement that only a Sith dealt in absolutes and declaring that no one in the galaxy should forget his allegiance. Subsequently, Vader instructed Piett to contact the recently returned Ochi, who had arrived on the _Executor_ with Sabé, and to bring Sabé into a room aboard the ship. Within, Vader had also summoned Sabé's recently assigned personal guards, stormtroopers [KA-336](/article/ka-336) and [KV-222](/article/kv-222); both troopers had violated protocol by openly discussing her classified assignment, and Vader demanded that the woman before him execute them both with a nearby E-11 blaster rifle as punishment. In reality, Vader suspected that the woman was not Sabé but another of Amidala's surviving handmaidens and was testing that theory. Vader also created a struggle when he urged the troopers to also run for the blaster. "Sabé" seized it first and fired at them, injuring both but sparing their lives. This confirmed Vader's suspicion that this was not Sabé but rather another handmaiden, [Dormé](/article/dorm%c3%a9). Lifted into the air via a Force choke, Dormé claimed that Sabé would not have killed them, which Vader declared proved Dormé did not know Sabé at all.
Upon realizing that Ochi had facilitated her entry as part of a scheme to eliminate Sabé, whom Ochi viewed as a rival, Vader hurled Ochi into a wall and informed Dormé that Sabé served him willingly. Dormé refuted Vader's assertion, stating that Sabé was the best of them. In response, Vader brought her to a hangar and told her she should follow Sabé's lead by claiming the same power. When Ochi advised against this, Vader dismissed him, stating that he simply needed her to serve his purpose. Dormé reiterated that neither she nor Sabé would serve Vader. Vader then declared that they would see before taking her aboard a _Lambda_-class T-4a shuttle and traveling to the planet [Fedalle](/article/fedalle).
Shortly thereafter, Dormé's fellow handmaidens [Eirtaé](/article/eirta%c3%a9), [Saché](/article/sach%c3%a9), and [Rabé Tonsort](/article/rab%c3%a9_tonsort) arrived on the planet. When Dormé insisted they pursue Sabé instead, the handmaidens told her they wouldn't leave her as they engaged Vader in combat. Despite their coordination, the handmaidens were subdued by Vader, who offered them one final chance to join him. However, Saché revealed that Eirtaé had seized codes from Vader's suit during the fight, allowing the handmaidens to complete Dormé's sabotage of the _Executor_. Before they could destroy Vader's flagship, which would result in the deaths of thousands in the name of rescuing Sabé and defeating Vader, Vader declared that they were just as bloodthirsty as he needed them to be to join him. However, he was contacted by Piett, who showed him a transmission from Tambor. After arriving on the planet [Brentaal IV](/article/brentaal_iv), Sabé had confronted Tambor while he was assisting a village of exiled Skakoans, urging him not to confront Vader and declaring that the Sith Lord had only grown more dangerous since her own failed efforts on Polis Massa. She was certain that Tambor's efforts against Vader would fail and that the Sith Lord would slaughter the hundreds of Skakoans on Brentaal IV in retaliation.
<InsImage
src="https://static.wikia.nocookie.net/starwars/images/e/ea/At-Vaders-service.png"
alt="With Sabés life in the hands of Jul Tambor, Darth Vader found an opening to recruit other handmaidens of his late wife and deal with the Skakoan revolutionary."
alignment="left"
height="332px"
width="230px"
>
With Sabé's life in the hands of Jul Tambor, Darth Vader found an opening to recruit other handmaidens of his late wife and deal with the Skakoan revolutionary.
</InsImage>
Unable to persuade Tambor to call off his impending attack on the [Skako Minor garrison](/article/imperial_garrison_(skako_minor)), Sabé shot him above his heart, keeping him alive but enabling her to take him away to a ship controlled by her and ZED-6-7. Aboard, Tambor listened to her reasoning about the danger Vader posed and declared that it was time to kill the Sith Lord, capturing Sabé after his rebuilt droids reached the starship. After showing Sabé video footage of Vader, Tambor sent his hologram to Vader, in which he revealed her capture and baited him to come after him. While fully aware of the Sith Lord's ruthlessness and not doubting Vader's willingness to slaughter his refugee camp in retaliation, the Skakoan had come to believe that Sabé was Vader's weakness, which would finally give him an advantage over the Dark Lord. On Fedalle, realizing they would need Vader and his forces to stage a daring rescue, the handmaidens reluctantly joined Vader to go after Tambor, much to Ochi's annoyance. The group returned to the _Executor_ aboard his Lambda shuttle and eventually departed for Brentaal IV.
#### Corrupting Sabé
<InsImage
src="https://static.wikia.nocookie.net/starwars/images/7/75/Arrive-on-Brentaal.png"
alt="Darth Vader, ZED-6-7, and their reluctant allies, the handmaidens of Padmé Amidala, arrive on Brentaal IV"
alignment="right"
height="145px"
width="300px"
>
Darth Vader, ZED-6-7, and their reluctant allies, the handmaidens of Padmé Amidala, arrive on Brentaal IV
</InsImage>
Vader, accompanied by the handmaidens, ZED-6-7, and arriving on Brentaal IV via a _Lambda_-class shuttle, contemplated his final encounter with Amidala on Mustafar, yearning for a different outcome. Within his thoughts, he vowed to finally achieve his desired result. He also envisioned it as a chance to recreate his idealized Bespin duel, drawing a parallel to his outreach toward Luke Skywalker. Upon entering a structure, Vader and the handmaidens encountered Moore, who elaborated on the potential benefits for each handmaiden in serving the Empire and the Sith Lord. When all four declined, Moore used telekinesis to propel them outside through a breach created by Tambor's forces. Tambor's forces had tracked the Sith Lord and his unwilling companions, forcing the handmaidens to confront the overwhelming B1 battle droid army alone. Vader perceived this battle as an opportunity for the handmaidens to demonstrate their power and earn their place by his side. Observing their triumph, Vader maintained silence as Moore declared it evidence of their skills, promising further enhancement under Vader's tutelage.
Soon after, Eirtaé extracted information from a B1's memory, revealing that Tambor's command ship, where Sabé was being held, was located three klicks south. Disregarding Sabé's repeated warnings that Vader would annihilate his refugee camp, Tambor dispatched three platoons of B1s and a Low Altitude Assault Transport/infantry to assault a civilian village. His intention was to ensnare his adversaries in the village's canyon, enabling his escape with Sabé. Both Vader and Moore recognized the attack as a ruse, with Vader proclaiming it an example of the frailty the handmaidens needed to overcome. When the handmaidens insisted on assisting the civilians, Vader chose to exploit them as a diversion, effectively turning them into pawns to reach and corrupt Sabé. This action, he believed, would impart another lesson: while they engaged the B1 horde, he could bypass the droids' lines, allowing the handmaidens to unlock their full potential against a significant adversary. Riding into the fray on speeder bikes, Vader downed the gunship, leaving the handmaidens to contend with the droids as he infiltrated Tambor's ship to rescue Sabé and confront the revolutionary.
Inside Tambor's vessel, Vader positioned himself before Sabé's confinement but was confronted by the reconstructed Gee-Ninety, who unleashed a barrage of fire before deploying magnetic spheres. Anticipating Vader's brute-force approach, Tambor and the droid had devised these spheres to immobilize him through electrocution. However, the handmaidens intervened, utilizing Eirtaé's magnetic devices to neutralize the spheres. Despite this, Tambor and Gee-Ninety managed to escape by detaching the room from the rest of the ship while Vader recovered. The Sith Lord asserted that he had not betrayed the handmaidens, but rather provided them with a chance to realize their true strength. He then employed the Force to choke Eirtaé and Dormé against the wall. Having just freed Sabé, they implored her to abandon Vader's service, but Vader offered her a chance to establish order instead of allowing Tambor, who was attacking innocents, to roam freely. As he extended the offer and the handmaidens urged Sabé to reconsider, Vader recalled both his lived and idealized versions of his encounters with Amidala on Mustafar and with his son on Bespin.
<InsImage
src="https://static.wikia.nocookie.net/starwars/images/2/2b/VaderSabe-DarthVader2020-32.png"
alt="Secretly seeing it as a way to finally have his idealized life with Padmé Amidala, Darth Vader guides Sabé down to him after she chooses to stay in the Sith Lords service."
alignment="left"
height="384px"
width="250px"
>
Secretly seeing it as a way to finally have his idealized life with Padmé Amidala, Darth Vader guides Sabé down to him after she chooses to stay in the Sith Lord's service.
</InsImage>
Sabé nearly accepted Vader's hand, but Dormé tackled her and pulled her from the room, while Eirtaé and Saché provided covering fire against Vader. Drawing his lightsaber, Vader pursued the handmaidens outside, only to witness them lifting Sabé into the air with Eirtaé's antigravity devices to an overhead Star Commuter 2000. The ship was piloted by Ochi, who had struck a deal with the handmaidens: they would persuade Sabé to abandon Vader to ensure he never saw any of them again. However, Sabé believed her handmaiden sisters lacked the resources to halt Tambor's campaign. She concluded that the only way to safeguard the civilians Tambor was about to attack was to join Vader's violent crusade. She also reasoned that, by remaining with Vader, she could continue to uphold Amidala's belief in the good within Anakin Skywalker. Bidding farewell to her fellow handmaidens, Sabé deactivated her antigrav device, falling back to Vader, who guided her to the ground with the Force. As a contingent of stormtroopers arrived via a _Lambda_-class T-4a shuttle and opened fire on the escaping Star Commuter, Vader called off their assault, declaring the matter closed before returning to the shuttle with Sabé.
The next day, upon returning to the _Executor_ and receiving updates on Tambor's gunships, Vader clarified to Piett that the campaign against Tambor was now under Sabé's command. After ordering her own shuttle prepared for departure, Sabé orchestrated Tambor's downfall without directly killing the Skakoan. Contacting the revolutionary, she falsely claimed that twelve Skakoan refugees, who were actually in the same room as her, were imprisoned by Vader and his forces in the abandoned village of [Kantiema](/article/kantiema), which Tambor promptly [bombed](/article/bombing_of_kantiema). Witnessing their supposed protector's willingness to sacrifice their lives and boast about his future rule, the people of Skako Minor swiftly abandoned and revolted against Tambor's crusade. Consequently, the Empire granted amnesty to all his refugees and initiated an armistice on Skako Minor. Following the [destruction of Jul's droid army](/article/destruction_of_jul%27s_droid_army), Sabé reported her success to Vader, who meditated and accepted her rationale for sparing Tambor, as killing him would have transformed the Skakoan into a martyr, costing hundreds of lives. Nevertheless, Vader felt compelled to correct her, asserting that they were imposing order, not just peace.
He further inquired about her feelings regarding the power at her disposal, assuring her that she would grow stronger in his service. However, Sabé remained convinced that her fellow handmaidens, whom Vader dismissed as weak, had only departed because they were unaware that he was Anakin Skywalker. Before departing, Sabé declared that this meant she was the only one present who had to sacrifice their soul by remaining under his command. Experiencing pain and losing control of the Force as the Force Wave resurfaced, Vader inwardly declared that Sabé was mistaken in believing she was the only one who had to lose their soul in return for the future they were working towards. Losing control of the Force, Vader's powers began to dismantle the _Executor_, presenting yet another threat to the Empire: himself.
#### Confronting the Force Wave
<InsImage
src="https://static.wikia.nocookie.net/starwars/images/f/fc/Vader32-Vader-loses-control.png"
alt="Crushing the walls of the Executor around him, Darth Vader loses control of the Force as the Force Wave returns."
alignment="right"
height="306px"
width="250px"
>
Crushing the walls of the Executor around him, Darth Vader loses control of the Force as the Force Wave returns.
</InsImage>
Sidious sensed Vader's fear stemming from his uncontrollable abilities all the way on Coruscant, where the Sith Master reveled in the unrestrained power granted to him by the Force Wave. Reaching out to Vader through the Force, Sidious spoke of the immense power but, noticing the fear, implored Vader to embrace his true nature. Managing to exit his chamber, Vader still failed to control the Force, causing portions of the _Executor_ to crumble around him. Sabé, realizing something was amiss with Vader's Force abilities, directed nearby Imperial officers and stormtroopers away from the uncontrolled Sith Lord. Vader's powers breached the _Executor_'s hull in the hallway just as Sabé cleared the room. Ignoring the objections of an officer, Sabé sealed off the hallway from the rest of the ship, leaving Vader vulnerable to being ejected into the vacuum of space. She attempted to reassure Vader that the inconvenience would be brief, but Vader Force-choked her as Sidious spoke in his mind: Sidious suggested that fear gave rise to anger and hate, but it was up to Vader to decide whether to transform that hatred into power or suffering.
While Sidious spoke to him, Vader was ejected into the vacuum of space. Reaching out toward his flagship, Vader only succeeded in carving a line of destruction in the _Executor_'s hull. Eventually, Sabé discovered an unmoving Vader aboard a [Lambda-class T-4a shuttle](/article/sab%c3%a9%27s_shuttle), from which she deployed two [Prowler 1000 seeker droids](/article/prowler_1000_seeker_droid) to retrieve the Sith Lord and bring him aboard. Despite Sabé's plea for him to restrain his destructive power for a single minute longer, Vader was unable to comply and swiftly began to tear apart the Lambda and crush the two droids. Sabé launched them into hyperspace, emerging above an [uninhabited astronomical object](/article/unidentified_astronomical_object_(sab%c3%a9)): taking Vader to the astronomical object had been Sabé's intention as it would give the Sith Lord a place to practice and rediscover control over his powers. As the crippled Lambda crashed towards its surface, Vader was ejected from the ship.
Sabé, wearing a wing backpack, followed and reached out to him. They both grasped each other's arm before plunging into the sea, causing Vader to lose his grip on Sabé. As he fell, Vader reflected on Palpatine's words about power and suffering, deciding to proceed inland on an island alone, leaving Sabé unconscious on the shore. Vader left a trail of destruction in his wake, which Sabé followed after regaining consciousness. Vader pushed the Handmaiden back when she approached and demanded to be left alone due to his uncontrolled powers. When Sabé—who called Vader "Anakin" once more in the process—suggested the astronomical object as an opportunity for Vader to regain control of his powers and life, arguing that he had never truly controlled his own destiny, another burst of his power devastated the land around her, forcing her to flee. Recalling moments from the past as he again reflected on Sidious's offer, Vader decided the test was no longer for himself, but for Sabé: Vader raised the confused Handmaiden into the air and gave her a choice to turn hatred into power or suffering, making Sabé experience a vision before asking her to choose.
<InsImage>
src="https://static.wikia.nocookie.net/starwars/images/e/e7/Vader34-Will-you-marry-Vader.png"
alt="Within their Force vision, Darth Vader asked Sabé to join him in forging a new future, a request which she rejected in the end."
alignment="left"
height="263px"
width="250px"
>
Within their Force vision, Darth Vader asked Sabé to join him in forging a new future, a request which she rejected in the end.
</InsImage>
Sabé disregarded the question and attempted to focus on regaining control of Vader's powers, but Vader pulled her close, asserting that the safest place was at the center of the storm. Vader then presented Sabé with what he claimed were her own desires, though she believed they were his, in a vision where she joined the Empire and brought order to the galaxy by turning suffering into power. Rejecting this possible future, Sabé demanded to know what "Anakin" wanted. A vision of one of the Handmaidens—as Saché, Tonsort, Rabé Dormé and Eirtaé were all present in the vision—attempted to argue that Vader and Skywalker were distinct, which she vehemently denied before pursuing Vader in the vision. Within the vision, Vader materialized in the shadows of the forest, with Skywalker's face visible when he turned back to her. Chasing after Vader led Sabé to visions of Amidala and Luke Skywalker, which Sabé interpreted as proof that the light still existed in Vader. However, the Sith Lord emerged and struck down both his wife and son, reiterating that the vision was not his own. The visions of the Handmaidens appeared to defend Sabé, but Vader cut all four down as he declared the vision was full of lies.
Vader implored Sabé to embrace a future with him, but she threw herself back and exited the vision. As Vader's powers spiraled out of control again, throwing Sabé back, the Sith Lord gave Sabé a final chance to forge either suffering and power out of hate, warning her that she would die should she reject him, simply because he would not be able to control his abilities. At that moment, Vader believed his abilities in the Force were more powerful than any point prior in his life. Having engaged in introspection through the vision, specifically recalling Vader's slaying of his own wife and son, Sabé determined she could not join Vader. She rejected him and the question altogether, declaring she would not succumb to hatred. Utilizing his remaining control of the Force but telling himself it was his lack of control that did so, Vader responded by hurling Sabé far out into the ocean.
#### Reasserting Control
Seeking to regain control of his powers, Vader levitated their Lambda shuttle from the waters and entered it, fashioning an [electrostaff](/article/darth_vader%27s_electrostaff) to serve as both a cane and a laser weapon. He also equipped an energy shield on his exposed electronic left hand. Some time later, a group of human operatives, having received information that Vader had lost control of his abilities and damaged his own flagship, arrived at the island with the intention of assassinating Vader while he was unable to control the Force, believing this was their best chance to eliminate the Sith Lord. Vader was standing on the beach, leaning on his staff, leading the captain to underestimate him as a weakened opponent. Vader raised the wreck of the Lambda to block their ship's laser fire. As their ship circled around and fired a blast of fire, Vader protected himself with his energy shield and, as the ship passed over him, destroyed it with his laser staff. Vader approached the crashed ship and informed the leader that, so long as he had hatred, he had power.
### The Dark Lord and the Droids
#### Reunion with Aphra
<InsImage>
src="https://static.wikia.nocookie.net/starwars/images/8/8d/DV35-VaderreuniteswithAphra.png"
alt="Darth Vader tracks down Doctor Aphra on Sesid"
alignment="right"
height="382px"
width="250px"
>
Darth Vader tracks down Doctor Aphra on Sesid
</InsImage>
Driven by a desperate need to regain control of his abilities, Vader dispatched Ochi to locate the only individual who could assist him: Aphra. Locating Aphra in a cantina on [Sesid](/article/sesid), Ochi engaged her in a game of Sabacc while Imperial forces converged. Realizing the situation too late, Aphra attempted to escape, only to be confronted by Vader himself. Overcome with anxiety, Ochi helped Aphra to relax before she reminded Vader of everything she'd done for him and offered her services once more. However, their conversation was interrupted by bounty hunters sent by the Emperor to test Vader, whom the three of them dispatched. Upon learning of Vader's current condition from Ochi, Aphra inquired about her next assignment. Vader reminded her that she had abandoned him for dead on Tython, to which Aphra retorted that he remained unharmed. Allowing Aphra to return to his service, Vader brought her along as he and Ochi followed a map provided by her, meditating in private during the journey.
Arriving at a base on Ringo Vinda, Aphra revealed it to be the lost [headquarters](/article/istan_zaly%27s_headquarters) of a Separatist scientist and Kyber expert named [Istan Zaly](/article/istan_zaly). As they approached an entry hatch, Aphra warned that the base was likely heavily secured, suggesting that Ochi enter first. Despite Ochi's reluctance, Vader threw him down the hatch, where he was subjected to the base's security weaponry. Once Ochi had absorbed the brunt of the fire, Vader and Aphra followed him inside without resistance. Aphra then led Vader and Ochi to the [Zaly Shield](/article/zaly_shield), which she explained was composed of [Kyberite](/article/kyberite); a mineral that channels and directs the Force emitted by Kyber crystals that grow within it. Aphra added that, while the Separatists were unable to effectively utilize the shield against the Jedi, Vader could use it to focus his unstable Force abilities into concentrated attacks. Vader proceeded to test the shield on Ochi, blasting him away with a potent burst of Force energy. As Aphra reassured Vader of her support, the three of them were suddenly confronted by an army of droids, including ZED-6-7, Ought-Six, Gee-Ninety, 0-0-0, and BT-1.
Vader fought alongside Ochi and Aphra against the rebuilt droids. After a lull in the fighting, the droid Arex reactivated and launched another assault on Vader by seizing control of the knee joint that Vader had once claimed from the droid. However, Vader seized control of Arex and forced them to attack their fellow droids. ZED-6-7 then disabled Gee-Ninety and declared his allegiance to Vader. Impressed by this betrayal, 0-0-0 and BT-1 followed suit, assisting their former master in destroying the remaining droids. Once the battle concluded, Aphra departed with her droids aboard an extra ship, which Ochi reported to Vader. When Ochi inquired whether they should pursue them, Vader stated that he had acquired what he needed and instructed ZED-6-7 to rebuild all of the destroyed droids and reprogram them to serve under his command.
#### Scourge of the Sith
Having assembled his army, Vader returned to Mustafar with several of the droids, including ZED-6-7, Arex, and members of the Crush Pirates. Other droids from his new army were transported to the _Executor_ for repairs. Within his castle, he tested himself against a training droid, requesting another upon its destruction. He also tested his control over the Force, but one of his attempts resulted in an uncontrolled explosion of power as soon as he tried. However, thanks to the Zaly Shield, Vader was steadily regaining control over his powers. Unbeknownst to all, a new threat was emerging: when Vader and Sidious departed from the Amaxine Station, they left behind the disc dropped by the Fermata Cage, allowing the Spark Eternal to escape into it. The fusion of the Spark and the ancient droid spawned a new menace: the [Scourge](/article/scourge). The Scourge rapidly corrupted the droids of the _Imperial I_-class Star Destroyer [Chelator](/article/scourge_01), which had been dispatched by Palpatine to retrieve everything from the station, and then spread throughout the galaxy by corrupting droids as the "[scourge of the droids](/article/scourge_crisis)."
<InsImage>
src="https://static.wikia.nocookie.net/starwars/images/5/57/DD3-ScourgeattacksVader.png"
alt="A Scourge-infected DT-series droid ambushes Darth Vader while he is within his Fortress Vader bacta tank."
alignment="left"
height="231px"
width="300px"
>
A Scourge-infected DT-series droid ambushes Darth Vader while he is within his Fortress Vader bacta tank.
</InsImage>
The Scourge soon turned its attention to assimilating organics and controlling the Force itself. Consequently, it targeted Vader, whose cyborg nature made him susceptible to corruption, after Luke Skywalker mentioned Vader as a cyborg who could use the Force to a Scourge-corrupted C-3PO. After a moment on his throne, Vader removed his armor and entered his bacta tank, guarded by two Royal Guards. Secretly, the Scourge, utilizing information gathered from Imperial databanks and across its collective minds, [infiltrated](/article/scourge_attack_on_fortress_vader) Fortress Vader via a mouse droid containing a [spider-droid](/article/spider-droid), which it used to spread itself, infecting several [DT-series sentry droids](/article/dt-series_sentry_droid) stationed in the castle. As Vader rested in his bacta tank, two DT-series units ambushed the Sith Lord, murdering the guards and shattering the bacta tank, dragging the out-of-armor Sith Lord across the floor by the straps used to suspend him within the tank. While his control over the Force remained weak, Vader attempted to summon his lightsaber, but it was intercepted by one of the DT units, causing minor damage to its back.
One of the DT droids then struck Vader before both hurled him against the wall. However, the Scourge suddenly had to redirect its focus to the _Chelator_, which it had renamed '_Scourge_ 01 and transformed into its command ship, upon realizing the vessel was under [attack](/article/attack_on_scourge_01) from the [warrior-priest droid](/article/warrior-priest_droid) [Ajax Sigma](/article/ajax_sigma) and his [Second Revelation](/article/second_revelation) followers. With the droids before him distracted as the Scourge debated where to focus itself, an enraged Vader began to levitate with the Force and stared down his attackers, crushing both with the Force just as the Scourge totally refocused itself on fighting off Sigma's attack. Afterward, Vader rested against the wall, only to snap to attention when the spider-droid jumped at him: after its victory over Sigma, the Scourge, which learned the secret to controlling organic life was turning its transmission into a heart-beat-like frequency, refocused itself on Vader and attempted to infect him, but Vader crushed the small spider-droid with the Force, leaving him alone in the room with destroyed droids. While the Scourge had found cyborgs in the form of Magna Tolvan, Beilert Valance, and [Lobot](/article/lobot), it continued to lust after Vader, whose memories, knowledge, and sensitivity to the Force made him especially valuable.
#### Conflict for the Executor
Back in his armor and outside, surrounded by his droid followers, Vader continued testing his control of the Force without using the Kyberite Zay shield. He managed to suspend Ought-Six in the air for 2.3 seconds before losing control and destroying him, indicating some progress in regaining command of the Force. Arex suggested meditating like the Jedi to improve his concentration, which Vader dismissed as a sign of weakness. ZED-6-7 then interrupted Vader to inform him of a call from Amedda, who relayed an order from the Emperor to secure the hijacked _Executor_: in its second attempt to reach Vader, the Scourge had infiltrated the Sith Lord's flagship and corrupted the members Vader's new droid army aboard. The corrupted droids slaughtered the Imperial crew and forced the survivors to flee to the bridge, from which the droids hoped the organics would call Vader once he came aboard. On Mustafar, Vader also revealed to Amedda he had reprogrammed the droid uprising and demonstrated his powers by blasting apart Ought-Six and another crush pirate with the Zaly Shield, promising he had never been stronger. Ordered by Amedda to reach out when they arrived at the _Executor_ and with ZED-6-7 promising Ought-Six the destroyed units would be rebuild once again, Vader made his way back to his castle before leaving for the _Executor_ in the droids' ship.
As Vader and his droid servants flew towards the _Executor_, ZED-6-7 discovered that the majority of the flagship's crew had been killed before a group of TIE fighters piloted by Imperial astromech droids attacked their transport, firing upon it as a distraction before crashing into it. Refusing Ought-Six's request to retreat, Vader then rammed their ship into the side of the _Executor_, boarding the hijacked dreadnaught and getting contact from Piett, who informed him of the droid "possession." Armed with the Zay shield, Vader fired blasts at the corrupted battle droids and led his droid servants in battle towards a command center, where Vader shorted out several B1s, but also the control panel, with his staff. Without the hours needed to repair the command line to shut down all droids aboard, as Piett and the crew had mere minutes by ZED-6-7's count, Arex urged Vader to remember his Jedi training and repair the panels, as he had with himself on the river moon of Al'doleem. Vader gave ZED-6-7 the Zaly Shield and attempted to repair the machinery with the Force, only to fail before Arex again encouraged him to remember his Jedi past. Bombarded by visions of his past, Vader lashed out in anger and crushed Arex after another failed attempt to repair the panels.
<InsImage>
src="https://static.wikia.nocookie.net/starwars/images/e/e0/VaderShieldBlast-DV2020-37.png"
alt="Darth Vader leads his forces in a direct attack against the corrupted droids on the Executor."
alignment="right"
height="461px"
width="300px"
>
Darth Vader leads his forces in a direct attack against the corrupted droids on the Executor.
</InsImage>
---
---
Unable to disable the rogue droids remotely, Darth Vader opted for a head-on confrontation, leading his own mechanical legions into battle. He and his forces clashed with the corrupted B1 and B2 units until Vader instructed Gee-Ninety and the repaired Arex to provide cover for ZED-6-7 and Ought-Six as they worked to restore command-line functionality. Despite being overwhelmed by the attacking droids, Vader maintained his defense until ZED-6-7 delivered a message from Piett: an Imperial fleet of five Star Destroyers had arrived near the _Executor_ with orders from Amedda to destroy Vader's flagship in order to contain the Scourge. Amedda, lacking faith in Vader and citing the lack of communication from the Sith Lord and the ship's rapidly dwindling crew, believed the vessel was lost. However, Amedda's primary motivation was to eliminate Vader under the guise of the Scourge threat. Vader, disregarding Amedda's treachery, instructed Piett to hold firm and resumed fighting the attacking droids. Fortunately for the _Executor_'s crew, the fleet was commanded by Admiral Corleque, who had previously clashed with Vader during the pursuit to Exegol. Corleque defied the order to destroy the _Executor_, choosing instead to rescue Piett and his crew, intending to fire on the _Executor_ only after his former commander was safe.
However, Corlque's rescue attempt inadvertently provided the Scourge with a new supply of KX-series security droids, which the Scourge then used to kill the rescuers. Simultaneously, Vader eliminated the remaining corrupted battle droids. After obliterating the last of the droids with the Zaly Shield, Vader paused to regain his composure before requesting an update from ZED and Ought-Six, who were nearing completion of the failsafe. Suddenly, the Scourge utilized a surviving RA-7 series droid to taunt Vader, offering him assimilation while a spider-droid attempted to ambush him. ZED destroyed the spider-unit, but the Scourge then launched an attack on Vader and his droids using its KX-series droid bodies. Vader ordered ZED to activate the signal, which shut down all droids aboard the _Executor_, including ZED and Ought-Six. Vader then surveyed the battlefield his ship had become. While Piett and his crew contacted Corleque, who was surprised by Vader's survival, the Sith Lord departed for Mustafar aboard his TIE Advanced, carrying the heads of ZED, Ought-Six, Arex, and Gee-Ninety, with the intention of rebuilding them. As Corleque attempted to confirm Vader's destination with Amedda, the Scourge attacked his bridge with corrupted B2 units, forcing the _Executor_ and the fleet to destroy Corleque's flagship, the _Unbreakable_.
#### Who to hate
Upon returning to Mustafar, Vader entrusted the heads of his droid servants to another droid before departing, much to the befuddlement of the droid he encountered upon landing. He then sought the counsel of the Eye of Webbish Bog to aid him in seizing control. The Eye reminded Vader of his Sith nature, urging him to take what he desired by force. In response, Vader unleashed a blast of electricity from his staff upon the Eye in an attempt to regain control, an action the Eye predicted would be futile. Instead, the Eye advised Vader to target Sidious, reminding him of the Tragedy of Darth Plagueis the Wise. Vader agreed to the plan and reunited with his rebuilt droid servants, excluding ZED-6-7, aboard a _Lambda_-class T-4a shuttle for a journey to Palpatine's Palace on Coruscant, delaying their departure until ZED's return. However, ZED had been compromised by the Scourge, which exploited him to locate the lost [Techno Union droid factory](/article/techno_union_droid_factory) and corrupt a massive Octuptarra tri-droid. As Vader and his droids attempted to contact ZED, Arex suggested to Vader that ZED may have been corrupted, a suspicion confirmed when the Scourge [manifested as ZED and the Octuptarra](/article/attack_on_vader), protected against Vader's electrical staff and Zaly Shield blasts.
<InsImage
src="https://static.wikia.nocookie.net/starwars/images/e/e5/DV39-Vaderattacked.png"
alt="Darth Vader attempts to defend himself against the Scourges octuptarra body"
alignment="left"
height="307px"
width="300px"
>
Darth Vader attempts to defend himself against the Scourge's octuptarra body
</InsImage>
Lacking the Force control to simply dismantle the Octuptarra, Vader defended against the machine's attacks with the shield before being thrown against a wall. Vader re-engaged the Octuptarra, using the Zaly shield to deflect a blaster shot, as the Scourge mocked him with its plan to infect him. Arex attempted to attack the corrupted ZED but was seized by the throat and analyzed by the Scourge, which extracted the Jedi teaching "hate leads to suffering" from Arex's databanks. The remark reminded Vader of his belief that hate was the path to power, only for the Sith Lord to be knocked back once more. Prompted by Vader's remark, Arex decided to amplify Vader's hate by attacking him with Gee-Ninety, a conflict Ought-Six chose to avoid. Their effort was unsuccessful, with Vader merely responding with random Zaly shield blasts. Arex then implored him to consider what he truly hated. As a barrage of blasts from the Octuptarra destroyed the ground beneath him and he defended himself with the kyberite shield, Vader recalled the Jedi Order's failure to liberate himself and his mother, his own inability to save his mother, and his Force-choking of Padmé Amidala.
Channeling his self-loathing, Vader regained command of the Force and hurled the Octuptarra onto its side, enabling him to bisect it with his lightsaber. Although ZED's form was damaged, the Scourge addressed Vader as he approached, presuming that Vader had harnessed a hatred of it to recover his Force abilities. In response, Vader silently decapitated ZED while Arex declared the Scourge was nothing. Vader then levitated Arex, who proclaimed the Force was everything. Vader retorted by striking Arex with his lightsaber, but not destroying him, to demonstrate that he himself was everything. Vader subsequently returned to his castle and entered his bacta tank under the guard of two Royal Guards. While healing, Vader reached out to Sidious on Coruscant through the Force, revealing that he had delved deeper within himself, discovering that he hated his master even more than he hated himself. Vader journeyed to Coruscant aboard his TIE Advanced, carrying a collection of Scourged disc droids, to teach his master a lesson.
#### Return to Hoth
On one occasion, Vader received a communication from an Imperial General, who informed him of the destruction of one of the remaining probe droids on Hoth. When the General suggested dispatching an Imperial detachment to investigate, Vader asserted that he would go alone. The General offered to send reinforcements, but Vader insisted that he was sufficient. Upon arriving at the ruins of Echo Base, Vader found the probe and the wampas responsible for its destruction. His suit damaged during the encounter, Vader narrowly escaped the pack of wampas and forced his way into an abandoned AT-AT. As the wampas surrounded him, Vader regained his strength and emerged from the wreckage, slaying the wampas with his lightsaber. He was then retrieved by his forces and repaired aboard the _Executor_. Subsequently, the General remarked to Vader that he should have heeded his suggestion to bring backup, to which Vader responded by snapping his neck with the Force.
### Redemption
#### Gambit in the Endor system
Having failed in his schemes against his master, Vader resigned himself to servitude, believing Sidious to be too powerful to overthrow and leaving him no alternative but to obey. Vader and Sidious also conspired to turn Skywalker to the dark side. As Vader understood it, Skywalker was to be converted into a third member of the Sith Order, to be trained by Sidious. However, Sidious secretly planned to replace Vader with Skywalker as his apprentice. Vader was eager to find his son, believing that his son had no option but to serve the Emperor, as he thought of himself.
In accordance with his master's strategy to counter the Alliance's attempt to destroy the [DS-2 Death Star II Mobile Battle Station](/article/ds-2_death_star_ii_mobile_battle_station), Vader was dispatched to the [Endor system](/article/endor_system) to inform Moff [Tiaan Jerjerrod](/article/tiaan_jerjerrod) of the Emperor's impending arrival and to ensure the Death Star's timely completion, even if it required additional personnel. Indeed, the Emperor arrived weeks later and was greeted by Vader, Jerjerrod, and hundreds of officers and stormtroopers assembled to honor him. Pleased with the Death Star's progress, the Emperor sensed Vader's desire to continue searching for his son, but instructed him to be patient, much to Vader's disappointment.
<InsImage
src="https://static.wikia.nocookie.net/starwars/images/9/9d/VaderkillingZombies.png"
alt="According to a story told later in galactic history, Vader fought zombies aboard the second Death Star."
alignment="right"
height="236px"
width="250px"
>
According to a story told later in galactic history, Vader fought zombies aboard the second Death Star.
</InsImage>
According to a tale recounted by the [Espirion](/article/espirion_(species)) [Saan](/article/saan), Vader's demand for the Death Star's completion without additional manpower was addressed when an Imperial engineer named [Aklin](/article/aklin) employed a Sith ring pilfered from Palpatine's collection to resurrect deceased workers as zombies. According to the narrative, as Vader met with Jerjerrod to convey the Emperor's satisfaction, he noticed an unusual-looking Imperial officer—in reality, one of the zombies—and disregarded Jerjerrod to investigate. Vader entered a room to witness a Death Star trooper being attacked by a horde of zombies. Vader eliminated numerous zombies with his lightsaber and eventually located Aklin. Vader confiscated the Sith ring used by Aklin but permitted the zombies to remain, intending to keep them "alive" until the station was finished. As they assailed Aklin, Vader departed to return the ring to Palpatine's collection.
Vader adhered to Palpatine's directives and remained on the _Executor_ despite intelligence reports of the [Alliance Fleet](/article/rebel_alliance_navy) gathering near [Sullust](/article/sullust). During his stay on the Super Star Destroyer, the Rebel shuttle _Tydirium_ requested permission to land on the [forest](/article/tree) moon of [Endor](/article/endor). Sensing Luke's presence, Vader granted the request.
<InsImage
src="https://static.wikia.nocookie.net/starwars/images/2/2a/IWillNotTurn-Transformations.png"
alt="Luke surrendered himself to attempt to turn his Father to the light."
alignment="left"
height="193px"
width="250px"
>
Luke surrendered himself to attempt to turn his Father to the light.
</InsImage>
Restless after sensing his son, Vader returned to his master's side and reported the shuttle's arrival and his son's presence. The Emperor allowed him to land on Endor at the [shield generator base](/article/death_star%27s_shield_generator), where he was to await Luke, who, according to the Emperor, would seek him out. He complied with his orders and landed on Endor with the [Lambda-class T-4a shuttle](/article/lambda-class_t-4a_shuttle) _ST 321_. As predicted by Sidious, Luke surrendered himself during the night in an attempt to reason with him and bring him back to the [light side](/article/light_side_of_the_force). While Vader acknowledged his son's Force abilities and lightsaber construction skills, he rejected his son's pleas. Rebuffed, Luke declared his father's identity as Anakin Skywalker was "truly dead" as Vader sent Luke to the Emperor.
#### One last duel
<InsImage
src="https://static.wikia.nocookie.net/starwars/images/e/e8/RotJ-DeathStarDuel.png"
alt="Father and son fight as the Emperor watches."
alignment="right"
height="161px"
width="287px"
>
Father and son fight as the Emperor watches.
</InsImage>
Vader escorted his son to the Death Star and into the [Emperor's throne room](/article/emperor%27s_throne_room). Shortly thereafter, the Alliance Fleet arrived to discover that the [SLD-26 planetary shield generator](/article/sld-26_planetary_shield_generator) was still functioning, protecting the Death Star. As the [battle](/article/battle_of_endor) between the Imperial and Rebel fleets intensified and the Endor strike team endeavored to destroy the Endor base, the Emperor tempted Luke to succumb to his anger. In a moment of weakness, Luke struck out, but Vader intercepted his attack and engaged him in another duel. Throughout the duel, the two appeared evenly matched, but Vader was not trying to kill Luke, only to guide him closer to the dark side. This was successful when Luke employed the dark side to overwhelm his father, sending him tumbling down several stairs. When the Emperor urged him to embrace his anger again, Luke realized his actions and adopted a more defensive stance. Eventually, Vader telepathically sensed the existence of his daughter and Luke's twin sister, Leia, and threatened to corrupt her instead. It was then that his son lost control and attacked him ferociously, severing Vader's right hand and knocking him down.
Vader was then betrayed by the Emperor, who commanded Luke to finish Vader and assume his place at his side. Vader awaited Luke to kill him, as it was the Sith's way to destroy the weak, and believed that Luke would replace him, just as Vader had replaced Dooku decades before. Luke, realizing that he was becoming what he sought to destroy, cast his [lightsaber](/article/luke_skywalker%27s_green_lightsaber) aside and proclaimed himself a Jedi, as Anakin Skywalker had been before him. Enraged, the Emperor unleashed a continuous barrage of Force lightning upon Luke, intending to torture him to death. Luke pleaded with Vader to save him. Vader knew that his son would die, viewing it as the price Luke would pay for his weakness. However, he began to question whether it was truly weakness, since Luke had shown him mercy. He also saw how Luke still believed that there was good in him. Vader became conflicted over whether to save his son or continue to serve his master, similar to when he chose Sidious over Windu 23 years earlier.
<InsImage
src="https://static.wikia.nocookie.net/starwars/images/0/0a/DarthVaderEyes-LINEWebtoon.png"
alt="Darth Vader has a change of heart when he sees his son being tortured by his master."
alignment="left"
height="363px"
width="287px"
>
Darth Vader has a change of heart when he sees his son being tortured by his master.
</InsImage>
Hearing his son's plea for help once more, Vader returned to the light and chose to save Luke. He seized the Emperor with what remained of his arms and lifted his master high into the air, struggling toward the reactor shaft. Surprised but angered by his apprentice's betrayal, the Emperor unleashed an even more potent lightning attack on Vader, now Anakin once again. In his hatred, his sole intention was to inflict more pain upon his now-former apprentice, even though he could have used his powers to save himself. At the cost of the Emperor severely damaging his life-supporting armor, Anakin hurled his former master down into the reactor to his death. The persona of Darth Vader ceased to exist, and Anakin Skywalker, Jedi Knight, was reborn. By killing Darth Sidious and ending the Sith's reign, the redeemed Jedi restored balance to the Force and thus fulfilled his destiny as the Chosen One, as Qui-Gon Jinn had foreseen 35 years earlier.
#### Death
<InsImage
src="https://static.wikia.nocookie.net/starwars/images/a/aa/Anakinredeemed.png"
alt="Anakin Skywalker in his final moments with his son"
alignment="right"
height="122px"
width="291px"
>
Anakin Skywalker in his final moments with his son
</InsImage>
Just before Calrissian on the _Falcon_ and Wedge Antilles destroyed the Death Star's main reactor, Skywalker was carried by his son to the Imperial shuttle _ST 321_, where he requested Luke to remove his mask. For a fleeting moment, Anakin beheld his son's face for the first and only time. He finally saw him not as a Jedi, a threat, or a mistake, but as his and Amidala's son, and gave Luke a genuine smile—the smile that only his wife ever saw. As Kenobi and Yoda appeared to Anakin behind Luke, smiling down at the redeemed Skywalker, Luke insisted that he had to save him, but Skywalker told him he already had and asked him to tell his sister he had been right about him. He smiled at his son.
As he died, Skywalker tried to speak to Amidala, telling her of how their son had saved him before trying to apologize, but he passed on before he could finish the thought, dying in the arms of his son while Imperial forces panicked around them, unconcerned with the fate of their former lord. However, Anakin's soul would survive death; his heroic sacrifice allowed his spirit to be preserved in the Force by Kenobi and Yoda. With the death of Anakin Skywalker, Luke took his father's body aboard the shuttle and escaped just before the Death Star's destruction. Back on Endor, Skywalker built a funeral pyre for his redeemed father, and [cremated him](/article/funeral_of_anakin_skywalker) in the manner of a [Jedi's funeral](/article/jedi_funeral) in solitude, for the sight of Vader's helmet consumed by fire would be cause for rejoicing to everyone but him. Having fulfilled his destiny and saving his son, Anakin joined Yoda and Obi Wan, once again a hero, though unsung to everyone except in the eyes of Luke.
### Post-death
#### Appearing on Endor
As his son set the pyre ablaze to burn his armor, he was found by C-3PO and R2-D2, who invited him back to an [Ewok](/article/ewok) [village](/article/bright_tree_village) to celebrate their victory. As Luke rejoined his friends and sister, Leia at an amid the celebrations, Skywalker returned from the [Netherworld of the Force](/article/netherworld_of_the_force) in his pre-fall form alongside Yoda and Obi-Wan Kenobi. All three at peace for balance had returned to the Force, they smiled at Luke—pleased to know that, despite the best efforts of the Emperor, the Jedi had returned. Each thought to warn Luke about the future, as each saw that there was yet much danger ahead for him and more darkness to overcome; instead, they decided not to burden him with this then. Luke, in turn, saw them and felt their approval and their sense of peace.
Skywalker then asked his two mentors whether Luke would end up alright. Kenobi responded, noting that it was possible, given that he had been alright thus far. For the next years, Anakin's spirit, alongside Obi-Wan and Yoda, continued to guide Luke.
#### Ghosts of Vader's castle
<InsImage
src="https://static.wikia.nocookie.net/starwars/images/9/9c/Anakin-Ghost-GhostsofVaderCastle.png"
alt="Upon fulfilling his destiny as the Chosen One, Anakin Skywalker learned how to retain his individuality after death."
alignment="left"
height="330px"
width="214px"
>
Upon fulfilling his destiny as the Chosen One, Anakin Skywalker learned how to retain his individuality after death.
</InsImage>
Following the Battle of Endor, Vader's castle remained standing on Mustafar, and his former servant, Vaneé, was freed from the captivity the Sith Lord had placed him into when two young Mustafarians, [Tuttel](/article/tuttel) and [Giggek](/article/giggek), tried to destroy the fortress. Surviving the blast but breathing in the unfiltered [lava fumes](/article/lava_fume) of Mustafar, Vaneé began to hallucinate that which he feared the most, his master; Vaneé thought he was hearing the voice of Vader and that he could help resurrect his master. After using nightmares to lure [Lina Graf's crew](/article/lina_graf%27s_crew) to Fortress Vader, Vaneé began the process to restore Vader, yet Rebel officer [Lina Graf](/article/lina_graf), having realized that the servant was only hallucinating, pretended as if she was the reborn Vader to be freed, then turning on Vaneé and freeing her companions.
Vaneé was again left imprisoned in Fortress Vader, forced to breath in the lava fumes and hallucinate nightmarish visions of Vader. Meanwhile, Graf tried to use the lightsaber given to her by Vaneé to lead her crew out of the castle, yet the blade failed to activate when she needed it. Instead, the true Force spirit of Anakin Skywalker intervened, appearing in the fumes and making a lightsaber appear in his hands. Unable to see the face of their savior, the crew assumed it was Graf and followed the light of the blade outside to safety. As the crew left Mustafar aboard the _Rabbit's Foot_, they were left to speculate whose lightsaber they had seen in the fumes; Skywalker, standing on the surface of Mustafar with the lightsaber he had summoned still drawn, laughed to himself when Graf claimed she knew ghosts did not exist.
#### Encountering Ahsoka Tano
<InsImage
src="https://static.wikia.nocookie.net/starwars/images/8/8e/Anakin_Ahsoka_Training.png"
alt="Anakin Skywalker completed Ahsoka Tano's training in the World Between Worlds"
alignment="right"
height="169px"
width="300px"
>
Anakin Skywalker completed Ahsoka Tano's training in the World Between Worlds
</InsImage>
Around [9 ABY](/article/9_aby), after Luke Skywalker and Ahsoka Tano had met whilst the former began his Jedi Academy, Tano engaged on a quest to find a compass that would lead to Peridea, the rumored location of Grand Admiral Thrawn, in the hope of preventing the beginning of another war and the return of the Empire. Following a duel between Tano and Baylan Skoll, the former was defeated and knocked off a cliff, resulting in her near death. However, Tano awoke in the World Between Worlds, where Anakin Skywalker awaited her. Skywalker greeted her, though her back was turned causing her to call out in confusion. Skywalker then stated that he was not expecting to see her so soon. Tano finally turned around and saw Skywalker, before saying his name in shock, causing Skywalker to smile. Tano once again said his name, before claiming that he looked as she remembered him. Skywalker responded that she had grown old, which Tano chuckled about before stating that it was a part of life.
When Tano asked why she had come to the World Between Worlds, Skywalker reminded Tano that she had lost her fight with Baylan Skoll and told her that he was there to finish her training. While Tano stated her belief that it was too late for Skywalker to teach her, he asserted that one was never too old to learn. When Tano asked what her lesson would be, Skywalker ignited his lightsaber and attacked Tano, telling her that it was time to live or die. When Tano told her old master that she would not fight him, Skywalker said that he had heard that before; as Skywalker continued his assault, Tano ignited her lightsaber and defended herself. As Tano and Skywalker continued their duel in the World Between Worlds, Tano held her own and suggested that perhaps her master didn't have anything left to offer her. Skywalker, smiling, said that he hadn't taught her everything before slicing the platform beneath Tano, sending her falling into the depths below.
<InsImage
src="https://static.wikia.nocookie.net/starwars/images/7/75/Acme-VisionsofthePast.png"
alt="Skywalker would present the Clone Wars to Ahsoka, where the two would revisit their past"
alignment="left"
height="400px"
width="300px"
>
Skywalker would present the Clone Wars to Ahsoka, where the two would revisit their past
</InsImage>
Tano awakened as a younger version of herself in a location obscured by fog. As clone troopers in Phase I armor, many of the 501st legion, ran by her, she was greeted by Skywalker, now wearing armor and appearing as he did when she first met him; he confirmed that they were witnessing a battle from the Clone Wars. Tano didn't understand why they would be experiencing one of her first missions, which Skywalker said was the problem; as her master headed into battle, Tano ignited her original green lightsaber and followed him for answers. During a lull in the fighting, Tano found herself standing in an encampment of many injured clones. Finding a clone on a stretcher with a bandaged head, Tano rested her hand on the trooper, who reached with his own hand.
Skywalker found her and warned that more Separatist battle droids were approaching. Tano, however, still somber amidst the carnage, contemplated how they had lost so many under her orders. Skywalker offered masterly insight; he reminded Tano that they were in a war and that it was a Jedi's job to lead, but affirmed that the mistakes and losses weighed heavy on him. Skywalker explained how he had to teach his Padawan to be a soldier despite his upbringing as a keeper of the peace. Tano wondered if fighting was the only thing she would have to teach her own Padawan one day, but Skywalker pushed that fighting was how one survived. As explosions appeared in the distance, Tano mused that she might want to stop fighting, which Skywalker said would mean that she would die. As Skywalker advanced once more into battle, his appearance flashed between his Jedi self and his Sith identity of Darth Vader.
<InsImage
src="https://static.wikia.nocookie.net/starwars/images/4/43/Anakin_and_Ahsoka_at_the_siege_of_Mandalore.jpg"
alt="Anakin and Ahsoka revisited the Siege of Mandalore."
alignment="right"
height="138px"
width="300px"
>
Anakin and Ahsoka revisited the Siege of Mandalore.
</InsImage>
As Tano continued to relive her past, she battled Mandalorian super commandos at the Siege of Mandalore alongside clone troopers of the 332nd company. Clone Commander Rex spotted Tano, complementing her on her work before charging forward. Tano paused, surveying the battle as Skywalker approached her, saying that he did not recognize the battle currently unfolding. Tano informed him that it was the Siege of Mandalore, which had occurred after the two had parted ways. Skywalker proudly affirmed that Tano did well. Though Skywalker explained that Tano was the culmination of Skywalker's knowledge and the legacy of masters before him, Tano believed that her part of that legacy was one of death and war. Skywalker asserted that both he and Tano were more than that, but Tano recalled how Anakin had been more powerful and dangerous than anyone could have realized. At the mention of his fall, Skywalker said that Tano had learned nothing and reminded her of the choice he had given her: to live or to die. Skywalker ignited his lightsaber again, revealing a red blade and yellow eyes. Tano once again attempted to refuse a fight, but Skywalker pressed on, and the two dueled viciously.
Skywalker kicked Tano back into the inky darkness of the World Between Worlds as his form shifted back and forth to his helmeted Sith persona. Enraged by Tano's lack of conviction, Skywalker battered down Tano with strike after strike, claiming that it was time for her to die. Tano outmaneuvered Skywalker and took his lightsaber, holding it to his neck; however, she dropped the lightsaber into the void, saying that she chose to live. Satisfied, Skywalker smiled, bowing his head as his eyes returned to their normal state, and said that there was hope for her yet. As the World Between Worlds rumbled, Skywalker disappeared, and the mysterious plane slowly filled with water, enveloping Tano as she closed her eyes. Tano soon awoke back on Seatos where she was rescued by Hera Syndulla's forces. Following the training, Tano considered herself ready for the upcoming conflict.
<InsImage
src="https://static.wikia.nocookie.net/starwars/images/f/f4/AnakinSkywalkerPeridea-PartEight.png"
alt="Anakin Skywalkers spirit appears on Peridea to watch over Ahsoka Tano."
alignment="left"
height="192px"
width="300px"
>
Anakin Skywalker's spirit appears on Peridea to watch over Ahsoka Tano.
</InsImage>
Following Tano's journey along the [pathway](/article/pathway_to_peridea) to [another galaxy](/article/peridea) to find Grand Admiral Thrawn and save Sabine Wren and Ezra Bridger, she and Wren became marooned there. As they adapted to their new circumstances and gazed at the stars, Skywalker maintained his vigil over them. Wren detected something through the Force, dismissing it as tricks of the light, but Tano also sensed a presence and recognized Skywalker's spirit. Content, Tano walked away, knowing Skywalker would continue his watch. The presence of Skywalker, along with the convor Morai, confirmed to Tano that she was exactly where she needed to be.
#### Offering Assistance to His Son
In the year [21 ABY](/article/21_aby), Luke Skywalker, Anakin's offspring, embarked on a [search](/article/quest_for_exegol) for Exegol, encountering nine spectral Sith figures. During a moment of overwhelming adversity for Luke, a shimmering blue apparition materialized, initially mistaken by the Jedi for his mentor, Obi-Wan Kenobi. After the figure deflected the wraiths with a lightsaber, he turned and revealed himself as Anakin Skywalker. Skywalker extended his hand, and upon Luke taking it, he found himself back on Tython, as if the ordeal had been merely a dream.
On Tython, Skywalker's form flickered, alternating between his younger Jedi self and the aged visage Luke had glimpsed behind Darth Vader's mask. Luke discerned that his father appeared to be in anguish and dread. Skywalker elucidated that a disturbance in the Force, a shadow from a bygone era, was present. He further explained that the seeing stone had dispatched a fragment of Luke to Exegol, and it had required all his power to retrieve him. Anakin reminded Luke of his ability to alter the course of the Force if necessary and reassured him that he was never alone as long as he embraced the Force as his guide. Following this, Skywalker vanished.
### Lasting Impact
#### Remembrance Across the Galaxy
<InsImage
src="https://static.wikia.nocookie.net/starwars/images/8/8e/StarWars55.jpg"
alt="Darth Vader was remembered as a symbol of fear throughout the galaxy."
alignment="right"
height="455px"
width="300px"
>
Darth Vader was remembered as a symbol of fear throughout the galaxy.
</InsImage>
After the Battle of Endor, Luke Skywalker publicly confirmed the deaths of his father and the Emperor to the Alliance, which subsequently disseminated news of the battle's outcome, asserting its dominance over the galaxy. The Galactic Empire crumbled in the wake of the Emperor's death, his primary enforcer, and numerous high-ranking officers, leading to internal power struggles and fragmentation. Disinformation campaigns were initiated by the Imperial remnant, resulting in the spread of rumors regarding the deaths of Vader and the Emperor in certain regions of the galaxy. Sympathizers who were aware of the truth created [graffiti](/article/graffiti) stencils of Vader's helmet with the inscription "Vader lives" in locations such as Taris and [Coronet City](/article/coronet_city).
The [Acolytes of the Beyond](/article/acolytes_of_the_beyond), a group of devoted [Sith cultists](/article/sith_cultist) with a fascination for Vader, considered him superior to the Empire. They acquired a lightsaber believed to be Vader's from a [Kubaz](/article/kubaz) named [Ooblamon](/article/ooblamon), with the intention of destroying it and returning it to him in death. Months after the Battle of Endor, the Acolytes instigated a [revolution](/article/coronet_city_revolution) on Coronet City, Corellia, attacking a [Peace and Security station](/article/peace_and_security_headquarters) to gain access to a [museum's](/article/unidentified_coronet_city_museum) basement and steal a red-bladed lightsaber, for reasons unknown. Another [Sith cult](/article/sith_cult), the [Alazmec of Winsit](/article/alazmec_of_winsit), established a colony in the [Corvax Fen](/article/corvax_fen) amidst the remains of Fortress Vader, venerating Vader as their Dark Lord and the galaxy's "true father" and ruler.
Although Vader was once a secretive figure, his reputation expanded during the Galactic Civil War and after his demise. By the time of his death, Vader had become, in the words of the future Jedi Padawan [Rey](/article/rey_skywalker), "the most hated man in the galaxy." Vader, along with its stormtroopers and other military forces, became a symbol of the fallen Empire he had helped enforce. [Decades](/article/standard_decade) after his death, Darth Vader remained a controversial and despised figure in the New Republic. The revelation that Organa was his biological daughter damaged her reputation, ultimately leading to her resignation from the [Galactic Senate](/article/new_republic_senate). The message, recorded by Bail Organa for Leia, explicitly revealing Vader's prior identity as the Jedi Knight Anakin Skywalker, was made public by [Centrist](/article/centrists) Senator [Ransolm Casterfo](/article/ransolm_casterfo), manipulated by [Carise Sindian](/article/carise_sindian), an operative of the [First Order](/article/first_order).
Leia's father's cruel actions were exploited against her by the Quarren general Nossor Ri during diplomatic talks with the king of Mon Cala, [Ech-Char](/article/ech-char), regarding potential support from Mon Cala for the [Resistance](/article/resistance) in [34 ABY](/article/34_aby). Terex, a former Imperial stormtrooper who became an agent of the [First Order Security Bureau](/article/first_order_security_bureau], remained unimpressed by Captain [Phasma](/article/phasma), considering her less menacing than Vader.
<InsImage>
src="https://static.wikia.nocookie.net/starwars/images/3/30/BenSolo-SWTLC.png"
alt="Ben Solo was the grandson of Anakin Skywalker."
alignment="left"
height="241px"
width="220px"
>
Ben Solo was the grandson of Anakin Skywalker.
</InsImage>
Leia and Han Solo's son, [Ben Solo](/article/ben_solo), Anakin's grandson, inherited his mother's Force sensitivity and was sent to [train](/article/jedi_training) under his uncle Luke. Under the influence of the enigmatic [Snoke](/article/snoke), Ben adopted the identity of Kylo Ren, becoming a master of the Knights of Ren and a warlord in the First Order. He pledged to complete the work Vader had begun a generation prior, aiming to succeed where Vader's sentimentality had failed. Unbeknownst to all, Snoke was a puppet of the resurrected Darth Sidious, whose spirit had taken refuge in a clone body on Exegol after Vader destroyed his original form. Palpatine learned from Vader's betrayal and used Snoke as a puppet rather than an apprentice.
Ren sought to surpass Vader in various instances, such as when he [fought](/article/battle_against_the_benathy_(first_order)) the Benathy, mirroring Vader's actions years earlier, to prevent their territorial expansion. He brought [Ruthford](/article/ruthford), the last survivor from Vader's battle, and engaged in a brief exchange with [Kristoff](/article/kristoff), the successor of the king Vader had slain, who remarked that Vader was taller and more imposing than Ren. Ren subsequently killed him with his lightsaber. He then confronted the Benathy, and despite Ruthford's urging to retreat, Ren persisted, discussing how Vader had also refused to retreat. When the Benathy's god, a Zillo Beast, appeared, Ruthford warned Ren extensively, asserting that he couldn't prove anything to a dead man. Ignoring the warning, Ren entered a shuttle and allowed the beast to swallow him, killing it from within, much to Ruthford's astonishment, and succeeding where Vader had failed. With their king and god dead, Ren gained control over the Benathy, and even the skeptical Ruthford acknowledged Ren's victory over his grandfather.
Ren's pursuit of Snoke and betrayal of the [Jedi Order](/article/jedi_order) led to Skywalker's self-imposed exile in search of the [first Jedi Temple](/article/first_jedi_temple) on [Ahch-To](/article/ahch-to). After losing his apprentices in the [destruction of his Jedi Temple](/article/destruction_of_the_jedi_temple) and Solo's fall to the dark side on the same night, Skywalker concluded that the Jedi Order should end with his death as the last Jedi. He held the Jedi responsible for the training and creation of Darth Vader. As a result of severing himself from the Force, Luke lost the guidance of Anakin's spirit.
<InsImage
src="https://static.wikia.nocookie.net/starwars/images/7/79/Kylo_Ren_Vader_Helmet_Chamber.jpg"
alt="The legacy of Darth Vader inspired his grandson, Kylo Ren, to destroy the last remnants of the Jedi Order."
alignment="right"
height="141px"
width="250px"
>
The legacy of Darth Vader inspired his grandson, Kylo Ren, to destroy the last remnants of the Jedi Order.
</InsImage>
Ren also possessed Vader's mangled helmet, recovered from his funeral pyre on Endor. Serving as a silent testament to the dark side's power and its fragility, it resided in Ren's private quarters aboard the _Finalizer_, where he communed with it whenever he felt drawn to the light. Another artifact that once belonged to Anakin—the lightsaber he constructed after the First Battle of Geonosis, wielded by his son until their duel on Bespin—reemerged in [Maz Kanata](/article/maz_kanata)'s possession and beckoned to Rey, a young scavenger from [Jakku](/article/jakku), who ultimately used it to duel Ren during the [Battle of Starkiller Base](/article/battle_of_starkiller_base) and prevail. When Ren shifted [quarters](/article/kylo%27s_chambers) from the _Finalizer_ to Snoke's flagship, the _Supremacy_, he abandoned Vader's charred helmet, feeling unprepared to confront Vader's "visage" until he recovered from his defeat on [Starkiller Base](/article/starkiller_base). Ren's master, Snoke, possessed [a ring](/article/snoke%27s_ring) crafted from obsidian sourced from Vader's castle.
#### Upholding Equilibrium
Following Skywalker's death, a group of Alazmec cultists established a settlement near Fortress Vader in the Corvax Fen region of Mustafar, venerating Vader alongside [Lady Corvax](/article/corvax). They acquired an ancient Sith [wayfinder](/article/vader%27s_wayfinder) that had once belonged to Vader. In [35 ABY](/article/35_aby), Kylo Ren orchestrated a [massacre](/article/mission_to_mustafar_(first_order)) of the Alazmec cultists and seized Vader's wayfinder from the ruins of the battle. When Ren utilized this [wayfinder](/article/wayfinder) to locate Exegol and confront the resurrected Darth Sidious, Palpatine employed the voice of Darth Vader to communicate with Ren in his mind.
<InsImage
src="https://static.wikia.nocookie.net/starwars/images/0/05/The_Skywalkers.jpg"
alt="With Ben Solos death, the bloodline of Anakin Skywalker ended."
alignment="left"
height="173px"
width="250px"
>
With Ben Solo's death, the bloodline of Anakin Skywalker ended.
</InsImage>
As Leia Organa Skywalker Solo prepared to expend her remaining strength to reach her son, Ben Solo, she allowed the voices and faces of her family to envelop her. Among the voices she heard was that of Anakin Skywalker, whose apology she finally accepted, reciprocating his love in a manner she had never done before. Skywalker's voice was later heard by Rey among the chorus of Jedi from the past who aided her in vanquishing Darth Sidious during the [Battle of Exegol](/article/battle_of_exegol), urging Rey to restore balance as he had done. He and the legion of Jedi channeled their eternal power to assist Rey in defeating Sidious once and for all, preserving the equilibrium Anakin had established. Ren, who had reclaimed his identity as Ben Solo, sacrificed himself to save Rey, emulating his grandfather Anakin's path of redemption. Although Solo was the last of the Skywalker lineage, Rey adopted the name Skywalker, and Anakin was finally reunited with his family in the afterlife.
## Character Traits and Attributes
### Jedi of the Republic
<InsImage
src="https://static.wikia.nocookie.net/starwars/images/4/46/TheChosenOne-SWE.png"
alt="Anakin Skywalker was a gifted yet unorthodox Jedi Knight who rose to prominence during the Clone Wars."
alignment="right"
height="340px"
width="180px"
>
Anakin Skywalker was a gifted yet unorthodox Jedi Knight who rose to prominence during the Clone Wars.
</InsImage>
Anakin Skywalker, even as a young boy, possessed a compassionate and generous nature. This was evident when he risked his life in a podrace to assist Qui-Gon Jinn and Padmé Amidala in leaving Tatooine during a critical situation. He cultivated friendships, with Kitster Banai, a fellow slave boy, being his closest confidant. He openly expressed his emotions and displayed a reluctance to abandon those he cherished. Skywalker harbored a profound fear of loss, particularly concerning his mother, a sentiment detected by Master Yoda during his evaluation by the Jedi Council. This fear would haunt Skywalker throughout his life, ultimately leading him down the path of the dark side, especially after the death of his mother, Shmi, filling his heart with sadness, anger, and guilt for years to come.
He also experienced this fear in relation to his friends, particularly when he believed that Obi-Wan had been killed by the bounty hunter Rako Hardeen, which drove him towards the dark side. However, upon discovering that it was a deception to prevent Chancellor Palpatine's kidnapping, he felt betrayed for not being informed sooner, leading to distrust towards Obi-Wan and the Jedi.
After being separated from his mother, Skywalker, feeling the pain of childhood abandonment and the loss of the only person who had ever cared for him before his encounter with the Jedi, clung to anyone who showed him affection. Initially, it was Qui-Gon Jinn, but he also lost the Jedi Master. Subsequently, he clung to figures like Obi-Wan Kenobi, Padmé Amidala, and Ahsoka Tano. Similarly, his experiences as a slave instilled in him a deep-seated resentment towards slavers. Skywalker generally kept these feelings to himself, rarely discussing them, even with those he trusted, as he struggled to overcome his past, making a conscious effort to avoid dwelling on it.
As he matured, Skywalker developed a reputation for being cocky, reckless, impatient, headstrong, and cavalier, despite Kenobi's efforts to provide him with the best possible training. Possessing confidence and boldness, he lacked subtlety, a trait that Plo Koon observed was one of the many that his Padawan, Ahsoka Tano, had acquired from him during her formative years. Another was his inclination to disregard orders, which he did whenever he believed that they were not the most effective way to resolve problems, along with his arrogance. Despite his numerous shortcomings, Skywalker remained selfless, willing to sacrifice his life for others, and demonstrated a commitment to causes greater than himself, such as the Jedi, the Republic, his friends, and his wife.
His unwavering determination was unparalleled, perhaps only matched by that of his Padawan. When Tano went missing in action and was taken to the moon of Wasskah, Skywalker blamed himself, believing he had failed to protect his student, and relentlessly searched star charts for her possible location, despite Plo Koon's suggestion to trust in her abilities. Indeed, Tano survived and guided others to safety, and upon her return to Coruscant, she assured her master that there was no need for apologies, explaining that he had already done everything necessary, as she had used his teachings to survive. When Skywalker was uncertain how to respond, she expressed her gratitude for his guidance, to which Skywalker replied, "You're welcome, my Padawan." In some respects, his role as a mentor to Tano facilitated his growth and increased responsibility. Skywalker's emotional stability, however, was disrupted by the High Council's decision to expel Tano, when she was suspected of treachery, and her subsequent decision not to rejoin the Order when invited back. Although he missed her greatly, Skywalker respected her wish to remain apart from the Order when he sensed her aboard the _Silver Angel_, allowing the ship to pass by his _Venator-class Star Destroyer_.
<InsImage
src="https://static.wikia.nocookie.net/starwars/images/a/ae/AnakinSkywalkerDedicatedMentor-CM.png"
alt="Skywalker was an impulsive but dedicated mentor."
alignment="left"
height="241px"
width="250px"
>
Skywalker was an impulsive but dedicated mentor.
</InsImage>
His heroic exploits during the Clone Wars eventually elevated him to the status of a symbol of the Jedi Order, revered by many as the warrior-savior of the Galactic Republic, earning him the moniker of the "[Hero With No Fear](/article/hero_with_no_fear)." He was fostered and liked by Supreme Chancellor Palpatine, applauded by the Galactic Senate and popularized on the [HoloNet News](/article/holonet_news). With a penchant for showmanship, Skywalker possessed a maverick spirit, albeit not in the same vein as his late informal Jedi Master Qui-Gon Jinn, who was known among the Jedi for his passionate and impulsive nature. Most of his peers trusted him and his ingenuity, although some Jedi considered his approach to logic to be simplistic. The 501st Legion and its captain, Rex, regarded his tactics as reckless and unorthodox but appreciated the fact that he would never jeopardize their lives without risking his own. Whenever Skywalker, who believed that a true military leader should always lead from the front, threw caution to the wind, Rex was invariably by his side and had complete faith in his general's instincts. Skywalker cared for his troops and even formed a friendship with Rex. Skywalker also displayed eagerness and dedication to ending the Clone Wars, which he believed, in their final days, were undermining the principles of the Republic.
Despite his commitment to the Jedi Order since joining, Skywalker harbored deep-seated conflicts about it, contemplating leaving the Order on several occasions before and during the Clone Wars, primarily due to his love and secret marriage to Padmé Amidala, whom he believed he could not live without. Possessive and prone to jealousy, Skywalker's affection for her was suspected by some of his peers, and at least Obi-Wan Kenobi and Rush Clovis knew for certain that he was attracted to her. Ahsoka Tano also came to realize that her master and Amidala had formed a relationship, and Rex knew for certain, with Skywalker entrusting his captain to watch out for passersby as he spoke with Amidala. Another source of conflict was his dwindling trust and growing resentment towards the Jedi High Council, which he felt distrusted him and was not treating him with sufficient respect. These fears and resentments were further fueled by Palpatine's manipulations and certain decisions made by the Council (and Kenobi), as well as his friendship with Chancellor Palpatine, of whom the Council was wary and kept secrets from. Kenobi and the Jedi Council's failure to support Ahsoka Tano during her trial angered him.
<InsImage
src="https://static.wikia.nocookie.net/starwars/images/c/c4/Anakin-Rex-Ahsoka.png"
alt="Anakin Skywalker was a man who forged deep connections with his friends, looking out for their wellbeing at all times."
alignment="right"
height="128px"
width="300px"
>
Anakin Skywalker was a man who forged deep connections with his friends, looking out for their wellbeing at all times.
</InsImage>
As the Clone War neared its conclusion, Skywalker faced numerous burdens on his emotional well-being; he lost Tano, only to lose clone troopers Tup and Fives shortly thereafter, making it seem as though his personal life was crumbling. The only constant in his life was his wife, whom he hoped would never abandon him after losing his Padawan. Unlike other Jedi, Skywalker struggled to control his emotions, particularly his anger. He deeply cared about his friends and, as Ahsoka Tano noted, "looked out for them until the end." Unquestionably loyal, Skywalker was willing to go to any lengths to protect those he cared about, often resorting to the dark side of the Force to do so. Throughout the Clone Wars, as Palpatine had intended, Skywalker's anger would draw him closer to the dark side, but his ultimate fall was triggered by his fear of loss after experiencing visions of Amidala dying in childbirth and his desire to acquire enough power to save his loved ones. He would justify his immoral and ruthless actions as necessary to bring peace, justice, and order to the galaxy.
As a teenager, he enjoyed exploring and discovering new places, as well as repairing things. At times, when he felt troubled during his time as a Jedi, Skywalker would retreat to his highly customized quarters in the Temple, where he would tinker with droids to pass the time. Similarly, he maintained ownership of the ship _Twilight_ during the Clone Wars, as the freighter provided Skywalker with ample opportunities for tinkering with machinery. As Vader, he would continue to repair his starfighters himself, and the act of repairing things would serve as a form of meditation for him. Reflecting on Vader's life as a Sith Lord and his life before his descent into darkness, Sabé believed that Anakin Skywalker was someone who had never truly controlled his own life and destiny. Consequently, she hoped to offer him a chance to take control of his own existence: when she expressed this sentiment to Vader during the Force Wave event, she was unable to complete her sentence due to being forced back by a surge of Vader's uncontrolled power.
<InsImage
src="https://static.wikia.nocookie.net/starwars/images/f/fc/Vader1.jpg"
alt="For all the blame that could be pointed at other people, Anakin Skywalker was ultimately the one responsible for the choices he made."
alignment="left"
height="288px"
width="300px"
>
For all the blame that could be pointed at other people, Anakin Skywalker was ultimately the one responsible for the choices he made.
</InsImage>
Conversely, Kenobi placed the blame for Skywalker's fall squarely on Skywalker himself, although Kenobi had spent a considerable amount of time blaming himself. For a decade after their duel on Mustafar, Kenobi held himself responsible for Skywalker's fall and apologized to his former disciple after their duel on a desolate moon. Vader, however, rebuked Kenobi and claimed credit for "killing" Anakin Skywalker, attempting to convince himself that the Jedi Knight he had once been was dead. Finding himself able to move on after Vader's comment, Kenobi noted how Skywalker possessed all the necessary tools to choose the path of light but made the conscious decision not to. He reminded the spirit of Qui-Gon Jinn that, regardless of the degree of fault each of them bore, the final decision had been Skywalker's alone. Nevertheless, Kenobi deeply missed his friend.
### Dark Lord of the Sith
<InsImage
src="https://static.wikia.nocookie.net/starwars/images/e/eb/VaderAnakin-DV5cover.png"
alt="Skywalkers desire to save his wife led him to do terrible things and become the Sith Lord, Darth Vader."
alignment="right"
height="330px"
width="265px"
>
Skywalker's desire to save his wife led him to do terrible things and become the Sith Lord, Darth Vader.
</InsImage>
Upon his conversion to the dark side, Skywalker's arrogance became even more pronounced, and for a brief period, he believed himself to be more powerful than Palpatine. During his early days as a Sith, Vader believed in justice and was committed to bringing it to the Empire at any cost. His impulsiveness and tendency to act in anger were also amplified; for example, when he discovered that Kenobi had stowed away on his wife's ship when she arrived on Mustafar, he immediately assumed that she was conspiring with his former master and strangled her with the Force. Despite this, Vader did experience significant regret for the decisions he had made to save Amidala.
However, everything changed following his defeat at Kenobi's hands. Having lost everything he had turned to the dark side to protect, and having no other recourse, he fully embraced the dark side and became, in Palpatine's words, a "true Sith." Convinced that he had become an irredeemable monster, Vader devoted himself entirely to furthering his connection to the Force, learning to amplify his power and utilizing the pain of Amidala's death as fuel. Nonetheless, the Jedi training droid Arex believed that the early Vader still retained memories of the Jedi teachings despite his newfound devotion to the Sith. Due to both what Palpatine had taught him about the relationship between Sith master and apprentice and his own personal tendencies, Vader in his early apprenticeship was completely devoted to the Emperor. In his initial days as a Sith Lord, Vader was confronted by a vision of himself finding redemption by killing Palpatine and apologizing to Kenobi. However, Vader rejected the vision, declaring that he had lost everything else in his life and that an existence as a Sith was all that remained for him. However, as his power grew, and particularly after learning of his son's existence, his devotion to Sidious diminished considerably. Instead, he contemplated ruling the galaxy with his son as the new leaders of the Empire.
<InsImage
src="https://static.wikia.nocookie.net/starwars/images/d/d0/Holding-Hope.png"
alt="Darth Vader was the dreaded enforcer of his Sith Master and the galaxy-wide empire they forged."
alignment="left"
height="345px"
width="230px"
>
Darth Vader was the dreaded enforcer of his Sith Master and the galaxy-wide empire they forged.
</InsImage>
Vader harbored contempt for those who betrayed the Empire, such as when he accused Leia Organa of being a traitor. According to an Imperial captain who worked with Vader, the Sith Lord was always violent but would "mature" over the years. Initially, Vader simply murdered those who annoyed him. However, he eventually began to wait for those he intended to kill to make a mistake; even a minor error provided Vader with an excuse to carry out the execution. Indeed, over the years since his descent into darkness, Vader developed a new, more hardened, and disciplined persona. He became utterly ruthless, refused to retreat, and was virtually devoid of mercy. Even though he once thought to himself that his master's punishment of the most loyal Imperials only hurt their efforts to establish order, Vader was known to occasionally kill his own officers for their failures. Vader came to view the Galactic Civil War not as a war but as a series of executions, believing that wars were for lesser beings than him and his Master. When confronted by Leia Organa on Vrogas Vas, he informed her of this belief and told her that her execution was long overdue, although he was unable to kill the princess due to the arrival of Commander Karbin. Vader treated droids as disposable servants.
Eventually, the identity of Vader within the Empire gave rise to tales of a dark-armored [humanoid](/article/humanoid) who served as the Emperor's most trusted enforcer and was considered to be the most feared individual in the Empire. Rumors circulated that he resided in a castle in a world of lava and that he wielded a red lightsaber, suggesting a connection to the Sith. The few who had interacted with him stated that they were unsure whether the individual behind the armor was a living person, a droid, or a clone trooper. Many feared that if Vader were ever defeated, numerous duplicates would be activated in his place. The Sith Lord also had no qualms about using torture to achieve his objectives.
<InsImage
src="https://static.wikia.nocookie.net/starwars/images/b/b0/Star_Wars_Darth_Vader_2_Cover.jpg"
alt="Darth Vader earned the ire of Imperial officers and the love of the rank and file."
alignment="right"
height="450px"
width="300px"
>
Darth Vader earned the ire of Imperial officers and the love of the rank and file.
</InsImage>
Esteemed as the initial instrument of fear for the Empire and known for his archaic manner of speech, he was relentless and unstoppable, creating unease among a majority of the Imperial naval command. Even Admiral Firmus Piett, whose exceptional battlefield leadership maintained his survival under Vader's command, was not immune to the Dark Lord's threats of execution. When Piett alerted him to the Scourge droid infestation, Vader's sole reaction was to reprimand Piett for assuming he would replicate the admiral's failures. In contrast to the strained relationships he maintained with most Imperial officers, his connection with his stormtroopers closely mirrored his prior self's bond with the clone troopers of the Republic. Indeed, his standing among the common soldiers was so pronounced that it was widely acknowledged, even as far as Ryloth, that the stormtrooper corps "almost worshiped him." Moreover, Vader enjoyed the unwavering devotion of his servant, Vaneé, who remained stationed at his castle on Mustafar and was aware of Vader's self-perception as a monster.
A component of his mystique was his usual silence (thus making his presence a strong, unspoken threat), whereas displays of leniency were not. In fact, it was common knowledge that he generally favored personally overseeing operations, utilizing action to suppress any unwelcome emotions. He frequently clashed with those who lacked belief in the Force, deeming it "disturbing" or even sacrilegious.
<InsImage
src="https://static.wikia.nocookie.net/starwars/images/a/a2/DarthVader-BlackWhiteRed1-virginvariant-Okazaki.jpg"
alt="Darth Vader was a man fueled by pain, turning it into a fuel to continue his life as a Sith Lord."
alignment="left"
height="384px"
width="250px"
>
Darth Vader was a man fueled by pain, turning it into a fuel to continue his life as a Sith Lord.
</InsImage>
Driven by self-loathing, he entertained self-destructive thoughts, such as blaming his former mentor Obi-Wan Kenobi for failing to kill him on Mustafar. His resentment towards Kenobi for the events on Mustafar fueled a desire to incinerate his former mentor's remains to the same degree as his own. Although Vader despised Obi-Wan for being the cause of his extensive injuries suffered on Mustafar, Vader did not completely hold Kenobi accountable for his descent into darkness. As he declared to his former master during one of their confrontations, it was not Kenobi who extinguished Anakin Skywalker, but rather himself. Darth Vader persisted in his deep-seated hatred for the Tusken Raider race due to their murder of his mother near the conclusion of the Separatist Crisis, which motivated him, following negotiations with the crime lord Jabba the Hutt, to assault a Tusken Raider encampment situated on the same planet where he witnessed his mother's demise.
In his early days as a Sith, he asserted the righteousness of his actions, proclaiming that the Sith were on the correct side while portraying the Jedi as the true evil, as he conveyed to Kenobi during their duel on Mustafar. As he aged and resided within his suit, he maintained his belief in justice, professing to be a staunch advocate of Imperial propaganda aimed at establishing order in the galaxy. Indeed, Vader would gain recognition as the Dark Lord of order, although the extent of his genuine belief in the pursuit of establishing order remained questionable. During the pursuit of the pacifist scientist [Galen Erso](/article/galen_walton_erso), Vader challenged the concept of peace, viewing violence as the true architect of order and dismissing pacifists as fools who failed to recognize this reality. He declared to his son that they would collaborate to reverse the disorder plaguing the galaxy.
During the conflict with Crimson Dawn, Vader harbored disdain for his master's failure to establish order, privately musing that Palpatine's actions had merely engendered the chaos they confronted. Even without Skywalker at his side, Vader embarked on a fresh endeavor to impose order upon the galaxy. His campaign to eradicate Crimson Dawn infiltrators within the Empire was perceived by him as a means of achieving order. Despite acknowledging the Emperor's punishment of the Empire's most loyal members amidst the collapsing state as a chaotic issue, Vader permitted the execution of loyal Imperials if it meant the elimination of Dawn operatives as well. When questioned by his agent Ochi regarding this, Vader declared it as integral to his mission to restore order to the Empire by eradicating the chaos wrought by the Dawn. When his agent Sabé characterized the cessation of Jul Tambor's revolution as a pathway to peace on Skako Minor, Vader paused momentarily before correcting her, asserting that it was more accurate to state they were establishing order. However, Sabé would ultimately conclude that Vader was, in actuality, disinterested in establishing order, observing during the culminating stages of the Schism Imperial crisis that his current pursuit of personal power had only fostered chaos.
<InsImage
src="https://static.wikia.nocookie.net/starwars/images/c/c1/Conquering-Shadow.png"
alt="Darth Vader was a warrior of hatred who carried out a campaign of terror and death."
alignment="right"
height="140px"
width="280px"
>
Darth Vader was a warrior of hatred who carried out a campaign of terror and death.
</InsImage>
As a Sith Lord, Vader derived strength from his rage and anguish, lamenting the loss of his wife and unborn child, the betrayal by the Jedi, and Kenobi for his injuries. He once leveled a villa in a Mapuzo settlement entirely to lure out Kenobi. He frequently utilized pressurized meditation chambers that permitted him to remain without his helmet—the neural interface to his armor—during which he experienced the constant agony that Kenobi had inflicted upon his flesh. During these sessions, he would meditate to channel this pain into his hatred, which, in turn, fueled his power, and he never laughed. Professing to feel no remorse, yet haunted by his past and the screams of his wife, he was determined to never discuss his former life and despised everything that reminded him of his past self, whom he deemed to be weak. He dared not recall such a period of his life, which he abhorred; indeed, through the use of the dark side, he kept his memories as Anakin Skywalker suppressed, although it required significant effort even after two decades of practice.
Although he retained access to Skywalker's memories and experiences, this suppression was such that he refused to even consider Skywalker as himself, referring internally to Skywalker's memories as those of "The Jedi." Consequently, Vader rarely contemplated his former name and believed that no one in the galaxy should mistake him for Anakin Skywalker, desiring that none forget his status as a Sith Lord. Nevertheless, his rapport with the stormtroopers who supported him, and the technique he displayed in wielding his crimson lightsaber, led Wilhuff Tarkin to suspect the truth. When the reprogrammed Arex attempted to assist Vader in regaining control of his powers during the Force Wave incident by suggesting Jedi meditation, Vader denounced the Jedi Order for focusing on weakness instead of power, threatening Arex by reminding the unit of how he killed the unit's master Kirak Infil'a and demanding that Arex not speak of the Jedi. After Arex, who conceded they may be presuming too much, repeatedly suggested Jedi teachings to him during the battle for the _Executor_, Vader destroyed Arex in rage and adopted a direct method of attack to regain control of his flagship.
<InsImage
src="https://static.wikia.nocookie.net/starwars/images/0/00/Scariest-Servant-Vader.png"
alt="Darth Vader desperately sought to destroy what remained of his past, regarding himself as a different person from The Jedi who had come before."
alignment="left"
height="207px"
width="300px"
>
Darth Vader desperately sought to destroy what remained of his past, regarding himself as a different person from "The Jedi" who had come before.
</InsImage>
Upon his fateful reunion with Ahsoka Tano, Vader expressed no inclination to rekindle their former bond, boasting that he had "killed" Anakin Skywalker, just as he had stated to Kenobi. Although he claimed he would spare her and collaborate with her once more if she aided the Empire in locating any hidden Jedi, he callously resolved to kill her when she rejected his offer, and he scorned her offer of compassion. During a mission with Grand Admiral Thrawn, who had encountered and befriended Skywalker during the Clone Wars, Vader repeatedly asserted that Skywalker was long deceased, ultimately compelling the Chiss officer to concede that the man he had befriended during the war was gone. Upon hearing Thrawn's admission, Vader declared that they were never to speak of the man again, although Thrawn stated he would always carry Skywalker's memory with him, consistent with his philosophy that someone was never truly gone if a friend remembered them.
As before, Vader remained an impatient individual, although he tempered his impulses with the unwavering obedience he displayed towards his Sith master, Sidious. Vader also acknowledged that Sidious could be even more malevolent than himself. Nevertheless, Vader remained a tormented figure, and he would attempt to inflict harm upon himself and others to alleviate his suffering. As sensed by Yoda, Vader's presence in the Force was rigid and potent, pulsating intensely when he sensed him. However, Vader's presence also conveyed a profound, crushing solitude, which only intensified after he killed Obi-Wan Kenobi.
### Redemption of Anakin Skywalker
<InsImage
src="https://static.wikia.nocookie.net/starwars/images/a/a3/Vader-ROTJHD.png"
alt="The persona of Darth Vader ended when Anakin Skywalker sacrificed himself in order to save his son from the Emperor."
alignment="right"
height="159px"
width="250px"
>
The persona of Darth Vader ended when Anakin Skywalker sacrificed himself in order to save his son from the Emperor.
</InsImage>
Following the revelation of his parenthood, Vader experienced emotional turmoil. Vader's thoughts of his son, Luke, evoked memories of his deceased wife, the woman he loved and destroyed—thoughts he could not tolerate. Memories would resurface whenever he sensed Luke's presence near him, and thus, he believed in erasing that part of his past. He had grown fearful of his compassionate son; not due to his mastery of the Force or skill with a lightsaber, but because Luke could compel him to question the dark truths that had long governed him. On the eve of the Battle of Endor, Vader asserted that it was too late for him, even as his son stubbornly believed that there was still good within him. Vader would suppress these questions with the dark side, but he ultimately demonstrated concern for his son. Ultimately, it was Luke's plea for assistance while being tortured by Palpatine that prompted Anakin to reawaken and redeem himself, demonstrating that despite all the malevolent acts he had committed, there was still inherent goodness within him.
His affection for Luke also challenged his loyalty to the Emperor. Vader began to distrust him, feeling like another pawn in his machinations. He plotted to assassinate him and seize his throne, deeming himself a superior ruler alongside Luke. His concern over being a pawn of Sidious was ultimately validated when Sidious attempted to replace him with Luke, akin to when he replaced Dooku with Vader. Vader was taken aback when he sensed that he was not the father of one child but two when he telepathically sensed his daughter, Leia, through Luke. Before succumbing to death, Skywalker instructed Luke to inform Leia that he was right about him, desiring that his daughter remember him as a benevolent individual in the end. Smiling at his son, Skywalker then passed away peacefully.
### Relationship with Padmé Amidala
Skywalker initially encountered Amidala when she was disguised as a handmaiden and commoner at Watto's shop in Mos Espa. There, Skywalker inquired if she was an angel. He was subsequently surprised when Padmé revealed herself to be the Queen. A decade later, Skywalker met with her at an apartment following an assassination attempt on her. As Skywalker continued to shield Amidala from further attempts, he endeavored to impress her and flirt with her in ways he later regretted. However, the missteps he and Amidala made during that period revealed their true selves to each other, and Amidala fell in love with him. They confessed their mutual affection for each other on Naboo and, following the Battle of Geonosis, were secretly married.
<InsImage
src="https://static.wikia.nocookie.net/starwars/images/b/b0/Husband_and_wife.png"
alt="Anakin married Padmé following the Battle of Geonosis."
alignment="left"
height="148px"
width="250px"
>
Anakin married Padmé following the Battle of Geonosis.
</InsImage>
During the Clone Wars, Skywalker and Amidala rarely saw each other due to their respective duties during the war, as well as the need to maintain the secrecy of their marriage. Skywalker would rescue and protect Amidala from numerous perils, such as General Grievous, the Zillo Beast, and the Blue Shadow Virus. Skywalker also experienced jealousy towards Amidala's close friend, Senator Rush Clovis of Scipio. Despite Amidala's assurances that her relationship with Clovis was over, Skywalker felt uneasy when she accepted the Jedi Council's mission to spy on Clovis. After departing Cato Neimoidia, Skywalker reassured Amidala that he never doubted her. Later, however, Skywalker did not completely trust Clovis with Amidala. Skywalker assaulted Clovis when he attempted to kiss Amidala, but Amidala suggested they should not see each other for a period of time. When Clovis appeared to have rejoined the Separatists, Skywalker led his forces and personally attempted to rescue Amidala.
Later, when Amidala revealed that she was pregnant, Skywalker experienced premonitions about Amidala dying during childbirth. Skywalker's fear ultimately led him to embrace the dark side; Palpatine informed him of how Darth Plagueis taught his apprentice how to circumvent death, but he subsequently stated that he required Skywalker's assistance to acquire this power. Fixated on the possibility of saving Amidala, Skywalker failed to recognize the contradiction. On Mustafar, Skywalker, now Darth Vader, Force-choked her when he believed that she had brought Kenobi to kill him. Following his duel with Kenobi, Vader continued to sense Amidala. After his rebirth, however, the Emperor informed Vader that he had killed her in his anger. Vader mourned her and succumbed to his rage, destroying the medical droids surrounding him and then attacking Palpatine, screaming that he had claimed she could be saved.
Vader believed Palpatine's lie that he had killed his wife because he recalled attacking her; thus, the man who once was Anakin Skywalker was severed from his former allies and family, instead placing the Emperor as his sole source of guidance and refuge. As a Sith Lord, Vader attempted to discover methods to resurrect Amidala, yet he discovered that Momin's portal was incapable of doing so. Subsequently, he resolved to dedicate himself fully to the dark side, but he still yearned to restore his wife, only for his attempts to invariably fail. Even after informing a vision of Amidala that the man she loved was dead, Force-choking the vision—just as he had choked the real Amidala on Mustafar—to reject her love, he, deep down, still loved her. He could never relinquish the anguish caused by killing his wife.
Vader eventually discovered that Amidala had given birth to a son, Luke Skywalker, and a daughter, Leia Organa. He even learned of Amidala's final words, which filled him with sorrow. Through Luke's acts of love, Vader later returned to the light, fulfilling Amidala's dying words that goodness still resided within Anakin.
## Powers and abilities
### Lightsaber abilities
<InsImage
src="https://static.wikia.nocookie.net/starwars/images/5/53/Darth_Vader_Dark_Lord_of_the_Sith_20_Textless.jpg"
alt="Vader was a skilled duelist, having retained his former personas proficiency in lightsaber combat."
alignment="right"
height="358px"
width="237px"
>
Vader was a skilled duelist, having retained his former persona's proficiency in lightsaber combat.
</InsImage>
Despite possessing exceptional natural talent, Anakin Skywalker was initially negligent in his lightsaber training, although he believed he could rival the Jedi Masters. Despite his relative indolence, Skywalker was the most accomplished duelist in his class, even though he commenced training later than his classmates. In his training, he prioritized lightsaber combat over Force mastery, dedicating more time to the physical aspects of becoming a Jedi. By the age of nineteen, Skywalker was so exceptionally gifted and skilled in dueling that he believed he already rivaled Master [Yoda](/article/yoda). When the Clone Wars commenced, Skywalker was a sufficiently skilled duelist to contend against Count Dooku, who was among the most skilled swordsmen in the galaxy. During the war, his frequent engagements in duels with individuals such as the informal Sith apprentice Asajj Ventress, Savage Opress, Count Dooku, and fallen Jedi Barriss Offee allowed him to significantly enhance his capabilities with a lightsaber. By the conclusion of the war, Skywalker possessed the skill to single-handedly defeat Dooku in combat, despite the fact that the Count was one of the few duelists who could hold his own against Yoda.
During his duel with Kenobi following his fall to the dark side, Skywalker proved to be equally matched with his former master, and was only defeated when Kenobi exploited his arrogance and blinding rage to dismember him. Skywalker was regarded by some within the Jedi Order, such as Kanan Jarrus, as having been the greatest warrior the Order possessed during the Clone Wars, with the only potential exceptions being Yoda and Mace Windu. His former Padawan, Ahsoka Tano, once acknowledged Skywalker as a powerful individual who rarely lost his battles.
Skywalker was particularly proficient in [Form V](/article/form_v)—both the Shien and Djem So variants. He was capable of deflecting not only blaster fire with ease, but also shots from freighters. He effectively utilized Djem So's strength-based strikes and counterattacks to overpower or overwhelm his opponent. Skywalker also employed [Jar'Kai](/article/jar%27kai) on occasion: He utilized Kenobi's lightsaber during his initial duel with Count Dooku on Geonosis, he wielded Barriss Offee's own lightsaber against her alongside his own, and he wielded Dooku's lightsaber in addition to his own to execute him after defeating him on the _Invisible Hand_.
Skywalker was also adept in the use of [Form IV](/article/form_iv), often incorporating its techniques (primarily acrobatics) into his dueling style. He was well aware that the key to deflecting the fire of multiple adversaries was fluidity of motion, which he mastered sufficiently to have adapted the classic techniques of Form IV to better defend against ranged attackers. He demonstrated this in a holographic recording, later discovered in [Kanan Jarrus' holocron](/article/kanan_jarrus%27_holocron).
<InsImage
src="https://static.wikia.nocookie.net/starwars/images/0/0a/Battlefront_Vader.jpg"
alt="Darth Vader wields his Sith lightsaber."
alignment="left"
height="309px"
width="220px"
>
Darth Vader wields his Sith lightsaber.
</InsImage>
After Darth Vader underwent his cybernetic enhancements and donned his armor, his dueling style became visually more straightforward than it had been, presumably due to his armor and cybernetics influencing his physical abilities; however, Vader's style remained sufficiently similar to how he fought as a Jedi that Admiral Tarkin was able to deduce Vader's former identity largely by observing him fight. Vader continued to employ Jar'Kai on various occasions. On Mustafar, he [Force pulled](/article/telekinesis) a [smuggler's](/article/corvax_descendant) lightsaber and wielded it with his own to eliminate the last remaining droid in [Lady Corvax's sanctum](/article/corvax_fortress). On another instance, Vader wielded his weapon with one of Darth Atrius's lightsabers against a group of thugs whom Sana Starros had hired to protect her from the Imperials.
A pragmatic combatant both as Skywalker and later as Darth Vader, he possessed the skill to hurl an activated lightsaber to attack, guiding it with the Force, or he would resort to lethally activating unsuspecting opponents' lightsabers. He once impressed Kenobi by telekinetically activating lightsabers (both in the arms dealer Chong's possession) and bisecting him before retrieving the lightsabers to his hands.
### Force powers
<InsImage
src="https://static.wikia.nocookie.net/starwars/images/6/67/Vader_Force_Absorb_ALNL.png"
alt="Vader absorbing blaster bolt energy with his hand."
alignment="right"
height="186px"
width="250px"
>
Vader absorbing blaster bolt energy with his hand.
</InsImage>
Endowed with impressive reflexes characteristic of a Jedi, Jedi Master Qui-Gon Jinn discerned immense potential in the 9-year-old Skywalker and believed him to have been conceived by the Force itself. Indeed, when his blood was analyzed, Skywalker's midi-chlorian count was off the charts—exceeding 20,000, reportedly even surpassing Yoda's. At the age of nine, Anakin already possessed adeptness in quick reflexes and precognition. He utilized this to his advantage when participating in pod racing. He was also capable of sensing objects without visually perceiving them.
During his teenage years, Skywalker's Force training progressed to the point where he could manifest various abilities, and Kenobi regarded him as being "advanced for his age." He was highly skilled in utilizing the Force to scan his surroundings, such as when he sensed poisonous kouhuns infiltrating Senator Padmé Amidala's bedroom from outside. He was also proficient in sensing other people's emotions and disturbances in the Force. Skywalker also exhibited aptitude for precognitive dreams, as when he foresaw the deaths of both his mother and his wife in dreams, as well as his own transformation into a Jedi, back when he resided with his mother on Tatooine. However, Skywalker struggled in utilizing the Force to control and befriend animals, noting that Kenobi was far superior to him in this regard.
Skywalker was skilled in telekinesis. Even as a late beginner, by his own admission, he was very proficient in it, surpassing any of his peers and the majority of the older Padawans as well. He could effortlessly levitate lightsabers in the air and ignite them, as he once did to intimidate a pair of Padawans who had labeled him a "slave to his emotions." Despite possessing an exceptionally strong connection to the Force, Skywalker tended to refrain from utilizing it frequently during lightsaber duels, focusing instead on the physical aspects of combat. This tendency persisted even when facing opponents who liberally employed the Force during duels, such as Count Dooku. He was also capable of exercising animal control.
During the Clone Wars, Anakin's power and skill continued to escalate. He became capable of utilizing telekinesis to accomplish esoteric tasks such as creating air bubbles around another person's head to facilitate breathing underwater, as demonstrated when he saved Padmé's life at Mon Cala. During his mission to Utapau, Anakin was able to discern brain waves on a deceased body, and upon his initial encounter with Grand Admiral Thrawn, he was able to sense his thoughts by reaching out to him through the Force. At one juncture during the war, Skywalker was able to telekinetically subdue both the Son and the Daughter simultaneously. However, this empowerment was lost when the Dark side grew too powerful and disrupted the balance in the Force.
<InsImage
src="https://static.wikia.nocookie.net/starwars/images/7/7e/Vader_no_at-at.png"
alt="Vader uses the Force to stop an AT-AT from crushing him on Cymoon 1."
alignment="left"
height="547px"
width="250px"
>
Vader uses the Force to stop an AT-AT from crushing him on Cymoon 1.
</InsImage>
Following his cybernetic reconstruction, Vader's connection to the Force intensified considerably, to the extent that his master Darth Sidious once lauded his powers as being "unparalleled." Although his injuries had physically crippled him, Vader believed that the suffering he had endured had both refined his spirit and liberated him from the constraints of the flesh, enabling him to concentrate solely on his relationship with the Force. He demonstrated sufficient telekinetic power to prevent an AT-AT from crushing him and was in the process of dismantling it before he was interrupted. On another occasion, he telekinetically lifted two [AT-DP](/article/all_terrain_defense_pod) walkers off of himself without any apparent exertion. He also demonstrated the ability to seize a Twi'lek freighter with engine damage and bring it to the ground, as well as crush a _Lambda_-class shuttle's engines midflight to force it to crash. He was capable of utilizing a Force push in a wave-like manner that was potent enough to obliterate numerous lyleks simultaneously, despite the fact that the creatures' carapaces were impervious to even heavy blaster fire.
Vader could also project Force barriers to shield himself and others. These barriers were sufficiently powerful to protect him while submerged in the lava of Mustafar, albeit for a limited time. On at least one occasion, he demonstrated that he could telekinetically manipulate targets without the need to gesture at them as virtually all other Force adepts did. This granted him the ability to hurl objects with the Force while actively engaged in swordplay. He was also capable of utilizing the Force Stasis ability and was sufficiently skilled in its execution that on one occasion he used it to freeze two Inquisitors simultaneously.
Vader was also capable of employing his telekinetic abilities to perform exceptionally delicate, complex, and precise tasks. On one occasion, he restored his severely damaged cybernetic limbs to perfect working order by disassembling a broken droid and telekinetically repairing himself with its components. He also demonstrated the ability to crush internal organs with the Force. At one point during an interrogation, he utilized the Force to inflict torturous amounts of pain on several insurgent prisoners, even causing heart failure in one of them.
Skywalker developed a predilection for employing Force choke over the course of his tenure as a Jedi, particularly when angered or using it as a means of interrogation when an individual was uncooperative. Skywalker would proceed to utilize this power to lethal effect when he assumed the name Vader, generally using the choke to eliminate those who insulted him or failed to meet his expectations, as well as to instill fear. He also employed the technique to twist, crush, or snap his victim's neck, notably executing Commander Fox in this manner, as well as other clone troopers and later stormtroopers.
Like the majority of Force adepts, Vader also possessed the ability to significantly augment both his strength and speed with the Force. He was also highly skilled at [using the Force to leap](/article/force_jump) great distances. During the [mission to investigate Geonosis](/article/mission_to_investigate_geonosis), Captain Rex remarked that Jedi Knight Kanan Jarrus had yet to demonstrate Skywalker's skill with Force jumps, despite having just leaped across a chasm more than 40 meters wide.
Vader demonstrated on numerous occasions the ability to [probe the thoughts of others](/article/mind_probe_(force_power)), including those of Force adepts of similar power to himself. Due to his strong connection with his son, Luke, he was able to sense his presence through the Force with relative ease—as opposed to his master, who was skeptical about this ability, and quickly became able to mentally communicate with him upon Luke learning he was Vader's son.
### Other skills
Even at a young age, Skywalker exhibited a remarkable aptitude for piloting, mechanics, and engineering. He rebuilt the protocol droid C-3PO, an advanced droid fluent in over six million forms of communication, as well as a functional podracer. Although during his adulthood, he would rarely utilize his talent as a mechanic, he retained the skill of repairing technology. Vader had displayed great power in hunting and exterminating the Jedi Order, leaving his later efforts against enemies like Crimson Dawn to require far less effort. Once most Jedi had been killed, Tarkin believed that Vader was actively searching for stimulating opponents to challenge himself.
<InsImage
src="https://static.wikia.nocookie.net/starwars/images/b/b6/VadersTIEAdvanced-DV2.png"
alt="Darth Vaders TIE Advanced"
alignment="right"
height="225px"
width="260px"
>
Darth Vader's TIE Advanced
</InsImage>
As a starfighter pilot, Skywalker possessed an unparalleled aptitude, a skill that few could match. Kenobi, in a later conversation with his son Luke, called him "the most gifted star pilot in the galaxy." Anakin demonstrated his piloting talent by racing podracers, becoming the first and only human to participate in such a race. Furthermore, he survived the Battle of Naboo and continued to hone his aerial skills and combat prowess. During the Clone Wars, Anakin earned a reputation as the Republic's top pilot, known for leading assaults and consistently emerging victorious. He displayed remarkable skill in target pursuit, evading enemy lock-ons, and executing complex maneuvers. His Force sensitivity granted him enhanced reflexes, enabling him to dodge incoming fire and pinpoint enemy locations. Notably, he showcased remarkable precognitive abilities, accurately predicting his targets' movements during aerial engagements. On one occasion, he successfully landed the severely damaged _Invisible Hand_ as it broke apart in the atmosphere.
Even after his transformation into Darth Vader, he retained his exceptional piloting skills, as evidenced by his near-destruction of Phoenix Squadron while flying a lone TIE Advanced x1. He effortlessly outmaneuvered their entire fleet, compelling their command to abandon ship. Additionally, he decimated multiple Alliance squadrons during the Battle of Vrogas Vas. Despite his proficiency, Skywalker's combat piloting career wasn't without its setbacks. Ahsoka Tano once joked that crashes were inevitable when he was at the controls, although Skywalker often blamed the spacecraft itself. While he primarily relied on lightsabers, Skywalker was also highly skilled in using [blaster pistols](/article/blaster_pistol). He also received training in the use of [staves](/article/staff), a skill he later imparted to a Felucian village for self-defense. Skywalker was fluent in [Galactic Basic Standard](/article/galactic_basic_standard), [Huttese](/article/huttese), [Jawa Trade Language](/article/jawa_trade_talk), and [Meese Caulf](/article/meese_caulf), while possessing an understanding of [binary](/article/binary) and the [Bith language](/article/bith_(language)). As Vader, he mastered the ancient [Sith tongue](/article/ur-kitt%c3%a2t), which he used in communication with his master, Sidious.
## Gear
### Attire
<InsImage
src="https://static.wikia.nocookie.net/starwars/images/c/ca/AnakinsPadawanAttire-SW100Objects.png"
alt="Skywalkers Padawan attire upon being taken as Obi-Wan Kenobis Padawan."
alignment="left"
height="328px"
width="150px"
>
Skywalker's Padawan attire upon being taken as Obi-Wan Kenobi's Padawan.
</InsImage>
While enslaved on Tatooine, Skywalker typically wore a simple tan-colored tunic. With his knack for engineering, he managed to rebuild C-3PO and construct his very own podracer. During the Battle of Naboo, he sported a Naboo pilot's helmet while piloting an N-1 starfighter. Upon joining the Jedi Order, he donned traditional Jedi robes and received a Padawan braid. He also carried a bit driver, which he misplaced during Yoda's rescue, and possessed his own lightsaber, which met its end on Geonosis. Subsequently, he acquired a replacement saber with a green blade for the arena confrontation, before obtaining a new lightsaber for the Clone Wars. Early in the conflict, Skywalker integrated pieces of [commander armor](/article/jedi_commander_armor) over his Jedi attire. Later, he opted for standard Jedi robes without the armor, although he did wear the armor once more when he encountered Commander Thrawn. While working undercover on the _Halcyon_, Skywalker wore a brown and grey outfit, which defined his muscular build, that included a cape.
<InsImage
src="https://static.wikia.nocookie.net/starwars/images/c/c8/FineArtPrints-Darth-Vader-The-Chosen-One.png"
alt="Darth Vader, the man who was once Anakin Skywalker, relied on a suit of life support armor."
alignment="right"
height="286px"
width="200px"
>
Darth Vader, the man who was once Anakin Skywalker, relied on a suit of life support armor.
</InsImage>
Throughout the Clone Wars, Skywalker piloted his personal Delta-7B _Aethersprite_-class light interceptor. As the conflict progressed, he upgraded to the newer Eta-2 _Actis_-class light interceptor. Both starfighters were painted yellow; the Eta-2's color was a deliberate homage to his old podracer. Skywalker also maintained ownership of the _Twilight_, a freighter he commandeered from Teth, which he used for clandestine missions. As a Jedi General, he commanded a fleet of starships from the _Venator_-class Star Destroyer _Resolute_. He could also be transported to battlefields aboard a Low Altitude Assault Transport/infantry gunship. While trying to reach the Republic Center for Military Operations, Skywalker and Captain Rex traveled in a [Praxis Mk. I turbo speeder](/article/praxis_mk._i_turbo_speeder).
In his early days as a Sith Lord, Darth Vader continued to wear his Jedi robes and flew a green Eta-2 _Actis_-class light interceptor. After suffering severe burns on Mustafar, he was outfitted with black life support armor, complete with a black cape. Following his victory over Kirak Infil'a, Vader claimed his lightsaber and corrupted its kyber crystal to create his own, which he further customized after surviving an assassination attempt. During his time as a Sith, Vader piloted a personal starship, black Eta-2 fighters, and the TIE Advanced x1. Palpatine also gifted Vader Padmé Amidala's old Naboo Royal Starship. Following torture by Sidious and abandonment on Mustafar, Vader repaired his armor using parts from destroyed battle droids and restored his green Eta-2. He also acquired an ancient wayfinder. After reaffirming his loyalty to his Sith Master, his armor was repaired.
### Lightsabers
Throughout his life, Anakin Skywalker wielded a total of at least four distinct lightsabers. The first was a weapon he constructed and used during his time as a Padawan learner under the tutelage of Obi-Wan Kenobi. This lightsaber was destroyed on a droid factory assembly line on Geonosis. Subsequently, during the Battle of Geonosis and his duel with Count Dooku (also known as the Sith Lord Darth Tyranus), Skywalker briefly wielded a green-bladed lightsaber belonging to a fallen Jedi. Soon after, Skywalker constructed a second blue-bladed lightsaber, similar in design to his first. He used this weapon extensively throughout the Clone Wars, battling a wide range of adversaries, including Dooku, his Sith apprentice Asajj Ventress, and bounty hunters like Cad Bane. Even after his transformation into the Sith Lord Darth Vader, Anakin Skywalker continued to wield his Jedi weapon when he was ordered to attack the Jedi Temple on Coruscant and eliminate the Separatists on Mustafar. Following his duel with Kenobi on Mustafar, his former master claimed the weapon after the now-Sith Lord's defeat. Kenobi later entrusted the lightsaber to Anakin's son, Luke. Vader then crafted a new weapon, a black-alloy version of his original with a red blade, which he used throughout the Imperial Era. The Sith Lord employed his lightsaber against surviving Jedi, including his former apprentice Ahsoka Tano, and in several rematches against his old master Kenobi. Although Vader's lightsaber prevailed in battle against Luke's use of Anakin's lightsaber, the Sith's lightsaber was lost during his final duel with Luke and his death.
## Production Information
### Development
<InsImage
src="https://static.wikia.nocookie.net/starwars/images/5/54/MCQ-deakvader.jpg"
alt="Concept art of Darth Vader fighting the character that would become Luke Skywalker"
alignment="left"
height="128px"
width="268px"
>
Concept art of Darth Vader fighting the character that would become Luke Skywalker
</InsImage>
Anakin Skywalker, initially introduced as Darth Vader, debuted as a primary antagonist in [Star Wars: Episode IV A New Hope](/article/star_wars:_episode_iv_a_new_hope). As the _Star Wars_ saga expanded, Skywalker's character underwent significant development and exploration, with [George Lucas](/article/george_lucas) ultimately positioning him as a central figure in the initial six _Star Wars_ installments. The character's widespread popularity and prominence led to his adoption as a mascot for the _Star Wars_ franchise, frequently depicted in merchandise as the armored Vader. According to _Star Wars: Behind the Magic_, Lucas intended the name "Darth Vader" to evoke the concept of "dark father."
The concept of Darth Vader as a cybernetic being in a suit was not initially conceived. In the original scripts for _A New Hope_, "Darth Vader" was simply the designation of a standard Imperial general. The idea of a cybernetic Vader emerged during the conceptualization of the opening scene involving the boarding of the _Tantive IV_. The initial vision involved Darth Vader flying through space to board the ship, necessitating a protective suit and breathing apparatus. This suit was later made permanent and integrated into the narrative. Vader's all-black uniform and unwavering loyalty to Emperor Palpatine were intended to draw parallels to the [Schutzstaffel (SS)](https://en.wikipedia.org/wiki/schutzstaffel) of Nazi Germany.
<InsImage
src="https://static.wikia.nocookie.net/starwars/images/c/ce/Anakin_Skywalker_Episode_1_Concept_Art.jpg"
alt="Concept art of Anakin Skywalker as a child"
alignment="right"
height="307px"
width="200px"
>
Concept art of Anakin Skywalker as a child
</InsImage>
To safeguard the pivotal revelation in [Star Wars: Episode V The Empire Strikes Back](/article/star_wars:_episode_v_the_empire_strikes_back) from potential leaks, Lucas employed a strategic misdirection tactic. Actor [David Prowse](/article/david_prowse) was instructed to deliver the line, "Obi-Wan killed your father" during filming. Subsequently, [James Earl Jones](/article/james_earl_jones)' voice was dubbed in, revealing the true nature of Vader's relationship in the iconic line, "_I_ am your father." The only individuals privy to this crucial secret were the writers, [Mark Hamill](/article/mark_hamill) (who was informed shortly before filming the scene), and Jones. Speculation has arisen that George Lucas derived the name "Anakin" from his friend and fellow filmmaker Ken Annakin. However, Lucas refuted this claim through his publicist following Annakin's passing in 2009.
In Lucas's initial script for [Star Wars: Episode VI Return of the Jedi](/article/star_wars:_episode_vi_return_of_the_jedi), Vader was to encounter Yoda and Kenobi once again as their Force spirits materialized aboard the second Death Star, deflecting Darth Sidious's Force lightning aimed at Luke Skywalker. Another alteration occurred at the film's conclusion: the redeemed Anakin Skywalker, along with Yoda and Kenobi, would have been resurrected and embraced by his son. In his article "[Rewind of the Jedi](/article/rewind_of_the_jedi)" for _Star Wars Insider_, [James Floyd](/article/james_floyd) humorously suggested that Skywalker's survival might have deterred Ben Solo from succumbing to the dark side, given his experience in such matters.
Darth Vader's charred helmet makes an appearance in the [2015](/article/2015) film [Star Wars: Episode VII The Force Awakens](/article/star_wars:_episode_vii_the_force_awakens), the inaugural installment of the [sequel trilogy](/article/sequel_trilogy). The inclusion of Anakin as a Force spirit or within a Force vision was a subject of debate among the filmmakers. Concept artist [Iain McCaig](/article/iain_mccaig), inspired by the adage "When you light a candle, you also cast a shadow," created a [2013](/article/2013) artwork depicting Anakin's ghost shifting between his two personas. However, according to [Phil Szostak](/article/phil_szostak), McCaig's idea was unsolicited by [J.J. Abrams](/article/j.j._abrams) or any member of the film's production team. Szostak recalls that Anakin's Force ghost artwork did not originate from an early script draft or treatment. Actor [Hayden Christensen](/article/hayden_christensen) was initially considered to reprise the role, but Anakin's presence in the film was ultimately omitted, although Christensen has since returned to the role on several occasions, including a vocal cameo in the sequel trilogy's [2019](/article/2019) finale [Star Wars: Episode IX The Rise of Skywalker](/article/star_wars:_episode_ix_the_rise_of_skywalker).
On both the [2005](/article/2005) DVD cover of [Star Wars: Episode III Revenge of the Sith](/article/star_wars:_episode_iii_revenge_of_the_sith) and the film's poster, the scar on the right side of Skywalker's face is absent.
Anakin, along with specific aspects of his character, has been represented by several musical themes within the film scores. These include "[Anakin's Theme](/article/anakin%27s_theme)," "[Anakin's Betrayal](/article/anakin%27s_betrayal)," "[Anakin's Dark Deeds](/article/anakin%27s_dark_deeds)," "[Across the Stars](/article/across_the_stars)" (his love theme with Padmé), and "[The Imperial March](/article/the_imperial_march)" (as Darth Vader).
### Darth Vader as a cultural icon
<InsImage
src="https://static.wikia.nocookie.net/starwars/images/b/b0/DarthVader-CotF.jpg"
alt="Vaders image has joined other mythic and historical figures as a symbol for evil."
alignment="left"
height="171px"
width="213px"
>
Vader's image has joined other mythic and historical figures as a symbol for evil.
</InsImage>
Given his pivotal role in the _Star Wars_ films, Vader has become ingrained in popular culture as an archetypal and terrifying villain. The [American Film Institute](https://en.wikipedia.org/wiki/american_film_institute) ranked him third among the greatest movie villains, surpassed only by Hannibal Lecter and Norman Bates. Lord Vader's commanding, deep voice, coupled with his ominous, mechanical breathing, is instantly recognizable to film audiences, symbolizing his transformation from a virtuous individual to a malevolent cyborg.
Vader has been extensively parodied and imitated by characters in various forms of popular culture. He has been satirized by figures such as "[Heinz Darthenshmirtz](/article/heinz_darthenshmirtz)" in _Phineas and Ferb: Star Wars_, "Dark Helmet" from [Spaceballs](https://en.wikipedia.org/wiki/spaceballs), and numerous other parodies in animated shows, including "Duck Vader" from Tiny Toon Adventures and "Darth Koopa" from the _Super Mario Bros._ TV series. Other fictional characters draw inspiration from Vader's archetype in a more serious manner. One such example is "Death's Hand" from the video game Jade Empire, who is similarly confined to a suit of armor, complete with a masked helmet, albeit through magical means rather than cybernetics. Other similar character would be [Dr Doppler](https://megaman.fandom.com/article/dr._doppler), the main antagonist from the videogame [Rockman X3](https://es.wikipedia.org/article/mega_man_x3) who after similarly being corrupted by a different character, modified his own body and later sacrificed himself to destroy the villain, save the protagonist and redeem himself. Another example is the primary antagonist of [Final Fantasy IV](https://finalfantasy.fandom.com/article/final_fantasy_iv), [Golbez](https://finalfantasy.fandom.com/article/golbez), who [Takashi Tokita](https://finalfantasy.fandom.com/article/takashi_tokita) stated was based on Darth Vader. Similar to Vader, Golbez had been turned to evil by an outside influence due to traumatic experiences, primarily wore dark armor after his fall, and was a relative of the main protagonist (his brother, in this case). The incarnation of [Bane](https://batman.fandom.com/article/bane_(tom_hardy)) in the [Batman](https://en.wikipedia.org/wiki/batman) film [The Dark Knight Rises](https://batman.fandom.com/article/the_dark_knight_rises) also takes inspiration from Vader, particularly due to his hulking size and high intellect (retained from other incarnations of the character), along with his unique mask and distinctive breathing. Within _Star Wars_ canon, the character of Kylo Ren is not only inspired by Vader, but aspires to be like him [in-universe](/article/in-universe) and has a similar appearance and personality to Anakin prior to his injuries.
Vader was also referenced in the 1982 _Space: 1999_ compilation film _Cosmic Princess_, as Captain Duro from the Year Two episode "Space Warp" was renamed "Vader, commander of the Whills Interplanetary Starfleet" in reference to the [Journal of the Whills](/article/journal_of_the_whills,_part_i), by George Lucas.
Furthermore, Darth Vader's name has become synonymous with terrifying evil. During the later stages of its construction, [Washington National Cathedral](https://en.wikipedia.org/wiki/washington_national_cathedral) organized a competition for children to create new [grotesques](https://en.wikipedia.org/wiki/grotesque) for the west towers. One winning design featured [a depiction of Darth Vader](http://www.nationalcathedral.org/about/darthvader.shtml) ([backup link](https://web.archive.org/web/20181119085153/https://cathedral.org/what-to-see/exterior/vader)).
Lucas once mentioned in an interview that he based Darth Vader on the android villain Hakaider from the 1972–73 live-action Japanese television series _Jinzo Ningen Kikaider_, which he watched while visiting Japan in the early 1970s. The book _Star Wars: The Complete Vader_ delves into the cultural impact of the Vader character in extensive detail.
<InsImage
src="https://static.wikia.nocookie.net/starwars/images/4/44/Star_Wars_Volkswagen_Commercial.jpg"
alt="A boy dressed as Vader in an advertisement for Volkswagen"
alignment="right"
height="152px"
width="229px"
>
A boy dressed as Vader in an advertisement for Volkswagen
</InsImage>
In [2011](/article/2011) and [2012](/article/2012), the automobile manufacturer Volkswagen broadcasted two Super Bowl commercials featuring Darth Vader. The first, titled "[The Force](/article/the_force_(volkswagen))," showcased a young boy dressed in Darth Vader's armor. The boy attempted to use the Force to levitate his parents' car but retreated when the car alarm activated, as his parents observed from the window. The 2012 commercial aired following a separate advertisement for Volkswagen that did not feature Vader. It depicted Darth Vader Force-choking Doctor [Cornelius Evazan](/article/cornelius_evazan) after Evazan remarked that the new commercial was more emotionally resonant than the previous year's Vader commercial.
### Depiction
Darth Vader, as initially established, was portrayed on-screen by [David Prowse](/article/david_prowse) in the [original trilogy](/article/original_trilogy), while [James Earl Jones](/article/james_earl_jones) provided the iconic voice of the armored Vader, a role he reprised for _Star Wars_: Episode III _Revenge of the Sith_, _Star Wars Rebels_, _Rogue One: A Star Wars Story_, _Star Wars_: Episode IX _The Rise of Skywalker_, and the [Obi-Wan Kenobi](/article/obi-wan_kenobi_(television_series)) television series. [Sebastian Shaw](/article/sebastian_shaw) played the dying Anakin, his head freed from his cybernetic armor in _Star Wars_: Episode VI _Return of the Jedi_.
[Star Wars: Episode I The Phantom Menace](/article/star_wars:_episode_i_the_phantom_menace) introduced Anakin Skywalker as a nine-year-old boy, a role secured by then-child actor [Jake Lloyd](/article/jake_lloyd) after casting director [Robin Gurland](/article/robin_gurland) auditioned three thousand actors. Hayden Christensen portrayed Skywalker in both [Star Wars: Episode II Attack of the Clones](/article/star_wars:_episode_ii_attack_of_the_clones) and _Star Wars_: Episode III _Revenge of the Sith_. Christensen auditioned for the part of the adult Skywalker without expecting to be chosen. Christensen and [Ewan McGregor](/article/ewan_mcgregor), who played Kenobi in the [prequel trilogy](/article/prequel_trilogy), engaged in lightsaber practice sessions, which Christensen described as the most enjoyable aspect of the experience, likening it to "playing with your friend every day."
Christensen's voice later made a cameo appearance in Episode IX _The Rise of Skywalker_. Hayden Christensen reprised the role of Anakin Skywalker/Darth Vader in the _Obi-Wan Kenobi_ television series, alongside Jones.
In the [Star Wars: The Clone Wars film](/article/star_wars:_the_clone_wars_(film)), [television series](/article/star_wars:_the_clone_wars), _Star Wars Rebels_, _Star Wars Forces of Destiny_, and _Star Wars: Tales of the Jedi_, the character of Anakin Skywalker was voiced by [Matt Lanter](/article/matt_lanter). In _Rogue One_, Vader is portrayed by both [Spencer Wilding](/article/spencer_wilding) and [Daniel Naprous](/article/daniel_naprous). [Lucasfilm Ltd.](/article/lucasfilm_ltd.) president [Kathleen Kennedy](/article/kathleen_kennedy) stated that Christensen was not considered for the role of Vader in _Rogue One_ because the scene of Vader pursuing the rebels "was just such a specific action sequence." Christensen was not involved in any discussions regarding _Rogue One_, but he admired the film's portrayal of the character and deemed it brilliant.
Prowse was initially intended to speak while wearing Vader's armor, but his West Country accent made Vader sound comical, leading to the swift replacement of his voice. Jones agreed to provide the voice work, as his own voice possessed the intimidating quality required for Vader. Prowse, however, remained unaware that his voice had been replaced until the film's release. Jones was not credited until Episode VI, as he felt he did not warrant credit solely for providing Vader's voice. For fight scenes in Episodes V and VI, swordsman [Bob Anderson](/article/bob_anderson) donned the suit. In new footage filmed for the [Special Edition](/article/the_star_wars_trilogy_special_edition) of the original trilogy, actor and former [Industrial Light & Magic](/article/industrial_light_%26_magic) visual effects artist [C. Andrew Nelson](/article/c._andrew_nelson) played the infamous Dark Lord.
<InsImage
src="https://static.wikia.nocookie.net/starwars/images/5/55/JediGhosts-ROTJ.png"
alt="Hayden Christensen (left) as the new spirit of Anakin Skywalker"
alignment="left"
height="94px"
width="225px"
>
Hayden Christensen (left) as the "new" spirit of Anakin Skywalker
</InsImage>
<InsImage
src="https://static.wikia.nocookie.net/starwars/images/e/ee/Spirits_copy1.jpg"
alt="Sebastian Shaw (left) as the old spirit of Anakin Skywalker"
alignment="left"
height="97px"
width="228px"
>
Sebastian Shaw (left) as the "old" spirit of Anakin Skywalker
</InsImage>
In the initial release of _Return of the Jedi_, the Force ghost of a redeemed Skywalker was depicted as a healthy, mature man, appearing to be between middle and old age, sporting browning gray hair and a kind expression. However, with the release of the Special Edition DVD of _Return of the Jedi_, Skywalker's Force ghost is shown as a man in his twenties, mirroring his appearance just before his transformation into a Sith. George Lucas explained this change by stating that redeemed Jedi would revert to their form before their fall when appearing as Force ghosts.
During the production of _Revenge of the Sith_, Hayden Christensen briefly donned the Vader suit, which the costume department customized to fit his specific measurements. The actor found movement within the suit to be challenging due to its inflexibility. When Christensen shared this with Lucas, the director suggested that the suit's restrictive nature should contribute to the character's mechanical and unnatural feel. [Christian J Simpson](/article/christian_simpson) served as Christensen's stand-in for the UK filming locations; Simpson also appeared alongside a young Skywalker in Episode I as [Bravo Six](/article/bravo_six-legends), also known as Lt. [Gavyn Sykes](/article/gavyn_sykes-legends). While James Earl Jones provided the voice for Vader in the suit, there was initial speculation about his involvement. Some fans questioned his participation as his name was absent from the _Revenge of the Sith_ credits, and the initial trailer featured a digitally altered voice of Christensen. This matter was clarified in the Summer 2005 edition of [Starlog](/article/starlog_(magazine)), where producer [Rick McCallum](/article/rick_mccallum) confirmed that Jones had spent part of a day recording for _Revenge of the Sith_.
In the [Legends](/article/star_wars_legends) series of [radio-drama adaptations](/article/star_wars_(radio)), [Brock Peters](/article/brock_peters) lent his voice to Darth Vader, while [David Birney](/article/david_birney) voiced Skywalker in the final episode of the _Return of the Jedi_ radio drama. Audio of Peters' performance was later incorporated into the [canonical](/article/canon) [2015](/article/2015) release of [Episode IV: A New Hope Read-Along Storybook and CD](/article/a_new_hope_read-along_storybook_and_cd). In the [Clone Wars cartoon](/article/star_wars:_clone_wars), Skywalker's voice was provided by [Frankie Ryan Manriquez](/article/frankie_ryan_manriquez) as a child and [Mat Lucas](/article/mat_lucas) as an adult. In _The Clone Wars_ CGI series and its corresponding feature film, Matt Lanter is the voice actor for the character. [Scott Lawrence](/article/scott_lawrence) voiced Darth Vader in various _Star Wars_ video games, including _Star Wars: Galactic Battlegrounds_, _Star Wars: Force Commander_, and [Star Wars: TIE Fighter](/article/star_wars:_tie_fighter_(video_game)). In other games, such as _Star Wars: The Force Unleashed_ and _Star Wars: Empire at War_, [Matthew Sloan](/article/matthew_sloan), known for voicing Vader in the [Chad Vader: Day Shift Manager](/article/chad_vader:_day_shift_manager) shorts, provided the voice of Vader.
In Japanese dubs, [Daisuke Namikawa](https://en.wikipedia.org/wiki/daisuke_namikawa) voices Anakin as an adult, while [Akiko Yajima](https://en.wikipedia.org/wiki/akiko_yajima) voices young Anakin in the Clone Wars. [Tōru Ōhira](https://en.wikipedia.org/wiki/t%c5%8dru_%c5%8chira) is the voice of Darth Vader in most adaptations starting with the DVD release, with the exception of _Star Wars: Galactic Battlegrounds_ (where [Ryūzaburō Ōtomo](https://en.wikipedia.org/wiki/ry%c5%abzabur%c5%8d_%c5%8ctomo) voices him), and other substitute voices in the original films. Ōhira also reprised his role in the Japanese version of _SoulCalibur IV_. After Ōhira's passing, [Taiten Kusunoki](https://en.wikipedia.org/wiki/taiten_kusunoki) took over the role, starting with _Rebels_.
Originally, the _Rogue One_ ending did not include Darth Vader's assault and pursuit of the Rebels with the stolen Death Star blueprints. The initial plan was for Vader to kill Krennic. In the _Star Wars: Bounty Hunters_ comic series, artist [Paolo Villanelli](/article/paolo_villanelli), a self-proclaimed Vader enthusiast, depicts Vader with dynamic energy. Villanelli's passion for Vader influenced writer [Ethan Sacks](/article/ethan_sacks) to advocate for the character's inclusion. Sacks consulted with line editor [Mark Paniccia](/article/mark_paniccia) and [Greg Pak](/article/greg_pak), writer of the _Star Wars: Darth Vader_ comic series, to ensure Vader's appropriate use. Sacks believed that Villanelli's dynamic portrayal of Vader demonstrated his deep appreciation for the character. During an interview with _Star Wars Insider_, Sacks expressed this sentiment and praised Pak's ability to capture Vader's essence in _Darth Vader_.
### Obi-Wan Kenobi and Ahsoka
[Stuart Beattie](/article/stuart_beattie) shared that his two primary ideas for an Obi-Wan Kenobi project were Kenobi leaving Tatooine and a confrontation between Kenobi and Darth Vader. When told these were off-limits, he referenced Vader's line in _Return of the Jedi_ about Kenobi believing there was still good in him. Beattie argued this was not shown in _Revenge of the Sith_, making his point valid. He further stated that the audience needed to believe Vader had extinguished Anakin Skywalker. This led to Beattie's hiring to write the script for the first of three Kenobi films, with his main goal being to depict Kenobi's acceptance of Vader's destruction of Anakin Skywalker.
<InsImage
src="https://static.wikia.nocookie.net/starwars/images/f/f5/Obi-WanKenobiVsDarthVaderConceptArt.png"
alt="Concept art of a lightsaber duel between Obi-Wan Kenobi and Darth Vader"
alignment="right"
height="95px"
width="230px"
>
Concept art of a lightsaber duel between Obi-Wan Kenobi and Darth Vader
</InsImage>
Beattie envisioned Vader as obsessed with Kenobi and driven by revenge. In Beattie's narrative, Emperor Palpatine repeatedly instructed Vader to disregard Kenobi and prioritize current matters. The film was to begin with Vader eliminating five Jedi, establishing him as a formidable "Jedi killer." One scene featured Palpatine dispatching Vader to quell a rebel uprising, during which Vader struggled to forget Kenobi. Vader's assertion to Palpatine that Kenobi and Yoda were the greatest threats provoked Palpatine's anger and a reminder of Vader's place. Kenobi's revelation to the Inquisitor Reva that Vader was Anakin Skywalker prompted her to realize her error. Reva then falsely claimed to have killed Kenobi, leading Vader to kill her. This act inadvertently saved Kenobi and ended Vader's obsession. Kenobi and Vader were to duel on a collapsing space station within a planet's atmosphere, culminating in Kenobi removing or slashing Vader's helmet, leaving a scar. Vader would then force Kenobi away, preventing him from reaching Kenobi. Seeing Skywalker's face would have solidified Kenobi's belief that Vader had destroyed Skywalker. Beattie emphasized the importance of separating the two during the duel, believing Kenobi would kill Vader if given the chance. The story would conclude with Vader believing Kenobi dead, explaining his lack of pursuit and his surprise at Kenobi's survival in _A New Hope_. Beattie's narrative ultimately served as the foundation for the first season of the _Obi-Wan Kenobi_ television series.
During the series' production, the creative team reassessed Kenobi's story and debated Vader's return. Director [Deborah Chow](/article/deborah_chow) advocated for Vader's inclusion due to his significance in Kenobi's life, viewing their relationship as a "love-story dynamic" that made his absence difficult. Chow was fascinated by the idea of Kenobi still caring for Vader despite his transformation. The debate was extensive and ongoing, with concerns raised about overshadowing their Death Star duel in _A New Hope_. The team acknowledged the high level of fan scrutiny and anticipated criticism of Vader's return. Ultimately, it was decided that Christensen would reprise his role as Vader. Writer [Joby Harold](/article/joby_harold) emphasized Christensen's importance to the character and the crew's commitment to handling Vader with utmost care "to honor one of the greatest villains and antagonists in the history of entertainment."
Harold aimed to surpass Vader's _Rogue One: A Star Wars Story_ scene while writing Vader, initially making him more extreme before scaling back. For the Mapuzo scenes, Harold decided Vader needed to express his feelings through action to reveal his underlying character. During the writing process, Harold considered having Kenobi learn of Anakin Skywalker's survival after their Mustafar duel to heighten the series' drama. He consulted _Star Wars_ lore advisor [Pablo Hidalgo](/article/pablo_hidalgo) about Kenobi's knowledge during the show's timeline and received permission to use the scene. Harold included a Kenobi-Vader duel in the series, finding no explicit prohibition against it in _A New Hope_. Harold emphasized the importance of feeling and conveying the range and anger beneath Vader's actions in the Mapuzo duel. He also sought to capture the characters' rivalry and the opportunities presented in the fight.
<InsImage
src="https://static.wikia.nocookie.net/starwars/images/3/32/HaydenChristensenTrainsWithRossKohnstam.png"
alt="Hayden Christensen training for a lightsaber duel with Ross Kohnstam"
alignment="left"
height="139px"
width="200px"
>
Hayden Christensen training for a lightsaber duel with Ross Kohnstam
</InsImage>
In the fall of [2019](/article/2019), director [Deborah Chow](/article/deborah_chow) personally pitched the project to Christensen at his farm, outlining her vision and promising Vader would add a new dimension to their _A New Hope_ duel. Christensen responded positively and expressed his excitement to return to _Star Wars_. Chow found directing and filming new scenes with such an iconic character intense. As showrunner, she championed the Kenobi-Vader rematch, which Lucasfilm was considering. Vader's return was finalized in [March](/article/march) of [2020](/article/2020).
To prepare for his return as Vader, Christensen watched all the _Star Wars_ films, _Star Wars: The Clone Wars_, and _Star Wars Rebels_, and read related comics. He also practiced lightsaber combat with McGregor's stunt double, [Ross Kohnstam](/article/ross_kohnstam). Harold stated that Vader's presence loomed large over the show's production, with Vader written to be emotionally present for Kenobi and potentially beyond. Vader was intentionally portrayed as less fully formed than in _A New Hope_. Chow and the crew ensured Vader was not overused to preserve his mystique.
<InsImage
src="https://static.wikia.nocookie.net/starwars/images/0/07/VaderStuntDoublesandMovementCoach.png"
alt="Darth Vader was played by stunt doubles Tom OConnell (left) and Dmitrious Bistrevsky (right), and their movement coordinator was Olga Sokolova"
alignment="right"
height="179px"
width="200px"
>
Darth Vader was played by stunt doubles Tom O'Connell (left) and Dmitrious Bistrevsky (right), and their movement coordinator was Olga Sokolova
</InsImage>
Vader's portrayal involved Christensen, [Dmitrious Bistrevsky](/article/dmitrious_bistrevsky), and [Tom O'Connell](/article/tom_o%27connell). Christensen wore a heavy, hot Vader costume equipped with a cooling liquid under-layer. Between takes, he connected to a device that circulated the liquid to help him cool down. Christensen stated that the suit's mechanical aspect helped him embody Vader. The costume also featured tinted helmet lenses. [Olga Sokolova](/article/olga_sokolova), a choreographer and "Vader movement specialist," ensured Christensen's movements and gait were accurate, aligning with fan expectations of Vader. Christensen gained 25-30 pounds over nine months to fit into the suit. Bistrevsky wore the suit for full-body shots with the helmet on, while O'Connell handled the fighting scenes. Bistrevsky trained for five months, learning all his lines. He described the suit as dark and heavy and used meditation on set to maintain Vader's mindset. Some scenes required switching between multiple actors. Sokolova provided real-time movement coaching and consultation to Bistrevsky through a secret hand language. Bistrevsky's first scene was the Mapuzo street scene. He quickly realized that speaking with anger caused the helmet to shake, so his friend Dorian provided the voice acting while Bistrevsky matched his intensity and added his own character voices.
When Christensen delivered Vader's lines on set, he drew inspiration from James Earl Jones' delivery and intonation. [Skywalker Sound](/article/skywalker_sound) hired the [Ukrainian](https://en.wikipedia.org/wiki/ukraine) start-up company [Respeecher](/article/respeecher) to create Vader's voice artificially for the series. Respeecher uses archival recordings and a proprietary A.I. algorithm to generate new dialogue with the voices of performers. Respeecher, which also created young Luke Skywalker's voice for _The Book of Boba Fett_, was chosen because Jones' voice has changed with age, and he has reduced his involvement in the role. After _The Rise of Skywalker_, Jones expressed interest in phasing out Vader. [Matthew Wood](/article/matthew_wood) presented Jones with Respeecher's work, and the actor approved the use of his archival voice recordings to keep Vader alive and vital through artificial means.
Jones received credit for guiding the performance on _Obi-Wan Kenobi_. Wood described his contribution as "a benevolent godfather." They kept Jones informed about their plans for Vader and followed his advice to stay on the right path. Respeecher completed their work on the series during the 2022 [Russian invasion of Ukraine](https://en.wikipedia.org/wiki/russian_invasion_of_ukraine). While Wood acknowledged that alternatives "wouldn't be as good" as Respeecher's work, he confirmed that Lucasfilm's primary concern was the team's well-being. They would have pursued other options to avoid endangering the Respeecher team, but the team insisted on continuing their work despite the Russian bombardments. One synthetic-speech artist, Bogdan Belyaev, volunteered to assist fellow Ukrainians displaced by the war.
<InsImage
src="https://static.wikia.nocookie.net/starwars/images/5/53/DarthVaderCostumeSDCC.jpg"
alt="Darth Vaders costume was designed by Suttirat Anne Larlarb"
alignment="left"
height="192px"
width="170px"
>
Darth Vader's costume was designed by Suttirat Anne Larlarb
</InsImage>
Costume designer [Suttirat Anne Larlarb](/article/suttirat_anne_larlarb) designed Vader's costume. Christensen's first scene was as Anakin Skywalker in a vision seen by Kenobi. He also portrayed a helmet-less Vader in a bacta tank. The crew knew Christensen would need to hold his breath underwater, so a dive instructor helped him extend his breath-holding capabilities. Christensen was not allowed to breathe through the regulator. A team of make-up artists spent four to five hours applying make-up for Christensen's Vader scenes. He collaborated closely with Lucasfilm's executive creative director, [Doug Chiang](/article/doug_chiang), for input on the overall look. Christensen also played Anakin Skywalker in the Order 66 flashbacks. Chow intended Vader's arrival in the [Mapuzo mining village](/article/mapuzo_mining_village) to resemble a [horror movie](https://en.wikipedia.org/wiki/horror_film), where the monster appears and disappears. Christensen and McGregor trained with lightsabers for the Skywalker-Kenobi training flashback in the [fifth episode](/article/part_v), wearing dots on their faces for de-aging technology.
After rumors circulated about his return, [Rosario Dawson](/article/rosario_dawson), the actress portraying Ahsoka Tano, confirmed Christensen's return to the role of Skywalker on [October 22](/article/october_22), 2021, for the [2023](/article/2023) Disney+ series _Ahsoka_ on her Instagram page. However, she subsequently deleted the post. Christensen's return as Skywalker was officially confirmed in the "Force" television spot, which featured new dialogue from Christensen as Skywalker, on [August 13](/article/august_13), 2023.
### Non-canon history
The _Darth Vader and Son_ book series by [Jeffrey Brown](/article/jeffrey_brown) portrays Darth Vader during the Imperial era as a loving father to Luke Skywalker and Leia Organa, engaging in activities such as buying them [ice cream](/article/ice_cream), hosting [tea](/article/tea) parties, and reading bedtime stories.
In the _Angry Birds Star Wars_ games, Anakin is depicted as the formidable "Lard Vader," a porcine military leader seeking to become Emperor, commanding the Pork Side.
Darth Vader and Darth Sidious serve as the primary antagonists in the non-canonical _LEGO Star Wars: The Freemaker Adventures_. While exploring the Jedi Archives, Vader discovers the existence of the [Kyber Saber](/article/kyber_saber), a powerful lightsaber crafted from multiple kyber crystals. However, the Jedi Master who created the Saber deemed it too powerful and destroyed it, scattering the crystals throughout the galaxy. Darth Sidious aimed to collect all the crystals to destroy the galaxy. The two Sith Lords were opposed by the [Freemakers](/article/freemakers/lego), a family of scavengers, and the Jedi [Naare](/article/naare).
In _Are You Scared, Darth Vader?_, various classic villains, including a [wolfman](/article/wolf) and a "[ghost](/article/ghost_(folklore))", attempt to frighten Vader, but he is either confused or unfazed. The story eventually reveals what truly terrifies Lord Vader.
On October 29, 2014, a Halloween-themed update to [The Sims 4](https://en.wikipedia.org/wiki/the_sims_4) added a Darth Vader costume for playable Sims to wear in-game. The costume is purely cosmetic and does not affect gameplay.
### LEGO
Skywalker was featured in "[Kamino Crisis](/article/kamino_crisis)," a non-canon comic story by [Martin Fisher](/article/martin_fisher), published on [October 7](/article/october_7), 2023, in the [101st issue](/article/lego_star_wars_101) of the magazine [LEGO Star Wars](/article/lego_star_wars_(magazine)). In the comic, Skywalker, Ahsoka Tano, and Clone Captain Rex were returning to the _Resolute_ after a successful mission. Rex mentioned that their missions were becoming too easy, prompting the two Jedi to devise a test for him by manipulating a training session for new clone troopers led by Rex. Tano disguised herself as a clone trooper named Tank, while Skywalker disguised himself as clone trooper Thrower to participate in a course in the [Tipoca City Training Facility](/article/tipoca_city_training_facility) on Kamino. During a training exercise against repurposed B1 battle droids, a voltage surge caused the droids to become more aggressive and skilled. The droids escaped the training arena, and Tano and Skywalker, still disguised, joined Rex and other troopers to stop them. During the fighting in the hallways of Tipoca City, clone trooper [Glider](/article/glider_(clone_trooper)) entered the control room and destroyed the controls with his blaster, deactivating the battle droids. As Rex thanked the troopers, Tano and Skywalker removed their helmets and revealed their identities, explaining their intention to test him. Rex admitted he would never call their missions easy again and invited them to join his bowling team if they ever left the Jedi Order.
### Translations
- In the Italian original and prequel trilogies, Darth Vader was initially known as **Lord Dart Fener**. In 2004, Lucasfilm held a "referendum" for Italian fans regarding changing the name to Darth Vader for _Revenge of the Sith_, but "Dart Fener" won. However, the name was changed back to "Darth Vader" for materials released from _The Force Awakens_ onwards.
- In French, Vader is known as **Dark Vador**. "Dark" is the French equivalent of "Darth" and was applied to later-introduced Sith characters. In French Canada, the name was reverted to "Darth Vader" for materials from _Revenge of the Sith_ onwards.
- In Icelandic, Vader is called **Svarthöfði**, which translates to "black head."
- In [Chinese](https://en.wikipedia.org/wiki/chinese_language), Darth Vader's name is directly transliterated. In [Cantonese](https://en.wikipedia.org/wiki/cantonese)-[spoken](https://en.wikipedia.org/wiki/varieties_of_chinese) [Traditional Chinese](https://en.wikipedia.org/wiki/traditional_chinese_characters), it is " **達斯·維達** ", and in [Mandarin](https://en.wikipedia.org/wiki/standard_chinese)-spoken [Simplified Chinese](https://en.wikipedia.org/wiki/simplified_chinese), it is " **达斯·维德** ." The most common translation is " **黑武士** " (Dark Knight). Darth Vader is also translated to " **黑衣勋爵** " (Lord in Black) or " **帝国大将** " (Imperial Grand General) in Simplified Chinese. Anakin is transliterated as " **安纳金** " in [Hong Kong](https://en.wikipedia.org/wiki/hong_kong) (a Cantonese-speaking country) and " **阿纳金** " in Mandarin. Skywalker is paraphrased as " **天行者** " (sky-walker) in Hong Kong or " **任天行** " (travel the sky at will) in other countries.
- In Japanese, Anakin Skywalker and Darth Vader are transliterated and written in katakana as " **アナキン・スカイウォーカー** " and " **ダース・ヴェイダー** " respectively.
- In Korean, Anakin Skywalker and Darth Vader are transliterated and written as " **아나킨 스카이워커** " and " **다스 베이더** " respectively.
<AppearanceSection>
<AppearancePanel
content_type="Unknown"
content="Star Wars: Force Arena"
content_location="Unknown"
>
-
</AppearancePanel>
<AppearancePanel
content_type="Unknown"
content="Star Wars: Galactic Defense"
content_location="Unknown"
>
-
</AppearancePanel>
<AppearancePanel
content_type="Unknown"
content="The High Republic (2023) 7 (Variant cover only)"
content_location="Unknown"
>
-
</AppearancePanel>
<AppearancePanel
content_type="Unknown"
content="Mace Windu 3 (Variant cover only)"
content_location="Unknown"
>
-
</AppearancePanel>
<AppearancePanel
content_type="Unknown"
content="Master & Apprentice (and audiobook)"
content_location="Unknown"
>
-
</AppearancePanel>
<AppearancePanel
content_type="Unknown"
content="Darth Maul – Black, White & Red 1 (Mentioned only; in the opening crawl)"
content_location="Unknown"
>
-
</AppearancePanel>
<AppearancePanel
content_type="Unknown"
content="Darth Maul – Black, White & Red 2 (Mentioned only; in the opening crawl)"
content_location="Unknown"
>
-
</AppearancePanel>
<AppearancePanel
content_type="Unknown"
content="Darth Maul – Black, White & Red 3 (Mentioned only; in the opening crawl)"
content_location="Unknown"
>
-
</AppearancePanel>
<AppearancePanel
content_type="Unknown"
content="Darth Maul – Black, White & Red 4 (Mentioned only; in the opening crawl)"
content_location="Unknown"
>
-
</AppearancePanel>
<AppearancePanel
content_type="Unknown"
content="Queens Peril (and audiobook)"
content_location="Unknown"
>
-
</AppearancePanel>
<AppearancePanel
content_type="Unknown"
content="The Phantom Menace 25th Anniversary Special 1"
content_location="Unknown"
>
-
</AppearancePanel>
<AppearancePanel
content_type="Unknown"
content="Star Wars: Episode I The Phantom Menace"
content_location="Unknown"
>
-
</AppearancePanel>
<AppearancePanel
content_type="Unknown"
content="The Phantom Menace Little Golden Book (and audiobook)"
content_location="Unknown"
>
-
</AppearancePanel>
<AppearancePanel
content_type="Unknown"
content="The Power of the Dark Side"
content_location="Unknown"
>
-
</AppearancePanel>
<AppearancePanel
content_type="Unknown"
content="Star Wars: The Prequel Trilogy – A Graphic Novel"
content_location="Unknown"
>
-
</AppearancePanel>
<AppearancePanel
content_type="Unknown"
content="Star Wars Journeys: The Phantom Menace"
content_location="Unknown"
>
-
</AppearancePanel>
<AppearancePanel
content_type="Unknown"
content="Star Wars Journeys: Beginnings"
content_location="Unknown"
>
-
</AppearancePanel>
<AppearancePanel
content_type="Unknown"
content="° 5-Minute Star Wars Stories 2"
content_location="Unknown"
>
-
</AppearancePanel>
<AppearancePanel
content_type="Unknown"
content="Star Wars Battlefront II"
content_location="Unknown"
>
-
</AppearancePanel>
<AppearancePanel
content_type="Unknown"
content="Race to the Finish Line — 5-Minute Star Wars Stories (and audiobook)"
content_location="Unknown"
>
-
</AppearancePanel>
<AppearancePanel
content_type="Unknown"
content="The Path of a Podracer — The Prequel Trilogy Stories (and audiobook)"
content_location="Unknown"
>
-
</AppearancePanel>
<AppearancePanel
content_type="Unknown"
content="A Different Path — The Prequel Trilogy Stories (and audiobook)"
content_location="Unknown"
>
-
</AppearancePanel>
<AppearancePanel
content_type="Unknown"
content="Droid Attack! — The Prequel Trilogy Stories (and audiobook)"
content_location="Unknown"
>
-
</AppearancePanel>
<AppearancePanel
content_type="Unknown"
content="The Final Fight — The Prequel Trilogy Stories (and audiobook)"
content_location="Unknown"
>
-
</AppearancePanel>
<AppearancePanel
content_type="Unknown"
content="Mace Windu: The Glass Abyss (and audiobook) (In flashback(s))"
content_location="Unknown"
>
-
</AppearancePanel>
<AppearancePanel
content_type="Unknown"
content="Age of Republic - Obi-Wan Kenobi 1"
content_location="Unknown"
>
-
</AppearancePanel>
<AppearancePanel
content_type="Unknown"
content="Padawans Pride"
content_location="Unknown"
>
-
</AppearancePanel>
<AppearancePanel
content_type="Unknown"
content="Obi-Wan and Anakin 1"
content_location="Unknown"
>
-
</AppearancePanel>
<AppearancePanel
content_type="Unknown"
content="Obi-Wan and Anakin 2"
content_location="Unknown"
>
-
</AppearancePanel>
<AppearancePanel
content_type="Unknown"
content="Obi-Wan and Anakin 3"
content_location="Unknown"
>
-
</AppearancePanel>
<AppearancePanel
content_type="Unknown"
content="Obi-Wan and Anakin 4"
content_location="Unknown"
>
-
</AppearancePanel>
<AppearancePanel
content_type="Unknown"
content="Obi-Wan and Anakin 5"
content_location="Unknown"
>
-
</AppearancePanel>
<AppearancePanel
content_type="Unknown"
content="Queens Shadow (and audiobook) (Mentioned only)"
content_location="Unknown"
>
-
</AppearancePanel>
<AppearancePanel
content_type="Unknown"
content="The Lesson (Obi-Wan & Anakin) — Star Wars (2020) 25"
content_location="Unknown"
>
-
</AppearancePanel>
<AppearancePanel
content_type="Unknown"
content="Choose Your Destiny: An Obi-Wan & Anakin Adventure (and audiobook)"
content_location="Unknown"
>
-
</AppearancePanel>
<AppearancePanel
content_type="Unknown"
content="Star Wars: Episode II Attack of the Clones"
content_location="Unknown"
>
-
</AppearancePanel>
<AppearancePanel
content_type="Unknown"
content="Attack of the Clones Little Golden Book (and audiobook)"
content_location="Unknown"
>
-
</AppearancePanel>
<AppearancePanel
content_type="Unknown"
content="Ambushed! — The Prequel Trilogy Stories (and audiobook)"
content_location="Unknown"
>
-
</AppearancePanel>
<AppearancePanel
content_type="Unknown"
content="Anakins Vow — The Prequel Trilogy Stories (and audiobook)"
content_location="Unknown"
>
-
</AppearancePanel>
<AppearancePanel
content_type="Unknown"
content="Inquisitor: Rise of the Red Blade (and audiobook)"
content_location="Unknown"
>
-
</AppearancePanel>
<AppearancePanel
content_type="Unknown"
content="Into the Arena — The Prequel Trilogy Stories (and audiobook)"
content_location="Unknown"
>
-
</AppearancePanel>
<AppearancePanel
content_type="Unknown"
content="Adventure in the Arena — 5-Minute Star Wars Stories Strike Back (and audiobook)"
content_location="Unknown"
>
-
</AppearancePanel>
<AppearancePanel
content_type="Unknown"
content="Jedi Training Academy (Non-canonical appearance)"
content_location="Unknown"
>
-
</AppearancePanel>
<AppearancePanel
content_type="Unknown"
content="The Brink of War — The Prequel Trilogy Stories (and audiobook)"
content_location="Unknown"
>
-
</AppearancePanel>
<AppearancePanel
content_type="Unknown"
content="Yoda and the Count — 5-Minute Star Wars Stories (and audiobook)"
content_location="Unknown"
>
-
</AppearancePanel>
<AppearancePanel
content_type="Unknown"
content="Star Wars Galaxy of Adventures — Yoda vs Count Dooku – Size Matters Not"
content_location="Unknown"
>
-
</AppearancePanel>
<AppearancePanel
content_type="Unknown"
content="Queens Hope (and audiobook)"
content_location="Unknown"
>
-
</AppearancePanel>
<AppearancePanel
content_type="Unknown"
content="Jedi of the Republic – Mace Windu 2 (Variant cover only)"
content_location="Unknown"
>
-
</AppearancePanel>
<AppearancePanel
content_type="Unknown"
content="Jedi of the Republic – Mace Windu 5 (Appears through imagination)"
content_location="Unknown"
>
-
</AppearancePanel>
<AppearancePanel
content_type="Unknown"
content="Star Wars: My First Comic Reader 1"
content_location="Unknown"
>
-
</AppearancePanel>
<AppearancePanel
content_type="Unknown"
content="Brotherhood (and audiobook)"
content_location="Unknown"
>
-
</AppearancePanel>
<AppearancePanel
content_type="Unknown"
content="Hyperspace Stories 1"
content_location="Unknown"
>
-
</AppearancePanel>
<AppearancePanel
content_type="Unknown"
content="Hyperspace Stories 5"
content_location="Unknown"
>
-
</AppearancePanel>
<AppearancePanel
content_type="Unknown"
content="501 Plus One — Age of Republic Special 1"
content_location="Unknown"
>
-
</AppearancePanel>
<AppearancePanel
content_type="Unknown"
content="Star Wars Adventures: The Clone Wars – Battle Tales 1"
content_location="Unknown"
>
-
</AppearancePanel>
<AppearancePanel
content_type="Unknown"
content="Star Wars Adventures: The Clone Wars – Battle Tales 2"
content_location="Unknown"
>
-
</AppearancePanel>
<AppearancePanel
content_type="Unknown"
content="Star Wars Adventures: The Clone Wars – Battle Tales 3 (Indirect mention only)"
content_location="Unknown"
>
-
</AppearancePanel>
<AppearancePanel
content_type="Unknown"
content="Star Wars Adventures: The Clone Wars – Battle Tales 4 (Mentioned only)"
content_location="Unknown"
>
-
</AppearancePanel>
<AppearancePanel
content_type="Unknown"
content="Star Wars Adventures: The Clone Wars – Battle Tales 5"
content_location="Unknown"
>
-
</AppearancePanel>
<AppearancePanel
content_type="Unknown"
content="Age of Republic - Anakin Skywalker 1"
content_location="Unknown"
>
-
</AppearancePanel>
<AppearancePanel
content_type="Unknown"
content="The Eye of the Beholder — Stories of Jedi and Sith (and audiobook)"
content_location="Unknown"
>
-
</AppearancePanel>
<AppearancePanel
content_type="Unknown"
content="Star Wars: The Clone Wars — Cat and Mouse"
content_location="Unknown"
>
-
</AppearancePanel>
<AppearancePanel
content_type="Unknown"
content="Star Wars: The Clone Wars — The Hidden Enemy"
content_location="Unknown"
>
-
</AppearancePanel>
<AppearancePanel
content_type="Unknown"
content="Star Wars: The Clone Wars film"
content_location="Unknown"
>
-
</AppearancePanel>
<AppearancePanel
content_type="Unknown"
content="Star Wars: The Clone Wars — Clone Cadets (In flashback(s))"
content_location="Unknown"
>
-
</AppearancePanel>
<AppearancePanel
content_type="Unknown"
content="Star Wars: Tales of the Jedi — Practice Makes Perfect"
content_location="Unknown"
>
-
</AppearancePanel>
<AppearancePanel
content_type="Unknown"
content="Star Wars: The Clone Wars — Rising Malevolence"
content_location="Unknown"
>
-
</AppearancePanel>
<AppearancePanel
content_type="Unknown"
content="Star Wars: The Clone Wars — Shadow of Malevolence"
content_location="Unknown"
>
-
</AppearancePanel>
<AppearancePanel
content_type="Unknown"
content="Star Wars: The Clone Wars — Destroy Malevolence"
content_location="Unknown"
>
-
</AppearancePanel>
<AppearancePanel
content_type="Unknown"
content="Star Wars: The Clone Wars — Rookies"
content_location="Unknown"
>
-
</AppearancePanel>
<AppearancePanel
content_type="Unknown"
content="Star Wars: The Clone Wars — Downfall of a Droid"
content_location="Unknown"
>
-
</AppearancePanel>
<AppearancePanel
content_type="Unknown"
content="Star Wars: The Clone Wars — Duel of the Droids"
content_location="Unknown"
>
-
</AppearancePanel>
<AppearancePanel
content_type="Unknown"
content="Star Wars: The Clone Wars — Bombad Jedi (In flashback(s))"
content_location="Unknown"
>
-
</AppearancePanel>
<AppearancePanel
content_type="Unknown"
content="Star Wars: The Clone Wars — Cloak of Darkness (Appears in hologram)"
content_location="Unknown"
>
-
</AppearancePanel>
<AppearancePanel
content_type="Unknown"
content="Star Wars: The Clone Wars — Dooku Captured"
content_location="Unknown"
>
-
</AppearancePanel>
<AppearancePanel
content_type="Unknown"
content="Star Wars: The Clone Wars — The Gungan General"
content_location="Unknown"
>
-
</AppearancePanel>
<AppearancePanel
content_type="Unknown"
content="Dooku Captured — The Clone Wars: Stories of Light and Dark (and audiobook) (Mentioned only)"
content_location="Unknown"
>
-
</AppearancePanel>
<AppearancePanel
content_type="Unknown"
content="Choose Your Destiny: A Clone Trooper Mission (Mentioned only)"
content_location="Unknown"
>
-
</AppearancePanel>
<AppearancePanel
content_type="Unknown"
content="Separation Anxiety Part One — Star Wars Adventures (2020) 9 (Appears in hologram)"
content_location="Unknown"
>
-
</AppearancePanel>
<AppearancePanel
content_type="Unknown"
content="Star Wars: The Clone Wars — Jedi Crash"
content_location="Unknown"
>
-
</AppearancePanel>
<AppearancePanel
content_type="Unknown"
content="Star Wars: The Clone Wars — Defenders of Peace"
content_location="Unknown"
>
-
</AppearancePanel>
<AppearancePanel
content_type="Unknown"
content="Star Wars: The Clone Wars — Trespass"
content_location="Unknown"
>
-
</AppearancePanel>
<AppearancePanel
content_type="Unknown"
content="Star Wars: The Clone Wars — Blue Shadow Virus"
content_location="Unknown"
>
-
</AppearancePanel>
<AppearancePanel
content_type="Unknown"
content="Star Wars: The Clone Wars — Mystery of a Thousand Moons"
content_location="Unknown"
>
-
</AppearancePanel>
<AppearancePanel
content_type="Unknown"
content="Star Wars: The Clone Wars — Storm Over Ryloth"
content_location="Unknown"
>
-
</AppearancePanel>
<AppearancePanel
content_type="Unknown"
content="Star Wars: The Clone Wars — Innocents of Ryloth (In flashback(s))"
content_location="Unknown"
>
-
</AppearancePanel>
<AppearancePanel
content_type="Unknown"
content="Star Wars: The Clone Wars — Liberty on Ryloth"
content_location="Unknown"
>
-
</AppearancePanel>
<AppearancePanel
content_type="Unknown"
content="Star Wars: The Clone Wars — Holocron Heist"
content_location="Unknown"
>
-
</AppearancePanel>
<AppearancePanel
content_type="Unknown"
content="Star Wars: The Clone Wars — Cargo of Doom"
content_location="Unknown"
>
-
</AppearancePanel>
<AppearancePanel
content_type="Unknown"
content="Star Wars: The Clone Wars — Children of the Force"
content_location="Unknown"
>
-
</AppearancePanel>
<AppearancePanel
content_type="Unknown"
content="Star Wars: The Clone Wars — Bounty Hunters"
content_location="Unknown"
>
-
</AppearancePanel>
<AppearancePanel
content_type="Unknown"
content="Star Wars: The Clone Wars — The Zillo Beast"
content_location="Unknown"
>
-
</AppearancePanel>
<AppearancePanel
content_type="Unknown"
content="Star Wars: The Clone Wars — The Zillo Beast Strikes Back"
content_location="Unknown"
>
-
</AppearancePanel>
<AppearancePanel
content_type="Unknown"
content="Star Wars: The Clone Wars — Senate Spy"
content_location="Unknown"
>
-
</AppearancePanel>
<AppearancePanel
content_type="Unknown"
content="A Jedis Duty — Stories of Jedi and Sith (and audiobook) (Mentioned only)"
content_location="Unknown"
>
-
</AppearancePanel>
<AppearancePanel
content_type="Unknown"
content="Star Wars: The Clone Wars — Landing at Point Rain"
content_location="Unknown"
>
-
</AppearancePanel>
<AppearancePanel
content_type="Unknown"
content="Star Wars: The Clone Wars — Weapons Factory"
content_location="Unknown"
>
-
</AppearancePanel>
<AppearancePanel
content_type="Unknown"
content="Star Wars: The Clone Wars — Legacy of Terror"
content_location="Unknown"
>
-
</AppearancePanel>
<AppearancePanel
content_type="Unknown"
content="Star Wars: The Clone Wars — Brain Invaders"
content_location="Unknown"
>
-
</AppearancePanel>
<AppearancePanel
content_type="Unknown"
content="Star Wars: The Clone Wars — Grievous Intrigue"
content_location="Unknown"
>
-
</AppearancePanel>
<AppearancePanel
content_type="Unknown"
content="Star Wars: The Clone Wars — The Deserter (In flashback(s))"
content_location="Unknown"
>
-
</AppearancePanel>
<AppearancePanel
content_type="Unknown"
content="Star Wars: The Clone Wars — Lightsaber Lost"
content_location="Unknown"
>
-
</AppearancePanel>
<AppearancePanel
content_type="Unknown"
content="Star Wars: The Clone Wars — The Mandalore Plot"
content_location="Unknown"
>
-
</AppearancePanel>
<AppearancePanel
content_type="Unknown"
content="Star Wars: The Clone Wars — Voyage of Temptation"
content_location="Unknown"
>
-
</AppearancePanel>
<AppearancePanel
content_type="Unknown"
content="Star Wars: The Clone Wars — Duchess of Mandalore"
content_location="Unknown"
>
-
</AppearancePanel>
<AppearancePanel
content_type="Unknown"
content="Catalyst: A Rogue One Novel (and audiobook) (Mentioned only)"
content_location="Unknown"
>
-
</AppearancePanel>
<AppearancePanel
content_type="Unknown"
content="Star Wars: The Clone Wars — Death Trap"
content_location="Unknown"
>
-
</AppearancePanel>
<AppearancePanel
content_type="Unknown"
content="Star Wars: The Clone Wars — R2 Come Home"
content_location="Unknown"
>
-
</AppearancePanel>
<AppearancePanel
content_type="Unknown"
content="Star Wars: The Clone Wars — Lethal Trackdown"
content_location="Unknown"
>
-
</AppearancePanel>
<AppearancePanel
content_type="Unknown"
content="Star Wars: The Clone Wars — The Academy"
content_location="Unknown"
>
-
</AppearancePanel>
<AppearancePanel
content_type="Unknown"
content="Star Wars: The Clone Wars — Assassin"
content_location="Unknown"
>
-
</AppearancePanel>
<AppearancePanel
content_type="Unknown"
content="Star Wars: The Clone Wars — ARC Troopers"
content_location="Unknown"
>
-
</AppearancePanel>
<AppearancePanel
content_type="Unknown"
content="Hyperspace Stories 10"
content_location="Unknown"
>
-
</AppearancePanel>
<AppearancePanel
content_type="Unknown"
content="Star Wars: The Clone Wars — Sphere of Influence"
content_location="Unknown"
>
-
</AppearancePanel>
<AppearancePanel
content_type="Unknown"
content="Star Wars: The Clone Wars — Evil Plans"
content_location="Unknown"
>
-
</AppearancePanel>
<AppearancePanel
content_type="Unknown"
content="Star Wars: The Clone Wars — Hostage Crisis"
content_location="Unknown"
>
-
</AppearancePanel>
<AppearancePanel
content_type="Unknown"
content="Hostage Crisis — The Clone Wars: Stories of Light and Dark (and audiobook)"
content_location="Unknown"
>
-
</AppearancePanel>
<AppearancePanel
content_type="Unknown"
content="Intermission, Part 1 — Star Wars Adventures (2017) 12"
content_location="Unknown"
>
-
</AppearancePanel>
<AppearancePanel
content_type="Unknown"
content="Intermission, Part 2 — Star Wars Adventures (2017) 13"
content_location="Unknown"
>
-
</AppearancePanel>
<AppearancePanel
content_type="Unknown"
content="Star Wars: The Clone Wars — Hunt for Ziro (In flashback(s))"
content_location="Unknown"
>
-
</AppearancePanel>
<AppearancePanel
content_type="Unknown"
content="Star Wars Forces of Destiny — Teach You, I Will"
content_location="Unknown"
>
-
</AppearancePanel>
<AppearancePanel
content_type="Unknown"
content="Star Wars Forces of Destiny — Unexpected Company"
content_location="Unknown"
>
-
</AppearancePanel>
<AppearancePanel
content_type="Unknown"
content="Star Wars Forces of Destiny — The Imposter Inside (Mentioned only)"
content_location="Unknown"
>
-
</AppearancePanel>
<AppearancePanel
content_type="Unknown"
content="Forces of Destiny: Daring Adventures: Volume 1 (and audiobook) (Mentioned only)"
content_location="Unknown"
>
-
</AppearancePanel>
<AppearancePanel
content_type="Unknown"
content="Forces of Destiny—Ahsoka & Padmé (Mentioned only)"
content_location="Unknown"
>
-
</AppearancePanel>
<AppearancePanel
content_type="Unknown"
content="The Incident, Part 1 — Star Wars Adventures (2020) 5"
content_location="Unknown"
>
-
</AppearancePanel>
<AppearancePanel
content_type="Unknown"
content="The Incident, Part 2 — Star Wars Adventures (2020) 6"
content_location="Unknown"
>
-
</AppearancePanel>
<AppearancePanel
content_type="Unknown"
content="Star Wars Forces of Destiny — The Padawan Path"
content_location="Unknown"
>
-
</AppearancePanel>
<AppearancePanel
content_type="Unknown"
content="Forces of Destiny: Daring Adventures: Volume 2 (and audiobook)"
content_location="Unknown"
>
-
</AppearancePanel>
<AppearancePanel
content_type="Unknown"
content="Star Wars: The Clone Wars — Heroes on Both Sides"
content_location="Unknown"
>
-
</AppearancePanel>
<AppearancePanel
content_type="Unknown"
content="Pursuit of Peace — The Clone Wars: Stories of Light and Dark (and audiobook)"
content_location="Unknown"
>
-
</AppearancePanel>
<AppearancePanel
content_type="Unknown"
content="Star Wars: The Clone Wars — Nightsisters"
content_location="Unknown"
>
-
</AppearancePanel>
<AppearancePanel
content_type="Unknown"
content="Star Wars: The Clone Wars — Witches of the Mist"
content_location="Unknown"
>
-
</AppearancePanel>
<AppearancePanel
content_type="Unknown"
content="Star Wars: The Clone Wars — Overlords"
content_location="Unknown"
>
-
</AppearancePanel>
<AppearancePanel
content_type="Unknown"
content="Star Wars: The Clone Wars — Altar of Mortis"
content_location="Unknown"
>
-
</AppearancePanel>
<AppearancePanel
content_type="Unknown"
content="Star Wars: The Clone Wars — Ghosts of Mortis"
content_location="Unknown"
>
-
</AppearancePanel>
<AppearancePanel
content_type="Unknown"
content="Star Wars: The Clone Wars — The Citadel"
content_location="Unknown"
>
-
</AppearancePanel>
<AppearancePanel
content_type="Unknown"
content="Star Wars: The Clone Wars — Counterattack"
content_location="Unknown"
>
-
</AppearancePanel>
<AppearancePanel
content_type="Unknown"
content="Star Wars: The Clone Wars — Citadel Rescue"
content_location="Unknown"
>
-
</AppearancePanel>
<AppearancePanel
content_type="Unknown"
content="Star Wars: The Clone Wars — Padawan Lost"
content_location="Unknown"
>
-
</AppearancePanel>
<AppearancePanel
content_type="Unknown"
content="Star Wars: The Clone Wars — Wookiee Hunt"
content_location="Unknown"
>
-
</AppearancePanel>
<AppearancePanel
content_type="Unknown"
content="Star Wars: The Clone Wars — Water War"
content_location="Unknown"
>
-
</AppearancePanel>
<AppearancePanel
content_type="Unknown"
content="Star Wars: The Clone Wars — Gungan Attack"
content_location="Unknown"
>
-
</AppearancePanel>
<AppearancePanel
content_type="Unknown"
content="Star Wars: The Clone Wars — Prisoners"
content_location="Unknown"
>
-
</AppearancePanel>
<AppearancePanel
content_type="Unknown"
content="Star Wars: The Clone Wars — Shadow Warrior"
content_location="Unknown"
>
-
</AppearancePanel>
<AppearancePanel
content_type="Unknown"
content="Star Wars: The Clone Wars — Nomad Droids (Mentioned only)"
content_location="Unknown"
>
-
</AppearancePanel>
<AppearancePanel
content_type="Unknown"
content="Star Wars: The Clone Wars — Darkness on Umbara"
content_location="Unknown"
>
-
</AppearancePanel>
<AppearancePanel
content_type="Unknown"
content="Star Wars: The Clone Wars — The General (In flashback(s))"
content_location="Unknown"
>
-
</AppearancePanel>
<AppearancePanel
content_type="Unknown"
content="Star Wars: The Clone Wars — Plan of Dissent (Mentioned only)"
content_location="Unknown"
>
-
</AppearancePanel>
<AppearancePanel
content_type="Unknown"
content="Star Wars: The Clone Wars — Carnage of Krell (In flashback(s))"
content_location="Unknown"
>
-
</AppearancePanel>
<AppearancePanel
content_type="Unknown"
content="The Shadow of Umbara — The Clone Wars: Stories of Light and Dark (and audiobook)"
content_location="Unknown"
>
-
</AppearancePanel>
<AppearancePanel
content_type="Unknown"
content="Roger Roger — Star Wars Adventures (2017) 19"
content_location="Unknown"
>
-
</AppearancePanel>
<AppearancePanel
content_type="Unknown"
content="Hide and Seek — Star Wars Adventures (2017) 20 (also reprinted in Star Wars Fun & Action 5)"
content_location="Unknown"
>
-
</AppearancePanel>
<AppearancePanel
content_type="Unknown"
content="Star Wars: The Clone Wars — Kidnapped"
content_location="Unknown"
>
-
</AppearancePanel>
<AppearancePanel
content_type="Unknown"
content="Star Wars: The Clone Wars — Slaves of the Republic"
content_location="Unknown"
>
-
</AppearancePanel>
<AppearancePanel
content_type="Unknown"
content="Star Wars: The Clone Wars — Escape from Kadavo"
content_location="Unknown"
>
-
</AppearancePanel>
<AppearancePanel
content_type="Unknown"
content="Star Wars: The Clone Wars — A Friend in Need (Appears in hologram)"
content_location="Unknown"
>
-
</AppearancePanel>
<AppearancePanel
content_type="Unknown"
content="Star Wars: The Clone Wars — Deception"
content_location="Unknown"
>
-
</AppearancePanel>
<AppearancePanel
content_type="Unknown"
content="Star Wars: The Clone Wars — Friends and Enemies"
content_location="Unknown"
>
-
</AppearancePanel>
<AppearancePanel
content_type="Unknown"
content="Star Wars: The Clone Wars — The Box"
content_location="Unknown"
>
-
</AppearancePanel>
<AppearancePanel
content_type="Unknown"
content="Star Wars: The Clone Wars — Crisis on Naboo"
content_location="Unknown"
>
-
</AppearancePanel>
<AppearancePanel
content_type="Unknown"
content="Banes Story — The Clone Wars: Stories of Light and Dark (and audiobook) (Mentioned only)"
content_location="Unknown"
>
-
</AppearancePanel>
<AppearancePanel
content_type="Unknown"
content="The Lost Nightsister — The Clone Wars: Stories of Light and Dark (and audiobook) (Mentioned only)"
content_location="Unknown"
>
-
</AppearancePanel>
<AppearancePanel
content_type="Unknown"
content="Star Wars: The Clone Wars — Brothers"
content_location="Unknown"
>
-
</AppearancePanel>
<AppearancePanel
content_type="Unknown"
content="Star Wars: The Clone Wars — A War on Two Fronts"
content_location="Unknown"
>
-
</AppearancePanel>
<AppearancePanel
content_type="Unknown"
content="Star Wars: The Clone Wars — Front Runners"
content_location="Unknown"
>
-
</AppearancePanel>
<AppearancePanel
content_type="Unknown"
content="Star Wars: The Clone Wars — The Soft War (Appears in hologram)"
content_location="Unknown"
>
-
</AppearancePanel>
<AppearancePanel
content_type="Unknown"
content="Star Wars: The Clone Wars — Tipping Points"
content_location="Unknown"
>
-
</AppearancePanel>
<AppearancePanel
content_type="Unknown"
content="Star Wars: The Clone Wars — The Gathering (In flashback(s))"
content_location="Unknown"
>
-
</AppearancePanel>
<AppearancePanel
content_type="Unknown"
content="Star Wars: The Clone Wars — Bound for Rescue (Indirect mention only)"
content_location="Unknown"
>
-
</AppearancePanel>
<AppearancePanel
content_type="Unknown"
content="Almost a Jedi — The Clone Wars: Stories of Light and Dark (and audiobook) (Mentioned only)"
content_location="Unknown"
>
-
</AppearancePanel>
<AppearancePanel
content_type="Unknown"
content="Star Wars: The Clone Wars — Secret Weapons"
content_location="Unknown"
>
-
</AppearancePanel>
<AppearancePanel
content_type="Unknown"
content="Star Wars: The Clone Wars — Point of No Return"
content_location="Unknown"
>
-
</AppearancePanel>
<AppearancePanel
content_type="Unknown"
content="Star Wars: The Clone Wars — Revival"
content_location="Unknown"
>
-
</AppearancePanel>
<AppearancePanel
content_type="Unknown"
content="Star Wars: The Clone Wars — The Lawless (Mentioned only)"
content_location="Unknown"
>
-
</AppearancePanel>
<AppearancePanel
content_type="Unknown"
content="Kenobis Shadow — The Clone Wars: Stories of Light and Dark (and audiobook)"
content_location="Unknown"
>
-
</AppearancePanel>
<AppearancePanel
content_type="Unknown"
content="Star Wars: The Clone Wars — Sabotage"
content_location="Unknown"
>
-
</AppearancePanel>
<AppearancePanel
content_type="Unknown"
content="Star Wars: The Clone Wars — The Jedi Who Knew Too Much"
content_location="Unknown"
>
-
</AppearancePanel>
<AppearancePanel
content_type="Unknown"
content="Sisters — Age of Republic Special 1 (Mentioned only)"
content_location="Unknown"
>
-
</AppearancePanel>
<AppearancePanel
content_type="Unknown"
content="Star Wars: The Clone Wars — To Catch a Jedi"
content_location="Unknown"
>
-
</AppearancePanel>
<AppearancePanel
content_type="Unknown"
content="Star Wars: The Clone Wars — The Wrong Jedi"
content_location="Unknown"
>
-
</AppearancePanel>
<AppearancePanel
content_type="Unknown"
content="Thrawn Ascendancy: Chaos Rising (and audiobook) (Voice only)"
content_location="Unknown"
>
-
</AppearancePanel>
<AppearancePanel
content_type="Unknown"
content="Star Wars: The Clone Wars — The Unknown"
content_location="Unknown"
>
-
</AppearancePanel>
<AppearancePanel
content_type="Unknown"
content="Star Wars: The Clone Wars — Conspiracy (In flashback(s))"
content_location="Unknown"
>
-
</AppearancePanel>
<AppearancePanel
content_type="Unknown"
content="Star Wars: The Clone Wars — Orders"
content_location="Unknown"
>
-
</AppearancePanel>
<AppearancePanel
content_type="Unknown"
content="Star Wars: The Clone Wars — An Old Friend"
content_location="Unknown"
>
-
</AppearancePanel>
<AppearancePanel
content_type="Unknown"
content="Star Wars: The Clone Wars — The Rise of Clovis"
content_location="Unknown"
>
-
</AppearancePanel>
<AppearancePanel
content_type="Unknown"
content="Star Wars: The Clone Wars — Crisis at the Heart"
content_location="Unknown"
>
-
</AppearancePanel>
<AppearancePanel
content_type="Unknown"
content="Star Wars: The Clone Wars — The Lost One"
content_location="Unknown"
>
-
</AppearancePanel>
<AppearancePanel
content_type="Unknown"
content="Star Wars: The Clone Wars — Voices"
content_location="Unknown"
>
-
</AppearancePanel>
<AppearancePanel
content_type="Unknown"
content="Star Wars: The Clone Wars — Destiny (Vision to Yoda)"
content_location="Unknown"
>
-
</AppearancePanel>
<AppearancePanel
content_type="Unknown"
content="Star Wars: The Clone Wars — Sacrifice (Vision to Yoda)"
content_location="Unknown"
>
-
</AppearancePanel>
<AppearancePanel
content_type="Unknown"
content="Star Wars: The Clone Wars — A Death on Utapau"
content_location="Unknown"
>
-
</AppearancePanel>
<AppearancePanel
content_type="Unknown"
content="Star Wars: The Clone Wars — In Search of the Crystal"
content_location="Unknown"
>
-
</AppearancePanel>
<AppearancePanel
content_type="Unknown"
content="Star Wars: The Clone Wars — Crystal Crisis"
content_location="Unknown"
>
-
</AppearancePanel>
<AppearancePanel
content_type="Unknown"
content="Star Wars: The Clone Wars — The Big Bang"
content_location="Unknown"
>
-
</AppearancePanel>
<AppearancePanel
content_type="Unknown"
content="Dark Disciple (and audiobook)"
content_location="Unknown"
>
-
</AppearancePanel>
<AppearancePanel
content_type="Unknown"
content="Darth Maul — Son of Dathomir 3 (Indirect mention only)"
content_location="Unknown"
>
-
</AppearancePanel>
<AppearancePanel
content_type="Unknown"
content="Age of Republic - Padmé Amidala 1"
content_location="Unknown"
>
-
</AppearancePanel>
<AppearancePanel
content_type="Unknown"
content="Star Wars: The Clone Wars — Gone with a Trace (In flashback(s))"
content_location="Unknown"
>
-
</AppearancePanel>
<AppearancePanel
content_type="Unknown"
content="Star Wars: The Clone Wars — Deal No Deal"
content_location="Unknown"
>
-
</AppearancePanel>
<AppearancePanel
content_type="Unknown"
content="Star Wars: The Clone Wars — The Bad Batch"
content_location="Unknown"
>
-
</AppearancePanel>
<AppearancePanel
content_type="Unknown"
content="The Clone Wars: Season 7: Volume 1"
content_location="Unknown"
>
-
</AppearancePanel>
<AppearancePanel
content_type="Unknown"
content="Star Wars: The Clone Wars — A Distant Echo"
content_location="Unknown"
>
-
</AppearancePanel>
<AppearancePanel
content_type="Unknown"
content="Star Wars: The Clone Wars — On the Wings of Keeradaks"
content_location="Unknown"
>
-
</AppearancePanel>
<AppearancePanel
content_type="Unknown"
content="Star Wars: The Clone Wars — Unfinished Business"
content_location="Unknown"
>
-
</AppearancePanel>
<AppearancePanel
content_type="Unknown"
content="Star Wars: The Clone Wars — Old Friends Not Forgotten"
content_location="Unknown"
>
-
</AppearancePanel>
<AppearancePanel
content_type="Unknown"
content="Star Wars: Episode III Revenge of the Sith"
content_location="Unknown"
>
-
</AppearancePanel>
<AppearancePanel
content_type="Unknown"
content="Revenge of the Sith Little Golden Book (and audiobook)"
content_location="Unknown"
>
-
</AppearancePanel>
<AppearancePanel
content_type="Unknown"
content="The Last Adventure — 5-Minute Star Wars Stories (and audiobook)"
content_location="Unknown"
>
-
</AppearancePanel>
<AppearancePanel
content_type="Unknown"
content="The Duel with Dooku — The Prequel Trilogy Stories (and audiobook)"
content_location="Unknown"
>
-
</AppearancePanel>
<AppearancePanel
content_type="Unknown"
content="Star Wars: The Clone Wars — The Phantom Apprentice (Mentioned only)"
content_location="Unknown"
>
-
</AppearancePanel>
<AppearancePanel
content_type="Unknown"
content="Star Wars: The Clone Wars — Shattered (Voice only)"
content_location="Unknown"
>
-
</AppearancePanel>
<AppearancePanel
content_type="Unknown"
content="Driven to the Dark Side — The Prequel Trilogy Stories (and audiobook)"
content_location="Unknown"
>
-
</AppearancePanel>
<AppearancePanel
content_type="Unknown"
content="Empire Ascendant — The Prequel Trilogy Stories (and audiobook)"
content_location="Unknown"
>
-
</AppearancePanel>
<AppearancePanel
content_type="Unknown"
content="Star Wars: The Bad Batch — Aftermath (In flashback(s))"
content_location="Unknown"
>
-
</AppearancePanel>
<AppearancePanel
content_type="Unknown"
content="Star Wars: The Clone Wars — Victory and Death"
content_location="Unknown"
>
-
</AppearancePanel>
<AppearancePanel
content_type="Unknown"
content="The Rule of Two — The Prequel Trilogy Stories (and audiobook)"
content_location="Unknown"
>
-
</AppearancePanel>
<AppearancePanel
content_type="Unknown"
content="Darth Vader Rises — The Prequel Trilogy Stories (and audiobook)"
content_location="Unknown"
>
-
</AppearancePanel>
<AppearancePanel
content_type="Unknown"
content="Darth Vader (2017) 1"
content_location="Unknown"
>
-
</AppearancePanel>
<AppearancePanel
content_type="Unknown"
content="Star Wars: Tales of the Jedi — Resolve (Indirect mention only)"
content_location="Unknown"
>
-
</AppearancePanel>
<AppearancePanel
content_type="Unknown"
content="Star Wars: Tales of the Empire — Devoted"
content_location="Unknown"
>
-
</AppearancePanel>
<AppearancePanel
content_type="Unknown"
content="Darth Vader (2017) 2"
content_location="Unknown"
>
-
</AppearancePanel>
<AppearancePanel
content_type="Unknown"
content="Darth Vader (2017) 3"
content_location="Unknown"
>
-
</AppearancePanel>
<AppearancePanel
content_type="Unknown"
content="Darth Vader (2017) 4"
content_location="Unknown"
>
-
</AppearancePanel>
<AppearancePanel
content_type="Unknown"
content="Darth Vader (2017) 5"
content_location="Unknown"
>
-
</AppearancePanel>
<AppearancePanel
content_type="Unknown"
content="Darth Vader (2017) 6"
content_location="Unknown"
>
-
</AppearancePanel>
<AppearancePanel
content_type="Unknown"
content="Darth Vader (2017) 7"
content_location="Unknown"
>
-
</AppearancePanel>
<AppearancePanel
content_type="Unknown"
content="Darth Vader (2017) 8"
content_location="Unknown"
>
-
</AppearancePanel>
<AppearancePanel
content_type="Unknown"
content="Darth Vader (2017) 9"
content_location="Unknown"
>
-
</AppearancePanel>
<AppearancePanel
content_type="Unknown"
content="Darth Vader (2017) 10"
content_location="Unknown"
>
-
</AppearancePanel>
<AppearancePanel
content_type="Unknown"
content="The Lesson (Darth Vader) — Star Wars (2020) 25"
content_location="Unknown"
>
-
</AppearancePanel>
<AppearancePanel
content_type="Unknown"
content="Darth Vader (2017) 11"
content_location="Unknown"
>
-
</AppearancePanel>
<AppearancePanel
content_type="Unknown"
content="Darth Vader (2017) 12"
content_location="Unknown"
>
-
</AppearancePanel>
<AppearancePanel
content_type="Unknown"
content="Reign of the Empire: The Mask of Fear (and audiobook) (Indirect mention only)"
content_location="Unknown"
>
-
</AppearancePanel>
<AppearancePanel
content_type="Unknown"
content="The Dark Wraith — Myths & Fables (and audiobook) (In flashback(s))"
content_location="Unknown"
>
-
</AppearancePanel>
<AppearancePanel
content_type="Unknown"
content="The Predecessor — Dark Legends (In flashback(s))"
content_location="Unknown"
>
-
</AppearancePanel>
<AppearancePanel
content_type="Unknown"
content="Darth Vader (2017) 13"
content_location="Unknown"
>
-
</AppearancePanel>
<AppearancePanel
content_type="Unknown"
content="Darth Vader (2017) 14"
content_location="Unknown"
>
-
</AppearancePanel>
<AppearancePanel
content_type="Unknown"
content="Darth Vader (2017) 15"
content_location="Unknown"
>
-
</AppearancePanel>
<AppearancePanel
content_type="Unknown"
content="Darth Vader (2017) 16"
content_location="Unknown"
>
-
</AppearancePanel>
<AppearancePanel
content_type="Unknown"
content="Darth Vader (2017) 17"
content_location="Unknown"
>
-
</AppearancePanel>
<AppearancePanel
content_type="Unknown"
content="Darth Vader Annual 2"
content_location="Unknown"
>
-
</AppearancePanel>
<AppearancePanel
content_type="Unknown"
content="No Good Deed... — Darth Vader (2017) 1"
content_location="Unknown"
>
-
</AppearancePanel>
<AppearancePanel
content_type="Unknown"
content="Ahsoka (and audiobook) (In flashback(s))"
content_location="Unknown"
>
-
</AppearancePanel>
<AppearancePanel
content_type="Unknown"
content="Thrawn Ascendancy: Greater Good (and audiobook) (Mentioned only)"
content_location="Unknown"
>
-
</AppearancePanel>
<AppearancePanel
content_type="Unknown"
content="Adventures in Wild Space: The Escape (and audiobook) (Mentioned only)"
content_location="Unknown"
>
-
</AppearancePanel>
<AppearancePanel
content_type="Unknown"
content="Adventures in Wild Space: The Snare (and audiobook) (Appears in hologram)"
content_location="Unknown"
>
-
</AppearancePanel>
<AppearancePanel
content_type="Unknown"
content="Adventures in Wild Space: The Steal (and audiobook) (Mentioned only)"
content_location="Unknown"
>
-
</AppearancePanel>
<AppearancePanel
content_type="Unknown"
content="Adventures in Wild Space: The Cold (and audiobook) (Mentioned only)"
content_location="Unknown"
>
-
</AppearancePanel>
<AppearancePanel
content_type="Unknown"
content="Thrawn Ascendancy: Lesser Evil (and audiobook) (Mentioned only)"
content_location="Unknown"
>
-
</AppearancePanel>
<AppearancePanel
content_type="Unknown"
content="So Much More — Star Wars Adventures Annual 2019 (Appears through imagination)"
content_location="Unknown"
>
-
</AppearancePanel>
<AppearancePanel
content_type="Unknown"
content="Thrawn (and audiobook)"
content_location="Unknown"
>
-
</AppearancePanel>
<AppearancePanel
content_type="Unknown"
content="Thrawn 1 (Appears through imagination)"
content_location="Unknown"
>
-
</AppearancePanel>
<AppearancePanel
content_type="Unknown"
content="Thrawn 5 (Mentioned only)"
content_location="Unknown"
>
-
</AppearancePanel>
<AppearancePanel
content_type="Unknown"
content="Thrawn 6"
content_location="Unknown"
>
-
</AppearancePanel>
<AppearancePanel
content_type="Unknown"
content="Orientation — Star Wars Insider 157 (also reprinted in Star Wars Insider: The Fiction Collection Volume 1 and Lords of the Sith)"
content_location="Unknown"
>
-
</AppearancePanel>
<AppearancePanel
content_type="Unknown"
content="Lords of the Sith (and audiobook)"
content_location="Unknown"
>
-
</AppearancePanel>
<AppearancePanel
content_type="Unknown"
content="Tarkin (and audiobook)"
content_location="Unknown"
>
-
</AppearancePanel>
<AppearancePanel
content_type="Unknown"
content="Darth Vader (2017) 18"
content_location="Unknown"
>
-
</AppearancePanel>
<AppearancePanel
content_type="Unknown"
content="Darth Vader (2017) 19"
content_location="Unknown"
>
-
</AppearancePanel>
<AppearancePanel
content_type="Unknown"
content="Darth Vader (2017) 20"
content_location="Unknown"
>
-
</AppearancePanel>
<AppearancePanel
content_type="Unknown"
content="Darth Vader (2017) 21"
content_location="Unknown"
>
-
</AppearancePanel>
<AppearancePanel
content_type="Unknown"
content="Darth Vader (2017) 22"
content_location="Unknown"
>
-
</AppearancePanel>
<AppearancePanel
content_type="Unknown"
content="Star Wars Jedi: Fallen Order"
content_location="Unknown"
>
-
</AppearancePanel>
<AppearancePanel
content_type="Unknown"
content="Jedi: Battle Scars (and audiobook) (Mentioned only)"
content_location="Unknown"
>
-
</AppearancePanel>
<AppearancePanel
content_type="Unknown"
content="Darth Vader (2017) 23"
content_location="Unknown"
>
-
</AppearancePanel>
<AppearancePanel
content_type="Unknown"
content="Darth Vader (2017) 24"
content_location="Unknown"
>
-
</AppearancePanel>
<AppearancePanel
content_type="Unknown"
content="Darth Vader (2017) 25"
content_location="Unknown"
>
-
</AppearancePanel>
<AppearancePanel
content_type="Unknown"
content="Inquisitors 1"
content_location="Unknown"
>
-
</AppearancePanel>
<AppearancePanel
content_type="Unknown"
content="Inquisitors 2"
content_location="Unknown"
>
-
</AppearancePanel>
<AppearancePanel
content_type="Unknown"
content="Inquisitors 3"
content_location="Unknown"
>
-
</AppearancePanel>
<AppearancePanel
content_type="Unknown"
content="Inquisitors 4"
content_location="Unknown"
>
-
</AppearancePanel>
<AppearancePanel
content_type="Unknown"
content="Bottleneck — The Rise of the Empire (Mentioned only)"
content_location="Unknown"
>
-
</AppearancePanel>
<AppearancePanel
content_type="Unknown"
content="A New Dawn (and audiobook) (Mentioned only)"
content_location="Unknown"
>
-
</AppearancePanel>
<AppearancePanel
content_type="Unknown"
content="Obi-Wan Kenobi — Part I (In flashback(s))"
content_location="Unknown"
>
-
</AppearancePanel>
<AppearancePanel
content_type="Unknown"
content="Obi-Wan Kenobi 1 (In flashback(s))"
content_location="Unknown"
>
-
</AppearancePanel>
<AppearancePanel
content_type="Unknown"
content="Obi-Wan Kenobi — Part II"
content_location="Unknown"
>
-
</AppearancePanel>
<AppearancePanel
content_type="Unknown"
content="Obi-Wan Kenobi 2 (Variant cover only)"
content_location="Unknown"
>
-
</AppearancePanel>
<AppearancePanel
content_type="Unknown"
content="Obi-Wan Kenobi — Part III"
content_location="Unknown"
>
-
</AppearancePanel>
<AppearancePanel
content_type="Unknown"
content="Obi-Wan Kenobi 3"
content_location="Unknown"
>
-
</AppearancePanel>
<AppearancePanel
content_type="Unknown"
content="Obi-Wan Kenobi — Part IV"
content_location="Unknown"
>
-
</AppearancePanel>
<AppearancePanel
content_type="Unknown"
content="Obi-Wan Kenobi — Part V"
content_location="Unknown"
>
-
</AppearancePanel>
<AppearancePanel
content_type="Unknown"
content="Obi-Wan Kenobi — Part VI"
content_location="Unknown"
>
-
</AppearancePanel>
<AppearancePanel
content_type="Unknown"
content="Star Wars Jedi: Survivor"
content_location="Unknown"
>
-
</AppearancePanel>
<AppearancePanel
content_type="Unknown"
content="Star Wars (2015) 7 (Indirect mention only)"
content_location="Unknown"
>
-
</AppearancePanel>
<AppearancePanel
content_type="Unknown"
content="Star Wars (2015) 15 (Mentioned only)"
content_location="Unknown"
>
-
</AppearancePanel>
<AppearancePanel
content_type="Unknown"
content="Choose Your Destiny: A Podracer Mission (Mentioned only)"
content_location="Unknown"
>
-
</AppearancePanel>
<AppearancePanel
content_type="Unknown"
content="Lost Stars (and audiobook)"
content_location="Unknown"
>
-
</AppearancePanel>
<AppearancePanel
content_type="Unknown"
content="Lost Stars webcomic"
content_location="Unknown"
>
-
</AppearancePanel>
<AppearancePanel
content_type="Unknown"
content="Star Wars Rebels: Spark of Rebellion (Appears in hologram) (Prologue version)"
content_location="Unknown"
>
-
</AppearancePanel>
<AppearancePanel
content_type="Unknown"
content="Star Wars Rebels webcomic"
content_location="Unknown"
>
-
</AppearancePanel>
<AppearancePanel
content_type="Unknown"
content="Star Wars Rebels: Recon Missions"
content_location="Unknown"
>
-
</AppearancePanel>
<AppearancePanel
content_type="Unknown"
content="Star Wars Rebels — Gathering Forces (Indirect mention only)"
content_location="Unknown"
>
-
</AppearancePanel>
<AppearancePanel
content_type="Unknown"
content="Kanan 7"
content_location="Unknown"
>
-
</AppearancePanel>
<AppearancePanel
content_type="Unknown"
content="Star Wars Rebels: Battle to the End"
content_location="Unknown"
>
-
</AppearancePanel>
<AppearancePanel
content_type="Unknown"
content="Star Wars: Starfighter Missions"
content_location="Unknown"
>
-
</AppearancePanel>
<AppearancePanel
content_type="Unknown"
content="Star Wars Rebels — Fire Across the Galaxy"
content_location="Unknown"
>
-
</AppearancePanel>
<AppearancePanel
content_type="Unknown"
content="Star Wars Rebels: The Siege of Lothal"
content_location="Unknown"
>
-
</AppearancePanel>
<AppearancePanel
content_type="Unknown"
content="Star Wars Rebels: Team Tactics"
content_location="Unknown"
>
-
</AppearancePanel>
<AppearancePanel
content_type="Unknown"
content="Star Wars Galaxy of Adventures — Darth Vader vs. the Rebel Fleet - Fearsome Fighter Pilot"
content_location="Unknown"
>
-
</AppearancePanel>
<AppearancePanel
content_type="Unknown"
content="Star Wars Rebels — The Lost Commanders (Indirect mention only)"
content_location="Unknown"
>
-
</AppearancePanel>
<AppearancePanel
content_type="Unknown"
content="Star Wars Rebels — Relics of the Old Republic (Mentioned only)"
content_location="Unknown"
>
-
</AppearancePanel>
<AppearancePanel
content_type="Unknown"
content="Star Wars Rebels — Always Two There Are (Mentioned only)"
content_location="Unknown"
>
-
</AppearancePanel>
<AppearancePanel
content_type="Unknown"
content="No Sympathy — Star Wars Rebels Magazine 14 (Appears in hologram)"
content_location="Unknown"
>
-
</AppearancePanel>
<AppearancePanel
content_type="Unknown"
content="Star Wars Rebels — The Future of the Force (Mentioned only)"
content_location="Unknown"
>
-
</AppearancePanel>
<AppearancePanel
content_type="Unknown"
content="Leia, Princess of Alderaan (and audiobook) (Mentioned only)"
content_location="Unknown"
>
-
</AppearancePanel>
<AppearancePanel
content_type="Unknown"
content="Leia Organa: Ordeal of the Princess (In flashback(s))"
content_location="Unknown"
>
-
</AppearancePanel>
<AppearancePanel
content_type="Unknown"
content="Star Wars Rebels — Shroud of Darkness"
content_location="Unknown"
>
-
</AppearancePanel>
<AppearancePanel
content_type="Unknown"
content="Star Wars Rebels — Twilight of the Apprentice"
content_location="Unknown"
>
-
</AppearancePanel>
<AppearancePanel
content_type="Unknown"
content="Age of Rebellion - Darth Vader 1"
content_location="Unknown"
>
-
</AppearancePanel>
<AppearancePanel
content_type="Unknown"
content="Star Wars Rebels: Steps Into Shadow (Mentioned only)"
content_location="Unknown"
>
-
</AppearancePanel>
<AppearancePanel
content_type="Unknown"
content="Star Wars Rebels — Ghosts of Geonosis (Mentioned only)"
content_location="Unknown"
>
-
</AppearancePanel>
<AppearancePanel
content_type="Unknown"
content="Star Wars Rebels — Twin Suns (Indirect mention only)"
content_location="Unknown"
>
-
</AppearancePanel>
<AppearancePanel
content_type="Unknown"
content="Thrawn: Alliances (and audiobook)"
content_location="Unknown"
>
-
</AppearancePanel>
<AppearancePanel
content_type="Unknown"
content="Thrawn: Alliances 1"
content_location="Unknown"
>
-
</AppearancePanel>
<AppearancePanel
content_type="Unknown"
content="Vader - Dark Visions 1"
content_location="Unknown"
>
-
</AppearancePanel>
<AppearancePanel
content_type="Unknown"
content="Vader - Dark Visions 3"
content_location="Unknown"
>
-
</AppearancePanel>
<AppearancePanel
content_type="Unknown"
content="The Mighty Chewbacca in the Forest of Fear! (and audiobook) (Mentioned only)"
content_location="Unknown"
>
-
</AppearancePanel>
<AppearancePanel
content_type="Unknown"
content="Target Vader 1"
content_location="Unknown"
>
-
</AppearancePanel>
<AppearancePanel
content_type="Unknown"
content="Target Vader 2"
content_location="Unknown"
>
-
</AppearancePanel>
<AppearancePanel
content_type="Unknown"
content="Target Vader 3"
content_location="Unknown"
>
-
</AppearancePanel>
<AppearancePanel
content_type="Unknown"
content="Target Vader 4"
content_location="Unknown"
>
-
</AppearancePanel>
<AppearancePanel
content_type="Unknown"
content="Target Vader 5"
content_location="Unknown"
>
-
</AppearancePanel>
<AppearancePanel
content_type="Unknown"
content="Target Vader 6"
content_location="Unknown"
>
-
</AppearancePanel>
<AppearancePanel
content_type="Unknown"
content="Star Wars: Secrets of the Empire"
content_location="Unknown"
>
-
</AppearancePanel>
<AppearancePanel
content_type="Unknown"
content="Vader Immortal – Episode I"
content_location="Unknown"
>
-
</AppearancePanel>
<AppearancePanel
content_type="Unknown"
content="Vader Immortal – Episode II"
content_location="Unknown"
>
-
</AppearancePanel>
<AppearancePanel
content_type="Unknown"
content="Vader Immortal – Episode III"
content_location="Unknown"
>
-
</AppearancePanel>
<AppearancePanel
content_type="Unknown"
content="Red Four — Marvel Comics 1000"
content_location="Unknown"
>
-
</AppearancePanel>
<AppearancePanel
content_type="Unknown"
content="Thrawn: Treason (and audiobook) (Mentioned only)"
content_location="Unknown"
>
-
</AppearancePanel>
<AppearancePanel
content_type="Unknown"
content="Star Wars Rebels — A World Between Worlds"
content_location="Unknown"
>
-
</AppearancePanel>
<AppearancePanel
content_type="Unknown"
content="Star Wars Adventures: Tales from Vaders Castle 2 (Mentioned only) (In flashback(s))"
content_location="Unknown"
>
-
</AppearancePanel>
<AppearancePanel
content_type="Unknown"
content="Star Wars Adventures Free Comic Book Day 2019"
content_location="Unknown"
>
-
</AppearancePanel>
<AppearancePanel
content_type="Unknown"
content="Star Wars Adventures: Tales from Vaders Castle 4"
content_location="Unknown"
>
-
</AppearancePanel>
<AppearancePanel
content_type="Unknown"
content="Star Wars Adventures: Tales from Vaders Castle 5"
content_location="Unknown"
>
-
</AppearancePanel>
<AppearancePanel
content_type="Unknown"
content="Star Wars Adventures: Return to Vaders Castle 1 (Appears in hologram)"
content_location="Unknown"
>
-
</AppearancePanel>
<AppearancePanel
content_type="Unknown"
content="Star Wars Adventures: Return to Vaders Castle 2 (Mentioned only)"
content_location="Unknown"
>
-
</AppearancePanel>
<AppearancePanel
content_type="Unknown"
content="Star Wars Adventures: Return to Vaders Castle 3 (Mentioned only)"
content_location="Unknown"
>
-
</AppearancePanel>
<AppearancePanel
content_type="Unknown"
content="Star Wars Adventures: Return to Vaders Castle 4 (Mentioned only)"
content_location="Unknown"
>
-
</AppearancePanel>
<AppearancePanel
content_type="Unknown"
content="Star Wars Adventures: Return to Vaders Castle 5"
content_location="Unknown"
>
-
</AppearancePanel>
<AppearancePanel
content_type="Unknown"
content="Vader - Dark Visions 2"
content_location="Unknown"
>
-
</AppearancePanel>
<AppearancePanel
content_type="Unknown"
content="Vader - Dark Visions 4"
content_location="Unknown"
>
-
</AppearancePanel>
<AppearancePanel
content_type="Unknown"
content="Vader - Dark Visions 5"
content_location="Unknown"
>
-
</AppearancePanel>
<AppearancePanel
content_type="Unknown"
content="Hard Shutdown — Darth Vader – Black, White & Red 1"
content_location="Unknown"
>
-
</AppearancePanel>
<AppearancePanel
content_type="Unknown"
content="Inescapable — Darth Vader – Black, White & Red 1 (Appears in dream)"
content_location="Unknown"
>
-
</AppearancePanel>
<AppearancePanel
content_type="Unknown"
content="Dissolution of Hope — Darth Vader – Black, White & Red 1"
content_location="Unknown"
>
-
</AppearancePanel>
<AppearancePanel
content_type="Unknown"
content="The Endless Mercy — Darth Vader – Black, White & Red 2"
content_location="Unknown"
>
-
</AppearancePanel>
<AppearancePanel
content_type="Unknown"
content="Power — Darth Vader – Black, White & Red 2"
content_location="Unknown"
>
-
</AppearancePanel>
<AppearancePanel
content_type="Unknown"
content="Annihilated — Darth Vader – Black, White & Red 3"
content_location="Unknown"
>
-
</AppearancePanel>
<AppearancePanel
content_type="Unknown"
content="The Inhabitant — Darth Vader – Black, White & Red 4"
content_location="Unknown"
>
-
</AppearancePanel>
<AppearancePanel
content_type="Unknown"
content="Blood Moon Uprising — Stories of Jedi and Sith (and audiobook)"
content_location="Unknown"
>
-
</AppearancePanel>
<AppearancePanel
content_type="Unknown"
content="Tales of Villainy: The Short Goodbye — Star Wars Adventures (2020) 5"
content_location="Unknown"
>
-
</AppearancePanel>
<AppearancePanel
content_type="Unknown"
content="Obi-Wan 1 (Cover only)"
content_location="Unknown"
>
-
</AppearancePanel>
<AppearancePanel
content_type="Unknown"
content="Obi-Wan 3 (In flashback(s))"
content_location="Unknown"
>
-
</AppearancePanel>
<AppearancePanel
content_type="Unknown"
content="Obi-Wan 4 (In flashback(s))"
content_location="Unknown"
>
-
</AppearancePanel>
<AppearancePanel
content_type="Unknown"
content="Obi-Wan 5 (Vision to Obi-Wan Kenobi)"
content_location="Unknown"
>
-
</AppearancePanel>
<AppearancePanel
content_type="Unknown"
content="Rogue One: A Star Wars Story"
content_location="Unknown"
>
-
</AppearancePanel>
<AppearancePanel
content_type="Unknown"
content="Rogue One: A Star Wars Story novelization (and audiobook)"
content_location="Unknown"
>
-
</AppearancePanel>
<AppearancePanel
content_type="Unknown"
content="Star Wars: Rogue One: A Junior Novel (and audiobook)"
content_location="Unknown"
>
-
</AppearancePanel>
<AppearancePanel
content_type="Unknown"
content="Star Wars: Rogue One: Secret Mission"
content_location="Unknown"
>
-
</AppearancePanel>
<AppearancePanel
content_type="Unknown"
content="Rogue One: A Star Wars Story Graphic Novel Adaptation"
content_location="Unknown"
>
-
</AppearancePanel>
<AppearancePanel
content_type="Unknown"
content="Rogue One Adaptation 2 (Mentioned only)"
content_location="Unknown"
>
-
</AppearancePanel>
<AppearancePanel
content_type="Unknown"
content="Rogue One Adaptation 4"
content_location="Unknown"
>
-
</AppearancePanel>
<AppearancePanel
content_type="Unknown"
content="Rogue One Adaptation 5 (Mentioned only)"
content_location="Unknown"
>
-
</AppearancePanel>
<AppearancePanel
content_type="Unknown"
content="Rogue One Adaptation 6"
content_location="Unknown"
>
-
</AppearancePanel>
<AppearancePanel
content_type="Unknown"
content="Star Wars Galaxy of Adventures — Darth Vader - Power of the Dark Side"
content_location="Unknown"
>
-
</AppearancePanel>
<AppearancePanel
content_type="Unknown"
content="Raymus — From a Certain Point of View (and audiobook)"
content_location="Unknown"
>
-
</AppearancePanel>
<AppearancePanel
content_type="Unknown"
content="Bounty Hunt"
content_location="Unknown"
>
-
</AppearancePanel>
<AppearancePanel
content_type="Unknown"
content="Of MSE-6 and Men — From a Certain Point of View (and audiobook) (Mentioned only)"
content_location="Unknown"
>
-
</AppearancePanel>
<AppearancePanel
content_type="Unknown"
content="Age of Rebellion - Grand Moff Tarkin 1"
content_location="Unknown"
>
-
</AppearancePanel>
<AppearancePanel
content_type="Unknown"
content="Star Wars: Episode IV A New Hope (First appearance) (First identified as as Darth Vader)"
content_location="Unknown"
>
-
</AppearancePanel>
<AppearancePanel
content_type="Unknown"
content="A New Hope: The Princess, the Scoundrel, and the Farm Boy (and audiobook)"
content_location="Unknown"
>
-
</AppearancePanel>
<AppearancePanel
content_type="Unknown"
content="Star Wars: A New Hope junior novelization"
content_location="Unknown"
>
-
</AppearancePanel>
<AppearancePanel
content_type="Unknown"
content="A New Hope Little Golden Book (and audiobook)"
content_location="Unknown"
>
-
</AppearancePanel>
<AppearancePanel
content_type="Unknown"
content="A New Hope Read-Along Storybook and CD"
content_location="Unknown"
>
-
</AppearancePanel>
<AppearancePanel
content_type="Unknown"
content="The Adventures of Luke Skywalker, Jedi Knight"
content_location="Unknown"
>
-
</AppearancePanel>
<AppearancePanel
content_type="Unknown"
content="A Leader Named Leia (and audiobook)"
content_location="Unknown"
>
-
</AppearancePanel>
<AppearancePanel
content_type="Unknown"
content="Star Wars: The Original Trilogy – A Graphic Novel"
content_location="Unknown"
>
-
</AppearancePanel>
<AppearancePanel
content_type="Unknown"
content="Star Wars: Heroes Path"
content_location="Unknown"
>
-
</AppearancePanel>
<AppearancePanel
content_type="Unknown"
content="Star Wars Battlefront"
content_location="Unknown"
>
-
</AppearancePanel>
<AppearancePanel
content_type="Unknown"
content="Star Wars: Battle Pod"
content_location="Unknown"
>
-
</AppearancePanel>
<AppearancePanel
content_type="Unknown"
content="Star Wars Galaxy of Adventures: R2-D2 (Mentioned only)"
content_location="Unknown"
>
-
</AppearancePanel>
<AppearancePanel
content_type="Unknown"
content="Escape from Darth Vader"
content_location="Unknown"
>
-
</AppearancePanel>
<AppearancePanel
content_type="Unknown"
content="Escape from Darth Vader — The Original Trilogy Stories (and audiobook)"
content_location="Unknown"
>
-
</AppearancePanel>
<AppearancePanel
content_type="Unknown"
content="Escape from Darth Vader — 5-Minute Star Wars Stories (and audiobook)"
content_location="Unknown"
>
-
</AppearancePanel>
<AppearancePanel
content_type="Unknown"
content="Star Wars Galaxy of Adventures — R2-D2 - A Loyal Droid"
content_location="Unknown"
>
-
</AppearancePanel>
<AppearancePanel
content_type="Unknown"
content="The Bucket — From a Certain Point of View (and audiobook) (Mentioned only)"
content_location="Unknown"
>
-
</AppearancePanel>
<AppearancePanel
content_type="Unknown"
content="Star Wars Galaxy of Adventures — Princess Leia vs. Darth Vader - A Fearless Leader"
content_location="Unknown"
>
-
</AppearancePanel>
<AppearancePanel
content_type="Unknown"
content="The Sith of Datawork — From a Certain Point of View (and audiobook) (Mentioned only)"
content_location="Unknown"
>
-
</AppearancePanel>
<AppearancePanel
content_type="Unknown"
content="Stories in the Sand — From a Certain Point of View (and audiobook) (Appears in hologram)"
content_location="Unknown"
>
-
</AppearancePanel>
<AppearancePanel
content_type="Unknown"
content="The Heros Journey Begins — The Original Trilogy Stories (and audiobook) (Mentioned only)"
content_location="Unknown"
>
-
</AppearancePanel>
<AppearancePanel
content_type="Unknown"
content="Star Wars Galaxy of Adventures — Luke Skywalker - The Journey Begins (Mentioned only)"
content_location="Unknown"
>
-
</AppearancePanel>
<AppearancePanel
content_type="Unknown"
content="Star Wars Galaxy of Adventures — Obi-Wan Kenobi (In flashback(s))"
content_location="Unknown"
>
-
</AppearancePanel>
<AppearancePanel
content_type="Unknown"
content="Fully Operational — From a Certain Point of View (and audiobook)"
content_location="Unknown"
>
-
</AppearancePanel>
<AppearancePanel
content_type="Unknown"
content="An Incident Report — From a Certain Point of View (and audiobook) (Mentioned only)"
content_location="Unknown"
>
-
</AppearancePanel>
<AppearancePanel
content_type="Unknown"
content="Master and Apprentice — From a Certain Point of View (and audiobook) (Mentioned only)"
content_location="Unknown"
>
-
</AppearancePanel>
<AppearancePanel
content_type="Unknown"
content="Beru Whitesun Lars — From a Certain Point of View (and audiobook) (Indirect mention only)"
content_location="Unknown"
>
-
</AppearancePanel>
<AppearancePanel
content_type="Unknown"
content="Change of Heart — From a Certain Point of View (and audiobook)"
content_location="Unknown"
>
-
</AppearancePanel>
<AppearancePanel
content_type="Unknown"
content="Born in the Storm — From a Certain Point of View (and audiobook) (Indirect mention only)"
content_location="Unknown"
>
-
</AppearancePanel>
<AppearancePanel
content_type="Unknown"
content="A Bad Feeling About This — The Original Trilogy Stories (and audiobook)"
content_location="Unknown"
>
-
</AppearancePanel>
<AppearancePanel
content_type="Unknown"
content="Verge of Greatness — From a Certain Point of View (and audiobook)"
content_location="Unknown"
>
-
</AppearancePanel>
<AppearancePanel
content_type="Unknown"
content="Added Muscle — From a Certain Point of View (and audiobook) (Mentioned only)"
content_location="Unknown"
>
-
</AppearancePanel>
<AppearancePanel
content_type="Unknown"
content="Trapped in the Death Star!"
content_location="Unknown"
>
-
</AppearancePanel>
<AppearancePanel
content_type="Unknown"
content="There is Another — From a Certain Point of View (and audiobook) (Mentioned only)"
content_location="Unknown"
>
-
</AppearancePanel>
<AppearancePanel
content_type="Unknown"
content="End of Watch — From a Certain Point of View (and audiobook) (Voice only)"
content_location="Unknown"
>
-
</AppearancePanel>
<AppearancePanel
content_type="Unknown"
content="Bump — From a Certain Point of View (and audiobook)"
content_location="Unknown"
>
-
</AppearancePanel>
<AppearancePanel
content_type="Unknown"
content="The Haunting of Grand Moff Tarkin — Tales from the Death Star"
content_location="Unknown"
>
-
</AppearancePanel>
<AppearancePanel
content_type="Unknown"
content="Time of Death — From a Certain Point of View (and audiobook)"
content_location="Unknown"
>
-
</AppearancePanel>
<AppearancePanel
content_type="Unknown"
content="Palpatine — From a Certain Point of View (and audiobook) (Mentioned only)"
content_location="Unknown"
>
-
</AppearancePanel>
<AppearancePanel
content_type="Unknown"
content="Star Wars Galaxy of Adventures — Han Solo – Taking Flight for his Friends"
content_location="Unknown"
>
-
</AppearancePanel>
<AppearancePanel
content_type="Unknown"
content="Star Wars Galaxy of Adventures — Luke vs. the Death Star - X-wing Assault"
content_location="Unknown"
>
-
</AppearancePanel>
<AppearancePanel
content_type="Unknown"
content="Battlefront II: Inferno Squad (and audiobook) (Mentioned only)"
content_location="Unknown"
>
-
</AppearancePanel>
<AppearancePanel
content_type="Unknown"
content="Lando 1 (Variant cover only)"
content_location="Unknown"
>
-
</AppearancePanel>
<AppearancePanel
content_type="Unknown"
content="Lando 5 (Mentioned only)"
content_location="Unknown"
>
-
</AppearancePanel>
<AppearancePanel
content_type="Unknown"
content="Star Wars Annual (2015) 4"
content_location="Unknown"
>
-
</AppearancePanel>
<AppearancePanel
content_type="Unknown"
content="Heir to the Jedi (and audiobook) (Mentioned only)"
content_location="Unknown"
>
-
</AppearancePanel>
<AppearancePanel
content_type="Unknown"
content="The Weapon of a Jedi: A Luke Skywalker Adventure (and audiobook) (Mentioned only)"
content_location="Unknown"
>
-
</AppearancePanel>
<AppearancePanel
content_type="Unknown"
content="Luke and the Lost Jedi Temple (and audiobook) (Mentioned only)"
content_location="Unknown"
>
-
</AppearancePanel>
<AppearancePanel
content_type="Unknown"
content="The Weapon of a Jedi, Part 1 — Star Wars - Magazin 19 (Mentioned only)"
content_location="Unknown"
>
-
</AppearancePanel>
<AppearancePanel
content_type="Unknown"
content="The Weapon of a Jedi, Part 2 — Star Wars - Magazin 20 (Mentioned only)"
content_location="Unknown"
>
-
</AppearancePanel>
<AppearancePanel
content_type="Unknown"
content="Choose Your Destiny: A Luke & Leia Adventure (and audiobook) (Mentioned only)"
content_location="Unknown"
>
-
</AppearancePanel>
<AppearancePanel
content_type="Unknown"
content="Star Wars: Commander"
content_location="Unknown"
>
-
</AppearancePanel>
<AppearancePanel
content_type="Unknown"
content="Star Wars (2015) 1"
content_location="Unknown"
>
-
</AppearancePanel>
<AppearancePanel
content_type="Unknown"
content="Star Wars (2015) 2"
content_location="Unknown"
>
-
</AppearancePanel>
<AppearancePanel
content_type="Unknown"
content="Star Wars (2015) 3"
content_location="Unknown"
>
-
</AppearancePanel>
<AppearancePanel
content_type="Unknown"
content="Darth Vader (2015) 1"
content_location="Unknown"
>
-
</AppearancePanel>
<AppearancePanel
content_type="Unknown"
content="Coda — Darth Vader (2015) 25"
content_location="Unknown"
>
-
</AppearancePanel>
<AppearancePanel
content_type="Unknown"
content="Star Wars (2015) 4"
content_location="Unknown"
>
-
</AppearancePanel>
<AppearancePanel
content_type="Unknown"
content="Doctor Aphra: An Audiobook Original"
content_location="Unknown"
>
-
</AppearancePanel>
<AppearancePanel
content_type="Unknown"
content="Doctor Aphra script"
content_location="Unknown"
>
-
</AppearancePanel>
<AppearancePanel
content_type="Unknown"
content="Darth Vader (2015) 2"
content_location="Unknown"
>
-
</AppearancePanel>
<AppearancePanel
content_type="Unknown"
content="Darth Vader (2015) 3 (also reprinted in HCF 2016 Darth Vader: Doctor Aphra 1)"
content_location="Unknown"
>
-
</AppearancePanel>
<AppearancePanel
content_type="Unknown"
content="Darth Vader (2015) 4"
content_location="Unknown"
>
-
</AppearancePanel>
<AppearancePanel
content_type="Unknown"
content="Star Wars (2015) 5 (Mentioned only; in the opening crawl)"
content_location="Unknown"
>
-
</AppearancePanel>
<AppearancePanel
content_type="Unknown"
content="Darth Vader (2015) 5"
content_location="Unknown"
>
-
</AppearancePanel>
<AppearancePanel
content_type="Unknown"
content="Star Wars (2015) 6"
content_location="Unknown"
>
-
</AppearancePanel>
<AppearancePanel
content_type="Unknown"
content="Darth Vader (2015) 6"
content_location="Unknown"
>
-
</AppearancePanel>
<AppearancePanel
content_type="Unknown"
content="Star Wars (2015) 8 (Mentioned only)"
content_location="Unknown"
>
-
</AppearancePanel>
<AppearancePanel
content_type="Unknown"
content="Star Wars (2015) 9 (Mentioned only)"
content_location="Unknown"
>
-
</AppearancePanel>
<AppearancePanel
content_type="Unknown"
content="Star Wars (2015) 10 (Mentioned only)"
content_location="Unknown"
>
-
</AppearancePanel>
<AppearancePanel
content_type="Unknown"
content="Star Wars (2015) 12"
content_location="Unknown"
>
-
</AppearancePanel>
<AppearancePanel
content_type="Unknown"
content="Darth Vader (2015) 7"
content_location="Unknown"
>
-
</AppearancePanel>
<AppearancePanel
content_type="Unknown"
content="Darth Vader (2015) 8"
content_location="Unknown"
>
-
</AppearancePanel>
<AppearancePanel
content_type="Unknown"
content="Darth Vader (2015) 9"
content_location="Unknown"
>
-
</AppearancePanel>
<AppearancePanel
content_type="Unknown"
content="Darth Vader (2015) 10"
content_location="Unknown"
>
-
</AppearancePanel>
<AppearancePanel
content_type="Unknown"
content="Darth Vader (2015) 11"
content_location="Unknown"
>
-
</AppearancePanel>
<AppearancePanel
content_type="Unknown"
content="Darth Vader (2015) 12"
content_location="Unknown"
>
-
</AppearancePanel>
<AppearancePanel
content_type="Unknown"
content="Darth Vader Annual 1"
content_location="Unknown"
>
-
</AppearancePanel>
<AppearancePanel
content_type="Unknown"
content="Rogues Gambit — A New Legacy 1"
content_location="Unknown"
>
-
</AppearancePanel>
<AppearancePanel
content_type="Unknown"
content="Vader Down 1"
content_location="Unknown"
>
-
</AppearancePanel>
<AppearancePanel
content_type="Unknown"
content="Darth Vader (2015) 13"
content_location="Unknown"
>
-
</AppearancePanel>
<AppearancePanel
content_type="Unknown"
content="Star Wars (2015) 13"
content_location="Unknown"
>
-
</AppearancePanel>
<AppearancePanel
content_type="Unknown"
content="Darth Vader (2015) 14"
content_location="Unknown"
>
-
</AppearancePanel>
<AppearancePanel
content_type="Unknown"
content="Star Wars (2015) 14"
content_location="Unknown"
>
-
</AppearancePanel>
<AppearancePanel
content_type="Unknown"
content="Darth Vader (2015) 15"
content_location="Unknown"
>
-
</AppearancePanel>
<AppearancePanel
content_type="Unknown"
content="Star Wars (2015) 16 (Mentioned only)"
content_location="Unknown"
>
-
</AppearancePanel>
<AppearancePanel
content_type="Unknown"
content="Star Wars (2015) 17 (Mentioned only; in the opening crawl)"
content_location="Unknown"
>
-
</AppearancePanel>
<AppearancePanel
content_type="Unknown"
content="Star Wars (2015) 18 (Mentioned only; in the opening crawl)"
content_location="Unknown"
>
-
</AppearancePanel>
<AppearancePanel
content_type="Unknown"
content="Star Wars (2015) 19 (Mentioned only)"
content_location="Unknown"
>
-
</AppearancePanel>
<AppearancePanel
content_type="Unknown"
content="Darth Vader (2015) 16"
content_location="Unknown"
>
-
</AppearancePanel>
<AppearancePanel
content_type="Unknown"
content="Darth Vader (2015) 17"
content_location="Unknown"
>
-
</AppearancePanel>
<AppearancePanel
content_type="Unknown"
content="Darth Vader (2015) 18"
content_location="Unknown"
>
-
</AppearancePanel>
<AppearancePanel
content_type="Unknown"
content="Darth Vader (2015) 19"
content_location="Unknown"
>
-
</AppearancePanel>
<AppearancePanel
content_type="Unknown"
content="Darth Vader (2015) 20"
content_location="Unknown"
>
-
</AppearancePanel>
<AppearancePanel
content_type="Unknown"
content="Darth Vader (2015) 21"
content_location="Unknown"
>
-
</AppearancePanel>
<AppearancePanel
content_type="Unknown"
content="Darth Vader (2015) 22"
content_location="Unknown"
>
-
</AppearancePanel>
<AppearancePanel
content_type="Unknown"
content="Darth Vader (2015) 23"
content_location="Unknown"
>
-
</AppearancePanel>
<AppearancePanel
content_type="Unknown"
content="Darth Vader (2015) 24"
content_location="Unknown"
>
-
</AppearancePanel>
<AppearancePanel
content_type="Unknown"
content="Darth Vader (2015) 25"
content_location="Unknown"
>
-
</AppearancePanel>
<AppearancePanel
content_type="Unknown"
content="Diplomatic Impunity — Darth Vader – Black, White & Red 3"
content_location="Unknown"
>
-
</AppearancePanel>
<AppearancePanel
content_type="Unknown"
content="Star Wars (2015) 21 (Mentioned only; in the opening crawl)"
content_location="Unknown"
>
-
</AppearancePanel>
<AppearancePanel
content_type="Unknown"
content="Star Wars (2015) 22 (Mentioned only)"
content_location="Unknown"
>
-
</AppearancePanel>
<AppearancePanel
content_type="Unknown"
content="Star Wars (2015) 24"
content_location="Unknown"
>
-
</AppearancePanel>
<AppearancePanel
content_type="Unknown"
content="Star Wars (2015) 25"
content_location="Unknown"
>
-
</AppearancePanel>
<AppearancePanel
content_type="Unknown"
content="Star Wars (2015) 26 (Appears in hologram)"
content_location="Unknown"
>
-
</AppearancePanel>
<AppearancePanel
content_type="Unknown"
content="Star Wars (2015) 27 (Mentioned only; in the opening crawl)"
content_location="Unknown"
>
-
</AppearancePanel>
<AppearancePanel
content_type="Unknown"
content="Doctor Aphra (2016) 1 (Mentioned only)"
content_location="Unknown"
>
-
</AppearancePanel>
<AppearancePanel
content_type="Unknown"
content="Doctor Aphra (2016) 2 (Mentioned only; in the opening crawl)"
content_location="Unknown"
>
-
</AppearancePanel>
<AppearancePanel
content_type="Unknown"
content="Doctor Aphra (2016) 3 (Mentioned only)"
content_location="Unknown"
>
-
</AppearancePanel>
<AppearancePanel
content_type="Unknown"
content="Doctor Aphra (2016) 4 (Mentioned only)"
content_location="Unknown"
>
-
</AppearancePanel>
<AppearancePanel
content_type="Unknown"
content="Doctor Aphra (2016) 6 (Variant cover only)"
content_location="Unknown"
>
-
</AppearancePanel>
<AppearancePanel
content_type="Unknown"
content="The Screaming Citadel 1 (Mentioned only)"
content_location="Unknown"
>
-
</AppearancePanel>
<AppearancePanel
content_type="Unknown"
content="Doctor Aphra (2016) 8 (Variant cover only)"
content_location="Unknown"
>
-
</AppearancePanel>
<AppearancePanel
content_type="Unknown"
content="Star Wars (2015) 33 (Variant cover only)"
content_location="Unknown"
>
-
</AppearancePanel>
<AppearancePanel
content_type="Unknown"
content="The Trouble at Tibrin — Star Wars Adventures (2017) 4 (Mentioned only)"
content_location="Unknown"
>
-
</AppearancePanel>
<AppearancePanel
content_type="Unknown"
content="Mind Your Manners — Star Wars Adventures Annual 2018 (Mentioned only)"
content_location="Unknown"
>
-
</AppearancePanel>
<AppearancePanel
content_type="Unknown"
content="Star Wars (2015) 35 (Mentioned only)"
content_location="Unknown"
>
-
</AppearancePanel>
<AppearancePanel
content_type="Unknown"
content="Star Wars (2015) 36"
content_location="Unknown"
>
-
</AppearancePanel>
<AppearancePanel
content_type="Unknown"
content="Shu-Torun Lives — Star Wars (2015) 50"
content_location="Unknown"
>
-
</AppearancePanel>
<AppearancePanel
content_type="Unknown"
content="Star Wars (2015) 37"
content_location="Unknown"
>
-
</AppearancePanel>
<AppearancePanel
content_type="Unknown"
content="Doctor Aphra (2016) 9"
content_location="Unknown"
>
-
</AppearancePanel>
<AppearancePanel
content_type="Unknown"
content="Doctor Aphra (2016) 10 (Variant cover only)"
content_location="Unknown"
>
-
</AppearancePanel>
<AppearancePanel
content_type="Unknown"
content="Doctor Aphra (2016) 11"
content_location="Unknown"
>
-
</AppearancePanel>
<AppearancePanel
content_type="Unknown"
content="Doctor Aphra (2016) 12"
content_location="Unknown"
>
-
</AppearancePanel>
<AppearancePanel
content_type="Unknown"
content="Doctor Aphra (2016) 13"
content_location="Unknown"
>
-
</AppearancePanel>
<AppearancePanel
content_type="Unknown"
content="Doctor Aphra (2016) 14 (Mentioned only; in the opening crawl)"
content_location="Unknown"
>
-
</AppearancePanel>
<AppearancePanel
content_type="Unknown"
content="Doctor Aphra (2016) 15 (Appears in hologram)"
content_location="Unknown"
>
-
</AppearancePanel>
<AppearancePanel
content_type="Unknown"
content="Doctor Aphra (2016) 17 (Mentioned only)"
content_location="Unknown"
>
-
</AppearancePanel>
<AppearancePanel
content_type="Unknown"
content="Doctor Aphra (2016) 21 (Mentioned only)"
content_location="Unknown"
>
-
</AppearancePanel>
<AppearancePanel
content_type="Unknown"
content="Doctor Aphra (2016) 22 (Mentioned only; in the opening crawl)"
content_location="Unknown"
>
-
</AppearancePanel>
<AppearancePanel
content_type="Unknown"
content="Doctor Aphra (2016) 23"
content_location="Unknown"
>
-
</AppearancePanel>
<AppearancePanel
content_type="Unknown"
content="Doctor Aphra (2016) 24"
content_location="Unknown"
>
-
</AppearancePanel>
<AppearancePanel
content_type="Unknown"
content="Doctor Aphra (2016) 25"
content_location="Unknown"
>
-
</AppearancePanel>
<AppearancePanel
content_type="Unknown"
content="Doctor Aphra (2016) 26 (Mentioned only; in the opening crawl)"
content_location="Unknown"
>
-
</AppearancePanel>
<AppearancePanel
content_type="Unknown"
content="Doctor Aphra (2016) 27 (Indirect mention only)"
content_location="Unknown"
>
-
</AppearancePanel>
<AppearancePanel
content_type="Unknown"
content="Doctor Aphra (2016) 31 (Variant cover only)"
content_location="Unknown"
>
-
</AppearancePanel>
<AppearancePanel
content_type="Unknown"
content="Star Wars (2015) 38 (Mentioned only)"
content_location="Unknown"
>
-
</AppearancePanel>
<AppearancePanel
content_type="Unknown"
content="Star Wars (2015) 40 (Mentioned only)"
content_location="Unknown"
>
-
</AppearancePanel>
<AppearancePanel
content_type="Unknown"
content="Star Wars (2015) 42 (Mentioned only)"
content_location="Unknown"
>
-
</AppearancePanel>
<AppearancePanel
content_type="Unknown"
content="Star Wars (2015) 43 (Mentioned only)"
content_location="Unknown"
>
-
</AppearancePanel>
<AppearancePanel
content_type="Unknown"
content="Star Wars (2015) 49 (Appears in hologram)"
content_location="Unknown"
>
-
</AppearancePanel>
<AppearancePanel
content_type="Unknown"
content="Star Wars (2015) 50"
content_location="Unknown"
>
-
</AppearancePanel>
<AppearancePanel
content_type="Unknown"
content="Star Wars (2015) 51"
content_location="Unknown"
>
-
</AppearancePanel>
<AppearancePanel
content_type="Unknown"
content="Star Wars (2015) 52"
content_location="Unknown"
>
-
</AppearancePanel>
<AppearancePanel
content_type="Unknown"
content="Star Wars (2015) 53"
content_location="Unknown"
>
-
</AppearancePanel>
<AppearancePanel
content_type="Unknown"
content="Star Wars (2015) 54"
content_location="Unknown"
>
-
</AppearancePanel>
<AppearancePanel
content_type="Unknown"
content="Star Wars (2015) 55"
content_location="Unknown"
>
-
</AppearancePanel>
<AppearancePanel
content_type="Unknown"
content="Star Wars (2015) 56 (Mentioned only; in the opening crawl)"
content_location="Unknown"
>
-
</AppearancePanel>
<AppearancePanel
content_type="Unknown"
content="Star Wars (2015) 57 (Mentioned only)"
content_location="Unknown"
>
-
</AppearancePanel>
<AppearancePanel
content_type="Unknown"
content="Star Wars (2015) 58 (Mentioned only)"
content_location="Unknown"
>
-
</AppearancePanel>
<AppearancePanel
content_type="Unknown"
content="Star Wars (2015) 62 (Mentioned only)"
content_location="Unknown"
>
-
</AppearancePanel>
<AppearancePanel
content_type="Unknown"
content="Star Wars (2015) 63 (Mentioned only)"
content_location="Unknown"
>
-
</AppearancePanel>
<AppearancePanel
content_type="Unknown"
content="Star Wars (2015) 65 (Mentioned only)"
content_location="Unknown"
>
-
</AppearancePanel>
<AppearancePanel
content_type="Unknown"
content="Star Wars (2015) 67"
content_location="Unknown"
>
-
</AppearancePanel>
<AppearancePanel
content_type="Unknown"
content="Star Wars (2015) 68 (Mentioned only)"
content_location="Unknown"
>
-
</AppearancePanel>
<AppearancePanel
content_type="Unknown"
content="Star Wars (2015) 70"
content_location="Unknown"
>
-
</AppearancePanel>
<AppearancePanel
content_type="Unknown"
content="Star Wars (2015) 71"
content_location="Unknown"
>
-
</AppearancePanel>
<AppearancePanel
content_type="Unknown"
content="Star Wars (2015) 72"
content_location="Unknown"
>
-
</AppearancePanel>
<AppearancePanel
content_type="Unknown"
content="Star Wars (2015) 73"
content_location="Unknown"
>
-
</AppearancePanel>
<AppearancePanel
content_type="Unknown"
content="Star Wars (2015) 74"
content_location="Unknown"
>
-
</AppearancePanel>
<AppearancePanel
content_type="Unknown"
content="Star Wars (2015) 75"
content_location="Unknown"
>
-
</AppearancePanel>
<AppearancePanel
content_type="Unknown"
content="Doctor Aphra (2016) 33"
content_location="Unknown"
>
-
</AppearancePanel>
<AppearancePanel
content_type="Unknown"
content="Doctor Aphra (2016) 34 (Mentioned only)"
content_location="Unknown"
>
-
</AppearancePanel>
<AppearancePanel
content_type="Unknown"
content="Doctor Aphra (2016) 35"
content_location="Unknown"
>
-
</AppearancePanel>
<AppearancePanel
content_type="Unknown"
content="Doctor Aphra (2016) 36"
content_location="Unknown"
>
-
</AppearancePanel>
<AppearancePanel
content_type="Unknown"
content="Doctor Aphra (2016) 37"
content_location="Unknown"
>
-
</AppearancePanel>
<AppearancePanel
content_type="Unknown"
content="Doctor Aphra (2016) 38"
content_location="Unknown"
>
-
</AppearancePanel>
<AppearancePanel
content_type="Unknown"
content="Doctor Aphra (2016) 39"
content_location="Unknown"
>
-
</AppearancePanel>
<AppearancePanel
content_type="Unknown"
content="Doctor Aphra (2016) 40"
content_location="Unknown"
>
-
</AppearancePanel>
<AppearancePanel
content_type="Unknown"
content="Squad Goals, Part 2 — Star Wars Adventures (2020) 12 (Mentioned only)"
content_location="Unknown"
>
-
</AppearancePanel>
<AppearancePanel
content_type="Unknown"
content="A Matter Of Perception — Star Wars Adventures (2017) 22 (Mentioned only)"
content_location="Unknown"
>
-
</AppearancePanel>
<AppearancePanel
content_type="Unknown"
content="Tales of Villainy: A Last Chapter — Star Wars Adventures (2020) 13"
content_location="Unknown"
>
-
</AppearancePanel>
<AppearancePanel
content_type="Unknown"
content="Battlefront: Twilight Company (and audiobook)"
content_location="Unknown"
>
-
</AppearancePanel>
<AppearancePanel
content_type="Unknown"
content="In Service to the Empire — Empire Ascendant 1"
content_location="Unknown"
>
-
</AppearancePanel>
<AppearancePanel
content_type="Unknown"
content="Forces of Destiny—Leia"
content_location="Unknown"
>
-
</AppearancePanel>
<AppearancePanel
content_type="Unknown"
content="Yoda 7 (In flashback(s))"
content_location="Unknown"
>
-
</AppearancePanel>
<AppearancePanel
content_type="Unknown"
content="Yoda 8 (In flashback(s))"
content_location="Unknown"
>
-
</AppearancePanel>
<AppearancePanel
content_type="Unknown"
content="Yoda 9 (In flashback(s))"
content_location="Unknown"
>
-
</AppearancePanel>
<AppearancePanel
content_type="Unknown"
content="Yoda 10 (Vision to Yoda)"
content_location="Unknown"
>
-
</AppearancePanel>
<AppearancePanel
content_type="Unknown"
content="Star Wars: Episode V The Empire Strikes Back (First identified as Anakin Skywalker)"
content_location="Unknown"
>
-
</AppearancePanel>
<AppearancePanel
content_type="Unknown"
content="The Empire Strikes Back: So You Want to Be a Jedi? (and audiobook)"
content_location="Unknown"
>
-
</AppearancePanel>
<AppearancePanel
content_type="Unknown"
content="Star Wars: The Empire Strikes Back junior novelization"
content_location="Unknown"
>
-
</AppearancePanel>
<AppearancePanel
content_type="Unknown"
content="The Empire Strikes Back Little Golden Book (and audiobook)"
content_location="Unknown"
>
-
</AppearancePanel>
<AppearancePanel
content_type="Unknown"
content="The Empire Strikes Back Read-Along Storybook and CD"
content_location="Unknown"
>
-
</AppearancePanel>
<AppearancePanel
content_type="Unknown"
content="AT-AT Attack!"
content_location="Unknown"
>
-
</AppearancePanel>
<AppearancePanel
content_type="Unknown"
content="The Battle of Hoth — 5-Minute Star Wars Stories (and audiobook)"
content_location="Unknown"
>
-
</AppearancePanel>
<AppearancePanel
content_type="Unknown"
content="Eyes of the Empire — From a Certain Point of View: The Empire Strikes Back (and audiobook) (Mentioned only)"
content_location="Unknown"
>
-
</AppearancePanel>
<AppearancePanel
content_type="Unknown"
content="Star Wars Galaxy of Adventures — Battle of Hoth"
content_location="Unknown"
>
-
</AppearancePanel>
<AppearancePanel
content_type="Unknown"
content="The Truest Duty — From a Certain Point of View: The Empire Strikes Back (and audiobook)"
content_location="Unknown"
>
-
</AppearancePanel>
<AppearancePanel
content_type="Unknown"
content="Kendal — From a Certain Point of View: The Empire Strikes Back (and audiobook) (Appears on screen)"
content_location="Unknown"
>
-
</AppearancePanel>
<AppearancePanel
content_type="Unknown"
content="Tales of Villainy: Invasion of Echo Base — Star Wars Adventures (2020) 1"
content_location="Unknown"
>
-
</AppearancePanel>
<AppearancePanel
content_type="Unknown"
content="Use the Force! (Appears as apparition, in Force vision and final page preview illustration)"
content_location="Unknown"
>
-
</AppearancePanel>
<AppearancePanel
content_type="Unknown"
content="A Jedi, You Must Become — 5-Minute Star Wars Stories (and audiobook)"
content_location="Unknown"
>
-
</AppearancePanel>
<AppearancePanel
content_type="Unknown"
content="The Final Order — From a Certain Point of View: The Empire Strikes Back (and audiobook) (Mentioned only)"
content_location="Unknown"
>
-
</AppearancePanel>
<AppearancePanel
content_type="Unknown"
content="Star Wars Galaxy of Adventures — Luke Skywalker Trains with Master Yoda (Vision to Luke Skywalker)"
content_location="Unknown"
>
-
</AppearancePanel>
<AppearancePanel
content_type="Unknown"
content="Faith in an Old Friend — From a Certain Point of View: The Empire Strikes Back (and audiobook) (Mentioned only)"
content_location="Unknown"
>
-
</AppearancePanel>
<AppearancePanel
content_type="Unknown"
content="Disturbance — From a Certain Point of View: The Empire Strikes Back (and audiobook)"
content_location="Unknown"
>
-
</AppearancePanel>
<AppearancePanel
content_type="Unknown"
content="Amara Kels Rules for TIE Pilot Survival (Probably) — From a Certain Point of View: The Empire Strikes Back (and audiobook) (Mentioned only)"
content_location="Unknown"
>
-
</AppearancePanel>
<AppearancePanel
content_type="Unknown"
content="Lord Vader Will See You Now — From a Certain Point of View: The Empire Strikes Back (and audiobook)"
content_location="Unknown"
>
-
</AppearancePanel>
<AppearancePanel
content_type="Unknown"
content="Vergence — From a Certain Point of View: The Empire Strikes Back (and audiobook) (Vision to Yoda)"
content_location="Unknown"
>
-
</AppearancePanel>
<AppearancePanel
content_type="Unknown"
content="STET! — From a Certain Point of View: The Empire Strikes Back (and audiobook) (Voice only)"
content_location="Unknown"
>
-
</AppearancePanel>
<AppearancePanel
content_type="Unknown"
content="Tooth and Claw — From a Certain Point of View: The Empire Strikes Back (and audiobook) (Mentioned only)"
content_location="Unknown"
>
-
</AppearancePanel>
<AppearancePanel
content_type="Unknown"
content="Wait for It — From a Certain Point of View: The Empire Strikes Back (and audiobook)"
content_location="Unknown"
>
-
</AppearancePanel>
<AppearancePanel
content_type="Unknown"
content="Star Wars Galaxy of Adventures — Boba Fett - The Bounty Hunter"
content_location="Unknown"
>
-
</AppearancePanel>
<AppearancePanel
content_type="Unknown"
content="Star Wars Galaxy of Adventures — Rendezvous at Bespin"
content_location="Unknown"
>
-
</AppearancePanel>
<AppearancePanel
content_type="Unknown"
content="Captured on Cloud City"
content_location="Unknown"
>
-
</AppearancePanel>
<AppearancePanel
content_type="Unknown"
content="There Is Always Another — From a Certain Point of View: The Empire Strikes Back (and audiobook) (Mentioned only)"
content_location="Unknown"
>
-
</AppearancePanel>
<AppearancePanel
content_type="Unknown"
content="Fake It Till You Make It — From a Certain Point of View: The Empire Strikes Back (and audiobook)"
content_location="Unknown"
>
-
</AppearancePanel>
<AppearancePanel
content_type="Unknown"
content="But What Does He Eat? — From a Certain Point of View: The Empire Strikes Back (and audiobook)"
content_location="Unknown"
>
-
</AppearancePanel>
<AppearancePanel
content_type="Unknown"
content="Due on Batuu — From a Certain Point of View: The Empire Strikes Back (and audiobook)"
content_location="Unknown"
>
-
</AppearancePanel>
<AppearancePanel
content_type="Unknown"
content="The Witness — From a Certain Point of View: The Empire Strikes Back (and audiobook)"
content_location="Unknown"
>
-
</AppearancePanel>
<AppearancePanel
content_type="Unknown"
content="Star Wars Galaxy of Adventures — Clash on Cloud City"
content_location="Unknown"
>
-
</AppearancePanel>
<AppearancePanel
content_type="Unknown"
content="Star Wars Galaxy of Adventures — Luke Skywalker vs. Darth Vader – Join Me"
content_location="Unknown"
>
-
</AppearancePanel>
<AppearancePanel
content_type="Unknown"
content="The Man Who Built Cloud City — From a Certain Point of View: The Empire Strikes Back (and audiobook) (In flashback(s))"
content_location="Unknown"
>
-
</AppearancePanel>
<AppearancePanel
content_type="Unknown"
content="Bespin Escape — From a Certain Point of View: The Empire Strikes Back (and audiobook) (Indirect mention only)"
content_location="Unknown"
>
-
</AppearancePanel>
<AppearancePanel
content_type="Unknown"
content="The Backup Backup Plan — From a Certain Point of View: The Empire Strikes Back (and audiobook) (Mentioned only)"
content_location="Unknown"
>
-
</AppearancePanel>
<AppearancePanel
content_type="Unknown"
content="Darth Vader (2020) 1"
content_location="Unknown"
>
-
</AppearancePanel>
<AppearancePanel
content_type="Unknown"
content="Star Wars (2020) 1"
content_location="Unknown"
>
-
</AppearancePanel>
<AppearancePanel
content_type="Unknown"
content="Star Wars (2020) 2 (In flashback(s))"
content_location="Unknown"
>
-
</AppearancePanel>
<AppearancePanel
content_type="Unknown"
content="Right-Hand Man — From a Certain Point of View: The Empire Strikes Back (and audiobook) (Mentioned only)"
content_location="Unknown"
>
-
</AppearancePanel>
<AppearancePanel
content_type="Unknown"
content="Star Wars (2020) 3 (In flashback(s))"
content_location="Unknown"
>
-
</AppearancePanel>
<AppearancePanel
content_type="Unknown"
content="Star Wars (2020) 4 (Vision to Luke Skywalker)"
content_location="Unknown"
>
-
</AppearancePanel>
<AppearancePanel
content_type="Unknown"
content="Star Wars (2020) 5"
content_location="Unknown"
>
-
</AppearancePanel>
<AppearancePanel
content_type="Unknown"
content="Star Wars (2020) 6"
content_location="Unknown"
>
-
</AppearancePanel>
<AppearancePanel
content_type="Unknown"
content="Darth Vader (2020) 2"
content_location="Unknown"
>
-
</AppearancePanel>
<AppearancePanel
content_type="Unknown"
content="Darth Vader (2020) 3"
content_location="Unknown"
>
-
</AppearancePanel>
<AppearancePanel
content_type="Unknown"
content="Darth Vader (2020) 4"
content_location="Unknown"
>
-
</AppearancePanel>
<AppearancePanel
content_type="Unknown"
content="Darth Vader (2020) 5"
content_location="Unknown"
>
-
</AppearancePanel>
<AppearancePanel
content_type="Unknown"
content="Darth Vader (2020) 6"
content_location="Unknown"
>
-
</AppearancePanel>
<AppearancePanel
content_type="Unknown"
content="Darth Vader (2020) 7"
content_location="Unknown"
>
-
</AppearancePanel>
<AppearancePanel
content_type="Unknown"
content="Darth Vader (2020) 8"
content_location="Unknown"
>
-
</AppearancePanel>
<AppearancePanel
content_type="Unknown"
content="Darth Vader (2020) 9"
content_location="Unknown"
>
-
</AppearancePanel>
<AppearancePanel
content_type="Unknown"
content="Darth Vader (2020) 10"
content_location="Unknown"
>
-
</AppearancePanel>
<AppearancePanel
content_type="Unknown"
content="Darth Vader (2020) 11"
content_location="Unknown"
>
-
</AppearancePanel>
<AppearancePanel
content_type="Unknown"
content="Star Wars (2020) 7 (In flashback(s))"
content_location="Unknown"
>
-
</AppearancePanel>
<AppearancePanel
content_type="Unknown"
content="Star Wars (2020) 8 (In flashback(s))"
content_location="Unknown"
>
-
</AppearancePanel>
<AppearancePanel
content_type="Unknown"
content="Bounty Hunters 7 (Mentioned only) (In flashback(s))"
content_location="Unknown"
>
-
</AppearancePanel>
<AppearancePanel
content_type="Unknown"
content="Star Wars (2020) 9 (Mentioned only)"
content_location="Unknown"
>
-
</AppearancePanel>
<AppearancePanel
content_type="Unknown"
content="Star Wars (2020) 11 (Cover only)"
content_location="Unknown"
>
-
</AppearancePanel>
<AppearancePanel
content_type="Unknown"
content="Star Wars (2020) 12 (In flashback(s))"
content_location="Unknown"
>
-
</AppearancePanel>
<AppearancePanel
content_type="Unknown"
content="Doctor Aphra (2020) 1 (Mentioned only)"
content_location="Unknown"
>
-
</AppearancePanel>
<AppearancePanel
content_type="Unknown"
content="Doctor Aphra (2020) 2 (Mentioned only; in the opening crawl)"
content_location="Unknown"
>
-
</AppearancePanel>
<AppearancePanel
content_type="Unknown"
content="Doctor Aphra (2020) 5 (Mentioned only)"
content_location="Unknown"
>
-
</AppearancePanel>
<AppearancePanel
content_type="Unknown"
content="Doctor Aphra (2020) 6 (Appears through imagination)"
content_location="Unknown"
>
-
</AppearancePanel>
<AppearancePanel
content_type="Unknown"
content="Doctor Aphra (2020) 7 (Mentioned only; in the opening crawl)"
content_location="Unknown"
>
-
</AppearancePanel>
<AppearancePanel
content_type="Unknown"
content="Bounty Hunters 10 (Mentioned only)"
content_location="Unknown"
>
-
</AppearancePanel>
<AppearancePanel
content_type="Unknown"
content="War of the Bounty Hunters Alpha 1 (Indirect mention only)"
content_location="Unknown"
>
-
</AppearancePanel>
<AppearancePanel
content_type="Unknown"
content="Bounty Hunters 11 (Mentioned only)"
content_location="Unknown"
>
-
</AppearancePanel>
<AppearancePanel
content_type="Unknown"
content="War of the Bounty Hunters 1"
content_location="Unknown"
>
-
</AppearancePanel>
<AppearancePanel
content_type="Unknown"
content="Darth Vader (2020) 12"
content_location="Unknown"
>
-
</AppearancePanel>
<AppearancePanel
content_type="Unknown"
content="Star Wars (2020) 15"
content_location="Unknown"
>
-
</AppearancePanel>
<AppearancePanel
content_type="Unknown"
content="Darth Vader (2020) 14"
content_location="Unknown"
>
-
</AppearancePanel>
<AppearancePanel
content_type="Unknown"
content="Darth Vader (2020) 13"
content_location="Unknown"
>
-
</AppearancePanel>
<AppearancePanel
content_type="Unknown"
content="Darth Vader (2020) 15"
content_location="Unknown"
>
-
</AppearancePanel>
<AppearancePanel
content_type="Unknown"
content="War of the Bounty Hunters 2"
content_location="Unknown"
>
-
</AppearancePanel>
<AppearancePanel
content_type="Unknown"
content="Doctor Aphra (2020) 12"
content_location="Unknown"
>
-
</AppearancePanel>
<AppearancePanel
content_type="Unknown"
content="Bounty Hunters 16 (Mentioned only)"
content_location="Unknown"
>
-
</AppearancePanel>
<AppearancePanel
content_type="Unknown"
content="Doctor Aphra (2020) 13"
content_location="Unknown"
>
-
</AppearancePanel>
<AppearancePanel
content_type="Unknown"
content="War of the Bounty Hunters 3"
content_location="Unknown"
>
-
</AppearancePanel>
<AppearancePanel
content_type="Unknown"
content="Star Wars (2020) 16"
content_location="Unknown"
>
-
</AppearancePanel>
<AppearancePanel
content_type="Unknown"
content="Darth Vader (2020) 16"
content_location="Unknown"
>
-
</AppearancePanel>
<AppearancePanel
content_type="Unknown"
content="War of the Bounty Hunters 4"
content_location="Unknown"
>
-
</AppearancePanel>
<AppearancePanel
content_type="Unknown"
content="Star Wars (2020) 17"
content_location="Unknown"
>
-
</AppearancePanel>
<AppearancePanel
content_type="Unknown"
content="War of the Bounty Hunters 5"
content_location="Unknown"
>
-
</AppearancePanel>
<AppearancePanel
content_type="Unknown"
content="Darth Vader (2020) 17"
content_location="Unknown"
>
-
</AppearancePanel>
<AppearancePanel
content_type="Unknown"
content="Bounty Hunters 17"
content_location="Unknown"
>
-
</AppearancePanel>
<AppearancePanel
content_type="Unknown"
content="War of the Bounty Hunters – IG-88 1 (In flashback(s))"
content_location="Unknown"
>
-
</AppearancePanel>
<AppearancePanel
content_type="Unknown"
content="Star Wars (2020) 18 (In flashback(s))"
content_location="Unknown"
>
-
</AppearancePanel>
<AppearancePanel
content_type="Unknown"
content="Crimson Reign 1 (In flashback(s))"
content_location="Unknown"
>
-
</AppearancePanel>
<AppearancePanel
content_type="Unknown"
content="Star Wars (2020) 19 (In flashback(s))"
content_location="Unknown"
>
-
</AppearancePanel>
<AppearancePanel
content_type="Unknown"
content="Star Wars (2020) 20 (Mentioned only)"
content_location="Unknown"
>
-
</AppearancePanel>
<AppearancePanel
content_type="Unknown"
content="Doctor Aphra (2020) 16 (Mentioned only)"
content_location="Unknown"
>
-
</AppearancePanel>
<AppearancePanel
content_type="Unknown"
content="Bounty Hunters 18"
content_location="Unknown"
>
-
</AppearancePanel>
<AppearancePanel
content_type="Unknown"
content="Bounty Hunters 19"
content_location="Unknown"
>
-
</AppearancePanel>
<AppearancePanel
content_type="Unknown"
content="Star Wars (2020) 21 (Cover only)"
content_location="Unknown"
>
-
</AppearancePanel>
<AppearancePanel
content_type="Unknown"
content="Crimson Reign 2 (In flashback(s))"
content_location="Unknown"
>
-
</AppearancePanel>
<AppearancePanel
content_type="Unknown"
content="Star Wars (2020) 22 (Mentioned only)"
content_location="Unknown"
>
-
</AppearancePanel>
<AppearancePanel
content_type="Unknown"
content="Crimson Reign 3 (In flashback(s))"
content_location="Unknown"
>
-
</AppearancePanel>
<AppearancePanel
content_type="Unknown"
content="Crimson Reign 4"
content_location="Unknown"
>
-
</AppearancePanel>
<AppearancePanel
content_type="Unknown"
content="Darth Vader (2020) 18"
content_location="Unknown"
>
-
</AppearancePanel>
<AppearancePanel
content_type="Unknown"
content="Darth Vader (2020) 19"
content_location="Unknown"
>
-
</AppearancePanel>
<AppearancePanel
content_type="Unknown"
content="Darth Vader (2020) 20"
content_location="Unknown"
>
-
</AppearancePanel>
<AppearancePanel
content_type="Unknown"
content="Darth Vader (2020) 21"
content_location="Unknown"
>
-
</AppearancePanel>
<AppearancePanel
content_type="Unknown"
content="Darth Vader (2020) 22"
content_location="Unknown"
>
-
</AppearancePanel>
<AppearancePanel
content_type="Unknown"
content="Darth Vader (2020) 23"
content_location="Unknown"
>
-
</AppearancePanel>
<AppearancePanel
content_type="Unknown"
content="Darth Vader (2020) 24"
content_location="Unknown"
>
-
</AppearancePanel>
<AppearancePanel
content_type="Unknown"
content="Darth Vader (2020) 25"
content_location="Unknown"
>
-
</AppearancePanel>
<AppearancePanel
content_type="Unknown"
content="Darth Vader (2020) 26"
content_location="Unknown"
>
-
</AppearancePanel>
<AppearancePanel
content_type="Unknown"
content="Darth Vader (2020) 27"
content_location="Unknown"
>
-
</AppearancePanel>
<AppearancePanel
content_type="Unknown"
content="Darth Vader (2020) 28"
content_location="Unknown"
>
-
</AppearancePanel>
<AppearancePanel
content_type="Unknown"
content="Bounty Hunters 24 (Mentioned only)"
content_location="Unknown"
>
-
</AppearancePanel>
<AppearancePanel
content_type="Unknown"
content="Bounty Hunters 25 (Mentioned only)"
content_location="Unknown"
>
-
</AppearancePanel>
<AppearancePanel
content_type="Unknown"
content="Bounty Hunters 26 (Mentioned only; in the opening crawl)"
content_location="Unknown"
>
-
</AppearancePanel>
<AppearancePanel
content_type="Unknown"
content="Star Wars Outlaws"
content_location="Unknown"
>
-
</AppearancePanel>
<AppearancePanel
content_type="Unknown"
content="Crimson Reign 5"
content_location="Unknown"
>
-
</AppearancePanel>
<AppearancePanel
content_type="Unknown"
content="Star Wars (2020) 28 (Mentioned only)"
content_location="Unknown"
>
-
</AppearancePanel>
<AppearancePanel
content_type="Unknown"
content="Bounty Hunters 27 (Mentioned only)"
content_location="Unknown"
>
-
</AppearancePanel>
<AppearancePanel
content_type="Unknown"
content="Bounty Hunters 28"
content_location="Unknown"
>
-
</AppearancePanel>
<AppearancePanel
content_type="Unknown"
content="Doctor Aphra (2020) 23 (Mentioned only)"
content_location="Unknown"
>
-
</AppearancePanel>
<AppearancePanel
content_type="Unknown"
content="Doctor Aphra (2020) 26 (Indirect mention only)"
content_location="Unknown"
>
-
</AppearancePanel>
<AppearancePanel
content_type="Unknown"
content="Doctor Aphra (2020) 27 (Appears in hologram)"
content_location="Unknown"
>
-
</AppearancePanel>
<AppearancePanel
content_type="Unknown"
content="Hidden Empire 1"
content_location="Unknown"
>
-
</AppearancePanel>
<AppearancePanel
content_type="Unknown"
content="Revelations (2022) 1"
content_location="Unknown"
>
-
</AppearancePanel>
<AppearancePanel
content_type="Unknown"
content="Hidden Empire 2"
content_location="Unknown"
>
-
</AppearancePanel>
<AppearancePanel
content_type="Unknown"
content="Hidden Empire 3"
content_location="Unknown"
>
-
</AppearancePanel>
<AppearancePanel
content_type="Unknown"
content="Doctor Aphra (2020) 28 (Variant cover only)"
content_location="Unknown"
>
-
</AppearancePanel>
<AppearancePanel
content_type="Unknown"
content="Doctor Aphra (2020) 29 (Mentioned only)"
content_location="Unknown"
>
-
</AppearancePanel>
<AppearancePanel
content_type="Unknown"
content="Hidden Empire 4"
content_location="Unknown"
>
-
</AppearancePanel>
<AppearancePanel
content_type="Unknown"
content="Hidden Empire 5"
content_location="Unknown"
>
-
</AppearancePanel>
<AppearancePanel
content_type="Unknown"
content="Doctor Aphra (2020) 30"
content_location="Unknown"
>
-
</AppearancePanel>
<AppearancePanel
content_type="Unknown"
content="Doctor Aphra (2020) 31 (Mentioned only)"
content_location="Unknown"
>
-
</AppearancePanel>
<AppearancePanel
content_type="Unknown"
content="Bounty Hunters 29 (Mentioned only)"
content_location="Unknown"
>
-
</AppearancePanel>
<AppearancePanel
content_type="Unknown"
content="Bounty Hunters 30"
content_location="Unknown"
>
-
</AppearancePanel>
<AppearancePanel
content_type="Unknown"
content="Bounty Hunters 31"
content_location="Unknown"
>
-
</AppearancePanel>
<AppearancePanel
content_type="Unknown"
content="Bounty Hunters 32"
content_location="Unknown"
>
-
</AppearancePanel>
<AppearancePanel
content_type="Unknown"
content="Bounty Hunters 33 (Mentioned only)"
content_location="Unknown"
>
-
</AppearancePanel>
<AppearancePanel
content_type="Unknown"
content="Bounty Hunters 34 (Variant cover only)"
content_location="Unknown"
>
-
</AppearancePanel>
<AppearancePanel
content_type="Unknown"
content="Star Wars (2020) 32 (Variant cover only)"
content_location="Unknown"
>
-
</AppearancePanel>
<AppearancePanel
content_type="Unknown"
content="Star Wars (2020) 33 (In flashback(s))"
content_location="Unknown"
>
-
</AppearancePanel>
<AppearancePanel
content_type="Unknown"
content="Darth Vader (2020) 29"
content_location="Unknown"
>
-
</AppearancePanel>
<AppearancePanel
content_type="Unknown"
content="Darth Vader (2020) 30"
content_location="Unknown"
>
-
</AppearancePanel>
<AppearancePanel
content_type="Unknown"
content="Darth Vader (2020) 31"
content_location="Unknown"
>
-
</AppearancePanel>
<AppearancePanel
content_type="Unknown"
content="Darth Vader (2020) 32"
content_location="Unknown"
>
-
</AppearancePanel>
<AppearancePanel
content_type="Unknown"
content="Darth Vader (2020) 33"
content_location="Unknown"
>
-
</AppearancePanel>
<AppearancePanel
content_type="Unknown"
content="Darth Vader (2020) 34"
content_location="Unknown"
>
-
</AppearancePanel>
<AppearancePanel
content_type="Unknown"
content="Darth Vader (2020) 35"
content_location="Unknown"
>
-
</AppearancePanel>
<AppearancePanel
content_type="Unknown"
content="Darth Vader (2020) 36"
content_location="Unknown"
>
-
</AppearancePanel>
<AppearancePanel
content_type="Unknown"
content="Doctor Aphra (2020) 32 (In flashback(s))"
content_location="Unknown"
>
-
</AppearancePanel>
<AppearancePanel
content_type="Unknown"
content="Doctor Aphra (2020) 33 (In flashback(s))"
content_location="Unknown"
>
-
</AppearancePanel>
<AppearancePanel
content_type="Unknown"
content="Doctor Aphra (2020) 34 (Mentioned only)"
content_location="Unknown"
>
-
</AppearancePanel>
<AppearancePanel
content_type="Unknown"
content="Star Wars (2020) 34 (Mentioned only; in the opening crawl)"
content_location="Unknown"
>
-
</AppearancePanel>
<AppearancePanel
content_type="Unknown"
content="Star Wars (2020) 35 (Vision to Luke Skywalker)"
content_location="Unknown"
>
-
</AppearancePanel>
<AppearancePanel
content_type="Unknown"
content="Bounty Hunters 35 (Mentioned only)"
content_location="Unknown"
>
-
</AppearancePanel>
<AppearancePanel
content_type="Unknown"
content="Bounty Hunters 36 (Variant cover only)"
content_location="Unknown"
>
-
</AppearancePanel>
<AppearancePanel
content_type="Unknown"
content="Star Wars (2020) 36 (Mentioned only)"
content_location="Unknown"
>
-
</AppearancePanel>
<AppearancePanel
content_type="Unknown"
content="Dark Droids 1"
content_location="Unknown"
>
-
</AppearancePanel>
<AppearancePanel
content_type="Unknown"
content="Star Wars (2020) 37 (Variant cover only)"
content_location="Unknown"
>
-
</AppearancePanel>
<AppearancePanel
content_type="Unknown"
content="Dark Droids 2"
content_location="Unknown"
>
-
</AppearancePanel>
<AppearancePanel
content_type="Unknown"
content="Bounty Hunters 37 (Variant cover only)"
content_location="Unknown"
>
-
</AppearancePanel>
<AppearancePanel
content_type="Unknown"
content="Bounty Hunters 39 (Variant cover only)"
content_location="Unknown"
>
-
</AppearancePanel>
<AppearancePanel
content_type="Unknown"
content="Dark Droids 3"
content_location="Unknown"
>
-
</AppearancePanel>
<AppearancePanel
content_type="Unknown"
content="Doctor Aphra (2020) 35 (Variant cover only)"
content_location="Unknown"
>
-
</AppearancePanel>
<AppearancePanel
content_type="Unknown"
content="Doctor Aphra (2020) 36 (Variant cover only)"
content_location="Unknown"
>
-
</AppearancePanel>
<AppearancePanel
content_type="Unknown"
content="Doctor Aphra (2020) 37 (Variant cover only)"
content_location="Unknown"
>
-
</AppearancePanel>
<AppearancePanel
content_type="Unknown"
content="Darth Vader (2020) 37"
content_location="Unknown"
>
-
</AppearancePanel>
<AppearancePanel
content_type="Unknown"
content="Darth Vader (2020) 38"
content_location="Unknown"
>
-
</AppearancePanel>
<AppearancePanel
content_type="Unknown"
content="Darth Vader (2020) 39"
content_location="Unknown"
>
-
</AppearancePanel>
<AppearancePanel
content_type="Unknown"
content="Star Wars (2020) 38 (Variant cover only)"
content_location="Unknown"
>
-
</AppearancePanel>
<AppearancePanel
content_type="Unknown"
content="Star Wars (2020) 39 (Variant cover only)"
content_location="Unknown"
>
-
</AppearancePanel>
<AppearancePanel
content_type="Unknown"
content="Dark Droids 4 (Indirectly mentioned only; in the opening crawl)"
content_location="Unknown"
>
-
</AppearancePanel>
<AppearancePanel
content_type="Unknown"
content="Darth Vader (2020) 40"
content_location="Unknown"
>
-
</AppearancePanel>
<AppearancePanel
content_type="Unknown"
content="Doctor Aphra (2020) 38"
content_location="Unknown"
>
-
</AppearancePanel>
<AppearancePanel
content_type="Unknown"
content="Bounty Hunters 40"
content_location="Unknown"
>
-
</AppearancePanel>
<AppearancePanel
content_type="Unknown"
content="Star Wars (2020) 40 (Variant cover only)"
content_location="Unknown"
>
-
</AppearancePanel>
<AppearancePanel
content_type="Unknown"
content="Darth Vader (2020) 41"
content_location="Unknown"
>
-
</AppearancePanel>
<AppearancePanel
content_type="Unknown"
content="Dark Droids 5"
content_location="Unknown"
>
-
</AppearancePanel>
<AppearancePanel
content_type="Unknown"
content="Doctor Aphra (2020) 40 (Cover only)"
content_location="Unknown"
>
-
</AppearancePanel>
<AppearancePanel
content_type="Unknown"
content="Star Wars (2020) 42 (Indirect mention only)"
content_location="Unknown"
>
-
</AppearancePanel>
<AppearancePanel
content_type="Unknown"
content="Star Wars (2020) 43 (Vision to Luke Skywalker)"
content_location="Unknown"
>
-
</AppearancePanel>
<AppearancePanel
content_type="Unknown"
content="Star Wars (2020) 44 (Cover only)"
content_location="Unknown"
>
-
</AppearancePanel>
<AppearancePanel
content_type="Unknown"
content="Star Wars (2020) 45 (In flashback(s))"
content_location="Unknown"
>
-
</AppearancePanel>
<AppearancePanel
content_type="Unknown"
content="Star Wars (2020) 48 (Appears in dream)"
content_location="Unknown"
>
-
</AppearancePanel>
<AppearancePanel
content_type="Unknown"
content="Tool of the Empire — Revelations (2023) 1"
content_location="Unknown"
>
-
</AppearancePanel>
<AppearancePanel
content_type="Unknown"
content="Darth Vader (2020) 42"
content_location="Unknown"
>
-
</AppearancePanel>
<AppearancePanel
content_type="Unknown"
content="Darth Vader (2020) 43"
content_location="Unknown"
>
-
</AppearancePanel>
<AppearancePanel
content_type="Unknown"
content="Darth Vader (2020) 44"
content_location="Unknown"
>
-
</AppearancePanel>
<AppearancePanel
content_type="Unknown"
content="Darth Vader (2020) 45"
content_location="Unknown"
>
-
</AppearancePanel>
<AppearancePanel
content_type="Unknown"
content="The Curse — Free Comic Book Day 2024: Star Wars 1"
content_location="Unknown"
>
-
</AppearancePanel>
<AppearancePanel
content_type="Unknown"
content="Darth Vader (2020) 46"
content_location="Unknown"
>
-
</AppearancePanel>
<AppearancePanel
content_type="Unknown"
content="Darth Vader (2020) 47"
content_location="Unknown"
>
-
</AppearancePanel>
<AppearancePanel
content_type="Unknown"
content="Darth Vader (2020) 48"
content_location="Unknown"
>
-
</AppearancePanel>
<AppearancePanel
content_type="Unknown"
content="Darth Vader (2020) 49"
content_location="Unknown"
>
-
</AppearancePanel>
<AppearancePanel
content_type="Unknown"
content="Darth Vader (2020) 50"
content_location="Unknown"
>
-
</AppearancePanel>
<AppearancePanel
content_type="Unknown"
content="Star Wars Galaxy of Adventures — Darth Vader - Might of the Empire"
content_location="Unknown"
>
-
</AppearancePanel>
<AppearancePanel
content_type="Unknown"
content="Return to Hoth — Darth Vader – Black, White & Red 4"
content_location="Unknown"
>
-
</AppearancePanel>
<AppearancePanel
content_type="Unknown"
content="We Shall Double Our Efforts — Tales from the Death Star"
content_location="Unknown"
>
-
</AppearancePanel>
<AppearancePanel
content_type="Unknown"
content="Return of the Jedi – The Empire 1 (Cover only)"
content_location="Unknown"
>
-
</AppearancePanel>
<AppearancePanel
content_type="Unknown"
content="Moving Target: A Princess Leia Adventure (and audiobook) (Mentioned only)"
content_location="Unknown"
>
-
</AppearancePanel>
<AppearancePanel
content_type="Unknown"
content="Return of the Jedi – Lando 1 (Cover only)"
content_location="Unknown"
>
-
</AppearancePanel>
<AppearancePanel
content_type="Unknown"
content="Age of Rebellion - Luke Skywalker 1"
content_location="Unknown"
>
-
</AppearancePanel>
<AppearancePanel
content_type="Unknown"
content="Trooper Trouble — From a Certain Point of View: Return of the Jedi (and audiobook) (Mentioned only)"
content_location="Unknown"
>
-
</AppearancePanel>
<AppearancePanel
content_type="Unknown"
content="Return of the Jedi – The Rebellion 1 (Indirect mention only)"
content_location="Unknown"
>
-
</AppearancePanel>
<AppearancePanel
content_type="Unknown"
content="Dune Sea Songs of Salt and Moonlight — From a Certain Point of View: Return of the Jedi (and audiobook) (Mentioned only)"
content_location="Unknown"
>
-
</AppearancePanel>
<AppearancePanel
content_type="Unknown"
content="Star Wars: Episode VI Return of the Jedi"
content_location="Unknown"
>
-
</AppearancePanel>
<AppearancePanel
content_type="Unknown"
content="Star Wars: Return of the Jedi junior novelization"
content_location="Unknown"
>
-
</AppearancePanel>
<AppearancePanel
content_type="Unknown"
content="Return of the Jedi: Beware the Power of the Dark Side! (and audiobook)"
content_location="Unknown"
>
-
</AppearancePanel>
<AppearancePanel
content_type="Unknown"
content="Return of the Jedi Little Golden Book (and audiobook)"
content_location="Unknown"
>
-
</AppearancePanel>
<AppearancePanel
content_type="Unknown"
content="Return of the Jedi Read-Along Storybook and CD"
content_location="Unknown"
>
-
</AppearancePanel>
<AppearancePanel
content_type="Unknown"
content="Any Work Worth Doing — From a Certain Point of View: Return of the Jedi (and audiobook)"
content_location="Unknown"
>
-
</AppearancePanel>
<AppearancePanel
content_type="Unknown"
content="Rescue from Jabbas Palace"
content_location="Unknown"
>
-
</AppearancePanel>
<AppearancePanel
content_type="Unknown"
content="Rescue from Jabbas Palace — Star Wars Galactic Adventures (also reprinted in 5-Minute Star Wars Stories; 5-Minute Star Wars Villain Stories; and Star Wars Galactic Stories: 7 Stories from a Galaxy Far, Far Away....)"
content_location="Unknown"
>
-
</AppearancePanel>
<AppearancePanel
content_type="Unknown"
content="Return of the Jedi – Jabbas Palace 1 (Cover only)"
content_location="Unknown"
>
-
</AppearancePanel>
<AppearancePanel
content_type="Unknown"
content="Star Wars Galaxy of Adventures — Leia and Han - The Han Rescue (In flashback(s))"
content_location="Unknown"
>
-
</AppearancePanel>
<AppearancePanel
content_type="Unknown"
content="Reputation — From a Certain Point of View: Return of the Jedi (and audiobook) (Mentioned only)"
content_location="Unknown"
>
-
</AppearancePanel>
<AppearancePanel
content_type="Unknown"
content="The Chronicler — From a Certain Point of View: Return of the Jedi (and audiobook) (Mentioned only)"
content_location="Unknown"
>
-
</AppearancePanel>
<AppearancePanel
content_type="Unknown"
content="From a Certain Point of View — From a Certain Point of View: Return of the Jedi (and audiobook) (In flashback(s))"
content_location="Unknown"
>
-
</AppearancePanel>
<AppearancePanel
content_type="Unknown"
content="The Burden of Leadership — From a Certain Point of View: Return of the Jedi (and audiobook) (Mentioned only)"
content_location="Unknown"
>
-
</AppearancePanel>
<AppearancePanel
content_type="Unknown"
content="Masters — Stories of Jedi and Sith (and audiobook)"
content_location="Unknown"
>
-
</AppearancePanel>
<AppearancePanel
content_type="Unknown"
content="When Fire Marked the Sky — From a Certain Point of View: Return of the Jedi (and audiobook) (Mentioned only)"
content_location="Unknown"
>
-
</AppearancePanel>
<AppearancePanel
content_type="Unknown"
content="Blade Squadron — Star Wars Insider 149–150 (also reprinted in Star Wars Insider: The Fiction Collection Volume 1) (Mentioned only)"
content_location="Unknown"
>
-
</AppearancePanel>
<AppearancePanel
content_type="Unknown"
content="Return of the Jedi: The Battle of Endor"
content_location="Unknown"
>
-
</AppearancePanel>
<AppearancePanel
content_type="Unknown"
content="The Man Who Captured Luke Skywalker — From a Certain Point of View: Return of the Jedi (and audiobook)"
content_location="Unknown"
>
-
</AppearancePanel>
<AppearancePanel
content_type="Unknown"
content="The Emperors Red Guards — From a Certain Point of View: Return of the Jedi (and audiobook)"
content_location="Unknown"
>
-
</AppearancePanel>
<AppearancePanel
content_type="Unknown"
content="Star Wars Galaxy of Adventures — Luke vs. Emperor Palpatine - Rise to Evil"
content_location="Unknown"
>
-
</AppearancePanel>
<AppearancePanel
content_type="Unknown"
content="Shattered Empire 1"
content_location="Unknown"
>
-
</AppearancePanel>
<AppearancePanel
content_type="Unknown"
content="To the Last — From a Certain Point of View: Return of the Jedi (and audiobook) (Mentioned only)"
content_location="Unknown"
>
-
</AppearancePanel>
<AppearancePanel
content_type="Unknown"
content="Brotherhood — From a Certain Point of View: Return of the Jedi (and audiobook)"
content_location="Unknown"
>
-
</AppearancePanel>
<AppearancePanel
content_type="Unknown"
content="Galactic Tales: Shockwave — Star Wars Insider 220 (Mentioned only)"
content_location="Unknown"
>
-
</AppearancePanel>
<AppearancePanel
content_type="Unknown"
content="Battle of Jakku — Insurgency Rising 1 (Mentioned only)"
content_location="Unknown"
>
-
</AppearancePanel>
<AppearancePanel
content_type="Unknown"
content="The Rising — Battle of Jakku — Insurgency Rising 1 (In flashback(s))"
content_location="Unknown"
>
-
</AppearancePanel>
<AppearancePanel
content_type="Unknown"
content="The Steadfast Soldier — From a Certain Point of View: Return of the Jedi (and audiobook) (Mentioned only)"
content_location="Unknown"
>
-
</AppearancePanel>
<AppearancePanel
content_type="Unknown"
content="The Princess and the Scoundrel (and audiobook) (Mentioned only)"
content_location="Unknown"
>
-
</AppearancePanel>
<AppearancePanel
content_type="Unknown"
content="Return of the Jedi – Max Rebo 1 (Cover only)"
content_location="Unknown"
>
-
</AppearancePanel>
<AppearancePanel
content_type="Unknown"
content="Star Wars Adventures: Shadow of Vaders Castle (In flashback(s))"
content_location="Unknown"
>
-
</AppearancePanel>
<AppearancePanel
content_type="Unknown"
content="Battle of Jakku — Insurgency Rising 2 (Mentioned only)"
content_location="Unknown"
>
-
</AppearancePanel>
<AppearancePanel
content_type="Unknown"
content="Battle of Jakku — Insurgency Rising 3 (Mentioned only)"
content_location="Unknown"
>
-
</AppearancePanel>
<AppearancePanel
content_type="Unknown"
content="Battle of Jakku — Insurgency Rising 4 (Mentioned only)"
content_location="Unknown"
>
-
</AppearancePanel>
<AppearancePanel
content_type="Unknown"
content="Shattered Empire 3 (Mentioned only; in the opening crawl)"
content_location="Unknown"
>
-
</AppearancePanel>
<AppearancePanel
content_type="Unknown"
content="Alphabet Squadron (and audiobook) (Mentioned only)"
content_location="Unknown"
>
-
</AppearancePanel>
<AppearancePanel
content_type="Unknown"
content="Aftermath (and audiobook) (Mentioned only)"
content_location="Unknown"
>
-
</AppearancePanel>
<AppearancePanel
content_type="Unknown"
content="Star Wars Adventures: Ghosts of Vaders Castle 1 (Voice only)"
content_location="Unknown"
>
-
</AppearancePanel>
<AppearancePanel
content_type="Unknown"
content="Star Wars Adventures: Ghosts of Vaders Castle 2 (In dream)"
content_location="Unknown"
>
-
</AppearancePanel>
<AppearancePanel
content_type="Unknown"
content="Star Wars Adventures: Ghosts of Vaders Castle 3 (In flashback(s))"
content_location="Unknown"
>
-
</AppearancePanel>
<AppearancePanel
content_type="Unknown"
content="Star Wars Adventures: Ghosts of Vaders Castle 4 (In dream)"
content_location="Unknown"
>
-
</AppearancePanel>
<AppearancePanel
content_type="Unknown"
content="Star Wars Adventures: Ghosts of Vaders Castle 5 (Appears as a ghost or spirit)"
content_location="Unknown"
>
-
</AppearancePanel>
<AppearancePanel
content_type="Unknown"
content="Star Wars: Squadrons"
content_location="Unknown"
>
-
</AppearancePanel>
<AppearancePanel
content_type="Unknown"
content="Shadow Fall (and audiobook) (Mentioned only)"
content_location="Unknown"
>
-
</AppearancePanel>
<AppearancePanel
content_type="Unknown"
content="Aftermath: Life Debt (and audiobook) (Mentioned only)"
content_location="Unknown"
>
-
</AppearancePanel>
<AppearancePanel
content_type="Unknown"
content="Battle of Jakku — Republic Under Siege 1 (Mentioned only; in the opening crawl)"
content_location="Unknown"
>
-
</AppearancePanel>
<AppearancePanel
content_type="Unknown"
content="Consolidation — Battle of Jakku — Republic Under Siege 1 (In flashback(s))"
content_location="Unknown"
>
-
</AppearancePanel>
<AppearancePanel
content_type="Unknown"
content="Battle of Jakku — Republic Under Siege 2 (Mentioned only)"
content_location="Unknown"
>
-
</AppearancePanel>
<AppearancePanel
content_type="Unknown"
content="Battle of Jakku — Republic Under Siege 4 (In flashback(s))"
content_location="Unknown"
>
-
</AppearancePanel>
<AppearancePanel
content_type="Unknown"
content="Battle of Jakku — Last Stand 1 (In flashback(s))"
content_location="Unknown"
>
-
</AppearancePanel>
<AppearancePanel
content_type="Unknown"
content="False Histories — Battle of Jakku — Last Stand 1 (In flashback(s))"
content_location="Unknown"
>
-
</AppearancePanel>
<AppearancePanel
content_type="Unknown"
content="Battle of Jakku — Last Stand 2 (Mentioned only)"
content_location="Unknown"
>
-
</AppearancePanel>
<AppearancePanel
content_type="Unknown"
content="Victorys Price (and audiobook) (Mentioned only)"
content_location="Unknown"
>
-
</AppearancePanel>
<AppearancePanel
content_type="Unknown"
content="Aftermath: Empires End (and audiobook) (Mentioned only)"
content_location="Unknown"
>
-
</AppearancePanel>
<AppearancePanel
content_type="Unknown"
content="Battle of Jakku — Last Stand 4 (Mentioned only)"
content_location="Unknown"
>
-
</AppearancePanel>
<AppearancePanel
content_type="Unknown"
content="Star Wars: The Mandalorian: The Manga (Appears through imagination)"
content_location="Unknown"
>
-
</AppearancePanel>
<AppearancePanel
content_type="Unknown"
content="The Mandalorian Season 2 Junior Novel (Indirect mention only)"
content_location="Unknown"
>
-
</AppearancePanel>
<AppearancePanel
content_type="Unknown"
content="The Mandalorian — Chapter 13: The Jedi (Indirect mention only)"
content_location="Unknown"
>
-
</AppearancePanel>
<AppearancePanel
content_type="Unknown"
content="The Book of Boba Fett — Chapter 6: From the Desert Comes a Stranger (Mentioned only)"
content_location="Unknown"
>
-
</AppearancePanel>
<AppearancePanel
content_type="Unknown"
content="The Mandalorian — Chapter 22: Guns for Hire (Indirect mention only)"
content_location="Unknown"
>
-
</AppearancePanel>
<AppearancePanel
content_type="Unknown"
content="Ahsoka — Part One: Master and Apprentice (Mentioned only)"
content_location="Unknown"
>
-
</AppearancePanel>
<AppearancePanel
content_type="Unknown"
content="Ahsoka — Part Four: Fallen Jedi (Vision to Ahsoka Tano)"
content_location="Unknown"
>
-
</AppearancePanel>
<AppearancePanel
content_type="Unknown"
content="Ahsoka — Part Five: Shadow Warrior (Vision to Ahsoka Tano)"
content_location="Unknown"
>
-
</AppearancePanel>
<AppearancePanel
content_type="Unknown"
content="Ahsoka — Part Six: Far, Far Away (Indirect mention only)"
content_location="Unknown"
>
-
</AppearancePanel>
<AppearancePanel
content_type="Unknown"
content="Ahsoka — Part Seven: Dreams and Madness (Appears in hologram)"
content_location="Unknown"
>
-
</AppearancePanel>
<AppearancePanel
content_type="Unknown"
content="Ahsoka — Part Eight: The Jedi, the Witch, and the Warlord (Appears as a ghost or spirit)"
content_location="Unknown"
>
-
</AppearancePanel>
<AppearancePanel
content_type="Unknown"
content="Shadow of the Sith (and audiobook) (Appears as a ghost or spirit)"
content_location="Unknown"
>
-
</AppearancePanel>
<AppearancePanel
content_type="Unknown"
content="Star Wars (2020) 50 (In flashback(s))"
content_location="Unknown"
>
-
</AppearancePanel>
<AppearancePanel
content_type="Unknown"
content="Bloodline (and audiobook) (Mentioned only)"
content_location="Unknown"
>
-
</AppearancePanel>
<AppearancePanel
content_type="Unknown"
content="The Rise of Kylo Ren 1 (Cover only)"
content_location="Unknown"
>
-
</AppearancePanel>
<AppearancePanel
content_type="Unknown"
content="Age of Resistance - Supreme Leader Snoke 1 (Mentioned only)"
content_location="Unknown"
>
-
</AppearancePanel>
<AppearancePanel
content_type="Unknown"
content="The Legends of Luke Skywalker (and audiobook) (Mentioned only)"
content_location="Unknown"
>
-
</AppearancePanel>
<AppearancePanel
content_type="Unknown"
content="All Creatures Great and Small (also reprinted in Tales from a Galaxy Far, Far Away: Aliens: Volume I) (Indirect mention only)"
content_location="Unknown"
>
-
</AppearancePanel>
<AppearancePanel
content_type="Unknown"
content="The Crimson Corsair and the Lost Treasure of Count Dooku (also reprinted in Tales from a Galaxy Far, Far Away: Aliens: Volume I) (Mentioned only)"
content_location="Unknown"
>
-
</AppearancePanel>
<AppearancePanel
content_type="Unknown"
content="Force Collector (and audiobook) (Vision to Karr Nuq Sin)"
content_location="Unknown"
>
-
</AppearancePanel>
<AppearancePanel
content_type="Unknown"
content="Age of Resistance - General Hux 1 (Mentioned only)"
content_location="Unknown"
>
-
</AppearancePanel>
<AppearancePanel
content_type="Unknown"
content="Age of Resistance - Kylo Ren 1 (also reprinted in Kylo Ren - Age of Resistance 1) (In flashback(s))"
content_location="Unknown"
>
-
</AppearancePanel>
<AppearancePanel
content_type="Unknown"
content="Poe Dameron 11 (Mentioned only)"
content_location="Unknown"
>
-
</AppearancePanel>
<AppearancePanel
content_type="Unknown"
content="Star Wars: Episode VII The Force Awakens (Mentioned only)"
content_location="Unknown"
>
-
</AppearancePanel>
<AppearancePanel
content_type="Unknown"
content="Star Wars: The Force Awakens novelization (and audiobook) (Vision to Rey)"
content_location="Unknown"
>
-
</AppearancePanel>
<AppearancePanel
content_type="Unknown"
content="Star Wars: The Force Awakens: A Junior Novel (and audiobook) (Vision to Rey)"
content_location="Unknown"
>
-
</AppearancePanel>
<AppearancePanel
content_type="Unknown"
content="Star Wars: The Force Awakens Graphic Novel Adaptation (Mentioned only)"
content_location="Unknown"
>
-
</AppearancePanel>
<AppearancePanel
content_type="Unknown"
content="The Force Awakens Adaptation 3 (Mentioned only)"
content_location="Unknown"
>
-
</AppearancePanel>
<AppearancePanel
content_type="Unknown"
content="The Force Awakens Adaptation 4 (Vision to Rey)"
content_location="Unknown"
>
-
</AppearancePanel>
<AppearancePanel
content_type="Unknown"
content="The Force Awakens Adaptation 5 (Mentioned only)"
content_location="Unknown"
>
-
</AppearancePanel>
<AppearancePanel
content_type="Unknown"
content="Galaxys Edge: Black Spire (and audiobook) (Mentioned only)"
content_location="Unknown"
>
-
</AppearancePanel>
<AppearancePanel
content_type="Unknown"
content="Join the Resistance: Attack on Starkiller Base (and audiobook) (Mentioned only)"
content_location="Unknown"
>
-
</AppearancePanel>
<AppearancePanel
content_type="Unknown"
content="Star Wars Adventures Ashcan (In flashback(s))"
content_location="Unknown"
>
-
</AppearancePanel>
<AppearancePanel
content_type="Unknown"
content="Star Wars: Episode VIII The Last Jedi (Mentioned only)"
content_location="Unknown"
>
-
</AppearancePanel>
<AppearancePanel
content_type="Unknown"
content="Star Wars: The Last Jedi: Expanded Edition (and audiobook) (Mentioned only)"
content_location="Unknown"
>
-
</AppearancePanel>
<AppearancePanel
content_type="Unknown"
content="Star Wars: The Last Jedi: A Junior Novel (and audiobook) (Mentioned only)"
content_location="Unknown"
>
-
</AppearancePanel>
<AppearancePanel
content_type="Unknown"
content="The Last Jedi Adaptation 1 (Mentioned only)"
content_location="Unknown"
>
-
</AppearancePanel>
<AppearancePanel
content_type="Unknown"
content="The Last Jedi Adaptation 3 (Mentioned only)"
content_location="Unknown"
>
-
</AppearancePanel>
<AppearancePanel
content_type="Unknown"
content="The Last Jedi Adaptation 4 (Indirect mention only)"
content_location="Unknown"
>
-
</AppearancePanel>
<AppearancePanel
content_type="Unknown"
content="The Last Jedi Adaptation 5 (Mentioned only)"
content_location="Unknown"
>
-
</AppearancePanel>
<AppearancePanel
content_type="Unknown"
content="Legacy of Vader 1 (Appears in hologram)"
content_location="Unknown"
>
-
</AppearancePanel>
<AppearancePanel
content_type="Unknown"
content="Legacy of Vader 2"
content_location="Unknown"
>
-
</AppearancePanel>
<AppearancePanel
content_type="Unknown"
content="Resistance Reborn (and audiobook) (Mentioned only)"
content_location="Unknown"
>
-
</AppearancePanel>
<AppearancePanel
content_type="Unknown"
content="Allegiance 2 (Mentioned only)"
content_location="Unknown"
>
-
</AppearancePanel>
<AppearancePanel
content_type="Unknown"
content="Allegiance 4 (In flashback(s))"
content_location="Unknown"
>
-
</AppearancePanel>
<AppearancePanel
content_type="Unknown"
content="Spark of the Resistance (and audiobook) (Mentioned only)"
content_location="Unknown"
>
-
</AppearancePanel>
<AppearancePanel
content_type="Unknown"
content="Pirates Price (and audiobook) (Mentioned only)"
content_location="Unknown"
>
-
</AppearancePanel>
<AppearancePanel
content_type="Unknown"
content="Galaxys Edge 3 (Mentioned only)"
content_location="Unknown"
>
-
</AppearancePanel>
<AppearancePanel
content_type="Unknown"
content="The Wanderer — Myths & Fables (and audiobook) (Mentioned only) (In flashback(s))"
content_location="Unknown"
>
-
</AppearancePanel>
<AppearancePanel
content_type="Unknown"
content="Star Wars: Galaxys Edge — Dok-Ondars Den of Antiquities (Statue only)"
content_location="Unknown"
>
-
</AppearancePanel>
<AppearancePanel
content_type="Unknown"
content="Star Wars: Tales from the Galaxys Edge – Last Call (Appears in hologram) (In flashback(s))"
content_location="Unknown"
>
-
</AppearancePanel>
<AppearancePanel
content_type="Unknown"
content="Halcyon Legacy 1 (In flashback(s))"
content_location="Unknown"
>
-
</AppearancePanel>
<AppearancePanel
content_type="Unknown"
content="Halcyon Legacy 3 (In flashback(s))"
content_location="Unknown"
>
-
</AppearancePanel>
<AppearancePanel
content_type="Unknown"
content="Tales of Villainy: Follow and Lead — Star Wars Adventures (2020) 2 (Mentioned only)"
content_location="Unknown"
>
-
</AppearancePanel>
<AppearancePanel
content_type="Unknown"
content="Tales from Wild Space: The Flat Mountain of Yavin — Star Wars Adventures (2017) 2"
content_location="Unknown"
>
-
</AppearancePanel>
<AppearancePanel
content_type="Unknown"
content="Tales from Wild Space: Mattis Makes a Stand — Star Wars Adventures (2017) 4 (Mentioned only)"
content_location="Unknown"
>
-
</AppearancePanel>
<AppearancePanel
content_type="Unknown"
content="Tales from Wild Space: Podracers Rescue — Star Wars Adventures (2017) 6 (In flashback(s))"
content_location="Unknown"
>
-
</AppearancePanel>
<AppearancePanel
content_type="Unknown"
content="Tales from Wild Space: A Tauntaun Tail — Star Wars Adventures (2017) 22 (In flashback(s))"
content_location="Unknown"
>
-
</AppearancePanel>
<AppearancePanel
content_type="Unknown"
content="The Lost Stories, Part 3 — Star Wars Adventures (2017) 32 (Appears through imagination)"
content_location="Unknown"
>
-
</AppearancePanel>
<AppearancePanel
content_type="Unknown"
content="Star Wars: Episode IX The Rise of Skywalker (Voice only)"
content_location="Unknown"
>
-
</AppearancePanel>
<AppearancePanel
content_type="Unknown"
content="Star Wars: The Rise of Skywalker: Expanded Edition (and audiobook) (Voice only)"
content_location="Unknown"
>
-
</AppearancePanel>
<AppearancePanel
content_type="Unknown"
content="Star Wars: The Rise of Skywalker: A Junior Novel (and audiobook) (Voice only)"
content_location="Unknown"
>
-
</AppearancePanel>
<AppearancePanel
content_type="Unknown"
content="Star Wars Galaxy of Adventures — Kylo Ren and Darth Vader - A Legacy of Power (In flashback(s))"
content_location="Unknown"
>
-
</AppearancePanel>
<AppearancePanel
content_type="Unknown"
content="Whills — From a Certain Point of View (and audiobook) (Mentioned only)"
content_location="Unknown"
>
-
</AppearancePanel>
<AppearancePanel
content_type="Unknown"
content="The Whills Strike Back — From a Certain Point of View: The Empire Strikes Back (and audiobook) (Mentioned only)"
content_location="Unknown"
>
-
</AppearancePanel>
<AppearancePanel
content_type="Unknown"
content="Star Wars: Galaxy of Heroes"
content_location="Unknown"
>
-
</AppearancePanel>
</AppearanceSection>