Battle of Hoth
The Battle of Hoth, alternatively referred to as the defense of Echo Base, represented a pivotal clash occurring in 3 ABY. It is often regarded as a substantial triumph for the Galactic Empire and simultaneously, the most devastating battlefield defeat endured by the Rebel Alliance throughout the Galactic Civil War. This battle unfolded as an Imperial invasion, spearheaded by Darth Vader, with the primary objective of obliterating the Rebel Alliance's Echo Base, a concealed installation situated on the isolated ice planet Hoth, and capturing Luke Skywalker. The discovery of the base's location transpired when a Viper probe droid, dispatched by Darth Vader's Death Squadron, landed on the planet, thereby triggering the evacuation of Hoth by the Rebels.
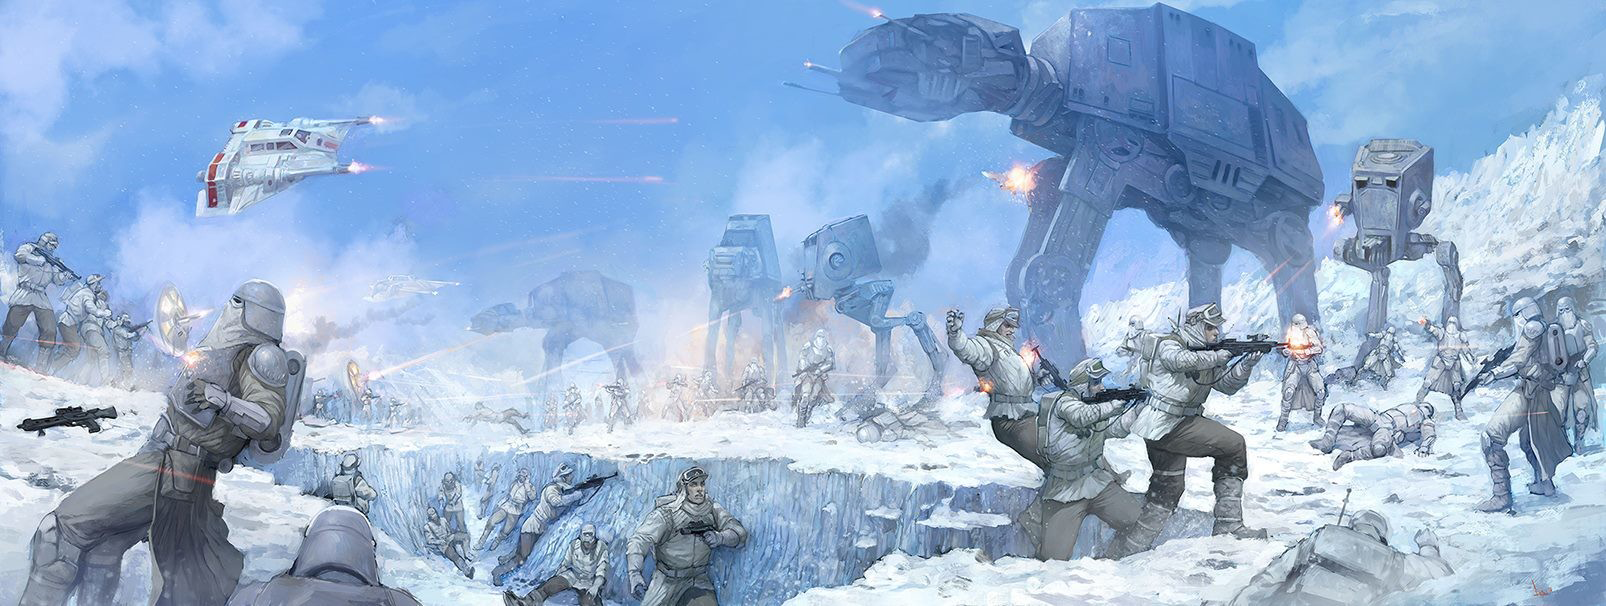
The Imperial assault force was mainly comprised of AT-AT walkers, under the command of General Maximilian Veers. His military force was assigned the mission of destroying Echo Base's primary power generator. This action would then enable orbital bombardment of the planet and pave the way for Darth Vader to arrive and direct ground forces into the base. Leading the defense of the generator were the T-47 airspeeders of Rogue Squadron, commanded by Luke Skywalker, the celebrated pilot who destroyed the first Death Star. However, the snowspeeders lacked the necessary firepower to effectively take down the walkers, prompting Skywalker to propose an alternative strategy involving the use of tow cables, equipped on each snowspeeder, to entangle and disable the walkers.
Despite the valiant efforts of Rogue Squadron, the power generator was eventually destroyed by Veers' main AT-AT. Consequently, the remaining base personnel initiated their evacuation, coinciding with the entry of the 501st Legion, led by Darth Vader, into the base. The overwhelming Imperial invasion compelled the Rebellion to disperse their fleet across the galaxy, leading to a series of scattered skirmishes throughout the galaxy until the Empire suffered a sudden and decisive defeat at the Battle of Endor.
Prelude
Following the Rebel Alliance's major victory at Yavin, the Rebellion abandoned its base located on Yavin 4. They then began a galaxy-wide search for potential new operational bases, considering planets such as Daxan Beta and Insk. They also attempted to establish a base on Crait. During the subsequent three and a half years of conflict, General Jan Dodonna issued an order for a mission to locate a base suitable for High Command, resulting in a list of potential planets, including Hoth. During this mission, a soldier from the Rebel Alliance Special Forces named Purpruff traveled to Hoth, situated in the Anoat sector, and submitted a report on the planet. Subsequently, the Corps of Engineers constructed the base over a period of two standard years, with the intention of claiming it as their new base of operations while evading the watchful eyes of the Empire. The base was occupied for less than a month before the battle occurred.
In the aftermath of the Empire's defeat three and a half years prior at the Battle of Yavin, the Rebel Alliance faced relentless attacks from the Empire during the Mid Rim Retreat. Rumors about a Rebel base circulated within the Rebellion, although only a select few within the Alliance possessed concrete knowledge of its existence. Rebel troopers stationed at Echo Base, geographically distanced from the disastrous tactical situation in the Mid and Outer Rim Territories, had access to superior equipment and training compared to Rebel soldiers elsewhere in the galaxy. The Empire intensified its search for the Rebel base following the ambush of a rebel convoy at Derra. As part of Project Swarm, the Empire deployed Viper probe droids to search for the rebel base throughout the galaxy. Doctor Chelli Lona Aphra significantly hampered the Empire's efforts to locate Echo Base by hacking into Vader's armor while the Sith Lord was weakened in the Martyrium of Frozen Tears, resulting in the deletion or alteration of numerous probe droid records. According to her own estimate, and that of the Empire when they began to rectify the situation, it would require weeks to recover the lost progress of the project.
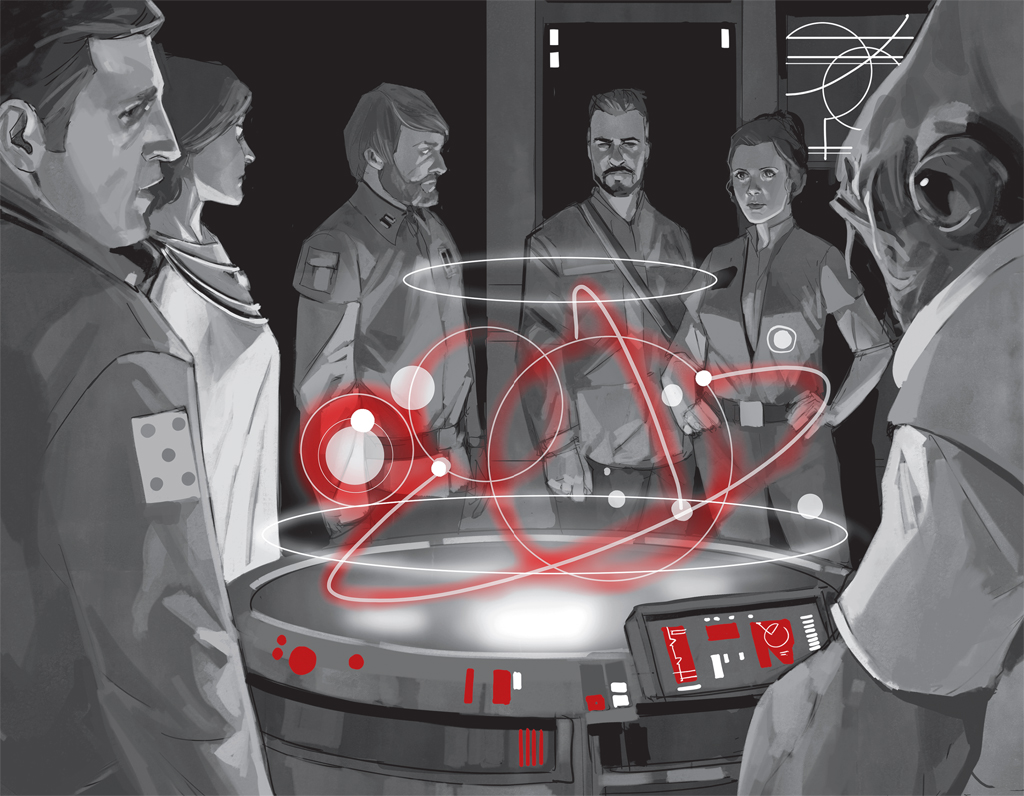
Shortly before the battle, a strategy conference took place at the base following the arrival of several transports rumored to be carrying Princess Leia Organa, General Carlist Rieekan, Commander Chiffonage, a Bothan spy, and various other members of Alliance Command. The main briefing during the conference was delivered by governor [Everi Chalis], an Imperial defector extracted from Haidoral Prime by the 61st Mobile Infantry under the command of Captain Micha Evon. Chalis provided valuable information about the inner workings of the "Imperial War Machine" and exchanged a map of trade routes and Imperial vulnerabilities. The meeting concluded shortly before the battle, forcing Leia and the other attendees to navigate the Imperial blockade in order to leave the system.
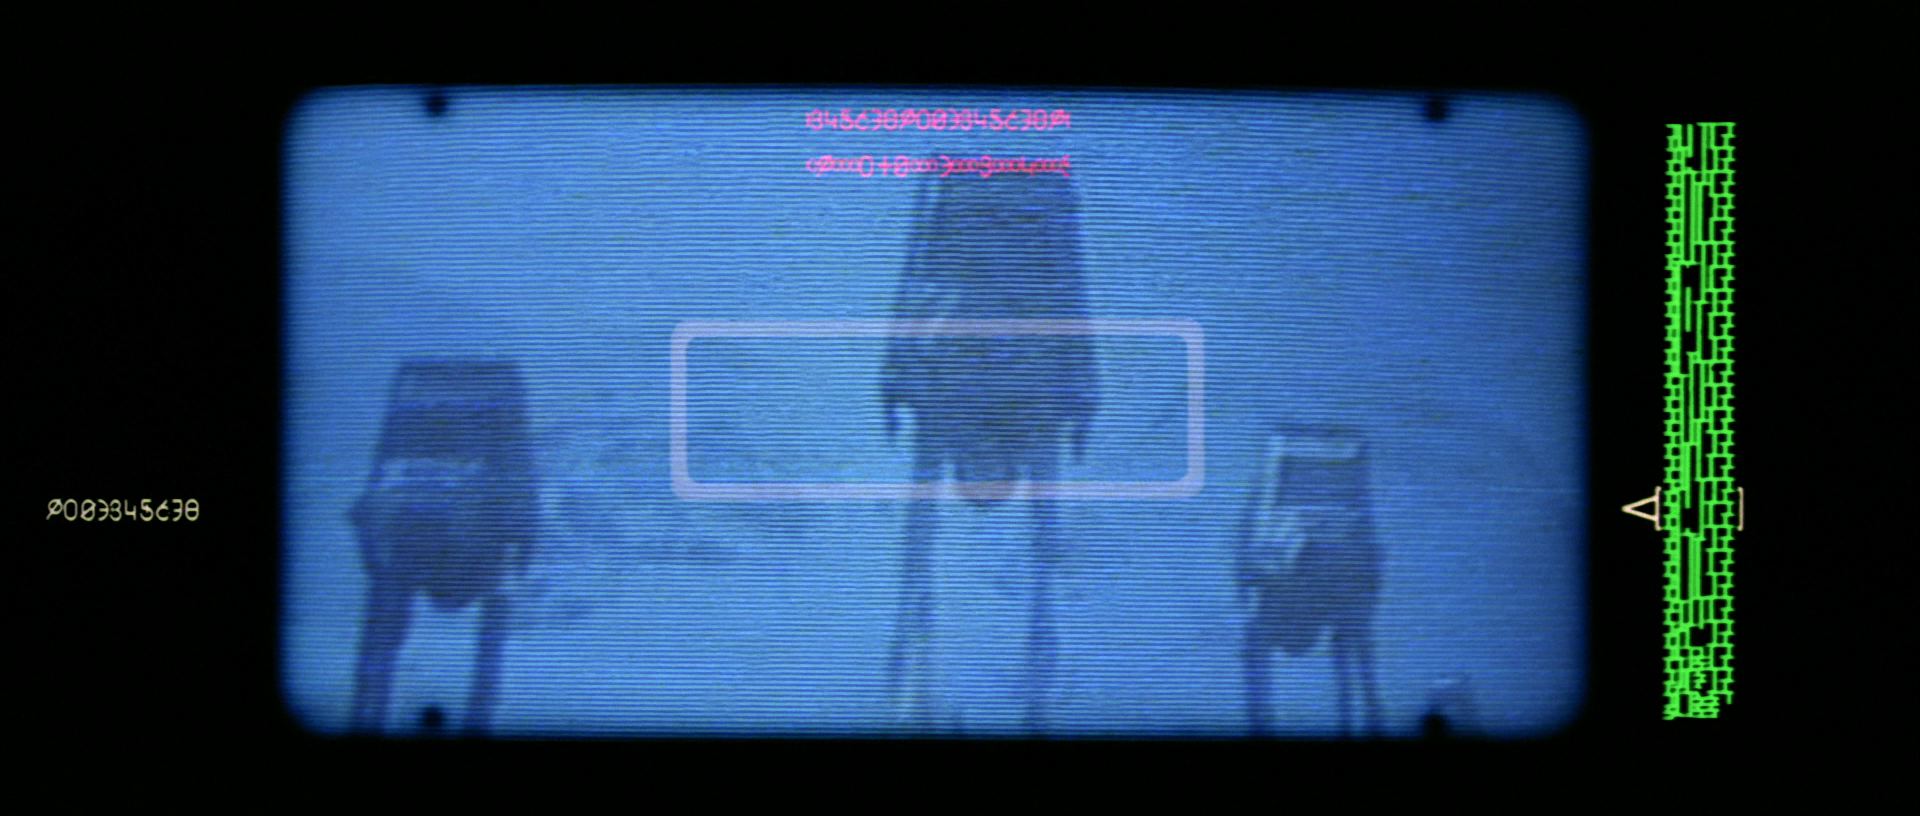
Viper probe XJ9-CS14, deployed from the Imperial II-class Star Destroyer Stalker, ultimately located the Rebel base. On the ground, Commander Luke Skywalker observed the probe droid crash while on a reconnaissance mission riding his tauntaun—native snow-lizards used by Alliance personnel as mounts—and mistaking it for a meteorite, approached it to investigate. En route, Skywalker was attacked by a native wampa and dragged into a cave before he could examine the droid. Han Solo eventually departed to rescue Skywalker during a severe snowstorm, despite concerns from his comrades.
Later, Solo and Chewbacca were tasked with investigating the lead Skywalker had discovered, leading to their finding of the probe droid's existence. Upon being spotted by the droid, Han attempted to destroy it, but the droid activated its self-destruct mechanism. After receiving new intelligence from the probe, the crew of the Executor-class Star Dreadnought Executor initially dismissed the findings. Despite Admiral Kendal Ozzel's belief that images of the Rebel shield generator belonged to smugglers, Darth Vader ordered the Imperial Death Squadron to invade the planet. With their location exposed, the Empire's vengeance was soon to be unleashed upon the Rebellion.
The battle
Plan Kay One Zero
Upon the distribution of Han Solo's report regarding the probe, General Rieekan, the base commander, correctly deduced that the mysterious probe originated from the Empire. Rieekan commanded the immediate evacuation of Echo Base, employing code K-one-zero. Subsequently, the general instructed Rebel technicians to maximize the base's shield strength to mitigate damage from orbital bombardment. By channeling energy directly into the planet's interior, the Rebel's planet-based shield provided protection against bombardments that would typically overwhelm ship shields.
Concurrently, Princess Leia Organa directed Rebel pilots in Hangar 7 to evacuate in groups to circumvent the Imperial blockade. The Rebel strategy involved all ships converging at a predetermined rendezvous point. The rebel base immediately became a scene of intense activity, with boarding commencing on thirty GR-75 medium transports assembled at the base's north entrance. Deck officers, including Serenity Meeks, were assigned the task of directing evacuees onto the transports. Noncombat personnel were prioritized for loading, while the tauntauns used by the rebels were released onto the frozen plains. An alarm sounded immediately, signaling the Empire's arrival, and a subspace alert was dispatched to transports carrying new recruits en route to the planet, advising them to avoid the system. Corwi Selgrothe, a journalist, was among the non-combatants present at the base; upon the Empire's arrival, she initially attempted to document Organa's actions before encountering L'cayo Llem, a rebel soldier, who guided her to a GR-75.
When Darth Vader's fleet entered the Hoth system, he quickly realized that the Rebels were fully aware of the planned ambush, a situation exacerbated by Ozzel's Star Destroyer emerging from lightspeed too close to the system. Vader promptly used the Force-choked Ozzel to death for mishandling the situation and immediately promoted Captain Firmus Piett to admiral, entrusting him with the invasion.
Imperial offensive
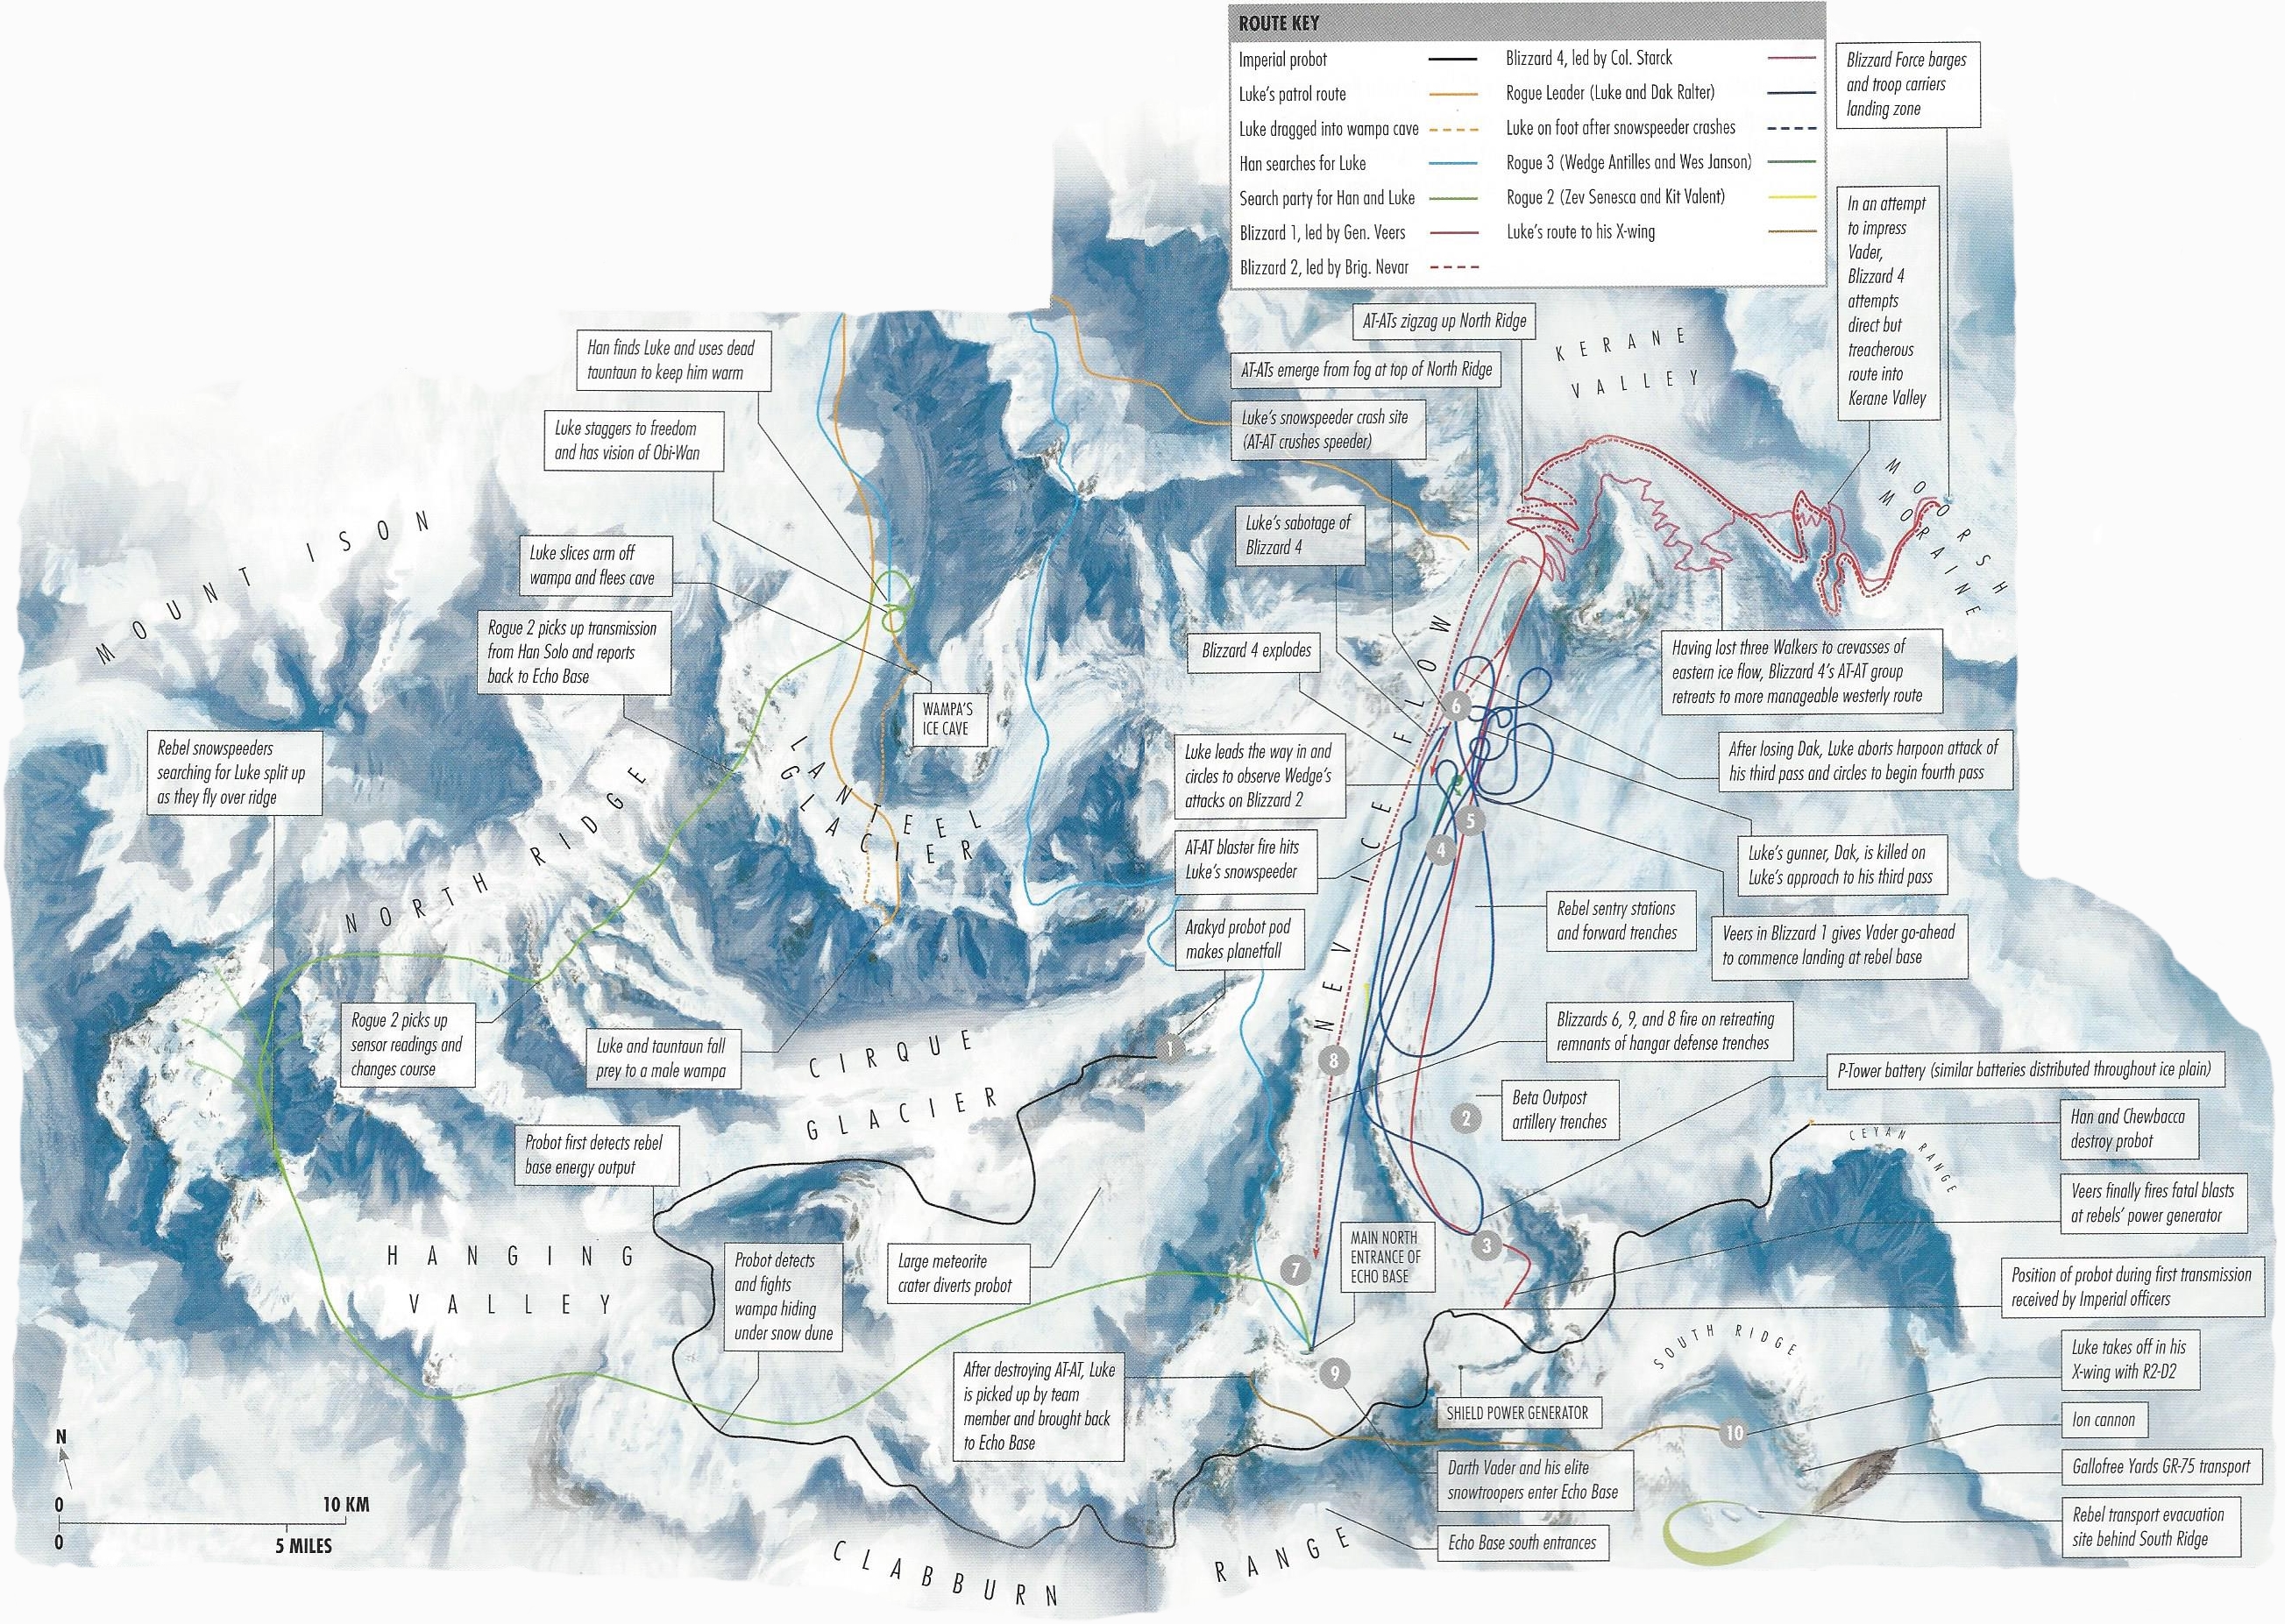
On the planet's surface, the decorated General Maximilian Veers was appointed commander of the ground assault and led the contingent of AT-ATs and AT-STs under the unified command of Blizzard Force. Blizzard Force's complement of 12 AT-ATs, led by Veers' Blizzard 1, were specifically engineered to operate in cold environments like the one on Hoth. Veers communicated to Lord Vader that he could land once Veers had destroyed the generator.
Veers, aware that Rebel starfighters would swarm the Executor's Incom Y-85 Titan dropships, requested the use of Death Squadron's more adaptable Gozanti-class cruisers, which could transport only two AT-ATs at a time, unlike the Titan's capacity of four. The barges and troop carriers of Blizzard Force, escorted by TIE fighters, converged at the Moorsh Moraine glacial feature, situated north of the heavily fortified mountain base. Unable to initiate an orbital bombardment due to the shield, which utilized projector modules dispersed throughout Rebel territory, Veers received orders to destroy the central power generator, which would disable its subsidiary projector modules. Veers was also instructed to capture, rather than eliminate, surviving Rebel forces during his assault.
In an attempt to impress Vader, Blizzard 4 attempted to traverse a direct, but treacherous route into the Kerane Valley, resulting in the loss of three walkers to crevices in the eastern ice flow. Blizzard 4's AT-AT group then retreated to a more manageable westerly route. The main group of AT-ATs soon emerged from the fog atop the North Ridge.
The Imperial Gozanti-class cruisers were initially spotted by Roja, a soldier from the 61st Mobile Infantry, at Perimeter Outpost Delta. Another soldier, Beak, deduced that they were carrying walkers, prompting his commanding officer, First Sergeant Hazram Namir, to instruct him to report it to Echo Base. While in space, the Imperial-class Star Destroyer Tyrant was disabled by Echo Base's ion cannon, enabling the first GR-75 medium transport, Quantum Storm, and its fighter escort to safely escape. Nevertheless, it would not be long before the Imperial forces on the ground were reported by Outpost Beta, confirming Beak's suspicions. Outpost Beta subsequently became the first sentry post destroyed by laser blasts from Imperial AT-ST walkers. Blizzard Force then defeated the Rebel scouts at Echo Station 3-T-8, allowing them to continue their advance towards Echo Base.
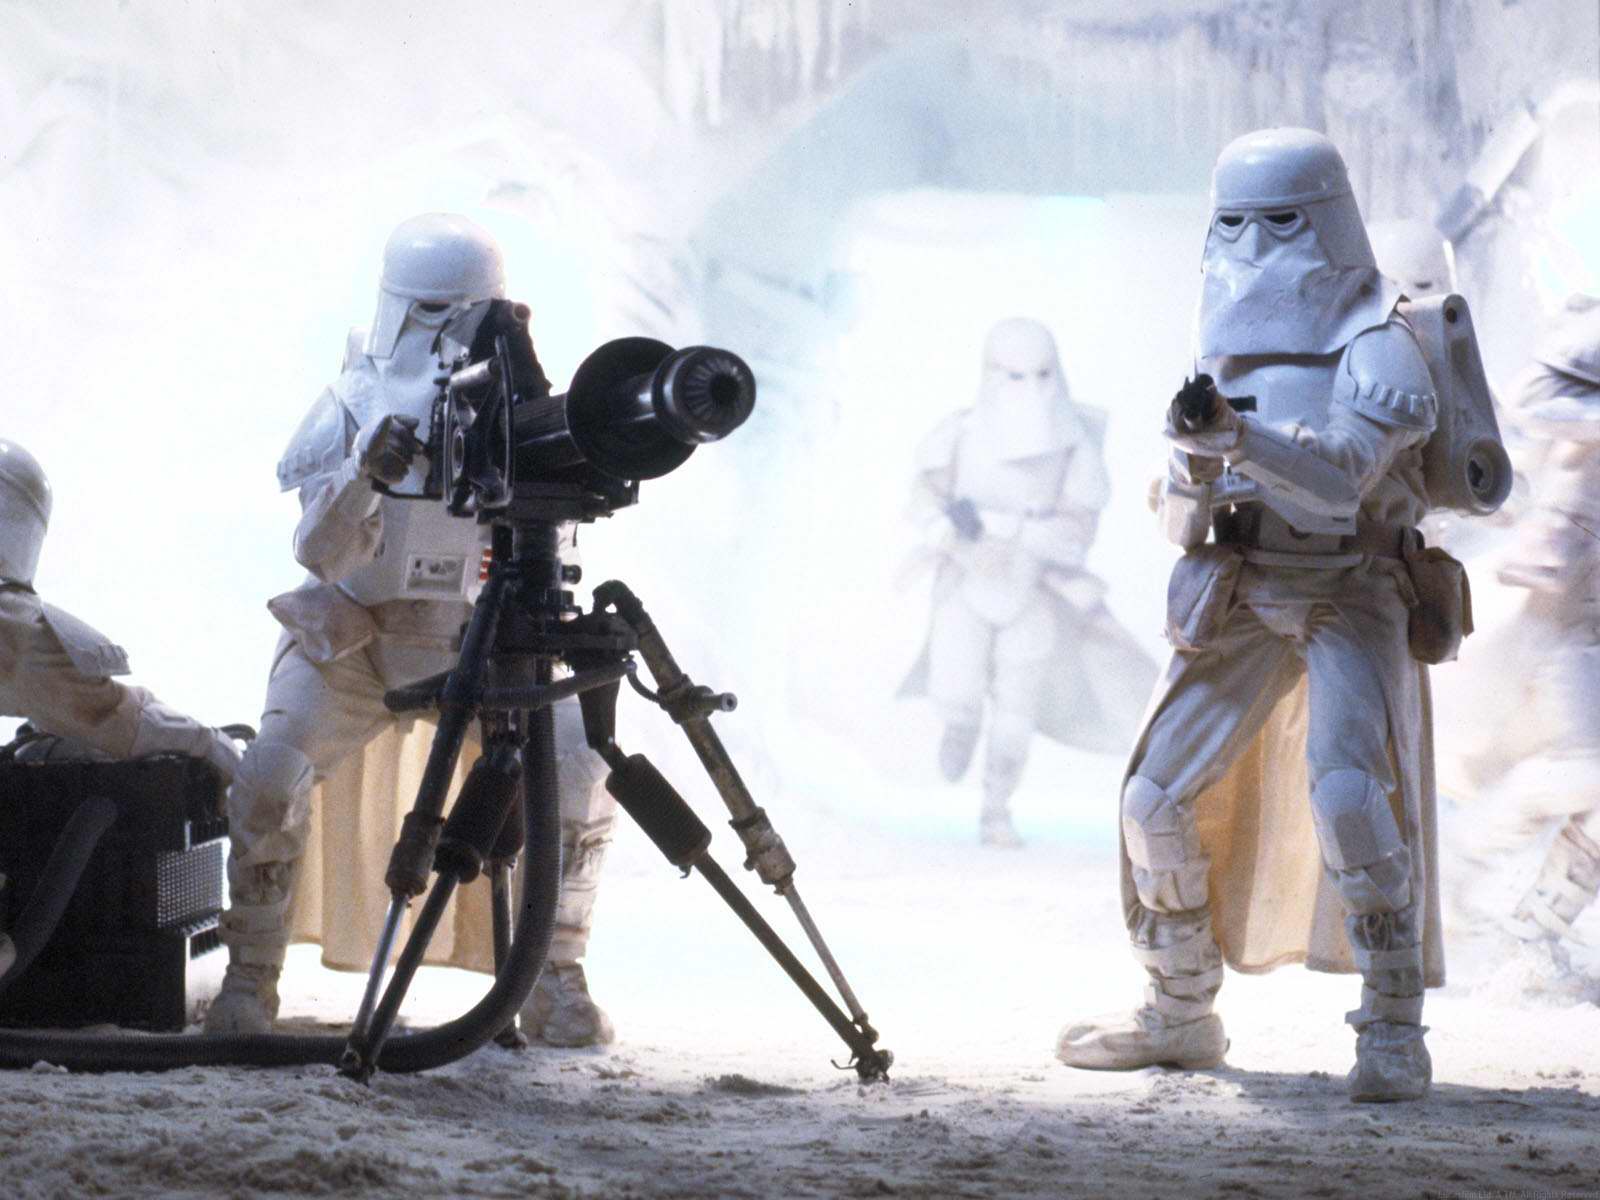
Rebel ground forces attempted to defend against the Imperial walkers in recently constructed trenches equipped with DF.9 turrets and the concentrated fire of 1.4 FD P-Tower laser cannons, but achieved little success due to the near-impenetrable armor of the AT-ATs. In one trench, Imperial fire passed over Private Emon Kref, impacting a rebel turret. When metal shards rained down on Kref and his squad, it highlighted the ineffectiveness of their efforts against the AT-ATs. Alliance sergeant Trey Callum urged his troops to continue fighting and focus their fire on the walkers, though to no avail. A wave of snowtroopers also attacked the squad but was defeated. The proximity mines planted by Outpost Beta personnel failed to damage the advancing AT-ST walkers, leading to the official order for rebel ground troops to protect the shield generator, as its destruction would enable Imperial forces to easily destroy Echo Base.
Outpost Delta soon came under attack by a force of snowtroopers on two floating gunnery platforms and an AT-ST walker due to their flanking position on the western edge of the Imperial advance. Despite heavy resistance and the destruction of a gunnery platform, the walker remained undeterred by blaster fire from ground troops in the trenches and destroyed several rebel artillery emplacements before being brought down by a female rebel soldier. With the outpost no longer a threat, the remaining Imperial ground support retreated to join the main assault on Echo Base, forcing the survivors of the encounter to return to base on an abandoned Imperial wheeled combat transport.
AT-AT assault
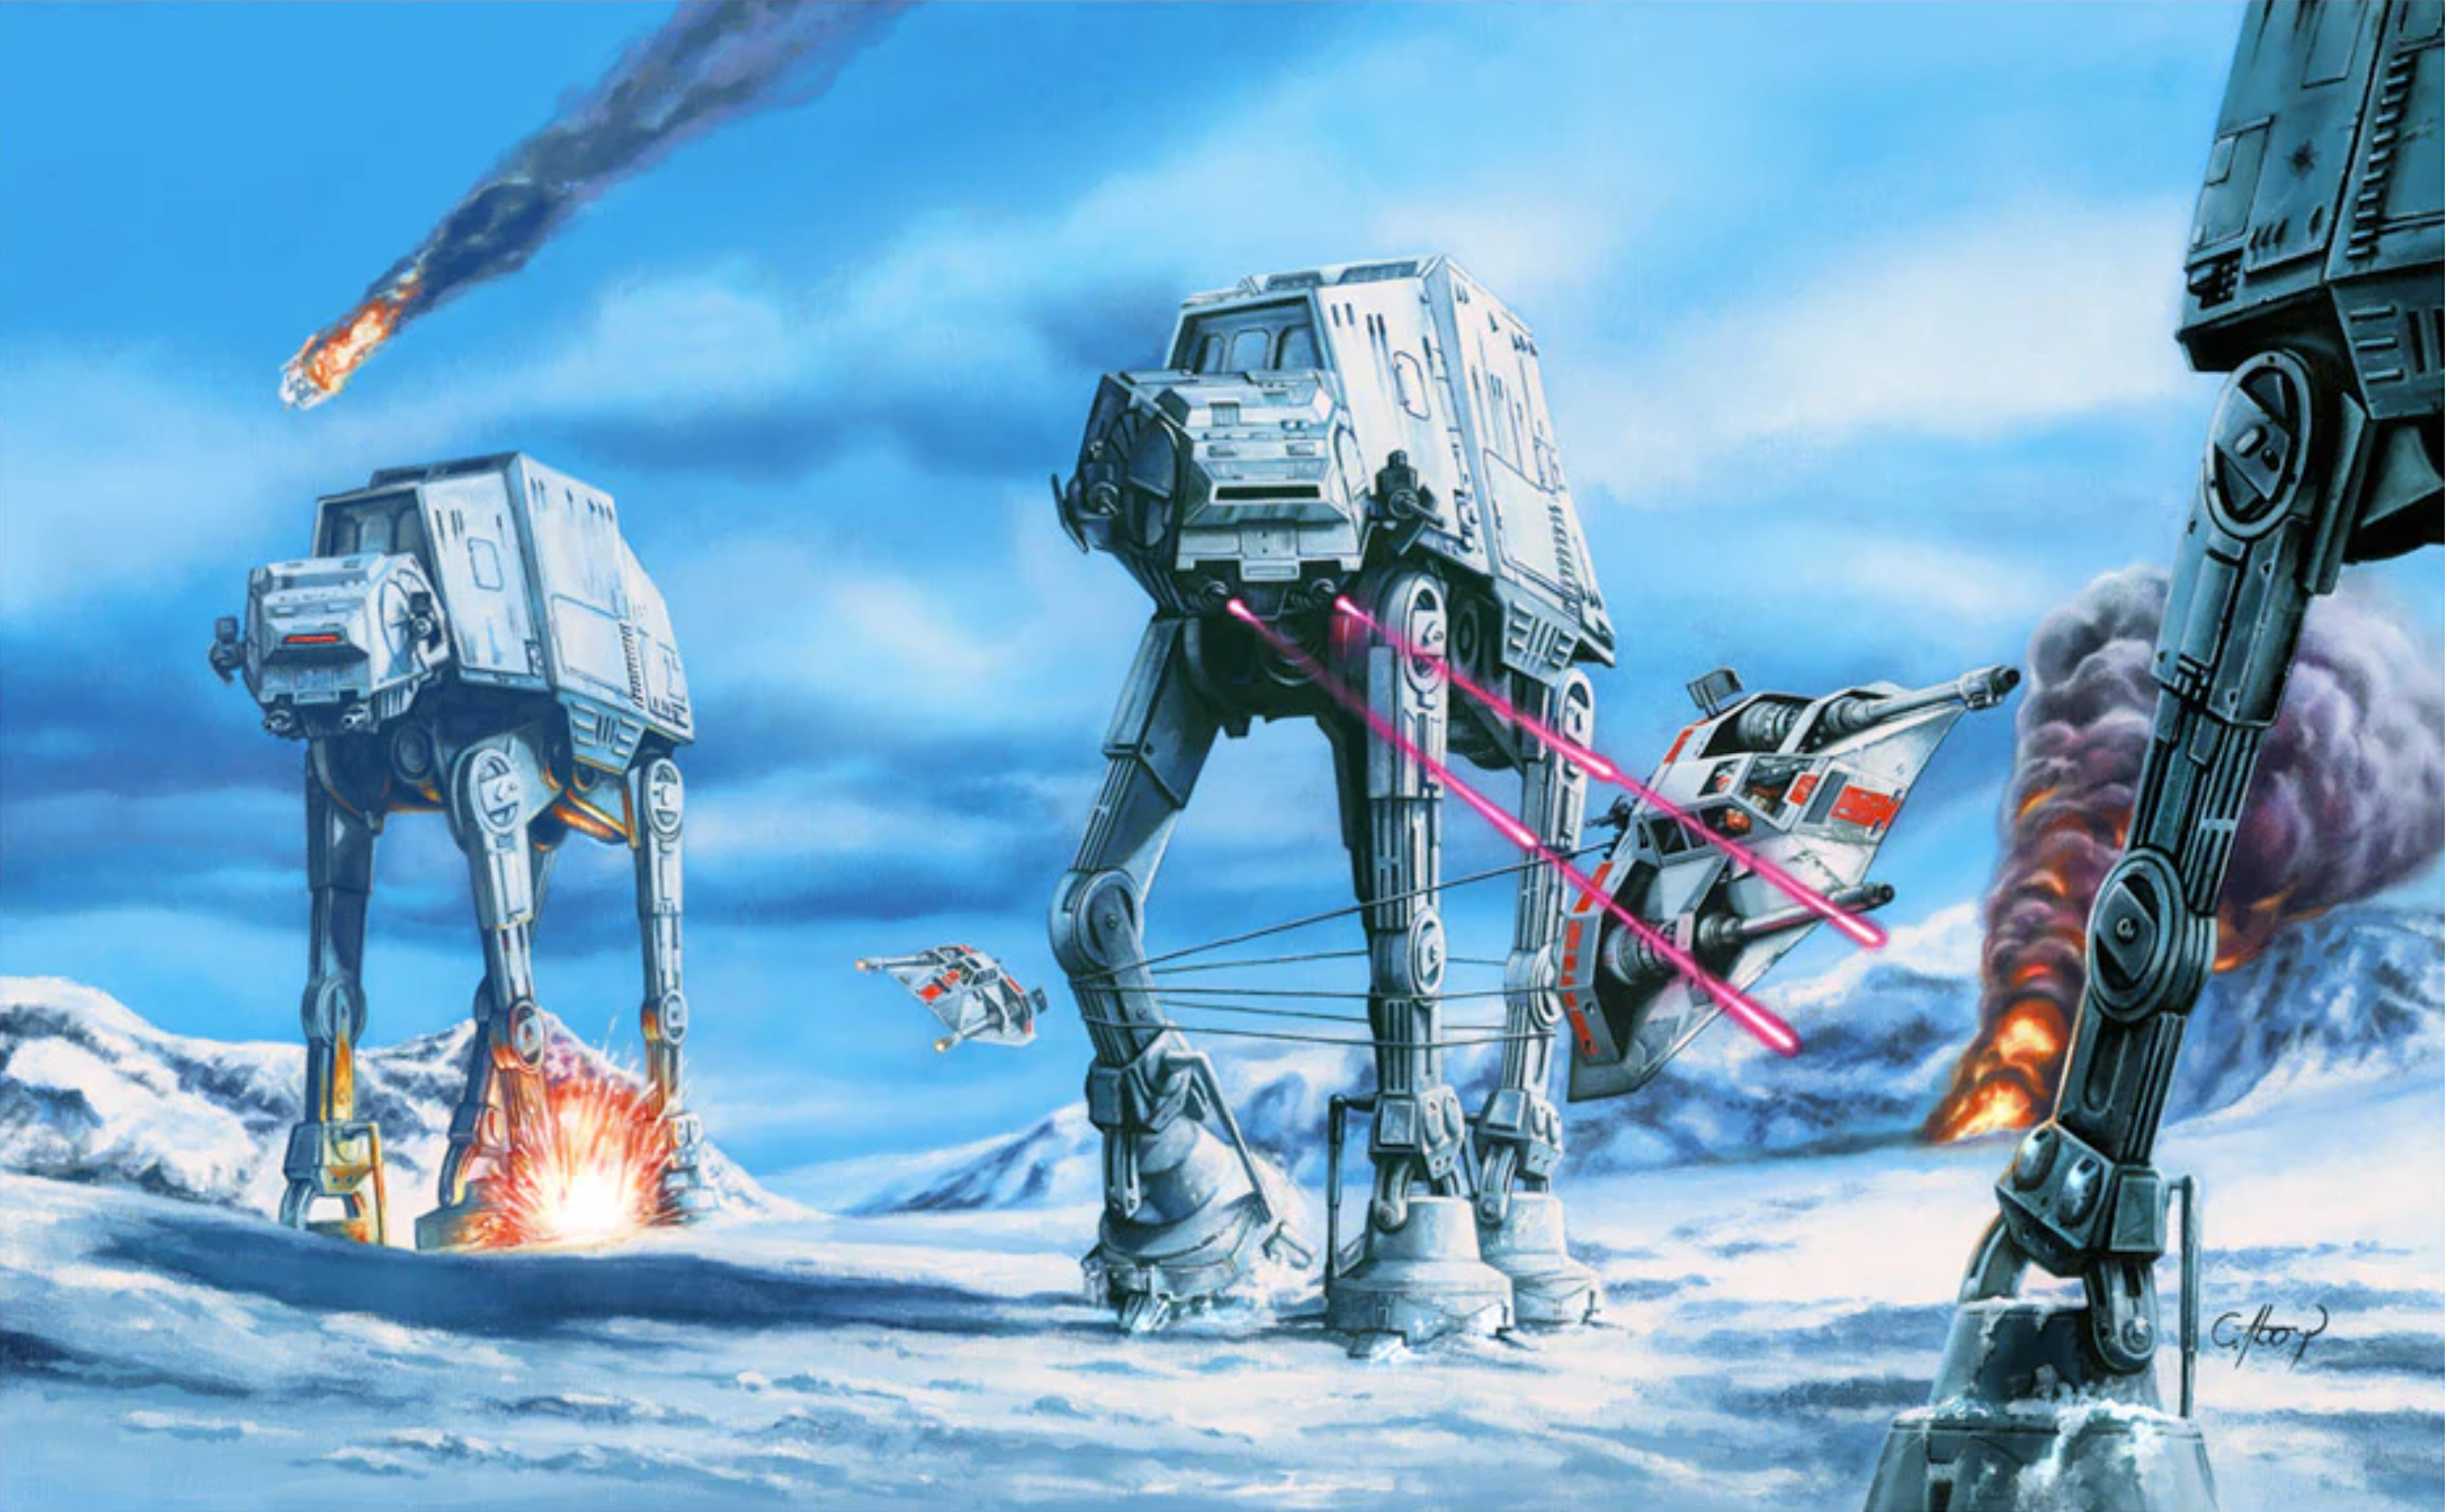
As T-47 airspeeders emerged from Echo Base's hangar to confront the approaching army, it became apparent that the AT-AT's armor was impervious to their blasters, with a single AT-AT shot destroying a rebel airspeeder. Despite this, pilots Thane Kyrell and Yendor managed to severely damage a walker's leg by targeting its joints, ultimately detaching its foot and disabling the behemoth. Meanwhile, Lieutenant Harlize Dana and her worker Chase Wilsorr from the kitchen staff arrived to board the transports. However, Doctor Tristan Melthabi and three medtechs were unable to evacuate due to a cave-in at the medical facility's access corridor. Overhearing Major Bren Derlin and Deck Officer Meeks discussing the doctor's situation, Wilsorr decided to go after Melthabi and the medtechs. The kitchen worker reached the medical facility, assisted the trapped occupants in escaping, and provided them with directions to the GR-75s.
Shortly thereafter, Rogue Squadron, led by Luke Skywalker and Wedge Antilles, utilized T-47 airspeeders to impede the Imperial advance. Initially, the Rogues attempted to employ Attack Pattern Delta against the walkers but found their cannons ineffective. Realizing a change in tactics was needed, Antilles and his gunner Wes Janson followed Skywalker's suggestion and used their T-47's tow cables to topple an AT-AT before destroying it in its weakened state. However, Skywalker's snowspeeder was struck by an AT-AT, resulting in the death of his co-pilot Dak Ralter. Skywalker initially maintained his speeder in the air, but it eventually crashed and was crushed underfoot by a walker. Skywalker managed to attach himself to a nearby AT-AT using his hoist cable, allowing him to use his lightsaber to cut through the walker's armor. The commander then threw a [thermal detonator](/article/thermal_detonator] into the hole he had created, bringing another AT-AT to a halt. The rebels' limited success against the AT-ATs prompted General Veers to grudgingly acknowledge his opponents' intelligence and lament the casualties Blizzard Force was sustaining.
Despite their courageous efforts, the Rebels were unable to repel the Imperials. Simultaneously, Blizzards 6, 9, and 8 targeted retreating remnants of hangar defense trenches. With many of the Rebel defense turrets destroyed, the Rebel troops were forced to retreat back to Echo Base. As the Empire deployed ground troops to force the Rebellion out of their last defensive line, survivors from Outpost Delta breached the Imperial front into friendly territory, only to discover that Rebel command's final order was for a complete evacuation. Confusion arose in the field due to a sudden communications blackout from Echo Base, attributed by some to a walker firing at it, resulting in the demoralized rebel forces hastily preparing for their escape. First Sergeant Namir, Roja, and Beak headed for the command center, which had been struck by AT-AT fire, in search of Captain Evon.
Upon reaching firing range of Echo Base's shield generator, Veers informed Vader that it was safe to land and ordered his troops to disembark from the walkers. Just before firing on the generator, the AT-AT targeted earlier by Luke Skywalker exploded. Although Veers was temporarily distracted, his walker managed to destroy the generator, leaving Echo Base vulnerable to orbital bombardment and allowing Lord Vader's Lambda-class T-4a shuttle to land on Hoth. Accompanied by a team of 501st snowtroopers, Vader exited the shuttle after it landed between two AT-AT walkers. As the troops engaged the enemy, Vader ordered his commander to advance past the defending rebel soldiers and locate an entry to Echo Base's commander center. The destruction of the base's shields created chaos on the ground, as large numbers of rebel troops retreated, aware that they no longer had any chance of victory. Many were shot down before reaching the base.
Rebel forces primarily evacuated Echo Base through the south entrances on the Clabburn Range, from where they proceeded east to the rebel transport evacuation site behind the South Ridge. Private Kref and his comrade, Andry Ked, followed suit, evading pursuing snowtroopers who injured Ked. One rebel soldier involved in the battle lost his leg during the fighting. As the troopers were escaping, Sergeant Maxim rode his tauntaun mount Reebak to subdue an E-web team threatening a GR-75. The sergeant then demanded that they evacuate the tauntaun as well. As the retreat continued, Blizzard 1 approached the position of Kref and Ked. At that moment, a burning rebel snowspeeder flown by Derek Klivian, crippled by AT-AT fire, crashed into Blizzard 1's cockpit, destroying the walker and severely injuring Veers.
Infiltration of Echo Base
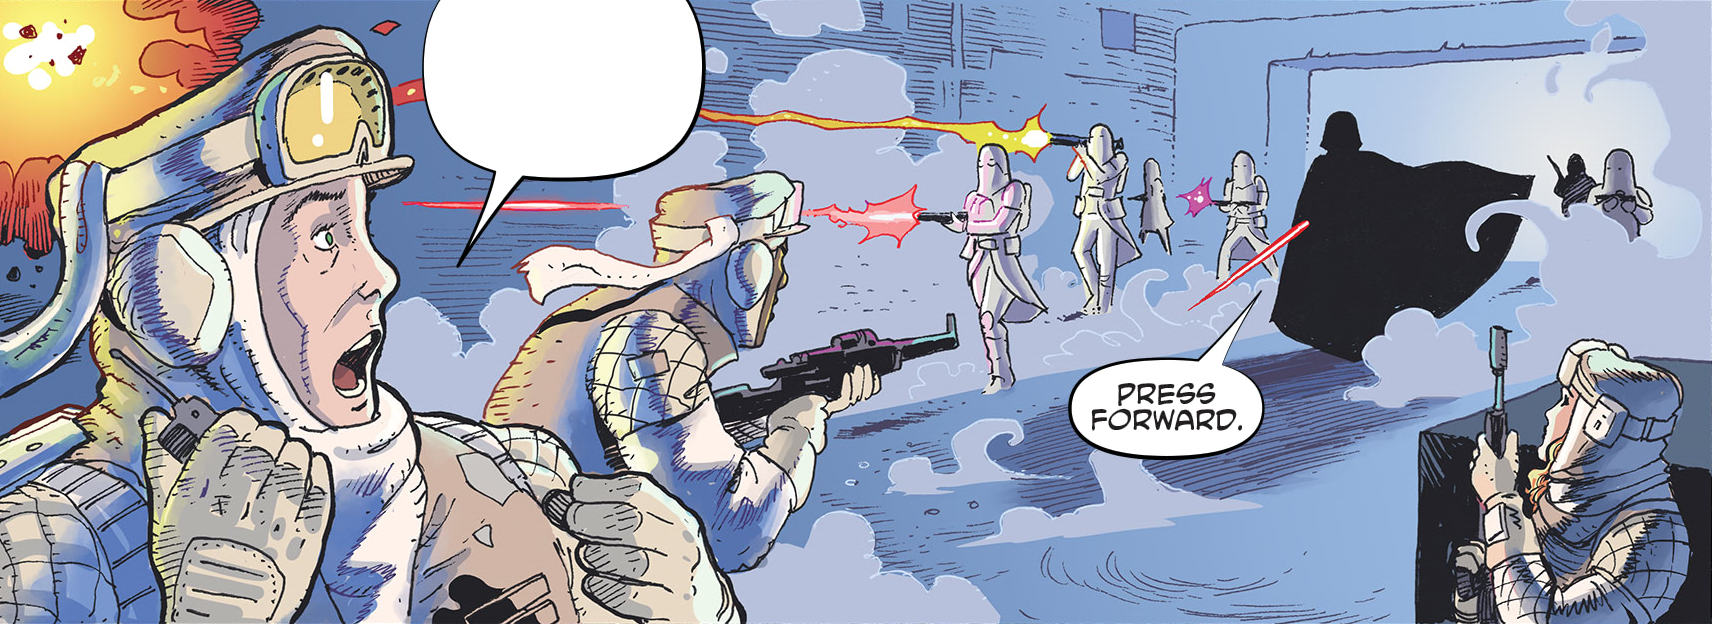
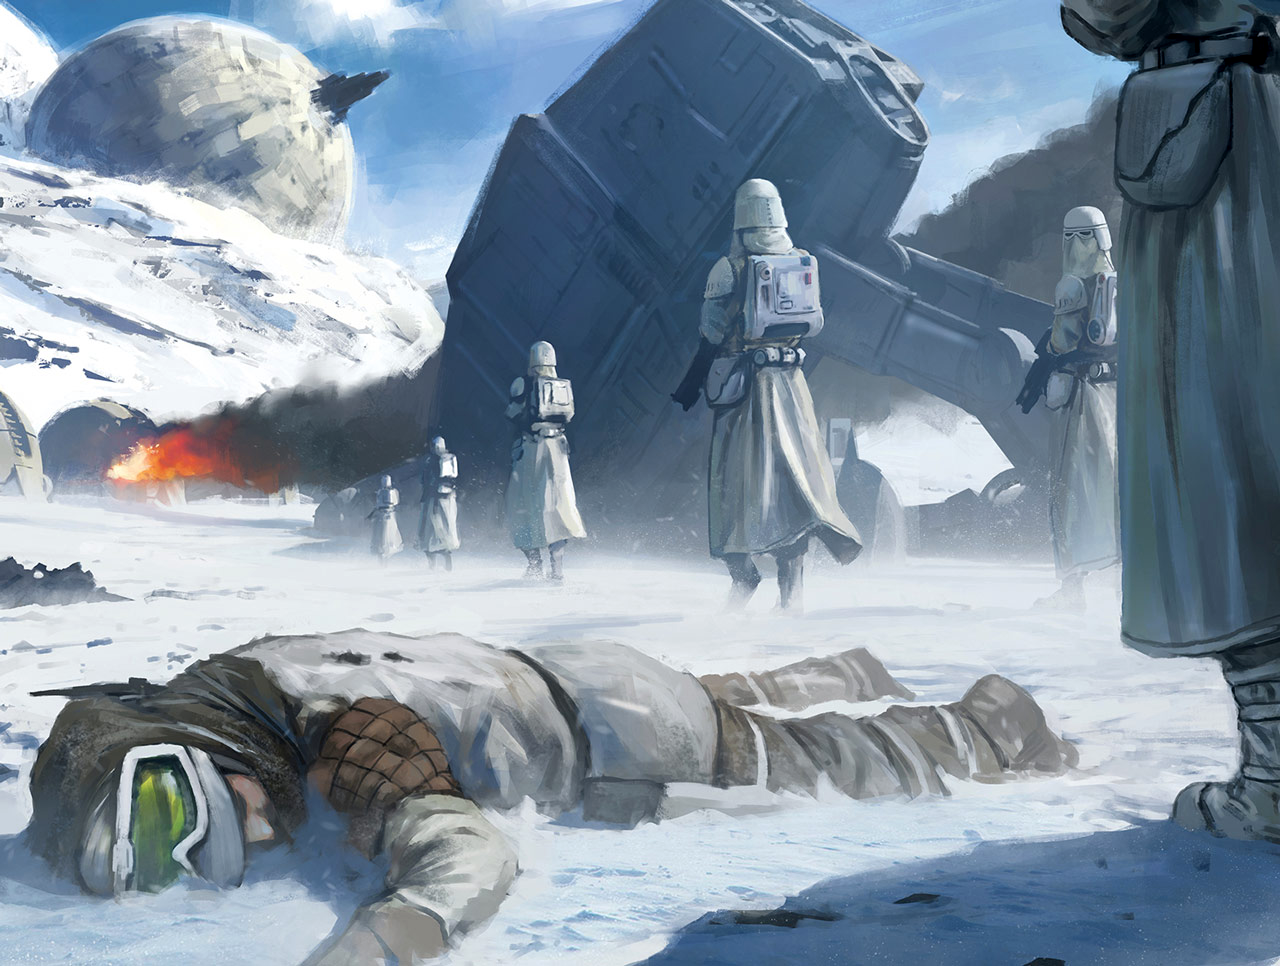
Han Solo, a smuggler working with the Rebellion, reached the command center to assist Organa, who remained in the damaged area with Communications officer Toryn Farr and Commander Chiffonage. At that time, Darth Vader's forces breached Echo Base by creating a hole in the mountain's eastern face, with one gate being forcibly opened by Vader's Force abilities. Witnessed by rebel troopers, including one soldier who issued a warning about the Imperial breach transmitted to the command center, Vader's snowtroopers pressed their attack under the Dark Lord's orders, with one firing a rocket launcher into the rebel lines as others opened fire. Snowtroopers began flooding into Echo Base, signaling the failure of the rebel defenses. Vader himself slew the rebel who warned the base about their entrance before becoming distracted by the Echo Base medical center, where he sensed his son had recently been and was reminded of his own past injuries.
While she initially wanted all troopers in sector twelve dispatched to the southern slope to protect the fighters there, Organa relented at Solo's urging and had Chiffonage send the signal for full evacuation before advising the commander and Farr to reach an evacuation transport. With Chiffonage ordering all troops to disengage, rebel soldiers outside fled from their trenches and the incoming Imperial assault, although Skywalker seized the opportunity to destroy AT-AT Blizzard 4 with a grenade by grappling up its middle. While the fleeing rebels were easy targets for Veers's AT-ATs, with numerous TIE/LN starfighters also entering the planet's atmosphere and making escape more difficult, many survivors managed to escape unharmed in the transports.
With the base's interior in chaos, remaining rebels hastily made their way to their respective starships, while firefights between Imperial and rebel forces erupted in the corridors, echoing throughout the crumbling base. Due to occasional wampa infiltrations into Echo Base, several snowtroopers were killed after entering a room where the vicious native wampas were kept, ignoring a clearly marked warning sign in the process. First Sergeant Namir, Roja, and Beak reached command to find their captain, Micha Evon, unconscious, and Everi Chalis, who had refused to abandon him. Namir scouted the corridors to find a route to the hangar and returned to guide them back to a shuttle. Roja and Beak picked up Evon, and they advanced down the corridors.
Meanwhile, Wilsorr checked more rooms for other stragglers, finding some soldiers, communications officers, and a group of refugees from Habassa II. He led the group of stragglers back to the evacuation transports and then decided to head for the tauntaun pens to rescue his crush, the handler Jordan Smythe, with only three minutes until the final GR-75, the Bright Hope, was scheduled to depart. Wilsorr found Smythe with his tauntaun Sunshine and encouraged the handler to evacuate, with the pair riding on Smythe's tauntaun.
As they advanced toward a hangar, Vader and a sextet of snowtroopers stumbled upon Namir and his fellow first sergeant's unit. Namir, Roja, and Beak initiated gunfire against Vader and his contingent, but the Sith Lord reacted with incredible speed, leaping in front of Beak and eliminating the rebel with his lightsaber. Subsequently, Roja launched a fragmentation grenade at Vader, but the Sith deflected it, causing Namir to lose consciousness. Roja was killed by blaster fire, Evon succumbed to his injuries, and Chalis, assuming the Sith Lord had arrived for her, surrendered, resigned to her impending demise. However, Vader inquired about Skywalker's location, and a snowtrooper informed him of the newly discovered position of the YT-1300 light freighter Millennium Falcon. Disregarding Chalis, whom he threw against the wall, the Sith proceeded toward the Falcon's location, intent on finding his true objective.
Due to a hallway collapse that separated Solo, Organa, and their droids C-3PO and R2-D2 from the Bright Hope, Solo contacted the transport and arranged for them to rendezvous at Solo's Millennium Falcon. As snowtroopers began to occupy the hangar where the Falcon was located, the light freighter experienced a delay in startup due to prior damage. Despite this, the ship's weapons systems were used to fend off the approaching snowtroopers. Just as Vader arrived, the Millennium Falcon successfully escaped the hangar, and subsequently, the Hoth system, carrying Solo and his companions.
Rebel escape
Before the Empire could completely destroy Echo Base, Luke Skywalker managed to return and depart in an X-Wing, escorting the GR-75 medium transport Dutyfree alongside Wedge Antilles. Acting upon the instructions of the force ghost of the deceased Jedi Obi-Wan Kenobi, Luke opted to deviate from the rendezvous point to seek out Jedi Master Yoda. Meanwhile, Solo and his team encountered issues with their engines, preventing them from entering lightspeed, and forcing them to evade the Imperial fleet through alternative means. Having barely survived their encounter with Vader, First Sergeant Namir and Everi Chalis managed to escape aboard a rebel transport by transmitting deceptive codes to a Star Destroyer in orbit, a tactic made possible by Chalis's prior employment with the Empire. Before the Destroyer could verify their authenticity, they jumped into hyperspace, unaware of the significance they would hold in future events. Despite taking fire from Imperial forces, Selgrothe's transport also managed to break through the blockade.
Farr, Kref, and Ked successfully reached the Bright Hope. Other passengers included Doctor Melthabi, Officer Sendak, Deck Officer Meeks, and the rebel Rainn Poras. Wilsorr and Smythe joined the passengers as the transport prepared for takeoff, boarding the GR-75 on Sunshine. The Bright Hope then departed, accompanied by Antilles, Tarrin, and Wes Janson. Out of the 30 GR-75 transports utilized by the Rebels, 17 were destroyed. Rebel pilot Adon Fox successfully escaped Hoth, escorting a transport in an X-wing. Tragically, the transport carrying his wife was destroyed during its attempt to flee Hoth. Biologist Kell Tolkani, captivated by the mysteries of Hoth, chose to remain on the planet. In a message to his family, he expressed confidence that neither the Empire nor the wampas would find him and requested that someone be sent to retrieve him after the war concluded. Although the majority of the remaining Rebel troops on Hoth managed to escape, the Alliance Fleet and Alliance High Command were dispersed, leaving many of the Rebel Alliance's leaders isolated from their forces and without directives.
Aftermath
Immediate aftermath
Soon after their departure from Hoth, Han Solo and his crew remained aboard the Millennium, desperately attempting to evade Vader's forces. Solo skillfully utilized the ship's exceptional maneuverability and his own piloting expertise to evade an Imperial Star Destroyer pursuing them, as well as two more emerging from hyperspace. Solo's piloting of the Falcon nearly resulted in a collision between the two approaching Star Destroyers and the one in pursuit. The Falcon then attempted to jump into lightspeed, but an equipment malfunction prevented it. Forced to take extreme measures to avoid capture, Solo made the decision to pilot the Falcon into a nearby asteroid field in an attempt to shake off the Imperial pursuers.
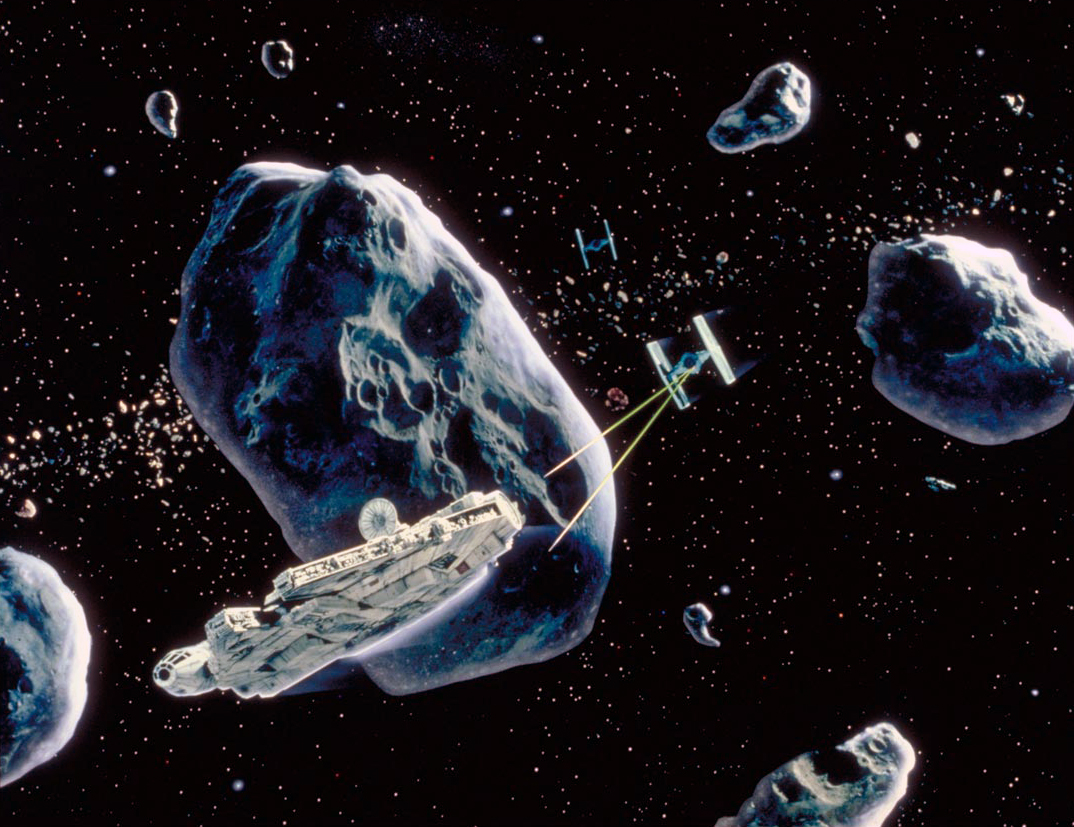
However, his repairs were interrupted when he unknowingly landed inside a space slug. After narrowly escaping the closing jaws of the creature, the Falcon was discovered by the Star Destroyer Avenger. They attempted to jump to lightspeed, but the hyperdrive was still not fully repaired. Solo then instructed Chewbacca to alter course and fly directly at the Avenger's bridge in what appeared to be a suicidal attack run. The ship vanished from sight and became undetectable to the Avenger. In reality, Solo had attached the Falcon to a blind spot on the conning tower of the Star Destroyer. Following standard Imperial protocol, the Star Destroyers of Death Squadron ejected all scrap and garbage before entering hyperspace. Solo then signaled Chewbacca to release the ship's landing claws, allowing the Falcon to "float away with the rest of the garbage." The bounty hunter Boba Fett, however, recognized the deception and remained behind in the Slave I, tracking the Falcon as it departed the system.
The battle represented a significant setback for the Rebel Alliance, scattering its surviving forces and diminishing morale for the cause. Commander Hill Purpura, in particular, lost all faith in the cause. Following the battle, the Rebel fleet dispersed, with rally points kept highly classified to prevent the Empire from locating them. In the weeks following the Battle of Hoth, Alliance High Command remained scattered, and various rebel elements were fragmented across the Outer Rim, while Imperial battle groups from the Core Worlds were deployed to pursue the scattered rebel fleet. Furthermore, Commander Ellian Zahra managed to intercept Rebel communications between fleet groups attempting to contact each other, isolating the Rebels and destroying the Eighth Division. Despite the communications breakdown, the Rebels persisted in their efforts to combat the Empire, despite this devastating defeat.
The battle in hindsight
Imperial strategists analyzed the rebel's ability to escape with minimal casualties while inflicting significant damage, while the Rebels were forced to abandon substantial amounts of equipment and snowspeeders during their hasty retreat from Echo Base. While rebel weaponry was comparable to the Empire's, inadequate body armor for foot soldiers plagued the rebel forces, despite troopers at Echo Base possessing superior equipment compared to many rebel forces during the Mid Rim Retreat. Hazram Namir and Everi Chalis reunited with the rest of the Sixty-First following the death of their Captain, Micha Evon. Chalis observed the dwindling Imperial forces on key Imperial worlds and devised a plan to target the Kuat Drive Yards. This plan, known as Operation Ringbreaker, led to attacks on numerous Imperial worlds before nearly resulting in obliteration on the manufacturing world of Sullust. The planned mission was ultimately never completed.
Although Solo was eventually captured by Boba Fett, Skywalker, Organa, C-3PO, R2-D2, and Chewbacca eventually rejoined the Rebel fleet, accompanied by a new ally, Lando Calrissian. Despite suffering significant losses at Hoth, the courage displayed by the rebels during the battle served as an effective recruitment tool for the cause. It also prompted them to intensify their vigilance throughout the war. Chewbacca, Calrissian, Organa, and Skywalker eventually returned to Echo Base to rescue personnel who had been left behind after the battle. They encountered Imperial resistance but successfully rescued the rebels. Several months after the Battle of Hoth, following the conclusion of Zahra's pursuit of the Rebel fleet in the Battle of Panisia, the Alliance made its public comeback through the Unity Day attack. The rebellion ultimately established a new base on the even more remote world of 5251977, while the Galactic Civil War continued to rage across the galaxy. The Defense of Hoth medal was awarded to any rebel who participated in the battle on Hoth.
ISB director, Sliro Barsha, criticized the Imperial Army's "mindless show of force" that enabled the rebel fleet to escape. Consequently, he invested in Zerek Besh, an ISB division disguised as a syndicate, believing that infiltrating the galactic underworld would be a more effective method of rooting out the rebels. Later historian Beaumont Kin questioned whether the Battle of Hoth was truly a victory for the Empire, highlighting the toll it took on Imperial morale; instead of achieving a complete victory over the rebels, the prolonged conflict was only prolonged by the Alliance's successful escape. With Vader's focus primarily on locating Skywalker rather than the rest of the Alliance, a growing apprehension also emerged within the Imperial Military that their Supreme Commander, and potentially the Emperor as well, was engaged in a different war than the one their followers were focused on.
Approximately one year after Hoth, the Alliance not only destroyed the DS-2 Death Star II Mobile Battle Station and the Imperial head of state during the highly successful Battle of Endor, but also eliminated his right-hand man, Lord Vader, ultimately paving the way for the formation of the New Republic in its ongoing effort to restore freedom to the galaxy. Future Civil War historians would argue that without the painful defeat at Hoth, the Alliance might never have risked everything at Endor a year later, where they dealt a crippling blow to the Empire from which it never recovered.
In the year following the battle, the planet remained a valuable source of wreckage, which was sought after by the Uprising during the Iron Blockade. As a result, a second battle of Hoth took place after the Battle of Endor to determine whether the Uprising would gain control of these resources. The Aftermath arena in the Grand Arena of Vespaara was inspired by the battlefields of Hoth and Endor, with the Hoth-half depicting the aftermath of its iconic battle using authentic, salvaged Imperial equipment. The Hoth Frontline served as another playing field utilized by the Hunters of the Outer Rim and modeled after the Battle of Hoth.
Behind the scenes
Empire's famous battle
The Battle of Hoth made its debut in the 1980 film Star Wars: Episode V The Empire Strikes Back and has since become an enduring symbol of the movie. To commemorate the film's thirtieth anniversary, artist Mark Daniels created the poster "Battle of Hoth," presented as an in-universe remembrance poster produced by the Imperial Veterans Association.
Galaxy of Adventures
The battle was also portrayed in the Star Wars Galaxy of Adventures short Darth Vader vs. Hoth Rebels - Crushing the Rebellion, although these shorts are not considered literal canon. In the short, Darth Vader, having arrived at Echo Base after the destruction of the shield generators in search of his son, Luke Skywalker, personally oversaw the rebels' defeat. Leading the Imperial ground assault forces to the gates of Echo Base, he used the Force to tear them down.
Several rebel troopers, having created a defensive barrier with crates, opened fire on the Imperials. Vader effortlessly deflected their blasts with his lightsaber and cut down several rebels. Snowtroopers then deployed an E-Web heavy repeating blaster cannon and decimated more defenders. Other snowtroopers attacked and killed rebel troopers with grenades. As the stockade burned, Vader surveyed the destruction while snowtroopers spread out across the base.
Battlefront II
The Battle of Hoth is featured in the 2017 video game, Star Wars Battlefront II, as one of the Galactic Assault battle scenarios. In this scenario, Imperial Colonel Brenna and her brigade engage in combat against Rebel Major Shin and his forces. After General Veers destroys the Rebels' power generator, Brenna begins landing her troops and launching an assault against Echo Base's east and west hangars to prevent the Rebel transports from taking off. In Phase One, the Imperial players are required to protect two AT-ATs as they advance on the base's hangars. Phase Two requires the Imperials to seize command posts in those hangars. Phase Three requires the Imperials to plant bombs on the fueling station, pipes, and depot, and defend them while the detonation timer counts down. Throughout the game, the Rebel players are tasked with defending the objectives and thwarting the Imperials.