Galactic Civil War
The Galactic Civil War, alternatively known as the revolution or the Rebellion, represented a significant galactic conflict. It was a power struggle where the Alliance to Restore the Republic rebelled against the then-dominant Galactic Empire. Their objective was to reinstate democratic governance across the galaxy. This conflict spanned from 4 BBY to 5 ABY. The seeds of this rebellion were sown during the Clone Wars, a period when the Galactic Republic and the Jedi Order equipped rebel cells to oppose the Confederacy of Independent Systems. Following Supreme Chancellor Palpatine's transformation of the Republic into the Empire—Palpatine being secretly the Dark Lord of the Sith, Darth Sidious—and after the destruction of the Jedi Order, numerous rebel cells began fighting the Empire. Eventually, many of these cells unified to form the Alliance to Restore the Republic.
Hostilities had commenced by 4 BBY, with the official start marked by the Rebel Alliance's formal establishment in 2 BBY, accompanied by Mon Mothma's Declaration of the Rebel Alliance. In 1 BBY, the Alliance achieved a pivotal triumph against the Empire by stealing the plans for the Death Star, the Empire's planet-destroying battle station, during the Battle of Scarif. These plans were delivered to the Rebel Alliance by Princess Leia Organa, aided by companions such as Luke Skywalker, Han Solo, and Chewbacca in 0 BBY. The analysis of these plans enabled the Rebels to launch the Battle of Yavin, where Skywalker, with Solo's assistance, obliterated the Death Star. Subsequent Alliance offensives, including an assault on the Empire's primary weapons factory, significantly weakened the Empire. Consequently, the Empire, led by the Emperor's right-hand, the Sith Lord Darth Vader in his new capacity as supreme commander of the Imperial fleet, relentlessly pursued the Alliance across the galaxy. Vader's forces located the Alliance on the planet Hoth. The ensuing Battle of Hoth compelled the Alliance to retreat, scattering the Rebel fleet. The fleet eventually regrouped during Operation Starlight and demonstrated its resilience through the Unity Day attack.
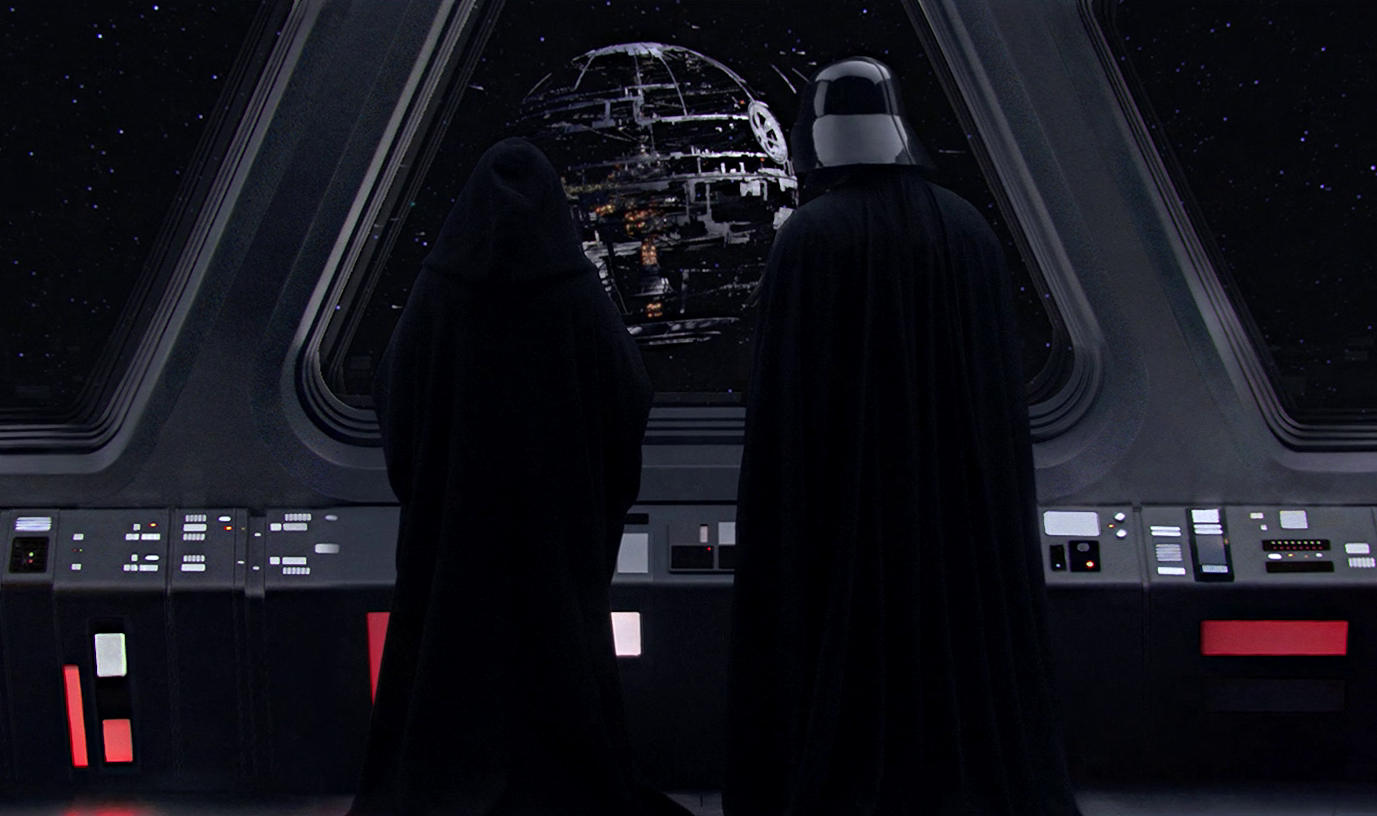
One year following the setback on Hoth, in 4 ABY, the Emperor intentionally revealed the existence of a second Death Star to the Alliance, setting a trap to annihilate them. The Alliance, believing they were launching a surprise attack, mobilized their entire fleet to destroy the Death Star. However, a substantial Imperial fleet was lying in wait, leading to the Battle of Endor. During this battle, Skywalker, having discovered that Vader was his father, confronted the Dark Lord in a final lightsaber duel aboard the Death Star. The Emperor attempted to kill the young Jedi, but Vader, moved by compassion for his son, cast Sidious down a deep shaft to his death, thus fulfilling his destiny as the Chosen One and eliminating the Sith. Darth Vader, once again Anakin Skywalker, succumbed to injuries sustained during the battle, ending the Sith's dominion over the galaxy. Simultaneously, the Alliance destroyed the second Death Star, eradicating the Sith and causing the Empire to fragment.
In the power vacuum that immediately followed the Emperor's demise, numerous Moffs and other powerful figures vied for control. Some began to secede from the Empire, becoming warlords. To prevent his people from learning of the Emperor's death, Governor Ubrik Adelhard imposed a lockdown on the Anoat sector behind the Iron Blockade, triggering an uprising within the sector. As the Empire's control over the galaxy and its inhabitants weakened, the Alliance re-established the Old Republic as the New Republic and continued to liberate the galaxy from Imperial rule. A year later, the Empire fought a final battle over the desert planet of Jakku, led by Counselor Gallius Rax, only to be defeated. Facing significant internal turmoil, the nominal head of the Empire, Grand Vizier Mas Amedda, surrendered to the Republic. On Chandrila, Amedda signed the Galactic Concordance with the Republic, formally concluding the conflict.
Despite the end of the civil war, Imperial remnants under the control of various warlords continued to exist. Concurrently, select Imperial officers, nobles, technocrats, warlords, and other loyalists discreetly regrouped in the Unknown Regions, where they established the isolationist First Order as part of a secret Contingency planned by the late Emperor Palpatine.
Prelude
Historical background
The Clone Wars
The Galactic Republic emerged victorious from the Clone Wars, a multi-year, galaxy-spanning conflict against the Confederacy of Independent Systems. Unbeknownst to the Republic's citizens, their leader, Supreme Chancellor Sheev Palpatine, was secretly the Dark Lord of the Sith, who had masterminded the war to advance his own agenda and execute the Revenge of the Sith.
The war pitted the Republic's loyalist factions against a Separatist movement headed by former Jedi Master Dooku. The Jedi Order, despite their role as peacekeepers, agreed to lead the newly formed Grand Army of the Republic, deploying its clone troopers across various battlefronts in the galaxy. The Jedi's involvement in the war led to a decline in their numbers, due to battlefield losses and defections from individuals such as Barriss Offee, who rebelled against the Order for abandoning its principles. The Jedi also experienced a decrease in support from the Republic's political elite, the Grand Army's growing military leadership, and a galactic population from which they had become increasingly detached. Protests against the Jedi and the war arose, and criminal organizations seized territory as the Jedi's peacekeeping duties were neglected in favor of the war.
In addition to the Jedi's decline, Supreme Chancellor Palpatine secured his rise to power as the Senate continually expanded his authority, suspending term limits and granting him greater control over the military and the Republic. By the war's end, his powers were nearly limitless, and his relationship with the Jedi Council had deteriorated to the point where they considered removing him from power if he refused to relinquish his emergency powers to the Senate. When Jedi Knight Anakin Skywalker presented proof that Palpatine was the hidden Dark Lord of the Sith, they attempted to arrest him. However, their attempt failed when Skywalker betrayed them and pledged allegiance to Darth Sidious as his new apprentice, Darth Vader.
Establishing the Empire

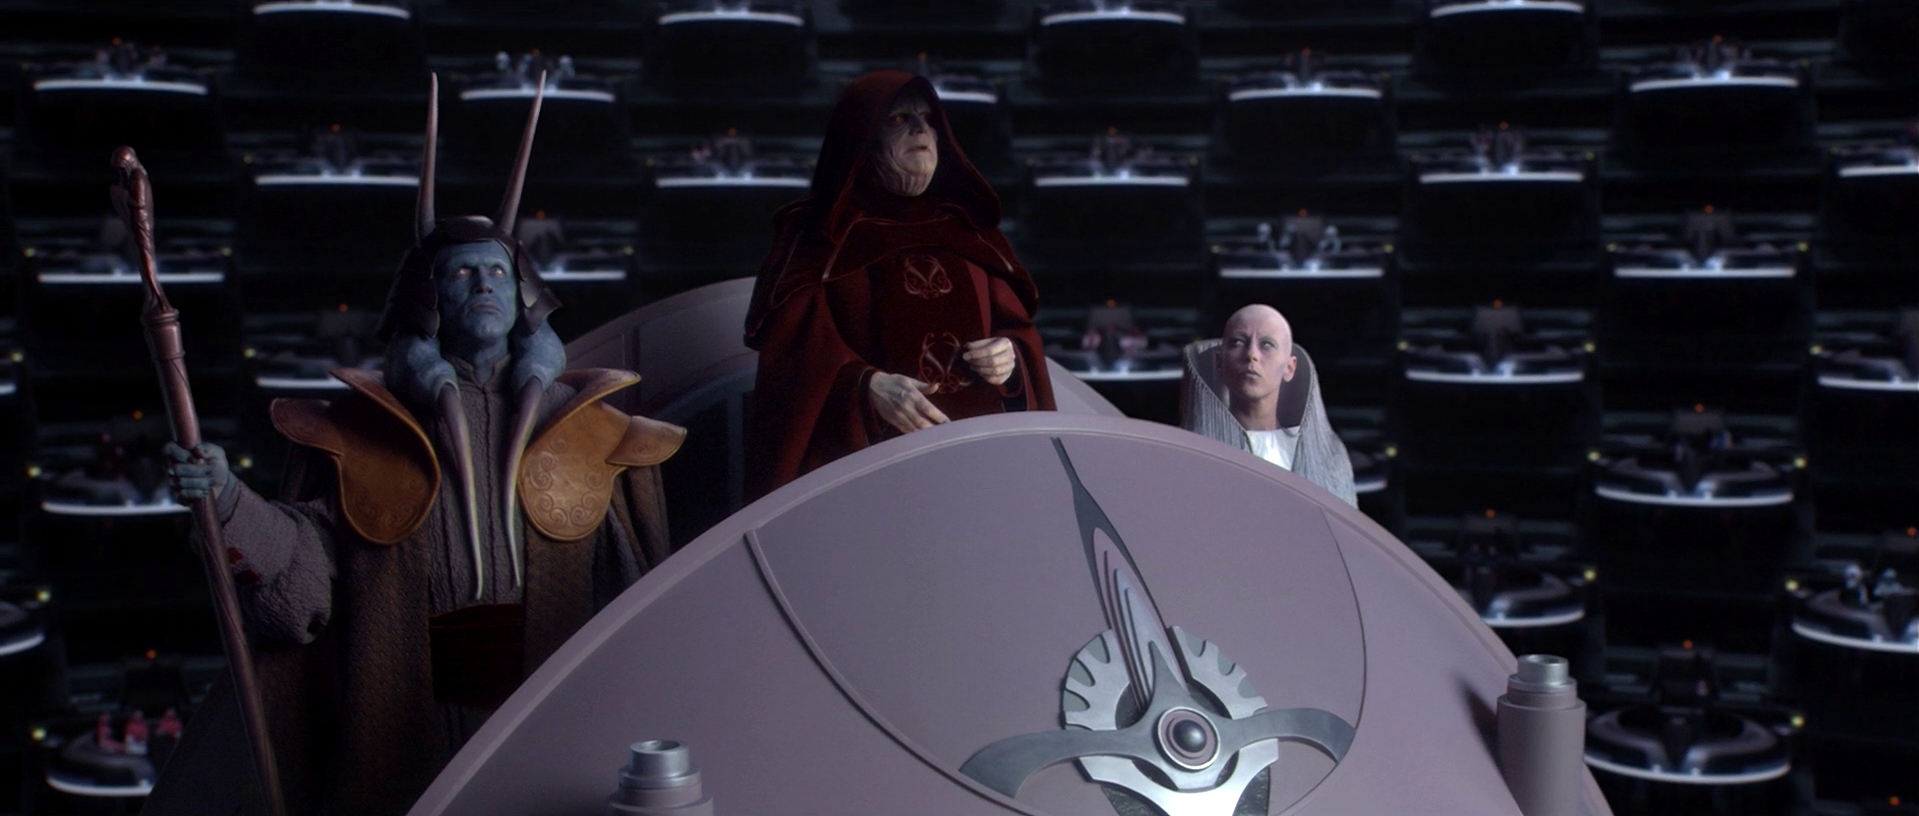
Sidious initiated the culmination of the Sith's grand plan to eliminate the Jedi and the Republic, ordering the clone troopers to execute Order 66, which mandated the execution of their Jedi commanders, while Vader led an attack on their Temple on Coruscant. Although many clones had developed respect and affection for their Jedi officers, each trooper had a behavioral modification biochip implanted, compelling them to obey the order. With his Jedi enemies eliminated, the Republic and its military under his control, and any opposition weakened by years of war, Sidious declared himself Emperor and announced the Republic's reorganization into the Galactic Empire, a move accepted by some Senators who hoped it would ensure security and stability after the Clone Wars.
The Empire promptly assessed its military capabilities, which it would use to control the galaxy. Admiral and Governor Wilhuff Tarkin was dispatched to the clone homeworld of Kamino, where he informed Prime Minister Lama Su that the Imperial regime was questioning the role of clones. Intrigued by the potential of Clone Force 99, an elite team of enhanced clones known as "the Bad Batch," Tarkin deployed them on a mission to Onderon, claiming they would eliminate a force of Separatist insurgents. However, Clone Sergeant Hunter ordered his squad to halt the mission after discovering that the insurgents included children, indicating that their targets were refugees. Taken prisoner by the rebels, their leader, former-Republic fighter Saw Gerrera, warned the squad that small rebel groups were the only thing preventing Palpatine from controlling the galaxy, predicting a civil war. Similarly, former Republic Intelligence ranger Matese later told smuggler Has Obitt that galactic conflict was merely "on pause," with certain groups seeking former Separatist equipment for use in a future war.
The remnants of the Old Republic
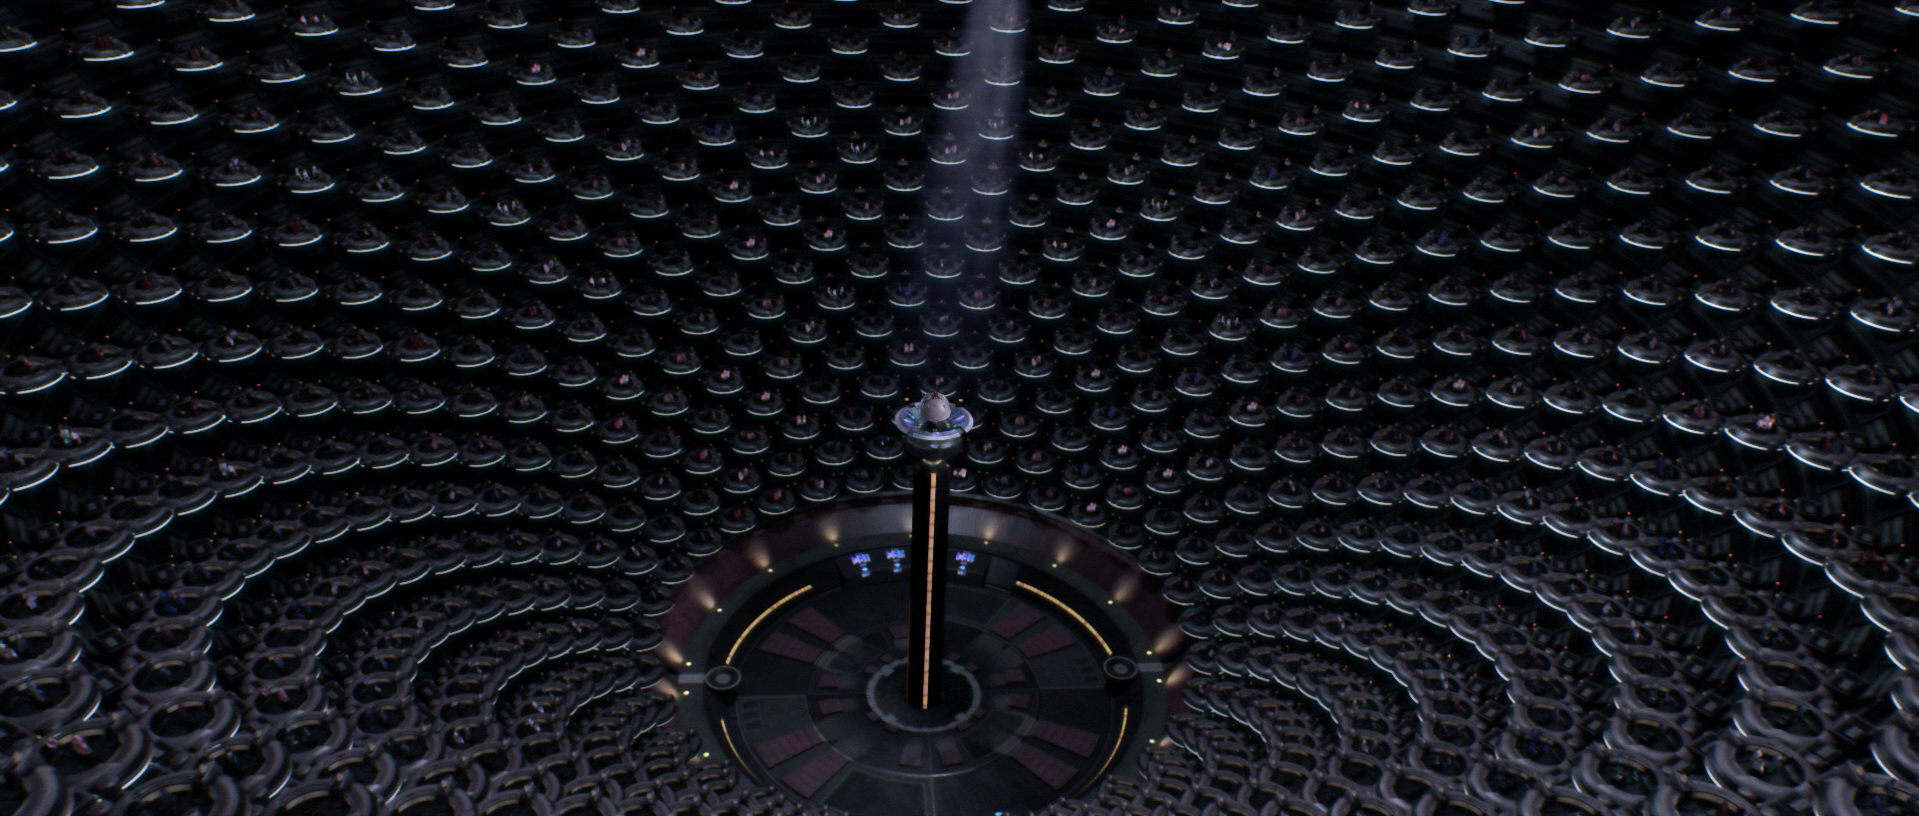
Although Darth Sidious intended to use his Empire to seize unlimited power, he maintained the appearance that the new regime was simply a continuation of the Republic. This was a tactic to prevent his enemies from gaining enough strength to openly oppose him. He transformed the former Galactic Senate of the Republic into the new Imperial Senate. While this new body had less power than its predecessor, it retained the ability to pass laws. Most Senators avoided directly criticizing the Emperor as the Empire grew stronger, but the Senate soon divided into supporters of the New Order and those who still desired a return to democracy. These Senators worked to curb the Empire's excesses and became the only check on the Emperor's power.
Among the Emperor's silent opposition were former members of the Loyalist Committee, such as Bail Organa of Alderaan and Mon Mothma of Chandrila, who hoped to effect change from within, but without success. Nevertheless, they gained enough influence in the Senate to affect the Empire's decisions, as the new regime's leaders constantly feared an uprising. Their achievements included limiting the influence of the new Imperial Military by outlawing the forced conscription of [stormtroopers](/article/stormtrooper], regular beings brought into the Empire's service after the clone troopers were phased out, and preventing beings from being sold into slavery for failing to honor debt commitments.
Following the brutal suppression of the planet Lasan and the near-genocide of its people, they banned the use of T-7 ion disruptor rifles after they were used on the Lasat. They also attempted to alleviate the suffering of populations caught in the Empire's expansion. When the planet Wobani was ensnared in the Commodities Enhancement Program, its economy collapsed due to its inability to meet the Empire's quotas, leading to a severe humanitarian crisis. Senators Organa and Mothma, along with their allies, negotiated with the Empire for weeks to ensure the relocation of Wobani's citizens. However, these efforts failed due to the intervention of Organa's adopted daughter, Princess Leia Organa, who led an unauthorized mercy mission to Wobani, rescuing hundreds of citizens but angering the Empire enough to end negotiations with the Senate.
In addition to their official roles in the Imperial Senate, Organa, Mothma, and their allies began covert operations to eventually mount a significant opposition to the Empire. Initially, their goal was not to organize a rebellion or armed resistance; instead, they sought to identify and recruit groups and individuals who opposed the New Order and unite them towards restoring the Republic and ending the Empire's tyranny.
However, as the movement grew and the atrocities worsened, the idea of armed resistance as the only way to save the galaxy gained traction. Using covers and concealing their activities, they began to channel funds towards forming a united military under a banner of rebellion. Previously isolated insurgent groups, such as Saw Gerrera's Partisans and Enfys Nest's Cloud-Riders, were united and given common objectives while remaining discreet. Other cells were kept completely hidden, establishing bases on remote worlds like Crait and shipyards to refit civilian vessels for military use. A major shipyard was secretly established in the Paucris system. The Empire's High Command was aware of senatorial efforts to obstruct its plans and protect rebel sympathizers. However, while they suspected rebellion, they lacked proof, and the Senators retained enough power to be protected in the years following the Proclamation of the New Order.
The lost Jedi

Order 66 and Emperor Palpatine's declaration of the Jedi as traitors led to the destruction of the Jedi Order, initiating a galaxy-wide purge. Barely a few hundred of the once ten-thousand strong Order survived. Several more were lured into a trap set by Lord Vader, who sent a message to all surviving Jedi to return to the Jedi Temple on Coruscant. However, Jedi Masters Yoda and Obi-Wan Kenobi, who had both survived the clones' attempts to kill them, infiltrated the Temple and altered the code to save as many Jedi as possible.
Few in number and scattered across the galaxy, the surviving Jedi took different paths. Some, like Yoda and Kenobi, went into hiding, waiting for the right moment to emerge and defeat the Sith. Others, like former Padawan Caleb Dume, adopted new identities and abandoned their Jedi ways to avoid detection, moving on whenever their cover was at risk. Others focused on different concerns: former Jedi Librarian Jocasta Nu created an underground school with a new Jedi archive to train future Jedi students and rebuild the Order. Her efforts ended with her death at Darth Vader's hands after she infiltrated the former Jedi Temple to retrieve a list of Force-sensitive children identified by the Jedi for recruitment.
Other Jedi made resisting the newly formed Empire their mission from the start. A former Padawan named Ferren Barr used the Force to compel several opponents of the Empire to join him in turning the galaxy against the Emperor. Inspired by visions of rebellion led by the aquatic Mon Calamari people, he advised Lee-Char, King of Mon Cala, to resist the Empire. However, Barr's manipulations led to the Empire's invasion of Mon Cala, the first Imperial show of force against a rebellious world. Like Jocasta Nu, ex-Jedi Knight Cere Junda and ex-Padawan Cal Kestis worked to rebuild the Jedi Order. They searched for a holocron containing a list of Force-sensitive children hidden by Jedi Master Eno Cordova in Bogano. Although they obtained the holocron after conflicts with the Empire and a confrontation with Vader, they decided to destroy it to protect the children from the Empire.
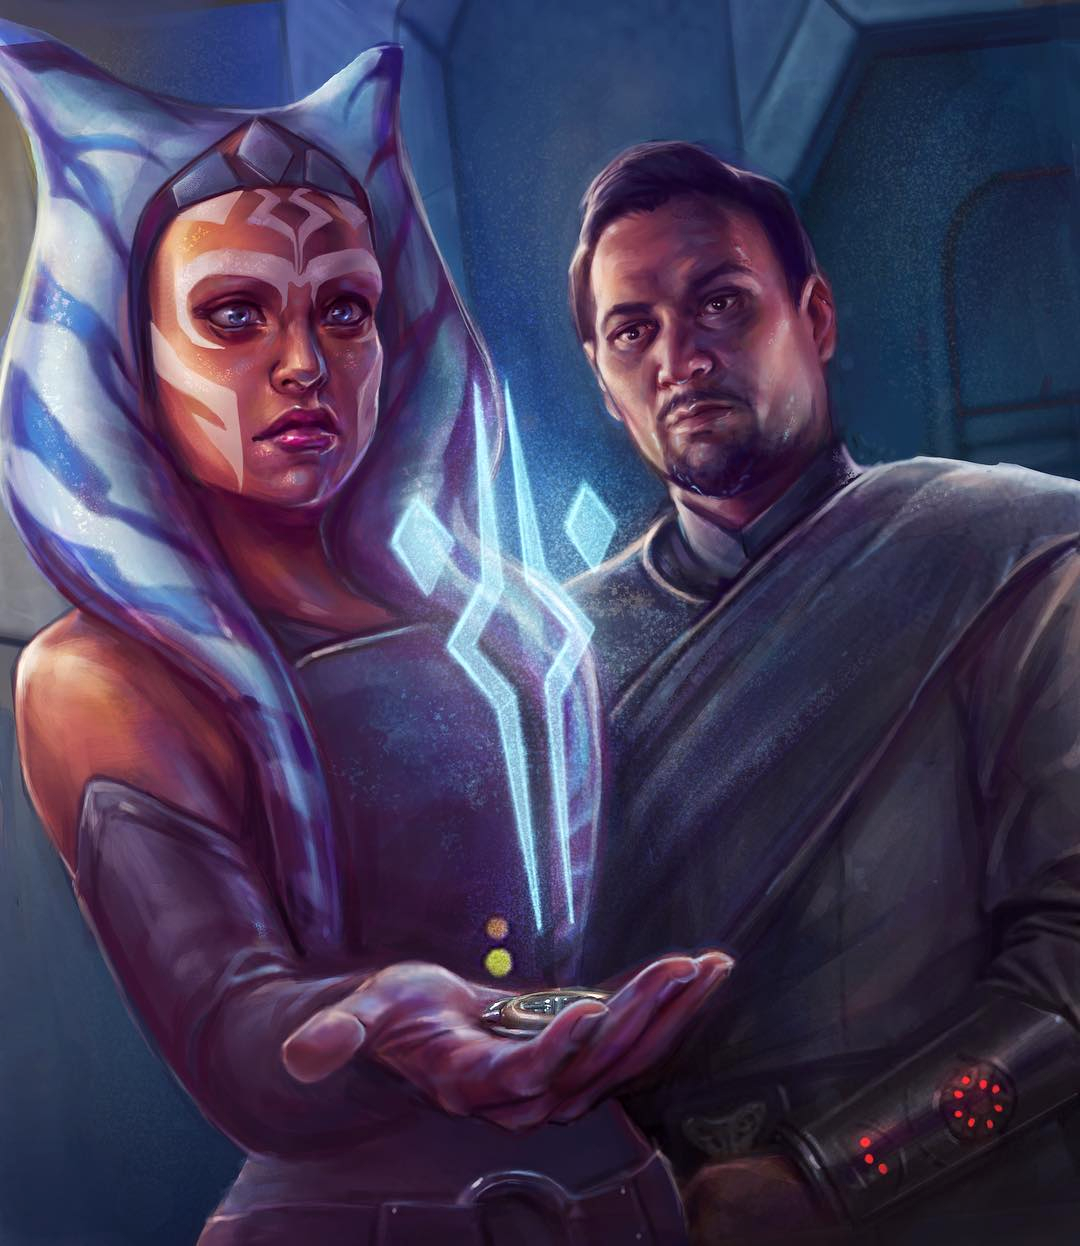
As the Galactic Empire's oppressive rule spread, several Jedi who had been in hiding began to reveal themselves, ready to confront their long-standing adversaries and challenge the Empire's control over the galaxy. Unlike Ferren Barr's failed attempt at insurrection, these Jedi chose to obscure their identities for as long as possible in order to avoid attracting unwanted attention from the Empire. A particularly vital figure in aiding the burgeoning movements against the Empire was a former Jedi: Ahsoka Tano, an ex-Padawan who had departed the Jedi Order not long before the Clone Wars concluded. While in hiding on the agricultural moon of Raada in 18 BBY, Tano found herself embroiled in a local resistance movement when the Empire invaded Raada to harvest herbs for their nutrient needs, thereby causing irreparable harm to the crops. Senator Organa, who had been secretly searching for surviving Jedi since the Purge's inception, noticed Tano's actions.
The senator enlisted Tano into the budding resistance movement he was organizing, entrusting her with the leadership of its emerging intelligence network. Tano established the "Fulcrum" agents, a clandestine network of operatives operating under this shared name to conceal their true numbers. Their mission was to gather intelligence on Imperial activities and enlist more individuals and groups to expand the movement against the Empire. While providing supplies and information to target Imperial interests, the Fulcrum agents kept their identities concealed even from the cells they managed, all the while protecting the secrecy of their larger strategy. One cell recruited by Tano, while she was operating under her Fulcrum alias, was the Spectres, who were active in the Lothal sector. This cell distinguished itself because it had a Jedi among its members. Caleb Dume, who later became known as Kanan Jarrus, eventually took on his own apprentice, Ezra Bridger, in 5 BBY.
However, while some Jedi remained in hiding and others started joining or creating rebellious factions, a more sinister option was available to those who survived the Purge. The Emperor, fearing that surviving Jedi or other Force-sensitive individuals would pose a threat to his authority, established the Inquisitorius, a group of former Jedi Knights who had rejected their previous allegiance and succumbed to the dark side of the Force. The Imperial Inquisitors, led by Lord Vader and trained in dark arts but denied the full power of their Sith masters, were assigned two primary objectives. The first was to hunt down any surviving Jedi who emerged, for which they received an Imperial decree signed by the Emperor stating that any opposition to their actions would be regarded as an act of war against the Empire. The second task was to locate other Force-sensitive beings throughout the galaxy, such as children who might be trained as Inquisitors themselves in a program given the code name Project Harvester.
As part of Project Harvester, the Inquisitorius kept a close watch on the Imperial Academies to identify such individuals and remove them before they became too powerful and potentially challenged the Emperor. This mission also involved tracking down trained Force-sensitive individuals who posed a threat to the Empire, most notably the one the Inquisitors referred to as the "shadow": Darth Sidious's former apprentice Maul. Having survived the Clone Wars, Lord Maul had reestablished his influence in the criminal underworld by leading the syndicate known as the Crimson Dawn. The Eighth Brother eventually tracked him down to the forgotten Sith world of Malachor, leading to a confrontation that would eventually include Ahsoka Tano, Kanan Jarrus, and Ezra Bridger, as well as two additional Inquisitors: the Fifth Brother and the Seventh Sister. The three Inquisitors all died during the subsequent battle.
The disappearance of the Jedi caused a significant change in the galaxy's awareness of the Force: while the Order's practices were not widely understood during their peak, the rise of the Empire led to the disparagement of such knowledge. Imperial authorities worked diligently to eliminate reminders of the Jedi, seizing locations that had once been central to their faith, such as the Holy City of Jedha or the ice planet Ilum. Even among the highest ranks of the Empire, understanding of the Force and its practitioners was limited, and engaging in what was viewed as occultism was frowned upon. Some Imperials, such as Governor Wilhuff Tarkin, had known the legendary Jedi during the Clone Wars, but others had not. Even Lord Vader and his Inquisitors, despite their influence and the favor they enjoyed with the Emperor, were sometimes viewed with suspicion, even dismissed by some high-ranking Imperial officers as "sorcerers" or "mystics."
History
The war
Growing tensions
As the Empire's oppressive methods tightened its hold on the galaxy and its military conquests aggressively expanded across the galaxy, various insurgencies and resistance movements arose to challenge the Empire throughout the galaxy as part of an early rebellion against the Galactic Empire. Initially, these rebel movements were strictly localized, emerging on specific planets, star systems, or sectors, and fighting for their individual freedom or independence. Imperial intelligence operatives and military units moved swiftly to suppress any rebellious worlds that showed signs of widespread resistance to Imperial authority. Nevertheless, the Empire failed to prevent the convergence of rebel groups across the galaxy, many of which were consolidated as rebel cells under a clandestine network orchestrated by figures such as Senators Bail Organa and Mon Mothma, along with their allies. A coordinated attack by multiple rebel cells was once considered unprecedented, and some Imperial officials questioned any evidence of a larger, galaxy-wide rebel operation. However, the Empire would eventually be forced to confront the reality of a growing rebellion against its rule.
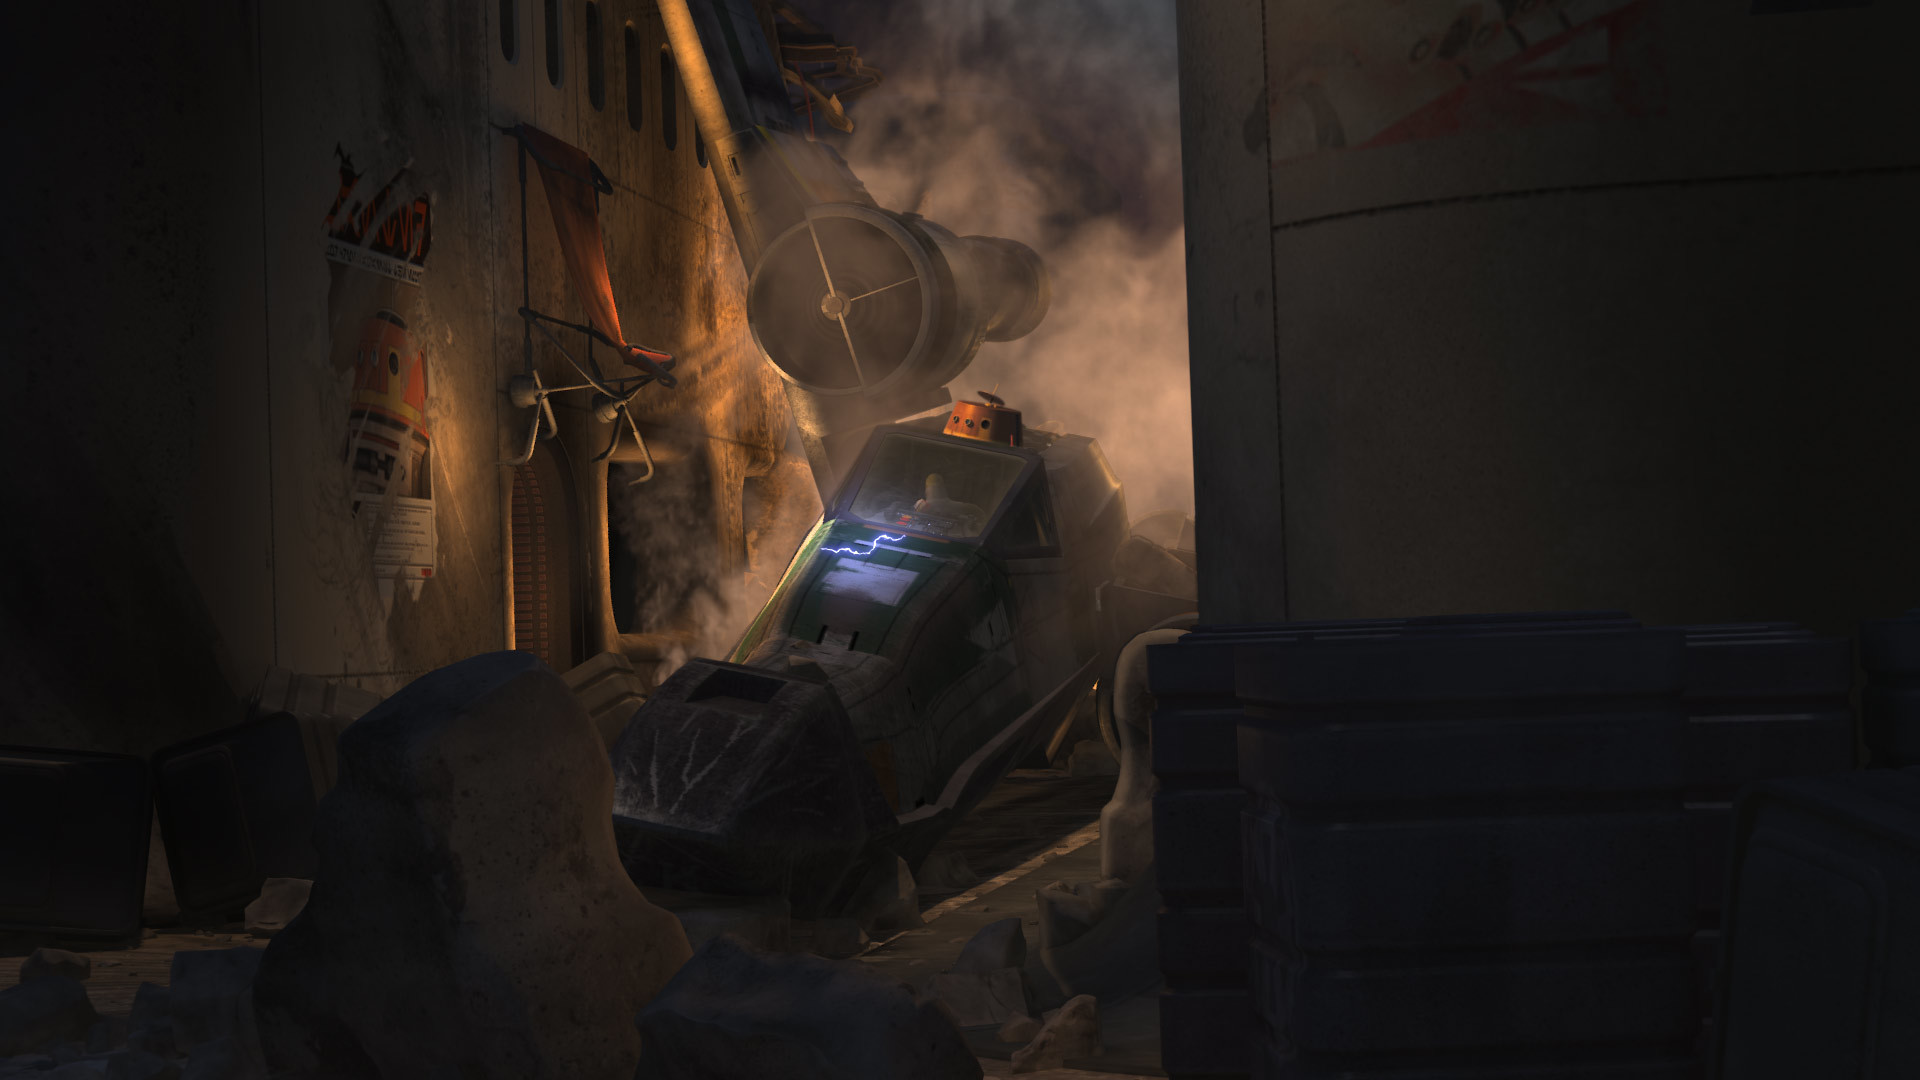
Despite their efforts to quell rebel activity, the Empire's greatest fear of a unified rebellion was secretly growing as various rebel factions began to unite against them. One significant rebel incursion against the Empire occurred in 4 BBY after Kanan Jarrus, a member of a rebel crew known as the Spectres, was captured when his team hijacked an Imperial communication tower on Lothal to transmit a transmission to nearby systems in the Outer Rim. Jarrus was taken to Mustafar for interrogation but was freed by his team while in transit aboard Governor Tarkin's flagship, the Sovereign. The escape attempt resulted in the death of the Empire's Grand Inquisitor and the destruction of the Sovereign. However, as the Spectres made their escape, the true extent of the rebellion became apparent: a fleet of corvettes emerged from hyperspace, neutralizing the approaching TIE fighters and enabling the Spectres to escape. This action also signaled an escalation of rebel activity in the Outer Rim, with Tano recognizing that the conflict against the Empire was evolving with their activity and the Spectres' broadcast.
Birth of the Rebel Alliance
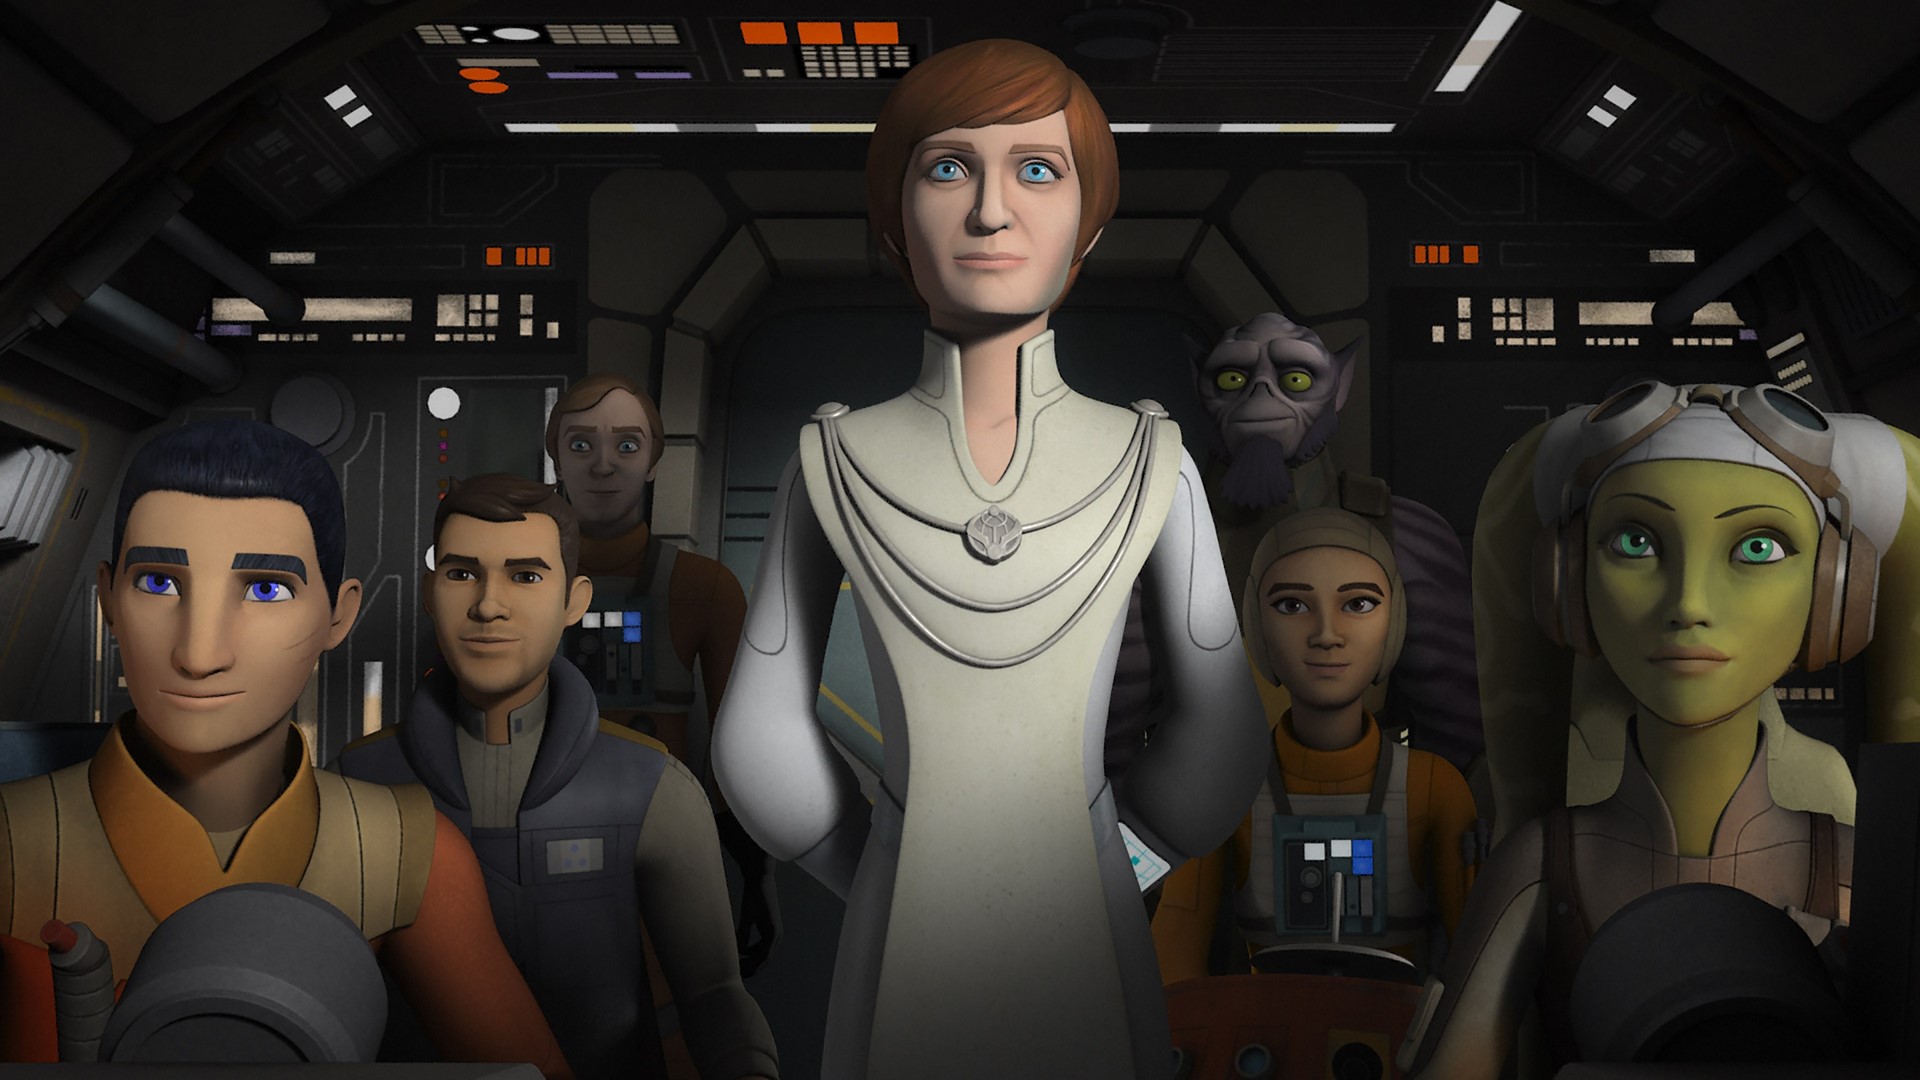
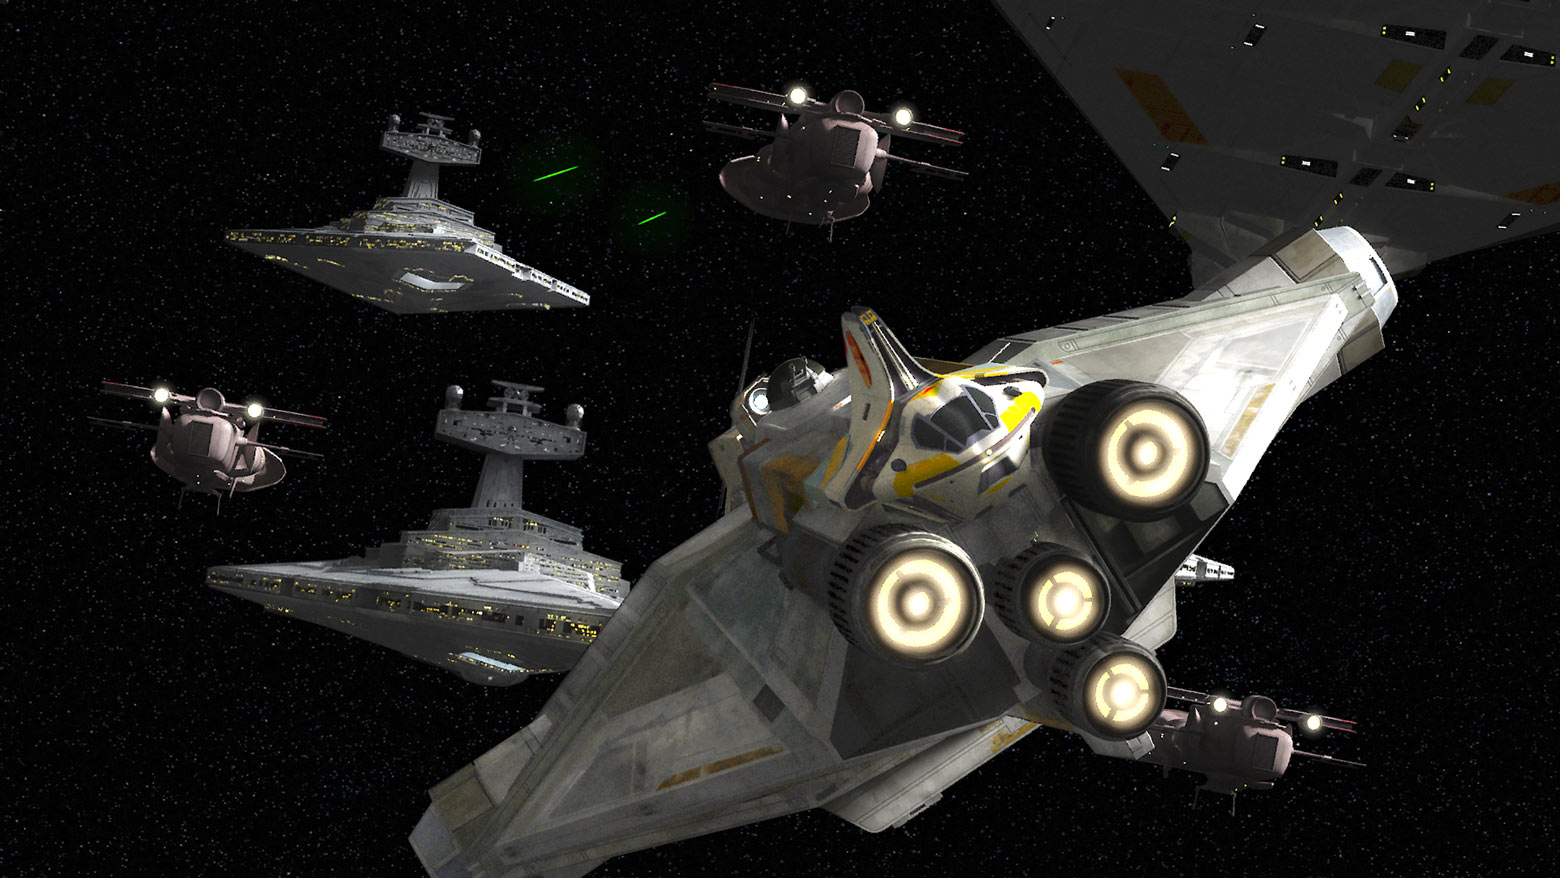
In time, the dissenting Senator Mon Mothma came to the realization that reforming the Empire through the Imperial Senate was impossible. After publicly denouncing the Emperor, Mothma was compelled to flee into hiding. Mothma and her followers met with the Spectres in deep space. Pursued by Imperial forces commanded by Commander Vult Skerris in his TIE/d "Defender" Multi-Role Starfighter, the rebel convoy traveled through the treacherous Archeon Nebula. Despite evading Skerris, the rebels encountered a pair of Star Destroyers commanded by Governor Arihnda Pryce and Admiral Kassius Konstantine waiting on the other side. Syndulla facilitated Mothma's escape by launching proton torpedoes into the nebula. The various rebel forces then gathered above Dantooine, where Mon Mothma delivered a hologram speech announcing the formation of the Alliance to Restore the Republic.
As a result of Mothma's speech, previously isolated rebel groups combined their efforts into a fully-fledged Alliance as more and more rebel cells arrived at Dantooine. Nevertheless, despite the founding of the Alliance marking the official start of the Galactic Civil War, open warfare would not begin for some time, as the Rebellion needed to prepare itself. Although the conflict was considered a war raging across the galaxy, the rebels focused on building their strength and conducting smaller strikes against Imperial forces, waiting until they were ready to launch an all-out assault. Still, the war created a new danger within the galaxy for the many citizens who sought to live normal lives. Despite the conflict, many citizens still faced the regular challenges of everyday life, which could include Imperial tyranny on occupied worlds, and both sides made efforts to appeal to the galactic population through propaganda.
While undertaking a mission on Killun Station to obtain clearance codes for the planned raid on Lothal, the rebel droid Chopper was remotely reprogrammed by a team of Imperial Information Office slicers and analysts led by LT-319. Driven by a desire for glory and victory, LT-319 devised an ambitious plan to use Chopper to download the coordinates of the Phoenix Cell's Chopper Base. The Spectres, Wedge Antilles, and AP-5 thwarted LT-319's plot through their combined efforts. In retaliation for harming her droid, Hera Syndulla transmitted a data surge back to the Imperial team's Gozanti-class cruiser, destroying the vessel and preserving the secrecy of Chopper Base's location.
Following the death of Maul on the planet Tatooine at the hands of Kenobi, Grand Admiral Thrawn acquired intelligence indicating that the Phoenix Squadron was meeting with General Jan Dodonna's Massassi Group for a coordinated attack on Lothal's TIE Defender factories. Thrawn ensnared Agent Alexsandr Kallus, an Imperial-turned-rebel mole, and utilized his communications to pinpoint the location of Chopper Base on the planet Atollon. The Grand Admiral's Seventh Fleet blockaded Atollon and wiped out a large portion of the two rebel cells. However, Thrawn was denied complete victory when Commander Jun Sato rammed Admiral Konstantine's Interdictor-class cruiser. This created a temporary opening that allowed Ezra Bridger and Chopper to escape with news of the siege of Atollon.
Unable to obtain assistance from Mon Mothma, Bridger and Chopper appealed to Sabine Wren and the Mandalorian Clan Wren for aid. Sabine's mother, Countss Ursa Wren, permitted Sabine and Fenn Rau to bring a Mandalorian strike force to Atollon to assist the rebels. Meanwhile, the surviving rebels retreated to Chopper Base as Thrawn initiated a devastating orbital bombardment. As Imperial ground forces stormed the base, Kanan Jarrus appealed to Bendu for help. However, this enraged the Bendu, who went on a rampage. Back in space, Bridger, Chopper, and their Mandalorian allies succeeded in destroying Thrawn's second Interdictor cruiser. This allowed the surviving remnants of Phoenix Squadron to retreat to Yavin 4 along with the defector Kallus, where they integrated with the rebel forces stationed there. Despite this setback, the Rebellion strengthened their alliance with Clan Wren and the other Mandalorian clans opposed to the Imperial–backed Clan Saxon on Mandalore.
Beyond Atollon
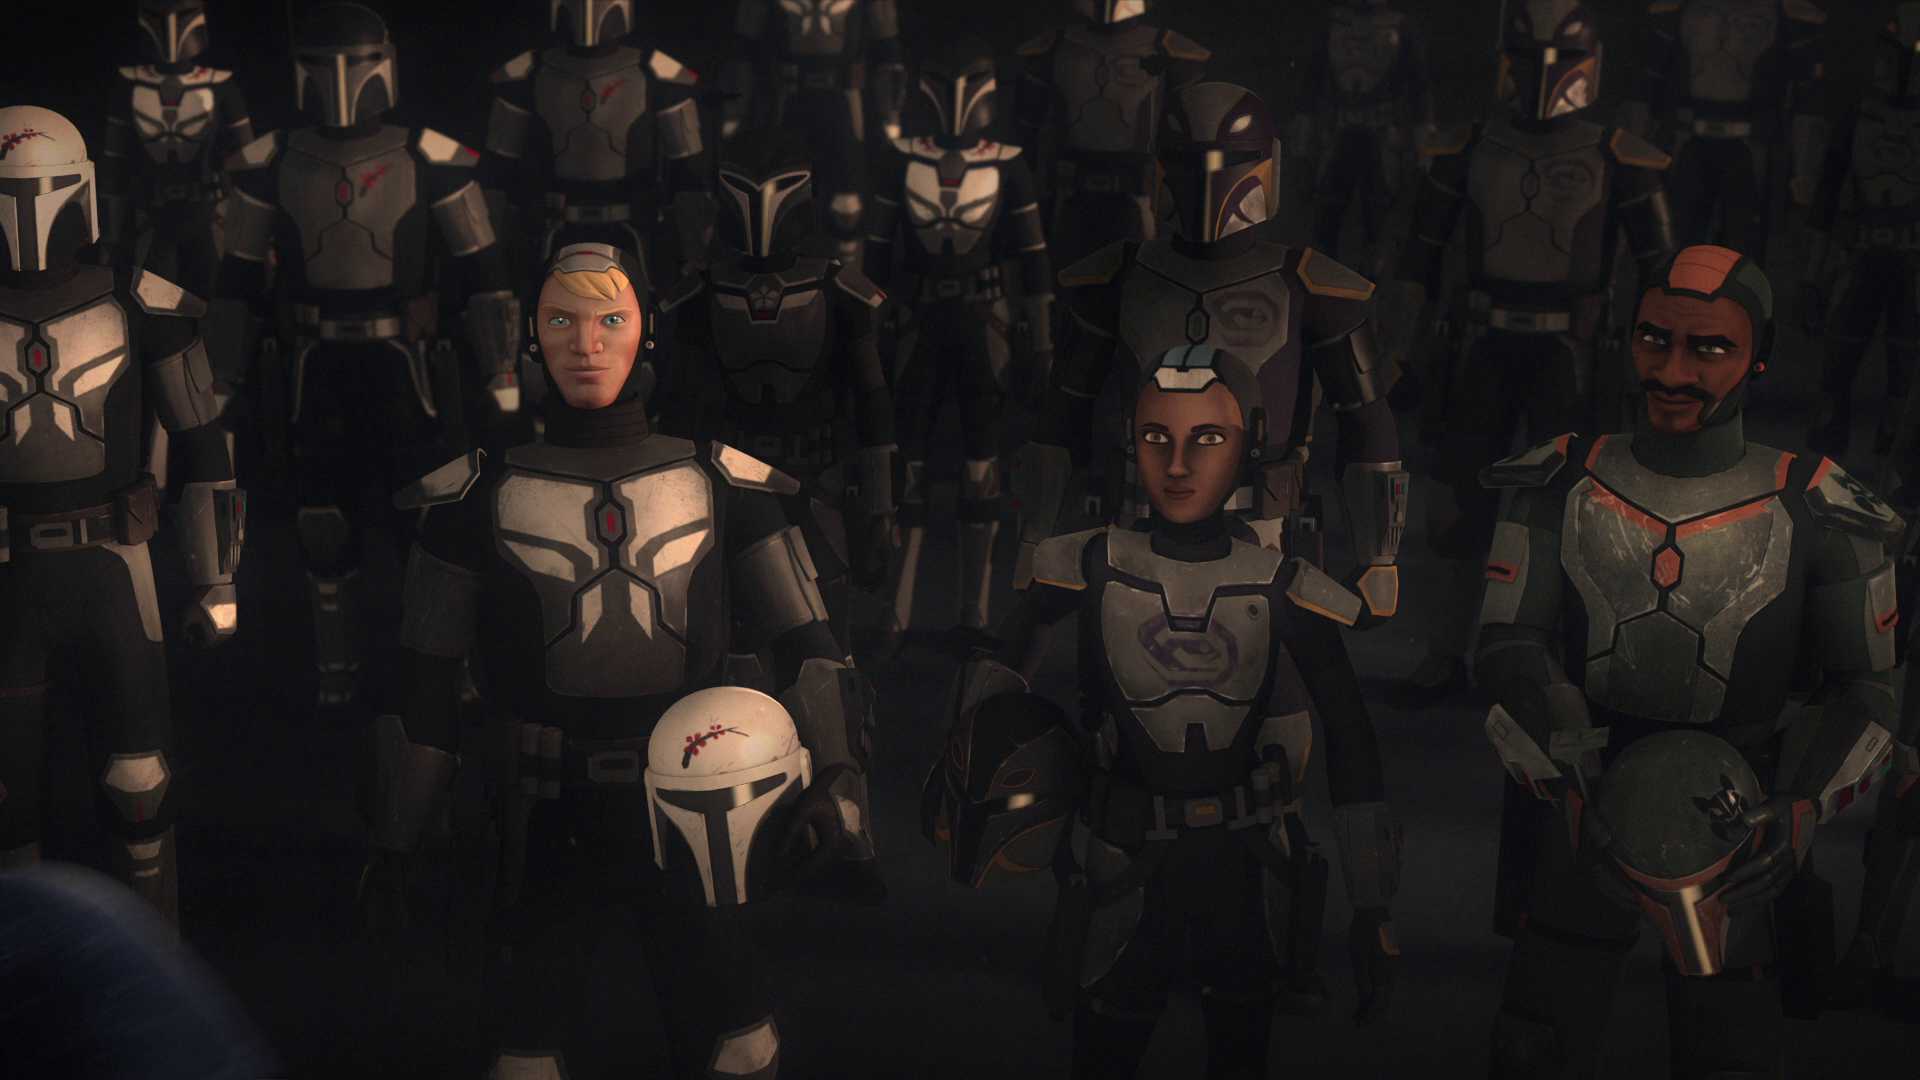
In 1 BBY, as a token of gratitude for the Mandalorian assistance on Atollon, Syndulla successfully persuaded Rebel Command to allow the Spectres to assist Clan Wren and its allies on Mandalore. The Spectres aided their Mandalorian allies in rescuing Sabine Wren's father, Alrich Wren, from execution. In response, Governor Saxon's brother and successor, Tiber Saxon, deployed the "Duchess," a superweapon capable of incinerating Mandalorian warriors by turning their vaunted armor against them. To atone for her role in creating the weapon, Sabine Wren led a successful strike operation that destroyed the weapon and Tiber Saxon's Star Destroyer. Following the operation, Lady Bo-Katan Kryze accepted the Darksaber and the mantle of Mandalorian leadership, allowing Sabine Wren to rejoin her rebel comrades.
The violent campaigns conducted by Saw Gerrera's Partisans led to their official official censure and removal from the Rebel Alliance. Nonetheless, the Rebel Alliance received intelligence from Gerrera indicating that the Empire was using a relay station on Jalindi to disrupt rebel supply runs. Acting on Kallus's advice, Rebel Command dispatched the Spectres on a mission to plant a spike on the relay station to monitor Imperial transmissions. Although the mission was disrupted by the arrival of Commander Titus's light cruiser, the Marauder, the Spectres were assisted by the arrival of Saw's U-wing. Saw rescued the strike team members Ezra, Sabine, and Chopper before bombing both the Jalindi relay and the Marauder. Saw then recruited the three rebels for his quest to investigate why the Empire had exterminated the Geonosians.
Saw and the three Spectres then journeyed to Faos Station, where they infiltrated the Imperial Freighter 2716, which was transporting a large Kyber crystal to the Tonnis sector. Aboard the ship, the rebels freed several technicians who had been conscripted for an unknown project. While Ezra and Sabine wanted to evacuate the civilians, Saw was determined to find out what the Empire was building at any cost. Saw was disappointed when the freighter emerged in empty space and was intercepted by Captain Slavin's Star Destroyer. Unwilling to concede defeat, Saw ignited the kyber crystal, causing an explosion that consumed both ships. Saw escaped aboard his U-wing, while the Spectres and technicians fled aboard a shuttle. Despite failing to uncover the Empire's secret project, the Alliance gained new recruits from the technicians.
Return to Lothal
The Empire launched a crackdown on Lothal that resulted in the death of Lothal resistance member Jho. Despite this crackdown, Ryder Azadi managed to alert Rebel Command about the TIE/D Defender Elite project on Lothal. Mon Mothma dispatched the Spectres on a mission to acquire information about the prototype fighter. With the assistance of the crime lord Cikatro Vizago, the Spectres managed to infiltrate Lothal. After separating, Ezra and Sabine visited Jho's former bar and discovered that it had been taken over by the Empire. There, they reunited with an old rebel contact, Jai Kell. Despite being pursued by Imperial forces, the rebels managed to escape through the sewers and link up with Azadi's group.
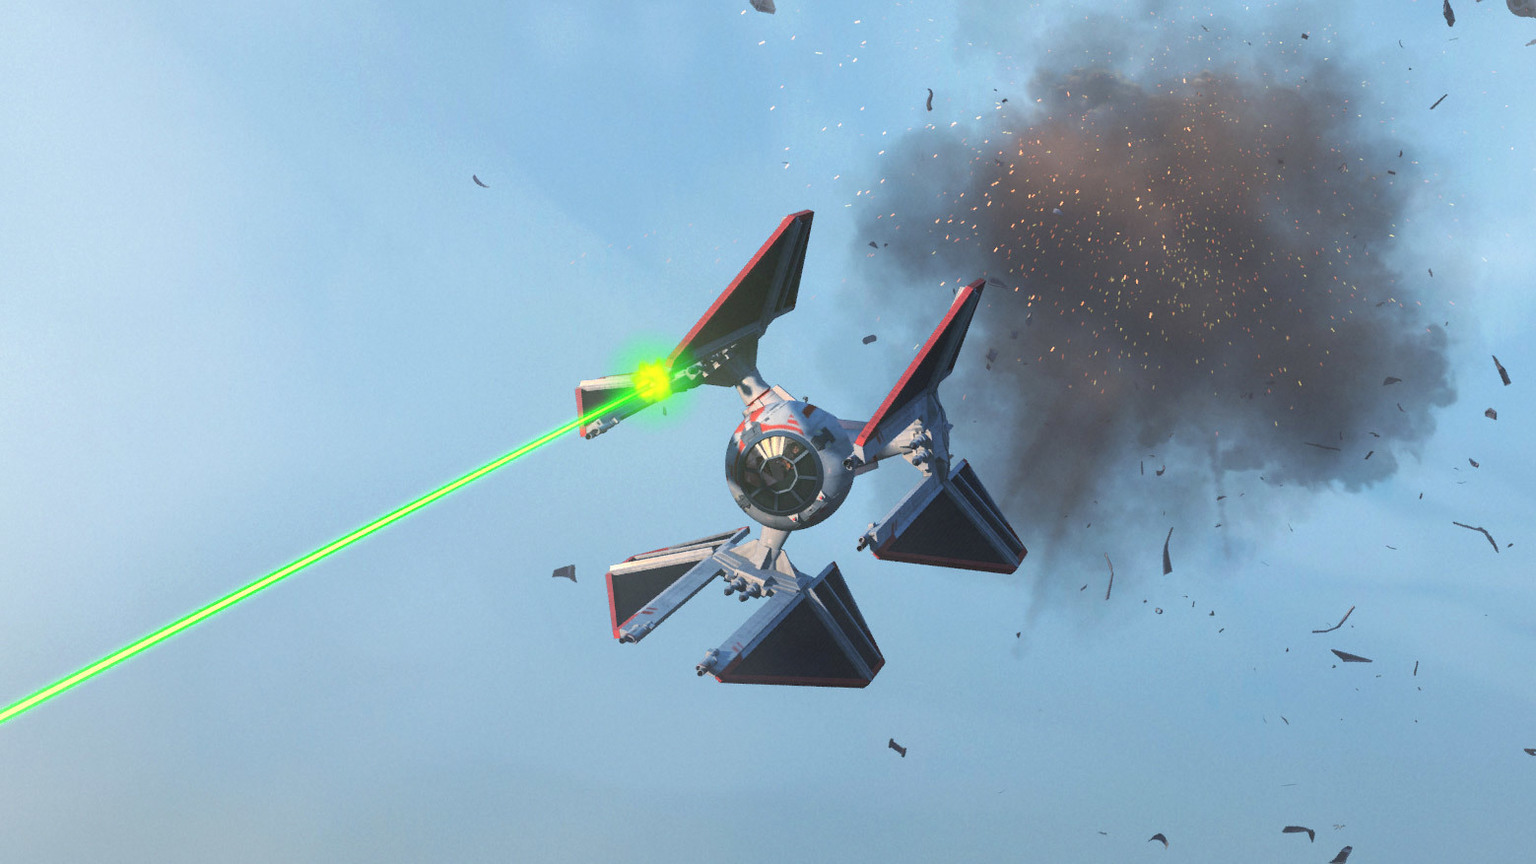
With Ryder's help, the Spectres made their way to a remote Imperial testing facility where the TIE/D Defender Elite was stored. The rebel heist coincided with a visit by Grand Admiral Thrawn and Governor Pryce. Prior to the test demonstration, Ezra and Sabine managed to steal the ship and engaged several TIE Interceptors in combat. Thrawn exploited the heist to assess the TIE/D Defender Elite's combat capabilities. Following a crash-landing, Ezra and Sabine managed to escape with the craft's flight data recorder to Yavin 4. After becoming lost in the wilderness, they encountered a loth-wolf that led them to Ryder's camp.
The following day, Ezra, Zeb, and Jai Kell returned to the crash site to retrieve the TIE/D Defender Elite's hyperdrive, which Sabine hoped to install on Ryder's U-wing. While Governor Pryce insisted on leading the manhunt, Thrawn dispatched his Noghri tracker Rukh to hunt the rebels. Despite being pursued by Rukh and scout troopers, the rebels managed to return to the camp in stolen vehicles. While Hera and Chopper departed with the flight data recorder aboard the refitted U-wing, the other Spectres, Jai, and Ryder fled into a series of tunnels. There, they encountered a pack of loth-wolves that guided them to Lothal's southern hemisphere.
After establishing a base in the caves, the Spectres encountered a Mining Guild ore crawler, Crawler 413-24, that was extracting minerals from Lothal's surface. The crawler was staffed by several prisoners, including Vizago, who had been convicted of aiding the rebels. The rebels freed the prisoners, killed the Trandoshan overseer Proach, and imprisoned the captain Seevor. The rebels narrowly avoided detection by an Imperial search party. Ezra later killed Seevor when he tried to retake the crawler. The rebels subsequently received news from Hera that Rebel Command had authorized a strike on Lothal to eliminate the Empire's TIE factories. The rebels and liberated prisoners were designated as the air raid's ground support team.
General Syndulla led a squadron of X-wing starfighters and Y-wing starfighters in the planned raid on Lothal's factories, while the rebel ground team sabotaged the Imperial artillery defenses. However, they were intercepted by Thrawn's fleet and suffered heavy casualties. Hera, Chopper, and Mart Mattin survived the rough landing but were pursued by Imperial forces, including Rukh. While Mart and Chopper managed to escape into Lothal's sewers, Hera was captured by Rukh, who handed her over to Governor Pryce. Due to the failure of the air raid, Kanan Jarrus and the ground team were forced to retreat from Capital City. During an ensuing effort to rescue Syndulla, Pryce ordered an AT-AT to fire upon the local fuel supply in a desperate final attempt to wipe out several of the Lothal rebels. Jarrus sacrificed his life in the explosion to save Syndulla.
Much to Thrawn's frustration, Pryce's attack also destroyed the fuel supply, thereby temporarily halting the TIE Defender project. Called away from Lothal, Thrawn had assisted in uncovering fellow Grand Admiral Balanhai Savit's treasonous efforts to divert material away from the Death Star project. Working alongside officers from Thrawn's home Chiss Ascendancy, Thrawn's forces also helped repel a Grysk infiltration into Imperial space. However, by focusing on those problems, Thrawn had technically failed to stop a gralloc infestation impacting Death Star supply lines, even though it had been caused by Savit's plot. Nevertheless, the failure freed up the funds allocated to the TIE Defender project to be appropriated into the Death Star project, although Tarkin claimed funding would have a chance to resume once the battle station was complete.
On Lothal, Commander Bridger and the Spectres also uncovered the Empire's efforts to excavate the Lothal Jedi Temple on the orders of Palpatine himself. Palpatine's advisor, Veris Hydan, oversaw the project. The Temple contained an entrance to the mythical World Between Worlds, which Palpatine intended to use to seize control of the universe. After rescuing Ahsoka Tano from the mission to Malachor through the World Between Worlds, Bridger escaped the plain and Palpatine's interference, destroying the portal into the World Between Worlds in the process. While the Rebel Alliance proper would not be involved in the engagement, the Spectres and their various allies then launched a gambit to liberate Lothal and end its Imperial occupation. Bridger also planned to summon a pod of purrgil to deal with the orbiting Imperial armada. Meanwhile, the Emperor personally ordered the Grand Admiral return to Lothal to put down the local rebellion and capture Bridger.
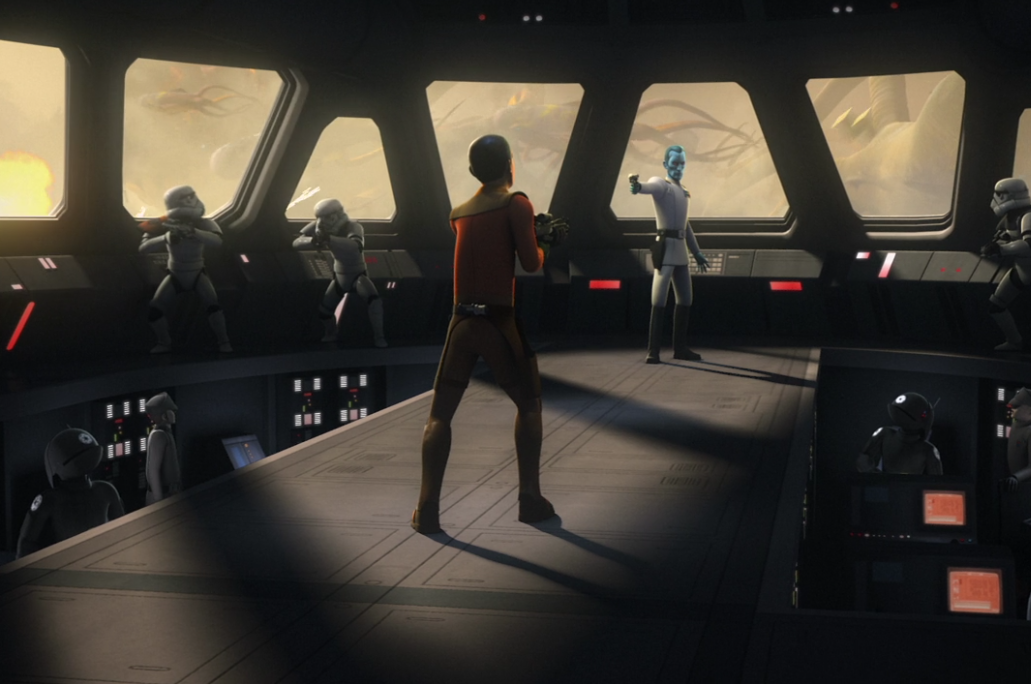
Overseeing events through a hologram, Palpatine attempted to persuade Bridger to create a new gateway to the World Between Worlds using a remaining part of the Lothal temple. Bridger, however, resisted Palpatine's influence and destroyed the portal again. Utilizing the Purrgil, Bridger eliminated Thrawn's fleet and directed the creatures to seize Thrawn's flagship, transporting him, the Grand Admiral, and everyone aboard the Chimaera into hyperspace. Following the Purrgil's triumph over the Imperial fleet, the ground garrison, largely recalled to the Imperial Command Dome under Protocol 13, suffered near-total annihilation when the Dome self-destructed. Consequently, Lothal was liberated from Imperial dominion. The burgeoning conflict with the Rebel Alliance prevented the Empire from launching a retaliatory assault on Lothal. Furthermore, Thrawn's vanishing act prevented him from participating in later campaigns against the Alliance, and Palpatine was also deprived of his chance to manipulate the Grand Admiral as a tool to seize control of the Chiss Ascendancy.
Other fronts
The rebellion also engaged the Empire in minor conflicts at Carsanza and at Nexator. The strategies employed in these encounters were later adapted for use throughout the war. Before the onset of open warfare, the Alliance primarily focused on targeted operations—including acts of sabotage, theft, espionage, and even assassination—aimed at disrupting Imperial progress, with both the Empire and the rebellion attempting to conceal public awareness of these less-than-honorable rebel successes. On the world of Vulpter, an undercover agent working for the Rebel Alliance Intelligence Service executed a data raid on the Arakyd Industries data storehouse.
However, General Davits Draven grew increasingly frustrated with the Alliance's reluctance to launch large-scale attacks against the Empire. Although he played a key role in leading the Rebel Alliance Intelligence Service and its clandestine operations, he had joined the Alliance with the aspiration of defeating the Empire before it became insurmountable. By 1 BBY, Draven had begun to view the Alliance as an organization that had missed too many opportunities to inflict significant damage on the Empire. At that time, some members of the Alliance Civil Government continued to advocate for a negotiated settlement with Palpatine as the Alliance's objective. Nevertheless, despite the Alliance's hesitation to engage in open warfare due to concerns that such conflict would jeopardize any peaceful resolution the Senate might achieve, the Alliance deployed the 61st Mobile Infantry—also known as "Twilight Company"—on missions against the Empire.
Twilight Company, established and commanded by Captain Micha Evon, was dispatched by rebel leaders on a brutal campaign against the Empire. After participating in battles on numerous planets, the company was sent to Crucival to destroy its transmitter tower during the Battle of the Tower. The Empire armed many civilians to hinder their attack but abandoned them as the Empire took cover behind their shield from Twilight Company's CR90 corvette, the Thunderstrike. Twilight Company emerged victorious after three days of intense combat and initiated a public recruitment drive to replenish their ranks, attracting many citizens, including Hazram Namir. Two months later, Twilight Company journeyed to Vir Aphshire.
Destroying the Death Star
In 1 BBY, Galen Erso, the primary designer of the Death Star, dispatched [Bodhi Rook](/article/bodhi_rook], an Imperial pilot, to Jedha to inform Saw Gerrera about the Death Star and its vulnerability. Upon hearing the rumors and learning that Rook had been captured by Saw, the Alliance recruited Galen's daughter and Saw's former associate Jyn Erso to verify the information and extract Galen, along with intelligence officer Cassian Andor and K-2SO. She and her team successfully rescued Rook, but not before the Death Star destroyed Jedha City in a test firing. The team subsequently traveled to Eadu, and although Andor was instructed to assassinate Galen, he instead attempted to extract him. However, the Alliance mistakenly attacked the facility, resulting in Galen's death and significant damage to the base. While the Eadu raid was not the first instance of open rebel aggression in the Alliance-Imperial conflict, it nonetheless signified an escalation of hostilities in the developing Galactic Civil War due to its nature as an overt assault during a period when the Alliance sought to avoid such actions.
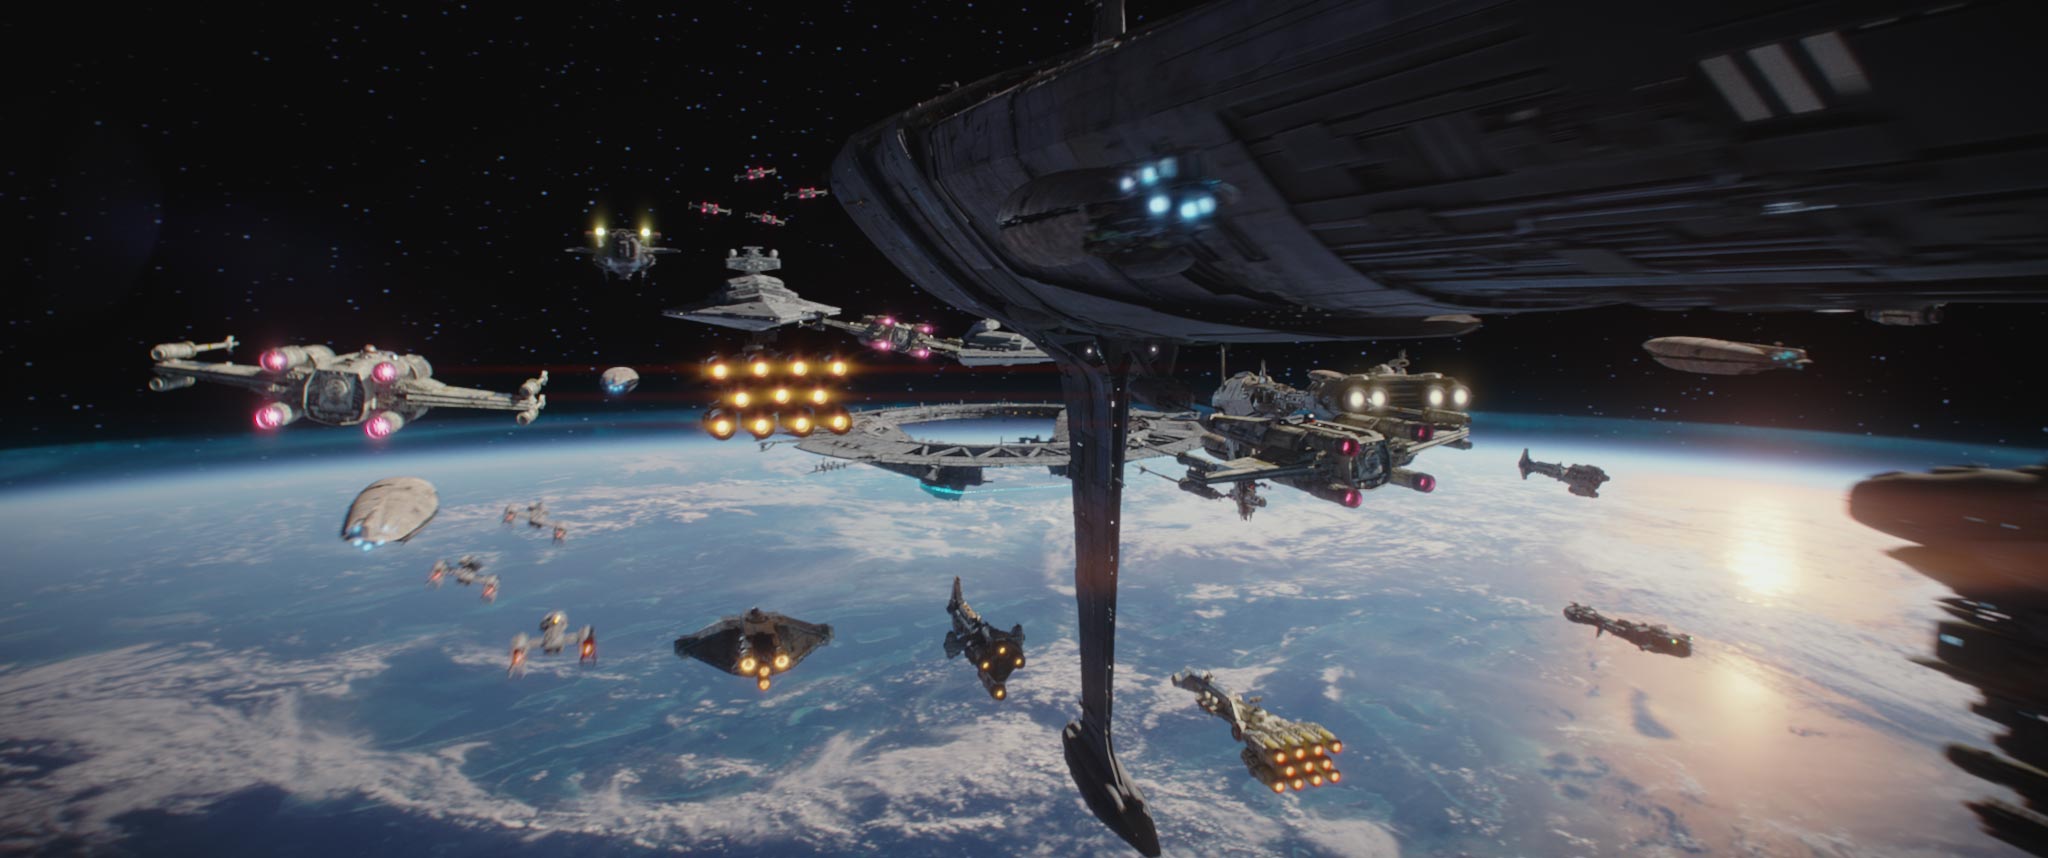
Most of the Rebellion's leadership opted not to act on the information provided by the team. However, Jyn, Andor, and K-2SO, along with a squad of Alliance soldiers who named themselves Rogue One, attacked the Citadel on Scarif and infiltrated the facility to steal the original schematics of the Death Star. The Alliance on Yavin 4 received the information, and Admiral Raddus swiftly arrived with a substantial portion of the Alliance Fleet to provide assistance. The infiltrators successfully obtained the plans, albeit with casualties, and rushed to the summit to transmit them to Raddus's ship, the Profundity. With the aid of the Lightmaker, which rammed a disabled Star Destroyer into the shield gate, the plans reached the flagship, but as the fleet attempted to escape, Vader's Imperial I-class Star Destroyer Devastator intervened, preventing their departure before too many ships could escape.
The Profundity was crippled, and the remaining fleet was either destroyed or dispersed. However, inside the Profundity, Rebel troopers transferred the plans onto a data tape and conveyed them to Princess Leia Organa aboard the Tantive IV (docked within the flagship) before Lord Vader could intercept them. The vessel escaped and jumped out of the system. Although the team accomplished their mission, they perished in the process, along with Director Orson Callan Krennic and all other Rebel and Imperial forces, as the Battle of Scarif culminated in the Death Star obliterating the planet's surface.
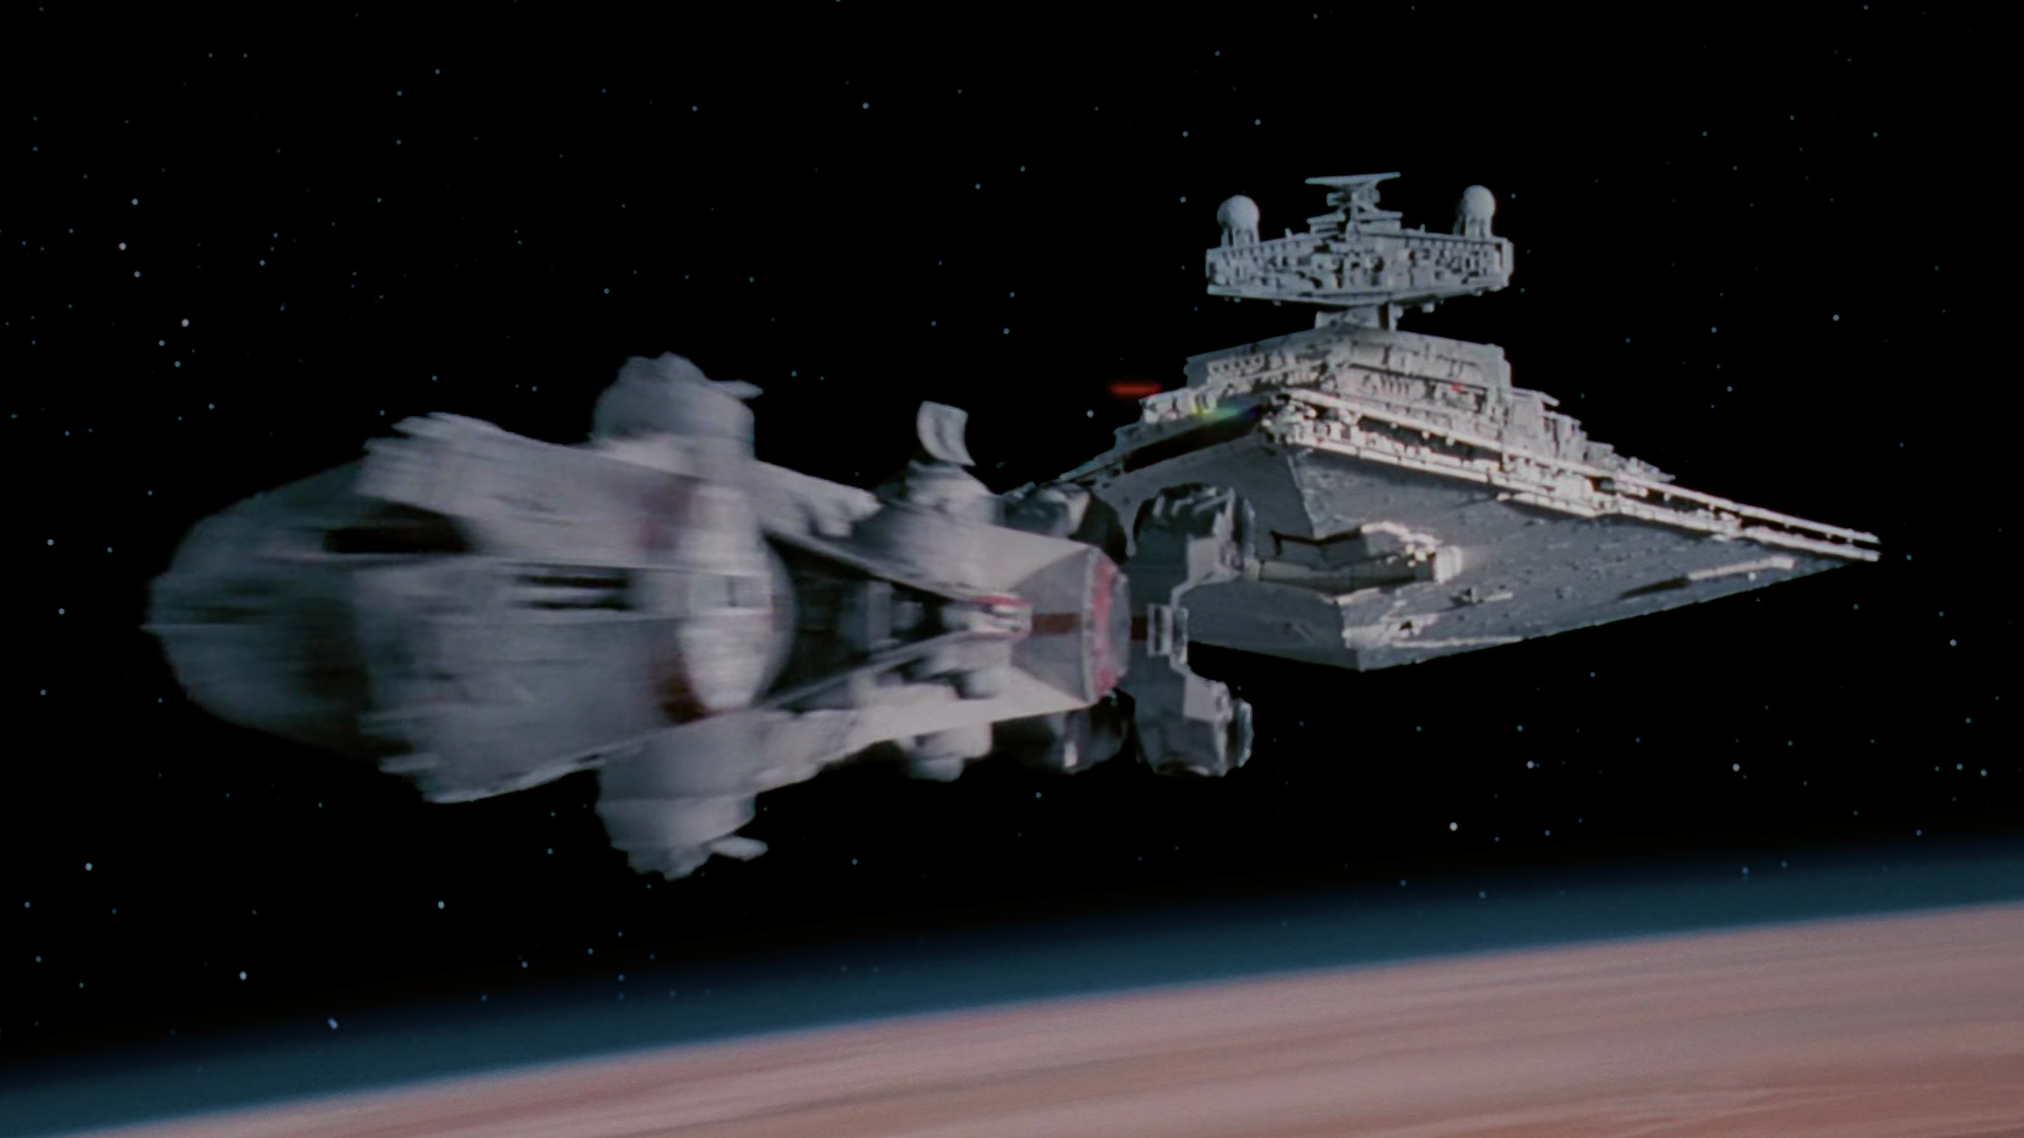
Racing toward the desert planet of Tatooine with the plans in her possession, Organa hoped to secure the assistance of Jedi Master Obi-Wan Kenobi. However, Vader overtook the Tantive IV and seized the ship in a space battle above the planet. Darth Vader's forces boarded Organa's vessel, compelling her to conceal the Death Star schematics within the memory banks of the R2 series astromech droid R2-D2. R2, accompanied by the protocol droid C-3PO, utilized an escape pod to flee to Tatooine, where they were captured by Jawas who subsequently sold them to moisture farmer Owen Lars, the uncle of Luke Skywalker.
While Skywalker was servicing the droids, he discovered a portion of the message within R2-D2 and became intrigued. However, R2-D2, adhering to his programming as the property of Master Kenobi, escaped in an attempt to locate Kenobi. Following an encounter with Tusken Raiders in the Dune Sea, Skywalker encountered Kenobi. R2-D2 then played Organa's desperate plea for assistance for Kenobi and Skywalker. The two soon realized that Imperial stormtroopers had attacked the Jawas who had sold Skywalker and his uncle the two droids in a futile search for the Death Star plans. Skywalker rushed back to the Lars moisture farm to discover his home in ashes and his aunt and uncle murdered. He then accompanied Kenobi to Mos Eisley, where, after employing deception to bypass Imperial troops, the two negotiated with Captain Han Solo and first mate Wookiee Chewbacca to transport them, the droids, and the Death Star plans to Alderaan aboard the Corellian YT-1300 light freighter the Millennium Falcon. Emperor Palpatine exploited the princess' rebel affiliation to his advantage in dissolving the Imperial Senate.

While in Imperial custody, Princess Organa was transferred to the Death Star, where Vader subjected her to interrogation and torture in an effort to ascertain the location of the Alliance's hidden base. When she refused to yield to torture, Tarkin resolved to extract the information from her by threatening to destroy Alderaan, the princess' home planet. Fearing the loss of Alderaan, but unwilling to compromise the Alliance's location, Organa falsely informed Tarkin that the Alliance was situated on the planet of Dantooine.
Governor Tarkin, confident in his triumph, proceeded with the operation to obliterate Alderaan regardless, asserting that Dantooine was "too remote" to serve as an effective demonstration of the Death Star's capabilities. Consequently, Alderaan was destroyed by a single blast from the Death Star, an event that claimed billions of lives and showcased the Empire's true power.
Following Alderaan's destruction, Tarkin dispatched a reconnaissance team to Dantooine to verify the presence of a Rebel base. Meanwhile, the Millennium Falcon emerged from hyperspace to discover that Alderaan had been annihilated. Fearing identification by a lone TIE fighter, they attempted to disable it, but were instead ensnared aboard the Death Star by a tractor beam. Skywalker sought to rescue Organa, while Kenobi ventured alone to disable one of the tractor-beam generators on the station.
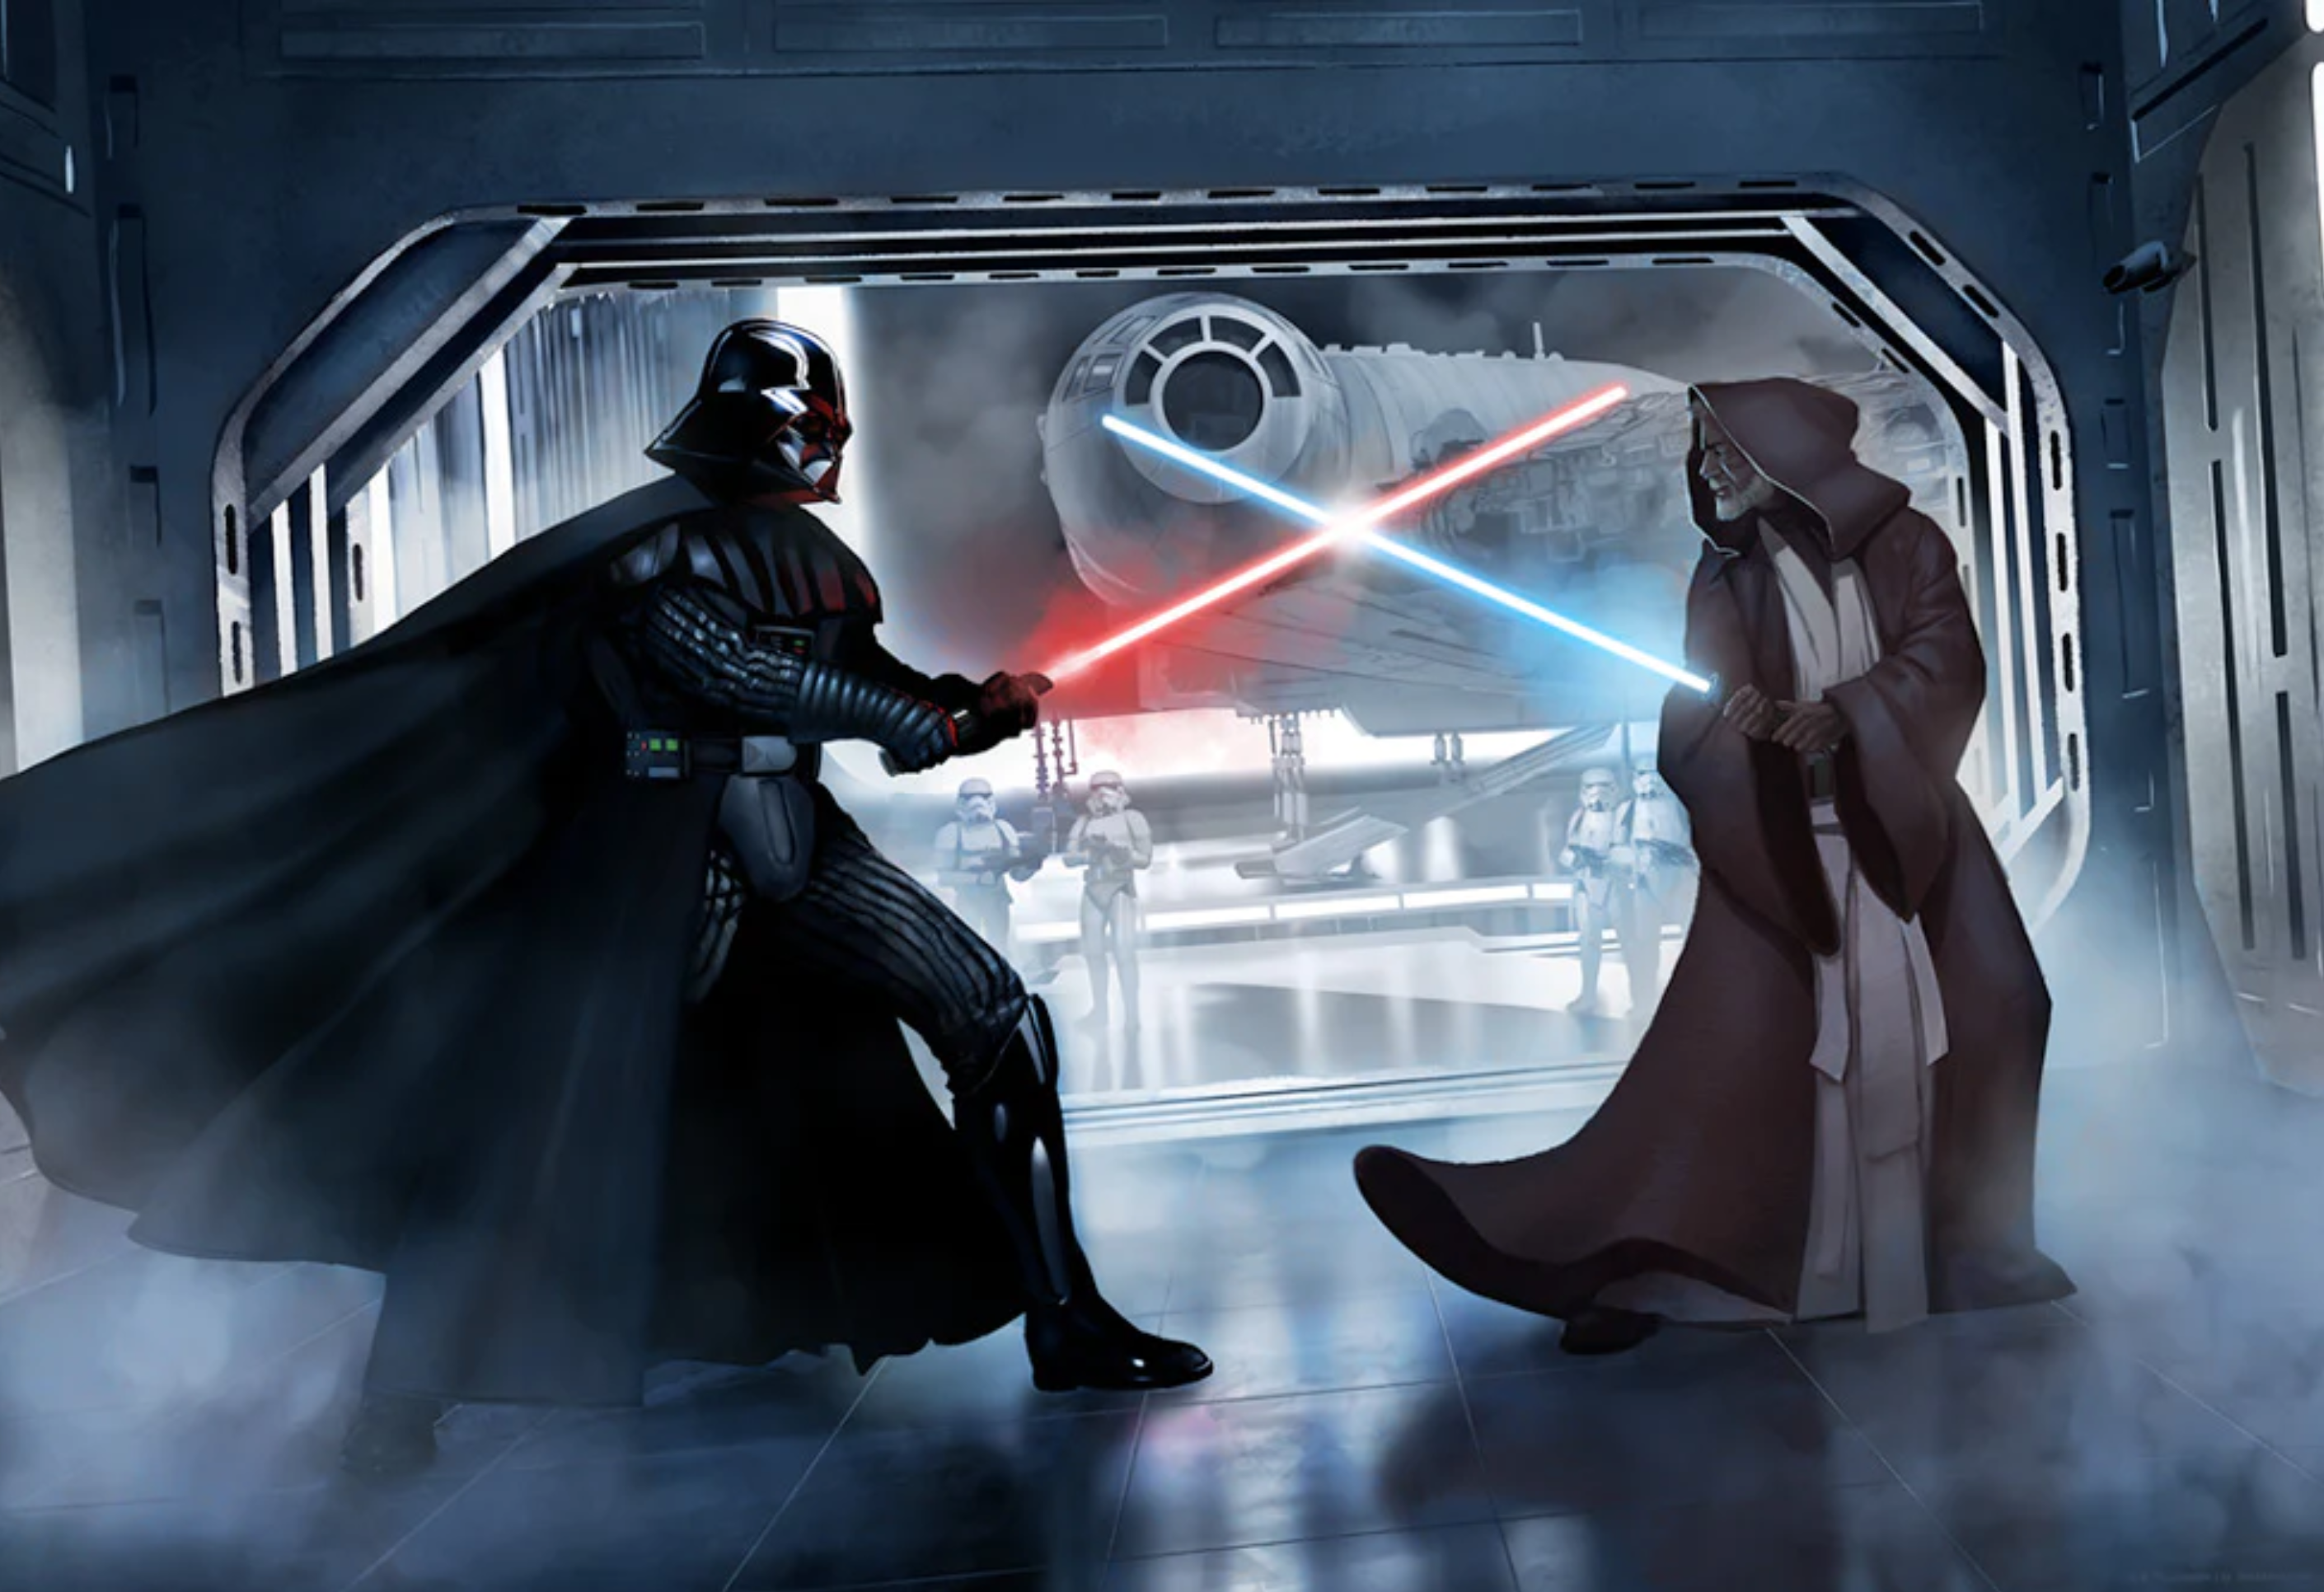
Upon learning that Organa had deceived him and that only a long-abandoned Rebel base existed on Dantooine, Tarkin ordered her execution. However, before the order could be carried out, Skywalker rescued her. An escape ensued throughout the Death Star's corridors. As Skywalker, Solo, Organa, and Chewbacca finally reunited with C-3PO and R2-D2 and reached the hangar to escape aboard the Falcon, Skywalker witnessed Kenobi confronting his former Padawan, Darth Vader. Kenobi lowered his guard, allowing himself to be struck down by Vader's lightsaber, instantly becoming one with the Force.

Riots erupted following the Empire's destruction of the planet Alderaan. Rumors of the event began to circulate among the Alderaanian population on Coruscant, who became enraged when images accompanying the rumors confirmed Alderaan's annihilation. The vigils transformed into riots that persisted for several days until security forces and stormtroopers were deployed to restore order. However, as the troops marched into the streets, the stormtroopers opened fire with their blasters. The crowds dispersed, and the following day, the police arrested anyone found in the streets. The day after that, stormtroopers began rounding up Alderaanians for interrogation.
The Millennium Falcon escaped the Death Star, but not before being pursued by several TIE fighters. The Falcon defeated the fighters, but it was all a ruse orchestrated by Tarkin and Vader, who had placed a homing beacon aboard the Falcon that led the Empire to the Rebels' hidden base on Yavin 4. By sending the TIEs after the Falcon, they created the illusion that the Empire did not want the ship to escape. Despite Solo's confidence in their safety, Organa feared that they were indeed being followed. Upon their arrival at the Great Temple, the Rebel Alliance analyzed the technical data. Organa and several other officers, including General Dodonna, devised an attack plan in which snub-fighters would target the exhaust port weak point with proton torpedos.
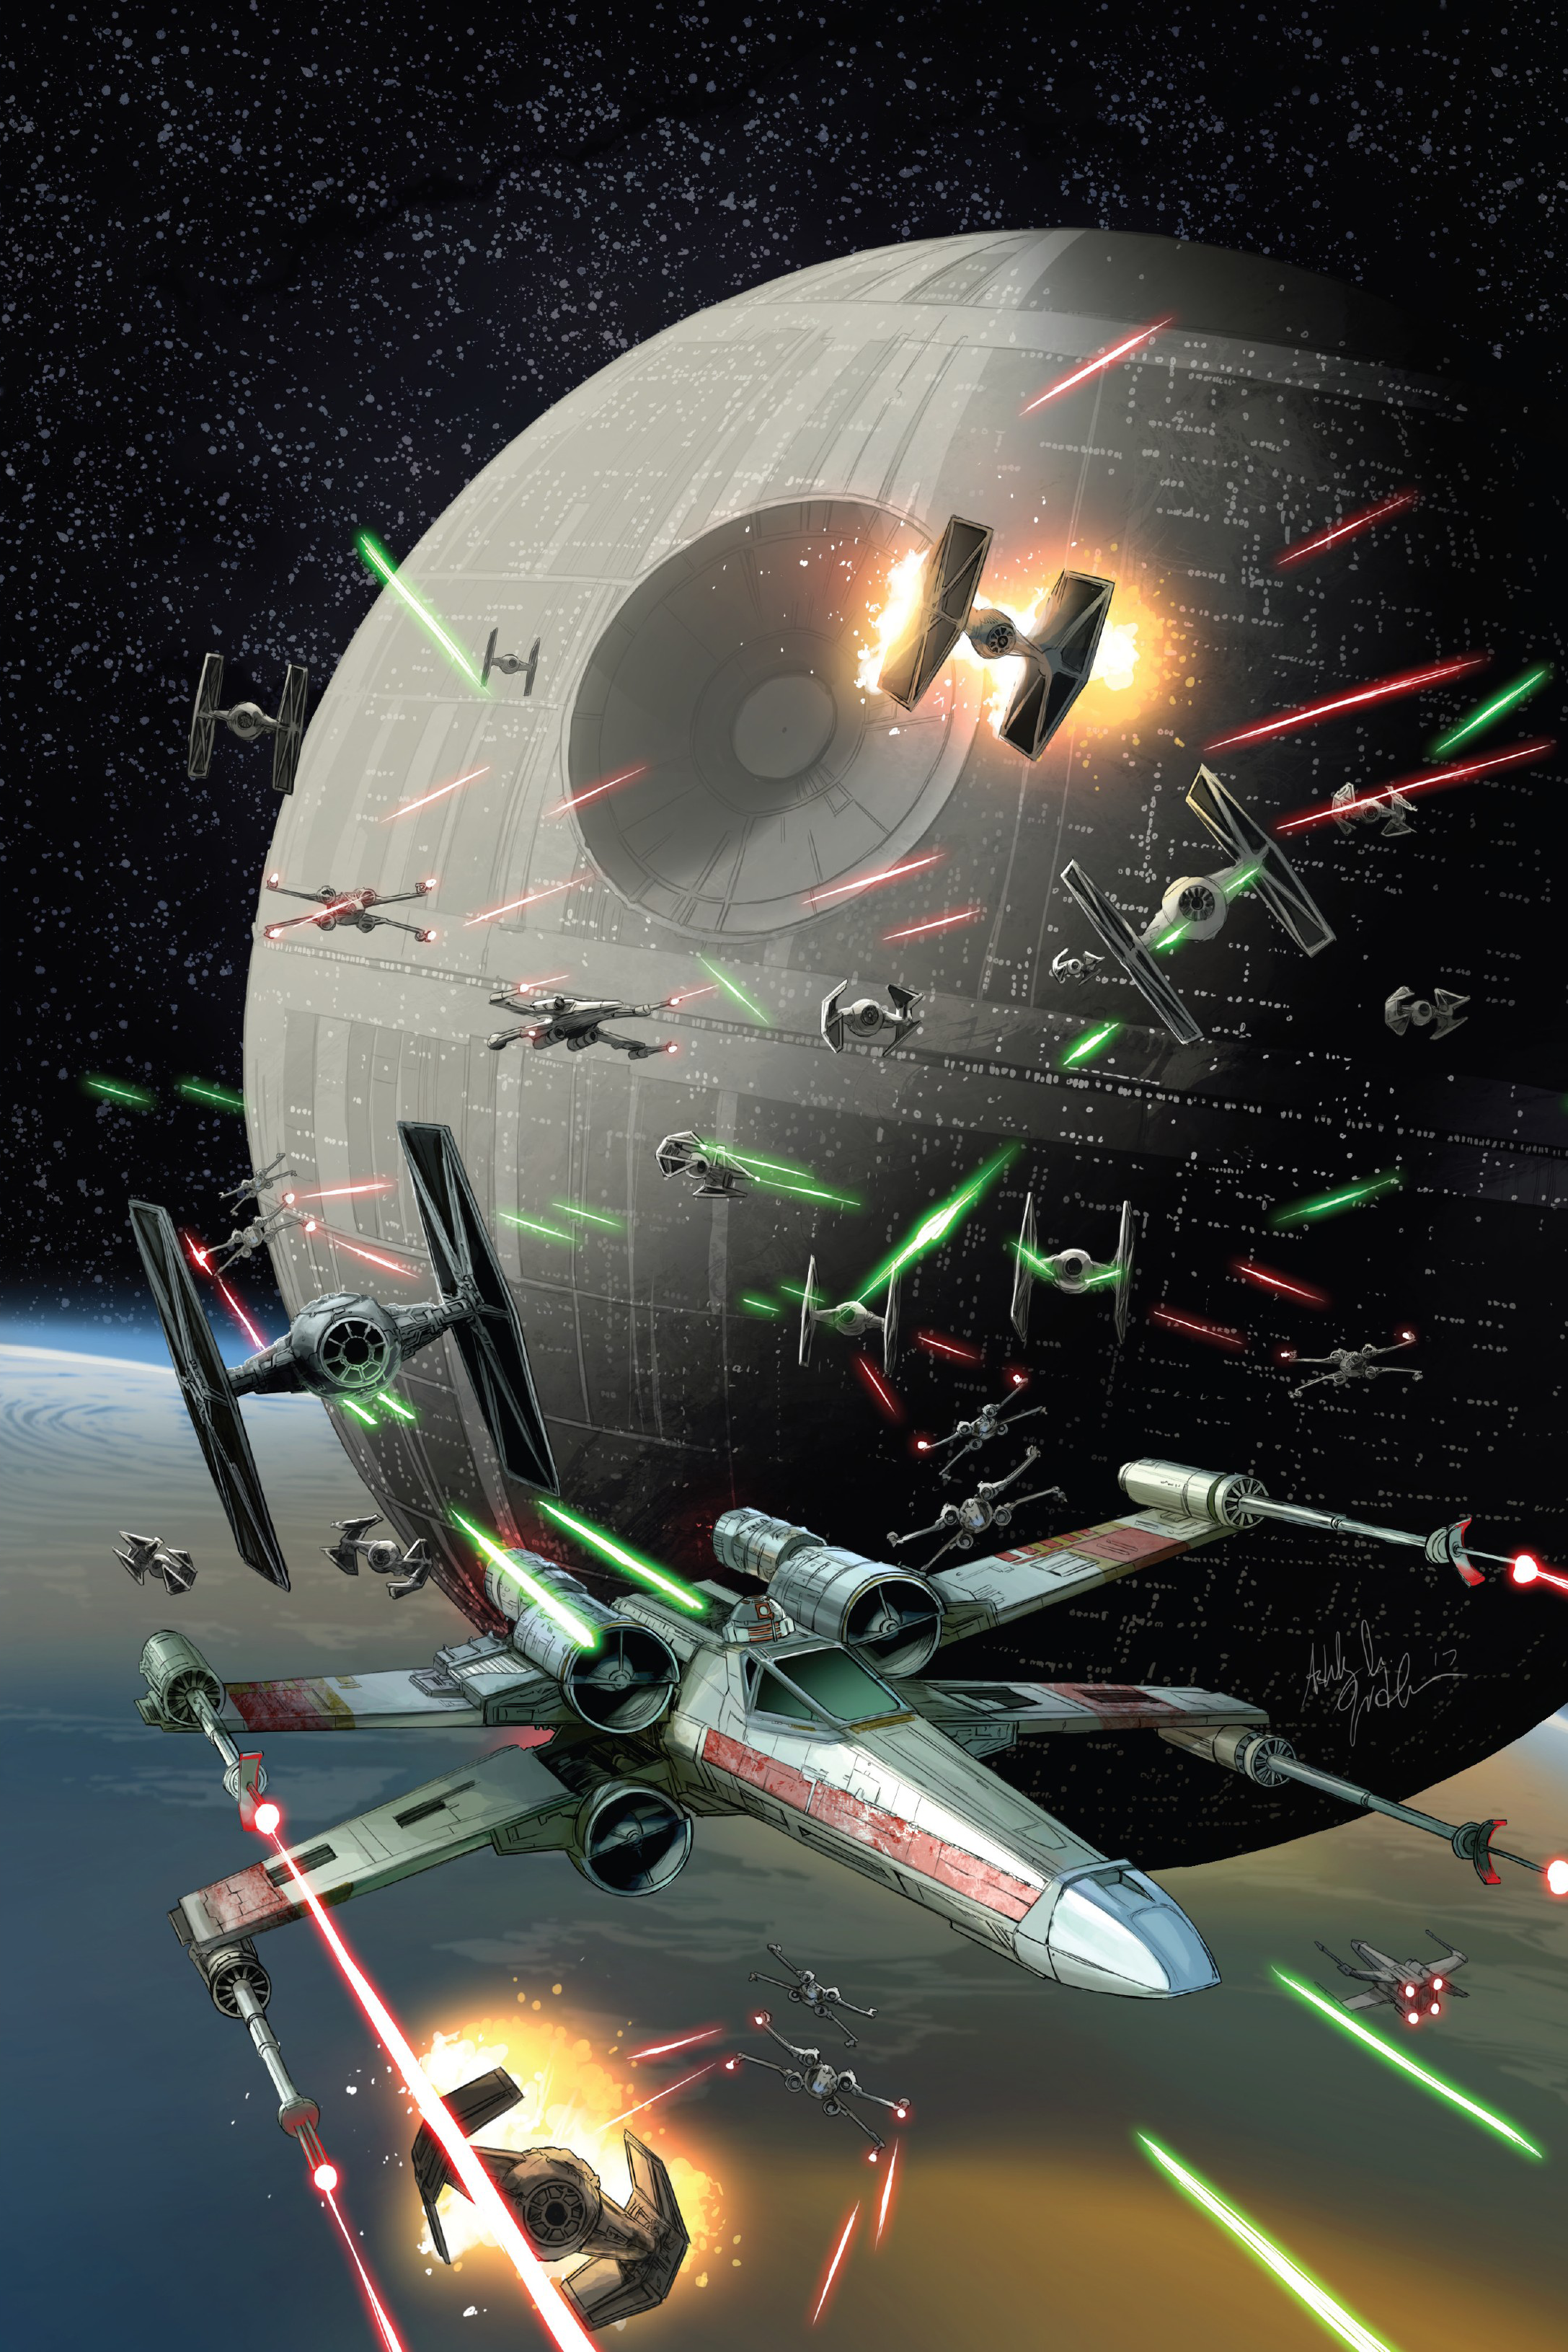
As the Death Star moved into range to unleash its superlaser, Rebel starfighters launched in a desperate attempt to destroy the battle station. According to the plan, the starfighters would skim down the Death Star's trench, following it to the thermal exhaust port, knowing that their torpedoes could reach the Death Star's main reactor, triggering a chain reaction and destroying the battle station. In the intense battle, the pilots of the Rebel Alliance confronted Imperial starfighters and turbolasers while simultaneously attempting to make attack runs on the exhaust port. Having underestimated the Alliance's chances, Governor Tarkin refused to dispatch additional reinforcements to engage the Rebel starfighters. He also disregarded an underling's warnings about the threat to the exhaust port and proceeded with his assault on Yavin 4.
Rebel pilots continued to be eliminated one by one by Vader and other Imperial pilots. Nearing the point of being the last of the Rebel assault force, Skywalker, Biggs Darklighter, and Wedge Antilles made a final run against the exhaust port. Vader shot down and killed Darklighter and forced Antilles to retreat, and was moments away from shooting down his son before Solo intervened in the fight with the Millennium Falcon. Solo forced Vader out of the battle, providing Skywalker with one final opportunity to strike the exhaust port. The attack succeeded, and moments later, the Death Star exploded, claiming millions of Imperial lives. Yavin 4, along with the Alliance, was saved.
After Yavin

Following a crucial victory over the Empire and the Royal Award Ceremony, the Rebellion was compelled to evacuate Yavin 4 in order to secure a new base of operations, as the Imperials were now aware of their location. All Rebel fleets converged on the planet to assist with the evacuation, and Dodonna began the search for a new planet to colonize.
During the evacuation of Yavin and in the aftermath of the Disaster, the Empire sought out surviving Alderaanians in an attempt to eradicate them, and Organa, accompanied by Rebel pilot Evaan Verlaine and astromech droid R2-D2, embarked on a mission to rescue them. They initially fled the Rebel base on Yavin 4, despite General Dodonna's objections. After escaping, they journeyed to Naboo, where they rescued a group of Alderaanian musicians known as the Melodic Order, before proceeding to Sullust. Unbeknownst to Organa and her companions, the Empire was tracking their every move, with their efforts spanning the galaxy.
In the period following Alderaan's destruction, Lindon Javes ascended through the ranks of the Rebel Alliance by targeting Imperial capital ships.
The Empire initiated attacks against Rebel targets, and Nashtah Squadron participated in several missions over the course of a week, often with inadequate intelligence. They suffered the loss of three pilots at the battle of Portocari, while Banshee Squadron lost two pilots at Phindar. Subsequently, the Empire planned to dispatch a task force to the Jovan system. In the wake of the loss of the Death Star at Yavin, the Empire mobilized its forces and reorganized TIE pilots under a unified command system.
The destruction of the Death Star dealt a significant blow to the perception of Imperial power, with the Rebellion disseminating footage of their victory across the DarkNet. In response to its damaged reputation, the Empire began to crack down on criminal elements it had previously tolerated in an effort to restore its image, although the Hutt Clan was permitted to continue its operations. In one city, a small Imperial detachment arrived at the illegal casino operated by a man known as "Luck Luck Freidal." While Freidal had been bribing Imperial officers to maintain the operation of his casino, the detachment sent to the casino disregarded their prior cooperation, murdered Freidal, and seized all of the casino's earnings as Imperial property.
Advancement into the Mid Rim
The Rebel Alliance, emboldened by their victory at Yavin, launched a military campaign in the Mid Rim. It was among the largest operations conducted by the Rebel Alliance, involving military units such as Twilight Company and thousands of starships. However, after nine months of combat on numerous worlds, during which the Alliance established numerous bases, Rebel High Command determined that the fleet was overextended and decided that the campaign would focus on defending their captured territories. Shortly thereafter, the forces initiated a retreat, and the battle companies evacuated their bases.
Attempt to kill the Emperor
A rebel operative named Eneb Ray was stationed on Coruscant, masquerading as a tax collector under the alias Tharius Demo. Leia Organa provided him with intelligence regarding a group of convicted former Senators incarcerated in the Arrth-Eno Prison Complex and requested his assistance in rescuing them. Upon infiltrating the complex, he discovered that Emperor Palpatine was scheduled to personally visit them. He then rallied all the spies on Coruscant, and they launched an assault on the sovereign as he addressed the doomed Senators. Palpatine attempted to flee the battle, and Ray pursued him to the rooftop, where he shot him down. However, that Emperor was a decoy, and the real one revealed himself as his shuttle approached. Enraged, Ray charged forward and launched himself into the shuttle as it began to ascend. As the shuttle carrying Ray and the Palpatine departed, the complex exploded, killing everyone inside. The Emperor then revealed his true identity by assaulting Ray with Force lightning and ejecting him from the shuttle.
Luke Skywalker's early missions
While Lieutenant Skywalker was aboard the Desert Jewel on a mission to rescue Drusil Bephorin and establish a supply line, he became embroiled in a skirmish between a Star Destroyer and a Kupohan starship.
To maintain the Rebel Alliance's advantage in the war, Luke sought to establish a clandestine smuggling supply route on Rodia. Following this, Luke embarked on a biological research mission to Fex for Fayet Kelen in order to earn some credits. There, he encountered brain-sucking creatures that had eliminated the previous team and commandeered the Harvester. Luke and Fayet's daughter, Nakari Kelen, successfully reclaimed the ship and gathered the necessary data for Fayet's company.
Despite Organa's warning not to blindly trust Kelen, Skywalker departed for Pasher with Kelen and R2-D2 to obtain intelligence from her father regarding their destination and the equipment required to survive its atmosphere. They then traveled to Denon to assist the natives there.
Skywalker and Kelen were on Denon to rescue Drusil Bephorin from Imperial custody. They initially contacted the Kupohan spy Sakhet, whose son was aboard the ship Skywalker rescued over Llanic. She provided them with valuable intelligence regarding Drusil's whereabouts each day, and Skywalker and Kelen observed her visit to the local park. They then devised a plan to extract her during a visit to a cafe. With R2-D2 chirping as a signal, they neutralized the security droid and distracted the bodyguards before seizing Drusil and transporting her through the sewer.
They transported her off Denon and to Kupoh, where one of the Kupohan spies, Azzur Nessin, was stationed. Nessin, the owner of a company called Nessin Courier & Cargo, was displeased about harboring highly sought-after rebels. However, they reached an agreement with him nonetheless. But one of the company's employees, Migg Birkhit, had informed the Empire of their location, and Drusil discovered this too late. They found Migg with a Gotal ISB agent named Barrisk Favvin. They captured both of them and held them hostage in their hotel room. However, another Kupohan employee named Ruuf Waluuk had also contacted the Empire, and this time the Empire dispatched a blockade. As Skywalker, Kelen, and Drusil were preparing to depart, Ruuf and a Devaronian mercenary arrived and murdered Nessin. Skywalker and Kelen then killed the two and fled the system with Drusil.
The trio traveled to Omereth, where Major Bren Derlin and his team were awaiting them with Drusil's family, whom they had rescued separately. However, they were intercepted by bounty hunters who had tracked Derlin's team to Omereth, and their ship was shot down and crashed into the ocean. They swam ashore and confronted the bounty hunters. Despite their victory, Kelen was killed by one of the bounty hunters while Luke rescued and completed his mission by reuniting Drusil with her family.
Empire in disarray
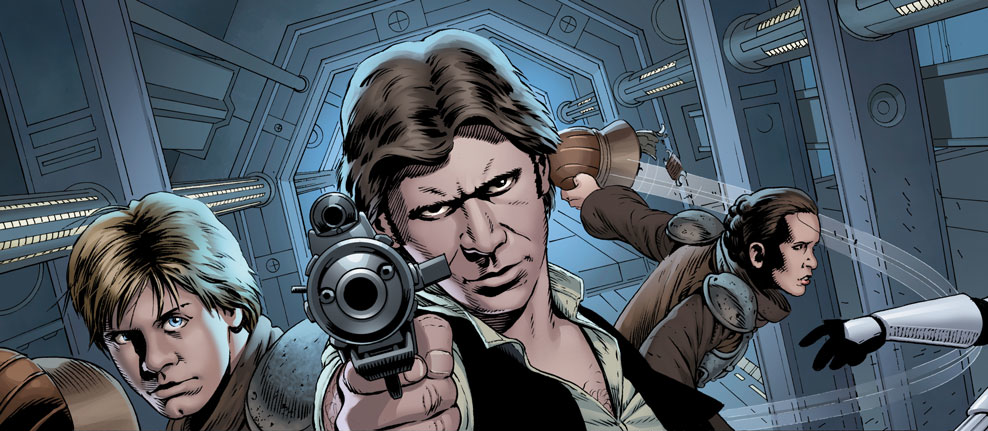
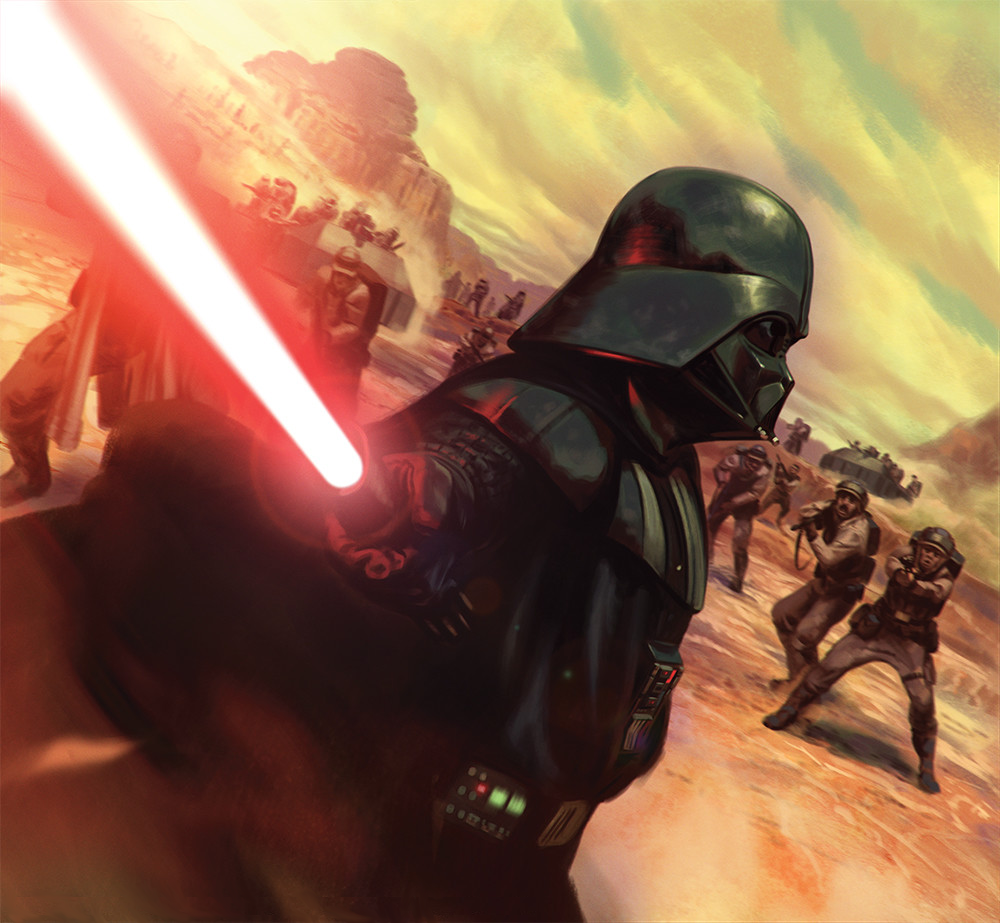
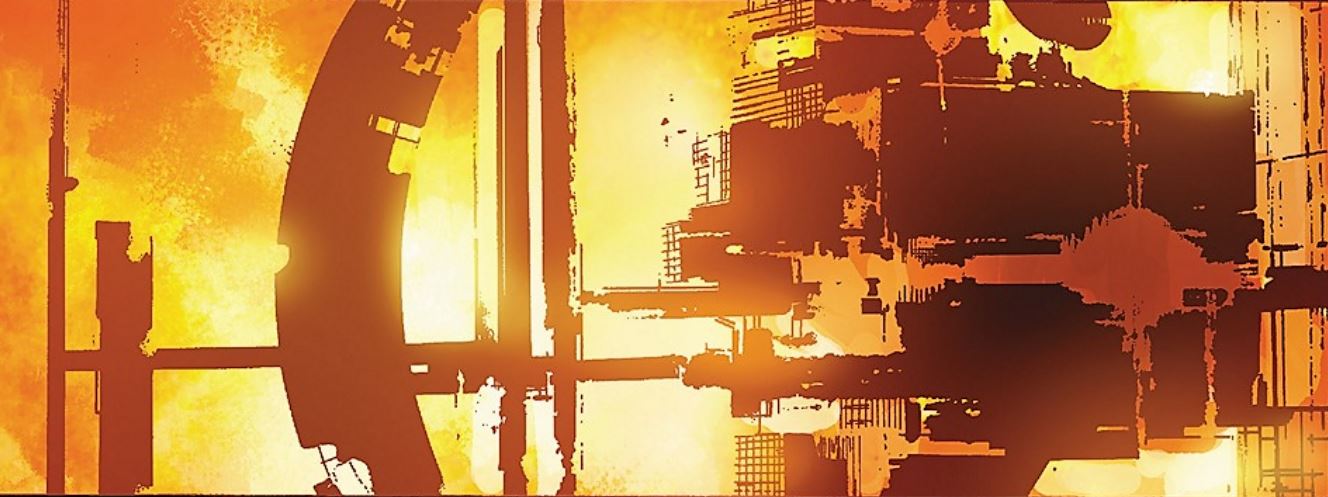
Following the obliteration of the Death Star, the Imperial forces were thrown into chaos. Seizing this opportunity, the Rebel Alliance launched a series of offensives, striking over a dozen critical Imperial sites. Notable among these were [bombing raids](link url) carried out [against](link url) the [Kuat shipyards](link url) and the [Imdaar supply base](link url). Furthermore, under the leadership of Solo, Organa, and Skywalker, a daring [assault](link url) and infiltration mission was executed against [Weapons Factory Alpha](link url) on [Cymoon 1](link url), recognized as the most substantial [weapons manufacturing](link url) facility in the entire galaxy.
After both the Death Star's destruction and the failure to safeguard Weapons Factory Alpha, the Empire was compelled to amplify its arms production. Simultaneously, Palpatine dispatched Vader as his [representative](link url) to engage in negotiations with the Hutt Clan. The objective was to secure Jabba the Hutt's allegiance as a dependable arms supplier. However, Vader used this opportunity to enlist two bounty hunters: [Boba Fett](link url) was tasked with gathering intelligence on the pilot responsible for the Death Star's demise, while [Krrsantan](link url) was hired to investigate a contact observed conversing with Palpatine, namely [Doctor](link url) [Cylo](link url).
Vrogas Vas Skirmish
Vader, in his pursuit of Luke Skywalker, had recently obtained his name from Boba Fett. Subsequently, one of Vader's rivals, [Commander](link url) [Karbin](link url), located Skywalker and inadvertently divulged his location to [Doctor](link url) [Chelli Aphra](link url). Aphra, in turn, shared this information with Vader, leading him to Skywalker's position on [Vrogas Vas](link url). There, he encountered three squadrons of [X-wing starfighters](link url), specifically [Red Squadron](link url), [Blue Squadron](link url), and [Yellow Squadron](link url), including Skywalker himself. In a fierce engagement, Lord Vader systematically eliminated numerous X-wings until only a handful remained. Skywalker, attempting to defeat his adversary, deliberately crashed his X-wing into Vader's [TIE Advanced](link url), resulting in both crashing onto the planet's surface.
Concurrently, rebels stationed at the [Rebel Refueling Base](link url) were mobilizing troops, vehicles, and [Y-wing bombers](link url) with the intention of permanently eliminating Vader. The [Gray Squadron](link url)'s Y-wings initiated a bombing campaign against his position, only to find their target retaliating by hurling chunks of terrain at them, neutralizing them one by one. As reinforcements arrived, Vader found himself surrounded by hundreds of [Rebel troopers](link url) and numerous rebel [tanks](link url), all poised to strike. Vader remained motionless, causing confusion among the rebels until they realized their grenades had been activated through the Force. A massive wave of explosions ensued, decimating hundreds of rebels, causing the survivors to scatter. Vader proceeded to cut down many more, deflecting tank fire back at the vehicles. He also seized control of a cannon, using it to target the [airspeeders](link url) of [Cyan Squadron](link url).
Meanwhile, Skywalker traversed the desert terrain, seeking assistance from the rebels. During his search, he stumbled upon an ancient [Jedi Temple](link url), but before he could investigate further, he encountered [0-0-0](link url), a lethal protocol droid adorned in gold to resemble C-3PO. Triple Zero incapacitated Skywalker, and was joined by Aphra, who sought to regain Vader's favor by capturing Skywalker. Han Solo then engaged Aphra to rescue Skywalker, while Leia Organa led a squad in another attempt to eliminate Vader. However, Vader mercilessly slaughtered them, but allowed Leia to escape in order to lure more rebels. Leia then instructed the Y-wings of [Amber Wing](link url) to initiate a bombing run on the area. As they did so, they were confronted by Karbin's forces, who had arrived on Vrogas Vas to clean up. Commander Karbin attempted to seize Skywalker, but Lord Vader intervened, leading to a confrontation between the two cyborgs. Their battle culminated when Vader lured Karbin onto a natural stone bridge and used the Force to hurl Aphra's ship into it. Vader descended to finish off Karbin, but the Millennium Falcon escaped with Skywalker, Leia, Solo, and a captured Aphra.
Assault on Sunspot Prison
Eneb Ray, a former attempted assassin of the Emperor, now bore both physical and mental scars. Believing that the Imperial prisoners held by the rebels were unworthy of life, he assembled a team of [IG-RM droids](link url) and launched an attack on [Sunspot Prison](link url), where numerous Imperials were being detained by the Rebel Alliance. They breached the control center, eliminated the [warden](link url), and began executing the prisoners. Leia Organa and [Sana Starros](link url) were present at the prison, having brought the captured Doctor Aphra there. They intervened in Ray's executions, and Dr. Aphra assisted them in subduing and arresting him. The mercenaries killed many of the prisoners, forcing the rebels to abandon the prison. Subsequently, [Task Force 99](link url) arrived at the prison to discover it deserted. [Kreel](link url) then ordered a new mission to eliminate the rebels. They later engaged rebel forces during a [skirmish](link url) on the [Ghost Moon](link url).
Crait Operation
With their base on Yavin 4 compromised, the Alliance dispatched Skywalker, Organa, Solo, Chewbacca, Antilles, and other rebels to the abandoned rebel outpost on Crait. There, they encountered a miner named [Trusk Berinato](link url), who provided them with a tour. Once satisfied, they began establishing defenses until Trusk betrayed them, leading Task Force 99 to attempt their capture. The rebels engaged the elite squad, defeating them before evacuating Crait.
Mon Calamari Armada
Skywalker, Organa, Solo, and Admiral [Gial Ackbar](link url) convened with Grand Admiral [Dors Urtya](link url) of the [Mon Cala Mercantile Fleet](link url) to discuss the integration of Mon Calamari vessels into the rebel fleet. However, their meeting was interrupted by an Imperial patrol. Following their escape, Urtya declined to involve Mon Cala, fearing a recurrence of Imperial oppression similar to the [Invasion of Mon Cala](link url) that followed Raddus' departure. Leia resolved to liberate King Lee-Char from imprisonment, hoping he could inspire his people to rise against the Empire. Luke, Han, C-3PO, Chewbacca, and R2-D2 infiltrated the [Moncaladrome](link url), abducted Moff [Tan Hubi](link url), and enlisted [Tunga Arpagion](link url), a [Clawdite](link url) [Changeling](link url), to impersonate him. They transported the Moff to [Strokill Prime](link url) and successfully infiltrated the planet's prison. They discovered Lee-Char barely alive, sustained by a life support system. Stormtroopers stormed in, initiating a firefight that resulted in the deaths of Lee-Char and Moff Tan Hubi, while the others escaped. Upon their return to Mon Cala, Urtya played the recording of Lee-Char's final moments to the fleet. This inspired the fleet to revolt and flee the system, aided by the Rebellion, towards the [Mako-Ta Space Docks](link url).
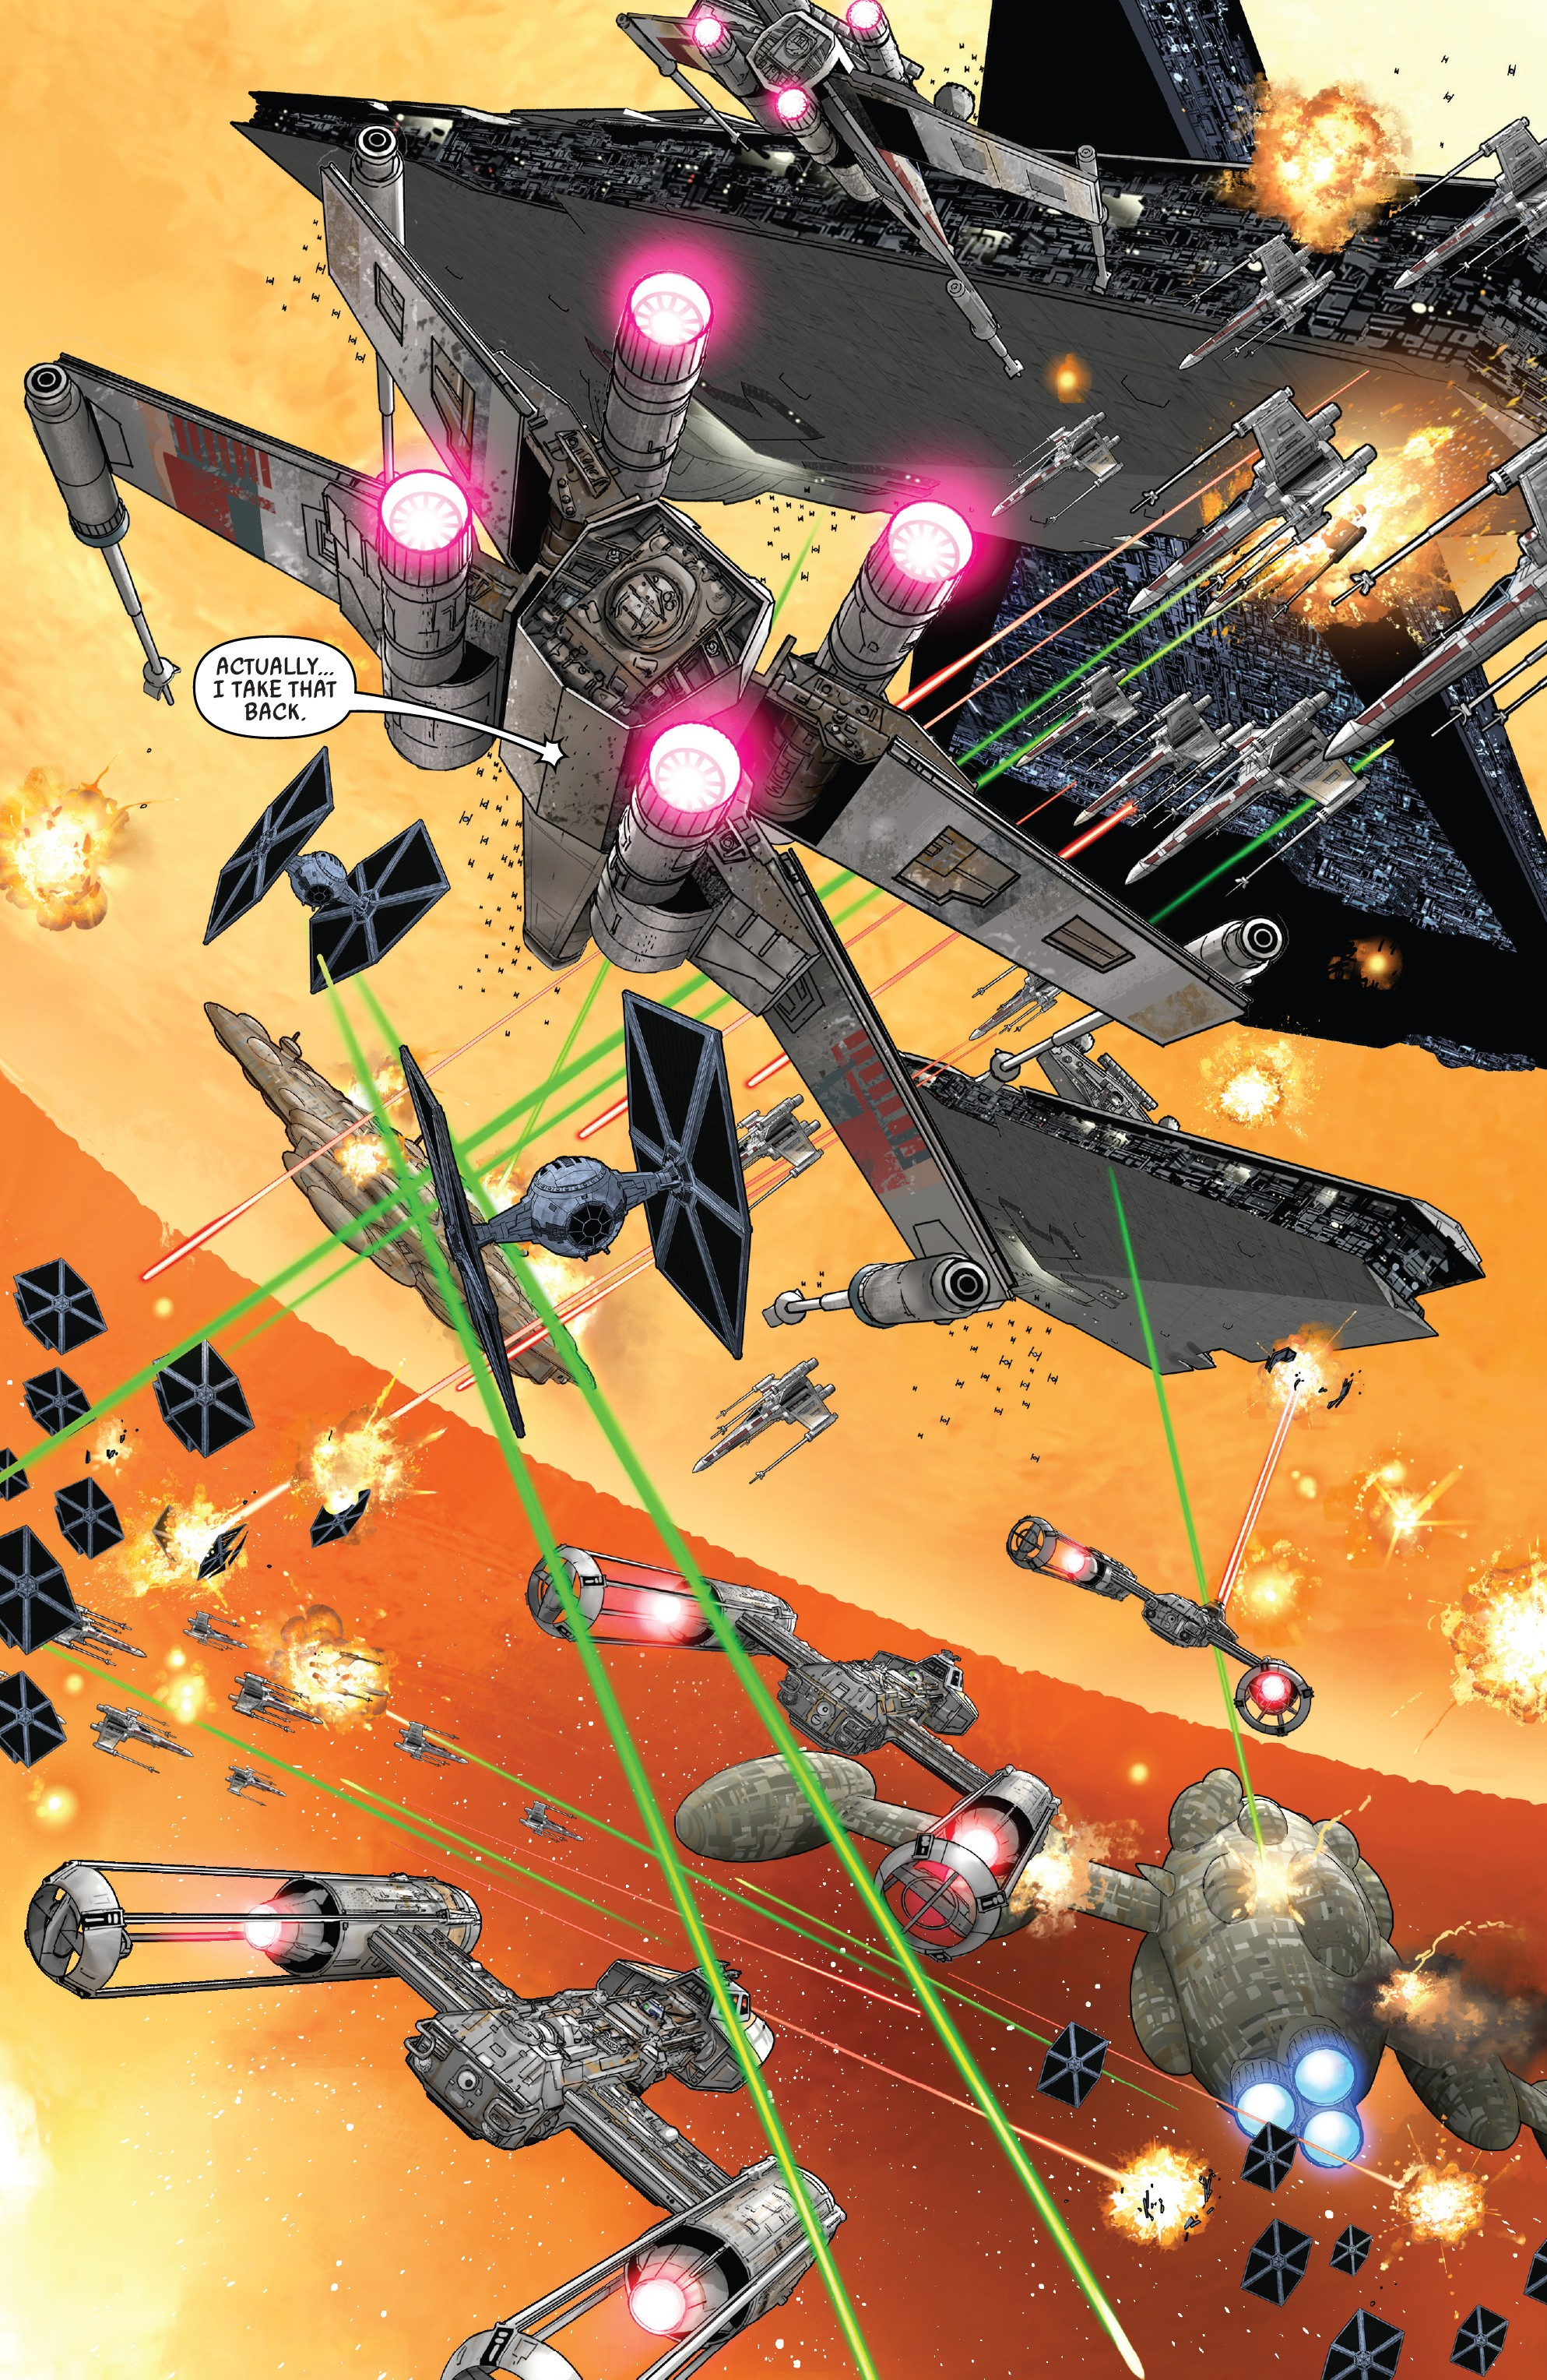
The Alliance now possessed a new fleet of Mon Cala vessels, including several MC75 and MC80 star cruisers, as well as Home One and Liberty type cruisers. However, these ships were largely unarmed. Trios, the queen of [Shu-Torun](link url), offered Shu-Torun engineers to assist in retrofitting these cruisers for combat readiness. Once the ships were completed, Mon Mothma convened a gathering of most of the Alliance's leadership, including Dodonna, Ackbar, Organa, [Davits Draven](link url), Syndulla, [Bandwin Cor](link url), Skywalker, [Vanden Willard](link url), Antilles, [Lajaie](link url), and [Bob Hudsol](link url). These celebrations were abruptly interrupted when the Imperial fleet, designated [Death Squadron](link url) and commanded by Darth Vader and Admiral [Kendal Ozzel](link url), entered the system.
The ships attempted to engage, but the space station had locked down all the Mon Cala cruisers, disabling their weapons and shields and sealing the flight bay doors. This revealed Trios' treachery, as she had been a spy for Vader all along. Vader now had most of the rebel leadership and a large portion of their fleet within his grasp and began to systematically eliminate them. Luke managed to free his squadron and officially named them "[Rogue Squadron](link url)" after Rogue One, joining Han Solo and Chewbacca aboard the Millennium Falcon. During the battle, Leia and Draven led a group of rebels to infiltrate Vader's flagship, the Executor, posing as Trios, and successfully stole the codes to unlock their cruisers. However, the Dark Lord detected their deception and intervened. Vader cut down the rebels, but Leia managed to escape with the codes.
The ships were able to break free using the stolen codes. While many managed to escape, the losses were substantial, with a significant portion of High Command killed, including Dodonna, Draven, Hudsol, Lajaie, and Bandwin, along with over half of their cruisers and nearly all of their starfighters.
Mid Rim Withdrawal
The rebel forces that had previously advanced triumphantly through the Mid Rim were now in full retreat. Units such as Twilight Company, [Bitter Pill Company](link url), [Fish Eye Company](link url), and the [Twenty-First](link url) were engaged in rescuing Generals, creating diversions on various worlds, and assisting the rebel fleet in its withdrawal from the Mid Rim. In [3 ABY](link url), Twilight Company initiated a campaign on [Haidoral Prime](link url) and successfully extracted the defecting [Governor](link url) [Everi Chalis](link url). She offered her insights into the workings and vulnerabilities of the "Imperial War Machine." After her knowledge proved valuable in the [Coyerti campaign](link url), the High Command invited her, Captain [Micha Evon](link url), and three others to [Echo Base](link url) on [Hoth](link url). Meanwhile, rebel bases such as [Unroola Dawn](link url), [Talrezan Four](link url), and [Hope Station](link url) fell to the Empire, the Twenty-First fought on [Bestine](link url) and General [Amrashad](link url) was killed. Despite these losses, the rebel fleet was almost entirely withdrawn from the Mid Rim.
Additional Conflicts

At some point during the conflict, the [battle of Distilon](link url) and [battle of Perimako Major](link url) took place, with rebel pilots Derek Klivian and Wedge Antilles participating in both engagements. A [mercenary unit](link url) on Tatooine was enlisted to assist a [garrison on Tatooine](link url) in [dealing with](link url) a Tusken Raider [camp](link url) in order to maintain control of the planet. They also aided the Alliance to Restore the Republic by supporting a [mission](link url) to recover medical supplies from the Imperial-aligned Hutt Clan on the planet of [Dandoran](link url). Later, the Empire initiated a crackdown on Jawas who were suspected of engaging in widespread unlicensed trade, prompting a local detachment of Rebels on Tatooine to protect the Jawas from the Imperials.
Shortly thereafter, Imperials and Rebels began searching an old freighter, which led to a confrontation between the Empire, the Rebel Alliance, and the Hutt Clan after defeating mercs who were supporting the Rebellion. Meanwhile, Vader ordered a search for his missing shipment that was taken by the [smuggler](link url) [Liana Kor](link url) on Dandoran. On the planet, the Empire had gained the formal senator [Johhar Kessen](link url), who was held prisoner in a base in order to prevent his rescue, only for the Rebels to rescue him later. The Rebels had to return to Yavin 4 in order to prevent the Empire from discovering the data centers that were left behind and were each destroyed by the Alliance that led to a ground battle for control of Yavin 4, while [Er'Kit](link url) and [Takodana](link url) both witnessed battles between the Empire and Rebels. [Project Blackwing](link url) also went awry during this period, leading to the [Undead Troopers invasion](link url).
Winning Hearts and Minds
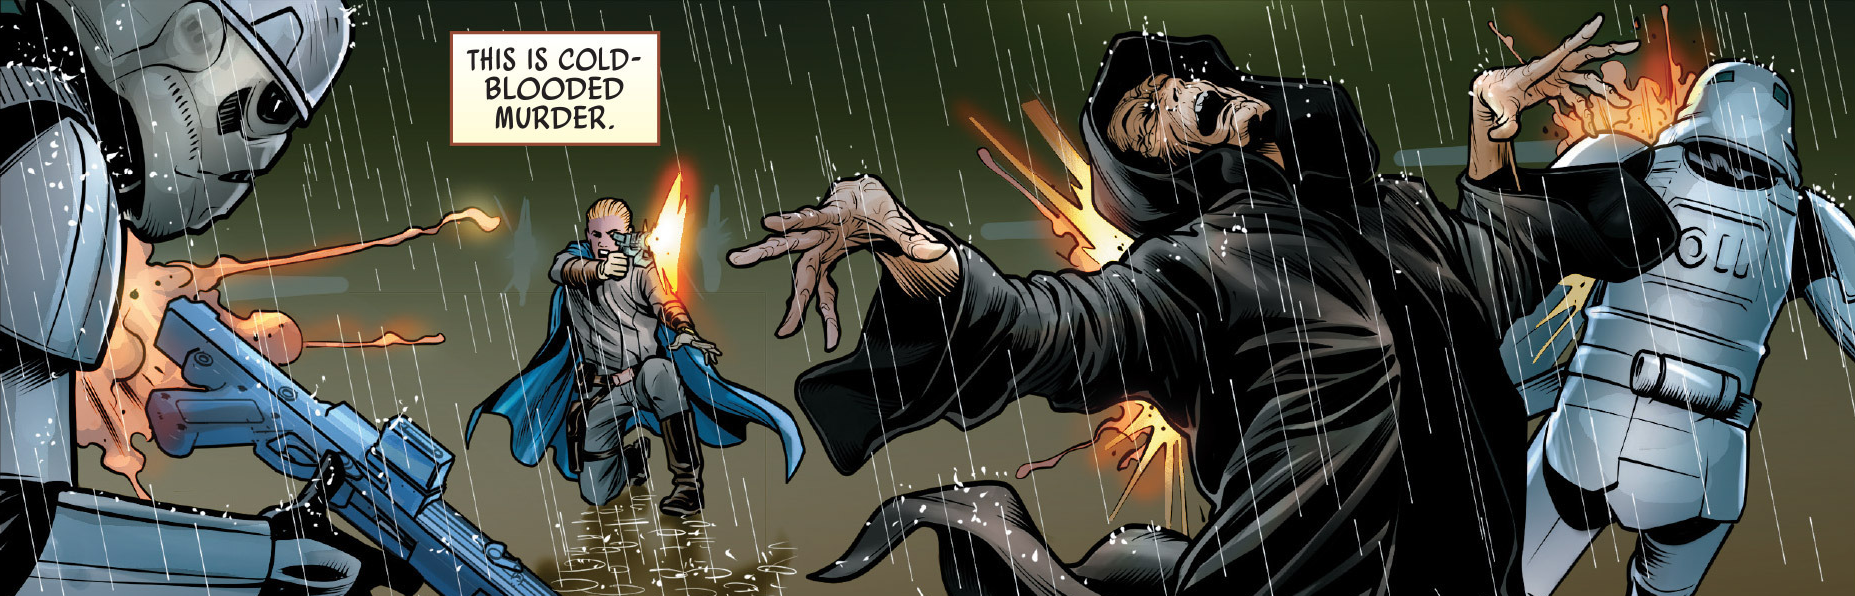
As the Galactic Civil War raged on, the elite stormtroopers of Task Force 99 continued their operations against the rebellion, even as Imperial supply lines struggled to recover from the Yavin disaster. This largely forced the SCAR troopers to operate independently. Furthermore, squad members were forced to witness the galactic population increasingly turning against the Empire, greeting them with fear or hatred instead of the affection they had once enjoyed as the "bringers of order." In response, the Empire resorted to increasingly brutal tactics in its attempts to eradicate the Alliance. During or after [2 ABY](link url), SCAR Squadron conducted a mission to Yelsain, deep within the Outer Rim, where an Alliance recruiter was working to enlist local citizens into the Alliance Military. After the recruiter was eliminated by team sniper [Misty](link url), SCAR Squadron's other members, led by Sergeant Kreel, revealed themselves to wipe away any remaining rebels, with Kreel slaying one individual who raised a blaster against him. Kreel congratulated the citizens of [Yelsain](link url) for being freed from the grip of Alliance "terrorists" but was forced to recognize the people were not applauding his actions. Always in pursuit of rebel agents, subsequent operations carried out by SCAR Squadron included a march through a swampy environment, a mission to a rocky area, a flight over lava near a city, and movement through a rainy, smokey location. During their missions, the stormtrooper squad needed to scavenge to survive and killed enemies whenever they grew homesick or hungry.
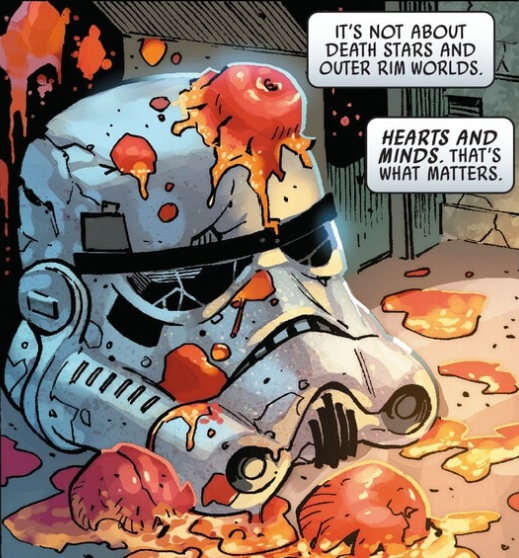
During Task Force 99's expeditions, rebels were often only revealed to the squad when they ambushed, something that Kreel believed was cowardly and proof the rebellion would not win the war on its own merits. On one occasion, the squad ventured through the frozen environment of an unnamed moon, where rebel personnel ambushed the squad with thermal detonators. Squad heavy hitter [Zuke](link url) took the brunt of the explosion to protect his fellows. Unable to bury their comrade, the squad opened fire against the rebels and used Zuke's body as a carrier for incendiaries, which were used to burn out the hiding rebels. Three weeks later, the squad returned to the once-Imperial loyal planet Horford, where they had once been celebrated as liberators. The love for the Empire displayed by the people of Horford had been proof to Kreel that the Empire was winning the war against the rebels and had been a fond memory for the soldiers of SCAR Squadron.
However, the local population had turned against the Empire in the time since and grown fearful of stormtroopers, with Kreel himself seeing several children playing as the rebellion's Heroes of Yavin upon their return. The moment was eye opening for Kreel, who realized that stormtroopers like himself had failed to win the hearts and minds of the galactic population; while the Empire could outnumber or overpower the Alliance, the people themselves had already been turned to the rebel cause, which he took as a sign that the war was lost. With his squad consumed by fear that they would be remembered as villains, Kreel allowed them to massacre the local population to work through their feelings, with Kreel deciding he would force the galaxy's peoples to either die or accept men like himself as bringers of order and law.
Hoth Showdown
Around [3 ABY](link url), approximately three years after the Battle of Yavin, the Empire deployed thousands of [probe droids](link url) across the galaxy as part of [Project Swarm](link url), seeking to uncover the Rebels' current base of operations. The [ambush of a rebel convoy at Derra](link url) intensified the Empire's search. The Alliance's Red Squadron also suffered losses in an [ambush](link url). A probot designated [XJ9-CS14](link url), launched from the [Star Destroyer](link url) Avenger, landed on the ice planet of Hoth and transmitted images of the Alliance's [power generator](link url) back to Vader's fleet, Death Squadron, in 3 ABY.
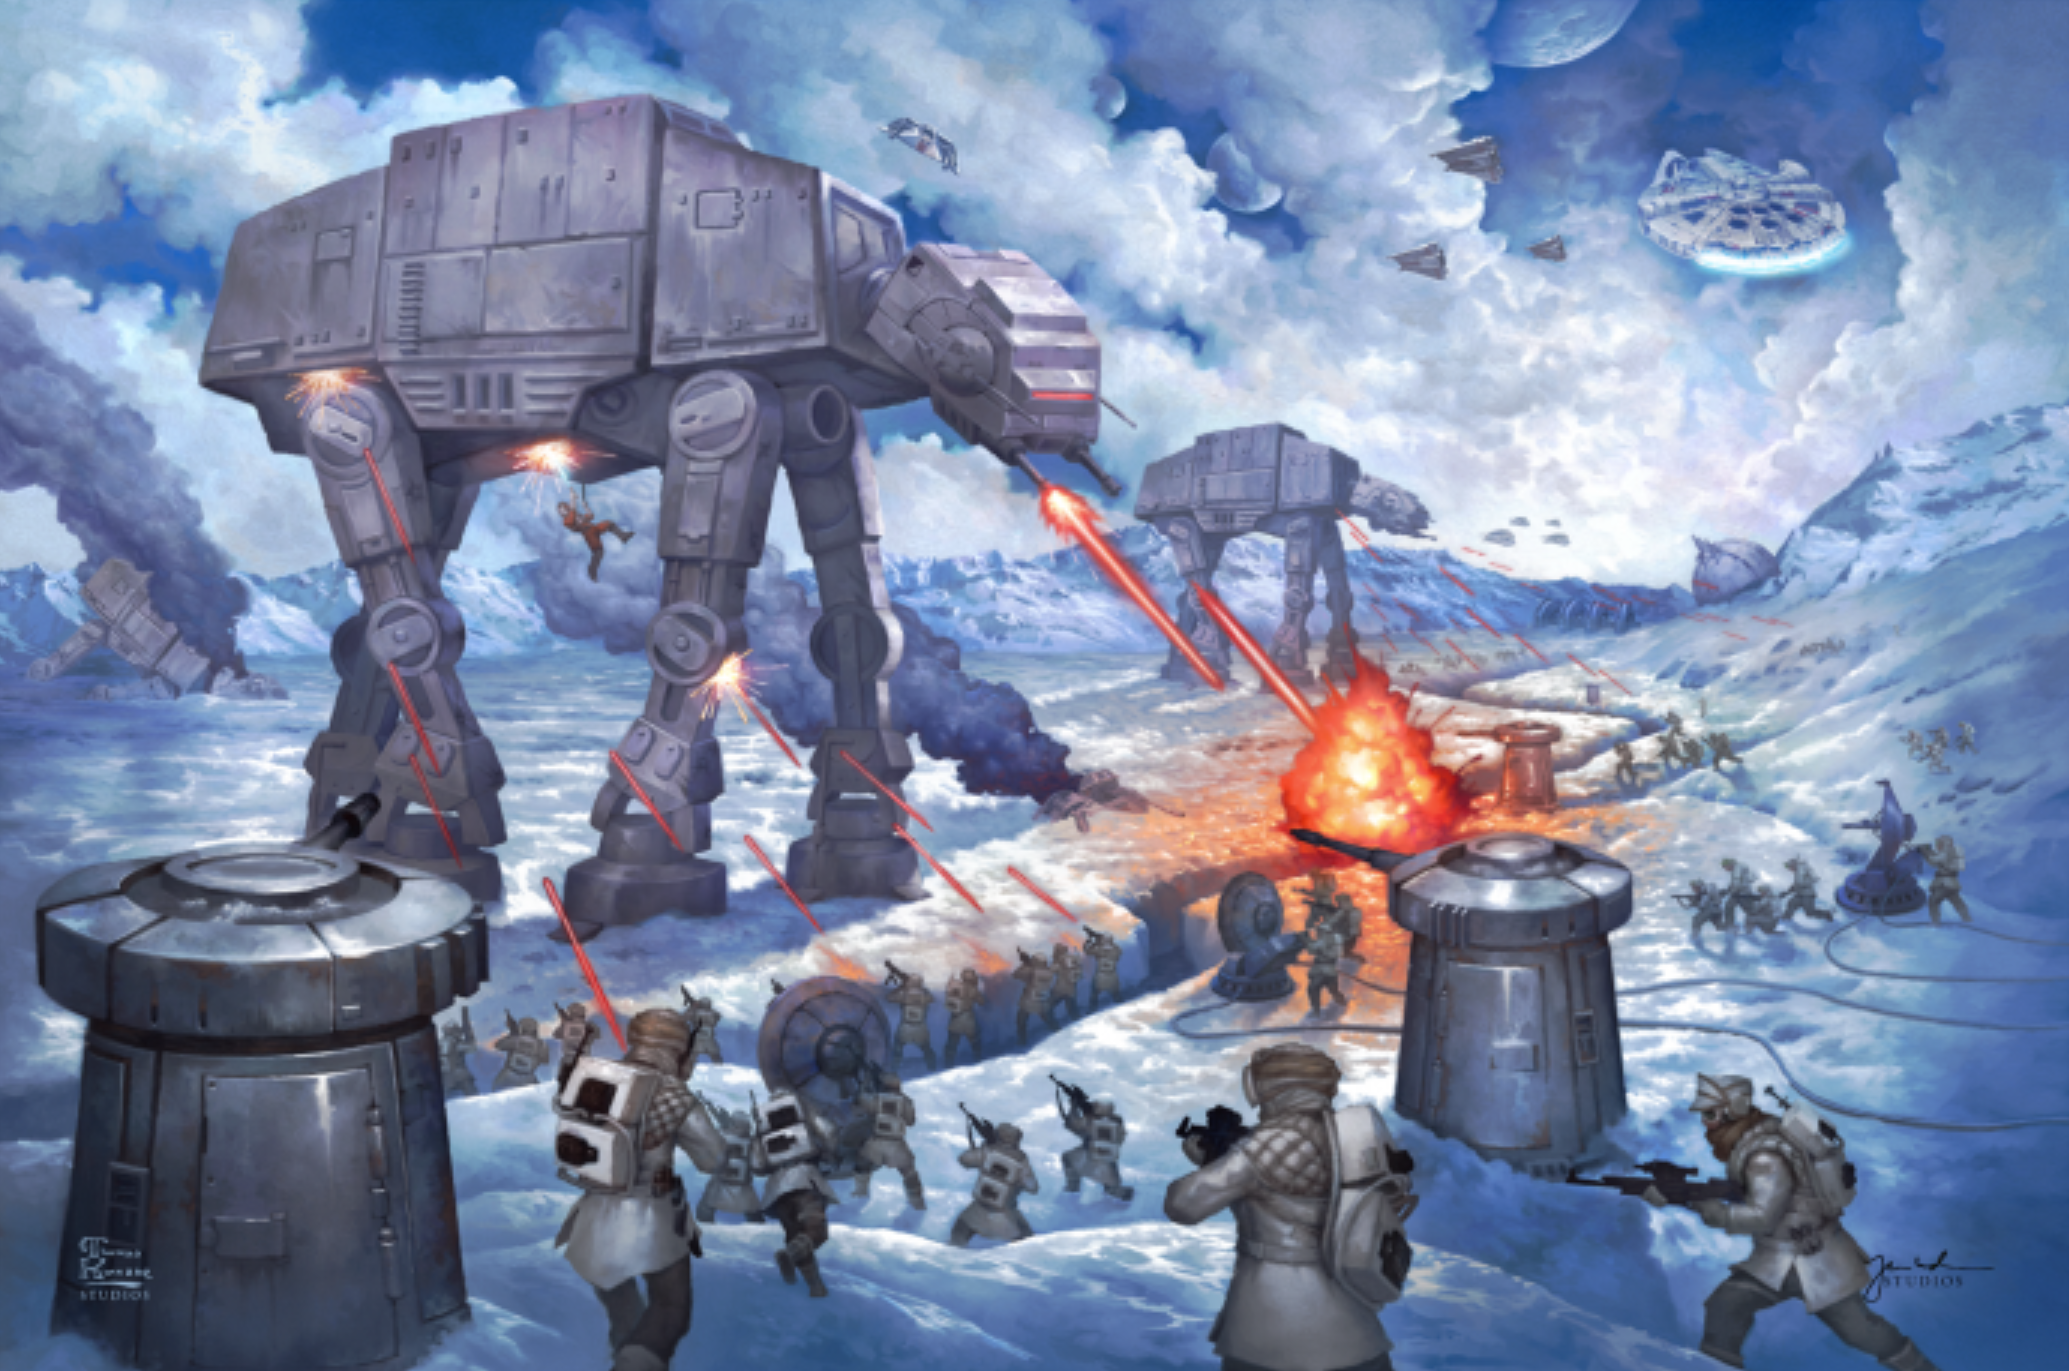
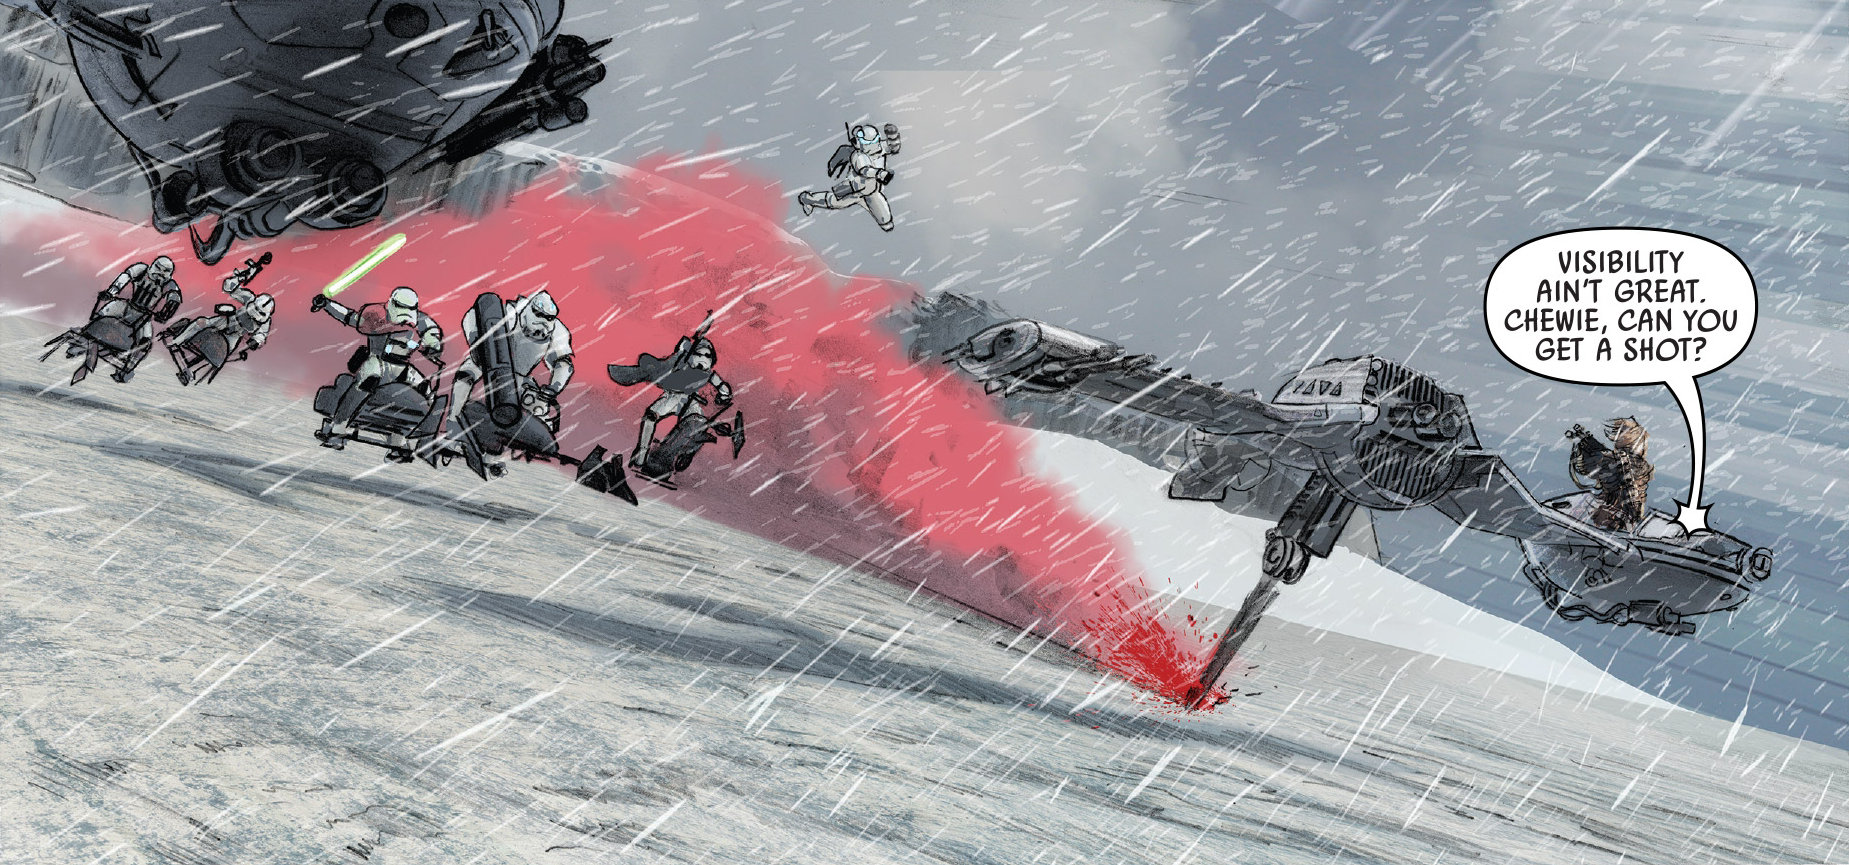
The [Imperial Navy](link url) launched an assault on Hoth, although the Rebels were alerted to the incoming attack after Admiral Ozzel brought the fleet out of hyperspace too close to the [Hoth system](link url). Vader subsequently executed Ozzel for his incompetence. This provided the Rebels with time to mount a defense and evacuate their Echo Base. They began evacuating their [GR-75 medium transports](link url), escorted by their X-wing starfighters, and utilized their heavy [ion cannon](link url) to disable Star Destroyers from Death Squadron's blockade. Imperial [Gozanti-class cruisers](link url) deployed [AT-AT](link url) [walkers](link url) and [AT-STs](link url) of [Blizzard Force](link url) to destroy the power generator. A smaller force of troops and AT-STs disabled [Perimeter Outpost Delta](link url), where [Sergeant](link url) [Hazram Namir](link url) of the Sixty-First Mobile Infantry and his two comrades [Roja](link url) and [Beak](link url) were stationed. They were forced to retreat to the main base with the other troops.
The AT-ATs were confronted by the T-47 airspeeders of [Rogue Squadron](link url) and [Corona Squadron](link url), which slowed the vehicles and destroyed three of them, including [Blizzard 1](link url), which an airspeeder crashed itself into as a last-ditch effort. Despite the strong resistance from the two squadrons, the AT-ATs destroyed the shield generator, and Vader and his elite [snowtroopers](link url) entered the base. Vader soon encountered Sergeant Namir, his two comrades, Everi Chalis, and the unconscious Captain Micha Evon. He slaughtered Evon and the two soldiers and then charged towards the Millennium Falcon, which escaped before he could board it. Namir and Chalis escaped the system with Chalis's clearance codes, while the Millennium Falcon, carrying Han Solo and Leia Organa, had to evade the blockading Star Destroyers.
In the aftermath of the Battle of Hoth, the Empire dispatched General [Octavion Sorin](link url) to eliminate any remaining rebels hiding on Hoth. A group of rebels encountered his forces and stole an Imperial shuttle. Tracking the ship, Sorin discovered the rebels had fled to the village of [Haven](link url) on the planet [Ison](link url). The rebel team frantically [returned to Hoth](link url) and boarded Sorin's Star Destroyer to try and prevent his [attack on Ison](link url), but the destroyer managed to jump into hyperspace. In the ensuing Imperial invasion of Ison, the rebels managed to crash Sorin's destroyer and confront the general himself on the ground, where they triumphed over Sorin and his troops.
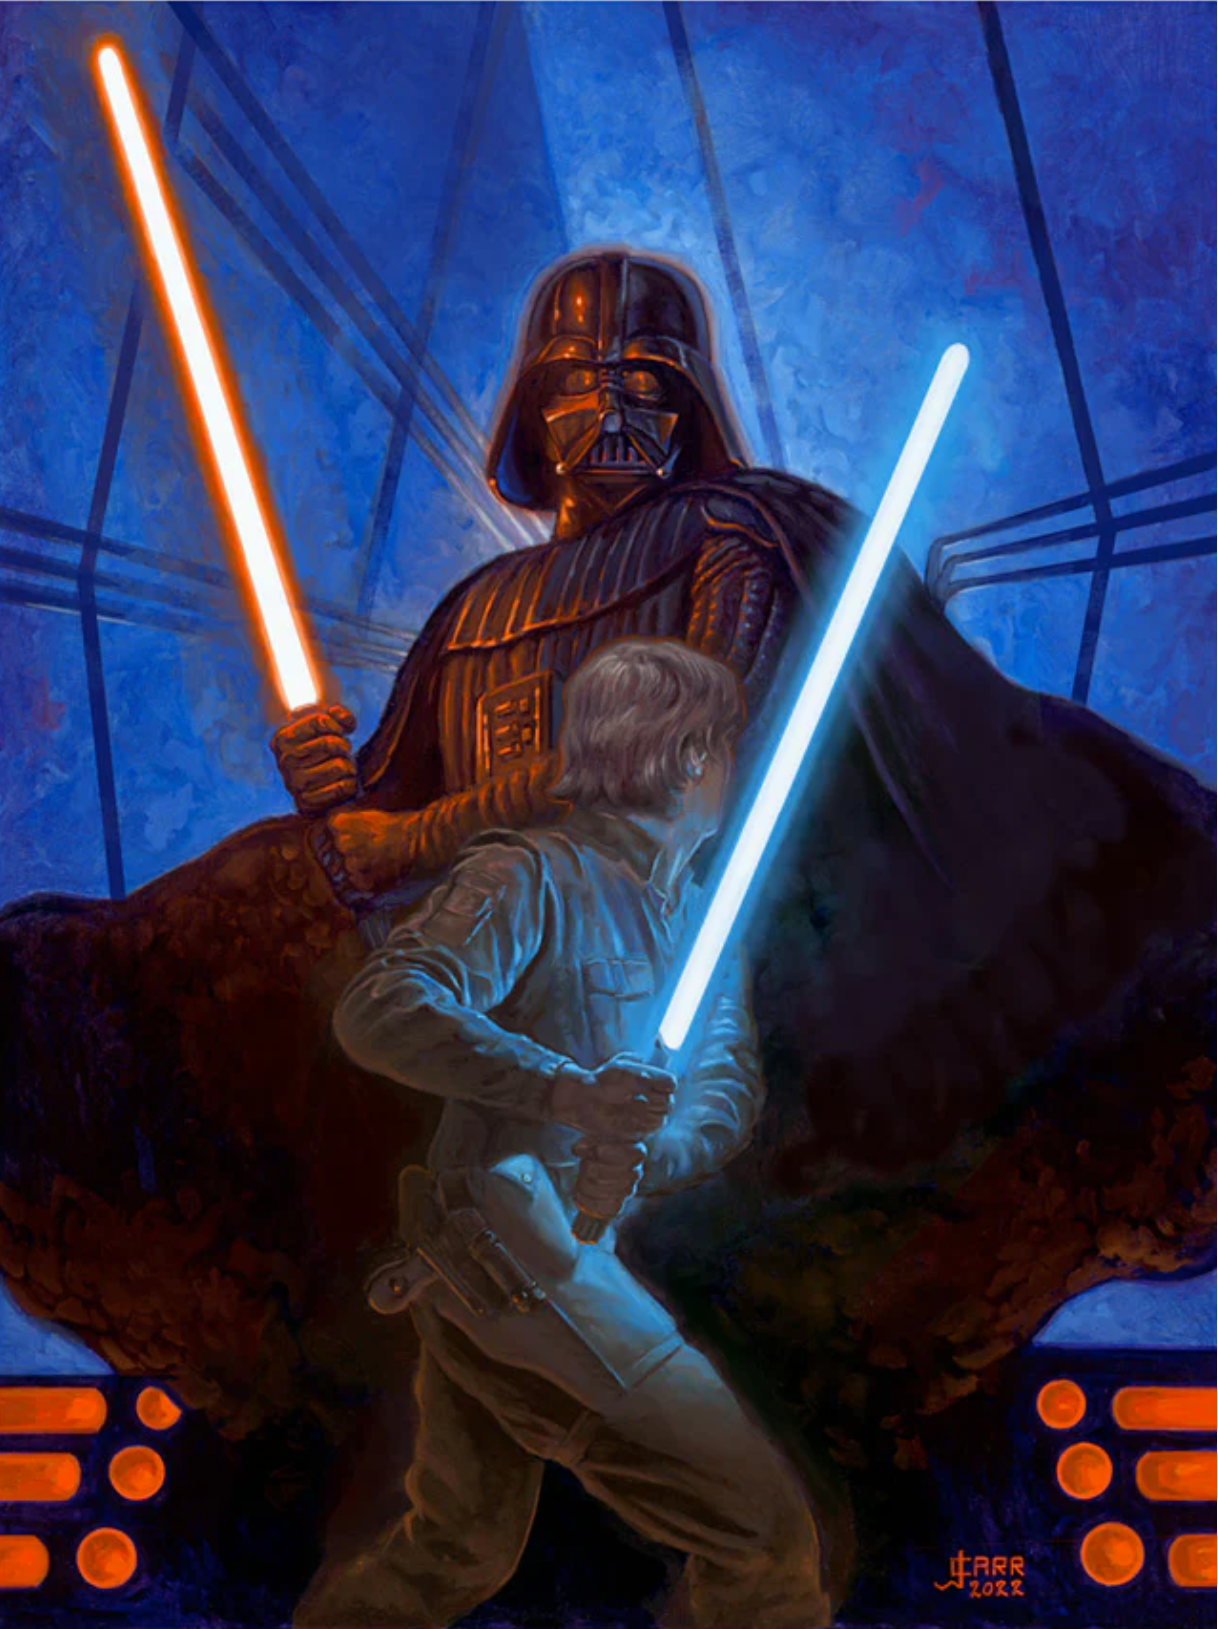
Following the Battle of Hoth, Organa, Solo, Chewbacca, and C-3PO evaded the Imperial fleet on the Millennium Falcon, outmaneuvering Captain [Lorth Needa](link url), and were forced to flee to [Bespin](link url) to seek out Solo's friend [Lando Calrissian](link url). Needa was killed by Vader as a consequence of his failure. However, the bounty hunter Boba Fett tracked the Falcon, enabling the Empire to capture Leia, Solo, and Chewbacca by utilizing Calrissian as an accomplice. Vader then arranged for Calrissian to set a trap to capture Luke Skywalker by freezing him in [carbonite](link url), but not before testing it on Solo. Luke arrived to rescue Leia and Solo and confronted Vader, where they engaged in a duel and Skywalker learned of their true familial connection. Meanwhile, the Imperial forces found themselves betrayed by Calrissian and, at least initially, overwhelmed by [Cloud City](link url) local authorities. The Rebel heroes escaped Imperial custody once again, but not without significant consequences. Skywalker lost his hand in his duel with Vader, while Solo was handed over to Fett for delivery to Jabba the Hutt. Bespin was also seized by the Empire.
Luke Skywalker, Leia Organa, and Lando Calrissian traveled to a [flotilla](link url), where the [EF76 Nebulon-B escort frigate](link url) Redemption was stationed alongside a large number of freighters. The Alliance was scattered, lacking direction or secure communication. General [Philap Bygar](link url) was deceased. At some point, the Rebellion successfully [captured](link url) four fully-laden transports in the [Pyros system](link url), although this victory did not compensate for the loss of the Echo Base ion cannon.
Operation Ringbreaker
The Sixty-First Mobile Infantry suffered complete decimation of their command structure, with Captain Micha Evon meeting his end at the hands of Vader on Hoth and the remaining officers falling victim to Imperial spies within the Elochar sector. Following this devastating blow, the company sought refuge on Ankhural to rebuild. However, Everi Chalis, an Imperial double agent, envisioned a more proactive approach, conceiving Operation Ringbreaker. This operation targeted Kuat Drive Yards and involved a series of diversionary attacks to confuse Imperial forces. Despite previous failed Rebel attempts on Kuat, Chalis's plan, in theory, held promise. Under the command of the newly promoted Captain Hazram Namir, Twilight Company attacked Mardona III, where Twilight squads inflicted substantial damage on the dockyards by strategically placing mines throughout the tunnels. Najan-Rovi, the subsequent target, housed dockyards containing Imperial luxury vehicles manufactured by Corellian Engineering.
The naval trooper garrison was caught entirely off guard and was utterly destroyed. While Twilight Company sustained no fatalities, several soldiers suffered injuries. The loss of nearly one hundred luxury vehicles compelled the Empire to redirect resources away from Kuat, precisely as Chalis had anticipated. The next assault took place on Obumubo. The garrison there, hardened by months of battling Obumubo's native sea creatures, proved to be a formidable force. The terrain favored the defenders, who expertly fortified their position. During the initial landing, two Twilight soldiers and a medic tragically drowned after exiting the dropships. An additional dozen perished in the first assault. It required two more days to prepare the siege cannons on the unstable landscape, ultimately leading to the garrison's downfall.
Nakadia proved to be one of the most challenging assaults for Twilight Company. While Nazrim anticipated a difficult fight to seize the synthetic armor facilities, the reality surpassed his expectations. Namir chose to leave Everi Chalis aboard the Thunderstrike and accompanied the squads on the initial assault. Twilight Company executed several nighttime raids from the stalks. Although effective, this strategy exhausted the soldiers and resulted in unattended injuries. Maediyu and others returned with bloodshot eyes, confirming the medics' suspicions. The soldiers were not affected by pesticides, but by military-grade bio-weapons. Namir informed the squad leaders, urging them to exercise caution. Sixteen more soldiers succumbed to airspeeders spraying the bio-weapon before the source was identified. A squad then attacked and incinerated the facility. Twilight Company proceeded to destroy the factories and evacuated Nakadia as star destroyers arrived. The Battle of Naator and the Battle of Xagobah also resulted in victories for the 61st, albeit with casualties. Subsequently, Namir handpicked twenty soldiers for a sabotage mission targeting machinery within the Kuliquo belt. The operation achieved complete success.
Siege of Inyusu Tor
Meanwhile, Prelate Verge and Captain Tabor Seitaron, driven by a desire to punish Chalis for her defection to the Alliance, attempted to anticipate Twilight Company's next move. Operating from the Imperial II-class Star Destroyer Herald, the pair narrowed down potential targets to a select few worlds, including Sullust, and prepared for an anticipated attack on each. Verge deployed multiple TIE/IN interceptor squadrons near these worlds, including Vixus Squadron near Sullust.
Twilight Company emerged from hyperspace aboard their starships, the CR90 corvette Thunderstrike and its escort, the Braha'tok-class gunship Apailana's Promise, a mere 500,000 kilometers from the planet. This was a calculated move to rapidly deploy dropships for an attack on the Inyusu Tor mineral processing facility before Imperial orbital defenses could mount a timely response. The attack commenced with an assault on the Inyusu Tor mountain. News of Twilight Company's arrival on Sullust reached the Herald, prompting Verge and Seitaron to dispatch Vixus Squadron to Sullust.
The Star Destroyer Herald arrived at Sullust, and Imperial ground forces initiated an assault on the Inyusu Tor factory, where Captain Namir and Twilight Company awaited. The ensuing battle was a slow grind, but the Imperials steadily pushed back the Rebel lines. The Apailana's Promise engaged the Herald to divert its attention from the ground forces. Everi Chalis betrayed the Rebels, commandeering a stolen shuttle to reach the Herald. Upon landing in the hangar, she was greeted by Prelate Verge and Captain Tabor Seitaron, at which point she detonated an ion bomb. This forced the Herald to retreat from the atmosphere to prevent the detonation from causing it to crash. Prelate Verge perished on the Herald. With the Herald removed from the battlefield, Twilight Company was able to overwhelm the remaining ground forces, securing victory on Sullust. The Apailana's Promise narrowly survived, and Twilight Company suffered the loss of over a third of its troops, but they ultimately prevailed. The small Sullustan resistance, led by Nien Nunb, incited an uprising in the nearby capital city of Pinyumb, sparking planet-wide rebellions that delayed any potential Imperial counterattacks for weeks. Twilight Company capitalized on this opportunity to replenish its ranks and formulate future plans.
Operation Starlight
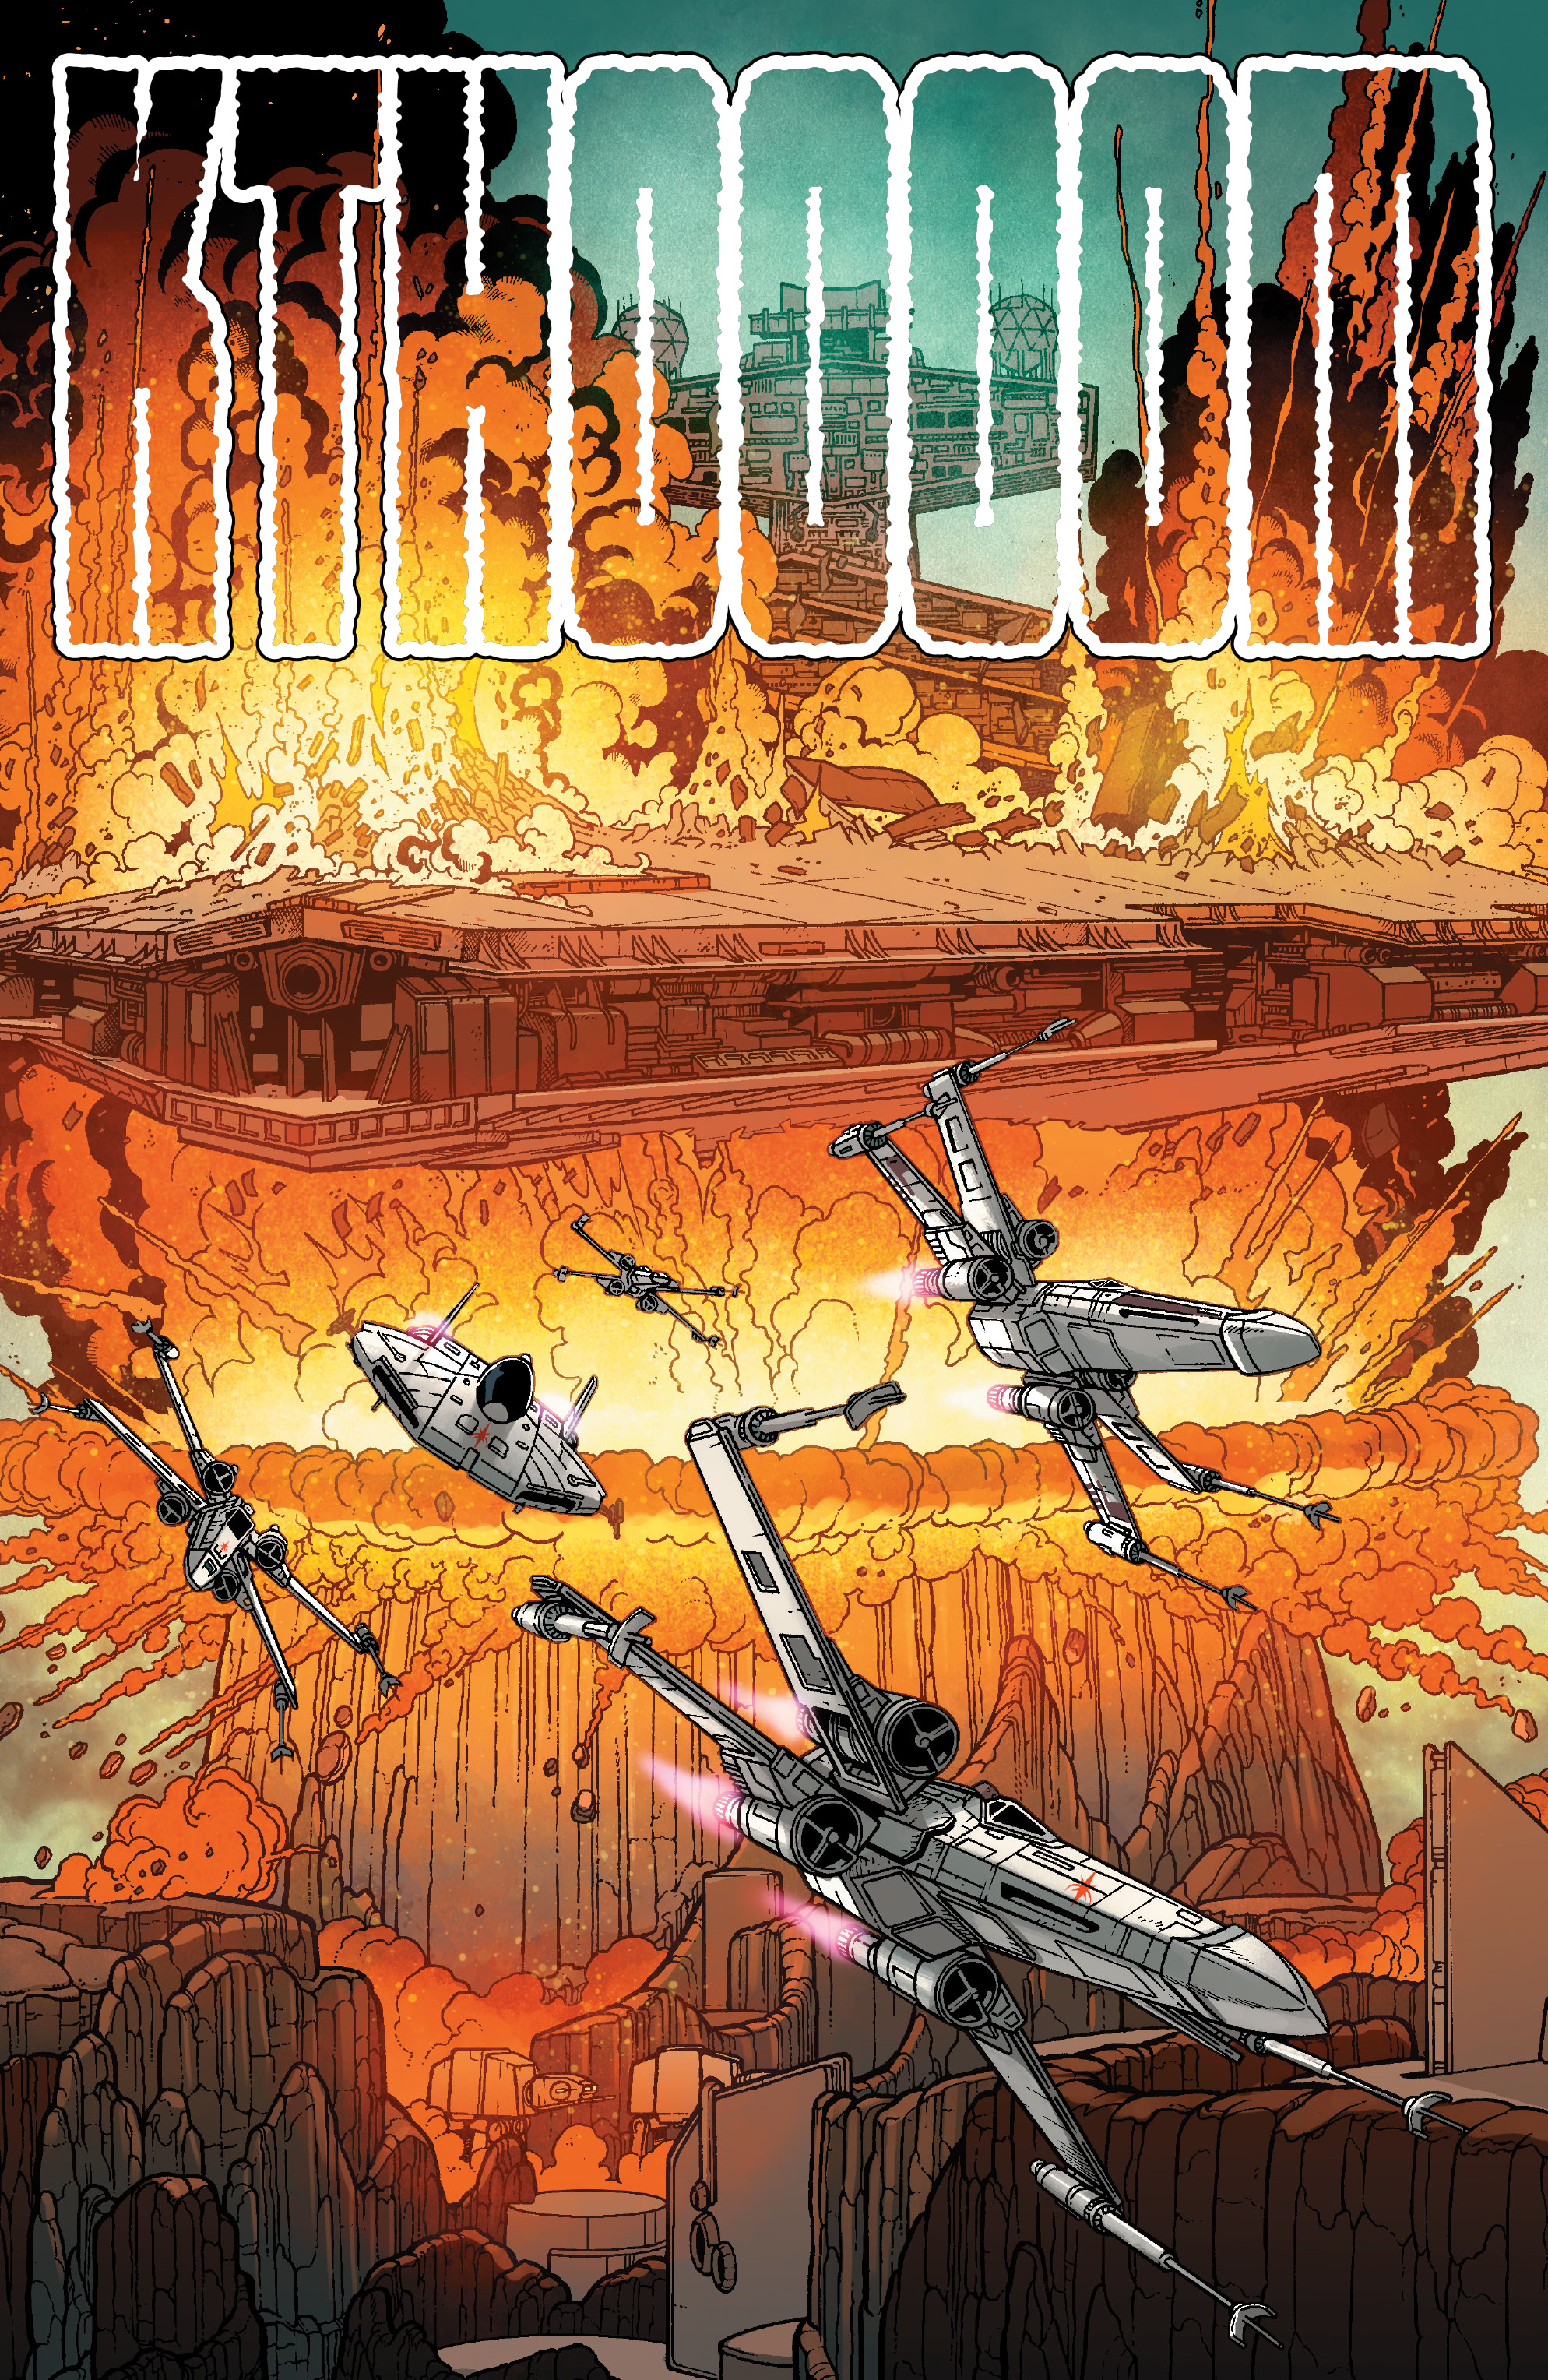
With the Alliance fleet dispersed across the galaxy, General Organa and the Fourth Division devised a strategy to reunite it. The Empire's ability to intercept Rebel codes and destroy fleet divisions upon contact necessitated a new approach. "Operation Starlight," named after the Starlight Beacon, involved disseminating new codes to the Rebel divisions that had yet to be compromised by the Empire. Rebel Pathfinders orchestrated a heist at the Imperial Museum on Coruscant to acquire the Autonomous Translator Module, Mark II droid, capable of translating the uncracked Trawak language into codes for the Rebels. These codes were entrusted to Starlight Squadron, who ventured near Felucia to deliver them to the Sixth Division. However, the Sixth Division was destroyed, and the squadron was ambushed by the Tarkin's Will under the command of Tarkin's former student, Commander Ellian Zahra. Starlight Squadron received assistance from Skywalker after responding to a distress signal from the Eleventh Division at Ab Dalis. Utilizing the provided coordinates, Starlight Squadron triggered a subterranean explosion beneath the Star Destroyer Ultima II, which was besieging the Eleventh Division's ground forces. This resulted in an underground volcano erupting, obliterating the Imperial forces.
Subsequently, the Tarkin's Will attacked the Second Division at the Temporary rebel cell base on Panisia. During the ensuing Battle of Panisia, the ship was ambushed by the entire Rebel fleet. The Tarkin's Will plunged toward the planet's surface, dragging numerous Rebel ships down with it and destroying the Rebel base. Upon re-engaging the fleet, the Star Destroyer focused its fire on the Home One. However, the Tarkin's Will sustained heavy Rebel fire and crashed onto the planet's surface. Surviving the crash, Zahra demanded a personal confrontation with Organa on Panisia's surface, ultimately leading to the Imperial commander's defeat.
The Rebellion's public return
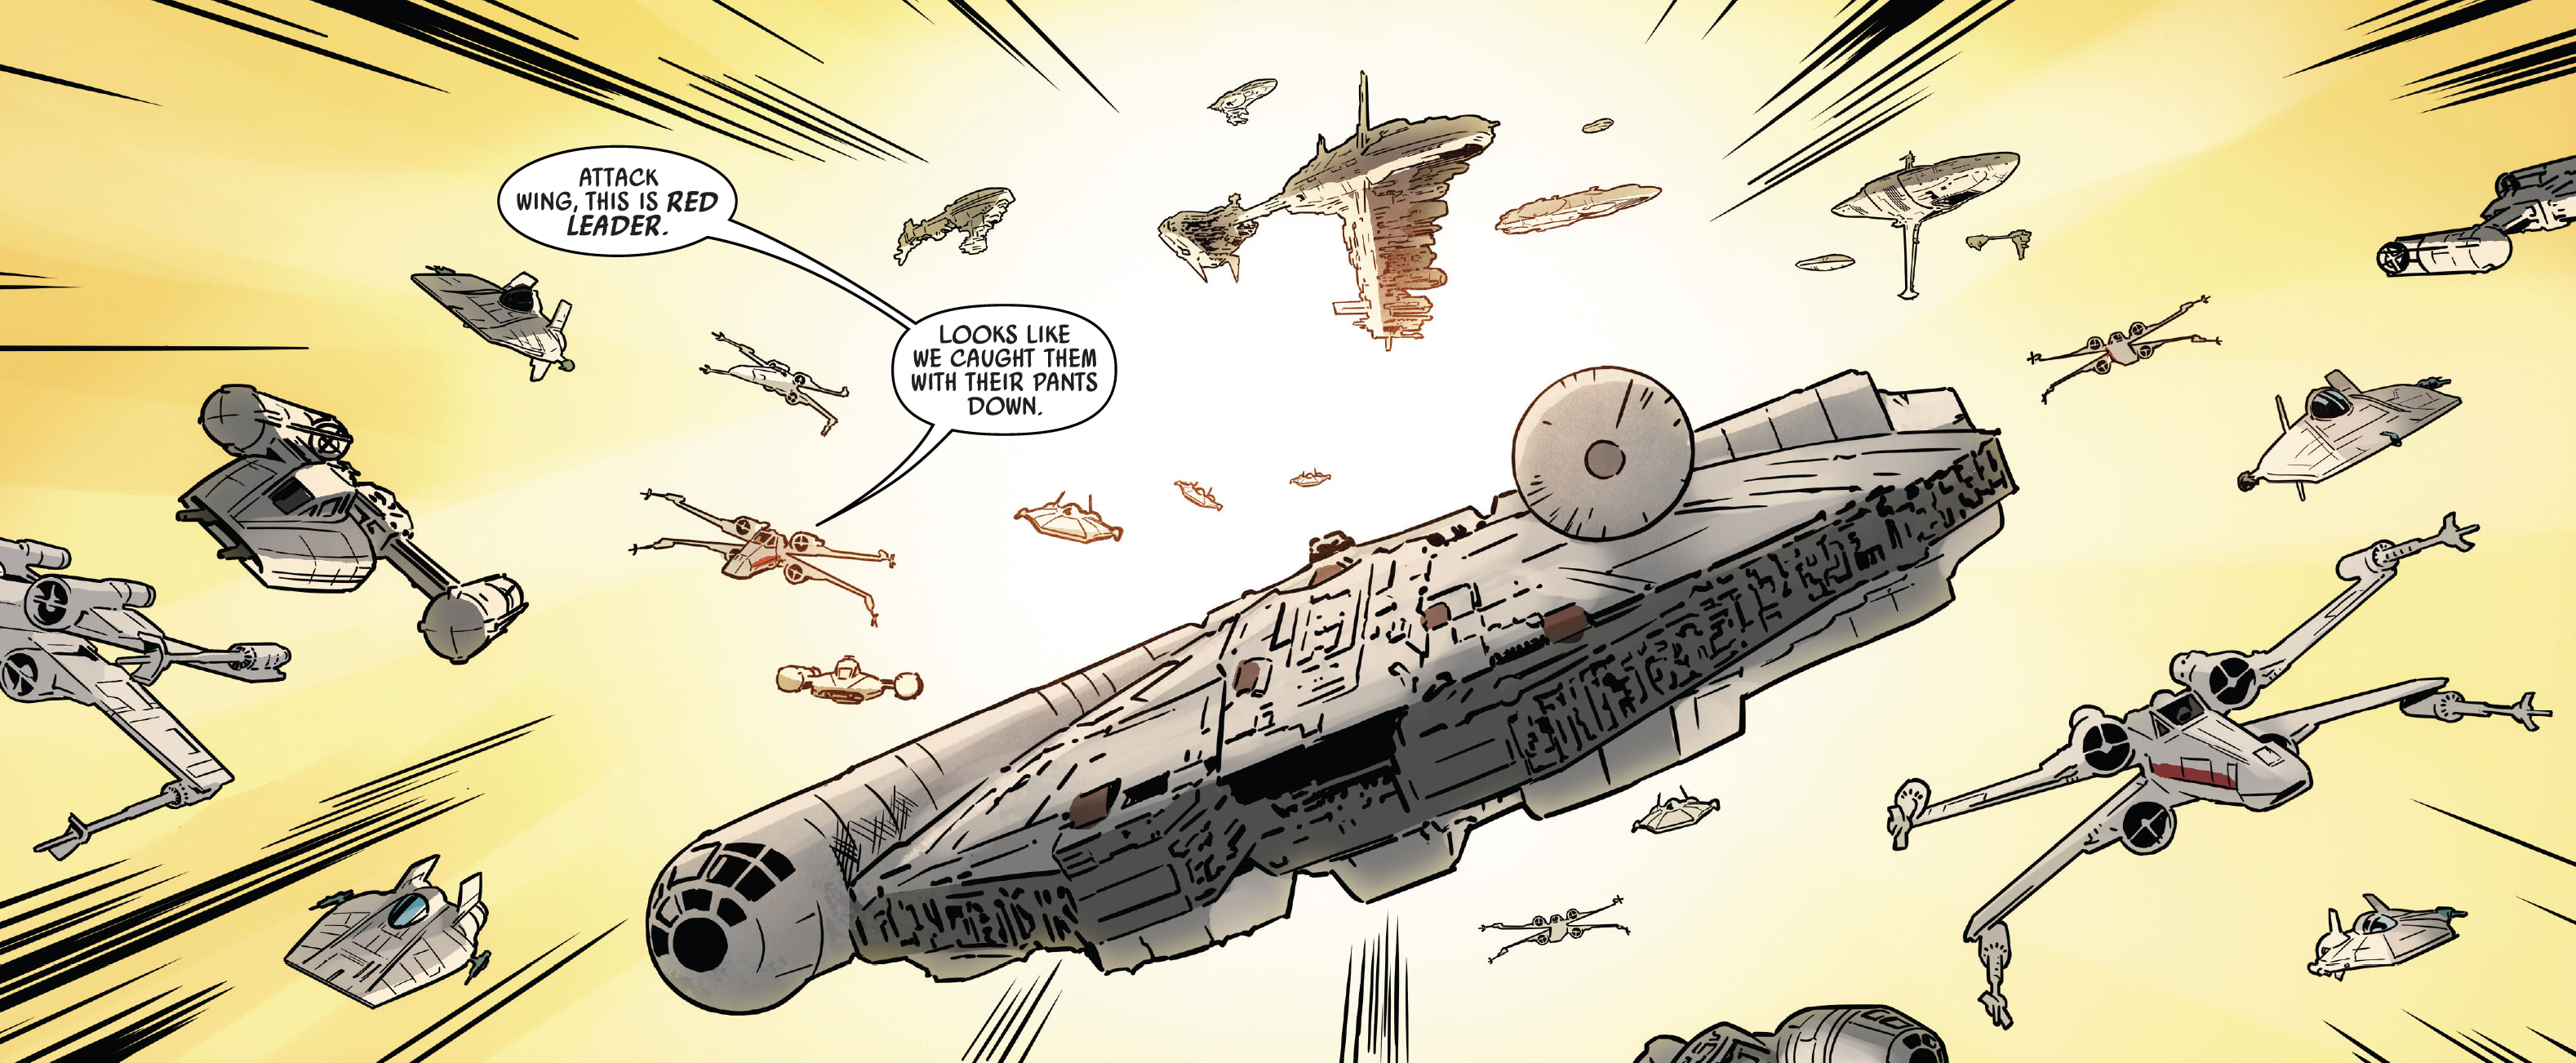
With the Alliance in a state of constant retreat since the defeat on Hoth and relentlessly pursued by Zahra's fleet, the public perception was that there had been a lull in major Rebel activity for several months. Consequently, the Imperial Propaganda Office proclaimed an Imperial victory in the war. Following Zahra's defeat and the reunification of the Rebel Fleet, Organa determined that the time was ripe for a public Rebel demonstration to prove the movement's continued existence. They chose to attack the Imperial Unity Day parade on the planet Bar'leth in the Core Worlds. This public victory underscored the Alliance's resilience and showcased their commitment to avoiding civilian casualties, as no one was hurt. After disrupting the parade, the Rebel Fleet successfully evaded Imperial defenses, including a swarm of TIE fighters from the local airbase.
The second Death Star
The Battle of Hoth revealed to the Empire that the Rebels would abandon their current location when faced with a surprise attack. While these surprise attacks prevented the Rebels from organizing effective counterattacks, as they were forced to disperse and retreat, the Rebellion endured through these retreats. However, constantly forcing the Rebels to abandon their safe havens and pursuing small cells across the Outer Rim presented a propaganda problem for the Empire: the people of the galaxy could see that the Empire was unable to eradicate the Alliance, and, in time, the regime would lose popular support to the surviving Rebellion. While a surprise attack on the current Rebel base or gathering point could theoretically succeed if the Rebellion and its leadership suffered significant losses, such attacks had been unsuccessful up to that point. Compounding this was the difficulty in locating the main Rebel force, with discovered Rebel rallying points only belonging to individual cells rather than the entire Alliance. Furthermore, the seemingly endless pursuit of these fleeing Rebel cells would not resolve the conflict. Emperor Palpatine, therefore, decided to implement a new strategy.
Drawing lessons from Hoth and recalling the Battle of Yavin, which demonstrated that the Alliance would not flee when faced with an overwhelming threat, the Emperor concluded that he needed a significant target to lure out the Alliance, who would walk into their own destruction rather than being ambushed. If the Rebels were unaware of the trap, Palpatine reasoned, he could present them with a grand target that they would be compelled to act against. Fortunately for the Empire, Palpatine possessed such a target in the form of the DS-2 Death Star II Mobile Battle Station. Since the destruction of the First Death Star, the Empire had been constructing a second Death Star, scheduled for completion above the forest moon of Endor. On Palpatine's direct orders, the Bothan Spynet was permitted to uncover its location. Despite the loss of numerous Bothan agents, the carefully orchestrated leak convinced the Rebels that they could surprise the Empire. The leak was designed to make the Rebels believe that the new Death Star's superlaser was not yet operational. Palpatine also publicized his intention to personally oversee the station's completion, transforming it into an even more enticing target. The Emperor hoped that his presence and the symbolic significance of the new station would draw the Rebellion into the Endor system, where they would be annihilated in a meticulously planned trap.
The Rebel High Command convened in the Galaan system to discuss the plan to destroy the Empire's new project. The Rebels aboard the MC80 Star Cruiser Invincible Faith intercepted a message from Moff Derrek Raythe detailing the Imperial fleet's trap at Endor. Commander Iden Versio of Inferno Squad allowed herself to be captured to delete the message and subsequently escaped from the ship aboard the Corvus.
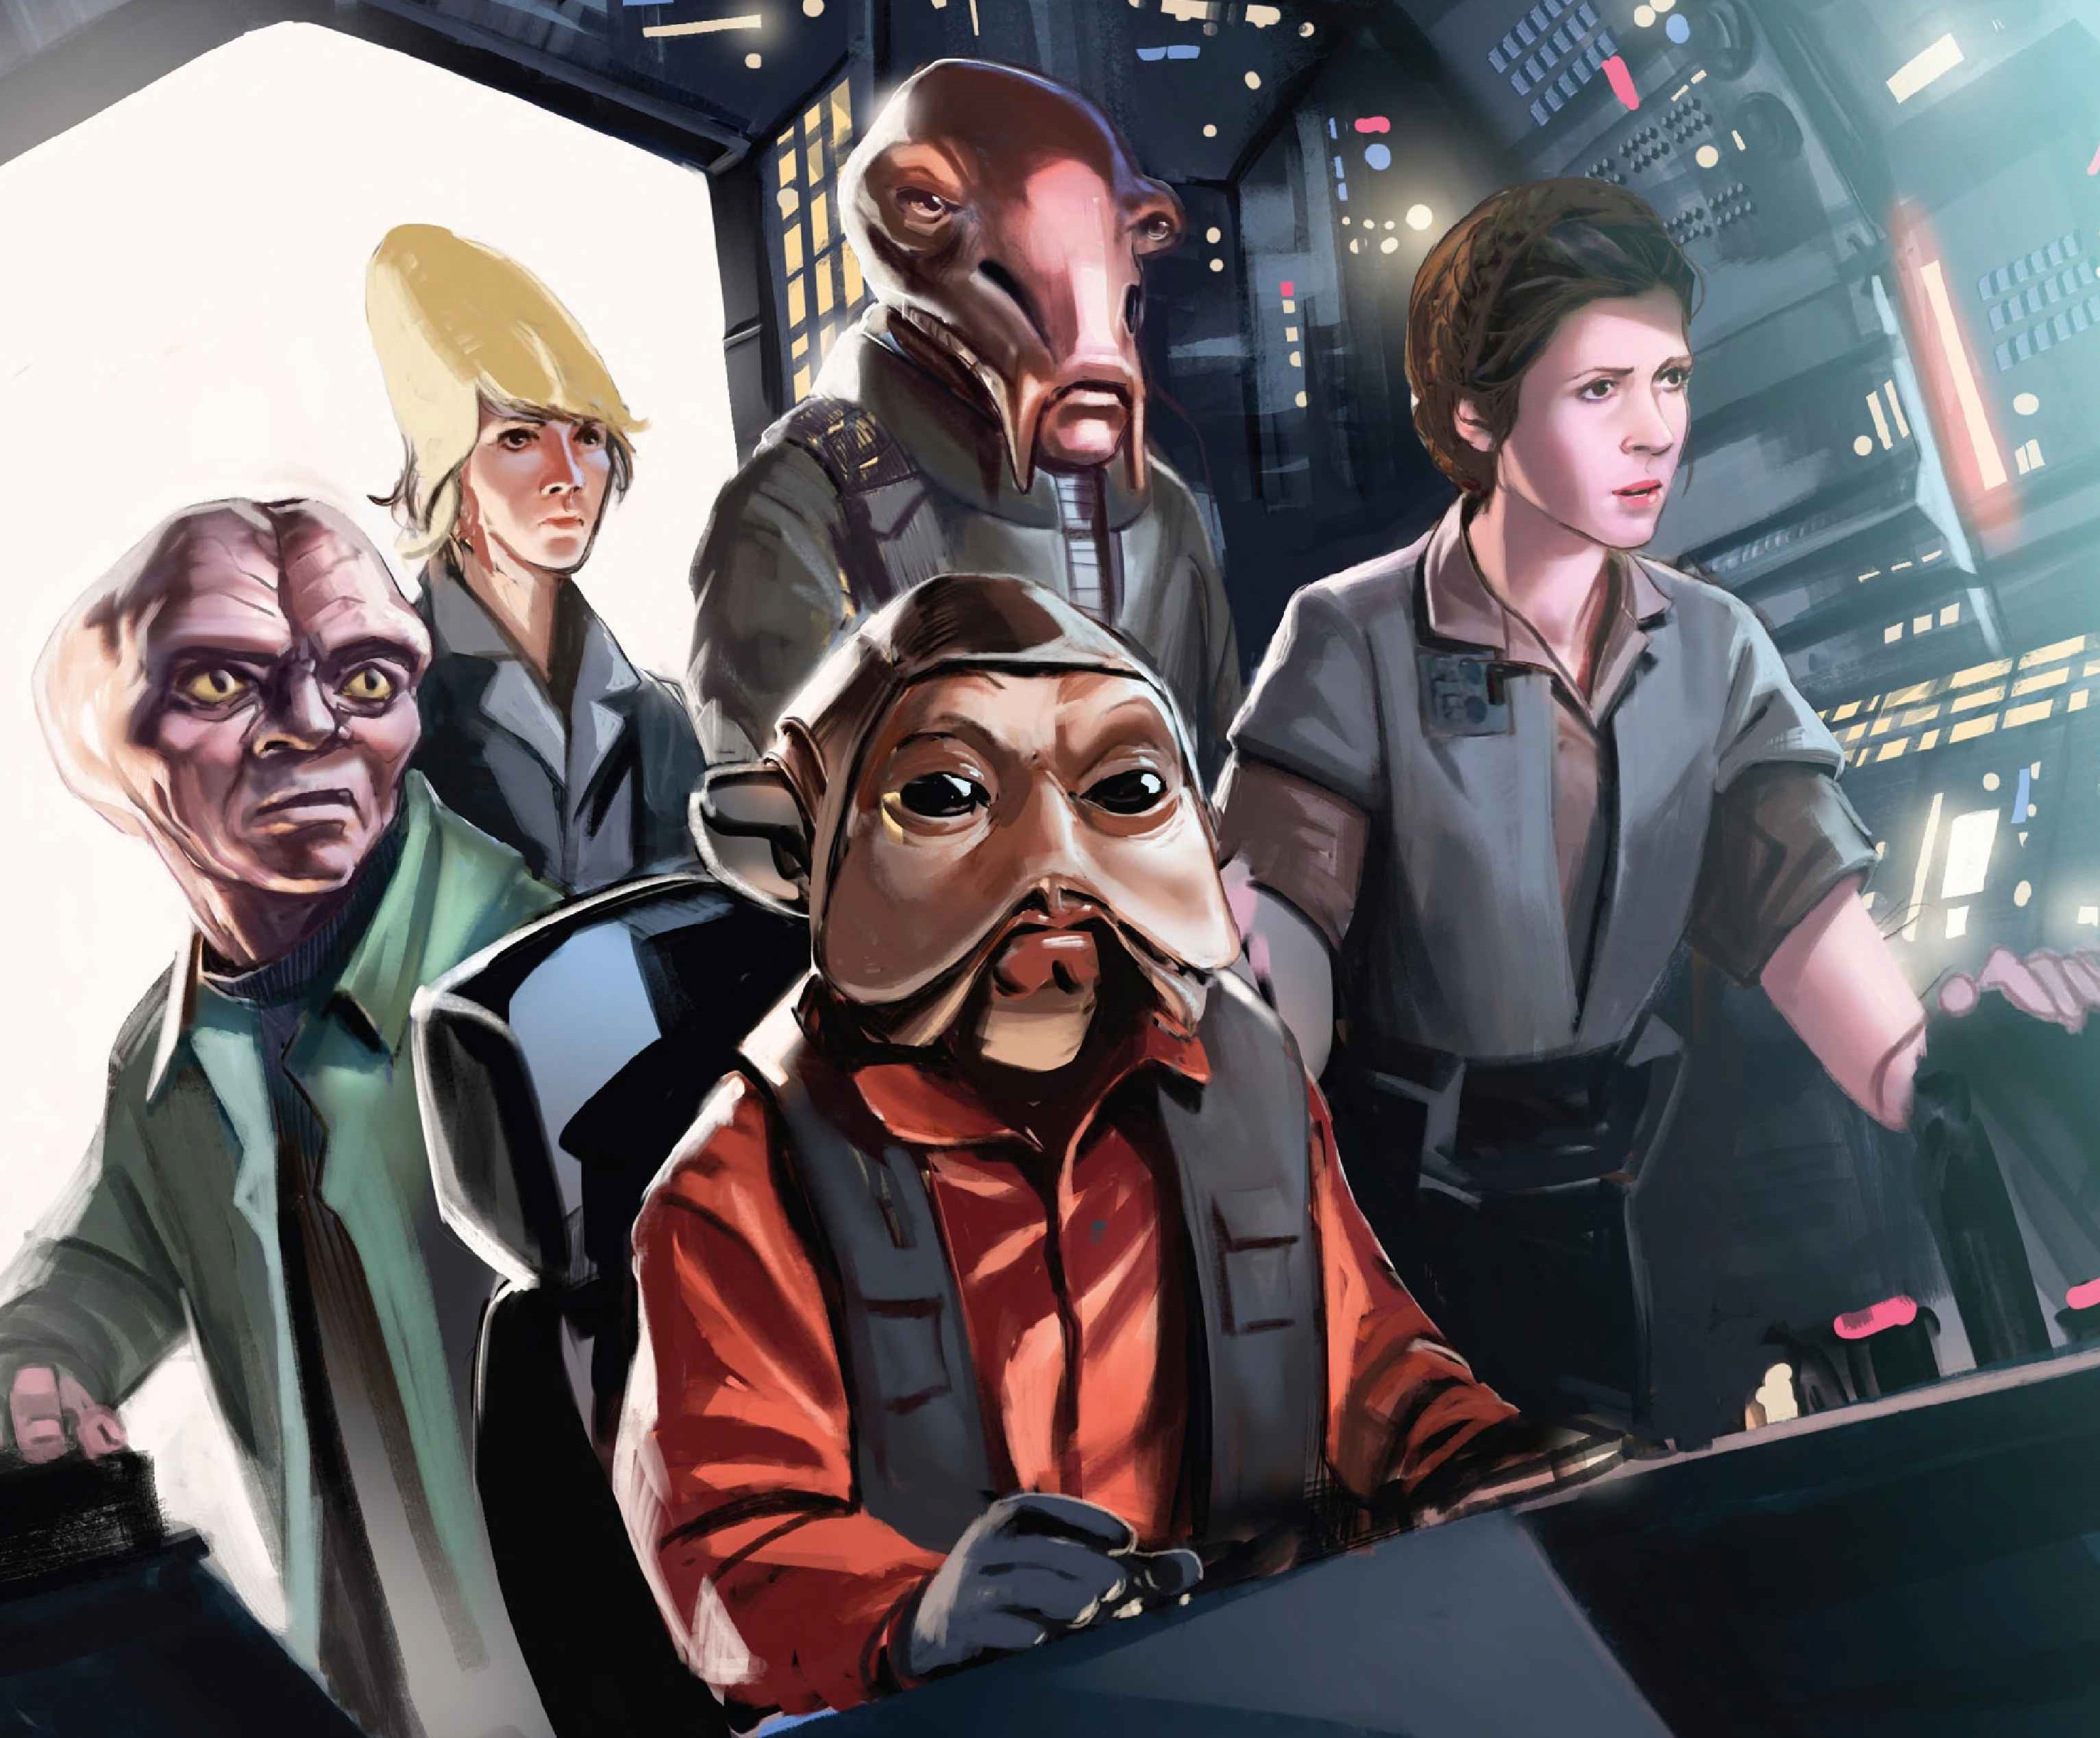
While in the Galaan system, the high command planned to launch Operation Yellow Moon, named after Galaan's yellow moon, to divert the Empire's attention, allowing the Alliance Fleet to mass at Sullust. Princess Leia Organa led this operation with a small team that included former Sullustan resistance leader Nien Nunb, Dressellian Major Lokmarcha, tech specialists Abednedo, Antrot, and Cerean, and communications specialist Kidi Aleri. They traveled to Basteel, Sesid, and Jaresh aboard the Mellcrawler to deploy hyper-transceivers that would create distractions for the Imperial forces. On each planet, they narrowly evaded Imperial forces led by Captain Khione of the Imperial-class Star Destroyer Shieldmaiden.
The team then returned to the Galaan system, scattering other ships before the Shieldmaiden arrived in pursuit. Captain Khione captured Leia and promptly interrogated her and her crew. However, Lokmarcha had concealed an EMP device within his chest and activated it, disabling many of the ship's systems. This act cost the Dressellian his life, but Leia and her team managed to escape, and the Shieldmaiden came under attack from the same vessels Leia had ordered to flee. Leia impersonated the unconscious Captain Khione to get them off the ship, but the ruse was short-lived, and they were forced to flee to a nearby Lambda-class T-4a shuttle called the Tydirium. Antrot boarded the Mellcrawler and crashed it through the hull of the Shieldmaiden. The others escaped the Shieldmaiden before it was destroyed. The scattered ships fled the system as another Star Destroyer arrived.
Sometime later, Organa and Skywalker launched a mission to rescue Solo from Jabba the Hutt. They infiltrated the Hutt's palace separately, and Organa succeeded in freeing Solo from the carbonite. However, Jabba refused to negotiate and attempted to kill Skywalker with a rancor. When Skywalker killed the beast, they were sentenced to execution at the Great Pit of Carkoon. They escaped after a confrontation with the Hutt's guards, during which Organa killed Jabba.
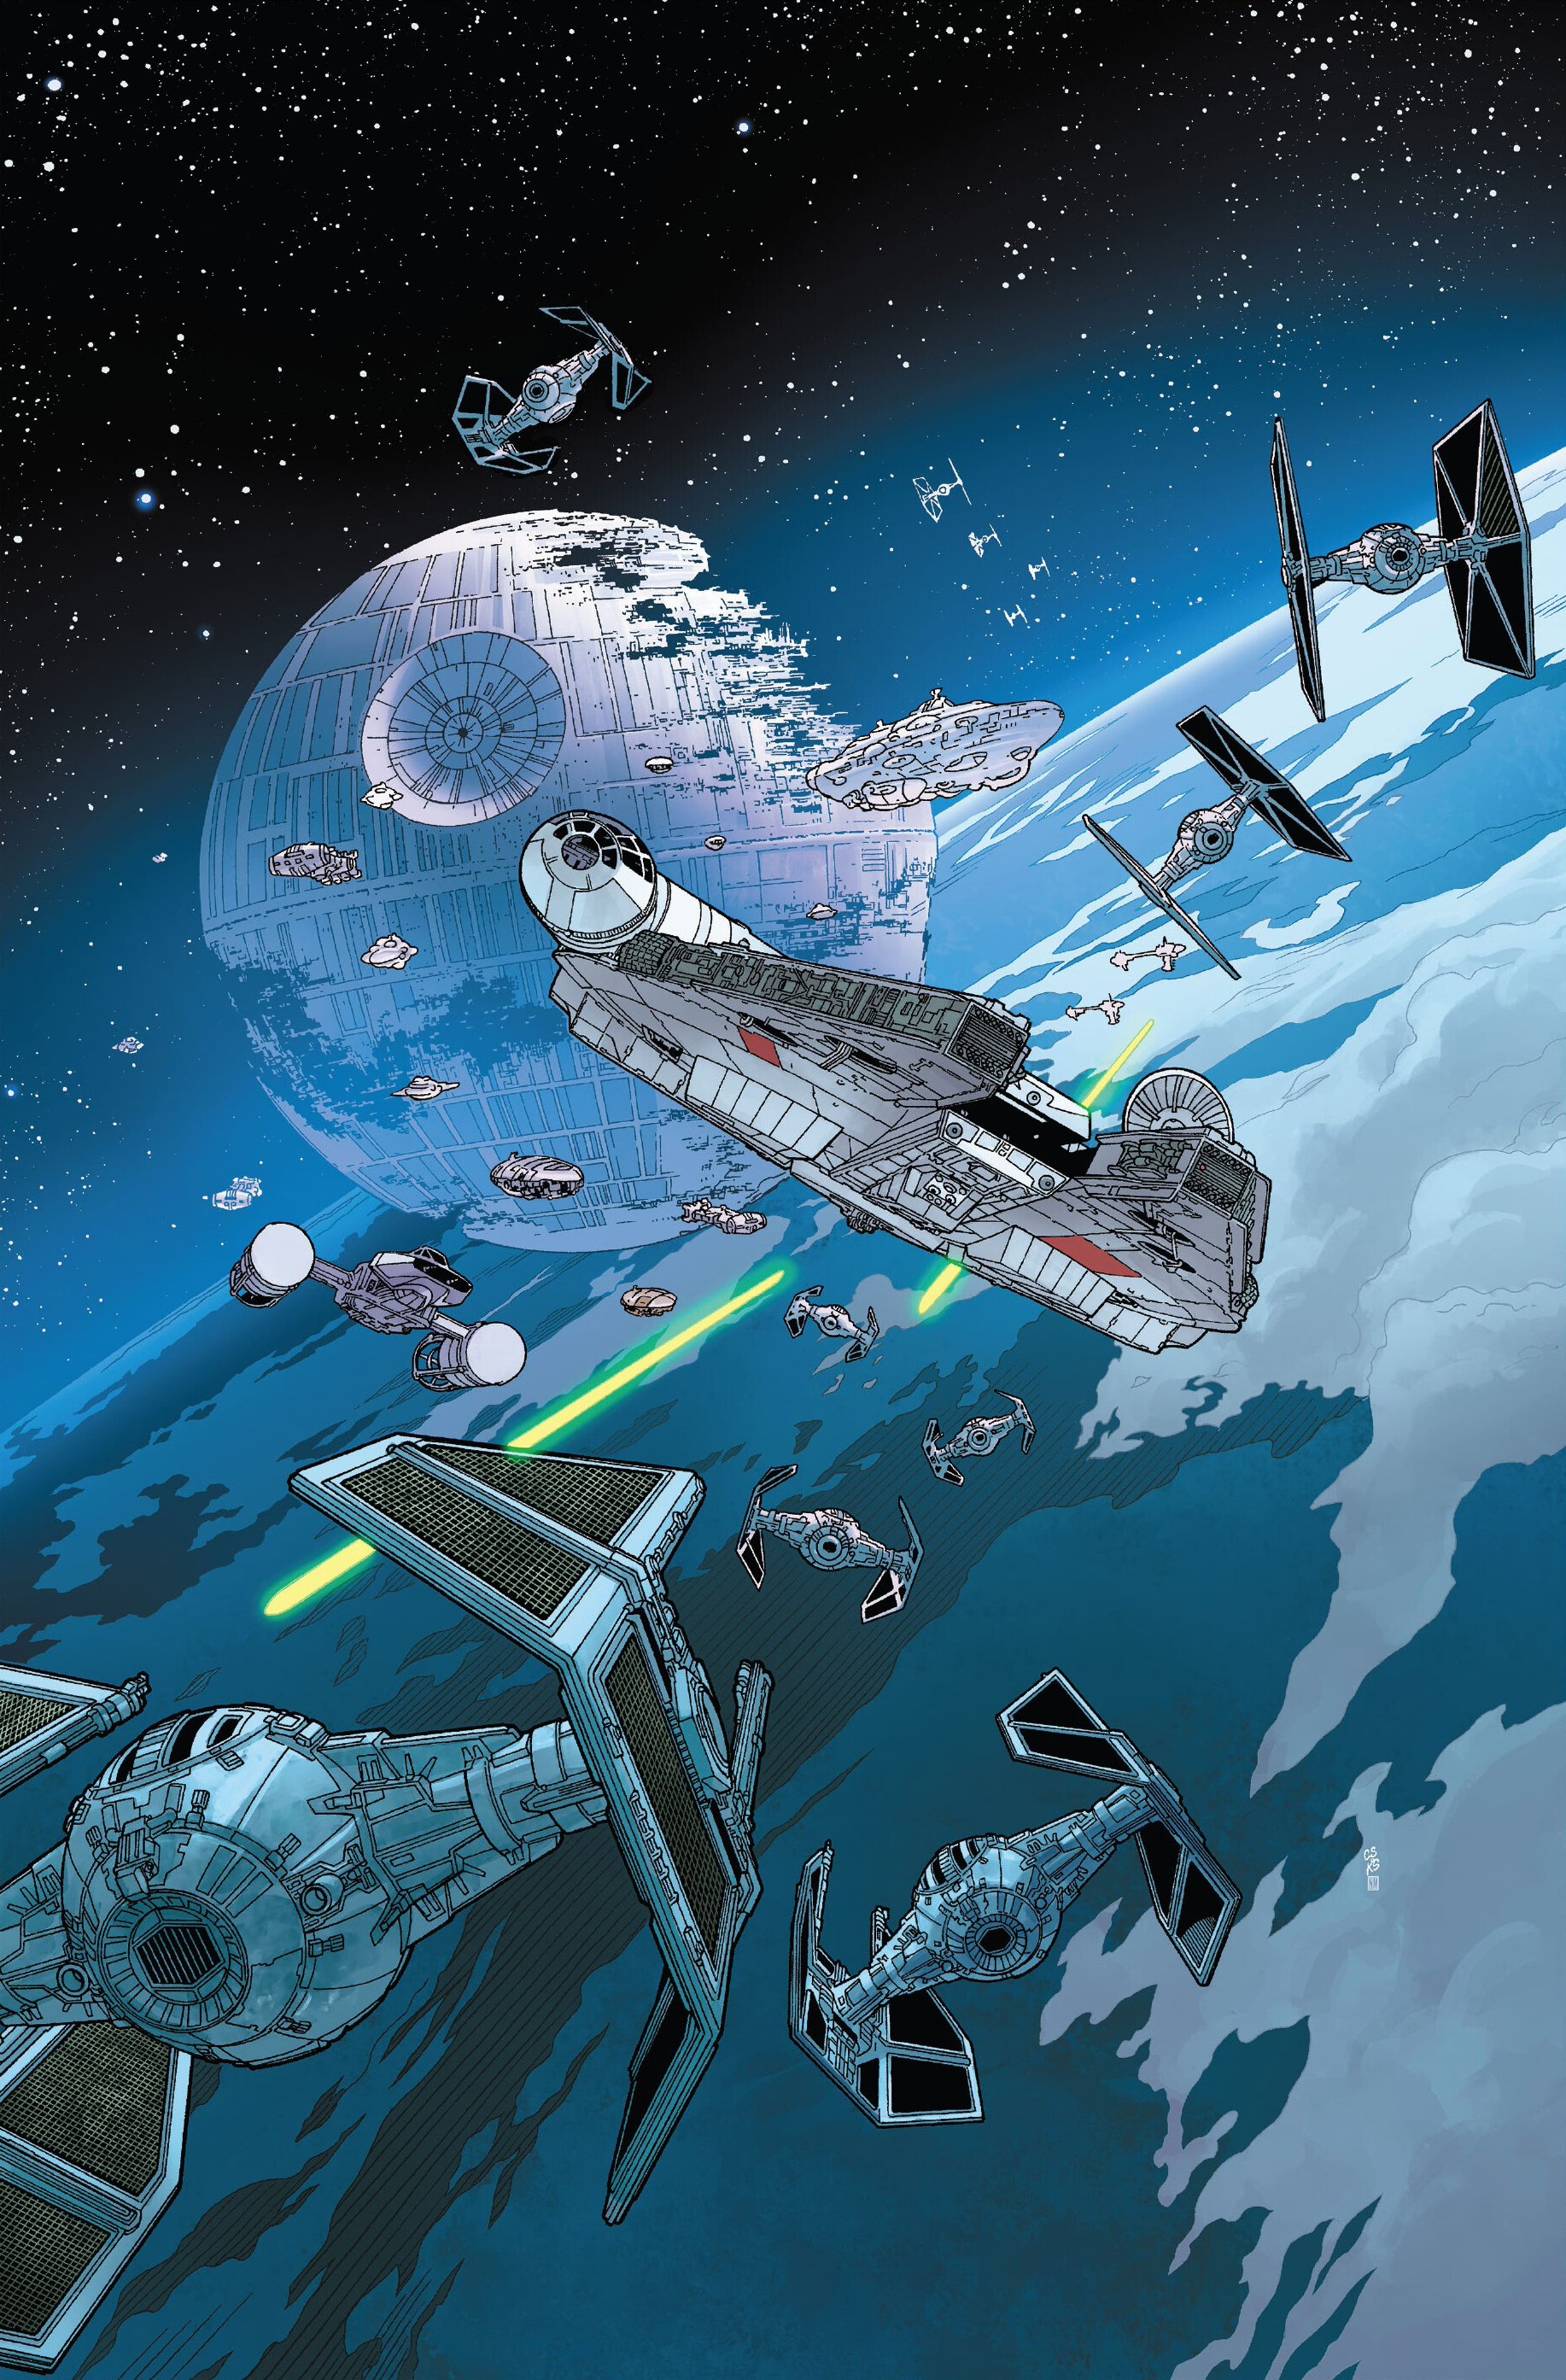
The Alliance fleet was assembling near Sullust, and reports of this reached Emperor Palpatine. After Organa and the others returned, Mothma and Ackbar briefed the fleet, and they soon jumped into hyperspace to engage in battle at Endor. The Rebels dispatched a strike team led by Solo to disable the shield generator protecting the Empire's second Death Star. However, the Emperor's trap was sprung, and the team was captured while storming the rear entrance. As the fleet arrived, expecting to find the space station defenseless, the shield remained active, and a large Imperial force trapped the Rebels. Solo's team formed an alliance with an Ewok village, enabling them to overwhelm and scatter the Imperial forces and destroy the shield.
Meanwhile, the Death Star II fired upon Ackbar's cruisers, forcing them to engage Imperial Star Destroyers to stay out of range while Calrissian led fighters to destroy the Death Star's reactor. Skywalker surrendered to Vader and was brought before Palpatine. He and Vader engaged in a duel, but when Skywalker refused to embrace the dark side of the Force, Palpatine attempted to kill him. This awakened Anakin Skywalker within Vader, causing him to turn against and kill his master, resulting in the destruction of the Sith. On the ground, Inferno Squad assessed the damage to the shield generator and eliminated multiple Rebel teams. Calrissian and Antilles reached the reactor and wreaked havoc before escaping through the same large exhaust port they had entered. The Alliance Fleet retreated to Endor as the Death Star exploded. Some cruisers remained at the wreckage to eliminate any remaining Imperial forces. The Alliance then celebrated their victory on Endor with the Ewok village.
Empire in turmoil
The day after the Battle of Endor, the Rebel Alliance launched an assault on an Imperial outpost on the far side of Endor. This attack, led by Han Solo, yielded valuable data and communications regarding Imperial plans. In the days following the Battle of Endor, news of the Emperor's death spread to various worlds across the galaxy, including Tatooine, Naboo, Bespin, and Coruscant, despite the Empire's attempts to suppress the information and declare it false.
While celebrations erupted, a riot broke out at Coruscant's Monument Plaza, leading to a civil war on Coruscant. The Empire's command structure crumbled without its central leader. TIE pilot Rella Sol later stated that, after the Battle of Endor, the Empire lost its head of state and devolved into massive factionalism. Meanwhile, Governor Ubrik Adelhard imposed an iron blockade on the Anoat sector. Denouncing reports of the Emperor's death as "treasonous fabrication," the Moff enforced his rule with Purge Troopers. He faced opposition from a coalition of criminals and nobles in the region. At some point, the Imperial fleet of Moff Royen was severed from the rest of the Empire by the Red Hand Cluster, effectively transforming it into an Imperial splinter faction.
Operation: Cinder
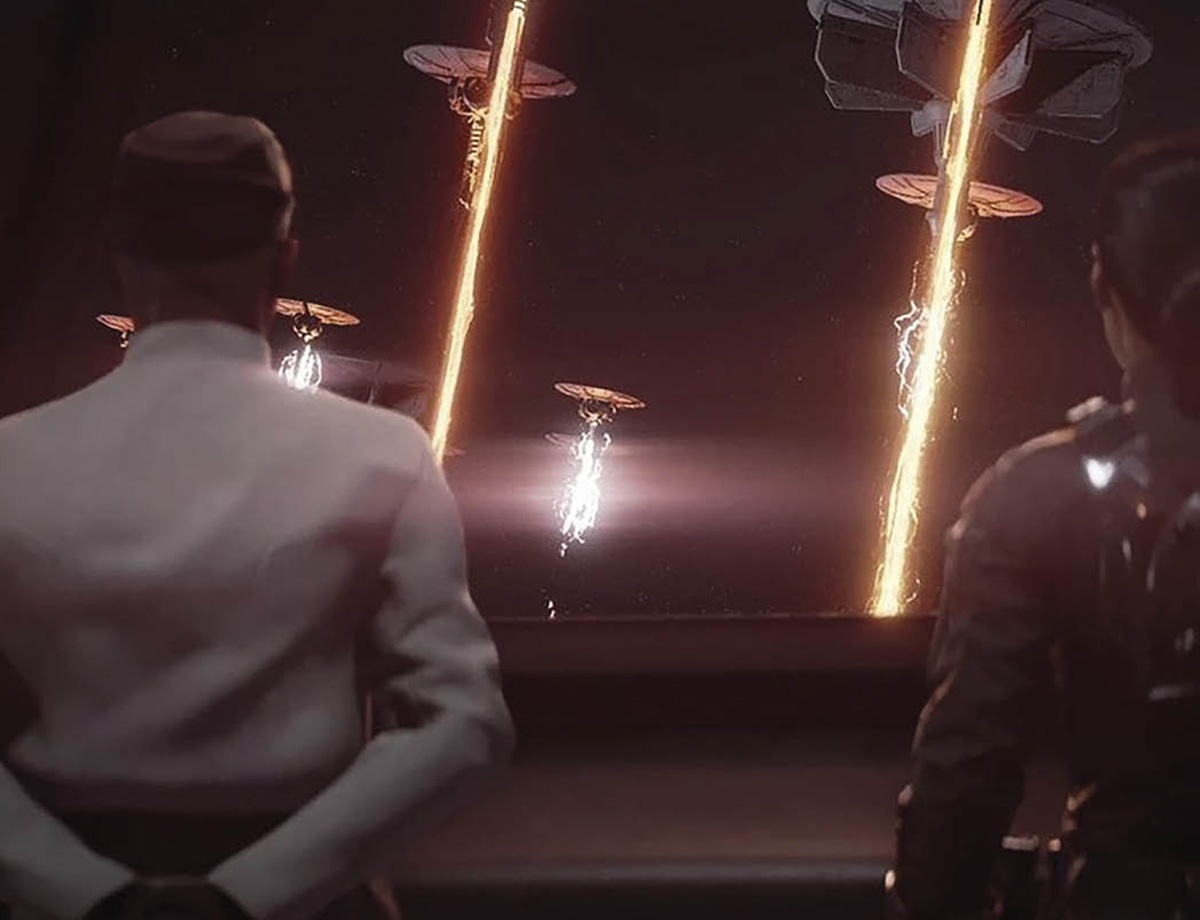
As the Rebel Alliance gained momentum, scattered Imperial forces across the galaxy, including Captain Lerr Duvat and Admiral Garrick Versio, received the Emperor's posthumous orders to execute Operation: Cinder, a contingency plan to devastate both loyal planets and rebellious worlds. Targets included Vardos, Naboo, Burnin Konn, Candovant, Abednedo, and Commenor to plunge the galaxy into chaos. The attacks involved experimental climate disruption array satellites capable of generating superstorms that would ravage targeted planets, as well as other tactics. These satellites were manufactured at Fondor Shipyards.
In theory, Operation: Cinder aimed to reinforce the Empire's dominance by instilling fear throughout the galaxy. One purpose of the operation was to deter planets from joining the Rebellion's new government out of fear. However, with both New Republic and Imperial worlds under attack, it aligned with Palpatine's overarching Contingency plan, which dictated that the Empire and the galaxy should suffer for the regime's failure to protect its ruler. The Sith Lord had decreed that the Empire should not outlive his death and that only the most ruthless elements of the Empire deserved to rebuild the regime, with his secret return on the planet Exegol also playing a role in his plan to secretly control whatever emerged from the Contingency: when Vader killed him, Sidious's consciousness and spirit escaped his body to inhabit a clone form maintained on Exegol.
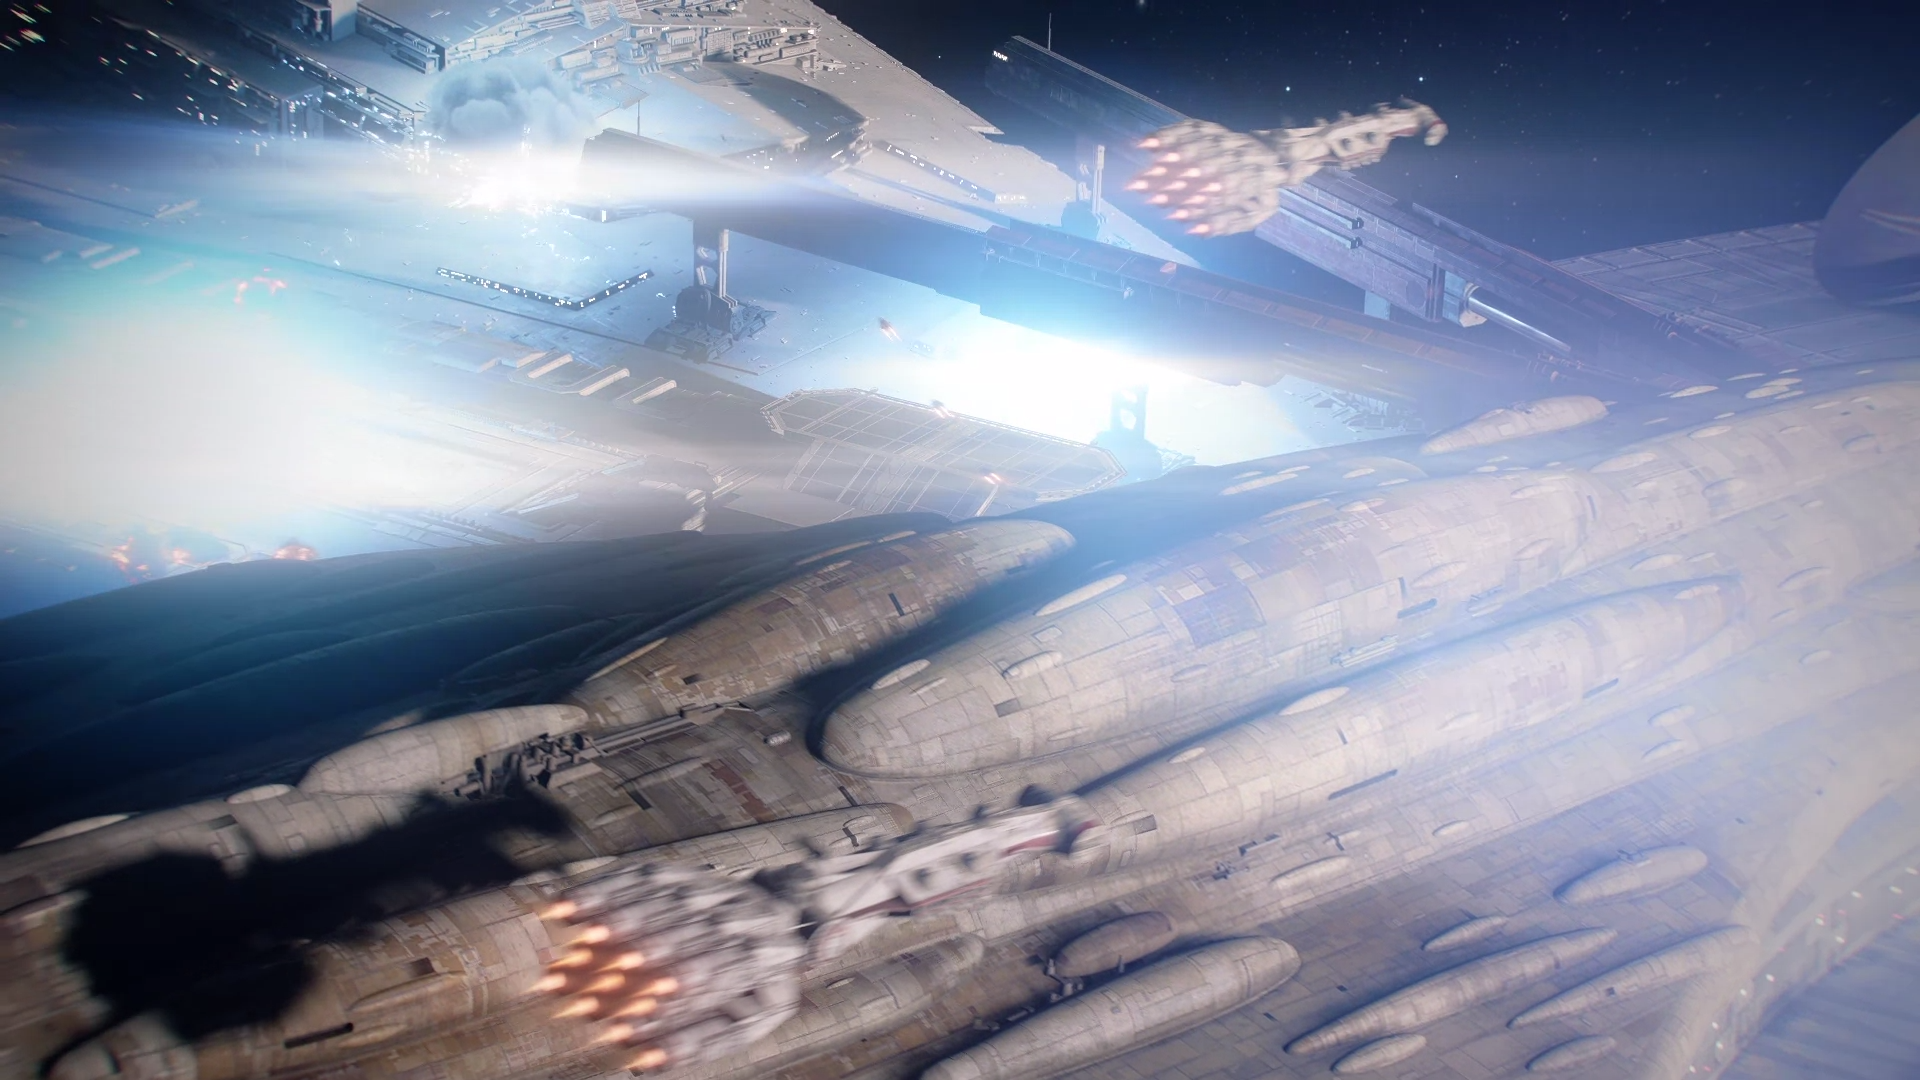
When Admiral Versio's elite unit, Inferno Squad, was dispatched to ensure Moff Raythe received his satellites, the Alliance launched an attack on the shipyard, disabling the Moff's Star Destroyer, the Dauntless. Inferno Squad, comprised of Iden Versio, Del Meeko, and Gideon Hask, defended the Dauntless from incoming U-wings alongside the Dauntless's TIE fighters. After successfully protecting the ship from the Rebel attacks, Iden boarded the Rebel MC80 Star Cruiser and wreaked havoc in the hanger. Iden then charged through the hallways toward the ship's ion cannons, killing any rebel who got in the way, and then she stormed the large room with the ion cannons and killed the rebel personnel controlling it.
Hask then joined her, and they destroyed each ion cannon whilst holding off the rebel troopers trying to kill them. The last cannon fell out of the Star Cruiser and crashed into a CR90 corvette outside, making it launch itself into the Star Cruiser. Iden and Hask then got back into their TIE fighters and reentered the battle outside, where the Dauntless had regained power. They then took out the disabled docking clamps keeping it in, and the Star Destroyer broke free. The Rebel cruiser wasn't ready for this and quickly fell victim to the first barrage of turbolaser fire the Dauntless set loose, bringing about an Imperial victory.
Shortly after the Attack on Fondor, Inferno Squad sent Del Meeko to destroy one of the Emperor's observatories located on the coral world of Pillio. His path crossed that of Luke Skywalker, who took out all of his men. Luke, however, did not kill him but helped him to the entrance. They then disabled the self-destruct system and got into the observatory. Luke took a compass with him, and Del decided to not destroy the observatory in the end.
Inferno Squad returned to Vardos to find that it was one of the targets the Emperor had set for Operation: Cinder. Iden was furious that the Empire would attack her loyal homeworld and confronted her father, who was blindly going along with it. She and her team were ordered to extract Protectorate Gleb from Vardos and no one else. However, when they went to get her out, Iden decided to let other civilians go with them. Hask was furious about this as they were disobeying orders. But despite his unbreakable loyalty to the Empire, Iden and Del just weren't going with it anymore, and as he tried to stop them, Iden shot him in the knee and they fled with the civilians. Hask took Gleb back to Admiral Versio and reported the mutiny of his former peers.
Iden, Del, and their ship's crew turned themselves in to the Alliance, and Captain Shriv Suurgav of the MC80 Liberty Type Heavy Star Cruiser Restoration took them in. General Calrissian came to see them. Seventeen days after the events of Endor, Alliance forces clashed with Imperial forces on Sterdic IV. Princess Leia also undertook a diplomatic mission to Naboo to invite Queen Soruna to align her planet with the New Republic, the government created by the Rebel Alliance. Her mission coincided with an Imperial attack on Naboo led by Captain Duvat.
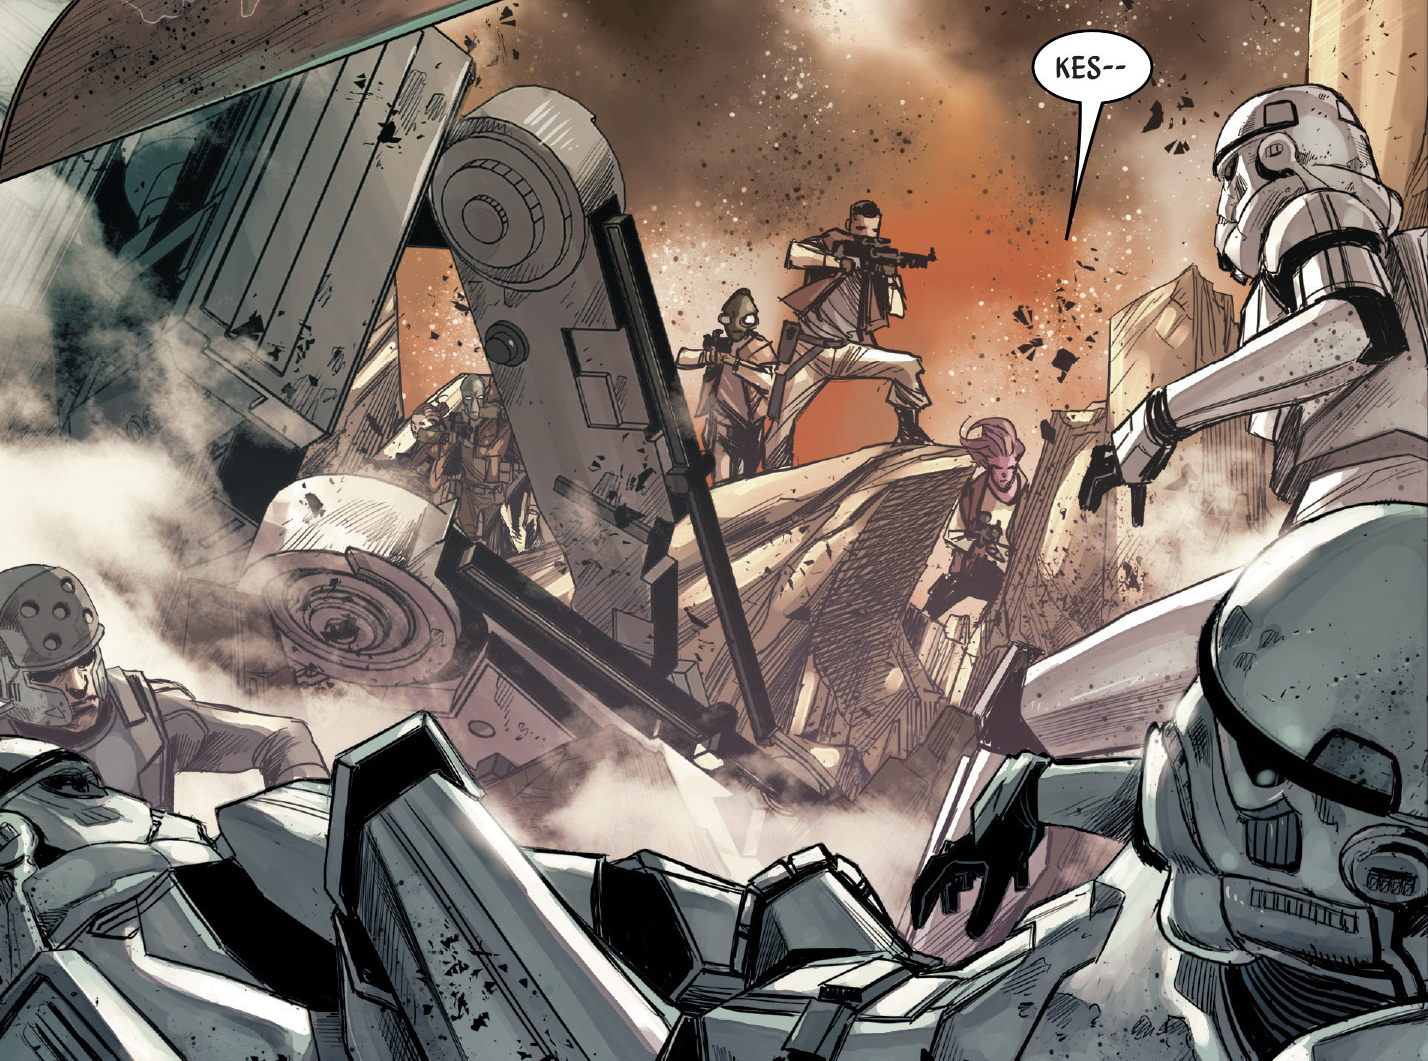
Later, the Rebel Alliance, with Solo and Chewbacca at the helm, seized an Imperial Security Bureau base located on the Wretch of Tayron. It was there that they uncovered intel regarding Operation: Cinder and the impending assault on Naboo. Before Captain Duvat could wreak further havoc on Naboo using climate disruption array satellites, General Calrissian proposed that Iden and Del assist in saving the planet. Lando Calrissian, accompanied by the Restoration, arrived in the cruiser Mellcrawler II, alongside Danger Squadron, which was under Shriv's command and included Iden and Del. They provided escort for the Y-wing bombers as they targeted Duvat's Star Destroyer, the Torment, with bombs. After the bombers successfully neutralized the shields, the Restoration unleashed its firepower on the Torment, resulting in its destruction.
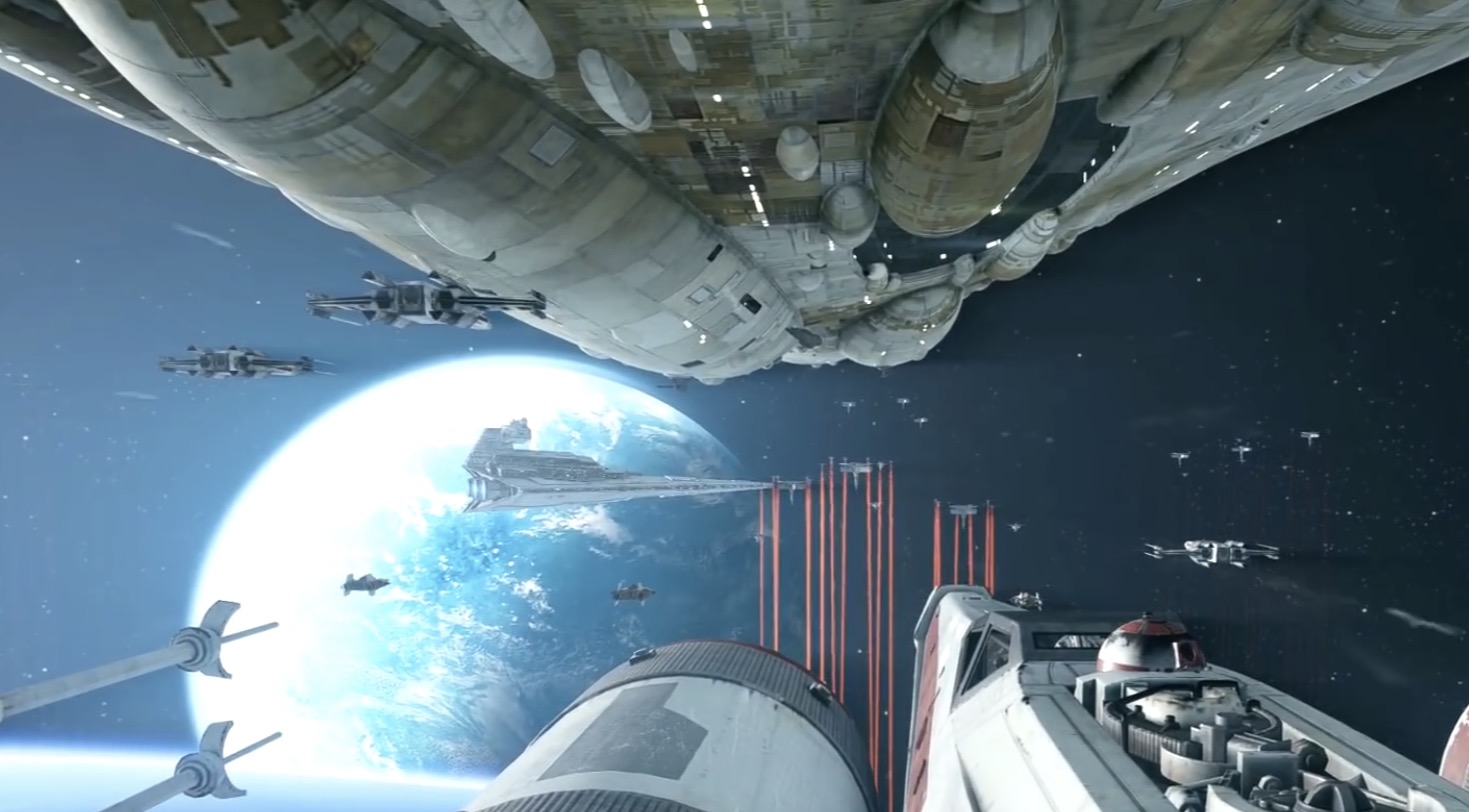
However, the ground forces of the Torment managed to escape, descending upon Theed, the capital of Naboo. The forces from the Restoration joined Leia's troops in confronting them. Iden and Del were instrumental in restoring power to the palace, enabling the activation of a secret weapon: an ion pulse designed to neutralize enemy weaponry. With the power restored, they retreated to the Palace to activate the EMP, rendering the Imperial forces defenseless. Following their surrender, Iden and Del formally switched their allegiance to the Rebellion. Subsequently, Alliance forces were deployed to disrupt other Imperial units engaged in Operation: Cinder. Concurrently, Alliance pilot Shara Bey, alongside Luke Skywalker, undertook a mission to retrieve Force-sensitive trees from an Imperial facility on Vetine.
Dawn of the New Republic
Following the Battle of Endor, the Rebel Alliance embarked on the reconstruction of the Galactic Republic, promptly reorganizing into a restored government known as the New Republic. They widely disseminated news of the Empire's defeat throughout the galaxy, encouraging star systems to join their cause in overthrowing the remaining Imperial forces. The New Republic also eased restrictions on the HoloNet, fostering the growth of new media outlets, such as the Queen of the Core Network. The period following Endor witnessed a power struggle between Imperial remnants and New Republic leaders, each vying for support across the galaxy. With the Alliance military reformed into the New Republic Defense Force, they engaged in extensive combat operations against Imperial forces on numerous fronts across the galaxy, including Naalol, Malastare, Geonosis, and Sevarcos. For pilots on both sides, the conflict evolved into a relentless sequence of battles, missions, and skirmishes. Pilot squadrons were commonly equipped with a diverse array of spacecraft to address the unpredictable nature of missions. Mon Mothma, the leader of the Alliance, became the New Republic's inaugural Chancellor. Despite retaining the emergency powers granted to her by Palpatine during the Clone Wars, Mothma intended to eliminate them and reduce the size of the New Republic military upon achieving victory over the Empire.
At some juncture, a civil war erupted over the control of the Virgillia system, with both the Alliance and the Empire backing opposing factions. While the Empire lent its support to the system government, the Rebel-supported Virgillian Free Alignment ultimately prevailed, paving the way for the Virgilla system to join the New Republic. As word of the Empire's defeat spread, the Empire began to disintegrate, marked by internal conflicts among Imperial leaders and mounting losses against the expanding Republic, preventing them from uniting as a cohesive force. The absence of a clear line of succession following the Emperor's death led to widespread chaos and anarchy within the Empire. Several members of the Imperial Ruling Council seized territories and disseminated contradictory propaganda regarding the New Republic and the alleged survival of the Emperor. Initial attempts to propagate the notion that the Emperor was still alive, using an actor impersonating Palpatine, quickly failed as observers recognized the individual as an impostor.
Certain Imperial forces attempted to reactivate droid factories on Geonosis, but their efforts were detected by the New Republic, prompting an operation on Geonosis. Elsewhere, Fleet Admiral Gallius Rax secretly took command of the Imperial fleets stationed in the Vulpinus, Almagest, Recluse's, Queluhan, Ro-Loo Triangle, and the Inamorata nebulae. Assuming command of the Super Star Destroyer Ravager, Rax instructed Admiral Rae Sloane to convene an emergency summit on Akiva to deliberate on the Empire's future. Rax and Sloane secretly plotted to eliminate their rivals within the Empire. Enacting Rax's plans, Sloane established an Imperial Future Council comprising herself, Grand Moff Valco Pandion, General Jylia Shale, the Adviser Yupe Tashu, and the financier Arsin Crassus.
New Republic pilots Captain Wedge Antilles and Lieutenant Norra Wexley uncovered the Future Council meeting. During a scouting mission on Akiva, Wedge was captured by Sloane. Before the Imperial Future Council could conclude its proceedings, Norra assembled a diverse rebel cell consisting of her son, Temmin Wexley, his B1-series battle droid Mister Bones, the former Imperial loyalty officer Sinjir Rath Velus, and the Zabrak bounty hunter Jas Emari. Collaboratively, they ignited a rebellion on Akiva and disrupted the conference. Operating as an informant known as the Operator, Admiral Rax also furnished Admiral Ackbar with intelligence regarding Imperial fleet movements and the Akiva summit. Consequently, New Republic forces launched an assault on Akiva, capturing General Shale and Adviser Tashu. However, Sloane successfully escaped back to the Ravager, having carried out Rax's directives. Following the events on Akiva, the New Republic reestablished the Galactic Senate on its capital, Chandrila.
Other incidents around that time included the Battle of Naalol, the Battle on Mordal, the Battle in Central City on the planet Uyter, and the Battle on Sevarcos. The New Republic initiated a siege of the Imperial stronghold Arkanis, which ultimately fell, and clashed with ruthless Imperial squadrons during the Criigo insurrection. In the months following the Battle of Endor, Han Solo and Chewbacca launched a campaign to liberate the Wookiee homeworld of Kashyyyk, which was under the control of Grand Moff Lozen Tolruck. Tolruck had fitted the enslaved Wookiees with inhibitor chips and treated them as an expendable slave labor force. After receiving intelligence from Imra indicating that the Empire had reduced its presence on Kashyyyk, Solo and Chewbacca organized a task force of refugees and smugglers to liberate the planet. However, this information turned out to be a trap set by the Empire. Han managed to escape, but Chewbacca was captured.
Inferno Squad returns
Approximately six months after their defection, Iden Versio and Del Meeko were now operating as the New Republic's Inferno Squad. Leia Organa tasked Iden with locating her husband, Han Solo, on Takodana. Han was scheduled to meet with an Imperial defector named Ralsius Paldora, who possessed valuable intelligence regarding Imperial interests and Chewbacca's homeworld of Kashyyyk. Han and Paldora were subsequently ambushed by dozens of stormtroopers, whom they managed to defeat. Upon returning to the Falcon, Inferno Squad arrived to provide support against the TIE fighters and an Arquitens-class command cruiser, successfully eliminating them with the assistance of the Millennium Falcon.
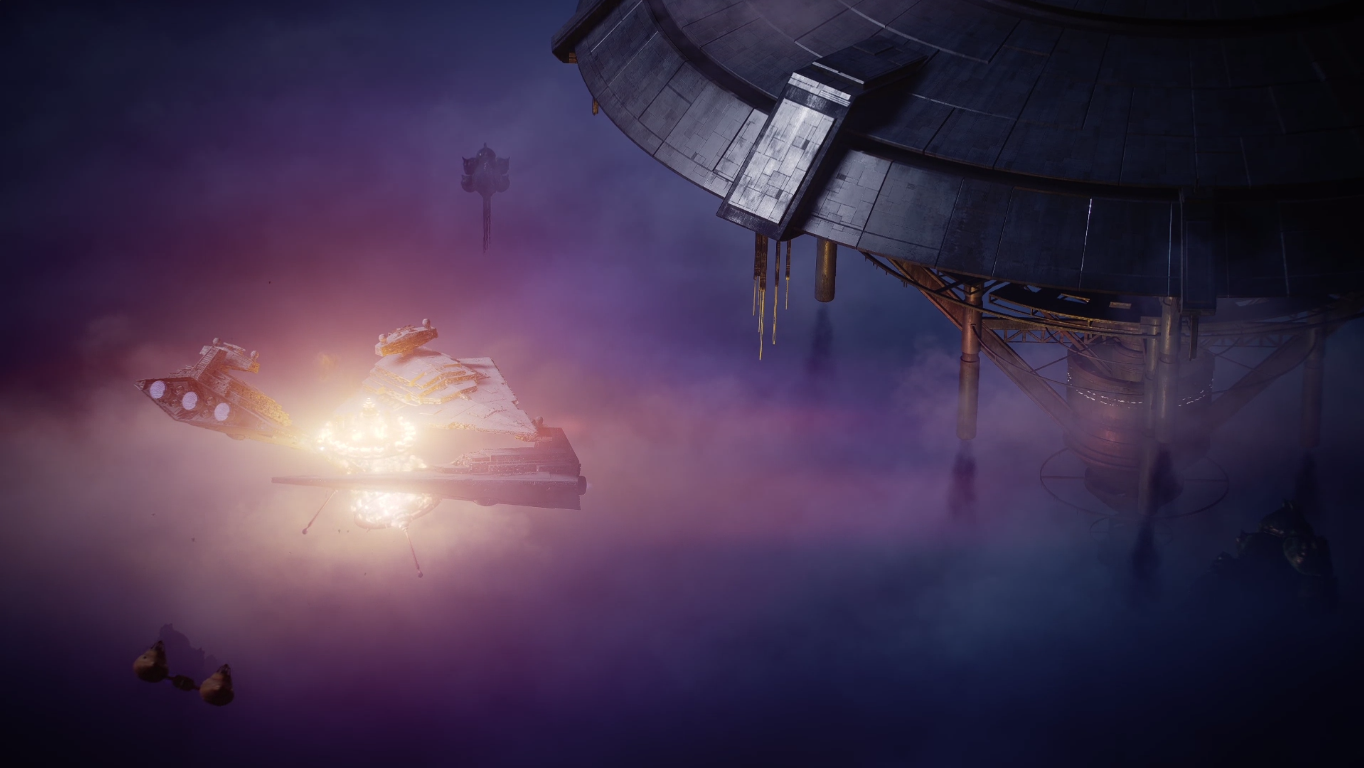
Using Paldora's information, Iden and Del were able to pinpoint the location of their former Imperial colleague, Gideon Hask, who held the key to tracking down Iden's father. They journeyed to Chinook Station on Bespin and infiltrated the facility disguised as stormtroopers. However, upon reaching the Overseer's Tower, they were confronted by a hologram of Hask, who revealed that he had anticipated their arrival. Hask departed on a Star Destroyer, forcing Iden and Del to fight their way out in search of a means of escape. They were compelled to commandeer a Cloud Car and used it to reach a nearby refinery, where three Star Destroyers were refueling. They targeted the fuel tanks, causing the refinery to detonate and destroying the three Star Destroyers in the process.
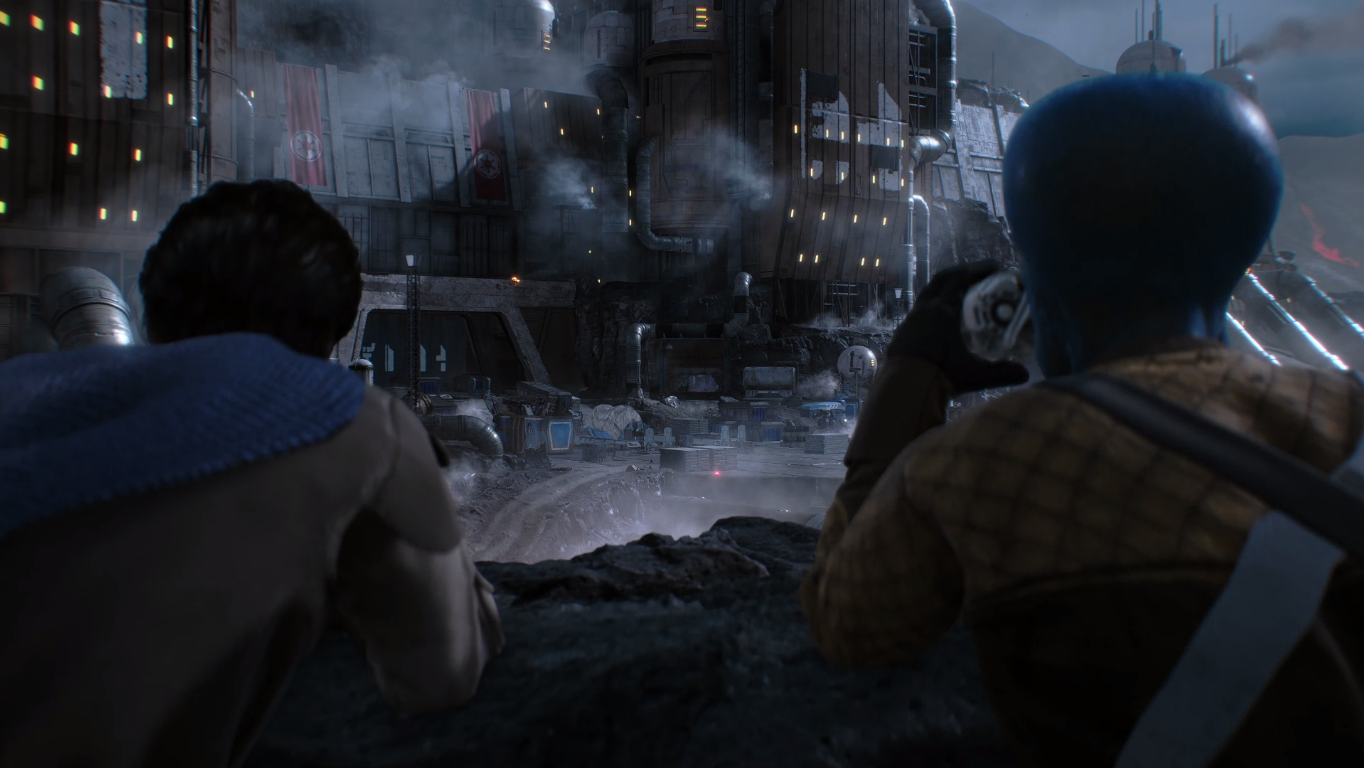
Shriv Suurgav and Lando Calrissian ventured to a weapons factory that was believed to be abandoned. However, upon entering, they discovered that it was fully operational. They fought their way through the assembly line and descended to the control center, where Lando attempted to shut down the facility. However, this action only triggered the alarm. Lando compromised and dispatched Shriv to locate an escape route while he proceeded to the lava pumps. Lando sabotaged the pumps, causing the factory to flood with lava. Lando then fled the factory to where Shriv was waiting in an AT-ST. They drove it to a nearby Lambda-class T-4a shuttle, which took off at the last moment. Shriv and Lando were rescued by Iden aboard the Corvus.
Cerberon system campaign
New Republic High Command was deeply concerned about the potential use of Troithe as a shortcut between Core Worlds. Consequently, they dispatched General Hera Syndulla with the Lodestar and its fleet to engage Imperial forces in the area. Troithe was invaded by the 61st Mobile Infantry following a prolonged and bloody siege. Twilight Company suffered significant casualties while capturing the capital, and Governor Hastemoor was killed during the battle. Catadra and Verzan were also seized.
The objective of capturing Troithe also served an additional purpose: to lure the 204th Imperial Fighter Wing into a trap. Caern Adan devised a plan to allow Troithe's garrison to transmit a distress signal for Shadow Wing to intercept. Adan suspected that they would attempt to use an asteroid to bypass Troithe's orbital defenses and inflict damage on the planet. A significant number of Imperial insurgents, led by acting Governor Fara Yadeez, remained on Troithe, awaiting their opportunity.
Hunt for Shadow Wing
Following the devastating Cerberon system campaign, Soran Keize contacted Grand Admiral Rae Sloane and formally pledged his allegiance to her and the remnants of the Empire. Sloane's initial assignment for Shadow Wing involved the destruction of disloyal Imperial factions. The Yomo Council was targeted for refusing to redirect its forces to the D'Aelgoth sector and for failing to acknowledge the Regent on Coruscant. Dybbron III, Kortatka, and Fedovoi End were all destroyed as a part of Operation: Cinder. Shadow Wing acquired numerous recruits from these planets, as they offered surrender before their destruction. Hera's Fleet intercepted Soran's speech transmission at Fedovoi End and pursued them.
Soran Kieze deployed numerous sabotage droids at Fedovoi End, causing significant damage to the Deliverance. However, the Deliverance continued its pursuit. The Barma Battle Group engaged them in several battles, including the Skirmish in the Ciaox Verith system, Battle in the Red Yars system, Third encounter with the Yadeez, Fourth encounter with the Yadeez, and Battle in the Ghonoath system. Shadow Wing's pattern of retreating, being rediscovered through a comm burst or a lucky find, and then escaping was repeated several times during these battles. During the Skirmish in the G'Tep'Noi system, Yriqa Quell revealed her decision to join Shadow Wing.
The Battle at Chadawa was triggered by Governor Bordanivaux's decision to separate Chadawa from Sloane. Soran Kieze contacted Colonel Madrighast regarding a rendezvous with Sloane, but he asserted that his unit would be protecting Chadawa. Chadawa was a unique planet, not formed naturally but constructed by an ancient species billions of years ago. During "high tide," the planet's rings emitted massive amounts of radiation, rendering combat impossible. Even at low tide, navigation and scanning were challenging. Chadawa had approximately half a dozen ships protecting it, the largest being the Star Destroyer Unyielding, which was positioned within the planet's rings. Shadow Wing managed to penetrate the rings. The New Republic was unable to enter before the rings discharged.
Shadow Wing was inside and began probing Madrighast's defenses. The New Republic rotated one of its three squadrons to attack the Yadeez while the other two patrolled the system. Two of the Raider-class corvettes began deploying satellites to absorb radiation before dropping onto the planet. Meanwhile, Nath Tensent, Wyl Lark, and others began broadcasting personal stories on open channels to disrupt the TIE pilots. After extensive preparations, the New Republic launched its attack with Hail Squadron, Flare Squadron, and Wild Squadron. The A-wings and X-wings engaged first but suffered heavy losses. As the Y-Wings of Hail Squadron approached, Syndulla aborted the attack due to the particle count and incoming TIE fighters. Meanwhile, Commander Broosh and Colonel Kieze were discussing their plans. Broosh suggested an attack on the Star Destroyer, but Kieze believed that time was all that was needed for the planet to fall. Suddenly, Lark challenged Kieze to a personal duel in the atmosphere, which Kieze accepted. As they dueled, Tensent led another attack by Hail Squadron on one of the Raiders. However, TIE fighters intercepted them and began decimating the Y-Wings. Two proton torpedoes struck the Raider, and only five of the Y-Wings escaped. The Y-Wings launched an attack on the other Raider, but the Chadawan Imperial Star Destroyer arrived and began decimating both Shadow Wing and Hail Squadron. Kieze received a message that Quell had returned, as well as news of the situation with the Raiders, and decided to end the duel. Wyl was shot down over one of Chadawa's moons.
What ensued was a three-way battle involving Shadow Wing, the New Republic, and the Chadawan Imperials. The Yadeez managed to retreat when Quell's ship arrived with critical data. The Unyielding and Deliverance engaged in a circular battle, with the Deliverance ultimately emerging victorious. Chadawa was saved, and the New Republic assumed control of the planet.
Waves of change
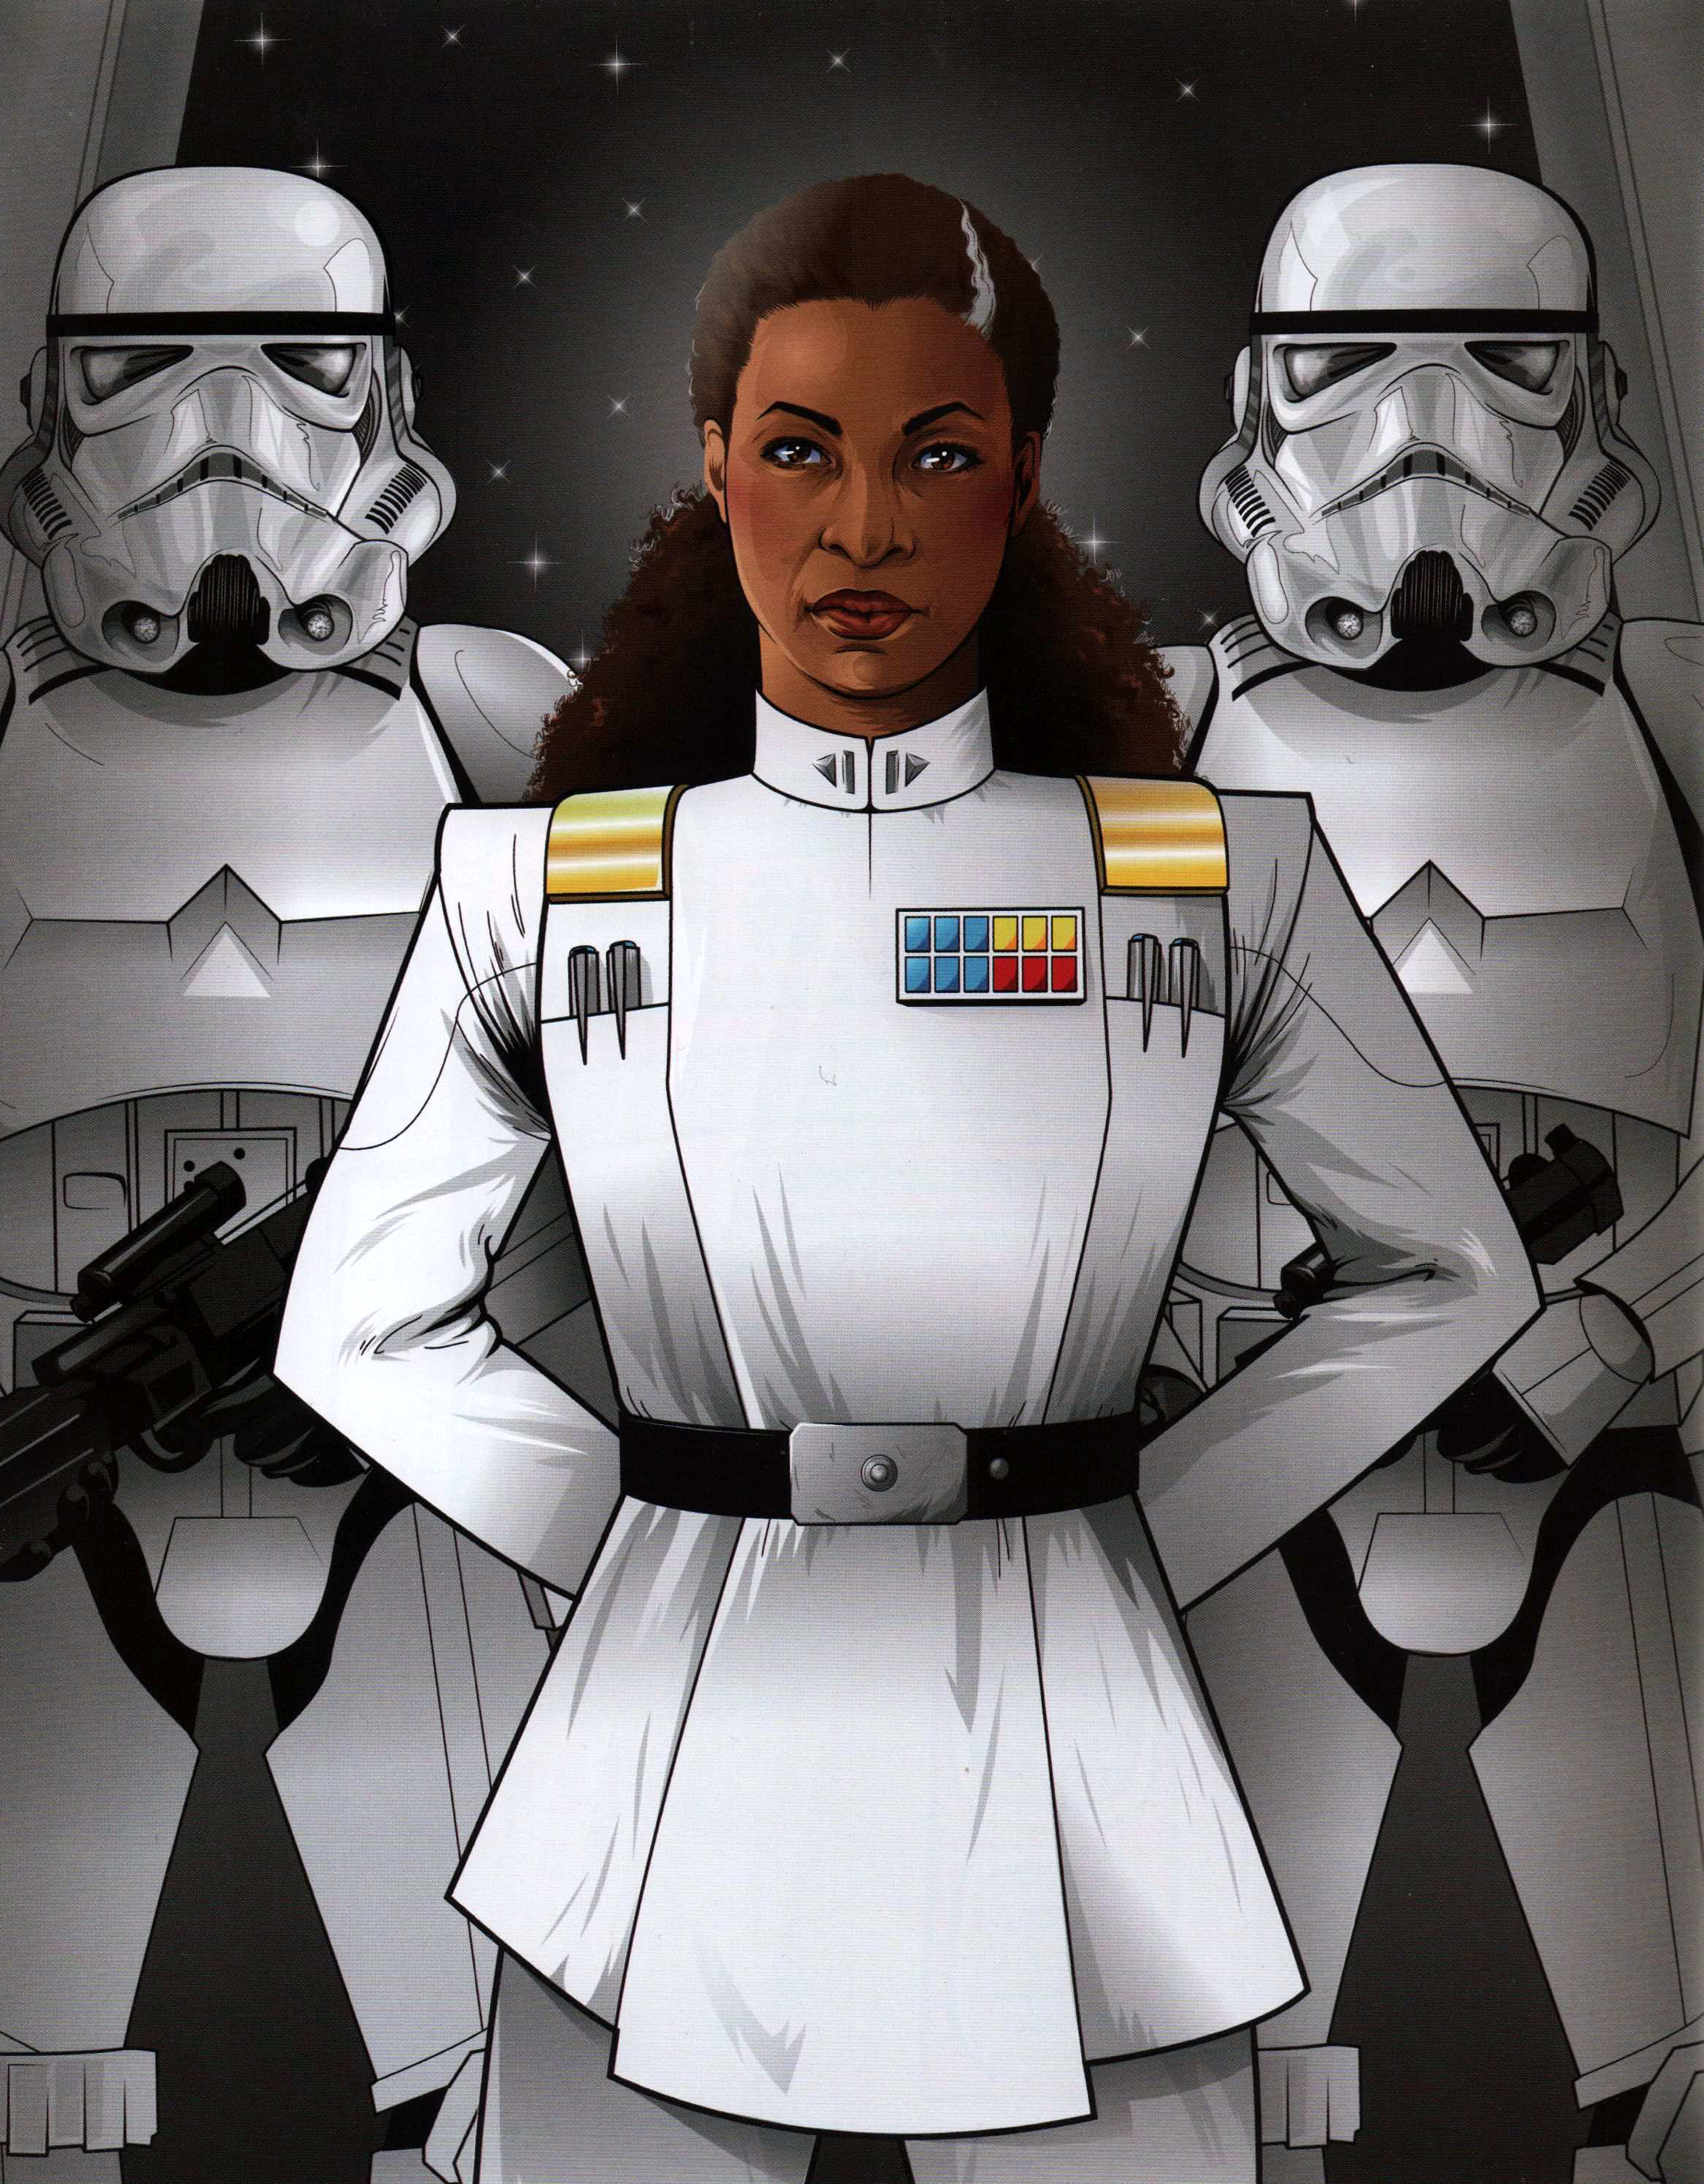
By the following year, momentum had shifted in favor of the New Republic. The Republic initiated a program to apprehend Imperial fugitives. New Republic forces also seized additional worlds from the Empire, including Arkanis and Nag Ubdur. Both sides employed propaganda. New Republic media, such as the Queen of the Core Network, highlighted Imperial atrocities and suicide attacks on Nag Ubdur. In response, the Office of Imperial Promotion, Galactic Truth, and Fact Correction disseminated posters and fabricated data portraying the New Republic as terrorists and criminals. Some criminals, such as the reptilian crime lord Eleodie Maracavanya, capitalized on the chaos to expand their criminal enterprises. Eleodie's power was amplified by the stolen Super Star Destroyer Annihilator.
Meanwhile, Grand Vizier Mas Amedda struggled to maintain control over Coruscant, which was embroiled in a civil war. With the Imperial Security Bureau barely able to maintain order, Mas attempted to surrender to the New Republic. However, Chancellor Mothma and Princess Leia rejected his terms and instructed him to find a way to secure the Empire's surrender. Elsewhere, Sloane assumed leadership of the Imperial forces in the Vulpinus Nebula as Grand Admiral. However, she was merely a figurehead for Gallius Rax, who was the true leader of the Imperial remnants. Following his instructions, Sloane convened the Shadow Council to promote the resurgence of the Empire. The Shadow Council comprised the former Commandant Brendol Hux, Grand Moff Randd, General Hodnar Borrum, and the Imperial propagandist Ferric Obdur. Privately, however, Sloane harbored distrust for Rax's agenda and initiated an investigation into the Imperial fleet inventory and Rax's background.
Following Han Solo's disappearance, Princess Leia enlisted Norra and her team to locate her husband. After defying an order from Admiral Ackbar to abandon her search for Solo, Norra resigned from the New Republic military to pursue her search. Norra's team and Solo joined forces on the planet Irudiru to capture and interrogate the Siniteen prison designer Golas Aram, who possessed knowledge of a secret Imperial prison on Kashyyyk known as Ashmead's Lock. Infiltrating Ashmead's Lock, Solo and Norra's team successfully freed Chewbacca and approximately a hundred other rebel prisoners, including Brentin Lore Wexley. Norra, Temmin, Mister Bones, and the freed prisoners returned to Chandrila aboard Solo's ship, the Millennium Falcon.
Meanwhile, Sinjir, Jas Emari, and the New Republic soldier Jom Barell remained on Kashyyyk to liberate the planet from Imperial rule. They resolved to hunt down Grand Moff Tolruck to disable the control module governing the inhibitor chips. Unbeknownst to the New Republic, the liberation of the Ashmead's Lock prisoners played into the hands of Fleet Admiral Rax, who had secretly implanted inorganic biochips into their heads. Rax then initiated a plan to assassinate the New Republic leadership on Chandrila. Following the fall of Kuat and its shipyards, Sloane offered to engage in peace talks with the New Republic. Believing that the Empire was on the verge of defeat, the Galactic Senate accepted her offer.
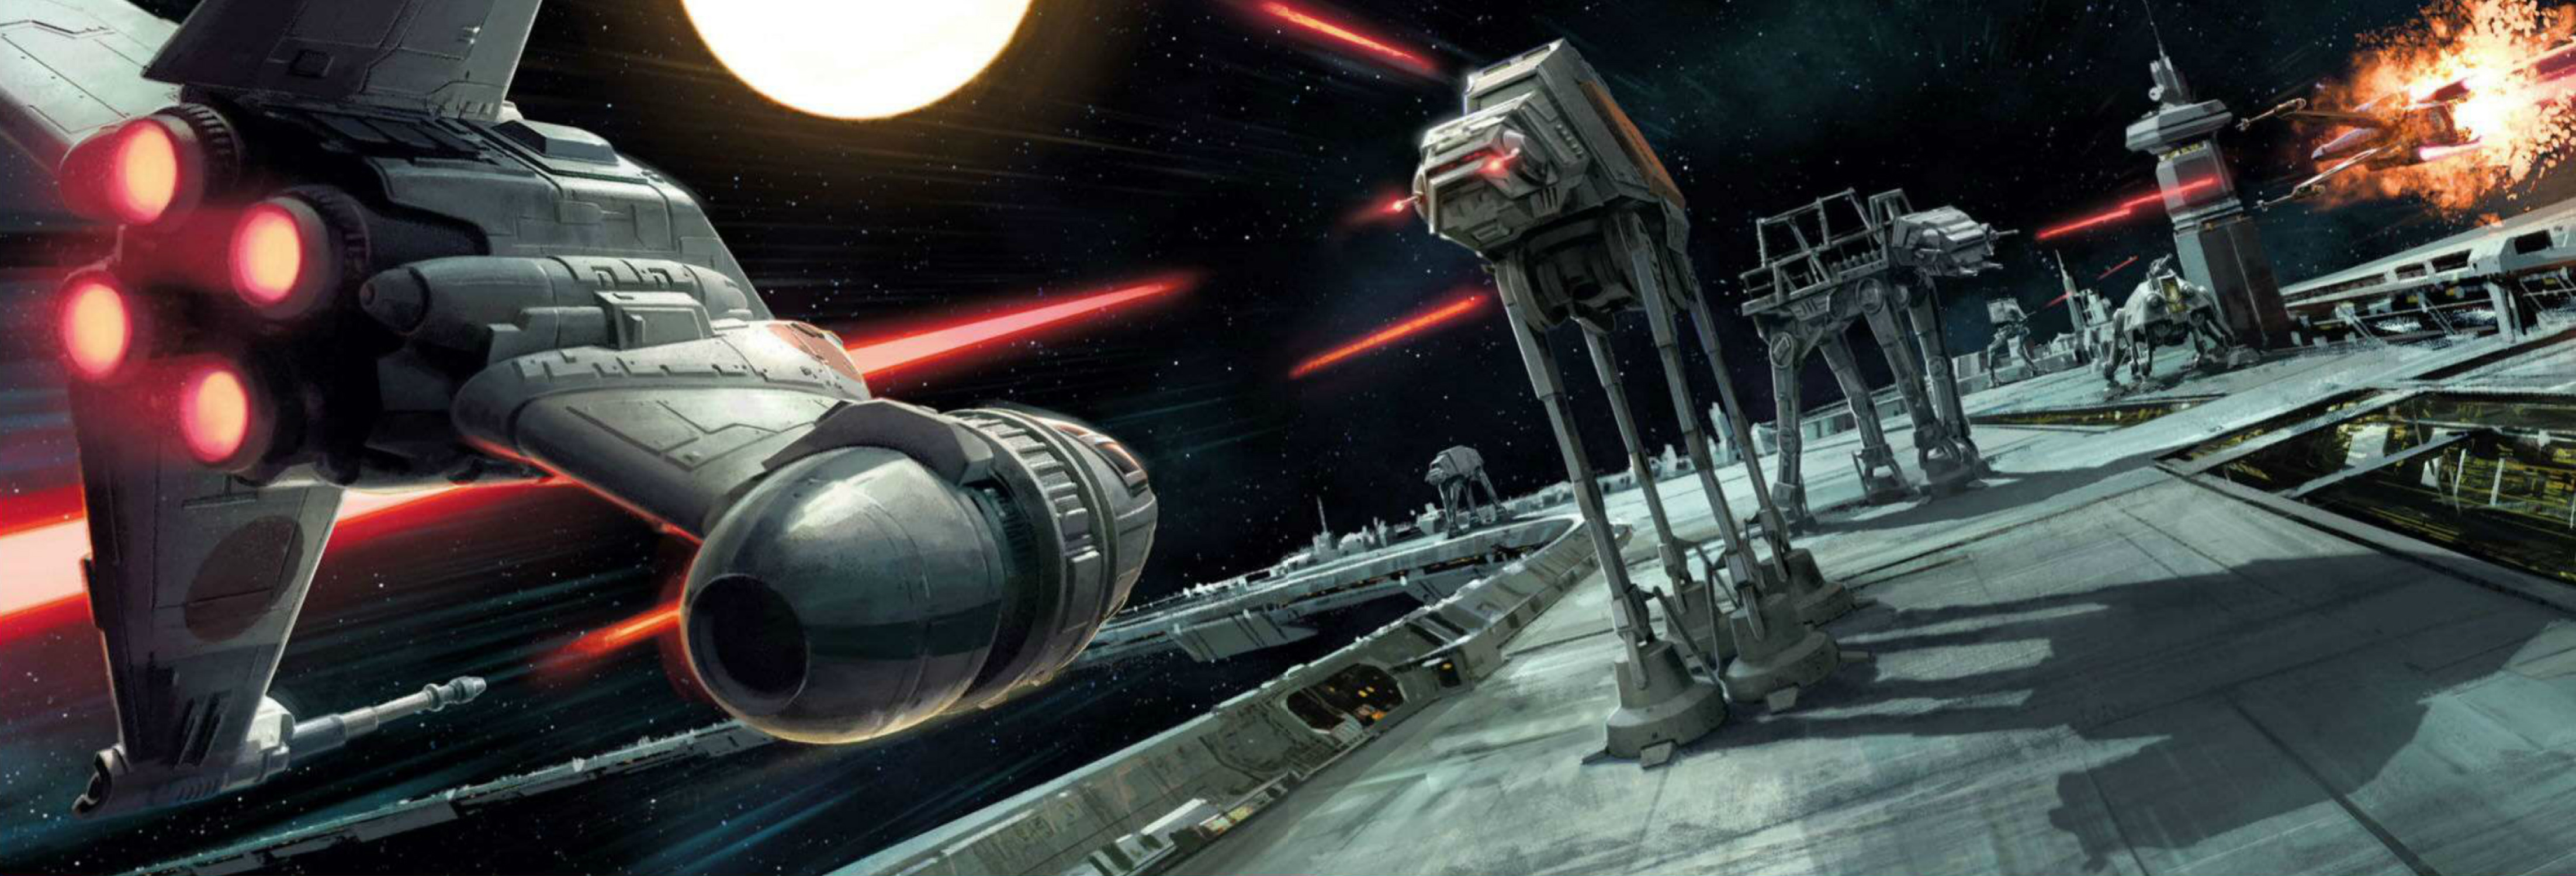
A month later, Sinjir located Grand Moff Tolruck at his island fortress. He deactivated the control module that governed the inhibitor chips and liberated Jom from his Imperial prison. This resulted in a planetwide uprising of massive proportions on Kashyyyk. Simultaneously, Solo and his crew launched an assault on Camp Sardo, a labor camp where slaves were forced to work, situated near the Wookiee settlement of Awrathakka. In a desperate move, Tolruck commanded the Imperial Star Destroyers in orbit to commence a bombardment of Kashyyyk. However, Princess Leia received intelligence about the impending attack from the slicer Conder Kyl and convinced Captain Antilles and Admiral Ackbar to dispatch ships to the planet. They received assistance from Solo and his team, who commandeered the Star Destroyer Dominion. Consequently, Solo, Chewbacca, and the New Republic brought an end to the Imperial oppression of the Wookiees.
In the meantime, on Chandrila, Chancellor Mon Mothma orchestrated Liberation Day to commemorate the liberation of the prisoners from Ashmead's Lock. These celebrations were intended as a prelude to the impending peace negotiations with Sloane. To encourage more planets to align with the New Republic, the festivities were transmitted live across the HoloNet. With the assistance of his local operative Windom Traducier, Rax sent a signal that compelled the former inmates to attack New Republic officials. As a result, numerous New Republic figures, including Chancellor Mothma and Commodore Kyrsta Agate, sustained injuries, while rumors circulated that General Crix Madine and Hostis Ij had been killed. Sloane then betrayed Rax due to her disapproval of his dishonorable methods.
After the assault on Chandrila, Rax assumed the position of Counselor to the Empire and commanded his Imperial fleets to converge on the planet Jakku for a decisive confrontation with the New Republic. The Chandrila attack diminished the New Republic's eagerness for peace talks with the Empire and deterred numerous planets from joining the fledgling government. Supported by Leia, Norra and her team initiated a campaign to track down Admiral Sloane, whom they believed was responsible for the Chandrila attack. Simultaneously, Sloane allied herself with Brentin to locate and eliminate Gallius Rax. With the help of the bounty hunter Mercurial Swift, they discovered that Jakku was Rax's planet of origin. Furthermore, New Republic forces successfully repelled three Imperial attempts to reclaim Naboo.
During a meeting involving the highest-ranking members of the New Republic, General Airen Cracken reported significant advances in the Western Reaches. Subsequently, Ackbar provided commentary on the situation along the Corellian Trade Spine. Six New Republic fleets were strategically positioned along the Spine to facilitate rapid deployment to the Western Reaches. General Ria offered insights on the Xagobah campaign. General Si-Flachitt gave an account of skirmishes with the New Separatist Union. Admiral Ho'ror'te began seeking allies within the Ravager's Rift to bolster Ackbar's fleets. Coruscant remained untouched. While disturbances and conflicts occurred, Troithe had demonstrated the devastating consequences of urban combat in the Troithe operation, and Coruscant possessed a significantly larger population.
One of the concluding battles of the war involved a skirmish in proximity to the planet Polaar, during which a Mon Calamari battle cruiser sustained damage but managed to escape into hyperspace. However, the ship's compromised hyperdrive caused it to exit hyperspace prematurely, resulting in its crash landing on Polaar.
Gallius Rax's hour
For a number of months, Norra Wexley, her son, Temmin, and her team relentlessly pursued the fugitive Admiral Sloane. After capturing the bounty hunter Mercurial Swift on Taris, the Imperial hunters discovered that the former Grand Admiral had journeyed to Jakku. Elsewhere, New Republic forces were engaged in mopping up operations against remaining Imperial strongholds on Kashyyyk and Cloud City. Meanwhile, the remnants of the Empire were stationed on Jakku, awaiting a final showdown with the New Republic. Although Counselor Gallius Rax considered the desolate, desert planet an ideal proving ground for his forces, the severe conditions eroded the morale and strength of his troops. Furthermore, Rax enlisted local orphans and street urchins to form a fighting force of child assassins.
Unbeknownst to his subordinates, Rax was secretly tasked with executing the Emperor's posthumous Contingency plan, designed to ensure the regime's destruction for its failures and its subsequent clandestine rebuilding. As part of the Contingency, Rax orchestrated the demise of numerous other Imperial commanders. The final phase of the Contingency involved provoking a confrontation between the Empire and the Rebellion above Jakku. Rax intended to annihilate the planet and both opposing fleets by dropping Sith artifacts into a borehole leading to Jakku's core, thereby triggering a cataclysmic explosion. In secret, Rax planned to escape to the Unknown Regions with a select group of Imperials, including Brendol Hux, his son, Armitage, and his child assassins.
Norra and her team soon located the Imperial fleet. While Norra and Jas Emari departed in an escape pod to search for Sloane, Temmin and Sinjir returned to Chandrila to report the Imperial presence on Jakku. Upon learning of the Imperial presence, Chancellor Mothma addressed the Galactic Senate to propose a bill authorizing the deployment of New Republic forces to Jakku. The vote failed to pass due to falling short of a majority by five senators. These senators had been coerced into opposing the bill by the Black Sun and Red Key crime syndicates, who sought to profit from the ongoing war. This vote coincided with the New Republic's efforts to relocate its capital to Nakadia, a Mid Rim agrarian world. Han Solo, Temmin, Sinjir, Conder Kyl, and Jom Barell successfully persuaded the senators to reverse their votes by rescuing Senator Nim Tar's child and offering them a pardon if they switched their votes during the re-vote on Nakadia. Consequently, Chancellor Mothma secured the necessary majority to dispatch New Republic forces to Jakku.
Showdown on Jakku
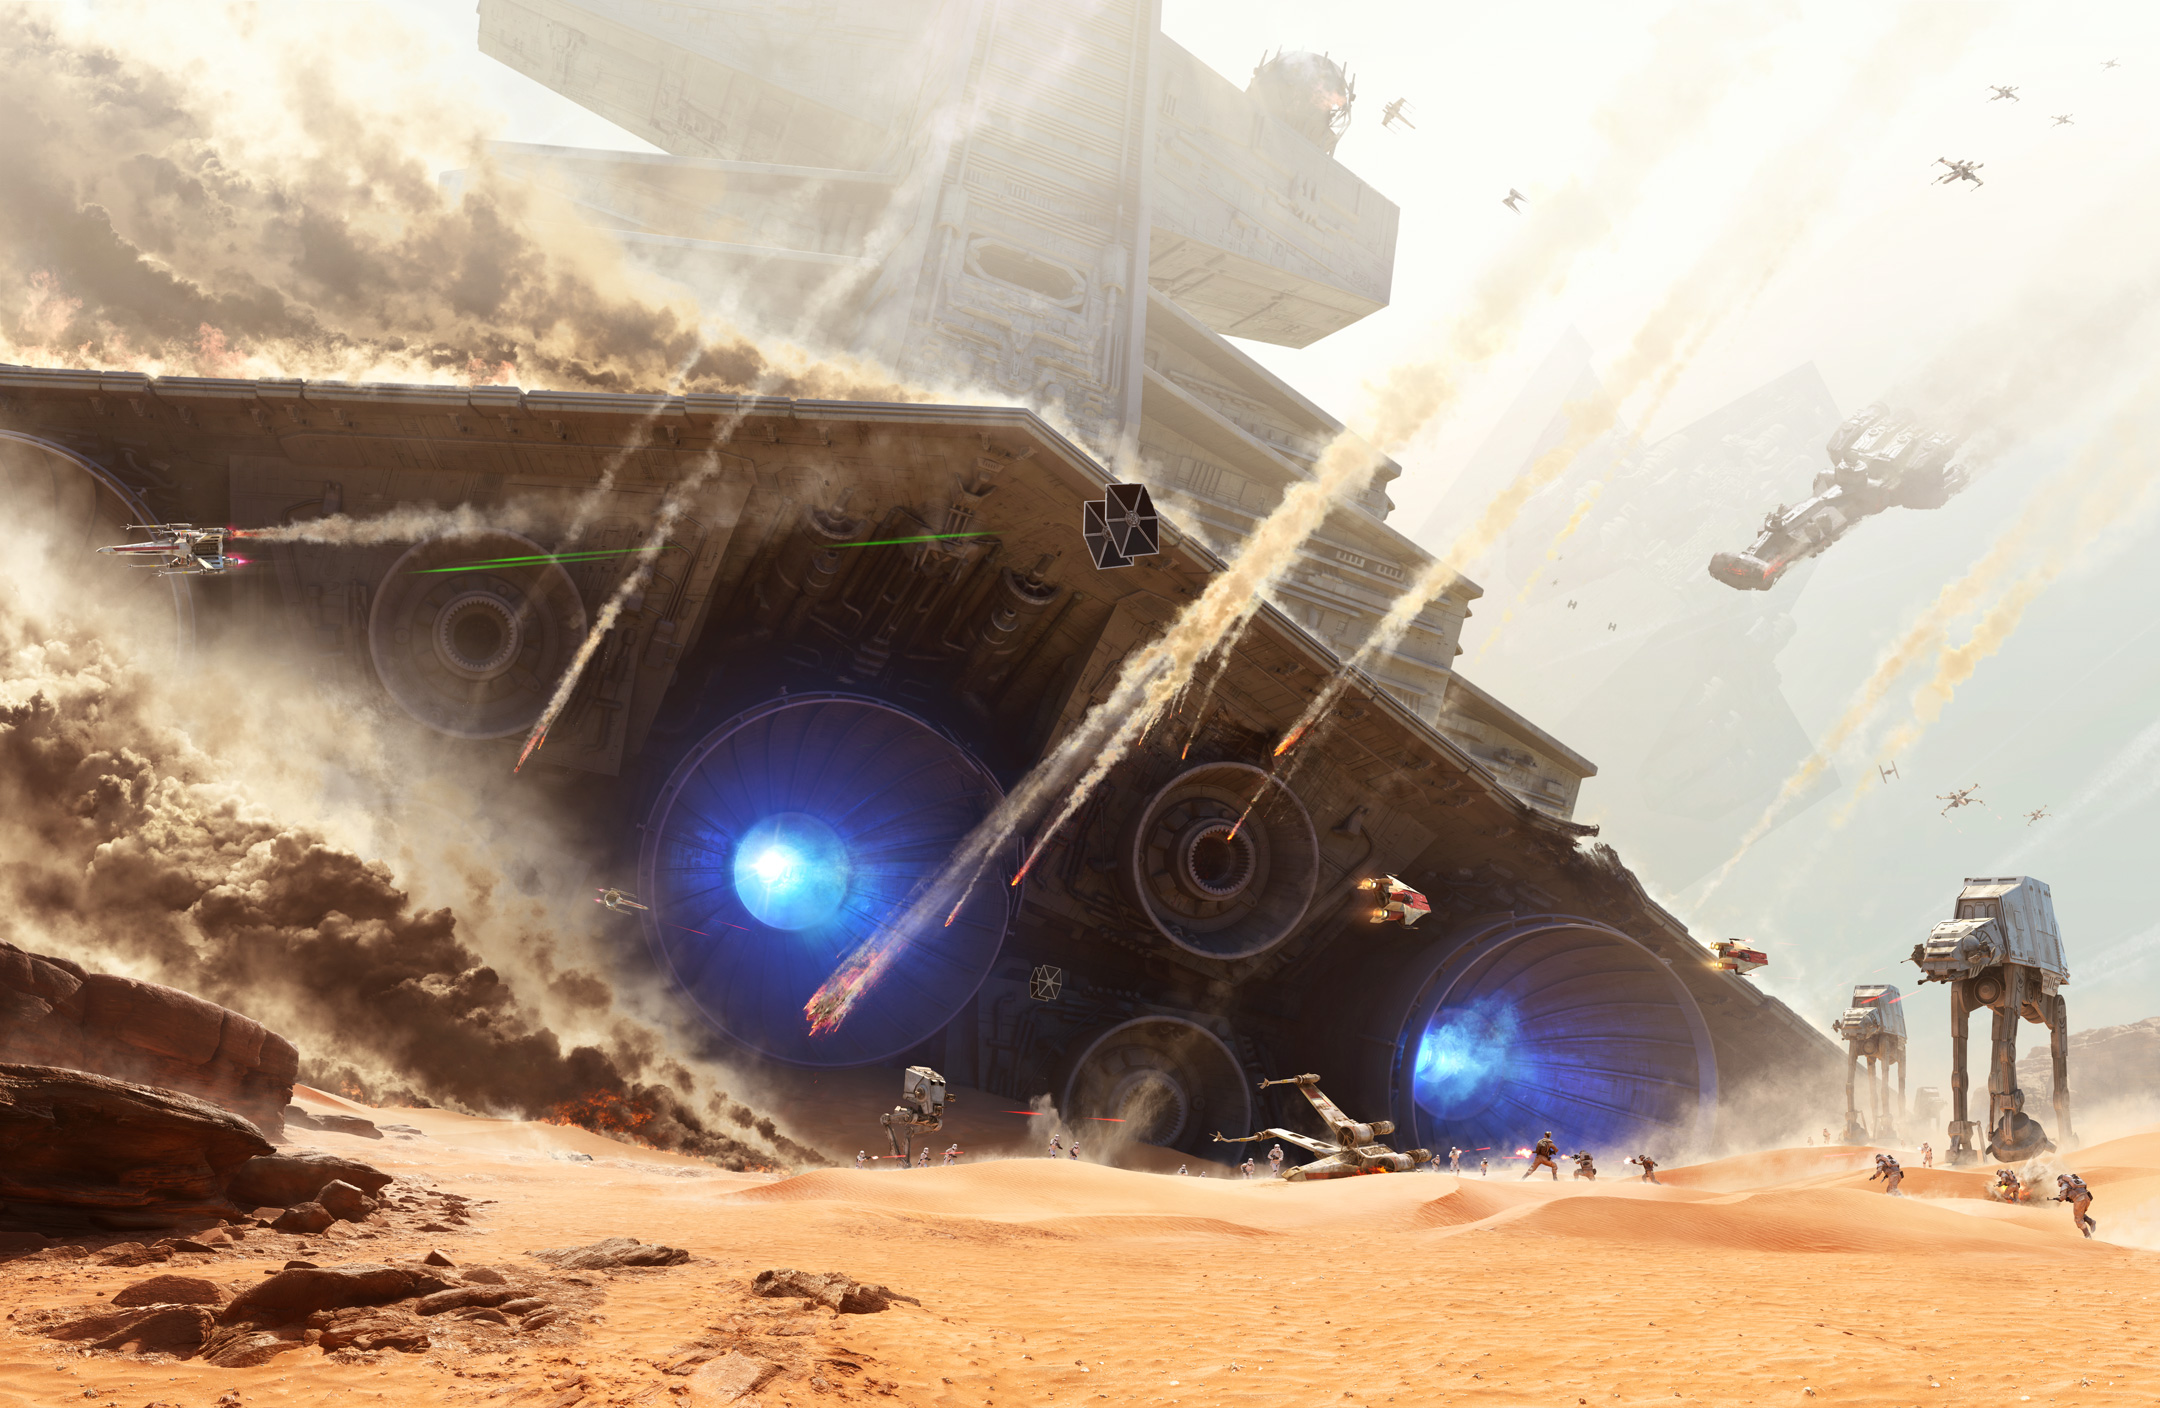
A New Republic fleet, under the command of Admiral Ackbar, entered the space surrounding Jakku and engaged Rax's Imperial fleet. The New Republic also deployed ground forces to attack the main Imperial headquarters and an Imperial weapons facility. Captain Wedge Antilles and Temmin Wexley, as well as Commodore Kyrsta Agate, were among the starfighter pilots participating for the New Republic. As the battle intensified, Norra joined forces with Sloane and Brentin to locate and neutralize Rax, who had traveled to the Jakku Observatory with Adviser Yupe Tashu to initiate the destruction of Jakku.
Initially, the battle favored the Empire. The Imperial fleet had established a tight defensive perimeter around Rax's Super Star Destroyer Ravager. This formation hindered the New Republic's assault and allowed the Ravager to repeatedly bombard the New Republic fleet from within the safety of its protective cordon. After the Star Destroyer Punishment broke formation and executed a kamikaze attack by ramming the Starhawk-class battleship Amity, Commodore Agate maneuvered her ship Concord into the resulting gap and bombarded the Ravager. Despite sustaining critical damage from the Super Star Destroyer, Agate managed to use the Concord's powerful tractor beam to pull the larger ship towards Jakku's surface. The New Republic ships and starfighters then disabled the Ravager's engines.
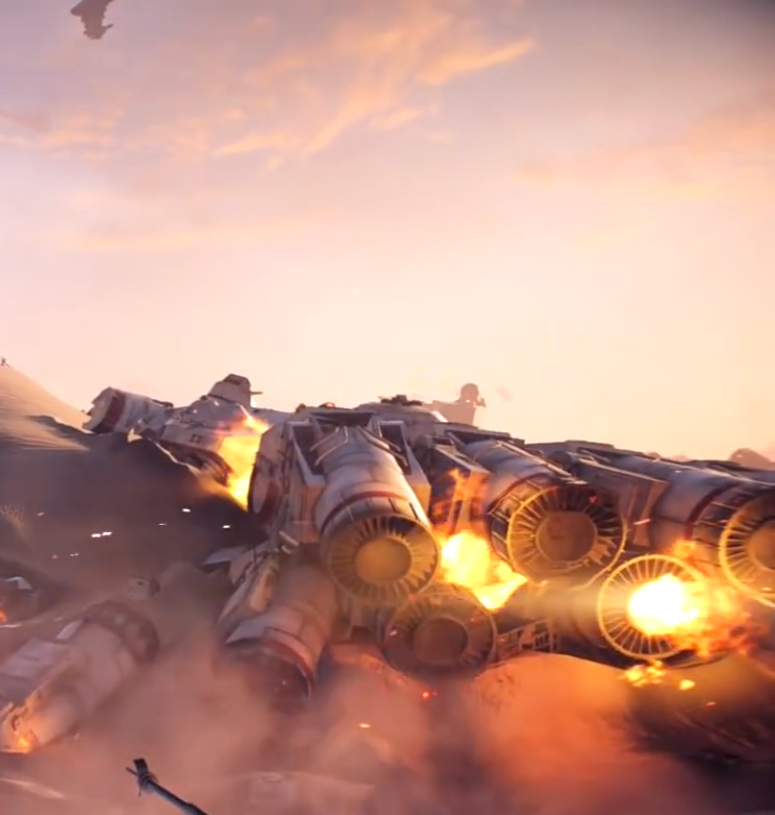
In the thick of combat, Iden Versio and Shriv Suurgav responded to distress signals across the battlefield, eventually rescuing Captain Lindsey and his crew after his corvette had crashed and was surrounded by Imperial ground forces. Assisted by bombardments from Starhawk Command, they eliminated two AT-ATs and evacuated Lindsey and his team aboard the Corvus. Subsequently, Iden and Shriv proceeded to a downed Star Destroyer and detonated the hangar to prevent the launch of incoming bombers. Upon returning to the Corvus, they came under attack from the Eviscerator, commanded by Admiral Garrick Versio. Gideon Hask was also present in a TIE Interceptor, whom Iden shot down, along with the other TIEs. Iden then crashed her X-wing starfighter into the Eviscerator and sought out her father. On the bridge, she attempted to persuade him to leave with her, but he refused, stating that his time had come. Iden then escaped the Eviscerator in an escape pod as it crashed onto the surface.
After the Ravager's commander, Grand Moff Randd, fled, the battle shifted in favor of the New Republic. New Republic forces then launched attacks against the beleaguered Imperials on multiple fronts, both in space and on the ground. During the battle, Captain Ciena Ree deliberately crashed her Star Destroyer Inflictor onto Jakku's surface to prevent the New Republic from gaining access to her ship. The New Republic also received assistance from the bounty hunters Jas Emari, Dengar, Embo, and Jeeta, who were granted pardons for their contributions. Meanwhile, Sloane and her New Republic allies tracked down and eliminated Rax, thwarting his plan to destroy Jakku. Sloane then fled with Brendol, Armitage, and Rax's child soldiers aboard a replica of the Emperor's yacht Imperialis, heading towards a set of secret coordinates in the Unknown Regions.
The Galactic Concordance
The Battle of Jakku coincided with Mas Amedda's escape from house arrest in the Imperial Palace. With the assistance of a group of child resistance fighters known as the Anklebiter Brigade, Amedda, acting as Emperor following Rax's death, traveled to Chandrila to sign the Imperial Instruments of Surrender and the Galactic Concordance with Chancellor Mon Mothma. These agreements formalized the Empire's surrender to the New Republic and mandated that all Imperial forces cease hostilities. Despite the decisive defeat of the Imperial fleet above Jakku and the signing of the Galactic Concordance, Imperial forces continued to fight on Jakku's surface and in other parts of the galaxy for several months. Following the battle, the scattered remnants of the Imperial fleet regrouped at various locations, including the Queluhan Nebula, to plan a coordinated attack on the New Republic.
One month after the Battle of Jakku, the remaining Imperial forces were confined to designated territories within the Core Worlds and Inner Rim. Under the terms of the Concordance, the defeated Empire was obligated to adhere to strict disarmament policies and pay war reparations, which the remnant in the Core and Inner Rim complied with, restricting themselves to the newly established boundaries. The Concordance also prohibited the recruitment and mobilization of stormtrooper forces, mandated the closure of Imperial Academies, ceded the former galactic capital, Coruscant, to the New Republic, and outlawed torture. While the New Republic focused on reshaping the galactic order, a group of hardliners eventually relocated to the Unknown Regions and became the First Order. Despite the conclusion of the Galactic Civil War, the New Republic had to contend with other emerging factions, including the New Separatist Union, the Confederacy of Corporate Systems, and the Sovereign Latitudes of Maracavanya, as well as some surviving Imperial splinter groups.
Legacy
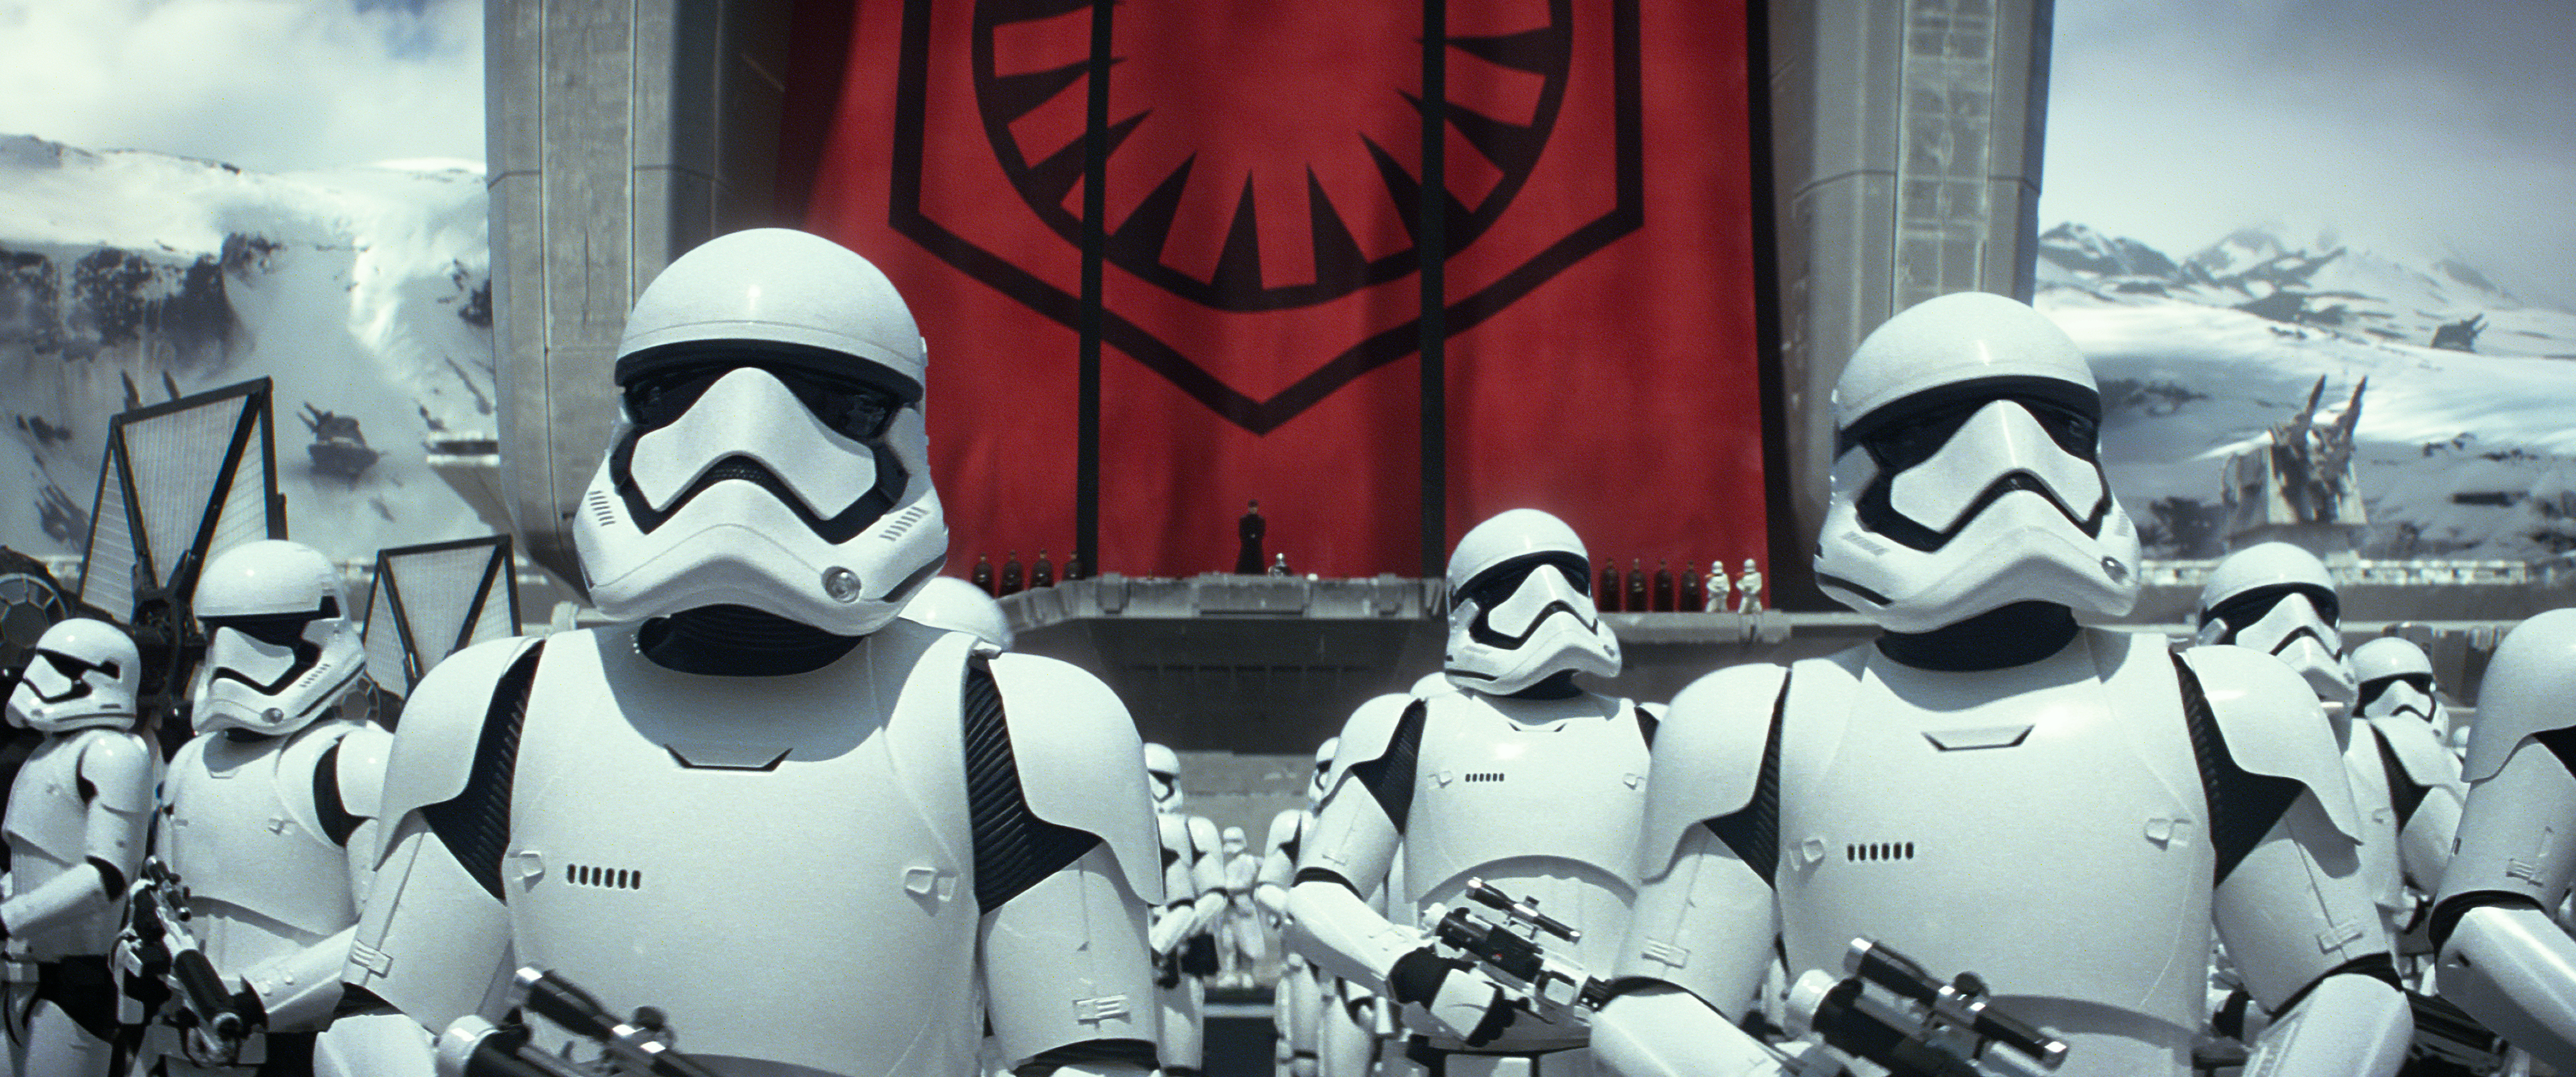
The war that originated from rebellion became known as a revolution in the galaxy's subsequent years. After the Galactic Civil War ended, and the New Republic rose to become the galaxy's leading government, the Republic found itself in a Cold War with the Imperial remnants. "The Client", an ex-Imperial, expressed his dissatisfaction with the galaxy's state following the Galactic Civil War, claiming that the Empire's collapse had led to chaos and destruction. His remarks were disregarded by Din Djarin, Greef Karga, and Carasynthia Dune, a former rebel shock trooper, despite the ongoing galactic recession.
Some affluent collectors, such as the Centrist senator Ransolm Casterfo, gathered historical items like Imperial helmets, banners, and armor. Rebel Alliance and Imperial banners, gear, and other historical objects were also sold at places like Chrome Citadel. Key Rebel leaders, including Senator Bail Organa, Chancellor Mon Mothma, Princess Leia, and Luke Skywalker, were widely respected and admired by the galactic populace. However, some individuals, like Casterfo, viewed the extreme actions of Saw Gerrera's Partisans, and even some actions of the official Rebel Alliance, as acts of terrorism.
By 28 ABY, the Galactic Senate had divided into two factions: the Centrists, who advocated for a stronger central government, and the Populists, who desired greater sovereignty for member worlds. Certain Centrists admired the "Old Empire" and questioned the New Republic's official accounts of the Battle of Yavin and the Galactic Civil War. Some even doubted that Skywalker had destroyed the first Death Star, suggesting that an Imperial traitor was responsible. Several Centrist senators, including Lady Carise Sindian and Erudo Ro-Kiintor, secretly worked as agents of the First Order to undermine the New Republic from within.
Due to his role as Palpatine's right-hand man, Lord Vader was universally despised by much of the galactic population. Consequently, his children, Princess Leia Organa and Luke Skywalker, kept the complete details of their parentage hidden from all but a small circle of trusted friends. After Lady Carise discovered Leia's true parentage, she manipulated Leia's friend, Senator Casterfo, into revealing Leia's connection to Darth Vader during a hearing to consider Leia's candidacy for the position of First Senator. As a result, the Princess lost considerable support in the Senate and was compelled to withdraw her candidacy. Later, Leia uncovered evidence that a paramilitary group called the Amaxine warriors, a front for the First Order, were planning to attack the New Republic. However, the Senate dismissed her warnings as warmongering. Sensing the approach of another galactic war, Princess Leia formed a paramilitary organization called the Resistance to defend the New Republic.
Many of the soldiers and military officers in the First Order, including General Armitage Hux, were taught that rebel "terrorists" had stolen the galaxy's future during the civil war. The First Order considered the New Republic too weak to protect the galaxy from chaos and believed that the First Order had to save the galaxy from itself. In the years leading up to the Hosnian Cataclysm, an uneasy peace existed between the New Republic and the First Order. The Trans-Hydian Borderlands, a neutral buffer zone, separated the New Republic and the First Order.
With the New Republic reluctant to take action against the First Order for fear of triggering another war, General Organa's Resistance maintained surveillance over the First Order. Following a series of skirmishes with the Resistance, the First Order destroyed the New Republic capital of Hosnian Prime. This event ended the cold war and set the stage for open warfare between the First Order and the Resistance, which posed the primary threat to the First Order's ambitions of restoring the Empire.
Behind the scenes
The Galactic Civil War has been the defining element of the Star Wars saga for decades, particularly the original trilogy. Most of the fictional works created for both the Star Wars Legends continuity and the current canon continuity are set during the Galactic Civil War.