Ahsoka Tano
Ahsoka Tano, a Togruta female, possessed Force-sensitivity and was ultimately expelled from the ranks of the Jedi Order. Following the events of the Clone Wars, she played a crucial role in the establishment of a network composed of various rebellious factions resisting the Galactic Empire. On her native world of Shili, Tano was discovered by Jedi Master Plo Koon. He subsequently brought her to the Jedi Temple located on Coruscant to commence her Jedi training. After the commencement of the Clone Wars, Jedi Grand Master Yoda designated the young Tano as the Padawan of Jedi Knight Anakin Skywalker. He humorously nicknamed her "Snips" upon her arrival at the Battle of Christophsis. Skywalker was known for his recklessness, while Tano was eager to demonstrate her abilities, resulting in a challenging initial period for the master and apprentice. However, they collaborated to save Rotta, the offspring of crime boss Jabba Desilijic Tiure, and returned him to his parent, thereby facilitating a vital agreement between the Hutt Clan and the Galactic Republic.
Serving as a commander within the Grand Army of the Republic, Tano found a mentor figure in Clone Captain Rex of the 501st Legion. She, along with Skywalker, partnered with Rex to spearhead frontline campaigns against the Confederacy of Independent Systems. During her inaugural command at the Battle of Ryloth, Tano defied direct orders, resulting in the loss of her entire squadron of pilots. Despite this setback, she recovered and contributed to securing victory on Ryloth. Throughout her assignments, she faced various adversaries, ranging from General Grievous and Sith apprentice Asajj Ventress to bounty hunters like Cad Bane and Aurra Sing. Over time, she developed into a highly regarded leader, making significant contributions to crucial Republic victories, such as the Second Battle of Geonosis and the Battle of Mon Cala. Tano even met her end during a series of events that occurred on Mortis, but the Daughter, a Force user representing the light side, made the ultimate sacrifice to revive Tano, restoring her to life.
Tano accumulated substantial experience both on and off the battlefield. She led a group of Jedi younglings in a rebellion against their Trandoshan captors, aided in the rescue of a Togruta colony from enslavement by the Zygerrian Slave Empire, and offered guidance to the Onderon rebels—including her close associate, Lux Bonteri—as they freed their planet from the Confederacy. In an unexpected turn of events, Tano was falsely accused of the Jedi Temple hangar bombing and other killings, leading her to flee into the Coruscant Underworld to establish her innocence. Despite forming an unlikely alliance with Asajj Ventress, she was captured by Republic forces and subsequently expelled from the Jedi Order. Ultimately, Skywalker identified the real perpetrator, Tano's friend and fellow Padawan Barriss Offee, preventing his former apprentice from being found guilty of treason. However, this experience shattered Tano's confidence in the Jedi. She declined the Jedi High Council's invitation to rejoin the Order, choosing instead to leave and seek a new path. Tano briefly returned to lead Republic forces during the Siege of Mandalore, confronting Maul and his allies. Order 66 was executed shortly after the Sith Lord's capture, and Tano, along with Rex, after freeing Rex from the influence of Order 66, escaped the remainder of her 501st division. She faked her own death and was forced into hiding.
Following the rise of the Galactic Empire, Tano went into hiding on Thabeska and Raada, adopting the alias "Ashla." After the Raada evacuation, Tano joined Senator Bail Organa's burgeoning rebel movement. She took on the role of manager for his intelligence network and adopted the codename "Fulcrum." As Fulcrum, Tano supplied intelligence to various rebel groups, including Hera Syndulla's Spectres rebel cell. Tano took a keen interest in Syndulla's rebels because one of their members, a Jedi named Kanan Jarrus, had begun to train his own Padawan, Ezra Bridger. Furthermore, Tano's efforts against the Empire brought her into contact with the Dark Lord of the Sith Darth Vader—who, unbeknownst to her, was actually her former master, Anakin Skywalker—as well as the Imperial Inquisitors known as the Fifth Brother and the Seventh Sister. However, it also provided her with the opportunity to reunite with Rex. After the mission to Malachor, Tano was lost in the debris and shadows of the Sith temple, and many, including Jarrus and Bridger, believed she had perished during a battle with Darth Vader.
However, Tano was unexpectedly rescued from Vader's wrath by a future version of Ezra Bridger. He pulled her through a portal into the World Between Worlds, a mystical plane of the Force that connects all of time and space. After a confrontation with Darth Sidious, who sought access to the dimension, Tano returned to her own time, promising Bridger that she would find him upon her return. Following the conclusion of the Galactic Civil War, Tano joined Sabine Wren on her mission to locate the missing Bridger, who had vanished during the Liberation of Lothal. She trained Wren in the ways of the Jedi until they parted ways. Tano then traveled to the city of Calodan on the forested planet Corvus, seeking information from Magistrate Morgan Elsbeth regarding the whereabouts of Grand Admiral Thrawn, who had disappeared alongside Bridger. In order to save the city from Elsbeth's control, she formed an alliance with the Mandalorian Din Djarin, who was on a mission to deliver the Force-sensitive youngling Grogu to the Jedi. After liberating Calodan, Tano declined to train Grogu and instead directed Djarin to the planet Tython. She later visited Luke Skywalker at his new Jedi Temple, and, when Skywalker found Grogu in his care after being summoned by the seeing stone, she temporarily oversaw his training of the child.
Faced with Thrawn's return, Tano returned to Lothal and once again enlisted Wren's help in locating Bridger and the missing Grand Admiral. Decades after Tano began her search, her voice joined a multitude of Jedi spirits to guide the young Jedi Rey, the granddaughter of a resurrected Darth Sidious, during the final battle of the First Order-Resistance War. Ahsoka inspired Rey to stand up to Sidious and destroy him once and for all.
Biography
Childhood
Ahsoka Tano was born in 36 BBY on the planet of Shili to Togruta parents Pav-ti and Nak-il Tano. Early in her life, Tano's mother took her on a journey, imparting knowledge about both life and death. During this time, the young girl encountered a raxshir cat, whom she fearlessly approached. She then rode the animal back home. Upon her return, the elder Togruta Gantika recognized the infant's Force-sensitivity and declared that she would become a Jedi. When Tano reached the age of three years, she was discovered among her people on Shili by Jedi Master Plo Koon, whose attention was drawn to her natural ability to perceive the intentions and emotions of others, marking her as Force-sensitive.
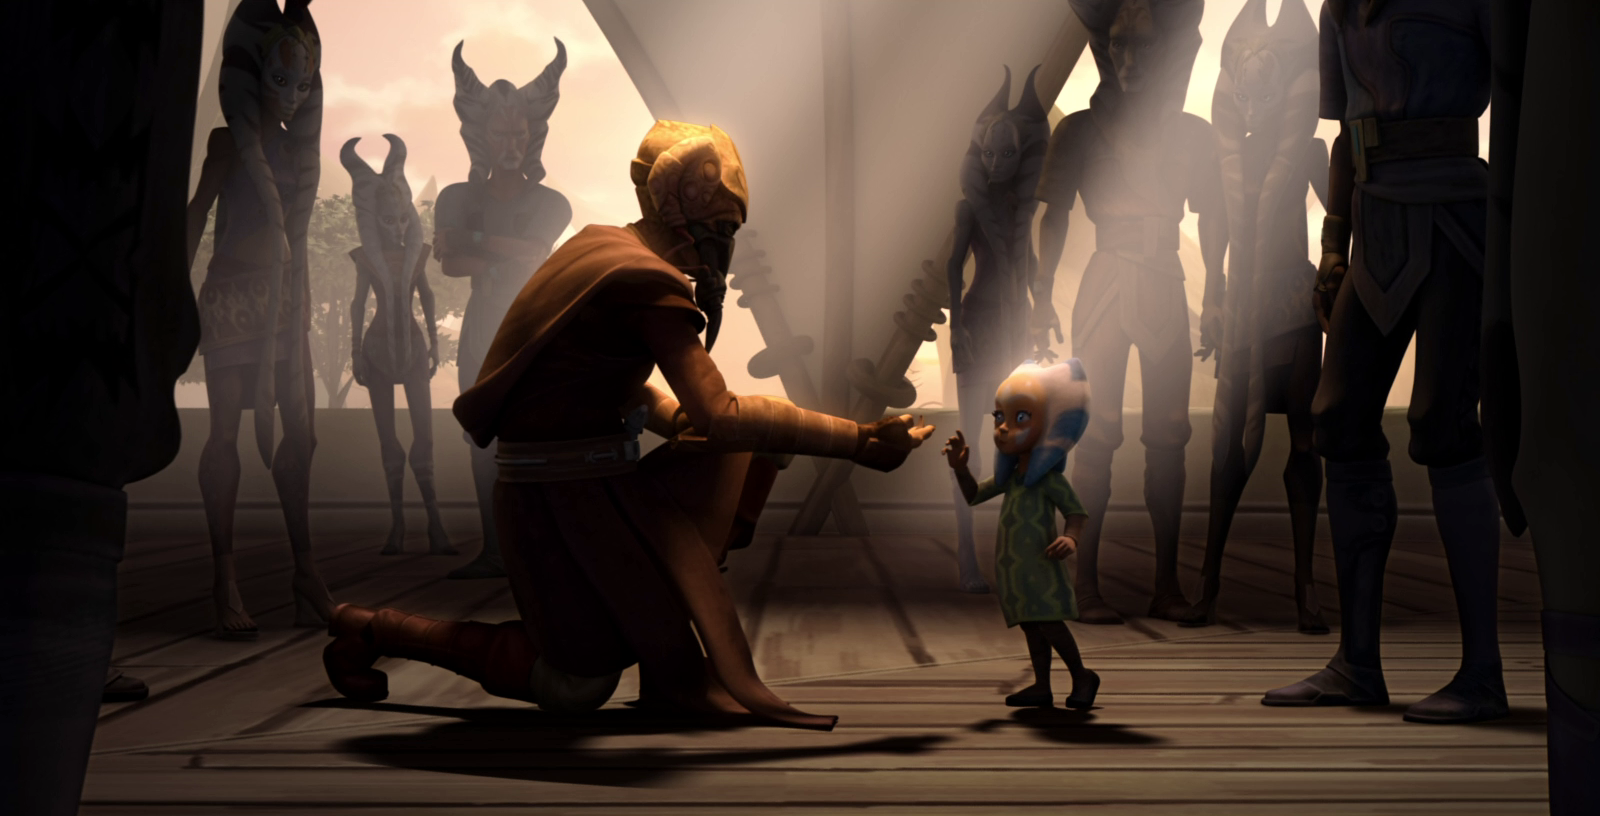
Around the same period, Tano was nearly enslaved by an imposter, who intercepted the signal intended for the Jedi Order and sought to exploit her abilities for their own purposes. Unable to adequately convey the danger posed by the imposter to the village elders, Tano faced their scorn when she refused to demonstrate her Force powers. However, the imposter's scheme was ultimately foiled. Despite the fear instilled in the young Tano by the imposter, she immediately trusted Koon, who taught her to calm herself by breathing slowly. Subsequently, she was accepted into the Jedi Order, beginning her new life after Koon brought her to the Jedi Temple on Coruscant, where, like all Jedi of her era, she was raised. Training as a Jedi Initiate restored her self-confidence after the fear caused by the impostor impacted it, and the life of a Jedi became the only life she ever knew.
At some point, Tano journeyed to the Jedi Temple on the icy planet Ilum to obtain a kyber crystal for a lightsaber. She sensed the crystals as soon as the Jedi starship exited hyperspace, although she did not initially understand what she was sensing. She entered the temple's cave after Grand Master Yoda informed her that she would recognize her crystal when she found it. As the cave entrance slowly closed with the setting sun of Asar, she frantically searched for her crystal until she calmed herself, recalling Yoda's words and finally noticing its light. Excited and ready to leave, she quickly exited the cave with the tool she would use to construct her own lightsaber. While her visit to Ilum was generally unremarkable, her decision to trust Yoda's teachings restored her ability to trust others after it was impacted by the false Jedi. From there, she would construct said lightsaber using the kyber crystal under the tutelage of Jedi architect droid Huyang, who fussed over her shoulder as she worked on it. At another point, Yoda taught her that she could sometimes find something she was not looking for in a situation.
During her time at the Jedi Temple, Professor Huyang would regale her with the History of the Galaxy, Parts One, Two and Three, of which she considered part one the best.
In the midst of galactic war
Becoming Skywalker's Padawan
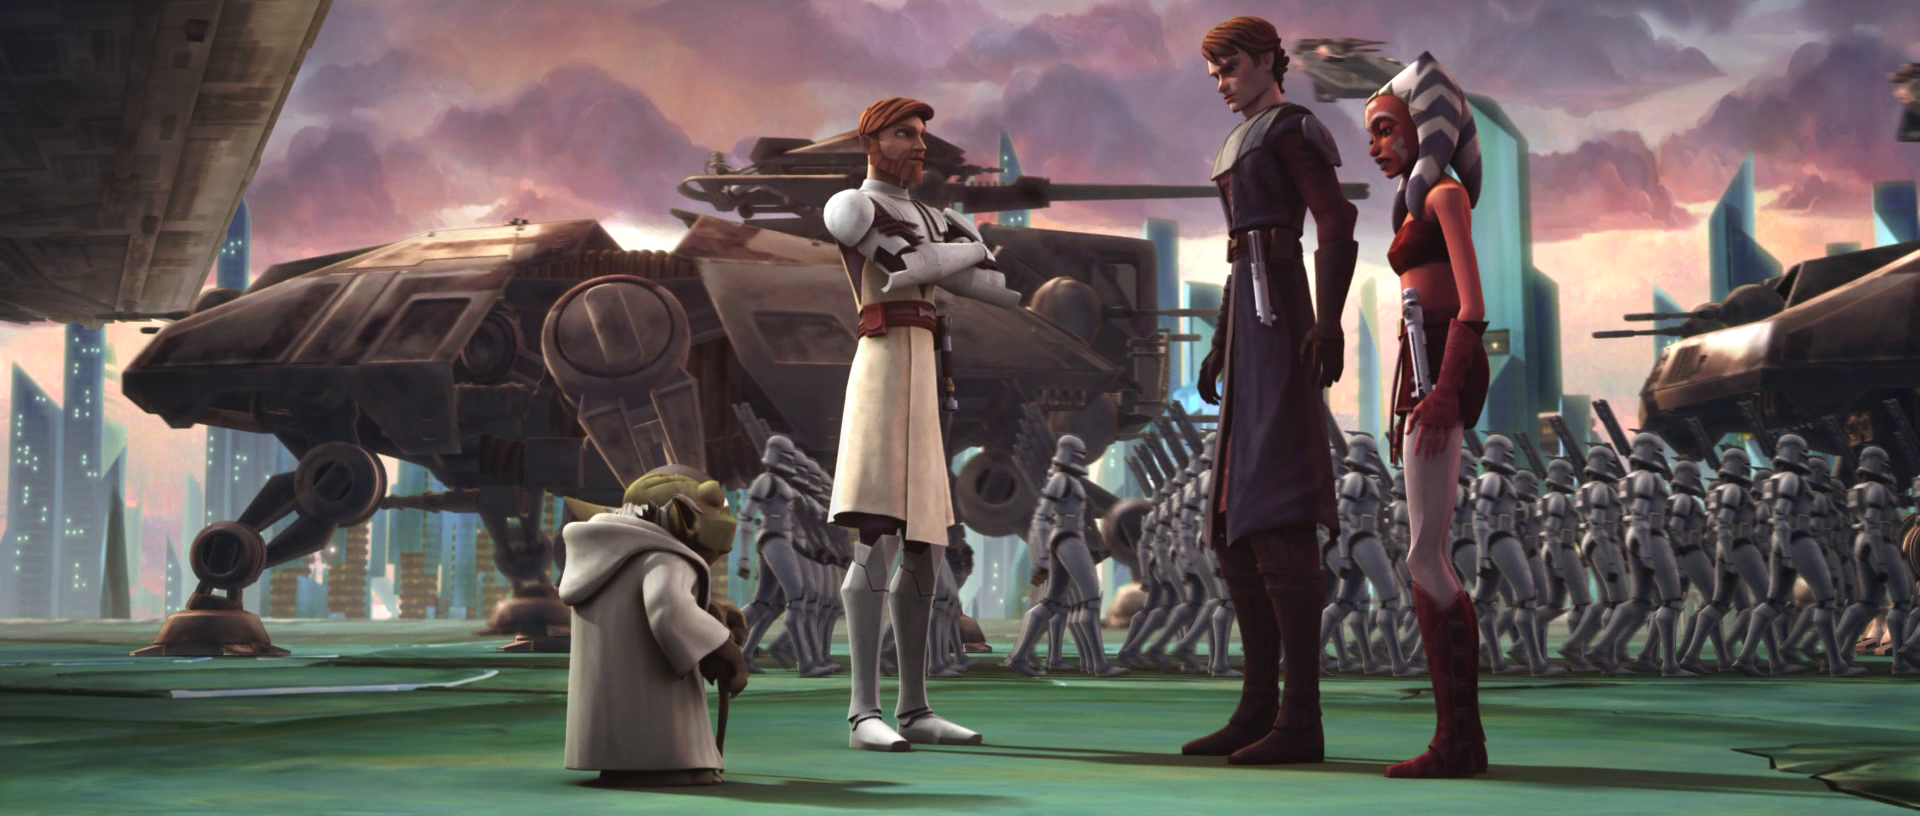
At the age of fourteen, just months after the First Battle of Geonosis marked the beginning of the Clone Wars, Tano was assigned to Jedi Knight Anakin Skywalker as his apprentice to learn the ways of the Force, following Yoda's orders. Her training was accelerated due to the galactic conflict that overshadowed her apprenticeship. Having been granted the rank of Padawan, which made her a Jedi Commander under the Jedi Military Integration Act, she demonstrated an eagerness to prove herself worthy to be his apprentice. Yoda did this to alleviate Skywalker's fear and inability to lose loved ones, as he believed that by becoming a teacher, Skywalker would develop emotionally and understand that his excessive bonding to those he cared about was unnecessary once Tano was ready to go off on her own.

The Jedi Council ultimately dispatched Tano on her initial mission to the planet Christophsis to meet her new mentor and inform Kenobi and him that they needed to return to the Jedi Temple on Coruscant. However, upon arriving on the planet shortly after a wave of Separatist forces retreated and delivering that message to the two, she discovered that the Republic had actually failed to secure the planet, contrary to the Jedi's belief on Coruscant. This left the generals and their forces trapped and outnumbered as the battle continued. Kenobi introduced himself, assuming that she was his new Padawan learner. She corrected him, emphasizing that Master Yoda had specifically assigned her to Skywalker, who was shocked by the news because he had strongly opposed the idea of taking on a Padawan learner. Despite Kenobi's confusion, he acknowledged that having a Padawan would benefit Skywalker, who vehemently disagreed.
Meanwhile, the droid army established a deflector shield to block the Republic artillery bombardment that had previously halted their advances. Skywalker took Tano to check on Clone Captain CT-7567 "Rex," who was equally perplexed by Tano's presence, referencing Skywalker's earlier opposition to taking on a Padawan learner. Tano defended herself, stating that Yoda believed in her abilities and that she would prove herself. As Skywalker proceeded ahead, Tano inquired of Rex whether she outranked him, to which Rex replied that experience superseded any designated command. However, Tano simply responded that she was eager to gain some experience.
Liberation of Christophsis
Skywalker and Tano eventually devised a plan to infiltrate the enemy lines while Kenobi and his troops held off the enemy forces to buy them time. The two Jedi concealed themselves inside a box while the droid tanks moved around them. As they approached the shield's source, Tano tripped over a sensor antenna, inadvertently activating a group of Separatist retail droids. While Skywalker engaged the droids, Tano began placing charges around the generator. As she was planting charges, a battle droid approached her from behind, but Tano noticed it and sliced it in half. The battle droid's body rolled over more sensors and activated additional retail droids. With her master pinned down by the horde, Tano noticed a piece of wall behind him with a convenient hole right where Skywalker was positioned. She used the Force to push the wall down, crushing the droids around her master.
Meanwhile, in the city, Kenobi tricked Separatist General Whorm Loathsom, stalling for time until the shield was destroyed. Then, Kenobi took the Separatist General hostage. When the battle concluded, Skywalker remarked on his new Padawan's recklessness, suggesting that she might not have succeeded as Kenobi's Padawan. Tano felt disappointed until her master reaffirmed himself, thanking Tano for her assistance on their mission and noting that her recklessness might serve her well as his student. As Tano and Skywalker found themselves settled, Yoda wondered if having a Padawan would calm Skywalker's wild ways.
Battle of Teth and rescuing Jabba's son
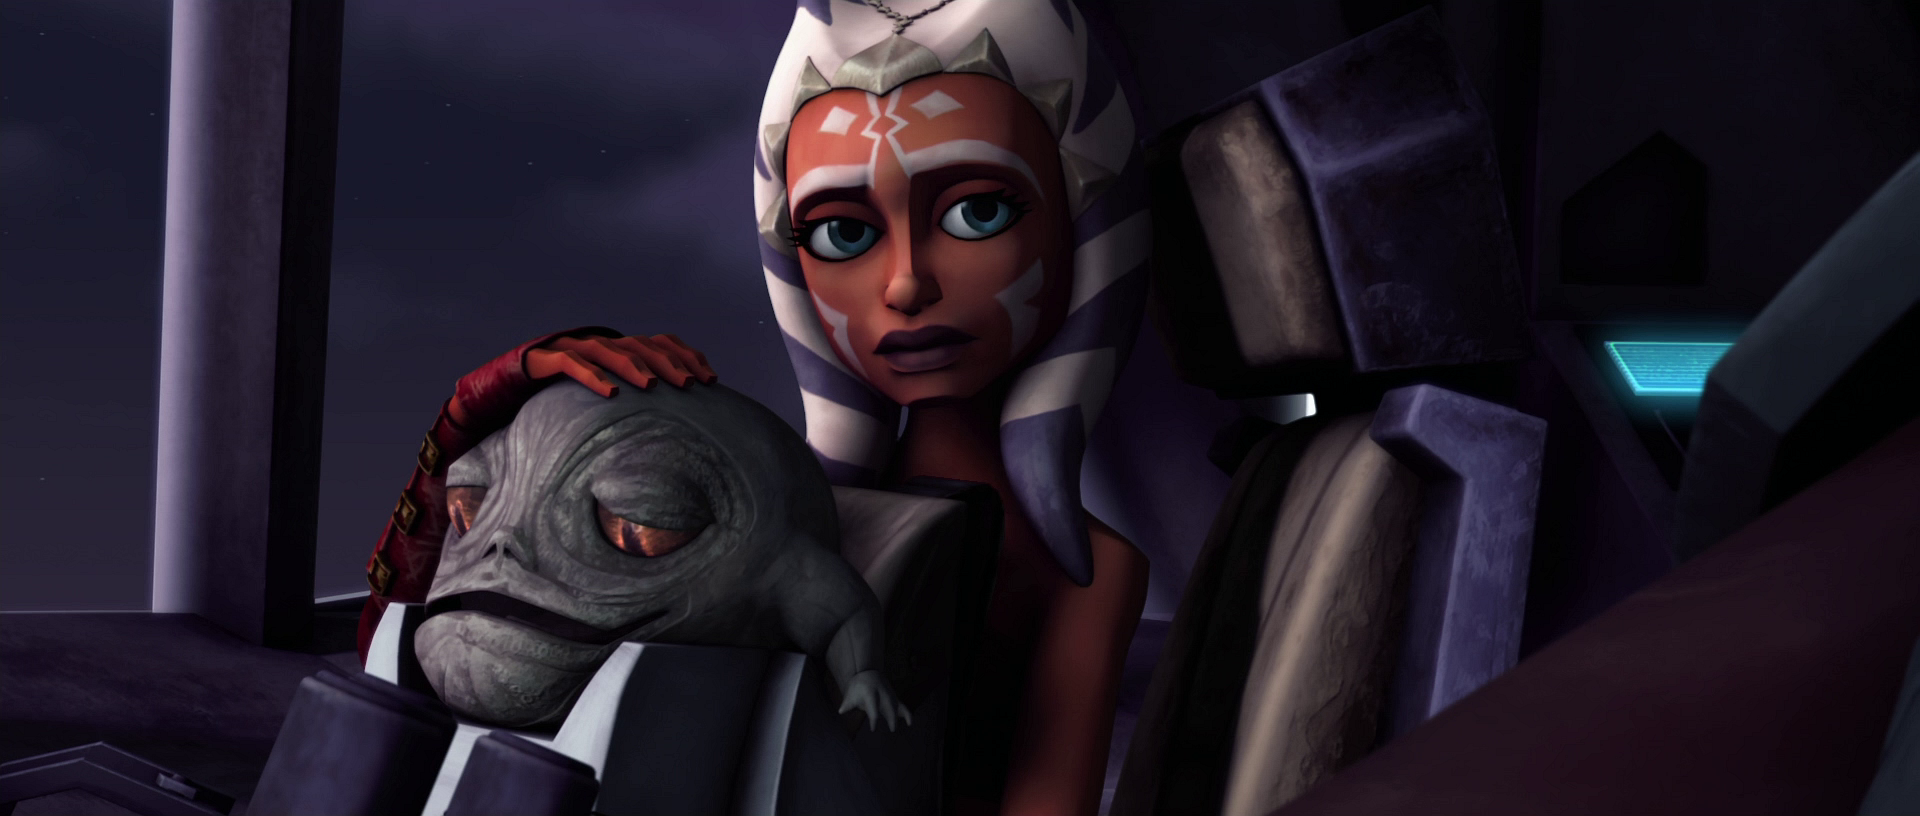
Following the Battle of Christophsis, Skywalker and his new apprentice were dispatched to locate and rescue Jabba the Hutt's missing son Rotta, who had been captured by Separatist forces and taken to the planet Teth. Rescuing Rotta was essential to secure trade and shipping routes for the Republic through Hutt Space in the Outer Rim Territories.
As Skywalker communicated with the scouts who had been sent to Teth, Tano quickly befriended the clones, recounting her rescue of Skywalker on Christophsis. Skywalker approached them and informed them that landing at the B'omarr Order Monastery would be impossible. As Rex directed the men to their positions, Skywalker advised Tano to remain humble, to which she responded that she was trying to inspire the men.
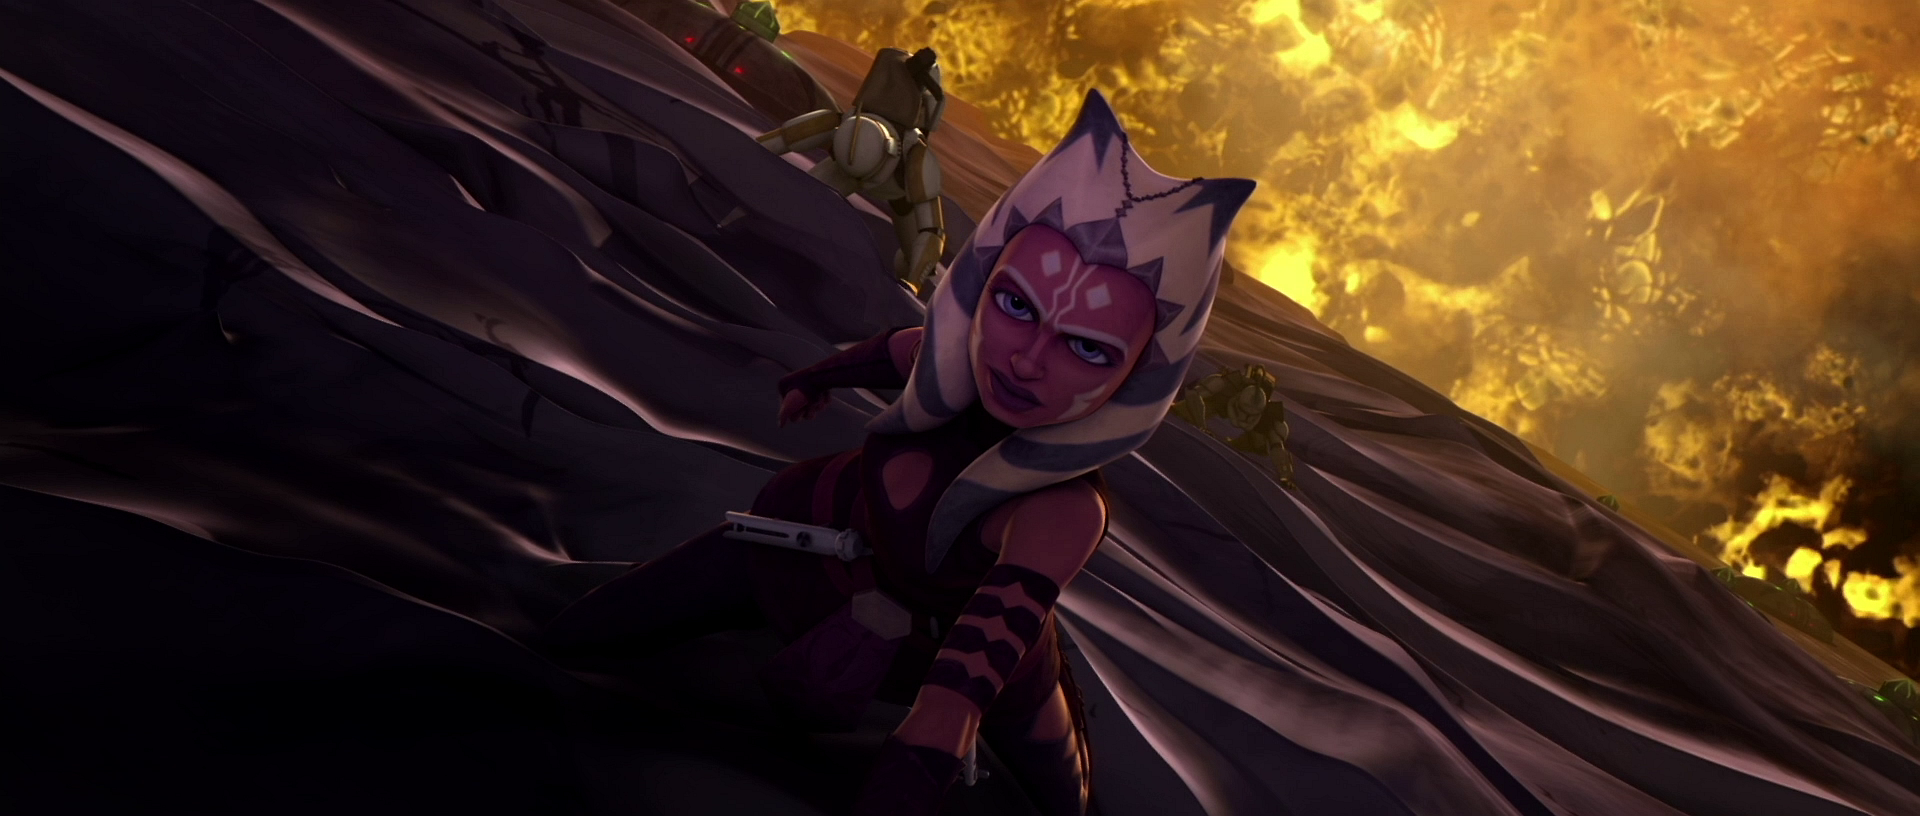
Republic forces were compelled to land below the monastery, with Tano riding in a LAAT/i gunship alongside Skywalker, Rex, and several other troopers. After landing, their forces began to scale the mountain using AT-TE walkers and ascension cables to reach the building's location. Skywalker led the charge, and Tano stood atop a walker, deflecting incoming laser fire. The climb proved challenging, but the Jedi and clones eventually reached the mountain's summit.
After securing the outer perimeter, they discovered a caretaker droid named 4-A7, who revealed the captured Hutt's location. Skywalker and Tano went to search for him and were forced to battle several enemy battle droids before finding the cell where the Hutt was held. Rotta turned out to be just a Huttlet. Meanwhile, 4-A7, who was actually serving the Separatists and Dark Acolyte Asajj Ventress, recorded the Jedi's speech. Ventress transmitted the recording to her master, Count Dooku, who presented the "evidence" to Jabba, claiming that the Jedi were behind the kidnapping. Dooku assured Jabba that he would dispatch his army to "rescue" Rotta, intending to gain Jabba's favor for safe passage through the system.
With the incoming droid army approaching and the little Huttlet ill, the Jedi had to find another way out to bring the kidnapped Hutt back to Tatooine. As they made their escape, Ventress arrived and eventually located the two, engaging them in battle. After a brief duel, they escaped on a can-cell to a nearby hangar, followed by Skywalker's astromech droid, R2-D2, where a ship, the Twilight, was docked. Once on the other platform, they encountered 4-A7 once again. However, it became clear that the droid was a spy when three battle droids emerged from the ship. The Jedi destroyed the droids and hijacked the ship.

During their escape, Master Kenobi and Republic reinforcements arrived, with Kenobi engaging Ventress in a duel. Now aboard the ship, Skywalker and Tano attempted to land on a Republic Star Destroyer, but the cruiser's hangar was destroyed, forcing the Jedi to make their way to Tatooine independently. As the two jumped to hyperspace, Ventress and Kenobi sensed their withdrawal. Kenobi, realizing that Ventress had failed her mission and that her master would be displeased to learn of it, gained the upper hand over Ventress until she boarded a Vulture droid to escape capture.
Meanwhile, Tano and Skywalker found medicine for the Huttlet, which saved his life as they made their way back to Jabba's palace on Tatooine. However, as they approached Tatooine, they were attacked by two MagnaGuards in Rogue-class Porax-38 starfighters. Despite destroying the fighters, their ship was forced to crash-land in the Dune Sea. Tano, Skywalker, and R2 then carried Rotta across the Dune Sea to reach his father's palace. However, she and Skywalker sensed Dooku's presence.
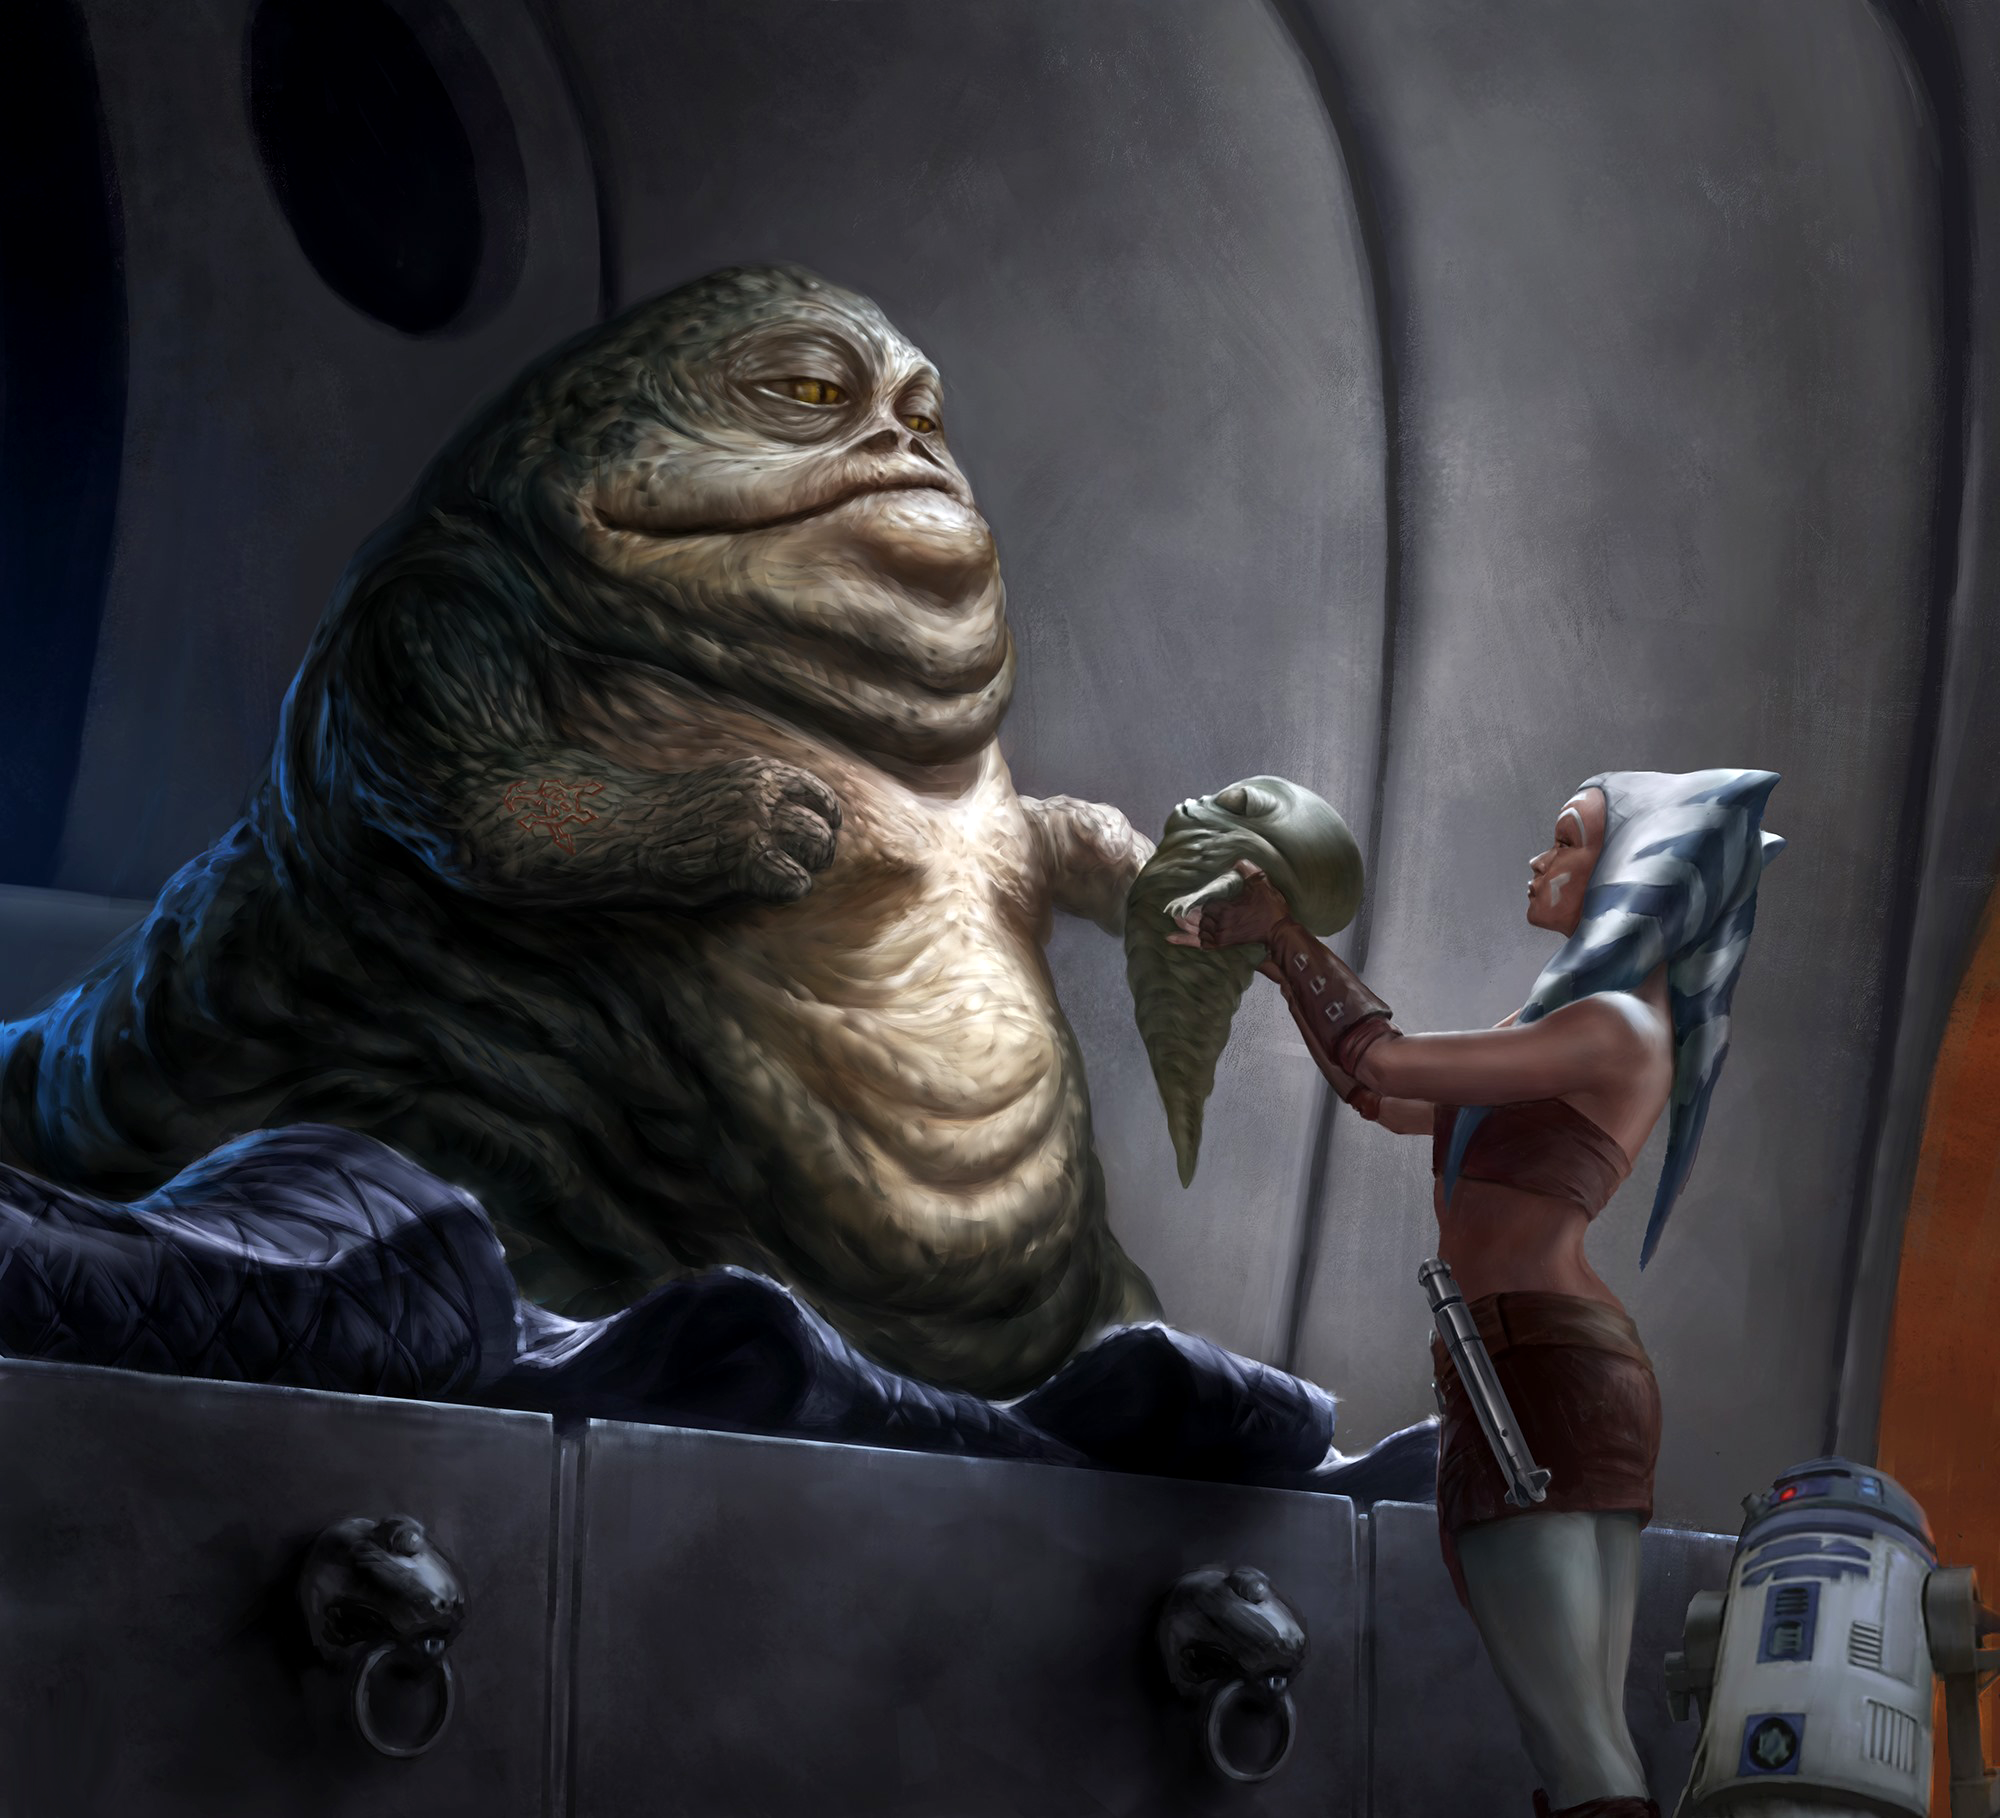
While Skywalker diverted Dooku's attention, Tano and R2 transported Rotta to Jabba's residence. However, they were ambushed by a group of MagnaGuards. Tano engaged the MagnaGuards in combat, ultimately destroying all of them and reuniting with her master at Jabba's palace. Nevertheless, Jabba initially sentenced them to execution until his uncle, Ziro, contacted him. Subsequently, Senator Padmé Amidala revealed to Jabba that his uncle was in league with Dooku and was the mastermind behind Rotta's abduction. Consequently, Jabba spared their lives, and Tano and her master were retrieved by Masters Kenobi and Yoda.
The Malevolence
At one point, Kenobi shared with Tano the story of how his own mentor, Qui-Gon Jinn, discovered Skywalker due to his exceptional reflexes. During the hunt for the Confederacy's new warship, the Malevolence, a Subjugator-class heavy cruiser equipped with two mega-ion cannons capable of disabling the power systems of an entire fleet of warships, Tano and her master were tasked with safeguarding the staging area within the Bith system. Master Plo Koon then contacted her and Skywalker, having traced the Confederacy's secret weapon to the Abregado system. Upon the loss of Koon's transmission, Tano implored her master to dispatch aid to Koon, but he required authorization from the Chancellor and the Jedi Council. During the meeting, Skywalker and the Council presumed that there were no survivors, and Skywalker received orders to protect the Republic's convoys. Tano then voiced her opinion, urging them to search for survivors, but the Council and the Supreme Chancellor rebuked her for her interruption. Skywalker then instructed Admiral Yularen to deploy their fleet while Skywalker and Tano embarked on the Twilight to "scout ahead."
Despite Tano's interruption, her master concurred with her that they must search for survivors. Initially, they were unsuccessful and received orders from both Kenobi and Palpatine to abandon their search. However, as Skywalker piloted the Twilight away, Tano sensed Koon's presence and assumed control, guiding the Twilight to his escape pod's location. Tano and Skywalker discovered Koon with the clones Commander Wolffe, Sergeant Sinker, and trooper Boost. They learned from Koon that the Malevolence's weapon was an ion cannon mounted on a massive ship capable of disabling other ships. Tano then detected the Malevolence approaching and swiftly disabled power to blend into the debris field. Initially, the ship passed by, but it then detected the Twilight's medical droid TB-2, who was tending to the injured Wolffe, and fired the mega-ion cannon. Skywalker successfully evaded debris and jumped to hyperspace before the blast wave reached them.
Following their return to the Republic fleet and the Resolute, Skywalker and Tano were placed in command of Shadow Squadron and dispatched on their subsequent mission: to eliminate both General Grievous and the Malevolence. Tano and Koon were both doubtful of the plan, recognizing that Grievous would be well-defended by his ship's defenses. Tano and Skywalker then received information that Grievous had attacked a medical convoy in the Ryndellia system. Skywalker inferred that Grievous's next target was the Republic's secret Outer Rim medical center near the Kaliida Nebula. Tano served as Skywalker's gunner aboard his BTL-B Y-wing starfighter/bomber as Shadow Squadron flew to intercept Grievous.
Tano, along with her master, Koon, and Shadow Squadron, utilized a shortcut through the nebula. During the journey, Tano detected several Neebray mantas. Despite damage to one of the bombers and an astromech, Tano, Skywalker, Koon, and Shadow Squadron arrived at the medical station. The Malevolence then appeared, and Tano shot down several of the vulture droids despite her master's skillful flying. As Shadow Squadron began to lose more ships, Tano convinced her master to target the ion cannon instead of the bridge. This tactic proved successful in disabling both the Malevolence's ion cannons and its hyperdrive.
Tano, Skywalker, and Koon then rejoined Kenobi aboard the Resolute as he continued attacking the Malevolence. However, Tano detected a Naboo ship approaching the battlefield. Tano then intercepted a comm signal from the ship's pilot, Senator Padmé Amidala. When Amidala was ensnared by a tractor beam, Skywalker decided to rescue the senator. Tano remained on the bridge of the Resolute with Koon and Admiral Yularen and guided both her master and Kenobi through the ship to locate Amidala and her protocol droid, C-3PO, until Grievous disrupted their transmissions. Tano observed as Skywalker, Kenobi, and Amidala made their escape, and the Malevolence crashed into the Dead Moon of Antar.
Battle of Bothawui and search for R2-D2
Following the Republic's defeat at Falleen, Tano, Skywalker, and their fleet were stationed at Bothawui for its defense. Tano concurred with Kenobi that they should retreat, but stood by her master when he declined to do so. Tano was part of Resolute command as Skywalker, R2, and Gold Squadron engaged Grievous's fleet. As Grievous's fleet attacked them, Tano signaled Rex and his AT-TEs to initiate fire from the asteroids behind Grievous's fleet. Although they destroyed the majority of Grievous's fleet, Grievous himself escaped.
After Skywalker sustained injuries when his starfighter collided with a large piece of shrapnel, he was transported to the Resolute for recovery, while R2 was left behind. Tano later accompanied her master, along with R2's temporary replacement R3-S6, secretly a spy for General Grievous, on a subsequent salvage operation to attempt to recover the droid. Tano was optimistic that R3 would be a suitable replacement but failed to convince Skywalker that R3 could ever replace R2. The pair boarded a nearby salvaging ship piloted by the Trandoshan scavenger Gha Nachkt. R3, secretly allied with the Separatists, activated several IG-88 assassin droids, which attacked the two Jedi within the ship's cargo hold. After failing to locate R2, they departed to continue their search, unaware that Nachkt was also in league with Grievous and was secretly concealing R2 from the Jedi. After Skywalker was caught in an ambush by Grievous as a result of R3's sabotage, Tano and Rex were compelled to rescue him, once again escaping the General's clutches. Tano continued to defend R3, but this only exacerbated Skywalker's anger since they were no closer to finding R2.
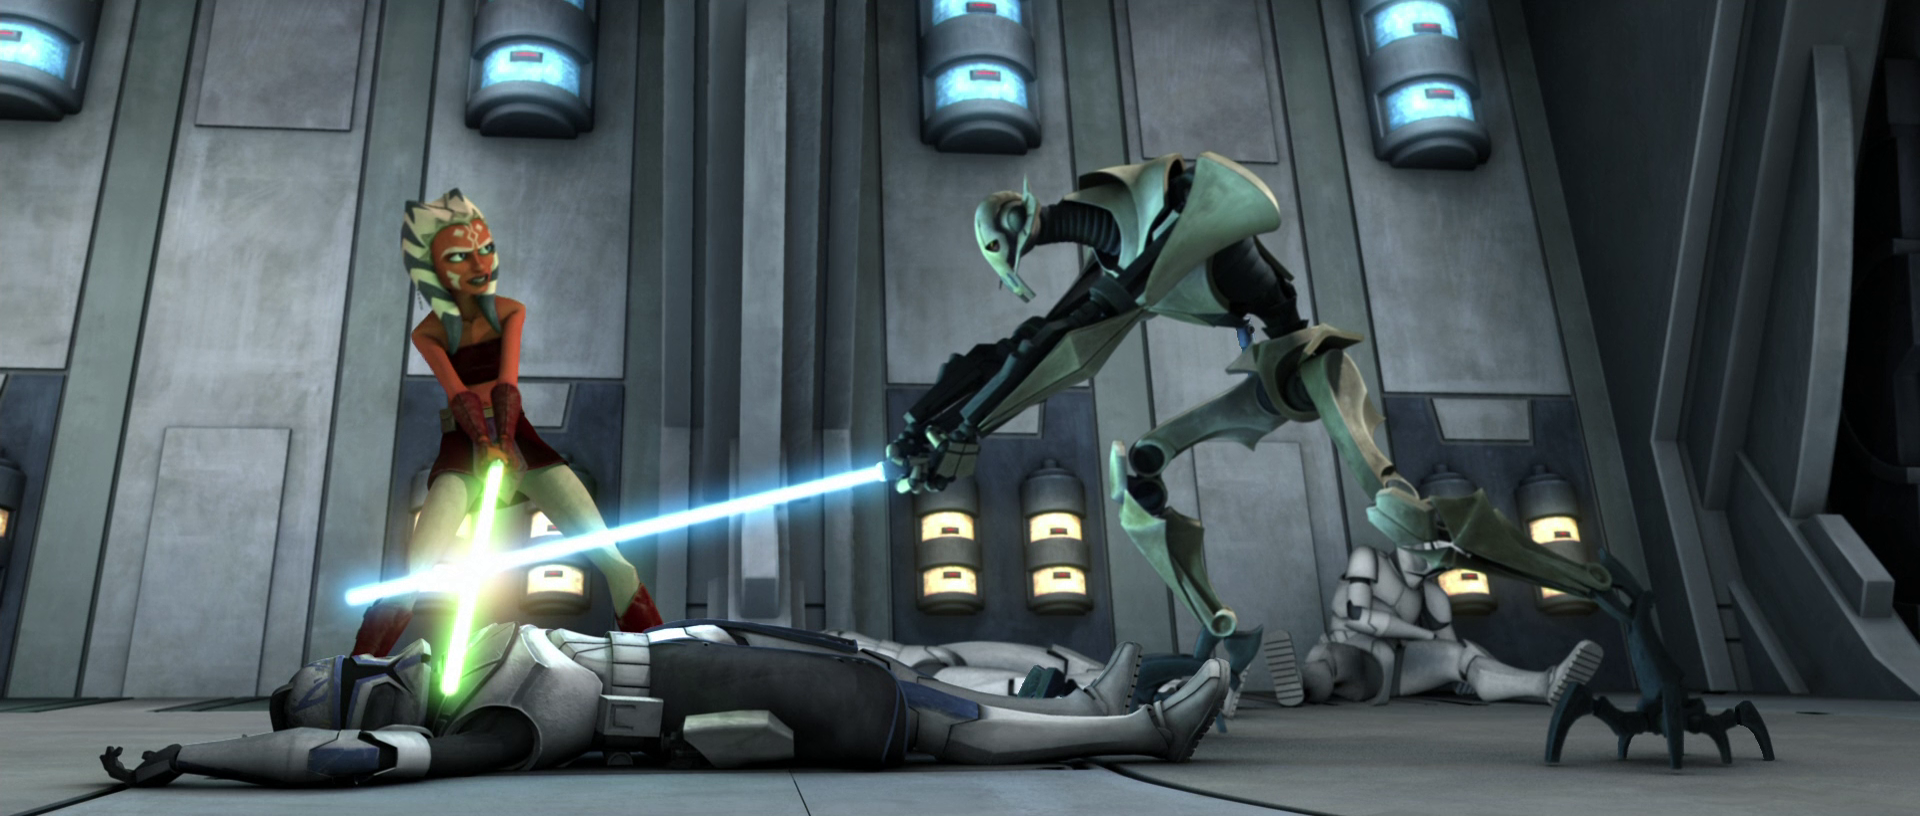
Upon receiving a transmission from R2 aboard Gha Nachkt's ship, Tano and Skywalker followed the transmission coordinates to Grievous's Separatist listening post on one of Ruusan's moons. To evade the station's scanners, Tano, Skywalker, R3, Rex, Denal, and several other clones skydived from the Twilight onto the station's surface, gaining entry via lightsaber. Once inside, Skywalker proceeded to rescue R2 while Tano and the clones began to plant explosives throughout the station. However, as Tano and the clones advanced through the station, they were discovered by a force of droids and were pinned down. Unbeknownst to them, R3 was the one who contacted Grievous to assist him in locating the infiltration team. After they defeated the enemy, Grievous personally arrived to attack them. While Tano initially remained confident that they could defeat him like the other droids, Grievous quickly overpowered her before he killed all of the troopers save Rex and Denal. Before he could deliver a killing blow to Rex, his strike was parried by Tano's own lightsaber, and the two engaged in a duel. Far outmatched by the cyborg General, Tano retreated into another room full of spare droid parts along with R3. As she hid, she contacted Rex and ordered him to proceed with the mission and continue to plant explosives with Denal while she distracted Grievous. Then, she was discovered and ambushed by Grievous thanks to the betrayal of R3. She escaped into the ventilation shaft and rendezvoused with the rest of the crew at the hangar and saw that R2 had been rescued. They escaped on board the Twilight, this time with R2, just as the station exploded.
Capture of Viceroy Gunray
Following the Republic's apprehension of Separatist Viceroy Nute Gunray, thanks to the efforts of Padmé Amidala and Senator Onaconda Farr on Rodia, Ahsoka Tano, and Master Luminara Unduli were tasked with overseeing Gunray's voyage to Coruscant aboard the Tranquility, where he would be put on trial for his crimes. Several Senate Commandos under Captain Faro Argyus were also dispatched as extra security to accompany the Jedi. Though Tano was initially skeptical of the need for so much security for just one Neimoidian, Unduli assured the Padawan that his allies could easily be conspiring against them and devising a rescue plan. The Mirialan Jedi Master was indeed correct, as Count Dooku had already sent his most trusted assassin, Asajj Ventress, to extract the Viceroy and return him to the Separatists. As Tano and Unduli attempted to interrogate Gunray, with the Jedi Master chastising Tano for threatening him out of impatience, Ventress and her small contingent of Super Battle Droids breached the hull of the ship.

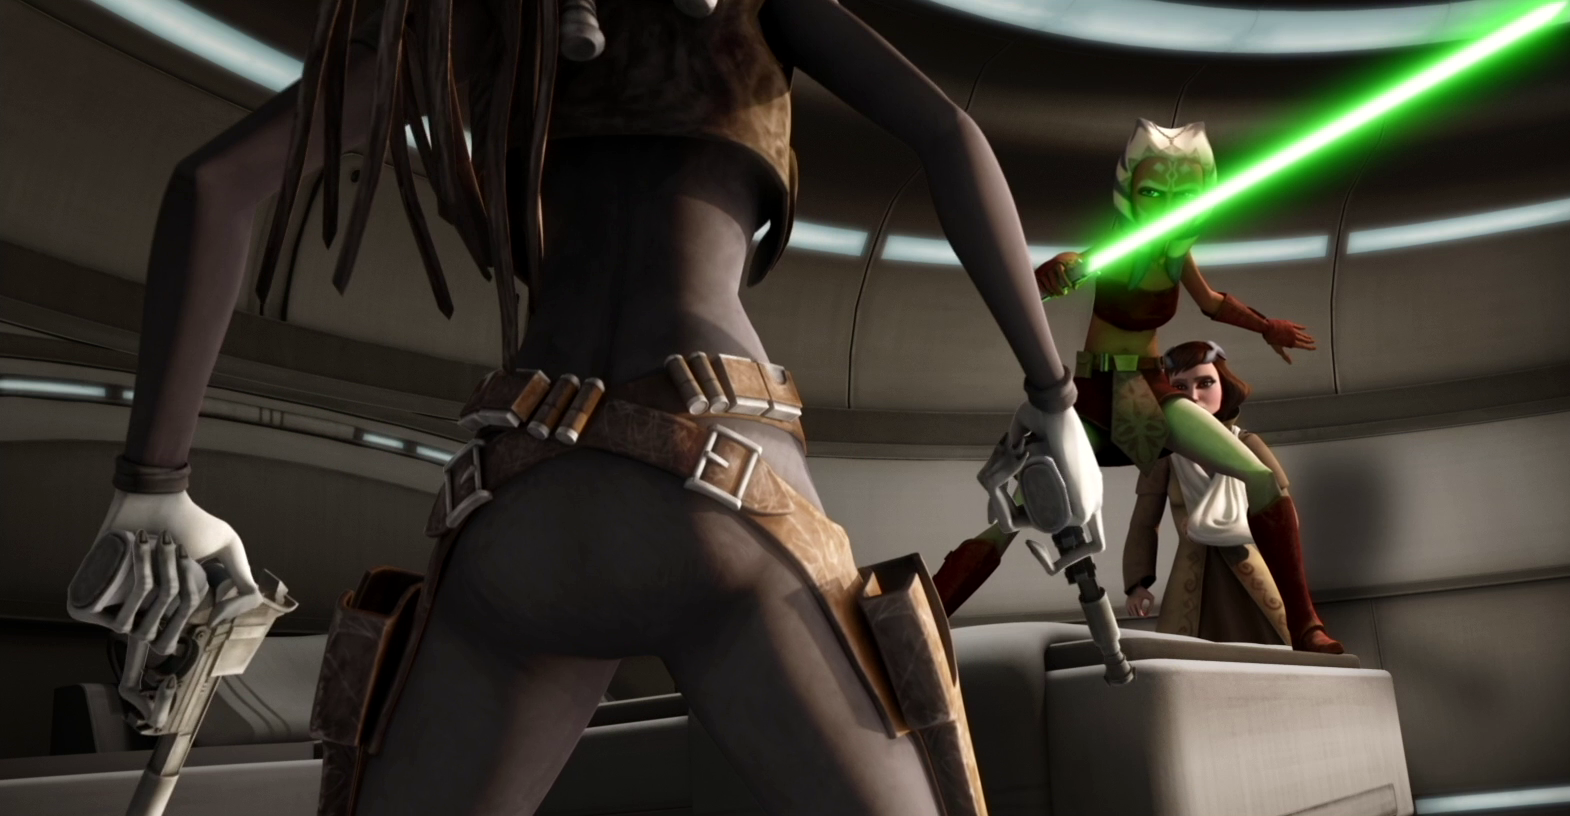
Tano was left to guard Gunray as Unduli and Commander Gree went to deal with the droids, where she was confronted by Ventress, who had slipped inside the ship undetected. Tano was once again confident enough to taunt Ventress as they dueled. The two dueled for a short time before Ventress managed to free Gunray and tricked Tano, trapping the Padawan behind an energy shield in his holding cell. Unduli arrived shortly after, freeing Tano so the two of them could duel Ventress together. However, instead of surrendering, Ventress set off several explosives which she had planted in the engine room, knocking both Jedi to the deck, and escaped down the elevator shaft. Though Tano wanted to follow and confront the assassin once again, Unduli beckoned her to stay put despite her protests. Ultimately deciding to disobey Unduli's instructions, Tano arrived just in time to save the Jedi Master from certain death by Ventress' blade. United as a team, the two Jedi confronted Ventress for a second time, though she once again escaped, this time accompanied by Gunray and Republic defector Faro Argyus. Thus, Ventress successfully completed, her mission much to the dismay of Tano and Unduli.
Rescue on Vanqor
After her master and Obi-Wan Kenobi found themselves trapped within a cave situated on the crystalline planet Vanqor, an event that unfolded following a crash landing during a confrontation with Count Dooku, the leader of the Confederacy of Independent Systems, Tano, accompanied by a small extraction team comprising clone troopers, was promptly dispatched with the mission to rescue the two Jedi. Tano and her dedicated team executed their rescue mission by blasting apart the collapsed cave opening, thereby successfully freeing both Skywalker and Kenobi. The Jedi Knights had been rendered incapacitated due to the inhalation of noxious green gas, which they had inadvertently released during their ordeal. Subsequently, they took the precautionary measure of re-sealing the cave entrance, effectively trapping a swarm of Gundarks within its confines.
Stranded on Maridun
Ahsoka Tano and Anakin Skywalker, accompanied by a fleet of Republic gunships, were subsequently dispatched with the mission to evacuate Jedi Knight Aayla Secura from the clutches of Separatist forces. This intervention became necessary after her fleet suffered a defeat during the Battle of Quell. The two Jedi, along with Rex and their clone battalion, successfully boarded Secura's vessel and rendezvoused with the Twi'lek Jedi and her own battalion. They narrowly managed to escape onto a docked cruiser, with Skywalker sustaining injuries during an explosion resulting from the Separatist assault. Tano and Skywalker led Secura and a group of survivors from her battalion, including Clone Commander Bly, Lucky, Flash, and Cameron, toward a waiting cruiser. En route, Skywalker sustained severe injuries while selflessly saving the group from an explosion. In order to evade the exploding Resolute in a timely manner, they were compelled to initiate a premature jump to hyperspace, much to the consternation of Admiral Yularen. As a consequence of this emergency maneuver, they were forced to execute a crash landing on Maridun to avert a catastrophic collision with one of its nearby stars.
Stranded on the planet following the explosion of their cruiser, they established a rudimentary camp utilizing salvaged components from the wrecked vessel. Deeply concerned for her wounded master, Tano volunteered to remain by his side, providing care and observation, along with Rex. However, Secura insisted that they should instead collaborate in seeking assistance from the local inhabitants of the planet. Tano reluctantly acquiesced to this proposal and accompanied Secura and Commander Bly on a scouting mission to locate potential sources of aid, while Rex remained with Skywalker. During their journey, the young Padawan confided in Secura, expressing her feelings of perplexity and uncertainty regarding the Jedi Code, particularly concerning the rule against forming attachments while simultaneously advocating for compassion. In response, Secura shared her own past experiences, recounting similar sentiments she had once harbored in relation to her own master, whom she eventually learned to release. Shortly thereafter, they were ambushed by a pack of mastiff phalones, resulting in the tragic deaths of Flash, Lucky, and Cameron. After an arduous journey, they eventually located the Lurmen village, where they encountered the village elder, Tee Watt Kaa, and his son, Wag Too. Initially, Watt Kaa declined to offer assistance to the Jedi, expressing his desire to remain uninvolved in the ongoing conflict. However, he later relented and agreed to dispatch his son with Tano to retrieve Skywalker for medical treatment, contingent upon Secura remaining with the village as collateral. Wag Too and Tano subsequently returned with Skywalker, and Too administered native healing oils, effectively tending to his wounds.
When Separatist forces, under the command of Lok Durd, arrived with the intention of imposing their "protection" upon the Lurmen people, the Jedi were compelled to depart from the village in order to prevent the villagers from suffering the consequences of their presence. As the Jedi concealed themselves, they discovered a heavily fortified Separatist base in close proximity, along with Durd's formidable superweapon, known as the Defoliator. This weapon possessed the capability to obliterate all forms of organic life. Upon realizing that Durd intended to test the weapon on the Lurmen village, the Jedi revealed themselves to protect the villagers from imminent destruction. Initially, Watt Kaa vehemently opposed any form of involvement, including defending his own people. However, his stance shifted after the Jedi successfully repelled Durd's forces and shielded the village from annihilation. He expressed his personal gratitude for their efforts, acknowledging their invaluable contribution to the safety and preservation of his community.
Containing the Blue Shadow Virus
Following the unexpected disappearance of Senators Padmé Amidala and Jar Jar Binks on Naboo during her investigation into a viral outbreak among the native population, Tano, Skywalker, and Kenobi were dispatched to Theed. Upon their arrival, Skywalker assigned Tano to accompany Peppi Bow, a Gungan native, to investigate the swamps where Amidala and Binks were last seen. Inadvertently, they triggered a spy camera, which they managed to conceal themselves from, indicating the presence of an underground bunker beneath the swamp. Acting upon the instructions of Kenobi and Skywalker, Tano infiltrated the facility by dropping a thermal detonator down one of the exit hatches, facilitating easier access. Tano and Rex discovered that Doctor Nuvo Vindi had established a secret laboratory beneath the ground and that he was responsible for the creation of the virus, which he referred to as the Blue Shadow Virus. They then diverted the attention of Vindi's droids, enabling Kenobi and Skywalker to infiltrate the facility discreetly. The Jedi apprehended Vindi before he could detonate the bombs within the facility, thereby preventing the release of the Blue Shadow Virus into Naboo's atmosphere. However, unbeknownst to anyone, one of Vindi's servant droids had pilfered one of the bombs before it could be deactivated by Kenobi and the clone bomb squad.
Before the facility could be properly evacuated, the servant droid activated its bomb shortly before destroying itself, releasing the virus. Amidala triggered the alarm in time, shutting down the facility and preventing the virus from escaping to the outside. Tano, trapped inside, made it into a safe room along with several other clones, but was unfortunately contaminated. While her masters attempted to find a cure on Iego, Tano and Amidala worked together to prevent any droids from escaping the facility and thereby releasing the virus into Naboo's air. Eventually, thanks to Jar Jar Binks's clumsiness, Amidala also became infected by the virus, and her and Tano's conditions worsened as time went on, and many clones died. At one point, Tano collapsed and fell unconscious from the effects of the virus. Luckily, Skywalker and Kenobi were able to obtain a cure, stop the virus, and rescue Rex, Amidala, Tano, and the surviving clones.
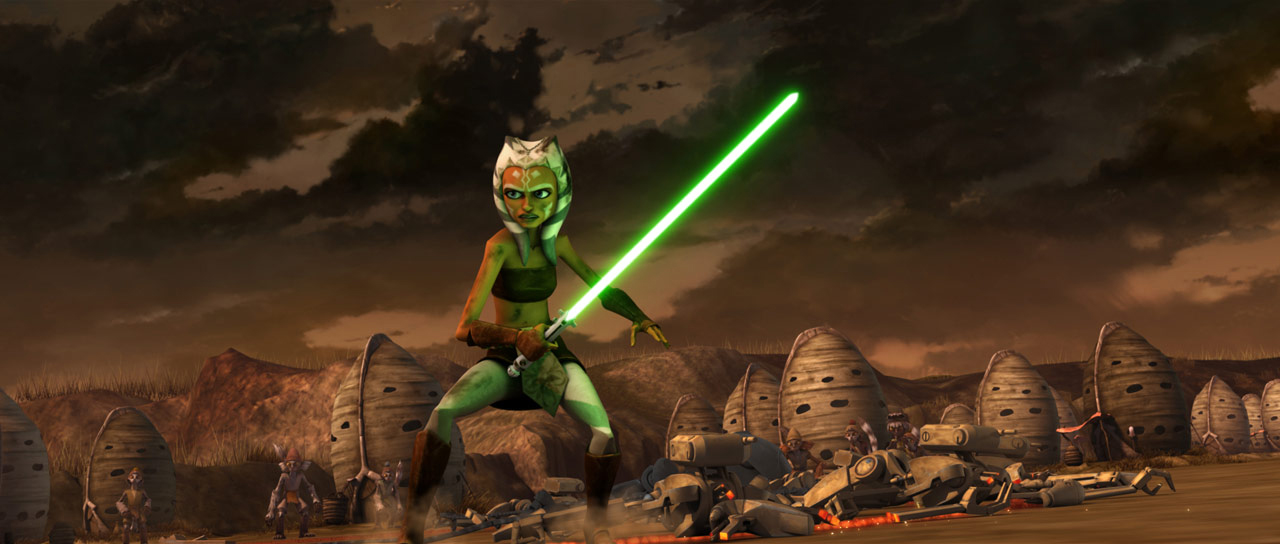
Battle of Ryloth
Ahsoka Tano assumed command of her own squadron for the first time during the Battle of Ryloth, in which she participated alongside her master. Tano led the clone pilots of Blue Squadron—Axe, Slammer, Kickback, Tucker, and Swoop—into battle against the Separatist blockade, which was commanded by Captain Mar Tuuk. However, Tano's squadron inadvertently stumbled into a trap and were ambushed by four Munificent-class star frigates. Tano stubbornly insisted on continuing their attack rather than retreating, as instructed by Skywalker and Admiral Yularen. After the majority of the clones' starfighters were destroyed as a result, Tano returned to the Resolute, devastated by the loss of her squad. Her master subsequently reprimanded her for disobeying direct orders, and although she asserted that she was merely acting on his teachings, she accepted full responsibility for her actions. Despite Skywalker's attempts to console her, the loss of her pilots left Tano scarred and consumed by feelings of profound guilt.
Later, Skywalker devised a plan to ram the Defender directly into the blockade, thereby eliminating Tuuk in the process and enabling the full force of their forces, under Tano's command, to complete the task by neutralizing the remainder of the blockade while Skywalker jettisoned himself in an escape pod. Tano, still grappling with the weight of her losses, reluctantly accepted leadership once again. This time, she successfully destroyed the blockade with her Y-wing squadron while simultaneously safeguarding the Resolute by instructing Rex and Yularen to execute an unorthodox tilt maneuver, rotating the cruiser's bridge away from the enemy fire so that only the belly of the ship was exposed. With the blockade eradicated, the Republic could commence its liberation of the Twi'lek people. Subsequently, Tano and Skywalker provided air support to Mace Windu, engaging Separatist bombers that were tasked with destroying the city of Lessu. By driving out and defeating the Separatists and Wat Tambor, the Republic liberated the planet from Dooku's control.
First Battle of Felucia and protecting the archives
Tano, Skywalker, and Kenobi were subsequently dispatched to Felucia to participate in the First Battle of Felucia against Separatist forces. Unfortunately, they were significantly outnumbered, prompting the Republic to dispatch an evacuation squad led by Plo Koon, with the mission of retrieving them after the Separatists managed to establish a blockade above the planet, effectively trapping them on Felucia's surface. Despite instructions from both Kenobi and Skywalker to retreat, Tano persisted in engaging the battle droids, determined to continue the offensive and refusing to yield. However, she eventually relented after her master ordered Tano and her troops to board his gunship. Moments later, the clone turbo tank that she had previously been standing on was destroyed by the droids, causing Tano to realize that she would have perished had she not retreated.

As a direct consequence of her actions during the confrontation, Tano was summoned before the Jedi High Council. She confessed to her error in judgment, admitting that she had not retreated immediately because she was "caught in the moment." Despite Skywalker's attempt to shoulder the blame, arguing that he had afforded Tano "too much freedom," Master Windu rejected his defense. Instead, Windu assigned Tano to guard duty in the Jedi archives, partnering her with Master Jocasta Nu, to provide her with an opportunity for introspection regarding her insubordinate behavior. When Tano inquired about the duration of her punishment, Windu responded by prolonging it.
Contrary to expectations, Tano was about to encounter significant action when the skilled bounty hunters Cad Bane and the Clawdite Cato Parasitti, disguised as the recently deceased Jedi Ord Enisence, infiltrated the Temple with the intention of stealing a holocron from the vaults. Master Yoda, communicating via her comlink, alerted Tano to the presence of the intruders. Tano confronted Parasitti, who was now disguised as Jocasta Nu, and engaged her in a brief lightsaber duel. Tano swiftly defeated the inexperienced Clawdite and took her into custody. However, Bane successfully completed his mission and absconded with a holocron. The Jedi received a vital clue to Bane's whereabouts when Parasitti, in captivity, revealed that Bane's subsequent target was the keeper of the kyber memory crystal, Bolla Ropal. While Kenobi remained on Coruscant to search for Bane, Tano and Skywalker journeyed to the Devaron system in an attempt to apprehend the bounty hunter.
Confronting Cad Bane
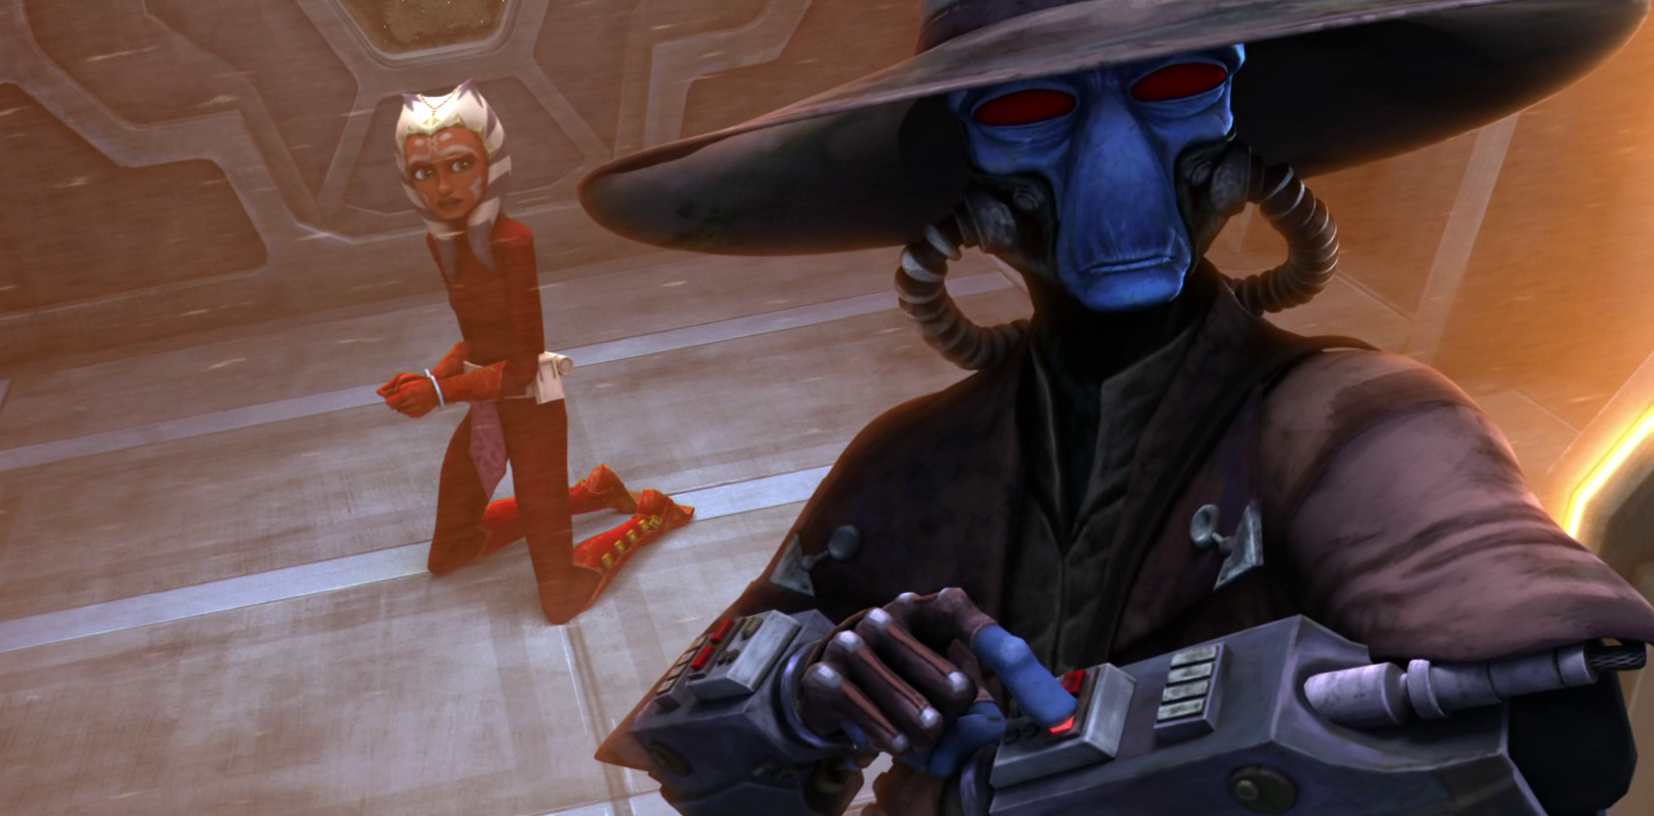
Upon arriving in the Devaron system, Tano and Skywalker's cruiser was compelled to engage Bane's Separatist fleet, as the Duros bounty hunter had already captured Ropal. Infiltrating Bane's frigate, the two Jedi stormed the bridge, utilizing R2-D2 to access the ship's computer in order to locate Ropal. Regrettably, they arrived too late, with Tano discovering only Ropal's lifeless body within the detention block. Subsequently, the Jedi pursued Bane into the ship's gunnery room, where Bane deactivated the artificial gravity as he and his battle droids launched an assault. After R2 reactivated the gravity, Bane attempted to escape. Determined to prevent his escape, Tano pursued him despite her master's warnings. Confronting him in a confined corridor, Tano triumphed over Bane in hand-to-hand combat after he disarmed her. However, as she attempted to retrieve her lightsaber using the Force, Bane unexpectedly seized her ankle and delivered a paralyzing electric shock through her body, rendering her unconscious. Bane then restrained her wrists with stuncuffs and pilfered her silka bead Padawan braid, holding her hostage in the hope that her master would attempt a rescue.
When Skywalker inevitably arrived, Bane blackmailed him into unlocking his stolen holocron, threatening to eject Tano into space by opening an airlock behind her. Bane proceeded to open the airlock regardless, compelling Skywalker to rescue his Padawan as Bane once again made his escape. The Jedi, along with Rex, Denal, and several other clone troopers, escaped the exploding ship, unaware that Bane had actually murdered Denal and disguised himself in the clone's armor. Tano later apologized to Skywalker for once again disobeying his orders, but he countered that the mission's failure was his responsibility, not hers.
Following their return from the unsuccessful mission, the Council instructed Tano and Skywalker to locate and intercept Bane on Naboo to prevent him from kidnapping a Force-sensitive Gungan infant named Roo-Roo Page. Tano and Skywalker ambushed Bane in the infant's bedroom, with Tano confronting him with her lightsaber. After a failed escape attempt, Bane was finally apprehended, and Page was returned to his mother. Before Bane's departure, Tano reclaimed her stolen Padawan braid. Although they thwarted the kidnapping, several other Force-sensitive children had already been successfully abducted by Bane. Consequently, the two Jedi examined Bane's starfighter for clues as to the children's whereabouts. Concluding that they were likely on Mustafar, Tano and Skywalker immediately departed for the volcanic planet. There, they discovered the children in one of Darth Sidious' secret facilities and engaged in combat with several surgery droids to rescue the children, who were eventually returned safely to their respective families. After the mission, they returned to the Temple, where Tano was disappointed to learn from the Council that Bane had escaped once again.
An unlikely alliance

While investigating the disappearance of a medical station over Felucia, Tano, Skywalker, and Kenobi instead stumbled upon a Separatist vulture droid base. After enduring an attack by a swarm of vulture droids, the three Jedi crash-landed on the planet's surface, where they came across a small Felucian village. Initially appearing deserted, they soon discovered a group of farmers in hiding, protected by the bounty hunters Sugi, Embo, Rumi Paramita, and Seripas. They discerned that the bounty hunters were defending the village from a pirate gang led by Hondo Ohnaka. Collaboratively, the Jedi devised a long-term solution and trained the villagers to defend themselves.
Although Tano observed that the farmers learned quickly, she also recognized the need to remind herself that they lacked the patience and adaptability of clone troopers. The Felucians were not soldiers, necessitating a different approach than that used with the clones. When Ohnaka led his men to attack the village, the villagers put their training to the test. When Seripas was nearly crushed to death, Tano intervened to save him and discovered that Seripas was, in fact, a small Ssori encased in an imposing suit of armor. Tano reassured Seripas that he did not require the armor to be strong and assisted the villagers in repelling Ohnaka's pirates, who withdrew when Ohnaka deemed the venture unprofitable. In exchange for their assistance, Sugi provided the three Jedi with a ride back to Republic lines in her ship.
Second Battle of Geonosis
Alongside her master, Ahsoka Tano participated in the Second Battle of Geonosis alongside Masters Obi-Wan Kenobi, Luminara Unduli, and Ki-Adi-Mundi. The Jedi, with the intention of recapturing Geonosian and Separatist leader Poggle the Lesser and destroying the Geonosis primary droid foundry, formulated a three-pronged assault against Poggle's Geonosian droid foundries. Early in the mission, Skywalker and Tano's gunship was shot down, but the duo survived and continued their attack, engaging the Geonosian defense line.
Together with Rex and a contingent of surviving clones, they attacked a Geonosian fortress that obstructed their path. Skywalker and Tano scaled the wall and destroyed the droids before demolishing the wall to proceed to the rendezvous point. After reuniting with Mundi and his troops, who had been separated from the main force, Tano and Skywalker commenced throwing electromagnetic pulse grenades to disable the enemy cannons, enabling the AT-TEs to destroy the shield generator, which compelled the remaining Geonosians to surrender. Tano and Skywalker then engaged in playful banter, comparing their kill counts, although Mundi's tally far surpassed both of theirs.
Tano's frustration with Skywalker grew as he repeatedly interrupted her during the briefing for the next phase of the mission, leading her to believe that she had not earned her master's complete trust. Following the arrival of Jedi Master Luminara Unduli and her Padawan Barriss Offee to assist in planning the attack on the droid foundry, Tano and Offee were assigned to infiltrate and destroy the foundry from within. The plan involved traversing the underground Geonosian catacombs beneath the facility while Unduli and Skywalker led the 501st and the 41st Elite Corps in a frontal assault as a diversion. Despite Tano's initial annoyance with Offee's "dependable" nature and Unduli's trust in her, stemming from her own feelings of inadequacy, the two Padawans quickly formed a bond and worked effectively as a team.
Although the two Padawans successfully reached the reactor room, they were ambushed by one of Poggle's super tanks, which promptly fired upon them. After Offee eliminated the two droid drivers, she and Tano seized control of the tank, resolving to use it against the reactor, fully aware that they would likely perish in the resulting explosion. They successfully destroyed the foundry but were buried beneath the rubble, surviving the explosion. Tano saved both of their lives by hot-wiring her comlink to alert Unduli and Skywalker to their location. Upon being rescued, both masters were relieved to see that their Padawans had survived. Unduli assured Tano that her master had never given up on her, reassuring Tano that Skywalker trusted her and believed in her capabilities.
Incident aboard TB-73
Following the rescue of Master Luminara Unduli from the Geonosians and the subsequent death of Queen Karina the Great, Tano and Offee were tasked with transporting medical supplies. The plan was to transport the supplies from Geonosis to Mace Windu on Dantooine from a station near Ord Cestus aboard the medical frigate TB-73. Unbeknownst to them, however, several Geonosian brain worms had been smuggled aboard the ship by Scythe, a worm-infected clone trooper. As the worms began to infect the rest of the ship's crew, the worm-controlled clone troopers turned against the two Padawans, who were compelled to defend themselves, initially in the mess hall against Ox and Edge, and later against [Trap](/article/trap], whom Offee was forced to kill in self-defense. Tano, utilizing her lightsaber, then eliminated Trap's worm, which had emerged from his mouth. In the cargo hold, Tano and Offee fled into the ventilation system after being outnumbered by the infected clones. Separating, Tano headed toward the communication room to warn Jedi Master Kit Fisto of the situation, while Offee went to disable the thrusters.
Upon establishing contact with Fisto, the Nautolan Jedi Master instructed her to dock at the medical base, despite her concerns about the brain worms spreading. She also updated her master on the situation before terminating the transmission. Immediately after her message, she was suddenly ambushed by Barriss Offee, who had been infected by one of the worms on her way to the reactor room. The two engaged in combat as Tano futilely attempted to break the creature's influence over her friend's mind. Following a brief confrontation, Tano once again escaped into the ventilation system, now the only individual on the ship not under the control of the worms. After learning that the worms were susceptible to cold temperatures from Skywalker via her comlink, Tano ruptured the coolant system to lower the temperature inside the ship, thereby inhibiting the brain worms.
Offee confronted Tano once more on the bridge, but Tano managed to fight her off, temporarily freeing Offee from the brain worm's influence with a blast from a ruptured coolant pipe. Although Offee pleaded with Tano to kill her, the Padawan instead killed her brain worm as it emerged from Offee's mouth. As the ship docked at the medical base, Fisto entered the freezing ship to find a barely conscious Tano cradling her unconscious friend. The two Padawans were then taken to the medical bay to recover from their ordeal. As Tano pondered what might have happened if she had killed Offee, Skywalker attempted to console her, believing that she had done the right thing to save her friend.
At the Jedi Temple on Coruscant, Tano, along with Offee, watched a transmission of General Grievous and his MagnaGuards torturing Master Eeth Koth. Tano and Offee comforted several of the younglings when they witnessed Koth screaming in pain. She and Offee then escorted the younglings away at Master Yoda's request while the others planned a rescue.
Further adventures and lessons
An important lesson
At a later time, Tano and Skywalker were pursuing the wanted Weequay arms dealer Car Affa within Coruscant's slums. Upon tracking the criminal to a dilapidated bar, her master instructed her to wait while he apprehended him. Due to Affa's sudden arrest, a large crowd of patrons surged from the bar, and in the ensuing commotion, the small Patrolian pickpocket Bannamu managed to steal the Padawan's lightsaber from her hip. Ashamed, Tano could not bring herself to admit to Skywalker that she had lost her weapon and immediately headed to the archives in the hope of tracking down her thief upon reaching the temple. There, she encountered the elderly Jedi Master Tera Sinube, who agreed to assist her in locating her missing lightsaber. Initially, Tano was frustrated with Sinube's preference for patience over speed, which contrasted sharply with her own style, but she gradually came to accept and respect the old Jedi Master's methods. Eventually, they discovered the lightsaber in the possession of underworld criminals Cassie Cryar and Ione Marcy. Tano engaged Cryar in a wild foot chase throughout the city, although the Terrelian Jango Jumper proved too swift for the young Padawan and managed to escape. Ultimately, Tano and Sinube succeeded in reclaiming her lightsaber from Cryar. Following the chase, the elder Jedi requested that Tano impart what she had learned from him to some Jedi younglings.
The hunt for Aurra Sing
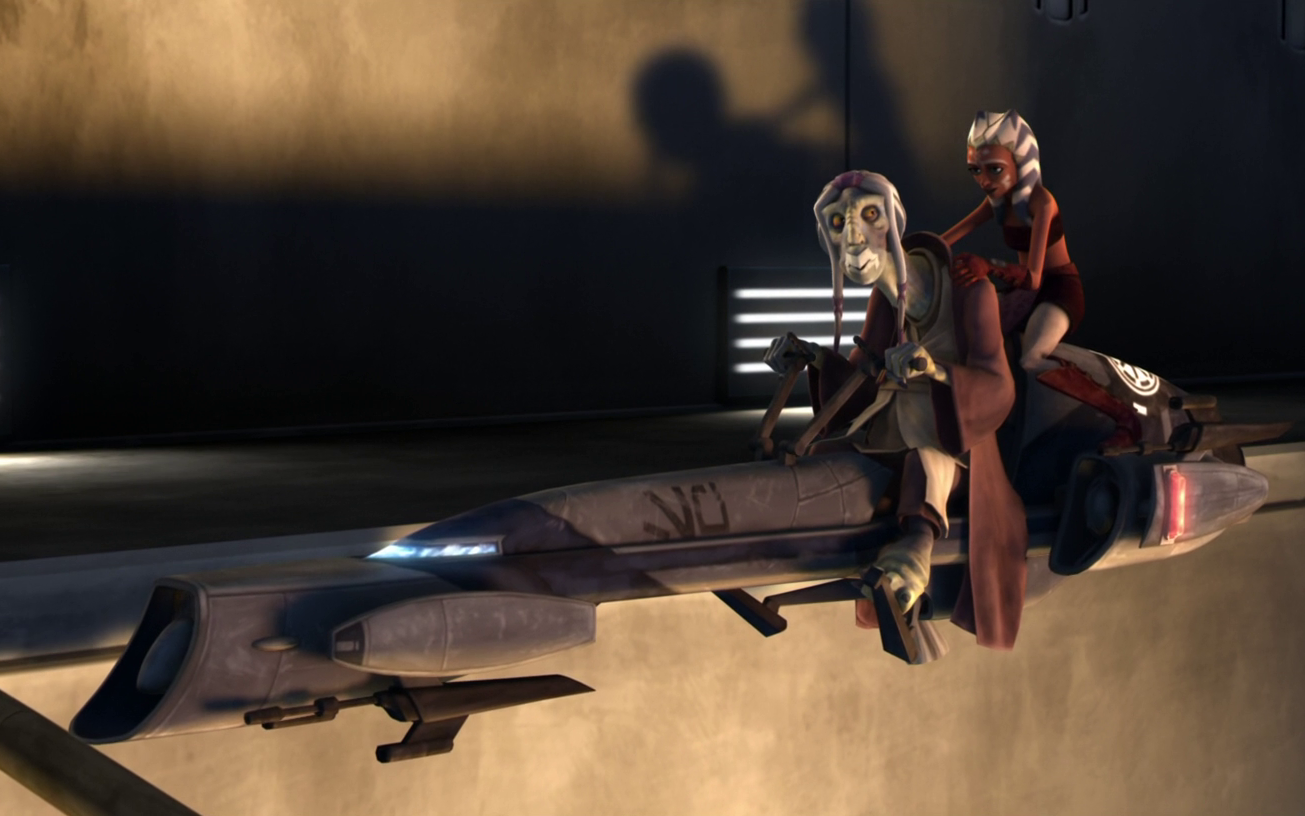
After Tano and Master Plo Koon rescued Skywalker and Mace Windu from the wreckage of the Venator-class Star Destroyer Endurance on Vanqor, Tano and Koon ventured into the Coruscant underworld. Posing as associates of the bounty hunter Castas, they hoped to uncover a lead on bounty hunter Aurra Sing, whom they hoped to track down after the Jedi received a threatening transmission from her and a young Boba Fett. Tano managed to find a lead but also disturbed some of the patrons at a cantina, and the two Jedi departed after a tense standoff. Tano and Koon then traveled to Florrum and located Sing in a cantina. The situation escalated rapidly when Fett created a diversion, allowing Sing to escape while Boba was captured. Tano skillfully pursued Sing on a speeder bike while Koon rescued the hostages. Tano caught up to Sing as she reached Slave I and damaged the ship, causing Sing to lose control and crash in a fiery explosion.
Undercover on Mandalore
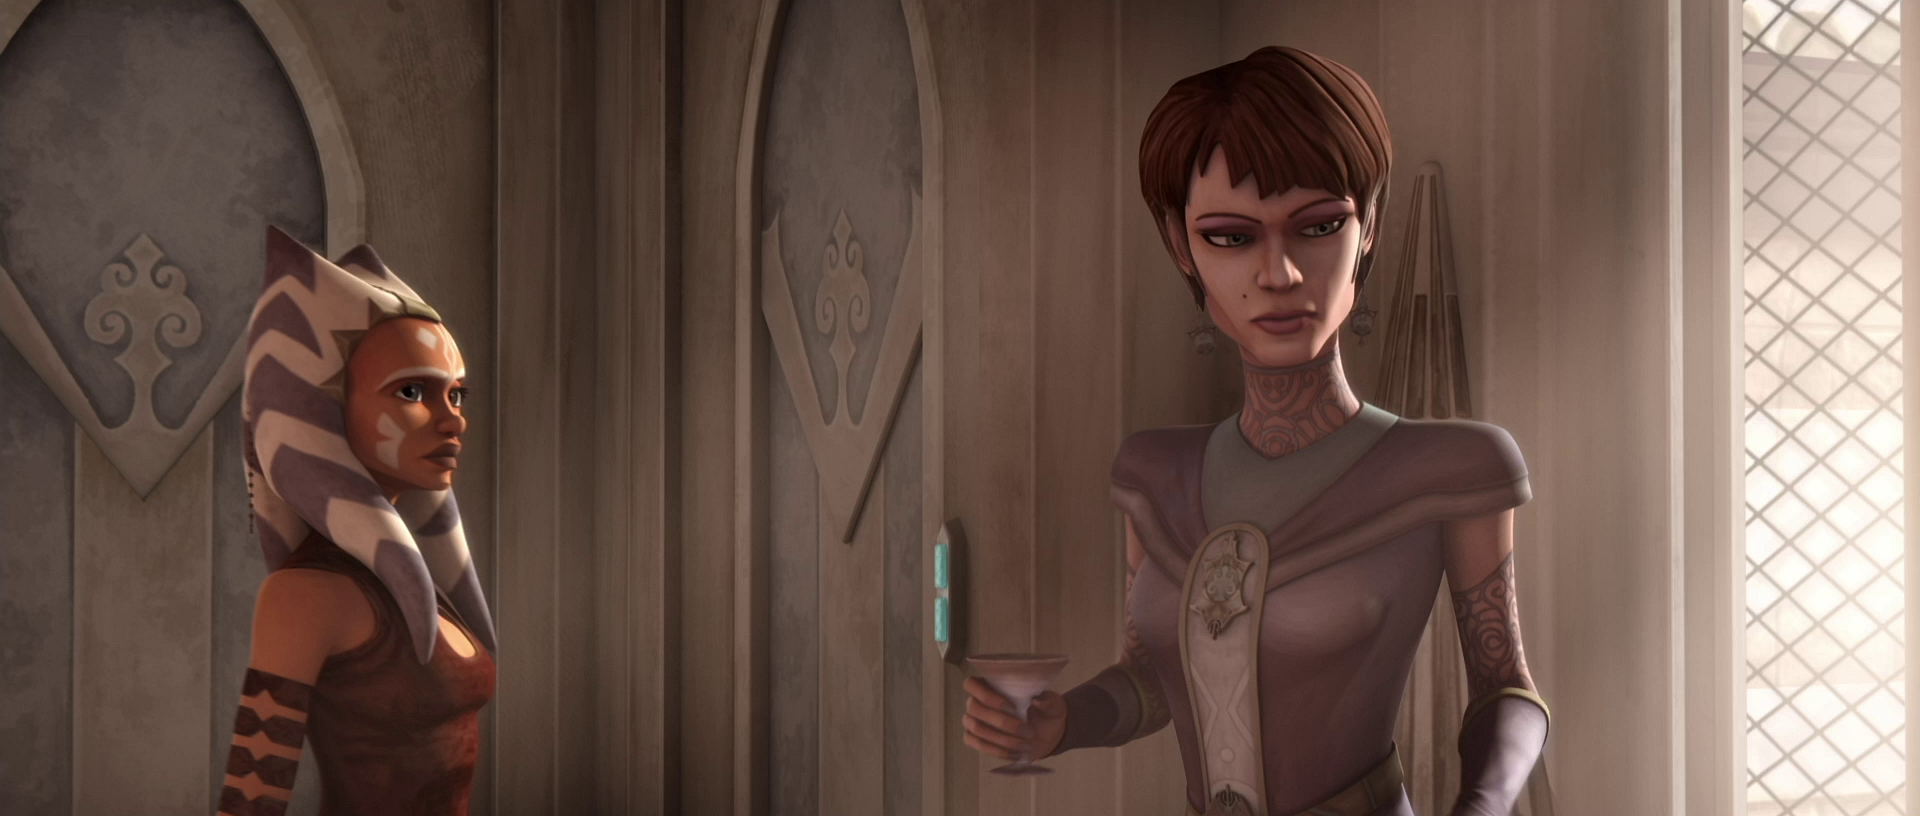
Shortly thereafter, Tano was dispatched to Mandalore on an undercover mission to eradicate corruption scandals within the Mandalorian government and to educate Mandalore's youth, including the Duchess's nephew Korkie Kryze and his friends Amis, Lagos, and Soniee, on the fundamentals of lawful and public-serving conduct. After being assigned the task by Master Yoda, who believed that a youthful Padawan could effectively reach Mandalore, she was transported to Mandalore by Skywalker. Upon meeting the Duchess and Prime Minister Almec, she was required to surrender her lightsaber due to restrictions on offworlders carrying weapons. A group of students led by Kryze, guided by her lessons, proceeded to combat a black market conspiracy. They presented their findings to Tano, who urged them to exercise greater caution. Kryze explained that he only wished to assist his planet as his aunt, the Duchess, did, but Tano cautioned him against entering a situation that he could not resolve independently.
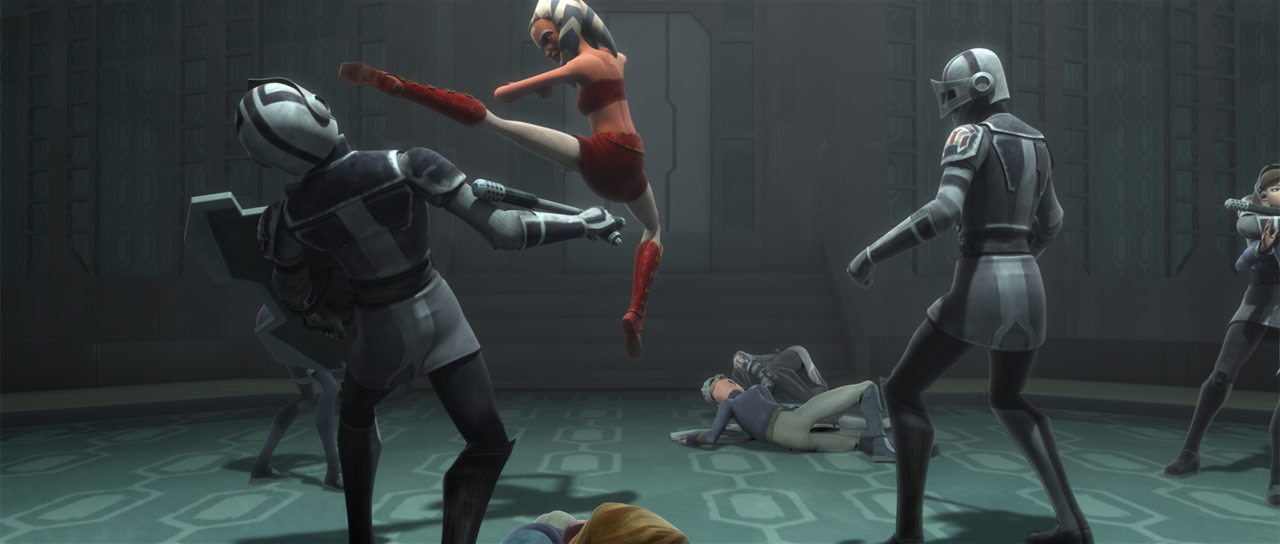
When the cadets were arrested by the Mandalorian secret service en route to a meeting with Alemc, Tano intervened to rescue them. She assisted the cadets in uncovering the scheme and discovered that it was, in fact, controlled by Almec himself. However, upon attempting to alert Duchess Satine, they found her missing, with her bodyguards deceased. Tano devised a plan to rescue her, employing a mind trick to bypass the guards, but Almec, who had anticipated her arrival, stunned her as she attempted to rescue the Duchess. When Almec attempted to coerce the Duchess into signing a confession of treason that would implicate her in the black market operations, the cadets arrived and, with Tano's assistance, apprehended Almec and his men. The conspirators were arrested, and Tano departed Mandalore shortly thereafter to return to the war.
Return of Aurra Sing
Following her mission to Mandalore, Tano received commendation from the Jedi Council for her actions. However, the Council instructed her to remain at the Temple while her master commanded the 3rd Legion on Balith to assist with its civil war. Tano then experienced a disturbing dream about Aurra Sing, whom she believed had perished on Florrum. The visions then revealed that Sing was targeting Senator Amidala.
Tano subsequently warned Amidala that she was being targeted by Sing. Despite her warning, Amidala proceeded with her preparations for her speech at Alderaan's Refugee Conference. However, Tano was permitted to accompany her to the conference as additional security. Upon their arrival, Tano identified the location of Sing's planned attack on Amidala, alerting her and Captain Gregar Typho to the threat. When the conference commenced, Tano spotted Sing but was unable to prevent her from wounding Amidala on the shoulder. Tano pursued her, but Sing escaped.
Despite Tano and Organa's pleas for Amidala to return to Coruscant, she opted to remain and deliver her speech. However, Tano devised a plan to enable Amidala to deliver her speech while remaining safe. Amidala utilized a BD-3000 luxury droid dressed in her clothing to deliver her speech while she remained in her room. However, Tano sensed that Sing was not deceived and realized that she had located Amidala in her room. Tano rushed in and deflected the blast when Sing fired upon Amidala. She then pulled Sing down from the vent. Tano engaged her in combat until Sing knocked her unconscious. However, Amidala was able to stun Sing. Tano and Amidala returned to Coruscant, where Tano reported to Skywalker and Master Yoda. Tano and Amidala identified Sing's employer as Ziro the Hutt, who sought her death due to her interference with his plans earlier in the war.
Rescuing Papanoida's daughters
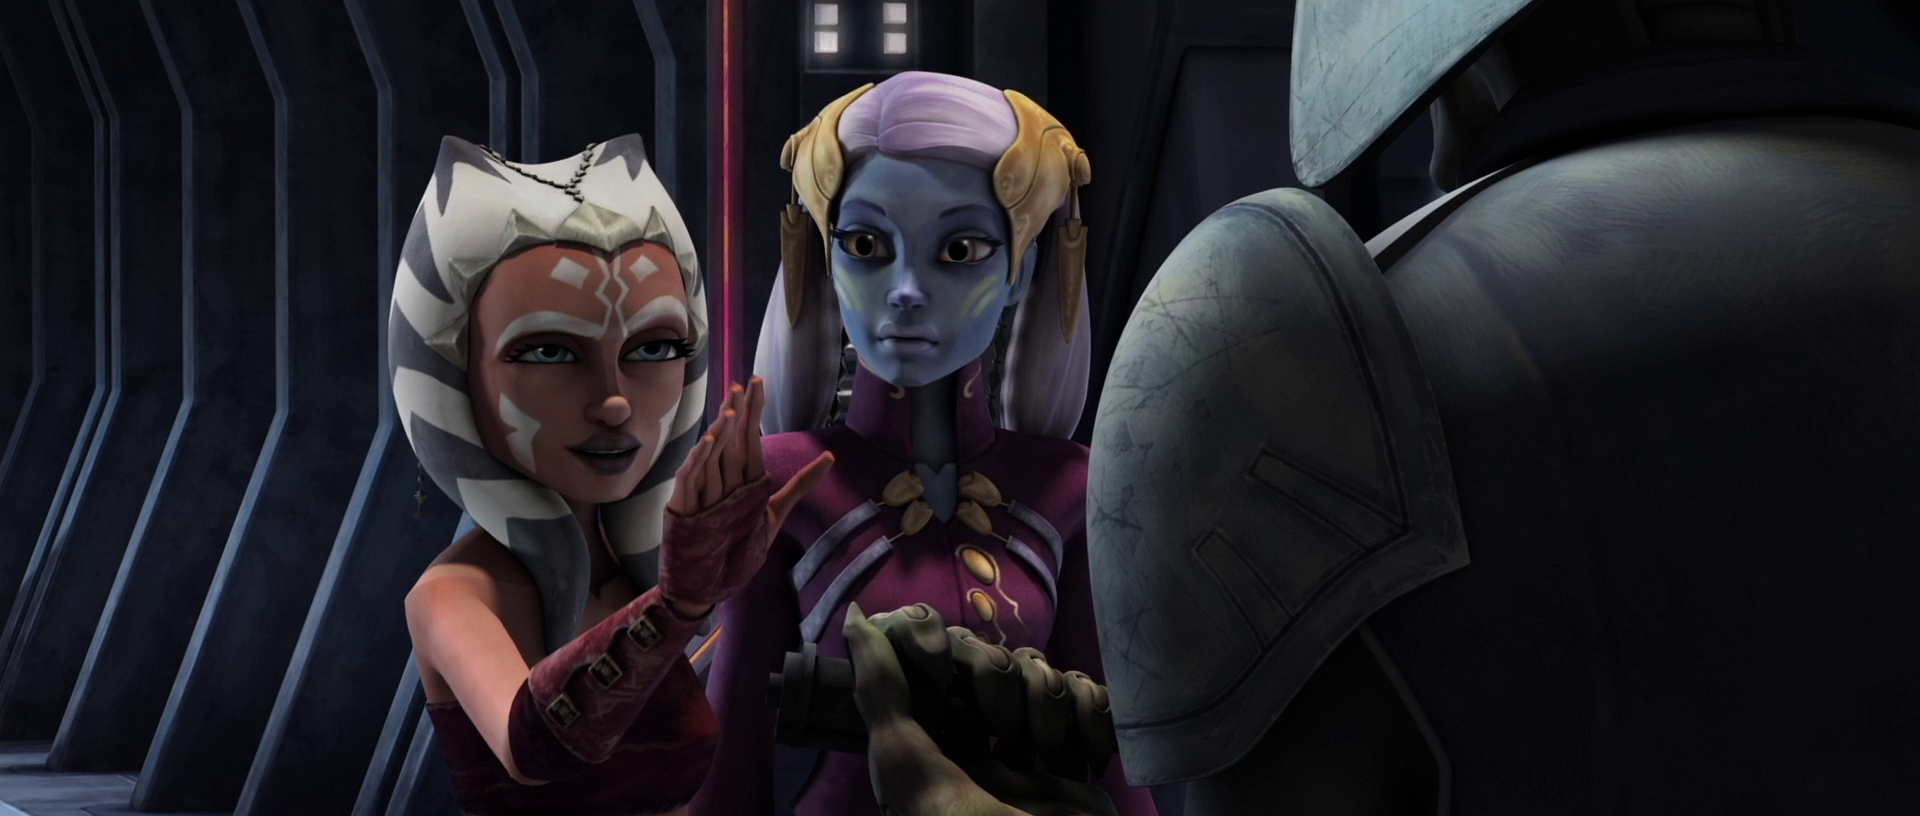
In an attempt to persuade the planet Pantora to join the Separatists, the Trade Federation established a blockade around the planet and, to make matters personal for Pantora's Chairman Papanoida, kidnapped his daughters Chi Eekway and Che Amanwe Papanoida. Upon the Republic's awareness of the situation, Anakin Skywalker dispatched Tano to investigate the matter outside of the Jedi's official operations. Tano accompanied her friend, Senator Riyo Chuchi, aboard the Trade Federation blockade, disguised as her servant. Tano assisted Chuchi in sneaking into the office of a Trade Federation Ambassador and overheard him conversing with Administrator Sib Canay about their holding Che Amanwe onboard their ship.
Chuchi's gasp nearly exposed them, but Tano utilized the Force to prevent their discovery. Subsequently, Tano granted them access to the detention complex after employing a mind trick and destroying a group of super battle droids. Upon freeing Che Amanwe, they were captured, but Senator Chuchi negotiated with the Trade Federation and, in conjunction with her father's efforts in hunting down Greedo, the bounty hunter responsible for the kidnappings, convinced the Trade Federation to release them and end their blockade.
A lesson from Yoda
Sometime afterward, Ahsoka Tano journeyed back to the sacred world of Ilum to obtain another lightsaber crystal and create her second blade. This visit to the icy planet was, once again, successful but unremarkable. She was delighted to discover her second kyber crystal during this trip. Anakin Skywalker and Tano were engaged in a sparring session within the Jedi Temple dojo, where Skywalker was instructing Tano on the proper use of her new lightsaber. However, because she was still adjusting to wielding two lightsabers simultaneously, Tano momentarily forgot about her second blade, and Skywalker easily disarmed her. Tano offered an apology to Skywalker for the lapse in her lightsaber technique, but he dismissed it, explaining that mastering a new skill takes time and practice.
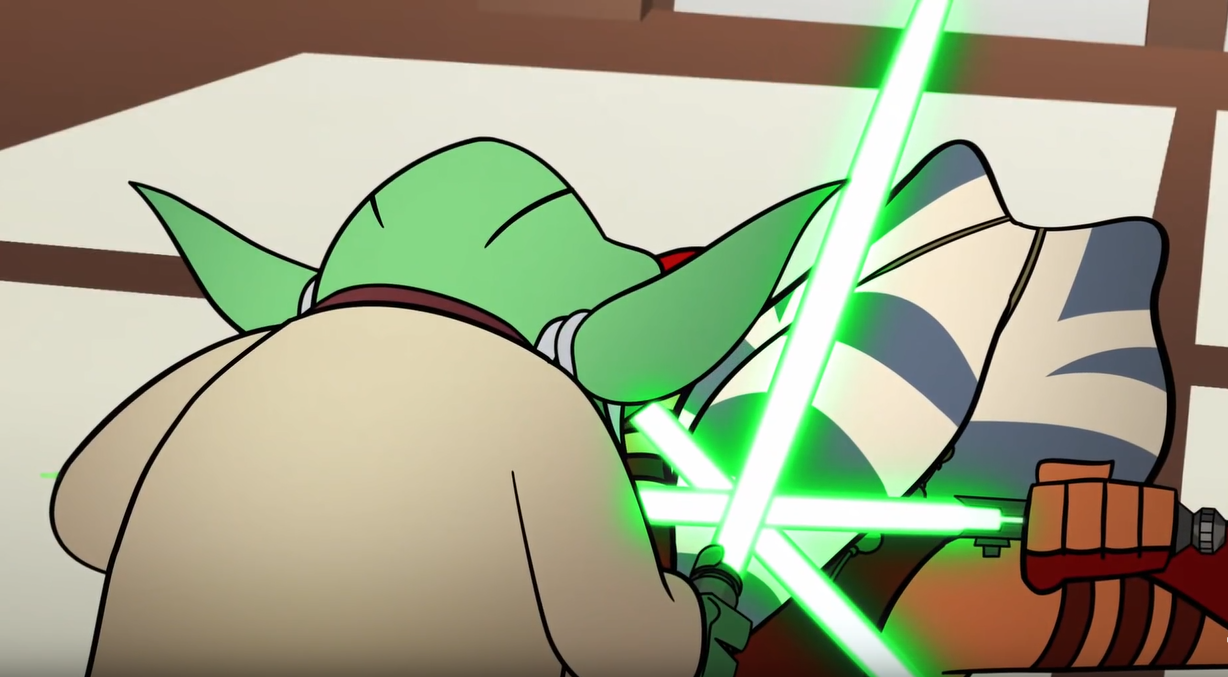
As Tano recovered her weapon, Yoda entered the dojo, expressing his interest in observing Tano's progress with her second lightsaber. After receiving Skywalker's approval, Tano agreed to demonstrate her skills. She stepped forward and ignited her primary lightsaber immediately. Skywalker visibly winced as Yoda regarded her with disappointment, reminding her that a bow is customary before any duel within the dojo. Feeling embarrassed by her oversight, she deactivated her blade and complied with the Grand Master's instruction. She then reactivated her lightsaber, again neglecting to ignite her second one. At this point, Yoda instructed her to use her second blade as well. Tano then ignited her second blade, and Yoda ignited his own.
With a single, swift motion, Yoda managed to knock Tano off balance as she attempted to defend herself with both blades. Yoda then proceeded to explain to Tano that the relationship between the two blades should be akin to that of master and apprentice. In response, Tano rose to her feet and attempted a thrusting attack on Yoda, but he simply evaded the strike and tripped her. As Tano regained her footing, Yoda imparted the lesson that she must always remain true to herself, prompting Tano to realize that she needed to fight in her own unique style. She reignited both of her blades, and Yoda launched another attack, which she successfully blocked this time. Yoda then commended Tano, stating that she had learned her lesson well.
Working Alongside Senator Amidala
Skywalker orchestrated an assignment to escort Senator Amidala on a mission to the planet Alderaan. Unbeknownst to Tano and the Jedi Council, Skywalker and Amidala had secretly married shortly after the First Battle of Geonosis, and they intended to use this mission as an opportunity to spend some time together privately. However, to her master's annoyance, Tano was also assigned to the mission at the suggestion of Kenobi, who was aware of the close bond between the couple.
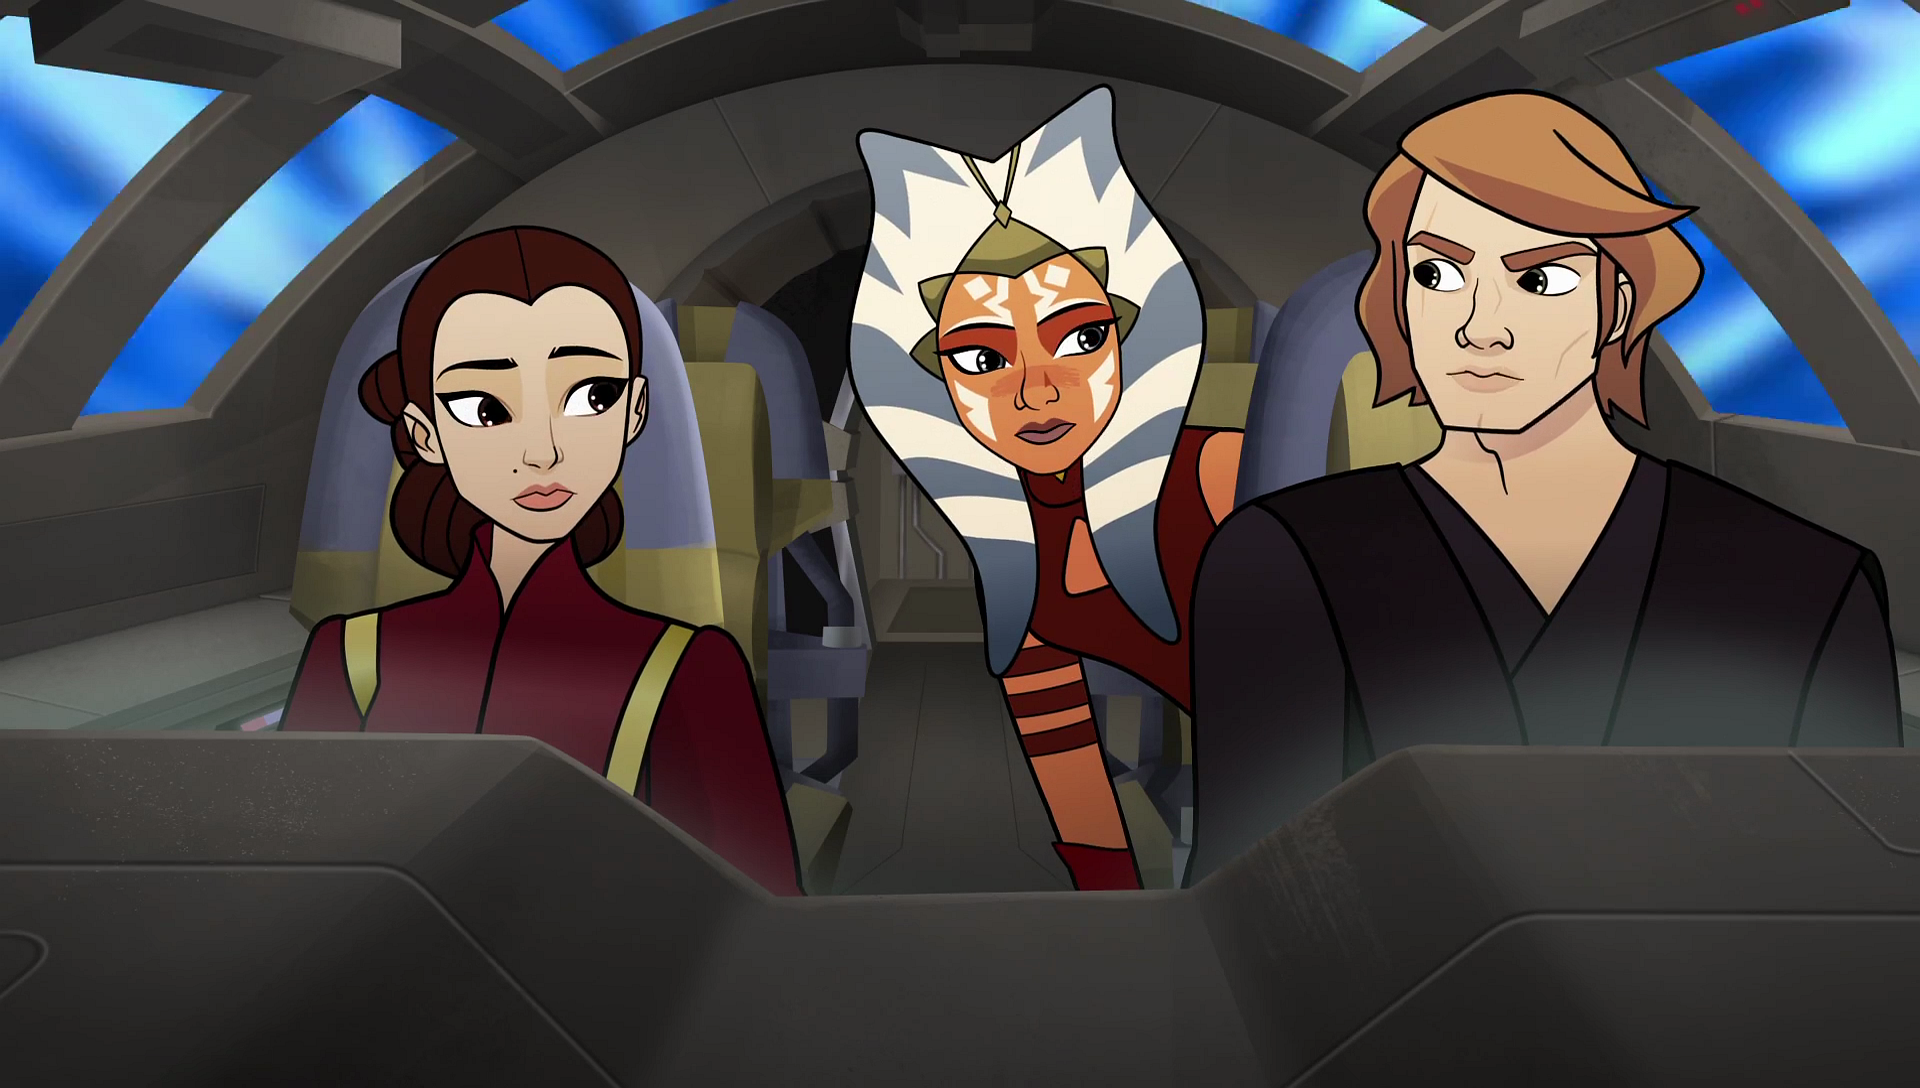
The trio boarded a T-6 shuttle and departed from Coruscant, initiating the jump to hyperspace. Eager to conclude the mission as quickly as possible, Skywalker altered the ship's flight path to take a different route. Tano cautioned her master that their new course would take them through a sector with suspected Separatist activity. As the ship emerged from hyperspace, Tano's warning proved accurate, as they were confronted by five Munificent-class star frigates. At the senator's direction, Amidala and Tano took control of the ship's guns while Skywalker skillfully navigated through the Confederate fleet.
Despite the Jedi Knight's impressive piloting skills, one of the frigates managed to strike the Republic shuttle, causing the senator to fall to the floor. As the smoke cleared within the shuttle, Tano observed that Skywalker had caught Amidala, who embraced her husband tightly. Recognizing that the two were occupied, Tano assumed the pilot's seat and successfully guided the ship to a safe landing on Alderaan. After landing, Skywalker expressed his gratitude to his Padawan for her assistance before leaving her and the senator alone. The two women then shared a moment, acknowledging their respective relationships with Skywalker.
Within the Jedi Temple dojo, Tano engaged in a training session with Padawan Barriss Offee, practicing lightsaber combat. During their sparring match, Offee utilized the Force to knock Tano to the ground. Seizing the opportunity, Tano hurled one of her lightsabers at Offee, catching the Mirialan off guard. Tano then leaped to her feet, ignited her remaining lightsaber, and forced Offee to yield, concluding the match. Offee remarked that the match was not a productive one, arguing that Tano would not have thrown her weapon in a real combat situation and that she had gained nothing from the session.

As they left the dojo, they discussed the contrasting approaches of their respective masters' teachings. Offee accused Tano of impatience and neglecting the lightsaber forms, while Tano countered by asserting that the forms were ineffective in actual combat scenarios. Tano handed her lightsabers to Offee, who then demonstrated how the application of Form VI could have been beneficial. Upon reaching Tano's quarters, she thanked Offee for the match, and they parted ways.
Inside her quarters, Tano attempted to practice the lightsaber forms but found herself struggling. To clear her mind, she sat down and began to meditate. During her meditation, she reflected on Offee's words and concluded that she had been correct. Tano determined that she needed to adopt a more Jedi-like mindset and that she still had much to learn. Tano's meditation was interrupted by a knock on the door from Senator Padmé Amidala, whom Tano invited inside.
Tano expressed surprise at seeing Amidala at the Temple and inquired if anything was amiss. Amidala explained that she was scheduled to host a crucial meeting with the Arthurian delegates the following day, and she requested Tano's assistance in conducting a security sweep. Tano initially doubted that Amidala required her help, suggesting that Captain Typho and the handmaidens would be sufficient. However, recalling her training session with Offee, Tano ultimately agreed to take on the task.

The next evening, Tano established a security perimeter around Amidala's apartment and assured the senator that the exterior of the building was secure. Amidala thanked the Padawan and requested that she remain for the meeting, acknowledging that her negotiations with the delegates from Arthuria were met with opposition from many. Tano politely declined, however, expressing her desire not to interfere in the affairs of politicians.
Before she could leave, Tano noticed that the banquet table, prepared by one of the senator's handmaidens, was set with utensils, which were traditionally not used by Arthurians. When Amidala questioned the handmaiden about this potentially offensive gesture, the servant produced a blaster and opened fire on the two women. As Tano confronted the handmaiden, she revealed herself to be Cato Parasitti, the same shape-shifting assassin whom Tano had encountered during Cad Bane's heist at the Jedi Temple. After a brief exchange of fire, Tano managed to subdue Parasitti and disarm a bomb that the changeling had planted within the apartment.
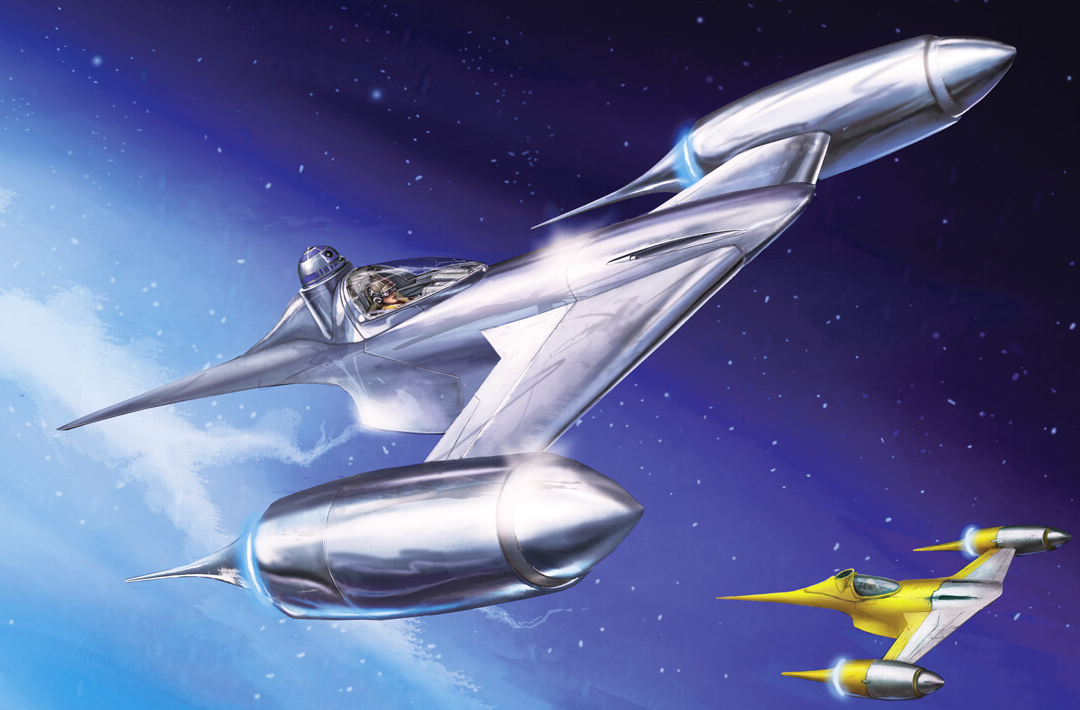
Tano then proceeded to train Senator Amidala in starfighter combat, taking the Naboolian to a secluded asteroid field for flight training exercises. Although Tano believed the field to be devoid of enemy forces, the duo was soon ambushed by a modified vulture droid stationed on one of the asteroids. The droid pursued them through the field and disabled Tano's N-1 starfighter with an ion torpedo, rendering her unconscious. Drawing upon the Padawan's teachings, Amidala successfully defended her friend and destroyed the droid. Tano regained consciousness and praised the senator for her instincts before the two returned home.
Skirmish on Coruscant

While patrolling the bustling streets of Coruscant, Tano overheard Skywalker's resounding voice through her comlink, urging her to return to the Jedi Temple for an upcoming ceremony in which she was expected to participate. As she neared the temple, she detected a large crowd shouting for assistance. Without hesitation, the Togruta Jedi changed direction and followed the sounds of their cries to offer help. Upon rounding a corner, she witnessed a female Aleena and her child under attack by a rogue droid. She immediately noticed exposed wiring on the droid. Initially, she used the Force to hurl a crate in its direction, aiming to divert its attention. As it approached her beneath residential water pipes, Tano ignited her dual lightsabers. She dashed toward it, severing one of its legs, and then leaped up to cut through the water pipes. Water cascaded down onto the droid, causing it to malfunction. The Padawan ensured that the mother and child were unharmed before suddenly recalling the ceremony she was already late for. Upon arriving at the Jedi Temple, she encountered Skywalker and Yoda near the Great Tree. As the ceremony commenced, Master Yoda proclaimed Tano's humility and bravery, interpreting them as signs of maturity. He further stated that she was progressing on the right path to becoming a Jedi Master before bestowing upon her an addition to her Padawan braid.
Lessons in Politics
Tano observed a Senate session where they debated deregulating banks to fund the creation of more clone troopers. However, Tano struggled to grasp the political complexities of the war. Her master entrusted her to Amidala to gain a better understanding of politics. Tano then facilitated Amidala's use of her Jedi status to venture behind enemy lines and converse with her mentor, Senator Mina Bonteri of Onderon from the Separatist Senate on Raxus Secundus.
Together, they traveled to Raxus. In Raxulon, they met Bonteri and visited her home. There, Tano encountered Bonteri's son, Lux. She discussed their differing perspectives with Lux and shared her encounters with other Separatists like Ventress and Grievous. Tano then attended a session of the Separatist Senate at their Senate Building and witnessed the Senate's vote to initiate negotiations with the Republic. Tano and Amidala subsequently returned to Coruscant, where they informed Chancellor Palpatine of their negotiations. However, the banks were ultimately deregulated following an attack on the power generators on Coruscant. She also discovered that her master was aware of their mission and reprimanded her for its recklessness. Nevertheless, Tano learned that the political landscape of the war was far more nuanced than she had initially perceived.
Continuation of the War
Journey to Mortis
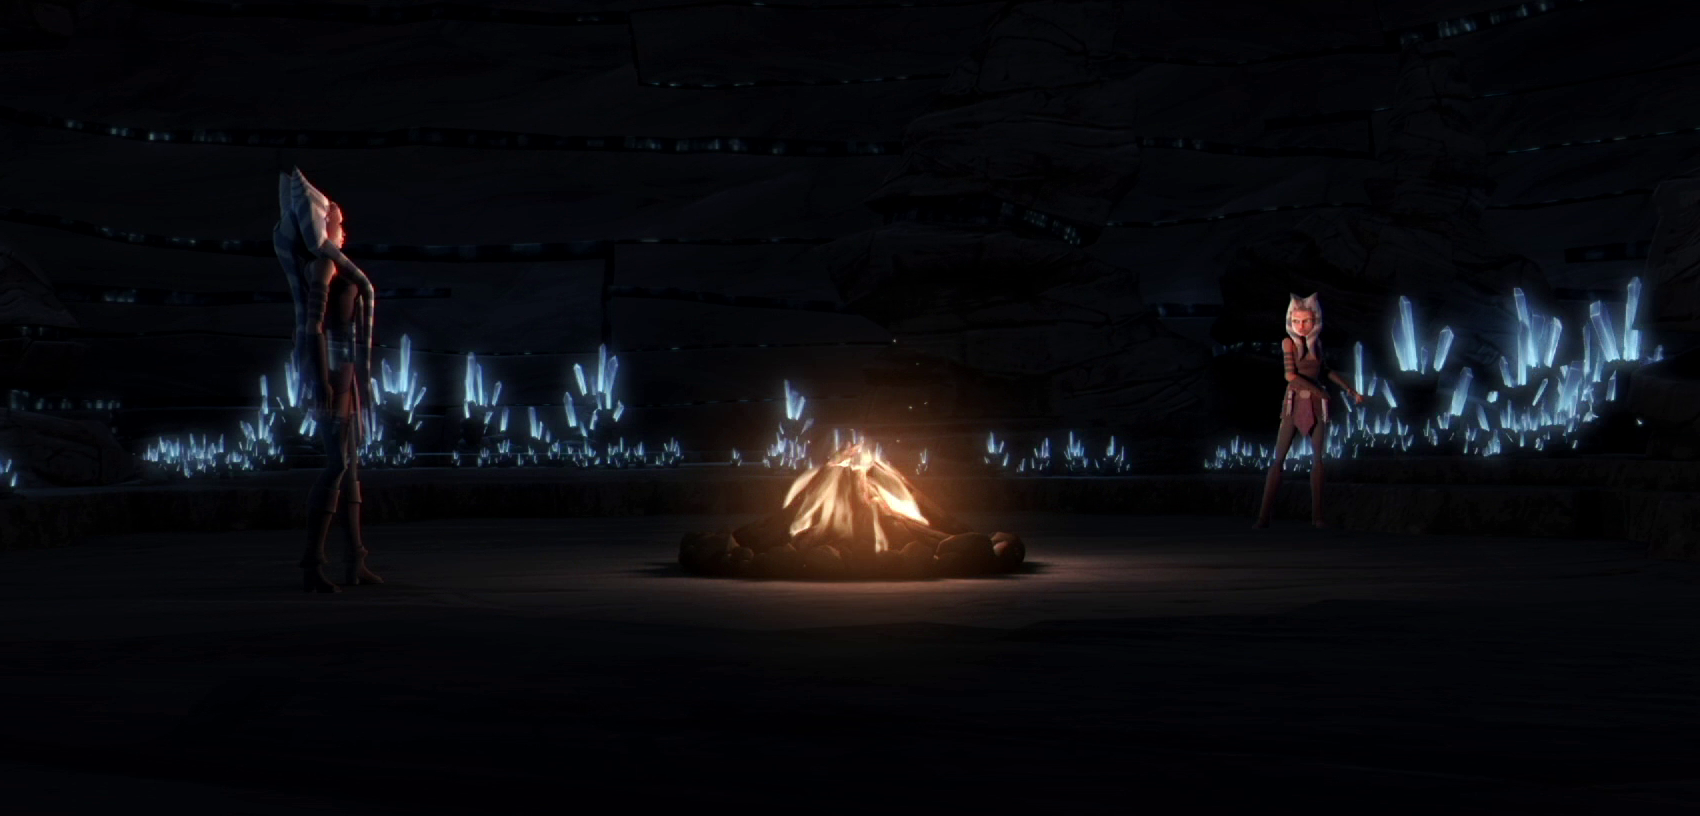
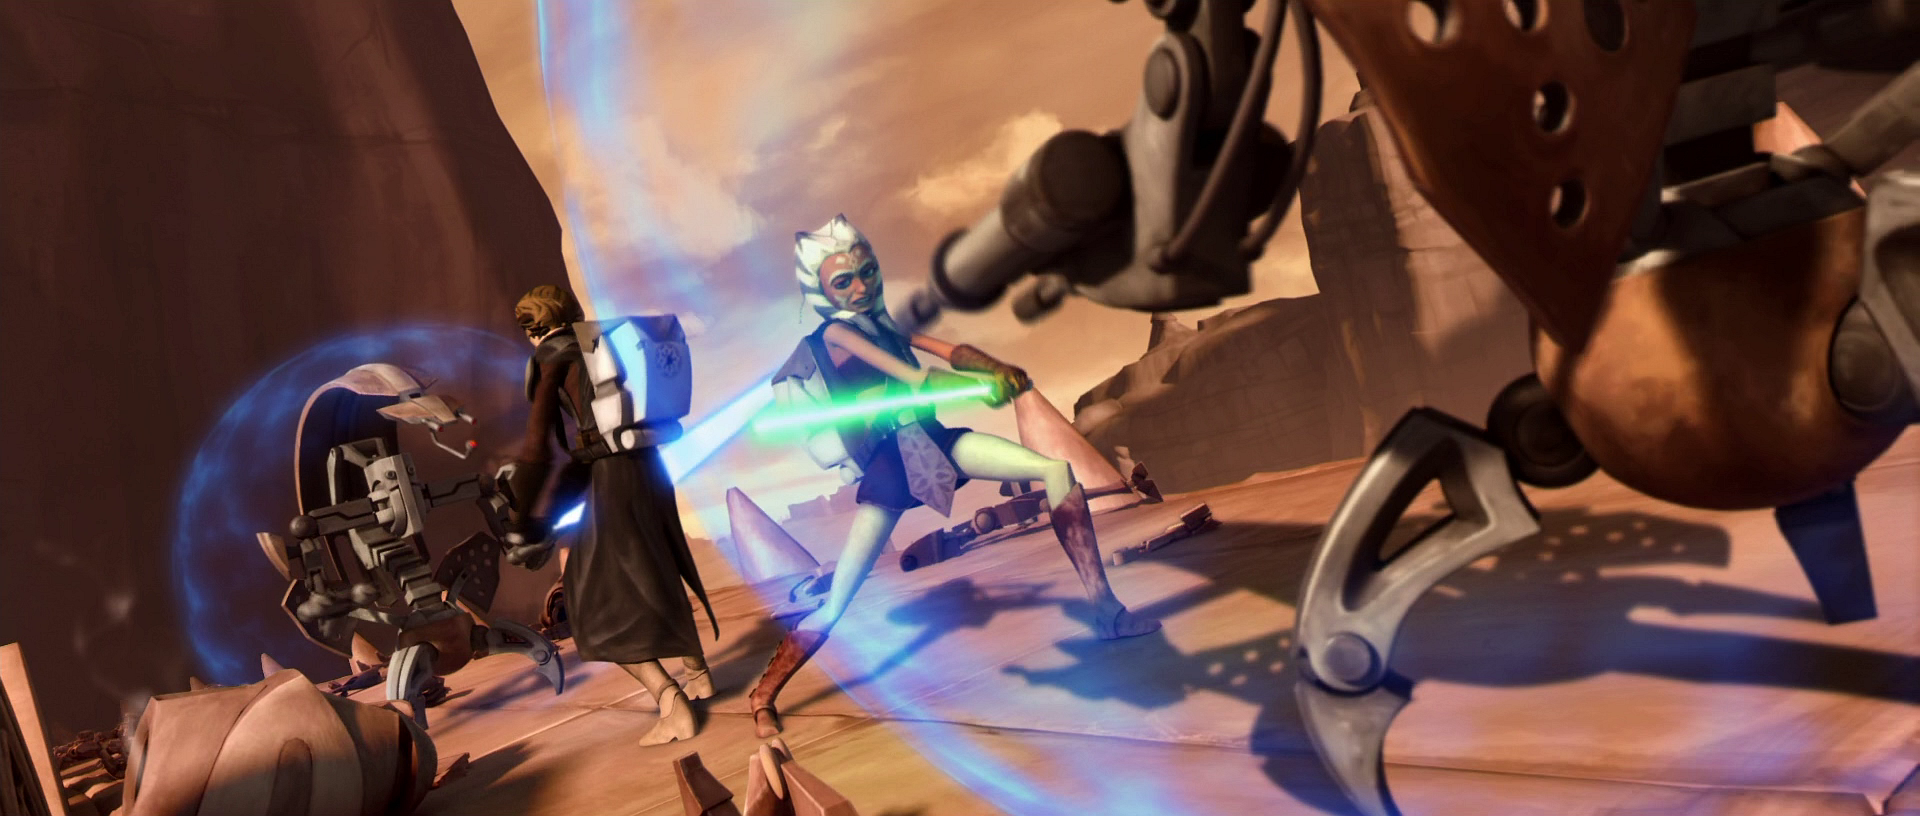
Tano, along with Skywalker and Kenobi, was dispatched to rendezvous with Captain Rex to investigate a 2,000-year-old distress signal in the Chrelythiumn system. There, they were brought through a vergence within an ancient monolith to the planet Mortis, an ethereal realm within the Force. Inside, Skywalker was quickly separated from Kenobi and Tano, and the latter two sought shelter as night approached. There, Tano was visited by a vision of her older self, who cautioned her against her attachment to Skywalker, warning that she might never realize her future if she remained his student. Her older self also warned that Skywalker's inclination toward the Dark Side would corrupt her if she did not distance herself from his teachings. Tano retorted that, despite her master's unconventional nature, she trusted him with her life, and he trusted her in return. Soon after, Tano and Kenobi were both abducted by the Son and the Daughter. The Father, the master of the realm of Mortis, presented Skywalker with a choice: to save either Tano or Kenobi, sacrificing the other. Skywalker chose to draw power from Mortis to save both his master and apprentice.
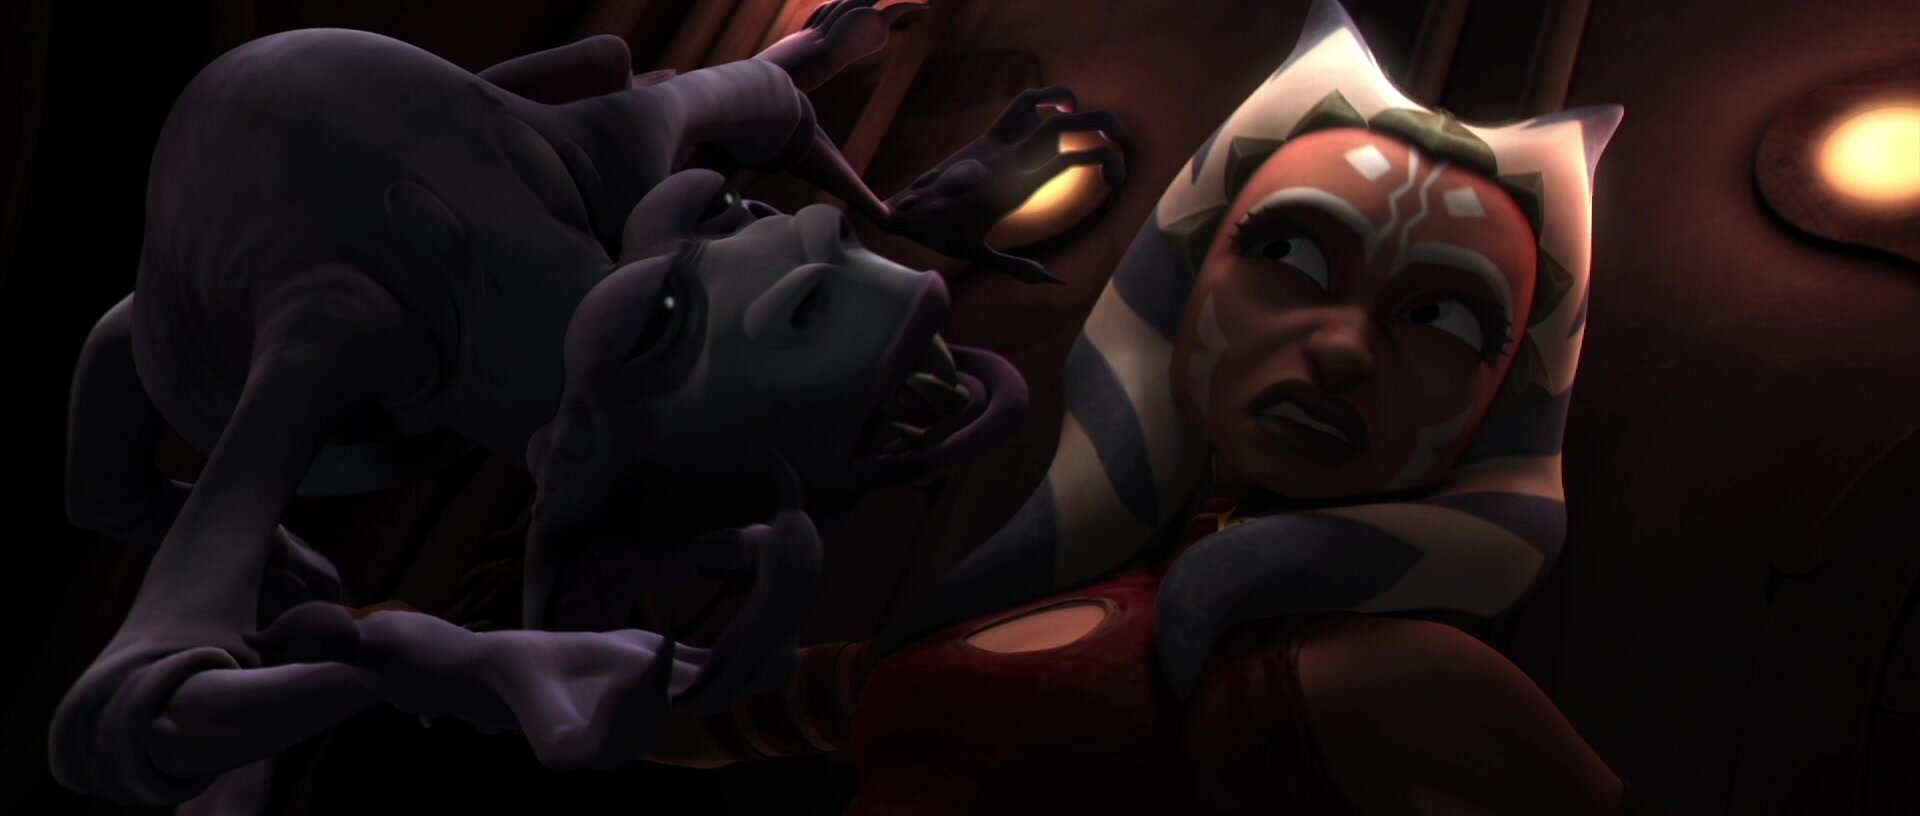
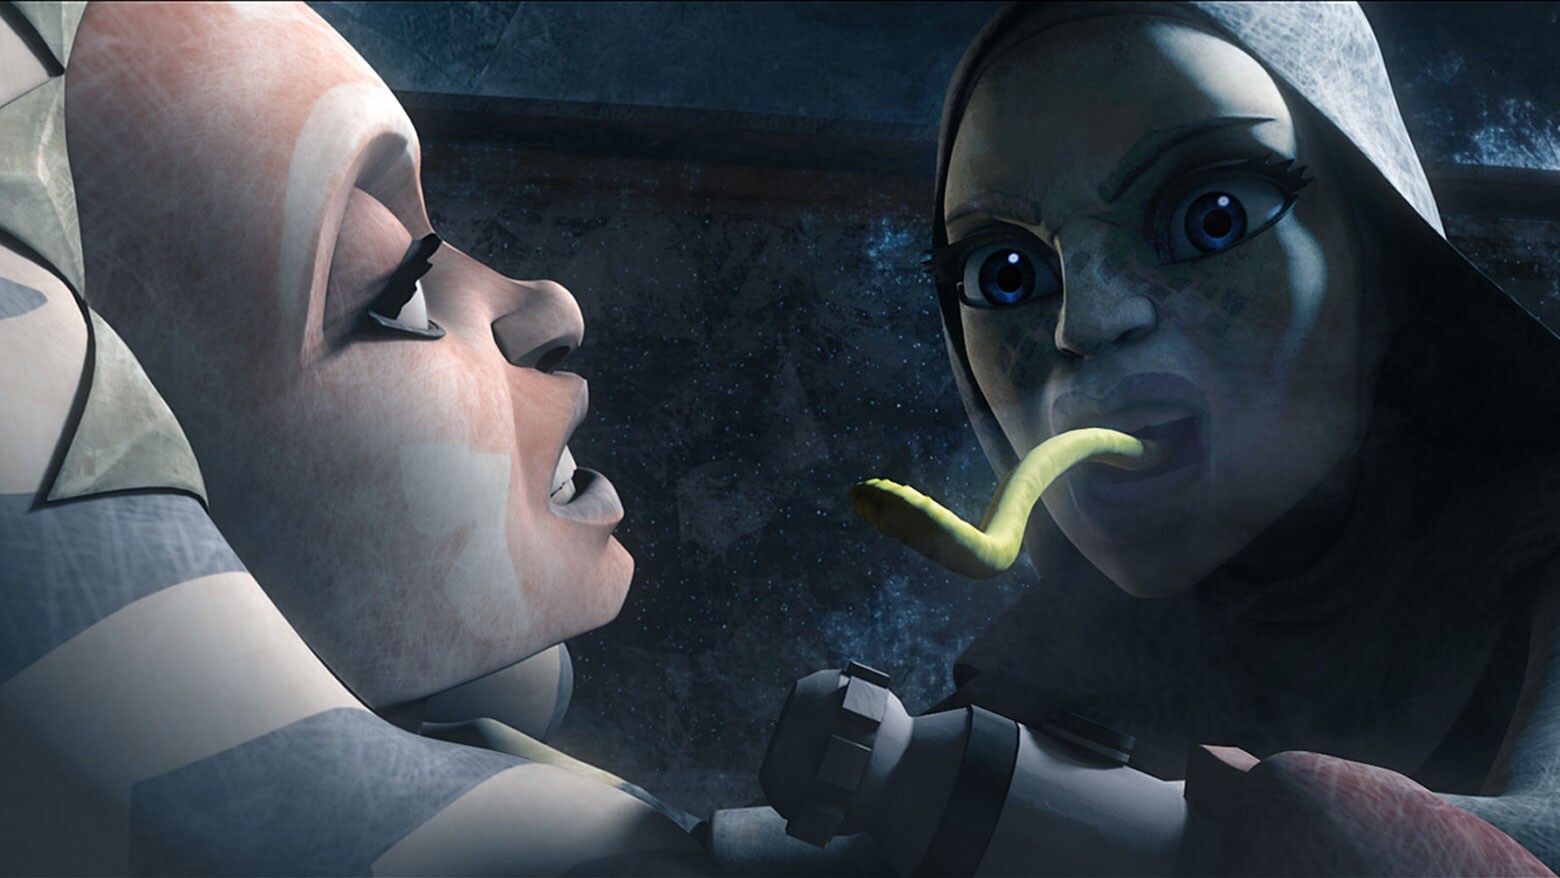
Subsequently, the three Jedi returned to their ship to attempt their departure but discovered that repairs were necessary. While they were attempting to make the repairs, Tano was abducted by the Son and imprisoned in a tower. Now in chains, Tano defiantly attempted to free herself until she heard a voice and found herself in the presence of a repulsive creature that addressed the young Padawan's deepest doubts and fears, particularly those concerning her master. Tano remained steadfast in her belief in Skywalker but realized that she still harbored doubts. The creature then released Tano from her chains and attempted to persuade the Padawan to abandon her master. When Tano refused, the creature bit her on the arm. As Tano collapsed in pain, the creature revealed itself to be the Son. Tano had been infected with the dark side of the Force.
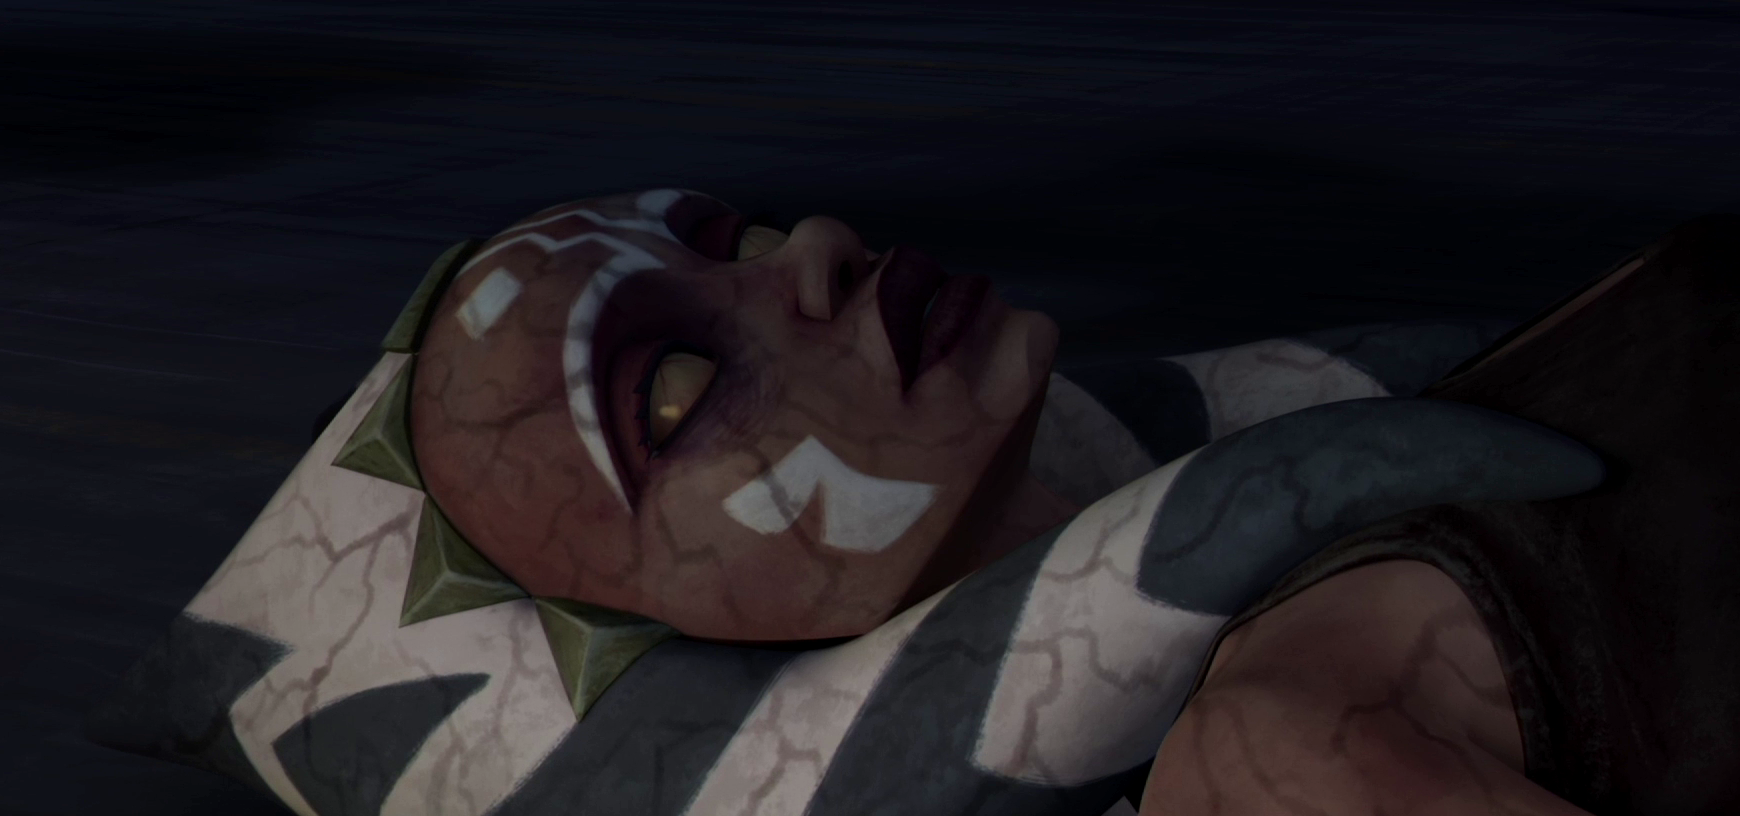
When Skywalker arrived to rescue Tano, the Son threatened to kill Ahsoka if he did not join him. Anakin refused, and the Son responded by sending a corrupted Tano to attack her master. When Kenobi arrived with the Dagger of Mortis, Tano became enraged, knowing that it could free her from the Son's influence. Tano held her own against Kenobi and Skywalker as the Son and the Daughter engaged in combat. Eventually, Tano stole the Dagger from Kenobi and, with a smirk, handed it to the Son. The Son, declaring that Tano was no longer useful, drained her life Force, instantly killing her.
As Tano lay lifeless, the Son turned to kill the Father. Instead, the Daughter lunged forward and took the blow, and the horrified Son dropped the weapon as he realized that the Daughter was mortally wounded. The Daughter told Skywalker that she could save Tano if she used him as a conduit to channel her life force into her. They completed the procedure as the Daughter died, bringing Ahsoka back to life and purging her of the darkness.
Ahsoka was then able to repair the ship as Skywalker confronted the Son, and as the Father took his own life, Skywalker killed the Son. The three departed from the realm of Mortis as the Father died and found themselves back with the Republic fleet. Upon communicating with Rex, they learned that they had only been in Mortis for a brief moment and that almost no time had passed at all.
Rejected
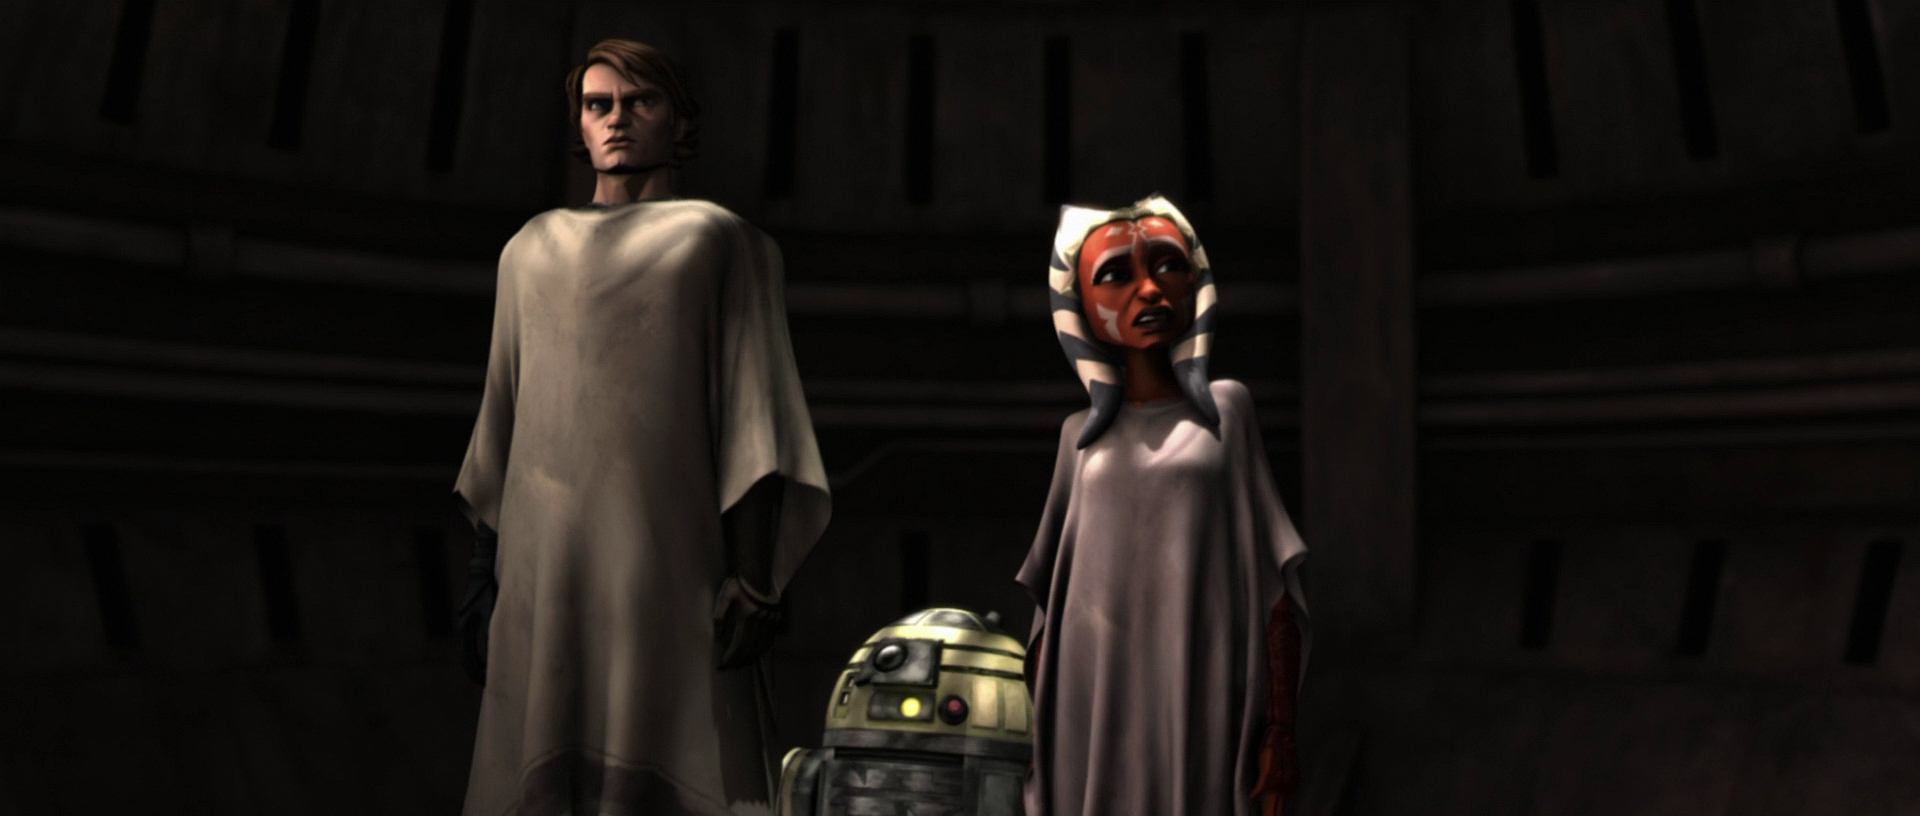
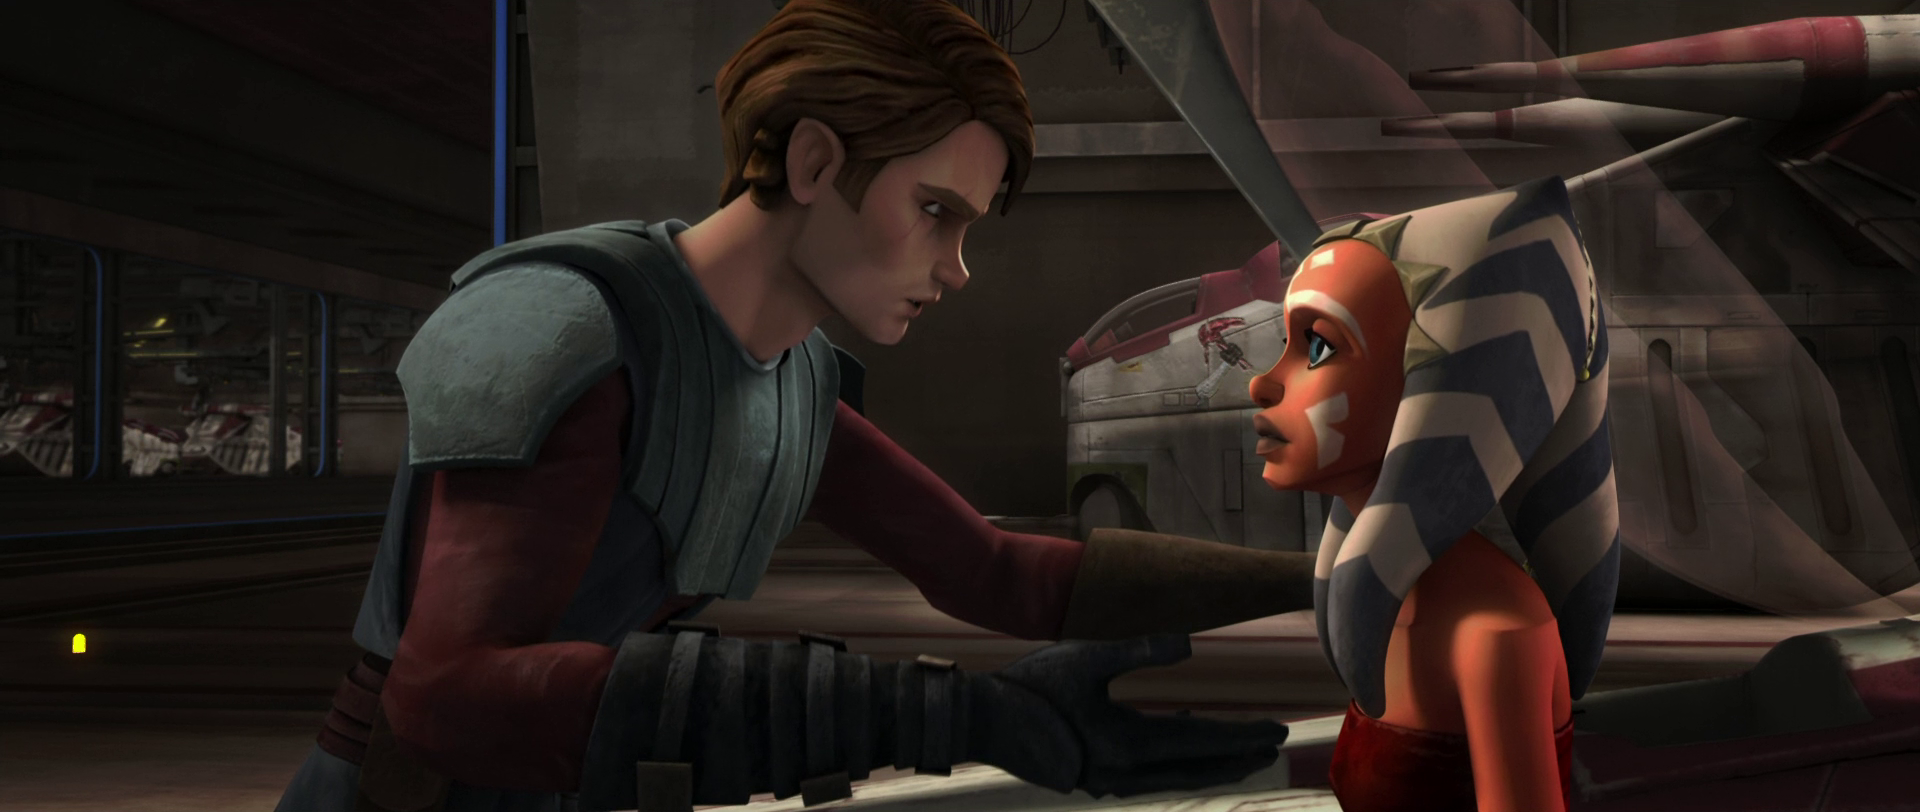
Nineteen months into the war, Jedi Master Even Piell was captured by Separatist forces during his return from the Outer Rim. Piell possessed vital information, along with Captain Wilhuff Tarkin, regarding the secret hyperspace lanes known as the Nexus Route, which the Separatists sought to acquire. Upon his capture, he was taken to an ancient prison called the Citadel, designed to detain Jedi who had strayed from the Jedi path. To rescue Master Piell, Skywalker, Kenobi, and Koon formulated a plan. As they exited the briefing room, Tano approached them, apologizing for her tardiness, explaining that she had just learned about the briefing and requested clarification on their mission to rescue Piell. As Skywalker paused, Koon remarked that Tano and Skywalker had much to discuss, and Kenobi and Koon departed to leave the two alone.
Skywalker then informed Tano that she would not be permitted to accompany them on this assignment. When she objected, he explained that the Citadel was designed to detain Jedi who had lost their way and was not a suitable place for Padawans. Tano argued that this was unfair and that Skywalker was being overly protective, questioning how she was supposed to learn if Skywalker was unwilling to allow her to take risks. However, Skywalker continued, stating that this was not a mission for teaching lessons to a Padawan and that it was a do-or-die situation, unwilling to share this risk with his Padawan. As he walked away, Tano grew increasingly frustrated.
Shortly afterward, Tano sought guidance from Master Koon regarding Skywalker's decision. In response to her inquiry, Koon simply informed her that it was Skywalker's prerogative to decide whether or not she should be allowed to participate. However, Tano reiterated her belief that Skywalker was being overprotective, stating that he had been selectively choosing which assignments she could participate in. Koon then responded by reminding her that Skywalker was her master, to which Tano countered that it should be her decision when she wanted to risk her life. With that, Koon began to contemplate her argument.
Rescuing Even Piell
Ultimately, Koon agreed with Tano's sentiment and, in a way, assigned her to the mission. After being "assigned," Tano was frozen in carbonite and placed aboard their stolen Sheathipede-class transport shuttle alongside Skywalker, Kenobi, and the clones. As they approached Lola Sayu, the planet housing the Citadel, Commandant Osi Sobeck, the prison warden, grew increasingly suspicious of their true cargo and ordered his droids to scan for lifeforms. However, after conducting a thorough scan of the ship, the scanners came up empty, indicating that the Republic's deception had been successful. Upon arriving on the planet, the shuttle deviated from its assigned landing zone, opting instead to conceal itself within the volcanic canyons of the planet and unload its "cargo."

As Tano was unfrozen, Skywalker casually acknowledged her presence before realizing that Tano was not supposed to be on the assignment. As Kenobi awoke beside him, he remarked that he must be experiencing carbon sickness, as he was seeing Tano with them. In response, Skywalker confirmed that his sight was fine and that it was Tano's hearing that needed assistance instead. Defensively, Tano explained that she had received orders from Koon and that she assumed he was aware of it. Skywalker grew more displeased with her as he informed her that Koon had not informed him of her joining the mission, which Tano followed up by stating that he had already been in carbonite when the decision was made. Pointing at Tano, he reiterated that he had specifically instructed her not to come, but Tano defended herself by saying that Skywalker had taught her that following direct orders was not always the right decision. With that, Kenobi approached and commented on Skywalker's teaching style before welcoming Tano to the mission, causing Tano to smile. After Kenobi's inquiry, the discussion concluded.
Before departing for the facility, Tano engaged in a conversation with one of the 212th troopers accompanying them as CC-2224 "Cody" was preparing his backpack. Once Cody finished preparing his pack, the two proceeded to the cliff surrounding the Citadel. Upon reaching a safe distance to avoid detection, Kenobi and Skywalker paused to assess the cliff they intended to climb in order to reach an entry point into the Citadel. Kenobi suggested using ascension cables but was met with disapproval from Skywalker, who pointed out the electromines scattered across the cliff face and that the ascension cables would have nothing to attach to without triggering the electromines, which would alert the entire prison of their presence. With this, Rex suggested freeclimbing it, which was met with approval from both Kenobi and Skywalker as the group continued their journey to the Citadel.
The group soon began to climb the cliff face, during which Skywalker inquired about Tano's progress, to which Tano simply replied that she couldn't be better but noted that the strong winds were posing a challenge. As they continued their climb, Kenobi ascended to the platform where the entry point the group wished to enter through was located but was halted when several droids emerged through the entry point, forcing him to instruct the rest of the group to remain silent, causing them to briefly pause their climb. As the droids retreated inside, they activated a ray shield, which Kenobi informed the rest of the group about, causing Skywalker to become distressed as the ray shield was not originally part of the plan. Continuing her climb, Tano noticed an opening near the door and suggested that she might be able to squeeze through the ventilation ducts and disable the ray shield. Skywalker then approved her proposal after an inquiry from Kenobi, and she made her way to the shaft and entered, arriving just outside the ray-shielded door. As she exited, she checked for any droid patrols, noticing none, and proceeded to the door controls, simply pressing a single button and deactivating the ray shield. As Skywalker entered, she attempted to show off to him, asserting that she could handle herself. However, as the rest of the group finished climbing up to the platform, a clone named "Charger" lost his grip on the cliff and began tumbling down towards the lava below, striking an electromine on his way down and alerting the entire facility to the group's presence. With that, all security protocols were activated, the entire facility was placed on lockdown, and Sobeck's special units were assigned to hunt the group down.
As they stealthily navigated the hallways of the facility, Tano served as a lookout as they traversed through said hallways. As they approached Piell's cell, Skywalker ordered ARC trooper CT-5555 "Fives" to disable their surveillance, leading several automated laser traps to attack the group, although they were easily neutralized by their combined efforts. However, an electrified wall soon activated, forcing the group to take cover, and killing "Longshot," who did not manage to take cover in time. Even so, Kenobi instructed the group to keep moving. As Master Piell was being tortured, the group arrived just in time to save him before an EV-series medical droid could remove his one remaining eye. As the group arrived, Skywalker freed Master Piell from his containment field while Kenobi helped him back to the ground. As he stood back up, he confirmed that he had not revealed the coordinates of the Nexus Route as Kenobi handed him his lightsaber back. However, Master Piell also confirmed that he only possessed half of the coordinates of the Nexus Route and that his captain had the other half, forcing the group to free them as well. With this, Skywalker was forced to devise a new plan for escaping the facility, and with that, the group made their way to the second cell.
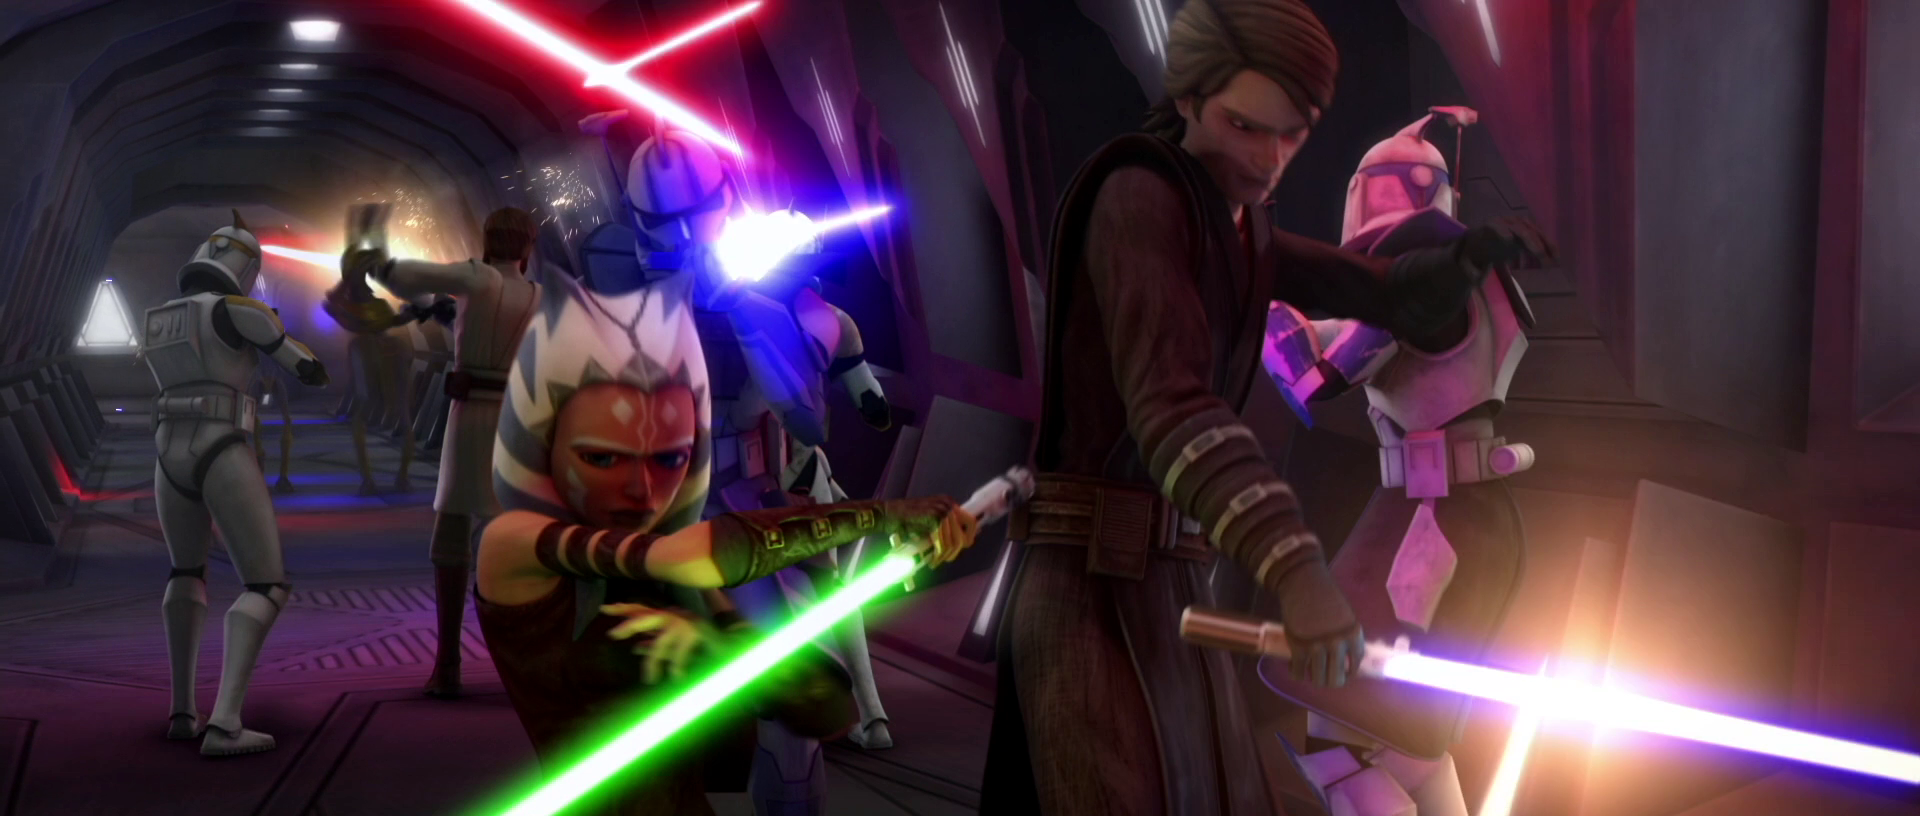
Sobeck's elite squad—six commando droids adorned with the Citadel's emblem on their armor—ambushed the group as they advanced, encircling them and initiating an assault. During the skirmish, one of the droids grappled Tano, forcing her to the ground, but she severed its head, neutralizing it. Soon after, Sobeck used a piercing sound to disorient the group before activating a magnetic field. This allowed him to seize their weaponry and shock Skywalker through his cybernetic hand, prompting Tano's outcry. Reinforcements from Sobeck's special forces arrived, and Sobeck declared their extended "guest" status, suggesting their capture.
However, Piell, Kenobi, and Tano attempted to use the Force to topple the droids, only to discover they were magnetically anchored to the floor. Despite this, they persisted, causing the droids' shots to miss, while the clones attempted to dismantle them barehanded. The droids retaliated, knocking the clones down. Amidst this, Skywalker managed to retrieve his lightsaber as Sobeck continued his electrocution, deactivating the magnetic field and returning the weapons. Skywalker stumbled back. The group then swiftly destroyed the commando droids and proceeded towards the officers' cell. Before departing, Rex destroyed the camera Sobeck was using to monitor them, obscuring their location.
Upon reaching their objective, the group breached the door. Tano swiftly moved behind Skywalker, kicking a commando droid to the floor and eliminating it with a lightsaber. As the others entered, Tarkin, Piell's captain, acknowledged their arrival and questioned their escape plan. Kenobi proposed a split: he and Skywalker would lead separate teams, with Piell and Tarkin assigned to different groups in case of capture. Tarkin initially resisted, but after Piell's urging, he relented and joined Skywalker's group with Tano, while Piell joined Kenobi. Kenobi's team would create a diversion en route to the landing pad for shuttle extraction, while Skywalker's team would navigate the old fortress tunnels to reach the pipeline, where they would also be rescued.
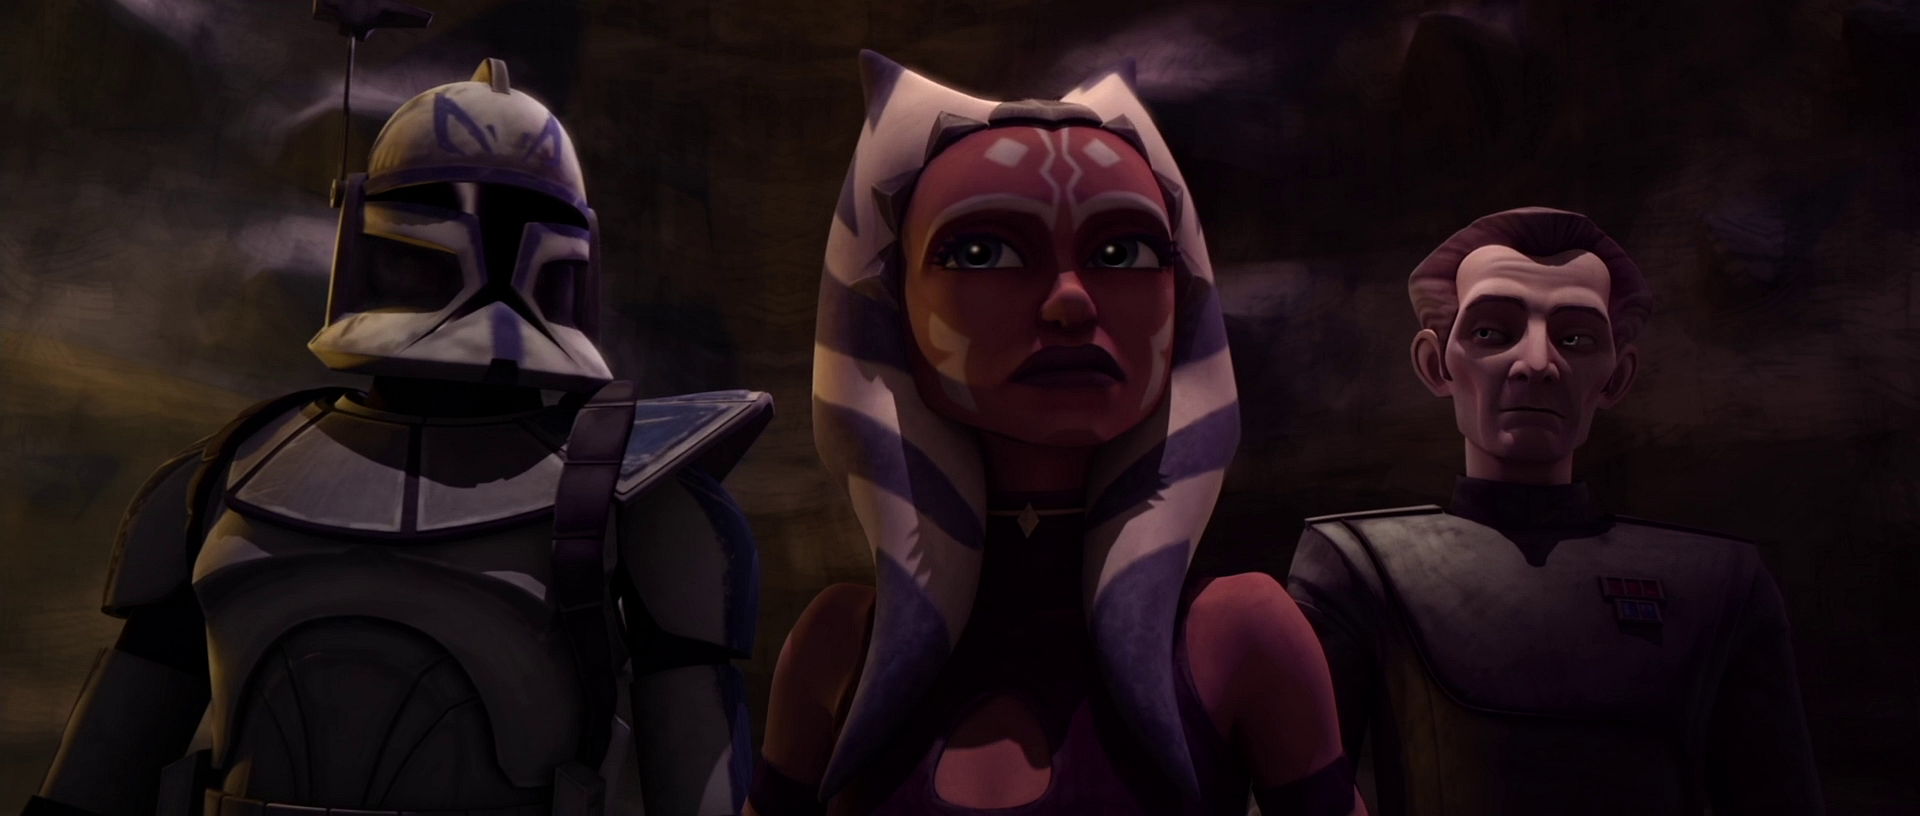
While Kenobi and Piell staged a distraction, Skywalker, using archived data, guided his team to a tunnel for their escape. Tano scouted ahead, finding no droids and reporting back. She rejoined the group as they moved through the tunnel. Skywalker inquired about R2's readiness for departure, while Tano continued to survey the tunnel. As she continued to scout for droids, a probe droid appeared, but Skywalker destroyed it before it could alert Sobeck. After glancing at the lava below, Tano questioned Tarkin's sudden admiration for the fortress's design. Tarkin argued that the current situation demonstrated its effectiveness, lamenting its capture by the Separatists. Skywalker, responding to Tano's questioning look, agreed with Tarkin. Tano gave him a bewildered look. Skywalker then informed Tano of his temporary departure to protect their flank, since Kenobi wasn't present. Tano replied that her presence might be beneficial after all, looking proud.

As they walked, Tarkin doubted Tano's leadership, but Rex vouched for her based on their past missions. Their conversation was interrupted by a dead end. Super battle droids emerged from their flank, forcing Tano to activate her lightsabers in defense. Skywalker intervened, bisecting the droids. Commando droids with personal energy shields arrived, renewing the conflict. Tano defended herself, saying she thought it was a dead end, which Skywalker used to point out that if Koon had assigned her to the mission, he would've briefed her on the plan. Ignoring him, Tano placed thermal detonators on the wall. After placing them, she grabbed two leftover Class-A thermal detonators and used them to destroy the commando droids. The wall exploded. Tano smiled at Skywalker and walked past him as the group moved forward.
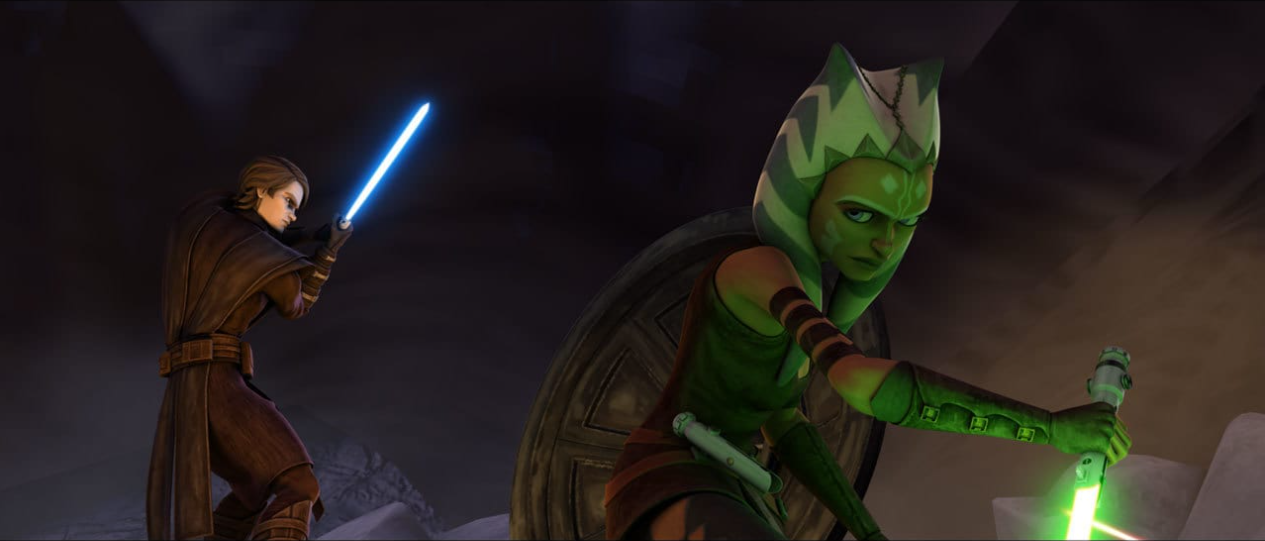
Arriving at the pipeline, Tano surveyed it while Skywalker explained the escape plan. He opened the hatch, and the group shielded their noses from the fumes. Tano entered the pipeline first. As they ascended, Tano climbed outside, using her acrobatics to reach the top. She cautiously scanned the area and reported no droids, but R2 hadn't arrived with the shuttle. As she tried to exit the hatch, two battle droids aimed at her, but she swiftly destroyed them. She discovered more battle droids and crab droids advancing. The group exited the pipeline towards the droids. Tano and Skywalker defended Tarkin and the clones, deflecting blaster bolts. Overwhelmed, the group retreated. Skywalker threw a thermal detonator into the hatch, destroying the pipeline and the droids. Skywalker announced they would proceed with plan B: meeting the shuttle where Kenobi was supposed to be.
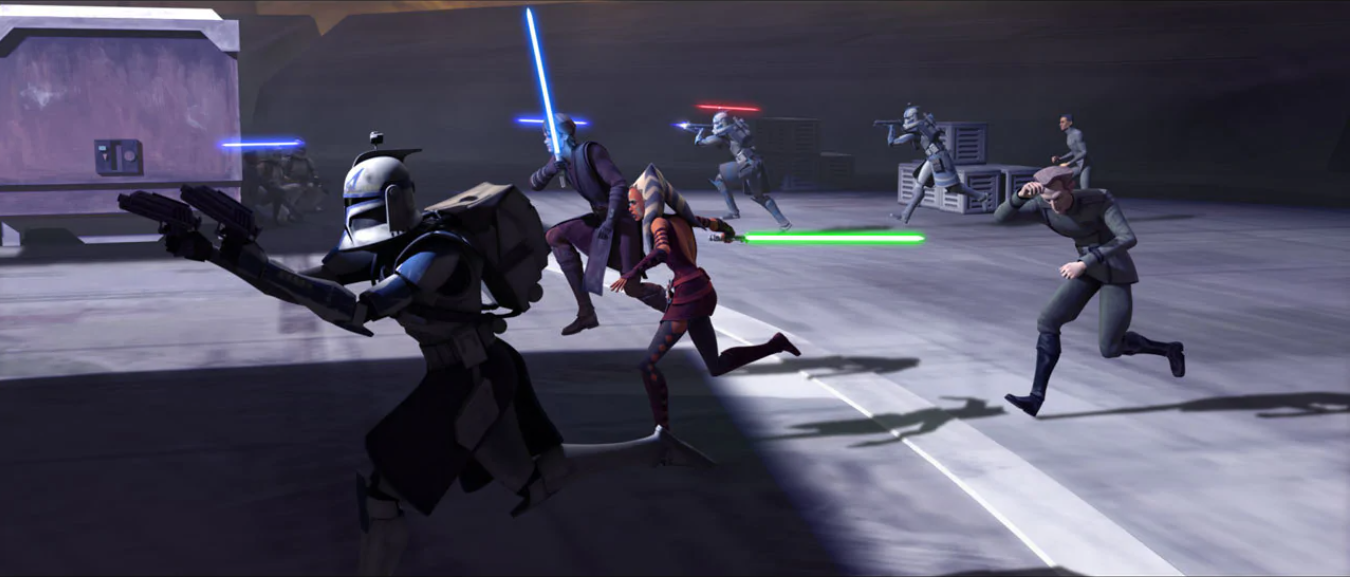
Skywalker's group found Kenobi's group pinned down by turrets around the shuttle. They took cover. Tano noted the ship was surrounded, and Tarkin suggested a full-scale assault. Kenobi countered that the turrets would destroy the ship, their only escape. Tarkin proposed taking over the turrets to eliminate the droids. Skywalker pointed out the approaching STAPs firing on them, destroying crates and forcing the Jedi to ignite their lightsabers.
The Jedi used this to their advantage; Skywalker grabbed a STAP to destroy the turrets. More droids and commando droids arrived, one entering a turret to destroy the shuttle. ARC trooper CT-1409 "Echo" charged to claim the shuttle, but it was destroyed, seemingly killing Echo. The debris destroyed the turret. The combined group retreated.
Kenobi and Skywalker contacted the Jedi Council, requesting rescue. Finding cover, Tano spoke with a rescued officer as Kenobi, Piell, and Skywalker planned their route to the rendezvous point, deciding to keep moving.
As they passed a lava cave, Tano asked about their next move. Skywalker said they would fight their way off Lola Sayu. Kenobi asked someone to contact the Council for rescue details, and Piell volunteered. R2 displayed a hologram of Windu, who was glad to see Piell alive. Skywalker asked about rescue plans, and Windu said Koon had left for Lola Sayu. Yoda added that gunships would arrive for extraction within a small window, requiring them to reach the rendezvous point—a lava-surrounded island. Windu wished them well and ended the transmission. Commando droids ambushed them but were destroyed by Fives' thermal detonator. The group moved out, expecting more droids.
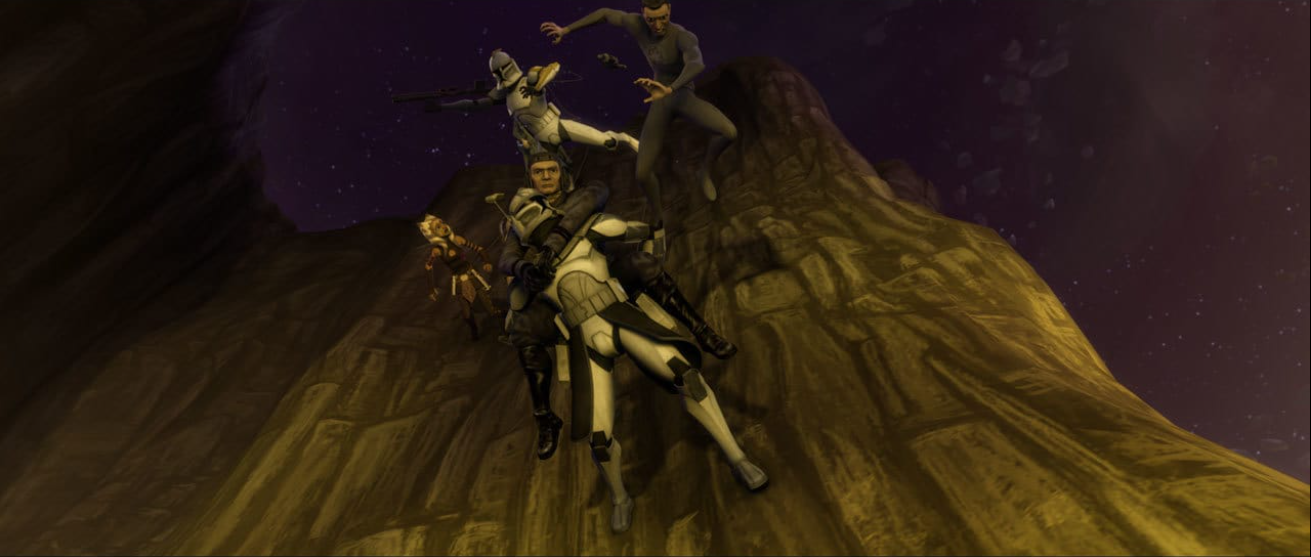
Sobeck's droids discovered the group, and Tano exclaimed they were being boxed in. Skywalker and Kenobi used ascension guns to lower the unarmed members down a cliff. Tano and the others defended against the droids as R2 ordered his droids to attack. The group used the cables to descend. Reaching the surface, commando droids fired from above after destroying R2's droids as the group entered a cave, covered by Cody and Skywalker.
Passing a lava river, Tarkin wondered if the Jedi would be at the rendezvous point, and Piell told him to keep moving. Tano rolled her eyes at Tarkin and asked why Piell had shared half of the Nexus Route coordinates with him, believing he was ungrateful. Skywalker said Tarkin believed the Jedi shouldn't lead the Republic army, and Tano called his beliefs ridiculous. Skywalker debated with Kenobi about the Jedi Code in war. Hearing anooba howls, Tano asked if others heard them. Trying to outrun the anoobas, Skywalker warned Tarkin against disobeying Piell, but Tarkin stood by his principles, citing the chancellor's favor. Skywalker said he and the chancellor were also friends. Kenobi urged them to hurry, ending their conversation.
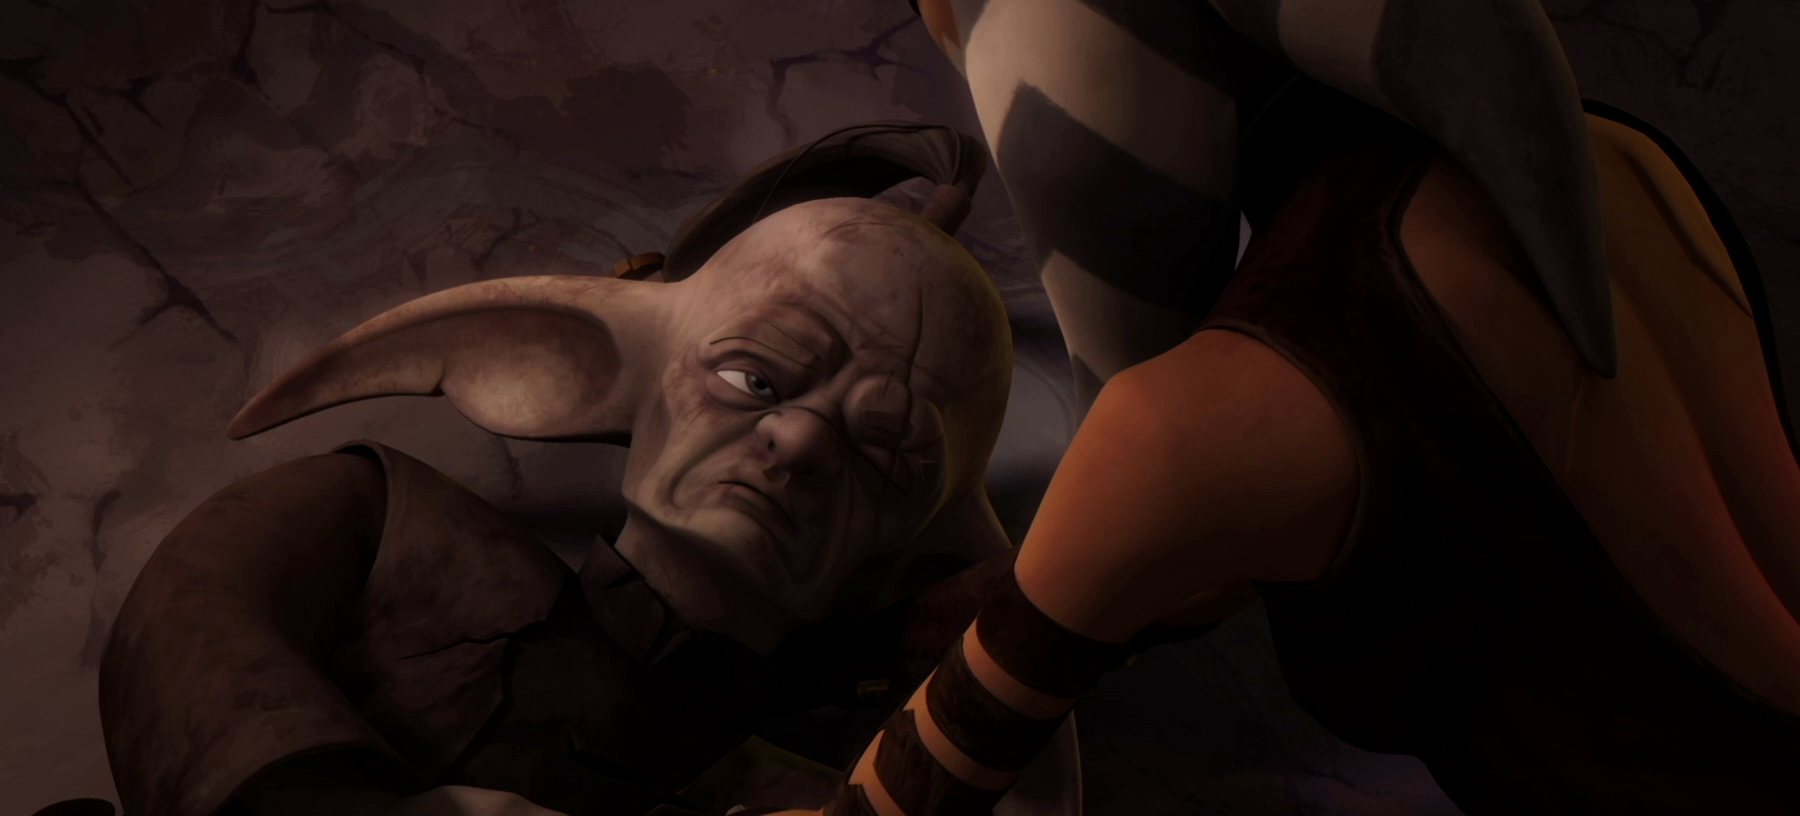
Nearing a cave, the anoobas were closing in, and Fives pointed it out. Skywalker said they had to deal with them to prevent the droids from finding them. Tano suggested using the cave for a surprise attack. Piell said they could distract the anoobas, and Skywalker and Kenobi volunteered. Tano and the others hid in the cave as Kenobi and Skywalker walked with R2 through a misty path. As the anoobas and commando droids on STAPs arrived, Tano and the others prepared to ambush them, but crab droids attacked from the cliff, killing a clone.
Piell killed a crab droid, but more arrived, and he ordered the clones to keep moving while he and Tano dealt with the crab droids. Tano defended against her crab droid while Piell destroyed his. An anooba tackled Piell, and Tano tried to save him. She used the Force to push the anooba away, but Piell was dying. Tano checked his vitals and said she needed help, but Piell stopped her, saying he needed to give her his half of the Nexus Route coordinates. Tano said she should get Skywalker or Kenobi, but Piell insisted she hear them. Tano admitted she hadn't been assigned to the mission, but Piell didn't care, saying she was now crucial and must give his coordinates only to the Jedi Council. Piell gave Tano his coordinates.
As the others finished off the droids, Tano arrived carrying Piell's body. She gave him to Skywalker, who laid him on the ground. Tano said Piell had died honorably and that she had his coordinates. The group brought him to a lavafall, where Kenobi and Skywalker used the Force to drop his body into the lava and honored him before moving on. Reaching the island rendezvous point, Cody and Skywalker used ascension guns to launch a cable. Commando droids on STAPs arrived with Sobeck, who decided to intervene himself.
As Sobeck was knocked out of the sky by Fives, he grabbed Tarkin and choked him, preparing to throw him into the lava. Tano swiftly killed him with her lightsaber to save Tarkin. Tarkin thanked Tano and told Skywalker he had trained her well. Koon arrived with the gunship as more crab droids arrived. Tano and the others boarded the gunship, which took off, flanked by Jedi Masters Saesee Tiin, Adi Gallia, and Kit Fisto in their own interceptors. As the _Venator_s prepared to jump to hyperspace, the gunship safely made its way back into the hangar as Koon gave Admiral Barton Coburn the go-ahead to jump to hyperspace, leaving Lola Sayu behind.
The coordinates
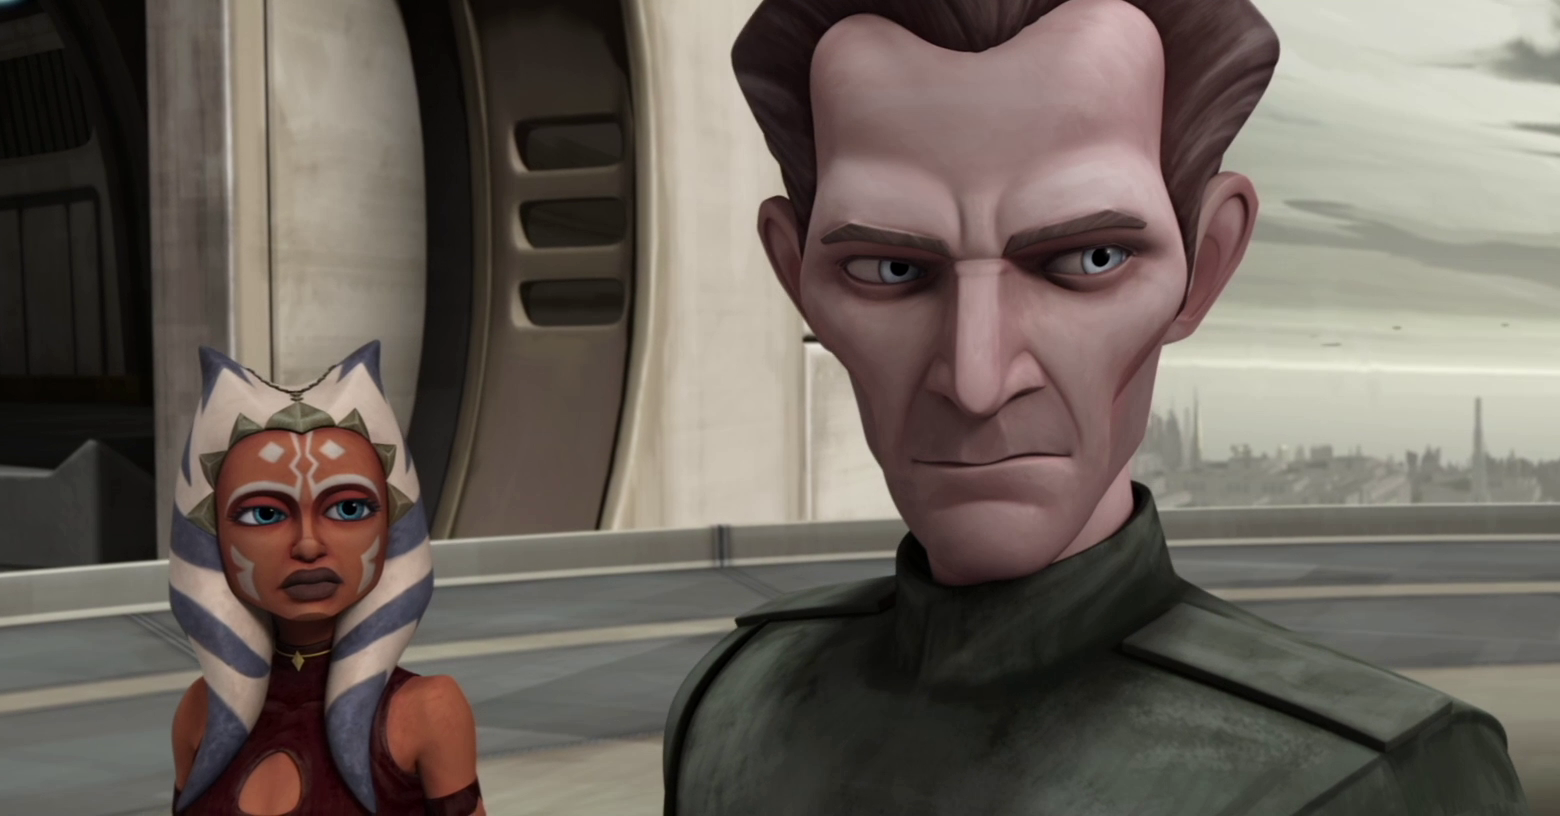
Back on Coruscant, the group was met by the Coruscant Guard, Yoda, and Windu. Kenobi informed the Jedi that Tano and Tarkin had memorized the Nexus Route coordinates, but Tarkin said Palpatine had instructed him to deliver them directly to him. Tano said she had promised Piell to give the coordinates only to the Jedi Council. Yoda left to meet with the chancellor. As Tano turned to leave, Skywalker asked Koon if he had assigned her to the mission, and Koon said he had, surprising Tano and dismaying Kenobi and Skywalker. Koon took Tano to the Jedi Temple.
Captured at Felucia

Tano traveled with Skywalker, Koon, and their troops to another engagement on Felucia. In a pincer movement, Tano led Clone Corporal "Comet" and other troopers around a Separatist facility. As the clones scaled the wall, Tano guarded the rear. However, she was captured in a stun net by the Trandoshan Lo-Taren. He placed her in a cage on a prisoner ship. Tano and other prisoners were dropped on Island Four on Wasskah, where Trandoshan hunting guild members would hunt them for sport. Tano survived the night and met former Jedi younglings Kalifa, Jinx, and O-Mer. She joined their band, who had lost hope of escape. Tano tried to convince them to be proactive, but Kalifa said other Padawans had died trying. Tano settled into their routine of moving during the day and hiding at night.
However, Tano's energy and belief gave the other Jedi hope. As they tried to find the Trandoshan base, O-Mer spotted their Ubrikkian Floating Fortress. Hunters attacked, forcing them to split up. Tano and Kalifa defended each other after Kalifa was wounded by Dar. Tano fended off Dar and sent him plummeting to his death. However, she was shot by Dar's father, Garnac, as she helped Kalifa up. Garnac continued to fire at Tano as Kalifa slumped against a tree, mortally wounded. Tano promised to look after the others and stayed with her until she died.
Returning to their hiding place, Tano revealed that Kalifa had been killed. Jinx and O-Mer despaired, but Tano kept their spirits up, proposing a plan to attack a transport ship. That night, they assaulted a ship but failed to gain control, and it crashed onto the beach. They gained a new companion in the Wookiee Chewbacca. Being the only one to understand Shyriiwook, Tano translated Chewbacca's ideas, including his plan to build a transmitter from the wreckage to contact his people on Kashyyyk.
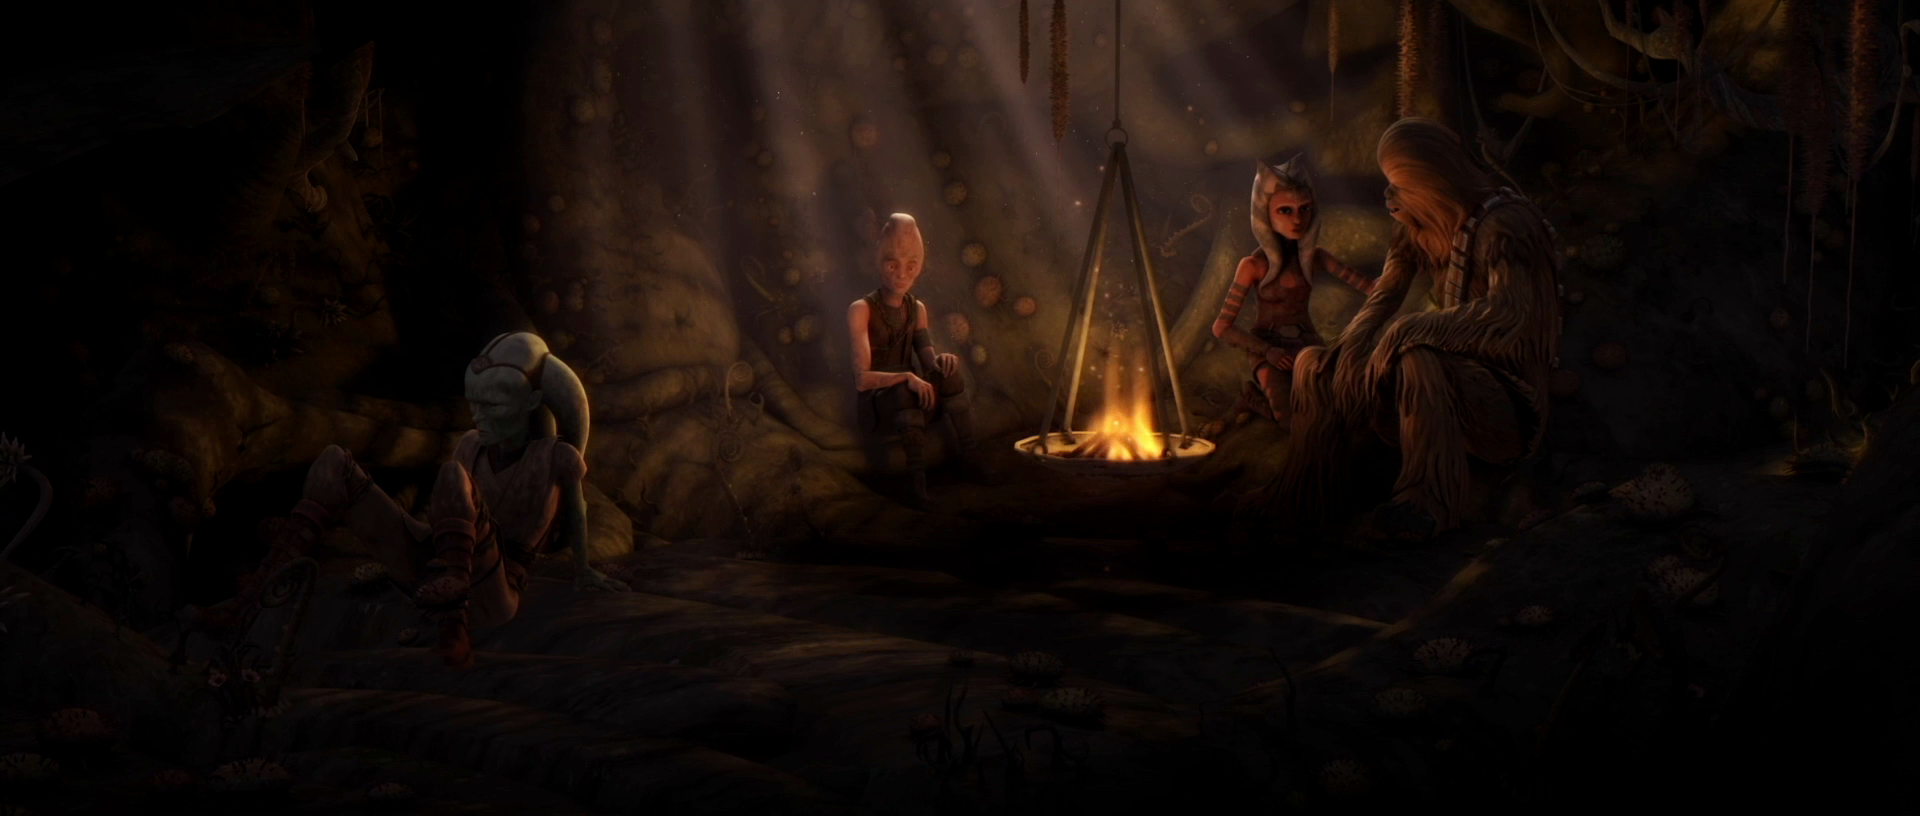
The next night, the four companions ventured back to the wreckage, with Jinx and O-Mer covering Tano and Chewbacca as they crawled through the ship. Tano helped Chewbacca find parts, and when they emerged, they were fired on by a sniper. Jinx and O-Mer incapacitated him, and the group took the Trandoshan prisoner. In the morning, Jinx used a mind trick to get the hunter to summon a pickup. Then, taking control of the hover pod, they flew to the Trandoshan base. The group engaged in hand-to-hand combat with the hunters and received support from the Wookiee chieftain Tarfful, who had gotten a message from Chewbacca's transmitter. Arriving in the assault gunship Halo, Tarfful and his warriors helped them defeat the hunters. Tano entered the main hall to confront Garnac and pushed him off the balcony, killing him.
Returning to the Jedi Temple, Skywalker was relieved to see his Padawan. He apologized for leaving her behind, but Tano thanked him, saying that without his training, she wouldn't have made it back or helped the others survive. The two walked back towards the temple, with Master Yoda looking on and smiling.
Campaign at Umbara
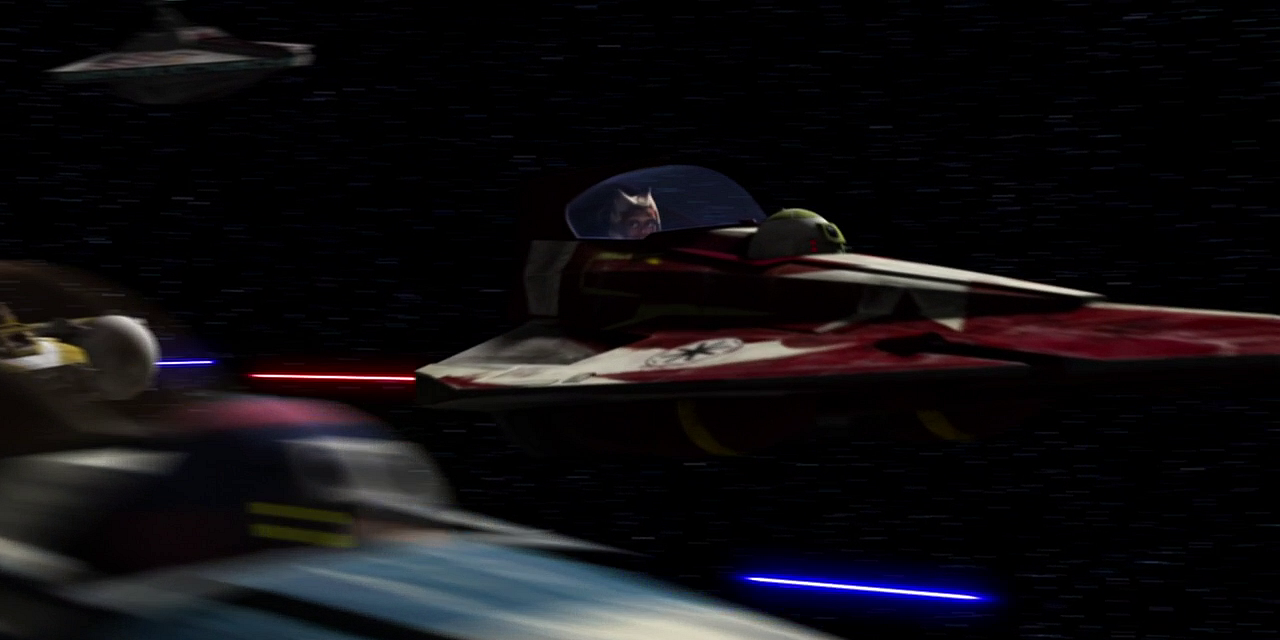
After the Umbarans sided with the Separatists, the Republic was dispatched to retake Umbara. Tano and Offee led fighter squadrons in an attack on the blockade. Tano and Offee led a squadron of Z-95 Headhunters and Y-wing bombers in an attack on a Munificent-class star frigate, destroying it and clearing the way for the Republic ground assault. Eventually, the Republic won the battle of Umbara.
Combating the Zygerrian Slave Empire

Following the threat of Separatist forces on Kiros, Tano joined Skywalker, Kenobi, Rex, and Cody in an effort to aid the native Togruta population of the planet. After engaging in combat with commando droids and Droideka Sharpshooters, Kenobi proceeded to the governor's tower with the goal of negotiating with Darts D'Nar, a Zygerrian who was leading the Separatist forces. Observing her master's anger and frustration at the prospect of negotiating with a slaver, Tano discovered that he had once been a slave himself, a fact he had never revealed to her. When D'Nar betrayed Kenobi and attempted to flee on his ship, the Tecora, Tano and Skywalker pursued him using AT-RTs. After disabling the engines of the Tecora, Tano infiltrated the bridge and defeated D'Nar in combat. Through interrogation, they discovered that the natives had been sold into slavery on D'Nar's home planet of Zygerria.
Subsequently, Tano, Skywalker, Kenobi, Rex, and R2 commandeered the Tecora and traveled to Zygerria. Tano assumed the role of Skywalker's slave in order to meet with the Zygerrian queen, Miraj Scintel. However, when one of Scintel's slaves attempted to assassinate her before taking their own life, Skywalker decided to offer Tano as Scintel's new slave. By gaining the Queen's favor, he secured an invitation to the slave auction scheduled for that night. Meanwhile, Tano was confined to a cage outside, but she managed to escape and assist her master during the auction. They soon realized that Kenobi had been captured, and despite their efforts, they were unable to overcome the Zygerrians. Kenobi and Rex were sent to a slave processing facility, while Scintel imprisoned Tano and Skywalker in her palace.
With the assistance of R2, Skywalker successfully escaped from the guards and freed Tano. From a dying Scintel, who had been killed by Dooku for refusing to hand over Skywalker, he learned that Kenobi and Rex were being held captive on the planet Kadavo. Tano and Skywalker reclaimed their ship and set out to rescue their companions. Upon landing at the facility, their ship was destroyed, and they quickly found themselves under heavy fire. When Dooku threatened to execute the slaves if they did not cease their attack, Republic reinforcements arrived, led by Plo Koon and the 104th Battalion, to provide assistance. Tano and Skywalker separated, with Tano heading to the slaves and her master disabling the defense turrets. Tano located the slaves and directed Koon to position gunships beneath the facility to facilitate their escape. After rescuing the slaves, including Kenobi and Rex, Koon's forces destroyed the facility.
Death Watch Involvement
Tano accompanied Amidala to the inaugural sanctioned peace conference between the Republic and the Confederacy. However, the negotiations were disrupted by Junior senator Lux Bonteri, who Tano had befriended earlier in the war during Amidala and Mina Bonteri's failed peace initiative. Bonteri accused Count Dooku of being responsible for his mother's death, and Tano left the meeting to protect Bonteri from possible retribution. Sneaking aboard a Separatist landing craft, Tano intervened when Dooku ordered Bonteri's execution via hologram. Tano intended to bring Bonteri to Coruscant to be granted amnesty, but Bonteri had other plans. Bonteri shocked Tano with a small device, knocking her out and bringing their ship to Carlac to meet with a group Bonteri promised would help him get his revenge on Dooku.
Bonteri instructed Tano to leave her lightsabers on the ship before meeting with the group. Tano quickly realized that the group was Death Watch, and told Mandalorian Nite Owl Bo-Katan Kryze that she was Bonteri's betrothed to keep her identity as a Jedi a secret. When Kryze left them both alone before their meeting with Pre Vizsla, Tano learned of Bonteri's plan to convince Death Watch, who recently had a falling out with the Sith Lord, to assassinate Dooku. Tano warned Bonteri that Death Watch still had their own agenda and could not trusted, but Bonteri kissed her to interrupt her as Vizsla arrived. Vizsla forced Tano to work alongside natives that Death Watch used as slave labor. Later, when Death Watch began to pillage and burn a village, Tano attempted to fight back but was imprisoned. However, when Vizsla drew the Darksaber, intent on killing Tano, R2, who had been forced to repair Death Watch droids they used for entertainment in a fighting ring, uses a smoke screen as a diversion and slips Tano her lightsabers that he recovered from the ship. Tano acrobatically freed herself and beheaded a group of Mandalorians approaching her before dueling Vizsla. When R2 set the droids on their masters, the three escaped from Vizsla. When Bonteri piloted a speeder back to their ship, Tano defended him from Kryze and the other Mandalorians. After successfully escaping Carlac, Bonteri used an escape pod to avoid being brought to Coruscant, leaving Tano behind.
Training Rebels on Onderon
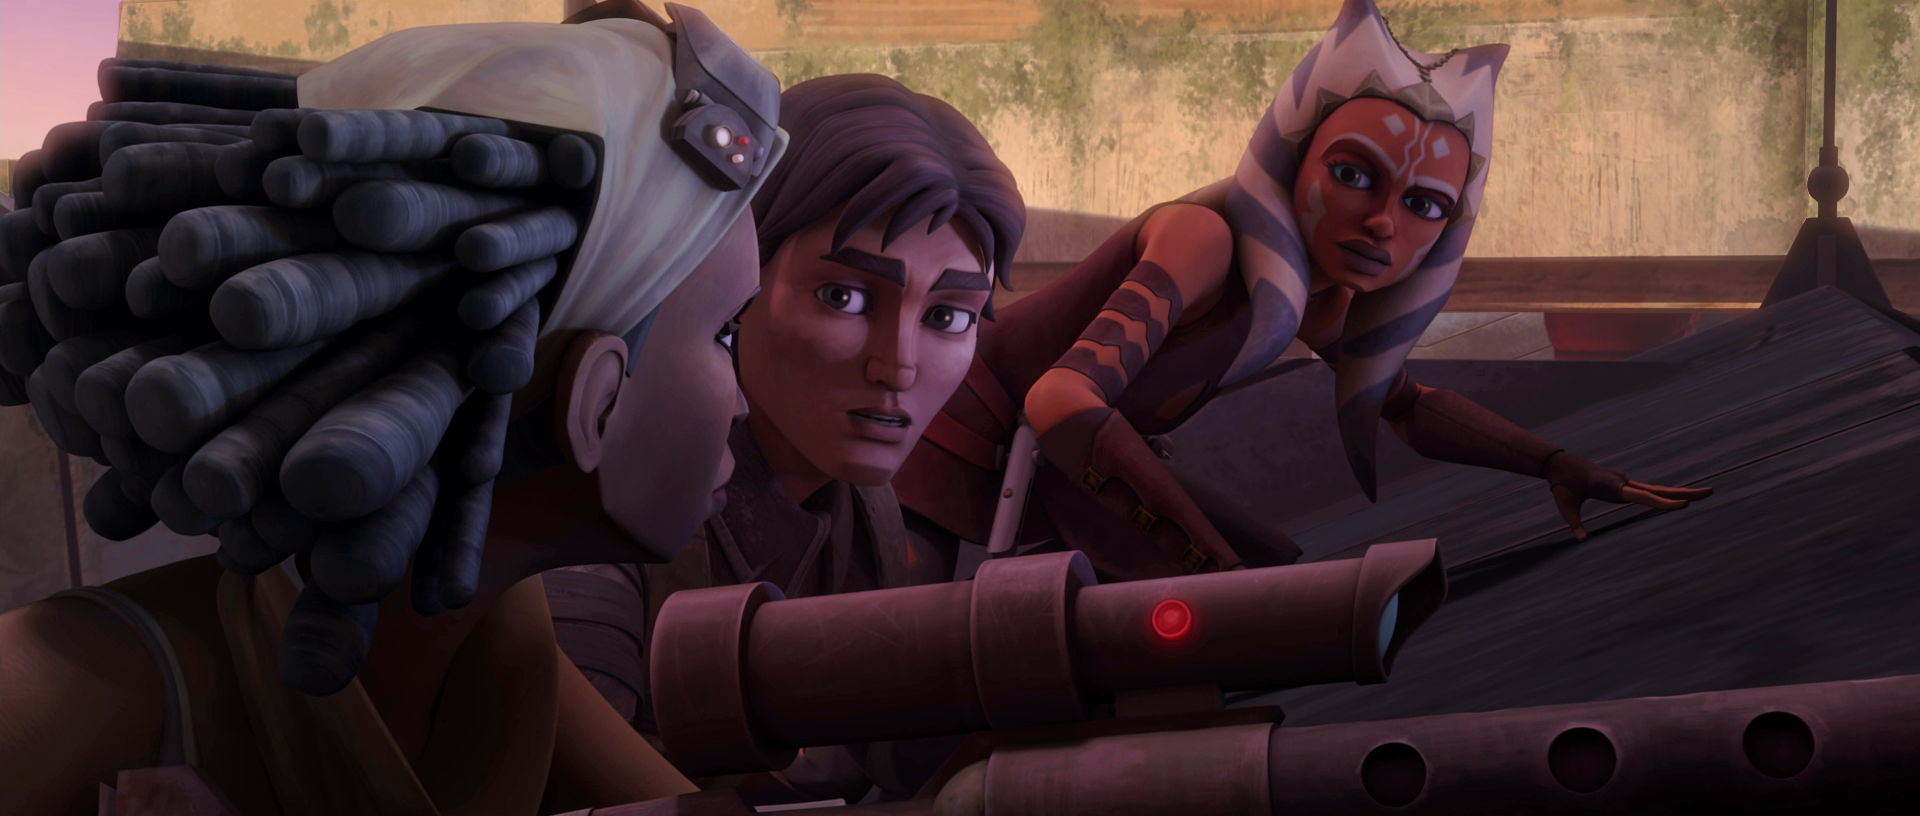
The Jedi Council instructed Tano, along with Masters Skywalker, Kenobi, and Captain Rex, to train and support the rebels of Onderon in their fight against the newly appointed King Sanjay Rash and the occupying Confederate forces. There, she encountered the rebel leaders, Steela Gerrera, her brother Saw, and former junior senator Lux Bonteri. Tano, her fellow Jedi, and Rex successfully taught the rebels how to combat the battle droids.
Following their infiltration of Iziz, Tano remained behind to serve as a liaison between the Rebels and the Jedi, while Skywalker, Kenobi, and Rex returned to Republic lines. Despite the Rebels' continued success, public sentiment remained unfavorable towards them. Hoping to improve public opinion, the Rebels, Tano, Bonteri, and the Gerreras destroyed the power generator to disrupt the battle droid patrols throughout Iziz, and after their victory, Steela was given the title of leader of the Rebels. However, the Separatist response to the growing resistance was swift. Dooku dispatched General Kalani to reinforce their control over the planet and ordered the execution of the former King, Ramsis Dendup. Saw attempted to rescue the King himself but was captured. Tano then assisted Steela in planning a breakout of the two during the public execution. They rescued King Dendup and Saw and fled the city. However, she exposed the Jedi's presence when she had to use the Force during the rescue.
Tano and the rebels regrouped in their base, which was located in the highlands outside of Iziz and awaited a Separatist response. They were soon assaulted by Kalani's forces, including the new HMP droid gunship, which inflicted heavy casualties on the rebels' side and could not be touched by the weaponry at their disposal. Tano decided to call in a favor from Skywalker, who made a deal with Hondo Ohnaka to get several rocket launchers delivered to the rebels. Ohnaka made the delivery himself, and the new weapons turned the tide of the battle. As the Rebels turned their new weaponry on the last of the gunships, Tano and Bonteri rushed to save the King from a force of commando droids. While they saved the King, a gunship shot down by Saw careened into their location, causing Steela to almost fall off of the cliff. As she hung on, Bonteri rushed to save her, but fell over himself. Tano used the Force to save Bonteri, but while she did the same for Steela, the gunship fired on her, wounding her and causing her to drop Steela to her death. In the aftermath of the battle, Tano was shaken from her role in Steela's death despite their victory. Saw was also bitter and at his sister's funeral, rejecting Tano's attempt to apologize for her failure.
The Younglings' Gathering
Tano journeyed to the sacred planet Ilum for the third time, accompanying younglings Petro, Katooni, Zatt, Ganodi, Gungi, and Byph to the icy world for The Gathering. This was a rite of passage where younglings sought their lightsaber crystals. At the Crystal Caves, Master Yoda greeted the group and shared his wisdom before they entered the cave. Tano then escorted the younglings back to the Crucible to return them to the Jedi Temple on Coruscant. During the trip, the younglings worked with Professor Huyang to begin constructing their lightsabers. Suddenly, Hondo Ohnaka's pirate gang attacked the Crucible, intending to steal the kyber crystals and sell them. As the pirates boarded the ship, Tano led the younglings and Huyang into the ship's ventilation systems to hide. Sending Zatt and Ganodi to join R2-D2 in securing the cockpit, Tano revealed her plan to eject the pirate's boarding tube by rerouting power to the Crucible's engines. However, the younglings were discovered and had to flee the ventilation system. As the younglings set their training remotes on their attackers, Tano arrived to engage the pirates. When Tano instructed Zatt to fire the engines, she was captured by Ohnaka's pirates and taken captive, leaving the younglings alone.
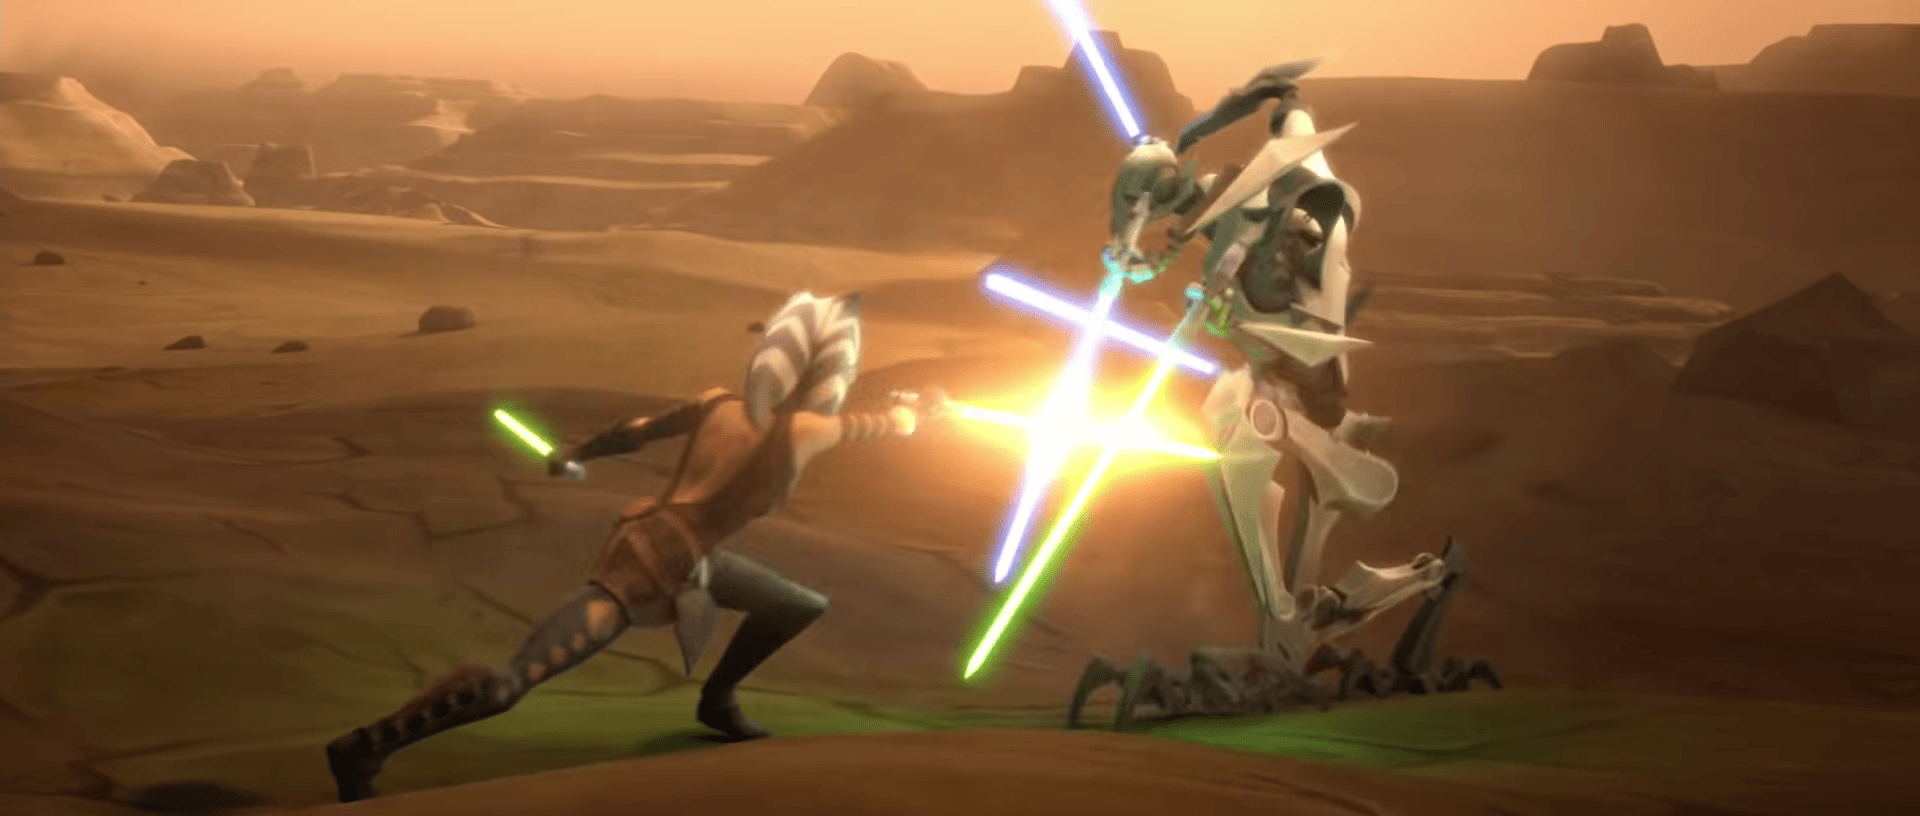
Tano was imprisoned at Hondo's complex, where the pirates mocked her. Eventually, Preigo's Traveling World of Wonder arrived, and the younglings had joined as a way to sneak in and free Tano. Katooni managed to steal Tano's lightsabers from a drunken Ohnaka, freeing Tano and allowing them to flee towards the Crucible. However, Ohnaka destroyed the Crucible with a WLO-5 speeder tank. The Jedi were recaptured, ignoring Tano's appeal to let the younglings go. However, the pirates arrived back at their base to find General Grievous and the Separatist army destroying it. Ohnaka and many of his pirates were captured, but freed by Tano and the younglings, who allied to drive the Separatists away. Eventually, the pirates begin to escape, with Ohnaka piloting the rebuilt Slave I. Tano convinced the younglings to run to Hondo's ship as she dueled Grievous. Holding her own with the Separatist General, the exhausted young Jedi eventually jumped over him and fled, leaping onto Slave I and escaping with the younglings and pirates to a Republic task force. Ahsoka considered the events surrounding her third trip to Ilum to be more of an adventure than her previous two journeys.
After her mission to Carlac with Lux Bonteri, Tano filed a report on what she learned, informing the Jedi that the alliance between the Mandalorian Death Watch and the Separatists had ended. This news prevented the Jedi Order from helping Mandalore after a crime family takeover, as it was now an internal affair. As Kenobi understood the Senate would not let them provide aid to a neutral system, he elected to go to Mandalore alone. There, he learned his old enemy, the rogue Sith Lord Maul, had been behind the takeover and was forced to watch as Duchess Satine Kryze was killed by the dark side user.
Bombing of the Jedi Temple
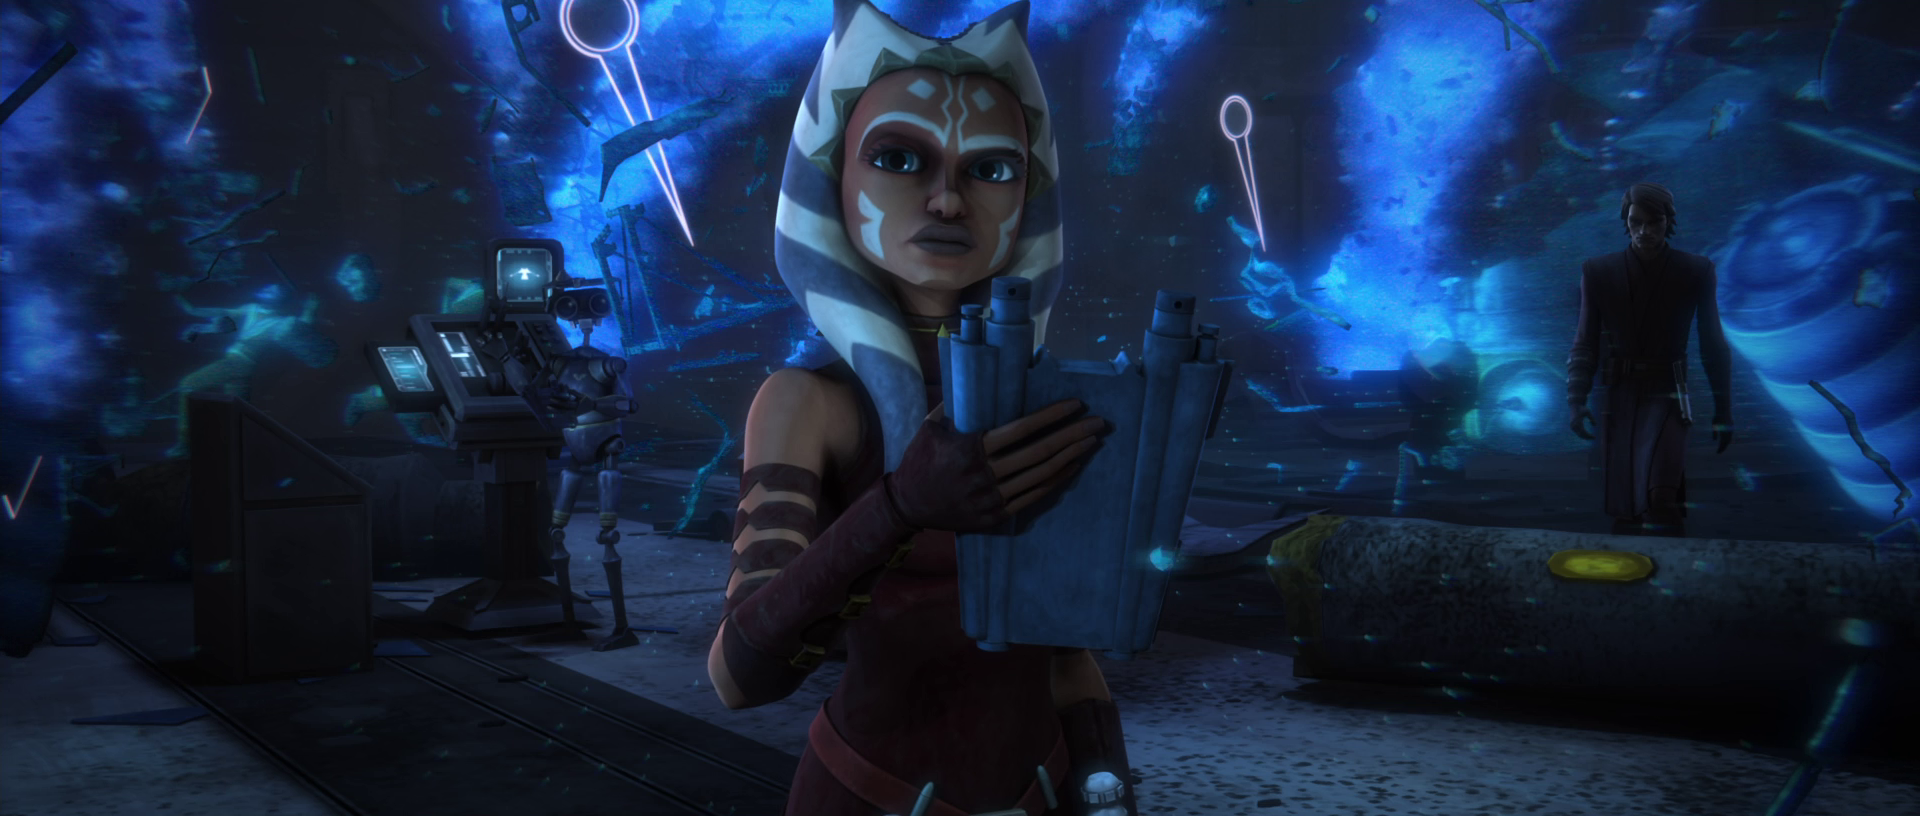
As the war neared its end, Ahsoka Tano noticed that Jedi Master Yoda became less happy as the war dragged on; the Togruta observed the Jedi Master's "deep sorrow" and his burden of seemingly knowing that an ending neared and the ensuing instatement of a new era. At the age of 16, Ahsoka Tano's friend, Barriss Offee, who believed the Jedi Order had become evil, corrupt and overly belligerent during the war, secretly orchestrated the bombing of the Jedi Temple on Coruscant. The incident resulted in the deaths of six Jedi, as well as several clones and Jedi Temple workers. Tano and Skywalker were summoned back from the defense of Cato Neimoidia to investigate the bombing, alongside crime scene analysis droid Russo-ISC. Before they began, Mace Windu told them that it was possible a Jedi was behind the attack. This deeply bothered both Tano and Skywalker. When Tano asked her master about the possibility, he told her that there will be Jedi who disappoint, but they will be far outnumbered by those who do the right thing.

Their investigation involved interviewing witnesses and examining the hangar where the bombing occurred. Their search narrowed down the suspect list to a Temple worker named Jackar Bowmani. They traveled to his apartment and discovered that his spouse, Letta Turmond was the guilty party. She had fed Bowmani nano-droids that made him a living bomb. Their findings brushed over the possibility of a Jedi culprit. Turmond was incarcerated in a prison and guarded by Shock troopers. When Tano went to interview her, Offee used a Force choke on Turmond, which killed her and framed Tano. Offee continued her work of framing her friend and caused the deaths of several clone troopers. Clones spotted the footage of Tano seemingly killing Turmond and, Clone Commander Fox arrested Tano after he and two shock troopers entered Turmond's cell.
While she was imprisoned despite being innocent, Tano was visited by Tarkin, who professed the Padawan guilty of Turmond's death. Later, she noticed a key card to the cell outside and used the Force to free herself. She believed that Skywalker had put it there because he had not been allowed to visit her. Knowing that she was innocent but not knowing how to convince the others of it, Tano decided to escape. However, after traveling only a short distance, she found multiple dead clone troopers and her lightsabers and comlink among the bodies. Little did she know, Offee had planted them to continue framing her. Clone Commander Fox noticed her and sounded the alarm, once again believing she had killed his men.
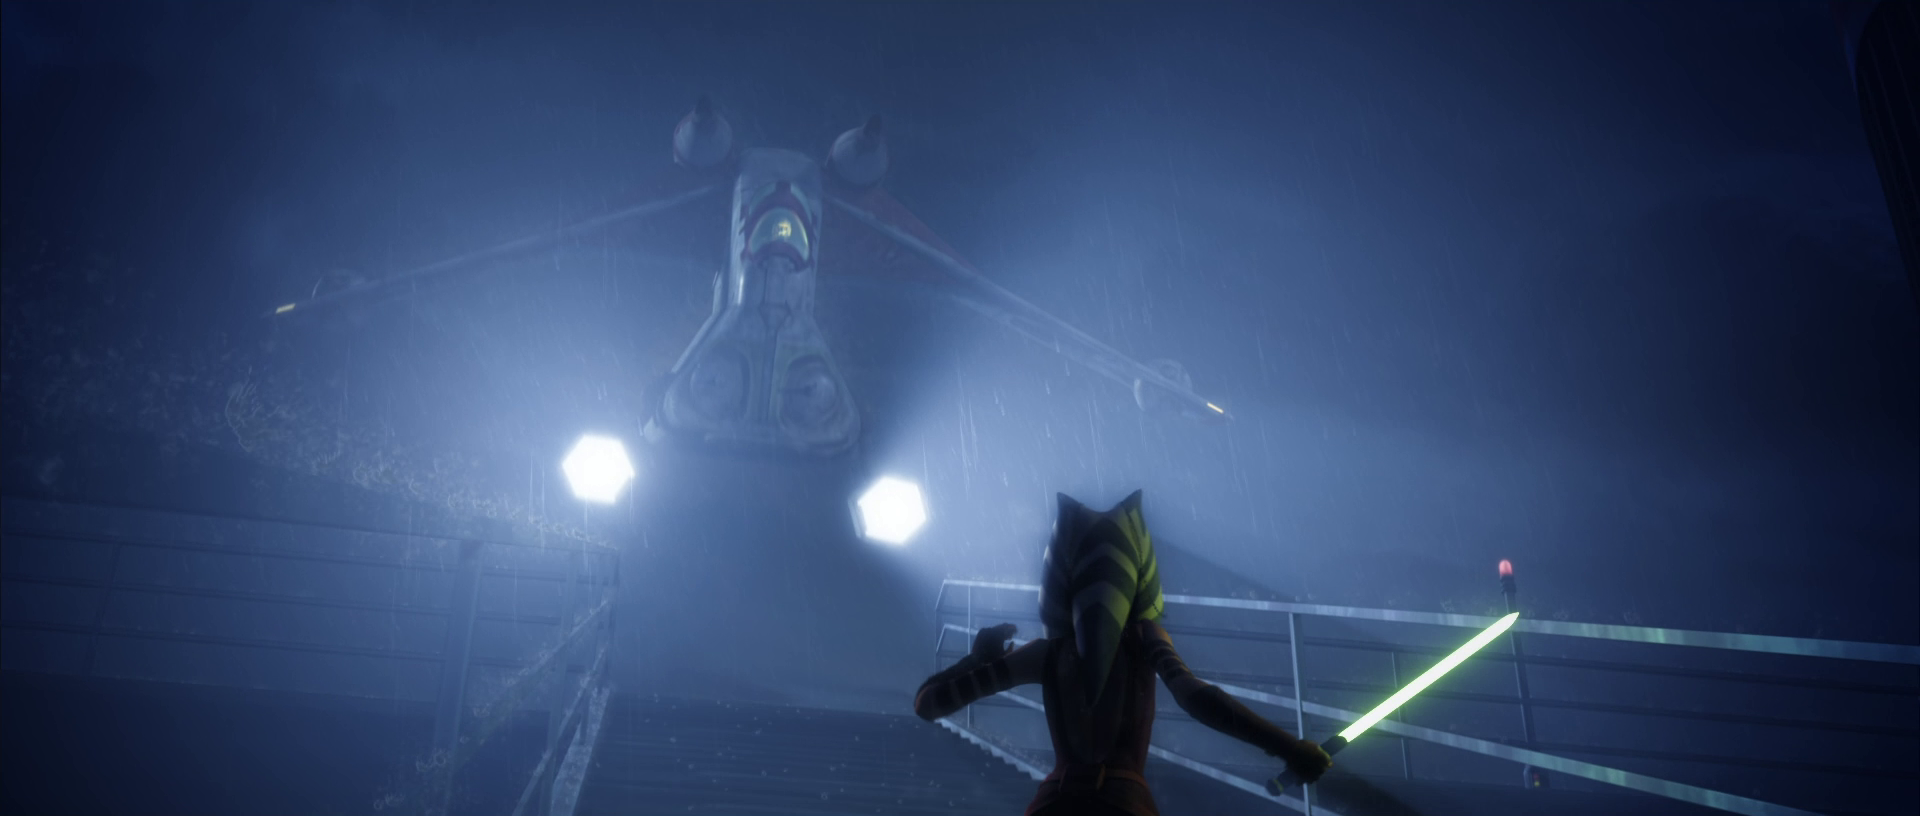
Fleeing from Republic authorities, she defended herself as clones shot stun blasts to apprehend her. Pursued by Rex, Fox, Sergeant Hound, and others, she fled into the industrial areas outside of the Republic military base. She was pursued by gunships and searchlights, and lost her shoto during the chase. Turning down into the pipes system, she temporarily hid from her pursuers until Skywalker caught up as she was preparing to jump down into the Coruscant Underworld. Skywalker told her that they could help her prove she was innocent, but Tano retorted that she was unwilling to face trial and punishment for something she did not do. Knowing that no one would believe her, Tano decided to go off on her own and jumped onto a ship that was descending into the underworld.
Tano, while struggling to remain hidden from the Coruscant underworld police and other Republic patrols searching for her, contacted her friend Offee, who promised to help her investigate to clear her name. Tano then destroyed her comlink and acquired a cloak for disguise. She boarded a train, but when she attempted to exit before she was asked for a pass by the police, she was surrounded by police forces outside. After fighting them off and fleeing, she was attacked by her longtime nemesis Asajj Ventress, who sought the bounty on her head. However, Tano convinced Ventress to ally with her, offering a pardon from the Galactic Senate in return for her help.

Tano used a public holographic system to contact Offee, the only Jedi whom she still saw as an ally, unaware that she was responsible for her situation. Offee informed her of a warehouse she said was where Turmond had obtained the nano-droids. Tano convinced Ventress to come with her to the location, but she was spotted by Commander Wolffe and a group of shock troopers. Tano attempted to negotiate with them, but the clones attempted to detain her and she was forced to combat them, leaving most of the group unconscious before continuing towards the warehouse. Ventress departed at that point, reminding her to fulfill her end of the deal. Inside, Tano found the warehouse abandoned before being attacked by a figure in Ventress' bounty hunter gear. Unaware she was actually fighting her friend Offee, whom she thought was her ally, she believed the attacker was Ventress. After a short duel, Tano was knocked to the ground next to a crate of nano-droids. When she rose, she was stunned by Commander Wolffe before she could explain herself.
The Jedi Council initially wanted to handle the situation internally, but Admiral Wilhuff Tarkin convinced them that a Republic military trial was necessary. Despite Kenobi's objections, the Council agreed to Tarkin's demands, expelling Tano from the Jedi Order and handing her over to the Republic for a military trial. Tarkin prosecuted Tano, while Padmé Amidala defended her. As the trial commenced, Tano remained confident that her master would resolve the situation and prove her innocence. However, she was shocked when Skywalker presented Offee, who confessed to her crimes, citing the Jedi Order's loss of direction as her motive. Tano was acquitted.
Charting a new course
Leaving the Jedi behind
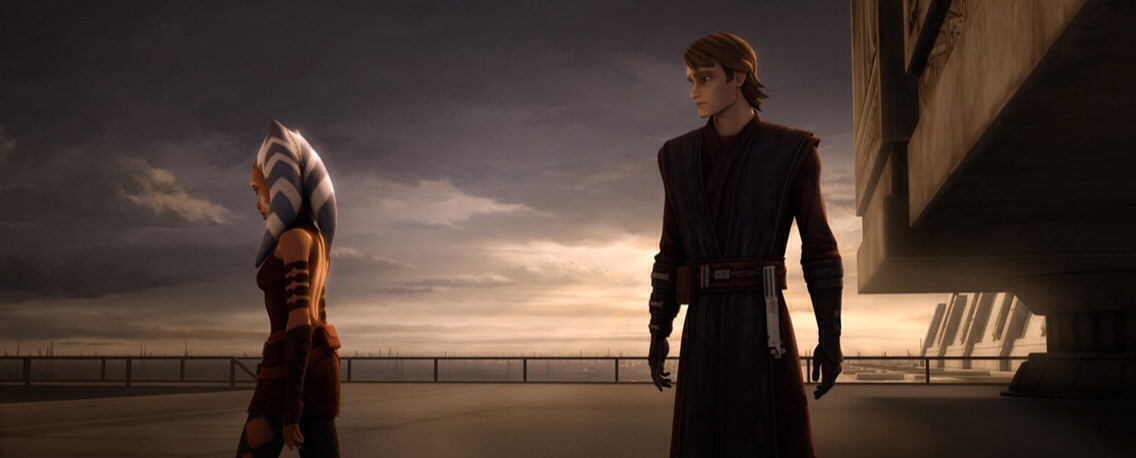
After her trial, the Jedi Council issued a personal pardon to Tano. Plo Koon apologized on behalf of the Council, acknowledging their error in questioning her loyalty. They stated that the Force works in mysterious ways and considered Tano's ordeal in hindsight as being her great trial, making her a greater Jedi and proving herself worthy of the title of Jedi Knight. However, the events surrounding her expulsion and trial had severely shaken Tano's faith in the Jedi. To everyone's surprise, she declined the Jedi Council and Skywalker's invitation to rejoin the Order, choosing instead to seek a new purpose for herself.
Skywalker pursued her, while Kenobi moved as well, Koon held the Jedi Master back. Upon catching up with Tano, Skywalker questioned her decision to leave and pleaded with her to stay. Tano explained that the Council's loss of faith in her had eroded her own self-confidence. Skywalker reminded her that he had believed in her and fought to prove her innocence, but Tano insisted that the situation was not about him. She felt she could no longer remain and needed to forge her own path, independent of the Jedi Order. Skywalker admitted that he understood the desire to leave the Jedi, but Tano simply responded that she knew, and as Skywalker looked at her, his former Padawan turned her back and walked away from the Jedi Order.
Tano's departure profoundly affected those who knew her. During a quest to uncover the secrets of immortality, Yoda experienced visions of the Great Jedi Purge. In one such vision, he witnessed Tano dying in the halls of the Jedi Temple, with her spirit questioning whether she could become one with the Force after being expelled from the Jedi Order. This vision reflected Yoda's guilt over his role in her departure from the Order.
Her former mentor Skywalker was particularly affected by her departure and felt even more alone in having to fulfill the expectations of being the prophesied Chosen One. Her departure also intensified Skywalker's frustration with the Council, as he felt they had betrayed her and left her with no choice by turning their backs on her during her trial. Following her departure, Skywalker continued to lament his Padawan's decision, and wondered if Amidala had the same thought. During Skywalker and Amidala's mission on the planet Mokivj, the Senator cited Tano's maneuver in the Battle of Ryloth, the Marg Sabl, to the Chiss Commander Thrawn, and explained the origins of the name to him.
When Skywalker and Kenobi undertook a mission to Utapau, where they discovered a secret arms deal between the Confederacy and Sugi weapons dealers, Skywalker briefly forgot Tano had left the Jedi and suggested contacting her, but he cut himself off after remembering her absence and tried to avoid the subject. Kenobi questioned if he wanted to discuss what had happened, and, after they had set up camp, Skywalker admitted he missed Tano and still could not understand how she left. Skywalker still felt that she was a Jedi and belonged with them. Kenobi disagreed with Skywalker's opinion, asserting that it had been Tano's decision to leave, but Skywalker believed that the Jedi Council had abandoned Tano, and therefore left her with no alternative to leaving the Order. Kenobi also felt mistakes had been made, but he still noted that leaving had been her choice and recalled that Tano had allowed her emotions to influence her judgment, which was not the Jedi way. When Kenobi told Skywalker to not take responsibility for her decision, the Jedi Knight asked how his former master would feel if he became a major disappointment, to which Kenobi admitted he would not feel very well about it.
Encountering the Martez Sisters
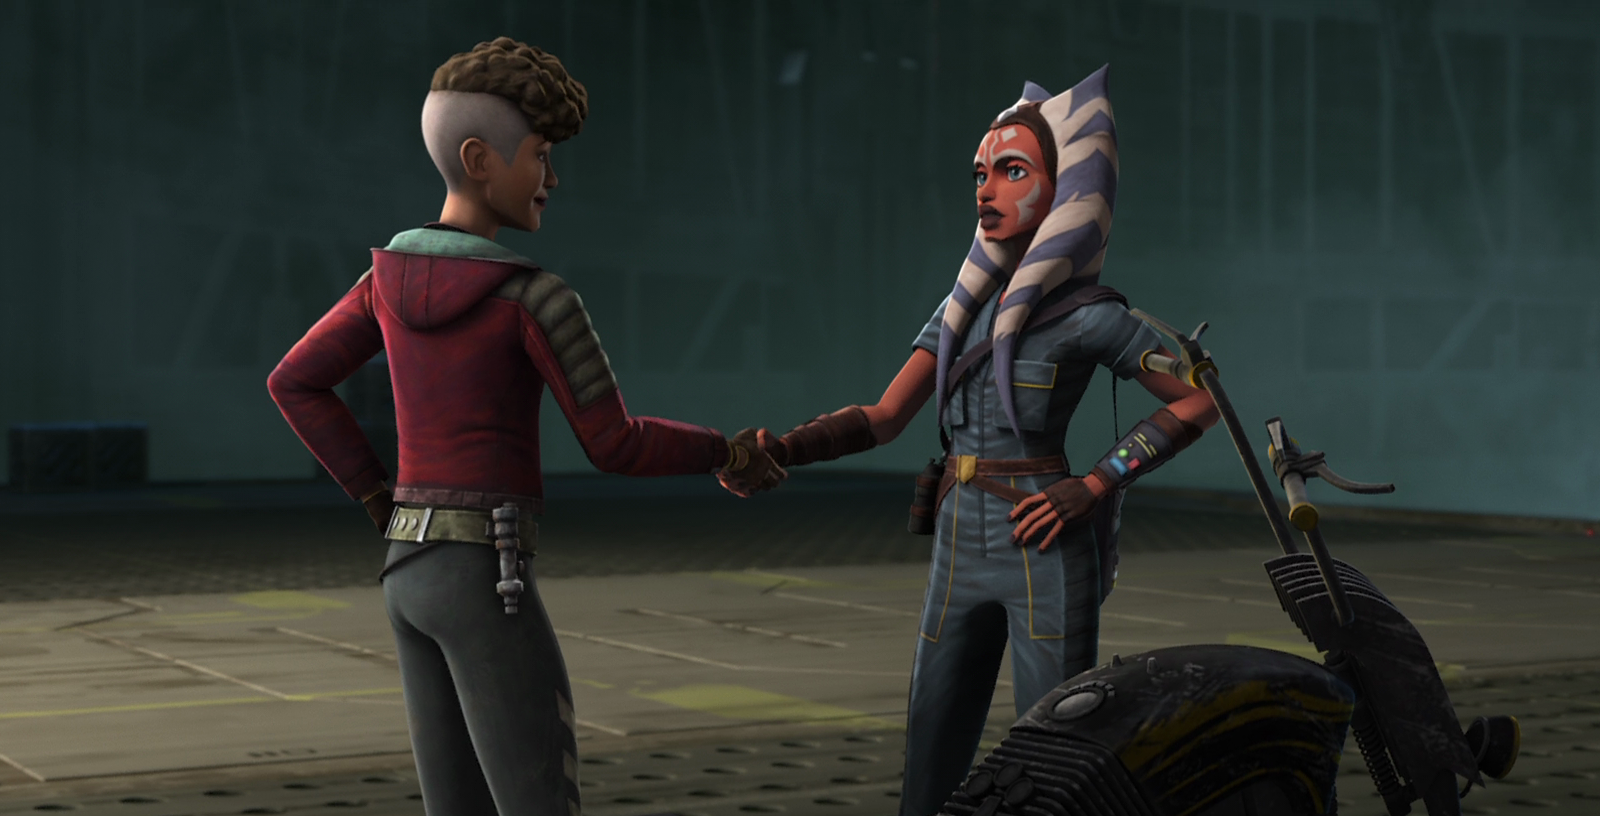
Shortly after her departure from the Jedi Order and nearing the conclusion of the Clone Wars, Ahsoka Tano was navigating Coruscant's Industrial District on a Joben T-85 speeder bike she had acquired, when the vehicle began to fail. Despite successfully averting a collision with a Gozanti-class cruiser, she was compelled to crash land on the platform of a repair shop situated on Level 1313.
This incident drew the attention of Trace Martez, the shop's human female mechanic. She approached Ahsoka as she gathered the remnants of her speeder. Following a brief exchange, both women introduced themselves, with Trace asserting ownership of one of the level's premier repair shops. Although she proposed repairing the speeder for a fee, Ahsoka indicated her inability to pay and expressed her intention to repair it herself using the available tools. After considerable negotiation, Trace eventually consented to let Ahsoka repair her bike without charge. Upon opening the shop's doors, Ahsoka noticed Trace's Nebula-class freighter, which she was modifying with the aspiration of eventually departing Coruscant. After directing Ahsoka to a workshop, Ahsoka inquired about the mechanic's motivation for helping her, to which Trace responded that it felt like the right action. Despite offering Ahsoka the option to leave if she desired, the former Jedi chose to remain.
After Ahsoka commenced repairing her speeder bike, Trace extended an offer to assist the former Padawan, but Ahsoka declined any assistance that would incur a cost. While the mechanic was irritated by this, pointing out that everything on 1313 came at a price, Ahsoka inquired if she had any sparkers for purchase. However, Trace's only sparkers were already in use on her freighter, and no stock was available. Expressing her dissatisfaction and emphasizing her need to leave, she remained silent after Trace questioned if she was evading something. Despite Trace calling after her, assuring her she could stay as long as she could pay, Ahsoka proceeded to the platform and gazed up at the Coruscant sky.
Subsequently, Ahsoka heard the bike operating within the shop and re-entered, discovering that Trace had assisted with it without charge. She vaguely alluded to being from Coruscant's upper echelons, omitting the fact that she had been a Jedi, but defended her former order when Trace accused them of instigating the Clone Wars. Trace, who felt the Jedi had forgotten ordinary individuals like herself, conceded that the Jedi were not as she had envisioned based on the stories she had heard, revealing her desire to escape the war and the Jedi aboard her starship with her older sister, Rafa. The mechanic's perspective on the Jedi influenced Ahsoka to continue concealing her past.
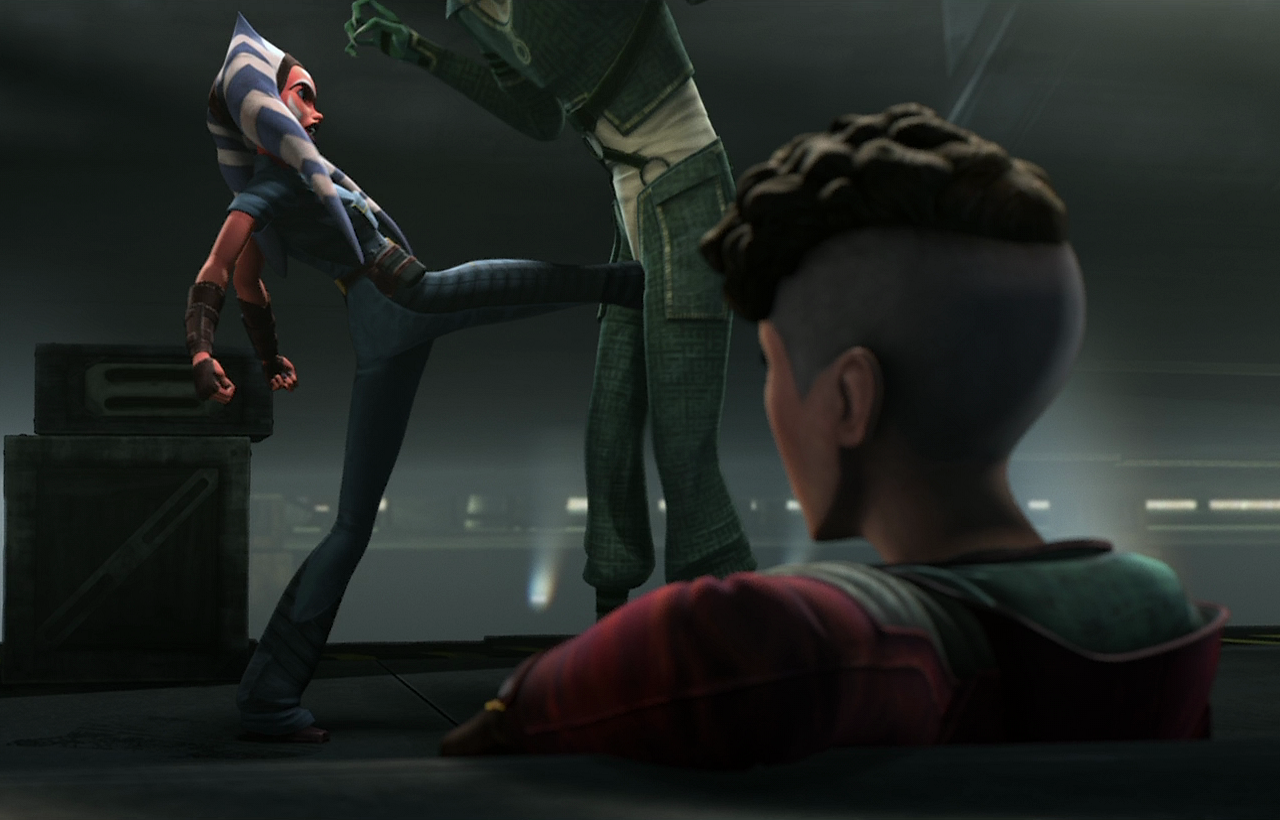
Their conversation was abruptly interrupted when Pintu Son-El, a low-ranking gangster, and his associates entered, seeking money from Rafa that she had promised him. Trace initially instructed Ahsoka to stay back and attempted to fend off Son-El's enforcers, but she was eventually overwhelmed and requested Ahsoka's assistance. Drawing upon her Jedi training, Ahsoka swiftly dispatched the two enforcers, although Son-El declared the situation unresolved as he fled. Having witnessed Ahsoka's capabilities, Trace inquired about her fighting background, to which Ahsoka fabricated that it was her "older brother." The two then proceeded to Rafa's Laundry to inform her about Son-El, where she mentioned an upcoming job that would improve their circumstances.
Rafa also inquired about Ahsoka's identity, and, after being introduced, Trace recounted Ahsoka's arrival on the platform. Following a brief discussion between Rafa and the Twi'lek Lokann, whose "business partner" had arranged a deal with Rafa to construct three droids, Ahsoka and Trace collaborated on the three binary loadlifters, with Ahsoka reminding Trace to install the restraining bolt onto the droid. After Ahsoka activated the droid she had been working on, she and Trace engaged in a conversation about human behavior, with Trace expressing her belief that some individuals were inherently good, others were inherently bad, and some were "cross-wired" like the loadlifter she had been constructing. However, through this conversation, Ahsoka realized they had been constructing Type II loadlifter droids and, after her Type II attacked and she shut it down, explained that the "loadlifters" were actually fraudulent, being repurposed demolition droids capable of violence. Unfortunately for the two, Trace had neglected to install a restraining bolt on her droid, enabling it to escape from the shop.
After passing Rafa on the street, Ahsoka and Trace pursued the droid before it leaped to a lower street to wreak havoc. As suggested by Trace, Ahsoka returned to Rafa's laundromat to locate the unit's tracking device while Trace sought a speeder. Upon arriving there, Rafa questioned the whereabouts of the loadlifter and Trace before Ahsoka boarded the speeder Trace had located. The two located the droid and pursued it, intending to seize the droid with the speeder's clamps and utilize the blue off switch on the droid's faceplate. However, after seizing the Type II, it began to ascend, prompting Trace to release the droid from the clamps and jump onto it herself. Although she successfully shut down the unit, the now lifeless body began to fall with Trace still clinging to it, compelling Ahsoka to seize hold of it with the speeder's clamps. She swiftly attached the vehicle's tow cable to nearby pipes to pull them up, but the droid and Trace proved too heavy. Before Trace could plummet to her death, Ahsoka subtly employed the Force to aid in pulling the vehicle up, with only a Twi'lek child observing her actions. Relieved to see Trace safe, the two returned to the laundromat, where Rafa refused to dismantle the loadlifters despite Ahsoka's objections, asserting that any harm they caused was not her concern.
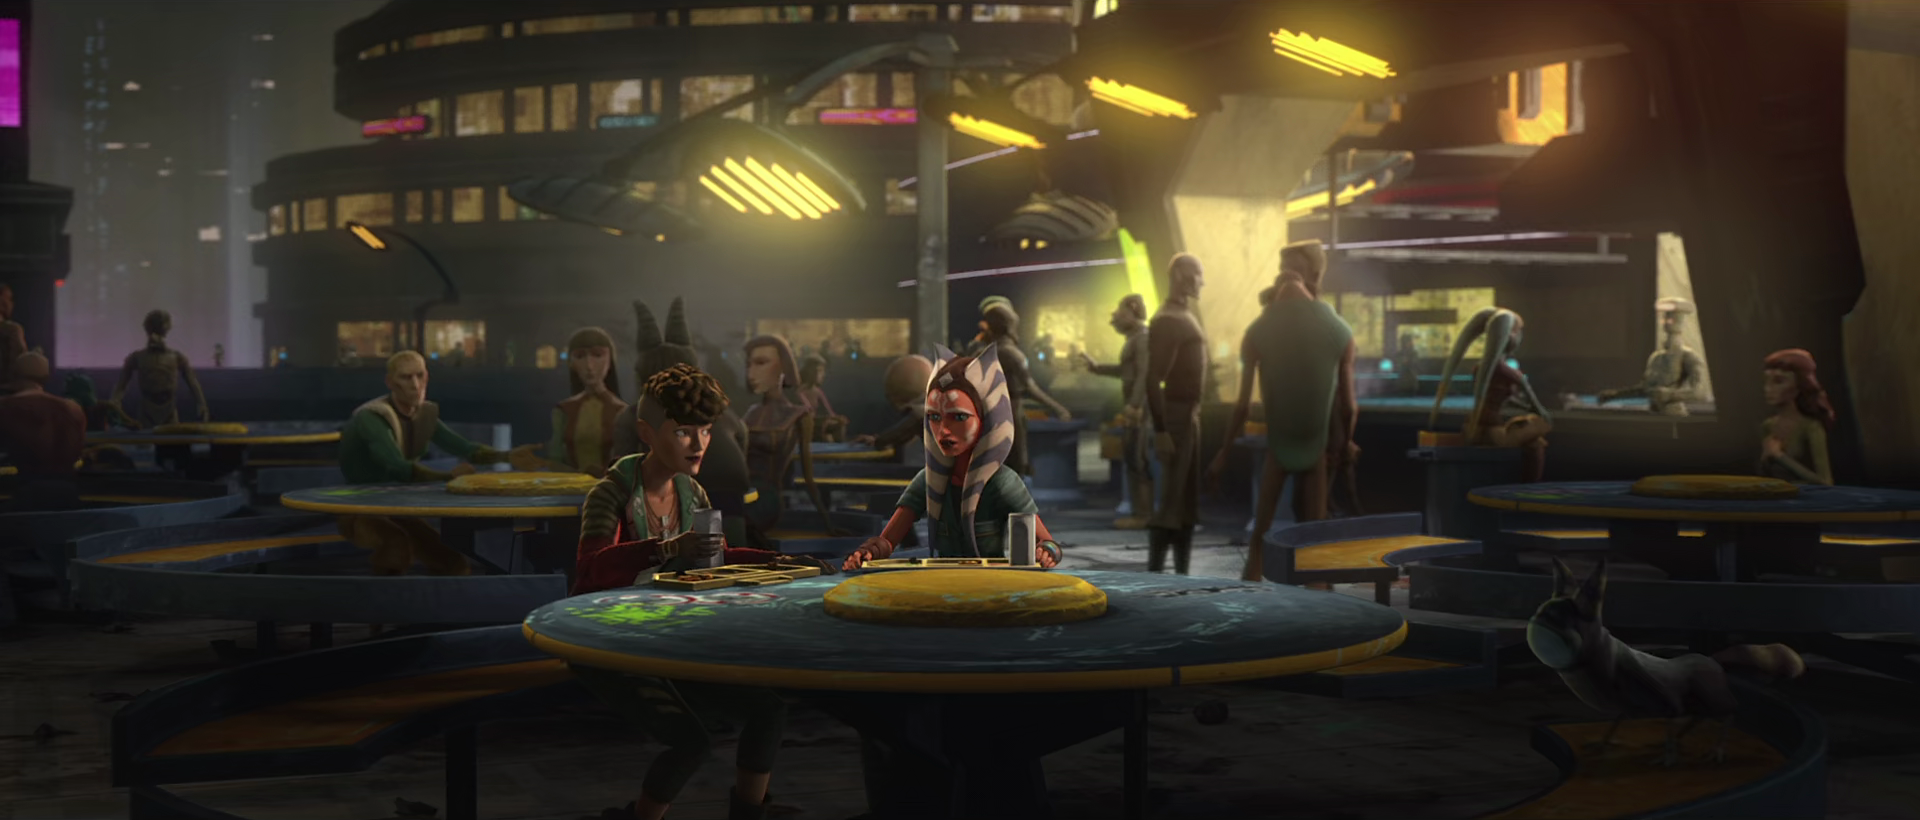
Dismissing Ahsoka's argument by stating she was new, Rafa assured Trace that she would do the right thing. Ahsoka and Trace proceeded to the wharf, where Ahsoka questioned if Trace had any influence in decision-making with Rafa. Trace responded that Rafa was attempting to improve their circumstances, although Ahsoka questioned the cost. Rafa then arrived to meet with them, revealing she had charged Lokann double the price, defending herself by stating they were not her property, someone else would have constructed them if they hadn't, and that it would have caused trouble for her and Trace. Although Trace was visibly disappointed, Rafa stated the credits had been used to pay off Son-El and provided money for new tools, hoping that would make it worth it. After exchanging a glance with Ahsoka, Rafa departed. Ahsoka also began to leave to complete her speeder, and Trace thanked her for saving her life before departing with the former Padawan.
Escape from Oba Diah
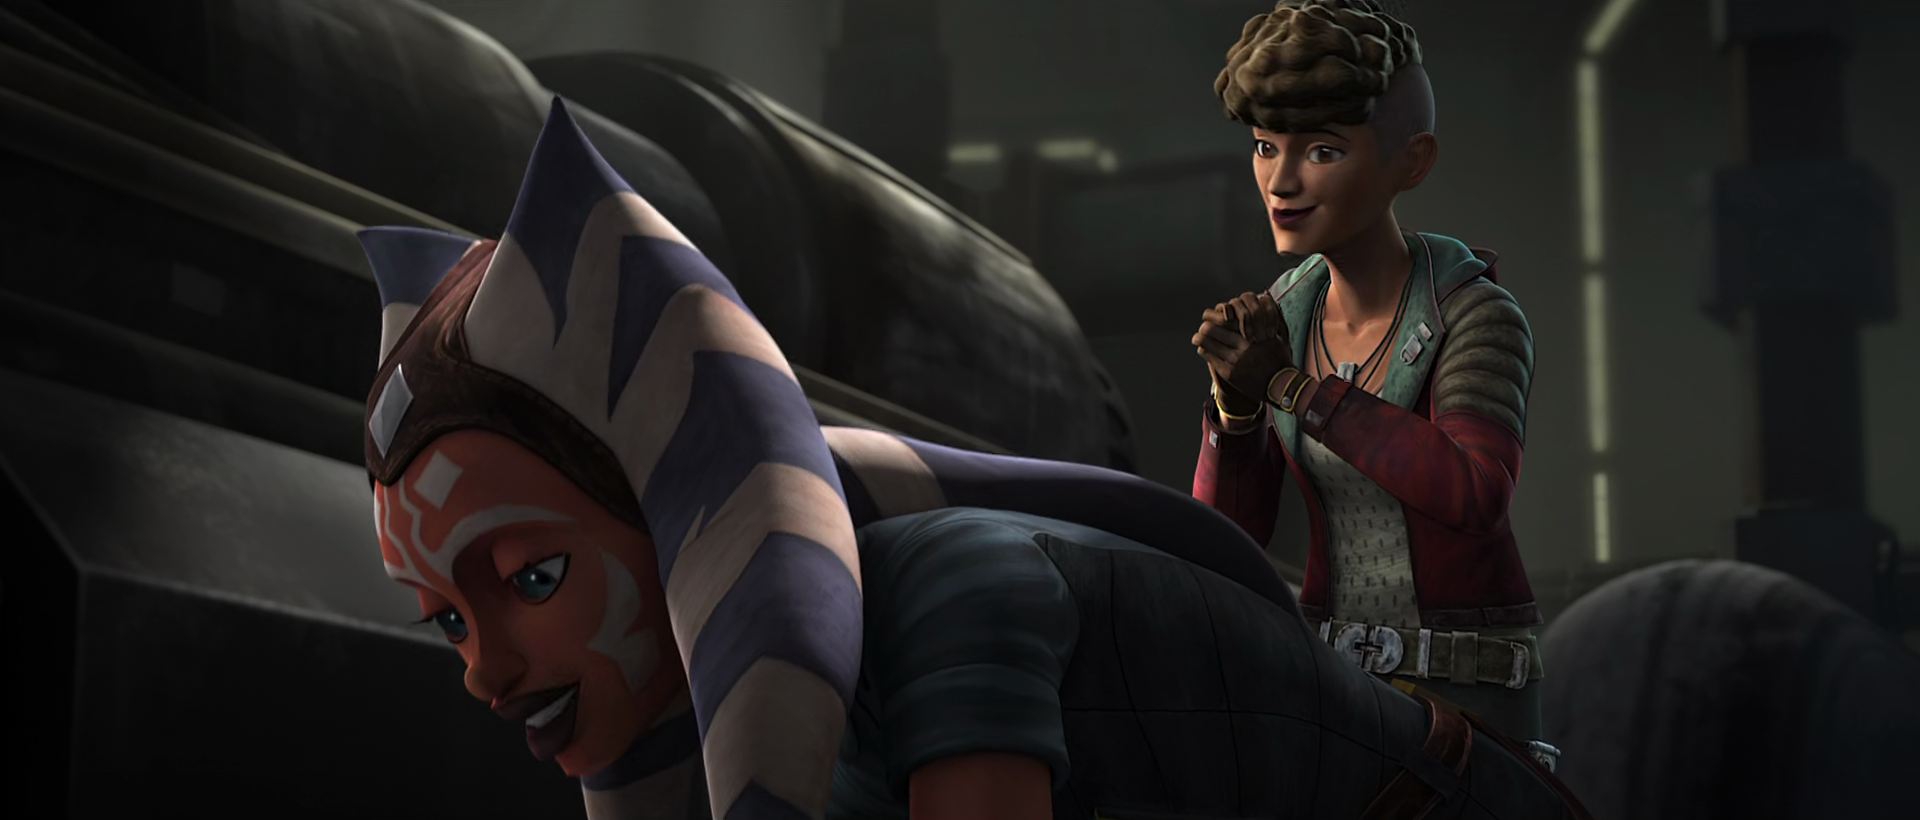
While both were working on Trace's freighter in the repair shop, Ahsoka continued to conceal her past from the Martez sisters by claiming she had attended "Skywalker Academy." Although Trace had never heard of the fictitious school, she believed it to be real, having never genuinely heard of any academy. When Ahsoka inquired why she would never have attended one of the schools, Trace noted that there were none where they resided and that she would not be able to afford it. Trace then stated that Rafa and she inherited the hangar the repair shop was in, claiming their parents had "split," and that Rafa had won her store gambling. However, Trace had constructed her freighter herself, informing Ahsoka that its name was the Silver Angel. Although Ahsoka chuckled at the name, she told Trace she could name her starship whatever she desired, and the secret Force-sensitive returned to work on her speeder bike, which Trace had dubbed "Trash." After discussing where she would go once the speeder was repaired, Ahsoka accepted Trace's suggestion to stay for a short time longer, provided Rafa did not object. At that moment, Rafa entered the shop and was informed that Ahsoka would be staying. After inquiring about Ahsoka's skills, Ahsoka stated she only possessed useful ones.
Rafa entered to inform her sister that a crew and starship she had hired had withdrawn from a job. Although Trace was annoyed that her sibling had hired a pilot other than herself, Rafa now required her sister and her freighter. Although Ahsoka inquired about the nature of the job, Rafa refused to answer until they had departed, and Trace accepted the task. Rafa reminded her sister that they could not rely on anyone's assistance, observing that Trace was beginning to trust Ahsoka. After her sister had entered the Silver Angel, Rafa confronted Ahsoka and inquired about her intentions. Ahsoka stated she did not have, as Rafa put it, an "angle," unless perhaps to keep the two siblings out of trouble. Rafa and her then entered the ship, but not without the older sibling implying Ahsoka could be the trouble Trace needed to avoid. Now with all three inside the cockpit, the Silver Angel lifted off from the underworld portal, but Trace flew the ship into a restricted military lane. The Angel was soon hailed by a Star Destroyer that had both Skywalker and Yularen, the same admiral Ahsoka had served with, aboard. While the admiral was prepared to dispatch a detachment aboard to arrest the Angel's crew, Skywalker and Ahsoka sensed each other, so the Jedi Knight decided to allow her and the Silver Angel to continue on their way.
Now in open space, Ahsoka noted that Rafa had yet to inform her and Trace of their destination. In response, Rafa only told her sister about their destination before they jumped to lightspeed. During their journey, however, Trace had neglected to disengage the air brakes, causing the Angel to rumble, and Trace noted she had never been to hyperspace. Ahsoka then learned that her friend had only ever piloted smaller vehicles intended for use on planets, allowing Rafa to quietly explain why she had desired a different pilot. Once Ahsoka pointed out the rumbling, Trace remembered to disable the air brakes, and the three finally arrived at the Akkadese Maelstrom, a massive cluster of debris and gas that surrounded their destination, the Outer Rim world of Kessel. Realizing they were heading to a planet notorious for its corruption, Ahsoka asked Rafa about their job. Rafa stated they were picking up medicine and attempted to alleviate Ahsoka's concerns when they reached the lush section of the planet. The three young women arrived at King Yaruba's palace, where they were greeted by his majordomo, Kinash Lock. Ahsoka and the sisters were brought to a banquet, but, after learning the medicine was three containers of unrefined spice, the Force-sensitive noted that the substance could be used in illegal products. Lock denied her allegation, claiming their spice was used for medicine during the current time of war and that the Yaruba Family had always supported spreading health and joy.

As they departed the palace, Ahsoka attempted to argue their mission was dangerous, as pirates frequently attacked Kessel transport craft, but Rafa believed the Angel was too small for any raiders to recognize their cargo. Ahsoka refused to concede, noting that pirates could deduce their cargo because they were departing Kessel, and, to conceal her past, claimed she knew this from stories. The Martez sister simply responded that it meant she should have faith in Trace's piloting skills and boarded their freighter. Before Trace could join her sibling, Ahsoka stopped her, telling her that she believed Rafa had wanted a different pilot because of the possible danger, but the pilot felt her sister had faith in her abilities. After Ahsoka learned this was likely Rafa's first time running spice, she asked Trace how her sister could know what they were facing, but the pilot simply felt there was a first time for every task. With this, the two boarded the Angel, and the three young women traveled to the mining zone of Kessel, which more closely resembled the version of the planet Ahsoka was familiar with. As they neared a landing platform, the three looked down to see what Trace initially thought were droids Yaruba had purchased, but Ahsoka quickly realized the laborers toiling below them were slaves. Rafa disagreed, believing the Republic would not allow an operation as large as Kessel's to remain active, but Ahsoka quietly noted that was not what the government would do.
Ahsoka joined the Martez sisters on the loading platform before heading back on the Angel to ensure the spice bins were secured. Before Trace could join her friend, Rafa confided in her sister that she did not know how to feel about their new partner, reminding her younger sister that Ahsoka was not family. Though annoyed by her sister's thoughts on Ahsoka, Trace stated she would keep an eye on her friend before both went aboard. When the Angel jumped to hyperspace, however, Ahsoka learned they were to deliver the spice to the Pyke crime lord Marg Krim on Oba Diah. Though Rafa questioned how the supposed mechanic knew about the Pyke Syndicate, Ahsoka avoided the question and asserted that they could not make a deal with gangsters, warning Trace that the Pykes would take everything from her and kill her. As the pilot panicked at the thought of losing her starship, Ahsoka, who felt they should take the spice to somewhere that would use it for medicine, debated what to do with their shipment with Rafa, who stated she needed the money to pay debts they owed on Coruscant, though Ahsoka believed these debts had nothing to do with Trace. Determined to keep the Silver Angel and make sure neither Ahsoka nor Rafa got their way, Trace suddenly dumped the spice containers into hyperspace, to the surprise of both her sister and the former Padawan, who had viewed her debate as an ethical discussion and had yet to figure out a way to settle their deal.
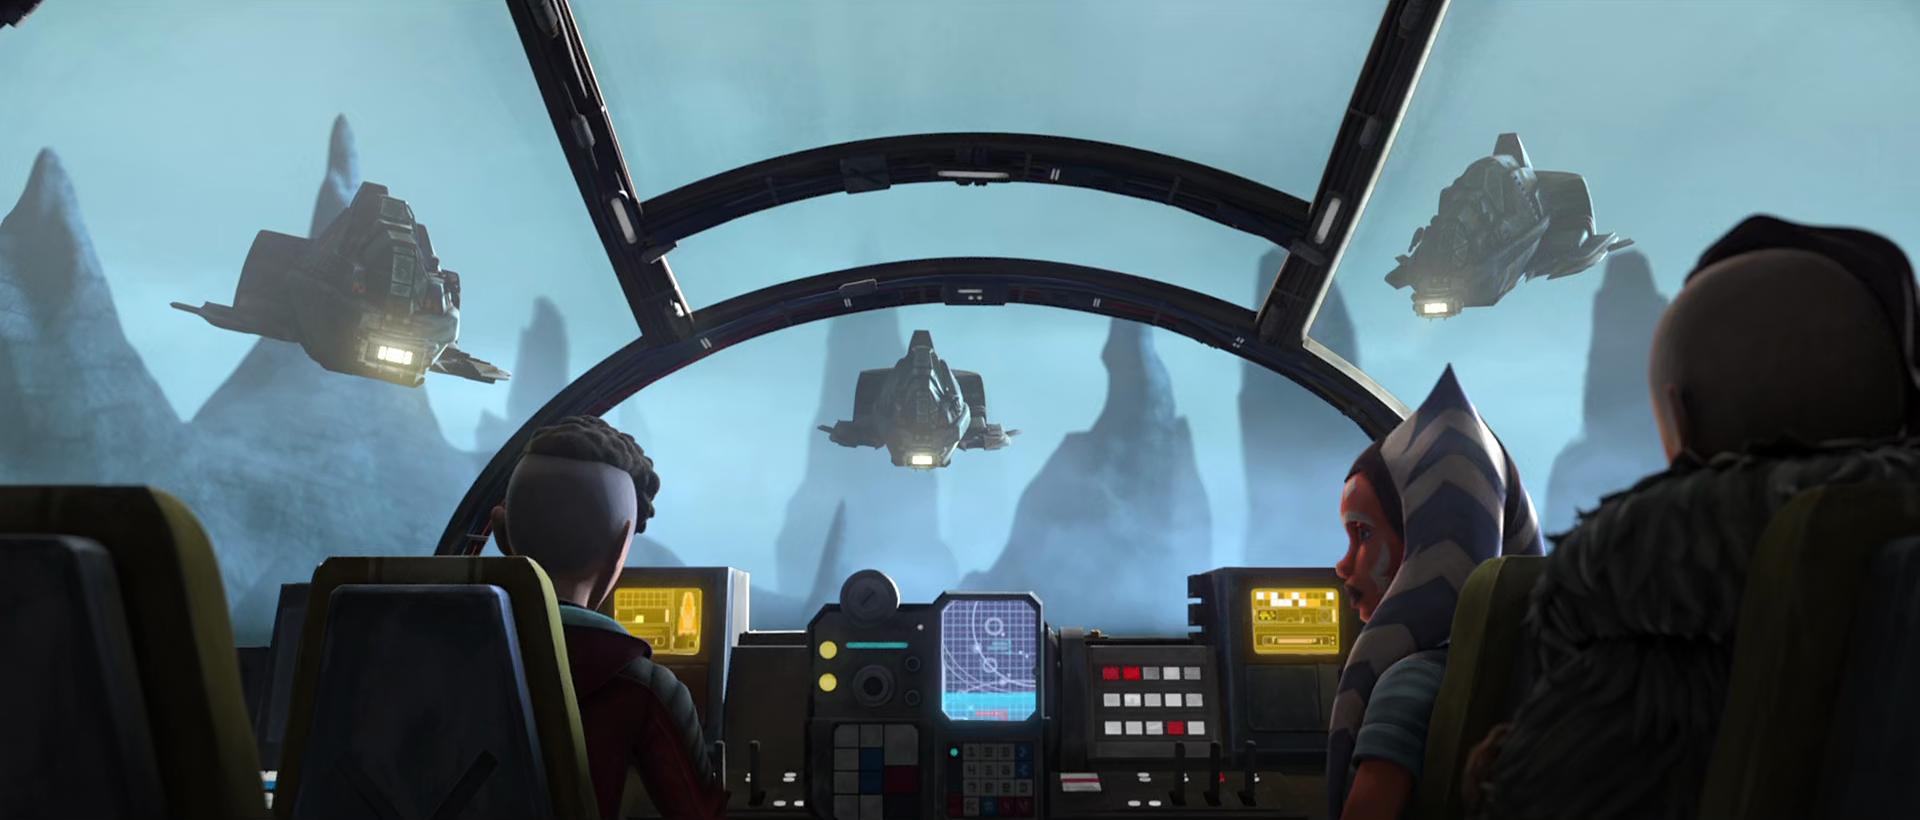
Rafa scolded Ahsoka and Trace for their similarities and suggested paying off the Pykes by selling the Angel, but the former Padawan interrupted the sisters' argument, reminding them that she had said she'd not figured out a plan "yet." Trace quickly responded by asking if she had one now, which Ahsoka stated they would find out once they acted. She told the sisters to pretend to drop the spice by giving the Pykes empty crates and that they would then flee the planet. Though both Trace and Rafa disliked her idea, neither had a better plan, and Ahsoka also knew she had the Force at her disposal. When the trio arrived on Oba Diah, they were greeted by Krim, who had been waiting for them, his majordomo Fife, and a force of armed Pyke guards. The crime lord withheld Rafa's payment, intending to verify they had brought him the spice, but Ahsoka used a mind trick on the Pyke and his entourage, persuading Krim to give Rafa her credits and let them leave. Unfortunately for them, Fife was not as weak-minded as his peers and grew suspicious. As Ahsoka prepared the Angel's engines, Rafa avoided giving Fife the bin password by claiming they had already transmitted it. The majordomo was not convinced and, after blasting open the case, saw that the three had tricked them. As the trio tried to escape on the Angel, they were caught in a tractor beam and surrounded by Pyke forces. Seeing that they were trapped, Rafa said she would blame everything on Ahsoka, although Trace noted all three of them had played a part in their current situation.
Ahsoka and the sisters were imprisoned deep within the Pyke Palace for their actions, where Ahsoka and Rafa continued to debate what they should have done. Rafa joked that Ahsoka's morals made her sound like a Jedi, making her question what they would do if she was a member of the Order. Though Trace told them not to jest about the subject, Rafa realized her sister had never told Ahsoka why they avoided the Jedi and other "Topsiders." Unwilling to have the secret Force-sensitive argue about morality, she recounted that, during Cad Bane's rescue of Ziro the Hutt several years earlier, the bounty hunter shot the engines of a cargo transport rising through an underworld portal to distract a team of pursuing Jedi. Trying to stop the starship from crashing into a populated landing platform, the Jedi instead steered it into the portal wall, the other side of which contained the Martez home. Their mother and father managed to get the siblings out of harm's way, but they were caught and killed in the crash.
After failing to capture Bane, Ziro, and the other criminals, the Jedi returned, and Rafa revealed one of the Force-sensitives, Ahsoka's old acquaintance Luminara Unduli, came over to her, telling Rafa that she had needed to make a choice about the transport. She then stated that the Force would be with them, but the religious belief meant nothing to Martez sister. The Jedi then left, leaving the two alone to find a way to survive. Rafa recounted that she had spent every day since trying to build a new life for herself and Trace, believing they had been fine until her sister let Ahsoka come with them.
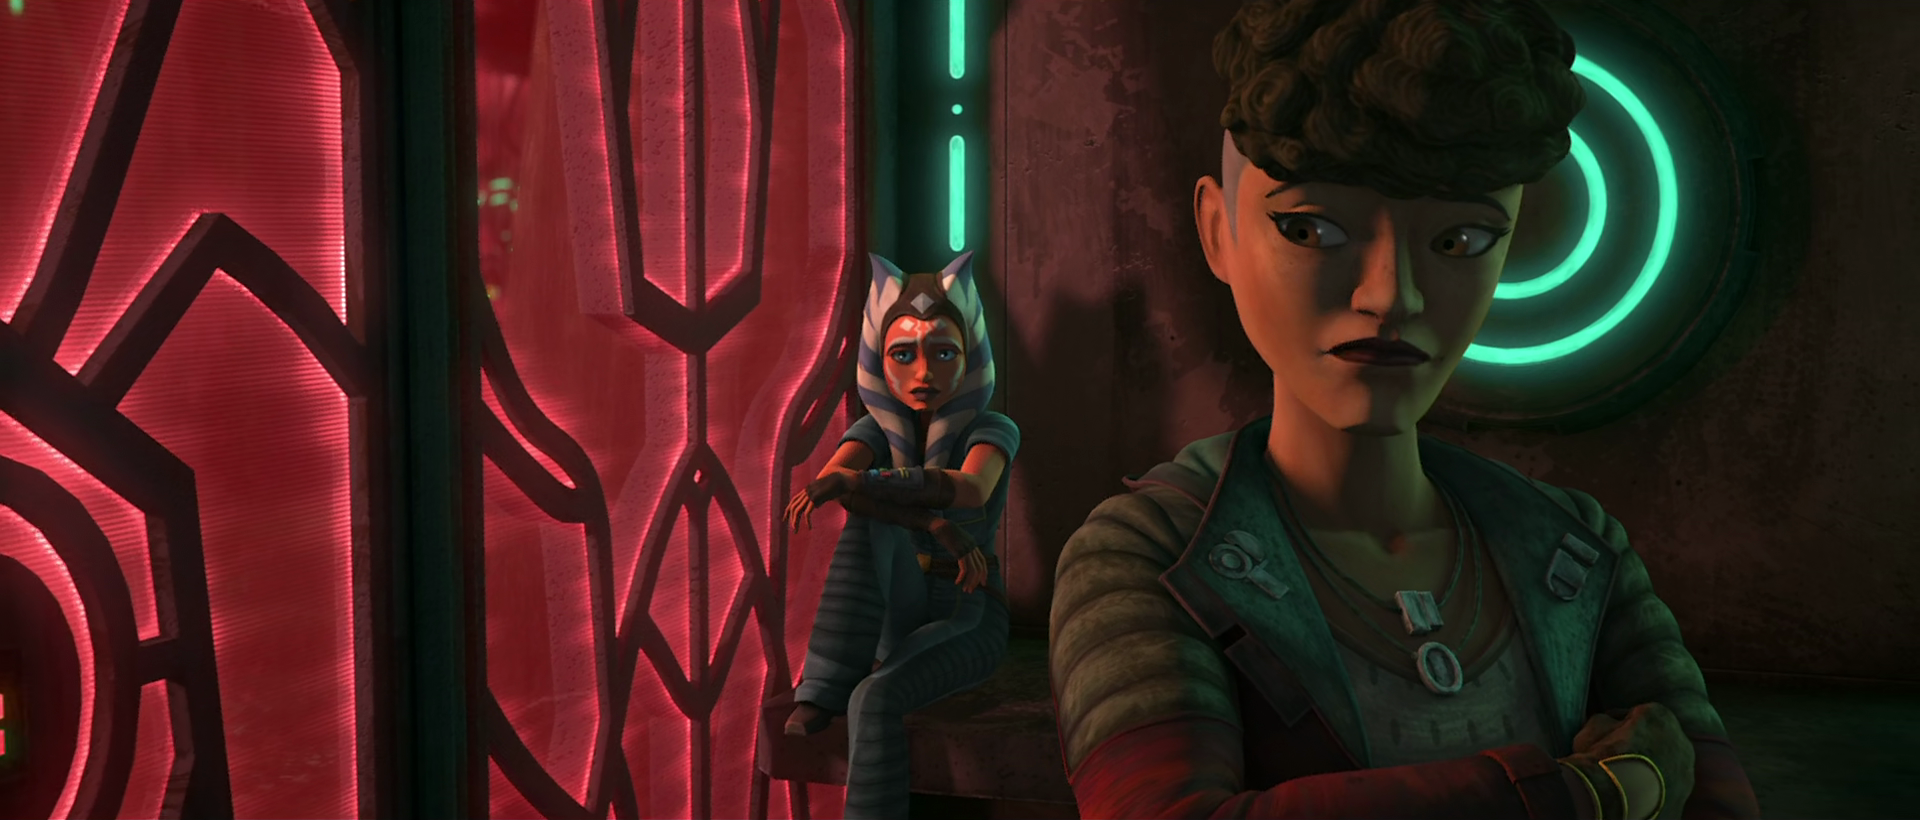
Ahsoka apologized for what had happened to them, but the three young women were interrupted by the Pyke guards, who demanded Rafa come with them. While Ahsoka stood in front of the sisters to try to protect them and Rafa offered that they instead take Ahsoka, the Pykes pushed past the former Padawan and Trace, taking the elder sister away for interrogation. As Rafa was tortured, Trace and Ahsoka were left in the cell, where the mechanic admitted she and her sister had been on their own until Ahsoka arrived. Trace also revealed she had helped her because it was something her mother would have believed in. Rafa, unconscious but having refused to give up information, was then thrown into the cell by the Pyke guards. Though Ahsoka advised her friend to not make the Pykes angry, Trace demanded they tell her what had happened to Rafa and shoved a guard, who grabbed the mechanic to take her away for interrogation.
Ahsoka objected to the action, but was hit down by a guard's stun baton, making her fall to the ground. Trace called for her friend to make sure Rafa was well before being taken to the interrogation room, where she pretended to faint to distract the guards, using the opportunity to steal a CC-420 pistol and escape the room, although several guards pursued her. After noticing the Pykes run down the hallway, Ahsoka secretly used the Force to unlock the door before waking Rafa. Informing the Martez sister that the Pykes had taken Trace and that they needed to flee, they escaped the cell, which the secret Force user claimed was opened by a power outage. As they searched for Trace, they eventually ran into the escaping mechanic, who had been heading back to the cell to break them out.
Reunited, the three made their way to an outside platform, and Trace blasted a barrel Ahsoka and Rafa had knocked over to clear away the pursuing guards. Their next challenge came from a retracting bridge; although Rafa made it across in time, Ahsoka had to use the Force to help push Trace across, and, while Rafa was willing to leave Ahsoka behind, she was able to Force jump over the gap. While the older Martez sister recognized that it had not been a normal feat, they nevertheless needed the run from two more Pykes guards, who had arrived just before Trace made it across the bridge. The three made their way to the city gate, during which time Ahsoka helped the sisters take out a Pyke guard in order to steal his stun baton, and she continued to debate their situation with Rafa.
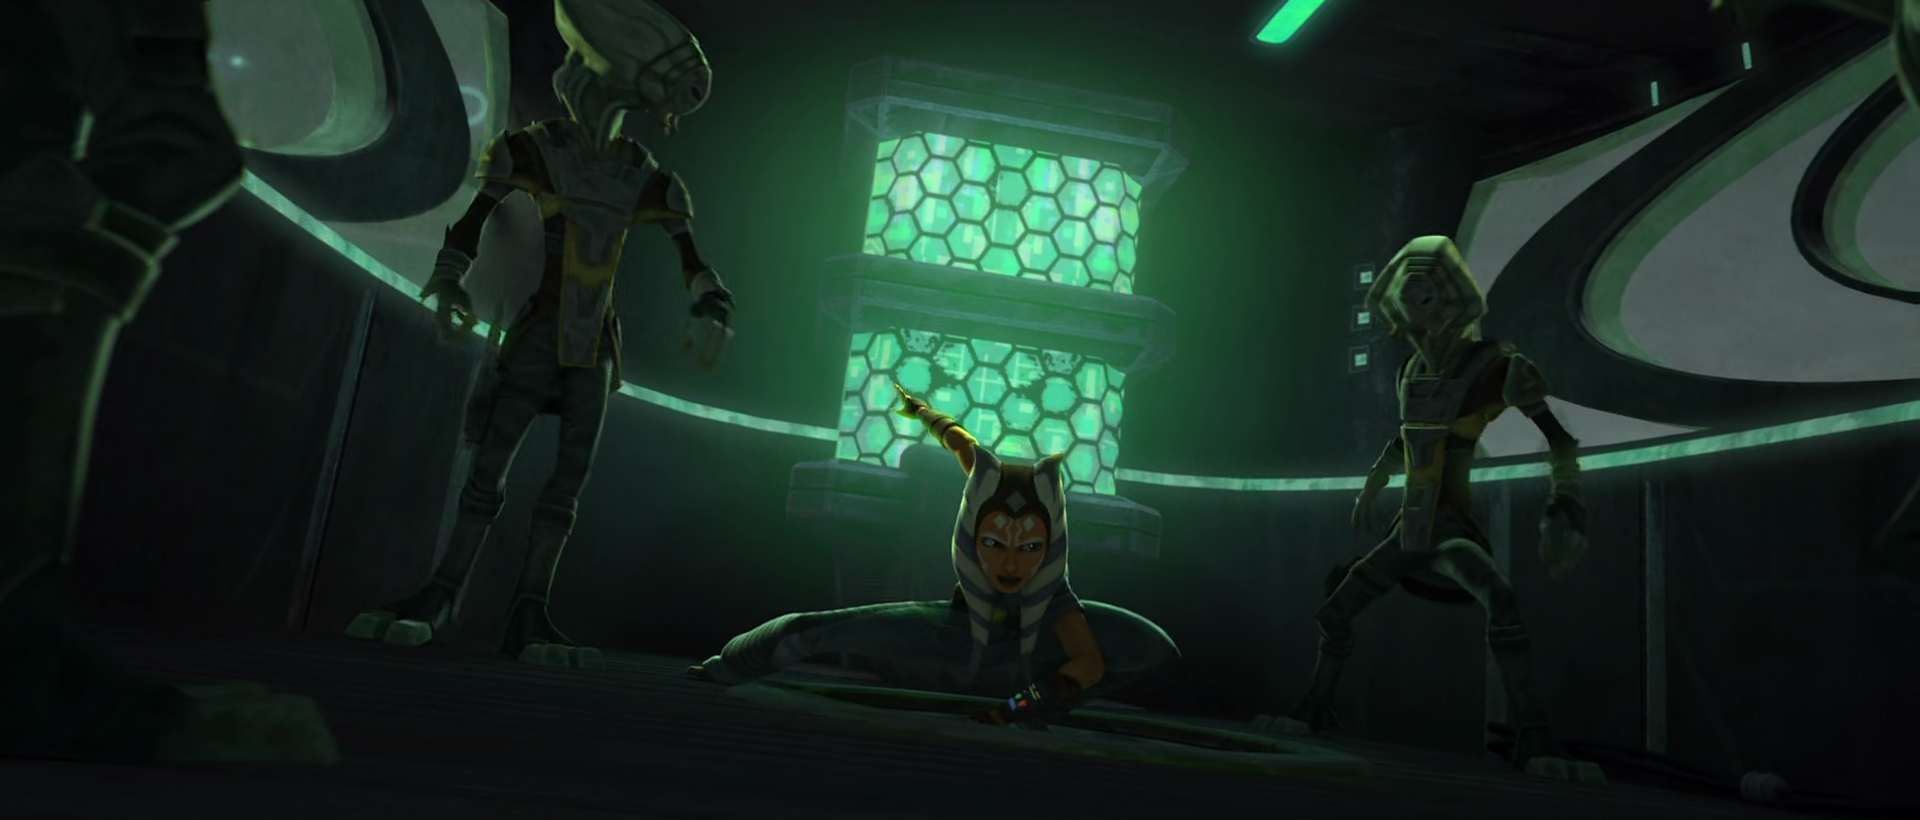
Understanding that the syndicate's reputation was at stake, the former Padawan recognized that the Pykes had no desire to let them escape, so Rafa had Ahsoka head to disable the gate while she and Trace went to distract the guards. The Martez sister claimed to give Ahsoka the job because of her resourcefulness, though the former Padawan also believed it was because Rafa thought it was more difficult. As her friend left for the control tower, Trace speculated that her sister and Ahsoka were getting along better, but Rafa denied that. Ahsoka was able to sneak into the control tower and managed to dispatch the control room's guards in physical combat, but she quickly saw that the Martez sisters had gotten into a firefight with the Pykes outside. After opening the gates and traveling down, she secretly used the Force to pull the two guards into the open, giving Trace the chance to shoot both of them. Ahsoka then called the sisters forward, and the three young women escaped into the city.
After Trace, believing she saw the Silver Angel, excitedly ran past the two of them, Ahsoka and Rafa were given the chance to talk in private about whether Trace should be involved in criminal jobs. Rafa changed the topic to question Ahsoka about why she was interested in helping, although they were soon interrupted by a begging Gotal. Rafa claimed to have no credits, and she and Ahsoka left him so they could catch up to Trace. Once they had, Rafa again asked what she wanted, so Ahsoka informed the Martez sister that she made it her duty to help those in need, a trait that Rafa admitted sounded like her mother. She confided in Ahsoka that she was simply trying to do what was best for her sister and herself. Trace then informed her friend and sister that she had in fact found the Angel, but the trio was spotted by the Pykes, who had been helped in their search by the angered Gotal beggar, after Trace and Rafa had argued about whether to use the Angel to escape. The three ran through the crowded street while pursued and under blaster fire, unknowingly attracting the attention of a hooded Mandalorian Nite Owl, who was on planet for a mission with Bo-Katan Kryze, the very Death Watch lieutenant Ahsoka had fought during the battle on Carlac earlier in the war.
While trying to escape the Pyke guards by riding on a civilian's landspeeder, one of the syndicate soldiers blasted out one of the craft's engines, throwing Rafa and Trace off the vehicle while pushing Ahsoka further away from the Pykes. As the sisters were captured, Ahsoka continued to escape through the city, unknowingly being watched by Kryze, who was unsure if the Force-sensitive was in fact Ahsoka, Ursa Wren, and a third Mandalorian Nite Owl. Although Wren feared her presence could compromise their mission on Oba Diah, Kryze also recognized that they shared an enemy in the rogue Sith Lord Maul, who still had control over Mandalore. Thus, Kryze decided they would keep track of the former Padawan's movements.
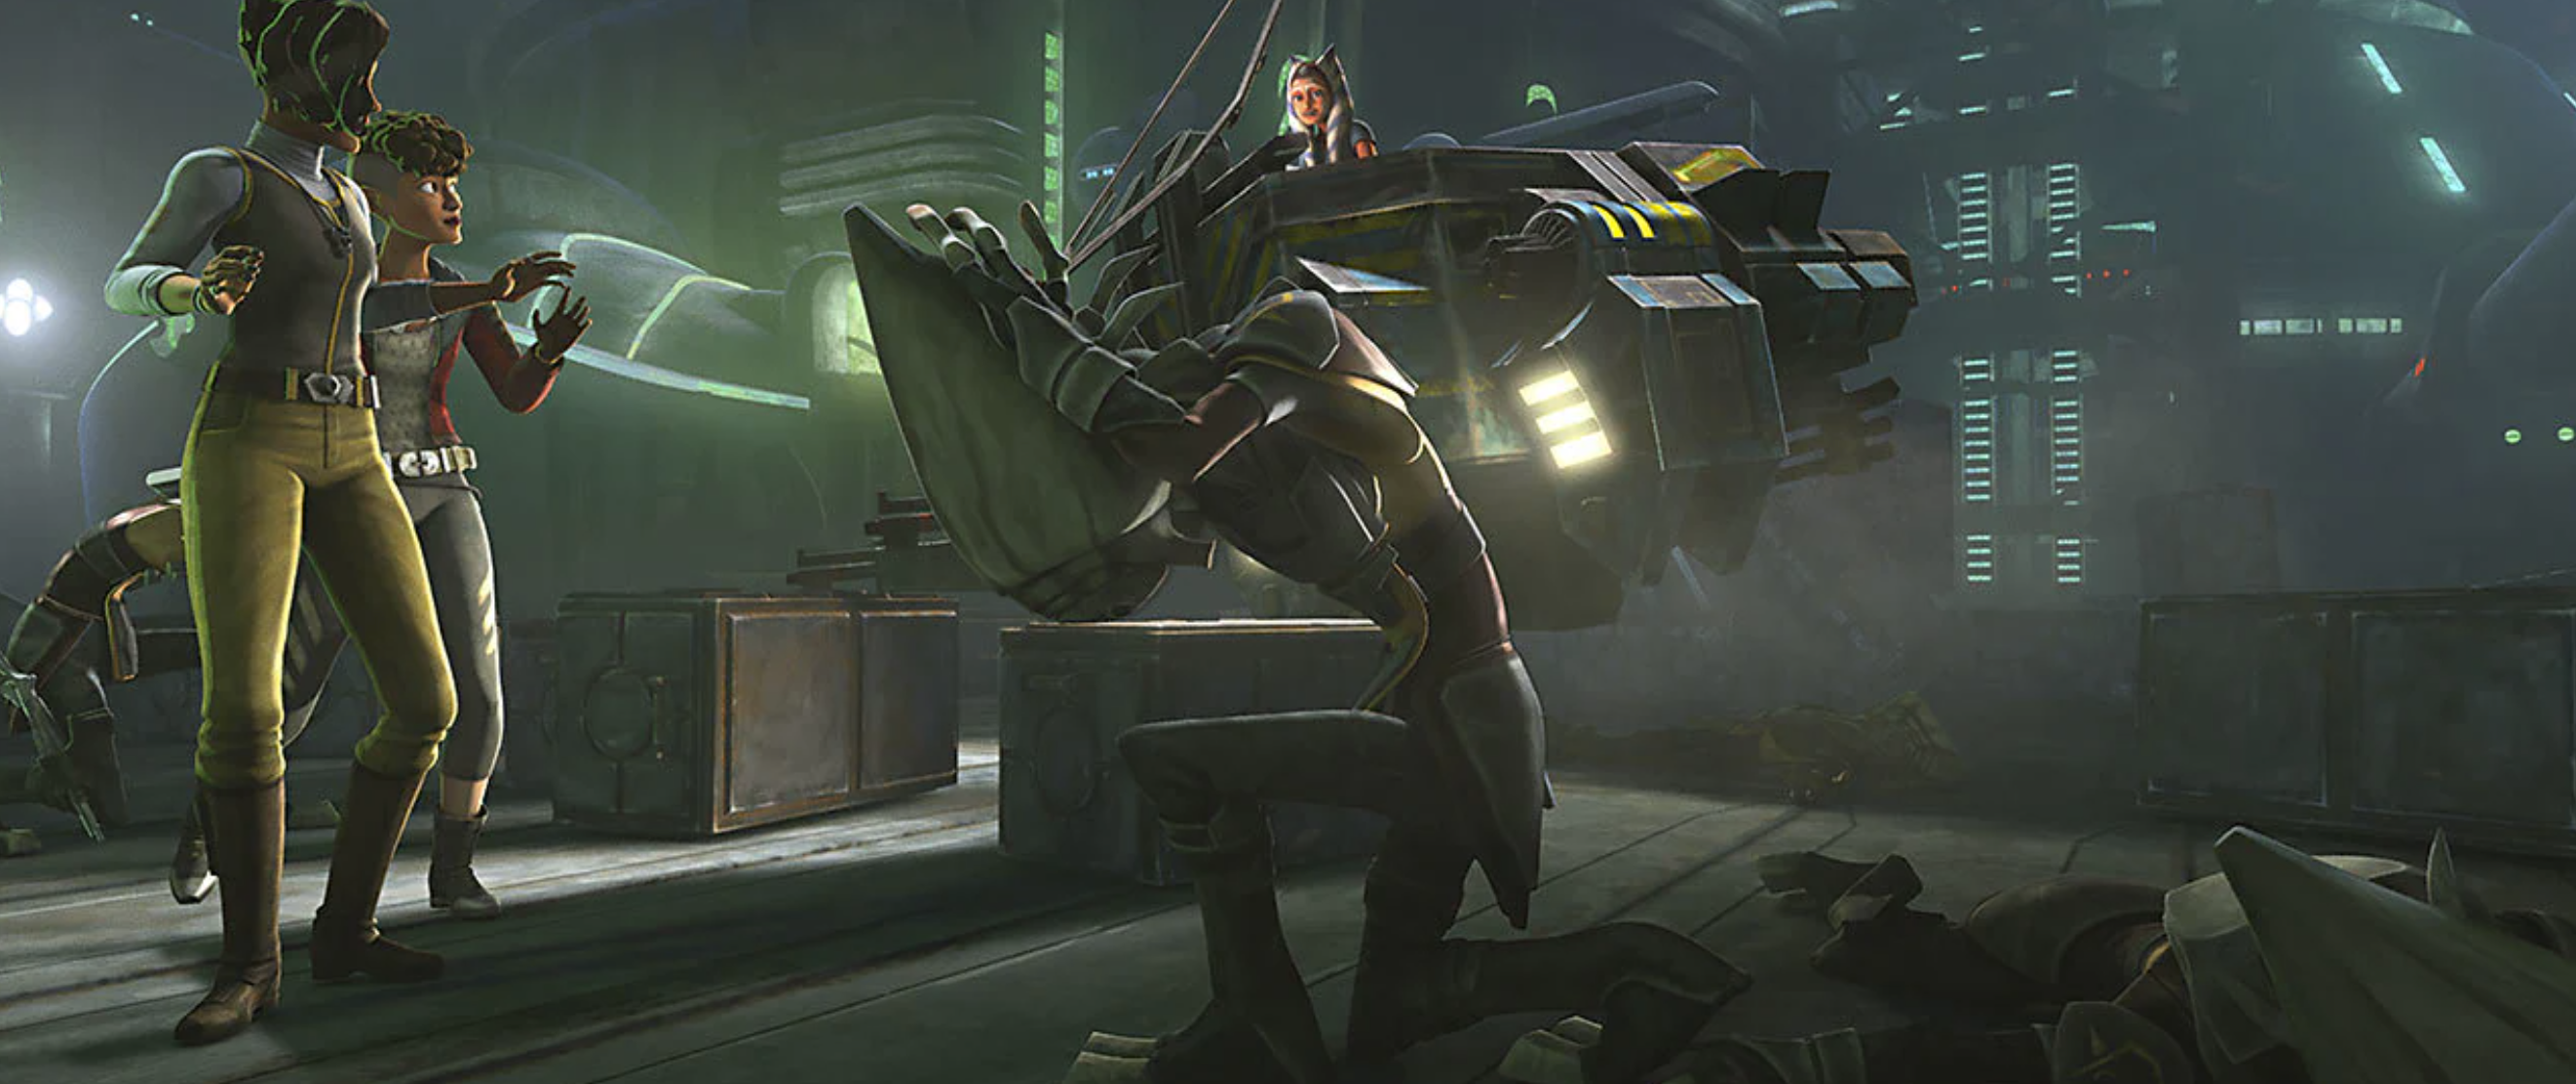
Elsewhere, Ahsoka watched over Rafa and Trace from a building-top, learning that Krim and Fife intended to kill the two sisters before torturing her to learn where the spice was. After discretely taking out a guard, the former Padawan took control of a construction vehicle, interrupting the planned execution by ramming the repulsorcraft into the Pykes and using its frontal cannons. Although she cleared away most of the Pyke guards in their path, Fife—who had purposely drawn Ahsoka into a trap with the execution—returned with a cannon-equipped landspeeder. The cannon downed Ahsoka's replusorcraft, preventing their escape and allowing them to be subsequently surrounded by Pyke guards.
Ahsoka and the sisters were escorted back to their cell, with one of the guards shoving the secret Force-sensitive into the confinement. Rafa tried to arrange a deal, but Krim denied the three the chance at another job and stated his intention to torture them until he learned where the spice was. Once all but one of the guards left, Rafa apologized for taking the job, so Ahsoka told the young woman that she would learn from the experience. Nevertheless, Trace asked her sister and friend how much longer they would be alive to learn those lessons.
Another new path
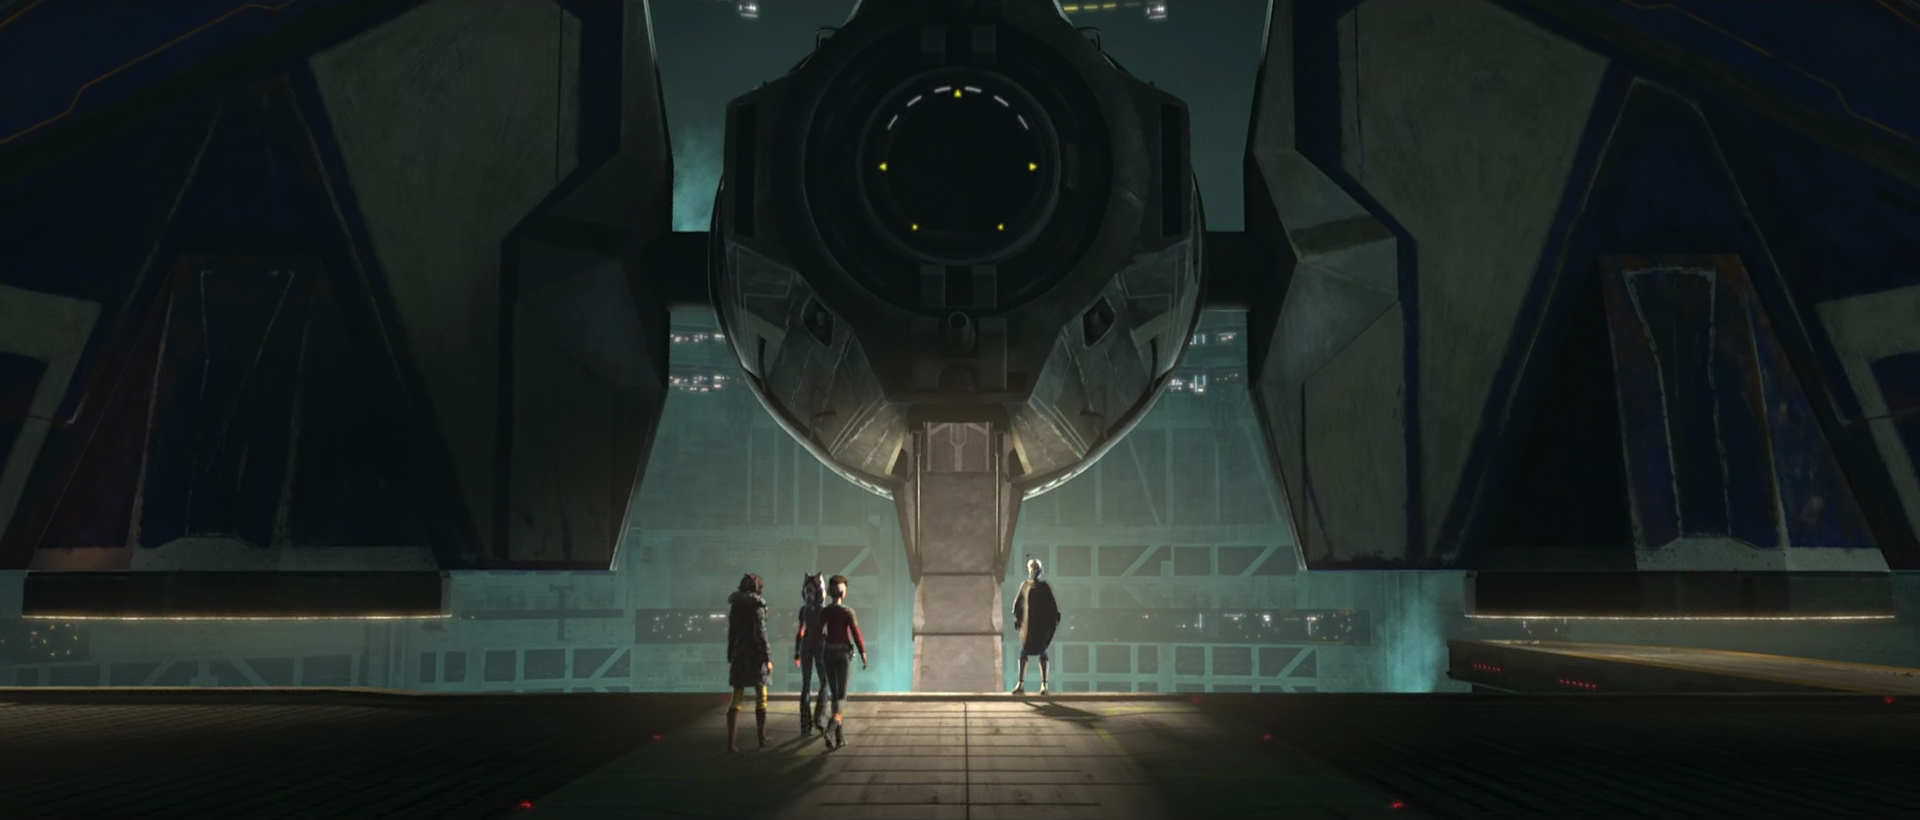
After successfully escaping from Oba Diah, Tano and the Martez sisters were met by Lady Bo-Katan Kryze and members of her Mandalore resistance. They had been tracking them from Oba Diah aboard a Kom'rk-class fighter/transport. Tano recognized Kryze from their earlier battle on Carlac during the war, but Kryze clarified that Death Watch had been disbanded. Tano and Kryze agreed to unite their efforts to defeat the renegade Sith Lord Maul. However, the former Padawan left her speeder bike with the Martez sisters, anticipating a possible return to her friends.
Shattered
The last meeting
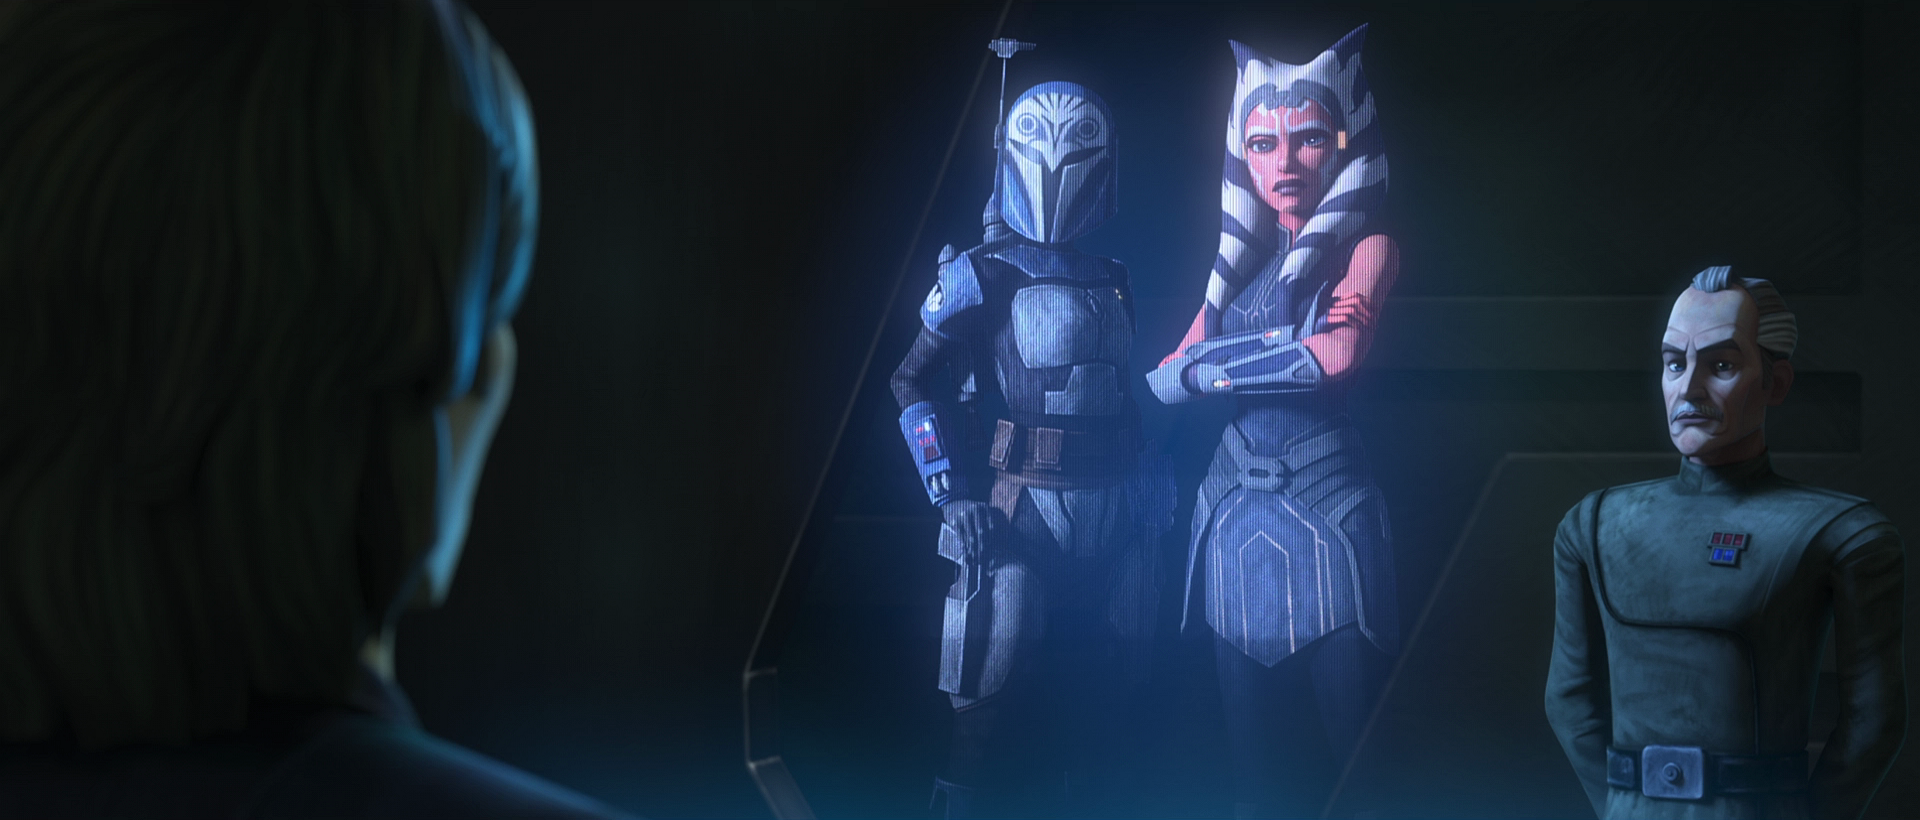
Once Tano had allied herself with the Mandalorians, she received a new outfit crafted from beskar. She immediately began working to locate Maul's hiding place. Tano and Kryze also formed a bond of friendship, with Kryze acting as a combat mentor for the former Jedi. After some time, Tano and the Mandalore resistance, using information Tano extracted from the Pykes on Oba Diah, successfully pinpointed Maul's location on Mandalore. Realizing they lacked the necessary forces for a siege of Mandalore, Tano and Kryze reached out to Skywalker and Kenobi. They were concluding a battle on the planet Yerbana, requesting their aid in the siege. Utilizing the subspace frequency "Fulcrum," Tano and Kryze connected with Yularen, who then summoned Skywalker and Kenobi back to the ship.
Upon Skywalker and Kenobi's arrival, Tano greeted Skywalker, remarking on the length of time since their last encounter. A brief silence ensued before Skywalker inquired about Tano's well-being and whereabouts. Responding to Skywalker's question, Tano stated she was fine, but emphasized the urgency of the situation, indicating they needed to immediately share the crucial information she and Kryze possessed. After Kenobi asked what this information was, Tano explained that they had finally managed to locate Maul and that they might be able to capture him if they moved swiftly.
With this information, Skywalker and Kenobi permitted the Mandalorians to board their Star Destroyer. As Tano disembarked, R2-D2 greeted her warmly. Subsequently, she approached Skywalker, who expressed his happiness at seeing her. However, she interrupted him, stressing that they would have to postpone catching up, as every moment wasted increased Maul's chances of escape, as Kryze pointed out. Following this, the group proceeded to the strategy center to discuss the proposed siege. Upon arriving, Tano explained to Kenobi and Skywalker that they had managed to pinpoint Maul's location using information she had managed to gather on Oba Diah to which Skywalker asked why she was on Oba Diah in the first place. However, Tano waved this aside by telling him that that wasn't really relevant at that present moment.
Following Kryze's explanation that Maul was on Mandalore, Kenobi inquired about their needs from the Republic. Kryze, somewhat embarrassed, explained that she lacked the necessary numbers for a siege of that scale and required the assistance of the Republic's clones for a complete lockdown of Sundari. To secure this assistance, she proposed handing Maul over upon his capture and assuming the leadership role on Mandalore after the siege concluded. Nevertheless, Kenobi cautioned that aiding them would violate long-standing treaties between the Republic and the Mandalorians, potentially reigniting war between the two factions. In response, Kryze questioned the significance of one more war, but Skywalker countered that they sought to avoid further conflict amidst the ongoing Clone Wars. Consequently, Kenobi stated he would seek guidance from the Jedi Council on the matter. However, Kryze, desperate for assistance, protested that there was no time for discussion with them and attempted to appeal to Kenobi's feelings for Satine, whom Maul had murdered months earlier. She scornfully looked at Kenobi as he walked away to speak with the Council, refusing to allow his feelings to control his actions. Kryze then angrily walked away as Tano watched her departure.
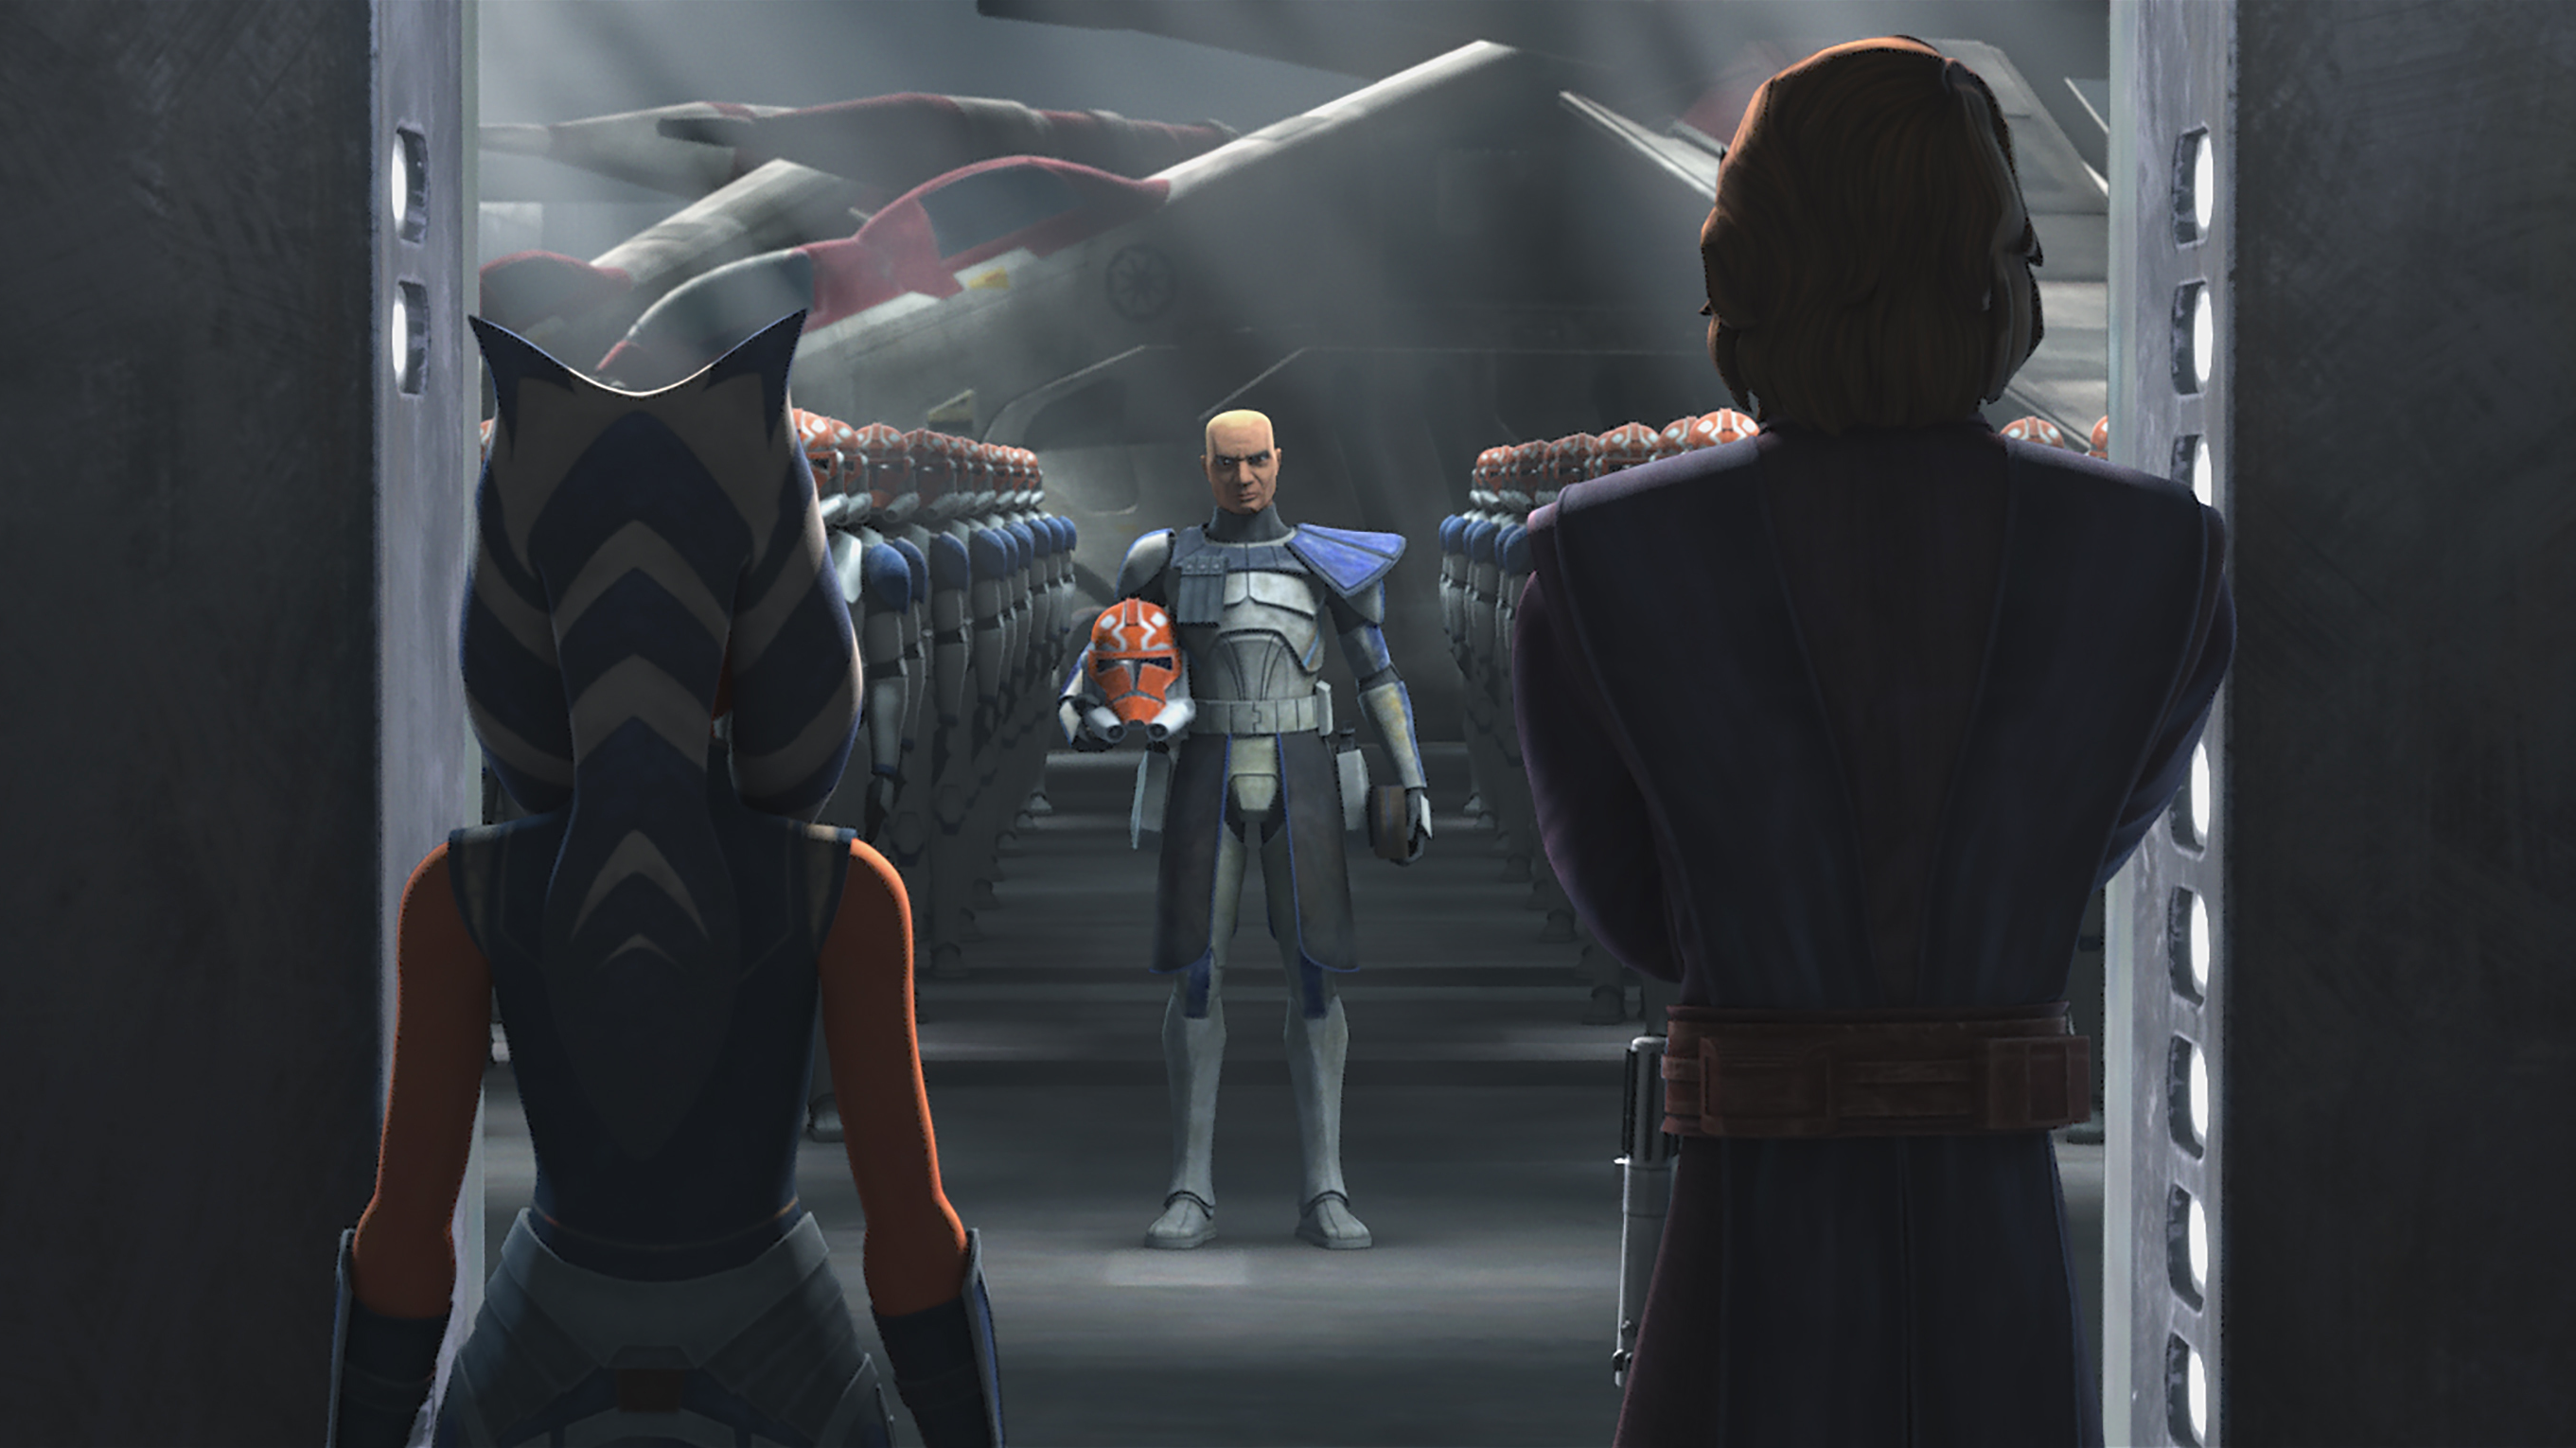
With Kryze gone, Skywalker remarked that the meeting had progressed smoothly, considering the circumstances. Upon hearing Skywalker's witty remark, Tano turned back towards Skywalker and said that he and Kenobi hadn't changed much since the last time she had seen them. Skywalker then asked if that was a bad thing to which Tano smiled. He then asked her to follow him as he had a surprise for her waiting in the hangar. As they walked towards the hangar, Tano observed the clones saluting her as she passed, commenting that the clones shouldn't salute her anymore since she had left the Jedi Order and therefore no longer commanded them. However, Skywalker explained that they were just showing respect for the years she spent with them serving on the front lines in the Clone Wars. Upon their arrival, the door slid open to reveal Rex and fellow members of the 501st's 332nd Company with their newly painted helmets bearing her markings. With her now having seen them, Skywalker motioned for her to move through the lines of troopers as they had been waiting for her.
After seeing the troopers, Tano walked back to Skywalker and Rex who said that the paint job on the helmets was a little crude, but it was still good to see her again. Before they parted ways once more, Skywalker presented Tano with a box which contained one of her most prized former possessions. However, just as he presented her with the box, the ship's emergency alarm went off, alerting all Republic personnel aboard to get ready for battle. Kenobi rushed in, informing Skywalker and Rex to prepare all forces and that they would be entering hyperspace shortly to help ward off Grievous' surprise attack on Coruscant. Kenobi informed Skywalker that the Chancellor was under the protection of Togruta Jedi Master Shaak Ti, but that Windu had lost contact with her. Growing annoyed by their political games, Tano asked if her former masters were just going to abandon the Mandalorians. Somewhat shocked by the accusation, Kenobi urged Tano to understand that they were needed at Coruscant as this was a pivotal moment in the Clone Wars. This only annoyed Tano more as she believed that the Jedi were still playing politics, and noted that was why the people of the galaxy had lost faith in them.
Kenobi tried to defend himself that they were needed to defend the people of Coruscant, but Tano countered that it was about saving the Supreme Chancellor instead. When Kenobi protested that what Tano was saying wasn't fair, Tano coldly retorted that she wasn't trying to play fair. However, Skywalker offered a compromise where he would divide the 501st into a new division led by Rex who would be promoted to Commander while Tano served as an advisor. Tano accepted her new position and, with Kenobi's approval, the Siege of Mandalore could begin. Before departing, Kenobi advised Tano to capture Maul instead of trying to kill him as he hadn't seemed to stay dead in the past.
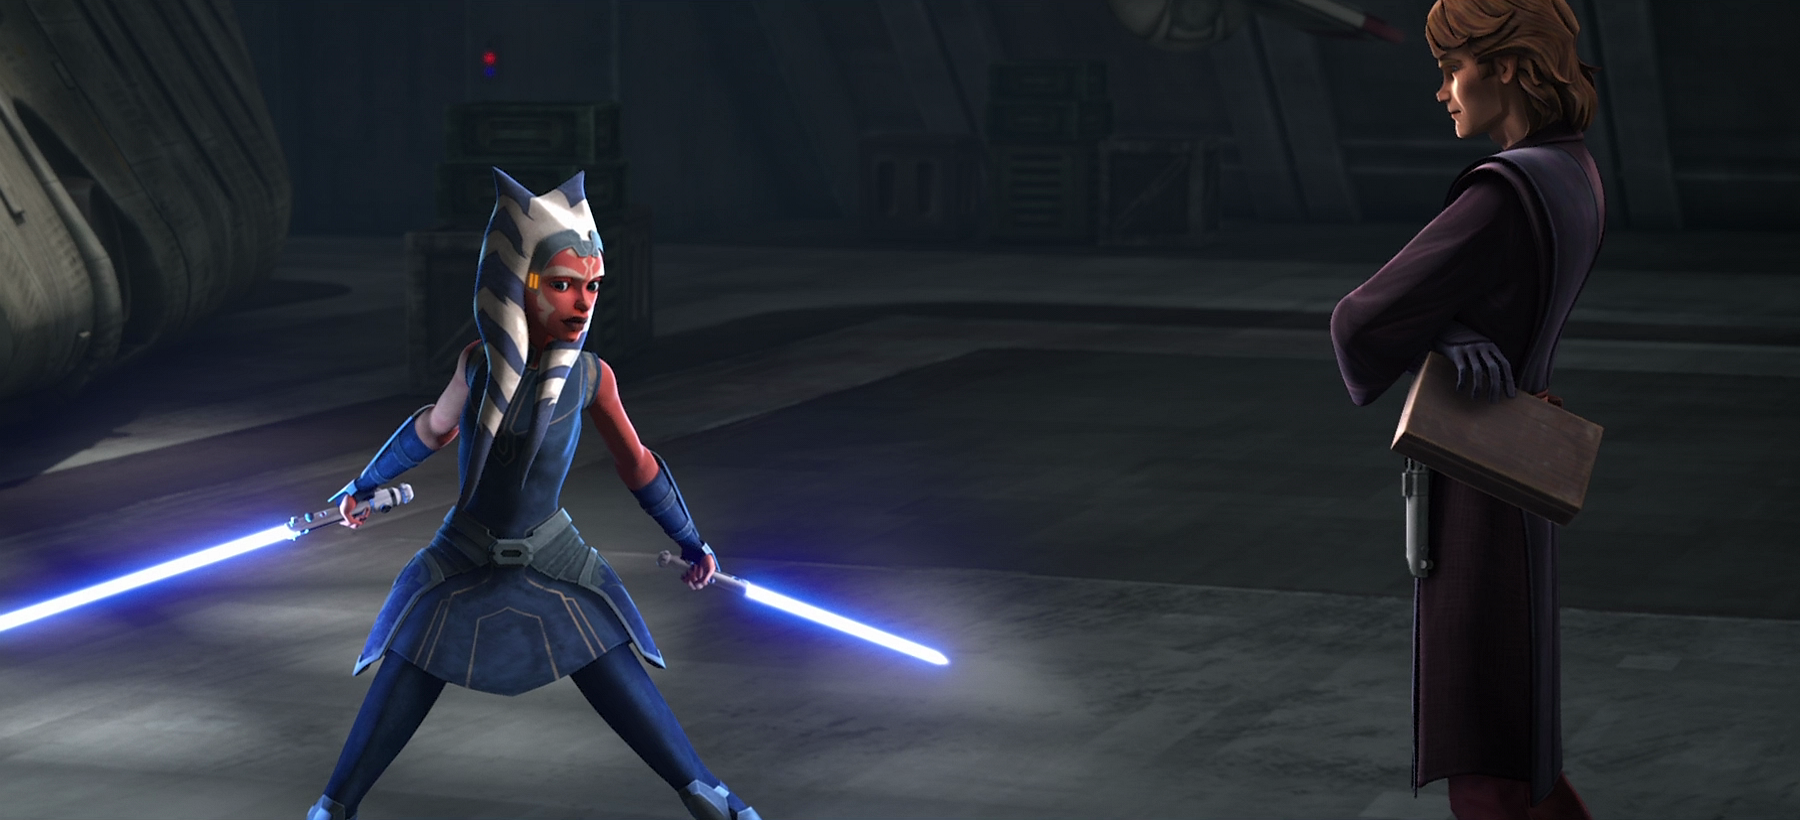
Tano then thanked Skywalker for the support as he once again presented her with the box, knowing she'd need its contents if she were going to face Maul. Realizing what was inside, Tano opened the box, revealing her lightsabers as she grabbed them, igniting them and revealing their new blue hue. As she looked at Skywalker, he said they were maybe a little better than when she had had them last. She then briefly practiced with them once more. Beginning to depart, Skywalker looked at Tano and said that with any luck their missions would be over soon and they would be able to reunite once more after their conclusion. She then offered Skywalker good luck as he briefly looked back at her before walking away to prepare to face Grievous. Tano then walked further into the hangar and reunited with Rex.
Siege of Mandalore
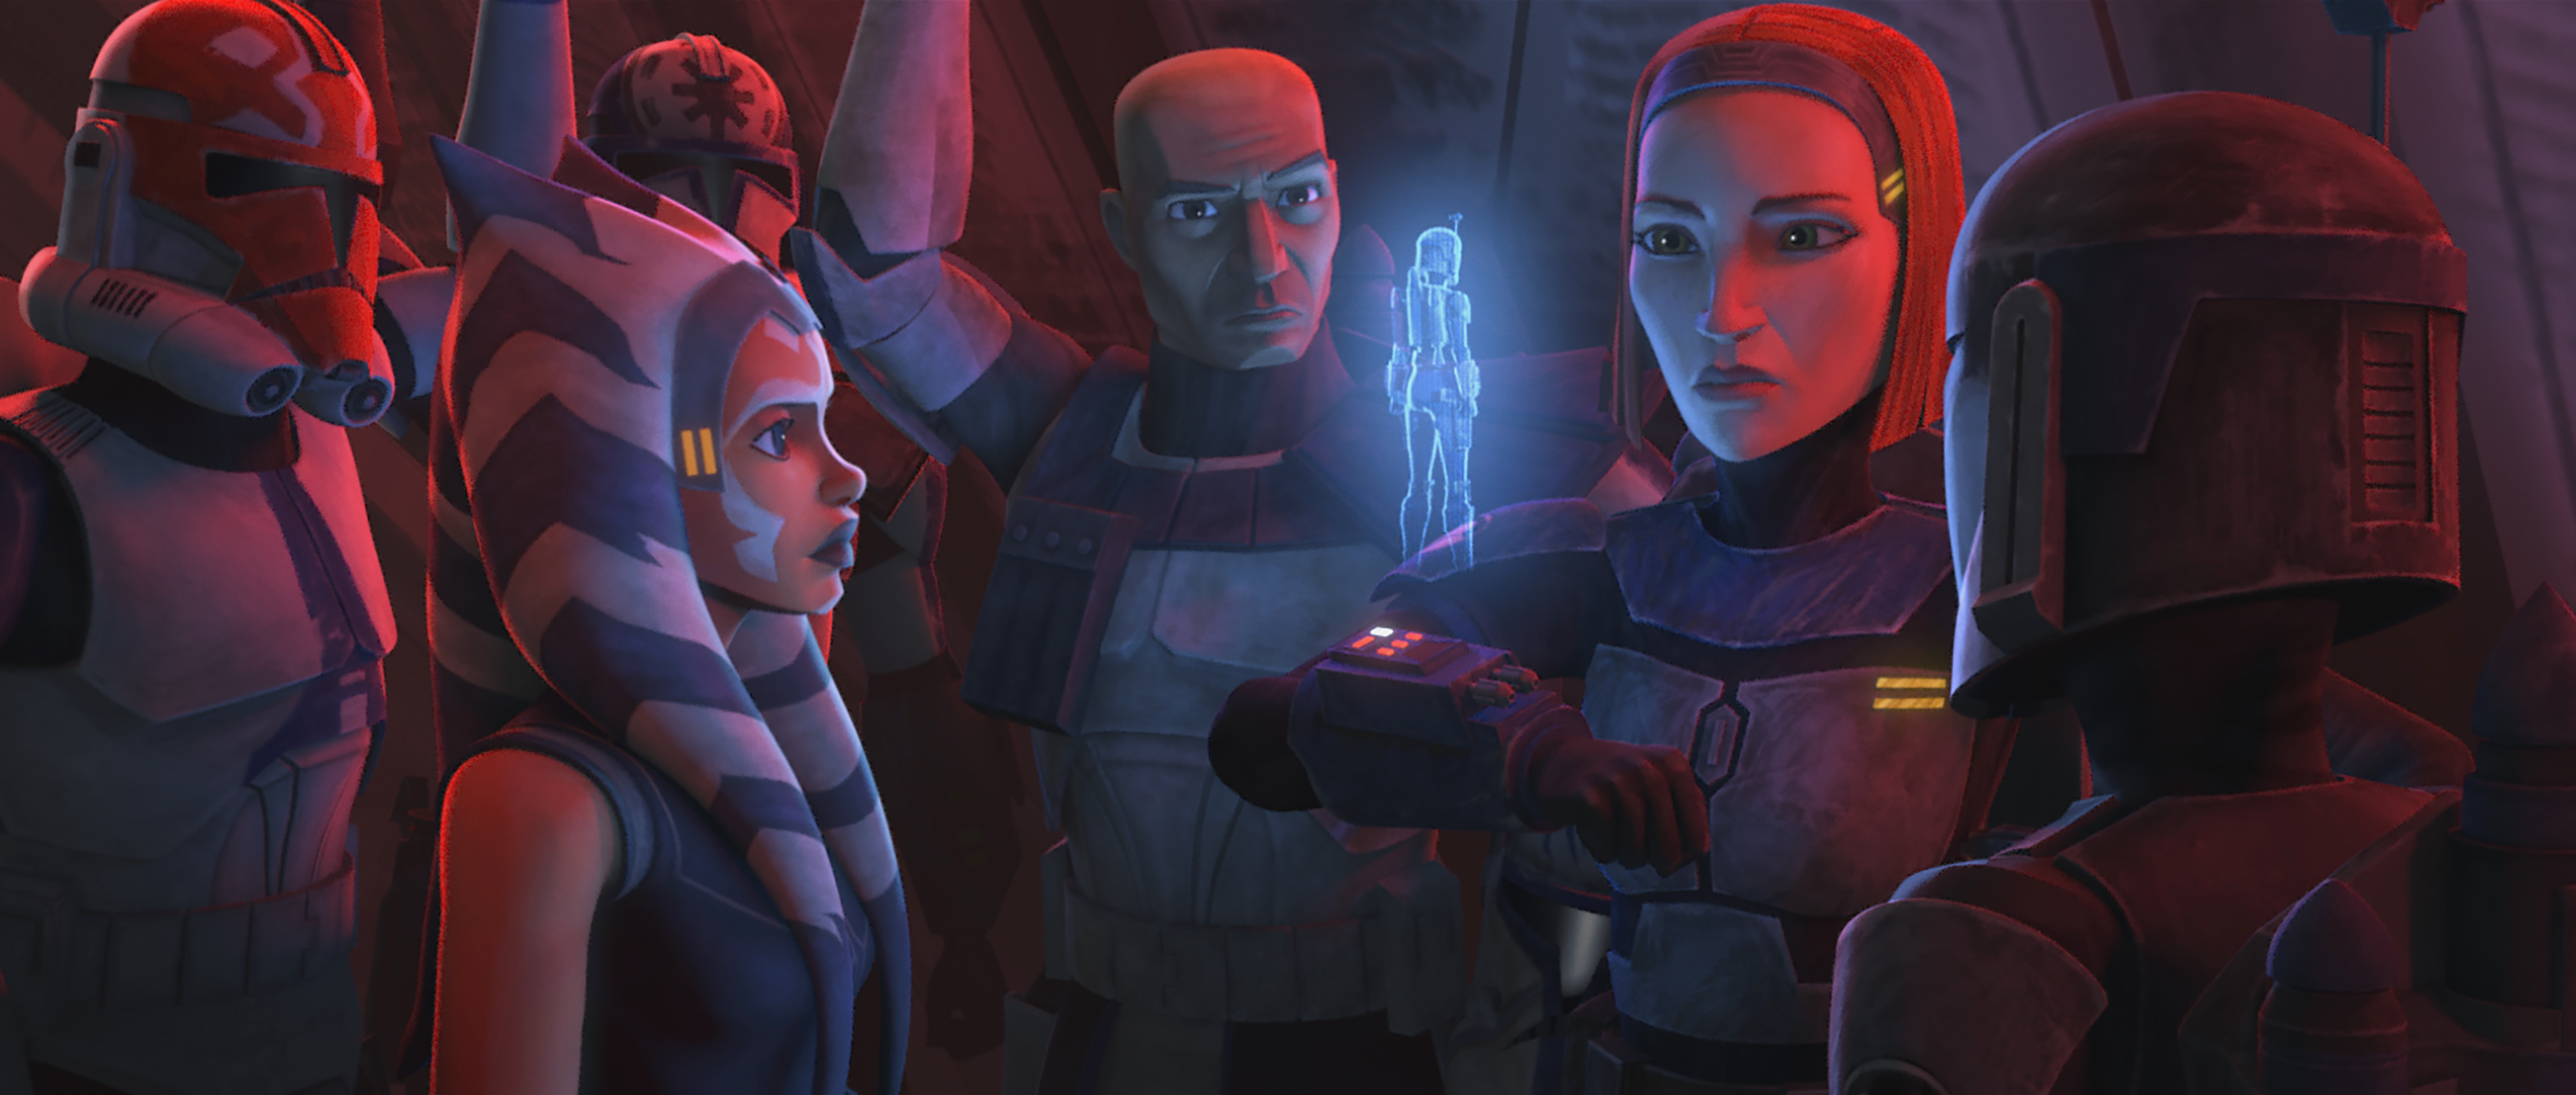
Upon arriving at Mandalore, Tano, along with Kryze, Rex, and ARC trooper CT-5597 "Jesse", boarded a gunship and joined the assault team as they approached Sundari. During their approach, Prime Minister Almec contacted them, questioning the Republic's attack on Mandalore. However, after Kryze revealed her presence to Almec, declaring their knowledge of him being Maul's puppet, Almec understood. As he informed her that this attack would make her an enemy to the citizens of Sundari, she ended the transmission, noting that she didn't care. Tano turned to address Kryze and commented on how much of a difference there was between her and her sister, Satine. Kryze then contacted Ursa Wren, another one of the Nite Owls, and asked her if she could confirm where Maul was located, but Wren was only able to confirm that he had not yet left the city and also informed them that Maul's forces were preparing for combat.
As she ended the transmission with Wren, their gunship began to violently shake as Maul's forces had arrived and had begun their attack. They opened the gunship's doors to see the carnage ensuing outside as a gunship was destroyed next to them, forcing Tano to shield herself from the oncoming debris. Shortly afterwards, everyone aboard their respective gunships left to engage the enemy in the air using their jetpacks. Rex apologized for not bringing Tano one, however, Tano instead smiled and informed him that she didn't one, declaring a race to the surface between the two.

Leaping from their gunship, Tano ignited both of her lightsabers and landed on another gunship, destroying both of the attacking super commandos' jetpacks with her lightsabers. Noticing more super commandos inside another gunship, she jumped down onto it, destroying one of their jetpacks before jumping inside the gunship and kicking two of the others. She then sliced the blasters off two other super commandos before kicking one and pushing another into the side of the gunship with the Force. Before leaving, she kicked one of the last super commandos aboard before destroying the last super commando's jetpack, allowing her to hitch a ride as it sputtered out before landing on a Kom'rk-class fighter/transport.
While running across the fighter, Tano noticed a crashing gunship. Landing atop it, she noticed the pilot's ejector seat had failed and needed assistance escaping the gunship. In order to do this, she used her lightsabers to cut the top off of the cockpit, allowing the pilot's ejector seat to launch as the pilot thanked her. Before the gunship crashed, she hitched a short ride as the super commandos on the surface prepared to fire at her. Jumping down onto a platform, the gunship exploded behind her as the super commandos began to fire at her, forcing her to deflect their blaster bolts, allowing her to kill several of them. As she continued to defend herself, Wren and many other Mandalorians arrived alongside Rex. With Rex's arrival, Tano mentioned that she had beaten him to the surface, reminding Rex that some things never changed. The two friends then rushed into Sundari.
Shortly afterward, Gar Saxon, one of the leaders of the super commandos, escaped into the Undercity of Sundari, taking several super commandos along with him. Watching the fighting occurring in the city atop a balcony, Tano watched as Rex returned from his scouting mission and confirmed to them that Maul had not yet been found. With this news, Kryze informed them that she and her Mandalorians would be heading to the Sundari Royal Palace to capture Almec and ordered her to find Maul as they would not be able to sustain a long siege. After Kryze left, Tano ordered Rex to support Wren at Sundari's docks in order to ensure Maul didn't escape. Before he left, Rex informed Tano that if Maul wasn't in Sundari then the entire siege would be playing into his plans. Just then, Clone Captain CT-0292 "Vaughn" contacted Rex, informing him that they had a lead on Maul's location as Tano and Rex rushed off to go investigate the situation.
After being dropped off by a gunship, Tano ventured into the Undercity and was met by Vaughn, who informed her that they had engaged Saxon, but he escaped into an access tunnel, seeming to be in a hurry. Tano asked what was down there and Vaughn told her that it was a series of mainly sewer tunnels and conduit access points, but he didn't know if it led outside of the city. Tano then ordered the clones to move in to investigate where the tunnels led.
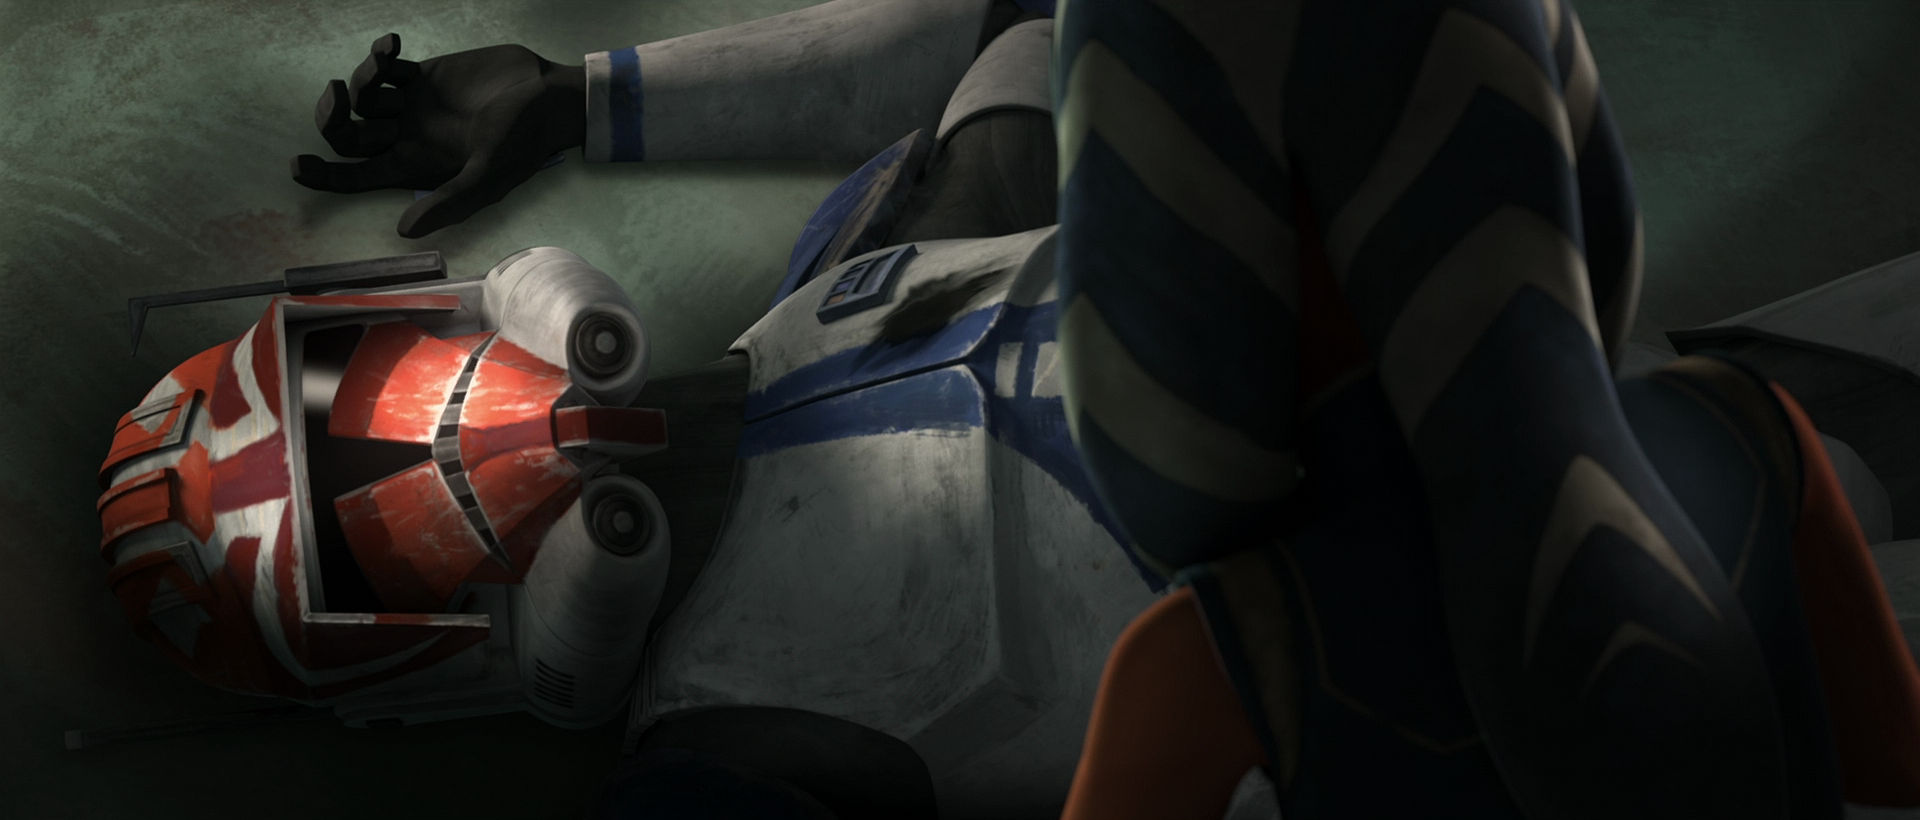
Unbeknownst to them, they were walking into a trap as another leader of the super commandos, Rook Kast, was prepping her super commandos to ambush Tano and her forces. As they continued to explore, Kast emerged from hiding and fired an explosive at them, forcing Tano to use the Force to divert the explosive on an alternate path. However, it still exploded near them, knocking Tano to the ground and briefly disorienting her and her forces. As Tano recovered herself, Vaughn and the rest of the clones chased after Kast and her super commandos, ignoring Tano's cries for them to wait. As Tano followed the trail of bodies, she was led to an opening in the Undercity where Vaughn apologized for his actions, dying while she held his hand.
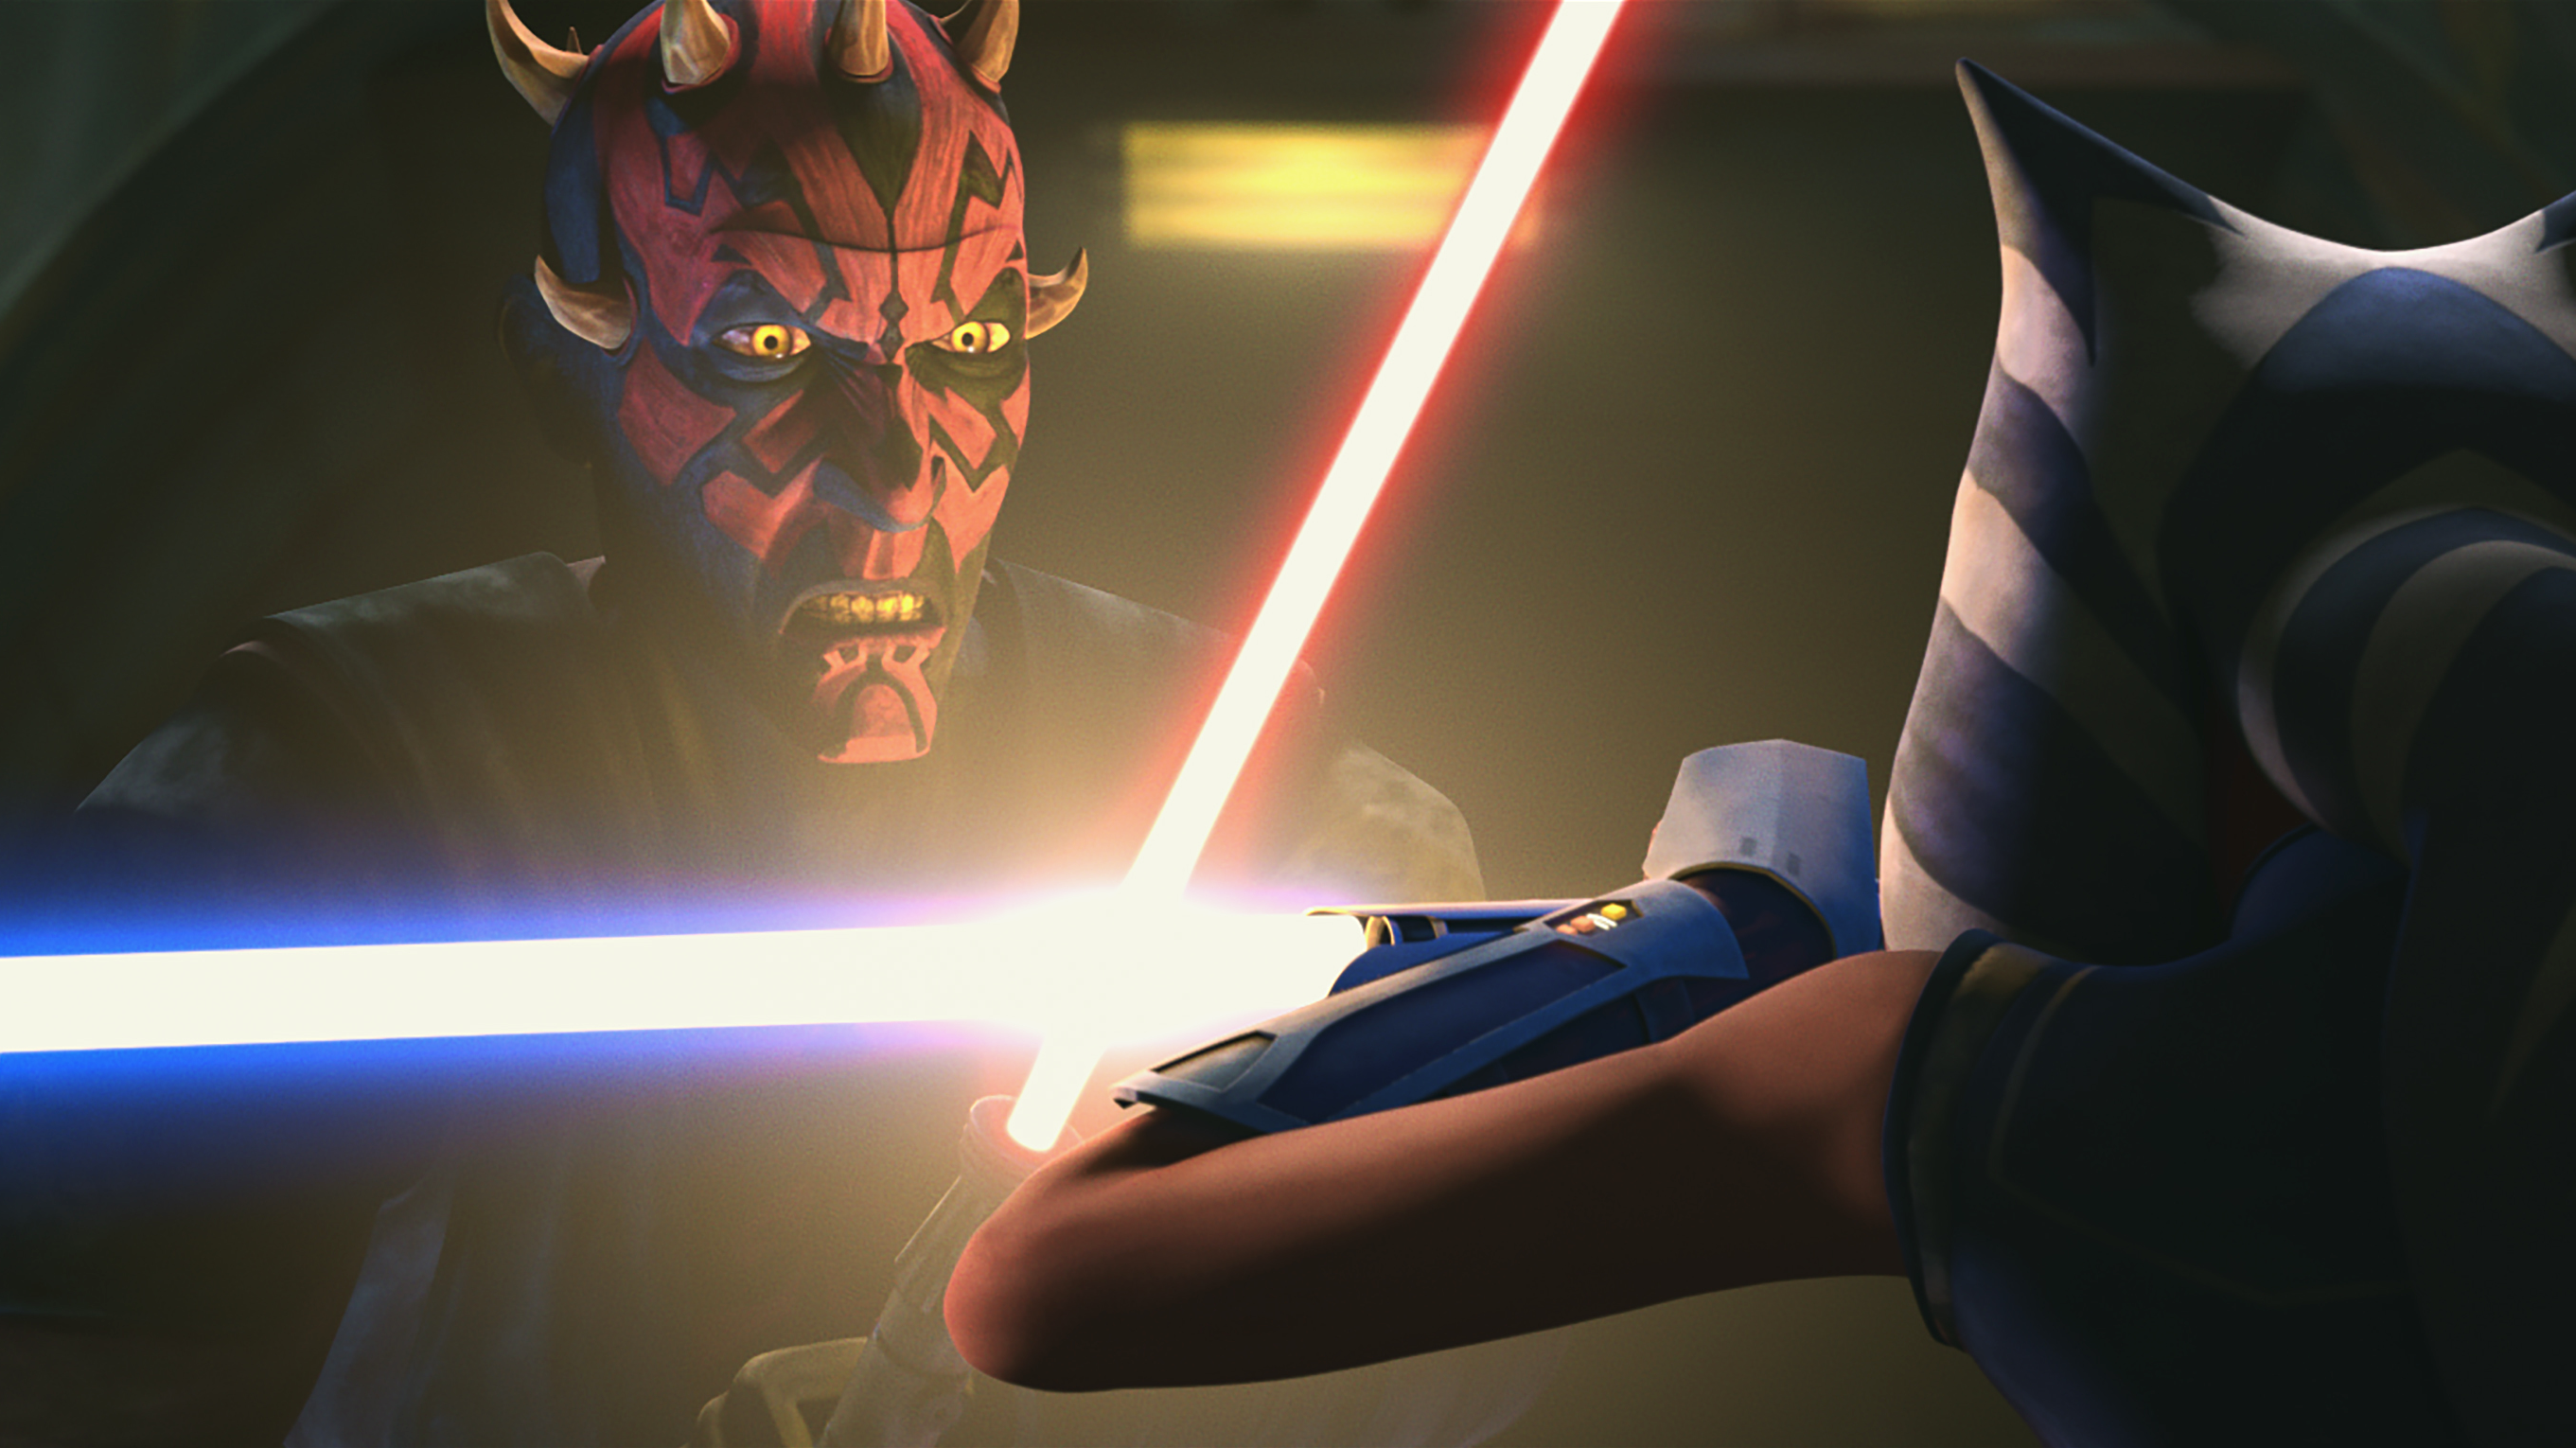
Shortly thereafter, the super commandos rushed in and surrounded Tano who ignited her lightsabers to defend herself as Maul similarly emerged from hiding. Upon his emergence, Maul explained that he had been hoping for Kenobi to show up instead of Tano and asked her why she was here instead. Tano then looked around at her opponents and readjusted her stand, turning her head back to Maul. Maul proceeded explained that he did not know who Tano was to which she said that she knew who he was. Maul went on to say that he assumed that they both mutually knew several people.
As Maul spoke, Tano pressed a button on her wrist comm, informing Rex that she needed assistance. While Rex traced her signal, Maul explained that he was certain Kenobi would've come instead of sending Tano to which she explained that he was needed at the Battle of Coruscant as opposed to fighting Maul. Maul then began to wonder if Sidious' plan was finally coming to fruition, but did not explain as much to Tano. Maul then asked why he sent Tano to which she taunted Maul by asking him to surrender so that they could both go and ask Kenobi themselves. However, Maul explained that that would be pointless as he believed the Jedi and the Republic would soon be toppled by Darth Sidious.
However, before they could finish talking, Rex and several other clones arrived, attacking two super commandos from behind as Maul ignited his lightsaber and attacked Tano who just barely managed to defend herself in time. However, after they very briefly fought, Maul declared that it was not time for their true confrontation to take place and pushed Tano back. Before she could recover, Maul picked Rex up with the Force and tossed him into her. Maul, Kast, and one other super commando then escaped to which Tano ordered her men to chase after them as she recovered and chased after him herself. As they split up, Tano chased after what she thought was Maul, but after attempting to take a shortcut, ran into Rex instead, losing Maul. Knowing they had failed, Tano declared that they had lost him.
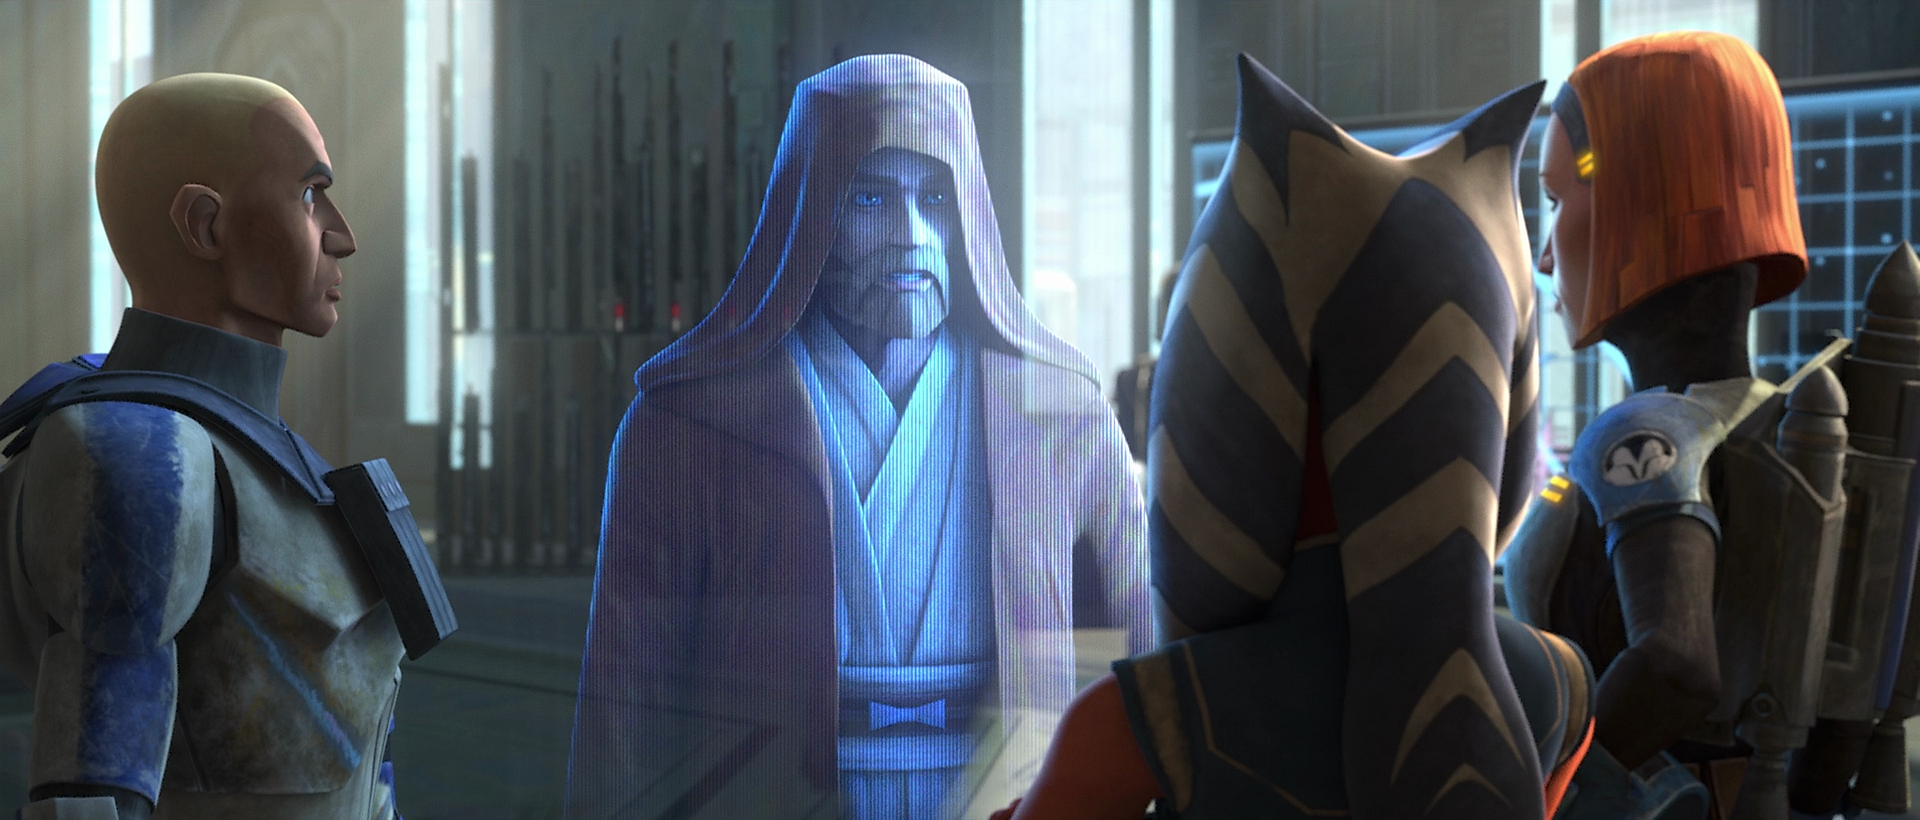
Following Maul's escape, Tano convened with a hologram of Kenobi, along with Rex, in the Grand Salon of the Sundari Royal Palace, overlooking a hologram of Sundari itself. During their conference, Kryze walked over and informed the group that firefights were still occurring in Sector 11 and congratulated the clones on how effective they had performed in the siege; however, she also noted that Maul still needed to be in custody by the end of it or the entire siege would've been for nothing. With this, Tano noted that while she was in the Undercity, Maul mentioned the name of Darth Sidious to which Kryze asked Kenobi who he was, but Kenobi could share very little information on him, only being able to tell them what the Jedi Council suspected.
After Rex turned off the holo-map for Sundari and motioning the astromech droid away, Kenobi informed the group that the council suspected that Sidious was a Sith Lord who had orchestrated the Clone Wars and had played both sides throughout the entire conflict. He then went on to note that he learned the name from Count Dooku on Geonosis, but any chances of learning more about Sidious from him were severed after Skywalker beheaded him during the Battle of Coruscant, briefly shocking Tano. After this, Kenobi noted that by capturing Maul, they may be able to discover the mystery behind Sidious and put the final pieces of the puzzle into place. With this, Tano asked for more troops, but Kenobi informed her that that would not be possible from his front as he was being sent to hunt down General Grievous on Utapau. Tano then asked if Skywalker could reinforce them, but, instead, Kenobi asked for Rex and Kryze to leave them while he talked with Tano alone.
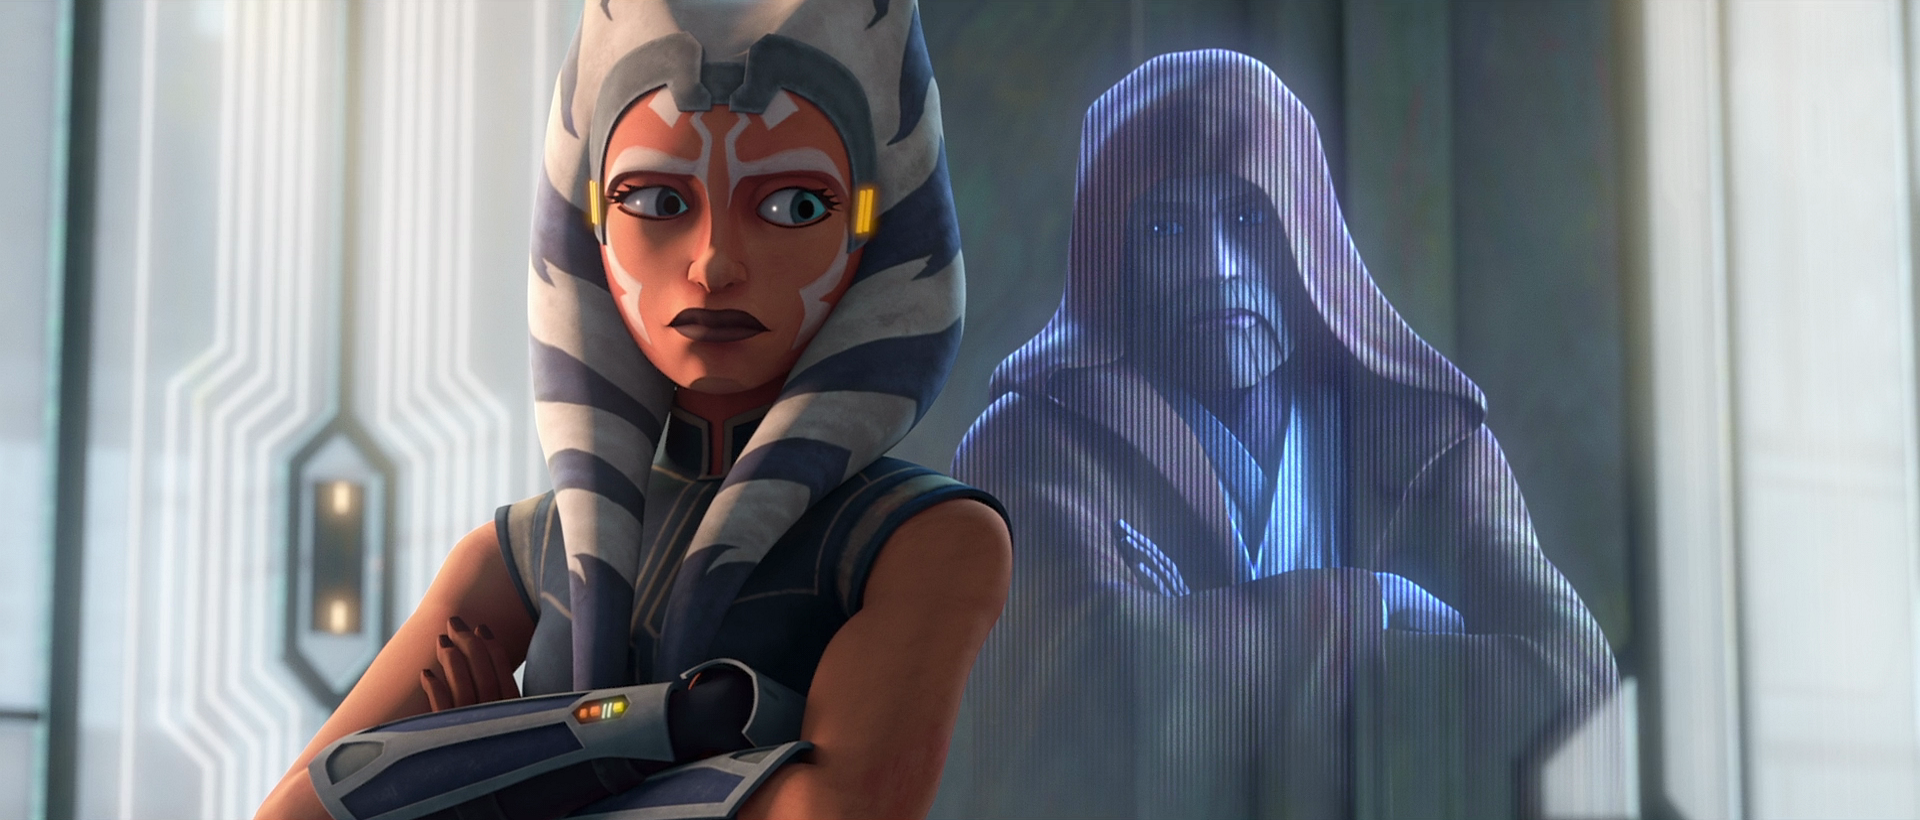
With their departure, Kenobi informed Tano that Skywalker had been assigned to spy on Supreme Chancellor Palpatine by the Jedi Council, which Tano found distasteful. When she asked why, Kenobi told her that the Galactic Senate had allowed Palpatine to stay in office far longer than his term allowed, even with the emergency powers granted to Palpatine shortly before The Clone Wars Begin and that the council was suspicious of Palpatine's true intentions. Tano then noted that Palpatine had been a great friend to Skywalker for a long time and that she did not believe he would be happy with his current assignment. Kenobi affirmed her suspicions and said that it was best for her to talk with him. Tano was displeased with this, believing that Kenobi was asking for her to hold up the Council's judgment in the situation, not believing she was the right person for that role after everything they had put her through. However, Kenobi relented and admitted that the Council wasn't always right in its decisions, which was why he was asking for her help.
Just then, Rex rushed in, apologizing to both for interrupting them, but telling the two that there had been an attack in the Undercity. Kenobi allowed Tano to go and, as she ran off, she began to ask the Jedi Master to tell Anakin something. Kenobi did not let her finish, simply responding that he would. Tano then rushed off to the Undercity as Kenobi watched.
Arriving back in the Undercity, Tano immediately received news that the clones there were ambushed on their way to reinforce C-deck leading Tano to order Rex to reinforce the location and him to run off to fulfill his orders. After this, Tano walked over to an injured clone named Sterling who had called her name. He informed her that Maul tore right through their defenses, asking about Tano the entire time. Eventually, Maul realized that Jesse was the oldest clone in the unit present by looking into his mind and had most likely served under Tano for longer, so he took him deeper into the Undercity as a prisoner in order to get as much information from him as possible. With this, Tano looked deeper into the Undercity.

Soon after, Tano departed the Undercity and went to the royal prison alongside Rex and Kryze to interrogate Almec in order to learn more about Maul's plan. Upon entering his cell, Almec sarcastically mentioned how flattered he was upon the three being able to find the time to meet with him. After this, Kryze began the interrogation by asking Almec what Maul's plan was and how he was planning on escaping. In response, Almec informed them that Maul was not attempting to escape as he saw no point in it. Kryze believed this meant that Maul believed he could win, but Almec assured her that that was not the reason as he had become filled with a sense of dread in recent days. Tano then asked him if he had mentioned Sidious to which Almec said he hadn't yet at that point. Continuing the questions, Kryze asked why Almec wanted Kenobi here to which Almec said that he didn't exclusively want Kenobi and that there was another individual Maul wanted as well, however; Almec feigned his forgetting of this person's name.
With this, Tano asked Kryze to "help" Almec remember and, with this, he became very defensive, but was immediately shot by Gar Saxon, who had infiltrated to prison to assassinate Almec under Maul's orders so that he could not tell them anything. While Kryze ran after Saxon, Tano ordered Rex to get a medic as Almec informed Tano that Maul had had a vision in which the name had come to him. As Almec slowly died, Tano cried out for him to tell her the name of the individual. With this, Almec slowly breathed out "Skywalker" before dying in Tano's arms. Tano, briefly shocked by this, eventually recovered and rejoined Rex and Kryze—who had lost Saxon in her pursuit of him—in returning to the royal palace.
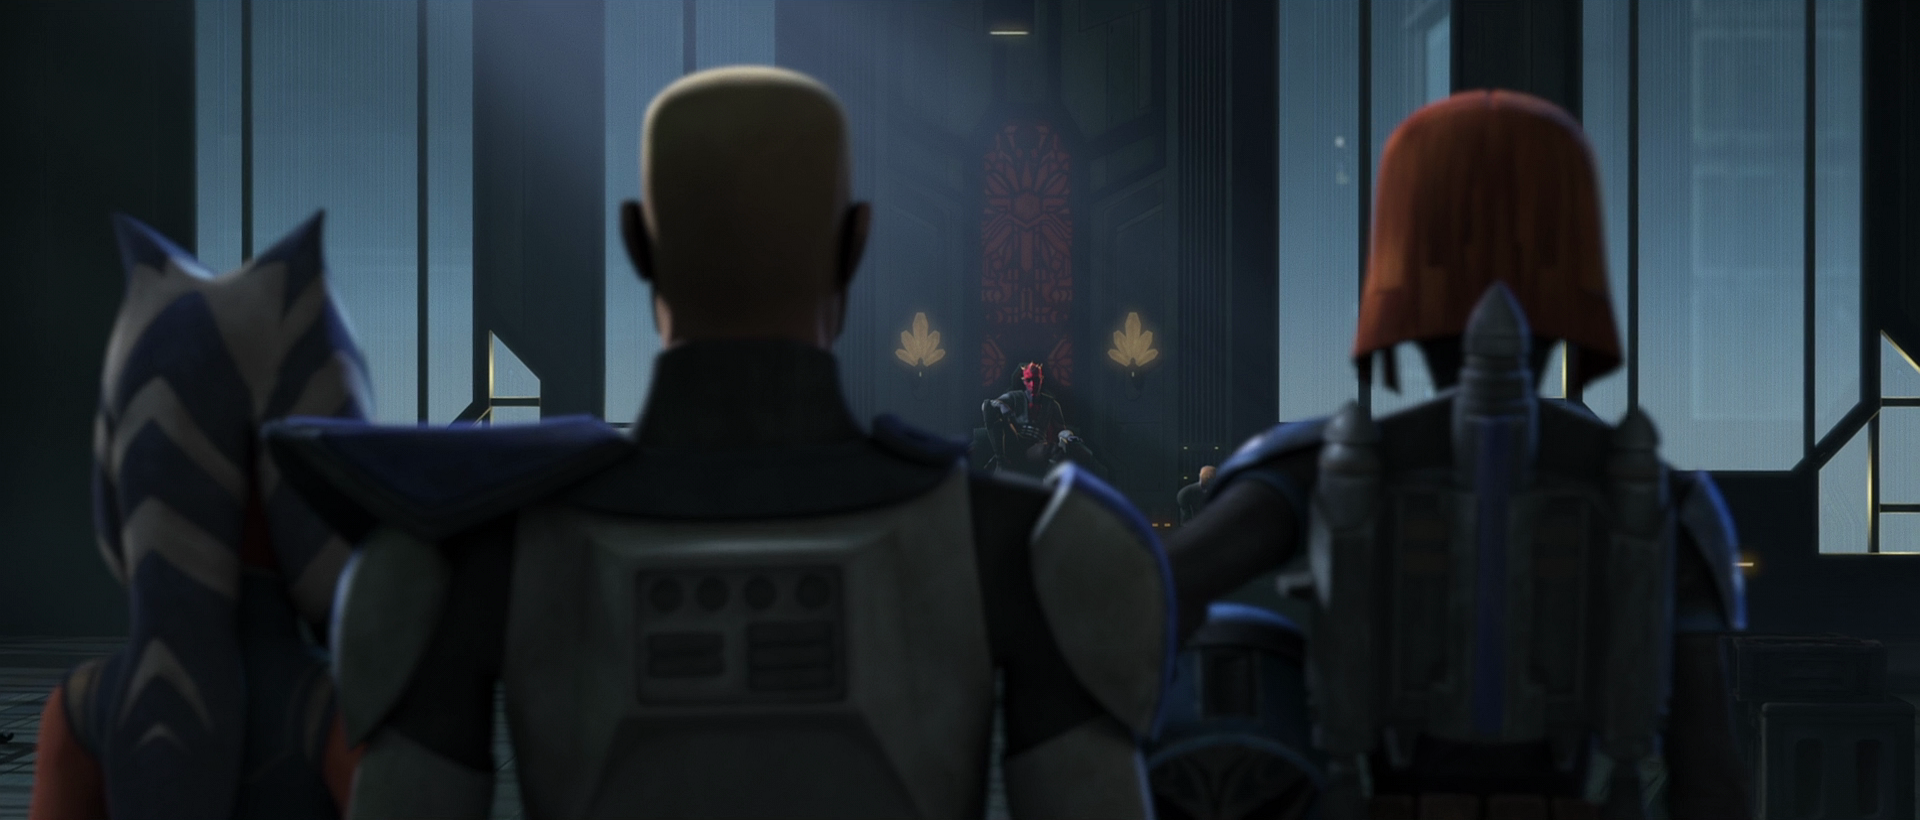
After heading back to the palace, Tano, alongside Kryze, Rex, Wren, and several other Mandalorians, stood atop a balcony overlooking one of Sundari's streets where the citizens were being ordered to move to shelter locations by clones to which they received major backlash from the citizens for, not liking to clones present in Sundari. Eventually, Kryze had had enough of this and walked away as Tano and Rex followed close behind. As they entered the palace, Kryze informed Rex and Tano that the citizens of Sundari would not accept a Republic occupation for much longer and that neither would she. As a response, Rex argued that he and his men did not want to remain as a police force within the city with Tano adding that they would leave once Maul was captured and that Kryze would then be granted her opportunity to lead the people. However, as she said this, Maul appeared sitting in the throne of the Grand Salon along with the captured Jesse, whom Maul had managed to retrieve information from regarding Tano using the Force.
Kryze attempted to attack Maul by pulling out her WESTAR-35 blaster pistols and firing several blaster bolts at the Sith Lord before being stopped by Maul who used the Force to hold her in place. He briefly held her there before dropping her, leading to Tano and Rex to rush to her aid. Maul then released Jesse back into their care as a show of good faith towards them. As Jesse arrived back with them, Rex asked if he was alright to which Jesse apologized, noting that he had told Maul everything before Tano ordered Rex to get Jesse out of the palace. As Rex left, explosions began to ring outside—having been orchestrated by Maul in a counterattack from the super commandos in order for Tano and him to be left alone—causing Tano to turn her head and Maul to ask that one of them deal with the explosions. Tano asked for Kryze to go, which led Maul to stand up and announce that he and Tano would be fine together. With a final plea from Tano for her to leave, Kryze put her helmet back on and rushed outside to defend her people.
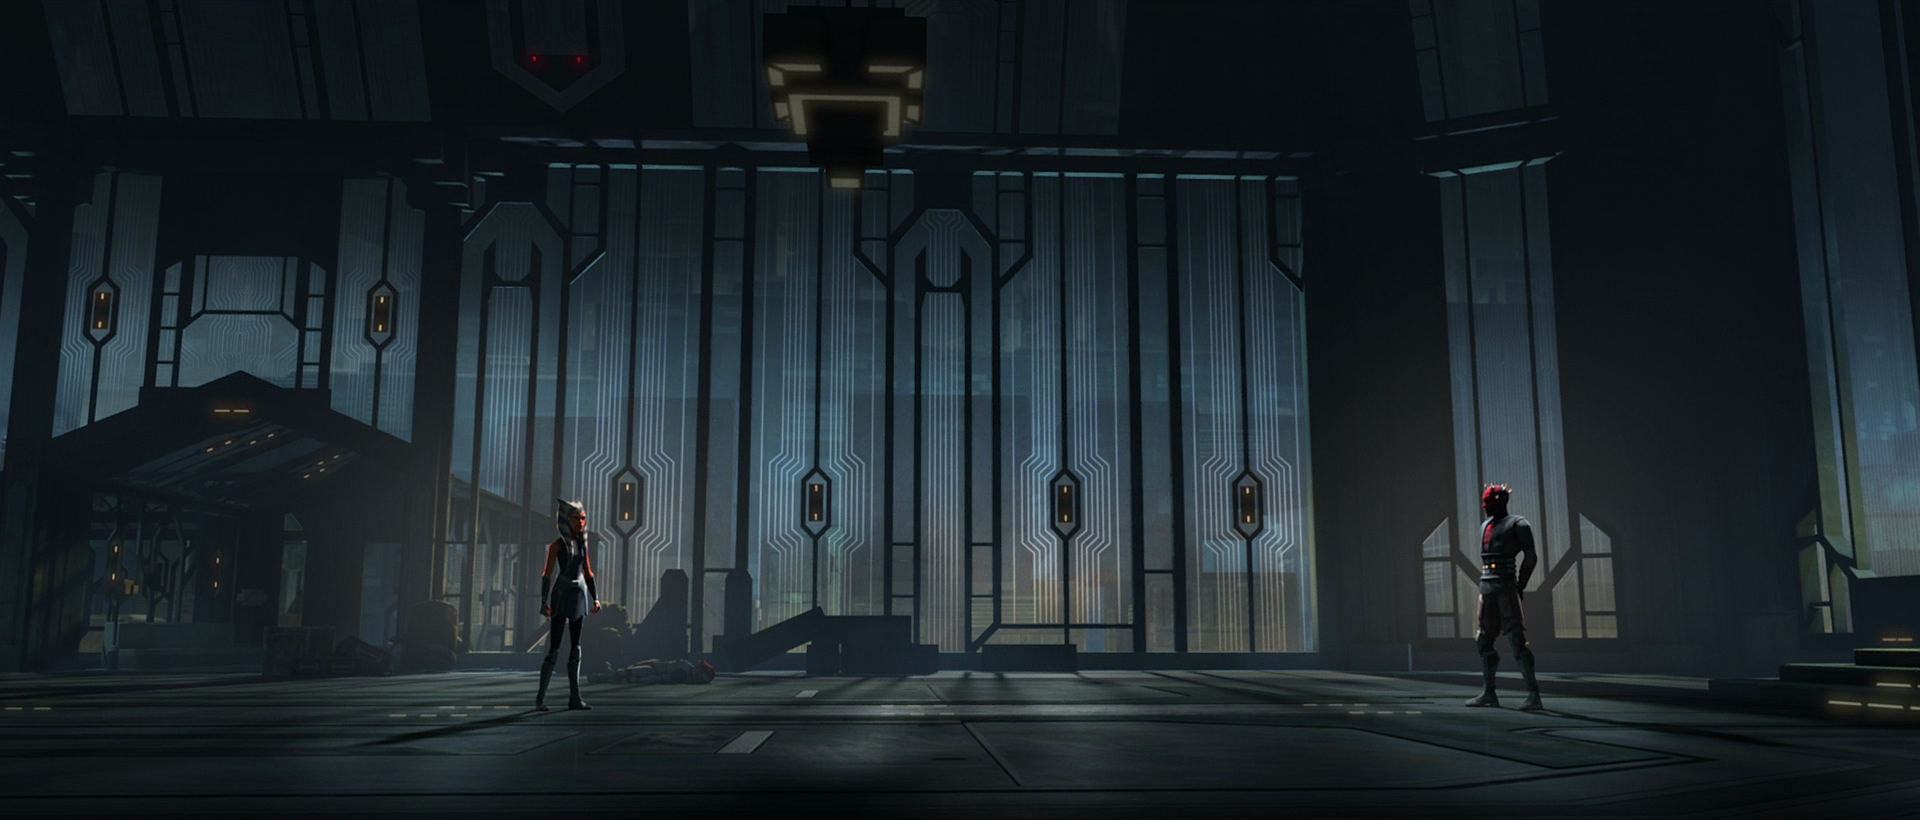
Now in isolation, Maul began to contemplate the naivety of the combatants outside, prompting Tano to question his motives for speaking to either her or the Jedi Council. Maul responded by stating that his intention was specifically to converse with her. Following this, Maul brought up Tano's perceived betrayal by the Jedi Order, inquiring about its truth, to which Tano affirmed that her departure was voluntary. Maul acknowledged this, yet highlighted that her choice stemmed from the Jedi Council's duplicity. This observation caused Tano to momentarily pause, after which Maul remarked on his own history as a pawn manipulated by a force beyond his control.
Subsequently, Tano advanced, declaring her intent to bring Maul to justice. He countered that justice is merely a construct reflecting the morality of the ruling power. He also voiced his prediction that the current regime would soon crumble, leading Tano to inquire whether Darth Sidious was the architect of this anticipated downfall. Maul then clarified that Sidious was the mastermind behind all recent galactic events, orchestrating them from the shadows, but would soon reveal his presence. Tano then requested that Maul join her in aiding the Jedi to stop Sidious before he could seize control of the galaxy. However, Maul was aware that the Republic was already lost, a truth she failed to grasp. He elaborated that the Jedi were incapable of defeating Sidious, their era having passed, but suggested that he and Tano, united, might succeed.
As explosions echoed in the background, Maul extended his hand to Tano, awaiting her decision. During this moment, an explosion shattered the glass surrounding them. Ultimately, Tano agreed to assist Maul, stipulating that he answer her query regarding his desire for Skywalker's presence on Mandalore. Maul explained that Skywalker held the key to Sidious' plan, prompting Tano to ask if he was the Chosen One, but Maul knew that his role was to destroy the Jedi and that he had been prepared for this task for a long time. Tano accused Maul of lying, but Maul stood firm in his convictions, asserting that he had engineered the war on Mandalore to lure Skywalker and Kenobi there, aiming to eliminate Skywalker and thus deprive Sidious of his prized apprentice and primary instrument.
Rejecting this explanation, Tano activated her lightsabers, ready to engage Maul and apprehend him, arguing that his vision was flawed and that her understanding of Skywalker precluded such an outcome. In response, Maul ignited his own weapon, stating that he needed to impart one final lesson. Maul then attacked Tano, initiating their duel.
Maul and Tano duel within the royal palace."
Tano evaded several of his attacks before being compelled to parry others. Spotting a weakness in Maul's defenses, she launched an offensive, pushing him back. Tano's attempt to kick Maul was unsuccessful, leading to him striking her in the face with his elbow, causing her shoto blade to fall from her grasp. Tano was once again on the defensive, forced to fight with a single saber; however, she soon managed to kick Maul, allowing her a brief opening to use the Force and retrieve her blade, forcing Maul to evade the saber as it returned to her hand. The fight then took a brief pause as Tano insulted Maul by claiming that if Skywalker had shown up, Maul wouldn't have lasted long in their fight to which Maul commented that Tano had Kenobi's arrogance before she swung her saber at him, mentioning that she likely had many qualities he disliked.
As the battle resumed, Tano briefly gained the advantage but was eventually forced to leap backward to avoid Maul's strikes. Locked in a saber clash, Maul grunted, attempting to disorient Tano, but this provided her with an opportunity to kick him through one of the palace's windows. Tano paused briefly to gather herself before pursuing Maul to continue their fight.
Tano arrives to face Maul one final time."
Upon exiting the palace, Tano observed Mandalorian reinforcements arriving to support the clones in repelling the super commandos' assault; however, turning her attention, she noticed Maul attempting to escape across a building, prompting her to pursue him to the support beams of the domed city's ceiling. Reaching the support beams, Tano reactivated her lightsabers, remarking that Kenobi had been correct in his assessment of Maul's resilience. As Maul turned to face her, Tano charged, and he reignited his lightsaber to continue their duel.
He blocked her attacks as she lunged at him, briefly forcing her on the defensive before regaining herself and attempting to kick Maul, but he managed to evade. As the fight continued, Tano jumped back on one of the support beams and almost lost her footing, but managed to regain herself before Maul exclaimed that if she had joined him they could have destroyed Sidious together, but Tano knew that this would have only been for Maul to take his place, which she commented in response. As Maul jumped towards her, Tano managed to elbow and kick him to another support beam, causing Maul to briefly be caught off balance. She then once again lunged at him, but was forced off and kicked back, barely managing to hold onto a support beam.
Maul asks Tano to join him one final time."
At that moment, Maul's fighter arrived, signaling his departure. As Maul shattered the glass dome of the city in an attempt to escape, Tano pursued him, leaping and knocking him from his position. As they regained their footing, their duel resumed. However, Maul soon dislodged one of Tano's lightsabers from her grip, causing it to fall to the battle below. Forced to fight with only one saber, Maul easily disarmed her of her second saber. Having gained the advantage, Maul severed the support beam they were standing on, causing it to tilt. Tano maintained a fighting stance, anticipating Maul's next attack. As Maul leaped onto the tilting beam, he offered her one last chance to join him, which she refused, leading Maul to continue his assault, only to be stopped when Tano seized his lightsaber and threw him from the beam. She then prevented his fall using the Force as Maul cried out for Tano to let him die.
As gunships arrived to extract him, Maul wailed in terror of what was to come, claiming they were all going to die before one of the Mandalorians used the whipcord within his vambrace and entangled Maul within it, allowing Rex to stun him. Rex then told Tano that they would take it from there as Tano caught her breath and looked out at the crack in the dome Maul had created.
Aftermath
Tano arrives with the captured Maul."
As dawn broke on Mandalore, Tano arrived with the captured Maul to regroup with Kryze. Upon exiting the gunship, Kryze exclaimed her disbelief in Tano's ability to capture Maul, which she noted she was impressed by and handed Tano her lightsabers back. In response, Tano noted that it was what the Jedi Council wanted, with Kryze following that by saying that it was still an impressive achievement due to the fact many had failed to capture Maul in the past. As they continued to walk, Tano noted that this achievement was due to the fact that she had learned from the best the galaxy had, including Kryze. However, Kryze was not flattered as she expressed that she wished she was proficient in something other than combat. With this, Kryze looked out at the ruins the siege had caused, and Tano followed up Kryze's previous statement by saying that the people of Mandalore needed a new type of leader. However, Kryze continued by saying that her sister had tried and failed to be a new type of leader for Mandalore, wondering if she could be any different.
Before they could continue, Rex approached the two and informed Tano that he had managed to contact the Jedi Council. Leaving Kryze, Tano asked if Skywalker was with them to which Rex noted that he had been when he had left to inform her about the meeting. Before leaving, Kryze turned to Tano and gave her her blessing to leave, telling her that she could handle Maul. With this, Tano left with Rex.
Tano attends a secret meeting with the Jedi High Council."
As Tano and Rex walked into the meeting via hologram, the members of the Jedi Council turned to look at the pair, with Windu noting that her mission had been a success. Tano confirmed this and reaffirmed their belief that she would be escorting Maul back to Coruscant once they departed. With this, Yoda thanked Tano for her service to which Tano said that she was just doing her duty as a citizen of the Republic. Yoda then asked if she did this act instead as a Jedi, but Tano followed this up by informing them that she was not yet ready to be called a Jedi once more. Moving on from this, Tano noted that she wished to speak with Skywalker, but was instead informed that Skywalker had left to inform Palpatine that Grievous had been located on Utapau. Having received an earlier report of Kenobi being sent to Utapau, Tano asked if he was the one who had engaged Grievous to which Yoda confirmed that he had indeed engaged the Separatist forces on the planet. With this, Tano noted that the war could be over soon if Kenobi managed to kill Grievous, but, in response, Windu noted that the war's conclusion depended on if Palpatine decided to end it or not. With Tano questioning what he meant, Windu explained that this was exclusively for the Council to discuss. Tano bowed her head and told Windu that she understood.
The briefing was subsequently adjourned, although Yoda remained in contact with Tano after the other masters ceased their transmission, and asked if she had more to say or if she had a message for Skywalker. However, Tano said that she had neither, neglecting the information she had received from Maul and informing the Grand Master that she would talk to Skywalker herself once he managed to make contact with him. With this, Yoda wished for the Force to be with Tano and cut off his own transmission. With the meeting over, Rex walked over and noted that Tano had neglected to inform them upon the information Maul had mentioned about Skywalker, but Tano waved this aside and simply confirmed that she hadn't. The two then walked out to regroup with Kryze and witness Maul's transport into their Nu-class transport.
Kryze and Wren escort the now imprisoned Maul."
As they walked out, Kryze, Wren, and several other Mandalorians walked by with the captured Maul contained within an old Mandalorian vault. Kryze walked up to Tano and the two acknowledged each other with a bow of their heads with Rex leaving Tano to accompany the Mandalorians as they escorted Maul. As the Mandalorians boarded the transport, Tano acknowledged the vault and noted that it was impressive, leading to Kryze mentioning that the vault was from an era when the Mandalorians were at war with the Jedi. With this, Tano jokingly remarked that she thought Kryze's sister, Satine, had outlawed such devices as these while she was duchess of Mandalore, which Kryze said that she had and that this was the last one the Mandalorians possessed. With their conversation finished, Kryze and Tano shook hands and the two said their goodbyes as Tano left to board the transport.
Now with Maul in their custody, the transport took off to board the Star Destroyer Tribunal. While onboard, Tano and Rex made conversation between one another. Arriving on the Venator, Tano and Rex exited the transport and made their way to the ship's bridge. As Tano and Rex entered the bridge, the officers present turned and saluted Tano with a smile on their faces. The Star Destroyer soon entered hyperspace as Rex and Tano watched.
As Tano looked into the void of hyperspace, Rex asked if something was on her mind, leading Tano to explain that all she had ever been since she was a Padawan had been a soldier, contrary to her training as a peacekeeper. To this, Rex said that all his life he had only been a soldier and that he and his brothers received a mixed feeling about the war because of it, but he knew that without the war, he and his brothers would've never existed. Tano then turned and smiled, telling Rex that the clones' existence was one of the few good things that had come out of the Clone Wars, nothing that the Republic would never have been able to find better soldiers and that it had allowed her to receive her best friend in Rex. The two then saluted one another as an officer walked in to report that a new briefing had come in and, when asked if she would like to join him to look at it, Tano declined, believing it was more good news. Tano then looked back into streaking blue void of hyperspace.
Order 66
As Tano stared into hyperspace, she received a vision of Windu dueling Palpatine within his office and Skywalker betraying Windu, but did not fully understand what she was feeling. With this, Tano rushed into the command center and informed Rex that she believed something terrible had happened to Skywalker. However, instead, the clones began to turn their blasters towards her in accordance with Order 66. Joining them, Rex asked for them to lower their blasters so that he could kill her himself and raised his own blasters, a tear rolling down his face as he attempted to fight his inhibitor chip, an organic brain implant that compelled each clone trooper to comply with the directive.
Tano defends herself against the oncoming clone troopers."
While his whole body shook and a tear rolled down his face, Rex asked for Tano to find Fives before firing upon her. Tano, forced to jump out of the way, ran towards Rex and tackled him, igniting her lightsabers to defend against the other clones' incoming blaster bolts, managing to kill both attacking her. She then closed the blast door as Rex began to stand up, rubbing his head from being forced into the command console. However, Jesse along with several other clones arrived, forcing Tano to divert her attention as all of the clones present began to fire upon her. With this, Tano attempted to direct the blaster bolts into the wiring above in an attempt to escape. As she escaped, the clones believed they had managed to kill her, but soon found that Tano had instead escaped into a vent above.
Exiting the vents, Tano made her way to the detention level in a bid to free Maul from capture in an attempt to create a diversion for herself. As she arrived, members of the Coruscant Guard were taking aim at Maul, ready to execute him, but she instead used the Force to push one aside and knocked the other one out by throwing him into the ceiling. With this, Tano looked towards Maul and told him not to make her regret her decision before she freed him from captivity. As Maul fell out of the vault, he expressed his surprise that she had survived, but instead of feeling flattered, Tano held her lightsaber to his throat and asked him if he was behind the clone's turning. Maul instead explained that he did not know exactly what had transpired, but instead said that he was sure Tano had felt the voices crying out in pain and death as Jedi across the galaxy were killed, including Tano's former mentor Plo Koon. Tano then explained that her clones had turned against her and she didn't know why to which Maul began to laugh and say that he had not known what Sidious' had been playing, but that he now did—the Grand Army of the Republic had turned against the Jedi Order.
He then stood up and said that Tano had done the right thing in seeking his help and asked her to follow his lead, but Tano instead held her lightsaber up to him once more and made clear that she just wanted to use him as a diversion and not as a partner. With this, Tano ordered Maul to go cause some chaos as Maul looked at her with hatred displayed on his face. As the two walked out of the cell, Maul asked for one of Tano's lightsabers so that he might be granted a fighting chance, but Tano declined his offer and commanded him to leave once more. Now having freed Maul, Tano made her way to the droid storage room to recruit help from the droids located there.
The droids pledge their allegiance to Tano."
As clones ran by, Tano snuck her way through the Venator, eventually arriving at her destination. Once Tano arrived in the droid storage room, she reactivated her old astromech droid R7-A7 who was ecstatic to see her, but Tano told him to quiet down as she required his help. R7 began to beep profusely, but Tano continued to attempt to quiet him down as the other two droids CH-33P and RG-G1 activated. As they activated, the droids began to profusely ask Tano questions upon what was happening, but Tano couldn't give them answers as she didn't know herself; however, she asked them for their help in discovering why. With this, the droids pledged their allegiance to her as Tano ordered them to get started.
With all of them in agreement, Tano ordered R7 to patch into the central computer and search for any secure file in relation to CT-5555 as asked of her by Rex. As R7 searched, he discovered files in relation to an incident that occurred aboard a space station above Ringo Vinda between CT-5385 "Tup" and Jedi Master Tiplee as well as a report from Kaminoan doctor Nala Se that said that Fives had had a malfunction with his inhibitor chip. She went on to mention a grievance report filed by Rex, which Tano asked R7 to open for her, but soon discovered that it was sealed. In order to open it, Tano tried Skywalker's passcode of 8108, which managed to open the file. Upon opening the file, Rex said that the inhibitor chips within the clones' brains could possibly have an alternative purpose they did not yet know. With this new information, Tano took the droids in an attempt to capture Rex and remove his inhibitor chip.
Tano begs Rex to allow her to remove his inhibitor chip."
As Rex rushed across a hallway, R7 and CH-33P stopped him, sealing the blast doors between him and the other clones to leave him and Tano alone. With Rex trapped, R7 displayed a hologram of Tano, informing Rex that she believes she knew why he turned against her and that she saw his report on Fives. On top of this, she informed him that he had been programmed to turn against her and that his mind had been altered by the inhibitor chip, continuing by saying that she could help him. As Rex took aim at R7 and asked where Tano was, she appeared behind him, with R7 electrocuting him in order to bring him to the medical bay. As Rex fell to the ground, Tano asked the droids to be careful as they had not been trying to hurt Rex. As clones began to yell from outside the blast doors, Tano asked CH-33P if all the doors were sealed between them and the medical bay, which he confirmed. With this, Tano lifted Rex and placed him on top of R7, G-G, and CH-33P, and the combined efforts of the three droids allowed Tano to bring him to the medical bay. As the clones broke through the blast doors, Tano sealed even more doors to cover their escape.
Reaching the medical bay, Tano placed Rex on the medical bed. With Rex in position, Tano ordered R7 to run a scan for the inhibitor chip within Rex's brain; however, the initial scans came up empty prompting Tano to ask the medical droid to check again. As they scanned once more, CH-33P alerted Tano that the clones had begun to hack into the door and, with this, Tano ordered G-G to reseal the door as fast as possible if the clones managed to break through. Tano then asked R7 once more if anything had come up in the scans, but nothing had yet been located.
Rex reawakens from his surgery."
With this news, Tano walked over to Rex and put her hands around his head, beginning to chant "I am one with the Force and the Force is with me." Continuing to chant, the unconscious Rex began to join in as the inhibitor chip was finally located. With its location finally having been discovered, Tano ordered R7 to remove the inhibitor chip to which R7 originally objected by asking if it would work, but Tano didn't know, only clarifying that if it didn't, the four of them were dead anyway. While they attempted to remove the inhibitor chip, the clones finally broke through the door, and Tano, in an effort to ward them off, reignited her lightsabers. As the clones began to fire upon Tano, she deflected their blaster bolts and used the Force to throw several of them while CH-33P attempted to reseal the door. As the clones began to overwhelm Tano, Rex woke up from his surgery and used his blasters to kill several clones as CH-33P finally resealed the door.
With Rex awake, Tano asked if he was alright. Rex assured her that he was and apologized for turning against and almost killing her earlier. With that, Tano asked how widespread the inhibitor chips were and how many Jedi were currently being betrayed across the galaxy, to which Rex responded with the crushing news that the entire Grand Army of the Republic had betrayed their Jedi and had been ordered to hunt down and kill the remaining ones. However, soon after, the clones began to cut through the door again as Tano and Rex turned to watch.
Tano and Rex stand to face their former allies"
Maul, finding himself all alone, started to ponder how unaware the fighters outside were, which made Tano wonder why he was saying all this for her or the Jedi Council. Maul answered by saying he wanted to talk to her specifically. After that, Maul brought up how the Jedi Order had supposedly betrayed Tano and asked if it was true, but Tano said she had left on her own. Maul knew this, but he said her choice came from the Jedi Council being hypocrites. When he said this, Tano paused for a moment before Maul said that he had also been used by a bigger power.
Then, Tano stepped forward and said she was there to bring Maul to justice. He said that justice was just what the people in charge thought was right. He also said that the current government would fall soon, so Tano asked if Darth Sidious was behind what he was saying. Maul then made it clear that Sidious was behind everything happening in the galaxy, pulling strings from the shadows, but he would show himself soon. Tano then asked Maul to join her and help the Jedi stop Sidious before he took over the galaxy. But Maul knew the Republic was already gone and she just couldn't see it. He went on to say that the Jedi couldn't beat Sidious and their time was over, but he thought he and Tano could beat Sidious if they worked together.
With explosions still going off outside, Maul held out his hand for Tano to join him as she thought about what to do. While she was thinking, an explosion broke the glass around them. Eventually, Tano decided she would help Maul if he answered why he wanted Skywalker to come to Mandalore. Maul explained that Skywalker was key to Sidious' plan, leading Tano to ask if he was the Chosen One, but Maul knew his job was to destroy the Jedi and he had been prepared for it. Tano then said Maul was lying, but Maul stood his ground, saying he had started the current war on Mandalore to get Skywalker and Kenobi there so he could kill Skywalker and stop Sidious from having his best student and main tool.
Tano didn't accept this answer and turned on her lightsabers, ready to fight Maul and arrest him, saying Maul's idea was wrong and she knew Skywalker well enough to know it could never happen. Maul then turned on his own weapon and said he needed to teach her one more thing. Maul then attacked Tano and they started fighting.
Maul and Tano duel within the royal palace."
Tano managed to avoid some of his attacks before having to block others. She then noticed Maul's defenses were weak and started attacking him, pushing him back. Tano tried to kick Maul but failed, which led to him hitting her in the face with his elbow and causing her shoto blade to fall. Tano was now defending again, having to fight with just one saber; however, she soon managed to kick Maul, giving her a chance to use the Force and grab her blade, making Maul avoid the saber as it came back to her. The fight then took a brief pause as Tano insulted Maul by claiming that if Skywalker had shown up, Maul wouldn't have lasted long in their fight to which Maul commented that Tano had Kenobi's arrogance before she swung her saber at him, mentioning that she likely had many qualities he disliked.
When they started fighting again, Tano briefly gained the upper hand but eventually had to jump back several times to avoid Maul's attacks. Stuck in a saber lock, Maul grunted, trying to confuse Tano, but this gave her the chance to kick him out of one of the palace's windows. Tano paused for a moment to catch her breath before chasing after Maul to continue their fight.
Tano arrives to face Maul one final time."
When Tano got outside, she saw Mandalorian reinforcements arriving to help the clones fight off the super commandos' attack; however, when she turned her head, she saw Maul trying to escape on top of a building, leading her to chase him to the support beams of the domed city's ceiling. When she got to the support beams, Tano turned her lightsabers back on and said that Kenobi had been right when he said Maul would be hard to kill. As Maul turned to look at her, Tano rushed at him as he turned on his own lightsaber to keep fighting.
He blocked her attacks as she lunged at him, briefly forcing her on the defensive before regaining herself and attempting to kick Maul, but he managed to evade. As the fight continued, Tano jumped back on one of the support beams and almost lost her footing, but managed to regain herself before Maul exclaimed that if she had joined him they could have destroyed Sidious together, but Tano knew that this would have only been for Maul to take his place, which she commented in response. As Maul jumped towards her, Tano managed to elbow and kick him to another support beam, causing Maul to briefly be caught off balance. She then once again lunged at him, but was forced off and kicked back, barely managing to hold onto a support beam.
Maul asks Tano to join him one final time."
Just then, Maul's fighter arrived and asked for him to leave. As Maul shattered the glass on the dome of the city in an attempt to escape, Tano chased after him, jumping up and knocking him off of where he stood. As the two regained their balance once more, their duel continued. However, Maul soon managed to knock one of Tano's lightsabers free from her hand, causing it to tumble down to the fighting below. As she attempted to fight with only one of her sabers, Maul managed to easily disarm her of her second saber. Having gained the upper hand, Maul sliced the support beam the two were standing on, causing it to sag. Tano remained in a fighting position, ready for Maul to attack her once more. As Maul jumped onto her sagging support beam, he gave her one last chance to join him, which she refused leading to Maul continuing his attack, but being stopped when Tano managed to grab hold of his lightsaber and throw him off of the beam. She then stopped him from falling by using the Force as Maul cried out for Tano to let him die.
As gunships arrived to extract him, Maul wailed in terror of what was to come, claiming they were all going to die before one of the Mandalorians used the whipcord within his vambrace and entangled Maul within it, allowing Rex to stun him. Rex then told Tano that they would take it from there as Tano caught her breath and looked out at the crack in the dome Maul had created.
Aftermath
Tano arrives with the captured Maul."
When morning came to Mandalore, Tano showed up with Maul, who had been captured, to meet up with Kryze again. As she got out of the gunship, Kryze said she couldn't believe Tano had caught Maul, which she said she was impressed by, and gave Tano her lightsabers back. In response, Tano said that it was what the Jedi Council wanted, with Kryze adding that it was still a big deal because many people had tried and failed to capture Maul before. As they kept walking, Tano said that she had been able to do it because she had learned from the best in the galaxy, including Kryze. However, Kryze wasn't happy about it and said she wished she was good at something other than fighting. With that, Kryze looked at the ruins from the siege, and Tano followed up Kryze's previous statement by saying that the people of Mandalore needed a new type of leader. However, Kryze continued by saying that her sister had tried and failed to be a new type of leader for Mandalore, wondering if she could be any different.
Before they could keep talking, Rex came up to them and told Tano that he had been able to get in touch with the Jedi Council. Leaving Kryze, Tano asked if Skywalker was with them, to which Rex said he had been when he had left to tell her about the meeting. Before leaving, Kryze turned to Tano and gave her her blessing to leave, telling her that she could handle Maul. With that, Tano left with Rex.
Tano attends a secret meeting with the Jedi High Council."
As Tano and Rex entered the meeting through a hologram, the Jedi Council members looked at them, with Windu saying that her mission had gone well. Tano confirmed this and said again that she would be taking Maul back to Coruscant when they left. With that, Yoda thanked Tano for her service, to which Tano replied that she was just doing her duty as a citizen of the Republic. Yoda then asked if she did this act instead as a Jedi, but Tano followed this up by informing them that
With Rex now conscious and allied with Tano, the pair was prepared to flee the Tribunal. As clones attempted to breach the entrance, Rex, positioned before it, inquired about Tano's escape strategy from the medical bay. She responded that she had a plan. When Rex pressed for details, Tano instead instructed him to set his blasters to stun, emphasizing their intent to avoid fatalities. As the clones persisted in cutting through the door, Rex cautioned Tano that the breach was imminent, but she maintained her instruction to wait. Upon the door's complete severance, Tano employed the Force to thrust it outward, dislodging several clones and facilitating their departure. The three remaining troopers, momentarily disoriented, were swiftly incapacitated by Rex. However, additional clones emerged from multiple directions as Tano, lightsabers activated, surged from the med bay, deflecting incoming fire while Rex neutralized clones in their path with stun blasts.
Amidst the ongoing battle with the clones, Tano directed R7 to identify an exit route from the Star Destroyer. In response, R7 successfully closed the blast doors surrounding them, isolating numerous approaching troopers, enabling Rex and Tano to subdue the remaining few. With a temporary lull in the fighting, R7 informed Tano that all escape pods had been destroyed, leading her to conclude that acquiring a shuttle was their optimal escape option. As Tano moved to depart, Rex revealed that Maul had escaped confinement. Tano, having orchestrated his release, informed Rex of this fact, much to his surprise. He began to question her motives, but she simply stated that it was a diversion as Tano began to rush for the hangar, asking Rex to hurry.
As they sprinted toward the hangar, the ship lurched violently as it was pulled out of hyperspace, an act perpetrated by Maul, who had used the Force to disable the hyperdrive, rendering the ship immobile and trapping it within the gravitational field of a nearby moon. Upon reaching the hangar's control center, Rex was the first to enter, stunning an unsuspecting officer before Tano rushed in and used the Force to push one aside as Rex stunned the other two. Upon reaching the controls, Rex lamented that the clones had already initiated a lockdown and that he would have been proud of them if they weren't trying to kill them. As Rex spoke, Tano commanded R7 to unlock the doors in Bay 12, CH-33P to ready the shuttle, and G-G to investigate the cause of the ship's violent jolt. As G-G attempted to discover what happened, he informed the pair that the hyperdrive had been completely destroyed to Rex's disbelief. The two soon discovered that they had become entrenched in the gravitational field of a moon nearby. With this, Tano instructed R7 to open the main hangar doors, revealing the approaching moon and prompting Tano to declare their urgent need to evacuate. As the ship continued to shake violently, Rex inquired about the status of the hangar doors as Tano asked about the shuttle. With that, R7 managed to open one of the hangar doors, revealing a shuttle for them; however, as R7 continued to open the rest of the hangar doors, it revealed an army of clone troopers, led by Jesse, waiting for them.
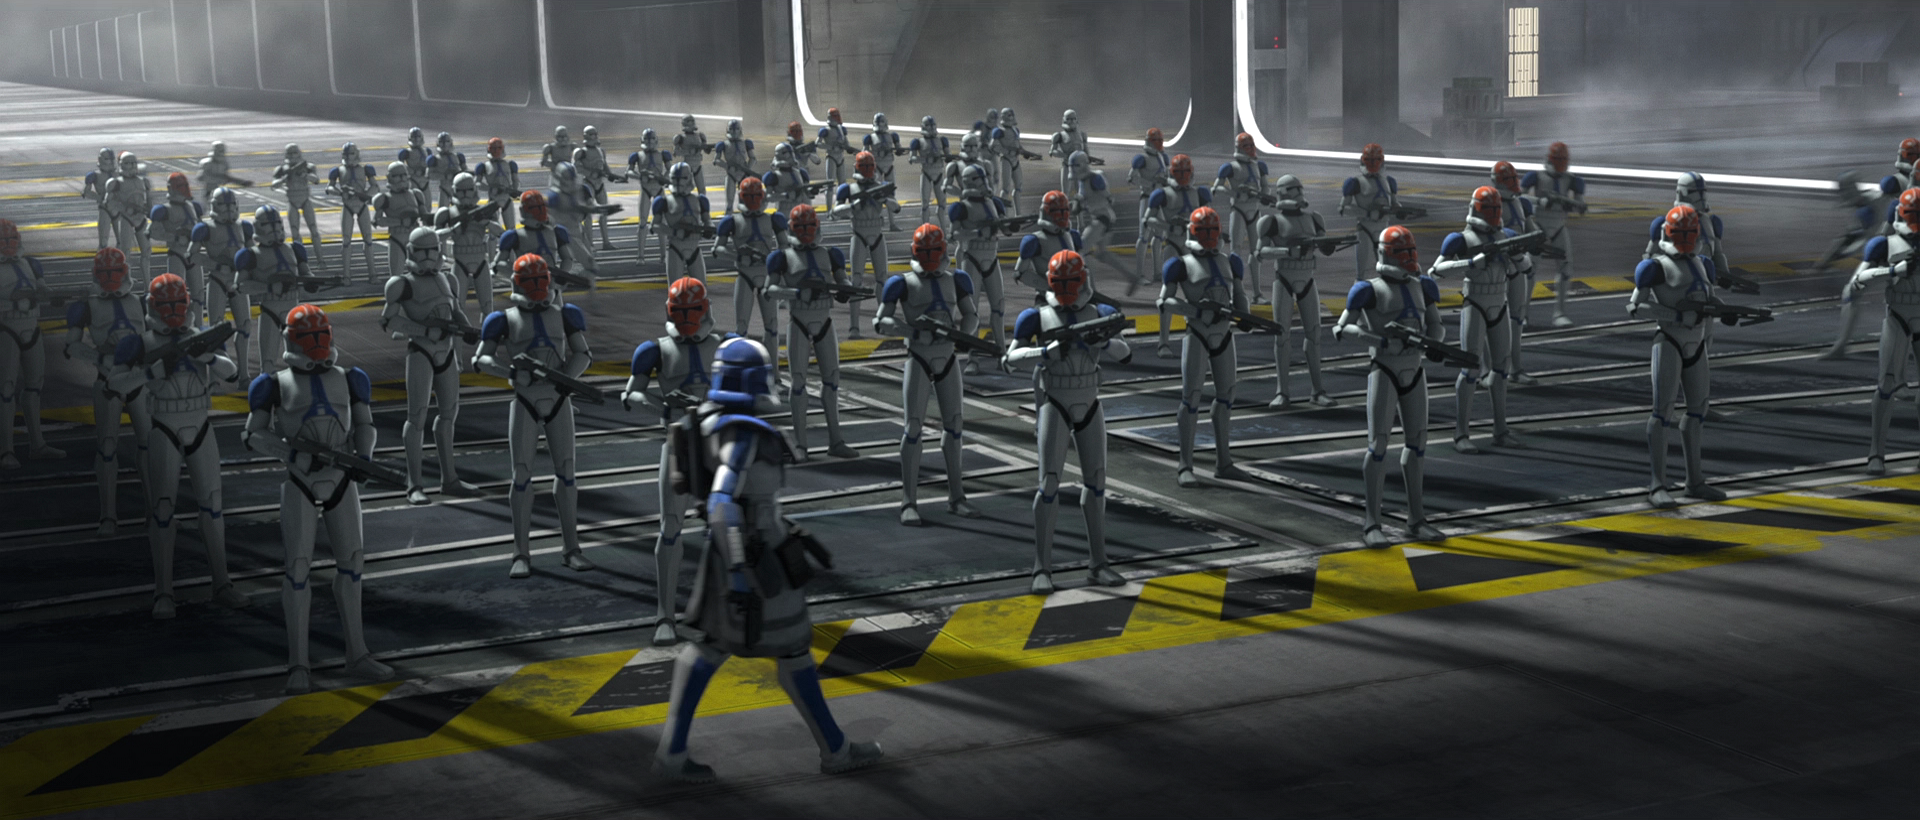
As the clones assumed their positions within the hangar, Rex urgently questioned their course of action, but Tano conceded that the overwhelming number of clones obstructed their path to the shuttle and that she was unwilling to harm them, prompting Rex to assert that the troops were indifferent to her sentiments. Rex continued, emphasizing that the Star Destroyer was doomed and that all clones aboard were prepared to sacrifice themselves to eliminate them both. In response, Tano approached Rex and removed his helmet, revealing his distressed state. With this, Tano explained that Rex was a good soldier, but that every one of the clones trying to kill was too. Tano continued to state that they may be willing to die, but she wasn't willing to be the one to kill them, leading Rex to believe that she was admitting defeat.
However, Tano refuted this, perplexing Rex, who saw no alternative to lethal force for escape. Tano then approached the viewport, observing the assembled clone troopers, and informed him that she had an idea. As Rex began to look slightly puzzled, Tano handed him back his helmet and assured him that she thought it was a good idea. She then knelt down and asked the droids if she could count on them to which all three of them agreed that she could. With their acknowledgement, she stood up and informed her four allies that she would explain her plan on the way to the hangar. As they approached the hangar, Tano outlined her strategy: Rex would simulate her capture to distract the clones, while the droids would discreetly bypass them and activate the lifts beneath the clones' feet. Before they arrived, Rex took Tano's lightsabers to make their ruse seem more plausible.
Upon reaching the hangar, Rex demanded that the clones cease fire as he escorted a purportedly captured Tano, her hands positioned atop her head. As the clones prepared to fire on Tano, Rex reiterated his demand to hold fire, prompting Jesse to declare his orders to execute Tano and threaten to do so himself if Rex failed to comply. As the clones continued to aim their blasters upon Tano, Rex explained that the order had been to eliminate the Jedi for treason and that since Tano was no longer a Jedi, she should not be considered a traitor under the directive. This caused Jesse to briefly pause before he informed Rex that he himself had informed the clones that they were under special orders from Darth Sidious to eliminate Tano, even though she was no longer considered a Jedi, as well as any clone who disobeyed the directive. As Jesse spoke, Tano turned to look at the droids who informed her that they needed a little more time, leading Tano to tell Rex to keep the clones talking for a little longer.
In response to Jesse's declaration, Rex made a final appeal to his friend, but the ARC trooper, after a moment's hesitation, revoked Rex's rank of commander, accusing him of treason. However, the droids turned towards Tano again and signaled that they had completed their task prompting Tano to ask Rex if he was ready, which he responded to by saying that he hadn't much liked being a commander anyway. As Jesse signaled for the clones to fire upon Rex and Tano, Tano's plan came to fruition; the lifts beneath the clones began to drop. With that, Tano pushed Jesse down the shaft with the Force and was thrown back her lightsabers by Rex.
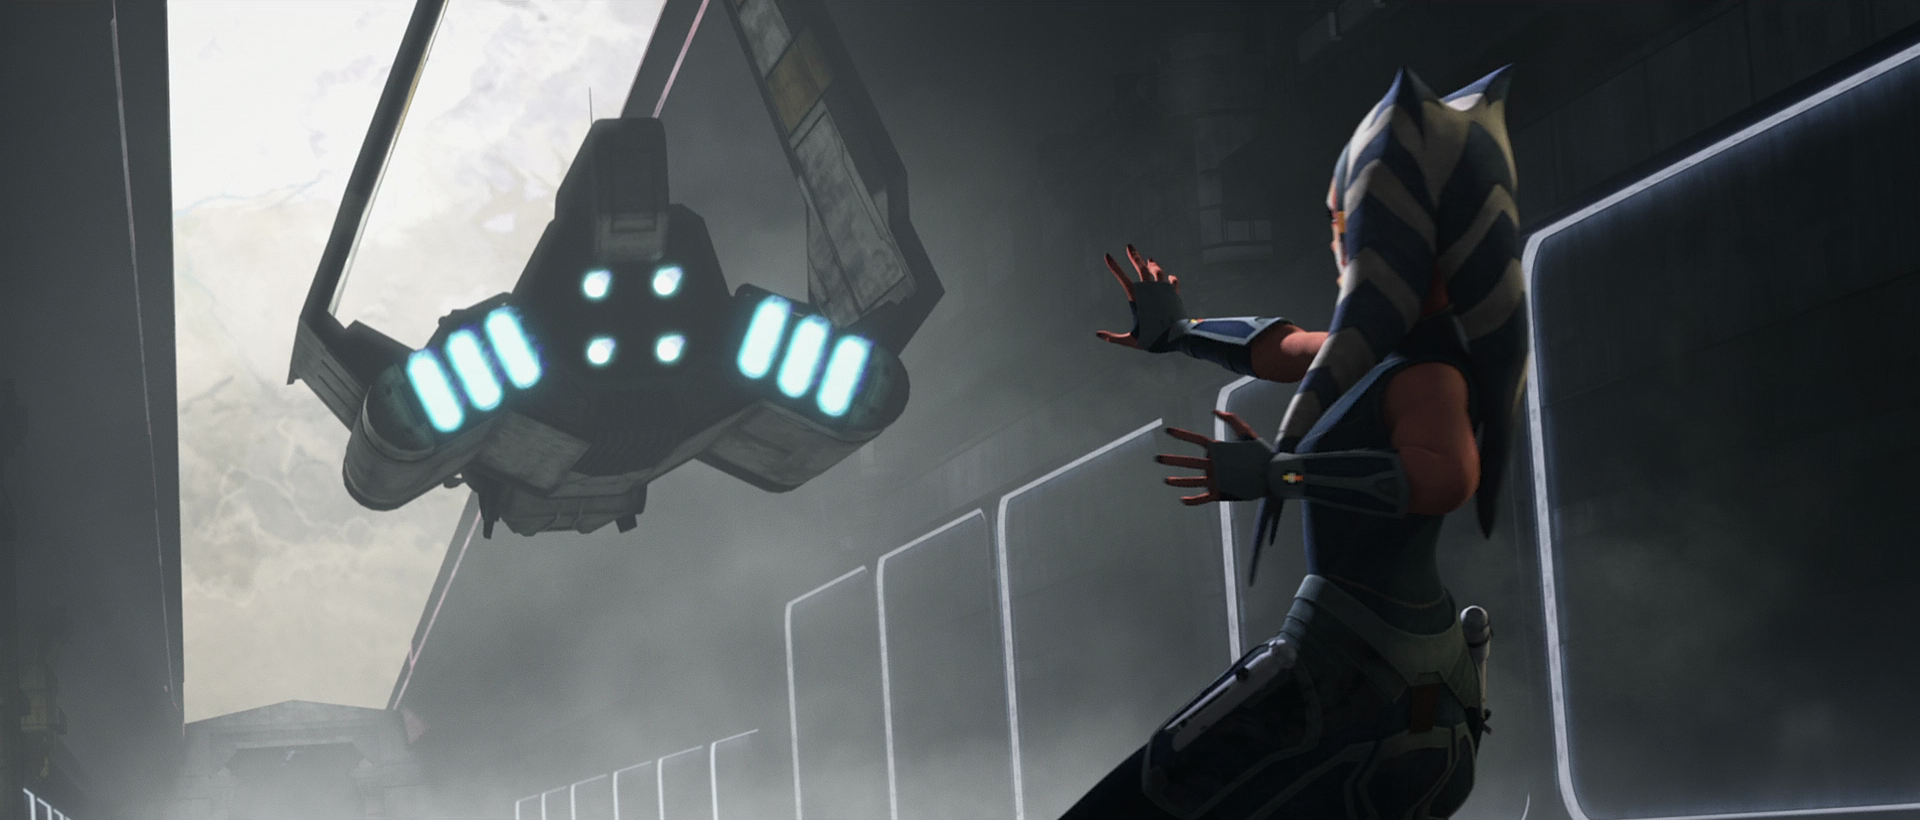
Now rearmed with her lightsabers, Tano, alongside Rex, swiftly subdued the remaining clone troopers. However, as they fought the remaining clones, Maul appeared inside the hangar, also attempting to escape the crashing Star Destroyer. As Rex and Tano continued to fight the remaining clones, Maul ran past them, and, noticing Maul running past them thanks to G-G, Tano notified Rex. Deeming the remaining clones insignificant, Tano pursued Maul, allowing Rex to manage the remaining troopers as he followed her. Upon intercepting Maul, he hurled several crates at her with the Force, asserting that she had instigated this chaos and threw a cart at her as she jumped to avoid it. Finally arriving to attack Maul, Tano slashed at Maul before he used the Force in a powerful push, knocking her all the way back to the lifts; however, before she could fall into the starship bay below, G-G managed to use one of his cables to help her back up. As G-G helped Tano up, the clones began to regain consciousness, forcing Tano to use one of her lightsabers to defend against the incoming blaster bolts.
While defending herself, Rex exerted every effort to assist her, neutralizing as many clones as possible with his blasters. However, Tano began to falter as blaster bolts struck her beskar-plated armor. The clones, identifying the droids as the source of their predicament, redirected their fire, compelling CH-33P and G-G to retreat. However, as this occurred, Maul stole the shuttle and began to use it to escape the Venator. Finally managing to fully climb up, Tano ran towards the shuttle and used the Force in an attempt to stop Maul from escaping. As she did this, Maul increased power to the thrusters, causing her to begin sliding across the floor of the hangar and forcing Rex to grab her hand to stop her from slipping away. However, reinforcements began to arrive in the hangar, which Rex noted to Tano, who was still attempting to hold Maul back. Being forced to divert his attention, Rex was forced to let go and defend her from the oncoming clones. Tano continued to strain and witnessed as R7 was killed by one of the clones' stray blaster bolts. However, seeing that Rex was beginning to become overwhelmed by the clones, Tano was forced to let go of the shuttle and allow Maul to escape. Tano then rushed back into battle alongside Rex.
Forced to defend herself on all fronts, Tano, recognizing their overwhelming disadvantage, plunged her lightsabers into the ground, utilizing the Force to create an opening for escape into the starship bay below. However, they were once again confronted by clones—Jesse and the other troopers whom the astromechs had dropped below—ready to fight them once again. As Jesse ordered for the clones to attack, Tano was once again forced to defend herself. Luckily, from above, CH-33P and G-G managed to manipulate the lifts once more, forcing many clones back up into the main hangar. However, the two droids' efforts did not go unnoticed and the two were promptly executed by the clones. Finishing off the remaining troopers, Rex and Tano began to look around the starship bay for another ship to escape with, coming up with nothing as most ships located there were under maintenance.
Ultimately, Tano spotted a solitary Y-wing starfighter, but before they could reach it, they were once again attacked by the clones. In an attempt to reach the shuttle, Tano jumped across one of the lifts and used the Force to push Rex onto the Y-wing. As many more clones arrived on the lifts, Tano used the Force to push them all aside, but still began to be overwhelmed. Concurrently, the Star Destroyer began to break apart and lost all artificial gravity onboard, causing everything on the ship to begin falling towards the moon's surface. This forced Tano to use her lightsabers in an attempt to stop herself from falling. As she did this, Rex asked her to hurry up and rush to the Y-wing, leading Tano to muster enough energy to run across the surface of the hangar and attempted to jump onto the Y-wing, but fell the into open air as the Y-wing fell out of the hangar.
Tano began to fly through the open air as Rex searched for her within the Y-wing, eventually spotting her and opening the gunner's hatch for her to climb inside. Tano attempted to use the air around her to reach the Y-wing, but, as she grabbed hold, she lost her grip and flew away. Tano was now forced to use the debris to her advantage and ran across one of the destroyed engines in an attempt to regroup with Rex. With one final jump, Tano was forced to use the Force to pull herself closer to the gunner's seat, finally being able to grab hold and climb into the hatch. Having finally rescued her, Rex flew the Y-wing away as the Tribunal, and the clones, went down in flames.
Burying the dead
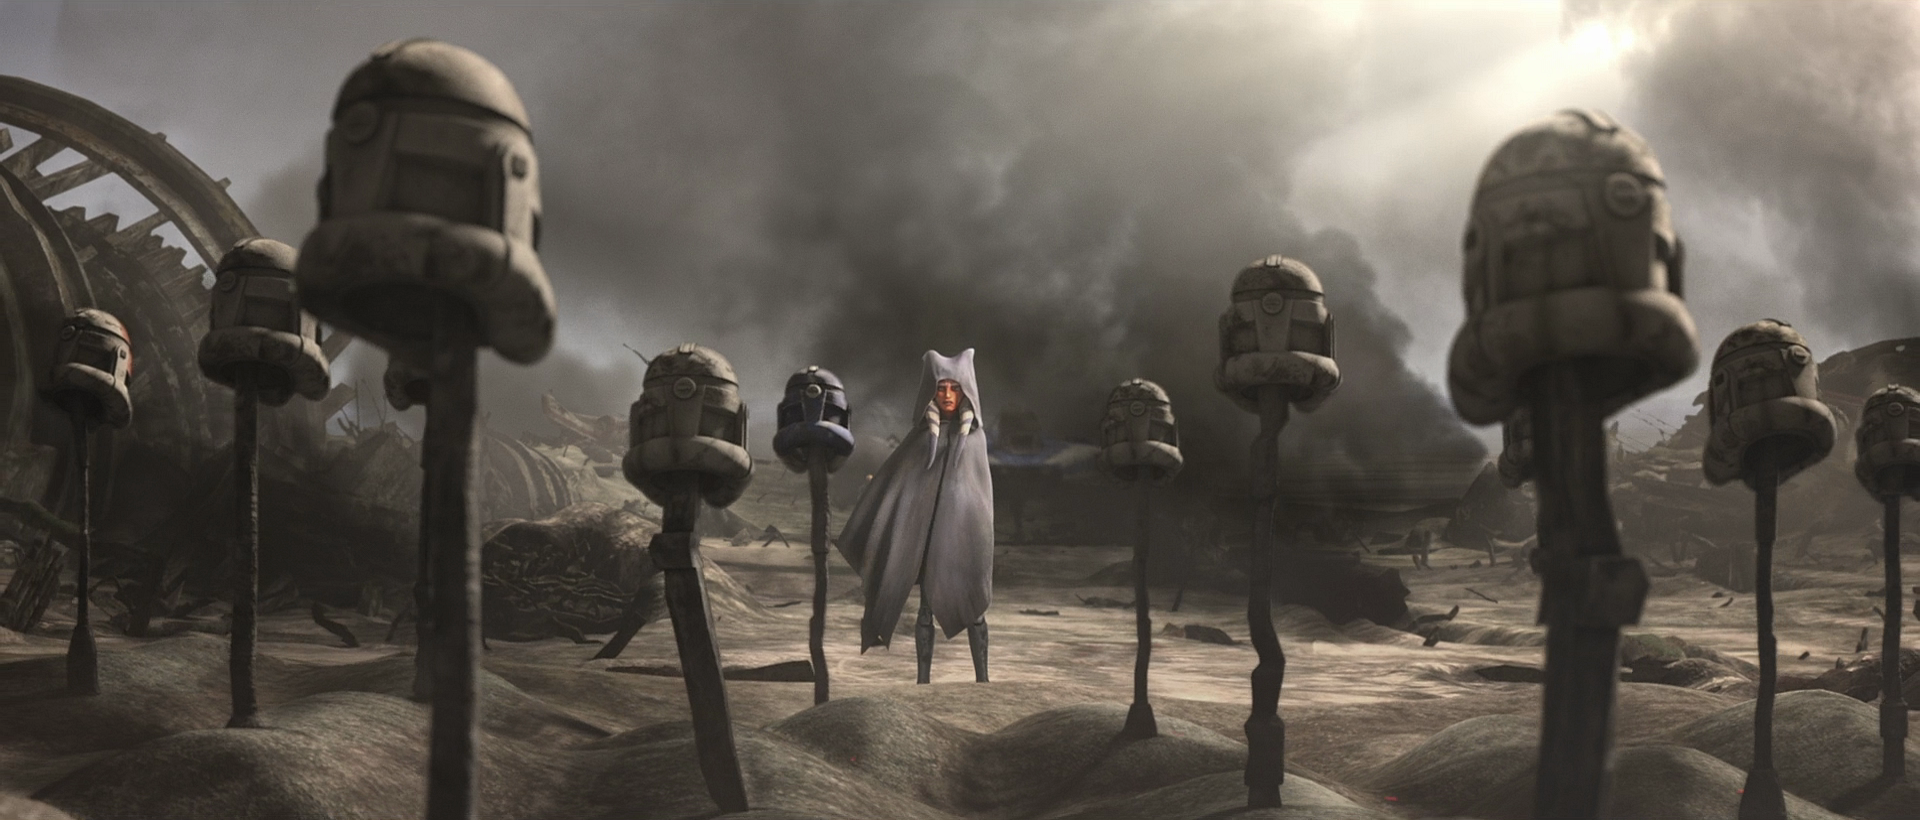
Subsequently, Rex piloted the Y-wing to a landing near the Star Destroyer's wreckage, where they constructed graves for each of the fallen clones they could locate, adorning each with the helmet of the deceased. They also salvaged the remains of R7-A7 to rebuild him. Upon completion of the burial site, Tano stood over the fallen clones, taking out her lightsabers and looking at one of them one final time before dropping them to the ground and leaving them behind. Now fugitives and enemies of the Republic, Tano and Rex were compelled to simulate their deaths and enter exile aboard their Y-wing. Tano also received a message from Kenobi sent to all surviving Jedi, warning to stay away from the Jedi Temple. She also came to understand that Palpatine had been a Sith Lord, and she was forced to stay on the run as Palpatine transformed the Republic into his Galactic Empire.
Following the destruction of the Jedi Order, Tano was listed amongst the Inquisitorius' priority targets of presumed survivors of the purge. Some years later during the early Imperial Era, the lightsaber she left behind was discovered and taken by Darth Vader, a Sith Lord who was in fact Tano's former master, Anakin Skywalker. Neither Tano nor Rex were aware that Maul's suspicions during the last days of the Clone Wars came true: Darth Sidious used Skywalker's frustration with the Jedi Council and his fear of losing his Amidala in childbirth to lure him to the dark side of the Force. Skywalker had clung closer to Amidala after losing Tano, who would have served as a counterbalance to his passions and fears, out of concern that she could leave him as well.

Ultimately, Amidala passed away, but her body was prepared by the mortician Commodex Tahn to make it look like she was still pregnant at the time of her death, keeping the existence of the children a secret from the Sith and, by extension, anyone who saw the late Senator's body. Concealed beneath a hooded cloak, Tano secretly attended Amidala's funeral in Naboo's capital of Theed, where she was observed by Senator Bail Prestor Organa. She was left unaware of the existence of Skywalker's children. Parting ways with Tano, Rex and the rebuilt R7-A7, meanwhile, began to work against the newly formed Empire with Tano's friends Trace and Rafa Martez. When Rex reunited with Clone Force 99, he kept Tano's survival a secret, merely telling them that he had help when his chip was removed.
Age of the Empire
Life on Thabeska
Ahsoka Tano escaped to the Outer Rim, intending to remain hidden from the Empire. Eventually, she located the planet Thabeska, a world primarily engaged in small-scale water and technology trade, characterized by a relatively small and disorganized population situated far from major hyperspace routes. Believing the rural world to be of little interest to the Empire, and a steady stream of newcomers would allow herself to blend into the quiet world, Tano made landing on Thabeska. However, the refugee did not account for the presence of the local Fardi clan, an influential family that either touched or ran most of Thabeska's businesses, including their own smuggling operations, though the family fronted such with several legal businesses. In time, Tano came to hear rumors that some kind of dark lord who was serving the Emperor and hunting Jedi, yet she was unable to confirm such reports.
To conceal her identity, Tano adopted the alias "Ashla," derived from the name of a moon orbiting the sacred Jedi world of Tython, a synonym for the light side of the Force, and the name of a Jedi youngling from the Clone Wars-era. Upon her arrival on Thabeska, Tano was greeted by several young girls. They showed her where she could find food and a place to stay, and introduced her to Fardi, who bought Ashla's ship for what she thought was a nearly decent price. Nevertheless, Fardi did not inquire the reason for Ashla's arrival at the dawn of the Empire, and the girls, who Ashla realized to be Fardi's daughters and nieces, took the Togruta arrival under their wing. Constantly accompanied by the young Fardi sisters, Ashla soon found herself working for the Fardi family once they learned that she was a good mechanic, and the refugee was given her own room in the Fardi compound and paid fair amounts of money for her work. Ashla had secured her place in the Fardi clan, becoming a friend amongst the Fardi girls.
Two months prior to Empire Day, the first anniversary of Emperor Palpatine's ascension to power, Ahsoka Tano was repairing droids in the Thabeska shipyard when she observed some of the Fardi children playing near a stack of crates. As Tano watched, the crates began to topple towards the terrified children, prompting Tano to employ the Force to levitate the crates and avert disaster. Tano had kept her Jedi powers a secret since leaving Mandalore, and feared that she had revealed herself to the young Fardis. Ashla reminded them that they should not have been playing near the crates, and they begged her not to tell Fardi, giving up their sweets—their only form of currency—and ignoring the supernatural incident they had just witnessed. Only Hedala Fardi, the youngest of her family, looked at Ashla with fascination. Sometime later, the Togruta outlander discovered that Hedala Fardi was Force-sensitive, as the Fardi youngling lifted several small stones with subtle hand gestures before the eyes of Ahsoka Tano.

On the day known as Empire Day, Tano received information from the Fardi girls indicating that their father was hosting important guests from the Empire for dinner. They expressed a desire to meet anyone new to the planet. The girls extended an invitation for Tano to join them at the Empire Day parade and aerial demonstration, also mentioning the lax security resulting from the large number of vessels in the shipyard.
Tano interpreted this invitation as both a subtle warning and a chance to flee the planet, an opportunity she decided to exploit. Gathering her few possessions, she made her way through the city streets towards the landing field in order to escape.
Despite several encounters with Imperial stormtroopers, Ahsoka Tano was ultimately compelled to commandeer one of Fardi's starships, thus departing the planet. Once she reached orbit, Tano recalled Hedala Fardi and the peril she faced as a Force-sensitive child likely to be targeted by the Empire. However, acknowledging that it was too late to help, she made the difficult decision to leave.
Raada
Tano's journey led her to the isolated agricultural moon of Raada, situated in the Outer Rim Territories. She landed the stolen Fardi ship at the primary settlement on the moon. Assuming the alias "Ashla," Tano developed a friendship with a local girl named Kaeden Larte, a member of a farming community. Kaeden allowed Tano to reside in an abandoned dwelling previously owned by Cietra. In exchange for ration packs, Tano agreed to work as a mechanic, repairing droids and various types of machinery. While settling into her new environment, Tano found herself reminiscing about her droid companion, R2-D2, and the necessity of concealing her Force abilities. The following day, Kaeden enlisted Tano's help to repair her thresher. While working on the machinery, Tano learned more about Kaeden's life as a farmer and contemplated settling down on the remote moon due to the perceived absence of the Empire. After completing the repairs on Kaeden's thresher, Tano explored the town, noticing several hills and caves nearby that she identified as potential hiding places.
On her third day on Raada, Tano seized the opportunity to explore the hills and caves surrounding the settlement. She discovered a cave that she designated as her personal refuge. Later, Tano met with Kaeden, her sister Miara Larte, and several local friends, including the farmer Tibbola, the work crew leader Vartan, and the twins Hoban and Neera, at Selda's cantina, known for serving the best food in the area. The cantina was owned by the Togruta bartender Selda and managed by the Sullustan woman Malat, who reminded Tano of the Jedi Master Plo Koon. While socializing with her new acquaintances, Tano learned that Kaeden and Miara were orphans who had lost their parents in an accident, and Vartan had subsequently adopted them. When Kaeden inquired about "Ashla's" family, Tano claimed that she had been adopted. When Selda asked Tano if she was among the influx of aliens migrating from the Core Worlds, Tano stated that she was not fleeing from anything but simply seeking peace and quiet. Selda advised her to consult with him or Vartan if she encountered any difficulties.
As time went on, Tano became the settlement's primary mechanic, repairing numerous broken threshers and other essential farming equipment. Kaeden and Miara began to regard "Ashla" as a member of their extended family, frequently visiting Tano to chat and bring gifts, including a door lock. Despite the friendship she shared with the Larte sisters, Tano grew restless with her new, simple life in the backwater moon. One day, she gathered some supplies and went to meditate alone in the caves. During her meditation, Tano sensed a disturbance in the Force and witnessed the arrival of an Imperial Star Destroyer above the settlement. The Imperial official Jenneth Pilar had decided to exploit Raada as a source of crops for the Imperial Military. Though initially alarmed, Tano concluded that the Empire's arrival was not specifically to hunt her.
Tano went to Selda's cantina and discussed the Empire's arrival with Kaeden and her friends. Miara speculated that the Empire was there to assess Raada's potential for crop production. The establishment of Imperial rule brought new restrictive measures, including night curfews, prohibitions on large gatherings, and limitations on cantina hours, food, and alcohol. Tano advised her friends to begin stockpiling rations in response. While several Imperial personnel visited the cantina, Tano and her friends avoided interacting with them by playing a game of crokin. When they questioned Ahsoka about her insights into their new circumstances, Tano chose to withhold her past for the time being.
The next morning, Tano was visited by two stormtroopers who questioned her employment status. Tano explained that she repaired broken machinery, prompting one of them to request her personal information, stating that she might be reassigned to the fields if deemed necessary. Wishing to maintain the freedom she had under her job repairing machines, Tano used a mind trick to convince the stormtroopers that her work was important for food production and they did not need to reassign her. With the pair in agreement with her, she asked if there was anything else she could help with and one reminded her of the new rules posted around the settlement. Tano closed the door on them and accumulated her rations to take to the caves. Being cautious of any surveillance that could be watching her, she made her way to the caves and hid the rations.
Desiring to relocate her freighter from the spaceport before the Empire imposed a lockdown, Tano scouted a concealed location and found a gully suitable for hiding the starship. She then proceeded to the spaceport to retrieve the freighter. There, an Imperial officer was recording the list of vessels present at the port. He asked Tano of her purpose there, to which she told him that she wished to move her ship. The officer tried to assure her that the local garrison would keep it safe, but she then began mocking the security, making her way past the haggled officer before he could continue to dispute.
Tano entered the pilot's seat of the freighter and prepared for takeoff. The Imperial officer reattempted to argue but was muffled out by the engines as she flew the ship away. Tano flew her freighter the opposite way to the gully, taking it the long way around Raada to cover her tracks. Although she briefly considered abandoning the moon forever to run from the Empire, she chose to continue instead and hid her ship in the gully with its nose positioned upwards towards the sky to ensure a swift take off.
Later, Tano gathered with Kaeden, Miara, and other farmers at Selda's cantina. Neera informed Tano that Malat and her husband had already secured employment on the planet Sullust. Tano fabricated a story about her freighter being stolen when Kaeden inquired why she had not left Raada as well. She and Miara then discussed the capabilities of the security lock the latter had created for her, with Vartan asking about making bigger charges. As Tano shut this down, Hoban argued that explosives would get rid of the Empire, to which the Togruta claimed would provoke reinforcements from the Empire, insisting that surviving with the Empire was a better strategy.
Tano then learned from Kaeden and Miara that the overseers were adding two hours to the farmers' shifts, with the Empire was planning on speeding up the crops and bringing their own seeds in. In this time, a number of uniformed Imperials entered the cantina. Tano then tabled the idea that the Empire was going to buy off the overseers and overwork the farmers, brushing off Neera's inquiry into her past. Hoban insisted in blowing up Imperials, but as Tano began arguing with him, a drunken Tibbola got into a scuffle with an Imperial officer. The Imperial officer overpowered Tibbola and let a stormtrooper shoot the farmer dead.
After Vartan, Hoban and Neera left, Tano watched Kaeden play crokin and suggested that the safest way to hurt the Empire on Raada was for the farmers to begin working slower to slow the growth of their crops. Before Kaeden and Miara departed, Tano told them to relay the suggestion to Vartan, who presumably knew how to slow crop growth. Tano briefly spoke to Selda, who deduced that she had seen deaths like Tibbola's before and told her to be careful. The bartender then gave her some leftover food. Tano quickly walked home after.
For the next two weeks, Tano dedicated her time to smuggling food, medical supplies, and water recyclers to the caves. She was aided by the bartender Selda and several local vendors. In response to the slow growth of crops, thanks to the farmers, the new Imperial overseers extended the farmers' work shifts without increasing food rations, water, and breaks. Vartan discovered that the Empire was growing a new artificial crop on Raada that leached the planet's soils, preventing the farms from growing more crops. This fueled local resentment against the Empire since Raada had little arable land.
During a conversation about the artificial crops, Tano convinced Vartan to lend her Miara and Kaeden, whom she recruited to assemble bombs for attacking Imperial forces. Tano showed Kaeden her caves on a map and later handed the farmer and Miara food at those same caves. The sisters became questioned Tano's intentions in stockpiling at the caves so early on, but Tano dismissed it as habits and directed the conversation towards Kaeden and Miara's parents. Over the next several days, Vartan recruited forty farmers including Hoban into a resistance movement for Tano. He briefed the Togruta on the matter at Selda's cantina, displaying how the recruits were organized into crews. Before leaving, Tano told him that she would brief the farmers the next day and departed the cantina.
Later, Tano led a mission to plant the corrosive charges on the Imperial walkers stored at the Raadian shipyard. For the mission she chose Miara, Neera and the Rodian Kolvin to accompany her; Miara to help set the charges, Neera for her swift thinking, and Kolvin for his nimbleness. Due to the weak stormtrooper security, Tano and her team infiltrated the spaceport easily. While planting charges, Tano took her time to observe the patrols, feeling that they would not be able to infiltrate the compound as easily after. After observing a couple patrol cycles passed, Neera advised the Togruta that it was time to leave.
Tano branched from the group with Miara to continue setting charges, and the Togruta was reminded of her time on Onderon during the Clone Wars. During their work, she also discovered that Miara had smuggled a real bomb, asking the girl of it. Miara tried to dismiss this as an accident, but the Togruta pressed her inquiry, asking if her companion had been plotting behind her back. The pair were briefly interrupted when another patrol passed, this time scanning the compound for a moment. After they passed, Tano and Miara continued their mission and soon reunited with Neera and Kolvin.
After evading stormtrooper sentries, Tano and her team headed back to Selda's cantina. There, she discovered that Vartan had sent Hoban and Kaeden on an unsanctioned mission to attack the Imperial admin building. Since the uprising was premature, Tano urged the farmers to return home and to disavow any knowledge of what had happened that night to evade any arresting that could ensue. However, Miara refused to abandon her older sister. A reluctant Tano agreed to rescue Kaeden and the others but warned Miara to follow her orders and bring the explosives.
Tano ran through the streets with Miara and Neera towards the Imperial admin building when the alarms sounded from the Imperial compound, where the damage to the walkers had been discovered. As they continued to the compound, an explosion sounded and Miara denied that it was one of her bombs. When Tano told her two comrades to reveal the real plan, Neera revealed that Hoban had split the resistance fighters into three groups and that they were armed with explosives and blasters.
Tano ordered Miara to hide in the caves and Neera to bring the remaining resistance fighters to the caves. Tano decided to disable the Imperial tanks. When Miara asked "Ashla" what she was going to do, Tano responded that she would head to the thickest part of the fighting and evacuate as many people as she could. Tano also confided that she was a veteran of the Clone Wars when Miara asked again where she had come from. After separating from Miara, Tano and Neera headed to the Imperial compound, where Hoban's ill-equipped fighters had been repelled by the garrison's heavy artillery and the five remaining survivors including Hoban and Kaeden were pinned down by enemy fire.
While Neera rounded up the surviving farmers, Tano planted explosives behind the Imperial tanks. These explosives immobilized the vehicles, halting the Imperial advance. Tano then took the opportunity to lead the five survivors to safety, knocking a stormtrooper to the ground and stealing the soldier's blaster. While fleeing the fighting, Tano and the farmers were blocked by a row of stormtroopers. Hoban surrendered but was gunned down by the troopers. Before these stormtroopers could execute the remaining survivors, though, Tano used the Force to fling the stormtroopers' blasters to the ground. Tano and the Raadian farmers then fled to the caves, with the former using the force to deflect artillery.
After arriving in the caves, the resistance fighters turned to Tano and Kaeden told her that she had some explaining to do. With Neera being sedated to prevent her from harming herself, the farmers took some time to be quiet before Tano decided to reveal her identity as a former Jedi apprentice. Kaeden was angry with Tano for not revealing her Jedi identity since she could have saved Hoban's life and stormed off before the Togruta could continue explaining herself. Having been discovered by the Empire, Tano considered leaving to avoid drawing further attention from the Empire. While meditating, Tano was interrupted by Miara, who informed her that her sister Kaeden had left the caves and headed back to town. Tano instructed Miara to stay in the caves with Neera while she went to find Kaeden, knowing that the Imperials would catch her.
Meanwhile, Kaeden returned to her home only to be captured by a stormtrooper patrol. Despite being tortured, the farmer refused to reveal Tano's name and the location of her fellow rebels. Tano, though, managed to infiltrate the Imperial admin building to retrieve Kaeden from her cell. Using one of Miara's corrosive explosives, the Togruta infiltrated the cell and carried the drugged farmer out of the high window using the Force, who told Tano that the Imperials wanted her very badly in a moment of consciousness. After escaping to the outskirts, Kaeden told Tano that the Imperial commander had taken an interest in her and advised her to leave offworld, thanking the Jedi for helping them. Tano promised that she would return, parting from the farmer shortly after.
Return to the Fardis

Tano's presence on Raada attracted the attention of both the Galactic Empire and Senator Organa, who continued to work against the Empire in secret. While the Empire dispatched the Inquisitor Sixth Brother to Raada in an attempt to draw the Jedi out of hiding, Organa became interested in reports of Jedi activity on Raada. He contacted Captain Raymus Antilles to retrieve R2-D2 for a secret mission to find Tano. After retrieving R2-D2, Organa hired the pilots Chardri Tage and Tamsin to locate Tano and then contact him to arrange a rendezvous. Organa believed that the former Jedi would make a valuable ally in the growing rebel movement.
After traveling through seven Outer Rim systems and hearing reports about Imperial oppression on the Wookiee homeworld of Kashyyyk, Tano resolved to return to Thabeska to check on the Force-sensitive Hedala Fardi. Upon landing at the Fardi shipyard, Tano was welcomed by the Fardi patriarch, who assured her that she was always welcome to work as a mechanic for his family. The Fardi patriarch also told Tano that his daughters missed her and invited her for dinner. Tano was greeted by the now five-year old Hedala, who confided that she had sensed a "shadow" while Tano was away. Before the togruta could ask about this, though, the Fardi cousins gathered around her, expressing their joy of her safety. Tano then allowed the cousins to each hug her, and when she parted with them, the Jedi told Hedala that the girl would need to tell her about the "shadow" but no one else.
While having dinner, Tano chatted with the older Fardi sisters Chenna and Makala about life while taking care not to disclose her adventures on Raada. "Ashla" claimed that she had seen people suffering in the galaxy, but there was nothing she could do about it, adding that the people had gone into hiding when the sisters asked why she could not help them. Tano also remarked that it was difficult for her to hide since she stood out as a Togruta.

Over the next five days, Tano dedicated her time to working on a large Fardi transport, overhauling the engine and installing a new compressor. When she managed to find time alone with Hedala, Tano asked the little girl about the "shadow." Hedala explained that she never saw the entity but could sense its presence. Hedala also mentioned that the "shadow" had one day mysteriously disappeared. Tano believed that this individual was a dark side creature, recalling rumors of a dark lord that served the Emperor. This "shadow" was actually the Sixth Brother, who had been hunting Hedala before redeploying to Raada. Tano complimented Hedala for staying out of the "shadow"'s way and told her not to mention the individual to her sisters. Tano then took a moment to think about that the "shadow could really be and considered her options once again, deciding to stay with the Fardis since she was safe with them.
A week later, Tano requested a new job from the Fardi patriarch, who was surprised upon this and had her prove her flying skills. Fardi then sent her to ferry supplies to the other branches of the Fardi family in the other cities on Thabeska. During her flights, Tano came to suspect that the Fardis were using her to smuggle goods. Fardi later assigned her offworld transport missions. While on a routine flight, she picked up a distress call from an escape pod. After rescuing the occupants of the pod, Tano was informed that their shuttle had been attacked by pirates, who had taken several hostages. The occupants, all humans, were part of a company that had been targeted by a rival firm competing for a large project. Tano suspected that the rival firm had colluded with the pirates to kidnap hostages in an attempt to bankrupt the company and she agreed to help the humans and rescued their companions from the pirates.
Upon her return to the Fardi residence, Tano discovered stormtroopers conducting a routine search of the premises. To avoid drawing Imperial attention, Tano claimed that she had repaired the Fardis' ship and taken it for a spin around the system. The Fardi patriarch vouched for "Ashla," identifying her as his mechanic. Tano also spoke with Hedala and learned that she had sensed no "shadows" that day. When the stormtroopers and their commanding officer inquired about the metal pieces found in her room, Tano dismissed them as "bits of junk" collected from various jobs. The Imperials accepted her explanation but cautioned Fardi about associating with criminal elements.
After the stormtroopers departed, Fardi apologized for involving Tano in his family's affairs. He confided that he was aware that she had been using the ships to run her own mercy missions. While appreciating her skills as a mechanic and pilot, Fardi advised Tano to leave to avoid further entanglements with the Empire. Without outright telling Fardi that his youngest daughter Hedala was Force sensitive, Tano told him that she was special and to be careful with her, although Fardi understood the deeper meaning of her statement. Thinking that Hedala had potential to be a Jedi, disguising the word by saying "mechanic," Fardi promised to protect his youngest daughter. Before leaving, Tano hugged Hedala and told her to avoid the "shadows." The Fardis allowed her to leave in her ship.
Entanglements
Tano piloted the Fardi ship to a small, sparsely populated world in the Thabeska system. However, she was pursued by a starship piloted by a non-binary Black Sun agent, who sought to extort credits from her as compensation for the damage her smuggling activities with the Fardis had inflicted on the Black Sun's operations. To settle these "debts," the Black Sun agent offered her a job, threatening to kill her if she refused. Tano rejected the offer and fled back to her ship under fire, with the Black Sun agent giving chase in their own vessel. During the ensuing dogfight, Tano resolved to abandon her "Ashla" persona and embrace her true identity as Ahsoka Tano.
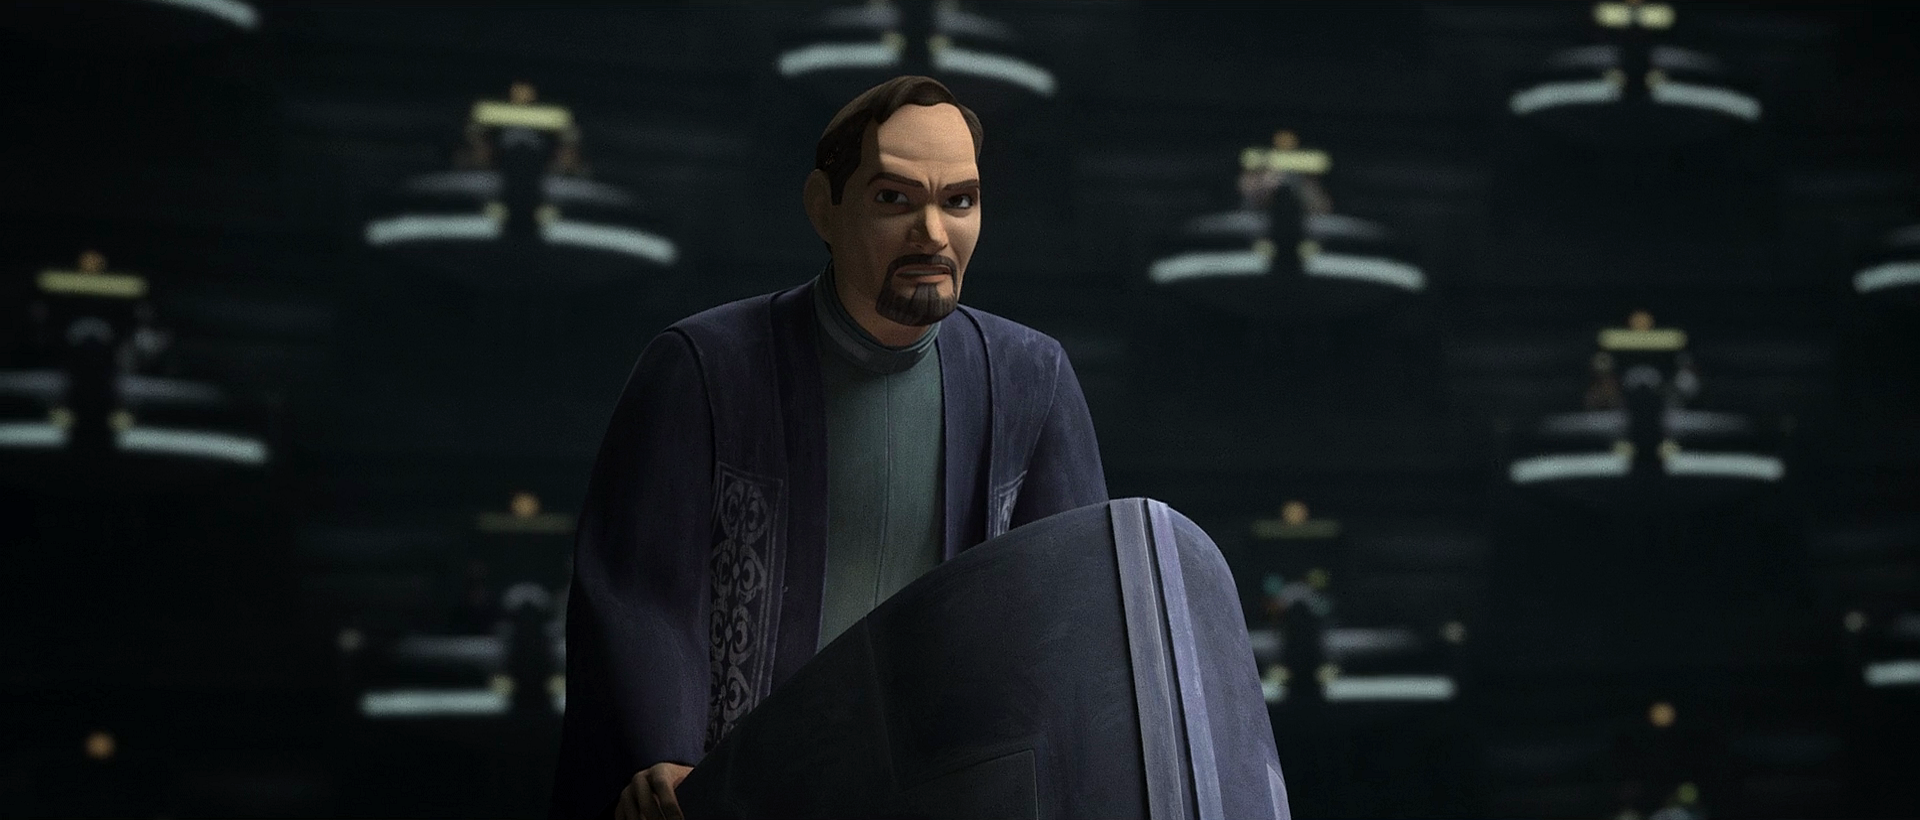
The Black Sun ship managed to damage her freighter's starboard engine, but a larger vessel intervened before Tano's ship could sustain further damage, chasing the syndicate's starship away. Tano managed to take her freighter into space, but burned out her port engine. Before she could engage the hyperdrive, she was caught in the tractor beam of the second ship that she had encountered. This ship belonged to Tage and Tamsin, who had been sent by Organa to find Tano. Believing the second ship to be hostile as well, Tano armed herself with batons. When Tage and Tamsin entered the ship through the hatch, she knocked them out cold.
While navigating her way to the bridge to disable the tractor beam, Tano encountered her old friend R2-D2 in the engine room. R2-D2 told her that he now worked for a senator and that Tage and Tamsin had been sent on a mission to take her to meet someone. The droid also confirmed that the senator was the Jedi sympathizer Bail Organa and that he had indeed sent the pilots to pick her up. Tano convinced R2-D2 to release the tractor beam on her ship and to tell everyone that he never saw her. However, she instructed him to make sure that she could track his ship. After repairing her ship, Tano left Tage's ship and hid on one of the small moons that orbited the planet where she had encountered the Black Sun agent. After R2-D2 had transmitted the coordinates of Tage's ship, she slept aboard her freighter.
A new ally

After Senator Organa, noticing Tano's montrals in security footage that R2 had failed to delete, arrived in his CR90 corvette called Tantive IV, Tano put on a pressure suit and entered the Senator's vessel via a hatch R2-D2 had kept ajar. Then, Tano surprised Senator Organa in his makeshift office. Following some small talk about R2-D2, Tano clarified that she hadn't brought Tage along because she didn't trust anyone who used a tractor beam before greeting someone. Organa confessed he hadn't informed his pilots of her identity to safeguard her true identity. Addressing her as "Padawan Tano," Organa then informed Tano that he was enlisting individuals for a rebellion against the Emperor, the Empire, and everything it represented.
Tano countered that she was no longer a Padawan and recounted her experiences on Raada to Organa. Senator Organa responded by saying that she couldn't combat the Empire alone and extended an invitation for her to join the burgeoning rebellion. However, Tano explained that she couldn't be a commander again because of what she experienced during the Clone Wars. Organa responded by stating that he could find another role for her. Tano then alerted Organa to the fact that "something" was actively hunting Force-sensitive children across the galaxy. She consented to join the rebellion if Organa pledged to assist her in protecting these children. Senator Organa accepted her terms and informed Tano that he needed her assistance with a mission to Raada.
Strategizing her return to Raada
Tano agreed to the mission, but requested a meal due to her exhaustion from her prior adventures. Organa then revealed that his contacts within Raada's sector had reported the presence of a new Imperial operative who had gray skin and wielded a lightsaber; this agent being the Sixth Brother, who had been following Hedala and was now tasked with finding Tano. The Inquisitor had already attacked the Raadian insurgents who had taken refuge in the caves, capturing Kaeden again before killing the others, including Kolvin and Neera. Only Miara had made it through the massacre.
Tano speculated that the new Imperial operative was a Force user dispatched by the Empire to hunt down Jedi. She attributed the Inquisitor's arrival to the Empire's interest in her "acts of kindness" within the local sector. Senator Organa warned Tano that the Empire might be setting a trap. While scrutinizing footage of the Imperial operative on Organa's datapad, Tano discovered that her friend Kaeden had been captured and was tied to a chair. Tano became alarmed, but Organa firmly told her to remain calm. He emphasized the need for her to rest and strategize. Organa also reassured her that the Empire wouldn't harm Kaeden because they wanted to lure her out of hiding. In the Tantive IV's hangar bay, Tano contemplated her upcoming mission with R2-D2.
When Captain Antilles entered the office to investigate Tano's unauthorized entry, Organa reassured him that she was an ally. Following her conversation with the senator, Tano rested in a room that Organa had made available to her. While sleeping, she had a flashback of her obtaining her kyber crystal as a youngling on Ilum. After resting, Tano constructed two lightsaber hilts from the various scrap metal pieces she had accumulated over time. Tano then met with Senator Organa and shared her strategy for their mission to Raada.
Returning to Raada
Before departing for Raada, Tano declined Organa's offer of a starship, believing that the models would be too conspicuous in the Outer Rim. She also declined backup, preferring to operate alone, a trait Organa recalled being common among the Jedi he had known, although Tano reiterated that she was not a Jedi. When Organa inquired about Tano's identity, noting that she still resembled and behaved like a Jedi, Tano responded that she would inform him once she determined who she was. After completing the modifications to her ship, Tano rested before embarking on her mission.
En route to Raada, Tano passed by the planet Ilum, exiting hyperspace far from the world, suspecting that others might be present. She quickly observed Imperial ships above Ilum, along with large sections mined from the planet. Enraged by the Empire's actions towards the world, Tano considered attacking an Imperial mining vessel, but remembered that Raada was her main priority. Tano also contemplated returning to Rex's false grave to retrieve her lightsabers, but decided against it, as they had been intentionally left there to be discovered. She then reached out through the Force to locate a crystal, finding one that was calling to her through the Force from Raada.
Upon arriving on Raada, Tano parked her ship on the opposite side of the moon from the main settlement, aware that scanners near the settlement could likely detect her vessel. After loading her weapons into a small bag, Tano walked for two hours towards the Raada settlement. Along the way, she found Miara sitting alone by a small fire. Tano learned that Miara was the only one who survived after the Sixth Brother had taken Kaeden as a prisoner, and murdered the other farmers hiding in the caves. Tano persuaded Miara to extinguish the fire and keep watch while she meditated in the Force. While meditating, Tano resolved that even though she was no longer a Jedi, she would still utilize her Jedi training to assist the people in fighting back against the Empire.
As they neared the settlement, Tano noticed that the Imperial crops had depleted the soil's vitality. She instructed Miara to remind her to burn the dying fields if they had the opportunity. Miara also informed Tano that the Empire had the farmers working shifts throughout the entire day. While Tano proceeded to the Imperial compound, she instructed Miara to locate Selda or Vartan and provide them with the holo she had recorded in hyperspace.

While approaching the Imperial compound, Tano heard the Sixth Brother calling her out. The Inquisitor mocked her about her friendship with Kaeden, ridiculing her for violating the Jedi Code by forming attachments. Tano then sensed him as he jumped down to attack her with his double-bladed spinning lightsaber. She evaded the Sixth Brother's attacks utilizing the Force, with the Inquisitor finding her endurance impressive. Stormtroopers lined up at the walls of the compound, forcing Tano to draw the fight into a side street to escape the line of fire. As Tano continued to observe the Sixth Brother, she questioned his nature and what had made him who he was. The Inquisitor responded that he served the Empire.
Tano used the Force to disrupt the Sixth Brother's balance, but he retreated towards her. She reached out and grasped his lightsaber, despite the Inquisitor's attempts to disconnect his weapon and engage her with two separate sabers. Tano managed to damage the power connection in the lightsaber's hilt, causing it to overload. As she jumped back to safety, the hilt exploded on him, leaving the Sixth Brother dead and covered in burns. Tano felt compassion for her defeated opponent and closed his helmet as a sign of respect. She then retrieved the kyber crystals from his lightsaber and used the Force to cleanse them of the dark side's influence, causing them to turn white.
Armed with her new pair of white lightsabers, Tano Force-jumped into the Imperial compound and navigated past the stormtrooper sentries to Kaeden's cell, deflecting blaster shots. Fighting through the corridors, Tano managed to unlock all of the cells, freeing all of the prisoners in the process. Kaeden reunited with Tano, and the pair headed to Selda's cantina. When Kaeden inquired about Tano's plan, Selda reassured them that Miara had transmitted Tano's message and that Vartan was evacuating the farmers. Tano informed the farmers that she had contacted an "old friend." In response, Kaeden stated that she understood that Tano had lied to protect them while the Inquisitor had lied because he enjoyed causing suffering. After tending to Kaeden's injuries, Tano exited the cantina to find several of Organa's A-wings bombing the Imperial compound.

Shortly after, Organa landed several transports and cargo ships, which began to evacuate the farmers. Tano led Kaeden, Selda, and Miara to the Tantive IV. When Captain Antilles informed her that they needed to evacuate soon, Tano responded that Organa's A-wings had already dealt with the Imperial fighters. After overseeing the evacuation of the Larte sisters, Tano assisted in the evacuation of the remaining farmers, who numbered less than a hundred. Three Imperial tanks then appeared and opened fire on the ships and civilians. Utilizing her Force abilities, Tano jumped onto the leading tank and severed its cannon with her lightsaber. She then opened the hatch and pulled the pilot out. Tano then destroyed the tank's controls and overloaded the cannon.
The resulting explosion caused the nearby tank to topple over, disabling its hover mechanism. Tano sliced off its gun and allowed it to crash into a house. Tano then proceeded to the third tank, but was unable to prevent it from blasting Vartan and a group of refugees. Enraged, Tano used the Force to cause the tank's turret to implode. Tano then tended to the wounded Vartan and carried him to the Tantive IV. After evacuating the last of the refugees, Tano and her rebel allies departed in their ships. Once aboard, Tano comforted the injured Kaeden. When Kaeden lamented that she should not have listened to her emotions, Tano reassured her that Jedi also made that mistake. Tano expressed confidence in her ability to navigate the galaxy now and promised to meet Kaeden again.
Joining Organa's Rebellion
Some time after the evacuation of Raada, Tano smuggled herself aboard the Tantive III to arrange a meeting with Senator Bail Organa. She overheard a conversation between the Senator and his young adopted daughter, Princess Leia Organa. After exchanging greetings, Organa confided that the Empire hoped to exploit his image as a family man to ensure his compliance. When Tano inquired if he was concerned about his daughter, Organa replied that she resembled her mother. When Tano asked what Organa was doing to oppose the Empire, he shared Captain Antilles' positive report of the Raada evacuation. There had been fifteen casualties, including fourteen evacuees and one A-wing pilot. However, Antilles' medical team had managed to save Vartan.
Tano also confided that the Inquisitor she encountered was not the last of his kind. While the Inquisitor had some training, she noted that he primarily relied on brute strength and lacked the finesse of a Jedi. Organa pledged to address the possibility of other Inquisitors and then inquired about Raada. Tano explained that the farmers couldn't return because the Empire would obliterate the moon's surface. Organa agreed to resettle the Raadian refugees on Alderaan. However, Tano responded that the farmers desired to join the rebellion. Organa thus agreed to resettle the farmers on an agricultural planet and to train pilots and soldiers.
At Organa's request, Tano displayed her new lightsabers. She informed Organa that she had obtained the kyber saber crystals from the Inquisitor. She explained that the crystals had previously been red because they had been corrupted by the dark side when those who wielded them had twisted them to their will, causing the crystals to "bleed." Tano speculated that the kyber crystals had been plundered from the former Jedi Temple. She also remarked that her former friend Barriss Offee, despite her treachery and atrocities, had been correct that the Jedi and the Republic had adopted the wrong approach to the Clone Wars. Organa commented that the former Chancellor Palpatine had been a skilled manipulator.
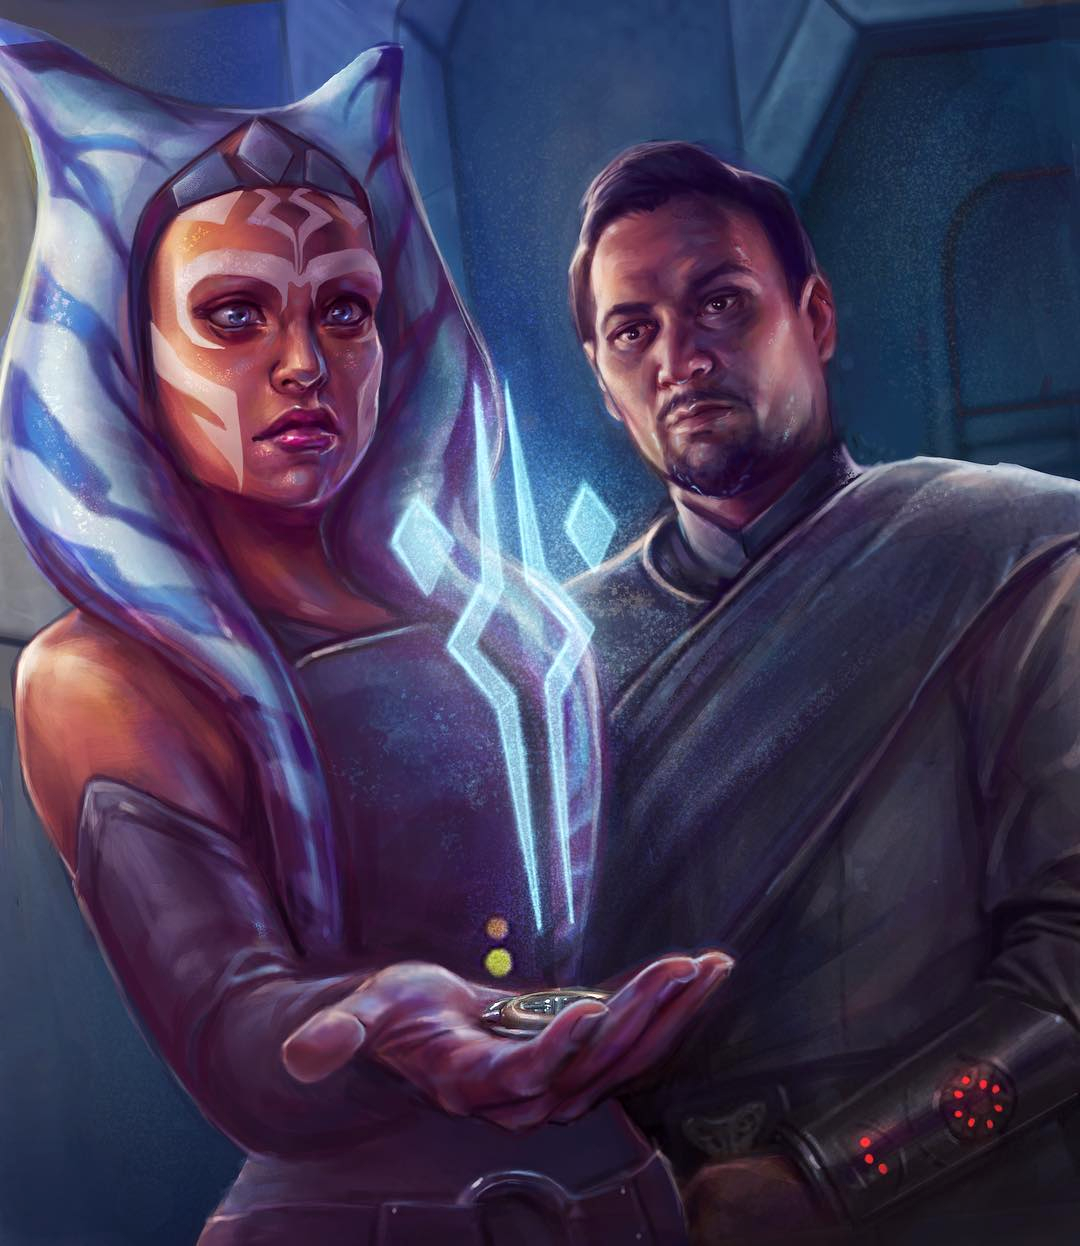
Tano added that she had attempted to escape the war, but kept being drawn back into it. Organa responded that their focus should be on the present, which he likened to a middle ground. Tano concurred with Organa's sentiments and expressed her desire to pursue a path distinct from that of a general or a Padawan. At that moment, the Tantive III exited hyperspace above Alderaan. Tano also commented that the lack of communication had resulted in deaths on Raada and also fueled her hostile reaction to Tage and Tamsin. After some discussion, Tano persuaded Organa to allow her to manage his intelligence networks and to provide her with a new ship. At Organa's suggestion, Tano adopted the code name Fulcrum for her role as a rebel spy, enabling her to connect with rebels across the galaxy, including an Anx informant situated on the planet Garel. Unbeknownst to Tano, her activities had also caught the attention of the Grand Inquisitor, who informed his superior Darth Vader that he had uncovered evidence of another Jedi Purge survivor.
Deciding to take an active role
Despite her promise to herself to cease living as Ashla, Tano eventually resided in another farming village under the same name sometime after the Raada Uprising. However, after she employed the Force to save a farmer, the farmer's brother reported her status as a Jedi to the Empire, leading to the Eleventh Brother's arrival and the burning down of the village. Confronting the dark side adept, Tano swiftly killed the attacker and contacted Organa, whom she agreed to join by actively participating in the fight. In deciding to take an active role, she found herself entering the larger rebel movement.
Vader's visions
In 12 BBY, Fortress Vader was erected on Mustafar. Vader had formed an alliance with the ancient Sith Lord Darth Momin—whose spirit resided within a mask he had worn many years prior to his downfall—in an attempt to resurrect his deceased wife, Padmé Amidala. The two succeeded in constructing a portal within a Sith cave beneath the fortress, which allowed Momin to resurrect himself but was once again killed by Vader shortly after. Now having gained entry to the portal, Vader entered and began to explore, receiving many visions granted to him by the dark side of the Force. Several of these visions granted him a view of Tano, his former apprentice. He witnessed the two fighting side-by-side during the Clone Wars as well as their future meeting upon Malachor.
Fighting for the rebellion
Capturing Admiral Gann
At some point, Tano was assigned the task of assembling a task force to capture the ruthless Imperial officer, Admiral Gann at his retreat on a remote world. Upon arrival, Tano and the group cautiously made their way towards the admiral's facility. Once there, Tano instructed one of the members of her team to proceed to Gann's Personal Suite while she disabled the security systems throughout the facility. Before departing, she informed them that she would rendezvous with them once she had completed her task. With that, Tano eliminated two guards using her now activated lightsabers and employed the Force to jump up to a vent and crawl inside.
Eventually, the team Tano had brought with disabled the comms hub present within the facility leading Tano to inform the group that no reinforcements would be coming to rescue Gann and that the day was all but won. Singling one of the rebels out, she thanked them for their help in Gann's capture and assured them that she would provide them aid whenever they called upon her.
The Bardottan Sphere
At some point afterward, the rebels received word from a rebel team operating out of Coruscant that an artifact had been discovered within Imperial City and was being sought after by the Empire to be used as a weapon. However, the team soon went missing and a new team was dispatched to learn more about the artifact.
Eventually, the rebel team managed to locate and retrieve the artifact, a shard of the Bardottan Sphere located in the Imperial Palace. After barely managing to hold Vader back from taking the shard, the rebel team now had to come up with a plan to escape. Meanwhile, Tano arrived with a shuttle to extract the team. As they rushed outside at the sound of a ship's engines, they found Tano emerging from the shuttle. As Tano did this, she smiled at the rebel team and informed them that the rebel leaders had believed the team would need a bit of additional help escaping Corucant and told them that she was ready when they were.
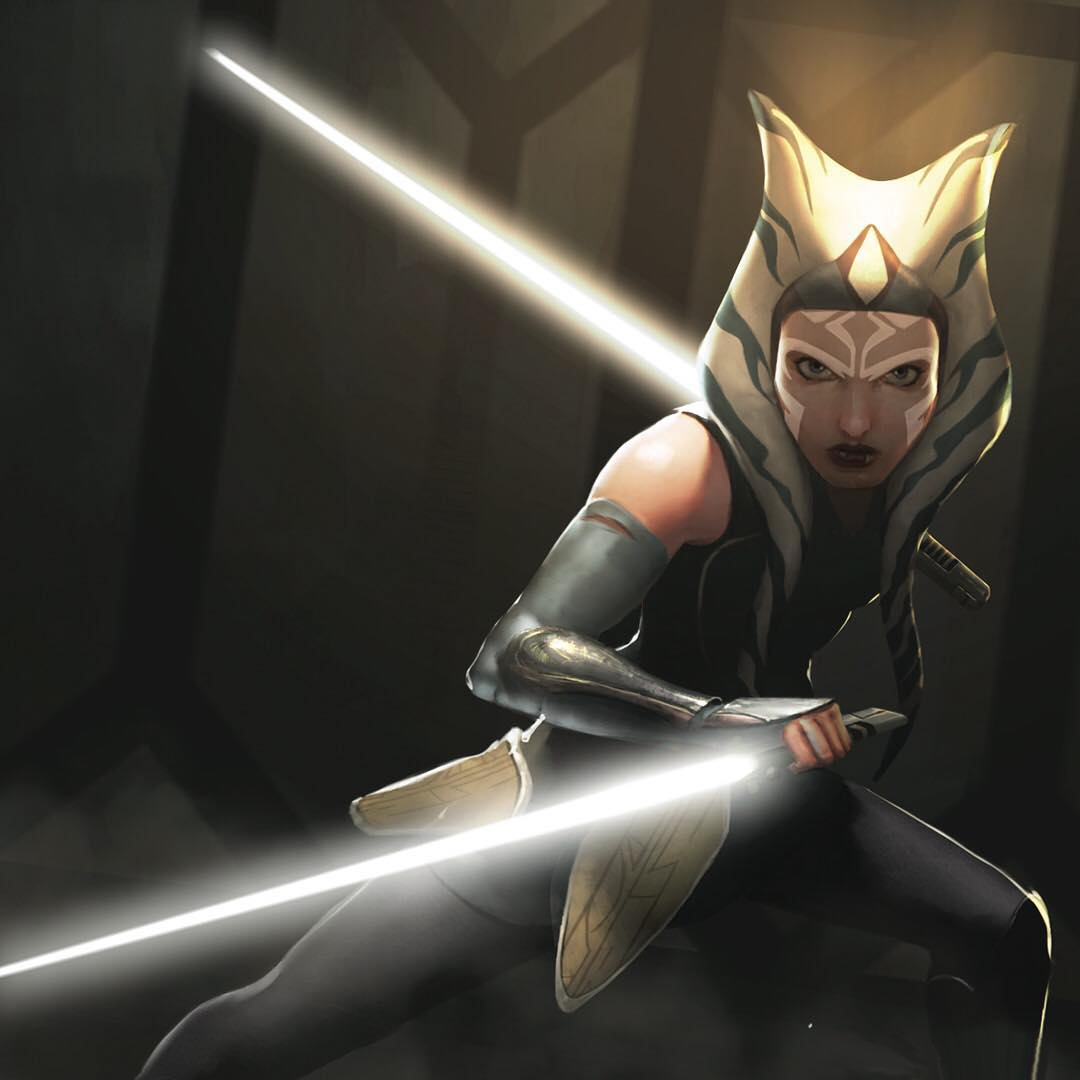
As the rebel team rushed out to board the shuttle, a large number of Imperial forces rushed out to capture them leading Tano to ignite her lightsabers and nod to the rebel team, signifying to them that she was ready to assist them in holding back the Imperials. As the rebels began to board the shuttle, Tano rushed to her own ship and called out to the team that she would draw their fire while they made their escape. However, the ship's engines were soon destroyed and the shuttle began to plummet toward the planet's surface. Before they crashed, Tano told them not to panic and that she would pick them up using her own ship after the team shut down the station's defenses.
After the rebel team accomplished their task, Tano was able to land and extract the rebel team, escaping into hyperspace. Back at the rebels' headquarters, Tano and the rebel leaders discussed what they should do with the shard before deciding that it was too dangerous to use. Initially, the rebel leaders wanted to destroy the artifact, but Tano convinced them against doing so and instead, a task force was assembled to take the shard to a remote corner of the galaxy where it would remain hidden.
Undercover messenger
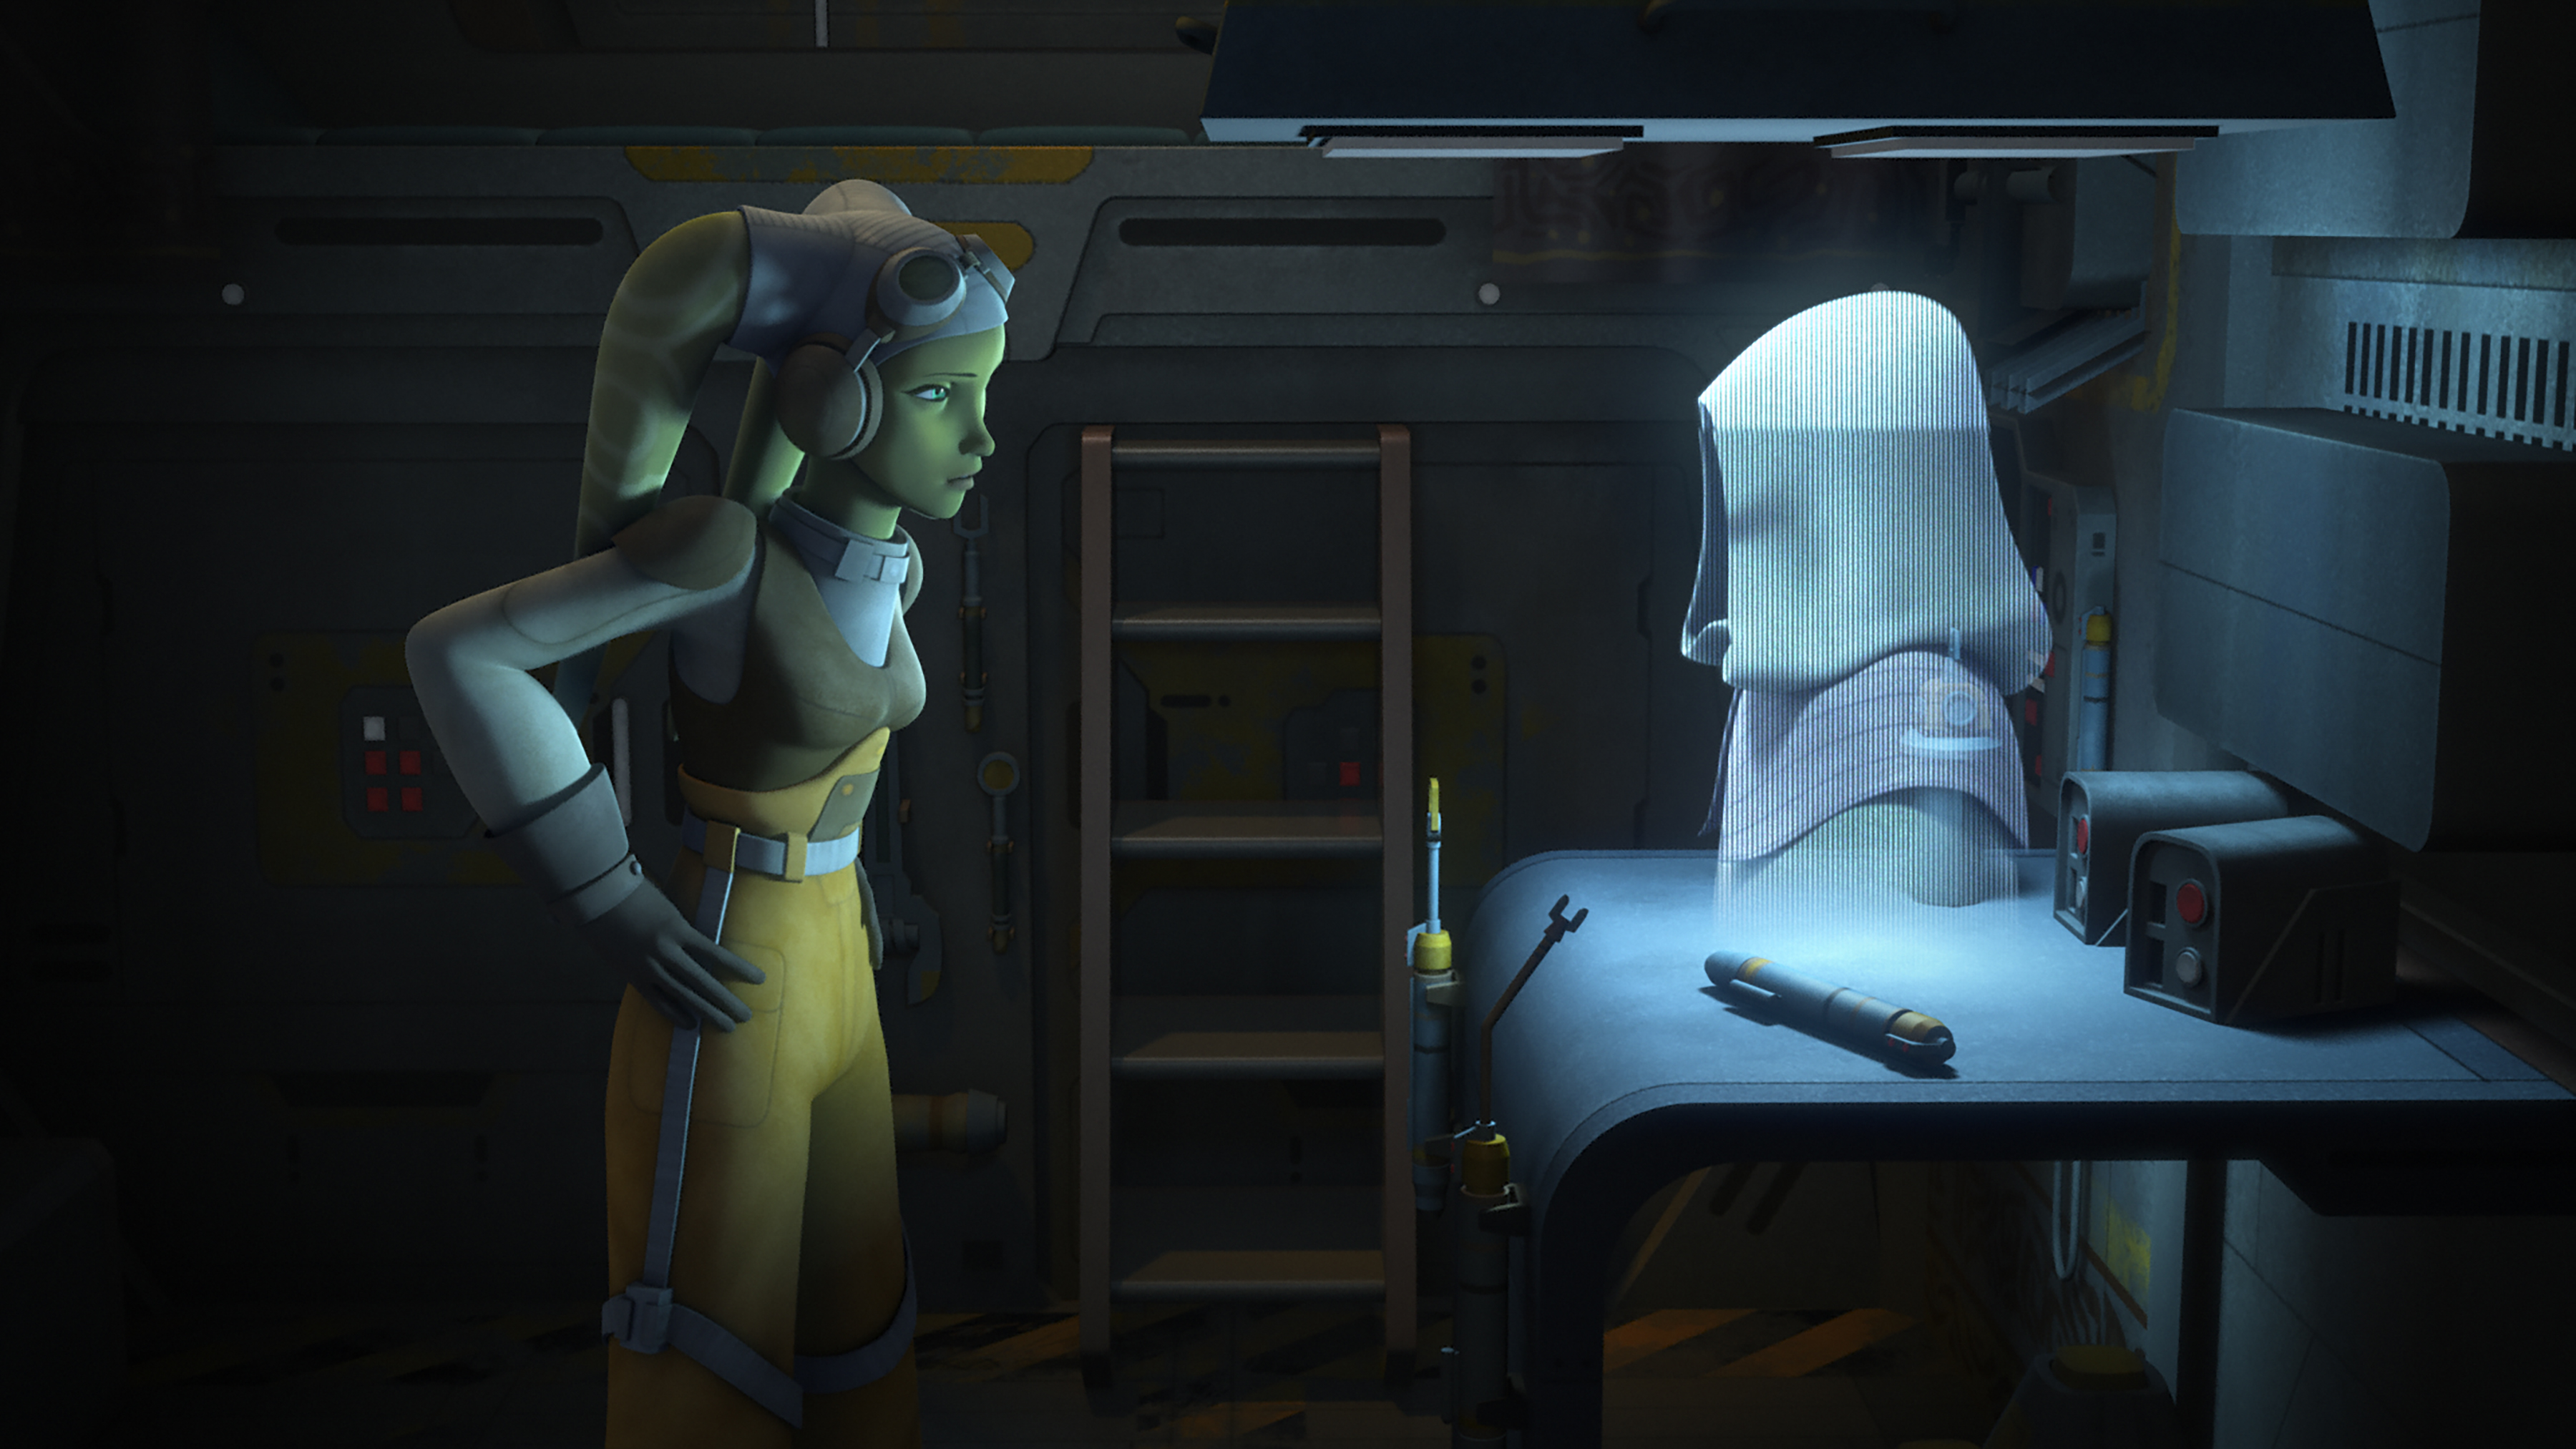
By 5 BBY, Tano had become a pivotal figure within the rebel network led by Senator Organa and Senator Mon Mothma. Operating under the codename "Fulcrum," Tano facilitated the exchange of intelligence and communications between the various rebel cells scattered throughout the galaxy. One such cell was the crew of the Ghost, which operated in the vicinity of the Outer Rim world of Lothal. She communicated exclusively with Hera Syndulla, the owner and pilot of the Ghost, identifying herself solely by her codename. As Fulcrum, Tano provided the Spectres with intelligence for missions aimed at disrupting Imperial forces or interests, with these missions forming part of a broader strategy that only Syndulla was privy to among the rebels. Tano's intelligence was generally reliable, although occasionally incomplete. One mission that Syndulla, accompanied by Ezra Bridger and Sabine Wren—the daughter of Ursa Wren, whom Tano had encountered during the Clone Wars—undertook involved an attack on an Imperial convoy. The intelligence provided by Fulcrum accurately identified the route and timing of the convoy, but underestimated the Imperial defenses. Consequently, the Phantom—the rebels' shuttle—sustained minor damage while evading a squadron of TIE fighters. Tano compiled a report for General Davits Draven regarding the Spectres, commending them for their efforts in freeing Wookiee prisoners, destroying a Star Destroyer, and disrupting Imperial shipping lanes between Lothal and Garel. She expressed her belief that Syndulla's talents were being underutilized and that the team could achieve far more with enhanced resources and support.
Shortly thereafter, Syndulla—along with Wren, who insisted on learning more about Fulcrum and the missions the rebels were being assigned—traveled to Fort Anaxes, an asteroid base previously used by the Grand Army of the Republic during the Clone Wars, to collect supplies from Tano. Tano contacted Syndulla while she was en route, informing her that the supplies had been unloaded and were ready for pickup. Wren, eager to uncover more about the individual providing their intelligence, suggested that "Fulcrum" await them at the rendezvous, prompting Tano to wonder if something was amiss. Syndulla reassured Tano, however, that Wren was merely there to assist with the mission. Nonetheless, Wren felt distrusted and sought to understand why the rebel missions were escalating in danger, but Syndulla assured her that the less she knew, the safer she would be if captured by the Empire. Upon their arrival at Fort Anaxes, Tano had already departed.
At some point afterward, Tano assigned the crew of the Ghost a mission to retrieve supplies on Kaller intended for the Lothal settlement Tarkintown. Tano had pre-arranged crates for the group, awaiting their arrival for pickup. However, by the time the Spectres reached the location specified by Tano's coordinates, the crates' contents had been pilfered. Eventually, the Spectres managed to recover the contents of the crates and departed Kaller after becoming embroiled with Imperial forces.
Sometime later, the rebels rescued Tseebo, a Rodian employed by the Imperial Information Office whose AJ^6 cyborg construct headpiece contained critical Imperial data, including a five-year plan for the entire Outer Rim. After fleeing Lothal, the Ghost rendezvoused with Tano's vessel. Syndulla handed Tseebo over to Tano, who possessed the capability to analyze the information stored within Tseebo's headpiece. Subsequently, Tano was able to furnish Syndulla with information regarding the senator-in-exile Gall Trayvis, confirming his impending visit to Lothal to meet with them. However, the Spectres soon discovered that Trayvis was, in fact, working for the Empire.

Following the capture of Kanan Jarrus, the leader of the Lothal cell, by the Empire, and the Ghost crew's subsequent transmission of messages designed to inspire the public, Tano contacted Syndulla and dissuaded her from attempting to rescue Jarrus. After reminding her that Jarrus understood the risks he faced, and that Bridger—the crew's remaining Jedi—was too valuable to be jeopardized, Tano informed her that their message had resonated beyond Lothal and had garnered attention from the highest echelons of the Empire. Tano urged Syndulla to lead her crew into hiding to prevent further compromise of their mission. The crew disregarded Tano's warning and embarked on a mission to rescue their captured leader.
The rebels soon ascertained that Jarrus was being held on the Sovereign, the personal Star Destroyer of Grand Moff Tarkin, in orbit of Mustafar. The crew set out to rescue him and succeeded, but were overwhelmed by Imperial forces. The crew's astromech droid, C1-10P, nicknamed "Chopper," contacted Fulcrum and requested reinforcements. Tano—leading Phoenix Cell, a fleet of rebel ships—arrived at Mustafar and assisted the crew of the Ghost in their escape. Once the rebels were safe and clear of Mustafar, Tano revealed her identity and informed them that they were part of a larger rebel movement. Tano prepared a report for General Davits Draven regarding the operation, summarizing the battle and, in a post-action report, detailing how the Spectres had been integrated into Phoenix Squadron, and Syndulla had received an Alliance officer's commission.
At some point later, Tano piloted a TIE fighter that had been repainted by Wren after it was stolen by the Spectres during a "meiloorun run" that went awry.
A lesson for Bridger
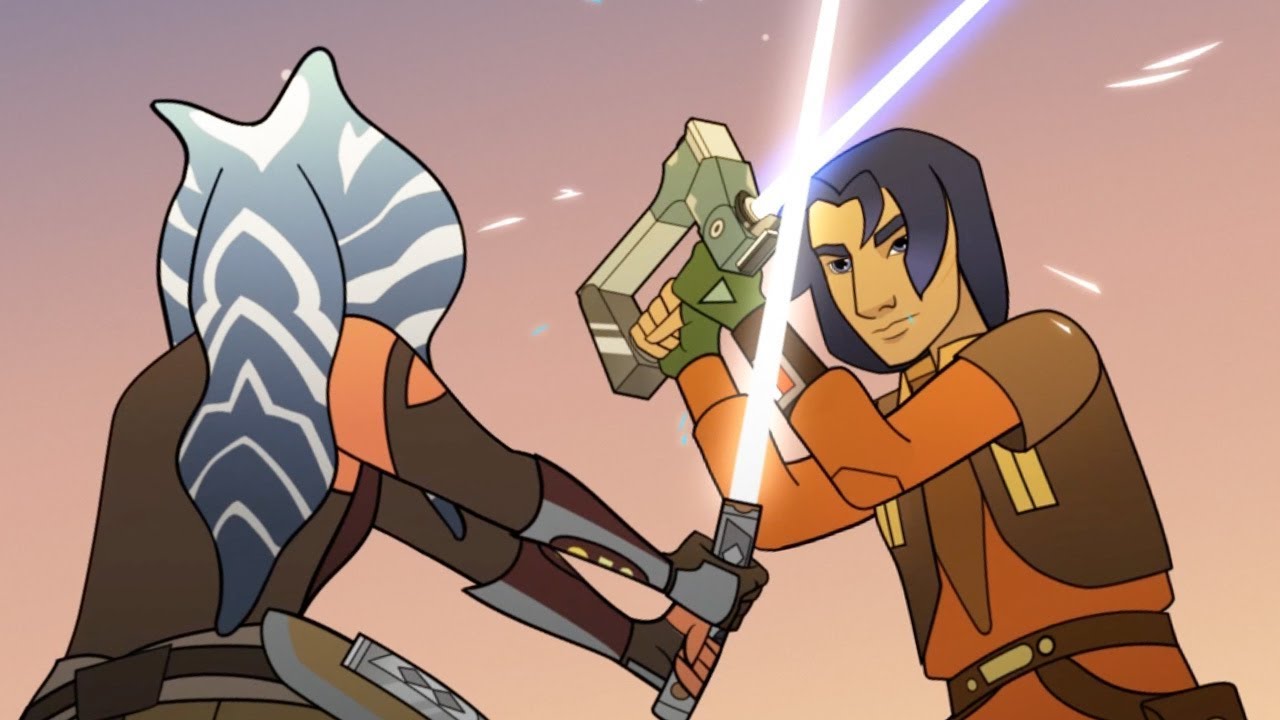
After the Ghost's crew became part of the Phoenix Squadron, Ahsoka Tano took on the role of a mentor and advisor for the newer rebel members. She felt a special connection with Kanan and his apprentice, Ezra Bridger, both Jedi who were fighting against the Empire. On one occasion, Tano and Bridger journeyed to a planet where Bridger was honing his lightsaber skills. While Bridger practiced, Tano surprised him and inquired about the origins of his lightsaber. Bridger recounted the story of how he acquired his weapon and then handed it over to Tano. Tano then removed the kyber crystal from the weapon and asked Bridger how he felt about being one of the few individuals in the galaxy with a lightsaber. Unsatisfied with his response, she decided to impart a lesson to Bridger by throwing the crystal into a nearby field. Frustrated, Bridger was given back his weapon as Tano ignited one of her own lightsabers. Tano started attacking Bridger, who felt defenseless and questioned her motives. As Tano relentlessly attacked Bridger, she encouraged him to focus on the Force to dodge her strikes while simultaneously searching for his lost crystal. While dodging, Bridger eventually located his crystal and activated his lightsaber to block Tano's approaching blade. Tano deactivated her lightsaber and questioned him about retrieving his crystal, to which he responded with a humorous remark, and they both began to laugh.
Attempting to rescue Janard
Some time had passed since the Ghost crew integrated into Phoenix Squadron when a distress signal was detected, originating from a Gozanti-class cruiser. The signal was traced back to Janard, an old friend of Wren's who had assisted her in escaping from the Imperial Academy of Mandalore. Tano decided to accompany Syndulla and Wren on the mission to rescue Janard, joining them in the cockpit as they approached the water-covered planet Quila, where the freighter had been abandoned. As they approached, Wren assured Syndulla and Tano that the transmitted message was indeed from the freighter. Tano inquired of Syndulla whether any Imperial presence had been detected, and Syndulla confirmed that there had been none so far, but Tano was aware that they could arrive at any moment and that they needed to be prepared. Following this, Wren got up from her seat, and she and Tano went to retrieve their scuba gear. As they gathered their equipment, Tano asked Wren about the significance of Janard to her, and she explained that she owed him her life, as he had saved her years prior. As they prepared to enter the water, Wren expressed her gratitude to Tano for her assistance on this mission. In response, Tano shared her experiences with underwater operations during the Clone Wars. Sensing Wren's apprehension about the ocean, Tano attempted to reassure her, but inadvertently intensified Wren's fears. Subsequently, the two jumped into the oceans of Quila.
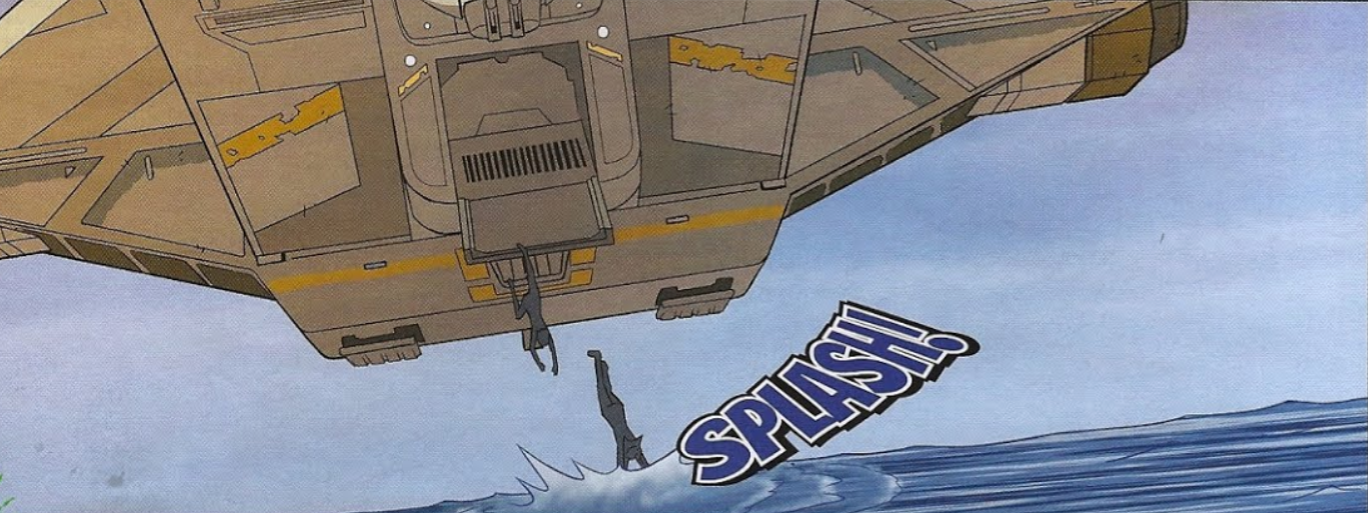
Inside the submerged freighter, Wren and Tano made their way to the holding cells in search of Janard, as he had been held as a prisoner on board. However, their path was obstructed by a fallen beam, which Tano and Wren effortlessly moved aside with the assistance of Tano's lightsabers. While shifting the beams, Tano continued her attempts to reassure Wren about being underwater. After moving past the beam, the two were ambushed by an eel. It quickly attacked Wren, who attempted to fend it off with blaster fire, but Tano easily managed to pull it off of her and used the Force to push it away. However, the eel had damaged Wren's oxygen tanks, causing her to rapidly lose oxygen. Tano swiftly reconnected the oxygen tubes and shared some of her oxygen to compensate for Wren's depleted supply. Eventually, the two reached the detention cells. As Wren opened the cell door, she and Tano rushed in with their weapons ready, only to discover that the cell was empty. Upon this discovery, the two left the detention level and continued their exploration of the ship.
The trio escape the flooding of the freighter."
Shortly after, Wren and Tano arrived in a section of the ship that had not yet flooded, but they were aware that time was running out as water continued to seep in. Hastening their pace, the two decided to inspect the front sections of the bridge when they heard blaster fire around the corner, leading them to believe that they had found Janard. Upon turning the corner, the two discovered two stormtroopers pursuing Janard, who had managed to escape from Imperial custody. Wren quickly shot the two stormtroopers, and she and Janard were reunited. Just as they were about to leave, more stormtroopers arrived, and Wren and Tano dealt with them in their own separate ways. Suddenly, the three of them began to hear the sound of rushing water as their area of the ship began to flood. Tano ordered them all to flee, and they narrowly escaped as Tano used the Force to slam a security door shut behind them. Now safe, Tano suggested that they head to the bridge to attempt to contact Syndulla for a pick-up.
Upon reaching the bridge, the three attempted to send a distress signal to Syndulla, but their signal was jammed by the arrival of another Gozanti-class cruiser. As they deliberated on their next course of action, they discovered more stormtroopers and an Imperial officer blocking their path. At that moment, Syndulla arrived with the Ghost and began to engage the newly arrived cruiser, giving the trio an opportunity to attack their newly arrived adversaries. As the Gozanti crashed in flames outside, the Ghost arrived to pick up the three; however, Janard was fatally shot in the back before he could escape, dying in Sabine's arms. As Janard bid a heartfelt farewell, Tano instructed Wren to leave the crashed freighter, and the two jumped back into the ocean and returned to the Ghost.
On board the Ghost, Syndulla attempted to console Wren for the loss of her friend. Tano, however, left her with the understanding that not everyone could be saved in a war, which Wren took to heart, reminding her that Janard would be remembered in history as a good and heroic man.
The Siege of Lothal
During the Imperial Siege of Lothal, Tano, along with Syndulla, Jarrus, and the Phoenix Commander Jun Sato, authorized a mission to rescue the Imperial Minister Maketh Tua, who wished to defect from the Empire. The Ghost's crew returned to Lothal, but unwittingly walked into a trap set by Darth Vader, Tano's former mentor and friend.
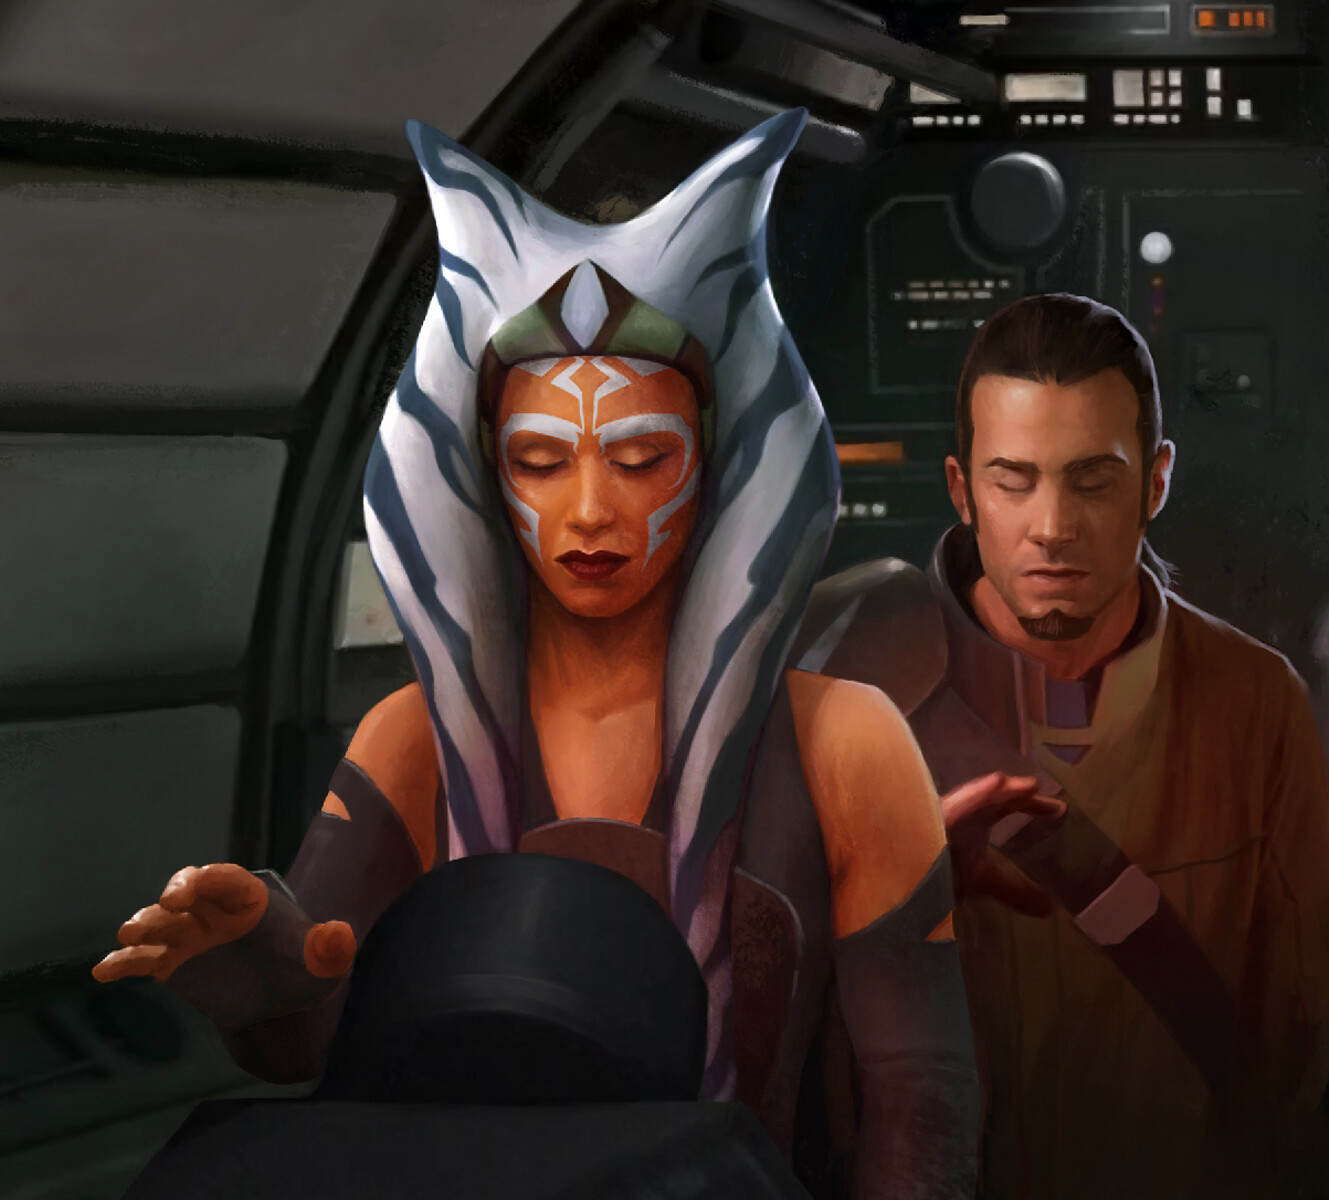
With great difficulty, the Ghost's crew managed to escape Lothal in a shuttle. However, Vader had secretly placed a tracking device on that shuttle, enabling him to locate the Phoenix rebel fleet. When Vader attacked the rebel fleet with his TIE Advanced x1 starfighter, Tano joined the crew of the Ghost on their ship. During the battle, Tano and Jarrus used the Force to try and identify him. As Bridger realized that he was the Sith Lord he and his master had previously encountered, Tano connected with Vader, screaming out and collapsing unconscious in shock. Vader also sensed her presence, realizing that his apprentice had survived.
After escaping Vader and recovering, Tano questioned Jarrus and Bridger about their previous encounter with Darth Vader on Lothal. Jarrus and Tano recalled that they had not sensed a presence as evil as Vader since the Clone Wars. When Bridger asked Tano about the identity of the Sith Lord, Tano stated that she didn't know who he was. However, she told them that she knew that Vader would be coming for the rebels again in an effort to destroy them. The rest of the Spectres then entered the cockpit to reaffirm their camaraderie, saying that they would fight together against Vader and anyone else who tried to stop the rebellion.
Reuniting with Rex

Following the destruction of the Phoenix flagship Phoenix Home, the Phoenix rebels were on the run. During a discussion about their next course of action, Tano suggested that the crew of the Ghost seek out an old friend: the former Clone Captain Rex. She revealed that she had been sending her old friend transmissions that had gone unanswered, but said that she had heard that he may be in the Seelos system. For their mission, she gave Wren and the crew of the Ghost the head of an old tactical droid and sent them to the desert planet of Seelos. Prior to departing, she told Jarrus to trust her friend. Ezra asked her why she was not coming with them, but she replied that she had to depart "to answer questions that need answering." After some difficulty, the crew of the Ghost managed to win over Rex, who supplied them with a datacard containing a list of Republic installations in the Outer Rim and Mandalore. After fighting off an Imperial assault, Rex agreed to join the Rebellion. After returning from Seelos, Tano reunited with her old friend, who commented that she had grown "old." Tano responded by saying that it "had to happen sometime." The two embraced after many years apart.
Discovering more Inquisitors
With Rex's datacard, the Phoenix rebels gained access to a list of abandoned Republic bases and installations. During a salvaging mission to an abandoned Republic medical station, the crew of the Ghost encountered two more Inquisitors—the Seventh Sister and the Fifth Brother. These Inquisitors were aware about the existence of Tano and attempted to force Bridger and Wren to divulge all information they knew about her. However, these rebels escaped with the help of Garazeb Orrelios.
Rescuing infants
While monitoring transmissions from Mustafar, Tano discovered that the Empire's Inquisitors had a secondary mission which involved kidnapping Force-sensitive children. Traveling to the planet Garel, she related her discovery to Kanan Jarrus. Tano had also decoded two sets of coordinates. While she decided to investigate the first set of coordinates, she sent Jarrus to investigate the second set. Jarrus accepted the mission and was accompanied by Bridger, Zeb, and Chopper. The first set of coordinates led Tano to the planet Chandel, where she encountered a derelict passenger ship. She quickly encountered an elderly woman named Darja, who revealed that the Seventh Sister and Fifth Brother had abducted her grandchild, Alora. Tano comforted the grandmother and promised to find her grandchild.
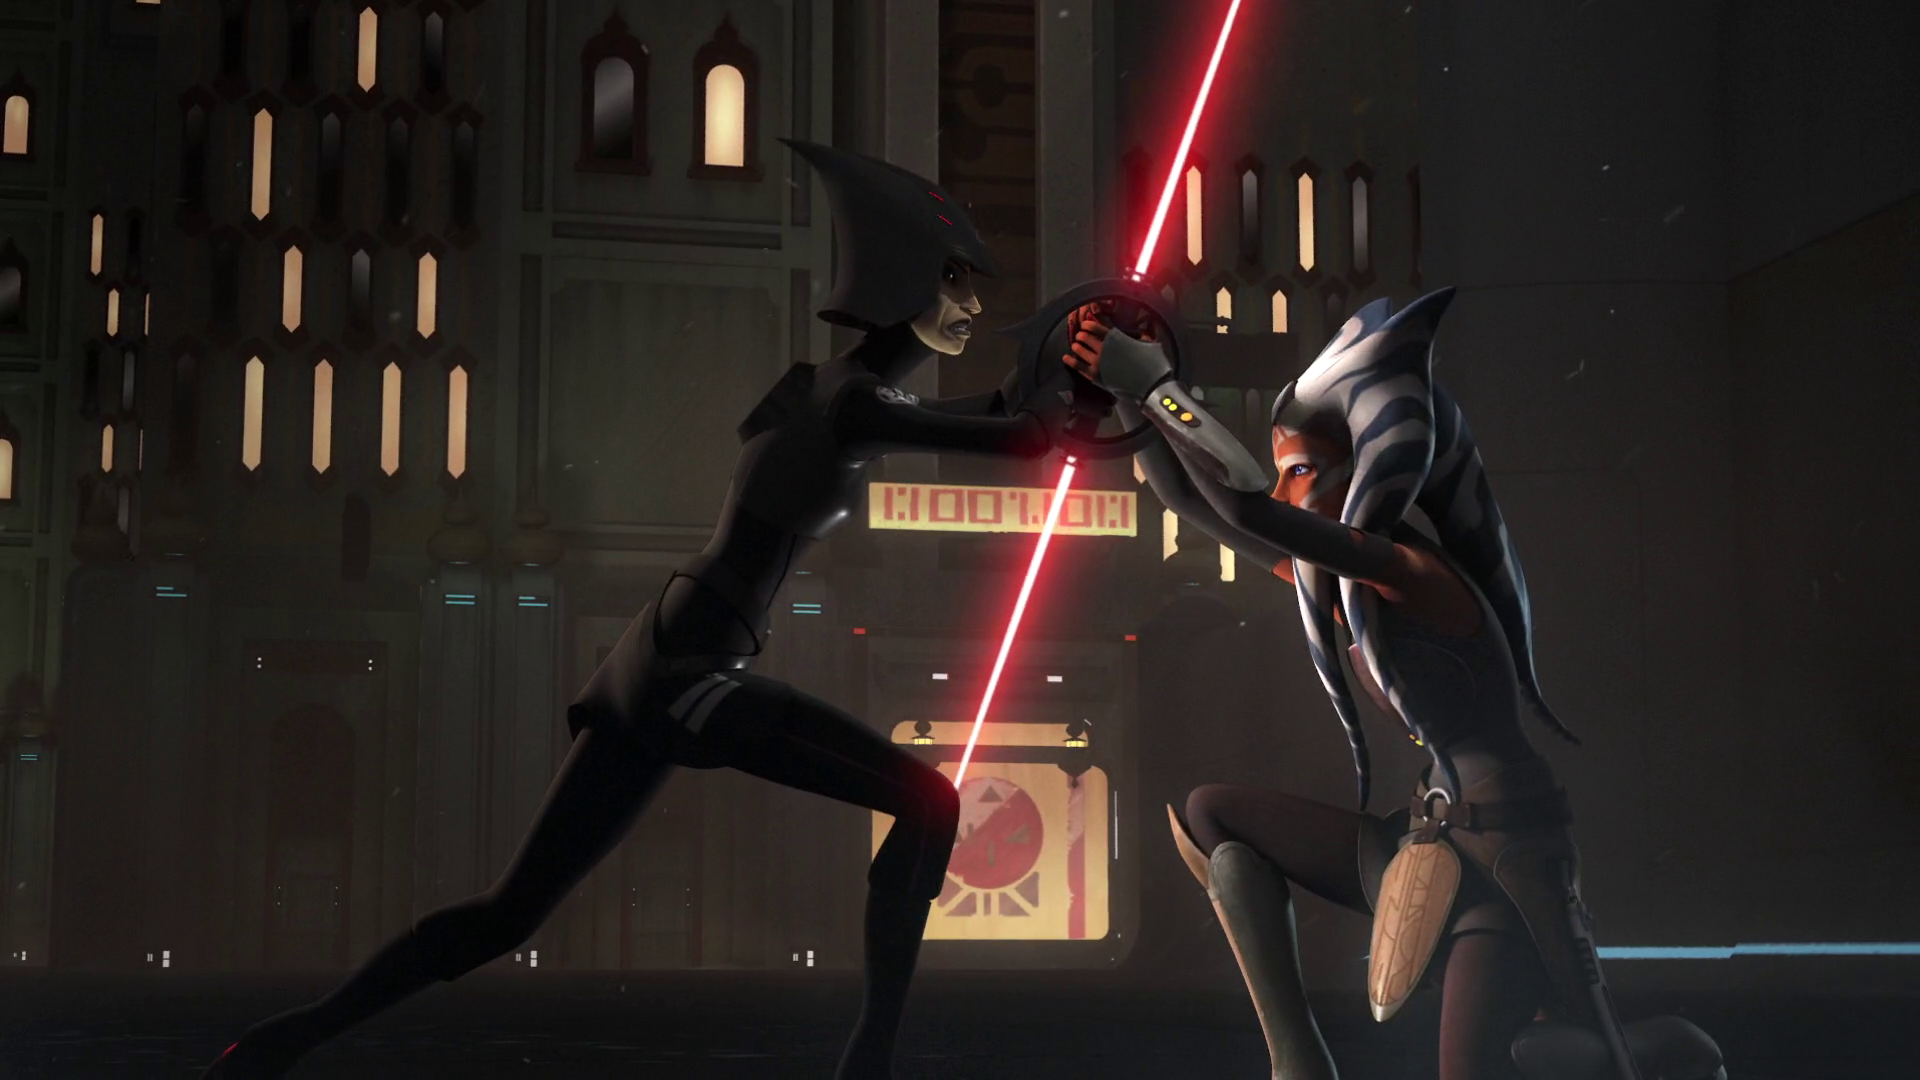
Meanwhile, Jarrus and his fellow rebels traced the second set of coordinates to a flat in Hammertown, a settlement on the planet Takobo. After rescuing Alora and an Ithorian infant named Pypey, the rebels ran into trouble with the Seventh Sister and Fifth Brother. Following a protracted pursuit and confrontation, the rebels were bested by the Inquisitors outside the spaceport where they had berthed their ship, the Phantom. However, before long, Tano arrived and engaged the two Inquisitors in a lightsaber duel. Through her mastery of the Force and lightsaber skills, Tano easily defeated the two Inquisitors. Before she could capture them, however, she was surrounded by Imperial reinforcements. Tano managed to escape Takobo with Jarrus and his rebels, who fled aboard the Phantom. As the Rebels departed from Takobo, Tano recalled that a similar attempt had been made by a Sith Lord to abduct children during the Clone Wars. In the past, the Jedi had protected them, but since they were now eradicated, the Rebellion was now their only protection.
Anguish on Lothal
After Jarrus and Bridger were attacked by the Inquisitors on [Oosalon](/article/oosalon], they realized their presence was endangering the rebellion's search for a base and met with Tano on the Ghost to discuss a plan of action. While waiting for them, she viewed a holocron of Skywalker giving a demonstration in lightsaber combat, which Ezra also watched when he arrived. Remarking on his skills, he asked her what happened to Skywalker. Hesitant, she claimed to have seen him once more when he was sent to rescue Chancellor Palpatine, but did not know what happened to him as the Jedi Purge unfolded. When Jarrus arrived expressing his concerns, she mentioned in difficult times she would have asked Kenobi or Yoda for advice. Jarrus revealed that they had communed with Yoda in the Lothal Jedi Temple, and decided to return there in the Phantom.

Tano declined to help them raise the entrance to the temple, pointing out she was no longer a Jedi. Jarrus and Bridger raised the temple from the ground, discovering a new door below the one they had entered before. Inside, Tano, Bridger, and Jarrus had their own separate visions. Tano was confronted by a vision of Skywalker, who expressed anger at her departure, calling her selfish and accusing her of abandoning him. He then asked Tano if she knew what he had become as the image of her former master faded into that of Darth Vader. Lashing out with her lightsaber, she cried in agony as she was forcefully confronted with the realization that her master may have indeed become Darth Vader.
The Inquisitors arrived, but the visions in the temple took the shape of numerous Jedi Temple Guards and distracted them, buying Tano and the Jedi time to escape. As she fled, Tano turned and saw Yoda on Dagobah, who waved at her. Smiling back, she turned and continued on her way back to the Phantom. On board, Bridger revealed he had spoken to Yoda and that he had been told to find Malachor. Tano explained that Malachor was not a person, as Ezra assumed, but a planet.
Twilight of the apprentice
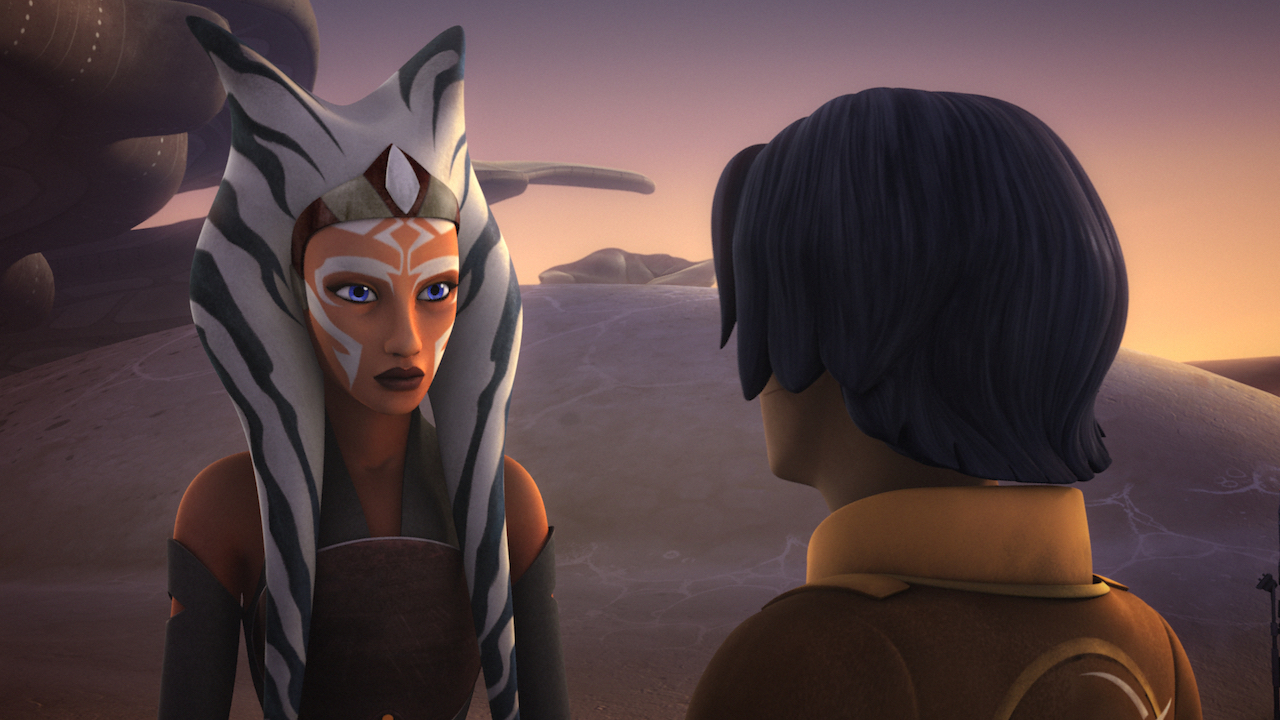
After the rebellion established a new base on the planet Atollon, Tano journeyed there to meet Jarrus and Bridger, joining them on their mission to Malachor. Before departing from Atollon, Bridger shared his predicament with the krykna with Tano, who explained that the Force becomes even more enigmatic as one gains more knowledge about it. Subsequently, Bridger accompanied Tano back to the camp, where they prepared for their departure to Malachor.
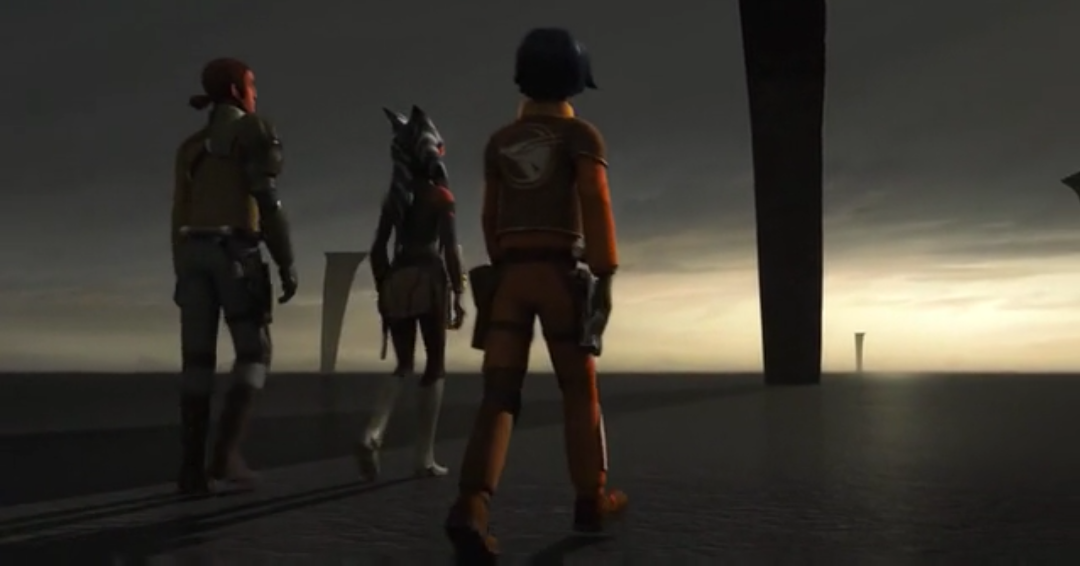
En route to Malachor, Rex contacted Tano and offered to join the crew on their mission, as he would arrive in just two rotations. However, Tano declined his offer. Following her conversation with Rex, Tano moved to the cockpit of the Phantom. When Bridger inquired of Jarrus why Rex was so concerned, Jarrus explained that before the Jedi Purge, the Jedi were instructed to never travel to Malachor due to ancient legends surrounding the planet. Tano commented that legends often hold a kernel of truth, after which Bridger questioned why Master Yoda would send the three of them to Malachor.
The group eventually emerged from hyperspace, and Tano explained that they were seeking knowledge that would aid them in defeating the Sith. Before they landed on the planet, Chopper detected a ship on the planet but couldn't identify its type. Jarrus instructed him to trace it, as someone was clearly pursuing the same objective as the three of them.
Upon reaching the surface, they landed at a site with peculiar-looking obelisks. As they approached one of them, they noticed that it was covered in an ancient language that Tano could partially translate. As Tano began to read the phrases aloud, Bridger became entranced by them and touched the pillar, causing the ground beneath them to collapse, and the three of them fell underground. As they regained their composure, they noticed that the place contained a hidden, underground Sith Temple, which might have been the reason Master Yoda had sent them there.
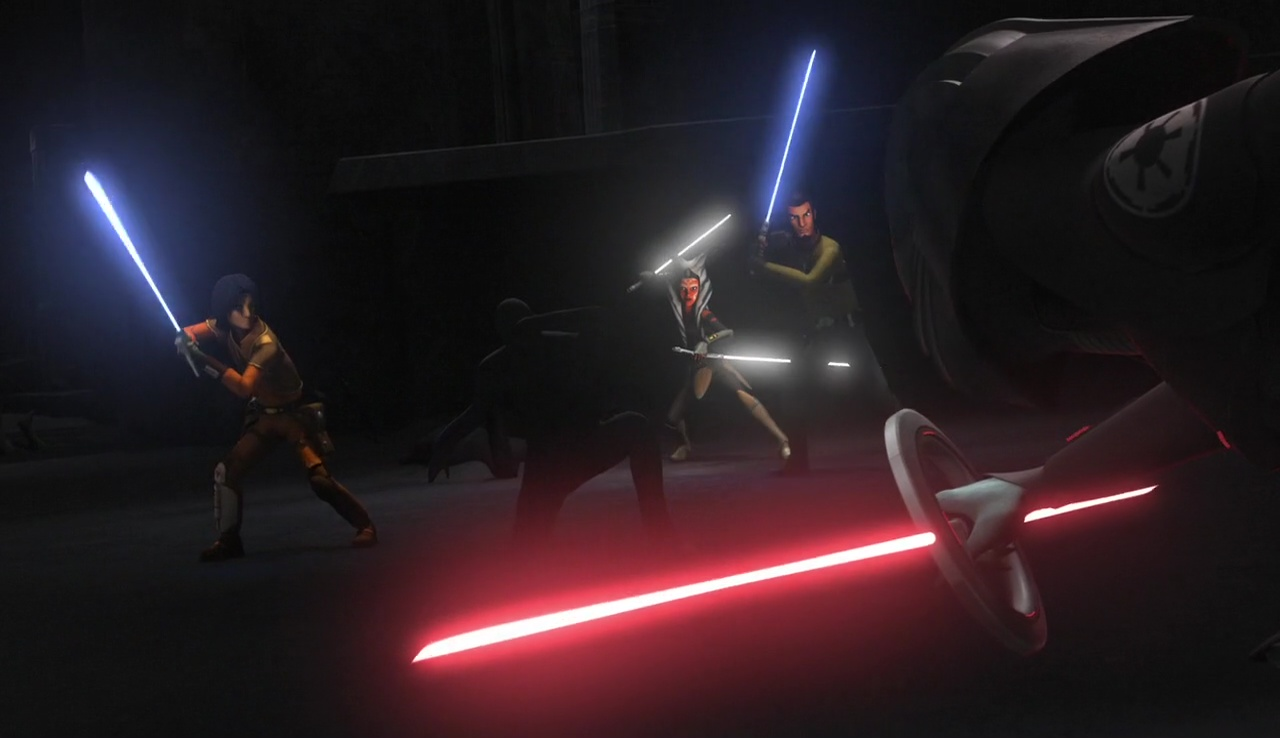
Upon closer inspection, they realized the place was a battlefield with some figures turned into stone. Bridger also discovered an old crossguard lightsaber. While discussing the events of the battle, they were attacked by the Eighth Brother, who hurled explosives at them, shattering another layer of rock beneath them and causing Bridger to fall further down. Tano and Jarrus decided to pursue the Inquisitor, while Bridger attempted to find a way back up. In his search for a way up, Bridger encountered a seemingly old and frail man trapped just as he was.
Back on the surface, Chopper had discovered the Inquisitor's TIE Advanced, while Tano and Jarrus pursued the Inquisitor. Jarrus had noticed that the Inquisitor was surprised to encounter the Jedi there, which could indicate that the Inquisitor was searching for something on Malachor, further supporting his theory that the Inquisitor was after something other than the Jedi. At the Inquisitor's TIE, Chopper managed to hijack the ship and use it against the Inquisitor, assisting Tano and Jarrus in capturing him. The pair deduced that the Inquisitor was hunting someone, but not them. When Ahsoka interrogated the Inquisitor, he revealed that he was hunting "a shadow."
When Bridger and his companion, who revealed himself to be named Maul, managed to claim a Sith holocron that they had located beneath the temple, the entire structure went into "stand-by" mode, with lights activating around it. This distracted Tano and Jarrus, allowing the Inquisitor to secretly call for backup. They made their way to the temple, where they encountered the Seventh Sister and Fifth Brother. The two Inquisitors freed the Eighth Brother, and a fight ensued between the Inquisitors and the two Jedi. Maul and Bridger soon found Tano and Jarrus, and Maul activated his double-bladed lightsaber, taking on the three Inquisitors single-handedly and forcing them to retreat.
Tano asked Maul what "game he was playing," to which he responded, "the end game." Maul then said that the four had little time, as Vader himself was probably on his way to Malachor. The group slowly made their way to the top of the temple, but on their way, they met the Inquisitors again. Maul told Bridger to run to the top of the temple with the Sith holocron, while Maul stayed back to help Tano and Jarrus against the Inquisitors. Maul killed two of them with ease, while Jarrus indirectly finished off the last one. Not soon after, Maul revealed his true intentions to Tano and Jarrus, then lashed out at Jarrus, slashing him in the eyes and blinding him, but before Maul could deliver the killing blow, Tano intervened. The two fought briefly, but Tano realized time was running short and left Maul with Jarrus, who managed to throw Maul off the temple.
Tano made her way to the top of the temple, where she found Darth Vader about to execute Bridger. She drew the Sith Lord's attention away from Bridger by addressing him. Vader told Tano that she would be spared if she gave him the location of any remaining Jedi. However, Tano told him that the Jedi had all been killed by Vader and his Inquisitors. Clearly disbelieving, Vader obliquely threatened to torture any such information out of Bridger if Tano would not cooperate. Tano replied in disgust that, though she had begun to suspect who Vader was behind his mask, his cruelty now led her to believe that he could not possibly be her former master. Vader stated flatly that Anakin Skywalker was weak and that he destroyed him. Angered, Tano snarled that she would avenge Skywalker's death. While Vader reminded her that revenge was not the Jedi way, Tano retorted that she was not a Jedi and attacked him.
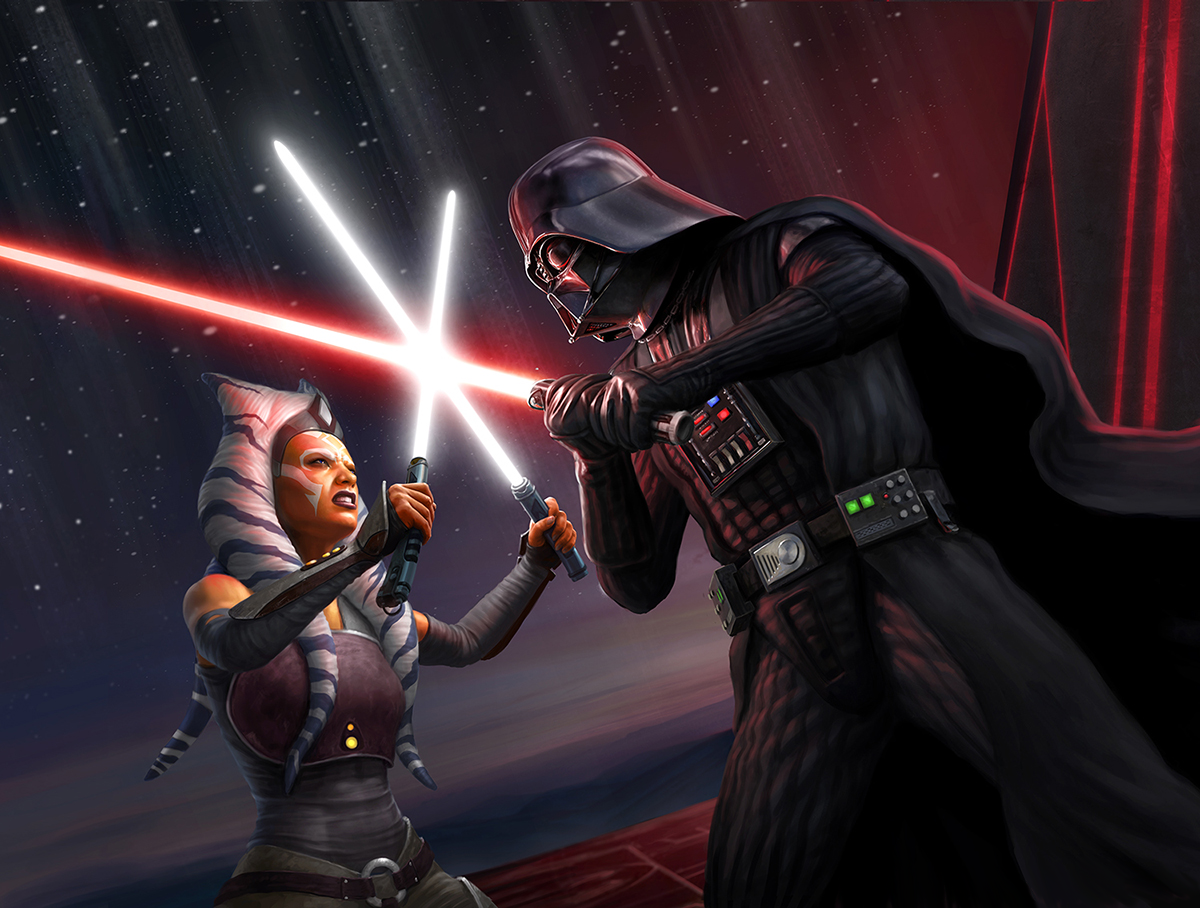
After several minutes of intense swordplay, Vader blasted Tano off of a ledge with the Force and went to claim the temple's Sith holocron from Ezra. Tano, however, managed to survive her fall and rushed to re-engage Vader. She managed to catch up to him at the summit of the temple as he used the Force to pull Bridger, Jarrus, and the holocron to himself. Tano then leaped into action, ambushing Vader and managing to cut a furrow into his mask above his right eye.
As Jarrus and Bridger escaped, Tano heard Vader call out to her. However, because of the damage that had been done to his mask, his voice was no longer that of Vader, but a combination of Vader's mechanical baritone and Skywalker's unfiltered voice. She turned around to face him and saw through the gash in his mask the charred face of her former master, confirming beyond any doubt that Vader and Skywalker were one and the same. As Vader regained his feet, Ahsoka called him "Anakin" and said she would not leave him as she had years ago. Vader paused for a moment upon hearing this, but then coldly responded that she would die and reactivated his weapon. The two engaged in combat once again, and the temple locked down with a burst of energy, allowing Bridger and Jarrus to escape.
Tano was thus lost to the shadow and rubble of the crumbling Sith temple. Following the mission, Bridger blamed himself for the disaster, believing that Tano had been killed by Vader. Jarrus however, reassured him that the mission's outcome had not been his fault.
The World Between Worlds

It escaped the notice of Jarrus and Bridger that Tano and Vader's duel had a very different conclusion than they imagined. After the holocron chamber sealed, Vader renewed his attack on Tano and swiftly gained the upper hand. During their final bladelock, Vader started to break through her defenses, but his attention was diverted by the massive bursts of energy coming from the damaged holocron dock. This gave Tano the opportunity to use the Force to push Vader back and break free. She then drove her lightsabers into the floor near her feet, making it unstable beneath them. Vader briefly looked at the floor, but dismissed it and prepared to deliver a fatal blow to his former apprentice. Just as Vader was about to strike, a portal materialized behind Tano, and a figure seized her by the shoulder, yanking her into a mysterious dimension. Vader's attack missed, and he plummeted through the collapsing floor into a pool of light.
When Tano regained consciousness, she discovered that the person who had pulled her into the portal was actually Ezra Bridger, aged by two years. Tano felt disoriented and wondered about Jarrus's whereabouts. Bridger explained the situation and their location. Bridger reasoned that if he could rescue Tano, he could also save his master. Tano cautioned him that doing so would result in the deaths of Bridger and the others, but Bridger stubbornly rushed off to find a portal to save his master. Tano caught up to Bridger, who was gazing into a portal showing his master's final moments. She told Ezra that he couldn't interfere because Jarrus's sacrifice had saved their lives. A heartbroken Bridger argued that she didn't understand what she was asking of him, but Tano sadly replied that she was asking him to let go of his master, just as she had let go of hers, after realizing that Anakin Skywalker's destiny was separate from her own. Accepting the inevitable, Ezra allowed the fire from the fuel pods to engulf Jarrus.
After Bridger relinquished his desire to save his master, he and Tano resolved to leave the dimension. However, the portal concerning Jarrus turned out to be a ruse by Darth Sidious, who tried to manipulate Bridger into allowing the Emperor to enter the world. Tano used the Force to block the Emperor's fiery energy, but as she struggled to maintain the barrier, Ezra assisted her before they both escaped. When Ezra was caught by a tendril of energy, Tano used her lightsabers to free him. As they continued to flee, they became separated but promised to reunite in the future. Bridger returned to the portal he had arrived through, while Tano entered another portal, which transported her back to Malachor, near the base of the Sith temple, accompanied by her convor companion Morai. She invoked the Force to be with Ezra Bridger and descended into a dark tunnel with Morai.
Entering the dark tunnel, Tano encountered a staircase that led her deeper, eventually reaching a stream where Morai was waiting. She entered the stream and followed Morai to another staircase, which led her to another portal into the World Between Worlds. She stepped inside, returning to the mystical plane. Thus, Ahsoka Tano embarked on a transformative spiritual journey. Meanwhile, Morai departed from the temple and was observed by Vader as he traversed the surface of Malachor. Vader presumed Tano to be dead. With her supposed demise, the Great Jedi Purge concluded.
Lost and found
In search of Ezra Bridger
Following the end of the Galactic Civil War, Ahsoka Tano still wielded her white lightsabers. Five years after her encounter with Ezra Bridger in the World Between Worlds and the Liberation of Lothal, during which Bridger sacrificed himself to protect his loved ones by disappearing with Imperial Grand Admiral Thrawn and the Chimaera into hyperspace via a pod of purrgil, Tano and Wren initiated a search for Ezra. Their mission involved an expedition into the Unknown Regions. Tano had also reunited with Huyang, who joined them aboard T-6 1974.
Despite the Mandalorian rebel's lack of Force sensitivity, Tano eventually began training Wren as her Padawan. However, their relationship deteriorated, and they parted on bad terms, with Wren later claiming that Tano had abandoned her training. Tano, on the other hand, believed Wren was not yet ready to walk the path of a Jedi. Wren returned to Lothal, while Tano continued to live out of her T-6.
Thrawn campaign
Dealing with Morgan Elsbeth
By 9 ABY, having not seen Wren for years, Tano began hearing rumors about the return of Grand Admiral Thrawn as heir to the Empire. Concerned by this prospect, Tano started searching for Thrawn and followed a lead to the forested planet Corvus, seeking information on the Grand Admiral's location. To obtain this information, Tano traveled to the city of Calodan, governed by Magistrate Morgan Elsbeth, a servant and former apprentice of Thrawn, and her army. Bo-Katan Kryze was aware of her journey to Corvus and directed the Mandalorian Din Djarin to her location to fulfill his quest of delivering an infant of the same species as Yoda to the Jedi.
Tano attacking the scout guards"
As she approached Calodan, Tano encountered significant resistance and was attacked by a unit of Elsbeth's scout guards. Tano managed to overpower them, forcing them to retreat. As they retreated, Tano used her white lightsabers to strike down one of the guards as they fled towards the city gates of Calodan. Deactivating her lightsabers and using the fog-filled forest to her advantage, Tano concealed herself behind a tree and used the Force to create a distraction for the guards before reigniting her lightsabers and cutting down another one by slashing through a tree. The guards retaliated by firing at her with their A350 blaster rifles, prompting Tano to use the Force to hurl a piece of the tree she had just cut down at one of the guards, before deactivating her lightsabers again and disappearing into the mist. Tano briefly reappeared and cut down another guard with her lightsabers before disappearing once more as the guards continued to shoot at her.
Sneaking behind the guards, she bisected them, leaving only one guard remaining. As the last guard attempted to retreat back to the city, Tano emerged from the mist and deflected the final guard's blaster bolts before cutting them down. As Tano returned to the mist, Elsbeth, standing atop a sentry point on the walls surrounding Calodan, demanded that Tano reveal herself, which Tano did, with her lightsabers ignited. Elsbeth announced that she had been expecting Tano, to which Tano replied that she must then know what she was after. Elsbeth declared that she would learn nothing from her, but Tano bluntly stated that she would not give Elsbeth that choice.
Summoning one of her HK-87 assassin droids, Elsbeth presented one of the town's inhabitants, now her captive, and asked how many lives Tano was willing to sacrifice for the information she sought. Elsbeth added that the lives of the city's inhabitants meant little to her and that they would suffer because of Tano's interference. However, Tano declared that the people were already suffering under Elsbeth's rule and that Elsbeth should surrender to avoid the consequences of her crimes. Raising one of her lightsabers, Tano announced that she would give Elsbeth one day to make her decision as Elsbeth disdainfully smirked at her. Extinguishing her lightsabers, Tano retreated back into the mist and away from Elsbeth.
Tano meets Din Djarin"
By daybreak, Tano had retreated deep into the forest. She eventually encountered the Mandalorian Din Djarin, who had been searching for her. Perceiving him as a threat, Tano lunged at him with her lightsabers; however, Djarin heard her and managed to block her lightsabers using his wrist gauntlets. As she continued to attack, Djarin managed to block each of her strikes with his wrist gauntlets before using his flamethrower to disorient her and his whipcord launcher to immobilize her. Spotting a branch above her, Tano leapt over it, freeing herself and, as the whipcord was still attached to Djarin's wrist gauntlet, dragging Djarin up with her before the whipcord snapped. Now free, Tano reignited her sabers, prepared to continue the fight before Djarin called out her name and stated that Bo-Katan had sent him, requesting to speak with the former Jedi. Noticing Djarin's foundling, a youngling of the same species as Yoda, sitting atop a rock, Tano moved out of her fighting stance and commented to Djarin that she hoped they would be talking about him.
Ahsoka Tano met Grogu, a Force-sensitive of the same species as Master Yoda."
By nightfall, she and the youngling were telepathically communicating through the Force under the light of a lantern and a moon above. Standing up, Tano picked up the youngling, who, as she had discovered through their telepathic communication, was named Grogu and had been raised in the Jedi Temple. Tano brought Grogu and the lantern closer to Djarin and sat down next to the youngling. Djarin asked if Grogu was speaking to her and if she understood him. Tano answered that she and Grogu could feel each other's thoughts. Djarin was surprised to learn Grogu's name for the first time and questioned the name upon hearing it. Tano reaffirmed that his name was Grogu and explained to Djarin that Grogu had been raised in the Jedi Temple on Coruscant and trained by many masters over his many years. However, she explained that he had been hidden away by someone at the temple at the end of the Clone Wars when the Galactic Republic was reorganized into the Galactic Empire, but after that, his memory became clouded, and he did not remember much of the years following. Tano continued that Grogu had felt lost and alone after the Jedi Order's collapse.
Moving on from Grogu's origins, Tano explained that she had known another member of his species, Jedi Grand Master Yoda, and noted how wise he had been. Tano asked Djarin if Grogu could still wield the Force as he had done at the Jedi Temple, to which Djarin questioned if she was referring to his powers. Tano explained that the Force is what gives Grogu his powers and that the Force was an energy field created by all living things. With this, she explained that one would need to have a great deal of discipline and training in the Force such powers. Now knowing this, Djarin brought up the supposedly unexplainable things Grogu had done prior and how he had been tasked to bring Grogu to a Jedi. However, Tano simply explained that the Jedi Order had fallen long ago, to which Djarin noted that even though the Empire was gone, it still hunted Grogu and that he would need her help if he was to evade them longer. Tano recommended that they let Grogu sleep and that she would test his abilities in the morning.
Tano, Djarin, and Grogu arrive for Grogu's test to begin"
At daybreak, Tano, Djarin, and Grogu went to a clearing, and Tano walked up to Grogu and playfully stated that they would discover what knowledge Grogu possessed. Tano motioned Djarin to place Grogu down on one of the rocks, which he did. Grabbing a small stone, Tano used the Force to slowly levitate the stone into Grogu's hands and explained that she wanted him to return the stone to her outstretched hand. Before he could do anything, Djarin interjected, attempting to inform Tano that Grogu didn't understand, but Tano rejected his inquiry, stating that Grogu could understand what she was asking of him.
With her arm still outstretched, she told Grogu that it was ok and once again requested the stone from Grogu. However, instead of returning the stone to her using the Force, Grogu simply dropped it, leading her to lower her arm in disappointment and walk towards him. Grabbing one of his small hands, Tano used the Force to feel his emotions and calmly announced that she felt great fear in Grogu. As she stood up and walked back to her original position, she explained to Djarin that Grogu had hidden his abilities over the years to conceal himself.
Tano then announced that she wanted to try something else and asked Djarin to come over to her. Djarin misunderstood and signaled for Grogu to go to Tano instead, and when he didn't move, he exclaimed that Grogu was stubborn. However, Tano quickly stopped him and informed him that she was not the one who would be performing the test but Djarin himself, explaining that she wanted to see if he would listen to him. This prompted Djarin to begin complaining about how, if Grogu would listen to him, it would be one of the first times, to which Tano jokingly told Djarin that she liked firsts, whether they be good or bad, because of how memorable they were. Handing the stone to Djarin, Tano instructed him to hold the stone in the palm of his hand and to request for Grogu to lift the stone using the Force.
As Tano walked past Djarin to witness the test, Tano whispered into his ear a request for him to use Grogu's name as opposed to referring to him as "kid" as he had done when first requesting for him to take the stone. Walking away and leaning on a large boulder, Tano watched as Djarin requested for Grogu to take the stone once more and him giving up moments later, once again claiming Grogu was stubborn. Tano instructed Djarin to try to connect with Grogu, prompting Djarin to pull out a small, silver ball used on one of the levers on his gunship, the Razor Crest, which Grogu had become quite fond of. Kneeling down, Djarin asked if Grogu wanted the ball and requested for him to take it. With little hesitation, Grogu used the Force to pull the ball to him.
Djarin congratulated Grogu on this, and, while doing so, Tano noted the attachment Grogu had formed with him and that she could not train him. Djarin was shocked by this and asked why she could not, citing his abilities. Tano explained that his attachment to Djarin made him vulnerable to the dark side. Djarin, however, did not understand and insisted that this was even more of a reason to train Grogu, but Tano once again refused, indirectly citing her former master, Anakin Skywalker, and how his emotions had gotten the best of him, turning him to the dark side. She once again refused to allow Grogu to go down that path and said that it would be better if they just let Grogu's abilities with the Force fade as he grew older. Hurrying, Tano informed Djarin that she had waited too long and that she had to return to Calodan and save its inhabitants.
As Tano walked away, Djarin noted how Elsbeth had sent Djarin to kill her and that he had not agreed to anything of what Tano had just told him. Attempting to strike a deal, Djarin told Tano that he would assist Tano in saving Calodan if she assisted him in training Grogu. Agreeing to this, Tano and Djarin set off on their journey back to Calodan.
On their way back to Calodan, Djarin noted the forces Elsbeth had under her control, including the HK-87 assassin droids, scout guards, and her hired gunfighter, Lang, and mentioned how he believed that her lightsabers would not be able to protect her from the number of blaster bolts that would be shot at her. In response, Tano affirmed his remark and that he should also be wary of the magistrate herself. Upon Djarin's questioning of who Elsbeth, Tano revealed her name to Djarin and that her home had been ravaged during the Clone Wars with her people massacred. Continuing on, she further explained that this developed a great anger in her, which led to her helping construct warships for the Imperial Navy and ravage worlds herself. This led Djarin to note the burned forest that surrounded them. After quickly surveying the environment, Tano asked Djarin if he had seen any prisoners within the city's walls, leading him to note the three villagers that had been taken prisoner. Tano declared that they had to find a way to free them, to which Djarin noted that Elsbeth's army would never see the pairing of the two coming.
Ahsoka with her ignited lightsabers after entering Calodan."
At late dusk, the two finally completed their journey. Running at the city's entrance, Tano used the Force to leap up to the sentry point at the city's gate, igniting one of her lightsabers and kicking one of the scout guards. Blocking the blaster bolts fired at her by another scout guard, Tano grabbed the guard and flung them against a support beam of a gong, the city's alarm system, before promptly blocking the blaster bolts of another scout guard. She then threw the body of the scout guard she had grabbed prior and tossing him into the wall opposite of where he had been prior. Immediately afterwards, she used the Force to grab the A350 blaster rifle out of the hands of one of the scout guards and threw it at the scout guard firing their rifle behind her, knocking the guard out. The guard she had grabbed the blaster from then raised his hands in surrender and escaped from Tano. Dodging the strike of a heavy weapon, she then sliced a sentry guard in half, slicing the gong in half in the process.
As Elsbeth's forces took formation outside of the city's main building, Tano emerged from around one of the city's huts and began to slowly walk towards Elsbeth's army. Slowing to a halt, she tossed the shoulder plate of Djarin's armor for Elsbeth and her army to see, claiming that Djarin had failed to kill her and once again asked for Elsbeth to give her what she sought. Instead, Elsbeth ordered her guards to attack Tano, forcing her to leap up to the roof of one of the huts and block the oncoming blaster bolts with her lightsabers. Being forced to retreat, Tano leapt behind the huts and out of sight of Elsbeth's army.
Leaping down behind two guards, Tano quickly used her lightsabers to eliminate them before disappearing once more. Emerging behind another two scout guards, Tano slowly revealed her lightsabers and dispatched the guards. Appearing upon a rooftop and igniting her lightsabers, she jumped down to face Elsbeth's hired gunfighter. Quickly disarming Lang, Tano stood triumphant for a moment, but was soon forced to divert her attention away when Elsbeth's two HK-87 assassin droids revealed themselves from opposite corners. Reacting quickly, Tano rushed up to one and slashing them in half before retreating and disappearing around another corner.
Tano blocking one of Elsbeth's strikes"
Standing atop one of the walls outside of the main building, Tano witnessed a faceoff between Djarin, who had snuck into the city during the chaos, and Lang before jumping down to face Elsbeth within her garden. Signaling a fight was about to take place, Tano and Elsbeth both took off their robes and readied their weapons, standing only a few meters away from one another. Using a spear made of pure beskar, Elsbeth lunged at Tano who quickly blocked her spear with one of her lightsabers before blocking a second strike with the same blade. Having not moved any closer to one another, Tano and Elsbeth began to pace perpendicular to one another, looking for an opening in each other's defenses. With Elsbeth lunging at her, Tano blocked another one of Elsbeth's strikes, now with both lightsabers as the two exchanged several more blows as the fight intensified. Starting to go on the offensive, Tano executed several strikes against Elsbeth's beskar spear before having to dodge two of Elsbeth's oncoming strikes. Switching positions, Tano went back on the offensive as Elsbeth blocked a strike from both of her lightsabers and entering into a saber lock that resulted in Elsbeth being pushed back by Tano's brute strength.
With Elsbeth having launched a strike at her throat, Tano was forced to dodge as Elsbeth quickly began aiming for her legs causing Tano to slowly walk backwards, blocking each one of her strikes before Elsbeth swept for her legs, forcing Tano to perform a front flip. Going back on the offensive, Elsbeth and Tano entered into a brief saber lock before Tano executed a strike at Elsbeth, leading her to duck below Tano's oncoming strike. Staggered for a brief moment, Elsbeth managed to knock one of Tano's blades out of her hand and into a small body of water nearby. Now armed with only her shoto lightsaber, Tano slowly backed up before putting her single remaining blade into a reverse grip and attempted to regain her breath as she slowly pushed Elsbeth back. As Tano launched several heavy strikes, Elsbeth continued to parry them before unsuccessfully attempting to sweep Tano's leg, giving Tano the upper hand and allowing her to grab Elsbeth's weapon with her free hand and throw it to the ground. Putting her saber up to Elsbeth's throat, Tano asked her one last time where her master, Grand Admiral Thrawn, was located.
Tano with Governor Wing"
By the next day, Djarin and Tano, spear in hand, walked outside of the city's gates as the citizens of Calodan celebrated their liberation from Elsbeth's rule. Presenting the spear to Djarin, Tano stated that she believed Elsbeth's spear had been payment for Tano's defeat. However, Djarin refused the offer, citing how he hadn't completed the task, which Tano affirmed, but stated that she believed a Mandalorian should possess the spear. As Djarin took the weapon, Tano asked where Grogu was, to which Djarin revealed that he was on the ship and that he would retrieve the infant. As Djarin walked away, Tano gave a troubled look before she was joined by Governor Wing who she gesturing to head back into the city along with her as a gesture of friendship. The two then proudly walked back inside the city's walls.
Later, Tano was present outside Djarin's gunship, the Razor Crest as Djarin was exiting with Grogu in hand to give to her to train. As he stepped outside, Tano stated that Grogu now saw Djarin as his father and once again stated that she could not train the youngling. Djarin was shocked by this, stating that he had held up his end of their bargain as Tano walked closer to him and took hold of Grogu's left hand. As she reached the two, Tano directed Djarin to the planet Tython where she recommended that he place Grogu on the seeing stone at the top of a mountain containing the ruins of an ancient temple with a strong connection to the Force. Djarin then questioned what he was supposed to do from there, to which Tano answered that Grogu would then be able to choose his own path and that if Grogu used the Force to reach out, a Jedi might be able to sense it and come to the planet searching for Grogu. However, she also stated that there were few remaining Jedi, which could possibly present a problem for the two. Djarin then thanked Tano and she wished for the Force to be with the two before smiling and bowing her head for Grogu, watching as the pair left in their gunship. With this, Tano began walking back towards Calodan, smiling.
Visiting Ossus
Ahsoka Tano and Din Djarin observe the early stages of the temple's construction."
Following Grogu's successful rescue, Tano encountered Luke Skywalker, the son of Anakin, her previous master, who also possessed her acquaintance R2-D2. Shortly before the events of the Battle of Mos Espa, Tano accompanied Skywalker and Grogu to Ossus, a planet where Skywalker was establishing a fresh Jedi temple to instruct a new wave of Jedi. She noticed Grogu's profound longing for his former guardian, Djarin, a sentiment she feared could hinder his Jedi training. During her stay on Ossus, Djarin himself journeyed to the temple, seeking to reunite with Grogu and present him with Mandalorian chain mail. The Mandalorian bounty hunter was initially overlooked, until R2-D2 guided Tano to him to address his yearning to see Grogu. Djarin was taken aback to find Tano on Ossus; she took the opportunity to explain that the structure would evolve into "a great school," with Grogu as its initial pupil, reassuring him that the youngling was thriving. Upon Djarin's insistence on seeing Grogu, Tano invited him for a stroll through the bamboo forest, reminding him of her earlier caution regarding the difficulty of relinquishing his bond with Grogu.
Mirroring her respect for Skywalker's choice to train Grogu, Tano consented to honor Djarin's desire to see the child he had nurtured for an extended period, gesturing towards a hill where Skywalker sat alongside Grogu. However, she implored him to contemplate whether his actions were for Grogu's benefit or his own, questioning if the armor served as a means for the former foundling—potentially a Padawan at that juncture, in Tano's estimation—to remember his paternal figure. While Djarin asserted that the armor would safeguard Grogu regardless of his chosen path, Tano proposed delivering it on his behalf, convinced that a reunion between Djarin and Grogu would only complicate his training further. Djarin accepted Ahsoka's proposition, entrusting her with the beskar armor and requesting her to ensure Grogu's protection.

Subsequently, Tano joined Luke in observing one of Grogu's training sessions. She expressed admiration for both the child's advancement and Skywalker's instructional abilities. Skywalker responded that it seemed more as though Grogu was recalling previous lessons, leading Tano to remark that the student occasionally guided their master. Skywalker then disclosed his awareness of the Mandalorian's presence, prompting her to reveal the gift he had left behind. When Skywalker questioned Grogu's commitment to the Jedi path, Tano likened him to his father and advised him to trust his instincts. Tano then prepared to depart, resuming her pursuit of Thrawn, assuring Skywalker of the possibility of a future encounter and wishing him the Force. Ultimately, Grogu opted to return to Djarin and embrace the life of a Mandalorian. At one juncture, Tano journeyed to Black Spire Outpost on the planet Batuu, a location previously visited by Thrawn and her master, Anakin Skywalker.
The Search for Grand Admiral Thrawn
Driven by concerns about Thrawn's potential return, Tano interrogated Morgan Elsbeth, seeking any insights into Thrawn, his motives, and the means to locate him. Elsbeth ultimately divulged the whereabouts of a map purportedly leading to Thrawn's location in the galaxy of Peridea. Following her capture, Elsbeth was handed over to New Republic custody.
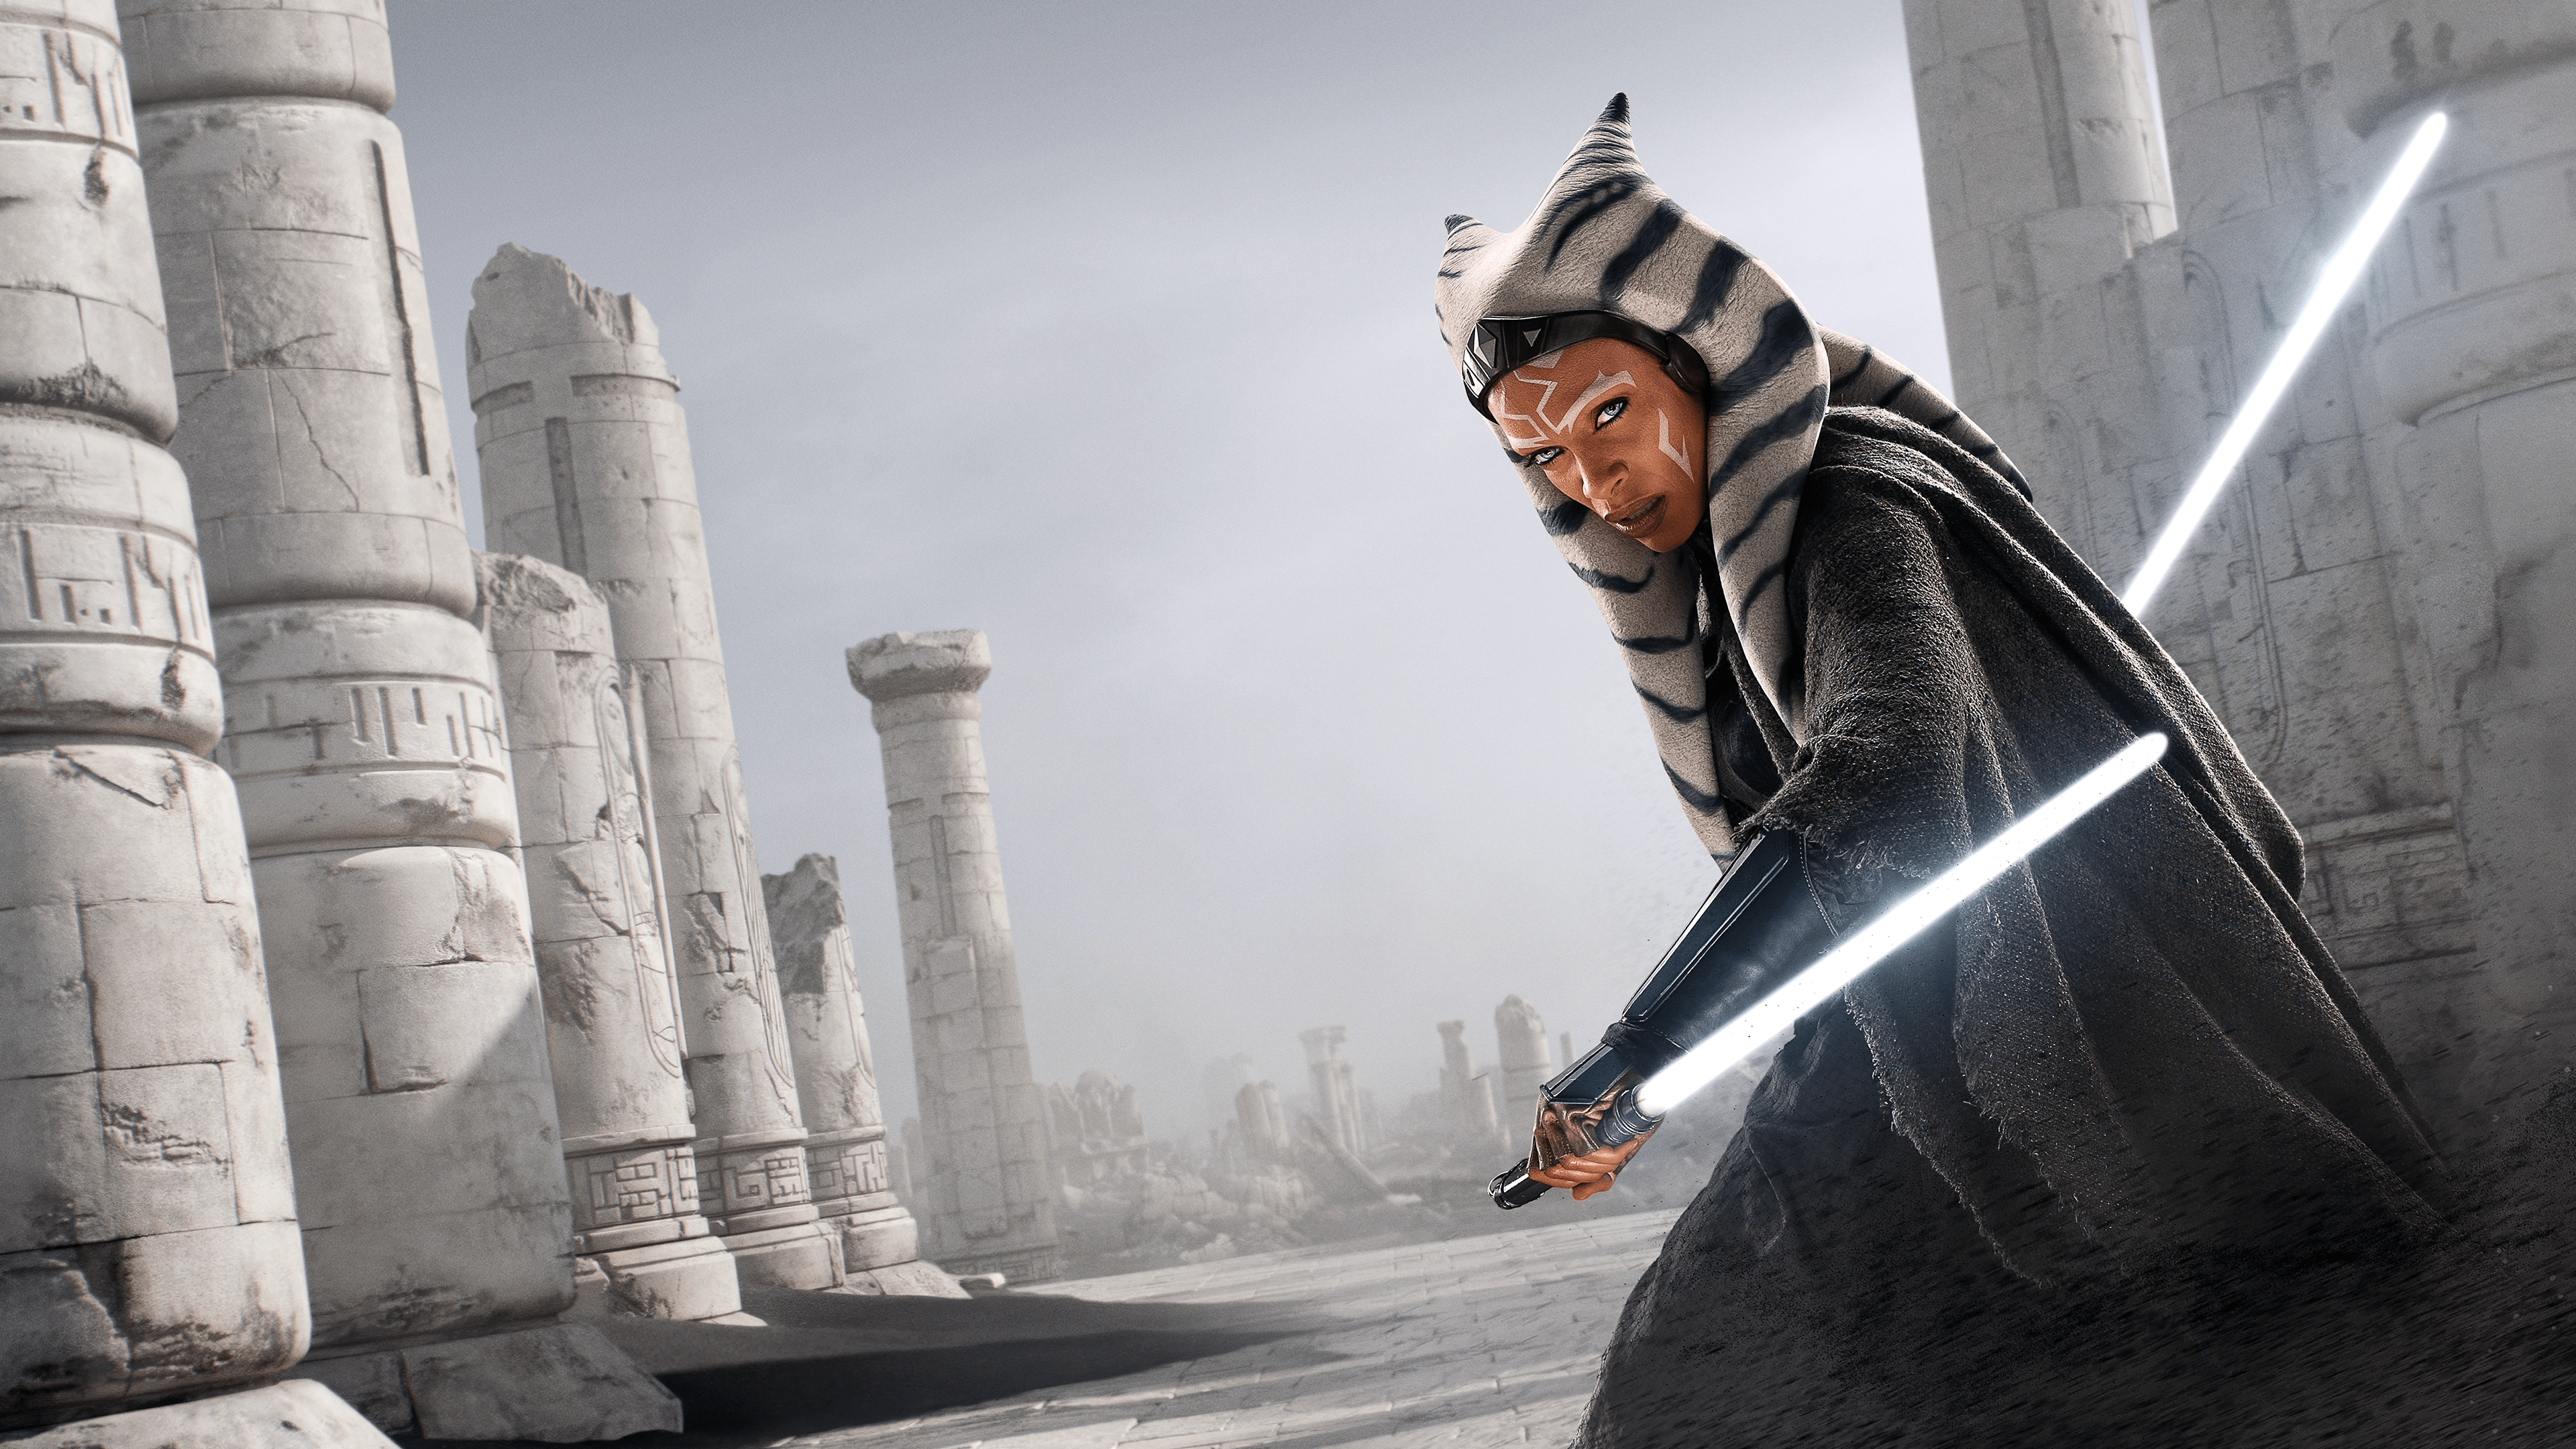
Tano promptly initiated a search within the remnants of an ancient stronghold situated on Arcana. She soon approached a runic circle positioned at the heart of the stony courtyard, employing her twin lightsabers to create an opening beneath her, granting her access to the chamber below. Tano surveyed several cloaked figures etched onto the wall before proceeding to a pillar and employing Psychometry upon it. Sensing that it held the key to retrieving the map, the former Jedi manipulated a segment of it, subsequently rotating its tip, which triggered an orb adjacent to one of the carvings to illuminate. Tano smirked before advancing to a second pillar. Following the manipulation of a portion of the second pillar, she observed an orb within the core of another carved figure to glow. She then rotated a section of a third pillar, causing a third orb to illuminate, and an altar bearing a rectangular stony object to ascend from the floor. Tano touched the stony box, which disintegrated, revealing a golden orb. She had communicated to Professor Huyang that she had discovered the object via comlink, but his transmissions were disrupted.
Tano swiftly resurfaced, where she was confronted by a red HK assassin droid demanding the map. She found herself encircled by five assassin droids armed with electrostaffs. Tano brandished her twin lightsabers in defense. Tano retreated back into the hole she had created and utilized her lightsaber to carve openings between three of the droids. Tano then engaged the remaining two, bisecting them across their torsos with her lightsaber. She decapitated the fifth droid. As two droids emerged from their holes, the lead droid issued commands to initiate their self-destruct protocols. The other two droids complied, compelling Tano to flee. While running, she contacted Huyang, who informed her that their T-6 Jedi shuttle was positioned above her. She instructed him to lower his ramp at a distance outside the ruins. The two escaped before succumbing to the fiery inferno that engulfed the ruins.
Within the cockpit, Tano engaged in conversation with Huyang regarding their communication difficulties. He explained that he had maintained her ship at a safe distance in accordance with Jedi mission protocol. She retorted that the Jedi Order no longer existed. When Huyang cited his programming, she advised him to remain close and watch her back. Huyang responded that such a task was the responsibility of a Jedi Padawan learner, which he was not. Tano informed Huyang that he had located the map based on Elsbeth's information. When Huyang inquired about her methods in eliciting the truth from Elsbeth, Tano replied that she had deviated from Jedi protocol.
Shortly thereafter, they received an incoming transmission from New Republic Fleet Command, informing Tano and Huyang about the recent attack perpetrated by Baylan Skoll and his apprentice Shin Hati to rescue Morgan Elsbeth. Tano and Huyang subsequently journeyed to Home One via hyperspace. Tano identified their ship as T-6 1974, and Fleet Command authorized their landing at hangar 2-9. Inside the hangar, General Hera Syndulla greeted them and apprised them of Elsbeth's escape.
Syndulla had prepared a briefing for Tano to bring her up to speed. During the briefing, Syndulla informed Tano and Huyang about the damage inflicted by the two mercenaries, who had eliminated an entire security detail and scuttled a new starship. Tano was unfamiliar with the attackers, who had displayed Force abilities akin to those of the Jedi. Huyang proposed that one of these intruders had once been a Jedi. Tano instructed Huyang to scan Skoll's and Shin’s lightsabers.
When Syndulla inquired about the mercenaries' connection to Elsbeth, Tano posited that she had employed them for plausible deniability. Tano also presented Syndulla with the golden orb, elucidating that Elsbeth had been interested in this map, believing it would lead to the location of Thrawn, the last Imperial Grand Admiral. Syndulla expressed surprise that Thrawn had survived the Battle of Lothal, but Tano clarified that she had heard rumors of his survival. Syndulla inquired if this implied that Ezra Bridger was alive. Tano remained uncertain but cautioned that their adversaries were also searching.
Syndulla expressed a desire to examine the map, but the key required to activate it eluded Huyang. Syndulla remarked that matters were never straightforward with the Jedi. A Mon Calamari officer notified Syndulla that the Defense Council was requesting an update from her. Syndulla stated that she would attend to the matter and informed Tano that she knew someone who could assist her. Tano expressed uncertainty that this friend would offer assistance, but Syndulla reassured her that she would do so for Bridger.
Later that day, Governor Ryder Azadi delivered a speech to the citizens of Lothal, commemorating the anniversary of its liberation shortly before the Galactic Civil War. Sabine Wren, still residing on Lothal and slated to address Lothal's community, failed to appear at the celebration, instead returning to the communications tower. Tano soon arrived on the planet, parking her T-6 shuttle near a ledge on a high tower. Wren arrived while Tano was conversing with Governor Azadi. When Azadi noted that Wren had missed the ceremony the previous day, Wren responded that it had slipped her mind. Azadi remarked that everyone had missed her, but Wren countered that not everyone had been present. Huyang also greeted Sabine, who recognized him. Huyang stated that he still retained 75 percent original parts before returning to the ship. Azadi instructed Wren to heed what Tano had to say before departing. Tano then informed Wren that she knew a way to locate Bridger, presenting her with the orb.
The two entered Ahsoka's T-6 Jedi shuttle and discussed the situation. Wren observed a bunk adorned with several wall drawings, including a loth-cat. When Wren inquired if she was certain Bridger was still out there, Tano responded that while nothing was certain, their enemy was seeking Thrawn, which had led her to the map. Tano explained that she had discovered the map on the planet Arcana, a Nightsister stronghold dating back thousands of years. Recognizing her artistic skills, Tano sought Wren's assistance in deciphering the map. Wren believed it contained a code. Tano shared a scan of the Nightsister temple chamber where they had located it. When questioned about where home was, Tano described her soul as a home. Both women accused each other of complicating matters. Tano replied that the Jedi way was arduous.
At that moment, Huyang provided an update. Wren requested permission to take the map and study it. Tano refused, asserting that the map was not solely about finding Bridger but also about preventing another war. She cautioned Wren that the map must remain aboard the ship before entering the lab to converse with Huyang. Huyang had scanned Skoll's and Hati's lightsabers. The droid stated that he recognized one of the two hilts, which was constructed in the Jedi style. The one he knew belonged to Baylan Skoll, who had vanished at the conclusion of the Clone Wars. Huyang informed Ahsoka that Skoll had received Jedi training. Tano surmised that Hati was Skoll's apprentice. He warned Tano that Skoll would not remain alone for long. Upon Tano's return to the briefing room, Wren had already departed with the map, disregarding Tano's instructions.
In the interim, Wren rode her speeder bike back to the old communications tower. A probe droid then emerged from behind a signal crossing, relaying information back to Hati and two HK assassin droids, who were stationed miles away on a hilltop. Upon returning, the Mandalorian commenced studying the compass. Back on Ahsoka's T-6, Tano and Huyang spoke to General Syndulla about Wren via holoprojector. Tano expressed concern for Wren, but Syndulla advised her to grant her some space. Syndulla believed that Wren was their best hope of deciphering the map. Tano conceded that she had a challenging relationship with Wren, describing the Mandalorian as stubborn and headstrong. Syndulla attributed these traits to her Mandalorian heritage and noted that mentoring could be a challenge, suggesting that Anakin Skywalker may have occasionally found her difficult. Tano acknowledged that she had abandoned her Jedi training and admitted to abandoning Wren.
Meanwhile, Wren was still endeavoring to solve the puzzle of the star map back in her home. Soon, she began to comprehend how to translate it, ultimately succeeding in doing so. Just as Wren gazed out over the balcony afterwards, she was attacked by the Empire. She promptly contacted Tano before engaging in combat. Huyang soon interjected, informing the pair that they had received communications from Wren, who was being pursued by HK droids led by Shin Hati. Tano and Huyang swiftly piloted the ship, heading towards Wren's tower. As Hati and Wren dueled, the former stabbed Wren through the abdomen, inflicting a severe wound. Upon witnessing the ship's arrival, Hati fled with the map, as Tano rapidly attended to Wren, who lay on the floor dying. Wren was promptly brought aboard by Tano and Huyang, where she was scheduled to receive urgent medical attention.
After saving Sabine, Ahsoka ensured she received immediate medical attention. Thanks to Bacta, Sabine recovered swiftly and was able to share her knowledge with Ashoka. She revealed that she had unlocked the map, which displayed an image of two galaxies connected by a pathway. Instructing her to rest, Ahsoka stepped outside, reflecting on past events while observing Sabine’s speederbike and helmet. She then proceeded to the old communications tower, examining the loth cat and equipment within. Upon playing an old hologram of Ezra, she was ambushed by an assassin droid. Swiftly decapitating it, she brought it back to Sabine.
The Mandalorian suggested utilizing the backup systems to potentially access its memory banks, but warned that an incorrect power level could trigger an explosion. Huyang proposed relocating the operation, but Hera, who was observing via hologram, and Ahsoka disagreed, emphasizing the urgency of the situation. Sabine successfully discovered that it originated from Corellia at the New Republic Shipyards before Huyang cut off the power to prevent an explosion. Ahsoka noted that Morgan Elsbeth owned factories there, and Hera suggested they should have been shut down after the war, agreeing to meet her there.
Hera and Ahsoka departed for Corellia's shipyards, having learned that Morgan Elsbeth had owned manufacturing plants there. Hera met with Regional Supervisor Myn Weaver to discuss potential Imperial remnant activity. Weaver initially claimed to be occupied, but Syndulla insisted, stating that a more formal investigation would be necessary if he couldn't cooperate immediately. Weaver escorted them on a REV-2K personnel carrier through the production plant, detailing his operation. During the ride, he was questioned about the loyalty of his workers (many of whom had been employed by the Empire), to which he responded that average workers were indifferent to galactic politics. Subsequently, Hera suggested that Tano consider taking Sabine back as an apprentice. Tano replied that neither of them was prepared for that. Nevertheless, Hera believed it would benefit both of them, suggesting that Wren needed structure and so did Tano.
Upon Myn Weaver leading them into the control center, Tano inquired about the manufacturing center's purpose and clients. While Weaver was explaining the priority given to shareholders, Hera noticed a massive hyperdrive core. Weaver explained that it had been extracted from a Super Star Destroyer. Hera was perplexed, as the New Republic was not constructing anything of that size. Weaver consulted the logs and revealed that it was classified and required approval before he could unseal it. The supervisor requested protocol droid C1-D1 to explain the regulations. Tano questioned him about the other types of droids in use, but the protocol droid interjected, mentioning that she had been interrupted by an HK earlier. The protocol droid stated that it was on the transport about to leave with the massive hyperspace core. Hera ordered the flight crew to prevent the ship from leaving the planet, but the crew, including Myn Weaver, had remained loyal to the Empire.
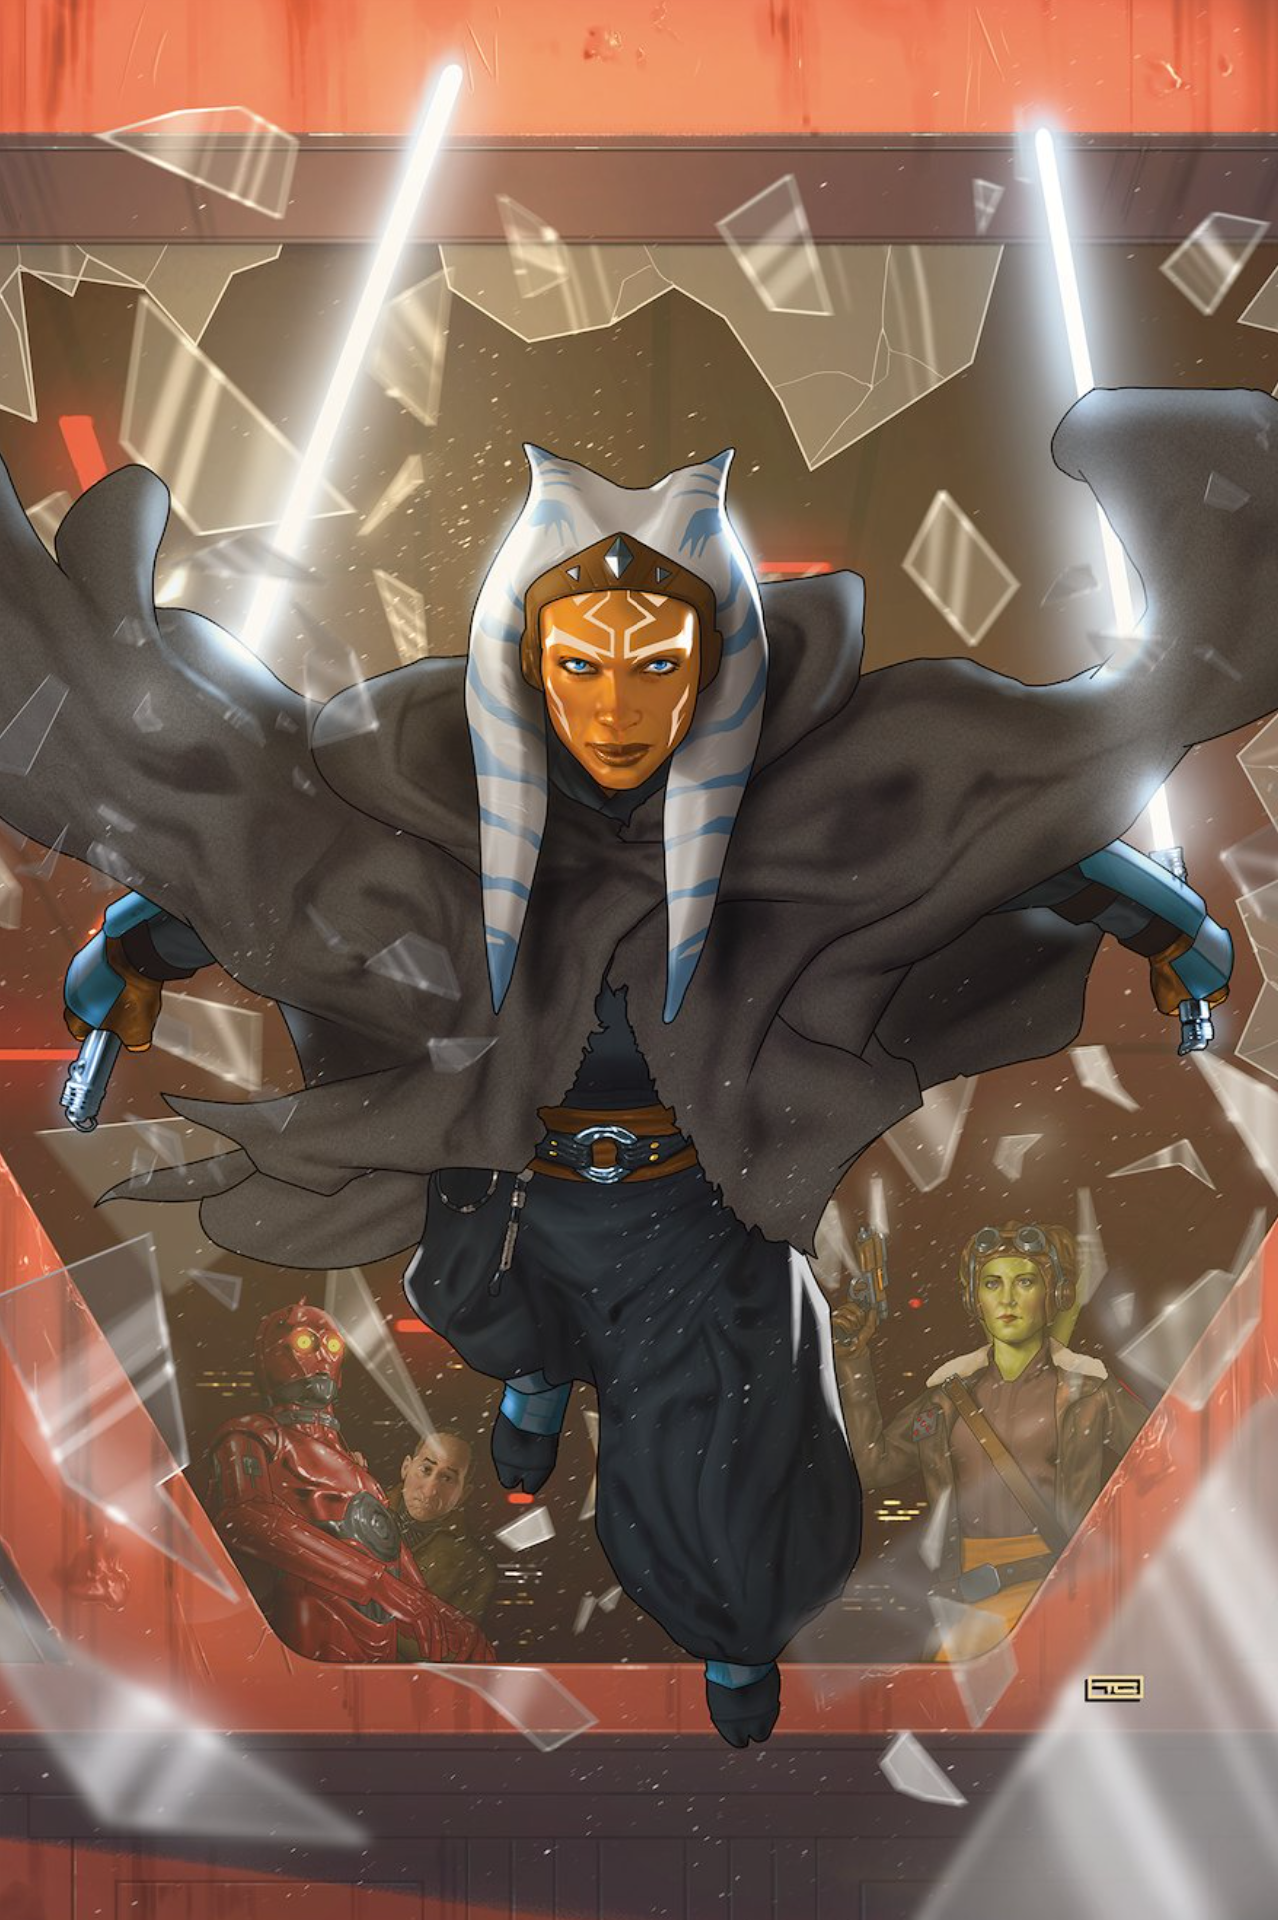
Several drew pistols, attempting to assassinate the general, but Tano's exceptional reflexes neutralized them in seconds. Hera hurried to the Phantom II to intercept the transport. Tano leaped out of the window, sprinting towards the rapidly ascending transport, but an assassin droid and a former Imperial Inquisitor named Marrok, employed by Elsbeth as a mercenary, blocked her path. They engaged in a duel, with Ahsoka defeating the droid as Marrok received a transmission instructing him to retreat. He hurled his lightsaber as Ahsoka somersaulted over it, and ran to a shuttle picking him up. The shuttle opened fire on Ahsoka, who evaded everything, including Marrok's lightsaber, which returned to him. She contacted Hera, hoping for positive news, and was relieved to learn that Chopper had attached a tracking device to the transport.
Hera and Ahsoka subsequently oversaw the arrests of the Imperial sympathizers, noting that greed, not loyalty, had motivated their actions. Ahsoka returned to Sabine at the Mural on Lothal, commenting on her haircut. Huyang reported that the tracking device was in the Denab System, orbiting Seatos. The trio boarded their ship and jumped to hyperspace, with Ahsoka instructing Sabine to launch the hyperdrive, addressing her as "Padawan."
En route to Seatos, Sabine practiced with Huyang as Ahsoka observed. Her performance was mediocre, but she retained the basics. Ahsoka attributed the basics to her Mandalorian upbringing, but emphasized the need to train the mind, not just the body. They then trained with Sabine wearing a visor, relying on her other senses. Ahsoka then easily outmaneuvered the frustrated Sabine. Huyang was caustic, declaring her the worst Jedi he had ever trained (which was nearly all of them).
Following the practice session, Ahsoka consoled Sabine, assuring her that it would take time. Sabine remained frustrated, hoping that their urgent situation would expedite her aptitude for the Force. Tano reminded her that all living beings were connected through the Force, and that talent was only one aspect of its mastery. Using the Force to pull a cup over, she encouraged her to start with small objects. In the cockpit, Huyang reminded Tano that Sabine would not have been accepted into the old Order and that very few Mandalorians ever became Jedi. Hera then called and told them that the mission was not approved by the committee.
As she elaborated, the ship entered the Denab System, and the comms began to break down due to jamming. A squadron of Morgan’s starfighters, commanded by Shin Hati, flew in behind them and began to fire on the T-6. Sabine ran to the gun and took out several fighters. Coordinating with Wren, Ahsoka flew towards the planet and dove at Sabine’s timing. This allowed Sabine to be able to get several shots off, missing them. She did redeem herself shortly and destroyed one craft. Now in the orbit of the planet, Sabine managed to destroy two more fighters. As this happened, they came into sight of the Eye of Sion. Huyang correctly guessed that it was a massive Hyperspace Ring. When they came into range, Elsbeth opened fire with turbolasers as the fighters pulled back. Huyang insisted on getting a scan. As soon as he completed it, they were struck by a direct hit, crippling the hit and short-circuiting Huyang.
Shin and Marrok swung back around to finish the job. Sabine quickly ran a diagnostics and did what she could to recover. Ahsoka donned a space suit and deflected shots with her lightsaber on the exterior of the shuttle. She sliced the wing off one that came too close but was propelled off the hull. As Sabine repaired the ship, Ahsoka climbed back in and ordered her to punch it. They fled down to the planet’s surface, evading the fighters behind a school of Purrgil in the clouds. The two landed in a forest to do repairs, and Huyang woke up at this point. Trying to evade detection, Sabine shut down the power of the ship, while Ahsoka turned Huyang back off. Marrok and Shin Hati’s fighters flew overhead but could not find them, believing them to be hidden in the forest.
Legacy
At some point, Luke documented Ahsoka's past in a personal journal while in exile on the planet Ahch-To. Following the Battle of Crait in 34 ABY, Tano was mentioned in Galactic Explorer's Guide, a book penned by her former adversary and ally, Hondo Ohnaka. The book recounted that Jedi Master Luminara Unduli had served as a mentor to Tano.
During the Battle of Exegol in 35 ABY, the last Jedi, Rey, fell in combat against the resurrected Darth Sidious, her grandfather, who had drained her life force. In a moment of tranquility, Rey heard the voices of Ahsoka Tano and the departed Jedi who had preceded her. The Jedi spirits offered words of encouragement to Rey, enabling her to summon the strength to rise and ultimately vanquish Sidious.
Long after the reign of Darth Sidious, when a member of the Whills began recording galactic history for an audience living in a faraway galaxy into the Journal of the Whills, another Whill mentioned Ahsoka Tano as someone deserving of remembrance.
Personality and Traits
The Fearless Force-Sensitive
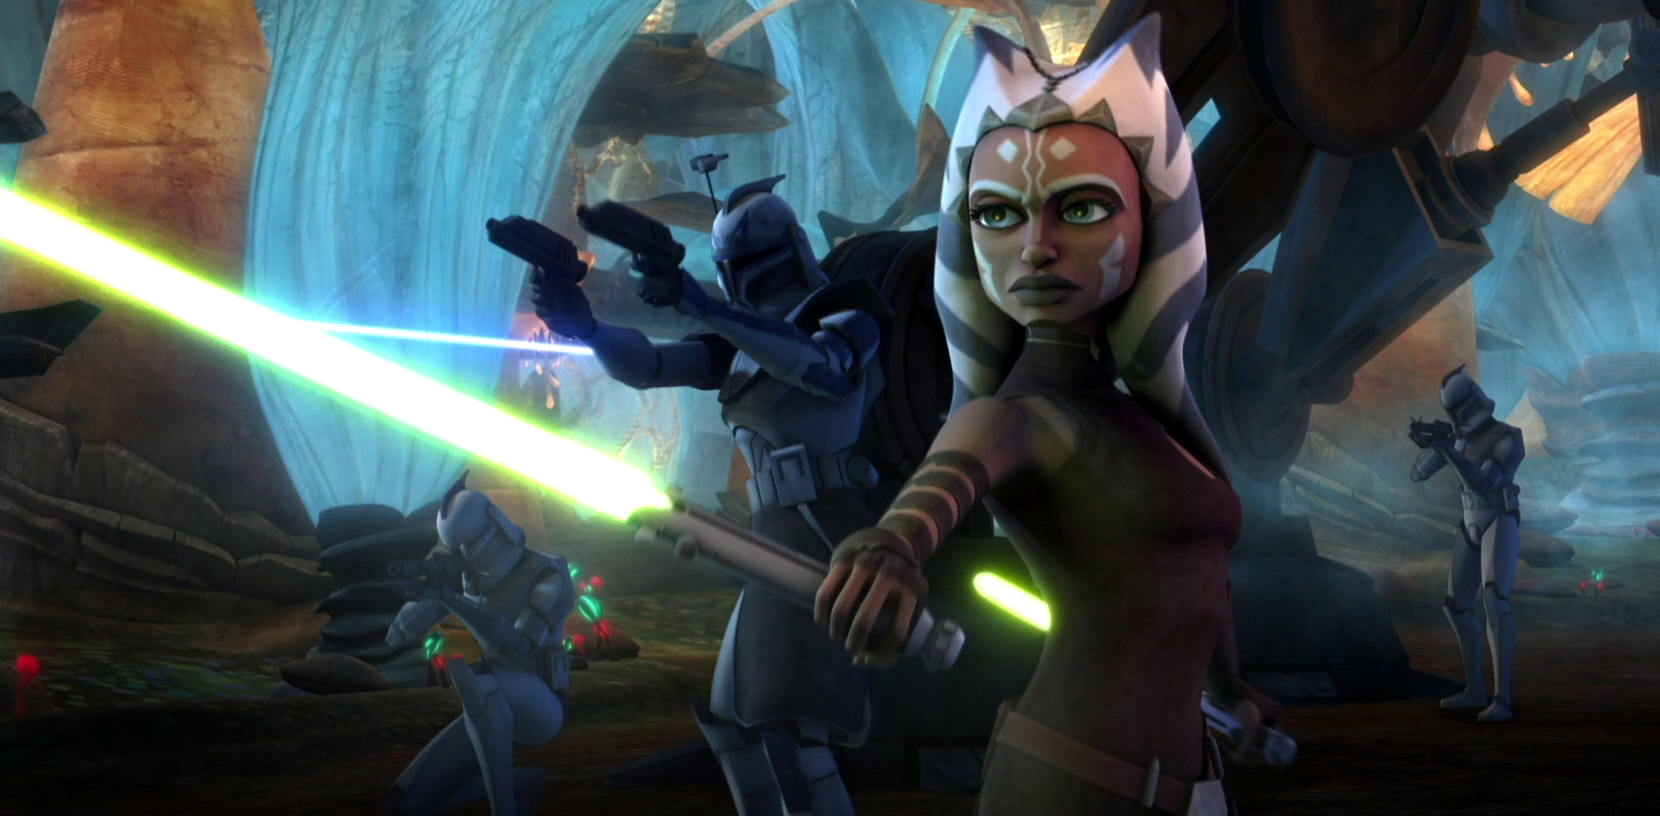
Ahsoka Tano was a Togruta female characterized by blue eyes, dark orange skin, brownish-grey lips, unique white facial markings, a slender physique, and white lekku and montrals adorned with blue stripes. The markings on her montrals were unique, and her montrals continued to grow as she matured. Tano's early childhood experience with a Jedi imposter who attempted to enslave her left a negative impact on her trust in others, and the memory of her villagers' scorn persisted until her journey to Ilum. Trusting Master Yoda, she felt that trust came easier to her because she was again trusting her own instincts. She held the teachings and values of the Jedi Order as sacred and consistently sought to safeguard the lives of innocents.
As a teenager, Tano exhibited snarkiness, cockiness, stubbornness, recklessness, and impulsiveness, alongside bravery, loyalty, generosity, and kindness. The young Tano's emotions made her an ideal apprentice for Anakin Skywalker, with Grand Master Yoda acknowledging that the pair became "twice the trouble" when paired together. She was known for her feistiness and snippiness, earning her the moniker "Snips" from her master. Like her master, she could sometimes become aggressive and willing to use terror or threats to get the answers she wanted. She had a tendency to follow her heart, which negatively impacted her path to Jedi knighthood. In her younger years, Tano's emotions inhibited her ability to make wise decisions, although she eventually gained the confidence to make the right ones, despite the great cost to her feelings. Beyond learning from both Skywalker and Obi-Wan Kenobi, the teachings of Qui-Gon Jinn were indirectly passed down to Tano.
Over time, Tano matured and gained enlightenment, with her experiences during the Clone Wars molding her into someone who could control her emotions. She experienced victories, failures, and losses, yet persevered, believing it was her duty as a Jedi to help restore peace and prosperity to the Republic. Her constant travels and experiences made her more worldly than most people her age, and often she was surprised by the various events and people she came across during the Clone Wars. Throughout her time as a Jedi, she remained close with Plo Koon, who had brought her to the Jedi Temple, and saw him as an important mentor in her life. She also developed a friendships with Obi-Wan Kenobi and his second-in-command, Cody, as well as Senator Amidala through her master, Anakin Skywalker.

She respected Yoda despite often not understanding his advice, feeling he was almost always correct. However, when Tano was framed for murder and treason, she was horrified when the Jedi Order cast her out and all but condemned her to a Republic military tribunal, and came very close to being sentenced to death. When Skywalker unveiled the true culprit, Tano was shocked to see it was her friend Barriss Offee. Though conflicted, she ultimately rejected the opportunity to become a Jedi again, having lost faith in the Order for not standing by her.
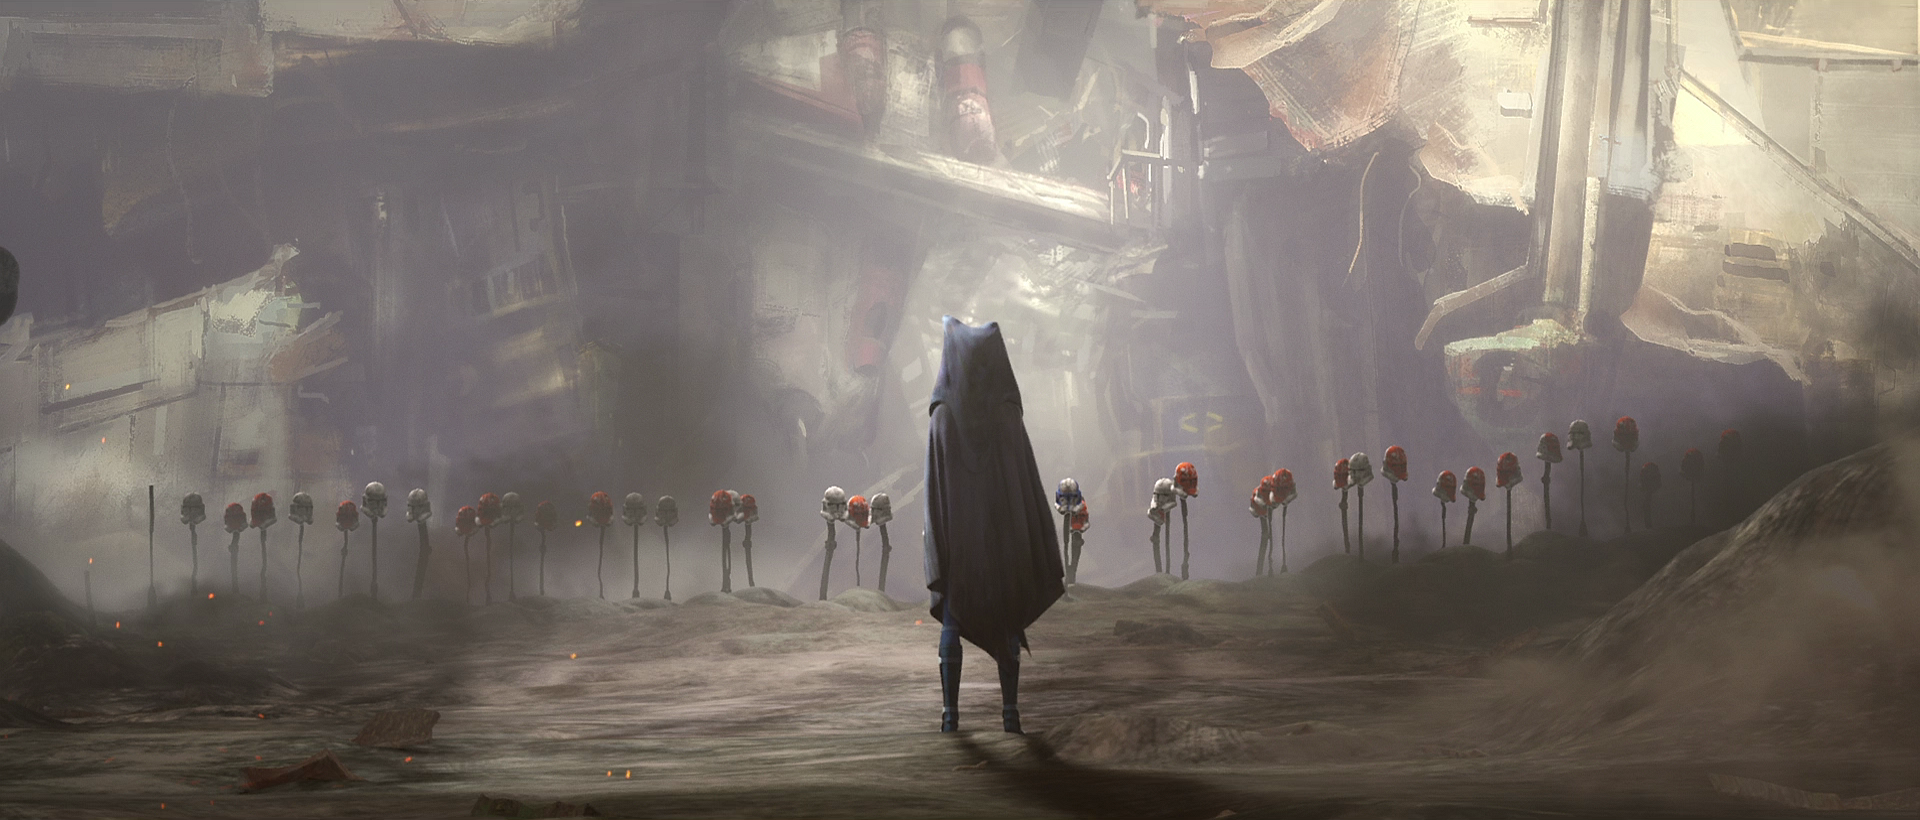
Tano formed a strong bond with the clones, especially Captain Rex, and throughout her time as serving as their commander had learned a lot from them. She respected the clones as individuals and got along with them very well. Tano quickly began to enjoy their company, telling war stories with them as soon as she had any experience to speak on. When Tano found herself serving with the clones of the 501st again at the Siege of Mandalore, the clones continued to salute her out of respect and even repainted their helmets in her likeness to show how much she meant to them. When Order 66 turned the friends she had served with for years into enemies, Tano stood by her beliefs and told Rex to not kill them, determined to escape without directly killing her former comrades. When the ship crashed into the moon, Tano returned to the crash site to dig graves for each clone.
Tano was a confident and moralistic person, and a firm defender of the innocent. This carried on even after she left the Order, as she joined Bail Organa's rebellion to restore liberty and democracy to the people oppressed by the Empire. Tano also felt pity and compassion for the Inquisitor known as the Sixth Brother despite slaying him in combat. She regarded the Sixth Brother as a victim whose potential for good had been twisted and turned to the dark side. After befriending the Force-sensitive Hedala Fardi, Tano became concerned with protecting Force-sensitive children from being captured by the Empire's Inquisitors. During her time with the Martez sisters shortly before the end of the war, they noted that she still acted like a Jedi even though she was no longer a member of the order.
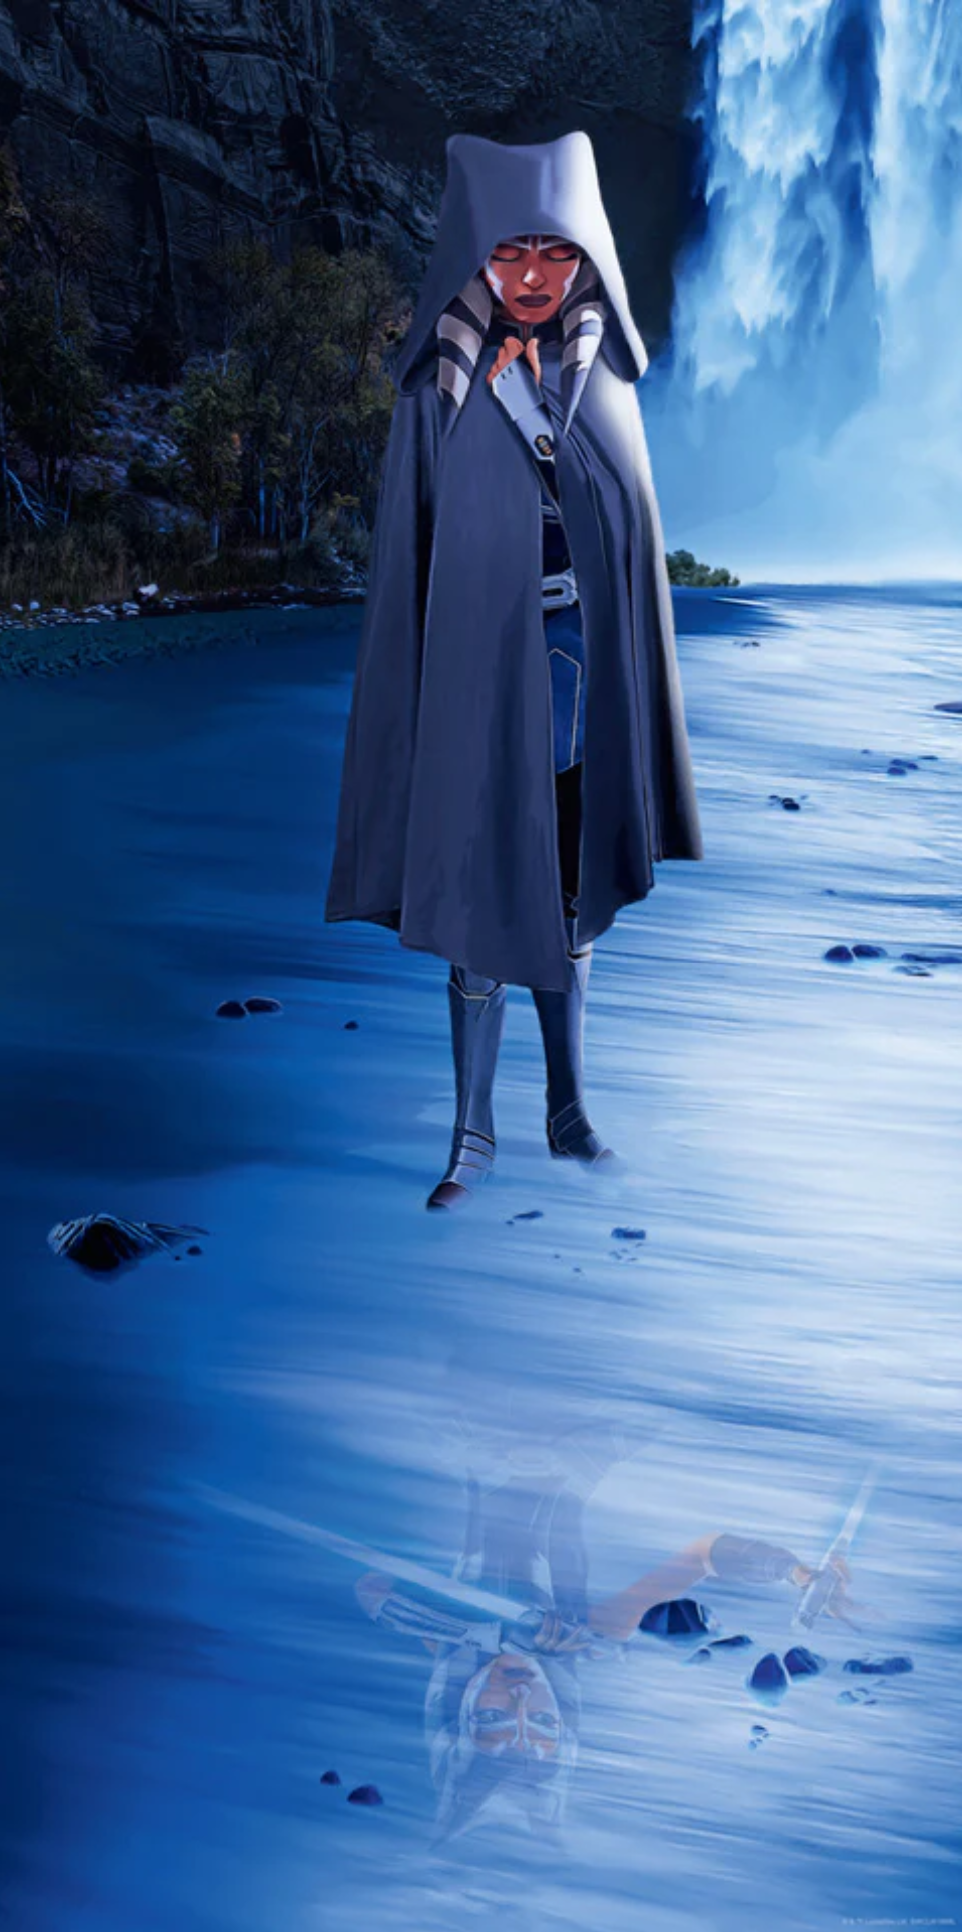
While evading the Empire, Tano remained plagued by sorrow for the friends she had lost and the remorse of not being present to support them. Her time on Raada was marked by a hesitation to form new bonds, largely stemming from the emotional scars inflicted by Offee's treachery. Despite Offee's actions, Tano conceded that she had valid points regarding the Jedi and the Republic, even suggesting that heeding her warnings might have prevented Darth Sidious's rise to power. Assisting those harmed by the Empire brought Tano a sense of purpose, allowing her to fulfill her training and strike back at the regime that had caused her so much pain. She regained a sense of heroism, albeit with the awareness of needing to temper her impulsive tendencies. Embracing the path of a rebel, she sought a balance, avoiding both a return to the Jedi Order and the hardening of her heart in the face of loss.
Recognizing the inevitability of death in war and its transformative effects on individuals, having spent her formative years as a Padawan thrust into combat rather than peacekeeping, she developed a deep aversion to warfare. This aversion led her to observe changes in Miara Larte's behavior as the fourteen-year-old attempted to evade Imperial patrols. She felt that her own early involvement in the Clone Wars was not a positive example for Larte to follow. Despite the encroaching Imperial presence, Tano found solace in meditation, yet she realized she had nothing to communicate with the Imperial forces on Raada, refraining from even engaging in banter or taunts. Upon her second encounter with Senator Organa, she noted his remark about his daughter resembling her mother, suspecting it was a veiled test. Although she surmised that Leia was secretly the daughter of Anakin Skywalker and Padmé Amidala, Tano chose not to pursue the matter, understanding the necessity of trust between Organa and herself, despite their respective secrets.
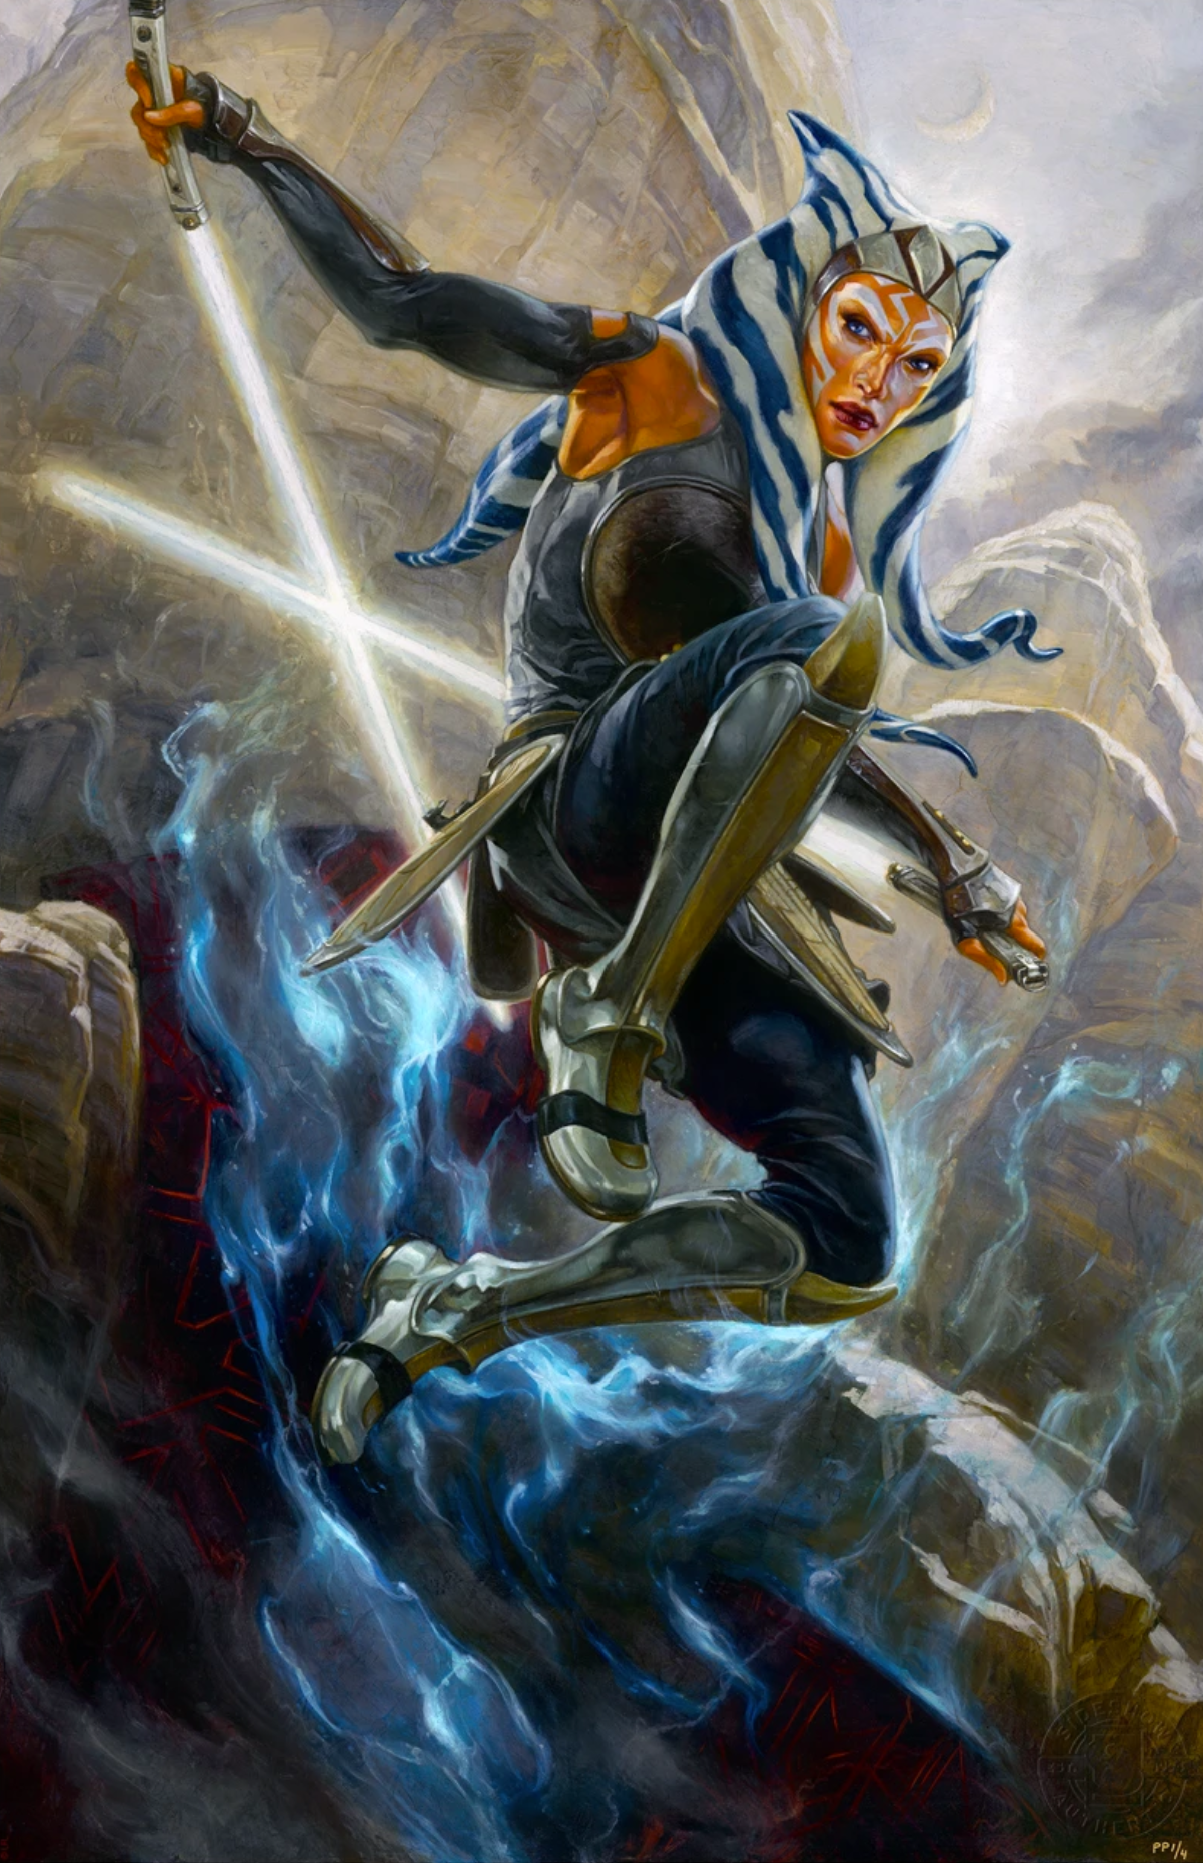
Operating under the alias "Fulcrum," Tano served as a rebel informant, coordinating with various rebel cells while concealing her identity through disguises and voice modulation. She adopted a pragmatic approach, advising Hera Syndulla to prioritize the safety of her crew, particularly Ezra Bridger, over the search for Kanan Jarrus. This suggests a development towards greater discretion and a prioritization of the collective over the individual. When Bridger rescued Tano and reunited her with him in the World Between Worlds, she was saddened by the news of Jarrus's death, but troubled by Bridger's desire to prevent it. Drawing from her own inability to save her master, Tano persuaded Bridger to accept Jarrus's fate, and they parted ways, promising to meet again as Tano returned to Malachor to resume her path.
Following the Battle of Endor, Tano sought to fulfill her promise to Bridger, joining his former companion Sabine Wren in the search to find him and bring him home. During this period, she presented a more stoic demeanor. However, after receiving a final lesson from the Force spirit of Skywalker and choosing to embrace life, her personality regained its former vibrancy.
Relationship with Anakin Skywalker
Anakin's student
Initially, Tano's connection with her master was strained. Skywalker expressed reluctance towards having a Padawan, especially one lacking experience and prone to arguments. Having previously asserted that he would never take on a Padawan for fear of being "slowed down," Skywalker initially opposed Master Yoda's decision to assign Ahsoka to him. Tano, feeling hurt and offended, was determined to prove herself to her new mentor. Yoda hoped that Tano's training would help Skywalker to better manage his more volatile emotions.
Tano's enthusiasm often clashed with her impulsive nature, a trait she shared with Skywalker. Her youthful bravery and impulsiveness made her an ideal Padawan for Skywalker. They frequently disagreed, each believing they knew best. During their first joint mission at the Battle of Christophsis, they created belittling nicknames for each other, with Tano calling her master "Skyguy" and Skywalker referring to Tano as "Snips," referencing her snippy wit. Tano used the nickname Skyguy to annoy Skywalker, but as the war progressed, these nicknames evolved into playful terms of endearment. Skywalker quickly came to appreciate Tano's courage and determination, recognizing that she was as reckless as he was.
Despite their bickering, the two developed a strong bond throughout the Clone Wars. Skywalker assured his Padawan that their meeting was not accidental but ordained by the Force for her to train under him. Their camaraderie extended to the battlefield, where they competed to see who could destroy the most droids during the Second Battle of Geonosis. The master and apprentice grew increasingly dependent on each other, frequently rescuing each other from Separatist forces and bounty hunters. After near-death experiences, she confided in her mentor to process her emotions. Tano's optimism balanced Skywalker's cynicism. During her time on Mortis, Tano was killed by the Son and only resurrected after Skywalker implored the Father to save her. Later, after being captured by Trandoshan hunters, Tano attributed her survival to her master's teachings.
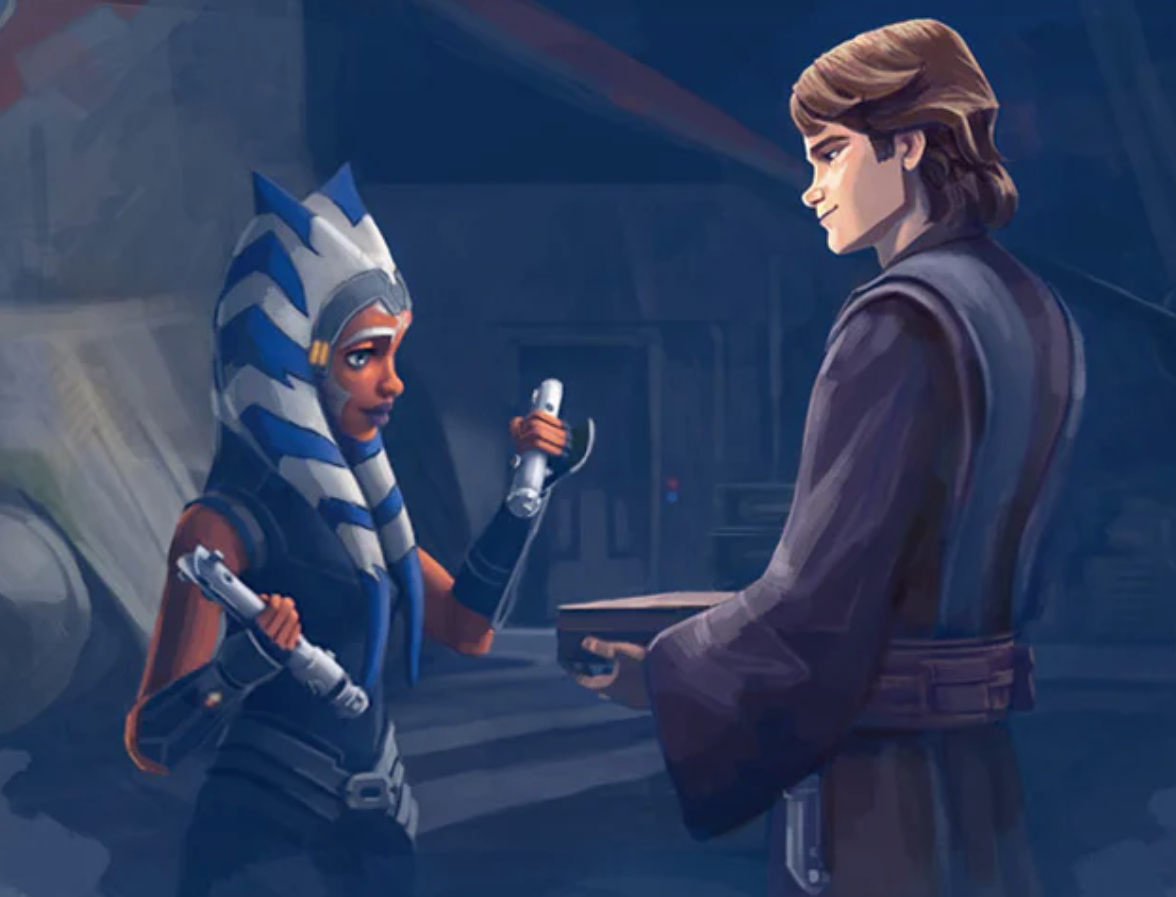
Skywalker became protective of his Padawan, which Tano perceived as a lack of faith in her capabilities. During the mission to Lola Sayu, Tano disobeyed Skywalker and joined his team, asserting her right to decide when to risk her life. Later, when Tano was falsely accused of murder and went on the run, she realized that Skywalker was the only person who would believe in her innocence and pleaded for his trust in her decisions. Ultimately, Tano left the Jedi Order, seeking to discover more about herself independently of her master. Skywalker admitted to his Padawan that he too understood the desire to leave the Order, and Tano, aware of a connection between her master and Senator Amidala, but never pressing the issue, assured him that she knew.
During her time away from the Order, Tano maintained respect for her master, viewing him as a brother and later as a father figure. The lessons he had taught her remained with her in her exile; when Trace Martez asked where she had learned to fly, the former Padawan credited her skills to "Skywalker Academy." Even then, when the Nite Owls approached her to join the fight against Maul, Tano feared growing closer to the life and master she had left behind, but knew she had to help others. As she met Skywalker before the Siege of Mandalore, she avoided an emotional reunion and focused on persuading the Jedi to aid the Mandalorians. In their final meeting as friends, Skywalker gifted Tano her old lightsabers, now with blue blades, similar to his own. Before Skywalker's departure, Tano expressed her emotions, thanking him for his help and wishing him well.
Vader's nemesis
During the Siege of Mandalore, Tano learned from Maul that Skywalker had been groomed to become Darth Sidious's apprentice, but she refused to believe the Zabrak, steadfastly trusting in her knowledge of her master. After Maul's capture, Tano tried to contact Skywalker but was unable to reach him. Later, she sensed his fall to the dark side through the Force, hearing his anguished cries after attacking Mace Windu. She had little time to process these events before Order 66 was executed, forcing her into hiding. Although she did not know her master's fate, she remembered him fondly, never forgetting the compassion and kindness Anakin had shown the galaxy.
In 14 BBY, Darth Sidious partnered Moff Wilhuff Tarkin and Darth Vader on a mission to investigate attacks on supply lines for the early Death Star. Sidious recalled Tarkin's prosecution at Ahsoka's trial as harming the relationship between Anakin Skywalker and then-Admiral Tarkin, and surmised that despite the Jedi's transformation into a Dark Lord of the Sith, Darth Vader still harbored resentment against Tarkin for his treatment of his former Padawan.

While with the Spectres, Tano was stationed aboard the Phoenix Home when the Rebel fleet was attacked by Darth Vader. During the battle, Tano sensed the anger and hatred emanating from the dark sider, realizing that the individual behind Vader's mask was Skywalker. The contradiction of the two men being the same caused Tano to lose consciousness. After this discovery, Tano struggled to accept the truth. Although she claimed ignorance of the Sith Lord's identity, she secretly felt grief and guilt, haunted by the thought that she could have helped her master in his time of need. During a mission to the Jedi Temple on Lothal, Tano was confronted by a vision of Skywalker that exploited these fears, blaming her for Darth Vader's rise. Tano resisted the vision, believing that there was still a way to reach her master.
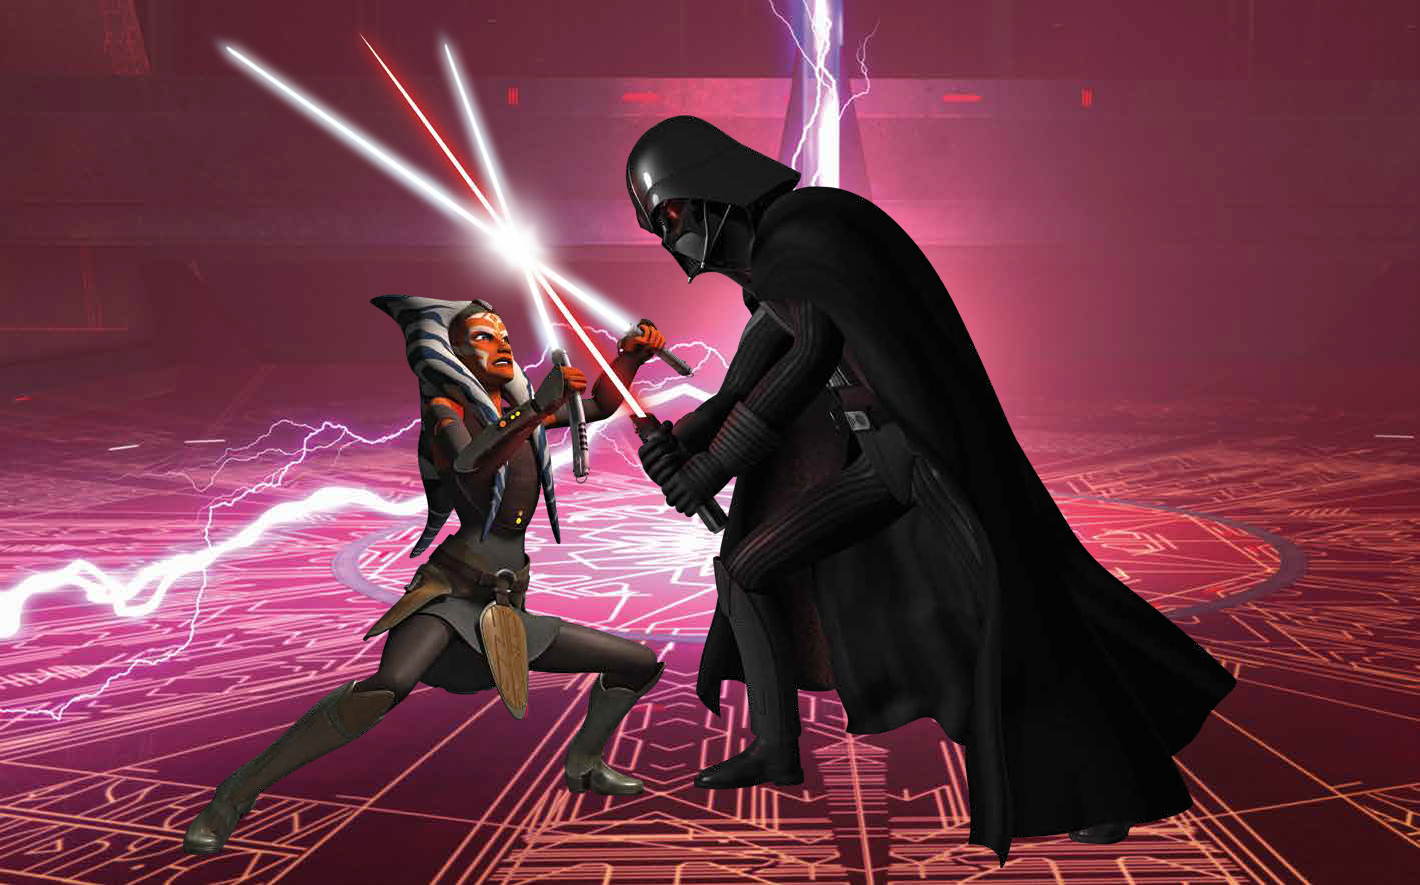
When she finally confronted her former master on Malachor, Tano refused to believe that he and Vader were the same person, unable to reconcile the Sith Lord's evil nature with the kindness of the man she had known. Despite her pain, Tano regarded Vader as Anakin Skywalker's murderer and vowed to avenge her master's death, defying the Jedi teachings she had learned as a child. She fought him atop the Sith Temple, defending the Padawan Ezra Bridger. As the Temple began to collapse, Tano damaged Vader's mask, revealing Skywalker's scarred face. The sight of her master caused her to hesitate. Feeling guilty for leaving him years ago, Tano refused to abandon Vader and continued to duel as her friends escaped. Before the falling debris could crush them both, Tano destroyed the floor beneath them, causing Vader to fall.
After Anakin's death
In 4 ABY, Anakin returned to the light side of the Force and sacrificed himself to defeat Darth Sidious at the Battle of Endor. After her master's death, Tano reflected on the impact of Anakin's choices on the galaxy. Despite his flaws, she remembered him as "the best of us," a good man who succumbed to his fears, and spoke favorably of him. In 9 ABY, she declined to train the youngling Grogu because she recognized that the child's attachment to his father figure Din Djarin made him vulnerable to the same fears as Anakin. Tano could not bring herself to separate the infant from Djarin, vowing not to lead him down the same destructive path as her former friend. However, she relented and told Djarin of Tython, a place where Grogu could reach out with the Force to contact other Jedi if he chose to.
Given her close connection to the Skywalker family, Tano inevitably met Anakin Skywalker's son Luke Skywalker. When asked how she knew of his temple, she simply stated that she was an old friend of the Skywalker family. Tano and Skywalker were on good terms. She even advised him in Grogu's training, encouraging the young Skywalker to trust his instincts, and accepted his decision to train the youngling despite her own reluctance. She even declared that being by Skywalker's side was the safest place in the galaxy for a young Force-sensitive like Grogu. While she still did not consider herself a Jedi, she had faith that Skywalker would create a "great school" and kept Djarin from seeing Grogu, as per Jedi rules on attachment. She favorably referenced Anakin to his son, noting their similarities, and did not rule out seeing Luke again. In the World Between Worlds, Anakin appeared to Tano as his younger self to complete her training.
Powers and abilities
Lightsaber abilities
Ahsoka Tano initially employed an unconventional reverse grip during combat but, at her master's urging, eventually incorporated the standard grip alongside her reverse grip. Tano was an exceptionally acrobatic lightsaber duelist who frequently used the Force to leap upon her opponents and evade lightsaber attacks. Despite being physically smaller than many of her adversaries, she proved to be a skilled duelist, wielding one and eventually two lightsabers.
Early in her apprenticeship under Skywalker, Tano's combat skills were already remarkable, as demonstrated by her solo defeat of three IG-100 MagnaGuards during her first mission. Later, Tano temporarily held her own against the skilled Sith assassin Asajj Ventress and the Jedi hunter General Grievous after only a brief period of training under Skywalker, although she was forced to flee from Grievous shortly into their confrontation. Her lightsaber combat skills improved over time, and she began to favor a variant of Form V in battle like her master, although Offee believed she would be skilled at Form VI as well.

During the Clone Wars, Tano became a practitioner of Jar'Kai, wielding a yellowish-green shoto lightsaber in addition to her standard lightsaber. However, Tano sometimes used only her main lightsaber, such as when she dueled Skywalker on Mortis while under the influence of the Son. Nevertheless, Tano more commonly utilized Jar'Kai, especially when facing multiple opponents, such as when she engaged the more experienced Skywalker and Kenobi on Mortis. While fleeing from clones after being framed for murder, Tano lost her second lightsaber and was forced to use only her main lightsaber to fight Barriss Offee. Her duel against Offee revealed that she had become too reliant on her second lightsaber, a trait she shared with Asajj Ventress, and although she fought valiantly, Offee overwhelmed her.
Approximately two years after her first duel with Grievous, Tano demonstrated during their encounter on Florrum that her lightsaber combat skills had significantly improved, holding her own against all four of Grievous's lightsabers, whereas previously she had only lasted briefly when he was using two. Instead of fleeing after a few exchanges, Tano stood her ground, allowing the Younglings to escape before escaping with them. By the time of the Siege of Mandalore, Tano displayed highly advanced lightsaber combat skills, as evidenced by her prolonged duel with the powerful former Sith Lord Maul. Although Maul disarmed Tano at the end of their duel, she turned Maul's own attack against him to defeat him nonetheless.

Throughout the Clone War, Tano showed adeptness at deflecting blaster shots, particularly during Order 66, where she survived a prolonged battle against her own men. Even in close-quarters combat, she was able to defend herself despite being surrounded by multiple troopers. Thanks to her training, she knew she could fight while blinded, but she recognized that doing so and fighting without lightsabers would be a challenge. She was also skilled enough to fight without lightsabers, defeating the Sixth Brother, who was wielding a lightsaber, using only the Force.
Sixteen years after leaving the Jedi Order, Tano's lightsaber combat skills had greatly improved to the point of mastery. During a skirmish at Hammertown, she easily defeated two Imperial Inquisitors simultaneously and even deactivated the double-bladed lightsaber of the Seventh Sister with her bare hands. During the mission to Malachor, Tano again proved capable of fighting several Inquisitors at once and even disarmed the Fifth Brother and destroyed his lightsaber. During the same mission, Tano again proved capable of dueling to a stalemate with the former Sith Lord Maul before breaking off the fight to rescue Ezra Bridger. Shortly afterward, Tano engaged in an intense duel with Darth Vader, and although she ultimately lost, she put up a far more impressive fight against him than either Jarrus or Bridger had previously been able to.
Force powers
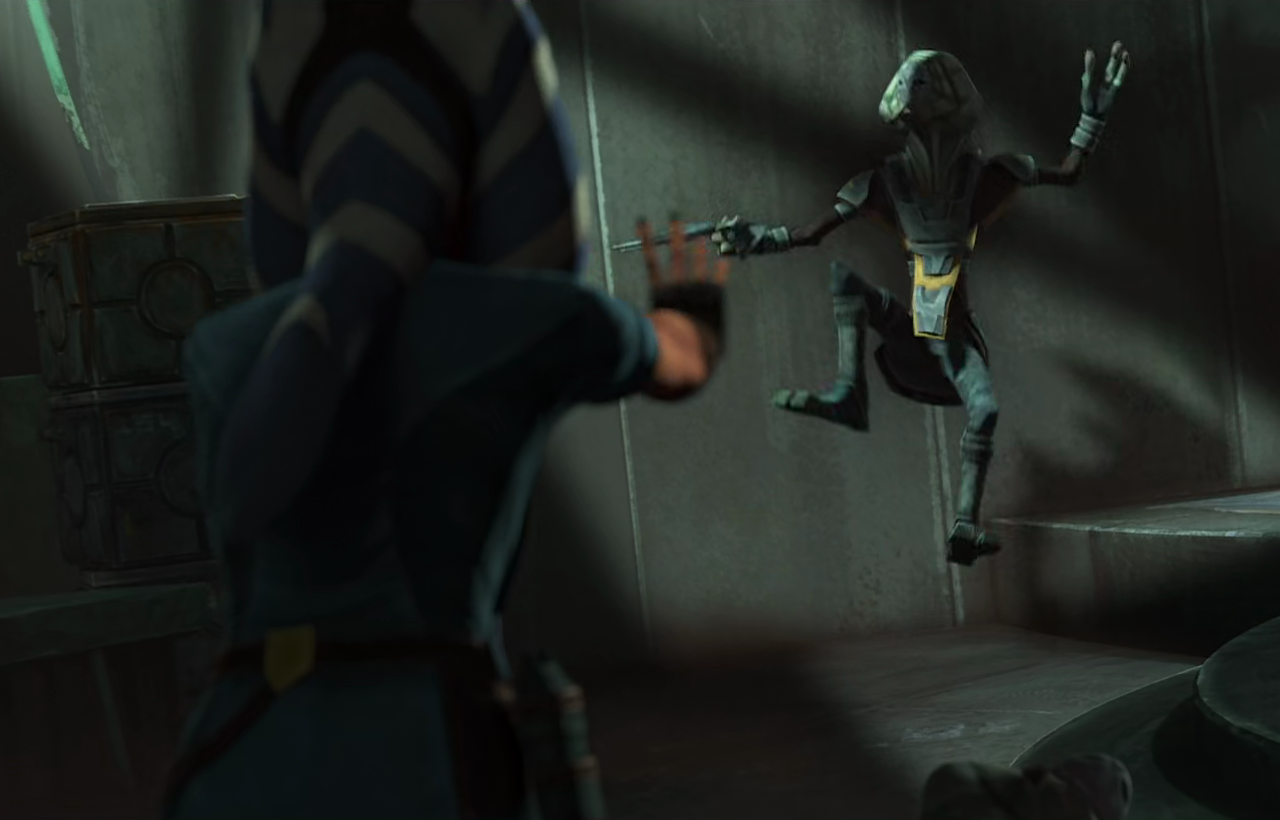
Endowed with natural Force abilities, Tano initially excelled at sensing the intentions and emotions of those around her, and she progressed in other skills once her training began. Her master noted her advanced capabilities. Early in her apprenticeship, Tano demonstrated telekinetic abilities during the Battle of Christophsis, where she pulled down a large wall to save Skywalker from a group of retail droids. In another instance, Tano strongly pushed Ventress, flinging her back to save Luminara Unduli's life. By the end of the Clone Wars, Tano's telekinetic abilities had advanced to the point where she could hold Maul high above Sundari and use the Force to prevent a small starship from taking off. During Order 66, she used the Force to guide her two lightsabers in a circle, creating an escape path for herself and Rex. Tano later created a powerful protective Force barrier that temporarily held back fiery dark side energies conjured by Darth Sidious.
Tano also had a strong ability to sense things in the Force, feeling Plo Koon's presence after his fleet was destroyed by the Malevolence and sensing the children kidnapped by Cad Bane. She eventually learned how to perform mind tricks. Tano sometimes used a Force choke, despite it being a dark side power, but mainly to temporarily fend off an enemy. She used this method against a Trandoshan hunter on Wasskah, prompting her companion Kalifa to use it as well. However, when Kalifa did not release the hunter and threatened to kill him, Tano convinced her to let him go, stating that killing out of anger was not the Jedi way.
Additionally, Tano's Force powers enabled her to leap to great heights. She used this to her advantage when leaping into the Phantom to escape two Inquisitors. She frequently used her acrobatic prowess during lightsaber combat, using flips and somersaults to avoid enemy attacks. During a duel against General Grievous, she vaulted herself onto the cyborg general before springing off his back and escaping. Ultimately, thanks to her skill in the Force, she was never without a weapon, as she could always call upon its power.
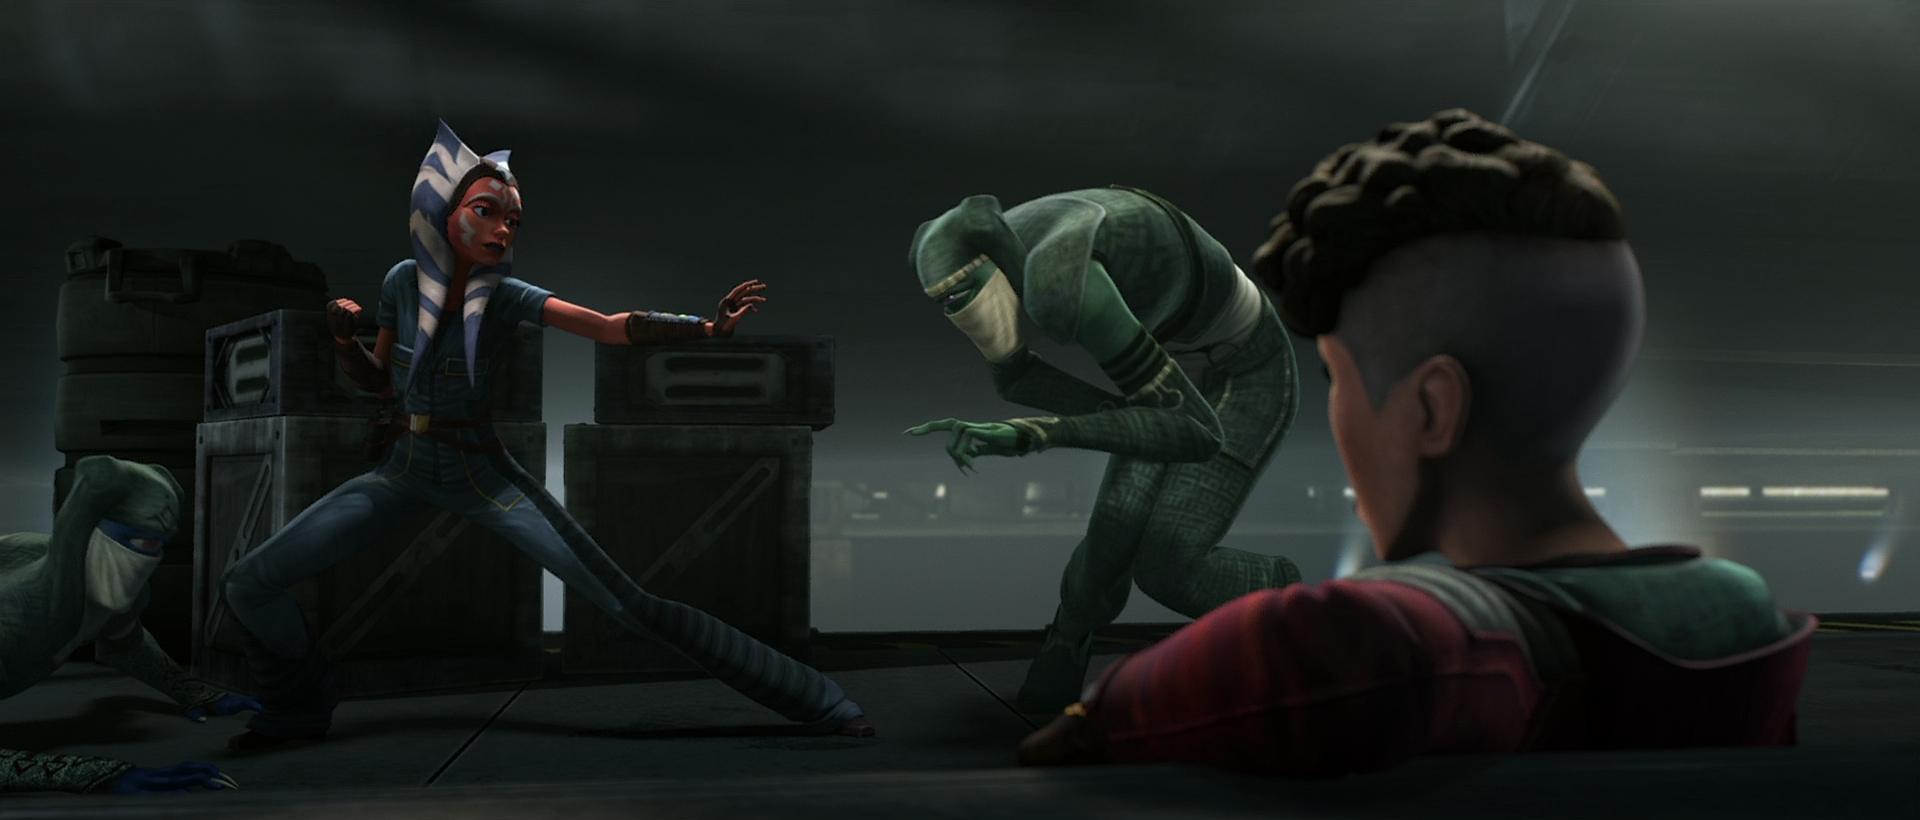
Tano also experienced Force visions and dreams. She used the Force to heal two corrupted kyber crystals that had been "bled red" and restored them to their natural white color. These crystals became part of her new twin lightsabers. Tano could also use the Force to amplify her touch. On one occasion, she used this Force power to shatter the hilt of the Sixth Brother's double-bladed spinning lightsaber.
Tano also demonstrated the ability to sense the thoughts and feelings of others. When she met Grogu, Tano sensed his thoughts with such precision that she deduced his name and that he had trained as a Jedi youngling at the Temple on Coruscant.
Other abilities
In addition to her Force powers and lightsaber combat skills, Tano was a talented pilot and displayed skill as a war strategist, leading an attack that penetrated a Separatist blockade on Ryloth. During the Clone Wars, Tano shared some of her flight knowledge with Senator Amidala, instructing her in starfighter combat. Due to her piloting skills, Tano worked as a courier for the Fardi clan while on the run from the Empire. She believed her skill in flying came from being trained by Anakin Skywalker, whom she considered the best pilot in the galaxy.
Tano displayed skill in hand-to-hand combat, easily overpowering Cad Bane before dropping her guard and being incapacitated by the bounty hunter. She later used her hand-to-hand combat skills on Mandalore, single-handedly defeating a group of the Mandalorian Secret Service and holding off several guards and subduing Prime Minister Almec despite being handcuffed. On that occasion, she armed herself with one of the guards' shields, using it to fend them off and defend herself from a stun gun. While a prisoner of Trandoshan hunters, Tano killed the hunters Dar and his father, Garnac, using only hand-to-hand combat and her Force powers.
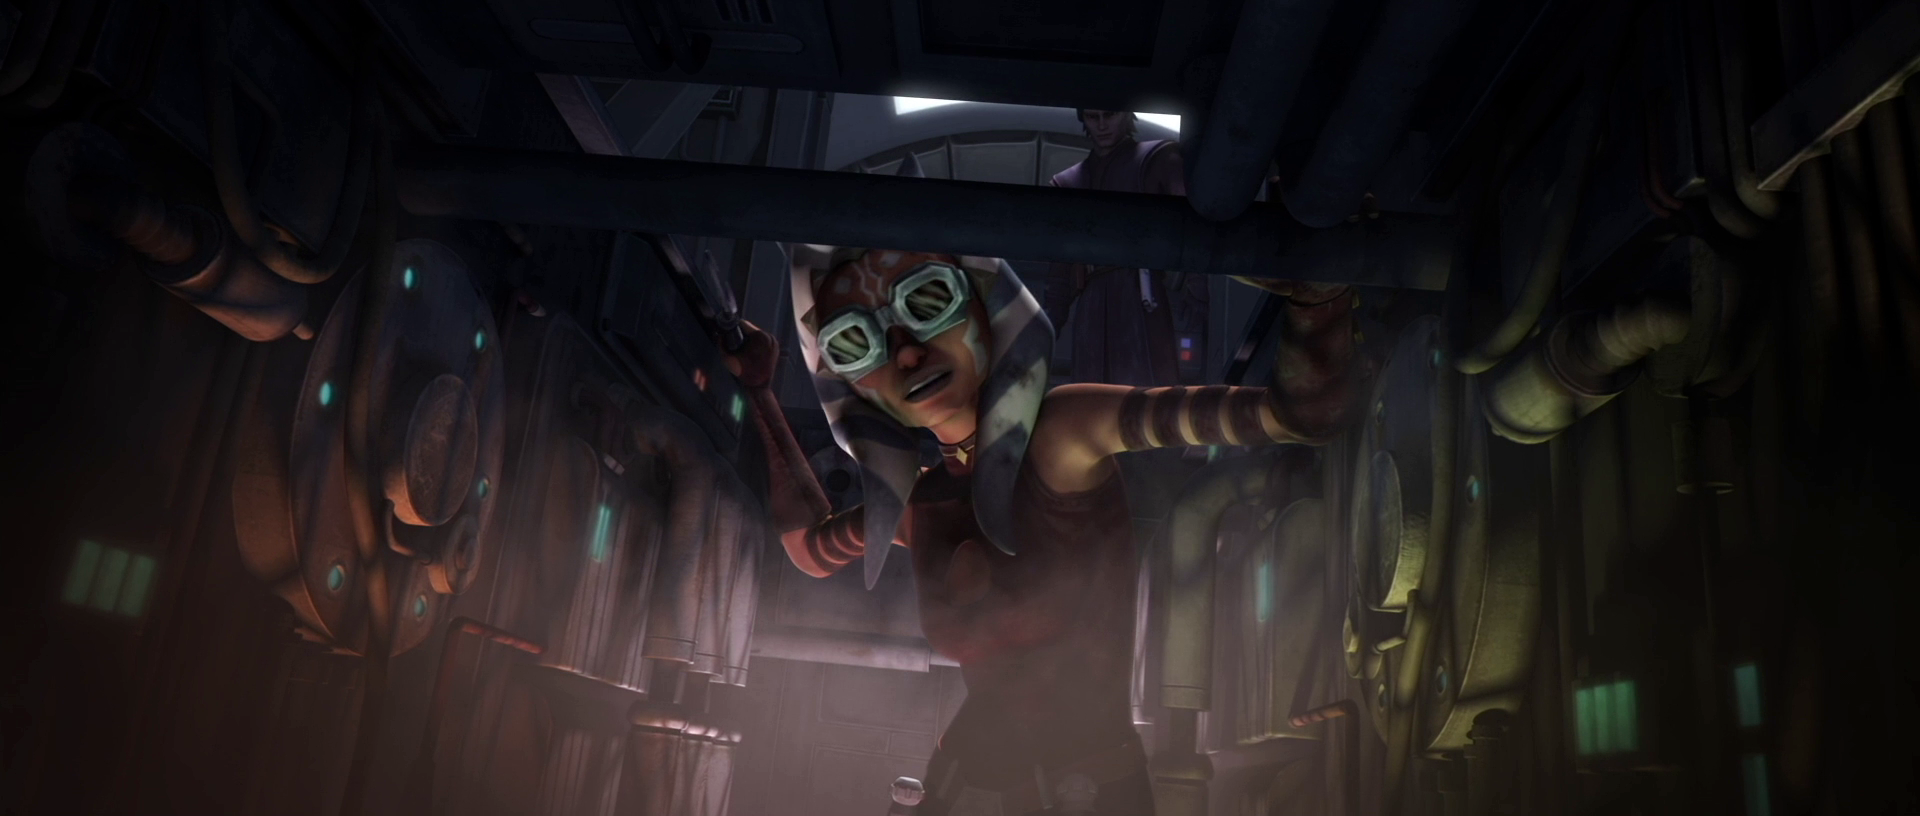
Tano had considerable mechanical knowledge, learned from her master. She used her mechanical skills to contact Skywalker and save her and Barriss Offee's lives when they were trapped under a destroyed droid factory on Geonosis. She also knew how to repair vehicles. While on Mortis, she repaired the shuttle that she, Kenobi, and Skywalker had crashed on the planet. Tano understood Shyriiwook, as demonstrated by her translations for Chewbacca while captured on Wasskah. Tano later used her skills as a mechanic as her occupation after Order 66 and the fall of the Republic, repairing starships and threshers while hiding on Thabeska and Raada. Tano assembled her new twin lightsabers from scrap metal parts she had acquired from the Fardis.
During their mission to Malachor, Tano read some words in Ur-Kittât, the ancient Sith language. Tano was also an effective military tactician, as well as a good leader and teacher.
Equipment
Weapons

Ahsoka Tano possessed two distinct sets of lightsabers. She initially constructed her first lightsaber, featuring a silver cylindrical hilt and a green blade, before becoming Anakin Skywalker's Padawan at the Battle of Christophsis. She wielded this lightsaber alone for a period before constructing a shoto lightsaber with a matching hilt and a yellow-green blade to accompany it upon adopting Jar'Kai. Both sabers contained kyber crystals from the sacred planet of Ilum. Tano wielded both lightsabers in battle until she left the Jedi Order, at which point the weapons came into the care of her former master Skywalker. While in his possession, Skywalker modified them to improve their performance, resulting in the sabers having blue blades when he returned them to Tano before the start of the Siege of Mandalore. Tano later abandoned the sabers on a moon after the issuing of Order 66 to fake her death to the Empire.
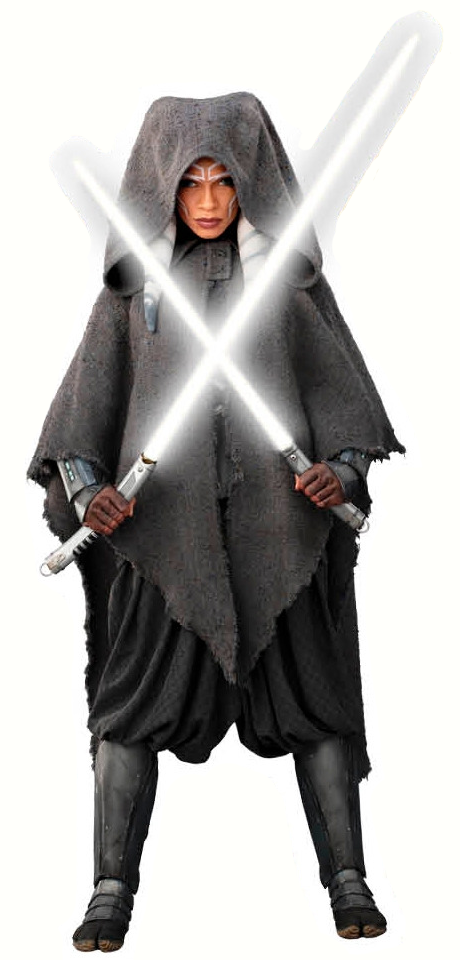
Over a year after the Clone Wars, Tano constructed a new pair of lightsabers with white blades during the evacuation of Raada. The weapons initially had rough handles made from scrap pieces Tano had acquired on her journeys, but she later rebuilt the hilts to be more functional and decorative. The kyber crystals within, as well as their mountings, came from the lightsaber of the Inquisitor Sixth Brother, whom Tano had defeated on Raada. Tano found the crystals familiar, and speculated that they had been looted from the Jedi Temple after the Order's fall. After claiming the crystals, she purified them of the dark side's taint until they shone white before assembling the weapons with collected scrap materials. These white lightsabers continued to serve her during the early rebellion, as she used them in battle against multiple Inquisitors, as well as Darth Vader.
During her time on Thabeska in the first year of the Empire, Tano also owned an unidentified blaster model, which she used against Stormtroopers while escaping the planet. She destroyed it to create a diversion for her escape. When her starship was captured by Chardri Tage and Tamsin, agents of Bail Organa, after her second departure from Thabeska, Tano knocked them out with a pair of bastons she had selected from the ship's weapons box.
Attire
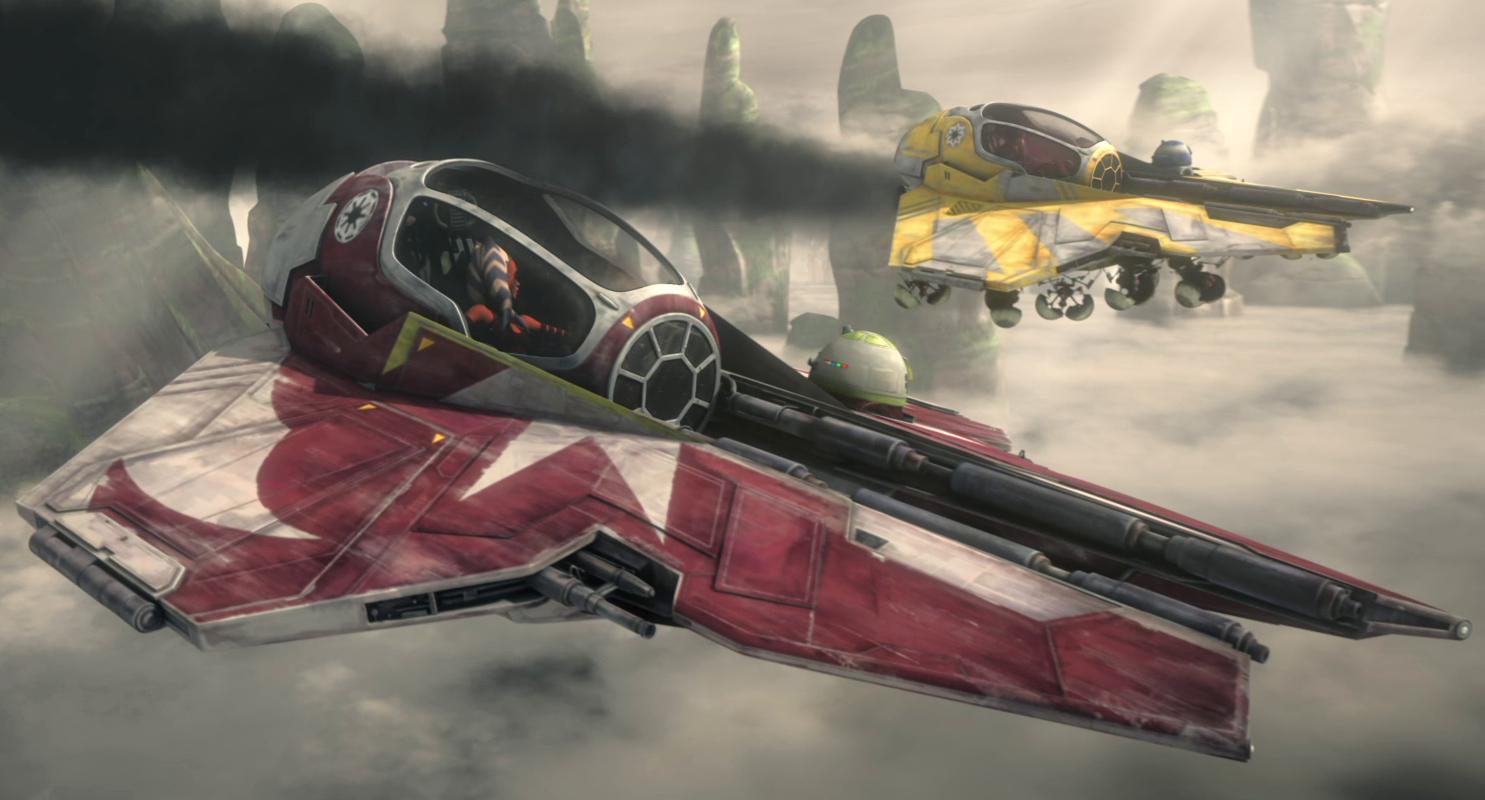
During her time as a Padawan learner, Tano operated two distinct Jedi starfighters. When deployed at Ryloth and Umbara, Tano was in command of her personal Delta-7B Aethersprite-class light interceptor. Subsequently, while participating in the defense of Cato Neimoidia, she piloted a more advanced Eta-2 Actis-class light interceptor, marking her final engagement prior to her departure from the Jedi Order. Both of her starfighters were painted dark red, adorned with a white Jedi symbol on top, and were co-piloted by her dedicated astromech droid, R7-A7.
In the early years of the Clone Wars, Tano frequently joined Anakin Skywalker on missions aboard the Corellian G9 Rigger-class light freighter named Twilight, including engagements like the Battle of Teth, the Battle of Abregado, the Mission to Skytop Station, and the Mission to Mustafar.
After leaving the Jedi Order, Tano acquired a Joben T-85 speeder bike, which was so unreliable that Trace Martez humorously named it "Trash" when asked for a designation. When Tano departed to find Maul alongside Bo-Katan Kryze, she left the bike at the Martez sisters' repair shop, with the intention of retrieving it later.
Upon her initial departure from Thabeska, Tano commandeered a small, unremarkable freighter from the Fardi clan. She utilized this vessel for travel both before and during the occupation of Raada, as well as upon her return to the Fardis. During the early days of the rebellion, Tano flew an A-wing starfighter on missions, including one to Takobo. Following the Battle of Endor, Tano journeyed to Lothal aboard a T-6 shuttle to reunite with her friend Sabine Wren.
Outfits
Typical garb

During her initial period as a Padawan, Tano's attire consisted of a dark red bandeau top and skirt paired with white tights, along with dark red boots, fingerless gloves, and a purple sash. Later, coinciding with the construction of her second lightsaber, Tano transitioned to wearing a dark red backless dress, now complemented by grey tights featuring diamond-shaped cut-outs and armbands adorned with diamond shapes on her upper arms.
She also wore a beaded headdress, which featured a Padawan braid made of silka beads extending from behind her right front lekku. Following a ceremony on Coruscant, Master Yoda granted her an extension to this braid. The braid was temporarily removed on two occasions: first, during her capture by Cad Bane during the Battle of Devaron, and again when she was expelled from the Jedi Order after being falsely accused of treason. Although she was offered the braid's return after her exoneration, she ultimately chose to leave the Order. Additionally, Ahsoka possessed a wrist-mounted comlink, which she was compelled to destroy to maintain a low profile while on the run.

After surviving Order 66, she concealed her identity by wearing a hood that obscured her face and montrals. During her time on Thabeska and Raada, Tano wore a simple, unremarkable outfit, which was the only clothing she possessed at the time. She sometimes paired it with hoods to further conceal her face, with Selda, a fellow Togruta, providing her with a new hood that better accommodated her recently grown montrals. She also reclaimed a disused weapons belt upon constructing her second pair of lightsabers and received a backpack on Raada that was designed to avoid rubbing against her lekku.
Following the naval engagement at Mustafar, when Tano encountered the Spectres, she was wearing a grey dress with grey-and-brown armor plating on her chest and skirt, along with grey detached sleeves, forearm armor, and fingerless gloves. The outfit was completed with armored boots.
While operating on Corvus during the New Republic Era, Tano was seen in sleeveless dark blue robes and a large belt from which her lightsabers were suspended, as well as a pair of silver vambraces and arm wrappings on her forearms. During her assault on Calodan, Tano concealed these clothes with a dark cloak. This cloak served to hide her in the smog of Corvus and also functioned as a poncho. Despite Din Djarin's incineration of this cloak during their meeting, she soon replaced it with a similar covering.
Specialized clothing
Ahsoka's outfit worn during the Siege of Mandalore"
During the boarding of Cad Bane's flagship in the Devaron system, Tano was equipped with a dark red vacuum-sealed bodysuit and a space helmet. When she participated in the Battle of Mon Cala, Tano wore a grey-and-red scuba suit, which included a face mask that allowed her to breathe while leaving her montrals and lekku exposed to the water. For the Mission to Zygerria, where she went undercover as a slave, Tano wore a turquoise outfit with gold jewelry and sandals, initially concealed by a grey-purple body-covering robe. Tano also possessed a reddish-grey winter coat lined with white fur, which she wore on cold planets such as Carlac and Ilum.
During her period of wandering Coruscant after leaving the Order, Tano wore a light blue mechanic's jumpsuit, along with a brown headpiece that covered her montrals and extended between her lekku, featuring a grey raised diamond on the front. She also carried a brown satchel. After being recruited by Bo-Katan Kryze and her resistance group to assist in the pursuit of Maul, Tano was provided with a new combat outfit. This outfit included a blue-and-grey dress with a short skirt, blue tights, grey boots, forearm armor, and fingerless gloves, as well as Mandalorian beskar plating. Following Order 66, she concealed this outfit with a grey cloak.
During the mission to rescue Janard, Tano wore an ocean jumpsuit. While defending against Morgan Elsbeth's agents in the Denab system, Tano wore a blue spacesuit, which was essential for surviving the vacuum while directly engaging incoming starfighters.
Behind the scenes
Overview
Ashley Eckstein provided the voice for Ahsoka Tano in the Star Wars: The Clone Wars television series and film, as well as in the subsequent Star Wars Rebels television series. Eckstein also authored the young-readers book Star Wars: I Am a Padawan and narrated the audiobook adaptation of the novel Ahsoka. American actress Rosario Dawson took on the role of Tano in "Chapter 13: The Jedi," which was the fifth episode of The Mandalorian Season Two, with Caitlin Dechelle performing as her stunt double. This marked the character's first appearance in live-action. Dawson continued to portray Tano in the Ahsoka television series.
Tano, alongside several other characters from The Clone Wars, was featured in Lucasfilm's 2009 holiday greeting card, which was designed by artists Kelly Smith and Harrison Parker. The characters were depicted as gingerbread cookies. She was later included in Lucasfilm's 2022 digital holiday card. In this depiction, she is seen holding a cup of hot chocolate and, along with Obi-Wan Kenobi, Yoda, and others, warmly welcomes Darth Vader to a holiday celebration.
Development

In the early stages of The Clone Wars' development, the character who would become Ahsoka Tano was deeply involved in the black market and collaborated with Jedi, but without directly participating in the Clone Wars. Her objective was to prevent criminals from exploiting the war. Dave Filoni, the supervising director, and George Lucas, the executive producer, decided that the inclusion of a Padawan was crucial, and Lucas specifically wanted her to be Anakin Skywalker's apprentice. He explained that she would provide Skywalker with someone to teach, fostering a dynamic between her, Skywalker, and Obi-Wan Kenobi. As of 2005, the character was known as Ashla, a reference to an early name for the light side of the Force during Lucas's development of Star Wars, which was later canonized as the Lasat name for the Force. Ashla also appears as the name of a Togruta Jedi youngling in Star Wars: Episode II Attack of the Clones. Filoni considered the possibility of them being the same character, but the age difference made it unfeasible. The two characters are otherwise unrelated.
Lucas renamed "Ashla" to "Ashoka," drawing inspiration from Ashoka the Great, the Indian Emperor of the Maurya Dynasty. Henry Gilroy then modified it to "Ahsoka" to give her a unique name. Ahsoka Tano was among the first characters that Filoni sketched when he joined Lucasfilm, drawing inspiration from San, the wolf-riding female protagonist of the 1997 Hayao Miyazaki and Studio Ghibli film Princess Mononoke. Ahsoka's facial markings were partly inspired by San's. The character was officially revealed on January 29, 2008, on StarWars.com, coinciding with toy industry events.

Catherine Winder, a producer, believed that The Clone Wars crew was fortunate to have Eckstein, as she felt the actress naturally embodied the character. Eckstein recorded the show's first season before the film's premiere in 2008. She engaged in numerous discussions with Filoni and spoke with Lucas about their aspirations for Tano and her journey throughout the series. Ultimately, Tano's narrative, especially the events surrounding her decision to leave the Jedi Order, became a significant aspect of Skywalker's own story and, ultimately, his descent to the dark side. Filoni himself acknowledged this in the "Obi-Wan Undercover" featurette for Star Wars: The Clone Wars The Complete Season Four. In teasing Tano's departure from the Jedi, he noted that Season Five contained a story that helped explain why Skywalker believed the Jedi Order had betrayed him. However, despite having ideas for her to die during The Clone Wars, Filoni did not want Tano's character to simply serve as another catalyst for Skywalker's turn to the dark side. He reasoned that if Tano's sole purpose was to advance Skywalker's story, she would have been included in the films.
The Clone Wars
Tano initially came across as very young and naive due to the show's writing, the crew's own inexperience, and their lack of experience. As "Downfall of a Droid" was initially the second episode to be developed for the Clone Wars series, Ahsoka's maneuver when attempting to fly between the Separatist frigates would've explained Anakin's hesitance for her to fly in the later produced episode "Shadow of Malevolence," although "Shadow of Malevolence" would later be revealed to take place prior to "Downfall of a Droid." Ahsoka's visions in the Clone Wars episode "Assassin" were designed to have the same distorted effect as her master Anakin's in Star Wars: Episode III Revenge of the Sith. In an early draft of the script for the episode, Ahsoka visited the young bounty hunter Boba Fett in his prison cell to gather information about his former ally, Aurra Sing.

Ahsoka's character model was updated for The Clone Wars: Season Three to reflect the passage of time, emphasizing her increasing age, maturity, and experience. The updated model was first featured in the episode "Heroes on Both Sides." The update was initially teased to fans in an announcement article on StarWars.com on November 16, 2010. This article included a screenshot of Tano and Skywalker's updated models, as well as a promotional image of the two of them with Kenobi in his updated model. The article also provided a link to a promotional video showcasing the three new models in action, featuring Tano leaping to the ground before her two mentors and igniting both of her lightsabers. While Kenobi and Skywalker's updates brought their designs closer to their appearances in Revenge of the Sith, the Clone Wars crew had to work around the lack of any live-action reference for Tano, but her character development was as noticeable as any other cast member's: as Filoni explained to StarWars.com in the announcement article, Tano had much to learn at the start of the war, but she had grown and changed, which was reflected in her older, more mature appearance. Furthermore, he promised "Heroes on Both Sides" was yet another step forward in her emotional journey as she met Separatists face-to-face.
For the Clone Wars episode "Ghosts of Mortis," the model for Ahsoka's goggles was repurposed from the one used for Hondo Ohnaka's pirate gang. In the Clone Wars episode "Citadel Rescue," Saesee Tiin's starfighter was modeled with the same pattern as Ahsoka's starfighter. When Wilhuff Tarkin enters Ahsoka's cell in the Clone Wars episode "The Jedi Who Knew Too Much," it is framed as a homage to when Darth Vader enters Leia Organa's cell aboard the Death Star in Star Wars: Episode IV A New Hope. Similar to this, his interaction with her while in her cell was meant to mirror his interaction with Leia shortly before he commands the destruction of Alderaan. Ahsoka's leap from the water pipe in the Clone Wars episode "The Jedi Who Knew Too Much" is an homage to a similar scene in 1993 film The Fugitive. When Filoni and the crew were writing the story about Tano leaving the Jedi Order, they made it about her being pulled in different directions and becoming frustrated. They wanted to show young people that they can take a predetermined path or use the information to make their own choice.
The Clone Wars cancellation and revival
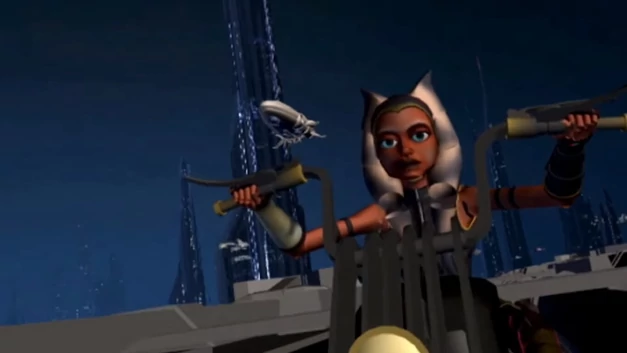
Following the cancellation of The Clone Wars in 2013, Filoni revealed his plans for twelve additional episodes that would have continued Ahsoka's story. He outlined each four-episode arc at Celebration Europe. With the release of the seventh season of The Clone Wars in 2020, eight of the twelve episodes Filoni had envisioned were fully realized.
In the first arc, Ahsoka would discover a new way of life within the underworld of Coruscant and develop a close relationship with a scoundrel named Nyx Okami. This arc was eventually adapted into the seventh season episodes "Gone with a Trace," "Deal No Deal," "Dangerous Debt," and "Together Again." The final release included significant changes to the arc, most notably the replacement of Nyx Okami with the Martez sisters, Trace and Rafa.
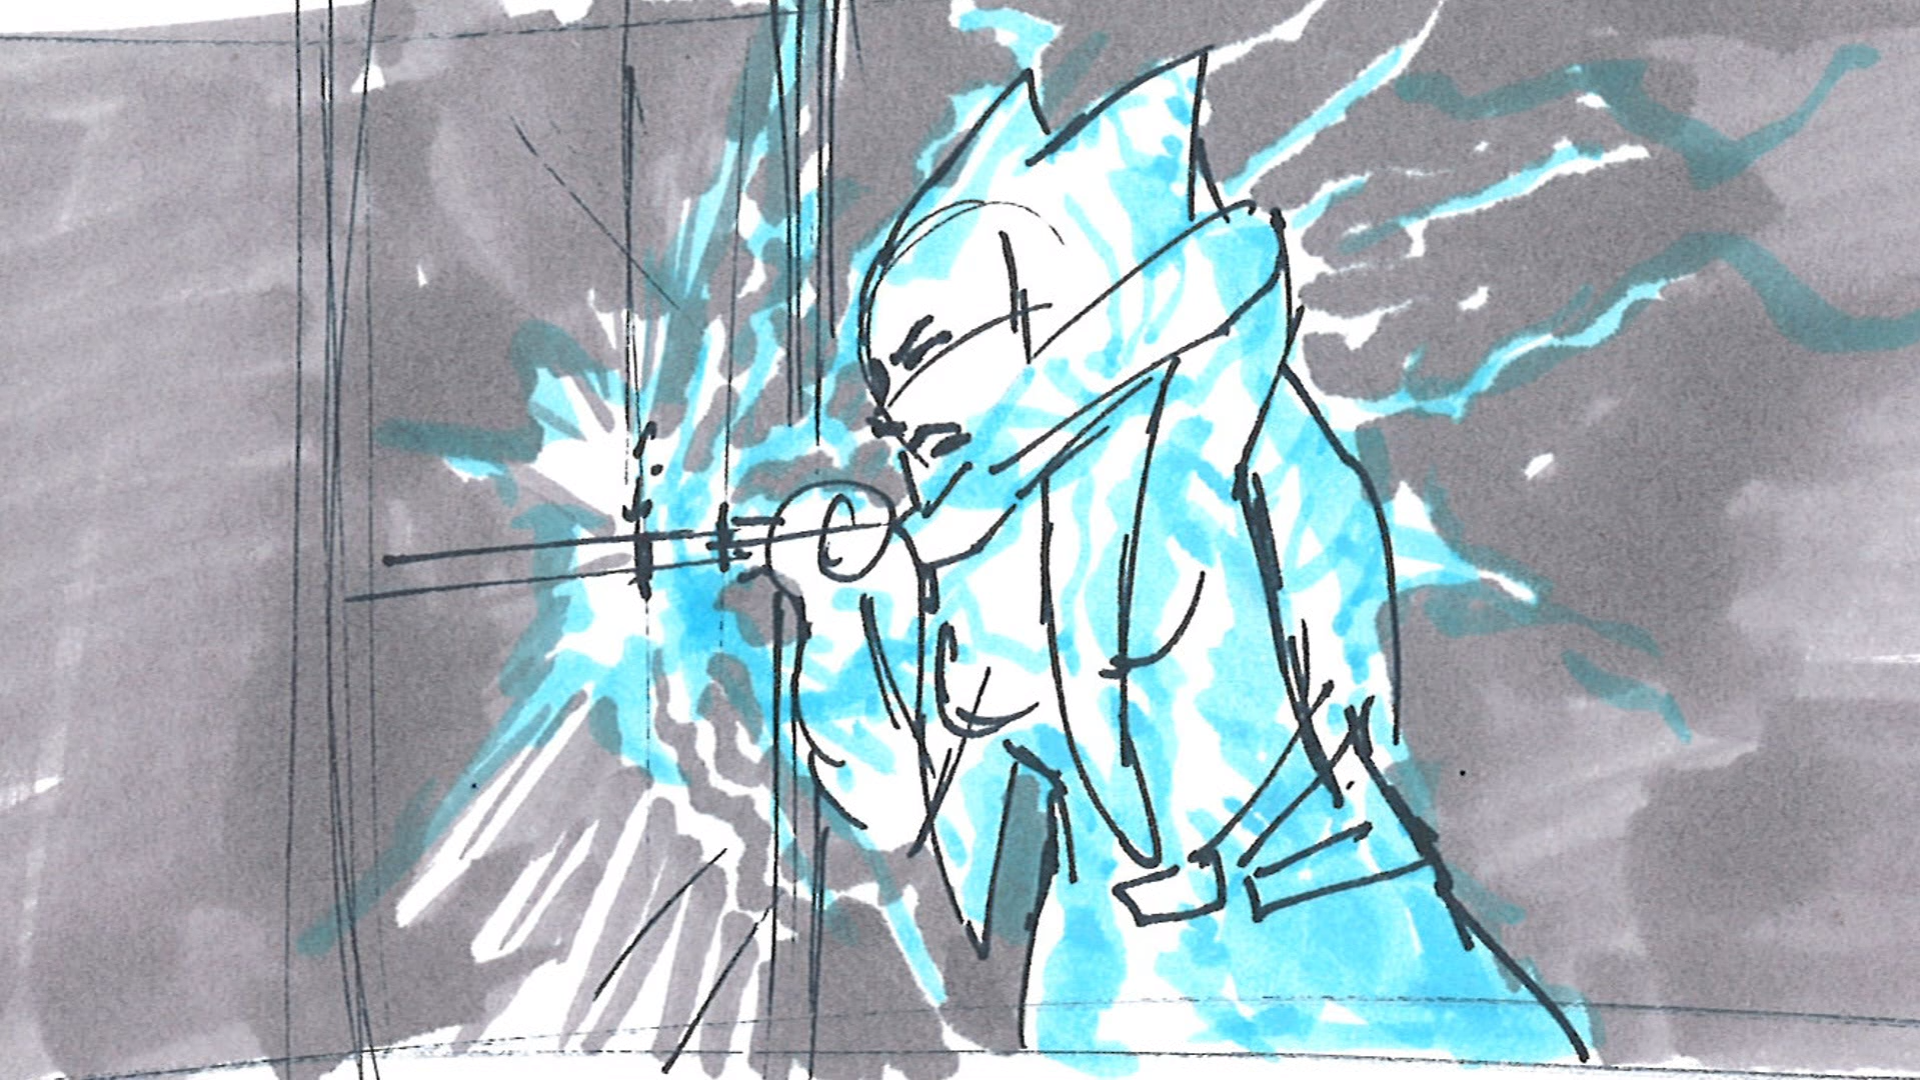
The second arc, which remained unfinished, would have involved Ahsoka assisting the Jedi Order and venturing beneath the Jedi Temple to a Sith shrine. The arc begins with Tano returning to warn the Jedi of a threat she discovered in the underworld of Coruscant.
Subsequently, Obi-Wan Kenobi and Anakin Skywalker would enlist her help to rescue Yoda from the Sith shrine underground. During this journey, Ahsoka and Anakin would have piloted autogyro-style vehicles and encountered large beasts resembling Kaiju. At some point during the arc, Ahsoka would defend the Jedi Holocron Vault from Darth Sidious, who would unleash Force lightning at her through the vault's doors.
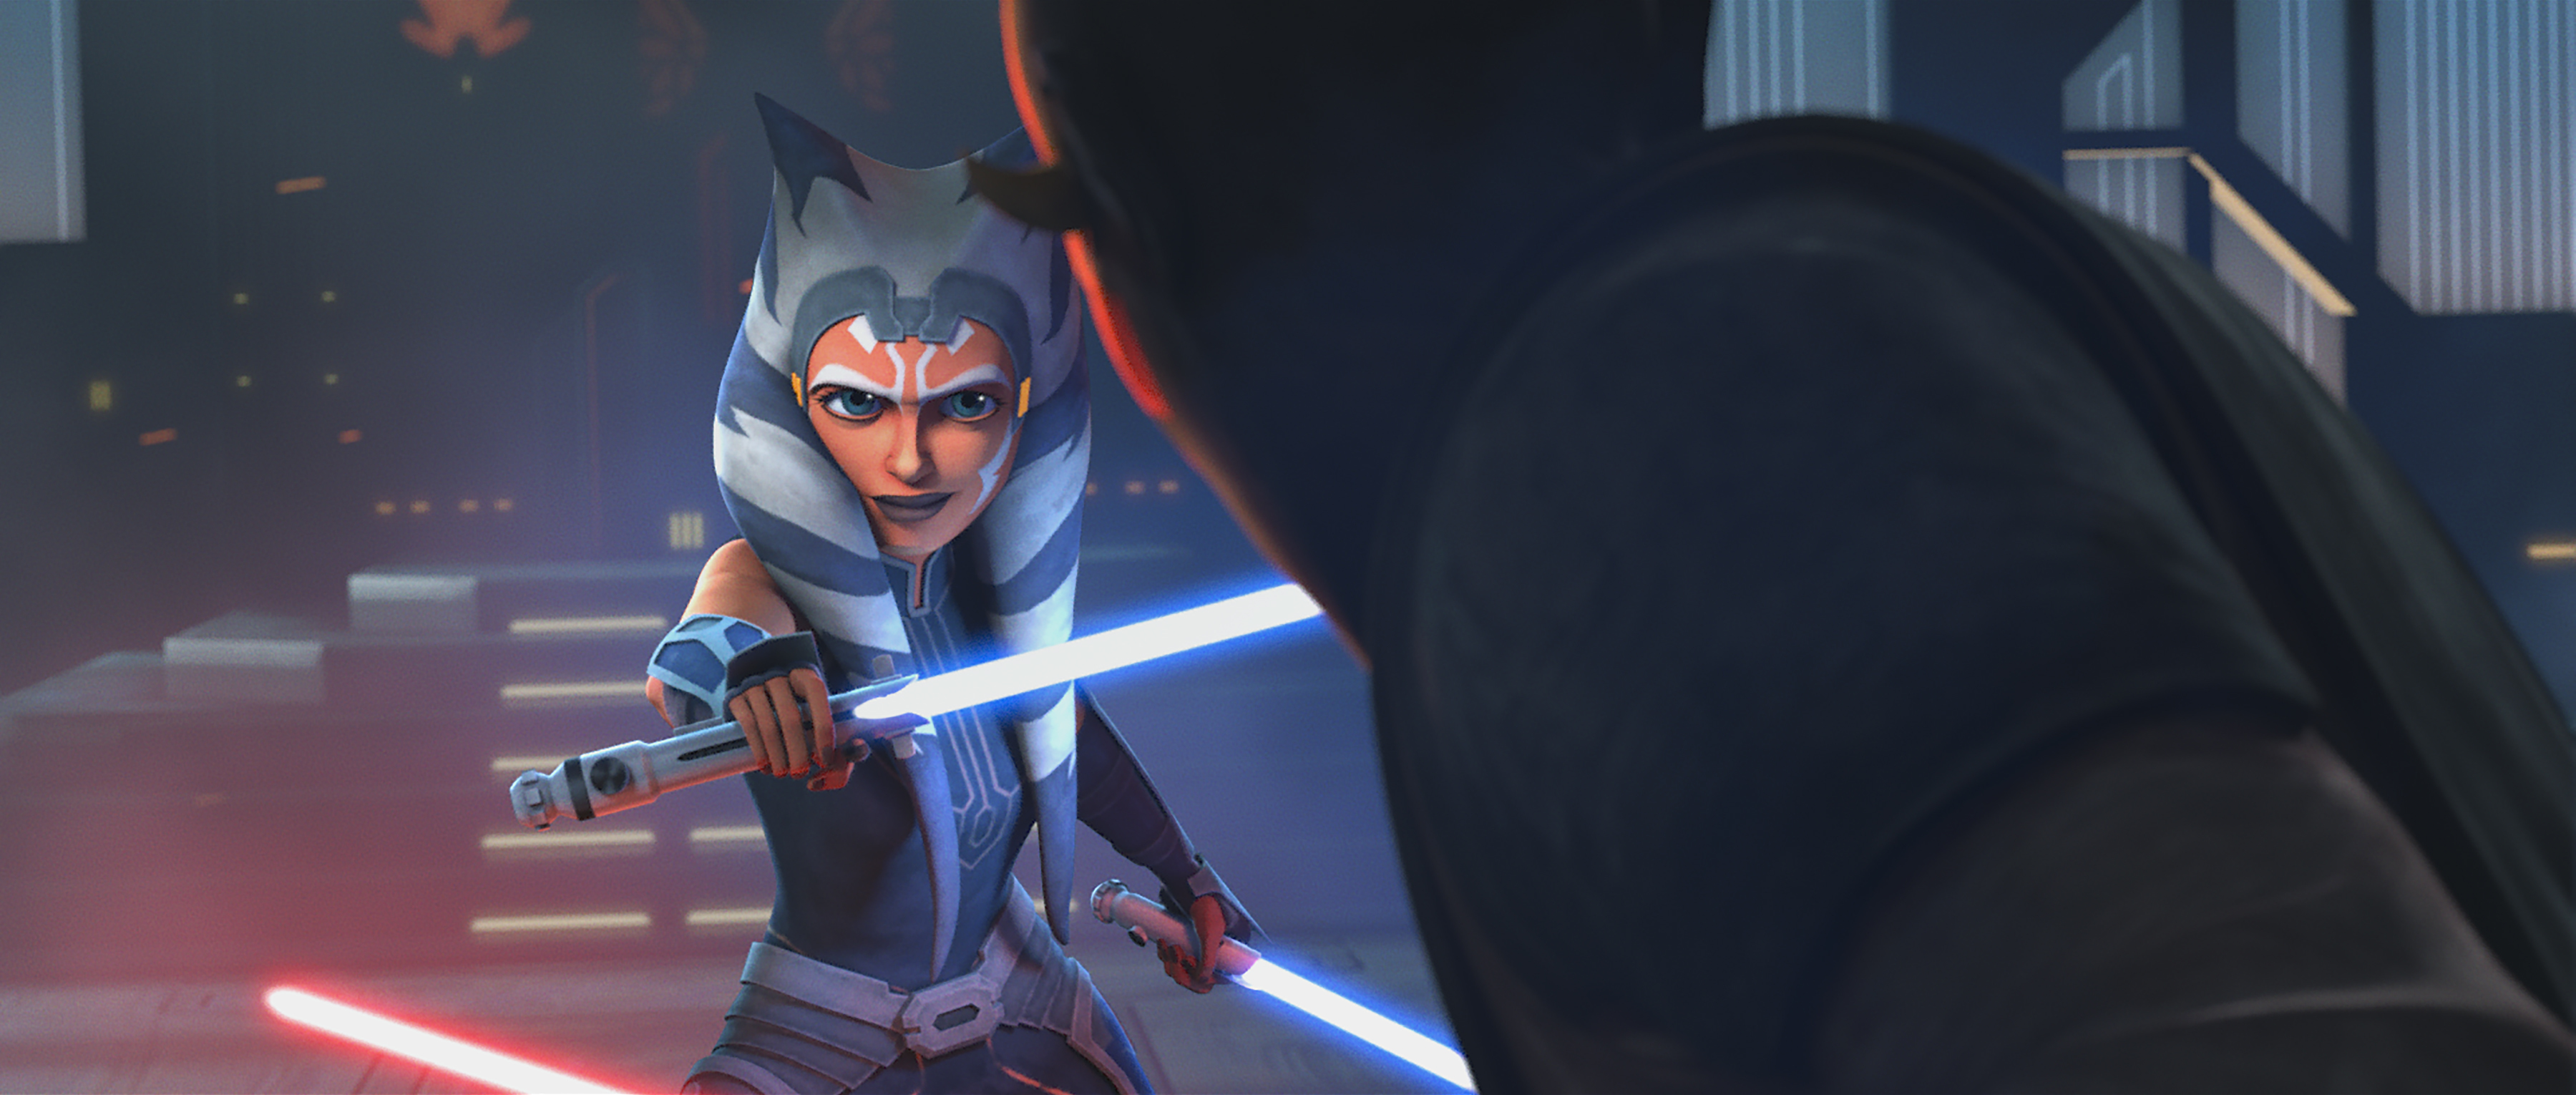
The final planned arc, which centered on the Siege of Mandalore, was fully released as the episodes "Old Friends Not Forgotten," "The Phantom Apprentice," "Shattered," and "Victory and Death." The color of Ahsoka's lightsabers in this arc underwent changes during development. In the initial story before cancellation, the lightsabers were intended to have their original green hue, while the final version released in 2020 featured a blue hue, reflecting modifications made by Anakin Skywalker while the sabers were in his care. For the character's duel with Maul in The Clone Wars: Season Seven, stuntwoman Lauren Mary Kim provided motion capture work to portray Tano's acrobatic fighting style.
Rebels continuation

In the television series Star Wars Rebels, Tano was envisioned as a wandering samurai, and she wielded new, slightly curved lightsabers that were designed to resemble the weapons used by samurai.
Ahsoka's conversation with Rex in the Star Wars Rebels episode "Twilight of the Apprentice" is intended to mirror their initial conversation in the Clone Wars film.
In an interview with the official Star Wars website, Dave Filoni, co-creator and executive producer of Rebels, stated that Vader would not want a memory of Tano, viewing their relationship as a failure, and that he would harbor a twisted form of anger towards her.
Encounter with Bendu
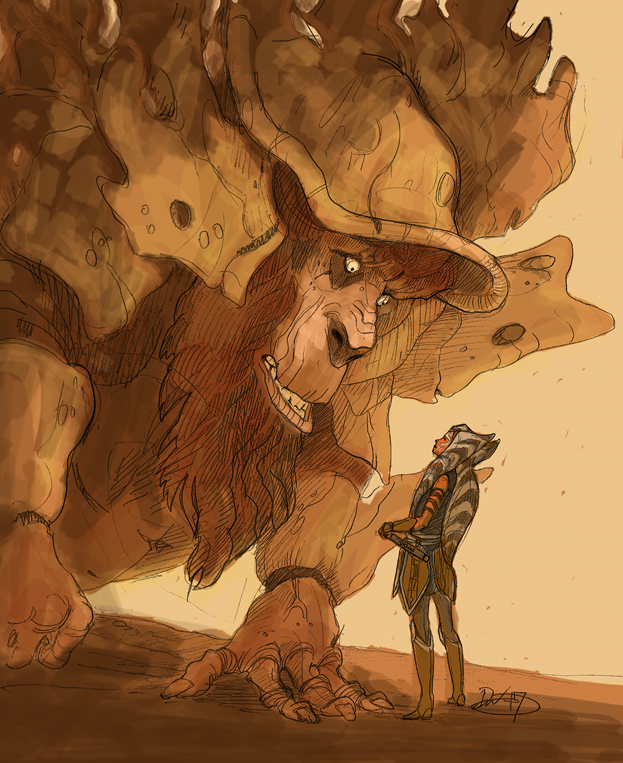
After the third season of Star Wars Rebels concluded, Dave Filoni, the series' executive producer, shared that Tano encountered the Bendu during "The Mystery of Chopper Base." Although this meeting was never visually presented in the show, Filoni posted dialogue and artwork related to their interaction on Twitter. In their conversation, the Bendu foreshadowed Tano's impending confrontation with her former Jedi master. When Tano expressed her need to know the truth, the Bendu countered that their meeting would cause everything, including her, to change. Because the Togruta did not understand, he clarified that "change" signified death. Tano then inquired if she would die, but the Bendu responded as if she was confirming it and said he did not know that before bidding her farewell.
The Mandalorian and The Book of Boba Fett
In February of 2017, a Star Wars enthusiast asked Dawson on Twitter if she would ever consider portraying Ahsoka Tano, to which she replied that she would be interested. This response sparked excitement among fans about the possibility of Tano appearing in live-action. Dawson stated that someone at Lucasfilm forwarded the Tweet to Dave Filoni, the executive producer of The Mandalorian, who thought she would be suitable for the role of Ahsoka Tano. Subsequently, Filoni and Star Wars began following Dawson on Twitter, but nothing further immediately transpired. Filoni maintained a casual awareness of Dawson's career in the Marvel Cinematic Universe and watched interviews where she expressed her enthusiasm for the role. During a discussion about the show between Dawson and Filoni, he reconsidered Dawson's casting and realized her age aligned with Tano's age in the series, making the casting a viable option. Filoni and Jon Favreau, the creator and executive producer of The Mandalorian, initially decided against including Tano in Season One because Filoni wanted to ensure Tano's character was accurately and respectfully portrayed.
Early in the production of Season One, Favreau revealed to Filoni that the Child's name would be Grogu. This prompted Filoni to brainstorm ways for the audience to learn the name. He theorized that Tano could discover Grogu's name through Force communication, accessing his memories and experiences, and then relay this information to the Mandalorian and the viewers. Filoni and Favreau had planned to include Tano in the storyline of the second season, so they began envisioning Dawson in the role and creating concept art of her as Tano. After presenting this art to Dawson, they offered her the role, which she accepted. Brian Matyas, the concept designer, clarified that the effects team shortened Tano's lekku for practical reasons related to stunt performance.
Tano made an appearance in Chapter 13: The Jedi, an episode both written and directed by Filoni. According to Filoni, this episode served as a trial run to gauge audience reaction to seeing Tano in live-action. When Filoni penned the scene where Tano reveals Grogu's history, he drew inspiration from the moment in A New Hope when Obi-Wan Kenobi tells Luke Skywalker about his father. While developing the episode, Filoni knew that the actress playing the Magistrate needed to be someone who could immediately pose a challenge to Tano. After being cast as Tano, Dawson prepared by watching The Clone Wars, Star Wars Rebels, and the Star Wars saga. Dawson studied Ashley Eckstein's animated portrayal of Tano and strived to honor it in her performance. Dawson was captivated by how Tano was central to "this whole other world" presented in The Clone Wars. Dawson approached Tano as a wandering samurai and a knowledgeable knight. Filoni referenced Gandalf from The Lord of the Rings as a source of inspiration, and all of these elements influenced Dawson's portrayal. Dawson aimed to capture Tano's playful and fun side, including her signature cocky eyebrow raise. She appreciated Tano's wisdom and her grounded nature, shaped by her past experiences. Dawson enjoyed incorporating homages to various aspects of Tano's character. Filoni mentioned classic samurai films like Yojimbo, describing Tano as someone who roams the galaxy assisting those in need.

Extensive screen testing was conducted due to the Volume's tendency to display a magenta hue. Every detail of Tano's costume received meticulous attention, including her headtails and horns. Filoni desired Tano's facial markings to be subtle and appear natural, rather than resembling face paint as in The Clone Wars. Brian Sipe, the makeup designer, faced the challenge of finding the right balance between a human-realistic look and one that would satisfy fans of the graphic style of The Clone Wars. The crew aimed for a warm and natural makeup aesthetic for Tano, conveying a different energy compared to her animated counterpart. Dawson was committed to being as authentic to the animated Tano as possible, so she insisted on wearing blue contact lenses to match the character's eye color. All of the prosthetics were custom-built to fit Dawson's skull and body, and Tano's headband was clipped in the back to secure the headtails. The makeup artists concealed Dawson's hair to allow her to wear the headpiece. Initially, the entire transformation process took three hours. Dawson found the face markings, altered skin color, and costume to be remarkable, but she didn't fully embody Tano until she put in the contact lenses. The crew had to consider how the Volume's temperature could affect Tano's skin color, so they made small adjustments accordingly.
Dawson reprised her role as Tano in "Chapter 6: From the Desert Comes a Stranger," the sixth episode of The Book of Boba Fett series. Dawson only learned that her character would interact with Luke Skywalker on the day of filming. She expressed her excitement at the opportunity to work with Mark Hamill, who provided the voice of Skywalker in the episode.
Ahsoka
Dawson continued her portrayal of Ahsoka Tano in the Ahsoka television series. To prepare for reprising the role, she rewatched the animated shows. Dawson shortened her hair, leaving enough to be comfortably concealed under her headpiece. The makeup process was reduced to an hour and a half, with the entire transformation taking approximately two hours. The process typically began between 4:30 and 5:00 in the morning. Dawson was determined to convey Tano's tireless nature, so she dedicated herself to rigorous lightsaber and fight training, as well as studying Tano's background. Dawson and Natasha Liu Bordizzo, who played Sabine Wren, received wushu training from stunt coordinator Ming Qiu. Dawson provided Qiu with freeze frames and clips from the animated shows, requesting that Qiu train her to perform Tano's stunts. Qiu initially deemed some stunts impossible, but she showed Dawson alternative techniques she could perform. Dawson described this role as the most physically demanding of her career. She aimed to portray Tano's struggle to balance her humanity, experiences, and desires.
A second season of Ahsoka was announced to be in development on January 9, 2024, with Filoni later revealing a development sketch on January 11 that depicted Tano and Wren atop a statue of the Father, a path previously braved by Baylan Skoll in the season one finale. Ahead of season two, Dawson reflected on Tano's character arc in season one and her hopes for the upcoming episodes, specifically expressing hope for "some levity and some lightness" and calling back to Tano's "spunky energy" seen in her early The Clone Wars appearances. She also noted how Filoni compares Tano's journey to that of Gandalf's arc, a story in Lord of the Rings that sees an already-powerful and experienced wizard continue to grow and adopt a more joyful personality.
Video game appearances
Tano has made appearances in a variety of Star Wars video games. She could be deployed into battle in Star Wars: Galactic Defense. She was a playable character on the player's team in Star Wars: Force Arena and is playable in Star Wars: Galaxy of Heroes.
Tano was featured as a playable character in the 2015 toys-to-life video game Disney Infinity 3.0, which presented an original, non-canonical story set during the Clone Wars. The story begins with Tano and her allies discovering a secret droid factory on Geonosis has been reactivated, leading to a third battle of Geonosis and compelling the group to uncover the mastermind behind the creation of a new Droid Army. Ultimately, Tano and her companions learn that Maul is responsible and confront the former Sith Lord in a battle on Naboo. As part of Infinity's toys-to-life concept, Tano received her own figure that could be scanned into the game. In 2023, Adrian Ropp, a former story lead for Disney Infinity, revealed that he advocated for Tano to have her own figure despite initial hesitation from higher-ups. He gained support from the Lucasfilm Story Group, which ultimately secured her inclusion as a figure.
LEGO
Tano was a character in "Kamino Crisis," a non-canon comic story authored by Martin Fisher, which was published on October 7, 2023 in the 101st issue of the magazine LEGO Star Wars. In the comic, Anakin Skywalker, Tano, and Clone Captain Rex were returning to the Resolute after a successful mission. After Rex remarked that their missions were too easy, the two Jedi devised a plan to test the Captain by manipulating a training session for new clone troopers that was being overseen by Rex. Tano disguised herself as a clone trooper named Tank, while Anakin Skywalker disguised himself as clone trooper Thrower to participate in a course within the Tipoca City Training Facility on Kamino. During a training exercise involving B1 battle droids repurposed as training droids, a voltage surge caused the droids to become significantly more aggressive and skilled in combat. The droids managed to escape the training arena, prompting Tano and Skywalker, still disguised as clone troopers, to join forces with Rex and other troopers to subdue the rogue droids. While battling in the hallways of Tipoca City, the clone trooper Glider entered the control room and destroyed the controls with his blaster, causing the battle droids to power down. As Rex gathered the troopers to express his gratitude, Tano and Skywalker removed their helmets, revealing their identities. They explained that their intention was to test the Captain, and Rex responded that he would never again describe their missions as easy. He then invited them to join his bowling team should they ever leave the Jedi Order.
Contradictions
In the Ahsoka novel, Bail Organa learns that Ahsoka Tano survived Order 66 a year after the establishment of Imperial rule, while Tano is surprised to discover that Organa, a known Jedi sympathizer, is still alive. However, the Tales of the Jedi episode "Resolve" reveals that they met during Padmé Amidala's funeral. This implies that both individuals must have assumed the other had died in the intervening year.
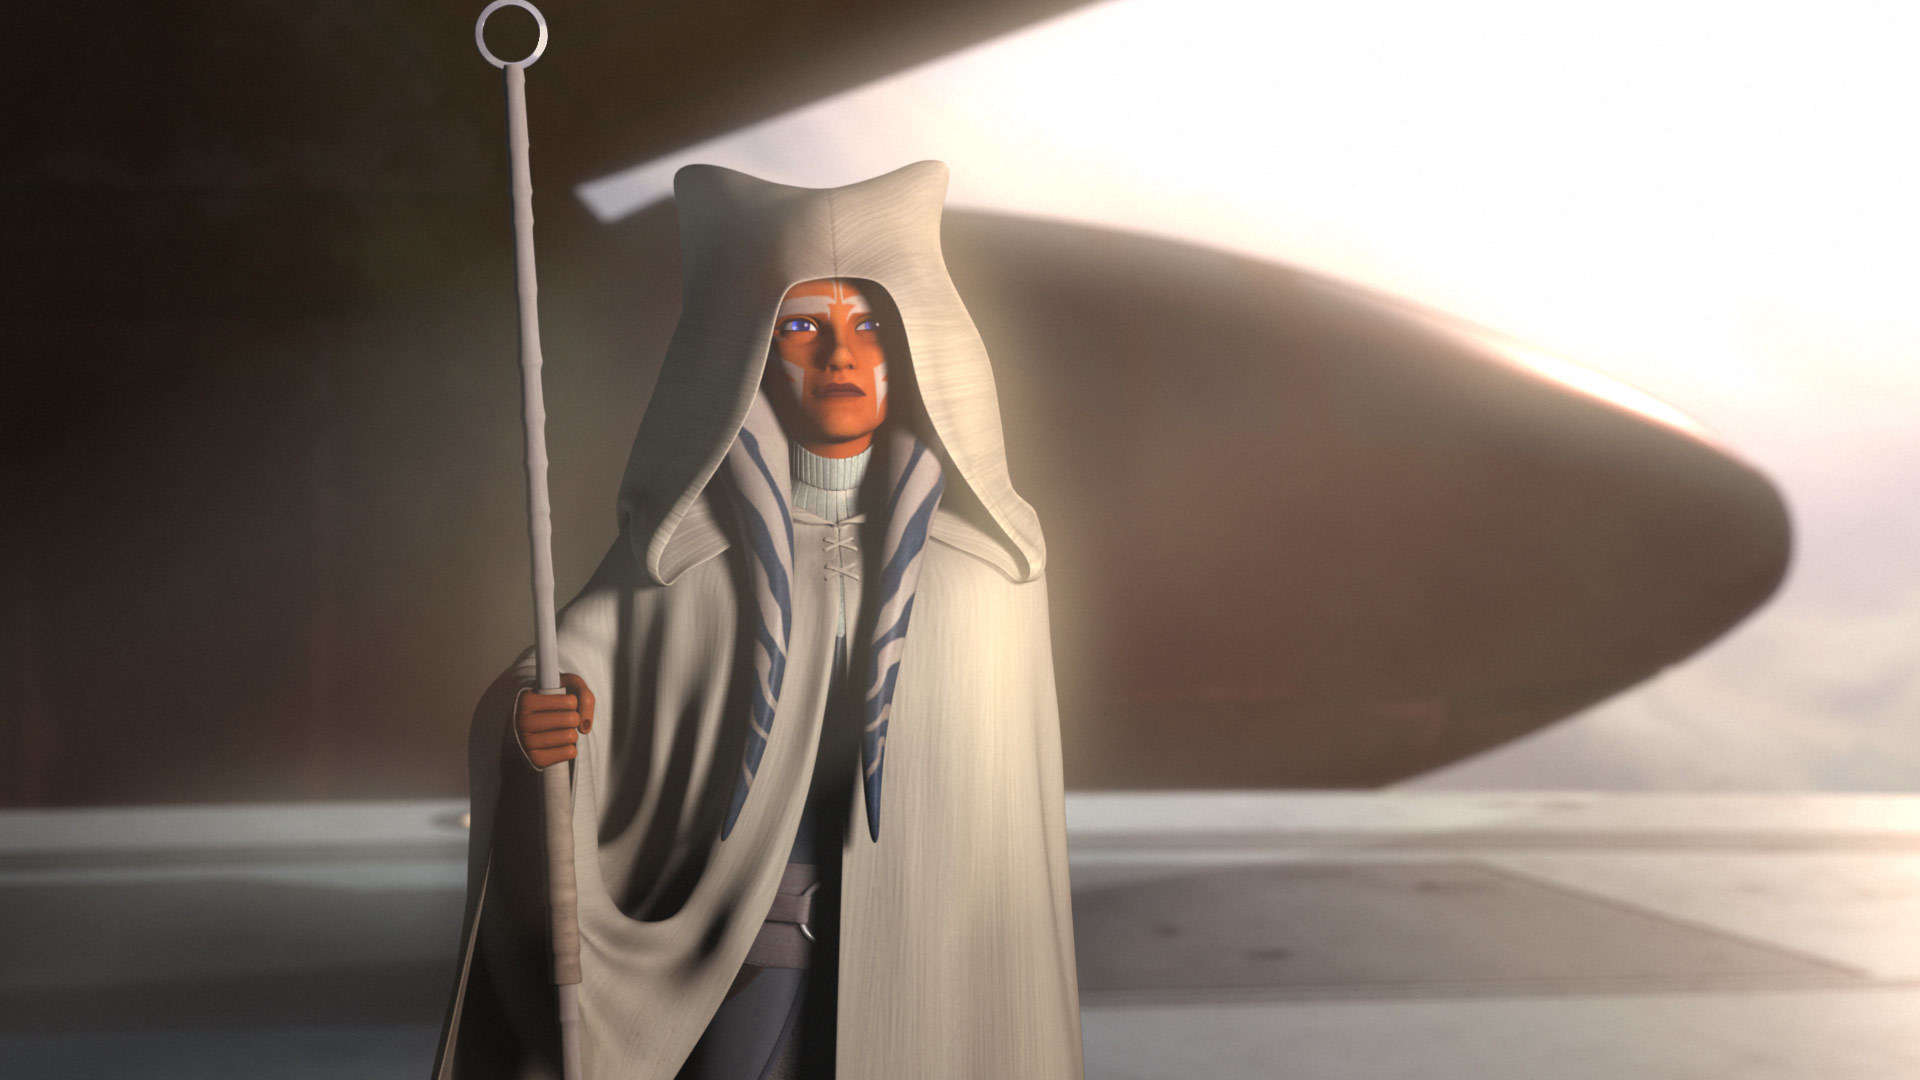
The Rebels finale "Family Reunion – and Farewell" depicted Tano traveling to Lothal in a T-6 shuttle, wearing white clothing and carrying a matching staff, to meet with Sabine Wren, who was seeking to bring Bridger home. This scene was later adapted for the Ahsoka series with some alterations, including Tano's attire. This article assumes the most recent depiction—the version of the scene in Ahsoka—is correct.