Massassi Group
Once known as the Massassi unit, the Massassi Group stood as a prominent rebel cell that opposed the Galactic Empire in the years leading up to the Battle of Yavin. This large rebel cell, a part of a larger rebel network, boasted a significant membership and was under the command of General Jan Dodonna. Their base of operations was the Great Temple situated on Yavin 4. In time, the Massassi Group, in conjunction with other rebel factions, coalesced to form the Alliance to Restore the Republic, with their base evolving into the Rebel Alliance's primary concealed stronghold. The unit played a vital role in the battles of Scarif and Yavin, where they successfully destroyed the Death Star battle station during the latter engagement.
History
Origins
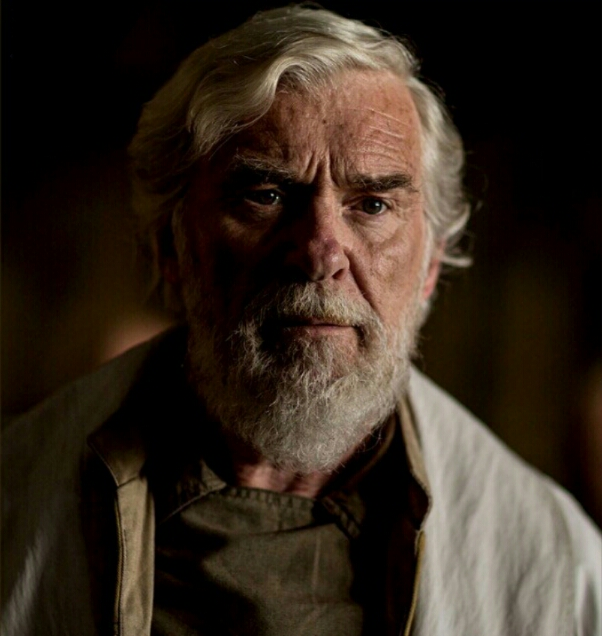
Jan Dodonna, who held the rank of General, previously served as a bridge officer aboard a Venator-class Star Destroyer during the Clone Wars. However, he grew disillusioned with the Galactic Empire and chose to defect to the burgeoning rebellion. This rebellion was a loosely organized collection of rebel cells secretly coordinated by Imperial Senator Bail Organa. By 5 BBY, Dodonna was leading a rebel team against the Empire. Leevan Tenza was among the members of this group, but an incident where he disobeyed orders by engaging an Imperial target prematurely led to his court-martial and subsequent defection to Saw Gerrera's Partisans.
Service in the Rebellion
Acquiring Y-wings
In 2 BBY, members of Phoenix Cell, another component of the rebel network, successfully stole five outdated BTL Y-wing light bombers from the Republic Navy at an Imperial salvage yard. Their plan was to deliver these bombers to Dodonna's unit. Eventually, the Y-wings were transferred to Dodonna's group and integrated into Gold Squadron, the cell's starfighter squadron under the leadership of Gold Leader Captain Jon "Dutch" Vander. This squadron was tasked with protecting rebel convoys and launching attacks against vulnerable Imperial assets.
Escorting Mon Mothma

Shortly after the Y-wings arrived, Senator Mon Mothma was compelled to leave her homeworld, Chandrila, after publicly denouncing the Empire and being branded a traitor. Gold Squadron was assigned the responsibility of safeguarding the Senator and escorting her to Dantooine, where she was scheduled to meet with other rebel cells. Mothma's Taylander shuttle, known as the Chandrila Mistress, met with the Ghost to refuel the shuttle's Y-wing escort, Gold Squadron.
The rebel ships came under attack from TIE fighters, an Arquitens-class cruiser, and a Gozanti-class cruiser, resulting in damage to the Chandrila Mistress' hyperdrive. Mothma and her crew were forced to evacuate to the Ghost, and the rebels escaped into hyperspace. Acting on the advice of Phoenix Leader Hera Syndulla, the rebels used an old smuggler's route through the Archeon Nebula to evade detection in the Lothal sector. However, an experimental TIE/d "Defender" Multi-Role Starfighter starfighter devastated the squadron, until Vander and Ezra Bridger (flying as Gold Two) intervened.
The remaining members of the squadron, Vander and the original Gold Two, successfully delivered the Senator to Dantooine. General Dodonna, along with Jun Sato and the rest of Phoenix Squadron, arrived shortly afterward. With the arrival of the other rebel cells, the Alliance to Restore the Republic was officially established.
Service within the Rebel Alliance
Battle of Atollon
Later, General Dodonna and the Massassi Group went to Atollon to aid Commander Jun Sato and Phoenix Squadron in their long-planned assault on the Imperial Armory Complex on Lothal. However, the trajectory of the Massassi Group, along with the trajectory of ISB Agent Alexsandr Kallus's Fulcrum transmission, allowed Grand Admiral Thrawn and his Seventh Fleet to pinpoint Chopper Base on Atollon.
Upon the arrival of the Seventh Fleet, the Massassi Group attempted to retreat, but the Imperials' Interdictor vessels prevented them from entering hyperspace. The Massassi Group and Phoenix Squadron then engaged Thrawn's forces, an attack that Hera, Sato, and Dodonna intended as a diversion to allow Lieutenant Commander Ezra Bridger to escape in the Gauntlet and inform Rebel Command and Senator Mon Mothma about Thrawn's siege. In the end, Sato sacrificed himself and his ship, the Phoenix Nest, by ramming Admiral Kassius Konstantine's Imperial Interdictor, allowing Ezra to reach hyperspace.
The Massassi Group suffered significant losses of cruisers and starfighters. The surviving members retreated to Chopper Base, where they attempted to defend against Thrawn's ground forces. Dodonna, Captain Syndulla, and the remaining forces retreated after Ezra returned with reinforcements from Clan Wren, who launched an attack to destroy the remaining Interdictor. Despite the attacks by the Bendu, the Massassi Group and the remnants of Phoenix Squadron managed to escape the blockade and relocate to Yavin 4.
Mission on Jalindi
In 1 BBY, Rebel Alliance leaders Mon Mothma, Bail Organa, and Jan Dodonna tasked the Spectres with spying on a newly built communications relay on Jalindi, based on a suggestion from former ISB Agent Alexsandr Kallus. Their mission was to install a spike, enabling the Rebels to monitor Imperial Fleet activities and facilitate their operations. The Ghost crew successfully infiltrated Jalindi's upper atmosphere and installed the spike. However, the unexpected arrival of Commander Brom Titus aboard his Arquitens-class command cruiser, the Marauder, forced the Spectres to abandon their mission and destroy the relay instead. The situation was further complicated by the arrival of extremist Saw Gerrera and his lieutenant Edrio in their UT-60D U-wing starfighter/support craft, who had already planned to destroy the relay using proton bombs. Gerrera invited Spectres Sabine Wren, Ezra, and Chopper onto his ship before detonating the bombs. Gerrera's U-wing and the Ghost departed Jalindi, but the sudden arrival of a Star Destroyer forced both ships to jump into hyperspace before Hera could retrieve her team.
Mission on Faos Station
Following the unsuccessful Jalindi mission, Saw Gerrera enlisted Ezra and Sabine's assistance on a mission to Faos Station to investigate the contents of a supposed civilian ship, Freighter 2716, that the Empire was transporting. The rebels soon discovered that the freighter was carrying a large kyber crystal to the Tonnis sector, where it rendezvoused with a Star Destroyer. Gerrera sabotaged the crystal and escaped with Edrio, while Ezra and Sabine rescued prisoners they found onboard using a Lambda-class T-4a shuttle. Shortly after, the kyber crystal exploded, destroying both the freighter and the Star Destroyer.
Return to Lothal
Several weeks after the Tonnis sector incident, Mon Mothma received information from Lothal resistance group leader Ryder Azadi about the Empire's development of a new TIE Defender variant, the TIE/D Defender Elite. Aware of the potential threat, Mothma dispatched the Spectres back to Lothal to investigate. After infiltrating the planet, they met with the Lothal Rebels. Hera and Kanan Jarrus, while conducting a long-range reconnaissance of Lothal City, uncovered evidence that the Empire intended to mass-produce the advanced fighter. During a spy mission on a test flight of the Defender Elite, Sabine devised a plan to steal the prototype starfighter's flight data recorder. She and Ezra infiltrated the airfield to carry out the plan. The arrival of Thrawn and Governor Arihnda Pryce complicated matters, leading the two Rebels to steal the entire prototype. After the prototype crashed, Ezra and Sabine retrieved the data recorder and returned it to the Rebels' camp, hiding the Elite's hyperdrive for later retrieval and installation on Ryder's U-wing.
Once the Spectres and Lothal Rebels recovered the hyperdrive and installed it on the U-wing, Hera and Chopper personally flew the flight recorder back to Yavin 4, successfully navigating the heavy Imperial blockade. Upon their return to Alliance headquarters, the data was analyzed, revealing no apparent weaknesses. Hera informed the Rebellion's leaders, including Mothma, Organa, and Dodonna, that this meant they had to prevent the mass production of the Defender Elites by destroying Lothal's factories. She added that there were individuals on Lothal who could assist if an attack was authorized. Mothma asked Hera and Chopper to leave the room while the Alliance leaders deliberated. Eventually, Mothma informed Hera that they had discovered the Empire was enacting Protocol 13, the evacuation of all personnel, on Lothal. This prompted Hera to re-enter the briefing, emphasizing that this news meant they had no time to waste and that Lothal needed their immediate assistance. Consequently, the Alliance leaders approved an attack, placing Hera in command and promoting her to General. Hera contacted the rest of the Spectres, informing them of the impending attack so they could prepare.
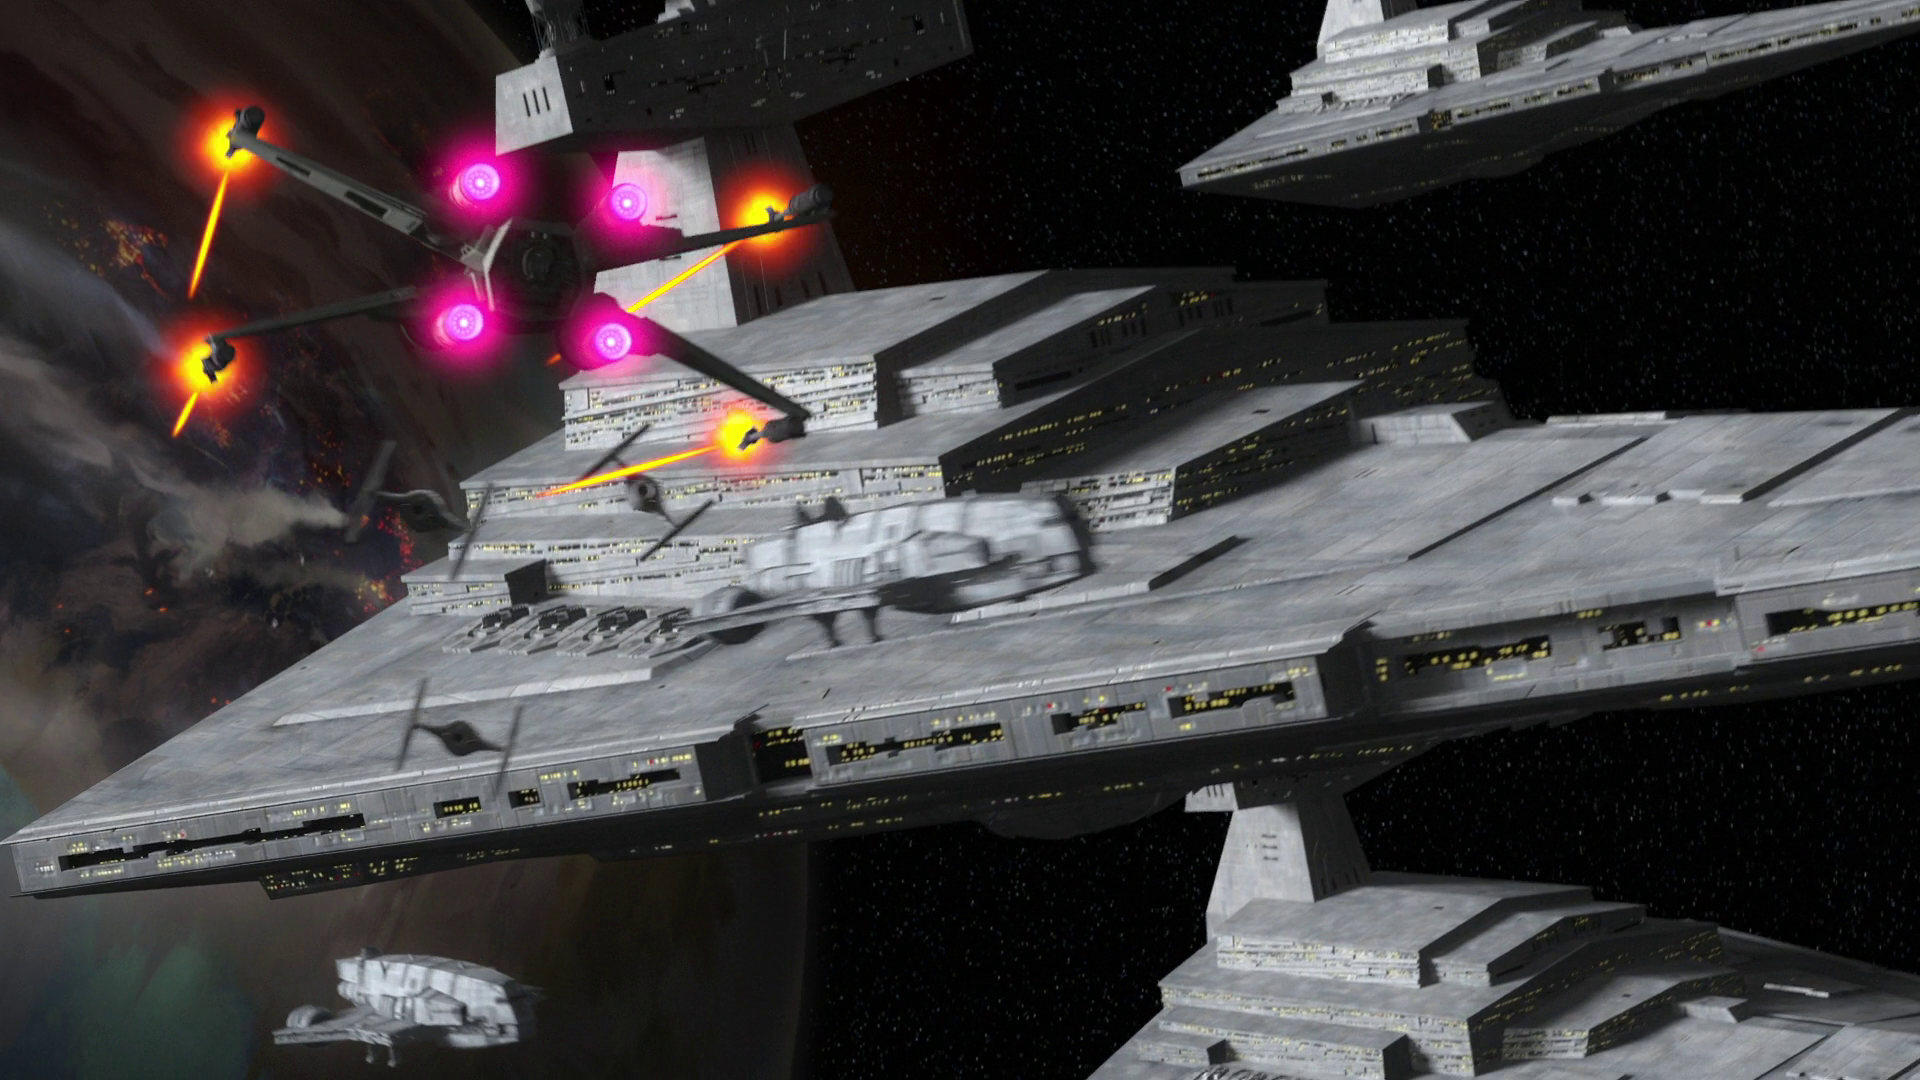
The attack force consisted of 24 starfighters, a combination of X-wings and Y-wings. Hera's pilots included Cleat, Duke, Mart Mattin, and Secon Daree. They emerged from hyperspace above Lothal, prompting the Imperial blockade to launch TIEs in response. Hera instructed the X-wings to protect the slower Y-wing bombers. During the ensuing battle, the Rebels shot down numerous TIEs, but Cleat and Duke were shot down by Imperial ace Vult Skerris. Hera retaliated by luring him into a trap, disabling his personal Defender Elite's deflector shields and allowing her to shoot him down. His ship crashed into a light cruiser, which then collided with a Star Destroyer, shearing off its bridge superstructure and creating an opening for Hera's force to reach Lothal's surface. However, Thrawn had anticipated the attack and had a second wave of TIEs waiting within Lothal's atmosphere, which shot down all the remaining Rebels.
On the surface, the other Spectres, who had destroyed several anti-air turbolaser turrets around Lothal City, watched in dismay as the fighters crashed. Only a few pilots survived the crashes, including Hera, Mart, and Daree. Thrawn dispatched his personal assassin, Rukh, to capture any survivors, particularly Hera. Rukh captured Daree before tracking down Hera, Mart, and Chopper, who were attempting to escape the city. Eventually, the three Rebels reached a sewer hatch guarded by Imperial troops. While luring away the guards and opening the hatch, Rukh caught up to them and engaged Hera in combat. She ordered Mart and Chopper into the sewers before being captured. Pryce arrived on the scene, delivering some dismissive remarks before stunning Hera. Mart and Chopper, after reaching a sewer exit outside the city, were met by Kanan, who had turned back from his journey to the Rebels' camp to rescue Hera.
Mission to the Ring of Kafrene
In 1 BBY, Captain Cassian Andor traveled to the Ring of Kafrene to meet with his underground contact, Tivik, a member of the Partisans. There, he learned about the Empire's possession of a superweapon, which would later be identified as the Death Star. Andor was forced to kill Tivik when Imperial troops closed in, as Tivik's broken arm prevented him from escaping the area. Andor then returned to Yavin 4 with the intelligence.
Reconnaissance of the Scarif System
The Massassi Group dispatched two scouts to the Scarif system to investigate their discovery of the Death Star as the Mk I Superlaser neared completion. However, they were intercepted by TIE fighters and Imperial Star Destroyers, resulting in failure.
Rescue of Jyn Erso
The Massassi Group played a role in the liberation of Jyn Erso from Imperial Detention Center & Labor Camp LEG-817 on Wobani. Ruescott Melshi led the extraction team, which included K-2SO.
Operation Fracture
The Rebel Alliance and members of the Massassi Group launched Operation Fracture to extract Imperial scientist Galen Erso so he could testify before the Senate about the existence of a planet-destroying superweapon. However, the mission's objectives were secretly changed to assassinate Erso.
This operation led to the Battle on Jedha, the Destruction of Jedha City, the deaths of Saw Gerrera and many of his Partisans, the extraction of Bodhi Rook from Jedha, the destruction of the Eadu Energy Conversion Laboratory by Rebel forces, the death of Galen Erso, and the Rebels' discovery of the Death Star project.
Battle of Scarif
After returning from Eadu, Jyn was summoned to a meeting of the Alliance leaders. Now in possession of irrefutable proof of the Empire's construction of a superweapon, the leading Rebel politicians were unable to agree on a course of action, as most were terrified of the Death Star's destructive capabilities. Despite Jyn's passionate plea, no decision was reached. This led Jyn, along with Cassian, Baze, Chirrut, Bodhi, K-2SO, and several volunteers, to travel to Scarif against orders. The Citadel Tower on Scarif housed the Imperial archives, including a complete copy of the Death Star plans. The team, who spontaneously named themselves "Rogue One", intended to infiltrate the facility and steal the plans.
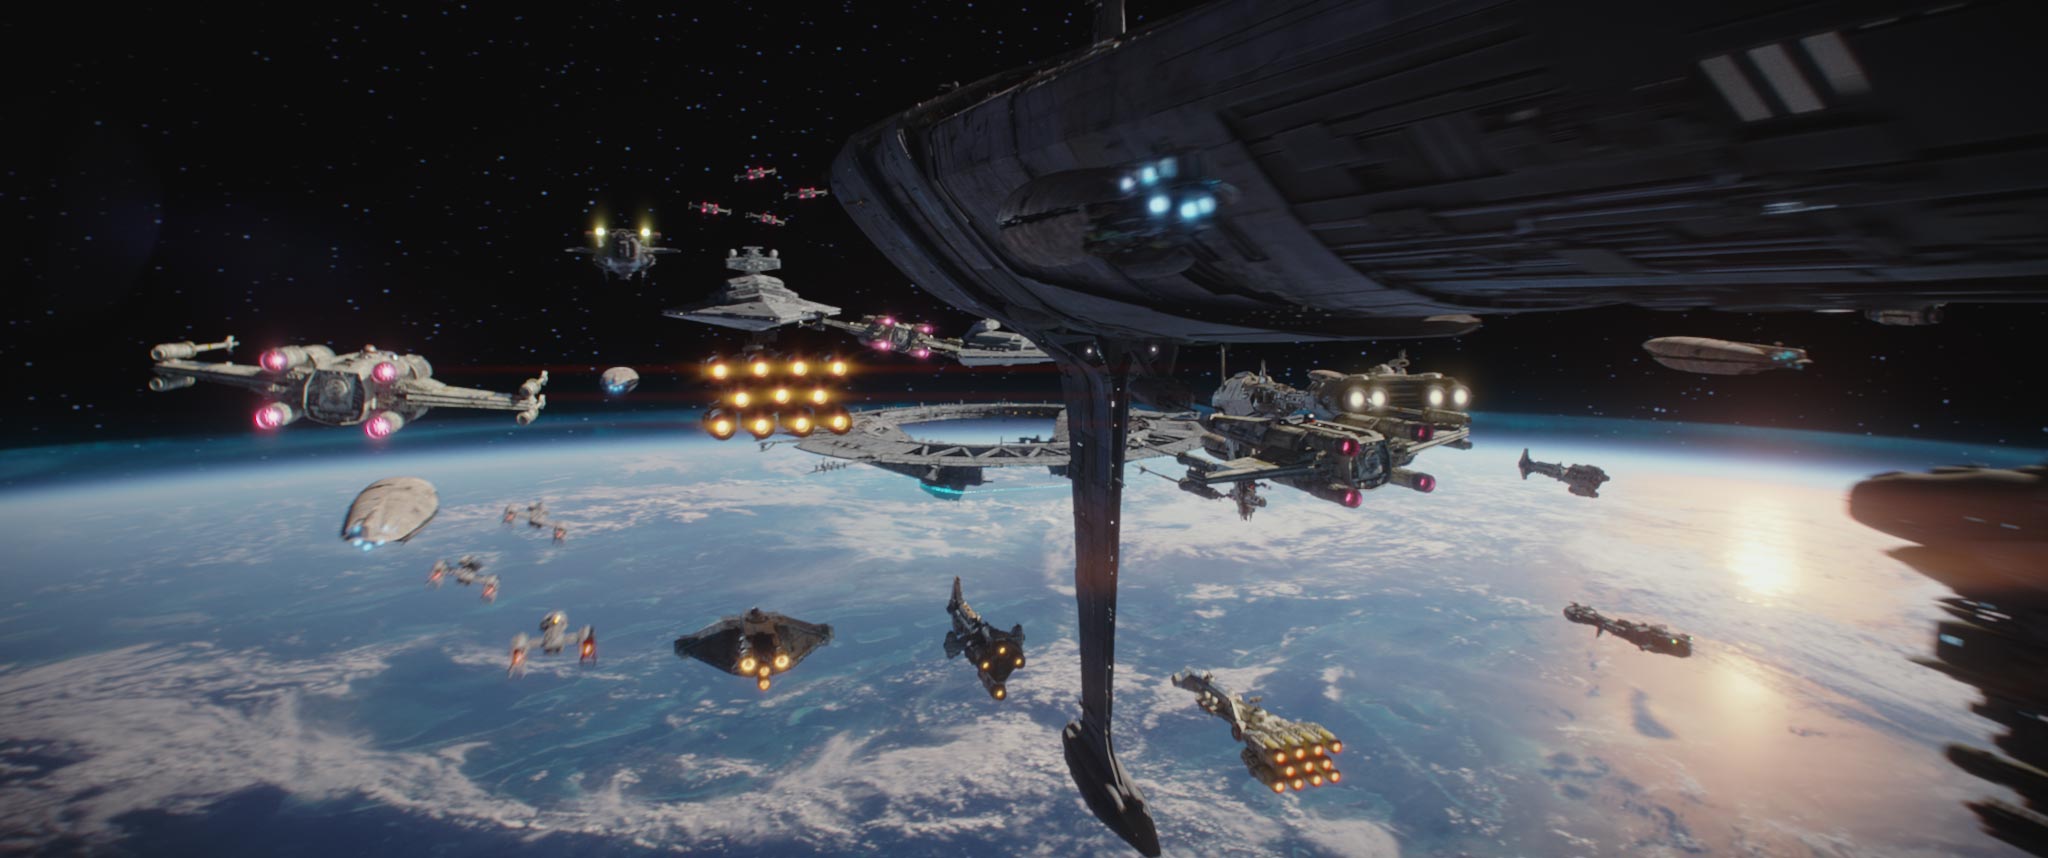
They entered Scarif's Shield Gate aboard a stolen Imperial cargo ship that had not yet been reported stolen to the Empire. Upon landing, Jyn, Cassian, and K-2SO infiltrated the tower, while the Rebel commandos created a diversion. Meanwhile, Rebel Command on Yavin 4 received news of the fighting on Scarif and immediately dispatched reinforcements. Admiral Raddus led the fleet from his flagship, the Profundity. Attached to the capital ship was the corvette Tantive IV, the ship of Princess Leia Organa, which was undergoing repairs. As Jyn and Cassian infiltrated the vault and stole the data-tape containing the Death Star plans, the other members of the group fought and died against the Imperials, who believed there were far more Rebels on the planet than there actually were.
The arrival of the Rebel reinforcements, primarily from the Massassi Group, caught the two Star Destroyers guarding the Shield Gate off guard, allowing many Rebel fighters to pass through before the gate closed. At the Citadel, an enraged Krennic managed to send a transmission requesting offworld reinforcements. Jyn eventually reached the transmitter at the top of the tower alone, as Cassian had been injured in the vault and she believed he was dead. During the space battle, the damaged Sphyrna-class Hammerhead corvette Lightmaker rammed one of the two Star Destroyers, which had been disabled by ion weaponry, into the other. This caused all three ships to crash into the Shield Gate, destroying it. At the Citadel Tower, Jyn successfully transmitted the Death Star plans to the Profundity, despite interference from Krennic, who was shot and injured by Cassian upon his arrival. The Death Star, alerted to the fighting, arrived shortly after. Grand Moff Wilhuff Tarkin, in command, decided to replicate what he had done to Jedha, ordering the station's superlaser to fire on a low setting, destroying the facility and killing Krennic, Jyn, and Cassian. The Star Destroyer Devastator arrived as the remaining Rebels were fleeing. Onboard the Rebel flagship, the technical readout of the battle station was downloaded onto a disc and rushed to the Tantive IV, where it was handed off just as Darth Vader, who had personally boarded the stricken Profundity, reached the door. The corvette escaped, leaving the Sith Lord displeased.
Battle of Yavin
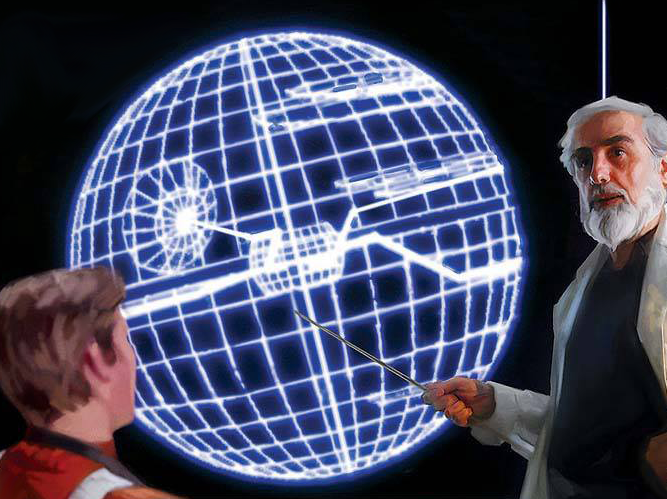
After the destruction of Alderaan by the Death Star, Princess Leia, a captive witness to the planet's demise, was rescued from that very battle station. The stolen schematics were hidden within her astromech droid, known as R2-D2. The Millennium Falcon, the vessel carrying Leia and her saviors – Luke Skywalker, Han Solo, and Chewbacca – unknowingly carried a homing beacon placed by the Empire. Leia strategically used this beacon to guide the Death Star toward the Yavin system, hoping to obliterate it. Once Rebel Command had thoroughly analyzed the plans, they identified a critical vulnerability deliberately incorporated into the Death Star's design: a thermal exhaust port that led directly to the station's reactor core.
Because of the heavy casualties suffered by the Massassi Group at Scarif, the Rebel forces could only deploy three starfighter squadrons: Red Squadron and Green Squadron, both equipped with X-wings, and Gold Squadron, which flew Y-wings. Red Squadron had previously participated in the battle of Scarif. Luke Skywalker was assigned the designation of Red Five. Han Solo, a man of cynicism burdened by substantial debts to the crime lord Jabba Desilijic Tiure, originally intended to depart, preparing to exit the system. Garven Dreis commanded Red Squadron, which included Wedge Antilles and Biggs Darklighter in its ranks. Jon Vander led Gold Squadron, with Davish Krail and Evaan Verlaine as members. The planned battle strategy involved the X-wings engaging the TIE fighters, while the Y-wings would navigate the trench to launch their proton torpedoes into the exhaust port. Due to the limited resources of the Rebels, each starfighter was equipped with only two torpedoes.
During the heat of battle, Vander and his two wingmen, Krail and Dex Tiree, secretly broke away to initiate the trench run, hoping their actions would go unnoticed. However, Darth Vader, present on the Death Star, detected their maneuver and intercepted them in his customized TIE Advanced fighter. He successfully shot down all three Y-wings, but before his demise, Krail managed to relay information to Dreis, reporting that the attacks originated from behind. The mounting losses suffered by the Rebels, as Yavin 4 drew closer into the battle station's sights, compelled Dreis to attempt a trench run himself. Vader eliminated his wingmen, but Dreis managed to launch his torpedoes toward the exhaust port. Failing to hit the target, he ordered Luke to proceed with a trench run before being shot down by Vader. At this point, the Rebel fighter force had dwindled significantly, with Evaan Verlaine being the sole remaining Y-wing pilot. Luke, accompanied by his wingmen, Wedge and Biggs, entered the trench. They were quickly pursued by Vader and his wingmen, who shot down Biggs and inflicted damage to R2, Luke's astromech droid, as well as Wedge's fighter. Luke instructed Wedge to retreat, acknowledging the futility of his damaged fighter. Just as Vader had Luke in his sights, the sudden arrival of the Millennium Falcon took him by surprise. The Falcon shot down one of Vader's wingmen and caused the other to send the Sith Lord's fighter spiraling into space. Han, experiencing a change of heart, returned to provide assistance in the battle. With no Imperial fighters in pursuit, Luke skillfully used the Force to precisely guide his proton torpedoes into the exhaust port. The three surviving Rebel fighters and the Falcon retreated to Yavin 4 as the Death Star erupted in a massive explosion.
Yavin 4 Evacuation
Immediately following the medal ceremony honoring Han Solo, Luke Skywalker, and Chewbacca for their courage in successfully destroying the Death Star and saving the Rebel Alliance from total annihilation, General Dodonna gave the order to immediately begin evacuating Yavin 4 because the Imperials were still aware of their location, despite the Rebels' costly victory.