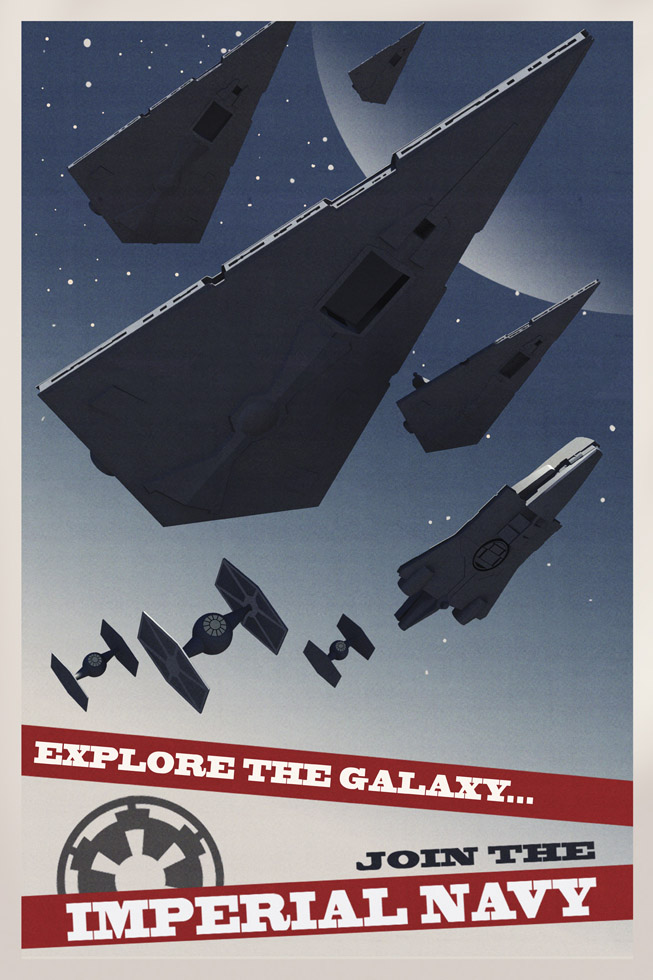
Imperial Navy
The Imperial Navy, also known as the Imperial Starfleet or Empire Navy, functioned as the naval component of the Galactic Empire's military. Following the Clone Wars, the Imperial fleet came into existence when Chancellor Sheev Palpatine transformed the Galactic Republic he governed into an authoritarian Empire. Primarily composed of Star Destroyers and TIE fighters, the Imperial Navy's duty was to maintain order throughout the galaxy.
History
Background
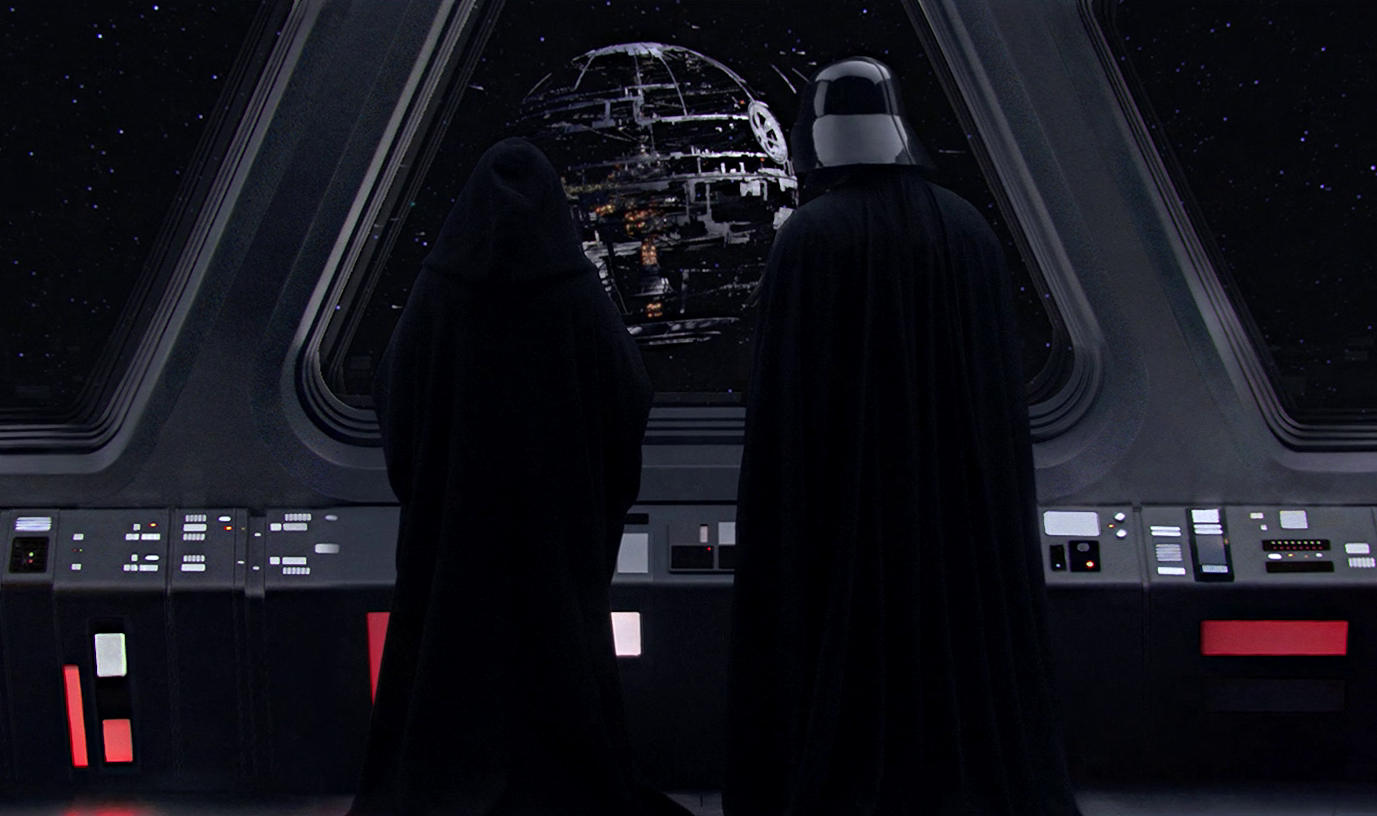
With the rise of the New Order, the massive military buildup characteristic of the late Galactic Republic to fight the Separatist Alliance during the Clone Wars persisted and grew within the newly formed Galactic Empire. After the Separatist leadership was executed on Mustafar by the Sith Lord Darth Vader, then Supreme Chancellor Palpatine revealed his long-held plans for the galaxy. Consequently, he formally dissolved the thousand-year-old Republic, declaring the establishment of the Galactic Empire, with himself as its Galactic Emperor.
Following the establishment of the New Order, the Imperial Navy emerged from the remnants of the Republic Navy at the conclusion of the Clone Wars, inheriting its esteemed naval heritage spanning thousands of years. It possessed its own starships that conducted patrols across the vast expanse of Imperial territory throughout the reign of Emperor Palpatine's New Order. Upon its creation, the Imperial Navy became the primary instrument of the Imperial Military's power projection, evolving into the largest branch within the Armed Forces, boasting a massive fleet of vessels and a workforce of millions.
Rise of the Imperial fleet
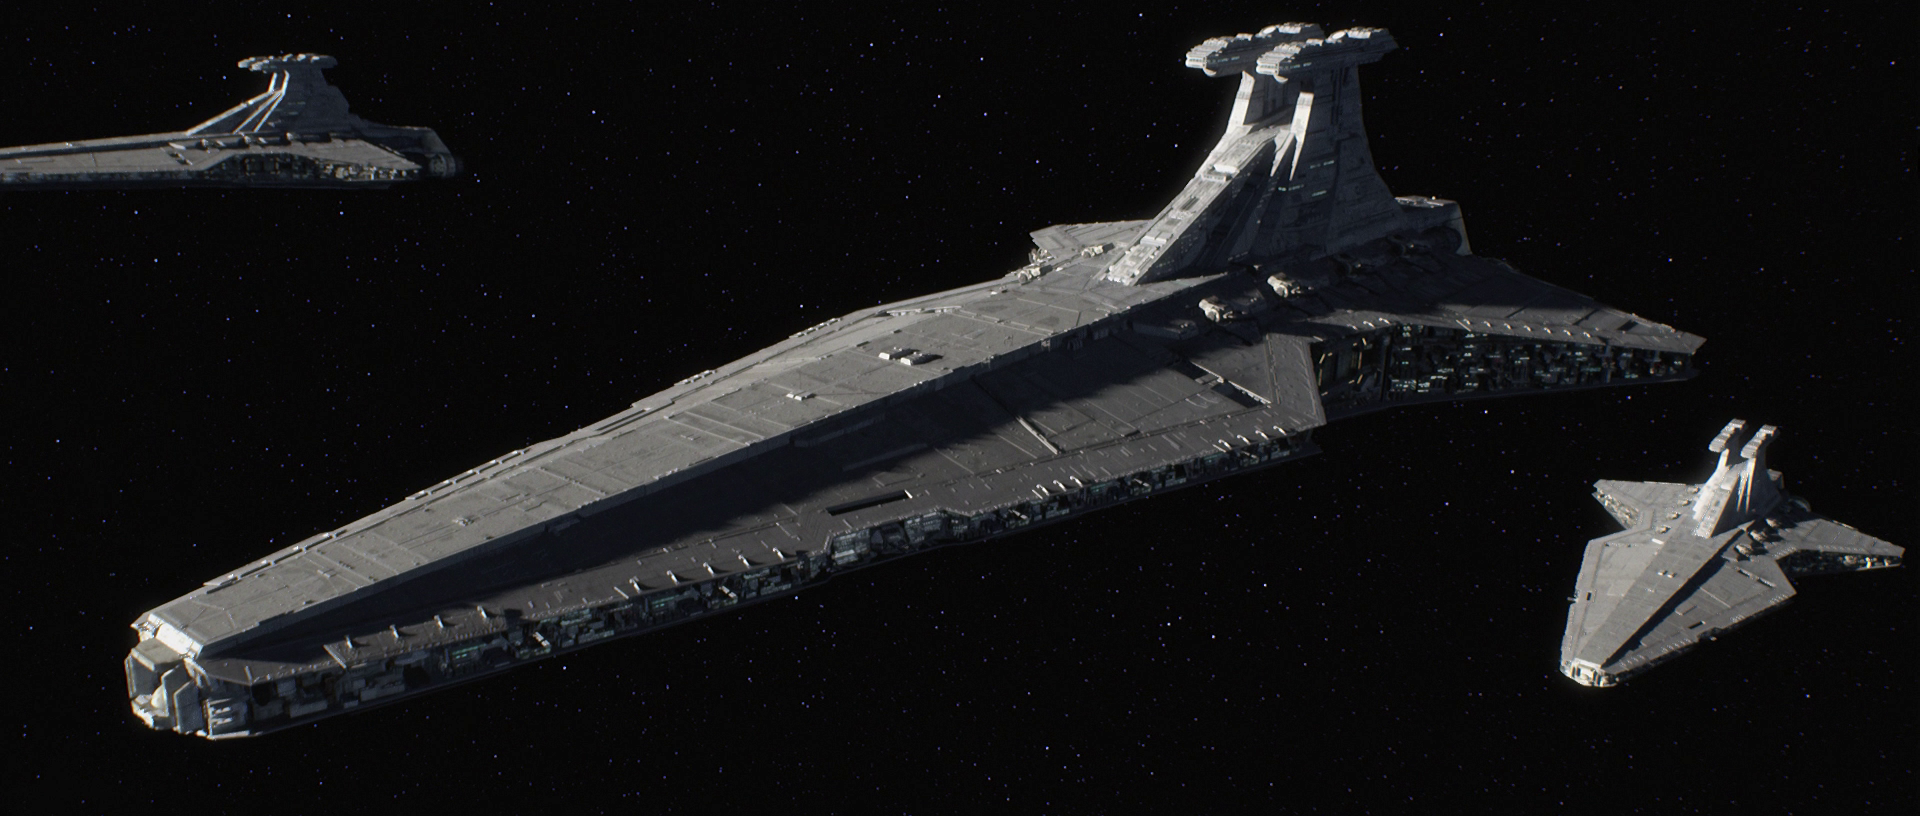
Almost immediately, all traces of the Old Republic were eliminated, with the Grand Army of the Republic renamed the Imperial Army and the Republic Navy restructured into the Imperial Navy. The distinctive red markings of Venator-class Star Destroyers were quickly repainted in a more muted gray, along with the eventual updates to uniforms and equipment for the countless personnel within the Imperial Military. In the period following the proclamation of the New Order, the Imperial Navy continued to utilize the popular Republic-era Alpha-3 Nimbus-class V-wing starfighters alongside the mass-produced Aggressive ReConnaissance-170 starfighter, while Lord Vader received his own black Eta-2 Actis-class light interceptor until he eventually piloted his significantly improved TIE Advanced x1, which was used during the Siege of Lothal four years before the Battle of Yavin.
Having lost her people, the Nightsisters, during the Clone Wars, the human Morgan Elsbeth channeled her anger into exploiting entire planets for their resources, establishing an industry that positioned her as a key figure in the creation of the Imperial Navy. However, the Nightsisters were in fact destroyed partly because they posed a potential threat to Palpatine's rule. With the destruction of the planet Anaxes and its shipyard facilities due to a catastrophic event, corporations such as Sienar Fleet Systems and Kuat Drive Yards assumed the responsibility of producing the newer Imperial vessels entering service.
For at least five years after the Empire's establishment, the Imperial Navy was engaged in suppressing remaining Separatist holdouts throughout the galaxy, as well as solidifying its political and territorial control, enabling a sense of peace and prosperity to return to the Core Worlds. The Empire's victory over an insurrection on Haruun Kal helped to establish the Imperial Navy's reputation, concluding the conflict with an orbital bombardment. Four years after the Empire's rise, the Imperial-class Star Destroyer Perilous was deployed to quell the Free Ryloth Movement on the Outer Rim world of Ryloth. However, unbeknownst to the Imperials, it was also subjected to an elaborate trap set by the rebels, making it the first ISD to be destroyed to Moff Delian Mors' knowledge. Nevertheless, the vessel remained one of the most feared ships in the Imperial Fleet.
Five years into Imperial rule, the Imperial Navy began replacing its aging ARC-170 starfighters with the newer TIE starfighter line, although Republic-era ships and equipment continued to be used as the newer models were distributed. The Navy also commissioned the Carrion Spike as Moff Wilhuff Tarkin's personal corvette, but a rebel cell led by former Republic Intelligence Captain Berch Teller ultimately stole the ship, causing a major political and military embarrassment for the Empire, with numerous star systems falling victim to the advanced ship's weaponry and mechanical systems. The ship was eventually destroyed after attacking a supply convoy carrying parts for the Empire's rumored Ultimate Weapon, which the galaxy would later recognize as the Death Star.
The cell and its collaborators were captured, interrogated, and executed. Furthermore, the Naval Intelligence Agency, created during the rise of the Empire, was reintegrated into Imperial Intelligence following the discovery that Vice Admiral Dodd Rancit, a leader within the agency and a member of the Joint Chiefs of the Imperial Military, was conspiring with the rebels in hopes of eliminating them and securing a promotion. Ultimately, the Empire successfully managed a potentially dangerous situation, while keeping details of its new superweapon a mere rumor.
Eight years after the Empire's formation, the Imperial Navy was involved in the Gorse Conflict, which saw the Imperial-class Star Destroyer Ultimatum, commanded by Rae Sloane, deployed to the Gorse system. The Empire sought to increase efficiency in the system due to the rare abundance of thorilide found there, a vital component in the construction of turbolaser batteries and thus essential for the expansion of the Imperial Starfleet. A brief encounter with rebels occurred, after which the planet was secured, and production was transferred to Baron Lero Danthe. Around this time, the Empire also began utilizing Gozanti-class cruisers to transport materials, slaves, and other essential resources.
Height of the Empire
Thirteen years into the Empire's reign, an insurgency tied up Imperial resources on the backwater agricultural world of Lothal, where a rebel cell known as the Spectres continually harassed and destroyed Imperial assets. With Sienar Fleet Systems engaged in the lucrative production of TIE fighters for the Empire, along with the production of the new TIE Advanced v1, a precursor to the x1, numerous Imperial-class Star Destroyers were dispatched into orbit to capture the rebel group, along with the eventual redeployment of Grand Moff Tarkin to address the terrorists a year later. After capturing the Jedi in charge of the cell, Tarkin's new flagship, the Sovereign, escorted the Jedi survivor to Mustafar, where a small rebel fleet engaged it and several other Star Destroyers, destroying the Sovereign in the process, but not before Tarkin managed to escape. The destruction of the _Sovereign _would be remembered years later by soldiers of the New Republic.
The Empire invested resources in developing a starship known as the "Blackburn," but its blueprints were sabotaged by the Spectres. Lord Vader eventually ordered the brutal Siege of Lothal, during which numerous TIE/LN starfighters scoured the planet to locate the rebels and instill fear in the local population. This eventually forced the rebels to flee Lothal, while the Imperial Navy inflicted a significant blow on the Phoenix Cell in a fierce space battle. At some point, the Skirmish at Merisee occurred between the Empire's Battlegroup Echelon and a rebel force, with the Empire emerging victorious despite an initial setback. The battlegroup's ability to turn a defeat into a triumph served as a source of inspiration for the Imperial Navy.
Fourteen years after the Empire's political formation, Imperial Interdictor vessels were still undergoing testing in locations such as the Del Zennis system, with the unique Imperial Interdictor improving on the design flaws of its predecessors from roughly a decade earlier. As a result, specialized test zones were established to assess the ships' capabilities, while Imperial weapons technicians wore a specialized gold-colored uniform variant to denote the uniqueness of the project.
At one point, members of the Imperial Senate expressed concern about whether the Imperial Navy was actively committing war crimes, leading to the passage of Imperial Naval Regulation 132.CAT.ch(22). According to the regulation, unless the officer was engaged in a Category V or higher engagement, firing on an escape pod required justification in a Form XTM-51-CT filed by the gunnery captain who issued the order.
Galactic Civil War
Mobilizing
As the Galactic Civil War formally commenced during the Battle of Scarif, the Death Star was ready for deployment after its lengthy construction, demonstrating its firepower on the populous world of Alderaan in an attempt to coerce the captive Princess Leia Organa into revealing the location of a rebel base for the recently formed Alliance to Restore the Republic, following her capture aboard her CR90 corvette the Tantive IV over Tatooine by the Imperial-class Star Destroyer Devastator, which also served as Lord Vader's personal flagship. In an instant, the influential world was destroyed, but an unlikely group of rebels, along with an older Jedi Master Obi-Wan Kenobi, managed to rescue the princess and escape to the Alliance's base on Yavin 4. Unbeknownst to the rebels, a homing beacon had been placed on their ship, the Corellian YT-1300 light freighter Millennium Falcon, leading the Death Star to the planet. During the intense Battle of Yavin, Luke Skywalker successfully fired the shot that ultimately destroyed the Empire's dreaded battlestation.
Following the destruction of the first Death Star, the Empire immediately began construction on the newer and more powerful DS-2 Death Star II Mobile Battle Station, while the Imperial Military struggled with the loss of such a significant portion of its forces. With nearly all of the Joint Chiefs of the Empire present on the battlestation when it was destroyed, General Cassio Tagge was promoted to the newly created rank of Grand General, assuming command of nearly all Imperial Military resources, while junior officers were rapidly promoted to fill the positions of the newly deceased. Simultaneously, Admiral Kendal Ozzel personally issued a communique ordering the fleet to battle readiness. The Imperial Military also underwent a major reorganization, rescinding the classification of Imperial Navy and Imperial Army pilots and engaging in rushed and disorganized offensives, often with poor intelligence, in an effort to keep the rebels off balance.
Mobilizing for a galactic war, the Imperial fleet also began occupying notorious spice-producing worlds such as Kerev Doi in an attempt to cut off potential sources of funding for the Rebel Alliance. Capitalizing on the Imperial Navy's—and Empire's—temporary state of disarray, the Rebel Alliance managed to destroy Weapons Factory Alpha located in the Corellian Industrial Cluster on Cymoon 1, the largest weapons factory in the galaxy and crucial for Imperial Military production. Bombing the Imperial shipyards at Kuat and bombing the supply base at Imdaar, the Rebellion also launched a series of over a dozen attacks against Imperial forces scattered across the galaxy. Consequently, the Empire was forced to negotiate with the Hutt Cartel to acquire the necessary resources for rebuilding after such a military setback. Grand General Tagge also observed that increased pirate attacks against Imperial convoys were a natural consequence of the loss of such a symbol of Imperial power.
Nevertheless, the Empire's determination to pursue the rebel fleet only intensified, leading to an elaborate scheme to sway the brilliant Drusil Bephorin to their cause, as she was believed to be capable of locating the fleet through advanced mathematics. Following a daring rescue led by then-Lieutenant Luke Skywalker, Drusil managed to escape her captivity on Denon and evade multiple pursuing Star Destroyers. Successfully avoiding numerous Immobilizer 418 cruisers attempting to pull them out of hyperspace, she and her family safely arrived on the ocean world of Omereth. With the rescue of Drusil to the Alliance's cause, the Empire suffered a significant defeat, providing the Rebellion with an advantage in its fight against the New Order.
Victory at Hoth
Leading up to the Battle of Hoth, the Empire initiated Project Swarm, an operation that deployed numerous Viper probe droids to scour the galaxy for any indication of the presumed rebel base of operations. Vice Admiral Rae Sloane also led the successful ambush of a rebel convoy at Derra, which intensified the search for the rebel base and was considered a near-perfect victory among Imperial Navy personnel.

After a lone probe discovered the rebels at Echo Base on the remote ice world of Hoth, the Empire launched an assault on the system under the newly formed Death Squadron, led by Lord Vader himself aboard his new flagship, the Executor-class Star Dreadnought, Executor. In an attempt to surprise the rebels, Admiral Kendal Ozzel entered the system too close to the planet, alerting the Alliance to their presence and enabling them to raise their defensive shields, forcing a ground-based assault rather than an orbital bombardment. After Force-choking Admiral Ozzel for his arrogant mistake, Vader appointed Captain Firmus Piett as the commander of the Executor, while the massive Battle of Hoth unfolded on the planet's surface.
With Death Squadron in orbit, escaping transports were targeted and destroyed, with Admiral Jhared Montferrat destroying the transport carrying the wife of young rebel Adon Fox. However, the planetary v-150 ion cannon managed to temporarily disable several Imperial-class Star Destroyers, allowing numerous rebel sympathizers to escape. Afterward, Commander Ellian Zahra led the Hunter Fleet against the rebels in the battle near Malastare, battle at Rendezvous Point Delta-Three, and destruction of the Sixth Division.
War with the Crimson Dawn
Concurrently with the war against the rebels, the Crimson Dawn crime syndicate, led by Lady Qi'ra, a disciple of Palpatine's former apprentice Maul, emerged as a significant threat to the Empire. Qi'ra had been secretly waging a war against the Sith, which Palpatine uncovered after the Hutt Clan's Attack on the Executor and Zahra's failure in the Battle of Panisia. Once Palpatine and Vader identified the threat, they ordered the Imperial Military to locate the Crimson Dawn command ship Vermillion, resulting in a sudden high-alert Imperial Navy searching for the enemy flagship. One Imperial fleet, including an Interdictor-class, battled the Vermillion until it self-destructed.
Later, Palpatine assumed personal command of the Executor and a fleet of Imperial Star Destroyers to eliminate the Dawn and destroy the Fermata Cage in the battle at an ancient Amaxine Space Station, where the Dawn Fleet emerged and forced the Executor to power its shields instead of focusing all power on its cannons to destroy the station. As the capital ship and Imperial starfighters engaged the Dawn forces, Palpatine and Vader took a Lambda-class T-4a shuttle to enter the station, intending to wipe out the Dawn and find the Cage. Under the protection of crimson TIE Interceptors, they boarded the station and led a mixed force of death troopers and Royal Guards into battle. Crimson Dawn's war ultimately ended in tragedy.
Failure at Endor
Seeking to crush the rebellion once and for all, Palpatine chose to leak just enough information to the Bothan Spynet so that the Rebel Alliance would learn that his new, more powerful Death Star was under construction over the forest moon of Endor, and that he would be personally overseeing its final construction phases. Tempted, the Rebel Alliance began assembling its fleet in the Sullust system, which the Emperor ordered the Imperial Navy to ignore, hoping that the rebels would commit all their forces to a doomed attack. In preparation, Imperial naval resources gathered for the encounter in the Hudalla system.

Upon arriving in the Endor system, the rebel fleet found itself surrounded by the largest concentration of Star Destroyers in Imperial history, as well as a fully armed and operational Death Star, contrary to the information they had received. However, the Emperor, seeking to turn a captive Luke Skywalker to the dark side of the Force, decreed that only the fighters engage the rebel fleet in an effort to prolong the encounter and enrage Skywalker. Unfortunately for the Emperor, Luke Skywalker not only refused the offer and became a Jedi Knight in his own right, but the rebel strike team sent to disable the Death Star's shield generator on Endor succeeded, allowing the rebels to enter the unfinished Death Star II and destroy its main reactor. With the death of the Emperor at the hands of his own apprentice, the Galactic Empire and the Imperial Military were thrown into disarray following the loss of their leadership. The Battle of Endor ended in a clear defeat for both the Empire and the Imperial Navy.
Imperial fragmentation
The Galactic Emperor's demise plunged the Empire into immediate disarray, with widespread galactic civil unrest and a multitude of individuals vying for the throne. Meanwhile, Imperial record-keeping was in complete disorganization for months as they tried to confirm the casualties from the second Death Star, while simultaneously fighting the emerging New Republic. Upon hearing about the Emperor's defeat at Endor, Governor Ubrik Adelhard sealed off the Anoat sector, creating the infamous Iron Blockade. Consequently, numerous splinter fleets broke away from the Imperial Navy, and internal conflicts and betrayals caused bloodshed in what the Imperial HoloNet dismissed as mere skirmishes and mutinies, while the full-scale galactic war that started after the Battle of Hoth raged on with even greater intensity. The Imperial Navy also faced fuel shortages because Republic attacks forced Imperial ships to retreat, using up more fuel than they could replenish.
Following the Emperor's death, Sentinel droids were dispatched to "selected" Imperial officers, including Admiral Garrick Versio and Captain Lerr Duvat. These officers received directives to initiate Operation: Cinder, an emergency plan to dismantle the Empire through the use of experimental weather arrays. The sight of Arquitens-class command cruisers became rare following the attack on Fondor. Later in the war, the Imperial Navy executed the Great Purge of Mandalore, with TIE/sa bombers obliterating cities and gunships eliminating survivors, aided by ground troops.
To reorganize the fractured Empire, a clandestine Imperial meeting, known as the Imperial Future Council, was held on the Outer Rim world of Akiva in the months after the Battle of Endor. However, the meeting was disrupted when the New Republic, having learned of the gathering, launched a massive attack on the system, leading to a major space battle. The Republic's information came from a mysterious source called the Operator, who was actually Imperial Fleet Admiral Gallius Rax. Rax provided the New Republic with intelligence to eliminate his political rivals. Admiral Rae Sloane survived the battle and rejoined the Fleet Admiral in the Vulpinus Nebula.

The breakdown of the Imperial war machine also hindered Imperial Military production in the months following the Battle of Endor, resulting in a shortage of TIE/LN starfighters and forcing Star Destroyers to deploy with fewer fighters. The Imperial Navy also suffered from a lack of trained personnel, and the once-powerful fleet was reduced to a single Super Star Destroyer, the Ravager. After the events on Akiva, Rae Sloane was promoted to Grand Admiral and took command of Imperial forces in the Vulpinus Nebula, the largest Imperial remnant force. However, Fleet Admiral Rax secretly controlled Imperial forces from behind the scenes. Sloane later discovered evidence that a quarter of the Empire's Star Destroyers and the Emperor's Super Star Destroyer Eclipse had vanished mysteriously, rather than being destroyed in battles with the New Republic as Imperial records indicated.
During the first session of the Shadow Council, Rax revealed that he secretly commanded large Imperial fleets, consisting of hundreds of Star Destroyers and thousands of smaller ships, in the Almagest, the Recluse's Nebula, the Queluhan Nebula, the Ro-Loo Triangle, and the Inamorata. Rax also utilized the Imperial-controlled foundry worlds of Zhadalene, Korrus, and Belladoon to produce war materials, including new TIE fighters, for the Imperial war effort. Following the loss of Kashyyyk and the attack on the New Republic capital of Chandrila, Rax seized power as Counselor to the Empire. To evaluate his new armada against the New Republic, Rax ordered the Imperial fleets to converge on the planet Jakku.
Showdown on Jakku
After Imperial forces were discovered at Jakku, the New Republic dispatched its military to confront the Empire following a vote by the Galactic Senate. One year and four days after the Battle of Endor, the Galactic Empire engaged in a major land and space battle over Jakku against the New Republic. While Rax prepared the next phase of the Emperor's posthumous Contingency plan (which involved destroying Jakku while he and a select group escaped into the Unknown Regions), Grand Moff Randd commanded the Imperial fleet from the Ravager.
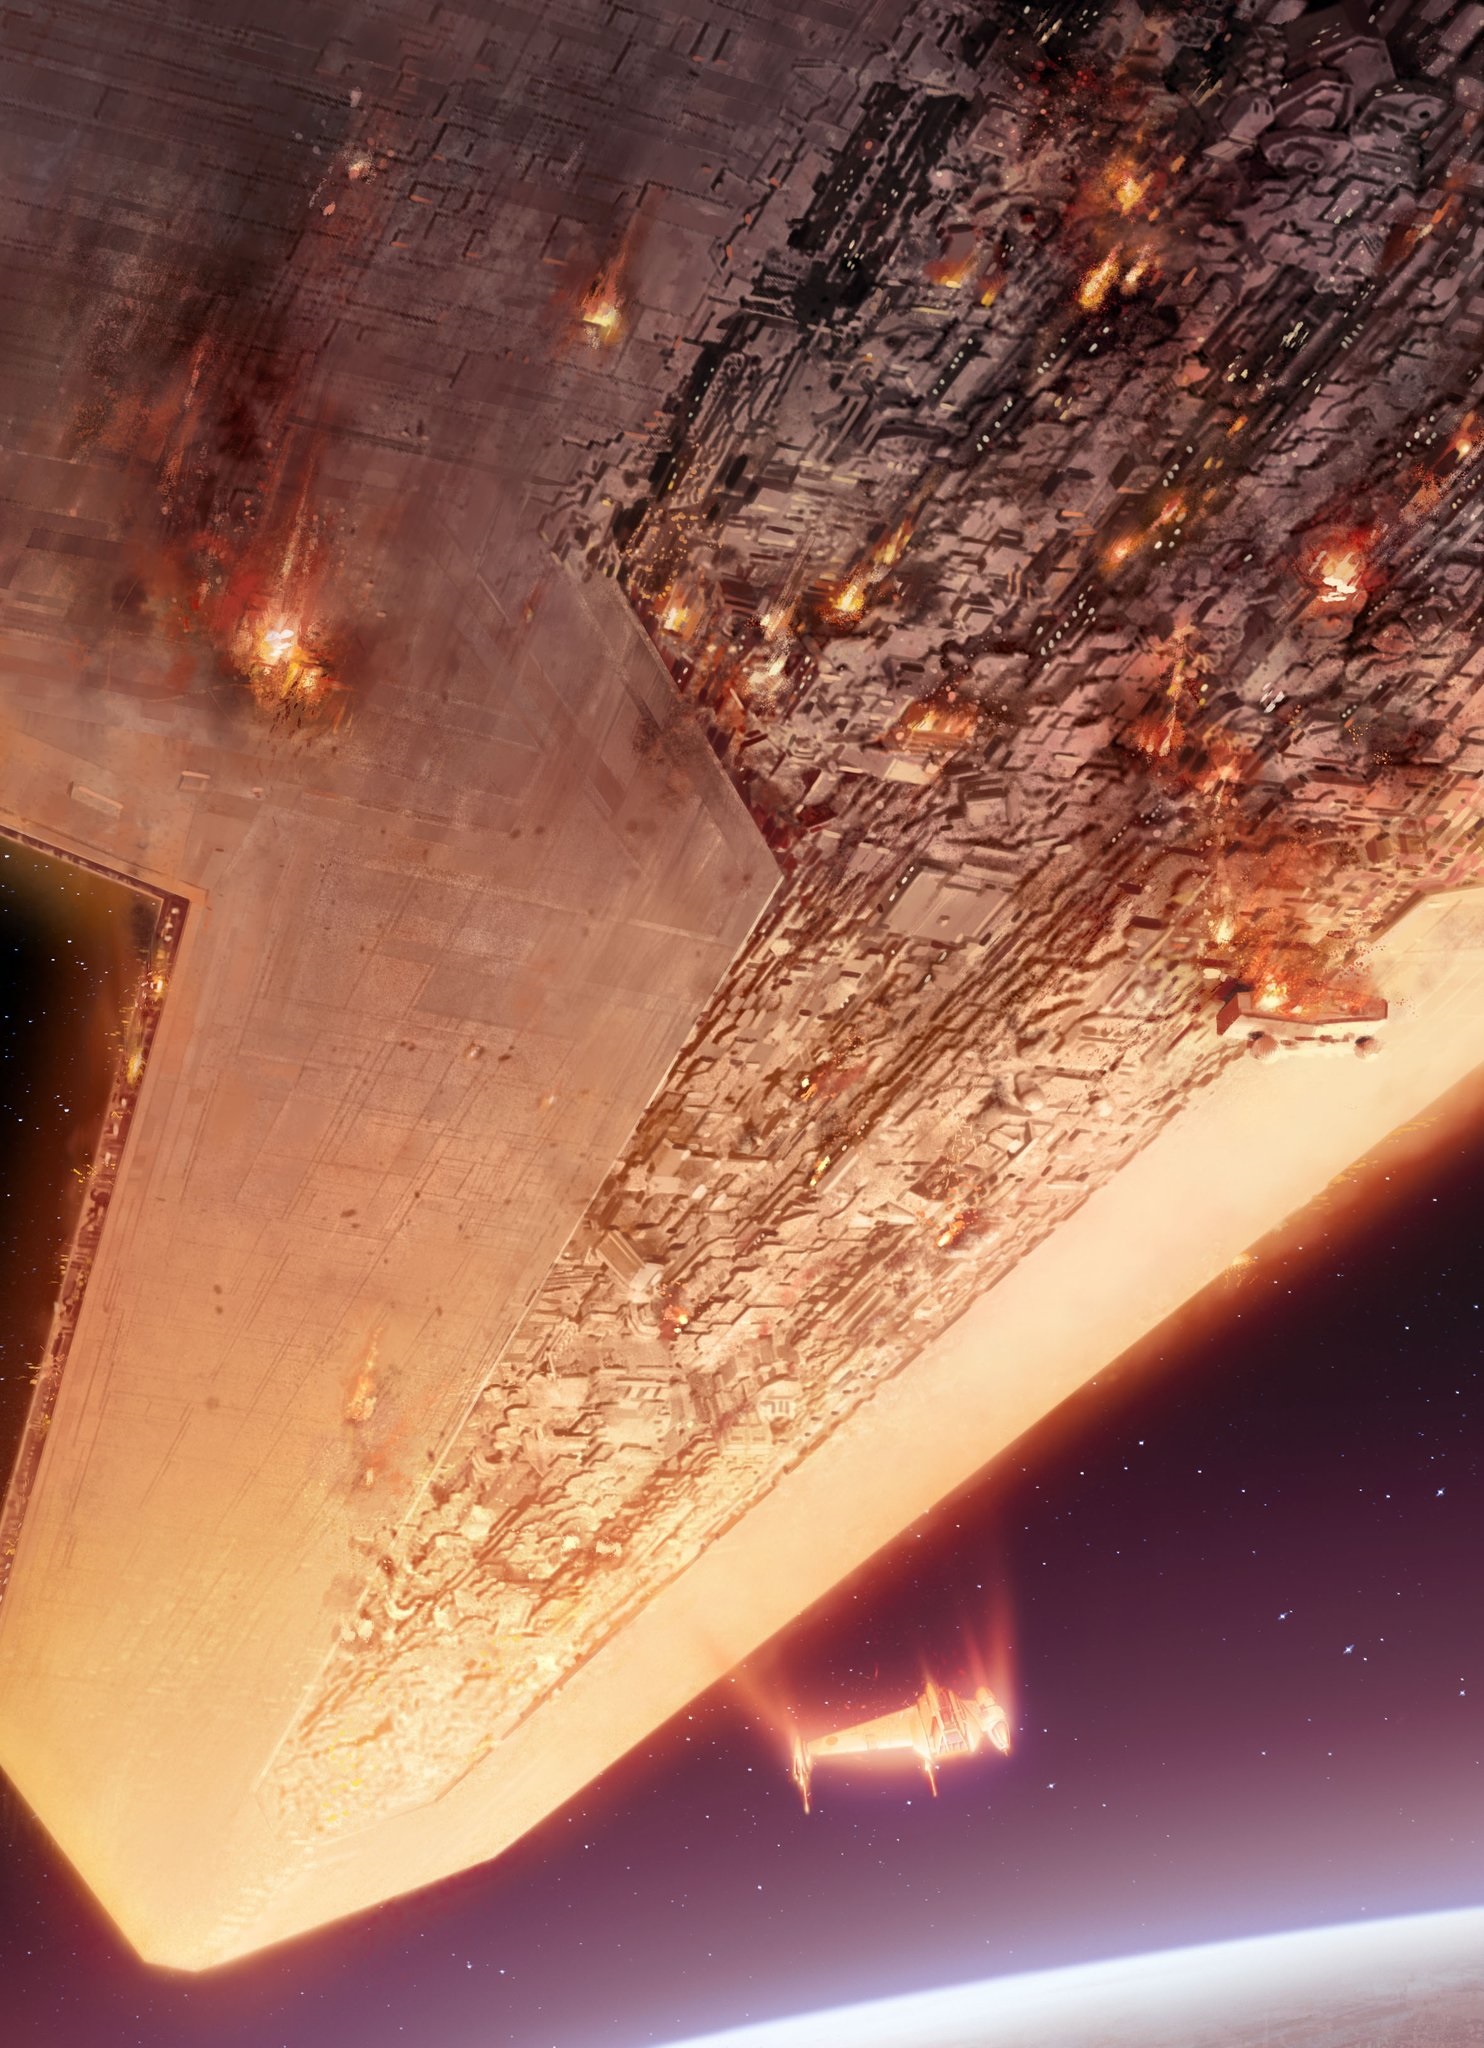
During the battle, the Imperial Navy formed a strong defensive perimeter around the Super Star Destroyer Ravager, impeding the New Republic's offensive. As the battle intensified, Captain Groff of the Star Destroyer Punishment panicked and crashed his ship into a New Republic vessel, creating an opening for New Republic Commodore Kyrsta Agate to attack the Ravager. The Super Star Destroyer quickly disabled Agate's Starhawk-class battleship Concord, but Agate managed to ensnare the Ravager with her ship's tractor beam. The destruction of the Ravager shifted the battle's momentum in favor of the New Republic. Randd, the commanding officer, abandoned his post and fled in an escape pod.
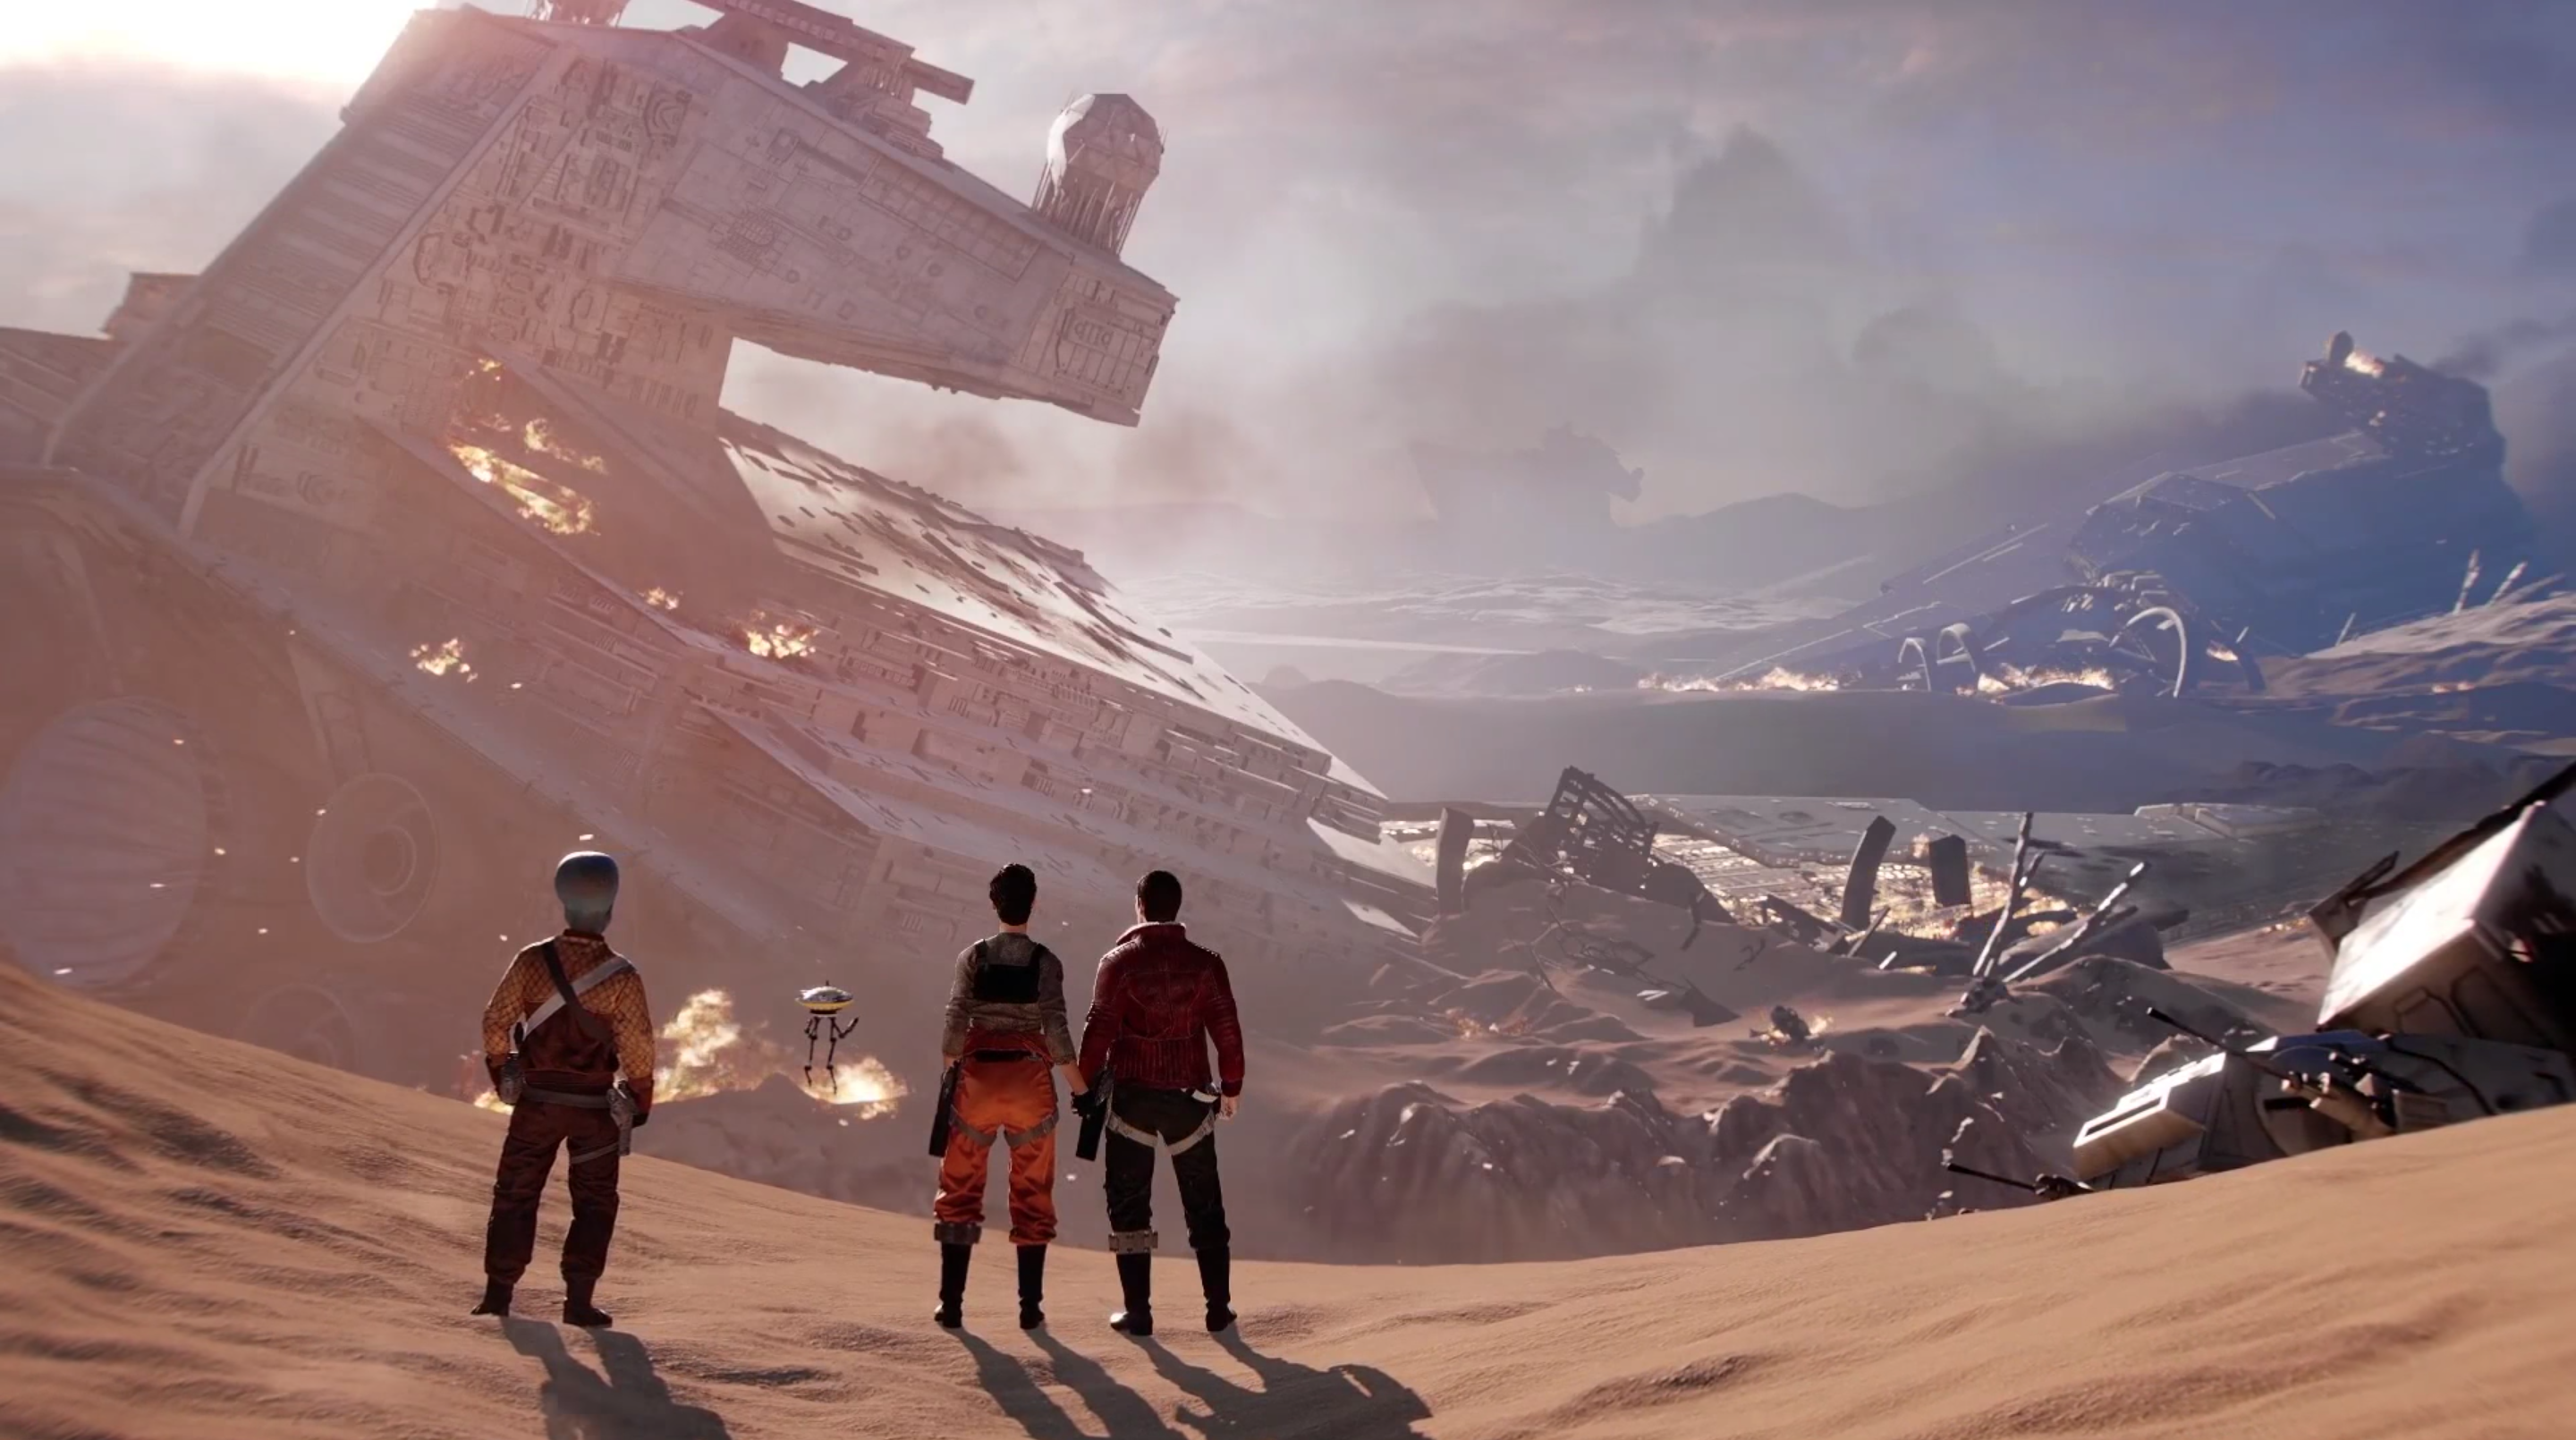
The growing New Republic Defense Fleet, needing ships to bolster its forces, launched a campaign to board and capture Imperial vessels during the battle. Lieutenant Thane Kyrell led a New Republic boarding party onto the Imperial-class Star Destroyer Inflictor in an attempt to capture their first Star Destroyer. However, the attempt failed when Captain Ciena Ree deliberately crashed the ship onto the planet's surface. Meanwhile, Grand Admiral Sloane allied with her New Republic adversaries Norra Wexley and Brentin Lore Wexley to prevent Counselor Rax from detonating Jakku and annihilating both Imperial and New Republic forces.
Following the loss of the Ravager and the death of Gallius Rax, Grand Vizier Mas Amedda signed the Galactic Concordance with the New Republic, officially ending the Galactic Civil War and resulting in the Empire's surrender to the Republic. According to the terms of the Empire's surrender, the Imperial government was dissolved, and all surviving Imperial military officers were labeled as war criminals. Despite the Empire's surrender, some Imperial captains continued fighting at Jakku, intentionally crashing their ships onto the surface to take their enemies with them. Other Imperial captains fled with their warships into the Unknown Regions, using secret coordinates provided as part of the Contingency. Meanwhile, Grand Admiral Sloane, the highest-ranking officer in the Imperial Navy, along with Brendol Hux, his son Armitage Hux, and several child soldiers, rendezvoused in the Unknown Regions with the Emperor's command ship Eclipse, which had been sent ahead as part of the Contingency.
Disbandment
The Battle of Jakku marked a devastating defeat for the Empire, decisively shifting the war's outcome in favor of the New Republic. With few remaining Star Destroyers, the severely weakened Imperial fleet was restricted to designated areas within the Core Worlds and the Inner Rim. As discussions about the Empire engaging in diplomatic talks with the New Republic arose in the month after the Battle of Jakku, many anticipated its imminent collapse and surrender. Unbeknownst to the rebels, Imperial forces under Grand Moff Randd and Commander Nash Windrider had secretly used this time to gather their ships in the Queluhan Nebula, concealing them from enemy sensors, with the intention of launching another assault on the Republic. With a restored chain of command and the factionalism that had previously plagued the Empire eliminated—along with upgrades to their TIE/LN starfighters—the Imperial Navy was prepared to strike again.
Ultimately, the remnants of the Empire were defeated by the New Republic. Under the terms of the Galactic Concordance, the former Empire was compelled to disarm its military forces and pay substantial war reparations. A group of Imperial hardliners, following the Contingency, relocated to the Unknown Regions, where they remained for the next three decades. During this period, they reorganized themselves as the First Order, a military junta that admired the New Order and sought to "restore it" to the Galaxy. In 28 ABY, an individual at a cantina on Pamarthe expressed their belief that the Imperial fleet still existed and would strike again.
In 21 ABY, the First Order initiated an expansion of the old Imperial fleet, rebranding itself as the First Order Navy. To finance this rearmament program, the First Order funneled significant funds to sympathetic Centrist senators in the New Republic, such as Lady Carise Sindian. Lady Carise used these funds to arm and train the Amaxine warriors, a paramilitary group led by Imperial loyalists, including Arliz Hadrassian. To conceal these funds, the First Order and their Centrist collaborators supported the Nikto crime lord Rinnrivin Di's cartel. The profits generated by Rinnrivin's cartel were then channeled back to shadow corporations in the Outer Rim managed by Centrists, who transferred the funds back to the First Order. Despite an investigation launched by Senators Leia Organa and Ransolm Casterfo that neutralized Rinnrivin and the Amaxines, the First Order Navy successfully rebuilt its fleet by the time of the Cold War.
Organization
Administration
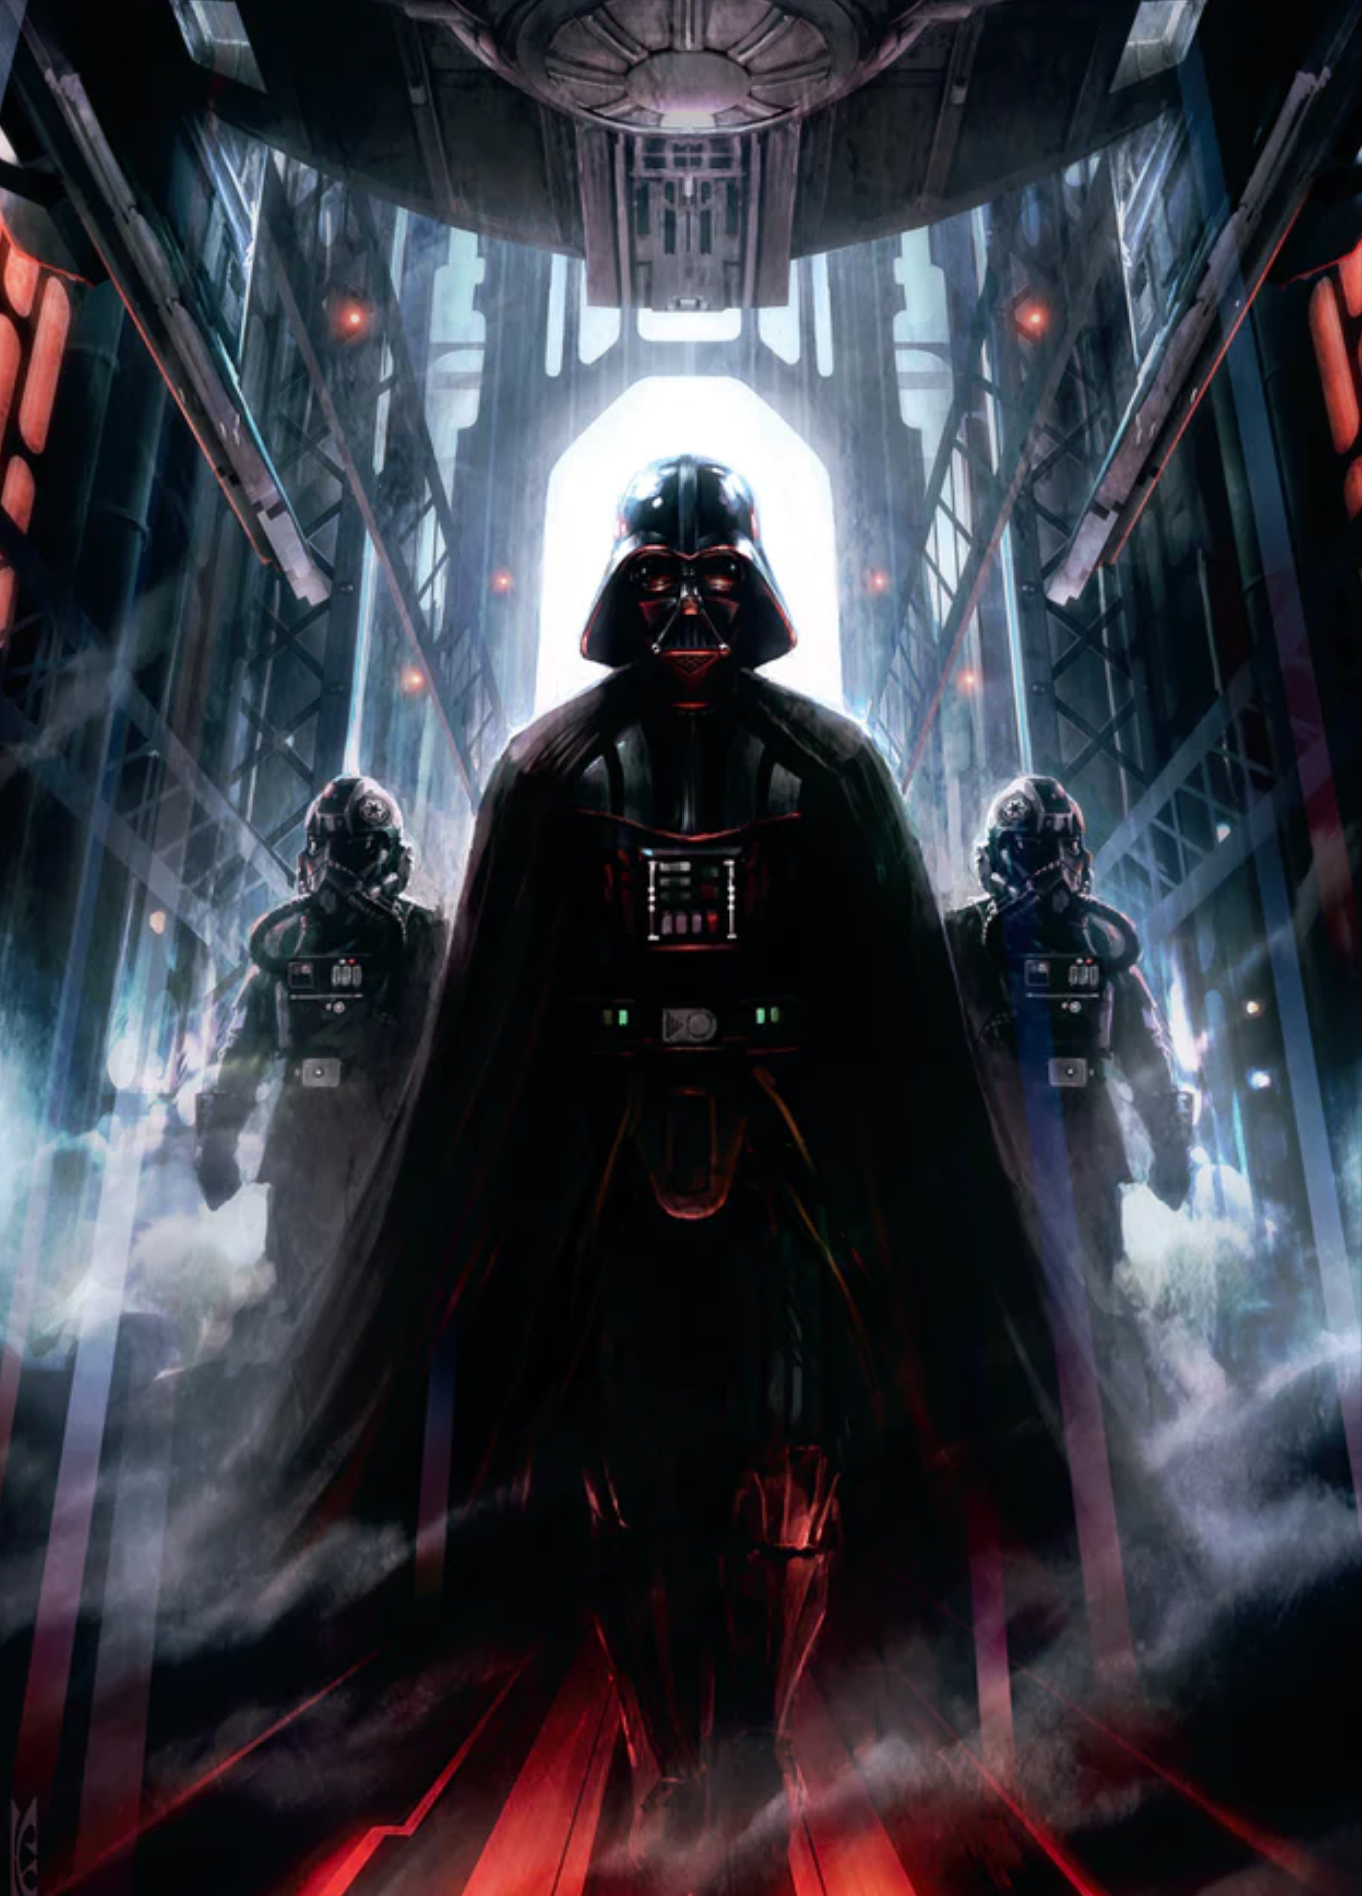
The Imperial Navy was under the command of Galactic Emperor Palpatine, who held the highest position in the Imperial military and political structure. During the early years of the Imperial era, Darth Vader, the Emperor's right-hand man, exercised de facto authority over the Imperial forces, including the Navy, as acting Commander-in-Chief. However, at the height of the Galactic Civil War, Palpatine elevated Vader to the official role of supreme commander of the Imperial fleet, granting him complete authority over the Navy and personal command of Death Squadron. While the overall Supreme Commander oversaw the entire Imperial armed forces, Vader, in his new capacity, directly commanded Imperial Navy operations. This seemingly complex system of overlapping ranks and commands was intentionally designed by Palpatine to foster competition among military officers and make organizing a coup difficult, if not impossible.
The Imperial High Command, a council that advised the Supreme Commander on military matters, dictated long-term plans and campaigns. The Navy was represented by the Admiralty, which served as the overall leading unit of the navy and included the Imperial Navy High Command. Day-to-day operations were drafted by the Joint Chiefs of the Military based on the IHC's recommendations and communicated down the chain of command by the Chief of the Imperial Navy, the highest-ranking officer in the fleet.
Naval Command and Control, the Naval chiefs and Fleet Command oversaw the tactical strategy of the Navy, controlling the Imperial Navy's sub-capital and capital ships, reassigning ships to hotspots, and planning long-term strategy under the supervision of both the Emperor and the Joint Chiefs. The Imperial Starfighter Corps also contributed to overall naval operations and opposed the Admiralty's support for Kuat Drive Yards' near-monopoly on capital ship production, believing that TIE/LN fighters were intentionally weakened to ensure continued production and purchases from the company. Admirals and captains were responsible for their respective ships and were informed of any long-term plans.
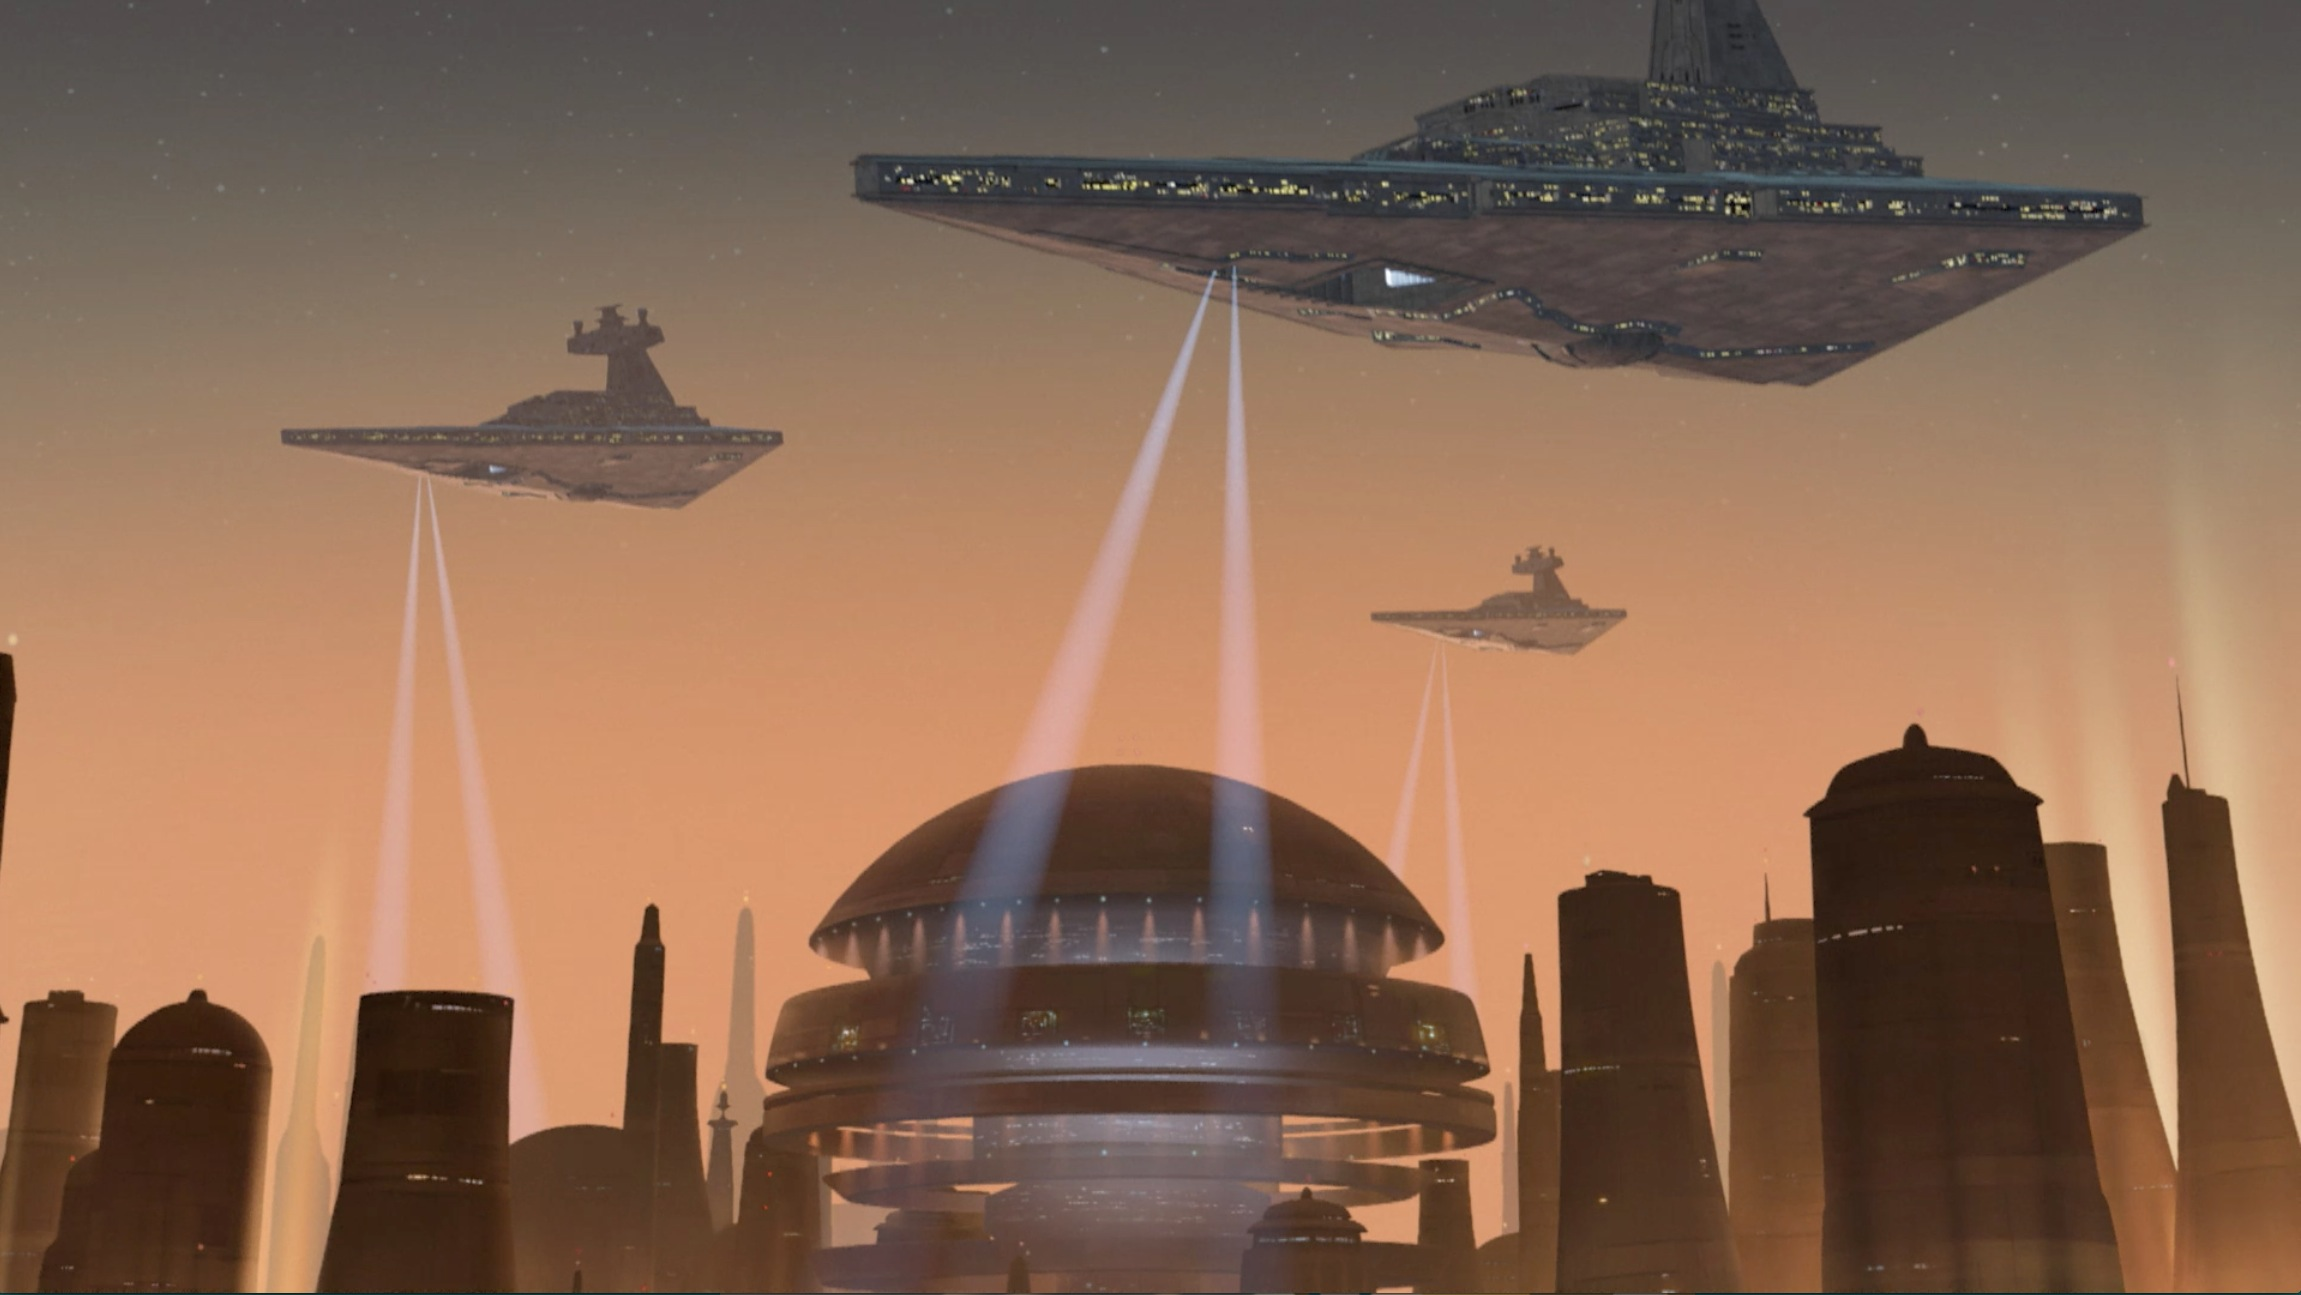
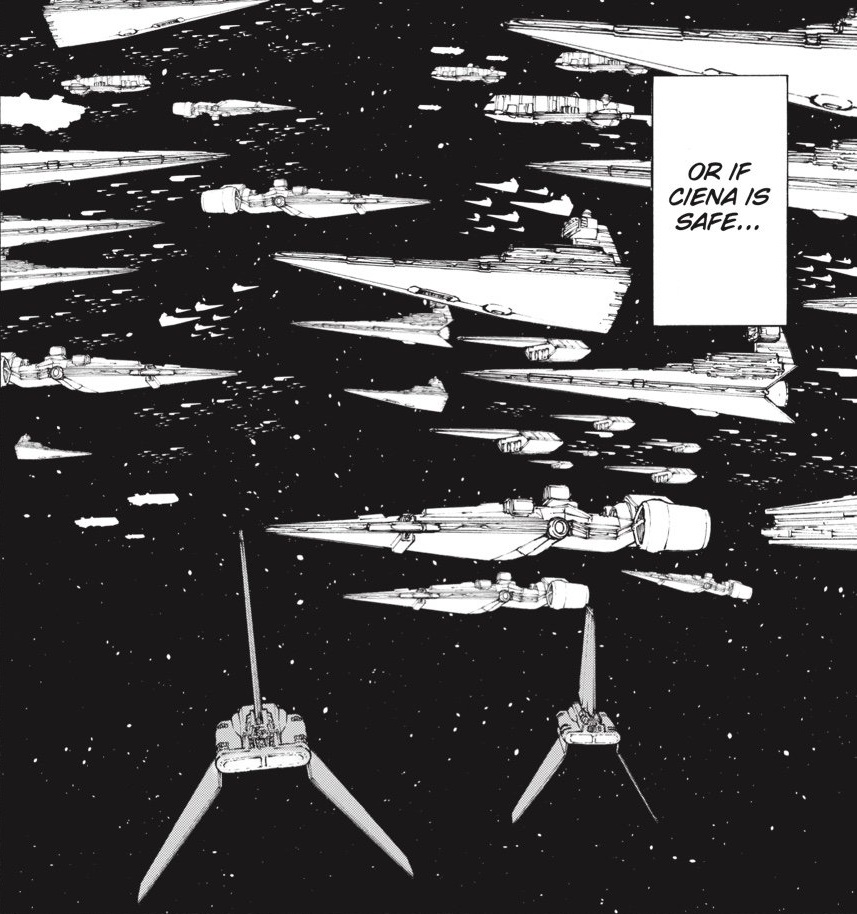
It was uncommon for officers to be appointed captain of a Star Destroyer until middle age, while being assigned captain of smaller ships was considered demeaning. The Imperial Starfleet often amassed ships to intimidate various worlds, and officers sometimes gathered their ships to demonstrate their power and impress superiors, with the number of ships and personnel under one's command reflecting their importance. With the Emperor commanding the most ships and personnel, he was regarded as the most important. The Navy also collaborated with the Imperial Security Bureau, which stationed an internal affairs officer on every Imperial-class Star Destroyer and Executor-class Star Dreadnought, while the Naval Intelligence Agency, overseen by Imperial Intelligence, provided crucial information for the armada.
Order of battle

To patrol the vast territories of Imperial space, the Empire divided its naval forces into fleets of varying sizes, commanded by an admiral, a Fleet Admiral, or a Grand Admiral. The Imperial Navy used naval divisions to organize its vessels, while sector fleets controlled specific sectors of the galaxy, such as the Lothal sector fleet, the Anoat sector fleet, and the sector fleet that defended Endor. System squadrons were also deployed and could supplement mainline naval squadrons, such as Death Squadron, which remained mobile.
However, other fleets were mobile and deployed to conflicts as needed. These included the Third Fleet, 7th Fleet, Eleventh Fleet, 14th Sector Fleet, and the 15th Deep Core Reserve Fleet. These fleets could contain smaller squadrons within their structure, such as the 7th Fleet having a Star Destroyer squadron. The Scarif fleet was stationed over Scarif to protect the Empire's military secrets.
These fleets typically consisted of half a dozen Star Destroyers as their core and were supported by various carriers, starfighters, transports, gunboats, and other support ships. The specific composition and size of a fleet varied significantly depending on its mission and the political influence of its commander. Task forces were ship units smaller than fleets, usually commanded by a commodore or admiral whose flagship was an Imperial-class Star Destroyer. Notable task forces included the 96th, the 103rd, the 125th, the 231st, and the task force under Admiral Carlou Gendling. Flotillas, such as the flotilla that defended Sentinel Base, were also used by the Imperial Navy.
At the height of the Galactic Empire, approximately 25,000 Imperial-class Star Destroyers were in service, while 20% of the Empire's starfighter fleet consisted of the TIE/IN interceptor and other newer models, developed in response to the Alliance's faster ships, such as the RZ-1 A-wing interceptor. However, investigations into the bank accounts of senior KDY and Sienar executives after the war revealed that a large number of those ships, the quarter that Sloane had discovered missing, may have never been built and were simply used to divert funds into other projects or personal accounts.
Personnel
Specializations
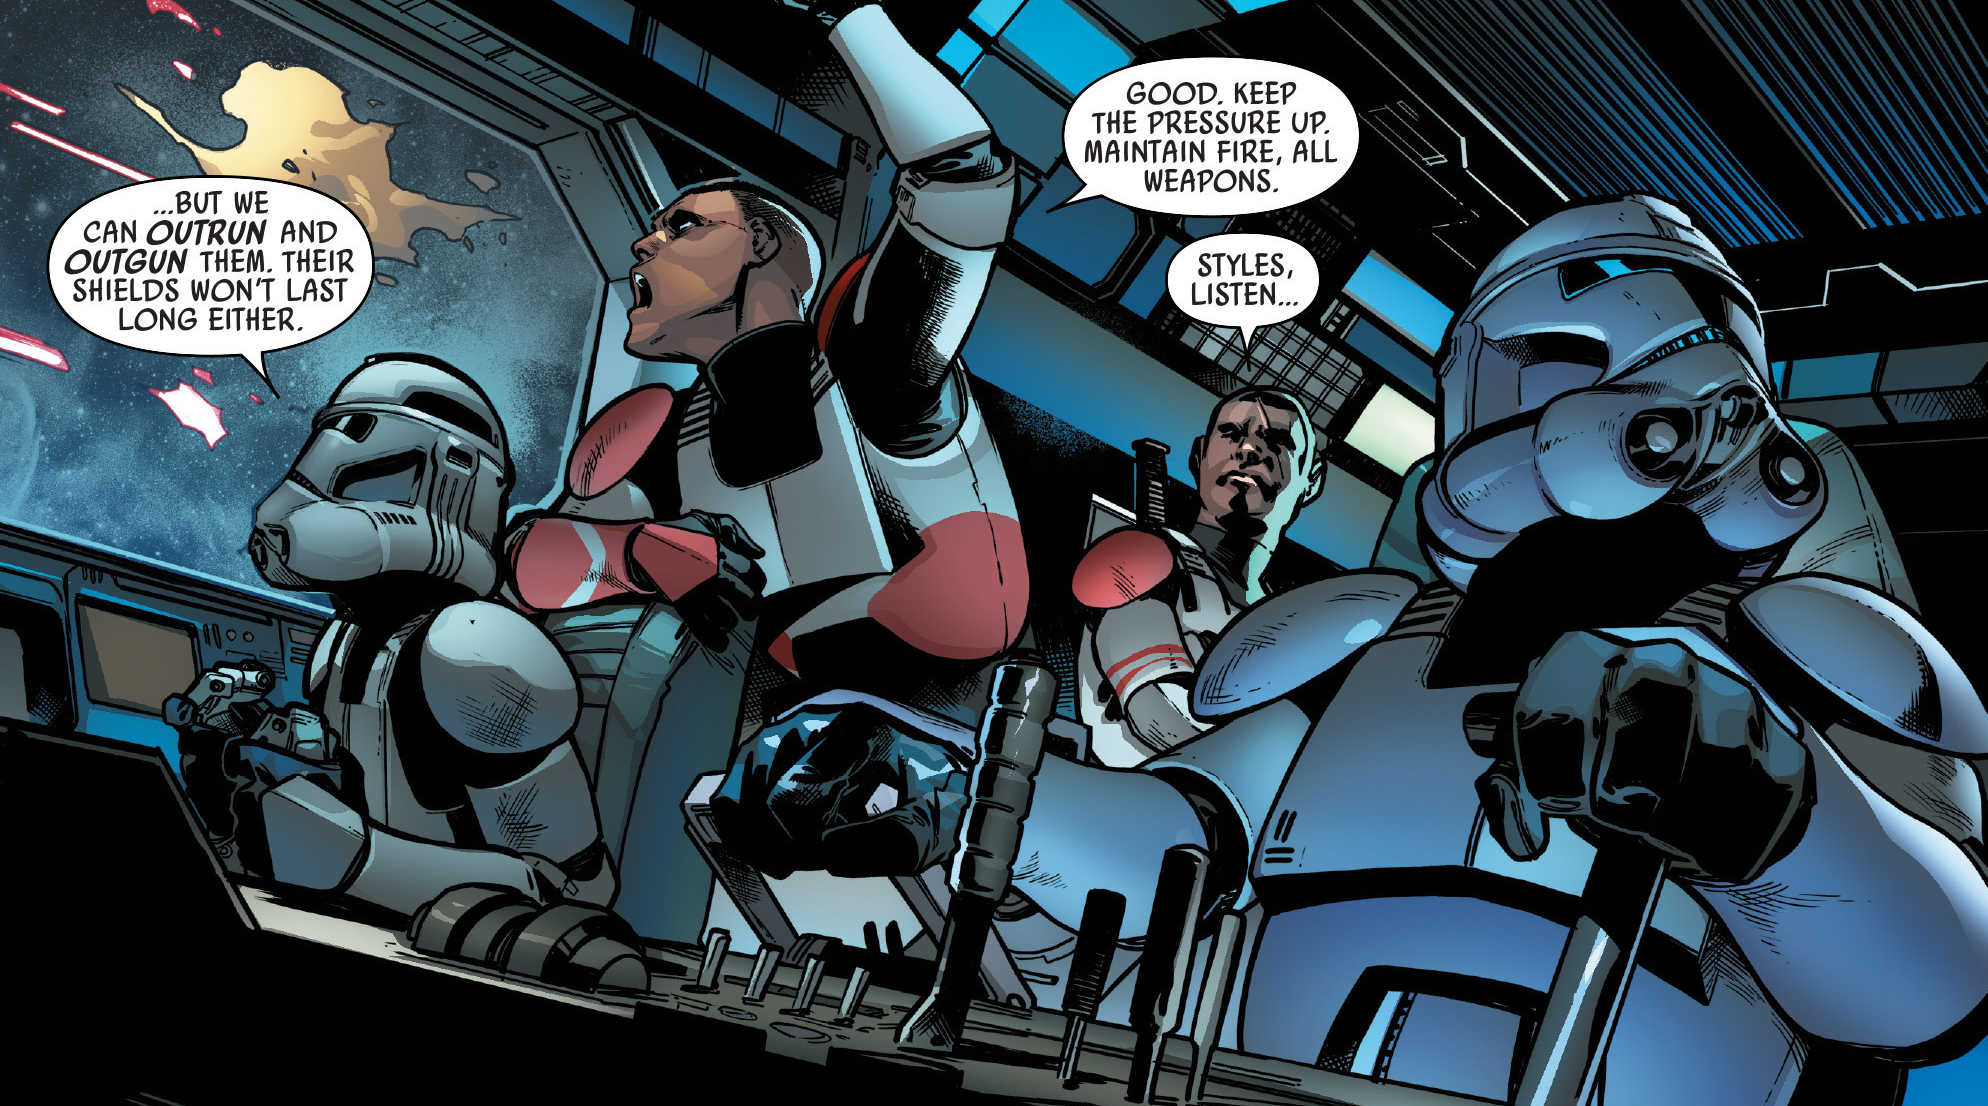
While the Imperial Navy was renowned for its imposing dagger-shaped ships, Imperial personnel were essential for operating them. Personnel were classified as either officer or enlisted, with officers receiving higher pay and more frequent visitation rights for their families, particularly those from the Core Worlds, who often limited communication with their families to demonstrate their commitment. Officers were encouraged to consume a nutritional slurry instead of regular food to conserve resources, but senior officers could indulge in lavish meals without appearing weak, and commissaries on Imperial stations offered exotic foods at a premium price.
Grade 4 Fleet logistics liaison Arvira observed that the Imperial Navy operated more on paperwork than action, noting that officers spent most of their time on reports and forms. Logistics liaisons like Arvira were responsible for keeping Star Destroyer crews fed, battle-ready, and clothed through extensive paperwork. Arvira believed that desk jobs within the Navy were as stressful as combat posts, despite the common perception that desk work was simple. All officers and stormtroopers were required to maintain combat readiness and pass regular certifications in self-defense, weapon handling, and vehicle operation, although these requirements were somewhat relaxed at higher ranks.
Like the Imperial Army, the Navy initially relied on clone troopers and their class of navy officers before transitioning to volunteers and conscription under Project War-Mantle. The enlisted ranks formed the majority of Imperial personnel, filling crucial roles in maintaining, operating, and supporting the Imperial fleet, with positions such as Imperial Navy Troopers, including their Death Star counterparts, flight commanders, duty officers, and technicians. Although only ten percent of TIE pilots graduated from the Imperial pilot training program, all pilots were expected to maintain and repair all single- and dual-pilot craft and often flew low over areas to remind them of Imperial power. Gambling was strictly prohibited within the military, with severe penalties for those caught. Those who shirked their duty could be reported for cowardice.
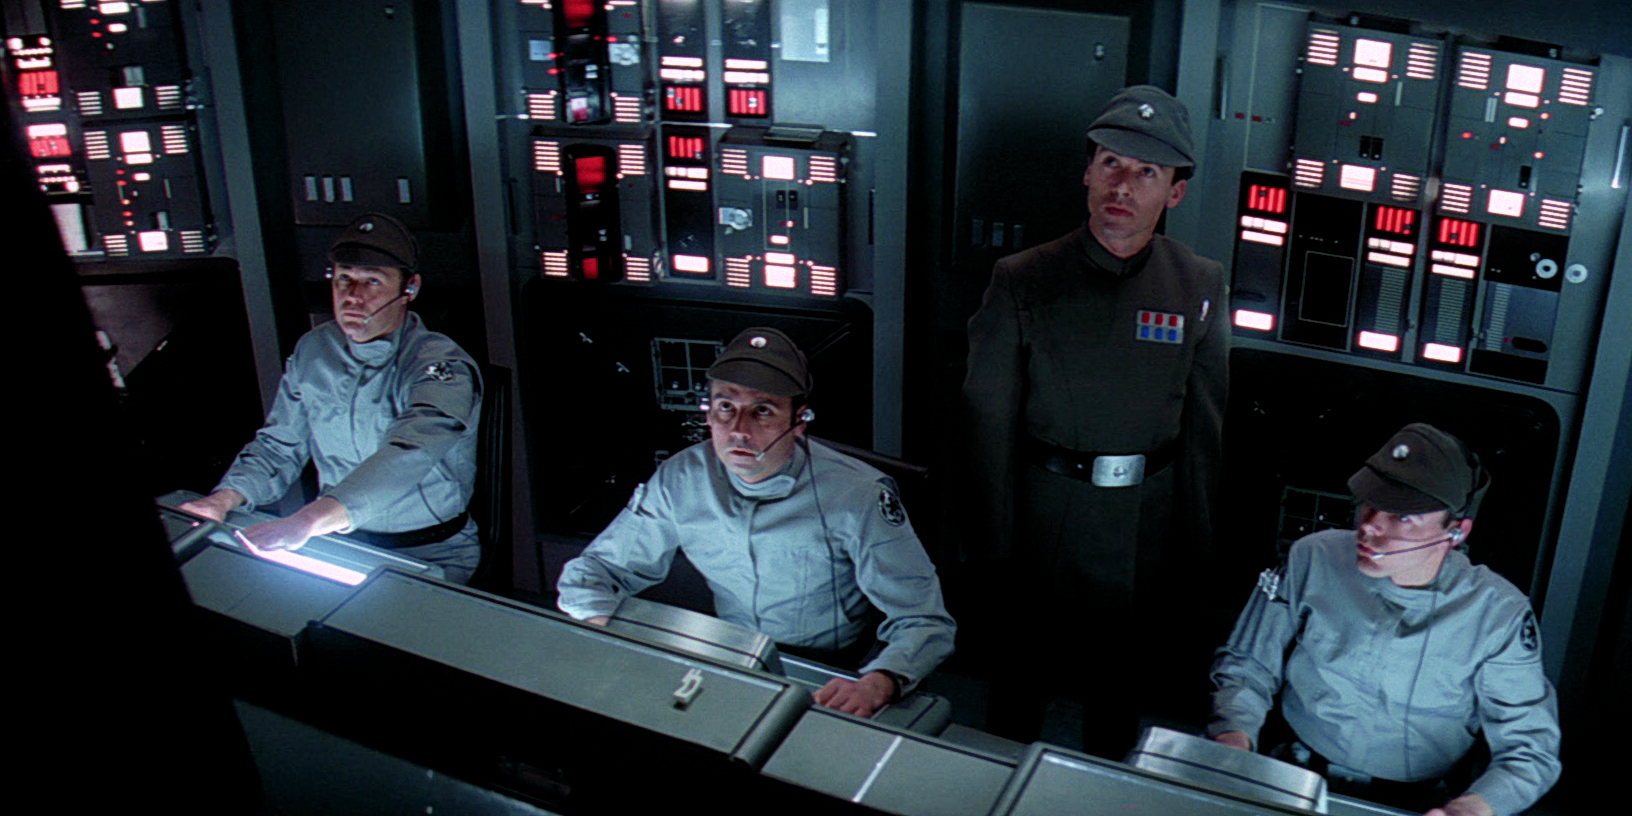
Crewmen often worked in sunken data pits on capital ship bridges, which indicated command hierarchy, and oversaw all data and intelligence transfer throughout the vessel, providing auxiliary navigational assistance to other ships in the system. While not all Imperial facilities used sunken data pits, Wilhuff Tarkin favored their design and had them installed at the prefabricated Imperial facility known as Sentinel Base. Imperial weapons technicians operated the turbolaser batteries on Imperial ships, while elite gunners manned the Death Star's superlaser.
Fleet logistics liaisons from the logistics corps handled logistical operations on Imperial Navy vessels. A rivalry existed between the Navy and the Imperial Army, with some naval officers accusing their army counterparts of being pompous, unimaginative, and arrogant. A rivalry also existed between Imperial Army and Imperial Navy pilots because the latter often received better public recognition through the HoloNet News. The Imperial MSE-6 series repair droid was used on most Imperial vessels to clean the floors.
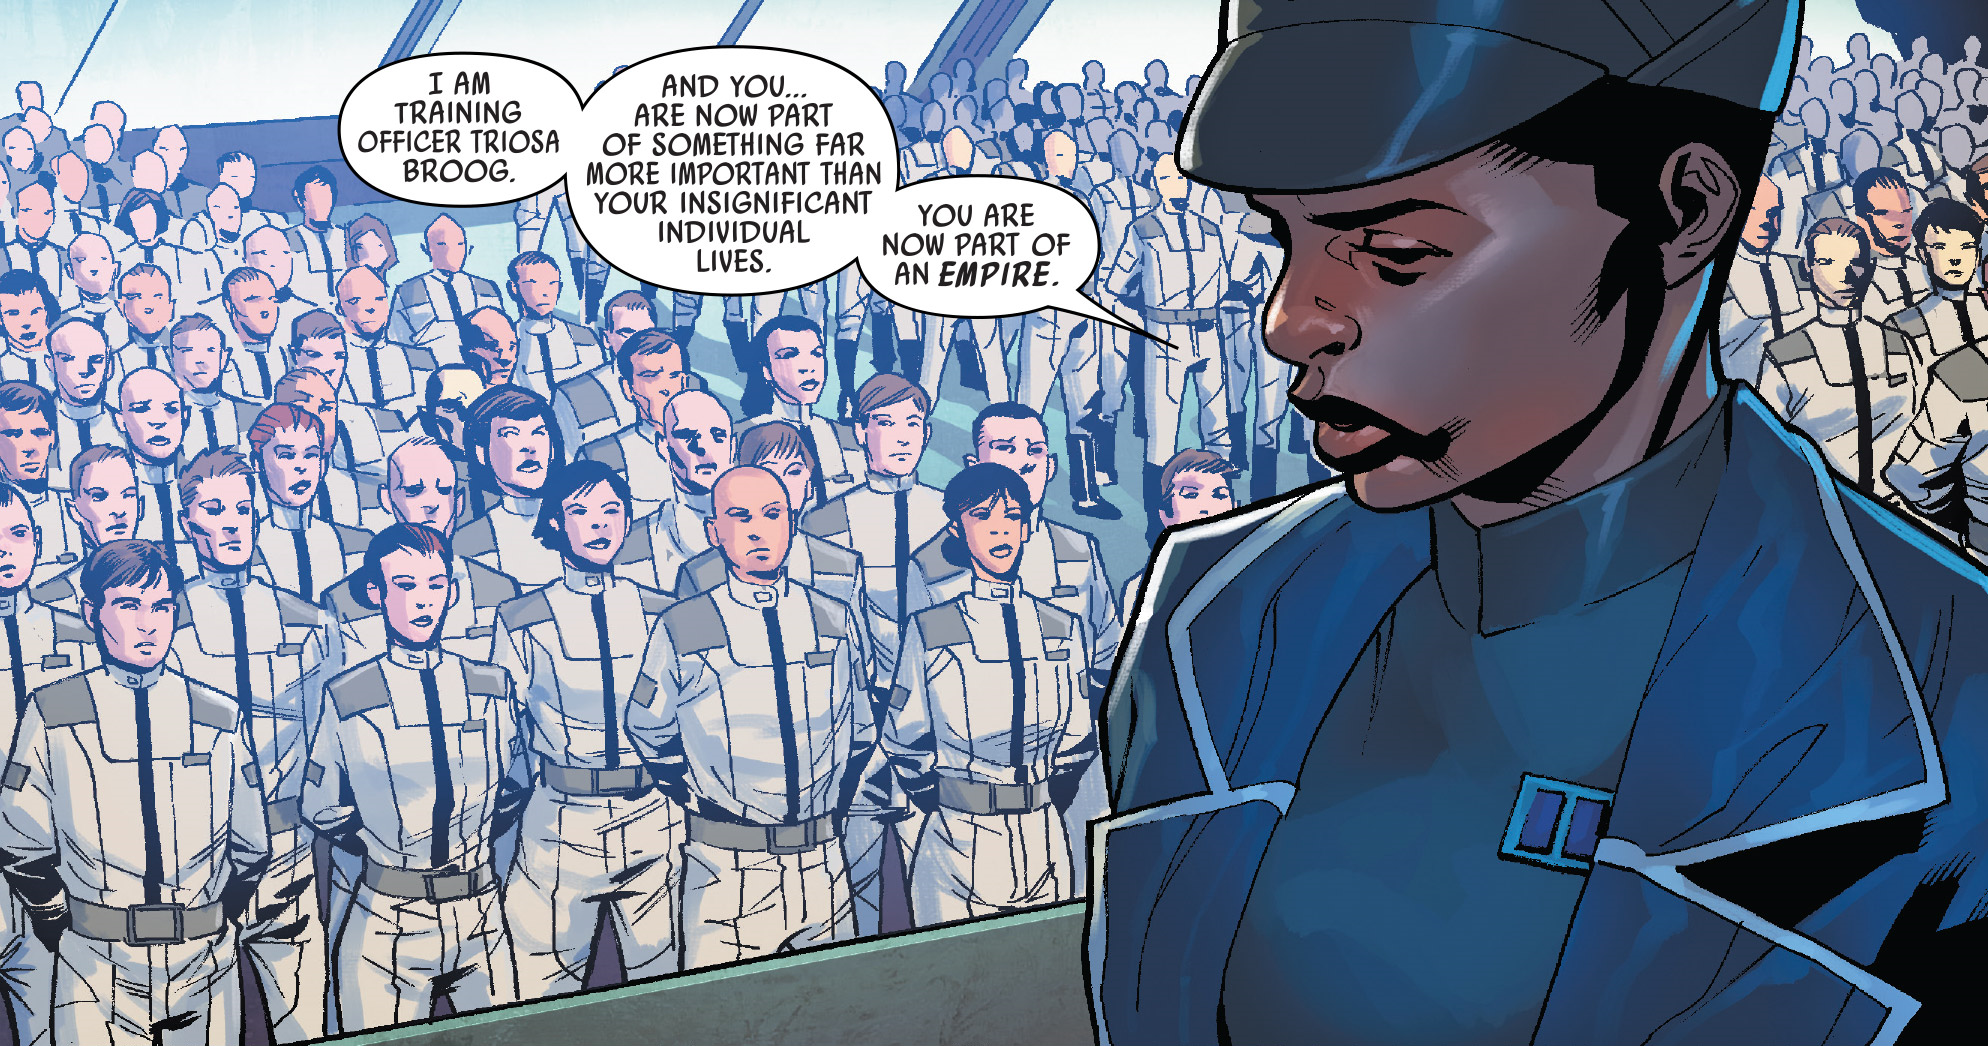
Training
Attracted by promises of good pay and access to advanced ships, prospective Imperial cadets could attend preparatory schools, such as the Academy for Young Imperials on Lothal, before being sorted into advanced Imperial academies for further training. However, not all candidates continued their training, with some returning to their previous lives or failing to meet the requirements. Most slots in the Inner Rim were reserved for citizens of former Separatist worlds to increase their loyalty.
After completing preparatory school, trainees were sorted alphabetically into academies such as the Arkanis Academy or the Carida Academy, with the Royal Imperial Academy on Coruscant being the most prestigious. Imperial officer training was rigorous, with frequent inspections and courses on Core Worlds Classical Culture, Security Protocols and Interrogation Techniques, Large Vessel Design, and Amphibious Battle Tactics, along with training in flight simulators. Imperial TIE pilots were trained to prioritize their assigned tasks over assisting fellow pilots. Recruits could also participate in athletic activities and compete professionally in Naval Corps Boxing for the chance to win the belt. Cadets were separated into tracks such as command or elite flight, and top cadets at the Royal Academy could attend a reception and ball at the Imperial Palace with senior military and government officials.
Upon graduation, trainees were commissioned as lieutenants and allowed a postgraduate visit to their homeworlds. Taking recreational time off was frowned upon, and most Imperial officers remained in service until mandatory retirement or death. The Medal of Honor was a high form of Imperial commendation, second only to the Distinguished Medal of Imperial Honor, awarded for the greatest acts of sacrifice.
Ranks
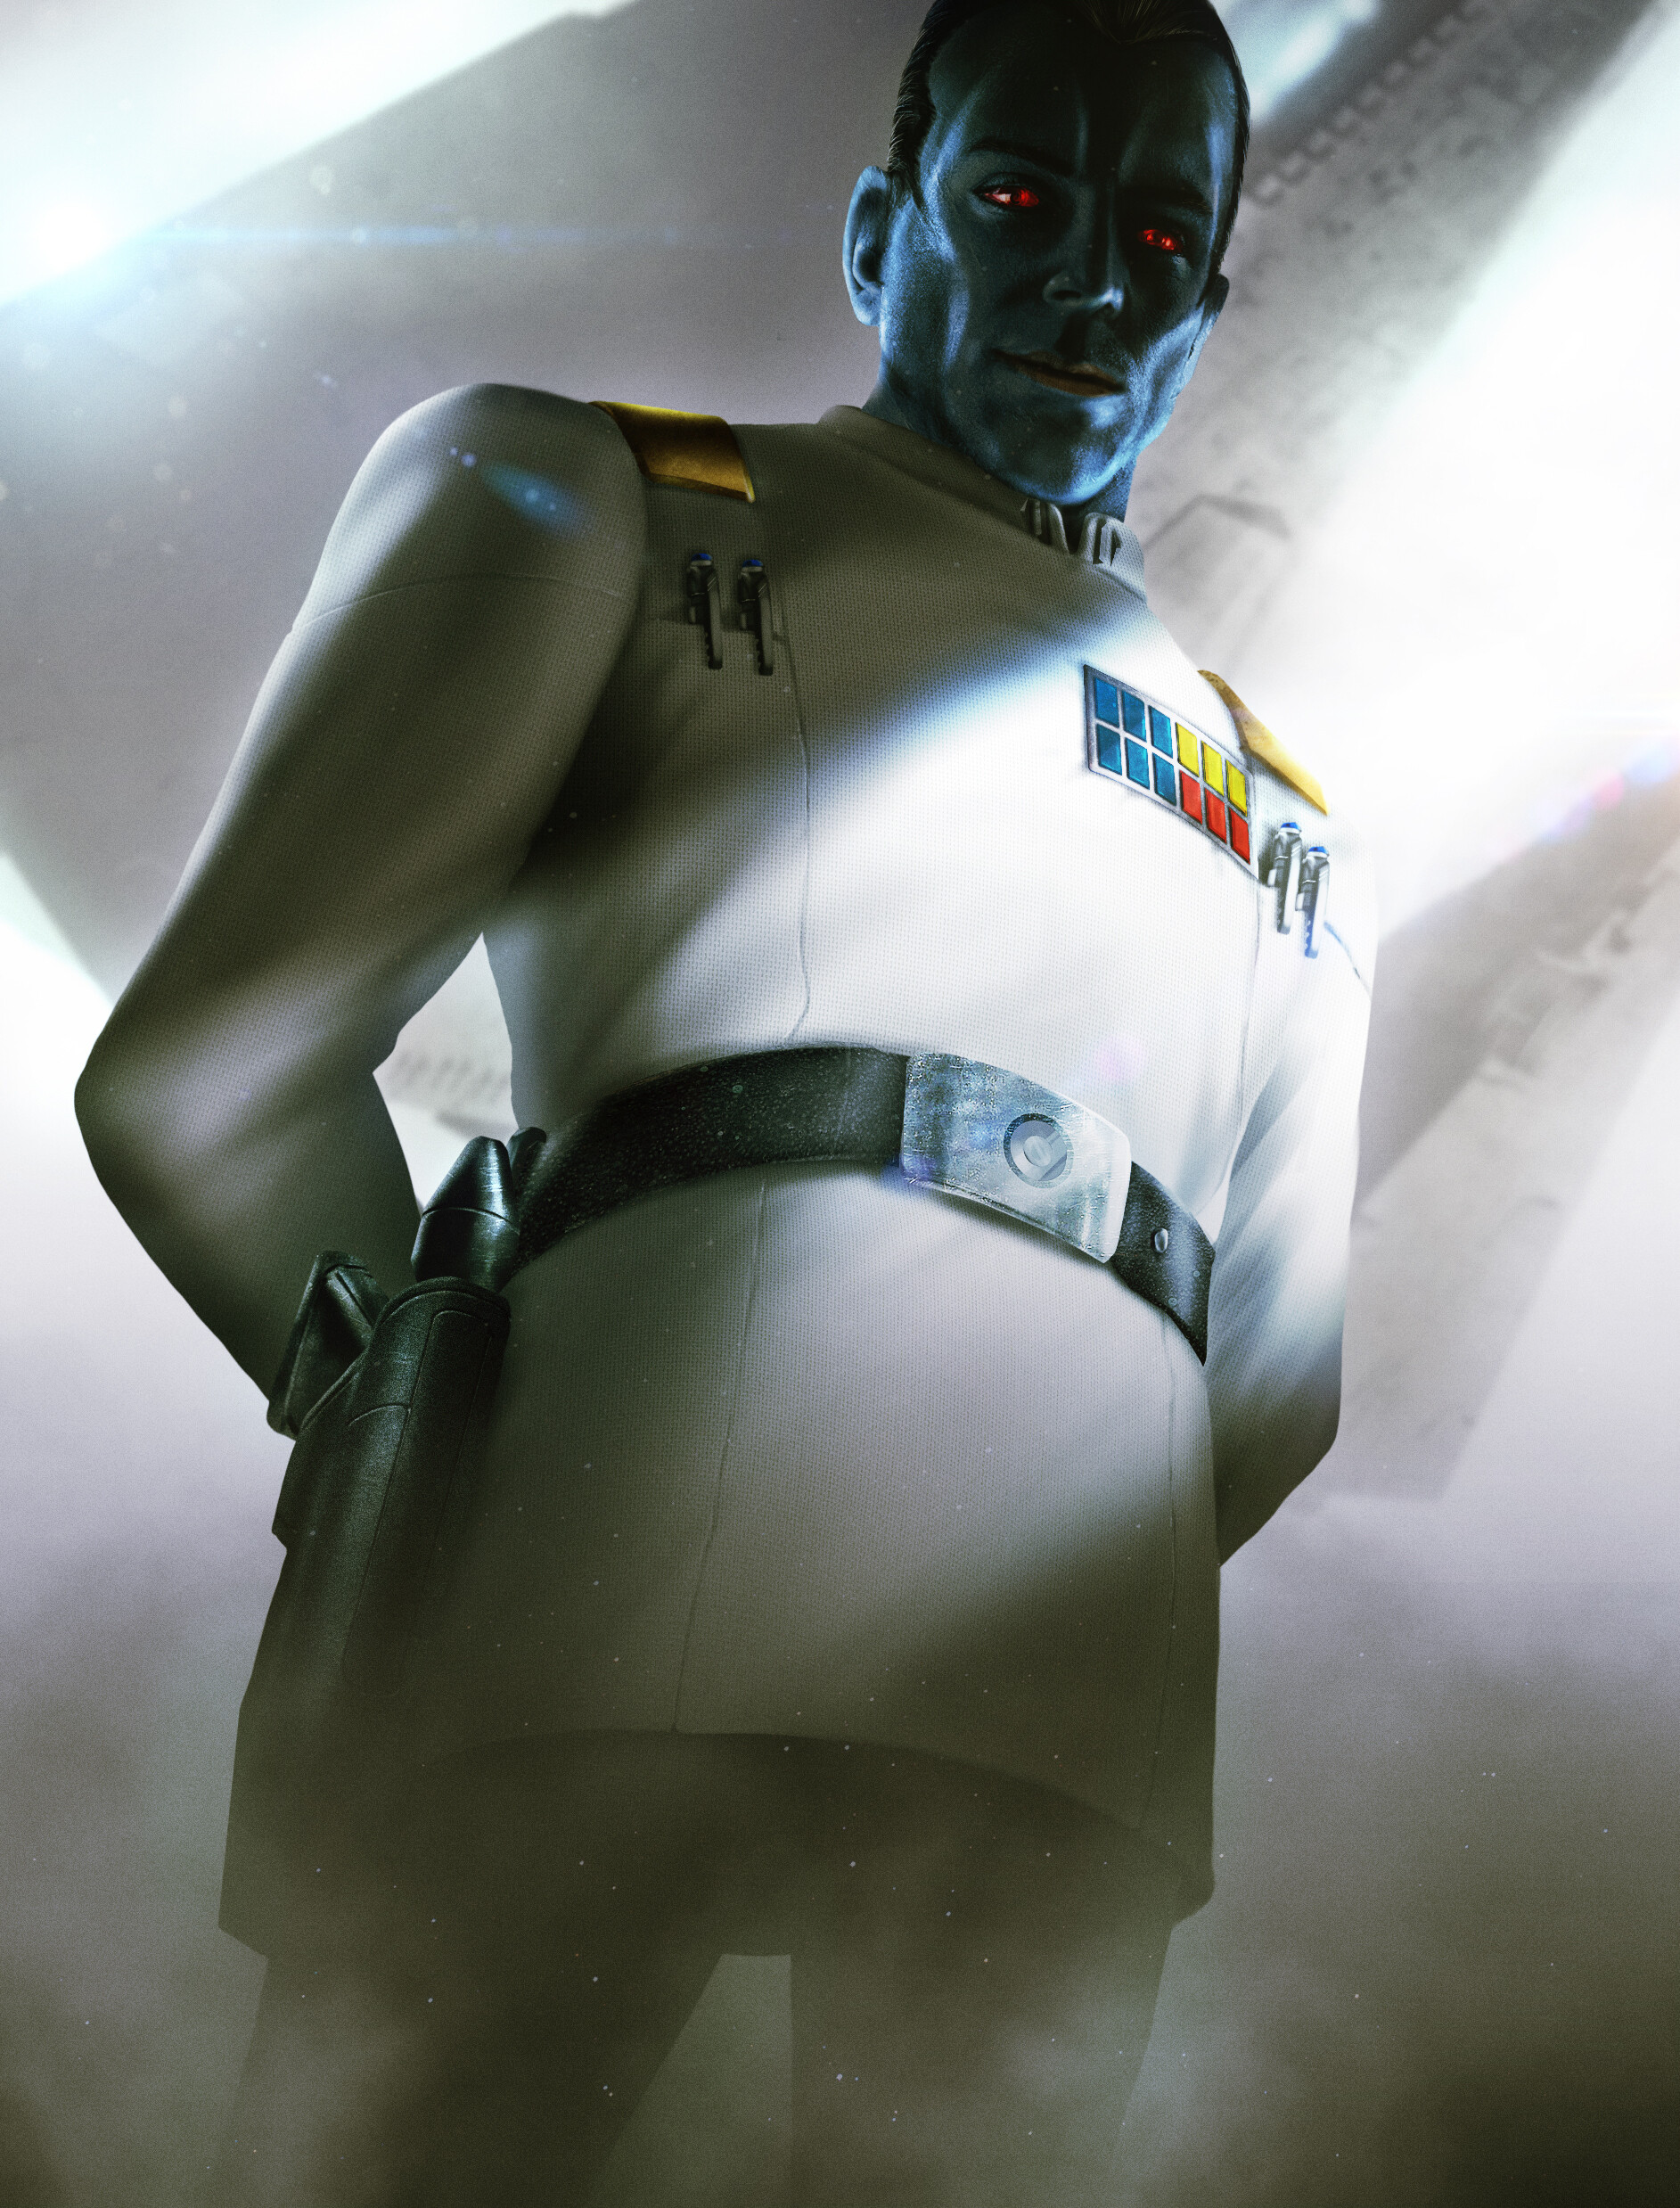
Within the Imperial Navy's officer corps, personnel's ranks were signified through a color-coded rank insignia plaque displaying red, blue, and yellow squares. Admirals could be spotted by their twelve multicolored squares, arranged in six red squares above six blue ones. On the other hand, officers in black uniforms were identified as admirals by six squares, positioned side by side, with four red and two yellow, and they also wielded red-tipped code cylinders, a contrast to the blue-tipped cylinders used by other officers. A captain's rank was shown with six squares, three red over three blue. The highly esteemed rank of Grand Moff was represented by twelve squares, six blue over three red and three yellow. While the majority of high-ranking officers were seen in olive-green drab, and lower-ranking non-commissioned officers wore black uniforms, some officers had the ability to climb the ranks while maintaining their black uniform variant.
The structure of the Imperial Navy, starting with the lowest rank and moving upwards, consisted of: Ensign, Lieutenant (further divided into Junior and Senior Lieutenant), Lieutenant Commander, Commander, Captain, Commodore, Rear Admiral, Vice Admiral, Admiral, Fleet Admiral, and Grand Admiral, the highest standard rank, limited to twelve individuals at any given time. The rank of Admiral of the Fleet was typically held by the Chief of the Imperial Navy, a solitary figure who participated in the Joint Chiefs and provided counsel to the Supreme Commander of the entire Imperial Military.
The term Flag Captain was used to describe a high-ranking officer commanding an admiral's flagship. A Flag officer was a senior officer holding a rank higher than commander. It generally took a period of ten to fifteen years to progress from an ensign fresh out of the academy to the rank of captain. Typically, a captain would wait at least another six years before attaining the rank of commodore. However, the High Command possessed the authority to expedite this process, especially when motivated by political considerations.
When the Rebel Alliance disseminated propaganda suggesting that the Empire's warriors were poor marksmen, fleet authorities mandated that promotions for gunnery officers would be contingent on their confirmed kill ratios. Arvira, a fleet logistics liaison, considered this decision to be a grave mistake, as she foresaw that it would incentivize ambitious gunner crews to target disabled ships instead of active, non-living targets like drones. Indeed, Arvira encountered another problem with this rule in 0 BBY, when gunnery captain Bolvan instructed his crew to refrain from firing on an escape pod fleeing the Tantive IV over Tatooine, as it lacked any detectable life signs. Engaging it would have negatively impacted his blast-to-kill ratio. However, this pod contained the droids C-3PO and R2-D2, with the latter carrying the Death Star plans, which were the very objective the Empire had pursued the Tantive IV for in the first place. After the Empire failed to locate the plans on the Tantive IV, Bolcan realized that the plans were most likely aboard the pod he had allowed to escape, leading him to seek Arvira's assistance in covering up his decision.
Equipment
Imperial uniforms were diverse, reflecting the individual's specialization, and ranged from protective armor to meticulously tailored jackets. High-ranking individuals often donned the distinctive olive-green, double-breasted tunic, complemented by boots, trousers, and a command cap featuring an officer's disk designed by Tarkin himself after the establishment of the New Order. This uniform saw extensive use in both the Imperial Navy and Army, although a black variant was worn by noncoms and stormtrooper officers.
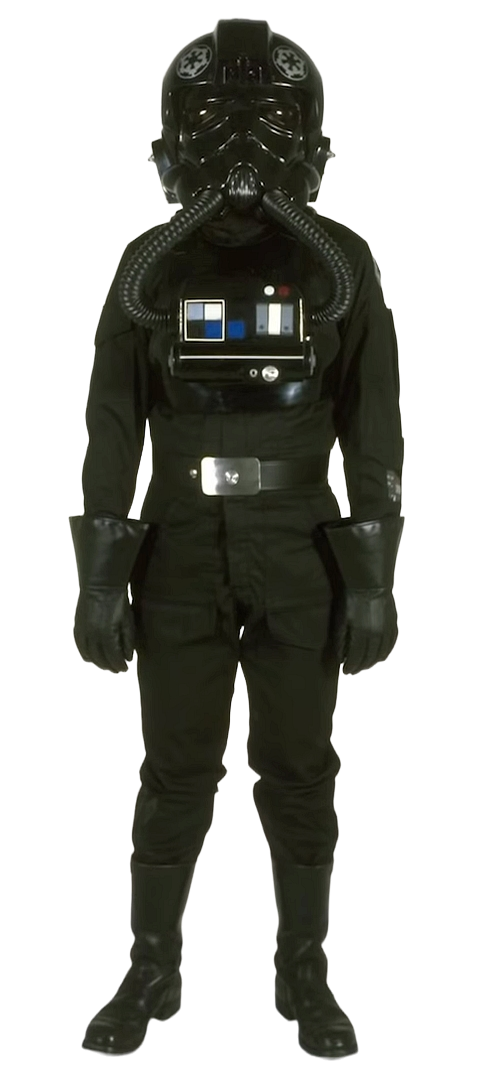
Imperial weapons technicians were equipped with distinctive clamshell helmets and partial body armor, while TIE pilots wore fully enclosed body armor with helmets resembling those of stormtroopers, along with flexible gas transfer tubes at the front of their helmets and other modifications tailored for operating in the vacuum of space.
Starships of the Imperial Navy
Capital ships
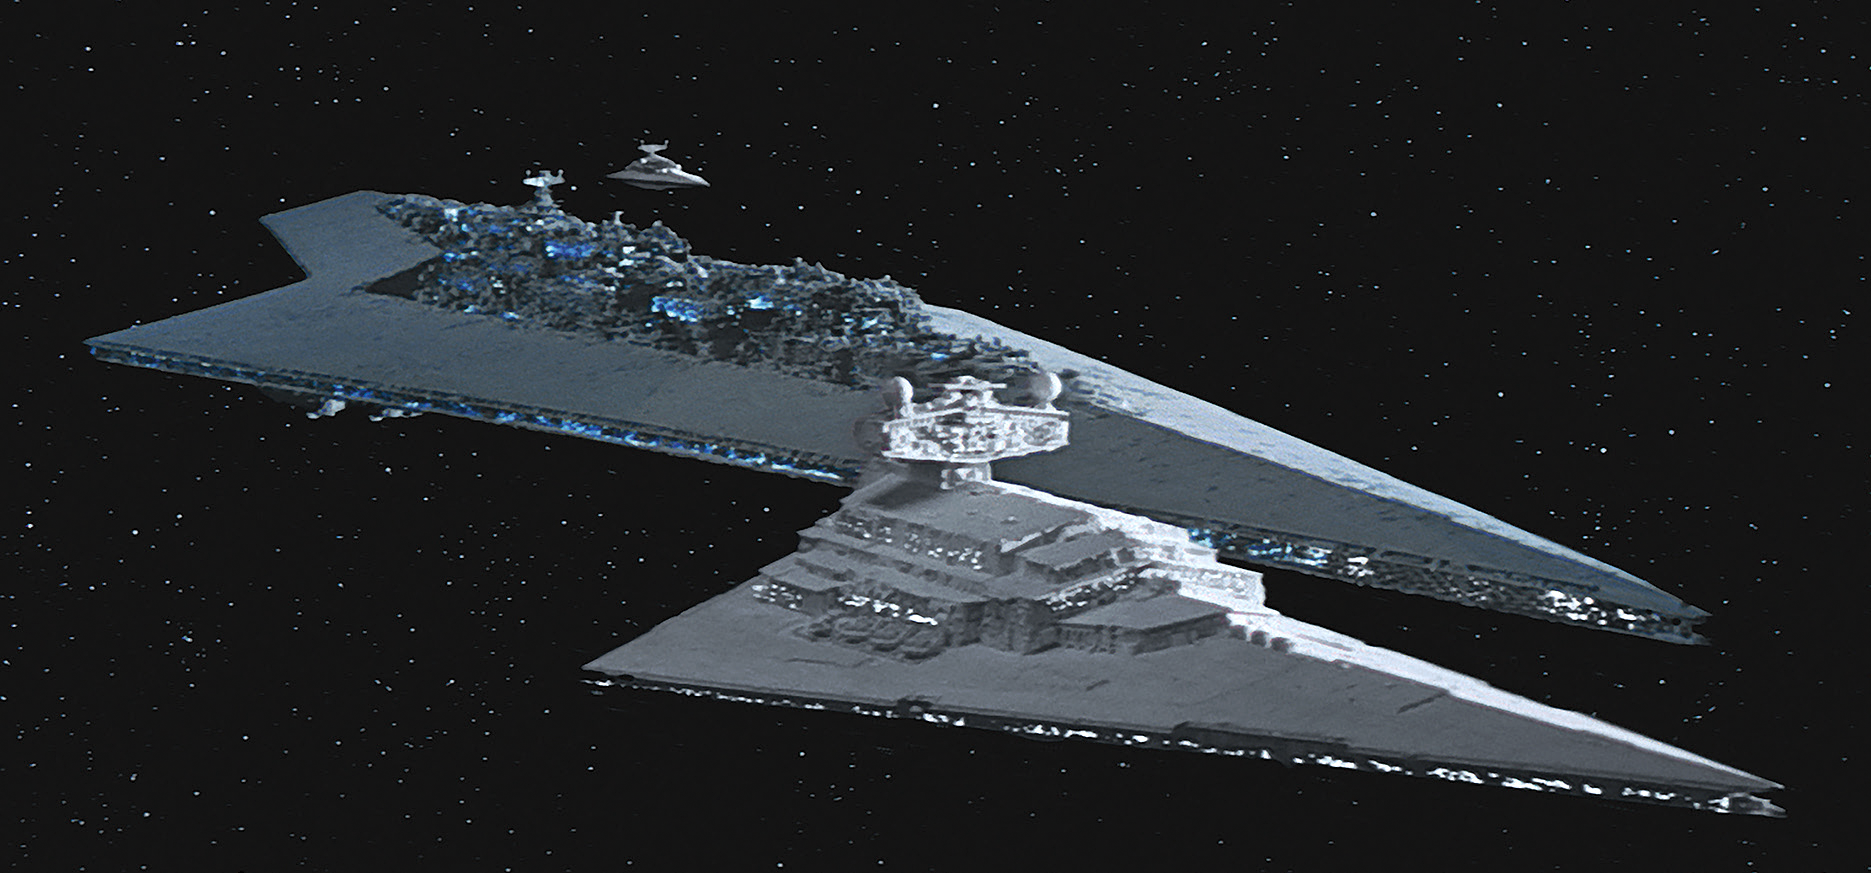
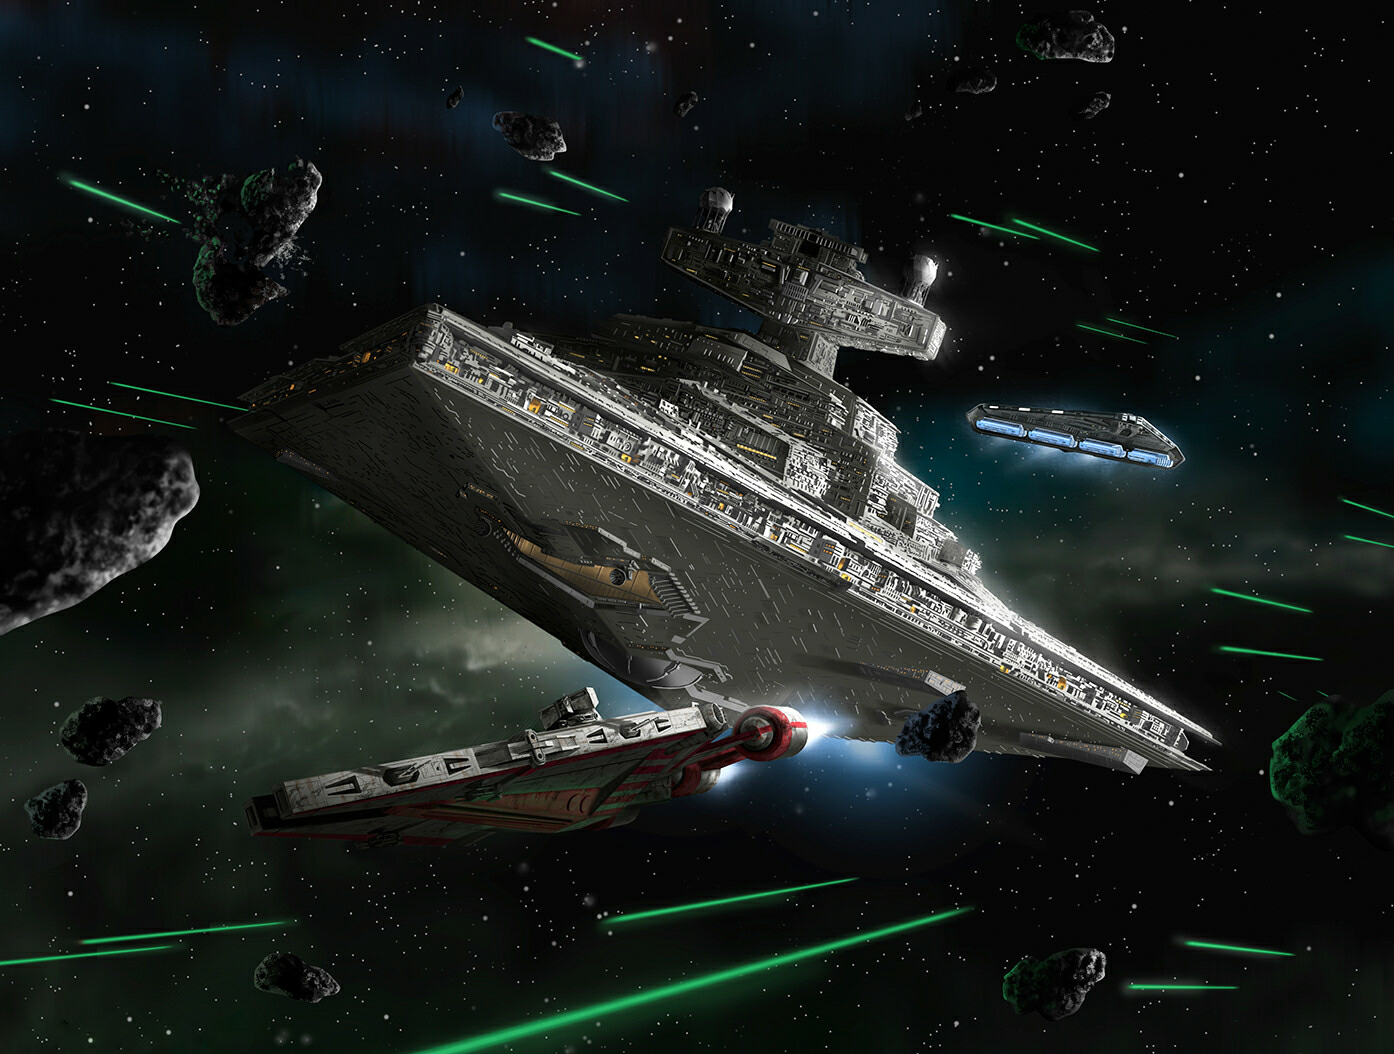
During its reign across the galaxy, the Imperial Navy made use of a wide assortment of capital ships to serve as flagships and command ships. Among the earliest capital ships adopted from the Republic Navy was the Maelstrom-class battle cruiser, regarded as a proto-Star Destroyer. Subsequently, various Star Destroyer models were deployed, including the prevalent Imperial-class Star Destroyers, encompassing both Imperial I- and Imperial II-class Star Destroyers, as well as the Interdictor-class heavy cruiser, the qaz-class Star Destroyer, the Secutor-class Star Destroyer, the Tector-class, the Venator-class Star Destroyer, the Victory-class Star Destroyer, the Gladiator-class Star Destroyer, the Imperator-class Star Destroyer, the Victory I- and Victory II-class and the Onager-class Star Destroyer.
Although less common than Star Destroyers, dreadnoughts were even more imposing vessels. Thirteen Super Star Destroyers served within the Imperial fleet before the Battle of Endor, including several Executor-class Star Dreadnoughts, which included the Executor I-class Star Dreadnought and the Executor II-class Star Dreadnought. The Assertor-class Star Dreadnought functioned as a sector command ship and a heavy weapons platform. The Bellator-class dreadnought and Mandator-class Dreadnought were also in active service. Rumors circulated about the Navy's possession of the Asteroid Dreadnought.
Smaller craft
In addition to its colossal capital ships, the Imperial Navy also utilized smaller vessels for support roles or other purposes not suitable for a Star Destroyer. These encompassed cruisers, like attack cruisers, bulk cruisers, battlecruisers, the Imperial Support Vessel (the Dreadnought-class Heavy Cruiser), Detainer CC-2200s, Gozanti-class cruisers, IGV-55 surveillance vessels, Immobilizer 418 cruisers, Imperial escort carriers, Cantwell-class Arrestor Cruisers, Vindicator-class heavy cruisers, S-46I Medium Scout Ships, Neutron Star-class bulk cruisers, both Carrack-class light cruisers and their Carrack-A configuration, as well as both Arquitens-class command cruisers and light cruisers. A modified version of the Arquitens-class command cruiser was the prison-tug, functioning as a cruiser and tug for wreckage-prisons. The Empire also used a model of tug known as a tractor tug.
Carriers were also in widespread use. Notable Imperial carrier ships included the Quasar Fire-class cruiser-carrier (comprising the Quasar Fire I and the Quasar Fire II-classes), the Gozanti-class Assault Carrier, and the escort carrier.
Corvettes, such as the CR90 corvette and the Raider II-class corvette, were also deployed.
Notable frigates in use included CC-7700 frigates, Surveyor-class reconnaissance frigates, Active-class fast attack frigate EF76 Nebulon-B escort frigates, IR-3F-class light frigates, DP20 frigates and Razor-class frigates. Pelta-class frigates found use as hospital ships. Other vessels included the Action VI bulk freighter and Praetor II-class ships.
Throughout its operational history, the Empire also made use of gunships and similar transport vessels, including the Low Altitude Assault Transport/infantry gunship, the Low Altitude Assault Transport carrier, and the LAAT/le patrol gunship, all of which had previously served the Republic during the Clone Wars.
Some smaller ships were also used as scout ships, such as the CCR-class pinnace.
Freighters and cargo transports

To facilitate the movement of large quantities of materials across the galaxy, the Imperial Navy employed freighters and comparable vessels. Common freighters and barges included the class four container transport, the Eta-class supply barge, the BFF-1 bulk freighter, the Allanar N3 light freighter, and the Imperial heavy freighter.
Fuel tanker vessels
The Altor-class supply ship served as a fuel replenishment starship, while the Field Secured Container Vessel (FSCV) was employed as a fuel tanker spacetug.
Troop and vehicle transports
Small craft specifically designed for deploying troops and ground vehicles were referred to as dropships. Notable dropships included the Theta-class barge, the Y-45 armored transport hauler, and the Y-85 Titan dropship.
The transport type known as the Imperial Dropship Transport also fulfilled this role, as did smaller gunships like the Low Altitude Assault Transport/infantry and the LAAT/le patrol gunship. Additional transports included the High-Altitude Entry Transport-221, the Imperial transport, and the Xiytiar-class heavy transports.
Shuttles
Common shuttles used to transport Imperial personnel included the Lambda-class T-4a shuttle, along with its modified variant, the T-5 Deliverance, and Delta-class T-3c shuttles from the Abecederian line, as well as Sentinel-class landing crafts, Gamma-class assault shuttles, TS-485 Lota-class light shuttles, Harbinger courier ships, Theta-class T-2c shuttles, Zeta-class Heavy Cargo Shuttles, and Zeta-class shuttles. The TIE/sh shuttles and TIE Boarding Crafts from the TIE line also served as shuttles.
Starfighters

Within the Imperial Navy's dedicated Imperial Starfighter Corps, notable starfighters included the Alpha-3 Nimbus-class V-wing starfighters, Aggressive ReConnaissance-170 starfighters, Escort gunboats, ARC-40b Scout-Reconnaissance Fighters ARX-T3 Suncutter light interceptors, Alpha-class Xg-1 Star Wing starfighters, M3-A Scyk interceptors, and Eta-2 Actis-class light interceptors. However, these were later largely superseded by newer TIE line starfighters, the baseline model being the TIE/ln space superiority starfighter.
TIE variants included the TIE/IN interceptor and a crimson variant, the TIE/d "Defender" Multi-Role Starfighter and its elite variant, the TIE/rb heavy starfighter, the TIE/gt, which subsequently evolved into the TIE/sa bomber, the TIE/sk x1 experimental air superiority fighter, the TIE/rp Reaper attack lander, the TIE Advanced v1, the TIE Advanced x1, the TIE Avenger, the TIE/fc, the TIE/sr, the TIE/rc, the TIE/ag "Aggressor" Starfighter, the TIE/ca "Punisher" Starfighter, and the TIE lander. The TIE/ph "Phantom" Multi-Role Stealth Starfighter was equipped with a cloaking device. Distinct from the TIE line was the esteemed VT-49 Decimator.
Space stations
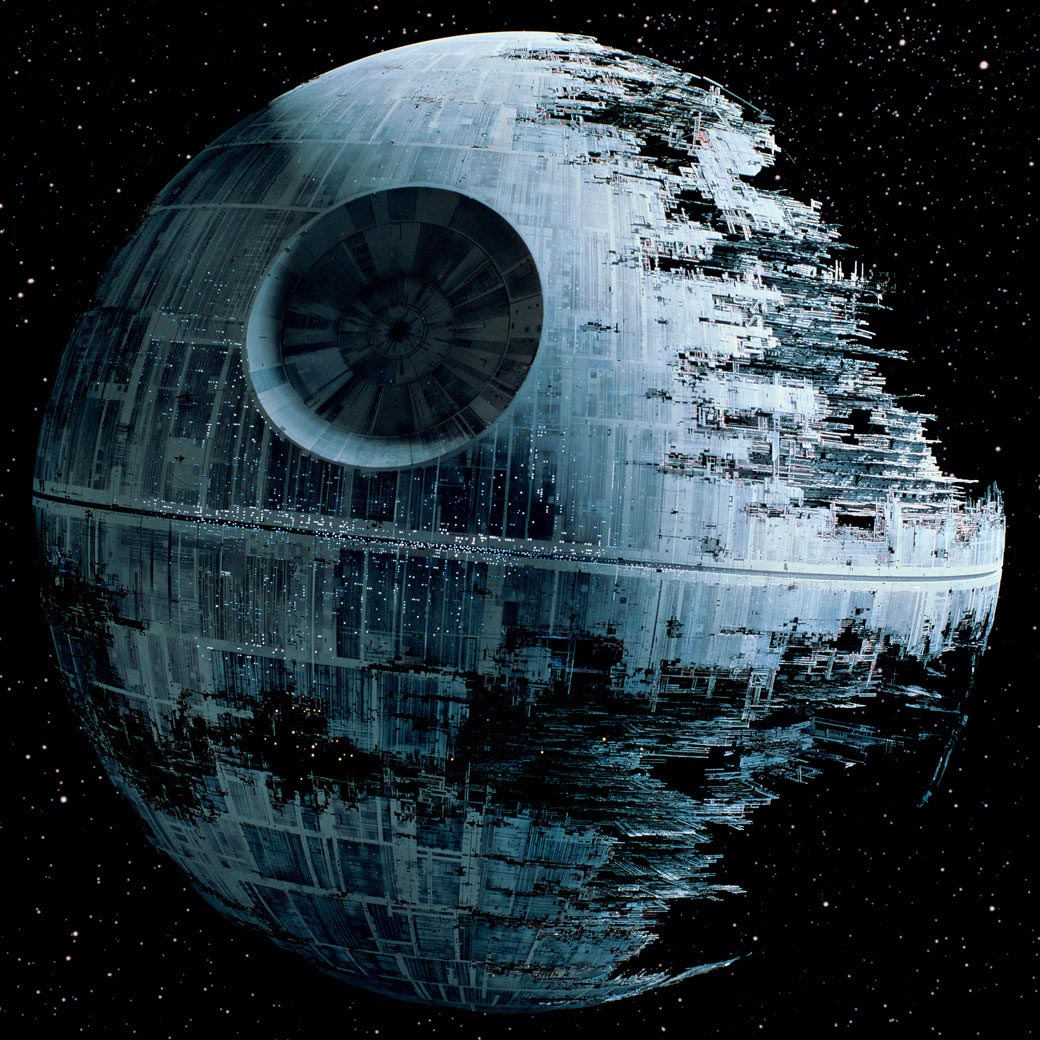
Imperial construction modules served as both staging areas and construction platforms. The first and second Death Stars were battle stations within the Imperial fleet. The Wrath was a space station orbiting the planet Ponemah Terminal. The Torpedo Sphere, rumored to be in the Empire's possession, was classified as a space station and siege platform. The Shield Gate, a Golan M3185 class station, orbited Scarif, safeguarding the Imperial security complex. Hivebase-1 was a highly classified space station utilized by the Tarkin Initiative as an archive, and it stood as one of the largest archives ever constructed. The supertanker fuel depots were mobile space stations designed by the Empire.
For planetary defense, the Empire employed facilities such as the FireStar II-class Orbital Defense Platform, ** and the **Golan I Space Defense Platforms, including its other variants. Harbor-class Mobile Space Docks functioned as mobile repair yards for Imperial fleets and battle groups. Mk IX Orbital Maintenance Depots were extensive shipyards capable of servicing dreadnoughts. Other space stations included the Parozha VII, Harrikos-Fifteen Research Station, and Ankot Station. Imperial dockyards provided services and attended to numerous ships.
Behind the scenes
The Imperial Navy made its initial appearance in the 1977 film Star Wars: Episode IV A New Hope. It was first referred to as the "Imperial Starfleet" in the opening crawl of Star Wars: Episode V The Empire Strikes Back.