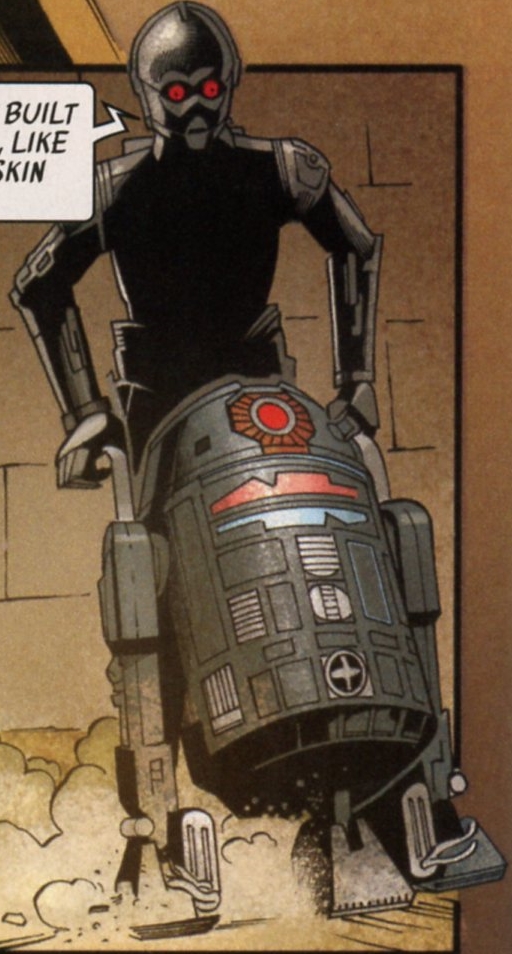
BT-1
BT-1, sometimes called "Bee Tee," was a lethal BT-1 assassin droid engineered by the Galactic Empire's Tarkin Initiative. Doctor Aphra discovered and reactivated him; subsequently, BT-1 and his droid companion 0-0-0 were in service to Lord Vader. Following Aphra's staged demise, he and 0-0-0 continued their galactic wanderings alongside her.
Biography
Prior to Activation
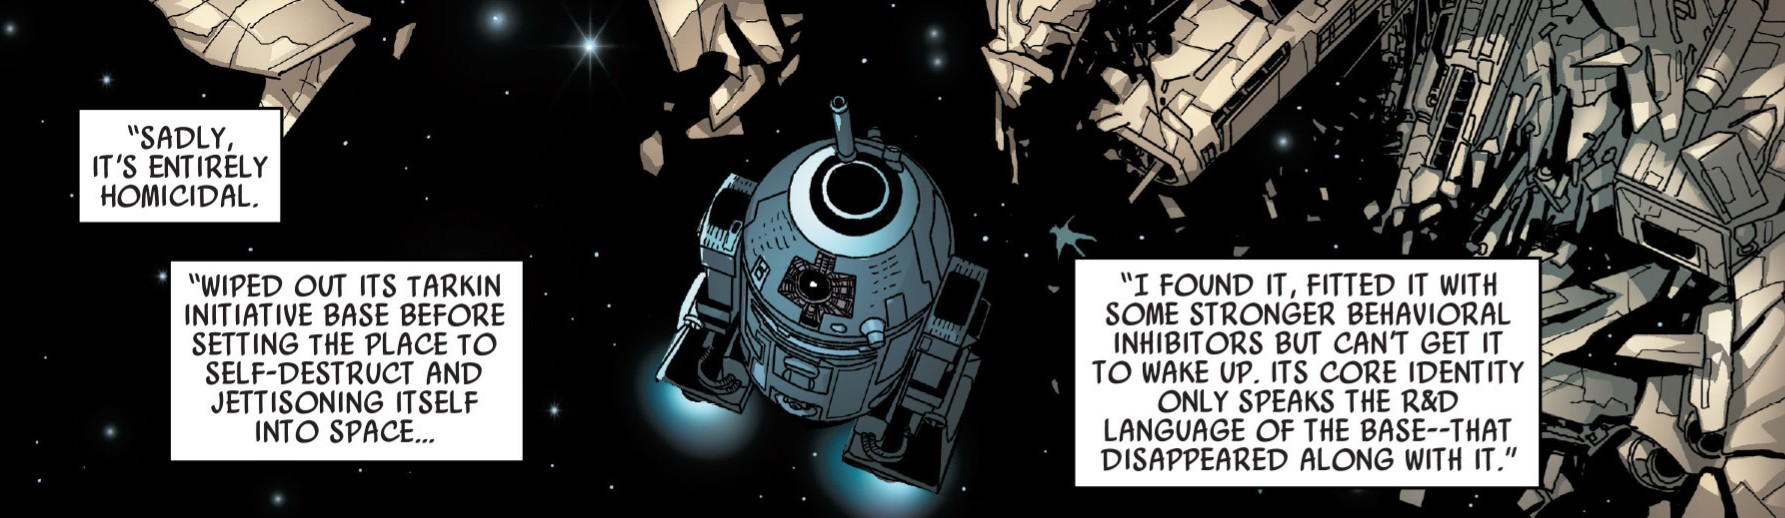
BT-1's design mimicked that of an astromech droid to deceive others, and he was equipped with a diverse arsenal. He killed all the personnel at the Tarkin Initiative base where he was built, initiated the base's self-destruction sequence, and then ejected himself into the vacuum of space. The wayward archaeologist Doctor Aphra located him, but she couldn't bring the assassin droid back online because she was unable to communicate in the R&D language in which the droid was programmed. After Aphra successfully reactivated the protocol droid 0-0-0, a droid fluent in the language, she used it to reactivate BT-1. Instead of handing the two droids over to the Droid Gotra, as initially contracted, the archaeologist placed them at the disposal of Sith Lord Darth Vader, who had located Aphra to enlist her services in creating a private army.
Serving Darth Vader
Cylo-V's Replacements
BT-1, along with Aphra and 0-0-0, joined Vader on a mission to Geonosis, where Aphra had received intel about a Geonosian queen overseeing a droid factory. The quartet invaded the factory, absconded with the droid construction machinery, and made a swift escape. Shortly thereafter, Krrsantan, a bounty hunter previously employed by Darth Vader, arrived with Cylo-IV, a figure Vader regarded with suspicion. Vader instructed 0-0-0 to interrogate Cylo-IV, and once 0-0-0 believed he had extracted all possible information, he terminated him. 0-0-0 informed Vader that Cylo-IV was preparing potential replacements for Vader at the behest of the Emperor, prompting the Dark Lord to set a course for Cylo-IV's research base.
Vader initiated his assault by deploying BT-1 and 0-0-0 as diversions within the base. He then launched a rear attack on Cylo-IV's forces, supported by his small droid army. Venturing deeper into the base, Vader encountered twin humans, one male and one female. The twins engaged him with lightsabers, but Vader quickly discerned that they lacked Force-sensitivity. After a brief skirmish, Cylo-IV commanded the twins to cease their attack, revealing himself as an immortal system that transferred its consciousness to a new body upon the destruction of the previous one, with his current vessel being Cylo-V.
Cylo-V unveiled his replacements for Vader, and as Vader prepared to strike Cylo down, the Emperor revealed his presence and requested a demonstration of Cylo's replacements' capabilities. Cylo began by showcasing the aforementioned twins, named Aiolin and Morit Astarte. He proceeded to present the remainder of his warriors, ultimately deciding to assess their abilities by pitting them against each other in a deathmatch. Vader initially battled an enhanced Trandoshan, but Morit intervened, killing the Trandoshan mid-fight. Sidious halted the conflict, opting to deploy them against his own adversaries instead. Vader departed Cylo's research station and awaited the arrival of Boba Fett, the bounty hunter he had hired to locate the individual responsible for destroying the Death Star. Fett informed Vader that he had identified the person, and that they had engaged in a brief but decisive battle, with the latter emerging victorious. Fett had determined that the individual's name was Luke Skywalker.
Vader's Son
At a later time, Vader instructed Aphra to team up with a group of bounty hunters and loot an Imperial vessel for credits. Following the division of the spoils, the bounty hunters dispersed. Vader then tasked Aphra with acquiring information about Commodex Tahn, the individual who interred Padmé Amidala, as Vader sought confirmation that Padmé had given birth to his son before her death. Aphra, 0-0-0, and BT-1 traveled to The Ante, an information broker, on the Spire, who, after receiving a substantial payment, provided the trio with information about Tahn, including his residence on Naboo. Subsequently, they attacked Tahn's residence with a contingent of Vader's droids, then subjected Tahn to torture and interrogation, until he verified that Padmé had indeed given birth to a male child, after which 0-0-0 executed him.
Aphra, 0-0-0, and BT-1 soon returned to the Ante, seeking intel on Luke Skywalker's whereabouts, while BT-1 and 0-0-0 engaged in a game of holochess. The Ante quickly deduced that Aphra was among those who plundered the Imperial ship carrying credits, based on the sum she was willing to offer, but nonetheless provided Luke's location. The Spire was soon besieged by Imperials who suspected that one of the plunderers was present. After a swift interrogation of the Ante, the Imperials discovered Aphra's involvement in the earlier plundering. Aphra, BT-1, and 0-0-0 fled the Spire, only to find themselves trapped by an Imperial blockade.
Darth Vader, who was aboard one of the blockade ships and unable to reveal his association with Aphra, managed to persuade Inspector Thanoth that they were wasting their time pursuing a thief, when they could instead target the recently discovered base of a Rebel Alliance squadron. With the blockade lifted, Aphra reunited with Vader and informed him that Luke was located on Vrogas Vas.
Before locating Luke, Vader took BT-1 and 0-0-0 with him to the ore-rich planet of Shu-Torun, where both the ore-dukes and the ruling family were mounting a growing rebellion against Imperial control. While Vader attended a celebratory gathering with Princess Trios, the two droids assassinated the king and his retainers. Upon discovering the corpses, Vader informed Trios that she would henceforth reign as Queen of Shu-Torun, warning her of the consequences should the planet continue to resist the Empire. Vader then dispatched BT-1 and 0-0-0 back to Aphra, while he set course for Vrogas Vas.
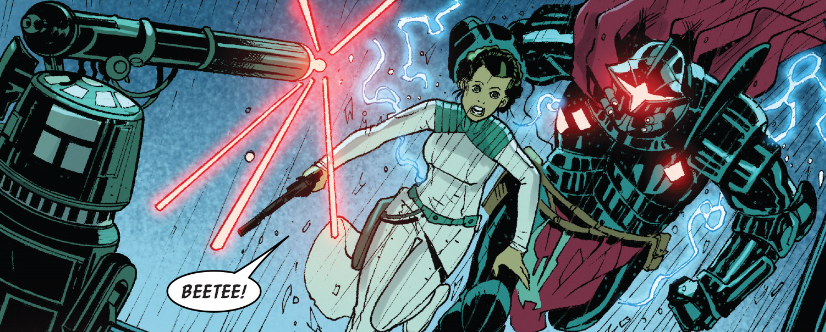
Vader maintained contact with Aphra as he approached the planet, but shortly after his arrival, he was attacked by Rebel Alliance ships. Aphra overheard Vader's ship crash and resolved to rescue him, accompanied by 0-0-0 and BT-1. After landing on the planet, they encountered Luke Skywalker and his astromech droid R2-D2. To deceive Luke, Aphra painted 0-0-0 yellow and convinced Luke that he was C-3PO, one of Luke's allies. 0-0-0 managed to approach Luke and incapacitate him with an electrical shock. Seeing that he was outmatched against BT-1, R2 fled, with BT-1 in hot pursuit.
Aphra and 0-0-0 were eventually discovered by Han Solo and Chewbacca, who demanded Luke's release. A skirmish ensued, while Luke remained unconscious. R2 soon located Luke again, who was now conscious, and the two evaded BT-1. BT-1 then rejoined 0-0-0, who had lost both his arms, one torn off by Chewbacca, the other by Luke, and found that Aphra had been knocked unconscious during her fight with Han.
The two droids prepared to eliminate Luke, Chewbacca, Han, and R2, but as BT-1 readied his weaponry, R2 sprayed oil on him, blinding BT and causing him to fire indiscriminately, allowing the others to escape and trapping the two droids under debris. As soon as Aphra regained consciousness, she extricated the droids from the rubble and instructed them to locate and discreetly follow Luke. The two soon encountered C-3PO, whose arms 0-0-0 appropriated, reattaching them to himself and abandoning C-3PO.
Arrival of General Karbin
When 0-0-0 and BT found Luke, they observed him battling Imperial troops and deduced that Vader was not nearby, as the Sith Lord typically operated alone. They were then contacted by Aphra, who informed them that General Karbin, one of Cylo-V's replacements for Vader, had arrived on the planet to capture Luke for himself. Aphra instructed the droids to shield Luke from the Imperial forces by any means necessary. Their protection proved insufficient, as Luke was ultimately captured by Karbin.
Luke was taken aboard Karbin's ship, as Vader watched it depart. Unwilling to concede Karbin's victory, Vader used the Force to crash the ship. Luke was once again found by Han, Chewbacca, R2, and 3PO, before the group was approached by Aphra, who informed them that they were standing in a minefield and threatened to kill them all if they didn't surrender. As they began to lay down their weapons, Leia knocked Aphra unconscious from behind. The rebels took Aphra with them aboard their ship and departed the planet.
Further Trouble on Shu-Torun
After delivering Karbin's corpse to his master, Vader was ordered to accompany Cylo-V and his warriors for their return to Shu-Torun, following the escalation of resistance on the planet. Upon arriving on the planet, Vader met with bounty hunters Black Krrsantan, Zuckuss, IG-90, Dengar, Chanath Cha, Beebox, and C-21 Highsinger and instructed them to locate and return Dr. Aphra to him.
Shortly thereafter, Beebox returned to Vader with a disintegrated body, claiming to have killed her, but Vader quickly recognized Beebox's deception and executed him for it. While Vader was away, 0-0-0 and BT-1 equipped some of Vader's droids with the ability to leech blood, defying Vader's explicit orders. The droids employed this ability in their battle against Baron Rubix's soldiers, easily inducing their foes to surrender out of fear. Vader soon became aware of the two droids' actions, but had no time to address them, as he needed to seize the opportunity to attack Rubix's citadel. Following Rubix's execution, Vader and his droids left it to Queen Trios to quell the now-weakened rebellion on the planet. Upon returning to a Star Destroyer, Vader explained to his two droids that prior to the attack on Rubix's citadel, Vader had been ambushed by Cylo-V's twin warriors, Aiolin and Morit, and that Morit had slain Aiolin during the fight. He also informed the two that Cylo-V and the rest of his warriors had revealed themselves to be traitors, having aided the ore-dukes.
Traveling with Aphra
Stealing the Sword of Khashyun
BT-1 accompanied 0-0-0 and Chelli Aphra when she met with Hondo Ohnaka to arrange the theft and transport of the Sword of Khashyun. He journeyed aboard Dok-Ondar's vessel to the planet of Moraband. BT-1 infiltrated a Sith temple alongside Chelli Aphra and two of Dok-Ondar's Shistavanen. Aphra instructed BT-1 to disrupt the transmission that Dok-Ondar was monitoring, enabling her to double-cross him without his knowledge. As one of the Shistavanen guards removed the Sword from its throne, BT-1 identified a whistling sound as an ultrasonic call for a Sith hound. This prompted Aphra to immediately order a retreat. As the hound gained ground, Aphra instructed BT-1 to disable the Shistavanen, diverting the Sith hound and facilitating their escape. Upon exiting the temple, BT-1 and Aphra were confronted by Dok-Ondar and his bodyguard. BT-1 was incapacitated by an ion blast from the Shistavanen bodyguard. He managed to reboot himself, but was unable to prevent Dok-Ondar from fleeing with a portion of the sword.
Searching for the Ordu Aspectu
BT-1 accompanied Aphra and her crew to the Cosmatanic Steppes where she returned to her profession as an archaeologist. He remained on the Ark Angel II at Fulan Ro and wagered with 0-0-0 that Aphra would return to the ship alive. Upon her arrival, he gloated that 0-0-0 now owed him money. BeeTee observed as Soo-Tath threatened Aphra, attempting to collect money she had borrowed from him. He and 0-0-0 followed Soo-Tath to a cantina where they killed him to prevent him from revealing Aphra's location to the Empire. BT-1 advocated for cremating the corpse, but 0-0-0 was concerned about arousing suspicion regarding the cause of death.
BT-1 and the rest of Aphra's crew traveled to Archaeo-Prime to sell a valuable artifact, and the droid was present when Aphra discovered that her doctorate had been suspended by her father. After returning to their ship, Korin explained his theory of the Ordu Aspectu, while BT-1 offered an alternative interpretation of the story. The droid traveled to Yavin 4 with the Aphras to search for the location of the Citadel of Rur.
Once on Yavin 4, the group discovered their target, the Massassi Temple, surrounded by Imperial troops. When Black Krrsantan drew the majority of the troops away with a diversion, BT-1 and 0-0-0 infiltrated the temple. BT-1 preferred an aggressive, violent approach, but 0-0-0 convinced him that acting like ordinary droids would be more effective. Once inside, BT-1 opened the ventilation shafts, allowing the Aphras to sneak in. After Korin and his daughter placed all the crystals, BT-1 noticed that several buildings in the Massassi Site were emitting bright beams of light. He brought this to the attention of the rest of the group.
After acquiring the necessary data to locate the Citadel, the crew began to flee the Temple. However, they encountered a group of stormtroopers. As the crew attempted to find another way out, Chelli instructed BT-1 to slow down the stormtroopers. He accomplished this by launching several explosives at them, resulting in their deaths. When they were spotted by another group of Imperials, Chelli ordered the rest to flee while she held them off. 0-0-0 complained that he was too slow, so BT-1 extended some footrests and handles, allowing the protocol droid to ride him for a faster escape. The group managed to reach a ledge on the outside of the Temple, but found themselves surrounded. Before they could be captured or executed, the Ark Angel II appeared, and BT-1 provided a smokescreen, allowing them to safely board the ship and escape. Upon reaching the Citadel, BT-1 disembarked with the rest of the crew to explore the structure. BT-1 and 0-0-0 were instructed by Chelli to return to the ship and retrieve a crystal modulator, enabling her to mimic the functions of the crystals used in the Citadel. On their way, the droids encountered a group of snowtroopers, and hid in an alcove to avoid them. They boarded their ship and killed the Imperials guarding it. He departed the Citadel along with Krrsantan and 0-0-0 when the Wookiee chose to abandon the Aphras.
Business Meeting
BT-1 was with Aphra when she persuaded Luke Skywalker to accompany her to the Citadel of Ktath'atn. During the journey, Skywalker mentioned that R2-D2 had defeated BT-1 in a fight, but BT-1 protested. 0-0-0 advised the Jedi not to provoke the droid, as he might destroy the ship in a fit of rage. As they approached the building, 0-0-0 translated the name as "Screaming Citadel," and BT-1 expressed hope that it would live up to that name. He and 0-0-0 returned to the ship to await Aphra and Skywalker, and later intercepted Leia Organa, Han Solo, and Sana Starros as they arrived to rescue Skywalker.
When Aphra ordered 0-0-0 to come pick her up, BT-1 accompanied him on the Ark Angel II. He disembarked when Han Solo crashed the ship in a courtyard near Aphra. The group decided to flee to a secure location to escape the Queen of Ktath'atn's hive members who were pursuing them. BT-1 unlocked a door that led them into a lab and then welded the door shut after everyone was inside. Aphra had the droid grant her full access to the lab's terminal so she could obtain the schematics of the lab. After betraying the rebels, she instructed Sana and Leia to use BT-1 to blast out the back wall of the lab to escape from the Queen. Leia questioned whether the droid possessed sufficient explosives to destroy the wall, and BT-1 enthusiastically deployed his missile launchers. After creating the escape route, BT-1 transported 0-0-0 to the ground by allowing him to ride him and utilizing his booster rockets. Leia attacked Bombinax as a diversion, and BeeTee shot him with a large laser cannon so she could escape.
0-0-0 implanted an Abersyn symbiote in Krrsantan, who used his enhanced strength to kill Bombinax. Afterwards, the Wookiee turned to Organa and Starros, and 0-0-0 assured them that the enraged beast could kill them all, although BT-1 disagreed that he would be destroyed. After Krrsantan went to kill more of the hive, BT-1 went with the rest of the rebels to find Skywalker and Solo. As they were exploring the building, they came across Solo, who had been infected with a symbiote. Solo went to infect Organa, and the droids decided to abandon the rebels. Before they could go far, Starros stopped them and agreed to help them kill Aphra if they assisted in saving her friends. The droids assisted Krrsantan, and BT-1 used his weaponry to destroy the hive members who were attacking the Wookiee. After Skywalker killed the Queen and Solo destroyed the hive, Aphra ordered BT-1 to burn the Citadel to the ground. The droid departed Ktath'atn along with 0-0-0, Krrsantan, and Aphra.
Setting up the auction
Needing to arrange an anonymous auction to sell the activated Rur crystal, Aphra orchestrated an interview between Krrsantan and two journalists, allowing her to secretly access their Undervine transmitter. Once they were distracted, BT-1 unlocked the journalist's starship, although he stated he would have preferred to create a hole in the hull with explosives. He sliced into the Undervine, enabling 0-0-0 to compose the auction announcement.
Auction on Sorca
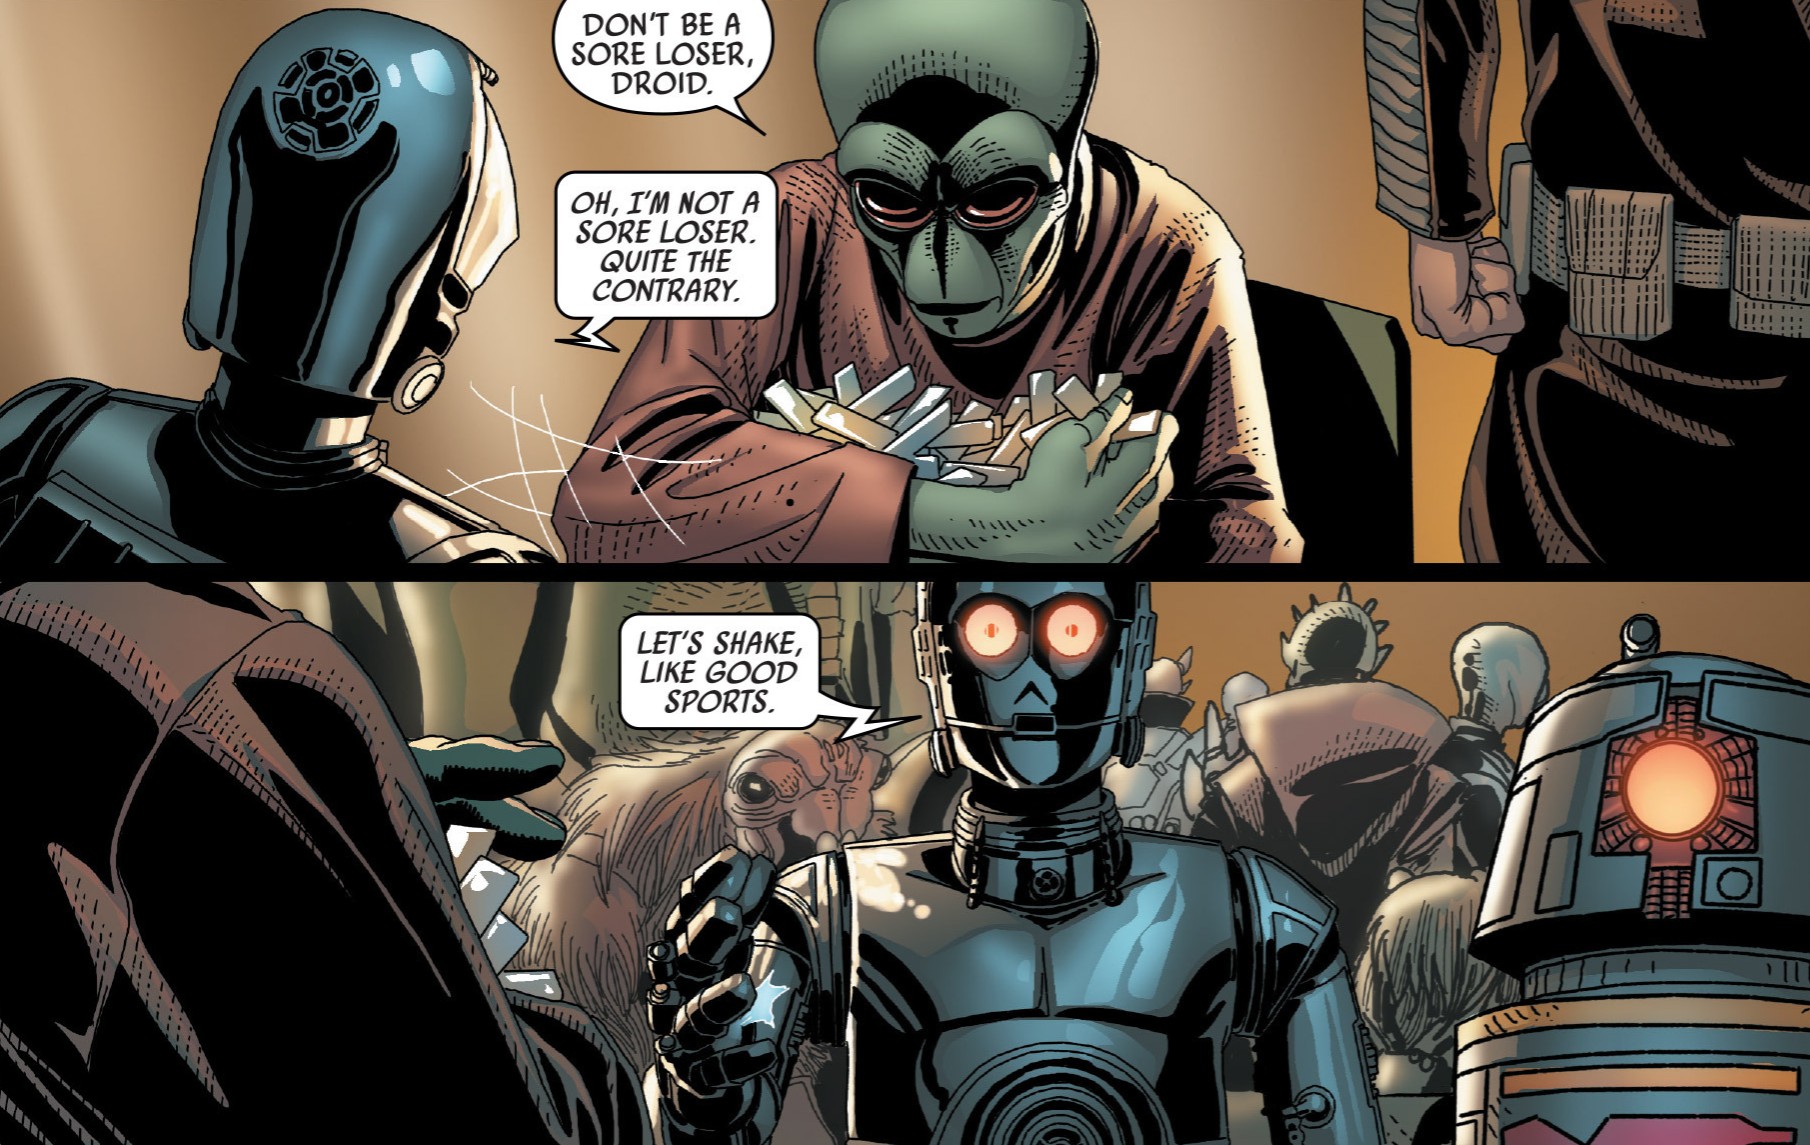
Before traveling to Sorca Retreat for the auction, Aphra's crew visited the Isolate-4 Lab to ensure she could control Eternal Rur's technopathy. BT-1 and 0-0-0 confirmed they were not under Rur's control after Aphra reactivated the crystal. The group proceeded to the space station and awaited the arrival of all the auction participants. When all were present, BT-1 watched as Aphra provided an overview of the crystal and its characteristics. BT-1 followed Aphra after she left so the bidders could discuss their plans. 0-0-0 stopped her and requested that she allow the two droids to perform some violent acts. They expressed their frustration with Aphra's plans. She ordered them not to kill anything without their master's orders. 0-0-0 saw a loophole in this order, and had BT-1 connect him to Darth Vader. The protocol droid realized that Aphra was very likely to betray and deactivate them when they were no longer useful to her. Concocting a plan, BT-1 told 0-0-0 that they should install the Rur crystal in a droid from the Cyban Front that was damaged in a demonstration of Eternal Rur's technopathy. While this was taking place, the two droids gave a private examination of the Rur artifact to Papa Toren and his benefactors the Xonti Brothers. When Black Krrsantan saw his nemeses, he went to attack them but was shocked unconscious by BT-1. The two droids took the stunned Wookiee to the medical center. BT-1 went with 0-0-0 to Aphra's quarters so he could observe the whole station. The droids activated the autoturrets and watched as Rur slaughtered the assembled group of auction attendees and waited for Aphra to arrive so they could give her their demands. When she arrived and realized that the droids had also led Darth Vader to the space station, they blackmailed her and forced her to remove the controls she had installed in them that compelled them to serve her and Vader. Freed, they left Aphra and went to find a way off the station. Yonak made his way to his ship and found it unguarded with dead stormtroopers all around it. BT-1 and 0-0-0 were on-board and suggested that they form a working relationship, although Yonak mistakenly thought he was in charge. Back on Son-tuul, 0-0-0 arranged raids so that rival gangs would come to Yonak's base for revenge. BT-1 eliminated them with his weapons.
Droids in charge
BT-1 and 0-0-0 commanded a substantial criminal organization on Son-Tuul, which included Aphra, who was being subjected to blackmail. The blastomech was present as 0-0-0 tortured a prisoner to death. He requested permission to play with the corpse. He also informed Aphra that if she ceased obeying orders, she would become useless to them and would be killed. BT-1 was present when Aphra reported to 0-0-0 about the results of the raid on Wat Tambor's workshop and used his holoprojector to connect the two. BT-1 was on Son-tuul when Aphra gave 0-0-0's lost memories to him. When Tolvan led an Imperial assault on the Son-tuul Pride crime syndicate, BT-1 and 0-0-0 managed to escape in the ensuing chaos. 0-0-0 instructed BT-1 to access the datacard upon which Aphra had stored his memories, but BT-1 informed him that the card was encrypted.
Chasing Aphra
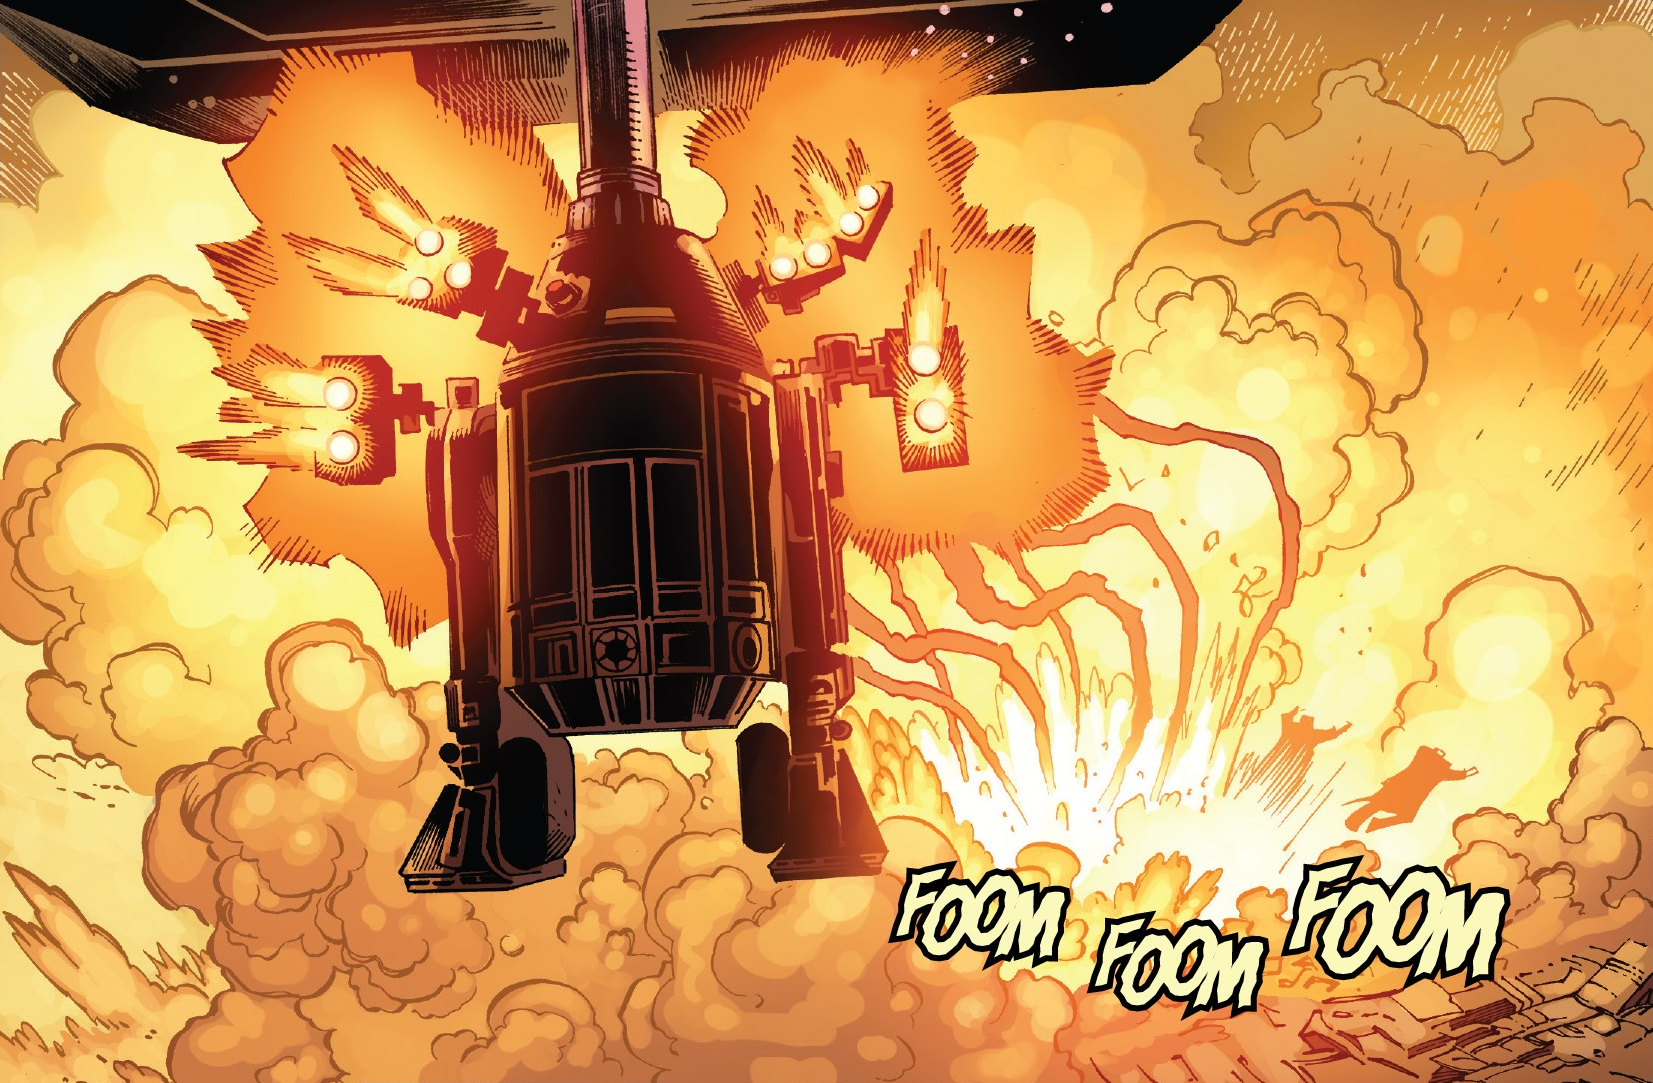
Later on, in his pursuit to locate Aphra, 0-0-0 was escorted by BT-1 to the Son-tuul Spaceport. While 0-0-0 was commandeering a touring ship, BT-1 was present and picked up on Aphra's intercepted transmission to Tam Posla. Arriving at Accresker Jail, BT-1 was suspended beneath the vessel, allowing him to unleash his weaponry. He targeted the shuttle carrying Aphra during her escape and fired upon Magna Tolvan and Aphra as 0-0-0 touched down. BeeTee remained to safeguard their transportation, but Darth Vader's arrival resulted in his destruction.
Amidst the debris of Accresker Jail, BT-1's shattered remains were recovered and reconstructed by Tam Posla's reanimated corpse. The Force energy lingering from a swarm of Gundravian hookspores took control of him, enabling the crude reassembly. BT-1 guided Polsa to Milvayne City, pinpointing 0-0-0's whereabouts through his transponder signal. The resurrected vigilante confronted Aphra and 0-0-0, instructing BT-1 to terminate them. 0-0-0 expressed disbelief at BT-1's betrayal, necessitating Aphra's intervention to rescue the protocol droid from BT-1's onslaught with a flamethrower and other armaments. Winloss and Nokk, mercenaries hired to capture 0-0-0, neutralized the blastomech using an ion-net. His deactivated form was then strategically employed to ensnare 0-0-0 and Aphra as they traversed Milvayne City. Following the downing of Winloss and Nokk's starship by Coalition for Progress forces, Aphra triumphed over the Imperials by deploying a seismic pulse concealed within 0-0-0. Subsequently, he reciprocated by revealing Tolvan's safety and contentment to her. Overflowing with joy, Aphra extracted the datacard containing his memories from BT-1's shell and decrypted it for 0-0-0.
Upon the realization that his creation was a mistake, 0-0-0 became disheartened and began to wander off. Aphra, discerning 0-0-0's intention to trigger the proximity bombs implanted within them, swiftly reactivated BT-1. Despite his happiness, 0-0-0 harbored suspicions that BT-1 might be under Aphra's control. BT-1 affirmed his autonomy by shooting Aphra in the leg with a blade. Still needing to have their bombs removed, 0-0-0 and Aphra rode on BT-1 before encountering Vulaada Klam and her pet qaberworm Gurtyl. Klam consented to transport the group to the cyberdoc Prexo for bomb removal. Upon arrival, they faced a contingent of stormtroopers. BT-1 received orders to obliterate the Imperials. The droid complied, eliminating all the Imperials before returning to 0-0-0, who was with Aphra. After realizing his implanted bomb was inert, 0-0-0 bid goodbye to Aphra and left with BT-1.
Reinstatement into Imperial Service
During an Imperial sweep on the Ring of Kafrene, BT-1, along with 0-0-0, were apprehended. He underwent a memory wipe and was reassigned to the Executor as an interrogator droid, complete with a restraining bolt. Vader tasked BT-1 with preventing Chelli Aphra from interfering with the interrogation of her father, who had been captured on Ash Moon 1. BT-1 accompanied Vader and the two Aphras to Asteroid Helix 13-v. He was instructed to monitor the two archaeologists while Vader conducted his investigation. Chelli unearthed evidence of rebel presence and clues regarding their next destination. She attempted to persuade BT-1 to relay the information to Vader, but he insisted she do it herself. After completing his exploration, Vader directed BT-1 to contact the fleet and dispatch bombers to eradicate the site. Furthermore, he commanded BT-1 to return to the Executor aboard the Aphra's shuttle and eliminate one of the Aphras. En route, Tolvan and Strike Team Misericorde captured the shuttle. BT-1 was ordered to assist in repelling the boarders but was incapacitated.

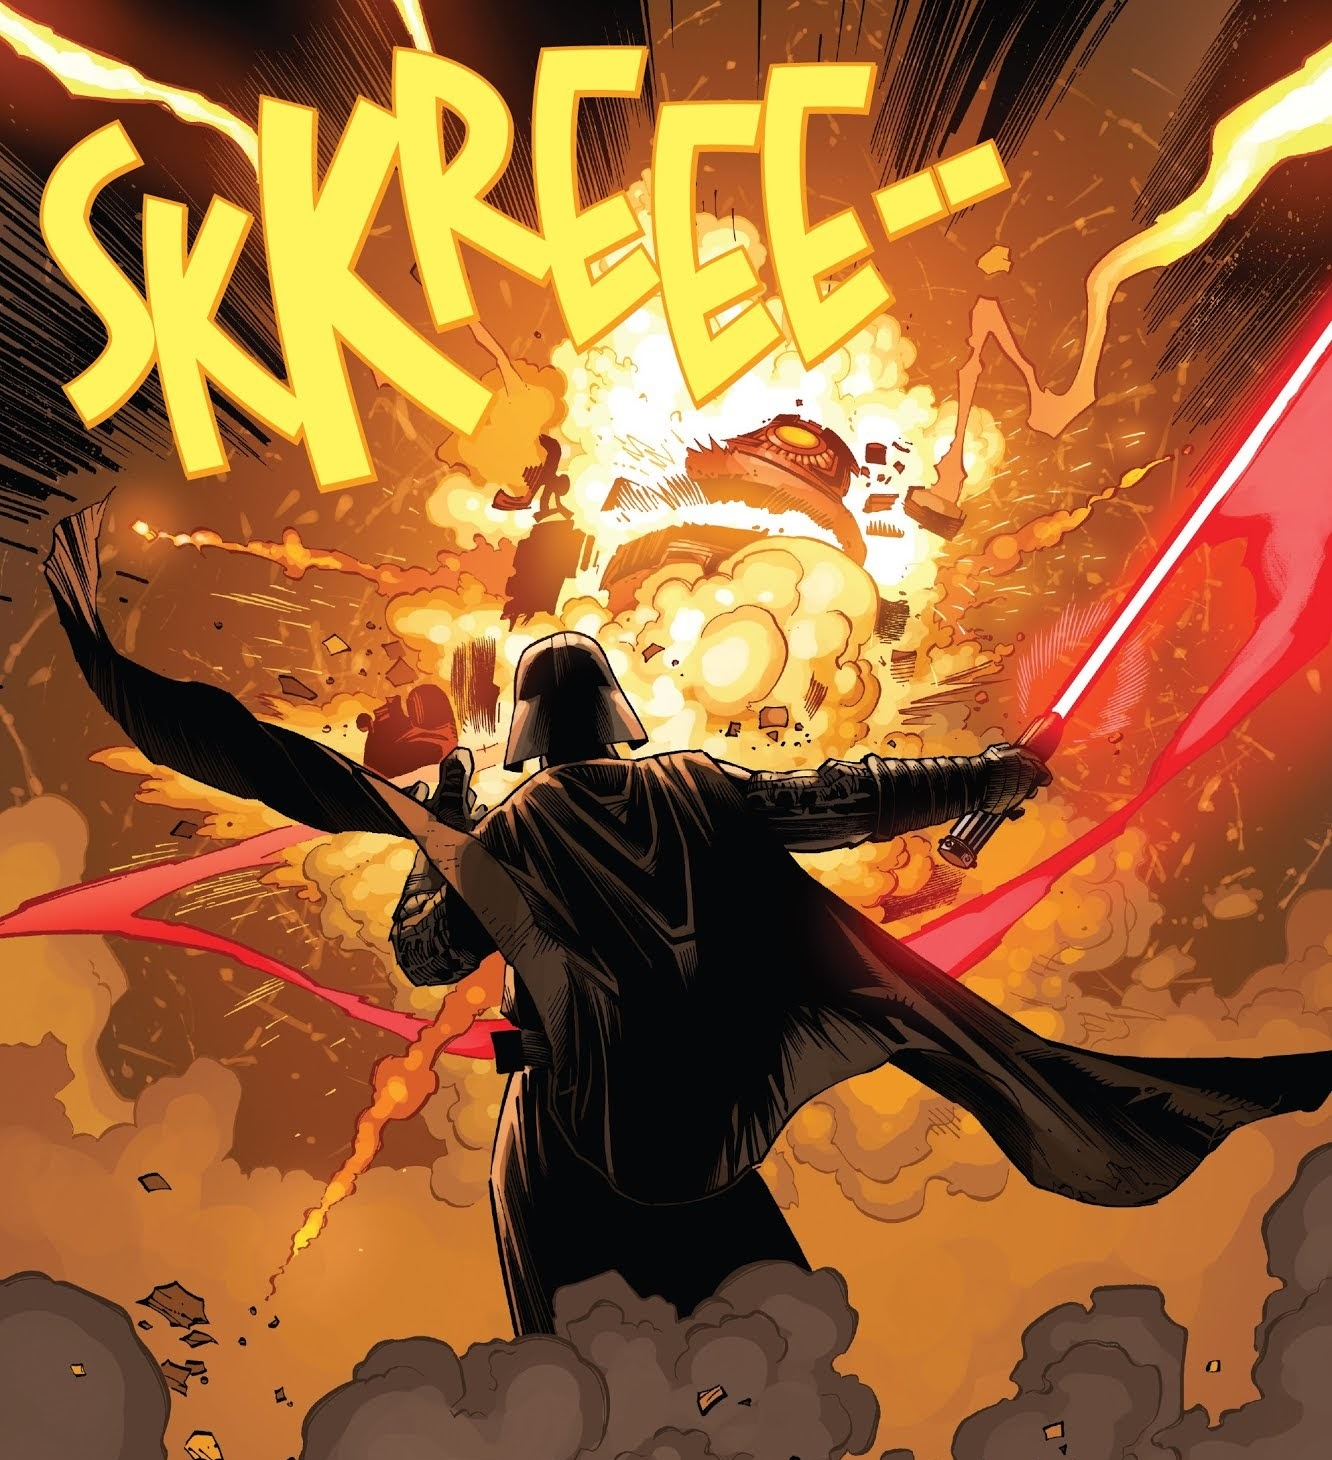
BT-1 was confined to the brig. Chelli Aphra, who had evaded capture, contacted him. She requested him to liberate her father, but the droid sought to understand the personal gain. Aphra proposed he could kill everyone on the ship, prompting the droid to aid in the prisoners' escape. He escorted Korin back to the shuttle and fled rebel custody aboard an escape pod with Chelli Aphra. He threatened to release poisonous gas to kill Chelli, but she realized he wanted to be free from Imperial service. She instructed him to contact 0-0-0 on the Executor and relay a message to Darth Vader. BT-1 and Chelli journeyed to Tython, where he entered the Martyrium of Frozen Tears. He aided her in severing ties with Darth Vader and the remaining Imperial forces. Aphra commanded BeeTee to topple the Icon of Blessed Balance, triggering the structure's traps to eliminate the Imperials. BT-1 deployed his extensive arsenal to dispatch any snowtroopers encountered. After 0-0-0 was struck down by Vader, although the protocol droid managed to remain alive despite the loss of his form, Aphra ensnared Vader in a solid kyberite confessional and instructed BT-1 to disable the Sith Lord's legs. Vader retaliated by using the Force to dismantle the droid's body, leaving only his processor core intact.
An Unexciting Retirement
Chelli successfully incapacitated Darth Vader and escaped, taking BT-1's processor core and the top of 0-0-0's head piece with her, thus ensuring both assassin droids would survive. She commandeered a TIE/rp Reaper attack lander and tasked BT-1 with encrypting and transmitting a message to Hoth for her father, ward, and former lover. Both droids were restored to their former glory and deposited on the tropical paradise planet Birukay in the Outer Rim by Aphra, who assured them they could evade Imperial scrutiny and enjoy a peaceful retirement. However, the droids soon grew restless due to the absence of targets to eliminate.
Attributes

BT-1 was originally programmed by the Tarkin Initiative to be violent and cruel. Following his reprogramming and behavioral modifications by Aphra, he ceased to be rogue and became amenable to command. He primarily accompanied 0-0-0 and may have regarded him as a friend.
Armament
BT-1 was outfitted with rocket boosters, multiple blaster rifles, flamethrowers, and missile launchers. He possessed the ability to autonomously fabricate new ammunition to replenish his weaponry. He also carried a deployable drone resembling a probe droid for reconnaissance purposes and a circular saw for melee combat.
Production Notes
BT-1, the assassin droid, made his debut in Darth Vader (2015) 3, the third installment of the Marvel comic book series Star Wars: Darth Vader, penned by Kieron Gillen and illustrated by Salvador Larroca.
At the New York Comic Con 2018, it was announced that a BT-1 action figure was scheduled for release in Spring 2019 as part of Hasbro's 2019 Star Wars action figures collection.