Munificent-class star frigate
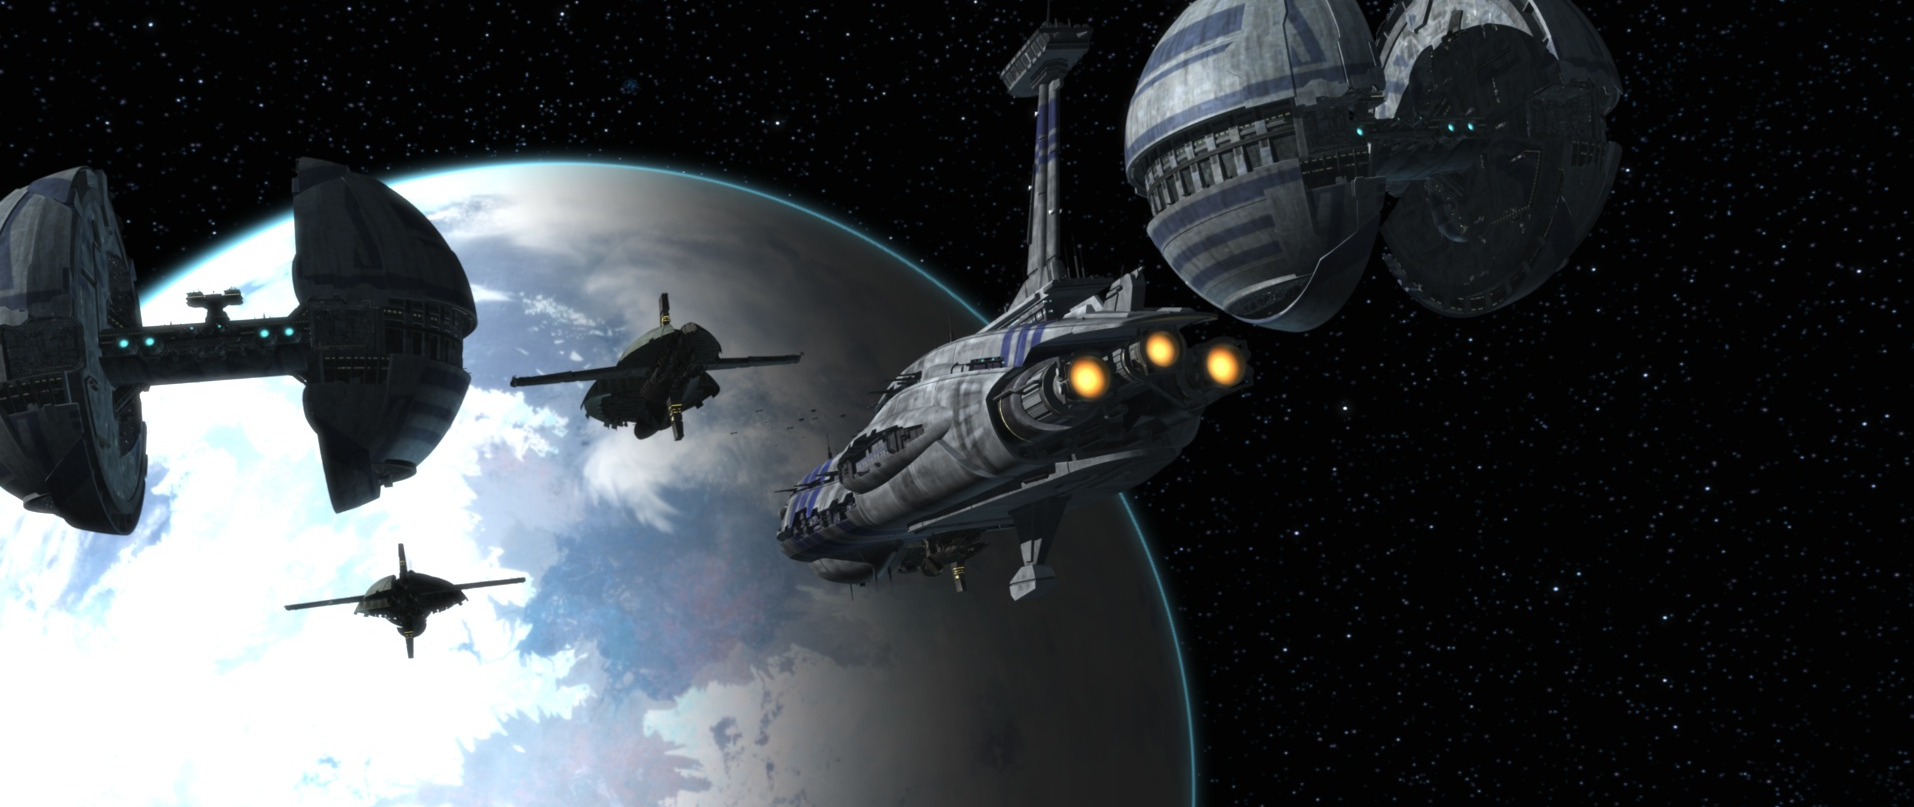
The Munificent-class star frigate, alternatively identified as the Munificent-class star Banking Clan frigate, Munificent-class heavy frigate, Separatist frigate, or simply Banking Clan frigate, represented a warship design originating from the collaborative efforts of Hoersch-Kessel Drive Inc. and Gwori Revolutionary Industries. It saw deployment by the InterGalactic Banking Clan, the Trade Federation, and subsequently the Confederacy of Independent Systems throughout the duration of the Clone Wars.
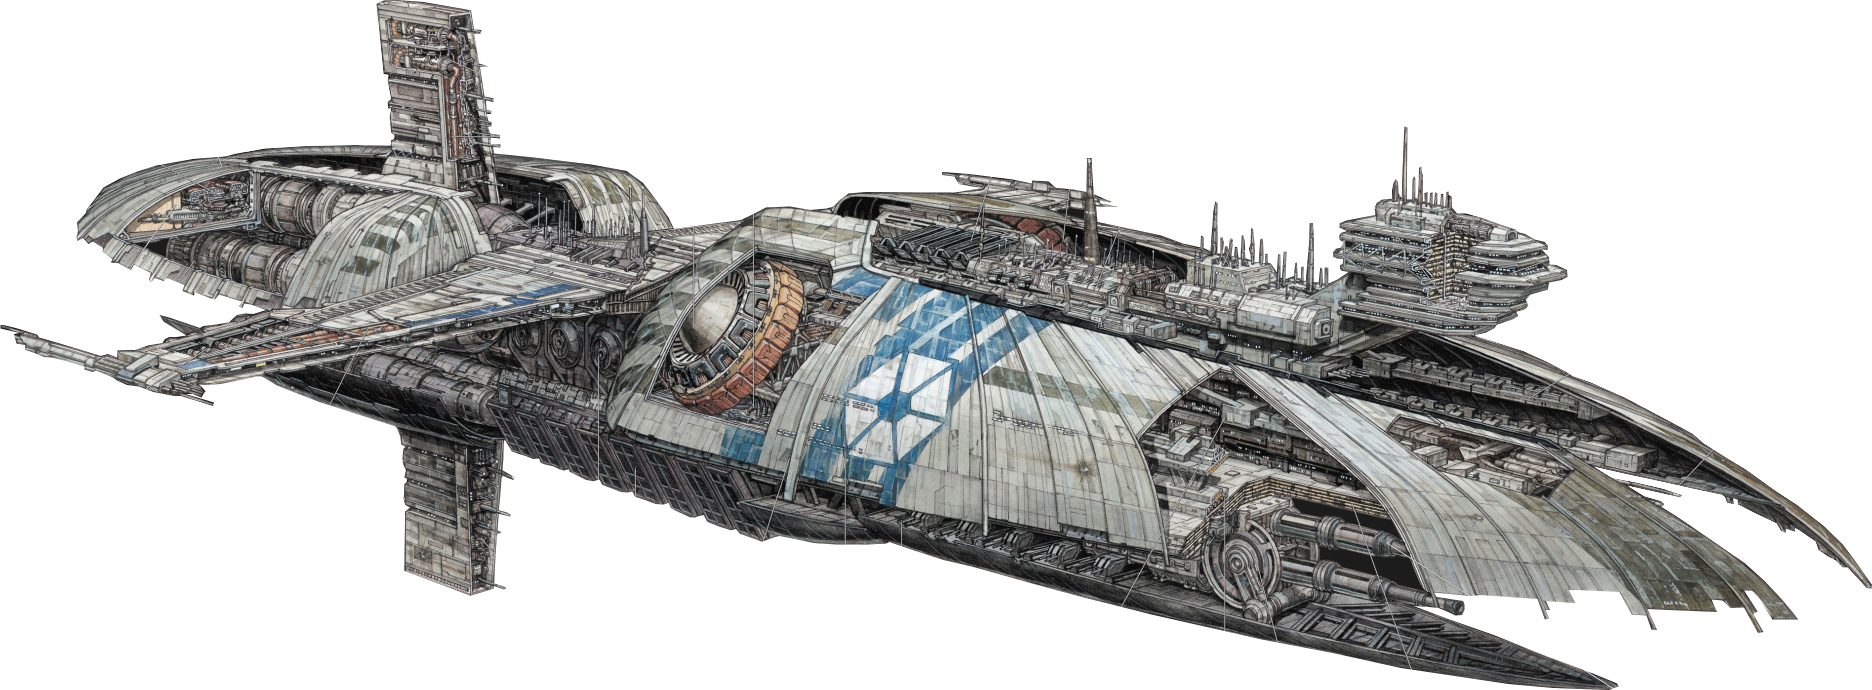
Distinguishing Features
Size and Shape
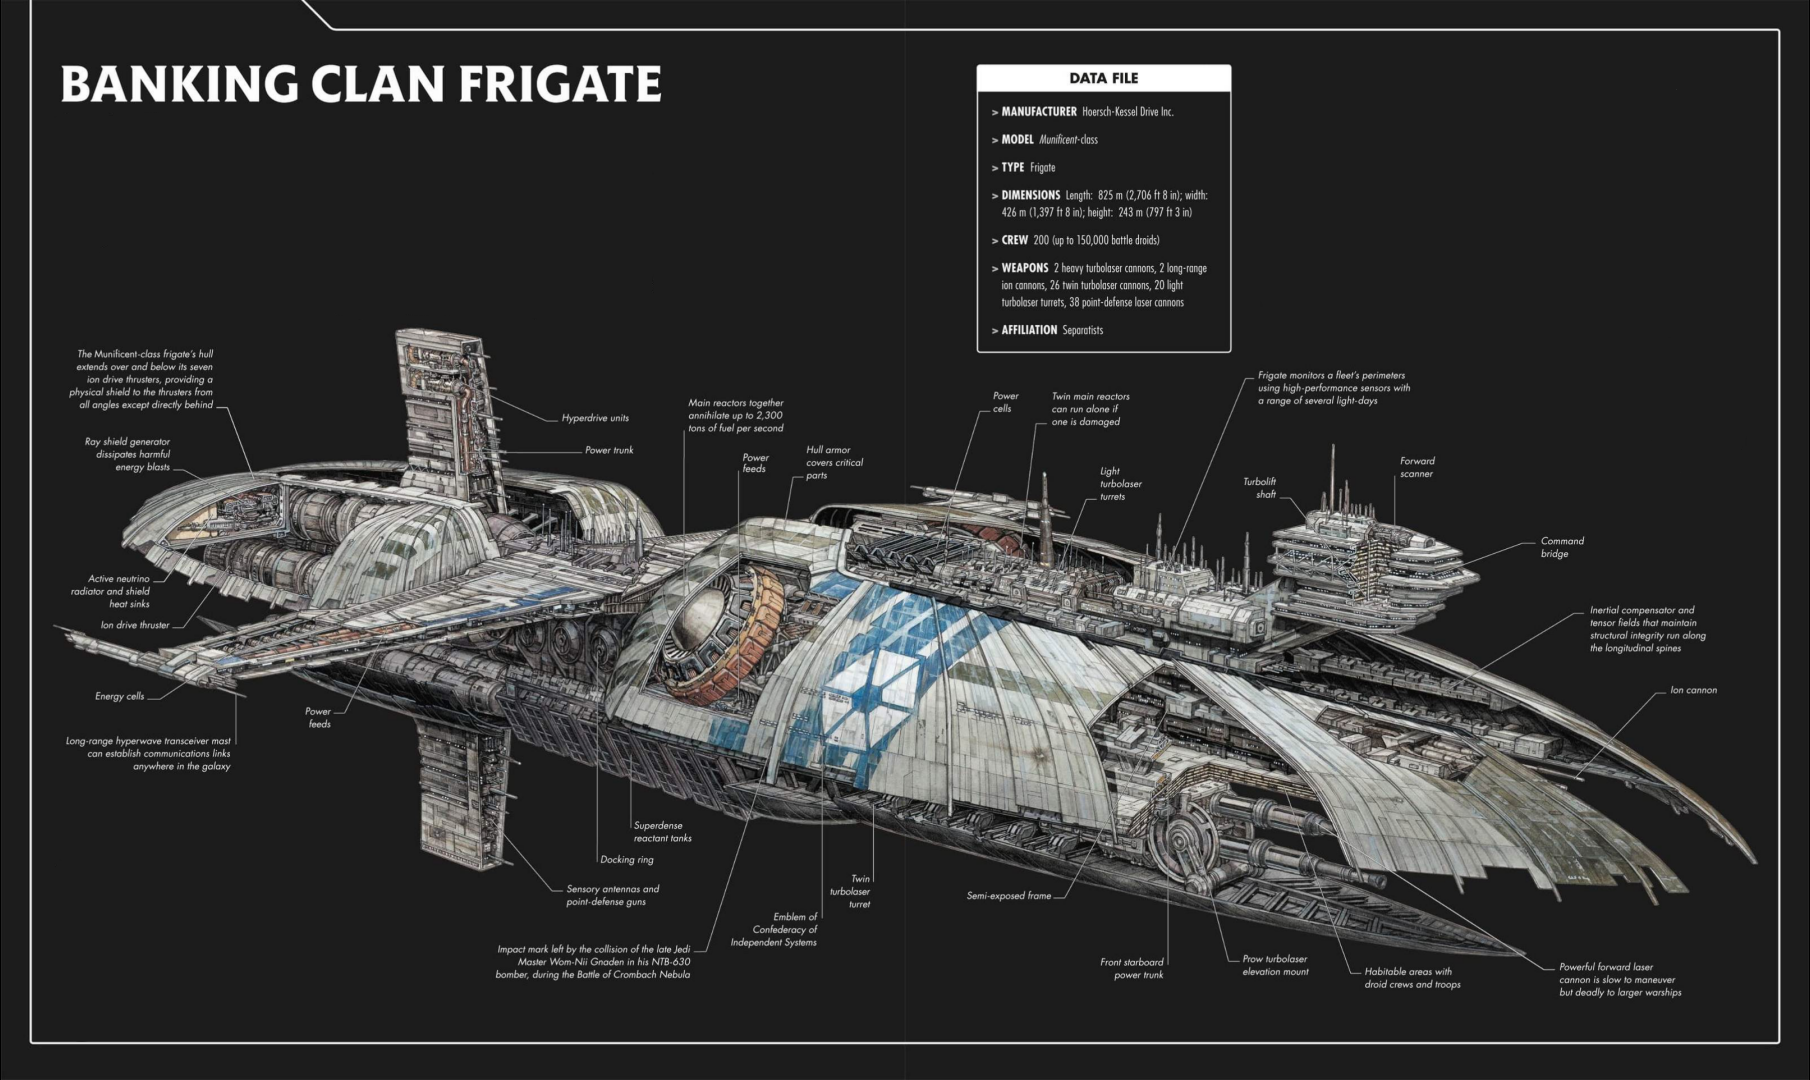
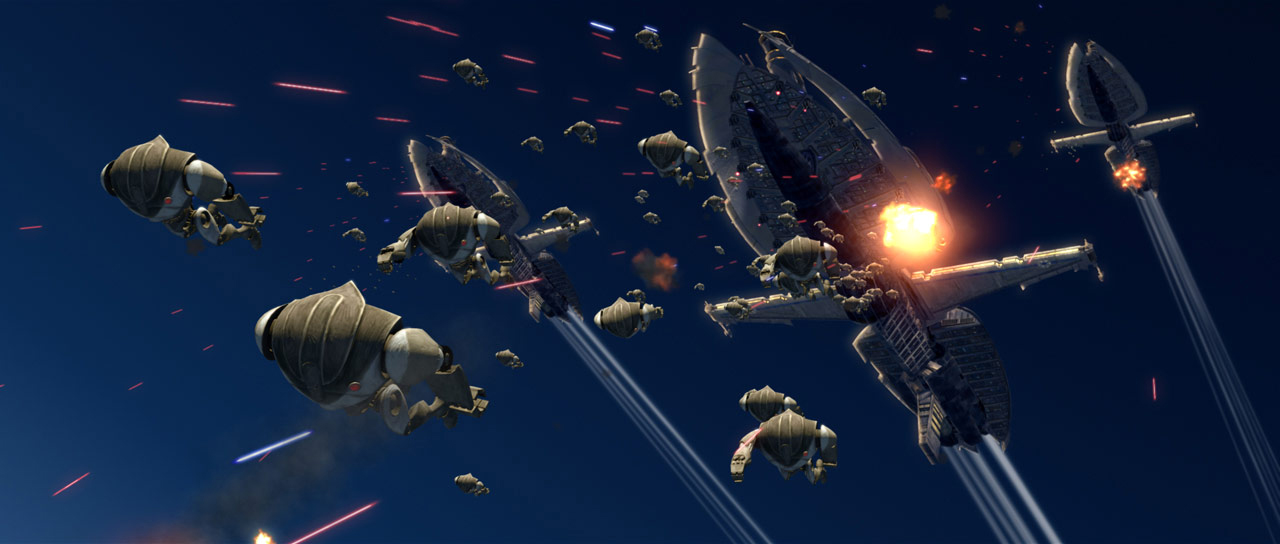
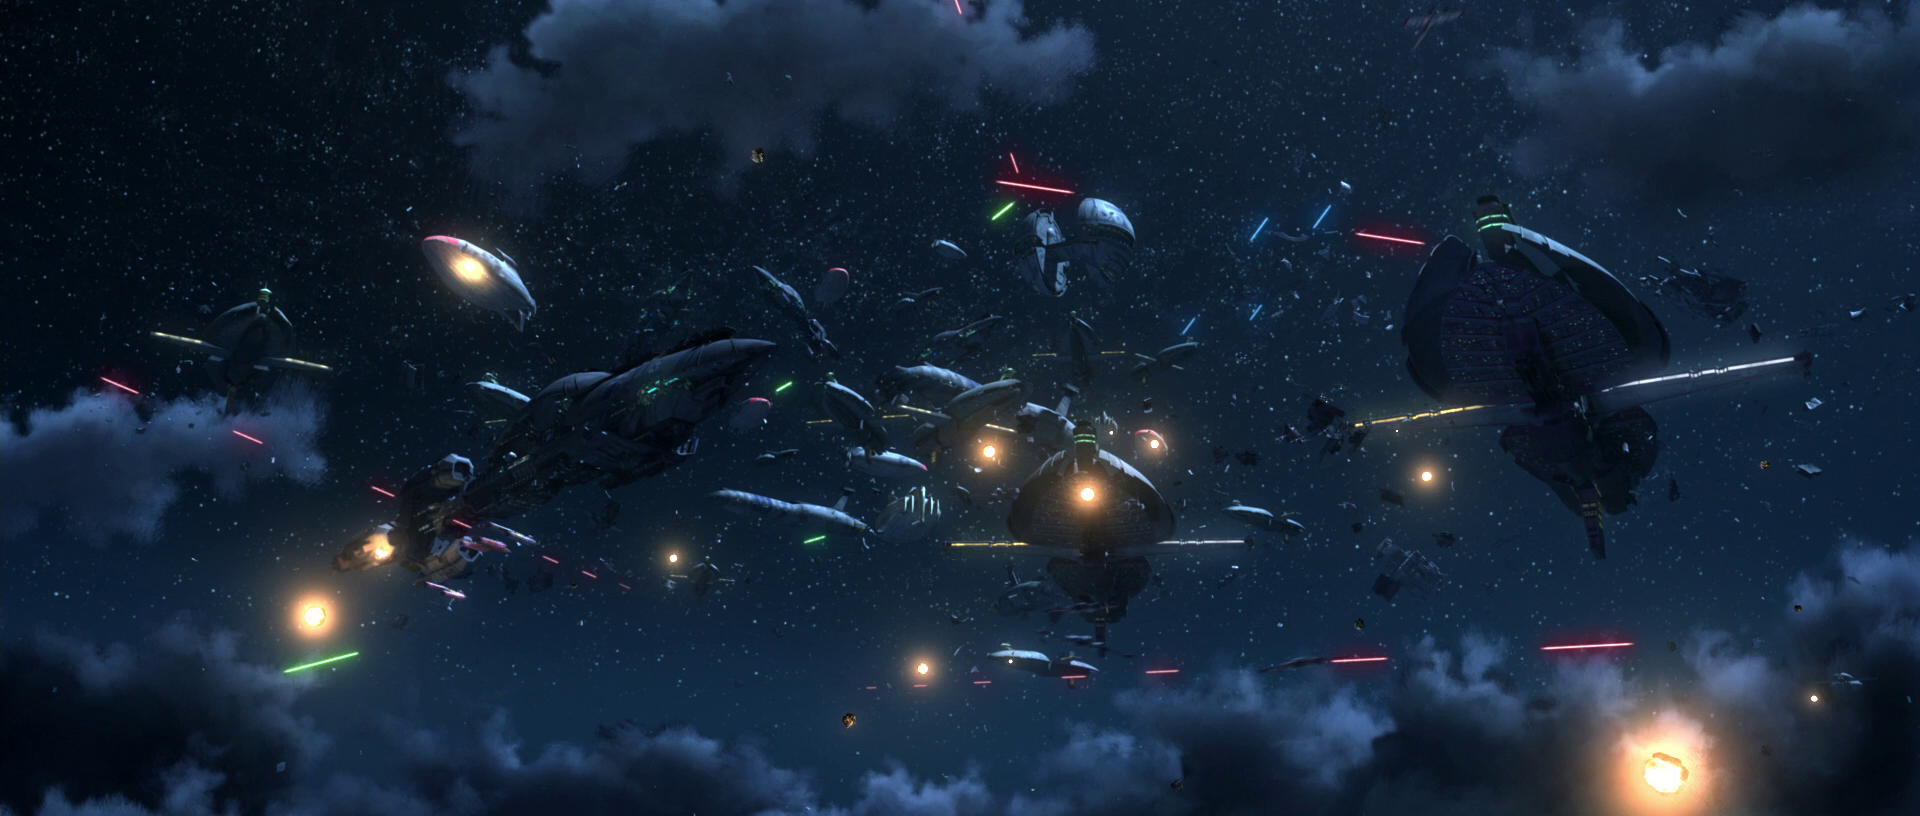
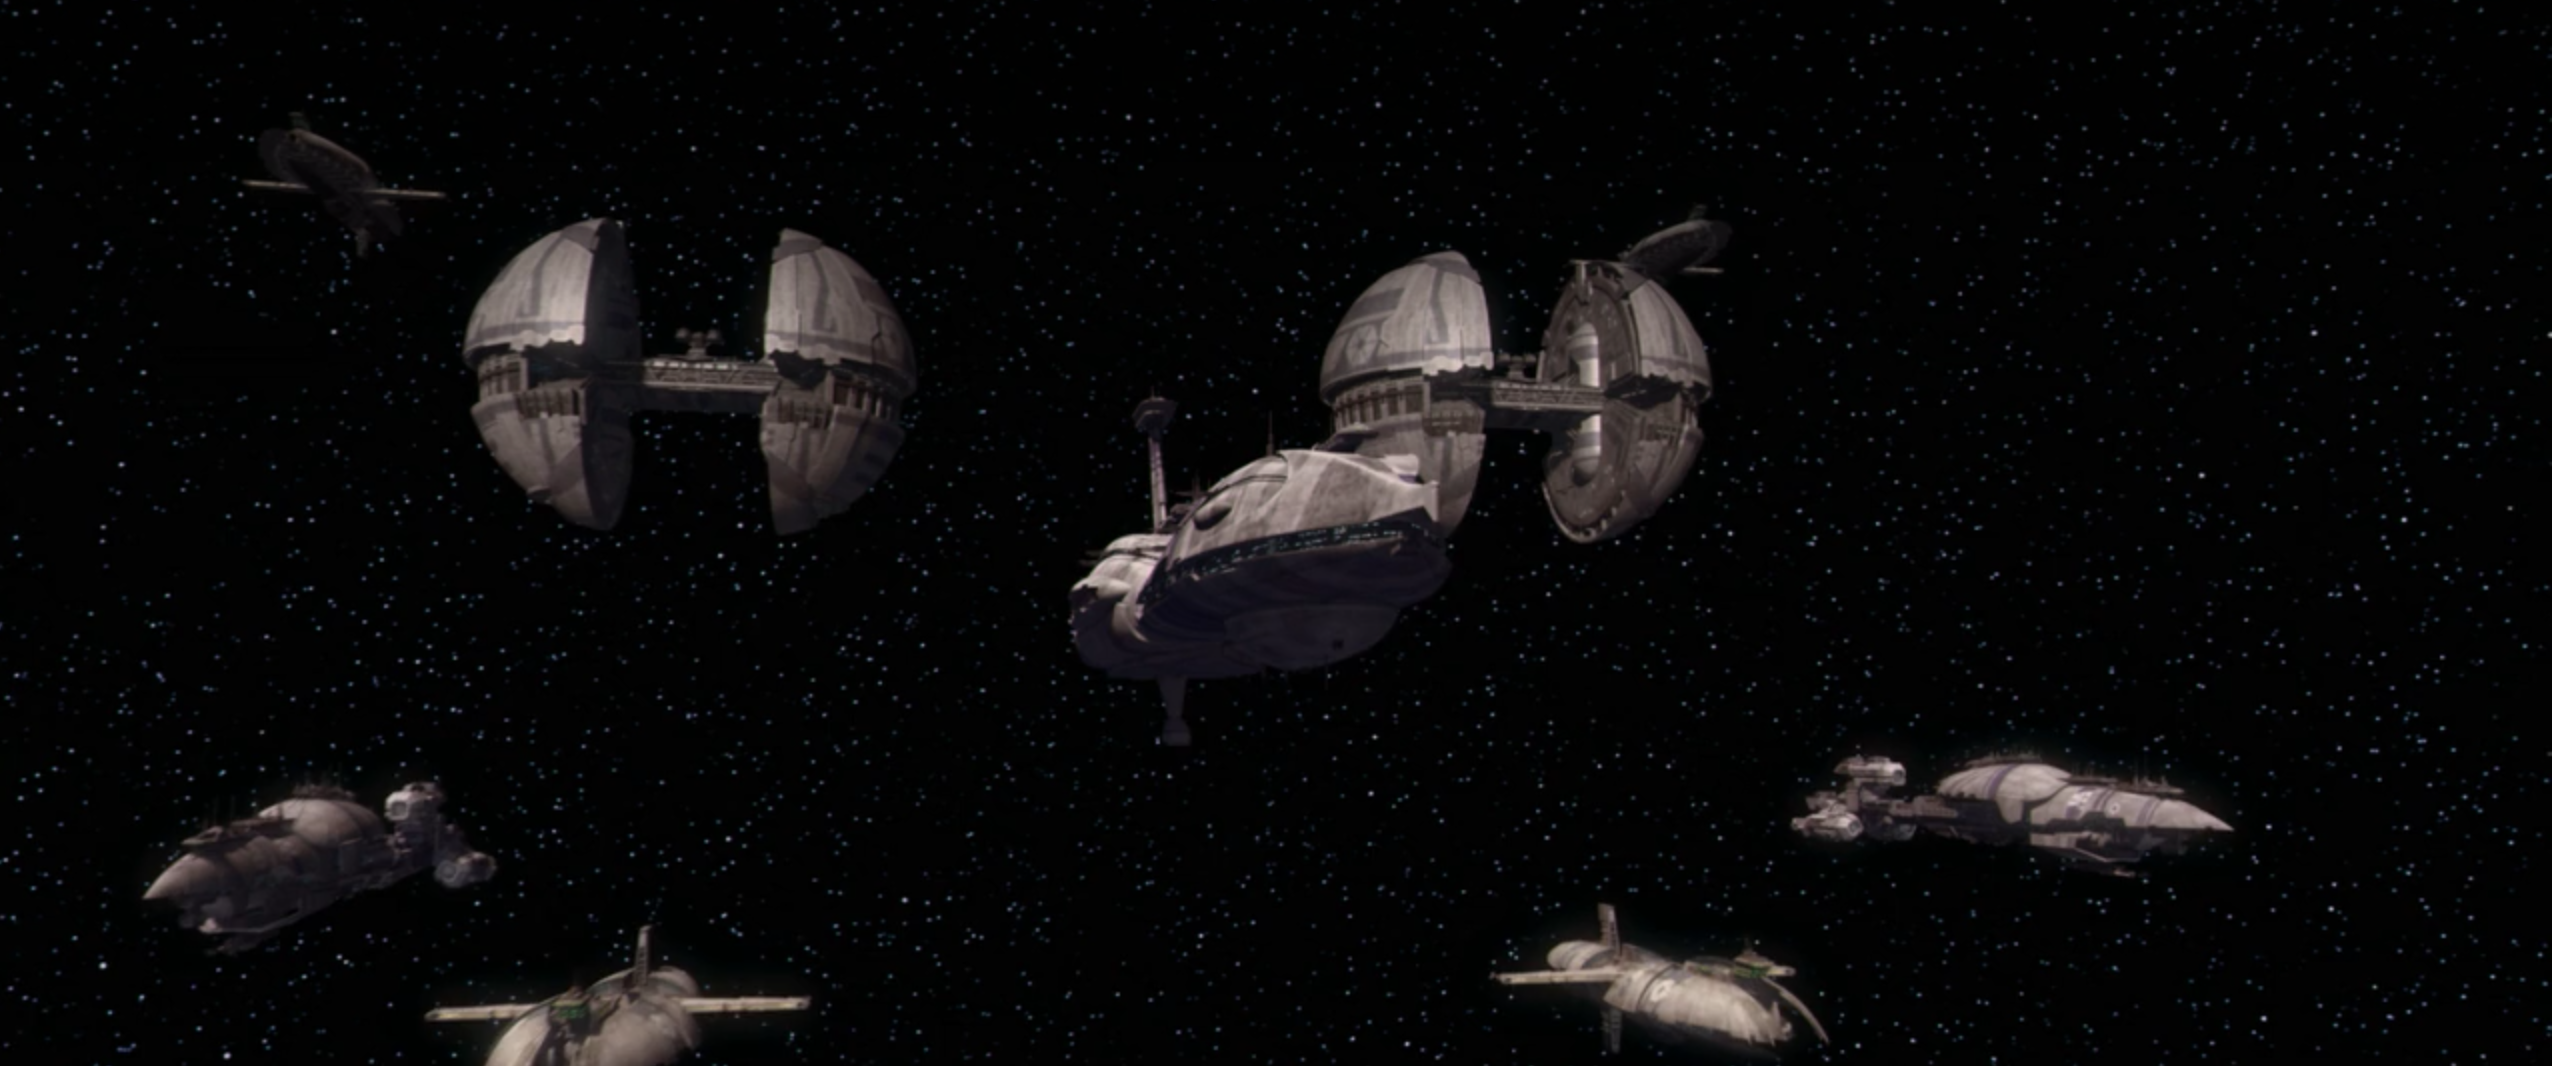
Conceptualized and brought to life by the starship manufacturers Hoersch-Kessel Drive Inc. alongside Gwori Revolutionary Industries, the Munificent-class star frigates stood as formidable and adaptable vessels, integral to the naval forces of the Confederacy of Independent Systems. Often nicknamed "pocket cruisers," these frigate models extended to a length of 825 meters, a width of 426 meters, and a height of 243 meters. These were rapid, sparsely armored warships, engineered for squadrons operations, supported by smaller spacecraft, with the goal of dismantling more substantial capital ships. Power was supplied by a dual reactor system.
Offensive Systems
The Munificent-class, a prominent and dreaded warship within the Separatist fleet, boasted a comprehensive array of weaponry. This arsenal rendered it a superior match against comparable vessels of the Galactic Republic Navy in terms of size and offensive capabilities. Its armament included two forward-mounted heavy turbolaser cannons with the capacity to vaporize an icy moon spanning 1,000 kilometers or penetrate the shields of a Grade III battle station measuring 10 kilometers in width. Additionally, it featured two forward-mounted heavy ion cannons, thirteen twin light turbolaser cannons on both the port and starboard sides, ten turret-mounted light turbolasers on both sides, six medium flak guns on both sides, and ten turret-mounted retractable twin light turbolasers on the dorsal, ventral, port, and starboard aspects. The vessel also incorporated numerous ordnance launchers and a hyperwave jammer, and was defended by a deflector shield generator.
Onboard Personnel and Capacity
Munificent-class frigates functioned with a high degree of automation, necessitating a minimal crew of approximately 200 individuals responsible for maintenance and routine tasks. The remaining interior volume was dedicated to machinery, redundant systems, hangar facilities capable of housing up to four squadrons of vulture droids. These frigates could also transport 150,000 battle droids of varying models in stasis, sustain consumables for up to two years, and accommodate a cargo capacity of 10,000 metric tons.
Movement, Communication, and Direction

Achieving a top atmospheric velocity of 950 kilometers per hour through seven ion drive thrusters, the Munificent-class was furnished with a Class 1 hyperdrive generator, complemented by a Class 10 generator as a secondary system. The frigate also utilized twin long-range hyperwave transceiver masts for communication, a long-range sensor tower, advanced sensors capable of reaching several light-days, and a navigation computer.
Historical Context
Clone Wars Era
Christophsis Skirmish
In 22 BBY, a few months following the First Battle of Geonosis that ignited the Clone Wars between the Galactic Republic and the Confederacy of Independent Systems, the Confederacy deployed its Droid Army, under the command of General Whorm Loathsom and the Sith assassin Asajj Ventress, to seize control of Christophsis. This was motivated by the planet's valuable resources and strategic location along the Corellian Run hyperspace route. A blockade of at least 30 warships, led by the Harch Admiral Trench, was established to prevent Republic intervention. This fleet was anchored by the Providence-class Dreadnought, Invincible, and included at least twenty-three Munificent-class star frigates, six Lucrehulk-class Battleships, and at least one battle refitted Hardcell-class interstellar transport.
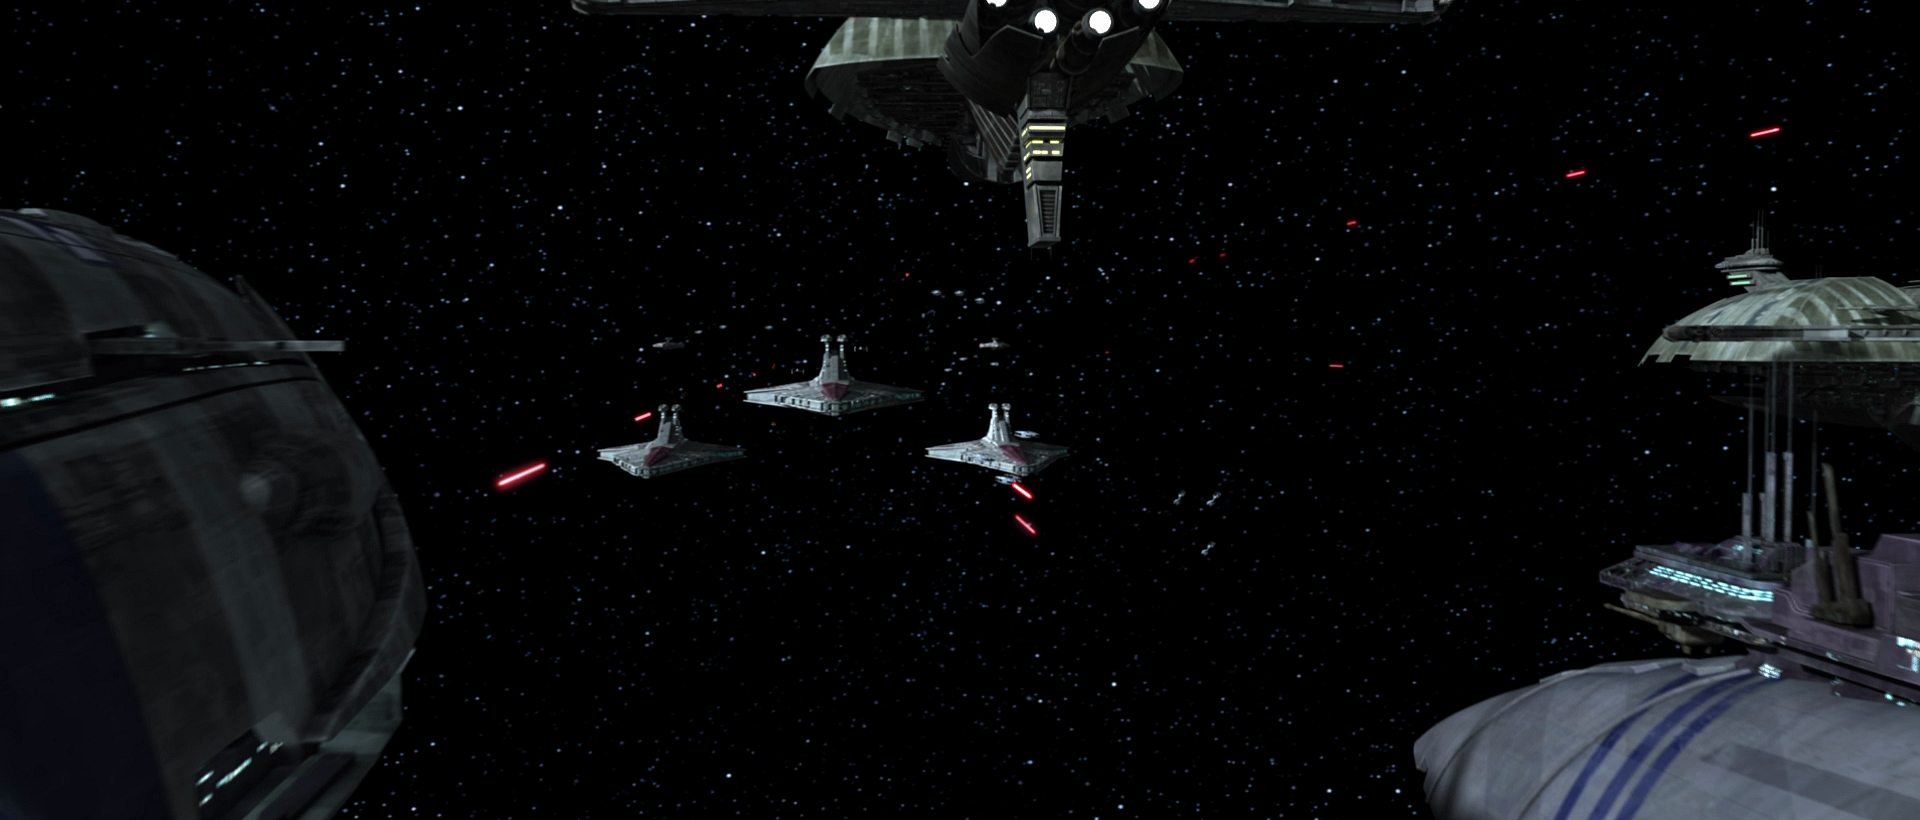
Subsequently, when the Republic arrived to break the blockade, Trench quickly overwhelmed the Republic fleet, composed of three Venator-class Star Destroyers and three Pelta-class frigates under the command of Jedi Knight Anakin Skywalker aboard his Venator, the Resolute. This was achieved by destroying one of the frigates intended to deliver supplies to Senator Bail Organa on the planet's surface, forcing Skywalker to retreat behind Christophsis's moon, Leesis. However, Skywalker later returned piloting a prototype IPV-2C Stealth Corvette and successfully breached the blockade by destroying the Invincible after a brief confrontation, disrupting the entire Separatist formation.
Following the Republic's establishment of a ground base, the blockade continued to engage the Republic fleet above, commanded by Admiral Wullf Yularen. The Republic forces eventually broke through again with assistance from the fleet led by Admiral Wurtz.
Teth Engagement

Shortly after their victory at Christophsis, Skywalker and his Padawan Ahsoka Tano journeyed to Teth in Wild Space to rescue Rotta, the Huttlet son of Jabba Desilijic Tiure. After securing Rotta, following a battle against at least two battalions of battle droids, General Obi-Wan Kenobi, aboard a Venator, arrived in the system with his 212th Attack Battalion to support Skywalker's Torrent Company against Separatist reinforcements. Simultaneously, the Venator and a squadron of Republic fighters engaged a Separatist frigate and several Vulture droids.
Ryloth Crisis
When the Separatist Droid Army, under the command of Techno Union Foreman Wat Tambor, invaded Ryloth, the Separatist Alliance established a blockade in orbit, led by Neimoidian Captain Mar Tuuk. This blockade, consisting of a single Lucrehulk-class Battleship and six Munificents, including Battlecruisers 17 and 19, successfully destroyed the Republic fleet commanded by Admiral Dao, which was supporting Jedi General Ima-Gun Di's Outer Rim garrison. All members of the garrison perished while enabling the Twi'lek Resistance, led by Cham Syndulla, to escape.
Rugosa Ambush
During a diplomatic mission to the Outer Rim moon Rugosa, at the invitation of Toydarian King Katuunko, Jedi Grand Master Yoda was ambushed by two Munificents. Their mission was to eliminate the Jedi Master and prevent his meeting with Katuunko on the moon. The two frigates compelled Yoda's Consular-class cruiser to withdraw from the star system, but not before launching all escape pods containing Yoda and his clone troopers.
Rishi Moon Defense
During the battle of the Rishi Moon, Separatist General Grievous commanded a fleet comprising nine Munificent-class frigates and two Lucrehulk-class Battleships. His forces had infiltrated the outpost on the moon, intending to maintain an active all-clear signal to facilitate a surprise attack on the cloning planet of Kamino. However, surviving clones, with the assistance of Clone Commander Cody of the 212th Attack Battalion and Clone Captain Rex of the 501st Legion, reclaimed the base and destroyed it after Grievous dispatched a C-9979 landing craft with reinforcements. This action deactivated the all-clear signal, alerting the Republic to Grievous's attack and forcing him and his fleet to retreat.
Bothawui Conflict
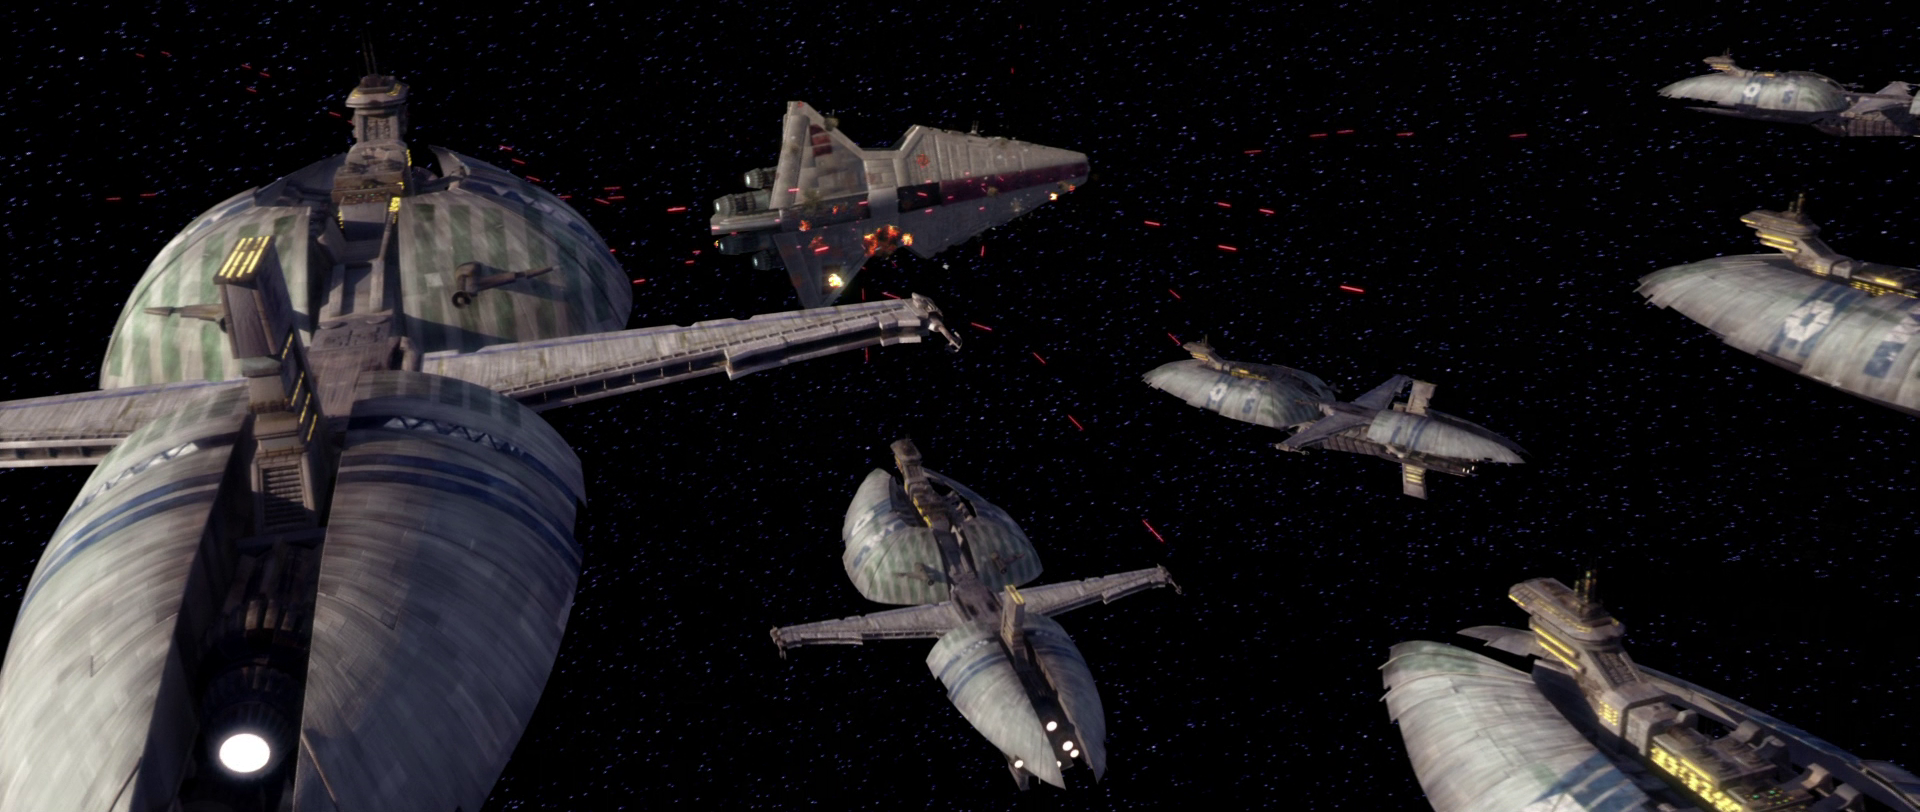
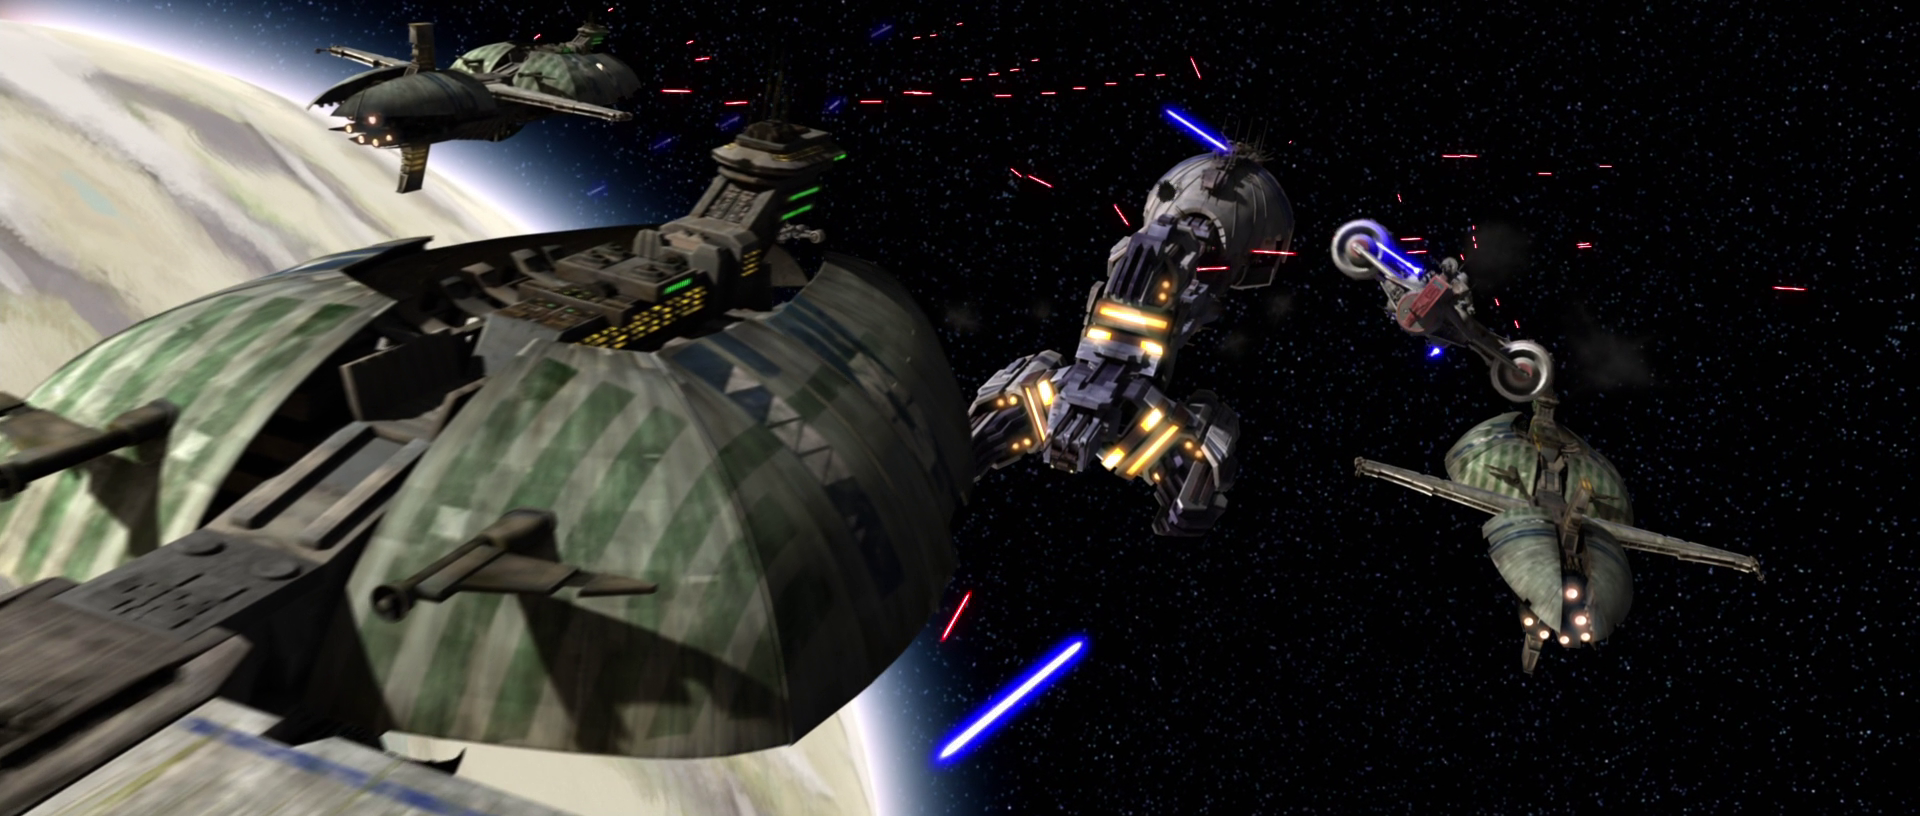
During the Battle of Bothawui in 22 BBY, Grievous led a fleet of six Munificent-class star frigates against Skywalker's fleet of three Venator-class Star Destroyers. The Separatist fleet initially gained a firepower advantage, destroying one Venator. However, all six frigates were soon destroyed after being outmaneuvered by several All Terrain Tactical Enforcers concealed within an asteroid field, leading Grievous to retreat from his personal frigate.
Following his defeat at Bothawui, Grievous used two more Munificents to ambush Skywalker, who was scouting ahead in an outer space corridor. Skywalker escaped the Kaleesh with assistance from his Padawan Ahsoka Tano and Rex, who piloted the G9 Rigger-class light freighter Twilight after Skywalker's starfighter's tracking beacon was activated, alerting Grievous to his location.
Vanqor Skirmish
The Republic devised a plan to capture the Separatist leader Count Dooku to expedite the war's end. The initial phase involved Anakin Skywalker infiltrating a lone Munificent-class star frigate, the personal flagship of Count Dooku, without his lightsaber and allowing himself to be captured.
Obi-Wan Kenobi later arrived on the ship in the Vanqor system after Skywalker's capture, freeing the Jedi and attempting to capture Dooku. Skywalker's flagship, the Resolute, engaged the frigate, with clone troopers boarding to assist. Dooku escaped aboard his Punworcca 116-class interstellar sloop, pursued by the Jedi in a Sheathipede-class shuttle.
Quell Conflict
During the Battle of Quell, the T-series military strategic analysis and tactics droid TF-1726 deployed several Munificent-class frigates against Jedi General Aayla Secura and her task force of three Venators, commanding Separatist forces from his own Munificent.
As Skywalker approached the Quell system to aid Secura, two of her Venators were destroyed, and the tactical droid deployed B2-RP super battle droids to board Secura's damaged Star Destroyer, aiming to expedite its destruction. Skywalker, aboard the Resolute, entered the system and deployed Low Altitude Assault Transport/infantry gunships to board the ship and rescue Secura.
After entering the damaged Venator through a hull breach, Skywalker and his forces joined Secura and her Clone Commander Bly, explaining that he had a frigate docking in the lower hangar to evacuate survivors. The Separatist frigates pressed their attack, causing an internal explosion as survivors evacuated onto the cruiser, severely injuring Skywalker, who used the Force to contain the blast.
Ryloth Liberation
Later, Skywalker and Ahsoka Tano were tasked with breaching the Ryloth blockade, enabling Obi-Wan Kenobi, Mace Windu, and the invasion fleet to land on the planet. After Tano's fighter squadron broke the droid fighter line, Captain Tuuk summoned four more frigates—including Battlecruisers 17 and 19—and additional fighters. The blockade's fighters overwhelmed the Republic forces, destroying Tano's squadron and executing suicide runs on the Star Destroyers Resolute, Redeemer, and Defender. After a vulture droid crashed into the Resolute's bridge, Skywalker ordered a retreat, losing the Redeemer and most of Tano's squadron in the initial assault.
Despite these losses, Skywalker returned to the blockade in the heavily damaged Defender, offering to surrender himself and the ship to Tuuk in exchange for supplies for the Twi'leks. Tuuk, considering the offer, was informed that Skywalker was the only individual onboard. Despite attempting to destroy the Defender, the vessel crashed into the Lucrehulk. The remaining blockade then targeted the Resolute, which had angled its hull towards them, but the remaining frigates were destroyed by Ahsoka's fighter squadron, allowing the invasion fleet to land as it exited hyperspace.
Devaron Conflict
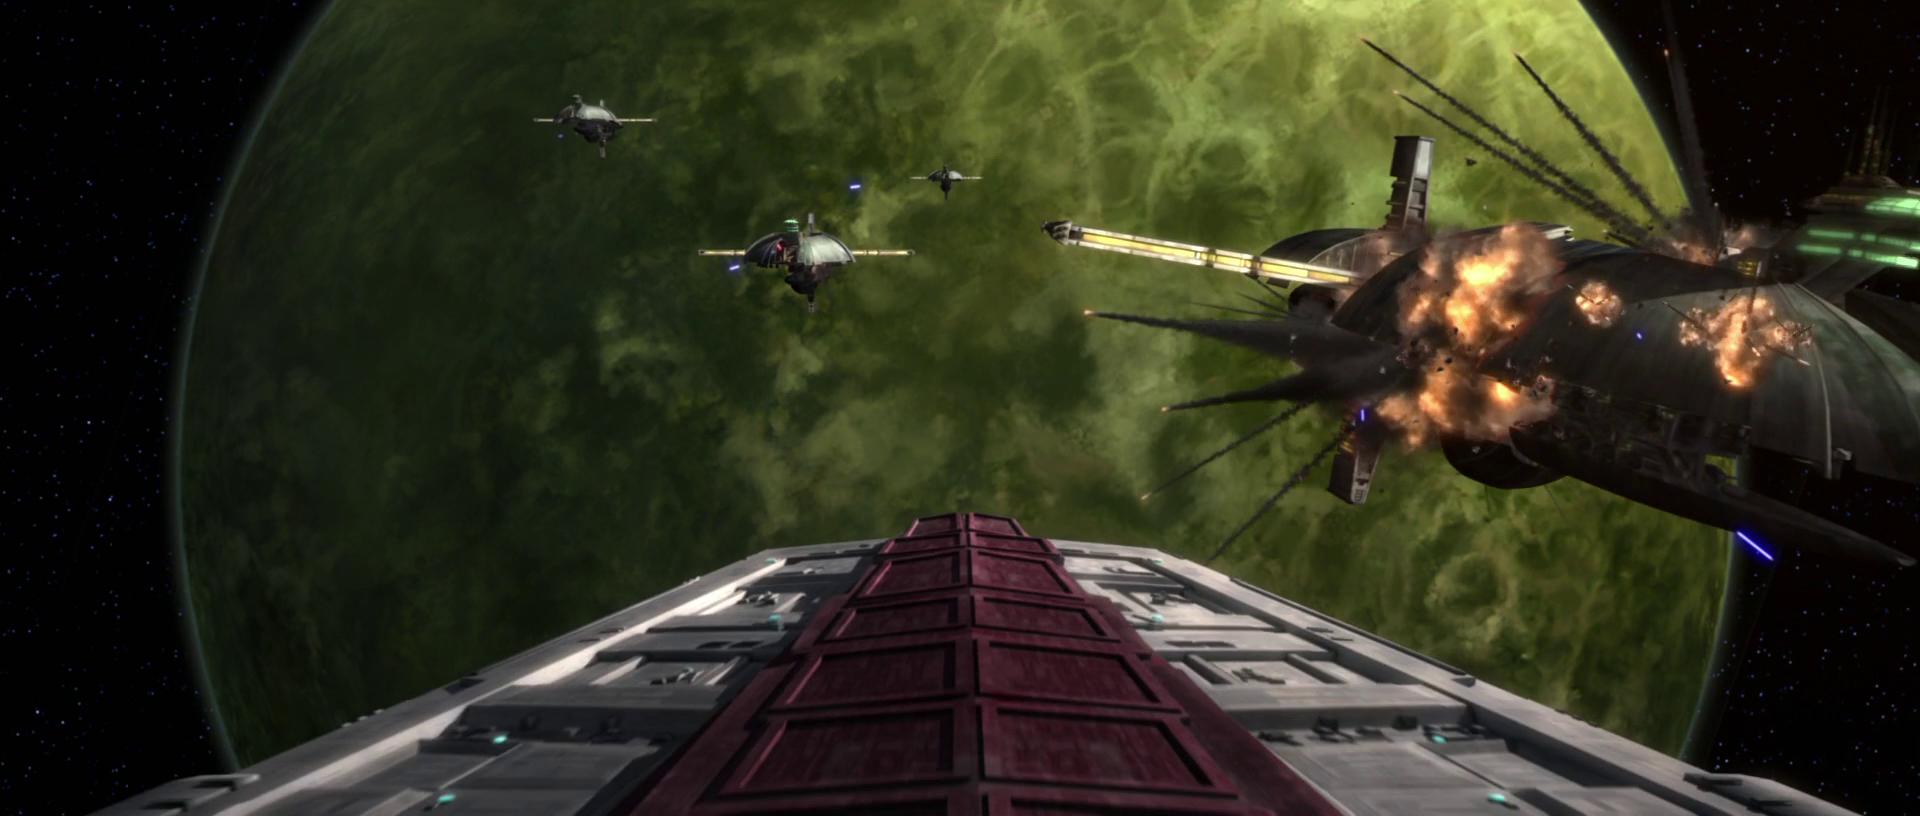
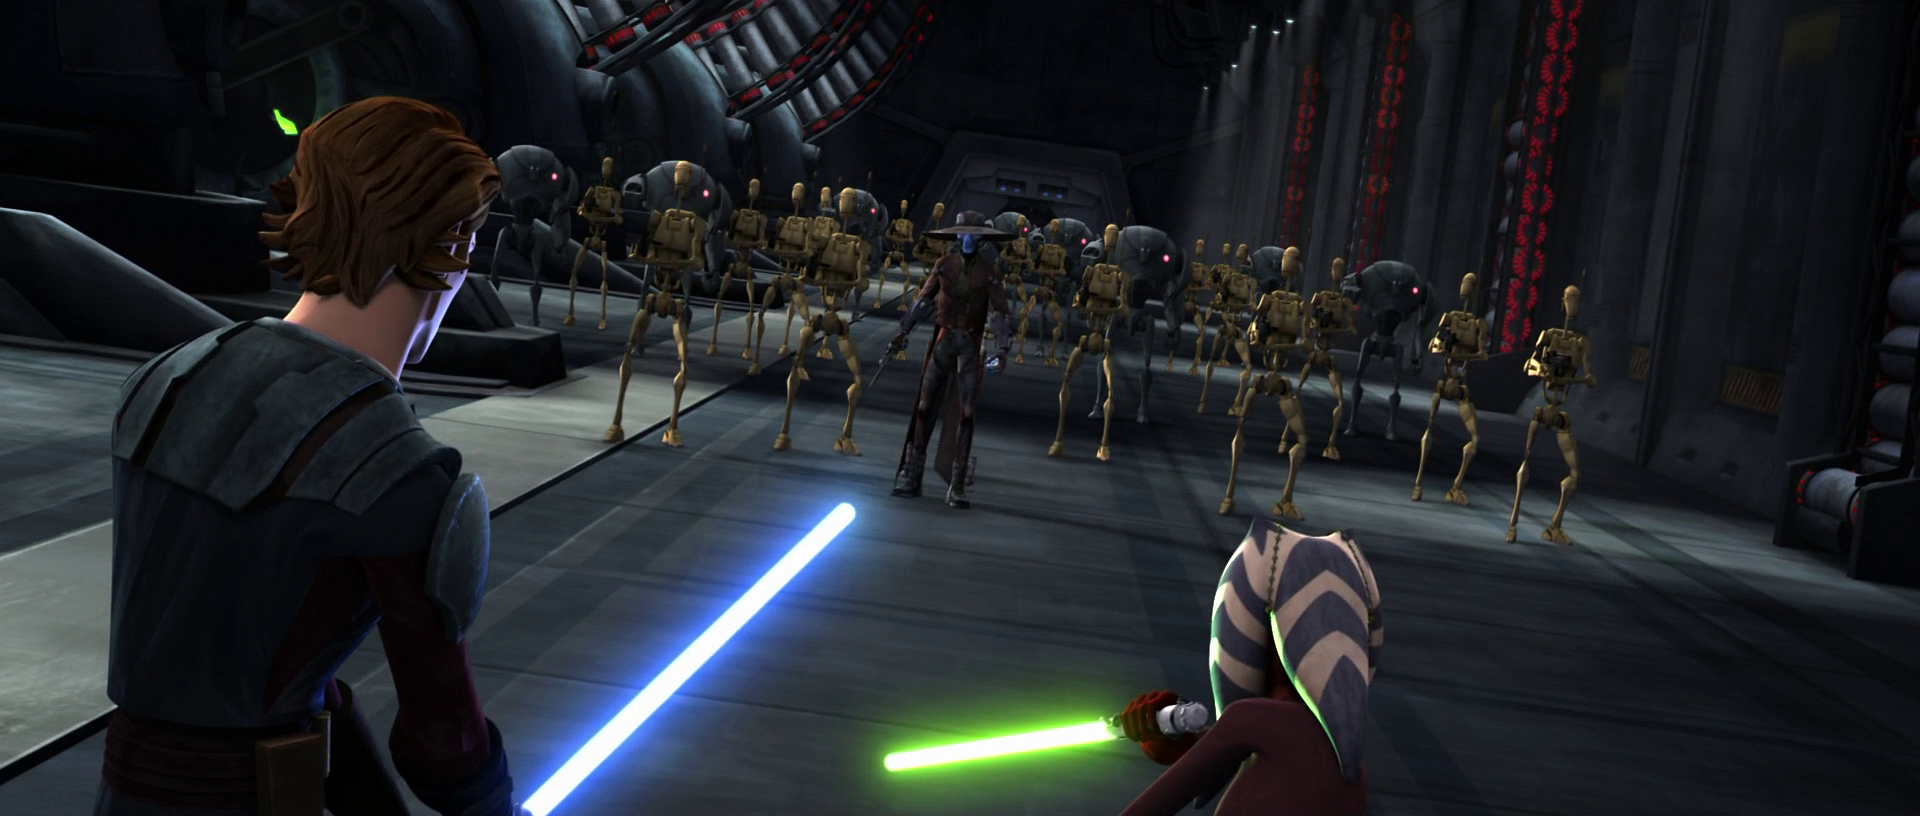
During the battle of Devaron, Cad Bane commanded a fleet of four Munificent-class frigates provided by the Trade Federation to aid in his mission to retrieve Jedi Master Bolla Ropal, who was missing on Devaron. After capturing Ropal aboard his frigate, Skywalker arrived aboard the Resolute, immediately engaging the fleet and destroying the other three frigates escorting Bane's vessel.
Attempting to escape, the Star Destroyer fired on the remaining frigate's hyperdrive, preventing its escape and allowing Skywalker, Tano, and a clone trooper team to board in search of Ropal and the Jedi holocron stolen from the Jedi Temple on Coruscant. Discovering Ropal's death at the hands of Bane and the Separatists, Skywalker and Tano engaged Bane and a force of battle droids, causing heavy damage to the vessel, which Bane had set to self-destruct.
Rescuing Tano, Skywalker and his apprentice pursued Bane to retrieve the holocron. Realizing the ship's impending explosion, the Jedi retreated to the hangar, where Rex and the clone troopers awaited aboard a shuttle. The Republic escaped, failing to recover the holocron and believing Bane was killed by clone trooper Denal.
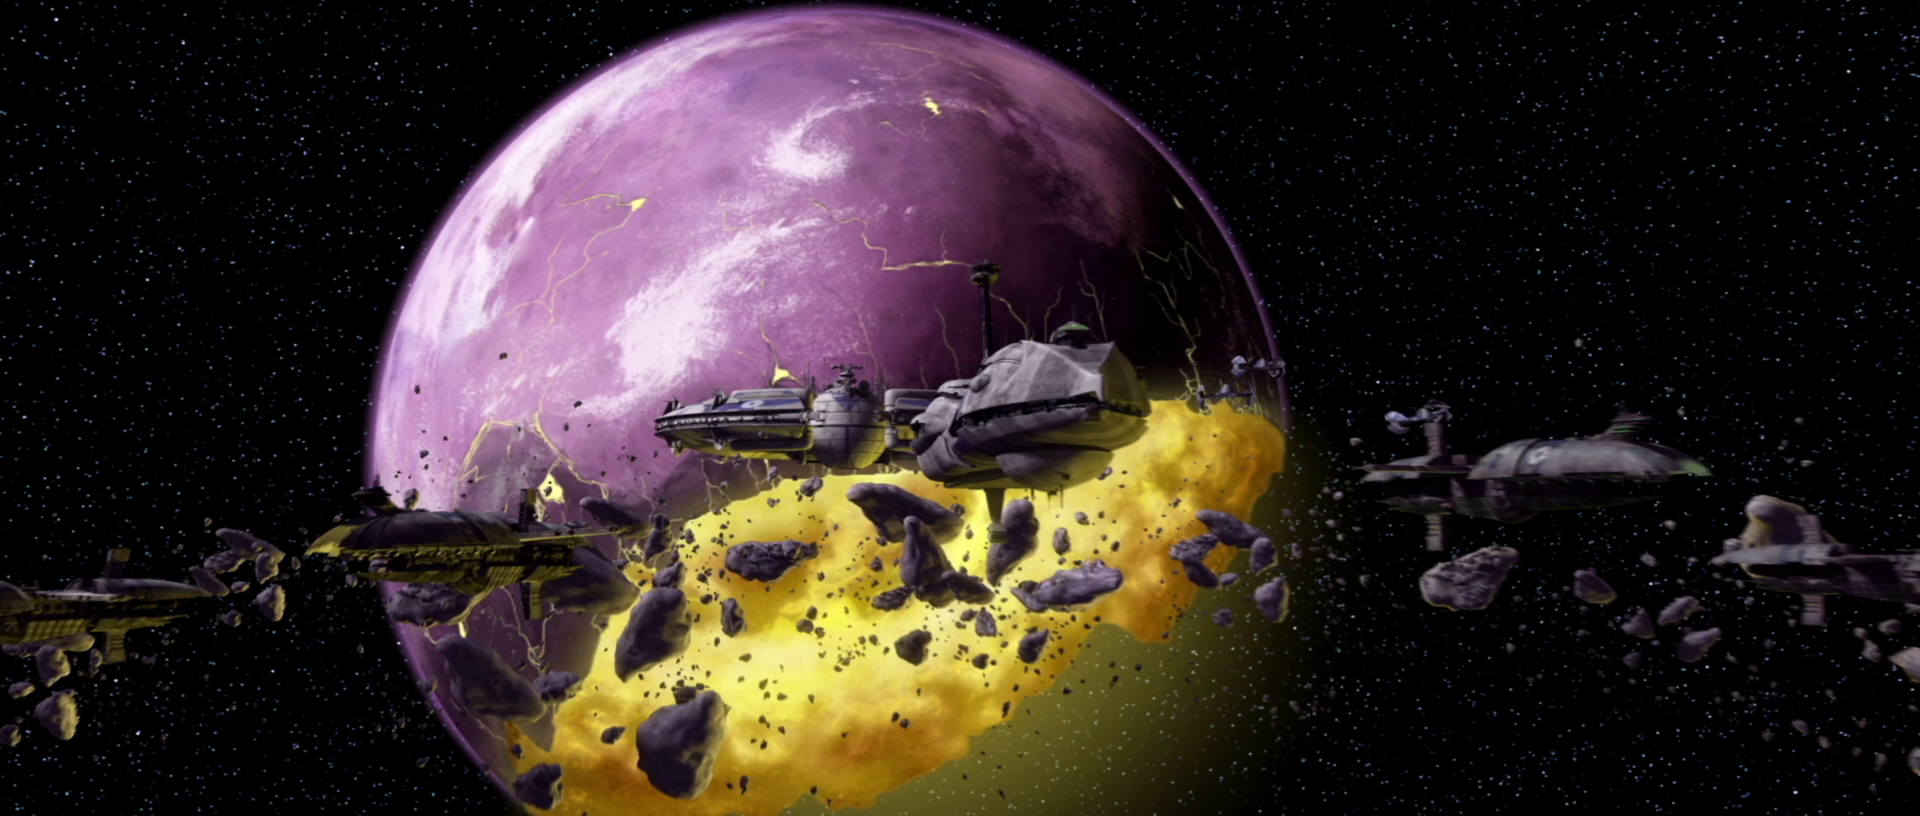
Felucia Medical Station Destruction and Saleucami Battle
Following their victory at Felucia in 21 BBY, the Confederacy launched an attack on Felucia Medical Station HCTFF2, a Haven-class medical station in the Felucia system. The attack, carried out by two Munificents and a Separatist dreadnought, resulted in the medical station's destruction.
Later, during the Battle of Saleucami, General Grievous deployed three Munificent-class frigates in his fleet, flagged by a Recusant-class light destroyer. These Munificents were engaged by a Republic fleet led by Kenobi, Skywalker, and Adi Gallia, who were attempting to rescue Jedi Eeth Koth from Grievous's Recusant.
Kamino and Sullust Battles
Despite an earlier failed attempt, Grievous and Asajj Ventress planned a second invasion of Kamino. However, the Republic intercepted a transmission detailing the invasion, prompting the 501st Clone Battalion and Generals Kenobi and Skywalker to reinforce the planet.
Arriving within the Kamino system, the Separatist invasion fleet, under the command of the Kaleesh, included Grievous' Separatist dreadnought, specifically his Providence-class carrier/destroyer, along with three Recusant-class destroyers and eleven Munificent-class star frigates. These vessels secretly transported components beneath their hulls for the assembly of Trident-class assault ships, intended for the assault on Tipoca City.
Later on, a Separatist fleet under Ventress' command, which included several Munificent-class frigates, two Recusant-class destroyers, and a single Providence-class Dreadnought serving as the flagship, engaged a Republic fleet. This Republic fleet was led by Generals Kenobi and Skywalker, and the resulting battle was fought for control of the planet Sullust. Ventress and her fleet encountered the Republic forces during this conflict.
Battle for the Nexus Route
As the war progressed, Jedi Master Even Piell discovered the location of the Nexus Route. This hyperspace route held significant strategic value, extending deep into both Republic and Separatist territories. This discovery led to a Separatist ambush of Piell and his warship, carried out by a small fleet consisting of two Munificent-class frigates and a dreadnought. Consequently, the Jedi was imprisoned within the Citadel, a seemingly inescapable prison situated on the volcanic world of Lola Sayu.
Following Piell's capture, the Republic dispatched a rescue team, led by Jedi, to retrieve him, two clone officers, and Piell's captain, Wilhuff Tarkin. The goal was to prevent the Confederacy from obtaining the hyperlane's coordinates and return them safely to Coruscant. Upon entering the Lola Sayu system, the rescue team, traveling aboard a stolen Sheathipede-class Type B shuttle, encountered the planet's defense fleet, composed of four Munificent-class frigates, a Lucrehulk-class battleship, and a Providence-class dreadnought.
After successfully freeing the Jedi Master and his officers from the Citadel, the rescue team's shuttle was destroyed during their escape. This led to the Republic sending a task force of four Venator-class Star Destroyers to extract the stranded personnel, which then forced the four Munificent-class frigates and the remainder of the Separatist fleet to engage the Republic's task force.
Capturing Adi Gallia
At some point during the war, Grievous, commanding a fleet of two Munificent-class frigates and his Providence-class Dreadnought, initiated a surprise attack against Jedi Master Adi Gallia and her single Republic Star Destroyer near the planet Patitite Pattuna. The Kaleesh was successful in capturing the Jedi Master after engaging her in lightsaber combat aboard the Star Destroyer.
Battle of Umbara
Later in the war, following the death of Senator Mee Deechi, the representative for Umbara in the Galactic Senate, the Umbaran government withdrew from the Republic and joined the Separatist Alliance. Subsequently, the Separatists established a planetary blockade consisting of at least six frigates and one dreadnought, which Republic forces engaged during their invasion to retake the planet.
As the battle intensified both in space and on the planet's surface, the Separatist Alliance deployed a Dual Hemisphere-Omni Support Vessel to reinforce the native Umbaran forces in an attempt to defeat the Republic troops led by Generals Kenobi, Skywalker, and Pong Krell. To protect the supply ship, a Separatist armada composed of at least eight frigates, four light destroyers, and three dreadnoughts defended the vessel, but ultimately failed as a trio of clone troopers destroyed the supply ship.
Massacre on Dathomir
After Ventress' unsuccessful assassination attempt on her former master, Dooku, and the betrayal by his new apprentice, Savage Opress, the Sith Lord learned that Ventress had returned to the planet Dathomir in the Quelii sector, the home world of the Nightsisters. Upon learning this, Dooku ordered Grievous to launch an invasion of the planet, intending to exact revenge on his former assassin and Mother Talzin, with the goal of eliminating the entire Nightsister clan.
The general led an invasion fleet composed of four Munificent-class frigates, two Recusant-class destroyers, two DH-Omni Support Vessels, and his Providence-class Dreadnought. Upon arriving in the Dathomir system, Grievous ordered his forces to initiate the landing sequence, successfully killing all of the Nightsisters except for Ventress and Talzin.
Attack on Obi-Wan Kenobi's fleet
Later in the final year of the war, Grievous and his fleet launched an attack against General Kenobi's Republic task force. This Separatist fleet included two Providence-class dreadnoughts, one Recusant-class destroyer, and three Munificent-class frigates. During the battle, one of the Munificent-class frigates was destroyed, which led to the destruction of Kenobi's fleet and his flagship, the Negotiator.
Invading Cato Neimoidia and Scipio
Later in the conflict, the Confederacy launched an invasion of Cato Neimoidia, the capital world of the Trade Federation. However, the Separatist forces, consisting of six Munificent-class frigates and a single Providence-class dreadnought, encountered a Republic defense force led by General Skywalker and his Padawan, Commander Tano. The Republic forces managed to break through the Separatist fleet in orbit, allowing both Jedi and a squadron of clone Z-95 Headhunters to reach the surface, where they engaged the command ship and its accompanying frigates.
Subsequently, during the Separatist invasion of Scipio, the world belonging to the InterGalactic Banking Clan, Count Dooku, the Confederate Head of State, commanded the invasion from his personal Providence-class Dreadnought, accompanied by three Munificent-class frigates and two supply ships. After the Serennian successfully tricked Senator Rush Clovis into increasing interest rates on the Republic instead of the Confederacy, the Count and his flotilla fled the system, allowing the Republic to regain control of Scipio and the Banks.
Fight against the Shadow Collective
During the campaign against the Shadow Collective, an organization formed from various crime families and syndicates and led by the former Sith Lord Maul, Grievous commanded a substantial Separatist fleet in the battle for the moon of Zanbar. This occurred after the Zabrak escaped from the Spire prison on Stygeon Prime. The fleet included Grievous's Providence-class Dreadnought, at least eighteen Munificent-class frigates, two Recusant-class warships, five DH-Omni Support Vessels, and at least five C-9979 landing craft.
Shortly after their victory at Zanbar, Grievous and his forces tracked Maul's retreat to the planet Ord Mantell, where he awaited the Kaleesh's fleet. Upon exiting hyperspace above the planet, Grievous ordered the fleet, which consisted of several Munificent-class frigates, support ships, a single Lucrehulk-class LH-3210 cargo freighter, and multiple landing craft, all led by the Providence-class Dreadnought Invisible Hand, to initiate an orbital bombardment on the city of Ord Mantell. Despite the bombardment, Maul deployed several Kom'rk-class fighter/transports to engage the fleet, managing to board the Invisible Hand and capture Grievous.
Other battles
The ships saw continued action throughout the Clone Wars. During the Battle of Crombach Nebula, Jedi Master Wom-Nii Gnaden's NTB-630 naval bomber collided with a Munificent-class frigate. The resulting impact mark remained visible on the frigate up to the time of the Battle of Coruscant, where numerous Munificent-class star frigates participated.
Later history
The Vontorian treasure ship Graceful Promising bore visual similarities to a Munificent-class star frigate. During the New Republic Era, the pirate Gruk gained control of a surviving Munificent-class star frigate, utilizing it within the Lost Clusters. However, Sidon Ithano's crew seized control of the ship, intending to use it to locate other surviving CIS vessels.