Tarkin (superweapon)
Known as the Tarkin Project, the Tarkin was an Imperial superweapon that drew inspiration from the first Death Star battle station. It was named to honor the deceased Grand Moff Wilhuff Tarkin. This Tarkin integrated the offensive might of the initial Death Star, specifically a planet-destroying ionic cannon superlaser, with a defensive shield generator and propulsion engines. Engineer Bevel Lemelisk conceived the Tarkin at the direction of Emperor Palpatine after the first Death Star's demise at the Battle of Yavin. It served as a prototype for the Eclipse-class Super Star Destroyer, a massive warship equipped with a ship-based superlaser. By incorporating technological improvements, the Tarkin addressed flaws identified in the first Death Star, most notably the exposed thermal exhaust port, while also supporting the development of a second Death Star alongside its own construction.
The Empire initiated the Tarkin's secret construction within the Patriim system, positioned above Hockaleg, a planet serving as a garrison. Admiral Nod Warfield oversaw the project. Following the Battle of Hoth in 3 ABY, Grand Admiral Martio Batch commandeered the Tarkin's destructive superlaser to annihilate Aeten II, the only time the Tarkin superweapon was used offensively. This action released millions of stygium crystals buried deep within the planet into space, which Batch then collected to recreate the stygium screen cloaking device for his TIE Phantom development program.
Soon after learning about the Tarkin's existence, the Rebel Alliance sent an elite team consisting of Luke Skywalker, Princess Leia Organa, the Wookiee Chewbacca, and the droids C-3PO and R2-D2—the only Rebels to have survived being on the first Death Star—to the Patriim system to penetrate the Tarkin and destroy it before it was completed. Despite the presence of Darth Vader and a group of traitorous commanding officers looking to kill Vader and stop the Rebel saboteurs, Organa remembered the original Death Star's technical schematics to reconfigure the Tarkin's superlaser to target itself. When activated, the sabotaged superlaser caused the Tarkin to self-destruct in a failed attempt to eliminate the escaping Rebels.
Description
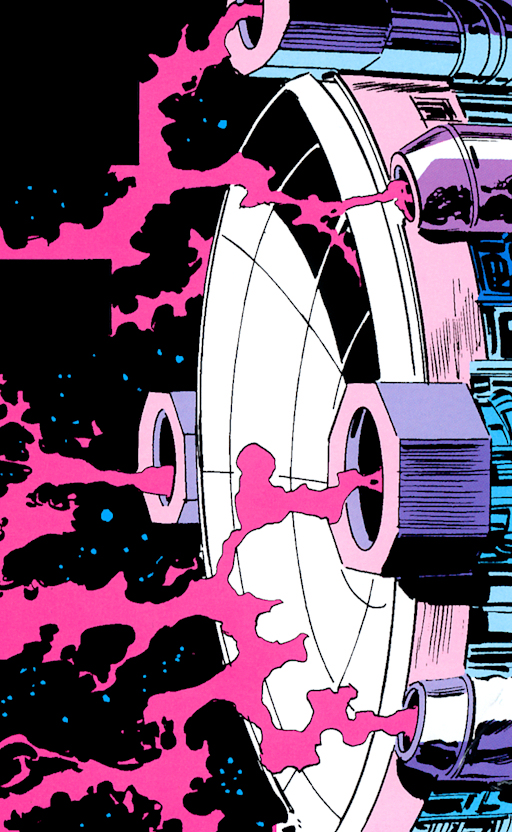
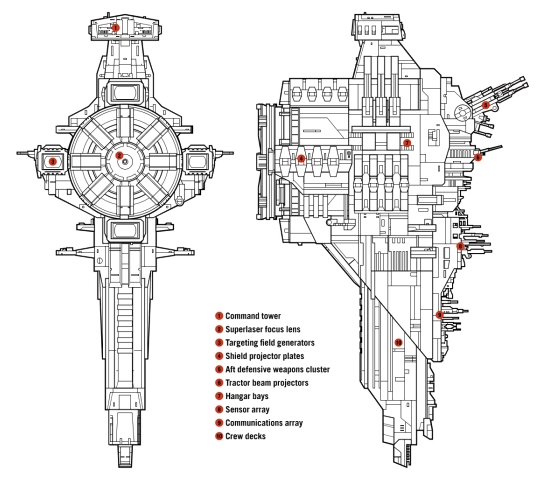
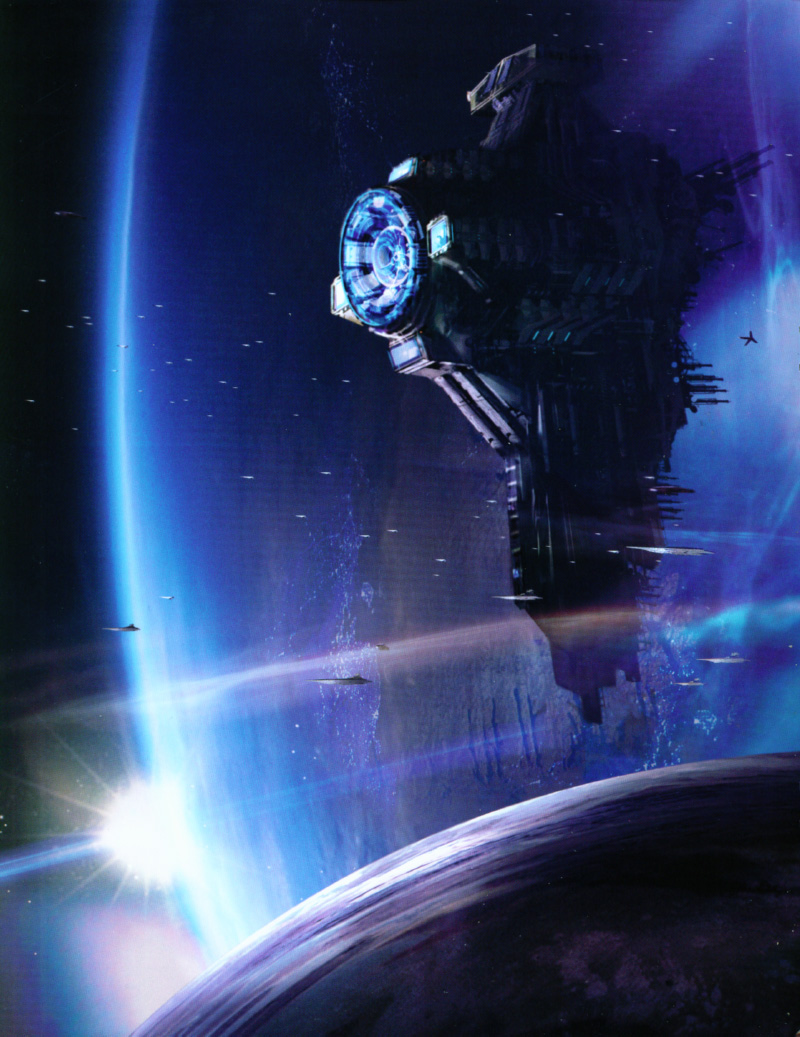
The Tarkin superweapon, also known as the Tarkin Project, represented a massive planetary-scale battle station built around the same core principles as the first Death Star. It integrated the primary offensive weapon of the Death Star, a powerful ionic cannon superlaser capable of planetary destruction, alongside a defensive shield generator system and a set of engines. The superlaser, featuring a central concave dish surrounded by smaller tributary nodes, was the most prominent feature of the battlestation's forward superstructure. Its immense size dwarfed the Empire's formidable Star Destroyers. Unlike its predecessor, the Tarkin was designed without the critical vulnerability of the first Death Star: an exposed thermal exhaust port.
Located behind the forward superlaser dish was the central command tower and bridge. The command tower mirrored the trapezoidal design found on Imperial-class Star Destroyers, but without the deflector shield generator domes. The bridge layout also resembled that of the Imperial-class Star Destroyer, featuring a wide, angular viewport and a command walkway. A series of tiered command stations were arranged in a circular pattern in front of the bridge's viewports.
The battlestation's interior was divided into sections and levels designated by letters and numbers, such as K-level and sections TH-10 and TH-11. Inside were the main power reactor, the primary external tractor beam generator, the escape pod bay, hangar bays for its starship complement, and the superweapon's complex activation mechanism. Service lifts provided rapid transportation between the many decks.
A stormtrooper force secured the Tarkin, restricting access to sensitive areas to authorized personnel. Gunners controlled the superlaser's firing mechanism. The Tarkin also had a TIE/LN starfighter squadron for close-range air support.
History
Design origins and destruction of Aeten II
The Tarkin was a direct successor, both in design and purpose, to the Empire's first Death Star, which was destroyed at the Battle of Yavin in 0 BBY. Enraged by this loss, Emperor Palpatine tasked engineer Bevel Lemelisk, the Death Star's original designer, with creating an even larger and more powerful version. Simultaneously, the Emperor had also commissioned the construction of two massive warships equipped with axial superlasers—the Eclipse-class dreadnought. To conceal the new Death Star from the Rebel Alliance and to test the ship-mounted superlaser for his new warships, the Emperor instructed Lemelisk to develop a prototype of the Eclipse-class as an operational weapons platform.
Lemelisk began by designing a superlaser testbed, similar to the Death Star prototype constructed at the Maw Installation, that would rectify the flaws of the first Death Star through technological upgrades. Imperial officers named this testbed, a scaled-down Death Star, the "Tarkin", in honor of the late Grand Moff Wilhuff Tarkin, the Death Star's former commanding officer.
After Lemelisk's team finished the Tarkin's design, they began working on the Death Star's successor. Construction of the superlaser testbed started at the Patriim shipyards in the Patriim system, above the garrison planet Hockaleg. The Empire secretly diverted resources to the Tarkin's construction, keeping it hidden from the Rebel Alliance. Despite being smaller than the Death Star, the Tarkin was large enough to be seen in the Hockaleg sky as a rectangular satellite. Admiral Nod Warfield oversaw the construction.
As the Tarkin approached completion in 3 ABY, following the Battle of Hoth, it became a subject of interest for Grand Admiral Martio Batch. The Emperor had tasked Batch with developing a functional cloaking device, since the technology had become scarce in the galaxy by the time of the Galactic Civil War. Batch's initial cloak suffered from "double blindness," preventing those inside from seeing out. To create a proper cloak, Batch needed access to stygium crystals, once common but now only found in the mines of Aeten II, which were now depleted. Batch requisitioned the Tarkin's superlaser to solve this problem.
Batch used his authority to redirect the Tarkin to the Aeten system in the Dreighton Nebula of the Outer Rim Territories, where he used the superlaser to destroy Aeten II, releasing the remaining stygium crystals into space. He then collected these crystals to recreate the stygium screen cloak for his prototype TIE Phantom project. The destruction of Aeten II was the only successful firing of the Tarkin's superlaser.
Rebel infiltration
The Tarkin was assembled in the Patriim orbiting drydock above Hockaleg, balanced by the planet's gravity. Workers lived in shanties in a spaceport town and were shuttled to the Tarkin daily. Imperial-class Star Destroyers guarded the construction site.
Shortly after the destruction of Aeten II, a Rebel pilot, Maraba Tev, led a spy mission to the Patriim system and stole the Tarkin's schematics, revealing its existence to the Rebel Alliance. Recognizing the threat, the Rebellion decided to destroy the Tarkin before it became operational. Lacking a vulnerability like the first Death Star, a direct attack was impossible. General Carlist Rieekan organized a commando team to infiltrate and destroy the battlestation from within. The team included Luke Skywalker, Princess Leia Organa, Chewbacca, and C-3PO and R2-D2—the only Rebels to have survived infiltrating the original Death Star.
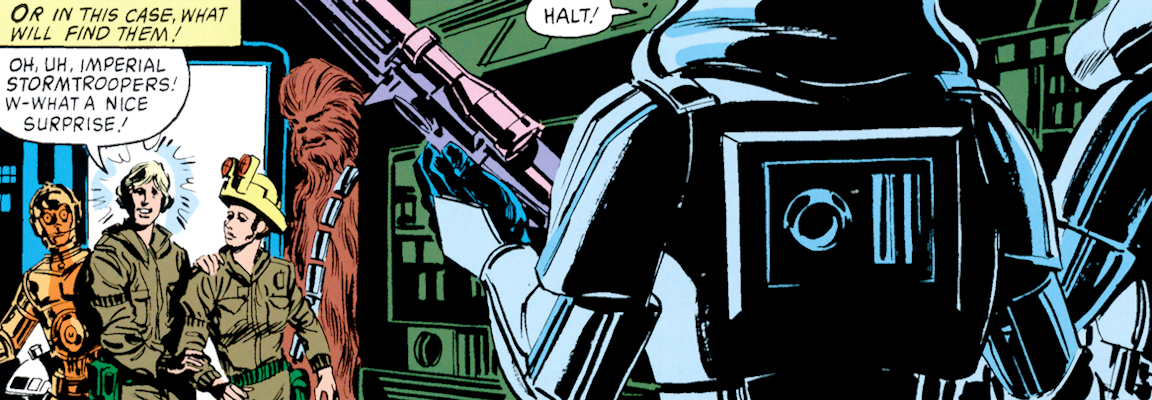
The team successfully infiltrated the Tarkin by docking on Hockaleg aboard the Millennium Falcon, disguised as a damaged freighter, then blending in with the construction crew and boarding a shuttle to the Tarkin. However, the superweapon became a battleground for three factions. Darth Vader, who had arrived for an inspection, sensed Skywalker's presence and ordered security to evacuate the main reactor area, planning to confront him and turn him to the dark side. Simultaneously, a group of the Tarkin's commanding officers, tired of Vader's harsh rule, planned to assassinate him.
The Rebels split into three groups: Chewbacca was to destroy the tractor beam generator for escape, Organa would secure an escape route by seizing an escape pod, and Skywalker would destroy the reactor with a proton grenade. They alerted the Tarkin's bridge to their presence. Vader moved to intercept Skywalker, while the officers prepared to strike, recognizing Vader's preoccupation with the Rebels.
The Princess's vengeance
Only one part of the Rebels' plan succeeded. Chewbacca, with C-3PO's help, destroyed the tractor beam generator after a brief fight with stormtroopers. Organa was ambushed in the escape pod bay and forced to abandon the planned escape route. Skywalker's mission was foiled, not by Vader, but by the officers.
Vader was waiting for Skywalker at the reactor, but before they could fight, Colonel Nord, one of the officers, remotely opened an airlock near the reactor, hoping to eject Vader into space. The breach nearly killed both Vader and Skywalker, and pulled the proton grenade into space. Skywalker escaped into a freight lift, unable to sabotage the reactor. Vader used the Force to close the airlock, realizing Nord had tried to kill him.
Organa, lost, stumbled upon the activation mechanism for the Tarkin's superlaser, the same weapon that had destroyed her homeworld of Alderaan. Knowing the Rebellion couldn't allow the Empire to use it, Organa created a failsafe. Remembering the schematics of the first Death Star that R2-D2 had acquired, she rewired the firing mechanism, reversing the polarity of the controls, effectively setting the Tarkin to self-destruct if it fired its primary weapon.
The Rebels commandeered a transport and escaped, but Vader sent TIE Fighters after them. Lando Calrissian in the Millennium Falcon helped them escape, prompting Vader to pursue them in his personal TIE fighter. The Millennium Falcon disabled Vader's fighter, leaving both the Dark Lord and the Rebels in firing range of the Tarkin. Nord ordered the superlaser primed, hoping to eliminate both Vader and the Rebels, but as the superlaser activated, the Tarkin exploded.
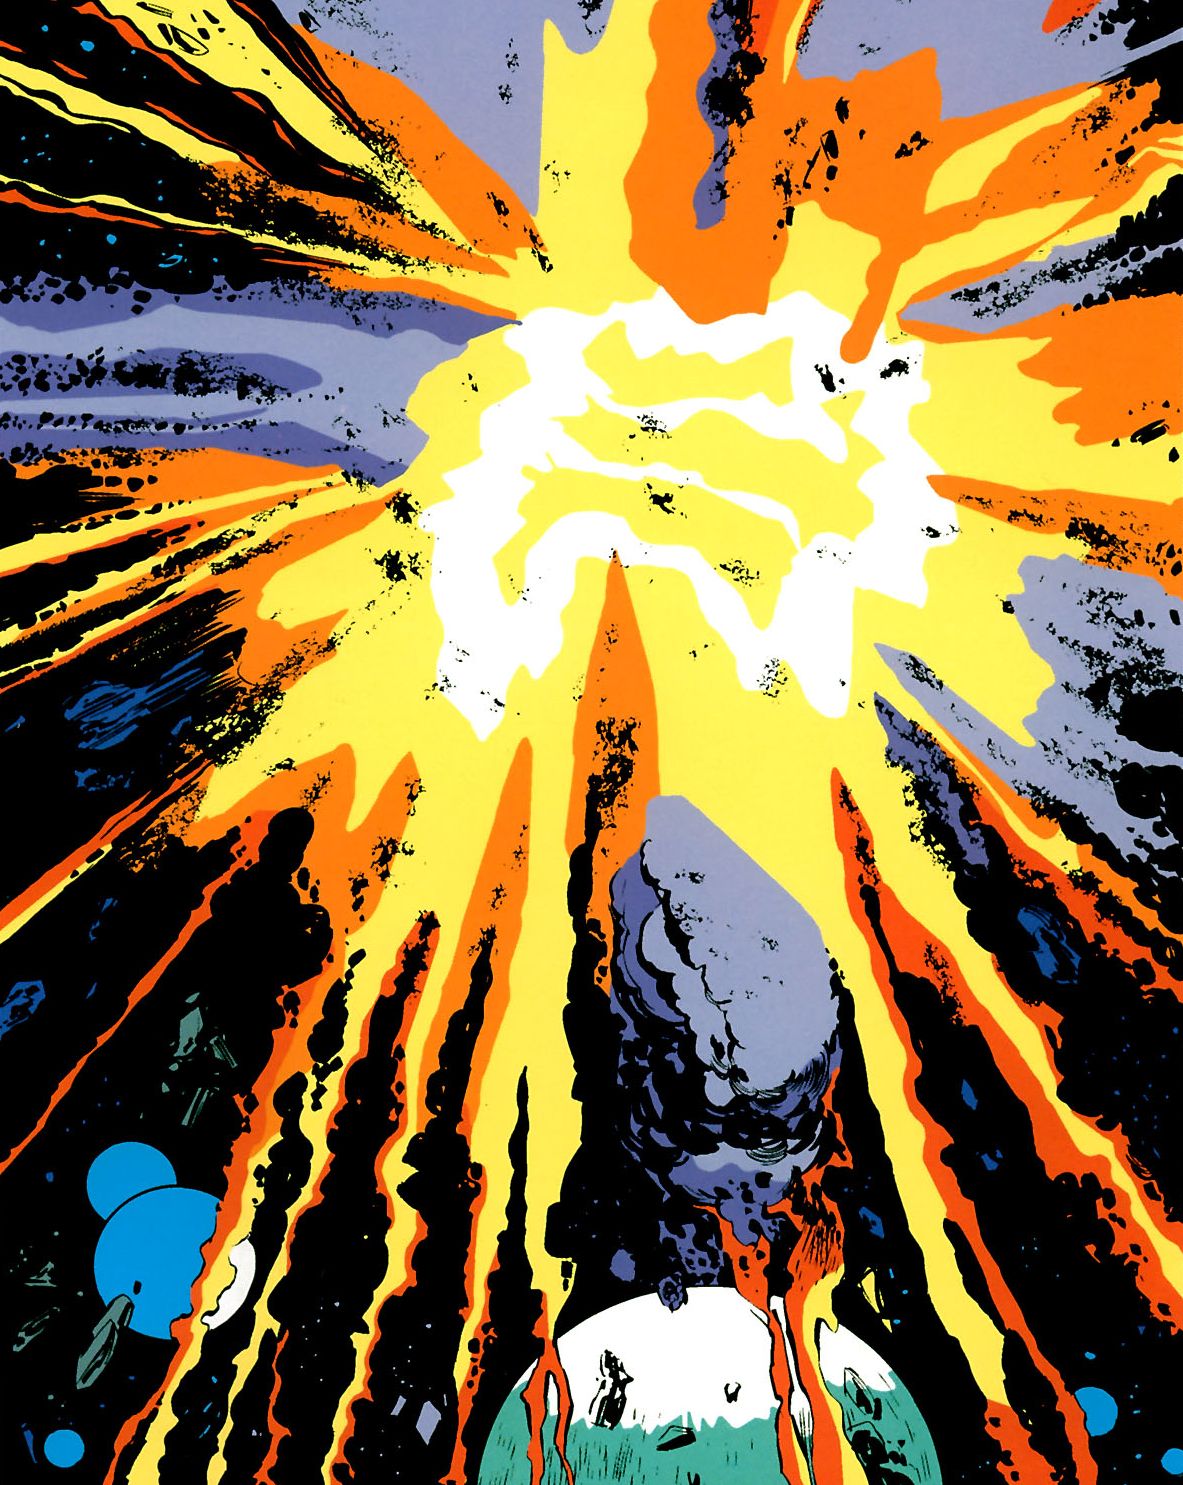
Organa's tampering had caused the superlaser to fire on itself. The Rebels' mission was a success, and Organa destroyed the weapon that had destroyed Alderaan. She and the Rebels escaped.
The Tarkin detonated in a massive explosion, visible in the skies of Hockaleg. The explosion destroyed two nearby Star Destroyers and other vessels, and released debris and electromagnetic radiation, disrupting communications. The shockwave sent Vader's fighter tumbling, but he was rescued. Vader knew the Emperor would be displeased.
Legacy
The loss of the Tarkin didn't stop the development of Imperial superlaser technology. The Empire deployed the second Death Star months later at the Battle of Endor, and although it was destroyed, its superlaser worked successfully. Years later, in 10 and 11 ABY, the resurrected clone Emperor Palpatine used the Eclipse-class warships, for which the Tarkin had served as a testbed, as his flagships in a failed campaign against the New Republic. Both were destroyed. In 12 ABY, the Hutt crime lord Durga Besadii Tai commissioned Bevel Lemelisk to build another Death Star-like superweapon, the Darksaber, similar to the Tarkin, but it also met the same fate.
Commanders and crew
The Tarkin's core officers were united by their desire to kill Darth Vader, a plan led by Colonel Nord. They were tired of Vader's cruelty and his tendency to execute officers for minor mistakes. They feared they would be his next victims. The group met in a secluded area to plan their attack.
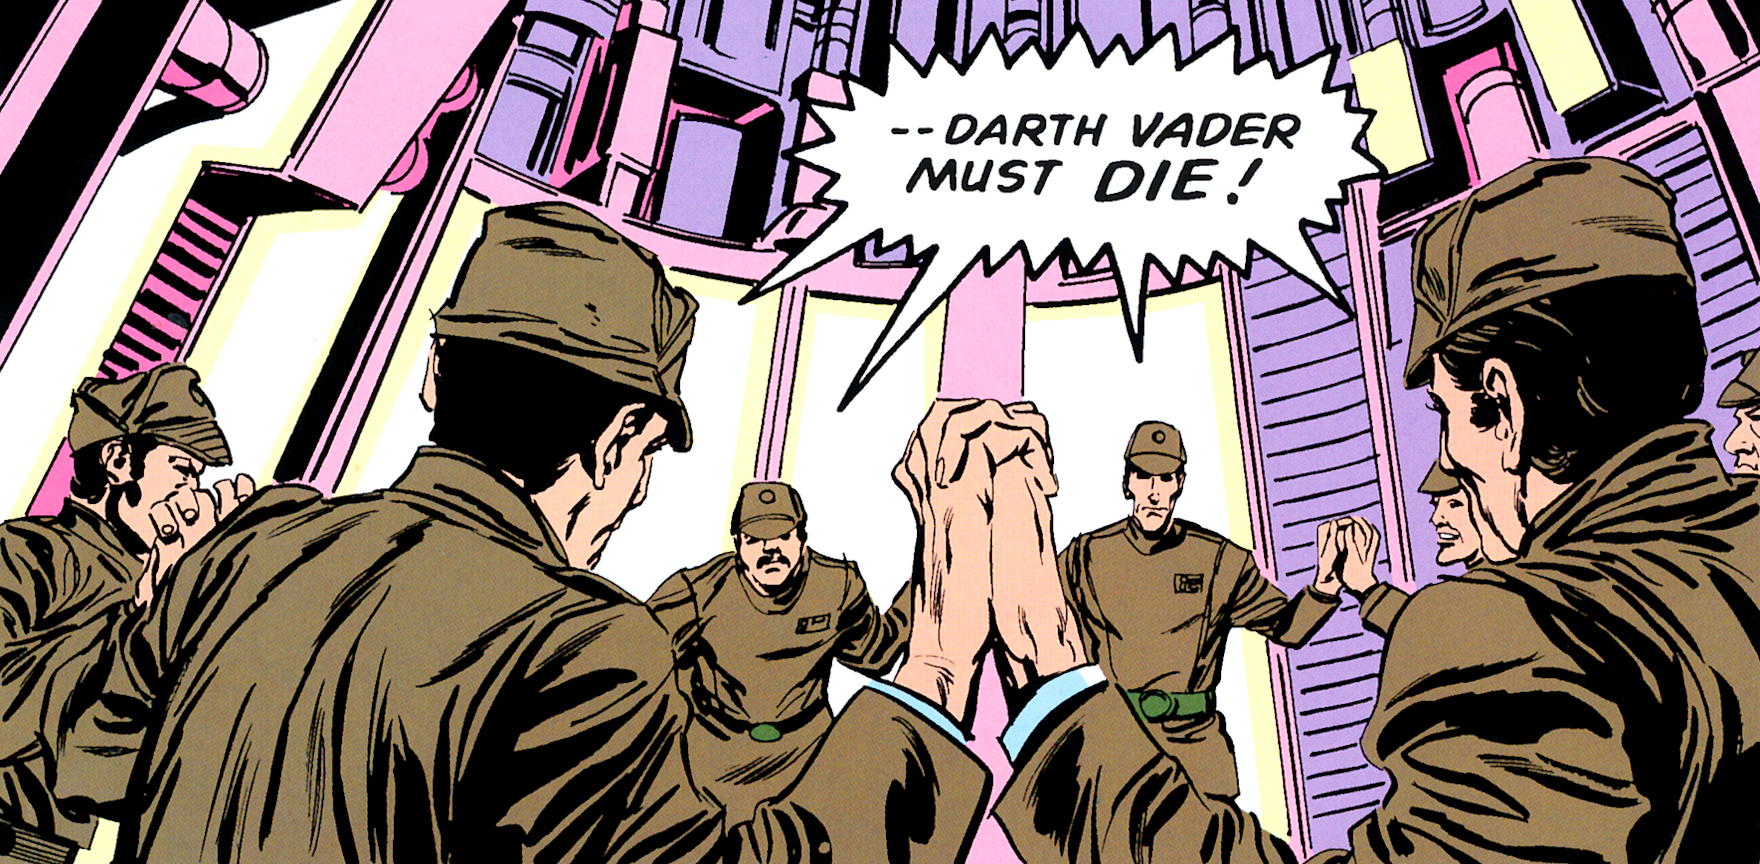
The Imperial officer contingent featured General Biel; Captain Voal, who was originally responsible for fulfilling Vader's directive to evacuate all security forces from the Tarkin's reactor area in anticipation of Luke Skywalker's apprehension; and Nord, the individual who masterminded the unsuccessful assassination attempt against Vader. From the bridge, Nord remotely unlocked an airlock in proximity to the reactor core while the Rebel forces were infiltrating, with the intention of ejecting Vader into the vacuum of space, but the Dark Lord's mastery of the Force enabled him to survive. Vader discerned Nord's betrayal, however, the Tarkin met its explosive end, eliminating the group of rebels before Vader could exact his retribution.
An admiral stationed on the bridge was among the other officers serving on the Tarkin during the Rebel incursion. This admiral received orders from Vader to prepare his personal TIE fighter for immediate launch to pursue Skywalker and the escaping Rebel contingent.
During the Rebel infiltration, the stormtrooper known as Berl was part of a trio of soldiers assigned to guard the Tarkin's external tractor beam generator. Chewbacca physically seized Berl and hurled him into the core of the generator, causing its destruction.
Furthermore, stormtroopers, including troopers Contrail, identified as CT-4981, who abandoned his post after the Tarkin's obliteration to search for survivors and recover Vader; TK-813; and TK-529, were patrolling Hockaleg's spaceport on the planet below. Contrail's responsibilities encompassed authorizing shuttle flights to the Tarkin in orbit. In addition to enlisted military personnel, the Empire enlisted a number of Humans for ground operations at the spaceport. A diverse construction crew composed of humanoids and other alien species—many of whom held resentment towards the Empire—also inhabited the planet amidst the spaceport's collection of makeshift structures while toiling on the Tarkin above. Each member of the construction crew donned standardized green uniforms. Skywalker and Leia Organa appropriated the uniforms of two construction crew members, a laborer named Brunok and his partner, allowing them to blend in with the construction crew and infiltrate the Tarkin. Upon witnessing the Tarkin's fiery demise in the skies above, many of the project's laborers initiated a revolt and wreaked havoc throughout the Hockaleg spaceport, targeting the Imperial headquarters and the stormtroopers they encountered.
Behind the scenes
The Tarkin superweapon entered Star Wars canon through the narrative presented in Marvel Star Wars comic issues 51 and 52—Resurrection of Evil and To Take The Tarkin—which were released on June 16 and July 21, 1981. David Michelinie and Walt Simonson, the creators of Marvel Star Wars, initially envisioned the Tarkin as a second Death Star, but Lucasfilm mandated a revision to their storyline. Michelinie and Simonson were unaware during the development of the Tarkin story arc in 1981 that Lucasfilm had concrete plans to feature a second Death Star in the film Star Wars: Episode VI Return of the Jedi scheduled for release in 1983. Lacking a clear explanation from Lucasfilm regarding the restriction on using a Death Star, Michelinie and Simonson simply repurposed their Death Star concept into a simplified, airborne cannon while preserving the original narrative. They eventually discovered that they had inadvertently conceived the same story idea as George Lucas for Return of the Jedi.
The article Who's Who: Imperial Grand Admirals, penned by Daniel Wallace and Abel G. Peña in March 2003 for Star Wars Insider 66, established a connection between the Tarkin's history and Grand Admiral Martio Batch's destruction of the planet Aeten II to acquire a stygium cloaking device. This connection provided a rationale for the Empire's possession of stygium-type cloaking technology in the 1995 video game Star Wars: Rebel Assault II: The Hidden Empire, despite conflicting evidence within the established canon. In a June 2005 blog post on StarWars.com, Wallace later described this connection as "the retcon of retcons."
In the November 2006 article Comic Marvels from Star Wars Insider 91, writer Jason Fry subsequently selected the Tarkin story—Marvel issue 51, Resurrection of Evil—as the premier "Anticipation" story throughout the entire Marvel Star Wars comic series, due to its foreshadowing of a second Death Star, which would not materialize until the release of Return of the Jedi almost two years later.
The events depicted in Marvel issues Resurrection of Evil and To Take The Tarkin served as the inspiration for the Ryder Windham short story Vader Adrift, which was featured in the November 2011 Star Wars Insider Special Edition 2012 magazine, introducing new developments concerning Darth Vader in the immediate aftermath of the Tarkin's destruction.
Non-canon history
The eleventh issue of the Star Wars Adventure Journal, published in November 1996, incorporated a recurring section titled "Fragments from the Mind's Eye," illustrated by Pablo Hidalgo. This issue presented a humorous scenario in which a collection of previously destroyed Imperial superweapons from Star Wars canon—including both Death Stars, the World Devastator, and the Galaxy Gun, among others—were being offered for sale at B'hob's Discount Superweapons. The Tarkin battlestation was included among the junkyard of failed Imperial superweapons.