Rogue Shadow
The Rogue Shadow was a one-of-a-kind starship that Starkiller, the secret apprentice to the Sith Lord Darth Vader, used as his personal transport. In addition to the primary occupants, the apprentice and PROXY, his training droid, the ship's piloting duties were rotated between eight Imperial officers, one of whom was Captain Juno Eclipse, who commanded Vader's Black Eight Squadron. The Rogue Shadow was constructed with stealth and covert operations as primary concerns, integrating advanced cloaking technology and a very sophisticated hyperdrive engine into its design, which allowed the apprentice to travel anywhere in the galaxy without being detected.
Following Starkiller's death, Eclipse kept the Rogue Shadow and transferred her allegiance from the Galactic Empire to the newly established Rebel Alliance. Later, Jedi Master Rahm Kota, a general in the Alliance Military, came to own the starship until a renegade clone of the original Starkiller met Kota on Cato Neimoidia. Shortly before a major battle began on the planet Kamino, Kota handed the Rogue Shadow over to the clone. After the Alliance secured victory on the Kaminoan homeworld, the Rebels imprisoned Darth Vader within the Rogue Shadow to move him to the Alliance's hidden base on Dantooine.
Characteristics
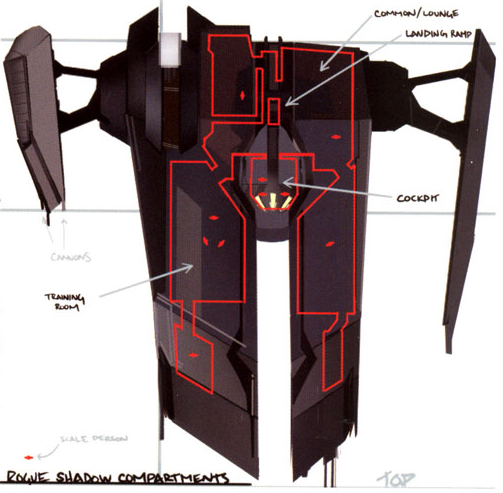
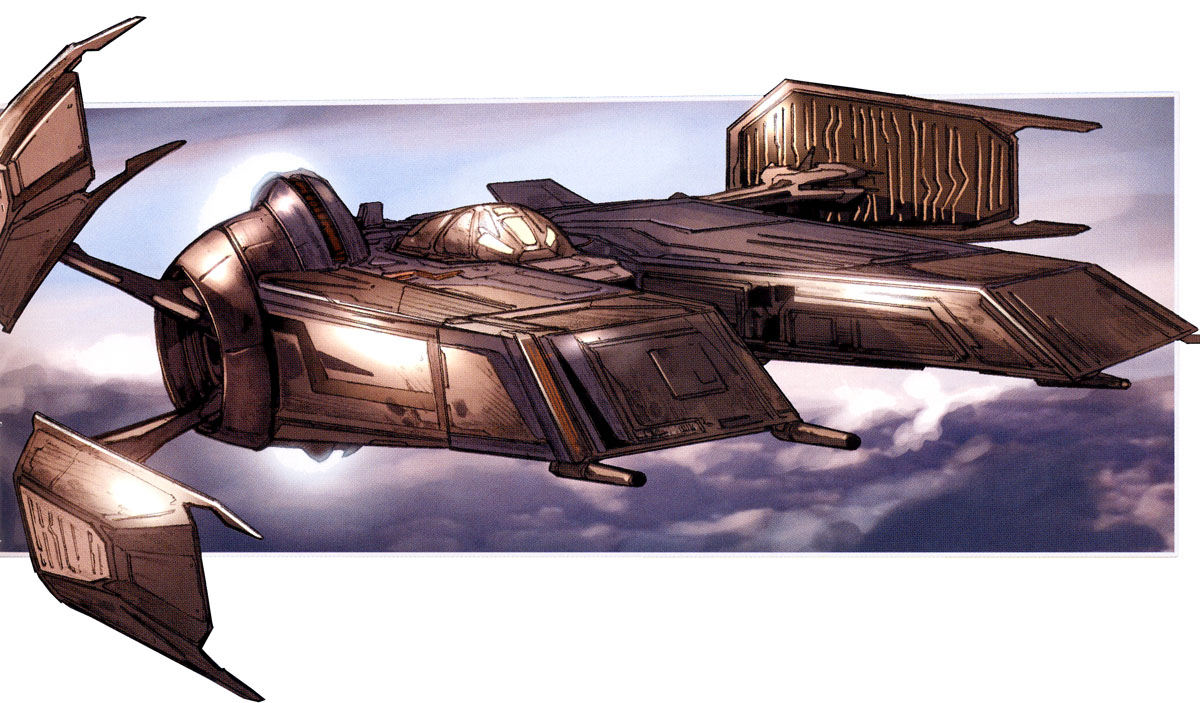
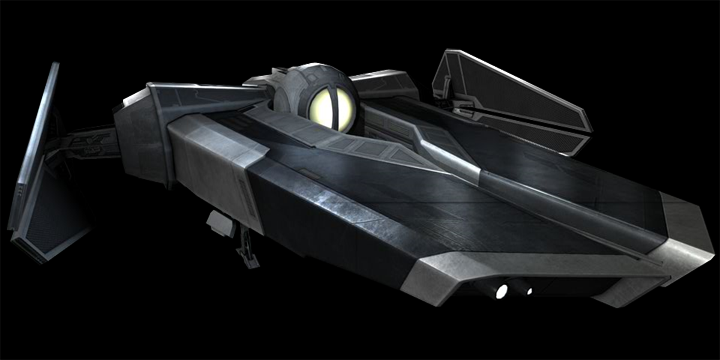
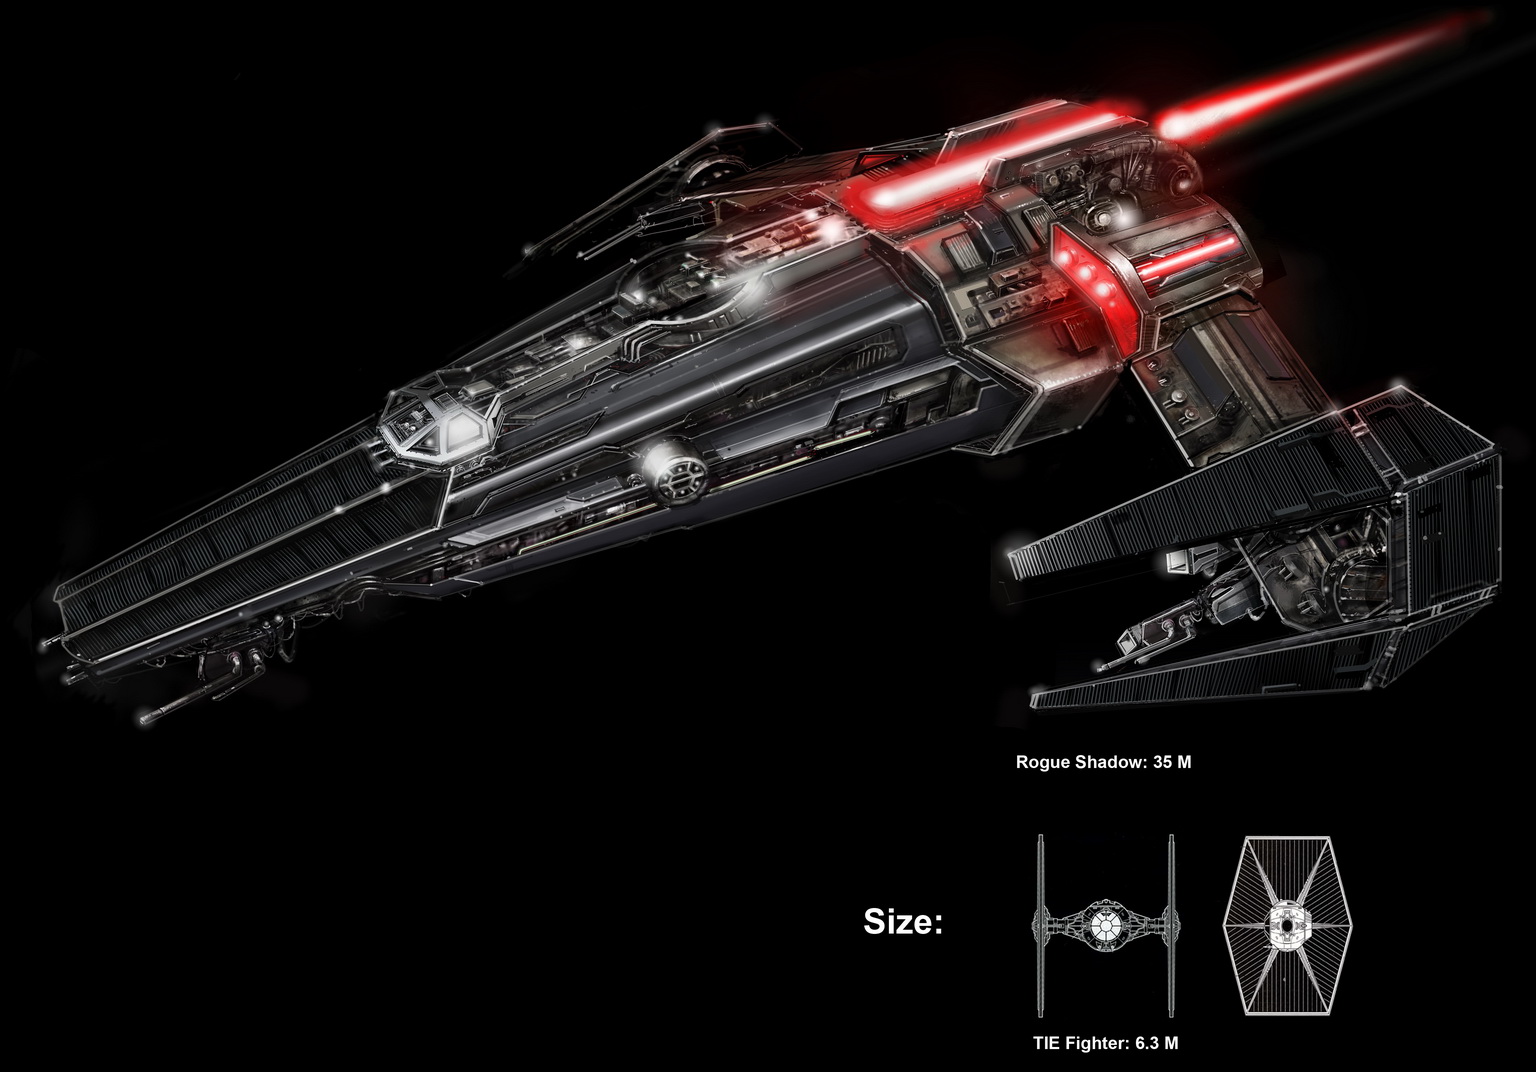
The Rogue Shadow was manufactured by Sienar Fleet Systems, using the Scimitar, Darth Maul's Sith Infiltrator, as a basis for its design. It also incorporated certain design features that were present in other Imperial vehicles, such as the Eta-2 interceptor and the starfighters belonging to the TIE series. The combat vessel was deliberately designed to resemble a small transport ship to avoid drawing unwanted attention. It had a long hull with dual arms; the wings were equipped with weapon pods containing solar panels, two smaller pods on the right side, and a single, larger one on the left.
The Rogue Shadow was equipped with powerful deflector shields, a state-of-the-art hyperdrive, advanced sensory arrays, and the fastest sublight drives available in the Imperial Navy. The ship's interior featured a fully equipped medical bay, living quarters for the crew, a workshop, and a meditation chamber that could also serve as a training area. In addition to these advanced technological features, the Rogue Shadow had an experimental cloaking device that allowed it to remain hidden from even the most sophisticated scanners for brief periods. This cloaking technology was powered by a rare stygium crystal, a type of lightsaber crystal originating from the Dreighton Nebula that could distort perceptions in its vicinity.
During General Rahm Kota's period of ownership, the starship Rogue Shadow was extensively modified to improve its suitability as a Rebel transport. The shielding was enhanced, making the starship feel heavier during acceleration; other modifications included enlarged compartments to accommodate Kota's squad. Despite the fact that these significant alterations resulted in several critical components being crammed together, a renegade clone of Galen Marek observed that the Rogue Shadow was still capable of traveling through hyperspace without causing system overloads.
History
The Secret Apprentice
To ensure secrecy during the Rogue Shadow's design and construction, all personnel and droids involved were killed, and their deaths were attributed to "industrial accidents" and street crimes.
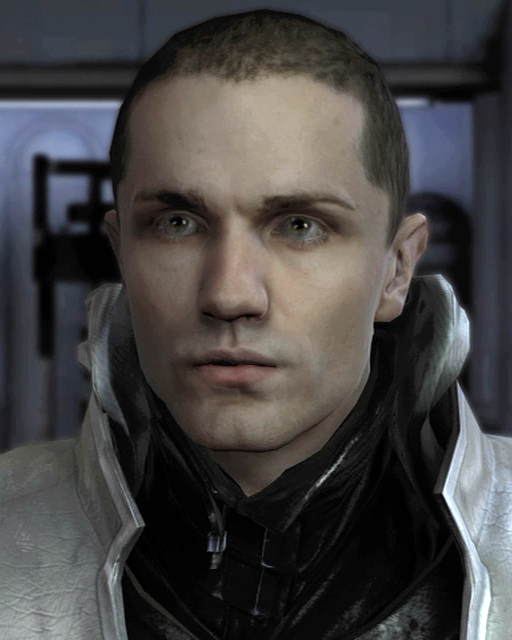
The first owner of the Rogue Shadow was Darth Vader's secret apprentice, Galen Marek, also known as "Starkiller", a young Sith assassin. The Dark Lord provided this vessel to his apprentice, which was specifically designed for clandestine operations, so that Starkiller could travel to any location his missions required. Both the Rogue Shadow and its owner were kept secret because Vader was determined to prevent anyone, especially his own master, Emperor Palpatine, from discovering the existence of his apprentice. When not on assignment, the ship and the apprentice remained hidden within a secret level of Vader's unfinished flagship, the Executor.
Although Starkiller was a capable pilot, he primarily focused on his training and meditation as instructed by his master. Consequently, Darth Vader personally chose the Rogue Shadow's pilot, who was sworn to secrecy under threat of death. However, by 3 BBY, Starkiller had already had seven pilots for the Rogue Shadow. Some died during the apprentice's missions, such as one who was shot by a Corellian gunrunner; others were executed by Vader for failing to meet the Sith Lord's standards. On one occasion, Vader killed an Imperial Sergeant for being late.
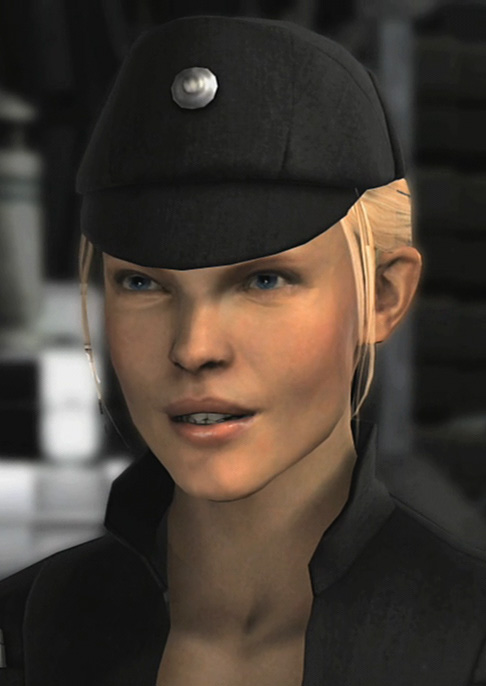
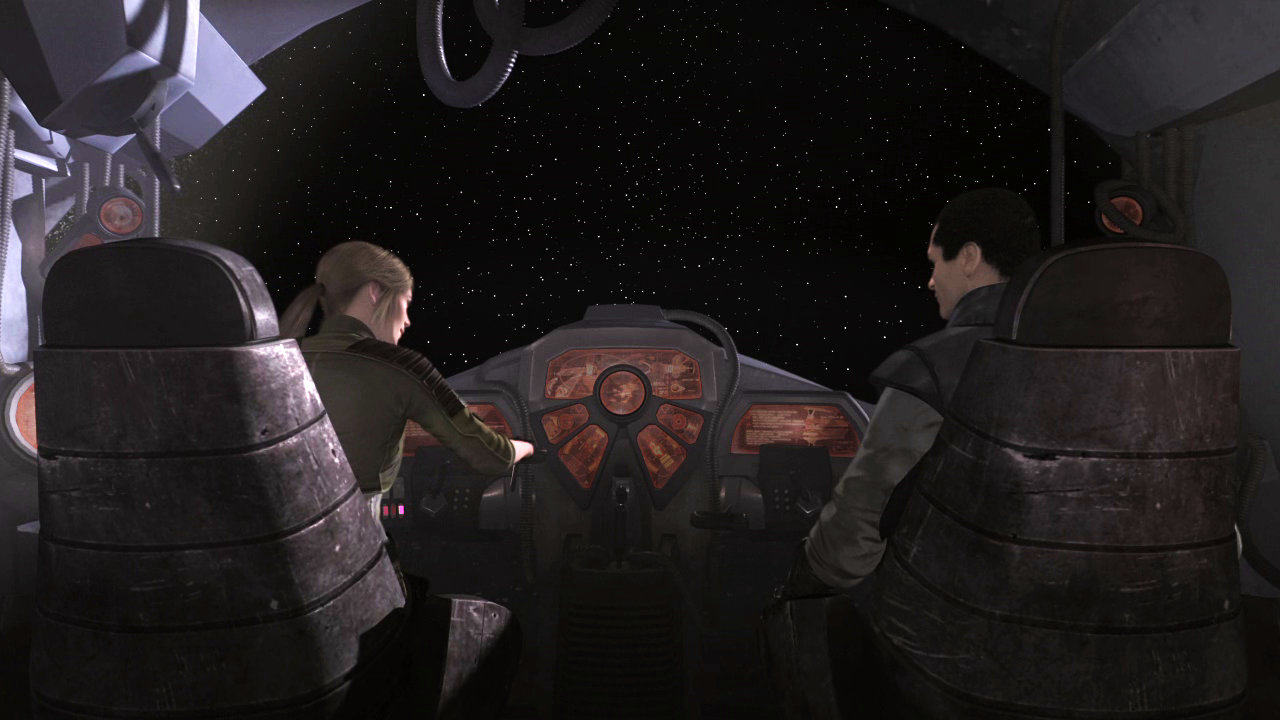
After killing his apprentice's most recent pilot in 3 BBY, Vader appointed Captain Juno Eclipse as the vessel's eighth pilot, impressed by the young officer's achievements. Eclipse, a skilled TIE pilot who had led the Dark Lord's Black Eight Squadron to victory on the planet Callos, welcomed the opportunity to fly a unique starship like the Rogue Shadow. However, she was initially uneasy about its main occupants, Starkiller and his training droid PROXY, and their assassination missions. Starkiller, fearing his master too much to ask, suspected that Vader was testing him by pairing him with a woman.
Eclipse's assignment to the Rogue Shadow coincided with the apprentice's first mission involving a Jedi target: Master Rahm Kota, one of the few remaining survivors of the fallen Jedi Order and a former general in the Clone Wars. After defeating Kota on Nar Shaddaa, the apprentice used the Rogue Shadow to travel to various locations throughout the galaxy, including Raxus Prime and Felucia, where he hunted down and killed Kazdan Paratus and Shaak Ti, other Jedi who had survived Order 66. The apprentice also utilized the Rogue Shadow to infiltrate Coruscant, the capital of the Galactic Empire, on multiple occasions to participate in the Jedi Trials at his master's direction.
In 2 BBY, Vader instructed his apprentice to create a rebellion against the Empire by uniting various dissidents and rebel groups against Palpatine's rule, claiming that this distraction would provide an opportunity to assassinate the Emperor. Throughout this new assignment, the apprentice kept the Rogue Shadow, as well as PROXY and Juno Eclipse, and traveled to planets such as Ziost, Kashyyyk, and Bespin, where he recruited Rahm Kota—intoxicated and deeply depressed, and feigning ignorance of Starkiller's true identity as the assassin who blinded him—on Cloud City. The Rogue Shadow also returned to Nar Shaddaa, Felucia, and Raxus Prime as the apprentice's scheme attracted more followers who opposed the Emperor's New Order.
After securing key allies within the Imperial Senate, the apprentice used the Rogue Shadow to travel to Corellia and attend the secret conference where senators Bail Organa, Garm Bel Iblis, and Mon Mothma gathered to formally announce the establishment of the Alliance to Restore the Republic. However, during the meeting, the Imperial Navy ambushed and surrounded the insurgents, and Darth Vader's stormtroopers arrested the Rebel leaders. Betrayed and left to die by his former master, the apprentice renounced the Sith and the dark side of the Force, embracing his Jedi heritage as Galen Marek by choosing to rescue his allies.
The apprentice's final flight in the Rogue Shadow was with Eclipse to the secret location of the unfinished Death Star, where the Rebels were being held captive by the Emperor and Darth Vader. Marek stormed the Death Star, killing numerous Imperial soldiers, and although he defeated his former master in battle, he ultimately died at the hands of Emperor Palpatine. However, his sacrifice allowed the Rebel leaders to escape aboard the Rogue Shadow.
Following Galen Marek's death, Eclipse, Kota, and the former senators took the Rogue Shadow to Kashyyyk, the apprentice's homeworld, where they met in his family's old hut to formally recognize the birth of the Rebel Alliance. Eclipse joined the new organization as the commanding officer of the Alliance's first flagship, the Salvation, and subsequently gave the Rogue Shadow to Rahm Kota. Under Kota's ownership, the apprentice's starship was used as a transport for Kota's squad during several unauthorized missions in the early years of the Galactic Civil War.
Refit and reassignment
Approximately six months after Galen Marek's death, in 1 BBY, General Kota and his squad took the Rogue Shadow to [Cato Neimoidia](/article/cato_neimoidia-legends with the intention of assassinating the planet's Imperial governor, Baron Merillion Tarko, despite the Alliance High Command's refusal to authorize the mission. The General planned to use the Alliance flagship's training exercise as a distraction for Imperial forces while he and his troops carried out their objective, following the Salvation. However, the plan failed, forcing the Salvation to retreat due to overwhelming enemy forces; Kota was captured and taken to Tarko-se, where the Baron forced him to fight for his life in the city's gladiatorial arena. During this chaos, the Rogue Shadow flew to a hidden location using its autopilot system.
Not long after Kota's capture, Starkiller—one of many failed clones created by Darth Vader to replace his deceased apprentice—escaped from Kamino and traveled to Cato Neimoidia, where he rescued the General in order to find out where Juno Eclipse was. Upon returning with the Rogue Shadow, the clone was dismayed to find that Eclipse was not in the ship's cockpit. Although Kota did not know Eclipse's location, he suggested they take the Rogue Shadow to the Athega system, the last known rendezvous point for the Alliance Fleet. Along the way, Starkiller expressed his displeasure at the extensive modifications made to his progenitor's ship. Arriving in the Athega system, the clone found no sign of Eclipse's frigate or the fleet she was serving with. Instead, the Rogue Shadow landed in the middle of an Imperial fleet. After being pursued by numerous TIE/LN starfighters, the Rogue Shadow escaped into hyperspace. Subsequently, Kota confronted the clone about his priorities, insisting that Starkiller should commit to the Alliance's cause against the Empire. When the clone made it clear that the Rebellion was unimportant to him, an angry Kota demanded to be dropped off at the nearest spaceport so he could rejoin his squad on Commenor. Meanwhile, the clone retained possession of the Rogue Shadow at the General's insistence.
After parting ways with Rahm Kota, the clone used the Rogue Shadow to track Juno Eclipse, arriving at the Mon Calamari homeworld of Dac. However, he was disappointed to discover that she was not there. He then traveled to the remote world of Dagobah, believing that the Force was guiding him there for a reason. During his brief stay on Dagobah, the clone experienced a premonition in which he saw the Salvation under attack. Fearing for Eclipse's life, Starkiller picked up Kota and his squad on Malastare before heading to the Itani Nebula. By the time they arrived, an Imperial squadron ambushed the Rebels, and a group of experimental Terror troopers boarded the Salvation under the command of Boba Fett, a bounty hunter hired by Darth Vader to bring Eclipse to Kamino. After docking the Rogue Shadow inside Eclipse's ship, Starkiller pursued the mercenary, killing everyone in his path, but ultimately failed to stop Fett from leaving the Alliance flagship with Eclipse as his prisoner.
At Starkiller's urging, General Kota ordered the fleet to Kamino, hoping to surprise the Empire. Instead, they found the planet heavily defended by a group of Imperial Star Destroyers. During the space battle, Kota and the surviving crew members evacuated the badly damaged flagship and escaped in the Rogue Shadow, while Starkiller guided the Salvation on a collision course with Timira City, the cloning facility where he was created. Kota and his soldiers invaded the facility and engaged its Imperial garrison, as the clone embarked alone on his personal mission to rescue Juno Eclipse.
Following the Battle of Kamino, the Rebel Alliance achieved victory. During the battle, Darth Vader was defeated in combat by the clone, who reluctantly agreed to spare his creator's life so that the Rebel Alliance could try him for war crimes. The Rebels then decided to use the Rogue Shadow to transport Vader to their hidden base on Dantooine. As they departed the Kamino system, Starkiller and Eclipse were unaware that Boba Fett was tracking them.
Behind the scenes
The Rogue Shadow made its first appearance in the 2008 multimedia project Star Wars: The Force Unleashed. It also appeared in the sequel project, Star Wars: The Force Unleashed II, which was released in 2010.
During development, the Rogue Shadow underwent more changes than any other element of the game's scenery. Initially, it was a YT-series, designed to blend in as a freighter. However, wanting something more unique, Matt Omernick suggested incorporating more Sith and Imperial designs, drawing inspiration from the Scimitar and the TIEs, resulting in a long snout and bent wings, a design that persisted for months during development. Eventually, after experimenting with various silhouette shapes, Omernick and W. Haden Blackman decided on an asymmetrical configuration, a freighter with a sleek, menacing design, described as "somewhere between the Falcon and the [Sith] Infiltrator". Unique design elements included the recessed cockpit, swiveling wings, and vertical engine.
In the original video game, the Rogue Shadow's boarding ramp is located at the stern in the Xbox version. In the PlayStation 2, PlayStation Portable, and Wii versions, the boarding ramp is situated at the front of the starship.
TFU alternate ending
In an alternative conclusion to Star Wars: The Force Unleashed, Galen Marek turns back to the dark side of the Force and kills his former master without mercy. Before he can truly become the new apprentice of Darth Sidious, the Emperor commands him to renounce his allegiance to the Jedi Order by assassinating Rahm Kota. However, the apprentice decides to betray Sidious instead, a move that the Dark Lord had foreseen. When Marek's assassination attempt fails, Juno Eclipse maneuvers the Rogue Shadow near the Emperor's observation dome on the Death Star to extract Marek. Sidious then uses the Force to seize control of the starship, and subsequently crashes it directly onto the apprentice.
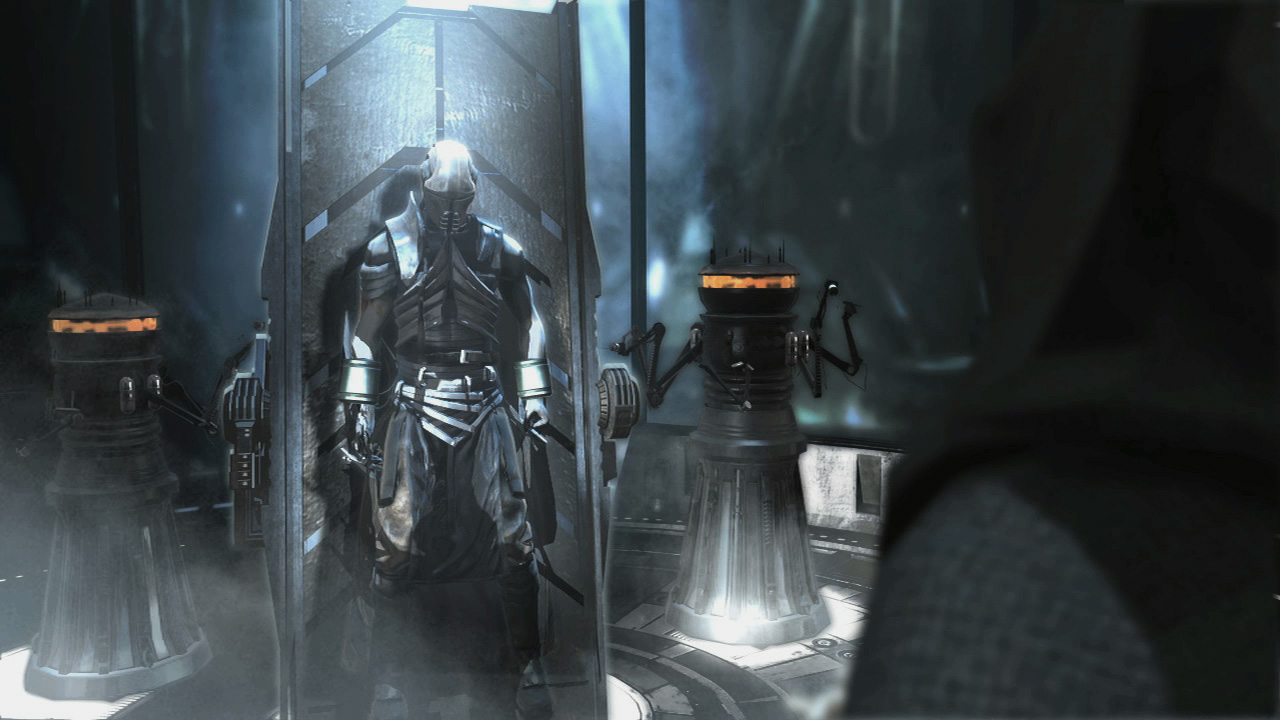
After narrowly escaping death by being crushed under his own ship, the apprentice awakens to find his body encased within a suit of armor, similar to the one worn by the deceased Darth Vader. Despite his disappointment at the prospect of being served by yet another Human cyborg, Darth Sidious begrudgingly transforms Galen Marek into Lord Starkiller, declaring that the apprentice will function as his personal Sith assassin until a more suitable disciple can be found.
TFU II alternate ending
Star Wars: The Force Unleashed II also presents an alternate ending where the main character embraces the dark side of the Force. During the Battle of Kamino, Starkiller, an insane clone of the late Galen Marek, holds a lightsaber to the throat of a defeated Darth Vader. Ignoring Kota's pleas to keep Vader alive as a prisoner for the Rebel Alliance, the clone raises his weapon, intending to strike down his creator without mercy. However, before he can land the fatal blow, Starkiller is impaled through the chest from behind by a red lightsaber. As Starkiller collapses in agony, a dark hooded figure reveals himself. After swiftly eliminating Kota, PROXY, and several Rebel troopers, the warrior steps to Vader's side and reveals himself to be the Dark Apprentice, the only successful clone of the original Starkiller.
The rogue clone then dies from his mortal wound. Darth Vader assigns the new Apprentice the task of hunting down and executing the remaining Rebels across the galaxy. To accomplish this, Vader instructs the dark clone to use the Rogue Shadow as his personal transport. The Apprentice complies, casting a final glance at Juno Eclipse's body before departing Kamino in his progenitor's starship.
By 4 ABY, the Rogue Shadow remains in the Dark Apprentice's possession. As he approaches the Sanctuary Moon of Endor, Darth Vader orders the clone to prevent the Rebels from destroying the shield generator bunker, thus preventing the Alliance Fleet from harming the new Death Star. The Dark Apprentice lands the Rogue Shadow near the bunker and proceeds to execute his Master's orders precisely. He fights his way through Rebel troopers, Ewoks, and even Imperial stormtroopers. Ultimately, his victims include the smuggler Han Solo, the Wookiee Chewbacca, and the Jedi Leia Organa. The Galactic Empire is victorious at the Battle of Endor, and Emperor Palpatine declares the end of the Rebellion.