Star Wars: Bounty Hunter
Star Wars: Bounty Hunter, a third-person action-adventure video game, serves as a prequel to Episode II Attack of the Clones. It details the origins of Jango Fett as the genetic source for the clones comprising the Grand Army of the Republic. LucasArts developed and published the game in 2002 for both the PlayStation 2 and the Nintendo GameCube. The game was later released on the PlayStation Network for the PlayStation 3 on April 28, 2015. In the Japanese market, the game was renamed Star Wars: Jango Fett.
When Komari Vosa, the leader of the Bando Gora cult, became a problem for Palpatine's schemes, Palpatine ordered his apprentice, Dooku, to eliminate her. Furthermore, he tasked Dooku with identifying an appropriate individual to serve as the template for the future clone army. Dooku reasoned that he could achieve both objectives by placing a bounty on Vosa's head, extending the invitation only to the most skilled bounty hunters. Among these were two Mandalorian bounty hunters: Jango Fett and Montross.
This game represented the inaugural collaborative effort among the three Lucasfilm divisions: LucasArts, Industrial Light & Magic, and Skywalker Sound, for the production of the game's cinematic sequences.
Opening crawl
Plot summary
Mission to Outland Station
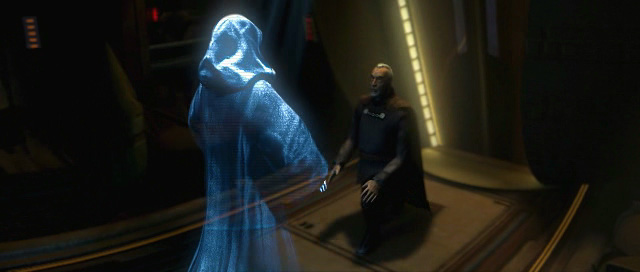
Darth Sidious communicates with Darth Tyranus, informing him that the Bando Gora cult has evolved into a "parasite" necessitating removal. He reminds Tyranus of a prior opportunity to eliminate their leader, questioning his failure to act. Tyranus begins to explain it was due to an experiment, but Sidious interrupts, stating that the experiment has failed. He asserts that "this deranged former Jedi has no place in my plans for the future" and commands Tyranus to correct this error. Tyranus agrees and inquires about the clone army. Sidious responds that the cloners require a host, directing his apprentice to locate an ideal specimen. Tyranus declares that he will accomplish both objectives with a single action.
Aboard the Outland Transit Station, managed by Rozatta, Jango Fett's Toydarian acquaintance, two borheks engage in combat within the Pit Fight Arena, where the red challenger confronts the reigning yellow champion. Above the pit, the Muttani Meeko Ghintee observes the fight alongside a Rodian and a Gran accomplice. Meeko manipulates the fight by controlling the red borhek using a neural implant. The red borhek defeats the gold champion, eliciting celebration from the Muttani. Jango arrives, eliminating Meeko's associates, and the Muttani, in fear, descends into the arena. Jango pursues Meeko, questioning whether he prefers capture dead or alive. Still controlling the borhek, Meeko launches the creature at Fett's back, dislodging his jetpack. Meeko escapes, leaving Jango to battle the borhek, which he defeats before resuming his pursuit of Meeko. The bounty hunter proceeds to the trading sector of Outland Station, where he ambushes an unsuspecting Gran, interrogating him to ascertain the location of Meeko's hideout. Jango retrieves his jetpack from a merchant along the way. Eventually, Jango reaches Meeko's hangar, where he must confront the Muttani's ship, the Longshot, before successfully capturing him.
Coruscant
After collecting his bounty, Rozatta informs Jango of a message. A hologram of Tyranus appears, informing Jango that he is among a select few chosen for a special hunt. The reward: 5,000,000 credits, dead or alive. The target: Komari Vosa, leader of the Bando Gora. Rozatta expresses deep concern upon hearing this, warning Jango that all bounty hunters who have attempted to defeat the Bando Gora have disappeared. However, she fails to deter Jango from accepting the hunt. He inquires about her knowledge of the Bando Gora, to which she replies that she has only heard rumors. They are highly secretive and "everywhere and nowhere at the same time." She mentions having heard that they are behind the new death-stick craze. Jango notes that death-sticks are prevalent in the underworld of Coruscant, prompting Rozatta to mention a bounty for a death-stick dealer on Coruscant, suggesting it as a good starting point. As he departs, Rozatta remarks that he might encounter Montross (Jango's enemy and rival bounty hunter) during the hunt. Jango pauses briefly and responds, "I'd be surprised if I didn't." Indeed, Montross has received the same offer from Tyranus.
Jango travels to Coruscant aboard his trusted ship, the Jaster's Legacy. Rozatta suggests that Jango should acquire a new ship rather than continue flying that "relic," but he refuses, explaining that it once belonged to Jaster Mereel, who was like a father to Jango. Rozatta provides him with information on the death-stick dealer: Jervis Gloom, wanted alive by the Coruscant Security Force. Both speculate whether Gloom might possess any knowledge of the Bando Gora. Jango locates Gloom in the Industrial District and discovers that he works for Groff Haugg. Jango arrives at Haugg's plant and discovers a batch of death-sticks that appear different from the usual ones. He sends a sample to Rozatta, who uses a chemical analysis droid to determine that it contains an untraceable neurotoxin, which Jango later realizes can be used for brainwashing. Jango pursues Haugg, but arrives too late, as Montross has already frozen Haugg to death in carbonite. A fight ensues between the bounty hunters, ending with Montross's escape.
Following the battle with Montross, Jango considers that Haugg could not have maintained his operation in secret without assistance and learns that Senator Trell of Ryloth is somehow implicated in the death-stick trade. He travels to the Upper City of Coruscant, where he breaks into the Senator's apartment and suspends the Twi'lek over the edge of a balcony to interrogate him for information. Unfamiliar with Vosa, Trell reveals that his underworld contact is Sebolto, a powerful Dug death-stick kingpin on Malastare, and begs to be released. A police gunship appears and orders Jango to release Trell. He promptly complies, releasing his grip and causing Trell to fall to his death. Jango then engages the gunship in battle, destroying it before departing Coruscant.
Oovo IV
Rozatta cautions that Sebolto will be wary of visitors, and Jango replies that he will employ a more subtle approach. Rozatta suggests using a bounty posted by Sebolto as a welcoming gift. The target is Bendix Fust; wanted alive with a 50,000 credit reward. However, Fust is currently incarcerated in the asteroid prison on Oovo IV. Jango briefly inquires about Montross, and Rozatta replies that he is in the Gazzari system. Jango breathes a sigh of relief, as that system is nowhere near Malastare, implying that Groff Haugg lied to him. Rozatta makes one final attempt to persuade Jango to abandon the hunt, but she is unable to dissuade him.
Meanwhile, Vosa is informed by one of the Bando Gora that their contacts on Coruscant are dead and that bounty hunters were responsible. She is unconcerned, as only one of their underworld contacts knows the location of their moon. Nevertheless, she declares that if the bounty hunters resurface, they will be dealt with.
Jango travels to Oovo IV and manages to infiltrate the prison by following and deceiving a supply craft's crew into believing that his ship is a glitch in their computer. After gaining entry, Jango encounters an old-timer of the prison named Smootie. Smootie provides Jango with valuable information about the backstory of Komari Vosa and the Bando Gora before they part ways. Jango arrives at Fust's cell, but he is abducted by a female bounty hunter (much to Rozatta's amusement). With a prison riot now underway, Jango fights his way back to the Jaster's Legacy only to find that the other bounty hunter and Fust are already there attempting to break into the ship. After killing the remaining guards, the two bounty hunters swiftly turn their weapons on each other, but while they are arguing, one of the facility's six prototype Firespray patrol ships flies overhead and destroys the Jaster's Legacy. Jango hopes that the bounty hunter has a ship of her own, but she stowed away aboard a supply ship, which was her plan for escape until Jango arrived. With the prison now in full lockdown, Jango instructs the bounty hunter to guard Fust while he salvages what he can from the Jaster's Legacy. He sets out to steal one of the Firesprays, and Smootie informs him of how to disable the prison's shield wall. Jango succeeds, but before departing, he destroys the five remaining Firesprays to prevent the prison from pursuing him. The other bounty hunter deduces Jango's identity, having heard rumors about him, and introduces herself as Zam Wesell.
Meanwhile, Montross has realized that Groff Haugg deceived him. As his lead has a vague connection to Bendix Fust, he learns of the riot on Oovo IV and quickly deduces that Jango is behind it, realizing that he is still in contention for the hunt.
Malastare
Zam initially believes that they will deliver Fust and then split the bounty between them, but Jango declares that she will deliver Fust. She then realizes that Jango is working on another job and offers her help, but Jango replies that he is letting her tag along as he thinks she might be useful. Jango instructs her to drop him off in the jungle and then convince Sebolto to let her stay and find a way to allow Jango to sneak into Sebolto's Palace. Jango makes his way to the cliffs directly opposite from Sebolto's compound, and he covers Zam with a sniper rifle while she sends a transport over to him. The two arrive back at the entrance to the palace, but Jango tells Zam to return to the ship while he tries to find Sebolto's death-stick factory. After he kills Sebolto's guards, Sebolto flees into his factory, but falls into the machinery and dies, with Jango quipping "It'll be a sour batch." Jango fights his way through the factory and discovers the Bando Gora occupying an underground cave. He finds the Bando Gora ship and attempts to access its flight log. It doesn't have one, but the instrumentation is in Huttese. Montross appears and briefly engages him in battle (also taunting him about the death of Jaster Mereel at the Battle of Galidraan), but Zam arrives in the Firespray, and Montross retreats, enabling them to escape.
The Firespray departs from Malastare. Zam wants to know what's going on with Jango and presses him for details about his "other job," quickly connecting it to Montross's mention of Vosa. Jango tells Zam about the death-sticks he found in Haugg's plant and says that the Bando Gora ship had Huttese markings on it. He deduces that Vosa uses Hutts to transport the death-sticks; she sends them to Tatooine, and then they are sent on to Malastare to conceal the trail. Zam deduces that if the Hutts deal directly with Vosa, then they will know where she is. They set a course for Tatooine, but Montross, having planted a listening device on the ship, follows them.
Tatooine
Rozatta informs the bounty hunters that the two major Hutts, Jabba and Gardulla, are currently vying for control of Tatooine. From this, Jango deduces that the Hutts are not working together, and Rozatta tells him that a gift must be presented to the Hutts in order to determine which of them is in league with the Bando Gora. A junk dealer has mentioned a bounty posted by Jabba on the outlaw Longo Two-Guns and his cronies. If Jango captures them, he can be guaranteed an audience with Jabba, though Gardulla is more of a recluse and will be harder to reach. The bounty hunters decide to split up; Jango sets out to hunt down the gang for Jabba, while Zam goes to search for Gardulla's palace (though she is rather miffed that Jango is going to "have all the fun"). Before she signs off, Rozatta asks the name of Jango's new ship. He answers, "she's called Slave I." Jango tracks down and captures Longo in a podracing hangar in Mos Gamos. When delivering the bounty to Jabba, Jango tells the Hutt that he is after the Bando Gora. Jabba angrily replies "I do not deal with such scum!" and reveals that Gardulla houses the Bando Gora's information. He also asks the bounty hunter to eliminate the rival Hutt, adding that he can gain access to her palace via the Tusken Canyon, though it is heavily populated by the Sand People. Jango contacts Zam, who informs him that the palace is crawling with Bando Gora and she is not sure she can get inside. Then Jango hears Zam struggling with someone, and her transmission cuts off.
Fett makes his way to Gardulla's palace through the canyon and infiltrates the compound where he finds Zam in a cell, but won't let her out yet because the empty cell would alert the guards. Zam is furious, thinking he's ditching her so he won't have to split the bounty and calls the guards down on him. Gardulla captures Jango and throws him into an arena pit without his weapons to face off with her pet krayt dragon. However the guards did not take away his cutting laser, with which he is able to escape the arena. He retrieves his weapons and fights through the palace. Jango confronts Gardulla in her throne room, where he steals the key to her vault. Jango tells Gardulla that Jabba sends his regards, then feeds her to the krayt dragon. Jango then kills the dragon before he makes his way to the vault, where he finds an encrypted computer that he sends to Rozatta. Jango returns to Zam's cell and she tries to apologise but he refuses to listen and abandons her. He departs Tatooine in Slave I.
The bounty hunter tries to contact Rozatta again, but is answered by Montross, who has tortured the Toydarian for Vosa's location, which was in the encrypted computer. Jango is positively outraged but Montross calmly replies "it's just business old buddy".
Meanwhile Vosa realises she has underestimated Jango and remarks "it is time the hunters become the hunted" and orders that he be killed.
Kohlma
Slave I boosts back to the Outland Station and docks quickly. Jango runs inside and finds Rozatta lying on the ground, injured. She says Montross has set thermal charges around the station that are ready to blow. However, she still manages to keep the coordinates for Vosa's location. She hands them to Jango and breathes her last words, saying that if Jango succeeds he should find something to live for other than money. Jango leaves moments before Outland Station explodes.
Jango heads to Kohlma, a small moon of Bogden, and finds Montross waiting for him outside Vosa's castle wearing his own Mandalorian jetpack and helmet. The two battle, and Jango finally defeats Montross who requests that he be given "a better death". But, as revenge for killing Rozatta, Jango leaves Montross to be mauled by the Bando Gora. Jango then heads for Vosa's Castle, but as he tries to infiltrate the castle, he is overwhelmed by the Bando Gora forces and blacks out.
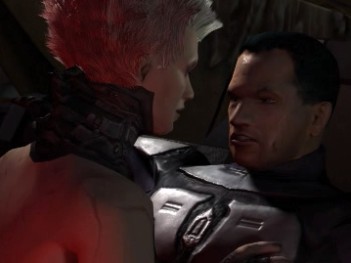
Two Bando Gora torture Jango until Vosa arrives and questions him, demanding to know who hired him. Jango refuses to answer. She pushes her body onto his, whispering to him, that he will be her slave. Vosa is just getting warmed up when she apparently senses Zam, who somehow followed Fett to the lair and is concealed just outside the interrogation room. Zam smiles at Jango and swiftly blasts the two Bando Gora. Zam and Vosa face off, with Zam apparently having a quick mental debate over whether to first free Jango or secure that big bounty, until Vosa attacks. The two women melee briefly until Vosa deflects a blaster bolt into Zam, who falls. As Vosa approaches to finish Zam off, Zam shoots off Jango's restraints. Jango snatches his blasters off the nearby table and attacks the startled Vosa, who flees. He then checks on an incapacitated Zam and eases her to the floor, telling her to save her strength. Jango gears up, and as he leaves, he comments, "Back in a minute."
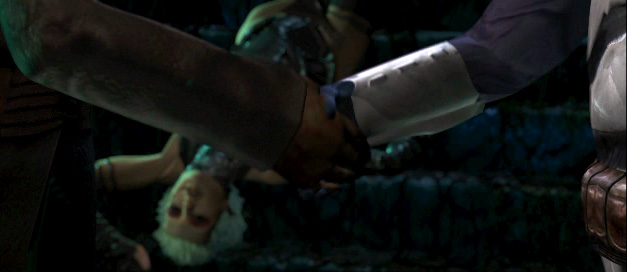
Jango manages to catch up to Vosa and defeat her, bringing her at blaster point. Vosa iterates: "Which will it be, bounty hunter? Dead, or alive?" Jango lowers his pistol, but after he does so, Vosa is strangled by an unseen force and dies. Jango turns around to see a bearded man standing next to him and recognizes him as Tyranus, the man who hired him. Tyranus remarks that Vosa was his padawan but she went rogue and thus had to be eliminated. Jango realises that Tyranus knew where Vosa was all along and could have easily killed her himself so is curious as to why he put a price on her head. He replies that it was to find Jango, though the bounty hunter is only interested the reward. Tyranus confirms this but adds it could be considerably more than 5,000,000 and offers Jango a secondary deal to come to Kamino to be cloned. Fett accepts the offer on the condition that he gets the first clone (unaltered) for himself - thus honoring Rozatta's final wish. Tyranus agrees.
After the deal, Jango carries Zam out of the castle. As they head towards Slave I, she asks if he would still split the reward 50/50, but Jango tells her to not push her luck.
Gameplay

The gameplay unfolds from a third-person perspective, encompassing eighteen distinct "levels" distributed across six different worlds. These worlds, which serve as the game's settings, include Outland Transit Station, Coruscant, Oovo IV, Malastare, Tatooine, and Kohlma, which is a moon orbiting the planet Bogden. Alongside the primary narrative, players can engage in optional side missions. These side missions take the form of bounties, which can be initiated by using Jango's ID scanner on enemies or NPCs, shifting the camera to a first-person view.
The game offers several unlockable features, attainable through the collection of Mandalorian feathers, level completion, and bounty acquisition. Each Mandalorian feather that is collected unlocks a new card from the Wizards of the Coast Star Wars Trading Card Game, with a focus on the game's characters. Upon completion of each level, three pages from Jango Fett: Open Seasons 1, published by Dark Horse Comics, become available. For every 3,000 credits earned through the capture of secondary bounties, one page of concept art is unlocked. Furthermore, a series of outtakes featuring the voice actors, accompanied by animation, are unlocked upon the completion of each game chapter.
Bounties
An optional side activity in Star Wars: Bounty Hunter is the pursuit of bounties. These can be discovered in every chapter, with the exception of the final one.
To successfully claim a bounty, players, as Jango, must activate his ID scanner and aim the targeting reticle at any creature or droid. If the target is a bounty, an image and brief details about them will be displayed. Bounties can be claimed regardless of whether the target is alive or dead. Information indicating which method yields a higher reward will be presented to Jango after scanning. Once a bounty has been identified, Jango can mark the target, enabling tracking. Jango can then claim the bounty by either eliminating the target or by employing the whipcord launcher to launch a fibercord whip, restraining and capturing the target alive. After dealing with a bounty, approaching the target will provide an option to claim the reward. The reward is granted immediately, and the target vanishes. If a target is killed before being marked, the bounty becomes invalid and cannot be claimed.
Below is a compilation of the majority of bounties available for claiming in Star Wars: Bounty Hunter, along with their respective rewards.
Development
The game's development commenced in November 2000, following LucasArts' commission to create a game centered around Jango Fett, coinciding with the release of Star Wars: Episode II Attack of the Clones. The game design proposal was presented in March 2001, with development initiating shortly thereafter. Jon Knoles stated in an interview that their intention was to evolve Jango into the quintessential action-oriented video game protagonist, ensuring he was both visually captivating and enjoyable to control. Furthermore, they aimed to craft a narrative that expanded upon Fett's character beyond his portrayal in Attack of the Clones, while adhering to the essence of his character as depicted in the film. It was crucial to avoid burdening the game with a sluggish storyline and uninspired dialogue; consequently, their objective was to achieve a delicate equilibrium between backstory, narrative, and action-packed gameplay. Knoles elaborated that Jango Fett was designed to function as an extension of the player's will, the ultimate conduit through which players could realize their aspiration of embodying the galaxy's most formidable bounty hunter. His movement and animation system was engineered to dynamically respond to environmental elements, ensuring uninterrupted access to his weaponry and gadgets in any scenario. Initially, the jet-pack was intended for use in designated areas. However, upon its successful implementation, the team revised their approach, introducing a rechargeable timer to enable its usage anywhere for a limited duration. At its peak, the development team comprised over fifty individuals, excluding personnel from Industrial Light & Magic (ILM).
The concept artists drew inspiration from their preferred graphic novels, alongside the concept artwork of Ralph McQuarrie, Doug Chiang, Joe Johnston, and other contributors to the Star Wars films. They were granted early access to the Episode II script and concept art prior to the film's release. LucasArts produced storyboarded scripts for their cutscenes and provided them to ILM, who then transformed them into cinematic sequences. Knoles outlined the level layouts and subsequently consulted with lead level designer David Wehr and his team. They constructed a bubble map of the levels, utilizing it to define specific details regarding the challenges and opportunities presented to the player. The team developed a new engine for the game to fulfill their design aspirations. The graphic designers collaborated concurrently with the level designers to create the environments, which the level designers then utilized to enhance their visualization of the intended experience. Knoles, having previously contributed to the development of the Super Star Wars trilogy for the Super Nintendo, frequently referenced those games when illustrating particular aspects of Star Wars: Bounty Hunter to the team.
The PlayStation 2 and Nintendo GameCube versions of the game feature distinct custom in-house graphics engines, each tailored to capitalize on the respective platform's unique strengths while mitigating its limitations, although the fundamental game engine remains consistent across both. In the PS2 version, both vector unit (VU) chips were utilized to maximize graphics performance. The DMA bandwidth was leveraged to support a substantial number of textures. Full-screen antialiasing and texture mip mapping were also implemented. The second VU1 chip handled all character skinning, while VU0 managed all skeletal animation transformations. This enabled the display of numerous characters on-screen without compromising frame rate. Ten individually optimized rendering loops were implemented on VU1 to accelerate the rendering process. The PS2 graphics engine was capable of rendering 10,000,000 triangles per second, with the inclusion of gameplay, collision, logic, textures, and sound reducing this figure to approximately 30,000 to 50,000 triangles per frame, all at an average frame rate of 30 frames per second.
In the Nintendo GameCube version, the system's fast CPU was utilized to achieve a higher frame rate, and the polygon count of characters, particularly Jango, was increased, roughly doubling on the GameCube. The GameCube's texture compression capabilities enabled the use of high-resolution textures. This compression also facilitated improved color variance on textures. Mip mapping support across all textures contributed to a rich and consistent environment. Additional memory was utilized to reduce load times. Projected shadows were implemented on all characters, and the draw distance was extended to allow for expansive vistas.
Industrial Light & Magic and Skywalker Sound collaborated in the game's creation, marking the first partnership between LucasArts and ILM in the realm of in-game cinematics. Knoles stated that LucasArts and ILM gained valuable insights from their collaboration, enabling ILM to explore innovative methods for creating scenes, as well as novel tools and techniques. LucasArts provided ILM with models, textures, and a storyboarded script, and ILM then applied their cinematic expertise to adapt the script into dynamic and visually compelling films. The sound designers from LucasArts and Skywalker Sound collaborated to create the game's soundtrack. Skywalker Sound produced sounds specifically for game animations and events, and created Foley sounds.
Tie-ins
Jango Fett: Open Seasons was created as a tie-in comic, consisting of four issues released between May and September 2002, and compiled into a trade paperback edition in January 2003. The comic details Jango's origins and his transformation into a Mandalorian warrior. A portion of the comic was included as unlockable bonus content in the game. Prima Games also published Star Wars: Bounty Hunter: Prima's Official Strategy Guide.