Star Wars: Republic Commando
Star Wars: Republic Commando is a computer and video game within the Star Wars universe, presented as a first-person shooter. LucasArts both developed and released it for Windows and Xbox on February 28, 2005, in the US. Later, Aspyr Media created and launched a version for Nintendo Switch and PlayStation 4 on April 6, 2021. Through backwards compatibility, it can also be played on PlayStation 5, Xbox 360, Xbox One, and Xbox Series X/S. Epic Games created the "Unreal Engine," which the game utilizes. It was intentionally created, in part, to connect Star Wars: Episode II Attack of the Clones and Star Wars: Episode III Revenge of the Sith. The developers have mentioned that, unlike the films and novels which focus on the perspective of the Jedi, Republic Commando tells the story from the perspective of regular soldiers.
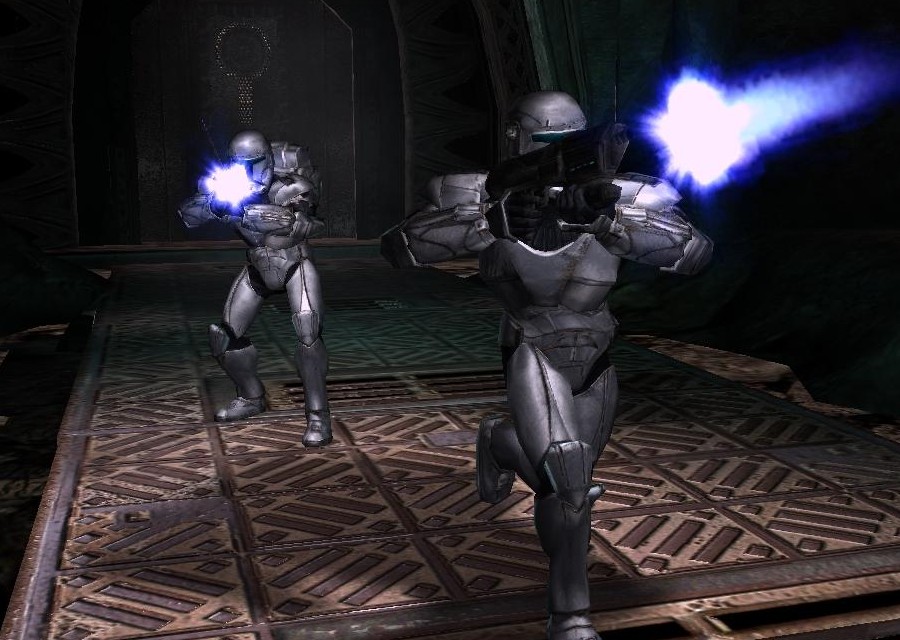
The game tells the story of 'Delta Squad', a top-tier clone commandos unit, across three missions set during the Clone Wars. These commandos, trained in groups of four by Mandalorian mercenaries like Walon Vau and Kal Skirata, were more skilled than standard clone troopers, having undergone live-fire training instead of just computer simulations. Every clone commando was skilled in the use of a wide array of weapons, computer systems, and demolition tools. The game follows Delta Squad's operations in three different locations: the planet Geonosis, a wrecked Acclamator-class assault ship called the Prosecutor, and the planet Kashyyyk. In each of these locations, players control the squad as they complete a series of objectives while fighting against enemy forces, including droids and Trandoshans. Throughout the game, a clone advisor named 01/425 assists the player by providing regular updates on mission objectives as the level progresses.
Publisher's summary
Instruction manual: The warm, rapid breaths you take inside your helmet are nearly indistinguishable from the distant thuds of the AT-TEs moving above you on the surface. Just moments ago, you were aboard a gunship amidst the chaos, with fire and smoke filling the sky, and blaster fire rising from Geonosis like colorful fountains. While the surface battle is the main objective for most of your clone brothers, you are a clone commando, and this is your element. The cavern walls shake, and reddish-orange dust falls from the ceiling, settling on your shoulder plates. You check the magazine of your DC-17m modifiable blaster rifle, giving it a firm slap to ensure it is secure. The dull thud echoes, followed by a faint chittering sound, like insects. You glance back and signal your squadmates to stay behind, allowing you to take the lead. They are eager for combat, but the tunnel ahead opens into a chamber, and you cannot see what lies beyond. As the leader, you are also the most skilled in close-quarters combat. You step into the chamber as the insect sounds intensify, and skeletal figures emerge from the shadows...
Plot summary
Prologue

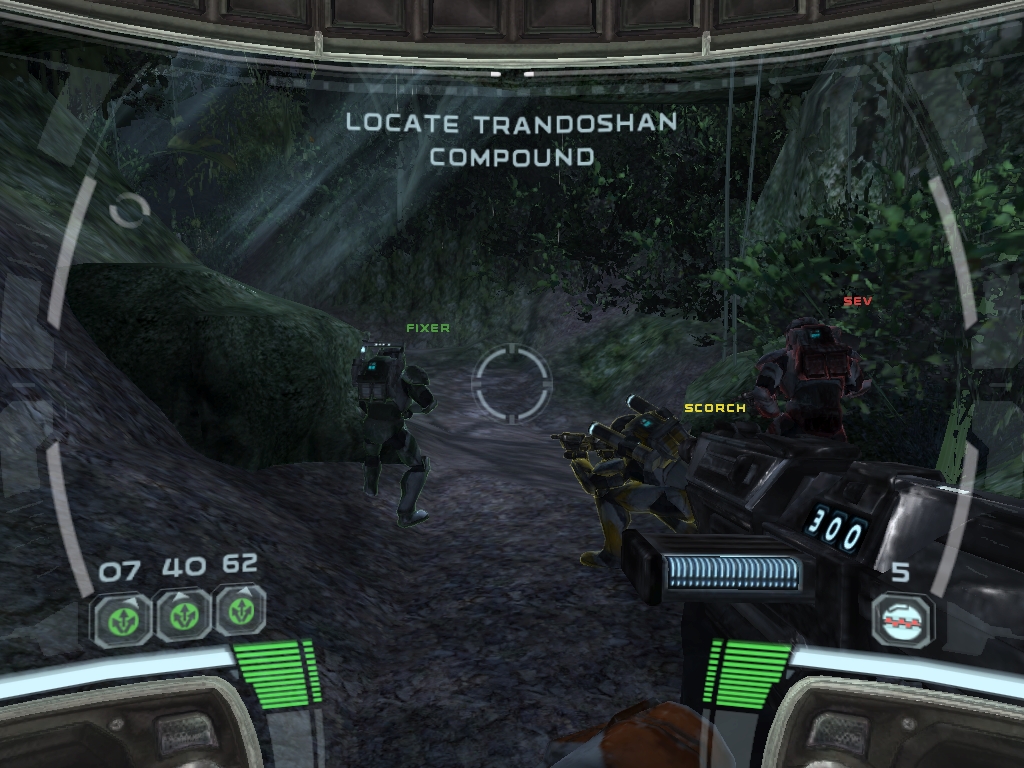
A montage shows the development and training of Clone commando Boss, with Taun We, a Kaminoan, explaining the role and purpose of Clone commandos and the war situation. Boss is then introduced to his Squad, Delta Squad, which includes RC-1140 (Fixer), Scorch, and Sev.
Geonosis campaign
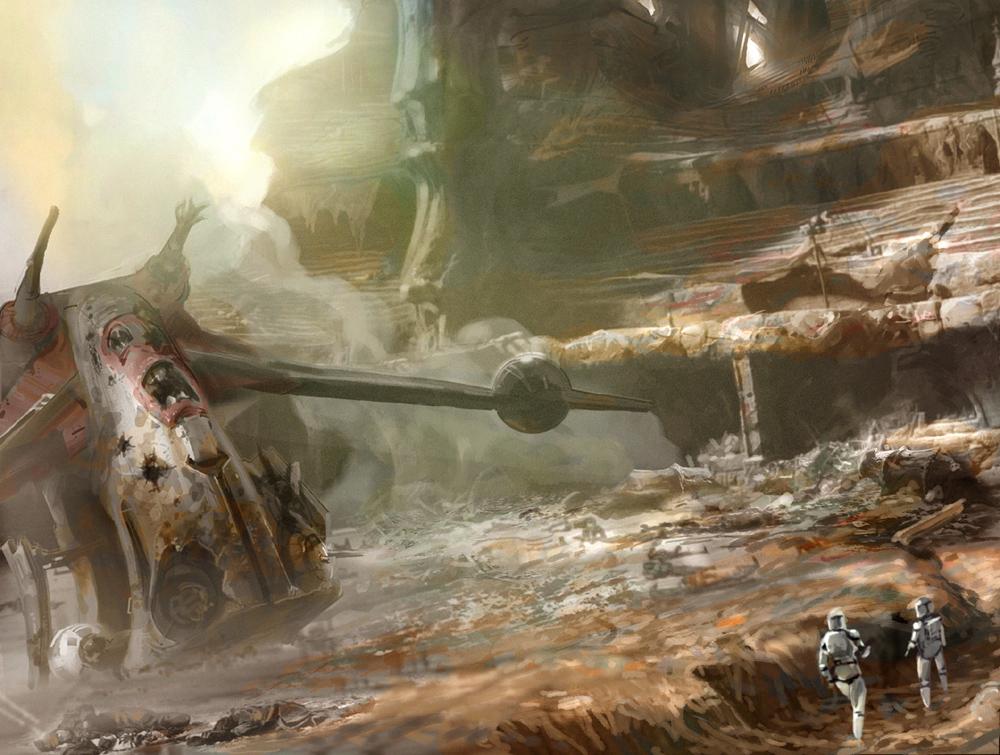
Delta Squad's initial mission takes place on Geonosis. They are deployed from Kamino using separate LAAT/i gunships and sent to the battle-scarred Petranaki arena. While en route to their drop-off point, Boss communicates with the squad's direct Commander and advisor 01/425 via a holocomm unit. The clone advisor informs Boss about his primary objective: to locate and eliminate the Geonosian Separatist Chief Lieutenant Sun Fac. As the gunship hovered, allowing Boss and a clone trooper to rappel to the ground, a flying Geonosian seized the trooper, killing him by dropping him to the ground. Shortly after exiting the gunship, Boss and two clone troopers were hit by an anti-infantry round. The nearby troopers were killed, while Boss' health scan showed 50 percent vitality. The advisor thus recommends healing procedures by using a nearby bacta dispenser. After doing so, Boss is ordered to secure the area around a nearby crashed gunship, where three clone troopers are under attack from B1-Series battle droids. After the droids are disposed of, and the surviving two clones call for a medic for their downed teammate, Boss comes across a squad of clone troopers — 17, 35 and two others—who are defending a barricade against battle droids. Shortly after Boss' arrival, the droids blow through the barricade, killing one of the clones by the explosion. Despite this, Boss, 17, 35, and the other surviving trooper manage to push the droid lines back to an armored gun emplacement, which is preventing Republic troops from advancing. Boss is then assigned to take the gun position out with thermal detonators, allowing the troops to advance as well as clearing his own path. After pushing through debris from the destroyed gun position, Boss meets with the squad's demolition expert, Scorch. Another bunker is blocking the squad's way, so Boss assigns Scorch to destroy it with a detonation pack. However, an OG-9 homing spider droid blocks their path. The commandos call for assistance, and the LAAT/i gunship Harken responds, destroying the droid and allowing the clones to access the spire.
As Boss and Scorch navigate the Geonosian corridors, they face little resistance. They then meet with RC-1140 (Fixer), the team's slicer, who is strangling a Geonosian warrior before finishing it off with a punch to the head. Fixer is then immediately tasked with slicing through a security door. They must then traverse several hangars, destroying Geonosian starfighters as they go, until they link up with Sev, the squad's sniper, on the balcony outside Sun Fac's planning room. A large glass wall separates the squad from Sun Fac. When Boss shoots through it, Sun Fac realizes he is being targeted and flees through a door towards his fighter. While the squad fights off super battle droids and battle droids, Sun Fac heads to his aircraft and starts its engines. Upon reaching the hangar, the Deltas find him behind a shield, starting up his fighter and taking off. As Boss assigns Sev to a sniper position, Fac decides turn his fighter's weapons on them before making good his escape. However, Sev quickly manages to damage the fighter's critical systems, causing it to crash back into the hangar, killing Sun Fac. The squad then notices an unidentified ship escaping into the sky, but Advisor tells them he will investigate it while they receive new orders.
After completing this objective, the Advisor informs Delta Squad that another commando's squad has been captured while trying to disable the droid foundries located deep within the Geonosian hives. Delta Squad is reassigned to this task, but they must first eliminate a nearby signal jammer that is interfering with the Republic's attempts to scan for weaknesses in the foundry. Taking a large elevator into the tunnels, Boss equips a sniper attachment to his DC-17m blaster rifle. After navigating through a Geonosian hatchery, they discover the jamming device. The squad disables its shield and destroys the jammer, while repeatedly being attacked by Geonosians and droids. With the jamming device destroyed, communications are restored, and the Advisor is able to give the squad the exact path to the foundries.
Although Advisor is able to scan the area of the factory, he isn't able to find any weakness Delta Squad could hit to destroy it. Therefore Delta is assigned to find and slice the foundry's computer terminal and upload the complete factory schematics. Navigating through ventilation shafts, they find the console, giving the data to Advisor. The squad is informed of two power conduits that have to be destroyed to shut the factory down. Delta Squad continues through the shafts, and after encountering and overcoming more droid resistance, the squad finds the first power conduit. After destroying it, they proceed to the next one and eliminate it as well, after which they are evacuated by a gunship.
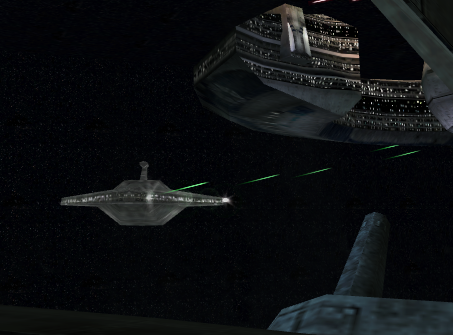
Their next objective is to infiltrate a nearby Confederacy Lucrehulk-class core ship which has been disabled, and retrieve the launch codes. These codes will be giving the Republic an edge against the entire Separatist fleet, as they can be used to prevent the droid armies from retreating from the Battle of Geonosis. The gunship pilot is forced to drop Delta a greater distance from the Core Ship than was planned, due to a large anti-air turret placed near the core ship. The commandos have to get to the core ship on foot through a canyon, encountering some Geonosian resistance and several crashed gunships. As they approach the anti-air turret, en route to the ship, they encounter more and more battle droids. Advisor directs the squad to a loading mechanism for the turret and orders its destruction. Although they put a charge on the loading mechanism and detonate it, it doesn't stop functioning and the Deltas move to the upper level to place another charge, this one obliterating the mechanism completely. After disabling the turret, they proceed to the Core Ship, now with gunship support.
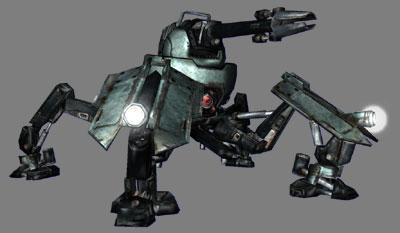
Delta Squad makes its way to the Core Ship entrance through several more canyons, but finds it shielded. Since the door itself is deep in the landscape, the squad can't call in gunship support to punch through its shielding. Therefore, they go through another canyon passage to reach the next entrance. After reaching it, the Deltas encounter an A-DSD advanced dwarf spider droid. As they fight it, the Advisor informs the squad about its only weakness, the red optical cluster in the middle of the droid's frame. After defeating it, they finally get to the entrance, discovering that it's shielded as well, but in a position suitable for air support. Shortly after Advisor calls it in, Delta 42's gunship appears above Boss's head and fires several rockets at the shield, warning Delta Squad to stand back in cover. The shield is now down and the squad is able to enter the hallway to the ship itself. The hallway leads the Deltas to an extendable bridge, connecting the ship's hull with the planet's surface. Since the bridge isn't extended, they have to slice a nearby console to extend it, while eliminating several droids guarding the entrance. When the bridge is extended, the squad is ready to infiltrate the ship by entering its ventilation system. They are now assigned to two objectives: First, to disable the ship for good, and the second, to retrieve the important launch codes. The Advisor reminds Boss several times of how important these codes are. Since each squad member is tasked disabling different critical systems (Boss is assigned to disable the super battle droid storage racks, Scorch to detonating the coolant intake valve, Sev to disabling the repulsorlift controls and Fixer to destroying the primary power conduit), the squad splits off and enter the ventilation shafts separately, to reach their objectives directly. This is the Republic's first breach of an enemy capital ship in the Clone Wars.
After Boss enters the ventilation shaft's elevator, he is taken to the Super Battle Droid storage racks. As he navigates through the racks full of droids on standby, other Delta squad members report reaching their objectives and successfully disabling the ship's systems. The squad's presence is no longer secret, as Boss runs into a Geonosian Elite warrior that sounds an alarm before Boss is able to kill him. As Boss finds his way to the next elevator, he encounters several activated Super Battle Droids. The second elevator takes Boss to a level where the storage racks controls are located. On his approach, Advisor uploads disabling protocols to him, tasking him with locating the control mainframe and inserting these protocols. Boss does so, causing explosions and short circuits in the racks, and destroying the mechanism's functionality. Now he's ready to meet up with Sev and the rest of the squad at level 1157. Encountering destroyer droids and droid dispensers for the first time, Delta squad makes its way through the ship's hallways to its command bridge. The ship's many systems are already malfunctioning, as a chain reaction started by disabling the four critical systems on the ship occurs. Encountering heavier and heavier resistance with every meter they get closer to their objective, they enter the bridge. Under heavy fire from wall turrets and droids, they retrieve the launch codes from the mainframe console. The Deltas escape the core ship with help from Delta 42 and his gunship, who leads them to a hallway leading to the ship's hull surface, blasts the hull door open and evacuates Delta Squad shortly before the Core Ship's total destruction.
Prosecutor campaign

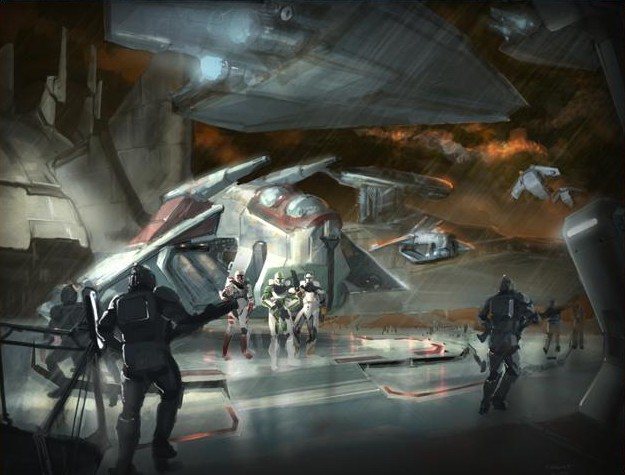
Nearly a year following the Battle of Geonosis, the Prosecutor, an Acclamator-class assault ship under the command of Captain Martz, goes missing while patrolling the Corellian sector. After two weeks without contact, the Prosecutor, Delta Squad's original base, reappears in the Chaykin Cluster near the Corbantis system, within Separatist territory, but does not respond to any communication attempts. Three hundred and sixty-seven days after the Clone Wars began, Delta Squad is sent to investigate. Following a briefing in a CR25 troop carrier, they board the ship by making a zero-gravity jump into the proton torpedo tubes. Each member of the squad is assigned to one of the ship's four data cores to extract critical information. Advisor informs Boss that his main task is to retrieve the flight recorder data from the aft data core, then regroup with the squad. However, as squad leader, he is to assist the other members of the squad if necessary. Sev is tasked with retrieving the sensor logs from the starboard data core, Fixer is to retrieve certain data from the port core. As Advisor finishes telling Boss of Fixer's objective, a static jamming interferes with the transmission, and contact is lost with command. Delta Squad decides to press on with their objectives, without the assistance of Advisor. Because the airlock to the ship has been destroyed, Boss must manually open the torpedo bay hatch to gain access to the ship.
Delta Squad agrees to press on to their objectives without the assistance of Advisor. Boss's way into the ship has been destroyed earlier, so he manually opens the torpedo bay hatch. After manually opening the torpedo bay hatch, he enters the ship, where he encounters mynocks. As he walks through the torpedo bay's corridors, Delta 62 reports strange static on his visor, then being attacked by a droid. After that, he doesn't respond to any of the other squad members. As Boss continues, he meets one confused clone trooper, hiding in the torpedo bay, which is killed by a scavenger droid. Continuing through the ship's maintenance hatches, Boss experiences an attack by one of the scavenger droids himself. He realizes what happened to Scorch and warns the other squad members to stay out of static and be aware of these droids. When he reaches a hallway leading to his objective, he finds it blocked by debris. Sev informs him the only way around is through the droid maintenance hatch, passing nearby the starboard data core. While Boss overrides the entrance, he's attacked by three more scavenger droids. As he exits the maintenance hatch by Sev's position in the core, he watches his squad-mate being attacked and knocked unconscious by a Trandoshan slaver, while he's getting ambushed by the Trandoshans as well. Then he enters another maintenance hatch and moves through the hallways to do Sev's work first, encountering Trandoshans equipped with Accelerated Charged Particle Array Guns, but mistakes them for projectile weapons, along with Trandoshan proximity mines, which he could only disable by crouching to avoid setting them off so he could get close enough to disarm them. He enters the core, but is unable to locate Sev. He slices the console while being under enemy fire. After downloading the data, he enters a hallway connecting the two data cores and heads to the aft data core, his previous task.
On his way to his objective, Boss comes across a clone trooper and two other clones successfully fighting the Trandoshans with help of the defense autoturrets. As he reaches the entrance to the data core, he's attacked by a sliced pair of turrets, however another two turrets are inactive and he uses them to cover his back and enters the aft data core, which has taken heavy damage and the console is barely working. After a successful slice, saving the flight recorder data before it could be lost, he heads to the rendezvous point through the ship's landing gear section. As he navigates a variety of corridors and hallways, Boss encounters a heavily armed Trandoshan, a Trandoshan Elite, carrying a LS-150 Heavy Accelerated Charged Particle Repeater Gun, who managed to cut down two clones before impaling the third one against the wall with his gun's bayonet and shredding him before turning to face Boss. Reaching the rendezvous point, Boss finds a junction door he needs to pass locked. However, Delta 40 appears on the other side of this door and unlocks the door. While Fixer is slicing, a Trandoshan slaver breaches a wall behind Boss and brings in a droid dispenser. When Fixer unlocks the door and Boss is good to go, he advises Boss to leave the dispenser alone and escape; however, it is the player's choice whether to blow the dispenser up or not.

Delta Squad, specifically members 38 and 40, proceed to locate their downed comrades and fulfill their assigned tasks. As they move through the corridors, they discover Sev in the clutches of Trandoshan slavers, undergoing a brutal interrogation. Simultaneously, two other slavers are amusing themselves with an R2 series astromech droid, provoking it to dart back and forth by roaring at it, until one of them strikes and destroys the droid with his Accelerated Charged Particle Array Gun. Subsequently, Delta Squad storms into the room, eliminating all hostiles and utilizing the field bacta dispenser to revive Sev. Following Delta 07's confirmation to the squad that Scorch is likely held within the detention sector, they advance to rescue him. Upon arrival, they are ambushed, but after neutralizing all enemies in the vicinity, they locate Delta 62 inside detention cell 2187. After reviving him, enemy battle droids detonate a barricade on the far side of the detention block, creating a pathway that Delta Squad utilizes to reach the ship's bridge. While navigating the corridors, the Deltas encounter more reprogrammed turrets, slicing the door controls to enter quietly without setting the turrets off had they attempted a door breach. Reaching the bridge, they find it heavily guarded by super battle droids and Trandoshans. After eliminating the droid forces, they discover and disable a jamming device that was disrupting their communications with command, thereby re-establishing contact with Advisor. Upon receiving the data sent by Delta Squad, Advisor expresses surprise at the volume of information gathered by the commandos, which includes a wealth of sensitive Trandoshan and Separatist intelligence, such as tactics, requiring months of analysis to fully process. After reviewing the data, Advisor determines that the Trandoshans had stolen the ship with the intention of selling it to the Confederacy of Independent Systems in exchange for battle droids. With the jamming device deactivated, Advisor provides a complete scan of the ship, revealing a Trandoshan dropship located in hangar A. Delta Squad is now tasked with destroying the dropship to eliminate the Trandoshan presence on board the vessel. En route to the hangars via a booby-trapped elevator, Delta Squad becomes trapped in the detention area and is ambushed by Trandoshans. Their survival in the detention block, which is teeming with Trandoshan slavers and mercenaries, hinges on the automated lockdown system, which has been damaged by the Trandoshans. To restore its functionality, Delta Squad navigates the detention block, repairing four damaged circuits while encountering a Trandoshan Rocket Turret. As they engage the Trandoshans, Fixer detects multiple clone trooper signatures emanating from below their position. Advisor instructs them to remain focused on their primary objective and states that he will investigate the matter himself. Shortly after the lockdown is activated, a poisonous gas is released into the hallways, instantly eliminating all remaining Trandoshans on that level as they succumb to asphyxiation, while Delta Squad remains safe within their sealed Katarn-class commando armor. Subsequently, Delta Squad proceeds through a maintenance hatch into a room filled with the corpses of clone troopers, apparently transported there by scavenger droids. Upon exiting the room, they bypass Trandoshan mines and reprogrammed autoturrets, either by destroying them or by re-aligning them to their side. They then advance toward the hangar and the Trandoshan dropship.
Upon reaching hangar A, Delta Squad confronts the Trandoshan dropship, which is fortified by debris and heavily guarded by remaining Trandoshans, mines, and two rocket turrets. Advisor informs Delta that the dropship possesses heavy shielding, requiring them to seize control of both turrets to destroy it. While they are engaged in combat, Advisor detects a Confederacy Lucrehulk-class battleship on long-range sensors and requests backup from Coruscant command. After a difficult battle, they seize control of the turrets and destroy the dropship, eliminating the Trandoshan base on the ship and eradicating their presence. While they are recuperating from the battle with the Trandoshans, the Lucrehulk-class battleship emerges from hyperspace and begins deploying battle droid dispensers into the other three hangars to seize control of the ship. Advisor realizes that they cannot await reinforcements from Coruscant and initiates an emergency signal to any Republic vessel in the vicinity of the Corbantis system. After a period of silence, when hope seems lost, Captain Talbot of the RAS Arrestor responds and alters his ship's course to assist Delta Squad. Consequently, Delta Squad proceeds to hangar B to repel the dispensers.
Upon entering the hangar, they establish defensive positions and await the impending assault. As the first two dispensers land on the hangar floor and begin deploying battle droids, Advisor discovers a method to seal the hangar and halt the arrival of additional dispensers by detonating the hangar's force field regulator. As the squad members carry out this task, they advance to the next hangar via the maintenance tunnels, where one dispenser has already been deployed and more are en route. After defending this hangar and destroying its force field, Delta Squad proceeds to the final hangar, hangar D, where the droids have been fully deployed and are beginning to spread throughout the ship.
Upon arriving at the hangar, Advisor informs the squad that he can provide them with useful ordnance via the lift at the rear of the hangar and instructs them to establish defensive positions. Because he is unable to remotely operate the lift, one of the Delta members must override the nearby console. As they do so, an AT-TE walker ascends on the lift. Boss then assumes control of the walker's main turret and destroys the force field regulator and all the droids and their dispensers within the hangar. As the commander of the Lucrehulk-class battleship realizes that there is no hope of capturing the ship by deploying battle droids, and with the hangar force fields activated, he decides to target the ship and open fire.
When Delta Squad recognizes that the ship will soon be defenseless against the larger Separatist battleship, Advisor directs them to the turbolaser control room to return fire. After battling through countless waves of battle droids and their own reprogrammed defense turrets, Delta Squad reaches the designated control room and is tasked with slicing three terminals to program all turbolaser batteries to target the largest enemy vessel within range. While the Deltas are slicing the terminals and repelling numerous droids, Captain Talbot arrives at the location aboard his ship, RAS Arrestor, and engages the Separatist vessel. Shortly thereafter, Delta Squad manages to activate their own weapon systems, and together, with the combined firepower of two _Acclamator_s, they defeat the Separatist battleship. With the droid remote controls destroyed along with the ship, all enemy droids aboard the Prosecutor are deactivated, and the ship is finally secured.
Kashyyyk campaign
As the conflict intensifies, Delta Squad becomes involved in increasingly perilous missions. The Republic receives a distress call from the Wookiee homeworld of Kashyyyk, where Trandoshan slavers have established camps and are enslaving the Wookiees with the assistance of Separatist weaponry. Delta Squad is dispatched to rescue the Wookiee chieftain Tarfful, who was captured by the Trandoshan forces on the planet several weeks prior to Delta Squad's mission. Delta Squad covertly infiltrates the dense jungles of Kashyyyk near one of the Trandoshan slaver camps and advances through the main entrance. After overcoming a trap set by the slavers, the squad infiltrates the camp and liberates a number of imprisoned Wookiees. While traversing the camp, they notice a starfighter that Advisor recognizes. He then instructs them to locate the ship and allow command to examine it more closely for identification. As they approach the designated landing pad, they identify the ship and its owner, General Grievous himself. As the General realizes he has been spotted, he prepares his fighter for departure. Delta Squad is now tasked with quickly reaching him and preventing his escape. En route to the landing pad, they finally encounter Tarfful, the captured Wookiee chieftain. They see him behind a force field, guarded by two IG-100 MagnaGuards and being escorted to Grievous's ship, but soon after they leave the Deltas' sight, the Wookiee overpowers the droids, returns, and awaits Delta Squad, which is preparing a charge to breach the force field and prevent General Grievous from escaping. By the time Delta Squad reaches Tarfful and breaches the door leading to the landing pad, Grievous's fighter is already taking off, and two of his bodyguard droids attack the Deltas as Grievous escapes. They are ordered to protect Tarfful at all costs, as he possesses information vital to the Republic; however, the Wookiee refuses to remain behind and engages the formidable droids himself, making it even more challenging for the player to defeat them. Ultimately, both MagnaGuards are defeated and destroyed, and Tarfful's intelligence is secured to aid the Republic and Delta Squad in assisting the Wookiees in reclaiming their planet from the CIS.
Following this, Delta Squad sabotages a critical Trandoshan supply depot and proceeds to the pivotal battle of Kachirho, which marks the beginning of the Battle of Kashyyyk. There, they navigate the Wookiee tree city, securing key objectives and engaging waves of advanced battle droids, supported by Wookiees whenever possible. They destroy the Bridge at Kachirho, severing the droid army's connection to its reinforcements, and proceed to secure the Citadel. Fighting through the most elite CIS forces and weaponry, Delta Squad once again divides to operate four Heavy AA turrets to assist in the destruction of a Separatist Recusant-class light destroyer positioned above the Citadel. Once the ship is destroyed, Advisor directs the Deltas to regroup at 38's location. However, Sev fails to reach the rendezvous point, and the squad manages to intercept a final transmission from him, which indicates that he is under heavy attack and possibly injured or killed. Delta Squad prepares to rescue Sev, but the commander orders them to withdraw. As they depart on the gunship, devastated by the loss of their comrade, they are debriefed by Jedi Master Yoda. A large Republic fleet is seen deploying outside the gunship, as Delta Squad prepares for another assignment in the battle.
Gameplay
The game adopts a first-person perspective, allowing the player to experience the action through Boss's helmet Heads-up display and control his actions. The Heads-up display can be toggled off, but all the things to get your character will still be shown. Health and shield bars provide a percentage-based representation of remaining health and rechargeable shields. The player can issue orders to the other members of Delta Squad through squad commands, such as "secure area" and "search and destroy". Specific objects offer unique commands; doors can be breached (resulting in a noisy explosion) or sliced (allowing for quiet hacking), and squad members can be directed to operate fixed weapon emplacements.
The player's primary weapon is the DC-17m Interchangeable Weapon System, which includes rifle, sniper, and grenade launcher attachments. The DC-15S serves as the player's secondary weapon, and a retractable Knuckle plate vibro blade is available for melee combat. Certain weapons are dropped by enemies and can be acquired and used by the player, such as the Geonosian elite beam weapon, Accelerated Charged Particle Array Gun, or Wookiee Bowcaster. These weapons occupy an additional slot, and only one can be carried at a time.
If a squad member's or the player's health is depleted, they become incapacitated rather than dying and can be revived to half health by another squad member, if possible. However, if the player cannot be revived because all squad members are incapacitated when the player is incapacitated, or if the player dies in an inaccessible location (such as falling into a bottomless pit), the squad is defeated, and gameplay resumes from a previous save point.
Soundtrack
Republic Commando stands out as the first official Star Wars game to incorporate licensed music. The song "Clones," performed by the band Ash, is played during the credits at the end of the game but is not included on the game's soundtrack. Ash is known to be avid Star Wars fans; their debut album, "1977", features numerous Star Wars references.
The game's music adopts a fast-paced, gritty, and vocal style that deviates from the traditional Star Wars score, enhancing the player's immersion in the game. It features the in-universe Mandalorian battle song Vode An (Brothers All), which is heard throughout the game, including the main menu and several battle sequences. Other Mandalorian battle songs also appear: Gra'tua Cuun, Kote Darasuum, Rage of the Shadow Warriors and Ka'rta Tor.
Development
The game is characterized by its uncommonly high levels of violence, including blood spatters during melee knife kills, Geonosian explosions when sufficient damage is inflicted, and head removal via sniper head shots. Infanticide is possible when the player traverses a Geonosian hatchery, and there are instances of dismembered bodies and blood stains. Consequently, it received a USK 16 rating in Germany. These elements were incorporated to provide players with a different perspective on the Star Wars universe, through the eyes of "A hardened Clone Commando," as opposed to the more common Jedi-centric gameplay of other Star Wars games.
A map editor was released with one of the patches for Republic Commando. It utilizes the Unreal engine, UnrealEd.
Legacy
During the development of Republic Commando, a sequel was already in the planning stages, but it was canceled in 2004, with only concept art and sketches having been created.
Tie-in books were authored by Karen Traviss to complement the game, beginning with Republic Commando: Hard Contact. Radio chatter heard in the game regarding Theta Squad directly relates to the opening of the book, whose main character Darman is the lone survivor of Theta.