Obi-Wan Kenobi's third lightsaber
Obi-Wan Kenobi's third lightsaber represented the final lightsaber design employed by the esteemed Jedi Master known as Obi-Wan Kenobi. This particular lightsaber was utilized by Kenobi throughout the duration of the Clone Wars, the harrowing period of the Great Jedi Purge, and also during his initial, second, penultimate, and ultimate confrontations with Darth Vader.
Design
In terms of design, this lightsaber differed from Kenobi's previous two, which were both modeled after the lightsaber of his master, Qui-Gon Jinn's lightsaber. This divergence symbolized his development into a more self-reliant Jedi, particularly following his elevation to the Jedi Council.
History
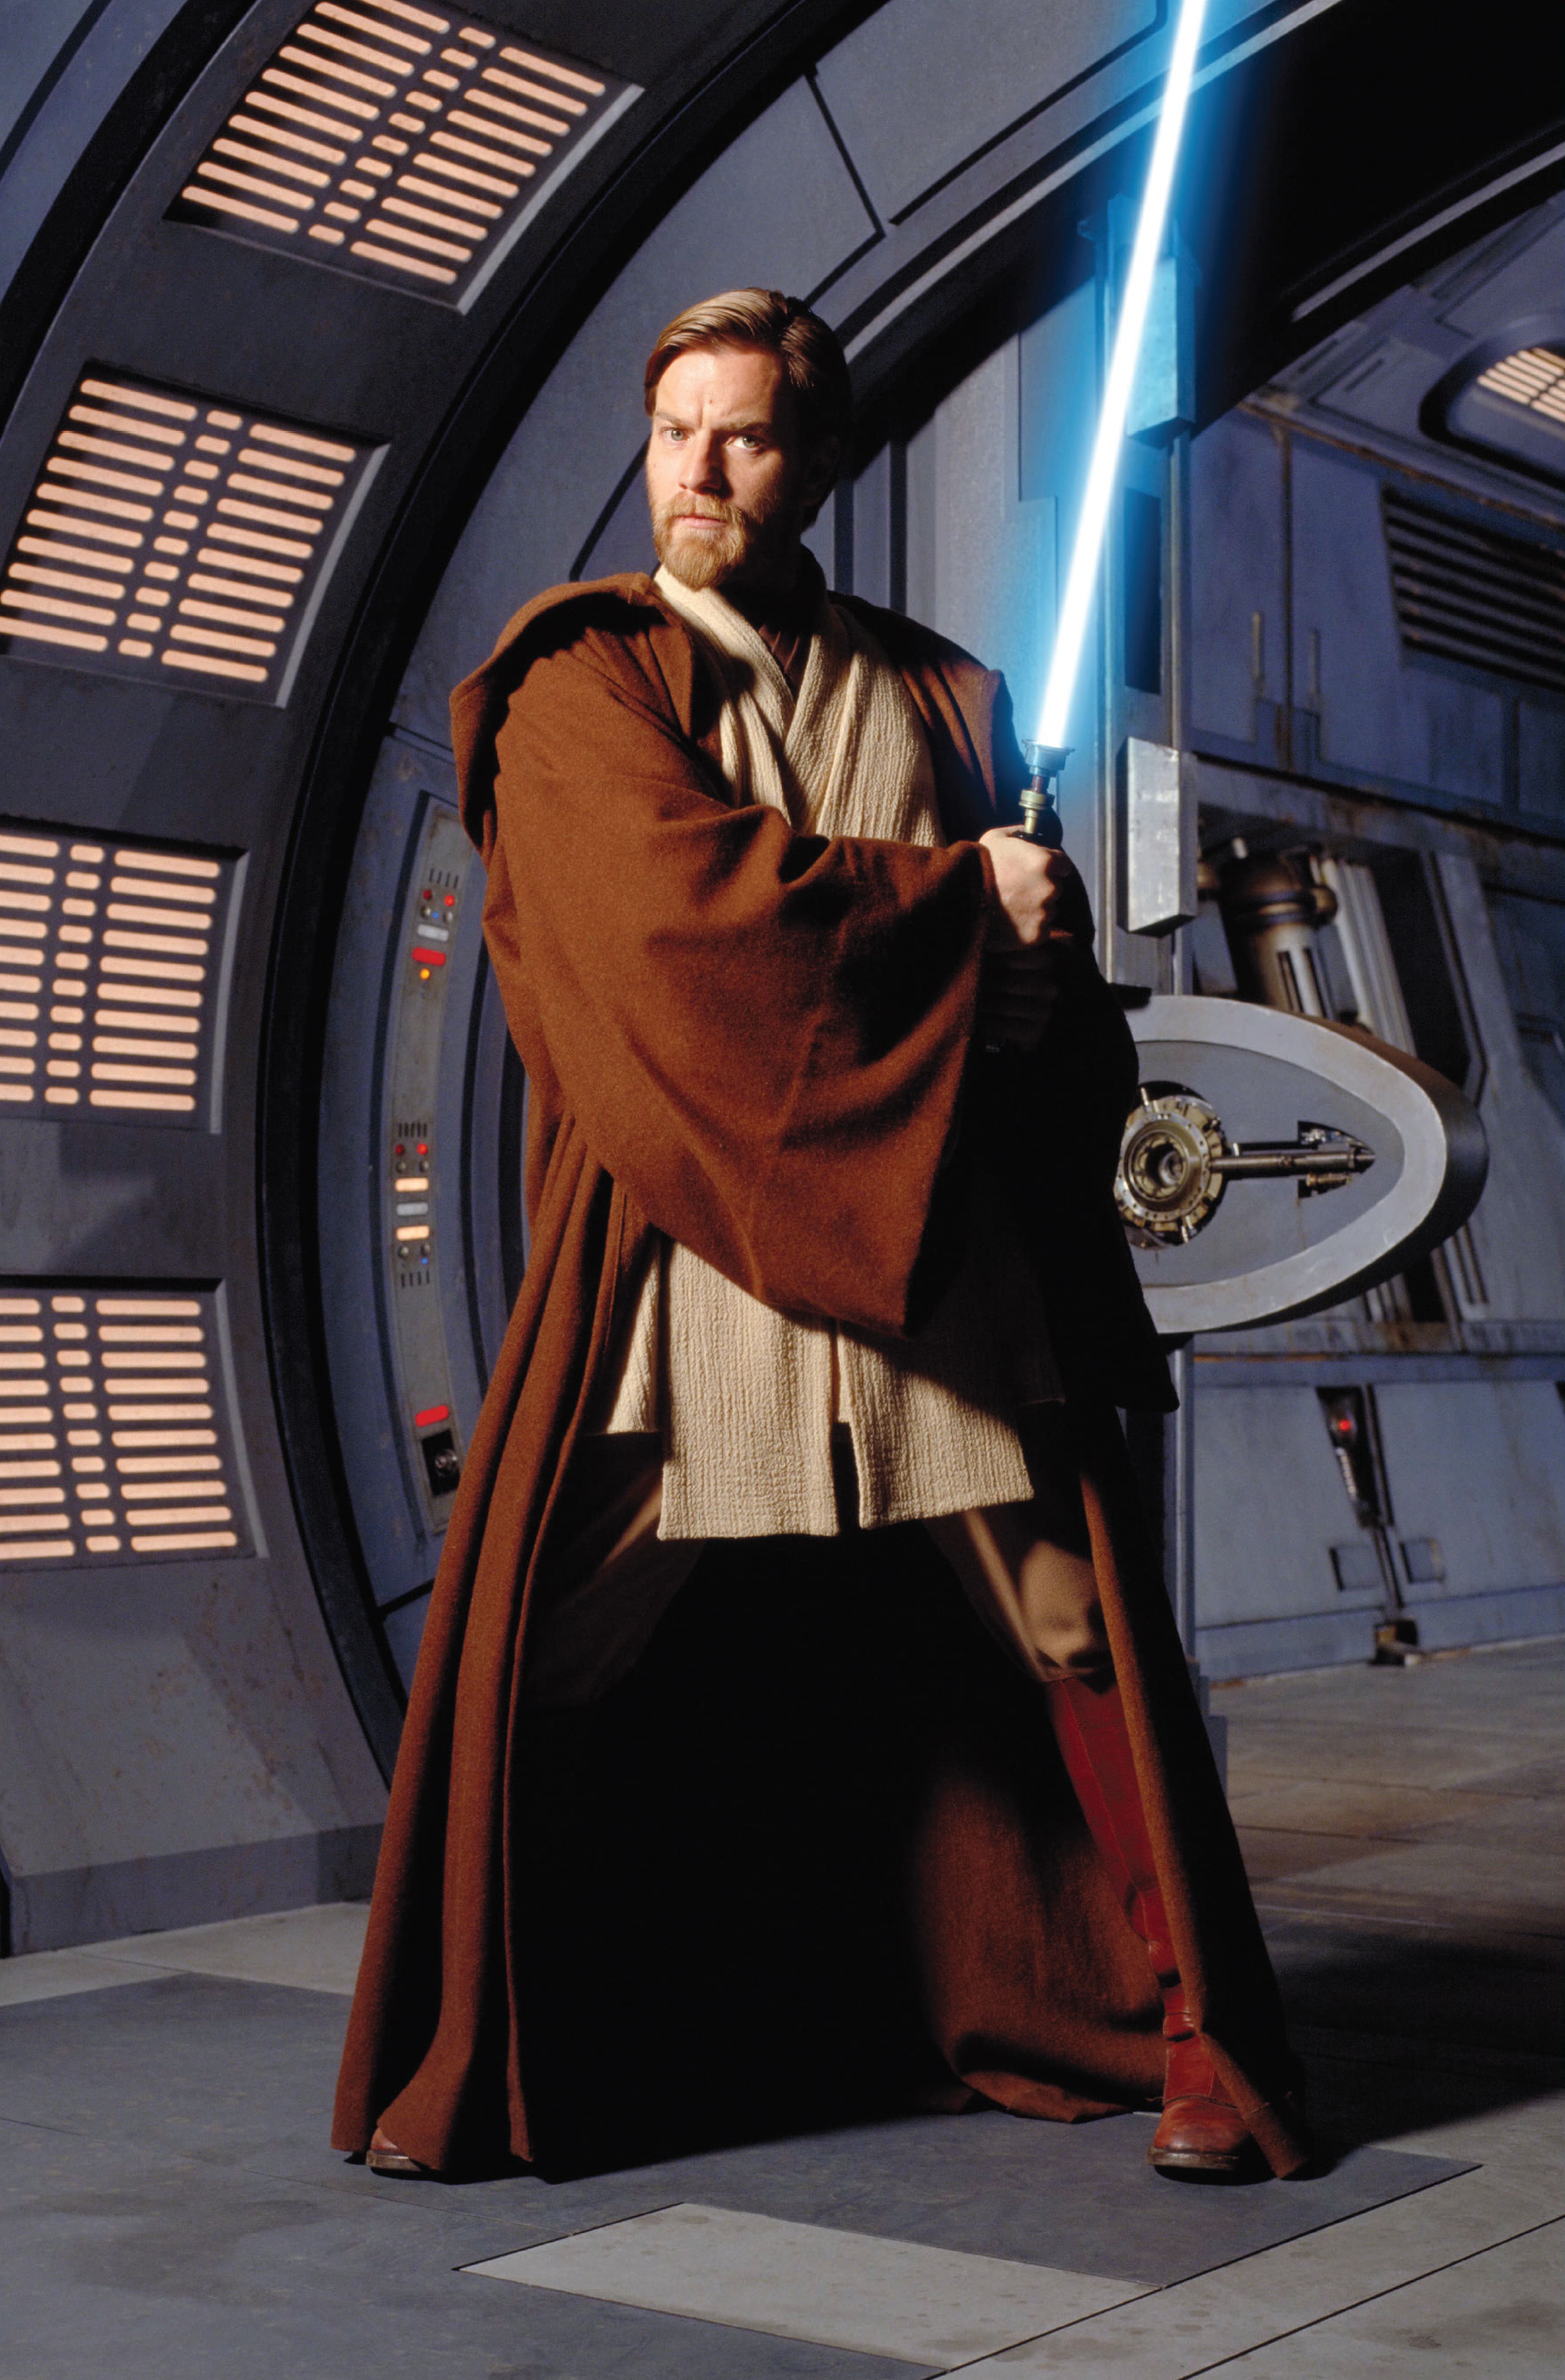
Following the loss of his second lightsaber just before the First Battle of Geonosis, Obi-Wan Kenobi, a Jedi who had also attained the rank of Jedi Master, constructed a fresh lightsaber for his personal use. This occurred during the Clone Wars, a conflict between the Galactic Republic and the Confederacy of Independent Systems. As the commanding Jedi General of the 212th Attack Battalion, Kenobi made extensive use of this lightsaber in his battles against the Confederacy military. This included duels with formidable adversaries such as Count Dooku, Commander Asajj Ventress, General Grievous, and even the resurrected former Sith Maul when he resurfaced in the galaxy. During his last duel with Grievous, Kenobi temporarily lost the lightsaber, but it was eventually returned to him by Clone Commander CC-2224 "Cody". He would also use this lightsaber to duel his fallen apprentice Darth Vader on Mustafar and would continue to wield the weapon during his exile on the planet Tatooine, although he was reluctant to use it as he kept himself hidden.
To avoid using it, Kenobi buried both his own lightsaber and the Skywalker lightsaber inside a chest in the desert environment. However, when Senator Bail Prestor Organa implored him to leave Tatooine to rescue his daughter, Leia Organa, Kenobi retrieved the chest and wielded the lightsaber during his mission to Daiyu. He also used it on Mapuzo, where he confronted his former apprentice after recently discovering that Skywalker was not dead and had survived the injuries Obi-Wan had inflicted upon him on Mustafar. Witnessing the transformation of his apprentice, Kenobi reignited his lightsaber to defend himself. Skywalker, now completely consumed by his identity as Darth Vader, unleashed a barrage of slanderous remarks and powerful lightsaber strikes, utilizing his enhanced strength to overwhelm Kenobi. Kenobi, having been out of practice since their previous duel, struggled to match Vader's intensity. Vader then used a Force choke to disarm Kenobi, igniting the flammable ground beneath him and causing Kenobi to be engulfed in fire. Vader's intention was to subject Kenobi to a similar torment that he had experienced on Mustafar.
Tala Durith, a member of the Hidden Path, created a diversion by ambushing Vader and his stormtroopers. This allowed the loader droid NED-B to rescue the injured Kenobi from the flames, also recovering Kenobi's lightsaber. After once again using the lightsaber to rescue Organa and defend against the attack on Jabiim, Kenobi engaged Vader in a second rematch on a barren moon, which Kenobi won. Upon his return to Tatooine, Kenobi used the lightsaber against the Wookiee bounty hunter Krrsantan. Years later, Kenobi wielded his lightsaber in his final duel against Maul, defeating him with a single, decisive strike that severed both Maul and his double-bladed lightsaber.
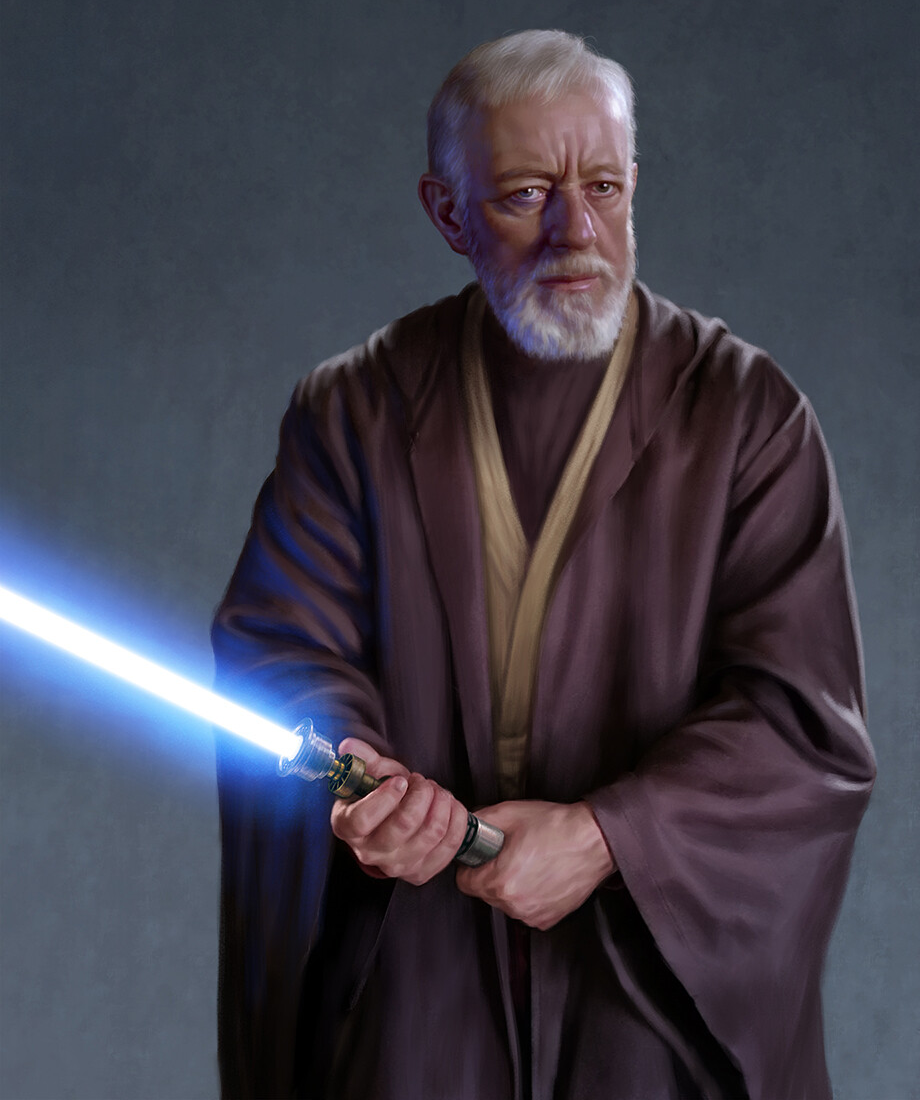
Kenobi continued to wield the weapon until his death at the hands of Vader during their rematch on the Death Star. Upon his passing, Kenobi became one with the Force, leaving behind only his robes and lightsaber. Vader then retrieved his former master's fallen weapon. Kenobi's second apprentice, Luke Skywalker, later drew inspiration from the design of this lightsaber when constructing his own lightsaber utilizing a green kyber crystal.
Behind the scenes
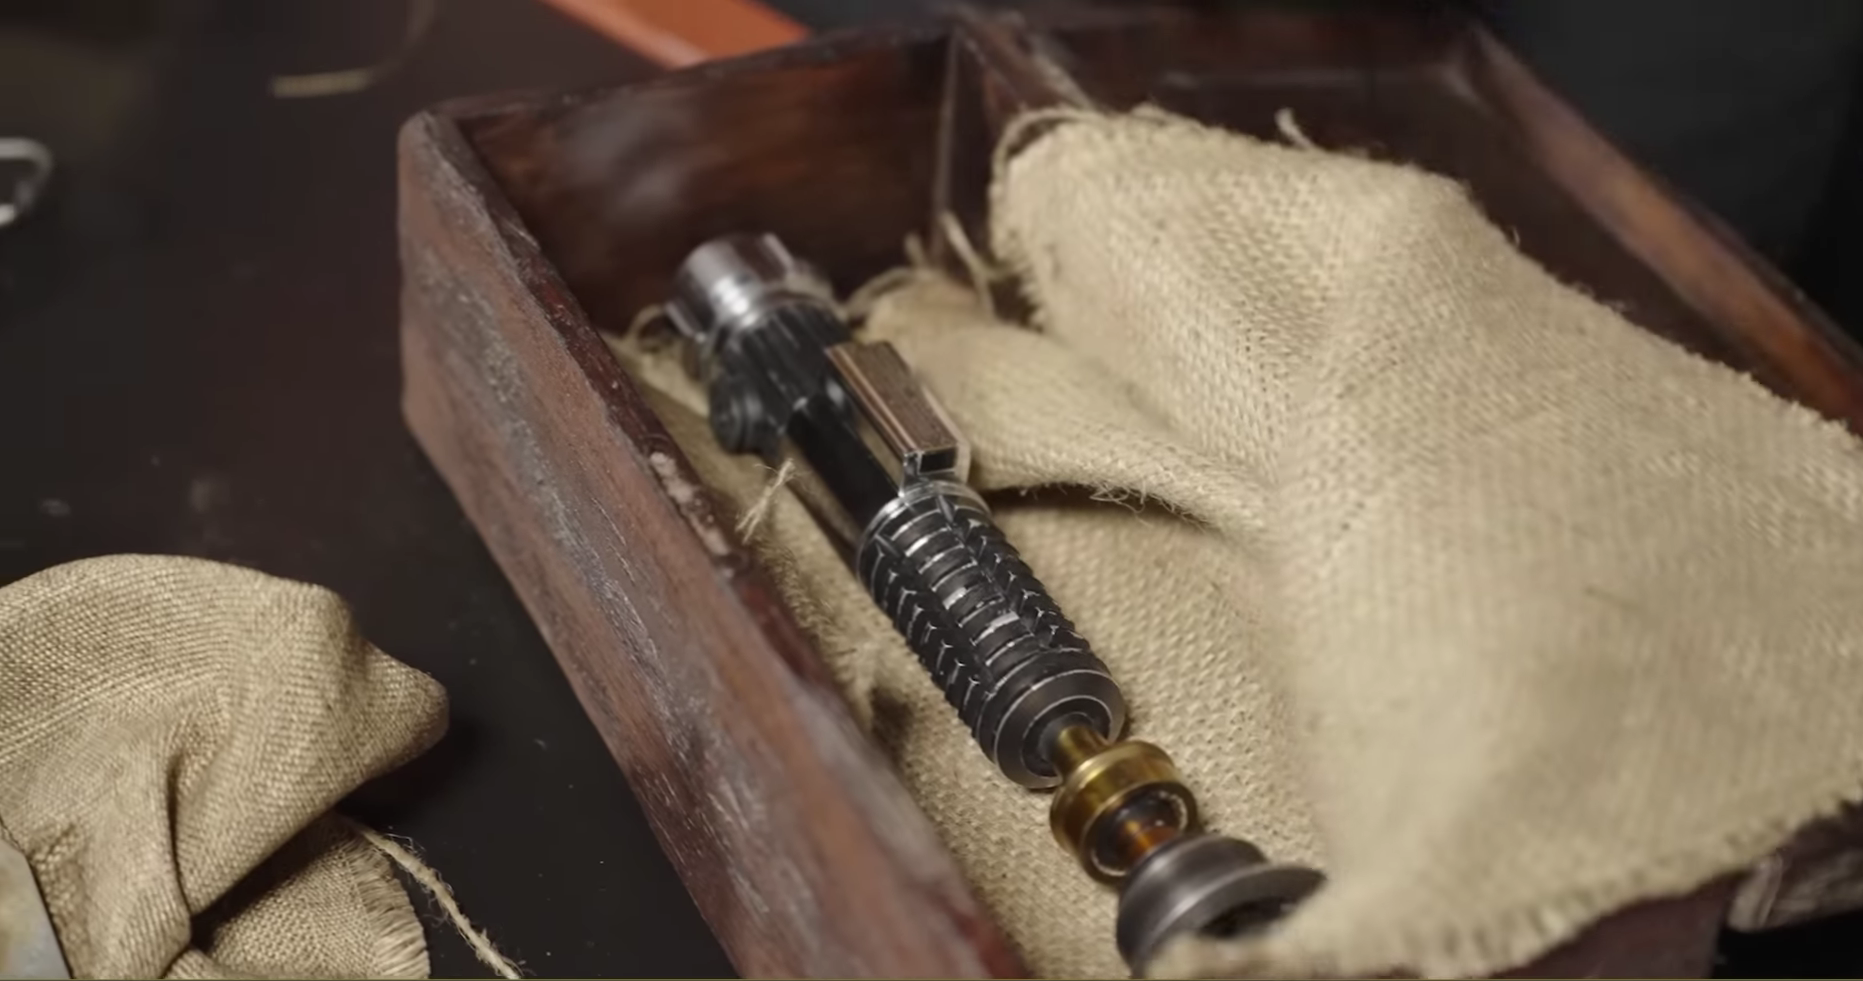
The initial appearance of Obi-Wan Kenobi's third lightsaber was in the inaugural Star Wars film, Star Wars: Episode IV A New Hope. Its identification was first established through a card in Star Wars: Card Trader. The original prop was assembled using components such as the balance pipe from a Rolls-Royce Derwent jet engine, a World War I–era No. 3 Mark I British rifle grenade, a battery pack, and a faucet handle.
A blooper in Revenge of the Sith shows Grievous wielding Obi-Wan's lightsaber, but with a green blade, during their duel on Utapau.
During the production of the Obi-Wan Kenobi television series, the primary objective was to emphasize the weight and significance of the imagery, particularly in relation to Kenobi's character arc. This led to the decision to feature Kenobi's lightsaber on his hip as the closing image of the first episode. Similarly, the second episode concluded with Kenobi holding, but not using, his lightsaber, highlighting the importance of its eventual use. The prop making team aimed to create a lightsaber prop that mirrored the hero lightsaber from the prequel trilogy. Propmaster Brad Elliott noted that replicating the lightsaber was particularly challenging due to the differences in details between the lightsaber from Star Wars: Episode III Revenge of the Sith and the one seen in A New Hope. To reflect the passage of time, the team added a subtle patina to the emitter and base of the prop, suggesting that it had not been used for approximately a decade.