Skirmish in the Operations Hangar
A brief battle unfolded in 44 ABY inside the Operations Hangar of the Jedi Temple located on Coruscant. After the Jedi Council relieved him of his duties, Kenth Hamner, the former acting Grand Master, attempted to prevent a squadron of StealthXs from taking off to aid Luke Skywalker in confronting the Lost Tribe of Sith. His fear was that it would ignite a conflict between the Jedi and the Galactic Alliance, as the latter was unaware of the Sith threat and believed the squadron was targeting the government. Saba Sebatyne, a Jedi Master, confronted Hamner, attempting to halt his efforts to obstruct the launch. She was victorious over Hamner, sending him falling over a catwalk, but she used the Force to catch him. However, he then hurled his lightsaber toward the hangar bay controls. While she struggled with him for control of the weapon, she lost her hold on Hamner. Sebatyne managed to catch the lightsaber using the Force, allowing the StealthXs to launch, but Hamner plummeted to his death.
Background
Around 43.5 ABY, several Jedi Knights started to succumb to a Force psychosis, which led to strained relations between the New Jedi Order and the Galactic Federation of Free Alliances. The Jedi desired to keep their Knights for study, while the Galactic Alliance insisted on taking all afflicted Knights into government custody to be encased in carbonite. Meanwhile, Luke Skywalker, the exiled Grand Master, discovered a new Sith Tribe preparing to launch an invasion of the galaxy. The Jedi Order decided to mobilize a flight of StealthXs to assist him, but they were prevented from doing so by a Mandalorian raid on the Jedi Temple, followed by a Galactic Alliance blockade of the Temple, and ultimately a Mandalorian siege. These actions were all ordered by Natasi Daala, the Chief of State of the Galactic Alliance, in an attempt to force the Jedi to hand over the psychotic Knights. In the meantime, Kenth Hamner, the interim Grand Master, secretly made a deal with Nek Bwua'tu, an Alliance Admiral, to ensure the Navy's cooperation with the Jedi launch, provided Hamner waited until Bwua'tu gave him the go-ahead.
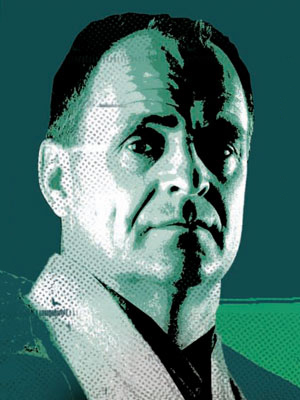
However, the afflicted Jedi suddenly recovered, and Daala was compelled to lift the siege. Despite this, she refused to release Valin and Jysella Horn from carbonite until the order submitted to her will. The Jedi Council debated their next course of action. Most of the Masters favored launching the StealthXs and attacking the GA prison where the Horns were held, but Hamner rejected these proposals. Following an assassination attempt on Bwua'tu, the Admiral had fallen into a coma, and Hamner feared launching the squadron without Bwua'tu's authorization. However, Bwua'tu had not kept the deal entirely secret, and word eventually reached Han Solo and his family through Luewet Wuul, a Senator. When Solo revealed to the Council that Hamner had made a deal with Bwua'tu, the Council felt betrayed and relieved Hamner of his duties, confining him to his quarters. Hamner soon escaped and made his way to the Operations Hangar, where he discovered the Jedi preparing to launch the starfighters. Fearing that the launch would be suicidal, given the presence of the Galactic Alliance Sixth Fleet in orbit, and that it would constitute treason against the Galactic Alliance, Hamner resolved to stop it at any cost. He incapacitated Yantahar Bwua'tu and Vaala Razelle, the two Jedi Knights guarding the hangar, then entered and confronted Master Saba Sebatyne, who was overseeing the procedures.
The Confrontation
Hamner attempted to persuade the Jedi present that their actions were treasonous, violating a tradition of Jedi protection of the government that extended back 25,000 years. However, the Masters remained opposed to him. Even Barratk'l, the newest Council member, whom Hamner had recently considered his strongest supporter, turned against him. Kyle Katarn offered him a chance to step aside, acknowledging the pressure Hamner had been under, but Hamner used the Force to bring a staircase crashing down onto the hangar floor. He refused to allow the Jedi to launch the fighters, and Sebatyne instructed Kyp Durron and the other Masters to proceed with the launch while she dealt with the former Grand Master.
Hamner, meanwhile, sprinted along the catwalk toward the mag-lev generators, intending to cut off their power supplies and prevent the squadron from launching. Sebatyne pursued him and was ambushed by the former Grand Master. He used the Force to push her over the side of the catwalk railing, but she caught herself with her tail. She resumed her pursuit of Hamner, convincing herself that he had not intended to kill her; and she sensed Master Cilghal in the Force, blocking the balcony exit in an attempt to trap Hamner. Sebatyne found him targeting the relay box that controlled the magnetic seal between the doors, tampering with which would indefinitely stall the launch, instead of the generator power feeds. She used the Force to knock him away, then caught him and pulled him back onto the catwalk.

Hamner quickly activated his lightsaber and attacked Sebatyne. The Barabel Jedi Master deflected his attacks and pinned him against a safety rail, but he persisted, and Sebatyne realized that while she was not prepared to kill him, he was willing to do whatever it took to stop the launch. Hamner managed to knock her away, and as she fell down the catwalk, he attempted to push her over the edge, but she used the Force to resist his efforts. When Sebatyne stopped her roll, Hamner again attacked her with the Force, attempting to dislodge her from the railing, but she steadied herself in an intersection. Realizing that the launch was imminent, Hamner moved quickly to finish her off. He Force-pushed her back, but she spun and knocked him down with her tail. As they both regained their balance, they began to duel for control of the intersection.
Initially, Hamner kept her off balance, but Sebatyne refused to yield, knowing that if she did, he would simply hurl his lightsaber into the relay box and halt the launch. Hamner was suddenly distracted by Sebatyne's chronometer, which indicated only thirty seconds until launch. She seized the opportunity to press the attack, pushing him backward. Hamner grew desperate and head-butted her armored throat. As Sebatyne countered with a knee to the groin, he managed to stab her in the abdomen with his lightsaber. She tried to prevent Hamner from reaching the relay box, but he easily broke free from her grasp. She then decided to reinforce his own attempt to break away with an extra Force shove that sent him tumbling over the safety rail after his lightsaber cut through. Sebatyne managed to catch him with the Force. In the last seconds before the launch Saba again tried to persuade Hamner to give up but Hamner locked his lightsaber on and threw it at the relay box, directing it with the Force. She reached out and struggled for control of the weapon, fighting Hamner's grasp on it, but as she did so, she lost control of Hamner himself. Sebatyne stopped the lightsaber, sending it flying into one of the hangar's turadium blast doors, but Hamner fell the remaining thirty meters to the deck, resulting in his death. Luke Skywalker also felt his death on Pydyr when hunting Abeloth.
Aftermath
The StealthX squadron successfully launched. Thanks to the Jedi's plan involving Booster Terrik in the Errant Venture and his Tendrando Arms Celebrity Sabacc Charity Challenge, which delayed Galactic Alliance units in orbit, they managed to leave Coruscant unharmed. The StealthXs, along with the Errant Venture, reached Skywalker on Pydyr and assisted him in fighting off the Sith there.
While Sebatyne recovered from her wounds, she was deeply affected by her failure to save Hamner's life. Daala contacted the temple and demanded to speak to Hamner but Saba made it clear that he was unavailible and that the jedi are no longer at her mercy. However, the Council continued to support her and unanimously appointed her as interim Grand Master in Hamner's place. She reluctantly accepted this role, only doing so at their continued insistence, stating that she would be judged for her actions when Master Skywalker returned. She then decided that their next objective should be to remove Daala from the office of Alliance Chief of State. Hamner was later given a funeral by the Jedi, during which Izal Waz, his former apprentice, ignited his body on the funeral pyre.
Behind the scenes
The skirmish was first depicted in Fate of the Jedi: Vortex, the sixth book in the nine-part Fate of the Jedi series, authored by Troy Denning and released on November 30, 2010. The event served to eliminate the established character of Kenth Hamner, who was initially introduced ten years previously in James Luceno's second novel in The New Jedi Order series, The New Jedi Order: Agents of Chaos II: Jedi Eclipse.