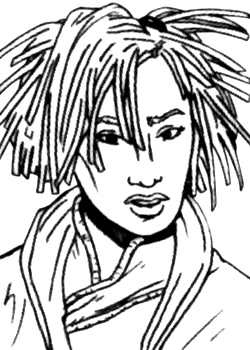
Saba Sebatyne
Saba Sebatyne, a Barabel female who was Force-sensitive, achieved the rank of Jedi Master within the New Jedi Order. She held the unique position as the only Jedi Knight serving on the Galactic Alliance High Council, and was also a Jedi Master on the Jedi High Council. Later, she took on the role of acting Grand Master of the Jedi Order. Eelysa, a Jedi Master, first identified Sebatyne's potent Force-sensitivity and subsequently accepted the Barabel as her Jedi apprentice. On Barab I, the Barabel homeworld, Eelysa trained Sebatyne to become a Jedi Knight. Sebatyne then trained several apprentices, including her son Tesar, forming them into the Wild Knights squadron. During the Yuuzhan Vong War, Sebatyne participated in numerous significant battles against the invaders. The Jedi of the Barabel species was inadvertently responsible for the death of thousands of her own kind; however, she overcame her feelings of guilt and assisted the Skywalker family in their quest to find the sentient planet Zonama Sekot. At the war's conclusion, Sebatyne was elevated to the rank of Jedi Master.
During the Dark Nest Crisis, Master Sebatyne played a significant part, taking Leia Organa Solo as her apprentice. During this period, Sebatyne engaged in a duel with Welk, the Night Herald of the Gorog, who she didn't know was a Sith. She also observed Leia's combat skills as she fought Alema Rar, a Dark Jedi, and realized that she had successfully trained her to the Jedi Knight level. Sebatyne remained on the Jedi High Council throughout the Second Galactic Civil War, participating in operations such as the Battle of Kuat and the Battle of Kashyyyk. Before the latter, she had to deliver the eulogy at the funeral of her close friend Mara Jade Skywalker. Later, Sebatyne was involved in an attack on the Anakin Solo, where she was wounded by Darth Caedus. She survived and took part in other battles during the war, which ended with Caedus's demise.
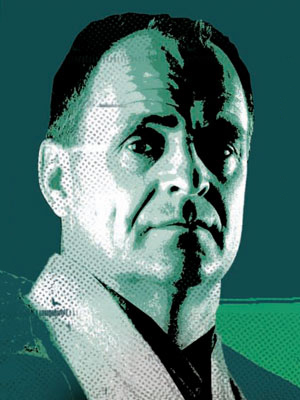
After the war concluded, Natasi Daala became the Chief of State of the Galactic Alliance and encouraged widespread anti-Jedi sentiment, exiling Luke Skywalker from the Jedi Order and appointing Kenth Hamner as Grand Master. Hamner's policy of appeasing Daala and her hostile actions led Sebatyne to be a leading voice among the Council members opposing him, and she spearheaded a consensus to remove him from his position. Hamner viewed Sebatyne and the others as treasonous, leading to a duel between Sebatyne and Hamner, where she killed him, an act that caused her significant remorse. Urged by the other Masters, Sebatyne temporarily assumed the role of Grand Master, planning to remove Daala from power for the benefit of the Order.
Sebatyne later orchestrated a coup against Daala, coinciding with separate coups launched by Senator Haydnat Treen and General Merratt Jaxton. Daala was apprehended and removed from her position. Sebatyne, along with Treen and Jaxton, convinced the Senate to replace the office of Chief of State, and the three of them formed the first Triumvirate of the Galactic Alliance to represent the Senate, the military, and the Jedi. Skywalker then reassumed his role as Grand Master. After the Jedi withdrew from the Triumvirate and the Alliance, the Sith infiltrated Coruscant and the galactic government. Sebatyne later played a key role in leading the Jedi to liberate the galactic capital and personally defeated one of the final avatars of the dark side entity Abeloth, allowing Master Skywalker to ultimately destroy her beyond shadows.
Biography
Early life
Eelysa, a Jedi Master, discovered Saba Sebatyne on Barab I. Despite Luke Skywalker's reluctance to train aggressive species such as the Barabel, Eelysa decided to train Sebatyne in the Force. However, the Diversity Alliance forced her to leave Barab I.
Together, the two Jedi trained other Force-sensitives to become Jedi Knights. These included Sebatyne's son, Tesar, and his hatchmates Bela and Krasov Hara. While one of them shared a father with Tesar, they were not Sebatyne's children. Most of her apprentices were Barabels, including Drif Lij, but she also trained a Brubb named Wonetun. Sebatyne organized her apprentices into the Wild Knights squadron, remaining isolated from the New Jedi Order.
Yuuzhan Vong War (25 ABY–29 ABY)
When the Yuuzhan Vong War began, Sebatyne believed it was the right moment for her and her apprentices to join the Jedi Order to fight the invaders. That same year, Sebatyne sensed the death of her former Master, Eelysa, who had been killed by a Yuuzhan Vong voxyn. The voxyn were a significant threat to the Jedi Order, created to hunt and kill them. The Jedi discovered that the voxyn were clones from a single source, the voxyn queen. Anakin Solo planned the mission to Myrkr to destroy the voxyn queen and eliminate the threat. Sebatyne's son Tesar, and his hatchmates Bela and Krasov Hara, joined the Myrkr strike team. Sebatyne and the rest of her Wild Knights assisted scientist Danni Quee in defending Arkania against the Yuuzhan Vong, just days before sensing the deaths of Bela and Krasov.

After sensing the deaths of her two apprentices, Sebatyne, Quee, and the Wild Knights tried to help defend Coruscant. They successfully destroyed the Yuuzhan Vong yammosk, but the capital was ultimately lost. After Coruscant fell, Tesar and some of the Myrkr strike team returned, having destroyed the voxyn queen, but at the cost of half the Jedi who participated, including Anakin Solo. The Myrkr mission led Sebatyne to suggest that the Jedi use Force melds to combine their minds and strength when fighting the Yuuzhan Vong.
During the Battle of Borleias, Sebatyne led the Wild Knights as a vanguard for Wedge Antilles, who aimed to retake the planet. Despite the efforts of the New Republic forces, including the temporary recapture of Borleias, the offensive failed, and the Vong retook the planet.
Sebatyne was later given a seat on the High Council, making her one of the six Jedi and six politicians who directed the war for the newly formed Galactic Federation of Free Alliances.
Pain of loss
Following the victory at Ebaq 9, Sebatyne went to Barab I to see her hatchmate Reswa. She found that the Yuuzhan Vong had ravaged her homeworld. Seeing a Yuuzhan Vong ship, she assumed her people had been killed and attacked it. However, it was a slave ship holding the remaining Barabel population. Sebatyne was horrified as the breach she caused released Barabel bodies into the vacuum of space.
Later, Sebatyne admitted to Master Skywalker that death was likely better for her people than slavery. Still, she felt responsible for their deaths and fought the Yuuzhan Vong fiercely to avenge them. Master Skywalker asked her to join him on a mission to find Zonama Sekot, which Sebatyne accepted as a way to take the fight to the enemy, though she initially hesitated.
Sebatyne's loss at Barab I unexpectedly heightened her Force sense for life. She could sense life in greater detail, even detecting when someone was ill, similar to a healer's skill. This life-sensitivity was a key reason Master Skywalker invited her on the expedition, as he believed her power would be important in detecting Zonama Sekot's Force-signature.
Search for Zonama Sekot
Despite her initial hesitation, Sebatyne, along with Luke Skywalker, his wife Mara, their nephew Jacen Solo, Danni Quee, and the Jedi healer Tekli, began searching for Zonama Sekot. They traveled to Bastion, the Imperial capital, only to find it under attack by the Yuuzhan Vong. Grand Admiral Gilad Pellaeon advised them to flee and meet the Imperial fleet at Yaga Minor.
At Yaga Minor, the Jedi found an ally in Imperial Captain Arien Yage, a supporter of Admiral Pellaeon, who had not arrived after a last-ditch assault against the Yuuzhan Vong at Bastion. Yage soon learned that Pellaeon had survived but was badly wounded. The Jedi convinced the Admiral to move the fleet to Borosk, a heavily fortified Imperial world with better defenses than Yaga Minor.

The Jedi helped Pellaeon and the Imperials at the Battle of Borosk, where Sebatyne and Quee infiltrated a Yuuzhan Vong slave ship. They destroyed the ship and rescued many Imperials captured at Bastion. After the Yuuzhan Vong were defeated at Borosk, Sebatyne and the others traveled to the Unknown Regions with Captain Yage, who joined the mission on Pellaeon's orders in return for the Jedi's help at Borosk. There, they met the Chiss. On Csilla, the Chiss homeworld, the Chiss reluctantly allowed the Jedi to search their library for Zonama Sekot's location, giving them a two-day deadline.
While searching for references to Zonama Sekot, Sebatyne was pleased to meet Syal Antilles Fel and her youngest daughter Wynssa. Syal Fel became hostile, fearing the Galactic Alliance would force her husband Soontir Fel to go to war, but Sebatyne eased her fears. Later, while accompanying Antilles Fel, her husband, Quee, and the Masters Skywalker to move the Jade Shadow, the group was targeted for assassination by Soontir's political rivals, but the Jedi thwarted the attack.
After the attack, Jacen Solo found Zonama Sekot's location, and the Jedi quickly left Csilla to complete their mission. The group encountered a disturbance in the hyperlane used to enter the system where Zonama Sekot was. While considering how to bypass the problem, Sebatyne and the other Jedi detected a large disturbance in the Force from the direction of Zonama Sekot. Acting on this hunch, they found the planet under siege by Yuuzhan Vong. Although the planet repelled the attack, it lashed out at the Jedi with the Force, knocking them unconscious.
Solo awoke first due to his connection to the Living Force, followed by Mara Jade Skywalker, who was the only one capable of landing the ship on its surface. After landing, Master Skywalker awoke Sebatyne through the Force, and she felt drawn into the planet's immense life force. Feeling more at home on the sentient planet than on her own homeworld, Sebatyne realized that by locating the planet and proving the Jedi sought a peaceful resolution to the war, she had atoned for the loss of Barab I.
Sekot's test and ascension

While on the planet, a dissident group of native Ferroans attacked the Jedi's camp and captured Danni Quee. Sebatyne helped Solo track down the group and followed his lead as he surrendered to diffuse the situation. When Sebatyne and Solo were taken to the dissidents' leader Senshi, they encountered another group of dissidents who had used the attack to capture Zonama's Magister, Jabitha.
Sebatyne defended her companions against boras and was later confronted by Zonama Sekot's conscious mind, which took the form of Vergere. Sekot, advised by Jabitha, had decided to test the Jedi to see if they could be trusted. After witnessing Sebatyne's heroism and the Jedi's refusal to leave Jabitha at Senshi's mercy, Sekot decided they were trustworthy.
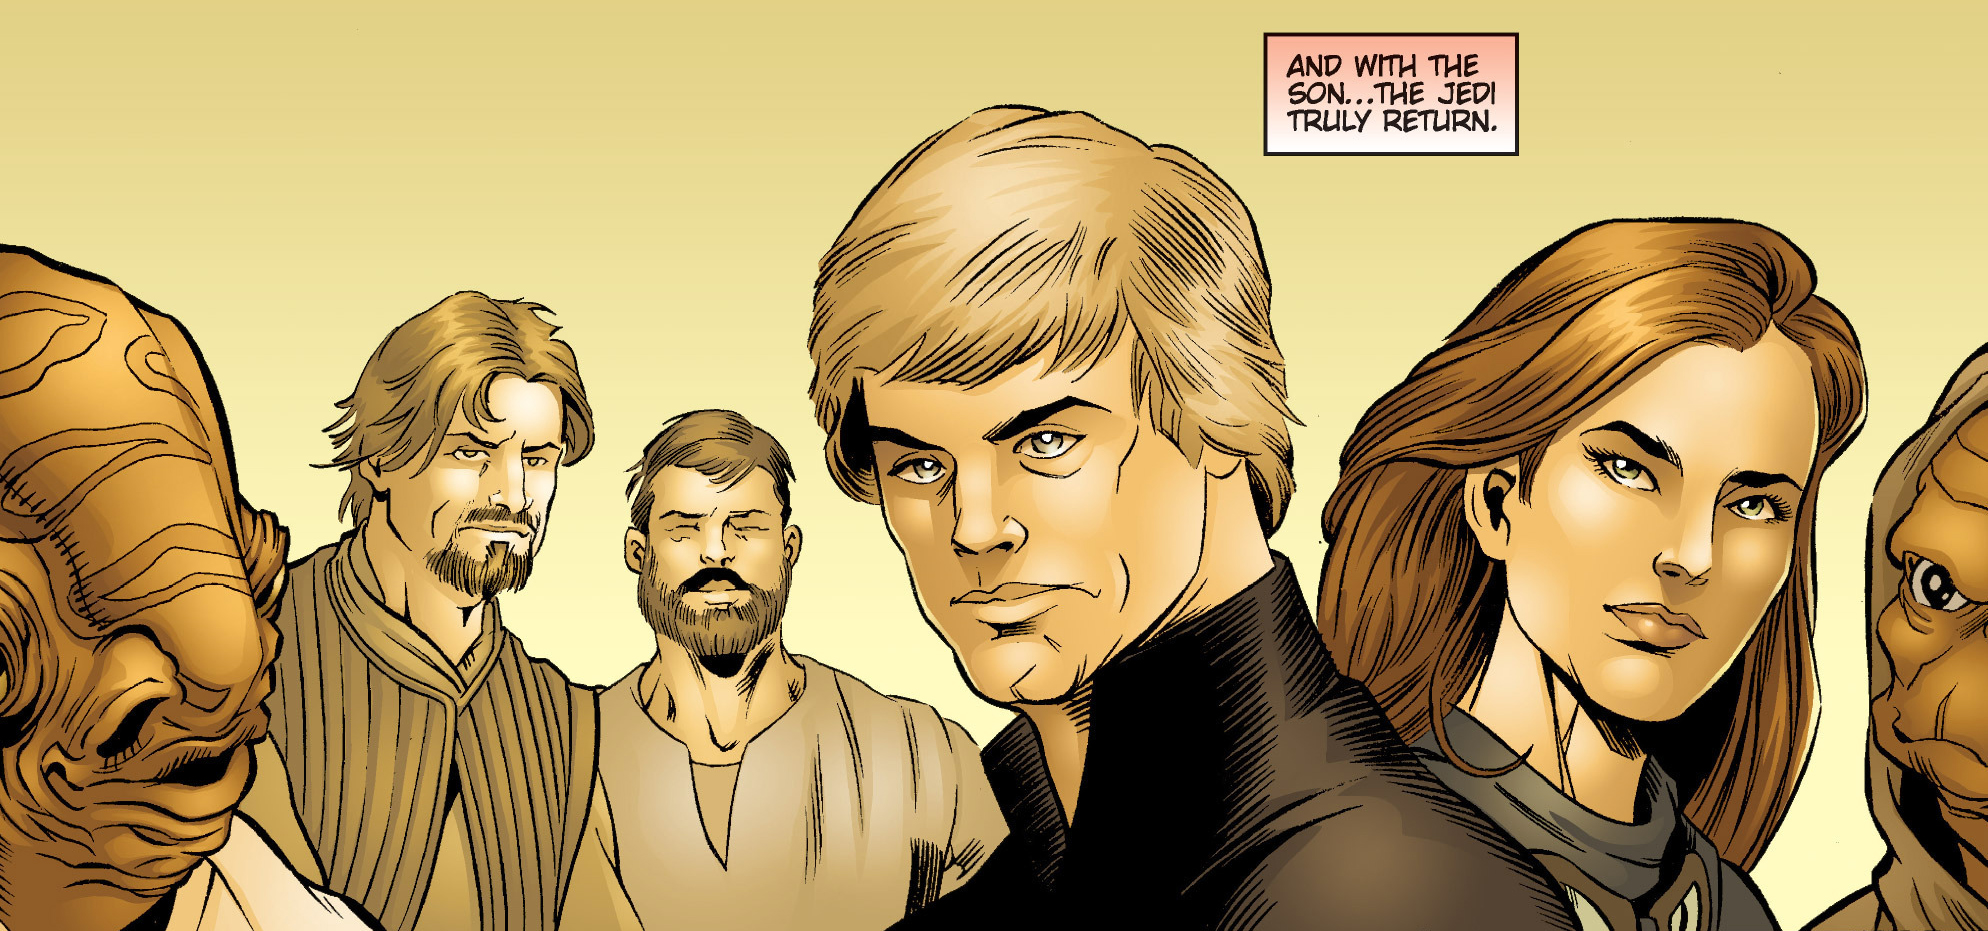
When the Yuuzhan Vong attacked Zonama Sekot with the life-killing disease Alpha Red, Sebatyne and the other Jedi defended the planet, while the remaining Galactic Alliance forces attacked Coruscant. The Jedi succeeded in defending Zonama Sekot, and the Galactic Alliance reclaimed the galactic capital. The Yuuzhan Vong surrendered, ending the Yuuzhan Vong War. After the costly war, in which half the Jedi Order died, Sebatyne became a Jedi Master and was given a seat on the Masters' Council formed by Luke Skywalker.
The Dark Nest Crisis (35 ABY–36 ABY)
Search for the missing Jedi
In 35 ABY, Sebatyne's son Tesar and the other survivors of the mission to Myrkr disappeared into the Unknown Regions. Sebatyne joined Masters Luke and Mara Skywalker, along with their son Ben, who was afraid of the Barabel because he could not read her, to find the missing Jedi Knights. The Jedi reached the Unknown Regions and discovered the insectoid Killiks. On the Killik nest Lizil, they found Han and Leia Solo, whose children were among the missing Jedi.
On the Killik planet Yoggoy, Sebatyne and the others discovered the Killik Prime Unu, Raynar Thul. Thul, a former Jedi Knight, had been kidnapped by the Dark Jedi Lomi Plo and Welk during the mission to Myrkr. After their ship, the Tachyon Flier, crashed on Yoggoy, they were absorbed into the Killik hive mind and became Killik Joiners. Thul believed the Dark Jedi had died in the crash, but Sebatyne and the others did not. Sebatyne, the Skywalkers, and the Solos went to the crash site, where they were attacked by large Killiks. Thul did not believe them, so Sebatyne and the others left the planet.
The group found Tesar and the other missing Jedi on Qoribu. They learned that the Jedi had been receiving calls for help from Raynar and had chosen to help. Thul had called for help because the Chiss had begun attacking the Killik colonies due to their increasing population. The Killik expansion was moving closer to the Chiss Ascendancy, and the Chiss felt threatened. The Jedi traveled to Qoribu to help them fight the Chiss and became Joiners. During a dogfight, the Jedi Knight Lowbacca was captured by the Chiss. While Skywalker and the others brought most of the Jedi back to the Jedi Academy on Ossus, Sebatyne and the Solos stayed with Jedi Knights Jaina Solo, Zekk, and Alema Rar to rescue Lowbacca.
Duel with Welk
After failing to rescue Lowbacca several times, Sebatyne encountered the Dark Jedi Welk on Jwlio. Unbeknownst to her, Welk, who Raynar Thul claimed had died in the shuttle crash, was a Sith. Welk had been sent to breed assassin Killiks to eliminate the Jedi Masters, including Sebatyne, who were interfering with Lomi Plo's plans. The Barabel Jedi Master tracked Welk to an underground cave, where they engaged in a vicious lightsaber duel.
Sebatyne was surprised by Welk's mastery of the dark side of the Force, unaware that he was a member of the New Sith Order or that it even existed. The Jedi Master fought valiantly against the Sith, despite his advantage of surprise and being hidden from her Force senses. Using her natural Barabel abilities to enhance her Force skills and lightsaber combat, Sebatyne proved to be a worthy opponent, severing Welk's Killik arm, removing one of his eyes, and wounding his neck. Welk fled, hoping his Killik assassins would eliminate her, but they failed. News of Welk's survival, which Raynar Thul had consistently denied, was broadcast to the New Jedi Order.
Hunting Rar and revealing the Gorog

Following the clash between Sebatyne and Welk, the Solos determined that she needed medical care on Ossus due to her injuries. While Jaina Solo and Zekk declined to go back to Ossus without Lowbacca, Alema Rar joined them. During their voyage aboard the Millennium Falcon, Sebatyne entered a healing trance to mitigate the effects of the poisons from Welk's Killik assassins and to mend her head wounds. However, Rar revealed her allegiance to the dark side mid-journey and battled Leia Solo; Leia subdued her and placed her in confinement.
On Ossus, Master Cilghal treated Sebatyne, and they later discovered that Alema Rar had been assimilated into the Gorog nest. It was speculated that the Gorog had concealed itself from Thul's Colony through unknown methods. The Jedi discovered the Gorog's plot to instigate a war with the Chiss. After Alema Rar's escape, Sebatyne, along with Masters Skywalker and the Solos, pursued her. They located the renegade Dark Jedi on Kr, Qoribu's moon. There, they found the Gorog nest. Sebatyne and her companions killed many corrupted Killiks and the Night Herald, Welk, but failed to eradicate the nest. Raynar Thul, thought to be manipulated by Lomi Plo, remained unconvinced of the Gorog's existence.
After the incident on Kr, Leia Organa Solo requested that Sebatyne train her in the ways of the Jedi, and Sebatyne accepted her as a Padawan.
Training Organa Solo
One year after the border dispute, Sebatyne journeyed to the Killik world of Woteba with her apprentice, Leia Organa Solo, Han Solo, and Master Skywalker. This planet was situated within the Utegetu Nebula, designated for the Killiks to prevent their expansion into Chiss territory. On Woteba, Raynar Thul informed the Jedi and Solo that a disease called "the Fizz" was decimating the Killik population, blaming them for its origin. Sebatyne, Jedi Solo, and Mara Skywalker departed the planet, while Han Solo and Luke Skywalker stayed behind to investigate the disease's source.
Later, Sebatyne, Leia Solo, Mara Skywalker, and other Jedi attempted to return to Woteba to retrieve Skywalker and Solo, but were intercepted by the Galactic Alliance Fifth Fleet. The Fifth Fleet had blockaded the nebula to contain the Killiks. Under the influence of the Gorog Nest and its Unseen Queen, Lomi Plo, the Killiks and their Joiners had been engaging in piracy of membrosia, an addictive substance, with the intention of sparking another war. The Galactic Alliance aimed to prevent this war from erupting. Sebatyne and Leia Solo, aboard the Falcon, tried to breach the blockade but were captured. They encountered Bothan Admiral Nek Bwua'tu, who ordered their detention. Using the Force, Solo contacted her brother, who warned her about fifteen Killik nest ships heading towards the blockade. The Killiks, controlled by the Gorog, were attempting to escape the nebula and reach the Unknown Regions. However, Solo and Sebatyne escaped their cells and alerted the admiral to the impending attack.

Nek Bwua'tu, trusting the Jedi, prepared for the assault. When the Killik nest ships arrived, Bwua'tu's forces opened fire. The busts on Bwua'tu's Star Destroyer, the Admiral Ackbar, revealed their hidden purpose as hundreds of small Killiks emerged and attacked the Galactic Alliance forces on board. While the Killik Nest ships engaged the Fifth Fleet, Raynar Thul and the Dark Nest boarded the Admiral Ackbar. Sebatyne and Solo assisted with the evacuation as Killiks swarmed the ship. Thul and the Killiks commandeered the ship shortly after Sebatyne and Solo escaped on the Falcon. Aboard the Star Destroyer Mon Mothma, Sebatyne witnessed Bwua'tu order the destruction of the remaining nest ships, marking the beginning of the Swarm War.
Weeks later, Sebatyne accompanied the Solos to the Killik world of Tenupe, where they hoped to rescue their daughter Jaina, who was aiding the Killiks against the Chiss. However, Sebatyne and the Solos were captured by the Chiss. They escaped and Leia Solo learned that the Chiss planned to destroy the Killiks with parasites. Sebatyne and the others located the two Chiss bombers intended to release the parasites and, with Jaina Solo, Zekk, and the traitorous Alema Rar, destroyed them. A wing containing the parasites broke off and crashed into the forest. Sebatyne and her apprentice pursued it on foot but became separated. Solo encountered Alema Rar and they engaged in a lightsaber duel. Sebatyne observed, confident in her apprentice's abilities. Solo defeated Rar, who fell into the jaws of a Tenupian spidersloth, seemingly ending the Twi'lek's life, though she would later return.
Hours later, Luke Skywalker killed Lomi Plo and returned Thul to the light, ending the Killik conflict. Thul was placed in a rehabilitation room at the Jedi Temple for treatment to overcome the Killiks' influence. After the Swarm War, Sebatyne promoted Solo to Jedi Knight and suggested she construct her own lightsaber. Sebatyne continued to train Organa Solo for several years.
Second Galactic Civil War (40 ABY–41 ABY)
Early events
In 40 ABY, Sebatyne assisted Skywalker in his search for Lumiya after the death of Master Tresina Lobi on Coruscant. As the Second Galactic Civil War unfolded, Sebatyne expressed concerns to the Jedi Council about the Galactic Alliance's potential involvement in the assassination of Corellian Five World Prime Minister and Confederation leader Dur Gejjen.

Following Mara Jade Skywalker's death, Sebatyne delivered the eulogy at her funeral, as Leia Solo was forced to flee the Jedi Temple due to the arrival of Galactic Alliance Guard operatives attempting to arrest her and her husband. When Jacen Solo arrived late to his aunt's funeral, Sebatyne used her eulogy to send a message to Colonel Solo, urging him to renounce his dark path and return to the light, as Mara Skywalker had done years before. However, Sebatyne was unaware that Solo was responsible for Mara Skywalker's death and had become the Sith Lord Darth Caedus. After the memorial service, Sebatyne and Solo exchanged tense words before she turned her attention to Master Skywalker.
Sebatyne and the Jedi Council were concerned about Grand Master's Skywalker's mental state after his wife's death and had taken steps to shield him from distress by avoiding involving him in Jedi Order matters, allowing him time to grieve. However, immediately after Mara Skywalker's funeral, the Council discussed Jacen Solo's recent actions, including an illegal coup against Chief of State Cal Omas. Sebatyne expressed her distrust of Solo, as did the other Masters, while Master Skywalker hoped to redeem him. To that end, Master Skywalker convinced Sebatyne and the other Council Masters to support Solo and the Alliance in the upcoming Battle of Kuat. Many Jedi, including Sebatyne, participated in a mass battle meld to enhance coordination during the Second Battle of Balmorra on the side of Colonel Solo and the Alliance, weakening the victorious Confederation's fleet.
While the Jedi waited aboard the Anakin Solo at the battle of Kuat for the call to their StealthXs, Sebatyne led the Night Blades squadron table and discussed the battle plan with the other Council members. She voiced her disapproval of Chief of State Solo and Kyp Durron's questioning of Luke Skywalker, firmly supporting the Grand Master. However, the Council soon learned of Cal Omas's death and Ben Skywalker's involvement. They suspected Chief Solo of manipulating young Skywalker into assassinating Omas. After confronting Solo, Grand Master Skywalker withdrew Jedi support from the Alliance, a decision Sebatyne supported.
The Jedi traveled to Kashyyyk, where Sebatyne briefly reunited with her former apprentice Leia Organa Solo before leading the Night Blades squadron against Chief Solo's fleet in the Battle of Kashyyyk. Following the battle, Sebatyne and the Jedi Order relocated to an abandoned Imperial base on Endor after the academy on Ossus and the New Jedi Temple were seized by the Galactic Alliance. The Barabel participated in a training session with the Council Masters, dueling Master Corran Horn using Master Octa Ramis's lightsaber in addition to her own. Sebatyne was also present during Tenel Ka's visit to the makeshift Jedi headquarters and agreed to participate in a mission to rescue the Hapan Princess Allana.
Opposing Caedus
During the Galactic Alliance attack to capture Centerpoint Station, the Jedi launched a diversionary attack on the Anakin Solo to rescue Allana from Darth Caedus. Sebatyne accompanied Luke and Ben Skywalker in infiltrating the ship. They encountered several YVH droids that Caedus hoped would eliminate Sebatyne or Skywalker, knowing he couldn't face them together. However, the droids were no match for the Jedi. They proceeded to the bridge to confront the Sith Lord.
Unbeknownst to Caedus, the Jedi confronted him to distract him while his parents and Iella Antilles rescued the Chume'da Allana. Sebatyne was severely injured when Darth Caedus used a Force push to trap her in an officer command pit with an exploding YVH droid. Despite attempting to escape, the blast injured her. Insisting on staying to help Luke and Ben Skywalker, she resumed fighting, but the Grand Master sent her back to the ship to prevent her succumbing to her wounds. The pair soon caught up with her, and together they escaped the Sith Lord's command ship with the rest of their team and Allana.
After the Second Battle of Fondor, Sebatyne was among the first Jedi Masters to agree with Jaina Solo's plan to eliminate Darth Caedus. Like the other members of the Jedi Council, she referred to Jacen Solo by his Sith title, believing that Jacen Solo had died during the Yuuzhan Vong War. Sebatyne supported Jaina Solo's plan, arguing that diplomatic attempts to control Caedus had failed because he had no qualms about killing his rivals, as evidenced by his murder of Mara Jade Skywalker.
Sebatyne accompanied the Grand Master and the Solo family to Nickel One based on intelligence from Lon Shevu indicating Caedus's presence. During the battle, Sebatyne manned the laser cannons of the group's blastboat and eagerly destroyed Imperial Starhunters. While it appeared to Caedus's forces that the Jedi Coalition was attacking Nickel One, it was a diversion for Jaina Solo to surprise and eliminate him. As the Jedi maintained the diversion, Sebatyne grew frustrated that the Mandalorians under Boba Fett were stealing her kills. Ultimately, the Jedi escaped the battle with Jaina Solo, though she failed to kill Caedus.
Later, during the Jedi Order's defense of their base on Shedu Maad, Sebatyne appeared to be accepted as first among equals on the Council, while Master Skywalker focused intently on the Force and was unresponsive. She later acted as a commando and boarded the Millennium Falcon during the later stages of the fighting. Han and Leia Solo piloted the ship past the defenses of the Anakin Solo, allowing Sebatyne and the other Jedi Masters to board the Star Destroyer and eliminate resistance. With a small exertion through the Force, she slammed a squad of sharpshooters to the ground head first.
During this conflict, Caedus was killed in a duel with Jaina Solo, ending the Second Galactic Civil War. However, Sebatyne and the other Masters were still required to eliminate resistance from the Council of Moffs and were instrumental in ensuring Jagged Fel was accepted as the new Remnant's new Head of State.
A new threat (43 ABY—)
Tensions with the government
Following Caedus's death, Natasi Daala became Chief of State. Daala quickly fostered widespread anti-Jedi sentiment as part of a plan to either bring the Jedi under the Alliance's direct control or destroy them. This led to the arrest of Grand Master Luke Skywalker for 'dereliction of duty' in failing to prevent Jacen Solo's transformation into Darth Caedus. Skywalker negotiated with Daala, gaining his freedom but being forced into exile from Coruscant and the Jedi Order. Additionally, Skywalker was compelled to appoint Jedi Master Kenth Hamner as the acting Grand Master and leader of the Jedi High Council.
Sebatyne was among those who sadly bid farewell to Luke and Ben Skywalker from Coruscant after the trial that sealed the former Grand Master's fate. She also attended a meeting of Jedi Masters and influential Jedi Knights to discuss the state of the Order with Kenth Hamner. When Hamner, attempting to humanize the Order, asked for a volunteer Master to star in a documentary, Sebatyne remarked that she would appear too ferocious to children. As a senior Jedi Master, Sebatyne was likely among the first Jedi to have a Galactic Alliance observer assigned to her, as Hamner stated that observers would be assigned to Masters first, followed by Knights and apprentices. Shortly after observers were assigned, Sebatyne was asked to report to Hamner during one of his morning addresses in the Jedi Temple Great Hall to receive a new assignment.
Later, the Jedi won a court case against the government, overturning the requirement for Galactic Alliance observers. Sebatyne stood with her former apprentice Leia Organa Solo and others at the steps of the Jedi Temple before negotiations began between Grand Master Hamner, Organa Solo, and Chief of State Daala regarding the Order's deception. Ultimately, the Order was allowed to retain custody of the rogue Jedi Seff Hellin and Natua Wan who had succumbed to a strange psychosis, so that Jedi healers could study them. However, the similarly afflicted Valin and Jysella Horn remained in the government's custody.
To make matters worse, the exiled Jedi Luke Skywalker discovered a resurgent Sith threat in the galaxy, which the Jedi Council was powerless to address due to Daala's threat to shoot down their ships without her approval. As more Jedi Knights caused public incidents after succumbing to the psychosis—Jedi that the Council refused to hand over to the Alliance government—Chief Daala issued a vague threat to Grand Master Hamner about the safety of the Jedi's families should they continue to resist her administration. Shortly after, she authorized a siege of the Jedi Temple, further entrapping the Council. Faced with no possibility of reinforcements, Skywalker formed a fragile alliance with the Sith to defeat the monstrous entity, Abeloth, whom he suspected was behind the psychosis outbreak.
Shortly after, the siege ended when Skywalker seemingly destroyed Abeloth, healing the infected Knights. However, Daala withdrew her forces but refused to hand over Valin and Jysella Horn to Jedi custody. During a Jedi High Council meeting, Hamner insisted that the Order give Daala more time to release the Horns, while Sebatyne was among those who said they would do anything to free their fellow Jedi. When Hamner insisted on avoiding conflict that could kill Galactic Alliance personnel, the Council decided to give his plan a chance. Moments later, Han and Leia Solo informed the Council of the slave uprising on Blaudu Sextus. After discussing the situation, the Council decided to send a pair of Knights to investigate whether Freedom Flight, a secret organization determined to eradicate slavery, was behind it. When Tesar and the other Wild Knights were suggested, Saba said that all Barabel Jedi would be unavailable, without giving the reason (they had built a nest in the Temple's depths and were guarding it until their offspring hatched). But the discussion soon changed when Hamner said he had an arrangement that would allow the Jedi to get the StealthX Wing off Coruscant without fighting. When Hamner refused to elaborate, Saba nearly rejected his authority and launched the StealthX Wing anyway, but Hamner made it clear that anyone who wanted to reject his authority would have to fight him for control of the Order.
Saba was later present at a meeting where the Council, Leia, and Han saw a media announcement about the events on Blaudu Sextus. When Belok Rhal, the Mandalorian who led the siege of the Temple and killed the representative that Hamner sent to negotiate, attacked and killed Madhi Vaandt during the broadcast, the Jedi sent to Blaudu Sextus intervened. The reporter mistakenly announced that the Jedi's actions meant the entire Order supported all slaves who rebelled against their oppressors. Saba and most of the Council interpreted this as the Force's way of saying the Jedi needed to confront Daala and strike against their enemies, believing it would convince Hamner to act. However, Hamner declared that the Jedi couldn't risk any actions that might provoke Daala. Instead, he planned to convince Daala that the Jedi were not trying to destabilize her government. But Han revealed that Hamner had been stalling, hoping that Nek Bwua'tu, with whom he had made an unsanctioned deal, would awaken from his coma following an assassination attempt and solve his problems by convincing Daala to be reasonable. Outraged by his deception and fed up with his appeasement, the Masters relieved Hamner of his position as acting Grand Master and removed him from the Council.
Jedi Grand Master

After Hamner's departure, the Council united behind Master Sebatyne, recognizing her as their new leader. With Sebatyne at the helm, the Council resolved to openly challenge Chief Daala and provide support to the burgeoning galactic slave rebellion. As the recognized head of the Jedi Council, Sebatyne tasked her former student, Leia Organa Solo, along with a group of Jedi Knights, to infiltrate the Galactic Alliance Security blockhouse where the Horn siblings were held in carbonite, with the objective of rescuing them from Daala's control.
Upon Jedi Jaina Solo's acquisition of precise intelligence regarding Imperial Head of State Jagged Fel's sudden departure from Coruscant, subsequent to his abrupt withdrawal from the Unification Summit, coupled with the diversion created by Booster Terrik's Errant Venture initiating an attack on orbital mirrors while simultaneously hosting a celebrity sabacc tournament attended by numerous influential government figures, Master Sebatyne made the clandestine decision to deploy the StealthX fleet without Daala's knowledge. This was done with the intention of reinforcing Master Skywalker in his fight against the Sith, as well as Abeloth, whose existence had been revealed. Upon discovering the Council's scheme, former Grand Master Kenth Hamner defied Sebatyne's directive to remain confined to his quarters, forcing his way into the hangar bay and incapacitating two Jedi Knights in the process. Convinced that the Jedi were engaging in treasonous activities against the Galactic Alliance, he attempted to compel Sebatyne to halt the launch. Sebatyne refused to yield, asserting that the Jedi's allegiance lay with the will of the Force, not the Alliance, which prompted Hamner to assault her.
A fierce duel ensued between the two Masters, with the Barabel ultimately gaining the upper hand over her predecessor. As the confrontation reached its climax, Sebatyne employed the Force to propel Hamner backward, causing him to fall from a catwalk. However, she harbored genuine affection for her fellow Master and sought only to disable him, not to end his life, despite his willingness to kill her. The Barabel Jedi used telekinesis to catch Hamner as he fell, but Hamner retaliated by using his own abilities to hurl his lightsaber at the hangar bay controls in an attempt to prevent the launch. Sebatyne struggled to gain telekinetic control of the lightsaber while simultaneously holding Hamner aloft, ultimately being forced to allow her predecessor to fall to his death in order to sever his control over the Jedi weapon. Despite her regret over Hamner's demise, Sebatyne remained steadfast in her commitment to the will of the Force, believing that ensuring the launch's success was essential for the greater good. Later, Saba responded to Daala's communication with the temple, in which Daala demanded to speak with Hamner regarding the Jedi's recent actions against her. When Daala declared that she had no choice but to eliminate the Jedi, Saba assured Daala that the Jedi would prevail. However, Daala was unable to launch an immediate assault on the Jedi because, to ensure the safe launch of the Jedi StealthX Wing, the Jedi had taken hostages. Subsequently, Saba requested that the Masters select a new leader, and they designated her as the acting Grand Master in Hamner's place. She expressed strong opposition to this appointment, viewing her failure to save Hamner's life as a significant failure. However, the other Masters refused to accept her refusal and insisted that the Jedi Order required a strong leader to head the Council. Consequently, Sebatyne reluctantly accepted the temporary title of Grand Master, stating that she would be judged for her actions upon Skywalker's return. She then informed the Masters that to safeguard the Jedi Order and prevent Coruscant from becoming a battleground, the Council had to remove Daala from power.
Subsequently, the Masters devised a strategy to seize control of the Alliance. When Daala ordered yet another Mandalorian assault on one of the slave uprisings occurring throughout the galaxy, specifically the uprising on Klatooine, the Council implemented their plans ahead of schedule to avert the massacre. While several senior Jedi stormed the Chief's office and placed her under arrest, Sebatyne interrupted a Senate meeting to announce Daala's arrest. Concurrently, a conspiracy orchestrated by Kuati Senator Haydnat Treen initiated their own efforts to remove Daala from office. The acting Grand Master engaged in negotiations with Treen and established a ruling Triumvirate, comprising Senator Treen, General Merratt Jaxton of Starfighter Command, and Sebatyne herself, which would serve as a constitutional replacement for the office of the Chief of State until new elections could be held. This arrangement ensured equal representation for the Senate, the Defense Force, and the Jedi Order within the Triumvirate, requiring a two-thirds majority among the three Triumvirs to make decisions and effectively manage the Alliance's executive branch.
Following this peaceful transfer of power, the Jedi conducted a funeral for former acting Grand Master Kenth Hamner. Sebatyne also personally assigned her former apprentice, Leia Organa Solo, to a mission on Klatooine, tasking her with negotiating with the various anti-slavery organizations that were engaged in rebellion. As a Triumvir of the Galactic Alliance, Grand Master Sebatyne authorized Organa Solo to offer the organization closest to achieving its planet's independence full membership in the Alliance and a seat in the Alliance Senate. Klatooine quickly emerged as the planet nearest to achieving independence and was ultimately admitted into the Alliance and granted a Senate seat, as Sebatyne had promised. Later, Daala's overthrow enabled Skywalker to resume his position as Grand Master, although he did not immediately return to Coruscant.
Personality and traits
Sebatyne struggled to comprehend the concept of grieving over loss. Like other Barabels, she did not view the end of life as the end of an individual, preferring to honor their memories and keep them in her heart rather than "wallowing in sorrow," considering grief to be a Human emotion. However, Sebatyne experienced significant pain at the destruction of her homeworld and her accidental killing of thousands of Barabel, perhaps demonstrating that the Jedi Master was not entirely immune to grief.
Sebatyne was known for her belief that Jedi should live in the present moment and heed the will of the Force, finding it challenging to cope with her apprentice Leia Organa Solo's need for meticulous planning. Master Sebatyne's Barabel instincts provided her with a natural advantage in combat and tracking, as the Barabel were renowned for their love of the "hunt." Along with her son Tesar and the Hara sisters, Sebatyne displayed a peculiar sense of humor that was typically understood only by other Barabel. She also differed from other Barabels in terms of her temperament. This was evident in her remarkable self-control, as she refrained from attacking a GA colonel who referred to her as a "short-tail" (an extremely offensive term for a Barabel), although it was noted that had she not exercised restraint, she likely would have severed the colonel's arm and used it to beat him about the head.
Powers and abilities
As a member of the Jedi Council, Sebatyne was, of course, a Jedi Master with an exceptionally strong connection to the Force. Sebatyne possessed proficiency in the use of Force sense, an ability that intensified following the Yuuzhan Vong devastation of Barab I; she was able to detect a disturbance at Mara Jade Skywalker's funeral and sense the apparent death of Luke Skywalker during the battle of Kashyyyk. Master Sebatyne also detected Ben Skywalker's periodic disappearances and subsequent reappearance in the Force during his torture at the hands of Jacen Solo. Indeed, Jacen Solo held Sebatyne's Force sense in such high regard that he feared she had penetrated his "public face" at his aunt's funeral and recognized that he had become a Sith Lord. Solo also considered Master Sebatyne a threat, believing that her power in the Force and skill with a lightsaber would be difficult for him to overcome.
Master Sebatyne was a master of telekinesis, capable of manipulating objects with her mind, as demonstrated aboard the Anakin Solo at the conclusion of the Second Galactic Civil War. During her duel with former Grand Master Hamner, she demonstrated the ability to telekinetically hold her fellow Master dozens of meters above the ground to prevent him from falling to his death, despite suffering a severe injury that depleted her strength. It is possible that Master Sebatyne was capable of utilizing the power of Force valor to overcome the pain of her injuries, as evidenced by her seemingly impossible ability to remain standing after being wounded by an exploding YVH droid. Sebatyne was also particularly adept at using Force meld, being one of the original proponents of the technique and one of its foremost coordinators during the Yuuzhan Vong War. Following her duel with Welk and injuries sustained by Killik assassins, Sebatyne displayed an affinity for the Jedi healing trance, enabling her to survive wounds that would have otherwise been fatal.
Despite her considerable size, Sebatyne was able to use the Force to enhance her mobility, utilizing powers such as Force Jump with surprising agility. Sebatyne's natural Barabel physical strength provided her with an advantage in combat, allowing her to generate tremendous power behind her lightsaber strikes. Master Sebatyne was an accomplished duelist who fought the Sith Welk to a stalemate before being interrupted by Killiks and was capable of sparring with Jedi Master Corran Horn, who wielded a three-meter-long lightsaber blade, to a standstill. During this sparring session with Master Horn, Sebatyne employed dual lightsabers, indicating her considerable skill in the use of Jar'Kai.
Master Sebatyne considered herself a "better fighter" than Grand Master Hamner, whom she herself acknowledged as a "master swordsman." She was able to disarm the Jedi Master early in their duel and later employed a combination of swift and overwhelmingly forceful Barabel power blows to exhaust him.
Behind the scenes
Saba Sebatyne made her first appearance in the ninth installment of The New Jedi Order series, The New Jedi Order: Star by Star, although chronologically, she was first mentioned in the e-book novella The New Jedi Order: Recovery. Both novels were penned by author Troy Denning, with Recovery serving as a prelude to Star by Star and thus informing the reader of Sebatyne's background as the first apprentice of Jedi Master Eelysa and the Master of the Force-sensitive squadron known as the Wild Knights.
Sue Rostoni later announced that Sebatyne would be featured on the back cover of the sixth book of the Fate of the Jedi series, Fate of the Jedi: Vortex. However, she was ultimately replaced by Kenth Hamner because the design team was unable to create an image of the Barabel that matched the particular style of the series' covers.