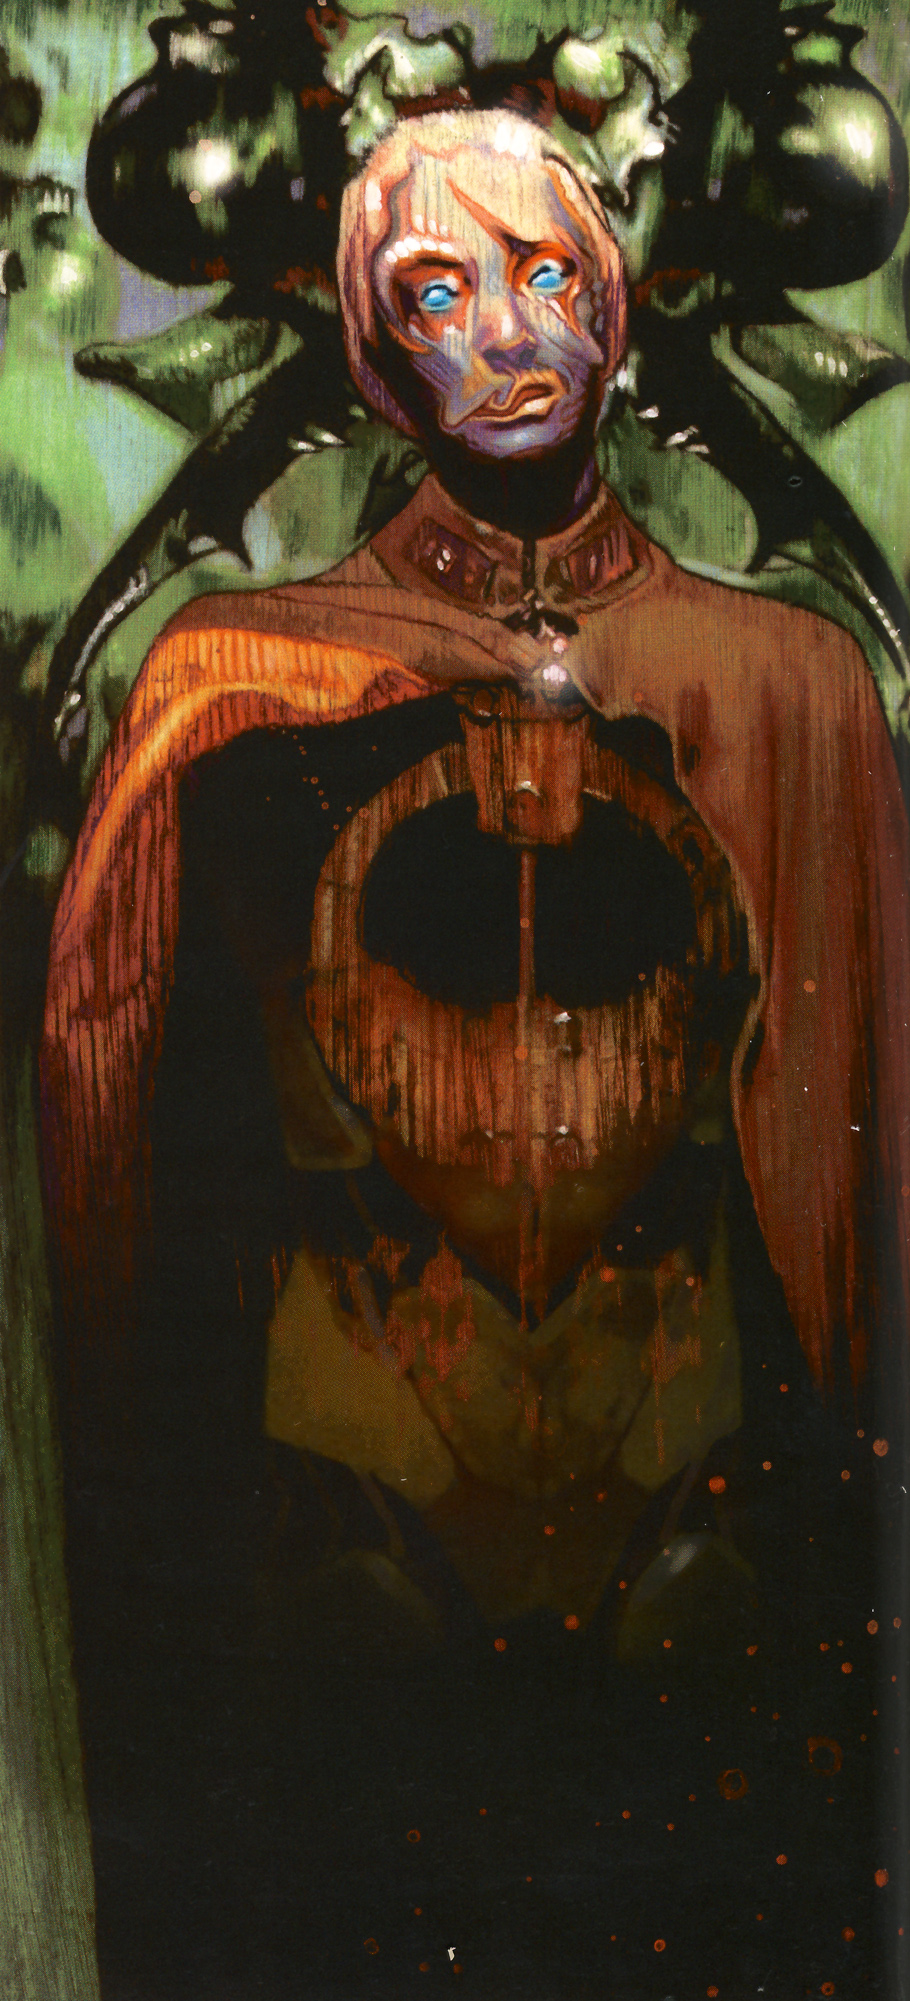
Nek Bwua'tu
Nek Bwua'tu, a Bothan male, held a position within the Galactic Alliance Defense Fleet as a naval officer. He ascended to the rank of admiral before becoming the Chief of Naval Operations. Originating from the planet Ruweln located in the Bothan sector, he enlisted in the Galactic Alliance Defense Force and fought against the extra-galactic Yuuzhan Vong during the Yuuzhan Vong War. In the subsequent peaceful era, Bwua'tu was promoted to admiral, taking command of the Alliance Fifth Fleet. His flagship was the Admiral Ackbar, a Victory-class Star Destroyer equipped with a powerful tractor beam, which he utilized to hunt pirates. Upon his promotion to admiral, Bwua'tu swore an oath of krevi to prioritize the Galactic Alliance's interests above his own and those of his species. Known for his tactical brilliance, he consistently triumphed over the Thrawn Simulator, despite a lack of experience in commanding a fleet in actual engagements.
Bwua'tu found himself at the heart of the Swarm War against the insectoid Killiks in 36 ABY, when he received orders to establish a blockade around the Utegetu Nebula, the Killiks' planetary habitat. During the ensuing battle at the Murgo Choke, where the Killiks attempted to break through the blockade, Killik forces seized control of the Admiral Ackbar. However, his tactical acumen played a crucial role in the ship's recapture and the war's conclusion during the battle of Tenupe. Bwua'tu continued his service to the Galactic Alliance throughout the Second Galactic Civil War, a conflict that pitted the Alliance against a Confederation of governments led by Corellia and including Bothawui. Despite pressure from his own government to resign, he remained loyal to his krevi and led Alliance forces in the battle of Hapes, the battle of Kuat, and the battle of Roche.
By 43 ABY, Bwua'tu had attained the position of Chief of Naval Operations under the leadership of Chief of State Natasi Daala. He was in command of the entire Alliance Navy when the government faced issues with the Jedi Order, and he was attacked by two assailants wielding lightsabers. This assault, orchestrated by a conspiracy seeking to remove Daala and Imperial Head of State Jagged Fel from their positions, left the Admiral severely wounded, including the loss of an arm, and in a coma. After weeks in a coma, Bwua'tu awoke to discover that the Jedi Order had deposed Daala and established a triumvirate to govern the Galactic Alliance. Suspecting a deliberate orchestration of recent events, including the attack on him, he concealed his recovery from his doctors and, with a select group, began investigating the conspiracy. His efforts were instrumental in liberating Coruscant from the control of the Lost Tribe of Sith several months later.
Biography
Early career
Nek Bwua'tu, a male Bothan, was born on Ruweln, a planet within the Bothan sector of the Mid Rim. During the Yuuzhan Vong War, a conflict marked by the invasion of the galaxy by the extra-galactic Yuuzhan Vong, Bwua'tu served in the Galactic Alliance Defense Fleet, participating in numerous engagements. By 36 ABY, Bwua'tu had been married three times and had achieved the rank of admiral, a promotion earned in the post-Yuuzhan Vong War period of peace. He was assigned command of the Fifth Fleet and used the Admiral Ackbar, a Victory-class Star Destroyer upgraded with an asteroid tug tractor beam and designated as a pirate-hunter, as his flagship. Despite his reputation for tactical prowess in consistently defeating the Thrawn Simulator - and being the only Bothan to ever do so - Bwua'tu had not yet led a military operation as a fleet commander.
The Swarm War
Blockading the Utegetu Nebula

In 35 ABY, the Killiks, a hive-minded insectoid species previously believed to be extinct by the citizens of the galaxy, began an aggressive expansion into the Gyuel system within the Unknown Regions. This expansion brought them into conflict with the isolationist Chiss. The Killiks were being influenced by the Gorog, a hidden "Dark Nest" that maintained its presence secret from the other Killik nests, yet directed them subconsciously. This nest was controlled by two Dark Jedi who had been assimilated into the Killik hive-mind during the Yuuzhan Vong War, becoming Joiners. Their inherent Force-sensitivity enabled them to dominate the Killik hive-mind instead of submitting to it. Simultaneously, a Jedi Knight named Raynar Thul was absorbed by another nest. His affinity for the Force allowed him to unite the other nests under his leadership, but he remained susceptible to the Dark Nest's suggestions, which advocated for war against the Chiss. The Dark Nest Crisis saw a series of battles between the two forces in the Gyuel system, until the Jedi Order intervened. They seemingly destroyed the Dark Nest and offered the Killiks the coordinates to the Utegetu Nebula, a shell nebula containing fifteen planets, in order to settle the conflict. Raynar Thul, now known as UnuThul, the leader of the Colony, accepted the offer, and the Killiks relocated from the Gyuel system to the Utegetu Nebula.
Bwua'tu, in command of the Admiral Ackbar, and the Fifth Fleet, were tasked with patrolling the Hydian Way, a major galactic trade route. During this assignment, the Gorog nest, which had not been destroyed as previously believed a year earlier, arranged for spinglass busts of Bwua'tu to be delivered to the Admiral Ackbar, using a third-party shipping company grateful for Bwua'tu's efforts in maintaining the Hydian Way's safety for traders. Wurf'al, a relative of Bwua'tu's serving on the vessel, placed the busts on pedestals throughout the ship as a sign of respect for his commander. Unbeknownst to the Alliance crew, the busts contained numerous thumb-sized insects allied with the Gorog. Several weeks later, Chief of State Cal Omas ordered the Fifth Fleet to blockade the Utegetu Nebula. Omas's decision to reassign the Fifth Fleet was a response to increased Killik activity outside the nebula, including the shipment of membrosia, an alcoholic beverage addictive to other insectoid species, and the harboring of pirate groups that were raiding Alliance shipping. The Dark Nest was still pushing for war with the Chiss, and these actions were intended to keep the Alliance occupied and unable to interfere with their plans. The Chiss believed that the Alliance was colluding with the Killiks, and the blockade implemented by the Fifth Fleet was an attempt to appease the Chiss government. Bwua'tu led his fleet to the Nebula.
The Admiral Ackbar, along with the Mon Mothma, an Imperial-class Star Destroyer equipped with gravity well projectors to function as an interdictor, positioned themselves at the Murgo Choke. This area, consisting of a pair of binary stars, was a complex region of space to navigate due to the numerous mass shadows connecting the Rago Run to the Utegetu Nebula. The presence of a single interdictor effectively blockaded the main hyperlane into the Nebula. Shortly after the blockade was established, the YT-1300 light freighter Millennium Falcon attempted to run the blockade to reach the planet Woteba within the Nebula. Piloted by Jedi Master Saba Sebatyne and her Padawan, Leia Organa Solo, the Falcon—accompanied by Master Mara Jade Skywalker and three Jedi Knights in StealthX starfighters—were attempting to rescue Jedi Grand Master Luke Skywalker and Captain Han Solo from Woteba, where they were being held prisoner by the Killiks. Organa Solo attempted to use her friendship with Commodore Gavin Darklighter, the Mon Monthma's commander, to gain passage. However, Darklighter, under orders from Bwua'tu, could not permit the Falcon to enter the Nebula. When Organa Solo attempted to breach the blockade, Bwua'tu positioned the Admiral Ackbar and used its tractor beam to capture the light freighter, bringing it aboard the Star Destroyer. With the Falcon secured, Bwua'tu ordered a boarding party to enter the freighter and arrest the Jedi. The troopers were unable to penetrate the Falcon's security system, but Sebatyne and Organa Solo exited voluntarily, attempting to use the Force to de-escalate the situation. Bwua'tu, anticipating the Jedi's use of their powers, ordered two soldiers in the docking bay to be armed with Czerka Arms HeadBangers set to maximum. When the two Knights used the Force to redirect the boarding party's weapons, the troopers, hidden behind their commander, used the HeadBangers, rendering the two Knights unconscious. Bwua'tu had overestimated the Jedi's resilience, as the two Knights remained unconscious for four days in the Admiral Ackbar's detention level.

While Sebatyne and Organa Solo were incapacitated, Bwua'tu ordered a search of the Millennium Falcon. Fuel cells, intended for refueling the Jedi StealthXs before reaching Woteba, were confiscated and moved to a separate location on the Admiral's orders. However, the two Noghri aboard the Falcon, Cakhmaim and Meewalh, managed to evade capture. When the two Jedi regained consciousness, Bwua'tu met with them in a briefing room. Although he was confident that he would soon receive orders from Chief of State Omas to release them, he attempted to negotiate with the Jedi to prevent them from disrupting the Admiral Ackbar's operations with an escape attempt. Initially, Bwua'tu threatened to damage the Falcon's drive nacelles to prevent its departure unless Organa Solo and Sebatyne promised not to attempt an escape, an offer they reluctantly accepted. He then tried to persuade them to recall the StealthX fighters still in the Murgo Choke. Organa Solo refused, stating that she sensed danger on the ship through the Force and would not endanger the pilots' lives. Bwua'tu assured them that they had nothing to fear from him; Organa Solo agreed, revealing that the danger was on the ship itself, but she could not elaborate. Believing the Jedi were using mysticism to frighten his crew, Bwua'tu had them returned to the detention block.
Battle of the Murgo Choke
With the Jedi imprisoned, Bwua'tu ordered the starfighter squadrons aboard the Admiral Ackbar and the Mon Mothma to deploy in a double screen formation between the two vessels and search for the missing StealthX fighters. While Bwua'tu oversaw the operation, Sebatyne and Organa Solo staged separate escapes from their cells. Sebatyne moved to secure the fuel cells and the Falcon, while Organa Solo proceeded to the bridge of the Admiral Ackbar. Organa Solo demanded to speak with Bwua'tu, a request he granted, believing she intended to assist in locating the StealthX squadron. Instead, she relayed information received through the Force from her brother, Grand Master Skywalker, that a Killik fleet was preparing to break out of the Utegetu Nebula and attack the Fifth Fleet. Bwua'tu dismissed this as a stalling tactic until a sensor officer reported fifteen contacts emerging from hyperspace, outbound from the nebula, approaching their position. Bwua'tu immediately recalled the Admiral Ackbar's fighters and ordered his turbolaser crews to target the Killik vessels. He also ordered the Admiral Ackbar to withdraw toward the Mon Mothma, while simultaneously ordering the other Star Destroyer to close with them.

As the Killik capital ships launched thousands of dartships, the Admiral Ackbar's turbolaser batteries scored direct hits on several enemy ships. With the battle underway, the Killiks initiated their plan to capture the Admiral Ackbar. Organa Solo, sensing danger since her arrival, traced the feeling to one of Bwua'tu's busts delivered weeks prior and placed on the bridge. Using the Force, she attempted to drop it down a disposal chute, but Wurf'al intervened, catching the item as it fell. The bust shattered in his hands, and the tiny insect assassins within attacked and killed him, before attempting to attack the rest of the command crew. Bwua'tu, Organa Solo, and the bridge crew fought off the initial attack but sustained casualties. Bwua'tu, acting on Organa Solo's advice, placed the ship on infiltration alert and ordered all statuary to be dumped into the nearest disposal chute.
Turning his attention back to the battle, Bwua'tu noted that while most of the Killik force targeted the Mon Mothma and the center of the Choke, five ships and thousands of dartships targeted the Admiral Ackbar. With Organa Solo's assistance, Bwua'tu commandeered the Jedi StealthXs—including a new squadron under Jedi Master Kyp Durron, who had arrived to rescue Organa Solo and Sebatyne—and used them to augment his forces, ordering them to destroy the hyperdrives on the nest ships. Organa Solo also identified the Dark Nest's ship through the Force. Bwua'tu ordered the ship targeted, designating it "Bug One," but refrained from attacking, preferring to keep their information a surprise. The Mon Mothma began to sustain serious damage as the battle intensified, while the Admiral Ackbar fared better; its position with its back to the binary stars of the Choke caused much of the enemy fire to miss due to the Killik gunners being unable to compensate for the gravitational fluxes. However, despite its positioning, the Admiral Ackbar was trapped between the stars and the oncoming Killik force. Recognizing the futility of his position, Bwua'tu ordered the Mon Mothma and all remaining starfighters to disengage and head for Rendezvous Alpha. He then ordered his gunnery crews to target and open fire on "Bug One." Despite registering successful hits, Organa Solo implored Bwua'tu to cease fire. Through the Force, Master Jade Skywalker told her that Master Skywalker and Captain Solo were aboard the vessel. Bwua'tu accepted the explanation but did not cease fire entirely, reducing the number of turbolaser batteries targeting the vessel. He reasoned that if Master Skywalker and Captain Solo were on the ship, they were either captives or stowaways. If captives, the attack would provide them with the best chance of escape. If stowaways, ceasing fire could betray their presence to the Killiks.
As the onslaught against "Bug One" pressed on, sensors aboard the Admiral Ackbar detected a separation from the Killik vessel. Initially mistaken for a missile, the detached object was identified as a Lancer-class frigate. Organa Solo, sensing peril and the presence of Raynar Thul on board, spurred Bwua'tu to prioritize the frigate as a target. As turbolaser blasts hurtled toward it, they inexplicably swerved away at the last second. A subsequent barrage met the same fate, leading Organa Solo to the sudden realization that Thul's intent was to seize the Admiral Ackbar, not destroy it. Bwua'tu's attempt to activate the ship's self-destruct mechanism was thwarted when Killik assassin bugs infiltrated the bridge through the ventilation system, forcing an evacuation. Managing to secure Organa Solo's lightsaber from his wardroom vault, Bwua'tu, along with the remaining bridge crew and other survivors encountered along their path, sought remote access terminals on different decks to trigger the ship's destruction. However, the Killiks anticipated their moves, destroying each access terminal while relentlessly harassing the survivors in a protracted battle throughout the Admiral Ackbar. The small group eventually reached the ship's capture bay, where a functional access terminal and the Millennium Falcon were located. At that moment, Alema Rar, a Jedi Joiner serving the Dark Nest, entered the fray. During a duel with Organa Solo, Rar attempted to strike down Bwua'tu with Force lightning, but his aide, Grendyl, bravely intercepted the attack. A second lightning blast destroyed the access terminal, much to Bwua'tu's dismay. The assault on the survivors was broken when Master Sebatyne, accompanied by the Noghri, emerged from the capture bay and unleashed overwhelming firepower, driving the attackers back. Bwua'tu then evacuated the Admiral Ackbar aboard the Millennium Falcon, leaving the Star Destroyer under Killik control.
The war begins
Following the Millennium Falcon's rescue of Master Skywalker, Captain Solo, and two traders, Jae Juun and Tarfang, from "Bug One," Bwua'tu was transported to the Mon Mothma. Transferring his flag to the Star Destroyer, Bwua'tu directed the ship, along with a small task force of cruisers and frigates, to return to the nebula. The Jedi StealthXs had performed exceptionally, disabling the hyperdrives on eleven of the nest ships, including "Bug One." While four ships and the captured Admiral Ackbar had escaped, the remaining ships formed a blockade in the Murgo Choke, preventing Alliance vessels from entering the Nebula. Bwua'tu discovered that Juun and Tarfang were responsible for delivering the Killik-infested busts to the Admiral Ackbar. However, they were unaware of the contents and, upon learning the truth, attempted to warn the Alliance by aiding the captive Skywalker and Solo on Woteba. Skywalker and Solo testified to the pair's innocence, and Bwua'tu, impressed by their knowledge of the Killiks, enlisted them as Intelligence Affiliates. Despite possessing only a slight numerical advantage over the Killik forces, Bwua'tu instructed Commodore Darklighter to launch all starfighters and prepare for an attack. Ignoring the shocked reactions of Darklighter and the Jedi Order representatives, Bwua'tu sought to disrupt the Killiks' equilibrium. He reasoned that Jedi involvement had disrupted their plans, creating uncertainty about the forces they faced. Bwua'tu intended to seize the initiative and attack when conventional wisdom dictated otherwise. By doing so, the Admiral hoped to further disorient the Killiks and force them into retreat. This risky assault proved successful, deterring the Killiks from further aggressive actions in the Choke. Despite the loss of the Admiral Ackbar, Grand Admiral Gilad Pellaeon, Supreme Commander of the Galactic Alliance Defense Force, allowed Bwua'tu to retain command of the Fifth Fleet, rather than removing him as he anticipated. Bwua'tu remained stationed at the Utegetu Nebula, overseeing Jedi reconnaissance missions and assigning intelligence tasks to his new recruits, Juun and Tarfang. He believed that the Killiks' actions, including subsequent attacks on Roche and Thyferra, indicated their intention to attempt another breakout from the nebula.
The battle of Tenupe
During the culminating battle of the Swarm War, the Chiss launched a massive assault against Killik forces at Tenupe. A Galactic Alliance fleet, commanded by Grand Admiral Pellaeon and including a task force under Bwua'tu's leadership, advanced to Tenupe to provide support to the Chiss. Their objective was to destroy the Killik fleet and assure the Chiss that the Alliance was not aligned with the Colony. The Chiss suspected that the Galactic Alliance had orchestrated the Killiks' capture of the Admiral Ackbar, leading to heightened tensions between the two governments. However, upon their arrival, Grand Master Skywalker persuaded Pellaeon to alter their strategy, emphasizing that the only definitive way to end the war was to reclaim the Admiral Ackbar and neutralize Raynar Thul and Lomi Plo, the Dark Jedi leading the Gorog nest. Consequently, the Alliance force would concentrate on the Admiral Ackbar, while allowing the Killik and Chiss fleets to engage each other. Skywalker hoped that the resulting casualties on both sides, combined with the elimination of the Killik leadership, would be sufficient to bring the war to an end.

Skywalker, accompanied by a unit of space-capable YVH 5 Bugcruncher war droids known as Stomper Brigade, launched an assault on the Admiral Ackbar with the intention of eliminating Raynar Thul's threat. Several Alliance Star Destroyers of the same class as the Admiral Ackbar used their powerful tractor beams to hold the vessel in place while Skywalker's force approached. Although Thul attempted to impede their progress, Bwua'tu had anticipated much of Thul's response. He correctly predicted that Thul would prioritize defending against Task Force Stomper with his dartship screen, rather than deploying it to engage his captors. As Alliance bombardment caused the Admiral Ackbar's shields to fail, the dartship screen retreated further to protect the ship. Bwua'tu had also foreseen this move, and Alliance starfighter squadrons exploited the gap in the dartship screen, strafing the Star Destroyer's weapons emplacements and clearing a path for Task Force Stomper. When Thul launched the starfighters that were aboard the Admiral Ackbar at the time of its capture, Bwua'tu countered by deploying the elite Rogue Squadron to quickly eliminate them in a series of attack runs. Finally, as the dartship screen moved to directly intercept Task Force Stomper, Bwua'tu used the tractor beams on the Alliance pirate catchers to send them spiraling off course, clearing the way.
Before Stomper's arrival at the Admiral Ackbar, Thul began using the Force to dismantle the assault shuttles. Although Bwua'tu had not anticipated this tactic, he had insisted that the YVH droids be fully capable of maneuvering in space, a modification that allowed the entire squad to board the Admiral Ackbar despite the loss of their transport. Skywalker, having donned an enviro-suit to survive the destruction of his shuttle, Stomper One, located and engaged Raynar Thul and Lomi Plo in combat. With both defeated and at Skywalker's mercy, Plo ordered the Killik forces to attack the medical ship Healing Star. The leader of the Dark Nest intended to trade the cessation of the attack on the vessel for her life. Bwua'tu had also foreseen this move, and the Healing Star was instead a decoy, staffed by mouse droids. With no other options, Plo attacked Skywalker and was killed by the Jedi Master. Thul was taken into custody, and the Admiral Ackbar was returned to Alliance control. With Thul removed from the Colony's leadership, the Swarm War officially ended.
The Second Galactic Civil War
Watching Kiris
In 40 ABY, Bwua'tu continued his service to the Galactic Alliance, retaining command of the Admiral Ackbar. In that same year, escalating tensions between the Galactic Alliance and Corellia escalated into armed conflict, with other planets, including Bothawui, the Bothan homeworld, poised to join Corellia's burgeoning Confederation. Despite this, Bwua'tu remained steadfastly loyal to the Galactic Alliance, having sworn an oath of krevi—a Bothan pledge that prioritized loyalty to the Galactic Alliance above his allegiance to Bothawui or his own species—upon his promotion to fleet admiral. This position presented Bwua'tu with the daunting prospect of potentially engaging his own people in battle, as he believed that Bothawui's involvement in the war was inevitable. Furthermore, the Bothan government pressured Bwua'tu to resign his commission and return home. Although Bwua'tu refused, the government persisted in their efforts, providing him with intelligence indicating that Jedi Knight Jacen Solo, now serving as a colonel in the newly established Galactic Alliance Guard, was assassinating Bothans on Coruscant, the galactic capital. Colonel Solo believed that Reh'mwa, leader of the True Victory Party who had vowed to eradicate the Yuuzhan Vong completely, was responsible for poisoning the World Brain on Coruscant. Colonel Solo used the World Brain to track Corellian terrorists on the capital, and its potential loss would have hindered Solo's efforts.

Amidst the escalating crisis, Admiral Bwua'tu received orders to position his fleet for an ambush of the Kiris shipyards, a clandestine Corellian construction yard situated within the Kiris Asteroid Cluster of the Corellian system. Stationing his fleet three light-years from the system's edge, Bwua'tu deployed Jedi Knights in StealthXs to spy on the activity within the shipyards. Following one such mission, Jedi Knight Jaina Solo reported the detection of a transport departing the asteroid cluster, heading towards the Hapes Consortium, which had allied itself with the Galactic Alliance. Jedi Solo expressed her belief that any attempt by a Corellian delegation to sway Hapes to Corellia's side was destined to fail, until Bwua'tu pointed out his suspicion that they were not seeking negotiations with Queen Mother Tenel Ka Djo, but rather with her political adversaries. Djo's support for the Galactic Alliance was unpopular among the nobility, and the Admiral theorized that Corellia intended to facilitate a coup within the Consortium, securing Hapes as an ally under new leadership. Solo vehemently maintained her belief that this was not the delegation's objective. Bwua'tu countered with his theory that the transport was, in fact, the Millennium Falcon, carrying Han and Leia Organa Solo to Hapes, and that Solo's conviction stemmed from her belief that her parents would never act in a way that could harm or betray the Queen Mother, whom they considered a close friend. Jedi Solo confirmed his suspicion, and Bwua'tu conceded that Solo undoubtedly knew her parents better than he did, but he remained steadfast in his theory that the Corellians intended to support an insurrection within the Consortium.
Bwua'tu hypothesized that the secret fleet under construction in the Kirises was not intended to breach the Alliance's blockade of the Corellian system, but rather to bolster the coup at Hapes. The Admiral recognized that his fleet was poorly positioned to prevent such a move, but hesitated at Jedi Solo's suggestion to reposition the fleet. Admiral Cha Niathal, Supreme Commander of the Galactic Alliance Defense Force, had ordered the trap to be set, and Bwua'tu knew that she would not abandon it without compelling reason. While he intended to communicate the information to her, he would not redeploy his forces without authorization. Examining a tactical starmap, Bwua'tu concluded that Thrackan Sal-Solo, the former leader of the Corellians and the architect of the Kiris fleet, had been planning to assault the planet Duro in several weeks. At that time, the Kiris Asteroid Cluster would have been positioned between Duro and Corell, Corellia's sun. With electromagnetic interference in the background, Duro would have been unable to detect the launch of the Kiris fleet. The assault made sense since Duro had large deposits of explosive baradium and lightsaber-resistant cortosis. Returning to the immediate issue, Bwua'tu requested that Jedi Solo and her partner, Zekk, travel to Hapes and personally warn the Queen Mother of the impending danger.
Defending Hapes

Bwua'tu's suspicions proved accurate; three Corellian Dreadnaughts constructed at Kiris were dispatched to the Hapes Consortium, rendezvousing with a fleet allied to the Heritage Council—an alliance of Hapan nobles opposed to the Queen Mother's rule—just outside the Hapes system. Bwua'tu shadowed the fleet to Hapes, maneuvering his own forces to emerge from hyperspace behind Megos, one of Hapes' moons. The Heritage Fleet engaged the Hapan Royal Navy; despite the surprise attack, the Queen Mother's forces held the advantage due to Han Solo, who had infiltrated the Heritage Fleet and broadcast their reversion coordinates prior to their arrival. As the two Hapan forces clashed, Bwua'tu carefully timed his strike; he considered the destruction of the Corellian forces his primary objective, believing that crippling their war effort could effectively end the insurrection. Bwua'tu's fleet of Star Destroyers, cruisers, and frigates emerged from hyperspace, rounded Megos, and assaulted the flank of the Heritage Fleet, breaching its formation.
As the battle raged on, another Hapan fleet, led by the Ducha Galney, entered the fray. Galney was considered an ally of the Queen Mother, but secretly belonged to the Heritage Council and intended to exploit that guise to pose as reinforcements for Djo's forces, then attack them. Ben Skywalker, son of the Masters Skywalker and a member of the Galactic Alliance Guard, managed to warn Djo of the danger after receiving information from Jedi Knights Solo and Zekk regarding Galney's duplicity. Galney's flotilla was decimated by a loyal Hapan fleet commanded by Jacen Solo, which had just returned to Hapes from attempting to engage the Heritage Fleet at Relephon, while Bwua'tu's fleet directly assaulted the Corellian Dreadnaughts. The combined Hapan–Galactic Alliance force successfully defeated the enemy.
Kuat
As the conflict escalated into open warfare between the Alliance and the Confederation, Bwua'tu was transferred from the Fifth Fleet and placed in command of both the First and Sixth Fleets, taking the Star Destroyer Welmo Darb as his flagship. Jacen Solo, who had ascended to the position of Joint Chief of State alongside Cha Niathal following Cal Omas's arrest, hoped that the Admiral could prevent the combined Corellian and Bothan forces from reaching the planet Kuat. Bwua'tu anticipated that the Confederation's combined forces of Corellian, Bothan, Commenorian, and Hutt fleets would attack the Kuat shipyards at their most congested point. The Admiral's battle plan involved luring the enemy fleet into the shipyards and surrounding them on all sides with allied formations, while Jedi forces, utilizing StealthXs, deployed shadow bombs to devastate the Confederation warships. Bwua'tu pre-positioned thousands of starfighters within the docks, established ambushes and traps throughout the shipyard, and stationed both the First and Fourth Fleets within the shipyards themselves. The Hapan Home Fleet was concealed on the far side of Ronay, one of Kuat's moons, while the Seventh and Fifth Fleets were positioned to flank the enemy. Six squadrons of Jedi StealthXs were stationed on the Anakin Solo, Jacen Solo's flagship, under the command of Grand Master Skywalker himself.
The Confederation forces acted as Bwua'tu had predicted, targeting the most densely populated area of the shipyard. The Corellians spearheaded the assault, with the Bothans providing support. The Commenorians, Hutts, and a flotilla of allied vessels formed the rearguard. The enemy fleet dispatched scouts throughout the shipyard to assess the Alliance's position, but they were swiftly eliminated by the starfighters that Bwua'tu had previously deployed. The First and Fourth Fleets bore the brunt of the assault, drawing the Confederation fleet in. The Corellians directly engaged the Fourth Fleet, while the Bothans attempted to flank the Alliance forces, although their progress was hampered by the traps and ambushes that Bwua'tu had meticulously set up. With the Confederation fleet fully engaged, Bwua'tu requested that the Hapan Home Fleet join the battle. As the Hapans emerged from behind Ronay, they attacked the rear of the Confederation fleet's formation. Simultaneously, the Seventh and Fifth Fleets converged from the flanks, completely surrounding the enemy. Bwua'tu ordered the StealthXs to begin their attack runs, but he discovered that Grand Master Skywalker—disgusted by Chief of State Solo's leadership of the Alliance, his possible involvement in Cal Omas's recent death, and his orders to station Galactic Alliance Guard troops at the Jedi Academy on Ossus to ensure the Jedi's cooperation—had withdrawn from the combat zone after removing Jedi support from the Alliance. Solo asked Bwua'tu if his plan was still viable if the Alliance pressed the assault against the Confederation. Without the Jedi StealthXs, Bwua'tu had to respond in the negative.
The battle at Kuat dragged on for a week. Both sides were evenly matched, and it devolved into a war of attrition, with both forces losing several capital ships and thousands of lives each day. The situation deteriorated when Chief of State Solo took his personal Star Destroyer, the Anakin Solo, to the Kashyyyk system along with the Fifth Fleet. The Wookiees had yet to choose a side in the war, but the Jedi had been sighted on Kashyyyk. Solo knew that the Wookiees would not join the Alliance after supporting the Jedi, so he chose to engage their forces in an attempt to draw Confederation forces away from Kuat. Solo reasoned that the Confederation needed allies and would be willing to offer assistance to the Wookiees to gain their support. His plan succeeded, and Confederation forces from Kuat disengaged and headed to Kashyyyk. Although Bwua'tu and his forces were intended to pursue and were expected by Solo to help reinforce his position, he was ordered to remain and defend the Core Worlds by Admiral Niathal. Without his support, the Fifth Fleet was severely mauled and barely escaped from the Kashyyyk system.
Final battles
As the war neared its end, the Galactic Alliance fractured when Admiral Niathal broke away from the government after Jacen Solo, who had assumed the mantle of Darth Caedus, ordered the assassination of Grand Admiral Pellaeon during a battle at Fondor, an act that underscored his descent into darkness and tyranny. Several weeks later, forces loyal to Caedus engaged Jedi and Confederation forces at Roche. Although Jacen Solo initially commanded the battle, other obligations forced him to delegate command of the Alliance forces to Bwua'tu, who traveled to the Roche system to oversee the engagement. Bwua'tu subsequently defeated forces loyal to Niathal during the battle, then trapped the remaining Confederation forces at Carbos Thirteen. Shortly thereafter, the war concluded with the battle of Shedu Maad, which resulted in Caedus's death at the hands of his own sister, Jaina Solo. In the aftermath, Bwua'tu was offered the position of Chief of State of the Galactic Alliance, but declined, believing that he lacked the necessary cunning to succeed in the role. However, he suggested Admiral Natasi Daala, who had returned from obscurity to assist Grand Admiral Pellaeon and had subsequently allied her forces with Niathal, for the position. She was the only universally acceptable candidate and was appointed as the new Chief of State.
Later career
Head of the Galactic Alliance Navy

By the year 43 ABY, Bwua'tu had risen to the position of the Galactic Alliance Navy's Chief of Naval Operations, overseeing its strategic direction. Despite keeping it under wraps, he maintained a romantic relationship with Chief of State Daala. When Daala was concerned about several young Jedi Knights who had been affected by a form of psychosis, Bwua'tu advised her, while also expressing his belief that the Jedi were ultimately a positive influence with the Alliance's best interests in mind. He also informed her, when asked, that some officers within the Navy felt she wasn't harsh enough on the Alliance's adversaries. Daala and Jagged Fel, the Head of State of the Galactic Empire, were targeted in a conspiracy orchestrated by Kuati Senator Haydnat Treen, Imperial Moff Drikl Lecersen, Coruscanti Senator Fost Bramsin, and General Merratt Jaxton, the Chief of Starfighter Command. The goal of these conspirators was to replace both leaders in an effort to establish a new political structure. During a planning session, Jaxton suggested that Bwua'tu's unwavering loyalty to Daala might stem from more than just a professional connection, and that it may be personal. Given that the conspiracy required the support of the Armed Forces chiefs, Jaxton sought reasons to force Bwua'tu into retirement. However, he also suggested that assassinating Bwua'tu would be an equally effective solution. Simultaneously, Bwua'tu's uncle, the esteemed lawyer Eramuth Bwua'tu, was engaged to defend Tahiri Veila in court after the Alliance decided to prosecute her for the murder of Grand Admiral Gilad Pellaeon, which occurred during the Battle of Fondor several years prior.
Jedi under siege
As more Jedi succumbed to the mental illness, exhibiting erratic and dangerous behavior, Daala gave the order for their apprehension and confinement. The Jedi Order resisted, refusing to surrender any Jedi afflicted with the illness. This prompted Daala to authorize a raid on the Jedi Temple by Mandalorian commandos with the aim of taking the affected Jedi into custody. The Jedi successfully repelled the initial raid, but a siege of the Temple then began. Belok Rhal, the Mandalorian commander overseeing the siege, demanded that the Jedi surrender the two most recent victims of the illness, Sothais Saar and Turi Altamik. When the Jedi attempted to negotiate, Rhal murdered their representative, Kani Asari, right on the Temple steps.

With the Jedi in a state of shock, Bwua'tu made private contact with Kenth Hamner, the acting Grand Master. During the initial raid on the Temple, holorecordings of the confrontation revealed the construction of a large StealthX fleet within the Temple. Bwua'tu directly asked Hamner if this was true, and Hamner confirmed it. The Bothan inquired whether these vessels were intended for use against the Galactic Alliance. Hamner assured him that they were not; they were being prepared to confront another threat, but he did not provide further details. Bwua'tu disclosed that he had not informed Daala about the buildup, and that she was unaware of it. He also stated that if Daala were to discover it, she would assume the fighters were intended for use against the Alliance and launch a full-scale assault on the Temple. With the best interests of the Alliance in mind, believing that a united Alliance and Jedi Order was the optimal path, Bwua'tu proposed a deal to Hamner. If Hamner agreed to delay the launch of the StealthXs until Bwua'tu specifically authorized it, he would leverage his personal relationship with Daala to ease tensions and improve relations between the Alliance and the Order. Furthermore, provided the ships were not used against Alliance assets, the fleet would receive support from the Navy in their operations, even if Bwua'tu had to deploy them discreetly. Hamner accepted Bwua'tu's proposal.
Ambush
Several days later, Bwua'tu visited Daala in her private quarters. He intended to assess her views on the Jedi as part of his agreement with Hamner, but as the conversation shifted to reports of slave uprisings, Bwua'tu realized that she would not be receptive to discussing the Jedi situation. Leaving her apartment at 3:14 AM, he planned to go to his office and speak with Master Hamner. En route, he was attacked on a walkway by two individuals—one dressed in street clothes and wielding a blaster, and the other in Jedi robes wielding a lightsaber—who demanded to know the location of the "real" Bwua'tu. One of the symptoms of the mental psychosis affecting the Jedi was the delusion that those around them had been replaced by imposters, leading Bwua'tu to initially believe that he was being attacked by psychotic Jedi. In reality, the assailants were agents of the conspiracy led by Senator Treen and Moff Lecersen. The Admiral responded by firing his concealed blaster repeatedly, while simultaneously activating an emergency signal. Diving off the walkway to a lower level, he wounded one attacker in a fall as he fired wildly above him. The second assailant pursued him, landing on the walkway behind him. Bwua'tu attempted to shoot him, but his arm was severed and cauterized by the attacker's lightsaber. During the ensuing struggle, Bwua'tu sustained lightsaber wounds to his back and stomach, but managed to kill his attacker by triggering the blaster that was still gripped in his severed arm. The shots struck the man's face, killing him instantly. As he began to lose consciousness and slip into a coma, Bwua'tu realized that the pair could not have been genuine Jedi, as he would not have been able to withstand them for as long as he had. His Bith aide-de-camp, Rynog Asokaji, received the emergency signal and promptly dispatched assistance, which arrived shortly after the Admiral lost consciousness.
Bwua'tu was transported to the Galactic Senate Medcenter, where a 2-1 BXS combat-trauma surgical droid spent thirty hours treating his stomach wound, repairing and replacing his damaged internal organs. His amputated arm was shaved above the elbow, and it was noted that cauterized nerves were difficult to regenerate in Bothan physiology. Ysa'i, a Bothan specialist in his species's physiology, served as the Admiral's primary physician. At Daala's request, the Admiral was to be fitted with a prosthetic arm, as she did not want him to awaken to a stump. During a visit to his bedside—which included Daala's Chief of Staff, Wynn Dorvan, and Rynog Asokaji—it was observed that Bwua'tu began to respond to Daala's voice and touch. Encouraged to speak to Bwua'tu, Daala demanded that he identify his attackers. Bwua'tu's eyes, which were kept open to stimulate his recovery, were fixed on a viewscreen showing a news report from reporter Madhi Vaandt covering revolts on Blaudu Sextus. While Dorvan and Asokaji suggested that Bwua'tu was fixated on Vaandt due to her attractiveness, Daala instead deduced from the Admiral's reaction that there was a connection between the attack on him and the reporter. Given Bwua'tu's response to the viewscreen, Asokaji sought permission from the doctors to play news reports continuously in an effort to stimulate the Admiral. The doctors agreed. An investigation into the attack yielded no results; the wounded assailant was never found, and the individual wearing Jedi robes was not identified as a member of the Order on record.
Shortly thereafter, Bwua'tu was successfully fitted with the prosthetic appendage, which was virtually indistinguishable from his real arm except for the absence of fur where the prosthesis met his natural limb. In Bwua'tu's absence, Admiral Sallinor Parova, a member of the conspiracy led by Senator Treen and Moff Lecersen, was promoted to the position of Chief of Naval Operations. Several weeks after the attack, Bwua'tu emerged from his coma. His uncle, Eramuth Bwua'tu, was at his bedside, and his aide, Rynog Asokaji, entered the room shortly after. Despite being lucid and in control of his mental faculties, Eramuth advised his nephew to feign grogginess and incoherence. When Bwua'tu's doctors arrived, the Admiral remained silent while Eramuth expressed his concern that his nephew might have suffered brain damage. Bwua'tu answered a few questions by blinking, but acted confused and agitated. Doctor Ysa'i and his colleague, Doctor Javir, expressed puzzlement at Bwua'tu's state, as the medical readouts indicated that the Admiral had fully recovered. Eramuth assured the pair that he would attempt to reach his nephew and jog his memory, and the doctors departed. Eramuth then informed his nephew of recent events—the various slave uprisings, the Jedi coup that had removed Chief of State Daala from power and replaced it with a triumvirate, and Daala's subsequent escape from the Armand Isard Correctional Facility. Along with Wynn Dorvan—who was currently serving as a member of the triumvirate and had joined the conversation via holographic receiver—the small group detected a larger force at play behind the recent events, and established a secret "club" to unravel the conspiracy that seemed to be unfolding. As part of the plan, Admiral Bwua'tu's recovery was kept a closely guarded secret.
Unravelling the conspiracy
With Chief of State Daala deposed, Jedi Grand Master Luke Skywalker was permitted to return to Coruscant. Skywalker, as part of an agreement with Daala, had been exiled from the capital for ten years to investigate the reasons behind Jacen Solo's fall to the dark side, and to develop strategies to prevent similar occurrences among his Jedi. As part of the agreement, Skywalker relinquished command of the Order, leading to Kenth Hamner's appointment. With Daala removed from power, the decision was reversed. One of Skywalker's initial actions was to declare his intention to remove the Jedi entirely from Coruscant and to abstain from any active involvement in the politics of the Galactic Alliance. The triumvirate was dissolved, and many anticipated that Wynn Dorvan would be elected as interim Chief of State until a formal election could be held. However, Senator Treen and her allies conspired to install Padnel Ovin, the newly elected senator from Klatooine, as Chief of State, intending to use him as a puppet ruler while they controlled the Alliance from behind the scenes. Ovin was elected, but he proved astute enough to recognize Treen's motivations, and retained Dorvan as his Chief of Staff.
Dorvan met with Bwua'tu in his hospital room, where they discussed recent events and the formation of a Senate subcommittee to investigate potential abuses of power by the Jedi Order during their partial governance, sparking a resurgence of anti-Jedi sentiment. Club Bwua'tu's investigations into the conspiracy had produced a list of suspects believed to be connected to the attack on Bwua'tu and a plan to remove Chief of State Daala from office, including Moff Lecersen, Senator Treen, General Jaxton, and Senator Bramsin. Through brainstorming, Bwua'tu and Dorvan also linked Admiral Parova to the conspiracy when they realized that a recent poisoning incident in the Senate had discredited Galactic Alliance Security, prompting Daala to assign responsibility for the Senate's protection to Fleet Intelligence, which was under Parova's command. Given that the three affected individuals—Lecersen, Jaxton, and Bramsin—were all suspected of involvement in the conspiracy against Daala, Bwua'tu instructed Asokaji to determine whether Parova and Lecersen had ever met.
Concurrently, Dorvan observed that the subcommittee addressing the Jedi was composed of newly elected senators and inferred that a second conspiracy was underway, as they could not have been involved in the original conspiracy due to their recent arrival on Coruscant. Shortly after the meeting, Jedi Leia Organa Solo—the only Jedi officially remaining on Coruscant since the Order's departure—was arrested on fabricated charges by order of the subcommittee. Dorvan met with her husband, Han Solo, and disclosed the existence of Club Bwua'tu to him; Solo joined the group to assist in his wife's rescue. Meanwhile, Eramuth met with Organa Solo in prison, posing as her legal representative, informing her of the club and securing her support and membership.
With Rynog Asokaji's assistance, Han Solo kidnapped Admiral Parova from her residence on Bwua'tu's orders. Asokaji contacted Parova, informing her that Bwua'tu was lucid and wished to speak with her, claiming to know who had sent the fake Jedi after him. Concerned about how much Bwua'tu actually knew, she hailed a hovertaxi, and upon entering it, she scratched herself on a needle containing a potent drug that rendered her unconscious. Her last memory was of Solo driving the taxi. Parova awoke in a cell in the Jedi Temple's Asylum Block. Asokaji and Wynn Dorvan were physically present with her, and Bwua'tu, via holocomm, confronted Parova about her ties to the conspiracy. She denied his accusations, asserting that meeting with two senators, a Moff, and a fellow military officer was not unusual behavior. Eventually, the Bothan terminated the meeting, dismissing Dorvan and Asokaji, leaving Parova alone in the cell. Shortly after, Parova was found dead, killed by a lightsaber. Although the media blamed Tahiri Veila for the killing—she had escaped from the Armand Isard Correctional Facility at the same time as Daala and was currently on the run from the authorities—Parova had actually been killed by members of the Lost Tribe of Sith. Many of the newly elected senators on the anti-Jedi subcommittee and their staffs were members of the Lost Tribe, and other members of the Tribe had infiltrated the Jedi Temple after it had been abandoned during the Jedi's withdrawal.
Not long after, Chief of State Padnel Ovin became aware of the existence of Club Bwua'tu, shortly before he was recalled as Chief of State. Citing the murder of Admiral Parova, the recent death of Fost Bramsin—who had been murdered by Senator Treen to prevent him from betraying the conspiracy, although the autopsy had been inconclusive—and Treen's subsequent resignation, Senator Kameron Suldar nominated Rokari Kem, a new senator from the planet Qaras, as his replacement. Kem had been targeted by Club Bwua'tu as a possible member. During the Senate deliberations surrounding the election of the new Chief of State, Han Solo and other members of the club successfully rescued Jedi Organa Solo from incarceration. During the deliberations, Chief of State Ovin delayed the vote by over an hour by addressing the Senate, providing Club Bwua'tu with the time needed to rescue Organa Solo. During his oration, he suddenly collapsed and was taken away to a medcenter, where he was later pronounced dead. Unbeknownst to all except members of the Lost Tribe, Senator Kem—who had been elected to the position of interim Chief of State—was, in reality, the dark side entity Abeloth.
The liberation of Coruscant
For a month after the Jedi's departure, Bwua'tu and his allies operated Club Bwua'tu as a clandestine intelligence network, providing information to the Order and assisting them in infiltrating Coruscant. Following Kem's election, members of the Lost Tribe ascended into key governmental positions and utilized BAMR News to disseminate anti-Jedi propaganda. With Club Bwua'tu's assistance, the Jedi were able to position themselves and eliminate twenty-five percent of the Lost Tribe's forces in a coordinated strike. The remaining forces, including Abeloth, retreated to the Jedi Temple. For the next phase of the plan, Bwua'tu contacted several thousand space marines who had served under him and requested their voluntary assistance in overthrowing Chief of State Kem and the Lost Tribe. The marines agreed, and three brigades were assembled in an industrial hangar to receive a briefing from the Admiral. He explained that the marines would launch an assault on the Temple at thirty different locations to draw the majority of the Sith forces to the building's perimeter. While the Sith were engaged, a strike force led by Grand Master Skywalker would infiltrate the Temple and deactivate the shields from within. Subsequently, Jedi forces would advance from the Temple, driving the Sith into the waiting force of marines. Bwua'tu emphasized that if the assault failed for any reason, he would order a baradium strike on the Temple, and that the marines should be prepared to retreat immediately upon receiving the order, as the missiles would already be in flight.
The assault commenced, but immediately encountered difficulties as the Jedi infiltration team was ambushed upon entering the Temple. Abeloth, utilizing her ability to see into the future, had foreseen the attack and countered accordingly. The strike team was trapped within the Temple for several days, engaged in a running battle with the Lost Tribe. Bwua'tu maintained constant communication with Skywalker, coordinating efforts and attempting to create an entry point for reinforcements to support the Jedi. Eventually, the strike team managed to create a breach in the Temple's exterior, allowing elite Void Jumper marine reinforcements to enter the building and begin securing the Temple level by level. However, during the assault to create the breach, the Jedi learned of Abeloth's presence in the Temple. Abeloth nearly thwarted their efforts, but she abandoned the fight for reasons unknown to the Jedi. The team was successful and subsequently med-evaced by the marine reinforcements.
With the assault prolonged, a meeting was convened in the offices of Sullustan Senator Luewet Wuul between the Jedi Council and their military and political allies. The Jedi reported that Abeloth was present in the building and that she could apparently inhabit multiple bodies and control them even if they were light years apart, based on a report from Tahiri Veila that she and Boba Fett had killed a manifestation of Abeloth on Hagamoor 3 at the same time as the strike team encountered Abeloth in the Temple. The destruction of Abeloth's form on Hagamoor 3 was believed to be the reason that the Abeloth form fighting the strike team had abandoned the battle, as the loss of one part of her had weakened the whole. Information obtained from the Thuruht Killik hive shed light on Abeloth's origins, making it clear that she had to be stopped by any means necessary. Bwua'tu proposed an immediate baradium strike on the Temple, as it contained two manifestations of Abeloth—the one that fought the Jedi strike team and another that had apparently merged with the Temple computer core. The second entity had been witnessed by Wynn Dorvan, who had been a prisoner of Abeloth's until rescued by marine teams storming the Temple. Admiral Darklighter pointed out that there were still marines and Jedi inside the Temple, and Bwua'tu countered that withdrawing their forces would alert the enemy to their plan. Grand Master Skywalker vetoed the plan, however, and Dorvan expressed his opinion that any strike would be ineffective as Abeloth could see the future and would plan for the attack accordingly. At the conclusion of the meeting, Skywalker sensed that one of the Abeloth manifestations had fled Coruscant, taking his son, Ben, and a young Sith named Vestara Khai with her.
Skywalker and newly promoted Jedi Master Jaina Solo pursued Abeloth with the intention of stopping her, while Master Sabatyne led a force of Jedi and Void Jumpers into the Temple to confront the Abeloth manifestation within the computer core. Both missions were successful, and the threat posed by Abeloth was diminished. Nevertheless, the Senate voted to remove the Jedi from Coruscant. Grand Master Skywalker acquiesced to their demands, as he did not want to plunge the galactic capital into war again. Preparations were made for the Order to depart Coruscant; three months later, Bwua'tu was present aboard the Super Star Destroyer Megador in Coruscant's orbit. On the flight deck sat the Millennium Falcon as it prepared to transport Master Solo to the Hapan cruiser Dragon Queen II for her wedding to Jagged Fel. Admiral Darklighter had arranged for several thousand Void Jumpers to form an honor guard for the Solos in recognition of their five decades of service to freedom. As Captain Solo requested permission to depart the vessel, Bwua'tu personally granted them clearance, wishing them a safe journey.
Personality and traits
During his command of the Admiral Ackbar, Nek Bwuat'tu inspired intense loyalty and devotion among his subordinates, and he permitted the busts of himself that his relative, Wurf'al, had placed throughout the ship to remain. After the loss of the Admiral Ackbar to the Killiks, Bwua'tu realized that his own pride and arrogance had contributed to the ship's loss, as Killik infiltrators had been able to stow away aboard the vessel within the busts. He was surprised to be allowed to retain his command and, for a brief period, became a figure of ridicule within the navy. Upon regaining the Admiral Ackbar after the conclusion of the Swarm War, Bwua'tu replaced the busts of himself with those of Admiral Gial Ackbar, the respected Mon Calamari who had served the Rebel Alliance, New Republic, and Galactic Alliance before his death, and after whom the ship was named. While many believed that they were placed there to ingratiate himself with Admiral Niathal, the current Supreme Commander and a Mon Calamari like Ackbar, Bwua'tu used them to remind himself to remain humble and to remember the consequences of his ego and arrogance several years prior.
A man of honor, Bwua'tu held his vow of krevi—a Bothan oath in which he swore to prioritize loyalty to the Galactic Alliance above his own interests and those of his species—in high esteem. This vow kept him aligned with the Galactic Alliance even when the Bothans sided against the Alliance and joined the Confederation during the Second Galactic Civil War. The strength of the krevi also motivated him to attempt to reconcile the tensions between the Chief of State and the Jedi Order, as he believed that the Alliance's best interests were served by its support from the Order, despite his personal reservations regarding some of their practices. Upon learning of Daala's removal as Chief of State, he maintained that she deserved a fair trial.
Skills and abilities
Nek Bwua'tu was an exceptionally competent and skilled naval commander, well-versed in tactical scenarios. Renowned for consistently defeating the Thrawn Simulator, Bwua'tu possessed confidence in his abilities despite not having commanded a fleet action until 36 ABY. A skilled tactician, Bwua'tu had the ability to accurately anticipate the enemy's projected battle tactics and counter them effectively. Jedi Master Kyp Durron believed that the Admiral possessed Force-sensitivity, but Bwua'tu simply understood not only how his enemy thought, but also how the enemy believed their enemy thought. This intuition enabled Bwua'tu to formulate effective defenses and counter-tactics that were a step ahead of his adversaries. This skill proved crucial to Alliance battleplans during the battles of Tenupe, Hapes, and Kuat. Bwua'tu was also proficient in hand-to-hand combat and maintained excellent physical fitness.
Behind the scenes
Nek Bwua'tu was created by Troy Denning for the Dark Nest Trilogy. Bwua'tu made his debut in the second book, The Unseen Queen, and was referenced in the third book, The Swarm War. Bwua'tu subsequently appeared in three novels of the Star Wars: Legacy of the Force series—Legacy of the Force: Tempest, Legacy of the Force: Inferno, and Legacy of the Force: Invincible—all of which were penned by Denning. Aaron Allston incorporated the character into Fate of the Jedi: Backlash, the fourth novel in the Fate of the Jedi series, marking the first instance of the character's use in a novel not written by Denning. He subsequently appeared in Fate of the Jedi: Allies, Fate of the Jedi: Vortex, Fate of the Jedi: Conviction, Fate of the Jedi: Ascension, and Fate of the Jedi: Apocalypse.