Star Wars: Shadows of the Empire (comic series)
Star Wars: Shadows of the Empire, a comic miniseries consisting of six issues from Dark Horse Comics, debuted on May 1, 1996, and continued monthly until October 1, 1996. It was a part of the broader Shadows of the Empire multimedia project. A sequel, Star Wars: Shadows of the Empire: Evolution, which spanned five issues, was then published between February 11 and June 17, 1998.
Although the comic's events happen simultaneously with those in the novel, the comic's focus shifts away from many of the adventures of Leia, Lando, and the enigmatic Guri, who has a smaller role here. Instead, the comic extensively covers Boba Fett's activities during that period, including his conflicts with other bounty hunters, and Wrenga Jixton's mission on Tatooine.
Storyline Summary
Leia Organa receives word aboard the Redemption that Imperial forces have detected the Rebel presence. Rogue Squadron, under the command of Wedge Antilles, engages in a space battle to protect the secrecy of their rendezvous point. Meanwhile, Leia senses a change in Luke Skywalker following his confrontation with Darth Vader, and she ponders the details of their encounter.
Emperor Sidious contacts Darth Vader on the Executor to express his displeasure with Vader's failure on Bespin. He then instructs Vader to finalize the arrangements for delivering the Death Star II plans with Prince Xizor, the head of the Black Sun crime syndicate. As he departs, Xizor reveals to Guri his plan to assassinate Luke, thereby enhancing his standing with the Emperor while simultaneously undermining Vader. Guri has made arrangements with bounty hunters, and Xizor prepares to meet Jabba.
Boba Fett, transporting Han Solo encased in carbonite, comes out of hyperspace above Tatooine and discovers that a signal beacon—placed when he was on Cloud City—has been activated. He then has a perilous encounter with IG-88D, who intends to claim the bounty on Solo. Fett activates the inertial dampers and maneuvers behind the IG-2000, finding himself caught in the crossfire from the Slave I. Fett is forced to go into hiding, while IG-88D manages to reach Ord Mantell to find replacement parts for his ship in the planet's Scraplands.
On the Executor, Vader tests his damaged hand with an ASP-series droid while informing Wrenga Jixton of his prediction that Luke will approach Jabba to rescue Han. Jix is ordered to infiltrate Jabba's organization, capture Luke, and ensure his survival. Finally, Vader concludes his meeting and arrangements with Xizor.
The Gall Conflict
Lando Calrissian learns from Dash that Fett is on Gall, so he meets with Luke and Leia on Tatooine. They travel to Gall, where they rendezvous with Rogue Squadron and Dash. Meanwhile, the bounty hunters Bossk and Zuckuss attempt to join forces with Boba to share the bounty on Han, but he refuses. He shoots a sniper positioned to shoot him, and his system alerts him that the Slave I has been infiltrated by 4-LOM and two other bounty hunters.
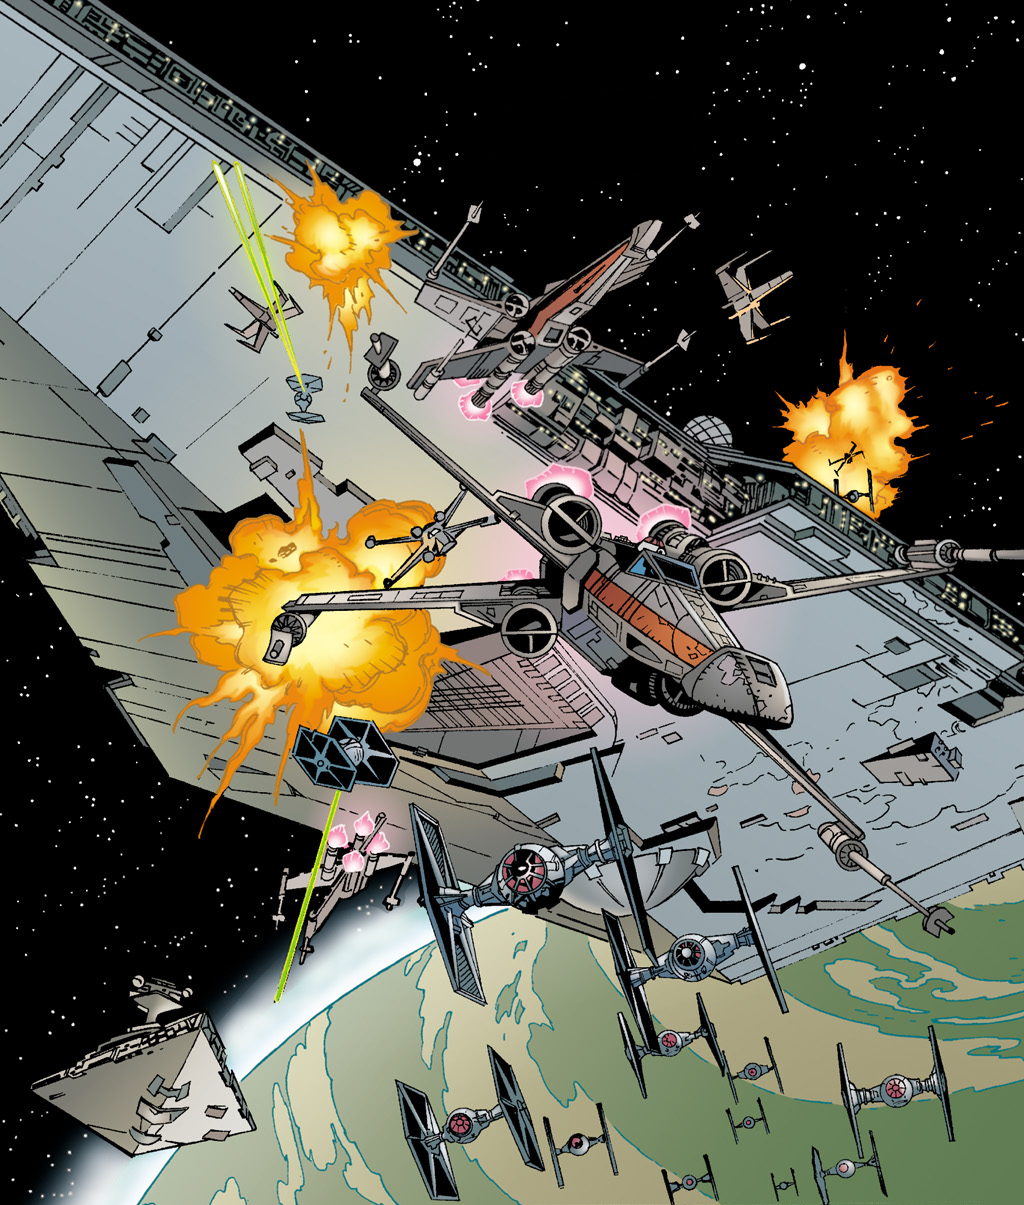
Dash Rendar, piloting the Outrider, guides Leia aboard the Millennium Falcon with Lando Calrissian, Chewbacca, R2-D2, and C-3PO toward the Slave I through the Grand Trench on Gall. Rogue Squadron engages in a space battle against the dayside Star Destroyer. The Falcon reaches the spaceport, but Dash decides to leave, stating that he was only paid to guide, not fight.
The Rogues' situation deteriorates. Another wave of TIEs arrives, and a second Star Destroyer enters the battle. They decide to retreat, faking a hyperspace jump. Wes Janson's X-wing fires on Luke while plotting a course toward their base on the moon of Kile. Luke discovers that his astromech droid had taken control of his ship, and he is forced to disable his fellow pilot's fighter.
Boba notices the Falcon approaching and takes off. The Falcon sustains significant damage and also retreats, resulting in the mission's failure.
Eventually, Luke discovers that Janson's droid had been programmed by a technician to kill him. Wedge shoots the technician, and it is revealed that she was paid by Vader (actually by Guri). Leia decides to contact an underground organization to uncover who is responsible. Unfortunately, she decides to contact the Black Sun, unaware that Xizor is the one who wants Luke dead. Leia also asks Luke to go to Tatooine after Fett, unknowing that Xizor expects so. She secretly hires Rendar to follow and protect him.
Events on Tatooine
Big Gizz is spending time with his friends in Mos Eisley when Jix, a mysterious stranger, challenges him. Gizz is impressed when Jix steals Spiker's swoop. Jabba receives a transmission that conflicts with Jix's instructions to protect Luke: Luke is there, and he is more valuable dead. After a conversation in Chalmun's Spaceport Cantina that Dash overhears, Jix and the gang rush to kill Luke.
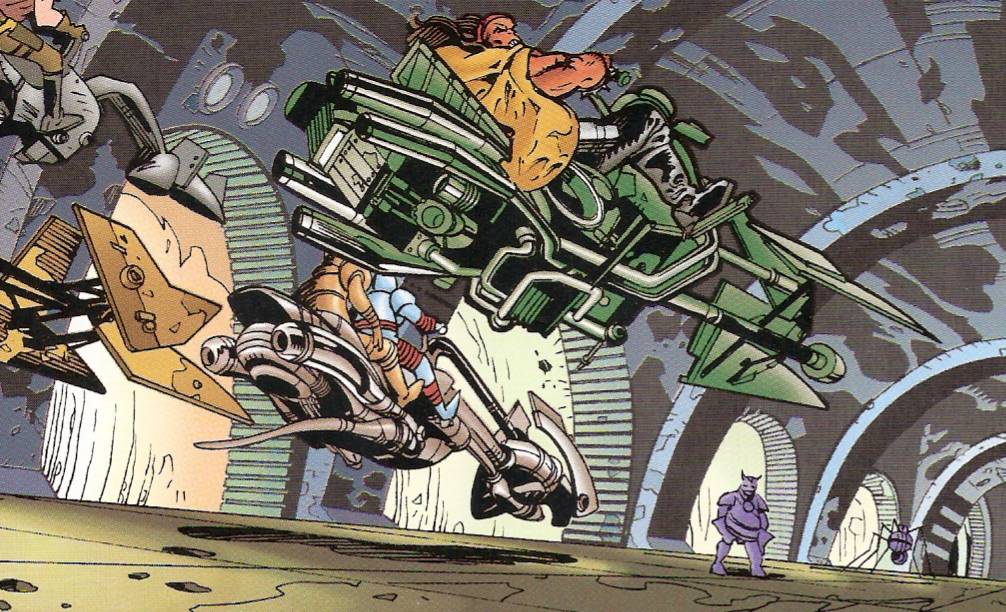
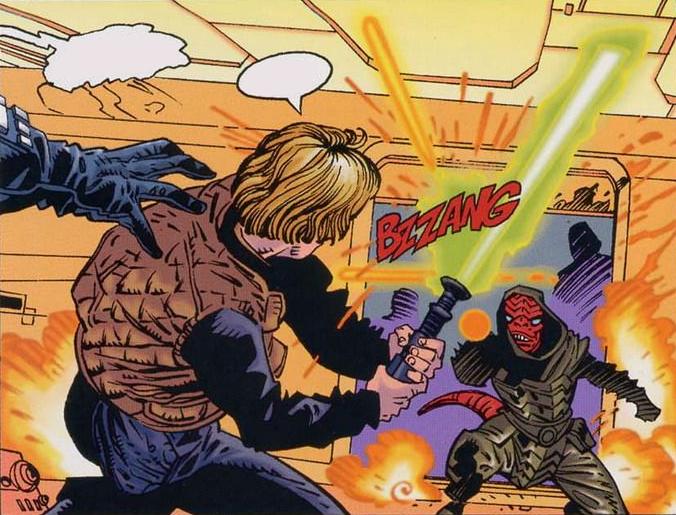
At Ben Kenobi's hut, Luke tests the new lightsaber he built using instructions from a book. When the swoop bikers arrive, Luke deflects blaster bolts before slashing aside one of the riders and stealing a bike within Beggar's Canyon, with Dash following. When Spiker gets a clear shot at Luke, Jix crashes his swoop into Spiker's to save Luke. Jix breaks a leg in the crash, and Spiker is nearly dead. Gizz falls from his bike and aims his rifle at Luke, but Jix strikes him in the head with a rock.
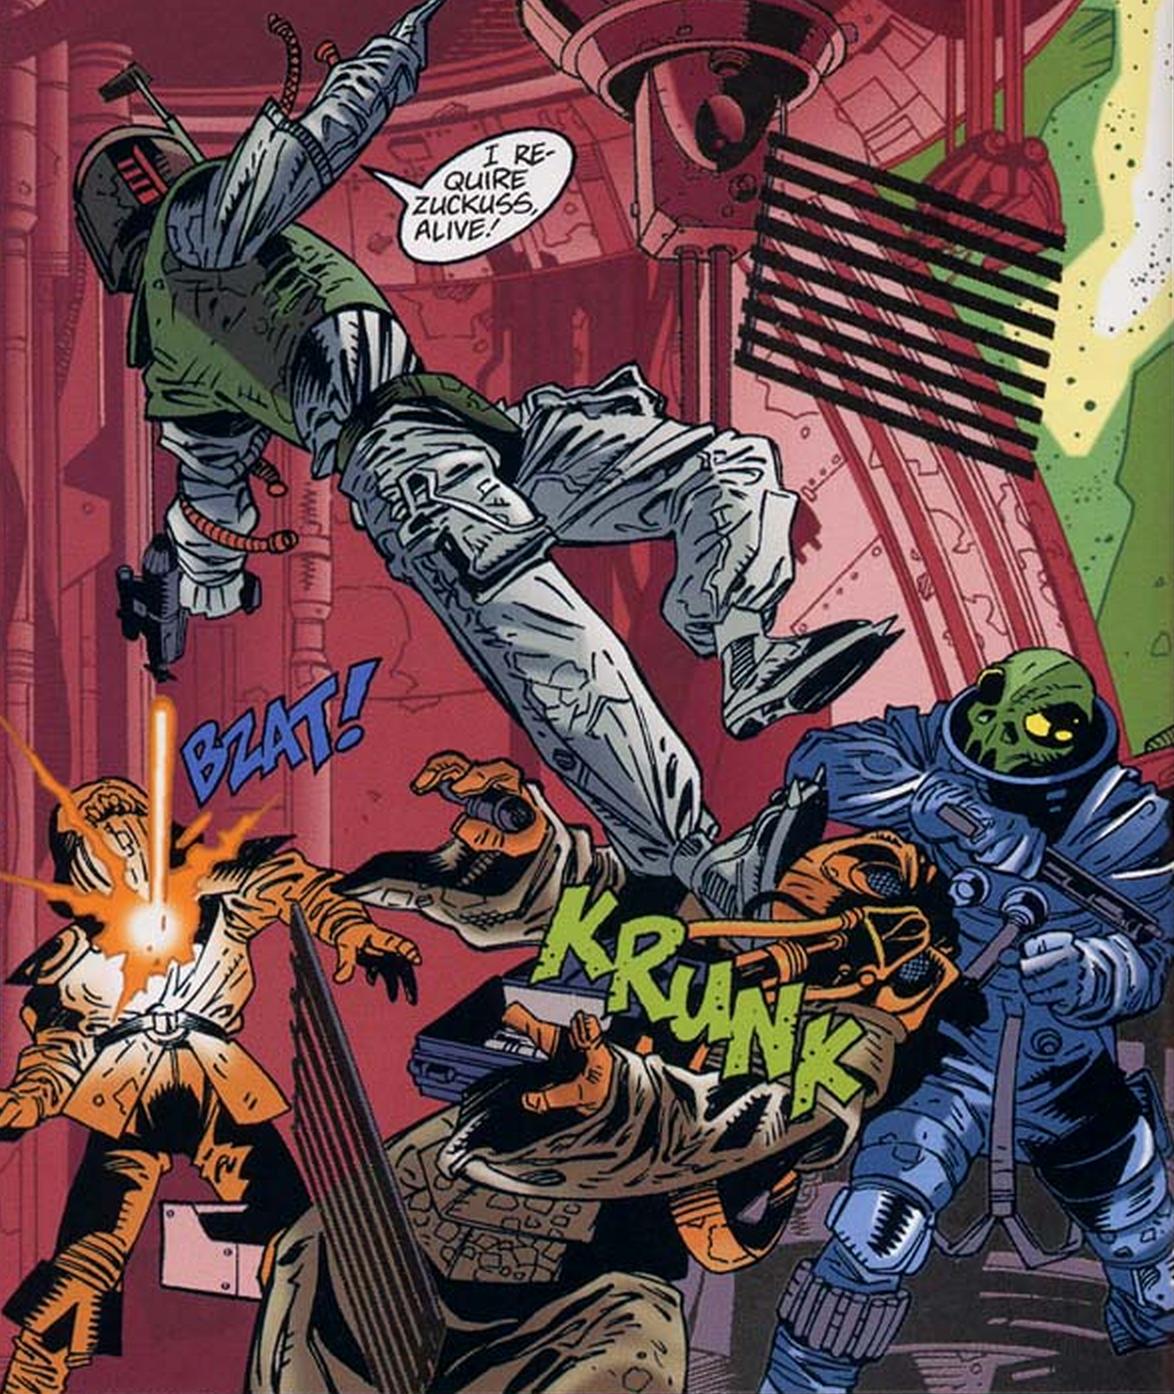
Meanwhile, Fett hides in an asteroid field when 4-LOM reactivates. Before Fett disables him again, Bossk picks up 4-LOM's signal and finds the stranded Slave I. Zuckuss and his team board the ship and capture Fett as he tries to seize the carbonite slab. Furlag leads Fett to his cell, but Fett opens a trapdoor under his feet. He keeps Zuckuss alive to communicate with Bossk and sends the shuttle back to him. When Bossk looks inside, he finds his fellows dead, along with a detonation device, as Fett jumps to hyperspace.
The Death Star Plans
As Xizor suggests to the Emperor, Bothan spies discover that the plans will be transported in a small computer on a fertilizer freighter, the Suprosa, heading to Bothawui, their home planet.

The Bothans send a message droid to Tatooine for Leia, but Luke and Dash receive it and accept the challenge. They intercept the Suprosa as it exits hyperspace, accompanied by a fleet of Bothan volunteers, including Koth Melan.
En Route to Coruscant
Koth Melan and Bothan technicians are decoding the Death Star plans on Kothlis when a Barabel bounty hunter raid, led by Skahtul, captures Skywalker and kills Melan. Luke learns that there are two bounties on his head: one for him alive and one for him dead. Vader wants him alive, while Xizor wants him dead.
After discussion, Leia agrees to travel to Coruscant with Guri in the Stinger, taking Chewbacca with her. Guri helps them disguise themselves to avoid detection on Coruscant. Leia poses as the Ubese bounty hunter Boushh, and Chewbacca is disguised as Snoova.
For a period, Luke meditates and focuses. After building confidence with the Force, he influences the mind of his cell guard. Luke convinces the guard to lock himself in the cell and take a nap. Luke then exits and uses the Force to escape the stronghold. Lando, with information from Dash, arrives and rescues Luke. They leave Kothlis on the Millennium Falcon for Tatooine, as the Executor has just arrived.
Darth Vader, aboard the Executor, is sent to Kothlis to retrieve Skywalker and to give the impression that the Empire is concerned about the loss of the plans. The plans have reached the Razor above the planet. Vader finds Skywalker missing and learns from Skahtul that someone wants Luke dead.

Xizor hosts Leia and Chewbacca at Black Sun and provides them with commodities. After a seductive encounter with Xizor, Leia regains control and knees him. He is outraged and sends her back to her room, while Chewie is intentionally allowed to 'escape' (although not easily) in the hope that he will lead Luke to rescue Leia and into Xizor's hands.
On Tatooine, Jix gets past security and contacts Vader on the Executor to inform him of the swoop bike incident with Luke. He learns that Jabba also has a bounty on Luke, placed by someone using Vader's name.
Luke, Dash, and Lando receive a message from Chewie and head for Coruscant, where they meet. Chewbacca stealthily navigates the sewers of Black Sun to enter Xizor's palace. Using the Force, Luke informs Leia that he and the group are nearby and will rescue her from Xizor. After blasterfire with security guards, Luke integrates his lightsaber skills, and the group finds Leia.
They enter a hallway with Xizor, Guri, and aides, and a battle begins. Xizor and Guri are impressed with Luke's Jedi skills. Luke and Lando threaten Xizor with thermal detonators, causing everyone to panic and scatter from Xizor's palace.
The Millennium Falcon, piloted by R2-D2 and C-3PO, arrives, allowing them to escape above Coruscant.
Battle of Falleen's Fist
Xizor boards his skyhook and sends four starfighters at the Rebels. Dash defends them with flak from the Outrider's laser turrets. Rogue Squadron's X-wing starfighters join the battle, along with TIE fighters.
Vader confronts Xizor via hologram on the Executor over Coruscant. Vader, having warned Xizor to stay away from Luke, orders the Imperial fleet to destroy Xizor's skyhook.
The Outrider is thought to be destroyed in the explosion, but Dash jumps to hyperspace at the last moment, feeling that his experiences with the Rebels have been too dangerous and that there is too much money to be made elsewhere.

On Tatooine, Fett tricks bounty hunters with a disguised Zuckuss and a covered 4-LOM, making it appear as if he and the carbonite block are speeding away from the Slave I. The real Fett delivers Han's carbonite block to Jabba and receives payment. Luke, Leia, Lando, Chewbacca, R2-D2, and C-3PO prepare to rescue Han from Jabba the Hutt.
Production
For this project, Ryder Windham selected newcomer Kilian Plunkett and veteran writer John Wagner, the latter of whom had already contributed to the Boba Fett comic series. Windham admired Wagner's work, particularly his Batman/Judge Dredd: Judgment on Gotham crossover, and his ability to create suspenseful and action-packed scenes. Windham maintained consistent communication with Steve Perry to ensure that the comic aligned with the novelization.
Despite Boba Fett's limited presence in the Shadows novel, the comic adaptation focuses significantly on his actions. Windham drew inspiration from the short story A Barve Like That, which depicts the encounter between Fett and IG-88. The comic also explores the aftermath of this encounter, with the Slave I damaged and Fett dealing with rivals, Rebels, and Imperials (though the latter are not involved in the final version). Wagner broke down Steve Perry's original outline into story arcs for each issue, and he also consulted continuity editor Allan Kausch's timeline flowchart, which detailed the events and actions of each character and was provided to all project participants.
Plunkett was so enthusiastic about working on a Star Wars project that he initially struggled to fit every explosion, angle, and "cool thing" he could imagine into each page. He eventually realized that he didn't need to cram everything into a single page of the swoop bike chase scene, as the scene was meant to unfold over a dozen pages.
Plunkett also stayed in contact with Windham to ensure that original characters, objects, and locations remained consistent with their other iterations. For the Battle of Gall, Windham provided him with the designs that LucasArts had already created for the planet. Plunkett was instructed to create loose pencils for Xizor until his visuals were finalized. Knoles credits Plunkett for giving a sleeker quality to his face by adding "a lot of nice lines" During drawing he first issues, Plunkett had almost finished earlier versions of the Outrider, as well as other things and vehicles, which he had to erase and redraw once the project revised their design. Even so, there are some inconsistencies, such as Falleen's Fist, which appears differently in the comic.
The Shadows project was developed alongside the Special Editions of the films. The special edition of Star Wars: Episode IV A New Hope featured a digital extended appearance of Mos Eisley and a swoop bike. John Wagner wrote a scene on Mos Eisley specifically to incorporate some of the new scenery, hoping that readers would notice the similarity. Plunkett traced some of those backgrounds directly from the storyboards.
Plunkett had little contact with Wagner during the creation process, as he found Wagner's script notes to be clear enough. The collaborators eventually met and spoke for the first time at the San Diego Comic-Con 1995. By that time, Plunkett was nearly finished with the second issue and anticipating the Beggar's Canyon Incident, while Wagner was writing the final issue and concerned about scripting the Battle over Coruscant.
Media
Promotional Items
As part of a cross-media promotion for Shadows of the Empire, Kenner released two abridged comic reprint issues of Dark Horse's Shadows of the Empire series within its Shadows of the Empire toy line.
The 1996 Topps Star Wars: Shadows of the Empire collection cards 89-94 feature artwork by Greg Hildebrandt and Tim Hildebrandt inspired from Boba Fett's actions in the comic.
Metallic Impressions released 36,000 1997 Metallic Impressions Star Wars: Shadows of the Empire sets of six collectible metallic cards; each one displays cover artwork by Christopher Moeller, a panel from that issue along with a title and a summary. The proposed titles of each chapter are: Xizor's Plan Revealed, Rescue Attempt on Gall, Wanted: Luke Skywalker, Leia Meets Xizor, The Trap is Set and Han Delivered.
Sources
Notes and references
External links
-
Star Wars: Shadows Of The Empire (1996) on Marvel Comics' official website (backup link)
-
Related categories: