Sayar Dun'La
Sayar Dun'La, a Jedi healer of the Bothan species, was present within the Jedi Order's Hidden Temple during the Second Imperial Civil War in 137 ABY. At this time, Cade Skywalker, a bounty hunter, came to the temple seeking the assistance of the Jedi Council to assassinate Darth Krayt, the Emperor and Dark Lord of the Sith. The Council declined this request, instead opting to explore a possible alliance with both the Galactic Alliance Remnant and the forces loyal to the deposed Emperor Roan Fel. Dun'La, accompanied by three other Jedi, was dispatched to meet with Admiral Gar Stazi, the leader of the Galactic Alliance Remnant. However, during their discussions, a crewmember of Stazi's flagship, the Alliance, shot the Admiral, and subsequently the Alliance Fleet faced an assault from Sith Imperial forces.
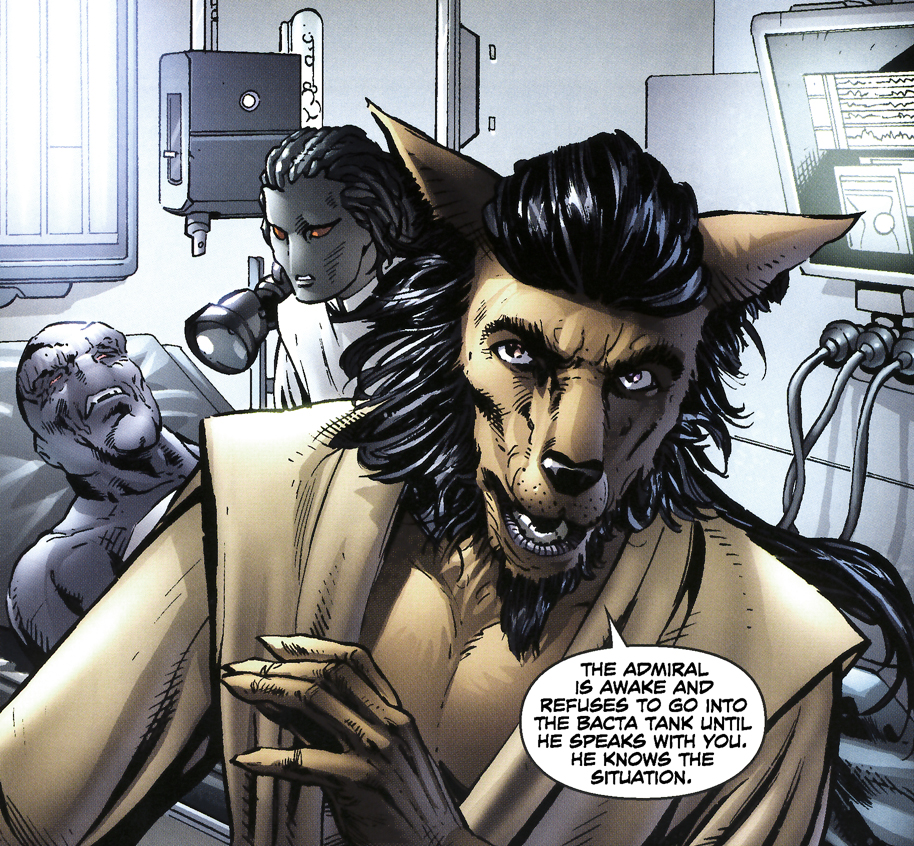
Dun'La swiftly moved to assist Stazi, transporting him to the ship's sick bay where he administered treatment for the Admiral's injuries. This occurred as the Imperial fleet relentlessly pursued the Alliance forces through hyperspace. Upon regaining consciousness, Stazi insisted on speaking with his second-in-command, Captain Jhoram Bey, before entering a bacta tank. Dun'La facilitated a connection between Stazi and the bridge, enabling the Admiral to provide Bey with the necessary strategy to overcome the Sith Imperial fleet. Following the confrontation, Dun'La and the other Jedi successfully established a preliminary agreement with the Galactic Alliance Remnant.
In 138 ABY, when Lord Krayt initiated an attack on the Hidden Temple, Dun'La joined the ranks of the Jedi defending against the Sith Imperial ground troops. With the Jedi planning to evacuate the planet, Jedi Master T'ra Saa harnessed the energy of the planet to generate a beam of light that would allow the evacuation vessels to break through the enemy fleet. While protecting Master Saa within the Jedi Council chambers, Dun'La fell victim to an attack from one of Darth Krayt's Sith troopers.
Biography
Forming an alliance
Sayar Dun'La, a Jedi healer of the Bothan species, held the rank of Jedi Master within the New Jedi Order during the Second Imperial Civil War in 137 ABY. Dun'La was stationed at the Hidden Temple—the sanctuary where the Jedi had sought refuge following the One Sith's massacre of Order members on Ossus seven years prior—around the time that Cade Skywalker, a bounty hunter and descendant of Jedi Grand Master Luke Skywalker, arrived at the Temple. Skywalker's purpose was to request the Jedi's assistance in assassinating Darth Krayt, the Emperor and Dark Lord of the Sith. Dun'La was present during Skywalker's arrival, as well as the arrival of a ship carrying Princess Marasiah Fel of the Empire-in-exile along with a contingent of Imperial Knights. Tension arose when Skywalker and the Imperial Knights confronted each other, nearly escalating into violence until Jedi Master Wolf Sazen, Dun'La, and the Nikto Jedi Drok intervened. The Jedi Council ultimately rejected Skywalker's request, choosing instead to explore a potential alliance with both the Galactic Alliance Remnant and the forces loyal to the deposed Emperor Roan Fel.
Following Skywalker's apparent success in his mission to kill Krayt, Dun'la—along with fellow Jedi Asaak Dan, Drok, and Te Corso—was dispatched by the Council to discuss the possibility of joining the Alliance and Empire-in-exile in the fight against the Sith. Traveling to the flagship of the Alliance Fleet, the Alliance, aboard their X-83 TwinTail starfighters, Dun'La and his fellow Jedi were greeted by the commander of the Alliance Remnant, Admiral Gar Stazi. Their conversation was interrupted, however, by Imperial Knight Sigel Dare—representing the Empire-in-exile—who wished to use one of the Alliance's shuttles to travel to the planet Dac to retrieve her former Master, Treis Sinde. Intrigued by Sinde's history, Asaak Dan offered to accompany Dare on her mission; and, after Stazi convinced the Imperial Knight to allow the Jedi to join her, the two left for Dac while Dun'La and the remaining Jedi were taken to discuss the Council's offer with the Admiral in private.
While Stazi and his second-in-command, Captain Jhoram Bey, discussed the Jedi's presence on the bridge of the Alliance, Te Corso sensed a disturbance in the Force just before the Alliance fleet was attacked by the Sith Imperial First Coruscant Task Force. Just as Stazi began ordering his fleet into action, however, he was shot by one of the ship's crew, the Mon Calamari Tealart, who was quickly disarmed by Drok. Rushing to the Admiral's side, Dun'La felt Stazi's life force flickering and quickly lifted his body with the Force to carry the Admiral to the sick bay. There, the Bothan was able to stabilize Stazi's condition, though his wound was serious.
As the Alliance Fleet attempted to escape the Imperials through hyperspace, Dun'La, along with the ship's medic, continued to care for Stazi. Despite the Alliance's efforts, the Imperial fleet managed to track their coordinates and launch an attack shortly after the fleet exited hyperspace. Upon awakening, the Admiral refused to enter a bacta tank until he had communicated with Bey, prompting Dun'La to connect him to the bridge. During their conversation, Stazi instructed Bey to leverage the fleet's frequency vibrations to their advantage. This revelation enabled Bey to understand that the Imperials had been tracking them through hyperspace by exploiting the frequency vibrations emitted by the Alliance's comm array. Bey successfully outmaneuvered the Sith Imperial commander by positioning only the Alliance to confront the Imperial fleet upon their exit from hyperspace, while the remainder of the Galactic Alliance Fleet ambushed them from behind.
Following the Alliance's victory over the First Coruscant Task Force, Dun'La and the other Jedi were able to establish a preliminary agreement with Stazi's command. Subsequently, the Jedi Council agreed to meet with Emperor-in-exile Roan Fel on the planet Agamar to further discuss collaboration in the ongoing war.
Death

In 138 ABY, following the return of Lord Krayt, the Dark Lord of the Sith launched an attack on the Hidden Temple, having learned its location from a captured Imperial Knight. The Jedi were joined by members of the Alliance Remnant and Empire-in-exile in defending Taivas, and Dun'La was among the Jedi who battled the Sith Imperial ground forces. With the aid of Lord Krayt's Sith troopers, the Sith gained the upper hand in the battle. The Jedi had a plan, however; the Neti Jedi Master T'ra Saa was gathering the energy of the planet to create a beam of light that could allow the evacuation ships to escape the Sith Imperial fleet.
Within the Jedi Council chambers, Dun'La—along with Cade Skywalker, Rawk, Drok, and Te Corso—fought against the Sith troopers to protect Saa. Just as Master Saa signaled for the evacuation ships to depart, Dun'La was struck down by one of the Sith troopers. A damaged Annihilator-class starfighter was set on a collision course with the remains of the temple, and as it collided, Rawk assisted Master Saa in unleashing the energy she had gathered. The resulting beam of light obliterated any ships in its path, creating an opening in the Sith Imperial fleet that allowed the Jedi and their allies to escape.
Powers and abilities
Sayar Dun'La was recognized as one of the Jedi Order's most skilled Jedi healers. When Admiral Gar Stazi was shot on the bridge of the Alliance, Dun'La's fellow Jedi placed complete confidence in his ability to care for the Admiral, and Dun'La successfully stabilized Stazi's condition. In addition to his healing abilities, Dun'La demonstrated proficiency in telekinesis, using it to lift Stazi's body and transport him to the sickbay.
Behind the scenes
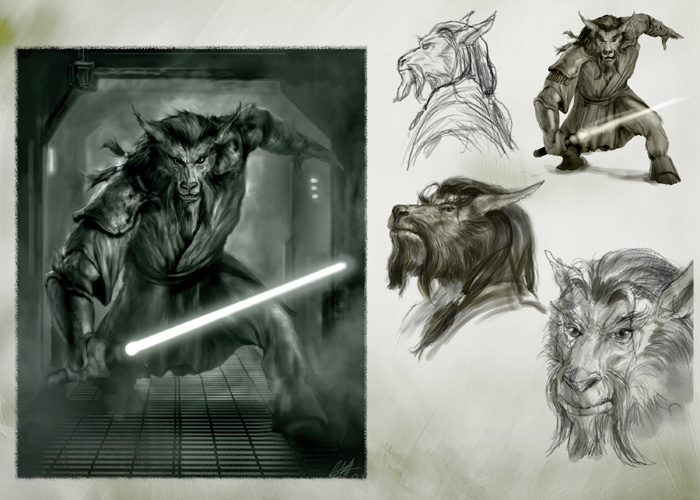
Sayar Dun'La made his initial appearance as an unnamed character in the twenty-fifth issue of Star Wars: Legacy, titled The Hidden Temple, Part 1, which was released in June 2008. He subsequently appeared on the cover of the twenty-sixth issue, The Hidden Temple, Part 2, released in July 2008, with cover art created by Omar Francia. Due to an abundance of characters in the storyline, Dun'La and the other three Jedi featured on the cover of Legacy 26 were not utilized in the actual comic itself. Originally, they were intended to accompany Cade Skywalker against the wishes of the Jedi Council in his pursuit of Darth Krayt. Dun'La later appeared in the forty-second issue of the comic series, Legacy (2006) 42, where he was first identified. This issue was released in November 2009 and was authored by John Ostrander with pencils by Dave Ross. Dun'La returned in the fourth issue of the sequel to Legacy series, Star Wars: Legacy—War.