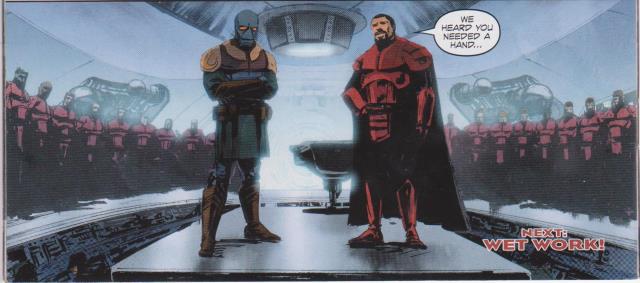
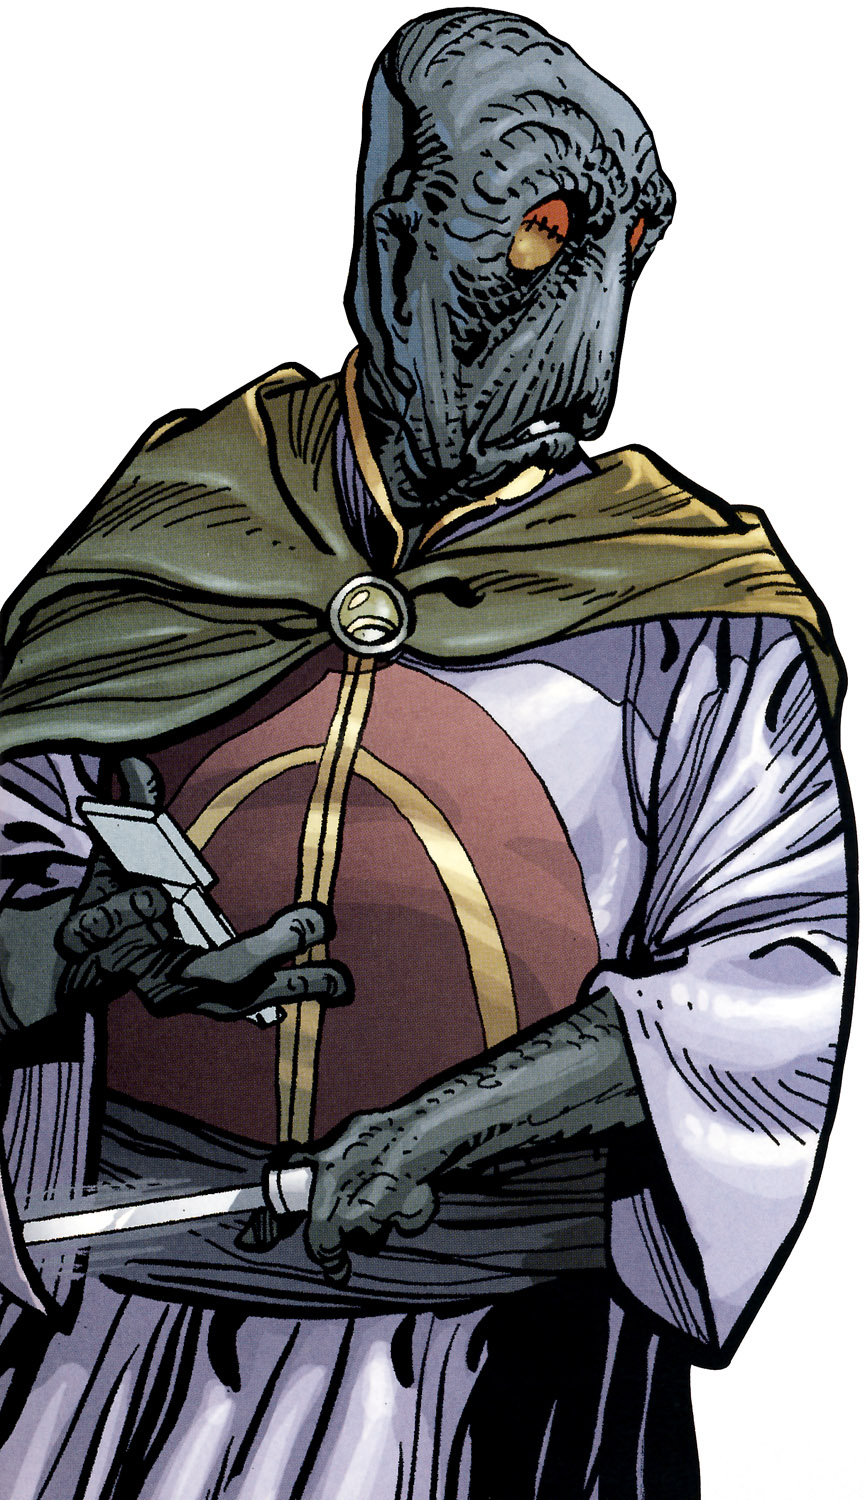
Gar Stazi
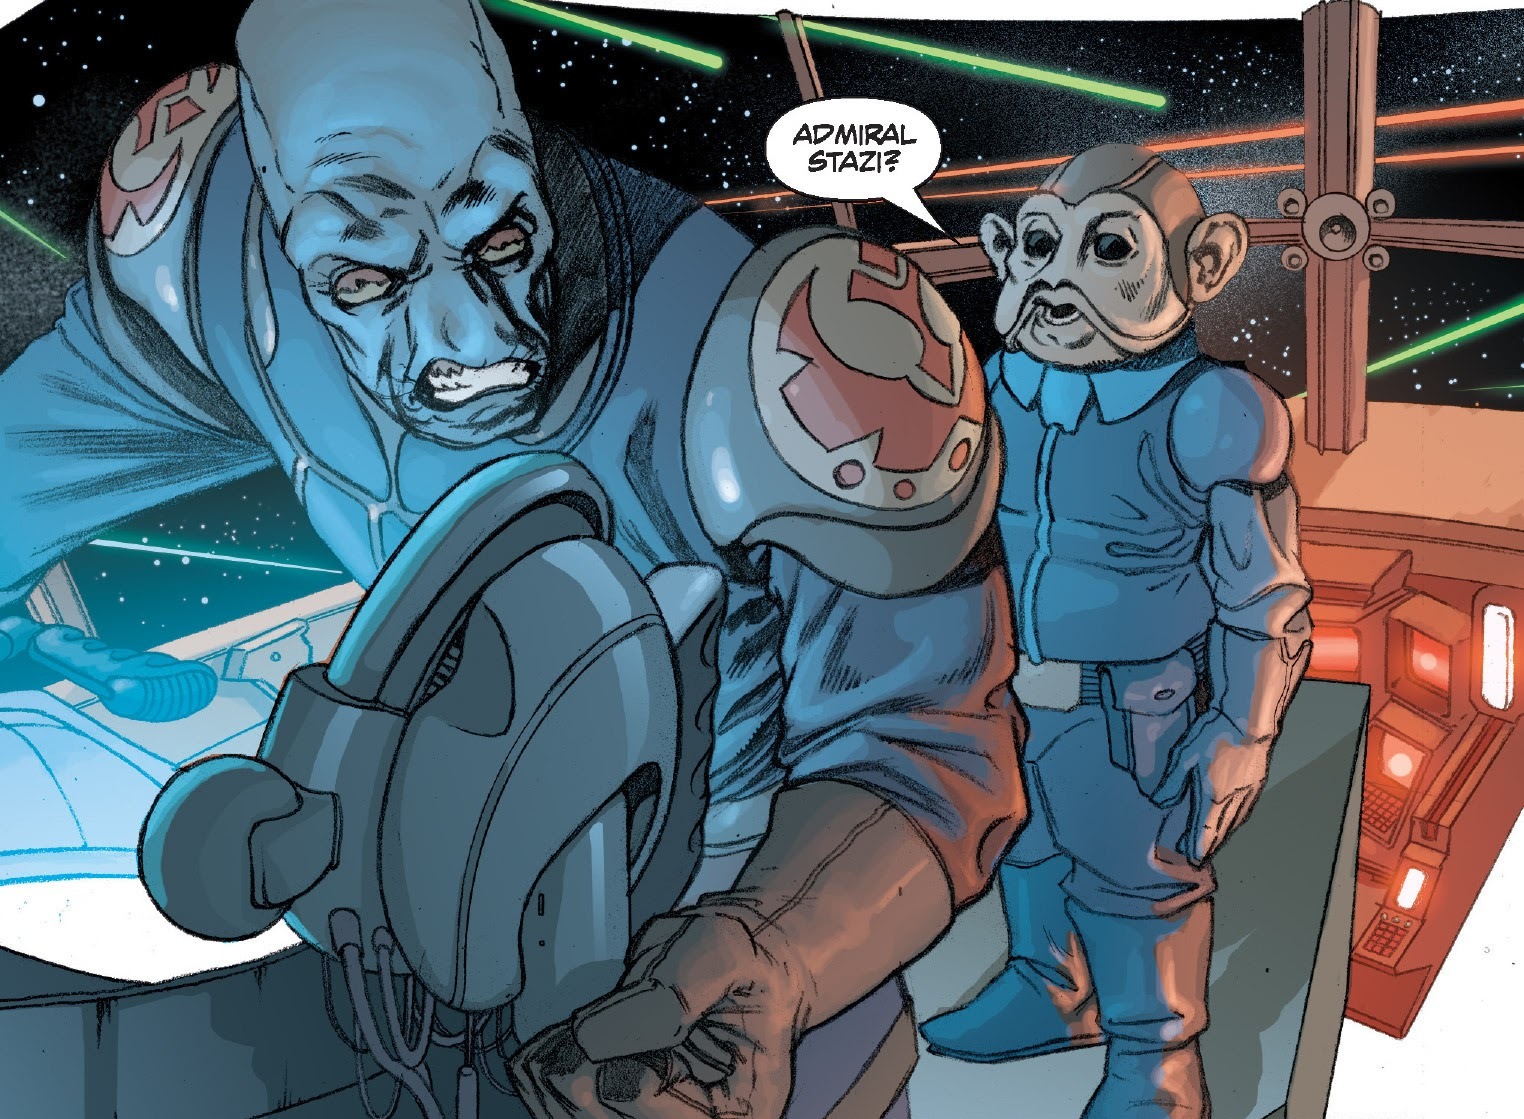
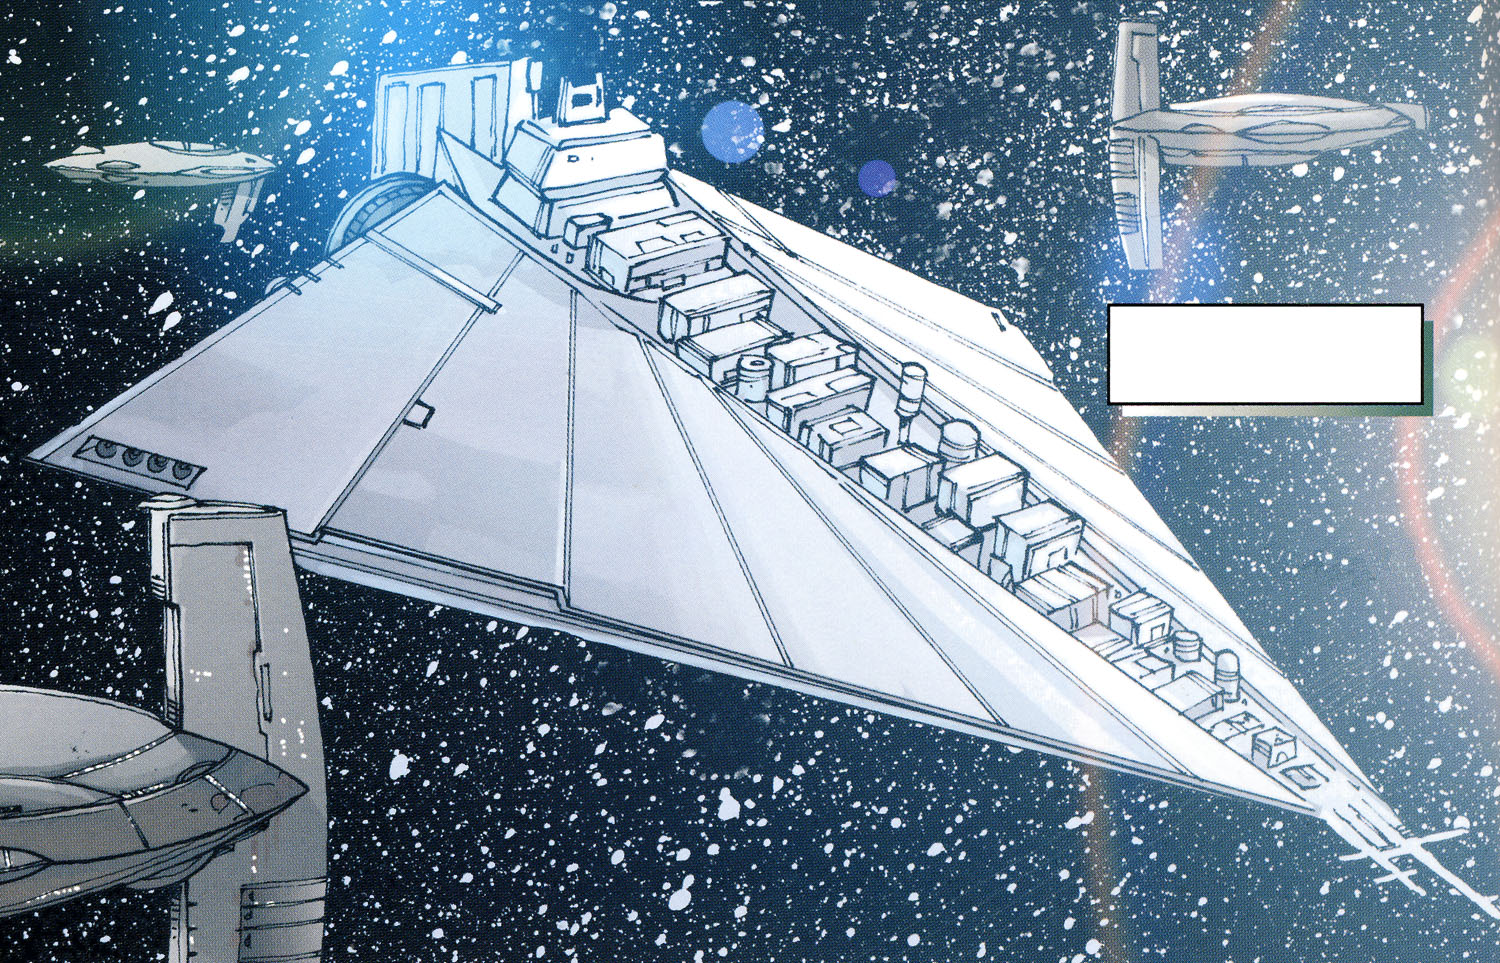
Gar Stazi, a Duros male admiral, held a commanding position within the Galactic Alliance Defense Fleet during the Sith–Imperial War, specifically leading the Galactic Alliance Core Fleet. Despite the Sith victory at the Battle of Caamas, his strategic actions ensured the survival of a portion of the Alliance, enabling them to continue their resistance against the Empire. This earned him legendary status, even among the Imperial officers he opposed. After the retreat from Caamas, Stazi rose to become the leader of the Galactic Alliance Remnant, holding the title of Supreme Commander. From the bridge of his personal flagship, the Scythe-class battle cruiser named Indomitable, he directed the Alliance's operations. Stazi consistently sought resources, recruits, and even attempted to seize Imperial warships to strengthen his fleet's capacity to challenge the Sith.
In 137 ABY, elements of his command played a role in the Battle of Mon Calamari. This engagement resulted in a significant Alliance triumph, with Stazi's forces successfully capturing the Imperious, a prototype Imperious-class Star Destroyer, and severely damaging the Mon Calamari Orbital Shipyards. This crippled the Sith's shipbuilding capabilities and hindered their efforts to dominate the galaxy. Following these successes, Stazi's forces remained actively involved in various battles, including a joint operation with Roan Fel's forces on Ralltiir and the large-scale evacuation of Dac. During the allies final push of the war, Stazi also commanded Galactic Alliance forces in the climactic confrontation with Krayt's forces over Coruscant.
After the Sith Empire's defeat on Coruscant, Stazi was appointed as one of the three Triumvirs in the Galactic Federation Triumvirate. Following the Carreras Incident, Stazi was informed about the emerging threat posed by the renegade Sith Darth Wredd, who sought to dismantle the One Sith in order to reestablish the Rule of Two. Later, Admiral Stazi and the Imperial Knight Master Yalta Val spearheaded a Triumvirate task force to liberate Mon Calamari and Quarren refugees who were enslaved in the Mon Calamari Shipyards, having fallen under the control of another Sith, Darth Luft, and his pirate accomplices. Stazi and Val successfully neutralized the pirate threat and secured the shipyards' liberation. This action proved to be widely popular, strengthening the fledgling Galactic Triumvirate's standing in the eyes of the galaxy.
Biography
Early years
Gar Stazi, a Duros male, entered the ranks of the Galactic Alliance Navy and received his training at the naval academy located on Anaxes. Stazi's career took a turn two years after receiving his commission when he was assigned to a peacekeeping mission in the Sepan sector. The sector, inhabited by the Dimoks and the Ripoblus, had been plagued by civil war and instability since before the Clone Wars. To maintain order, Galactic Alliance warships patrolled trade routes, preventing engagements between Dimok and Ripoblus starships, while the Galactic Alliance Army deployed units to worlds with mixed populations of both races.
During his deployment, Stazi was part of a group of naval officers who conducted a groundside visit to Kuthard, a planet inhabited by both Dimoks and Ripoblus. While touring a partially destroyed village in Kuthard's backcountry, Stazi accompanied journalists from the Coruscant News Network and a Tynnan diplomat. They encountered an elderly Dimok matriarch, who was interviewed by the Coruscant News Net reporters. Initially, the old Dimok expressed a desire for peace, hoping for a better future for her grandchildren. However, when the Tynnan diplomat questioned whether she would cede a small portion of her land to the Ripoblus to resolve an old dispute, the Dimok woman became enraged, declaring she would rather die than relinquish even a small piece of her land. This event deeply impacted Stazi's perspective on war and peace, and he later recounted it to Jhoram Bey in 137 ABY.
Command during Sith-Imperial War
Prior to 127 ABY, Gar Stazi was given the prestigious command of the Galactic Alliance Core Fleet. This fleet was entrusted with the critical mission of safeguarding Coruscant and other vital Core Worlds. Stazi's fleet became a crucial asset for the GA following the One Sith's sabotage of the Ossus Project and their subsequent alliance with the Fel Empire. Fueled by anger over the perceived betrayal of the Yuuzhan Vong and a desire to restore the former glory of the old Empire, the Moff Council compelled Galactic Emperor Roan Fel to declare war on the Galactic Alliance. The ensuing Sith–Imperial War brought an end to nearly a century of peace between the two galactic powers.
As the war progressed beyond its initial successes, the Galactic Alliance began to feel the strain. Due to his role in defending the Alliance capital, Stazi attended a crucial meeting of the Alliance Triumvirate in 130 ABY. During this meeting, the Triumvirs Gial Gahan, Nu Toreena, and Bail Antilles considered a proposal from the recently promoted Rear Admiral Piers Petan to ambush Roan Fel at Caamas. Petan's intelligence suggested that Fel was scheduled to meet with representatives from the Hapes Consortium and Chiss Ascendancy to discuss forming an alliance against the Galactic Alliance.
Jedi Master Kol Skywalker advised against the proposed ambush, and Gial Gahan echoed his opposition. Skywalker argued that the New Jedi Order believed Caamas to be an Imperial trap and advised against sending Alliance forces there. Stazi concurred with Skywalker and Gahan, expressing his belief to the Triumvirate that Caamas was an Imperial deception. However, with Nu Torenna's support, Petan's arguments swayed Bail Antilles. Fearing the Alliance's diminishing control over its star systems, Antilles approved Petan's plan. Still cautious about the battle plan, Stazi confided in his friend and fellow officer Jaius Yorub, revealing his intention to position the Core Fleet to cover the main fleet's retreat, should Caamas prove to be an Imperial ambush.
During the Battle of Caamas, Stazi witnessed his worst fears materialize as the Empire ambushed the Alliance fleet. Any hopes of Jedi assistance were dashed when news arrived that the Jedi Order had successfully thwarted a Sith feint near Coruscant. Although the Jedi's actions were successful, their forces were unable to reach Caamas in time to support the Alliance. As the battle progressed, Grand Admiral Morlish Veed, holding the upper hand, demanded the Alliance fleet's surrender. Alliance Admiral Piers Petan, believing the situation to be hopeless, ordered his forces to accept Veed's terms.
Stazi, however, refused to surrender and instead called upon any forces willing to follow him. Other Alliance commanders, such as Admiral Nict of the Pride of Corellia, an old friend of Stazi, answered his call, joining the Indomitable and other Alliance warships. Stazi led the remaining Alliance forces in a strategic withdrawal, maintaining cohesion and escaping through a secret hyperspace route. His actions at Caamas cemented his status as a legend within the Empire.
Opposition to the Sith Empire
Following the defeat at Caamas and the Galactic Alliance government's surrender, Stazi reorganized the remnants of the Core Fleet and other surviving Alliance units into a new resistance group known as the Galactic Alliance Remnant. Similar to the Rebel Navy of nearly a century and a half earlier, Stazi's fleet launched a campaign of hit-and-run attacks against Darth Krayt's Sith Empire. Krayt, who had seized control of the Empire from Roan Fel in a coup, faced opposition from both Fel's Empire-in-exile and Stazi's Alliance forces. This conflict was referred to by Alliance personnel as the Second Rebellion.
In addition to numerous battle cruisers and escort vessels, Stazi's fleet included one of the galaxy's most skilled starfighter units, Rogue Squadron. Led by Weequay Commander Jhoram Bey, the Rogues flew the Alliance's CF9 Crossfire starfighters. Some Rogues, like Monia Gahan, were occasionally assigned to supply runs in addition to their standard duties as fighter pilots.
The Mon Calamari, longtime supporters of the GA and its predecessors, the Rebel Alliance and New Republic, provided Stazi with spare parts, supplies, bacta, and new recruits. This helped to maintain Stazi's fleet's combat readiness, although supplies became increasingly difficult to obtain due to similar efforts by Roan Fel's Loyalist forces. Like Stazi, Fel also needed military supplies as he gathered forces loyal to him at Bastion.
Meeting on the Wheel
As the Sith tightened their grip on the galaxy, Emperor-in-exile Fel, already engaged in his own actions against the Sith, decided to propose an alliance to Stazi. Fel sent an Imperial fast frigate under Captain Mingo Bovark to meet with the Duros admiral. Stazi chose to represent the Alliance Remnant directly during a meeting held on the space station known as the Wheel. Stazi arrived at the Wheel aboard a shuttle accompanied by only three unarmed Galactic Alliance Intelligence officers, due to restrictions imposed by the Wheel's administrator, Pol Temm.
During the meeting, Stazi expressed his reluctance to join Fel's Loyalist forces, stating that Fel had little to offer the remnants of the Galactic Alliance fleet. Furthermore, Stazi pointed out that the Alliance Remnant and Fel's forces often competed for the same scarce resources. However, the revelation that Fel had captured Bastion convinced the admiral that discussions of an alliance were worthwhile. With Bastion as a potential safe haven from which to strike at Krayt's empire, Bovark and Stazi began negotiations.
Meanwhile, Darth Maladi dispatched Sith assassin Jor Torlin to the Wheel to locate Cade Skywalker, the last known surviving Skywalker and son of Jedi Master Kol Skywalker. Unbeknownst to the Sith, Director of Imperial Intelligence Nyna Calixte, under the guise of her alter ego, Morrigan Corde, also sought Skywalker, as he was her son. While searching for Skywalker, Calixte discovered the meeting between Stazi and Bovark. After rescuing Torlin from a gang of criminals, Calixte convinced the Sith agent to help her sabotage the conference, arguing that it was their duty to prevent an alliance between Stazi and Fel's forces for the good of the Empire.
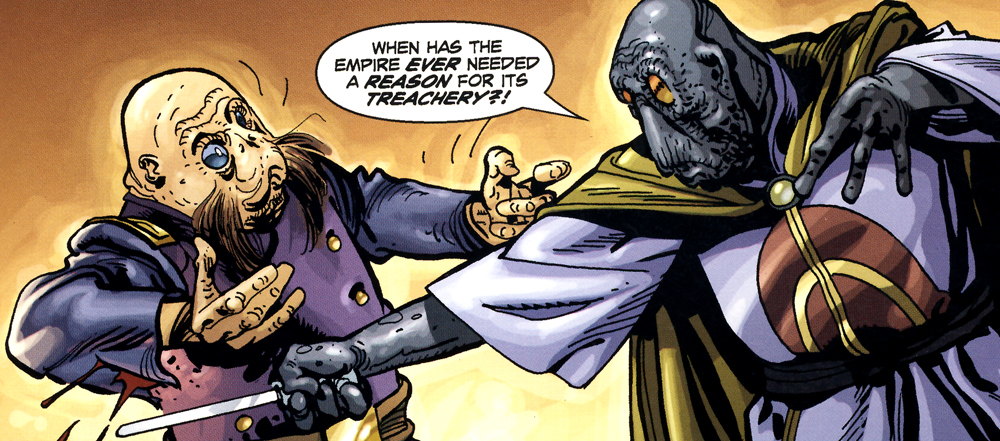
Their plan involved using advanced technology known as the Command Override Limpet Droid. These C.O.L.D.s would attach to a vehicle's hull, hack into the onboard computer, and order it to open fire. After attaching to Bovark's Nune-class Imperial shuttle, the C.O.L.D.s caused the vessel to open fire on Stazi's Alliance shuttle. Warned of the attack through his personal comm unit, Stazi assumed the entire conference was an Imperial ruse. His experiences at Caamas and subsequent years as a fugitive had instilled deep Imperial suspicion within him. Revealing a vibro-shiv hidden in his sleeve, Stazi lunged at Bovark. However, the timely intervention of Bovark's bodyguard, Imperial Knight Antares Draco, prevented Stazi from seriously harming Fel's ambassador. Station administrator Pol Temm arrived with his own guards and ordered Bovark to leave the Wheel, forbidding him or any other of Fel's forces from returning. Stazi was allowed to return to his shuttle and depart the station.
Battle of Mon Calamari
Sometime after the meeting on the Wheel, Stazi learned about the Imperious, a new advanced class of Star Destroyer under construction at the Mon Calamari Orbital Shipyards. The warship was larger and more powerful than the Empire's Pellaeon-class Star Destroyer. Always seeking additional forces, Stazi planned to capture the Star Destroyer and add it to his fleet. Rogue Squadron pilot Monia Gahan provided intelligence on the Imperious, courtesy of her uncle, former Triumvir and longtime friend of Stazi, Gial Gahan. Gahan had been supplying the Alliance with matériel since the end of the Sith-Imperial War. His plan was to access the central computer of the shipyard's defensive systems and disable them moments before Stazi's fleet arrived, allowing Alliance commandos to board the Imperious, disable its skeleton crew, and escape the system before any Imperial forces could intervene. Recognizing the value of capturing an advanced warship to maintain the Alliance's threat in the eyes of the Empire, Stazi initiated the operation.
However, Imperial Admiral Dru Valan of the Outer Rim Third Fleet was waiting for him. Valan, the Imperial commander who had failed to prevent Stazi's forces from escaping at Caamas, had spent the intervening years seeking to defeat Stazi. Anticipating Stazi's attempt to capture the Imperious, Imperial stormtroopers were prepared for both Gahan's sabotage attempt and the Alliance commandos. With both fronts of Stazi's plan thwarted, Valan believed Stazi and his fleet were trapped between the defensive systems of Mon Calamari and the Imperial fleet, and offered Stazi's fleet a chance to surrender. Echoing his decision from seven years prior, Stazi refused.
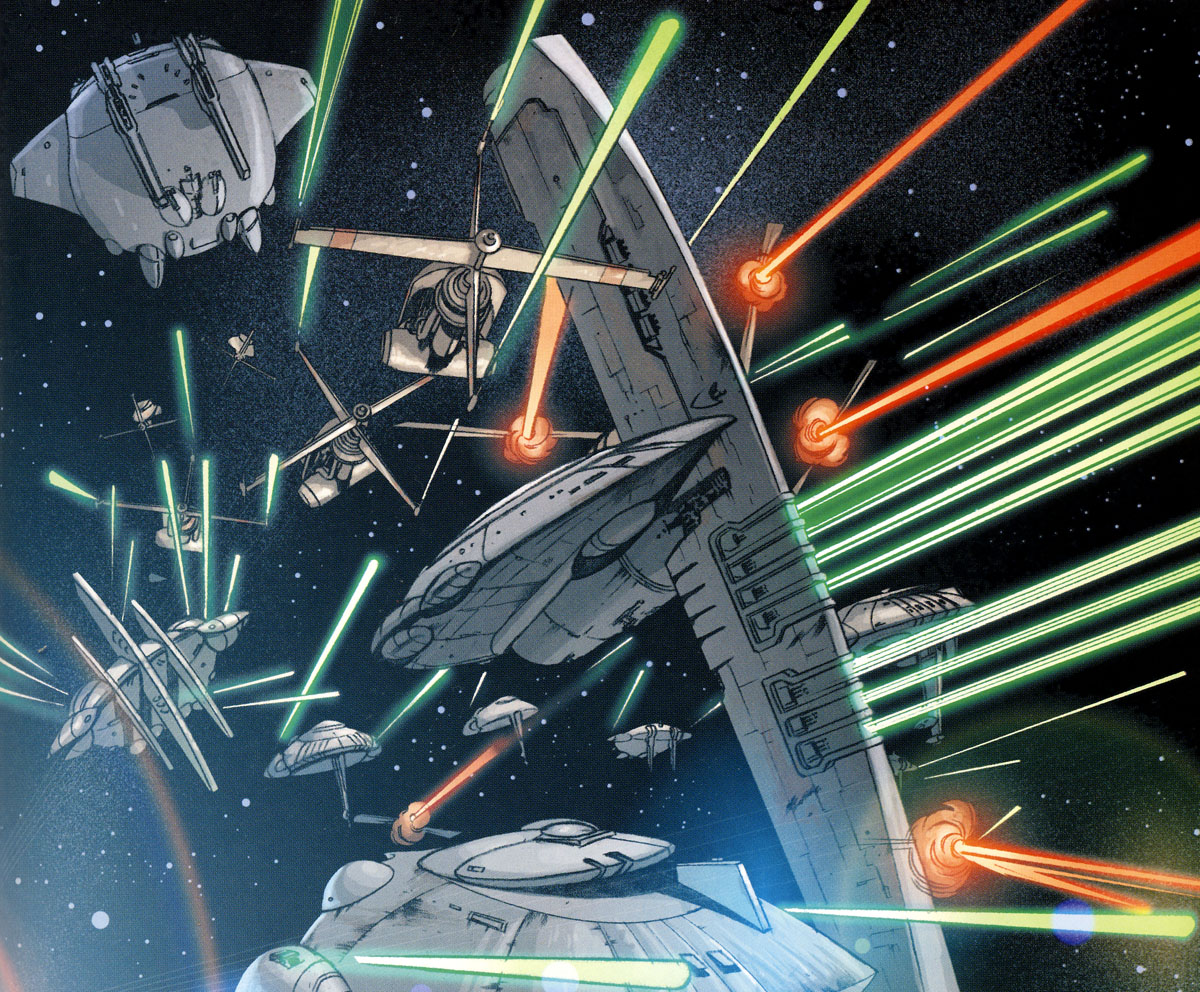
Despite the apparent Imperial advantage, the Alliance had, in turn, trapped the Empire. Forming his fleet around the Indomitable, Stazi ordered all Alliance forces to open fire on Valan's fleet. Despite the sudden attack, Valan was confident that the orbital weapons batteries on the Mon Cal shipyards would quickly dispatch Stazi's fleet. However, unbeknownst to him, the Alliance had a backup plan. While Gial Gahan acted as a diversion, Monia Gahan hacked into the shipyard's central computer and redirected the weapons to target the Imperial fleet. The shipyard's major batteries inflicted heavy damage on Valan's fleet, including severe damage to the frigates Ironstar and Verpine.
Meanwhile, on the bridge of the Imperious, it became clear that the Imperials had been tricked. Disguised as stormtroopers and Imperial officers, Alliance commandos led by ex-stormtrooper Hondo Karr seized control of the Advanced Star Destroyer. As Karr's crew piloted the Imperious out of the docks, Stazi ordered them to retreat to the secret rendezvous point and join up with the other Alliance warships already waiting there. Enraged by Stazi's audacity, Valan ordered all of his forces to converge on the Indomitable. As the Alliance capital ships retreated behind the shipyard defense systems, Rogue Squadron intercepted and destroyed several Predator-class starfighters. The Rogues' crucial cover prevented swarms of Imperial fighters from attacking the Alliance's larger vessels.
Escape
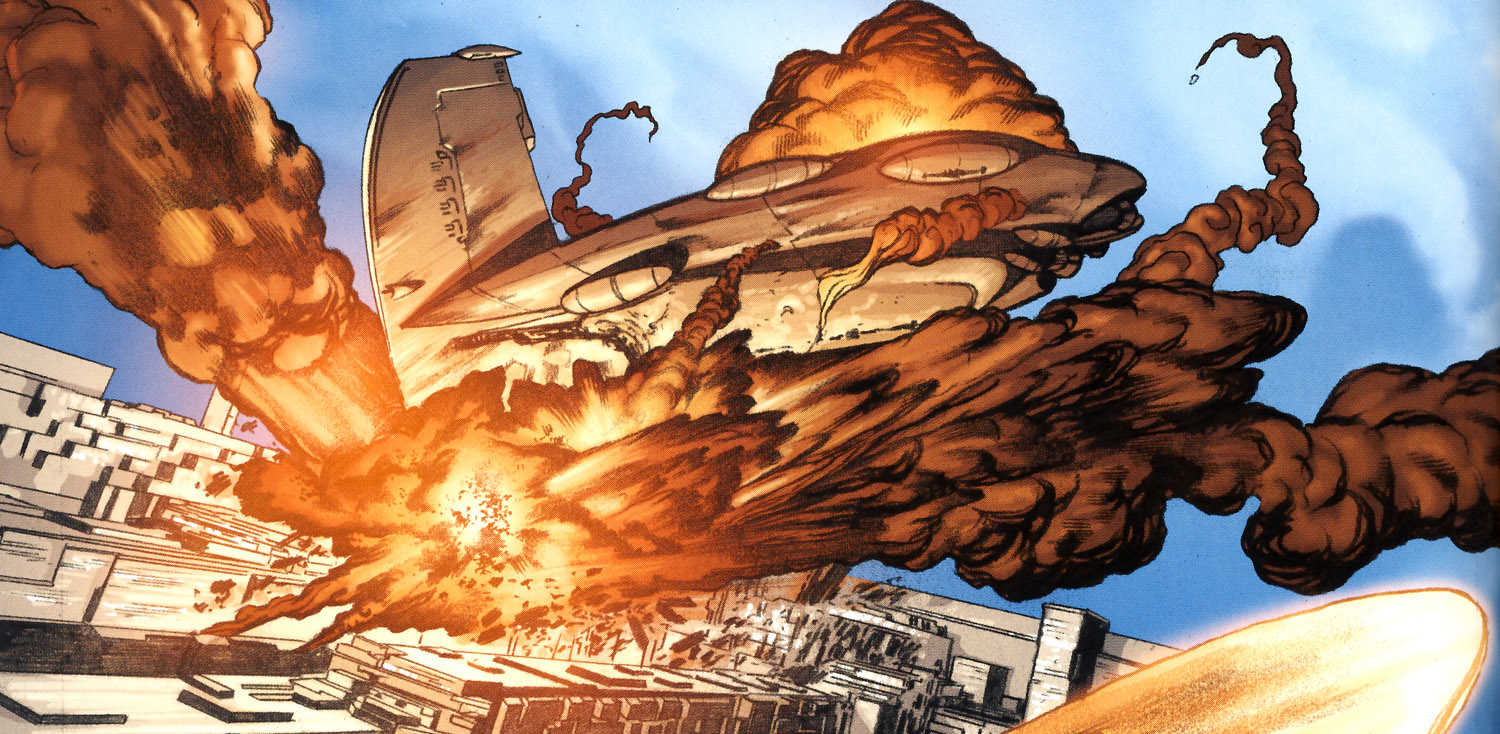
With the primary objective of capturing the Imperious achieved, Stazi turned to covering his fleet's escape. Knowing that Valan would ignore other Alliance warships and target him, Stazi and the Indomitable stood firm, enduring heavy fire from the Imperial fleet. A powerful blast struck the bridge, wounding Captain Jaius Yorub and crippling the ship. Over the comm, Valan offered Stazi one last chance to surrender. Instead, Stazi informed Valan of his intention to disable the Mon Cal shipyards, strategically depriving the Empire of their shipbuilding capacity.
As the Rogues covered the escape of the last remaining Alliance capital ships, Rogue Leader Jhoram Bey decided to return to the admiral's flagship and attempt a rescue. Reaching the bridge, Bey found Stazi. Stazi explained that it was his duty to remain behind and crash the Indomitable into the shipyards, ordering Bey to escape with Yorub instead. Still wounded on the bridge, Yorub pleaded with Stazi to escape, arguing that the admiral was more than just an officer—he was a symbol for the Alliance. Stazi refused, arguing that his life was no more important than any other Alliance officer. Taking matters into his own hands, Bey knocked Stazi unconscious at Yorub's urging. Relieved that Stazi would now be taken off the Indomitable, Yorub ordered Bey to take the admiral back to his fighter and flee the ship. Following orders, Bey escaped with Stazi.
While an unconscious Stazi was transported to the rendezvous point, Yorub sacrificed himself by ramming the Indomitable into the shipyards. Despite the loss of the Indomitable and several fighters, the battle was a major Alliance victory. The Alliance was further aided by Valan's incompetence, as he focused his efforts on destroying the Indomitable instead of attacking the rest of the Alliance fleet. Realizing that his obsession with Stazi cost the Empire the battle, Valan considered suicide his only option. Later, at the rendezvous point, Stazi confronted Bey about his actions during the battle, but instead of punishing him, he promoted him to his second-in-command. Stazi also warned his crew that their actions would undoubtedly lead to an Imperial reprisal. However, determined to keep the cause of the Galactic Alliance alive, he ordered his crews to prepare the fleet for further battle, stating that only when the fleet was ready would there be time to mourn those lost.
Tragedy and new hope
Three days after his victory at Mon Calamari, Stazi, along with beings across the galaxy, witnessed an atrocity live over the HoloNet. Enraged by the recent capture of the Imperious, Krayt traveled from Coruscant to Mon Calamari. Transmitting from the Mon Calamari capital of New Coral City, Darth Krayt broadcast a message: one-tenth of all Mon Calamari would be executed and the rest placed in forced labor camps. After issuing this proclamation, stormtroopers and Sith Lords led by Darth Azard slaughtered the assembled members of the Mon Calamari Council, both Calamari and Quarren.
Upon seeing the broadcast, former Rogue Leader Jhoram Bey wanted the Alliance fleet to return to Mon Calamari to aid its citizens. However, Stazi, knowing that such an attack would be futile, overruled him. Unbeknownst to Stazi, events were already unfolding to help both the Alliance and the Mon Calamari. Several Alliance pilots who had been imprisoned on Dac following the battle arrived aboard his new Star Destroyer, accompanied by the Imperial Knight Sigel Dare. Dare and fellow Knight Treis Sinde had sabotaged the Imperious prior to Stazi's capture of it, and during the massacre of New Coral City, they had rescued the Alliance pilots in an effort to reach Stazi and warn him of the explosives they had planted. The bombs were disarmed, and Monia Gahan diffused a tense moment between Stazi and Dare by emphasizing the need to work together. Stazi realized that the Sith were the greatest threat to the galaxy. Setting aside his own prejudices, Stazi instructed Dare to contact Roan Fel and inform him of his willingness to collaborate against their common enemy. With his fleet secure, Stazi announced that the Imperious would be his new flagship, renaming the vessel Alliance.
Joint operation to Ralltiir

In the time period after their triumph at the battle of Mon Calamari, coupled with the tragedy of the Dac Genocide, the Galactic Alliance Remnant saw a surge in support from across the galaxy. While some planets were intimidated by the slaughter of ten percent of the Mon Calamari population, many secretly aided the GA. Several crucial star systems contributed warships from their planetary defense forces to Stazi's command. Furthermore, the Alliance's ranks grew significantly with the addition of many Mon Calamari who were not on Dac during the genocide. This influx of fresh ships and personnel greatly enhanced the Alliance fleet's overall size and capabilities.
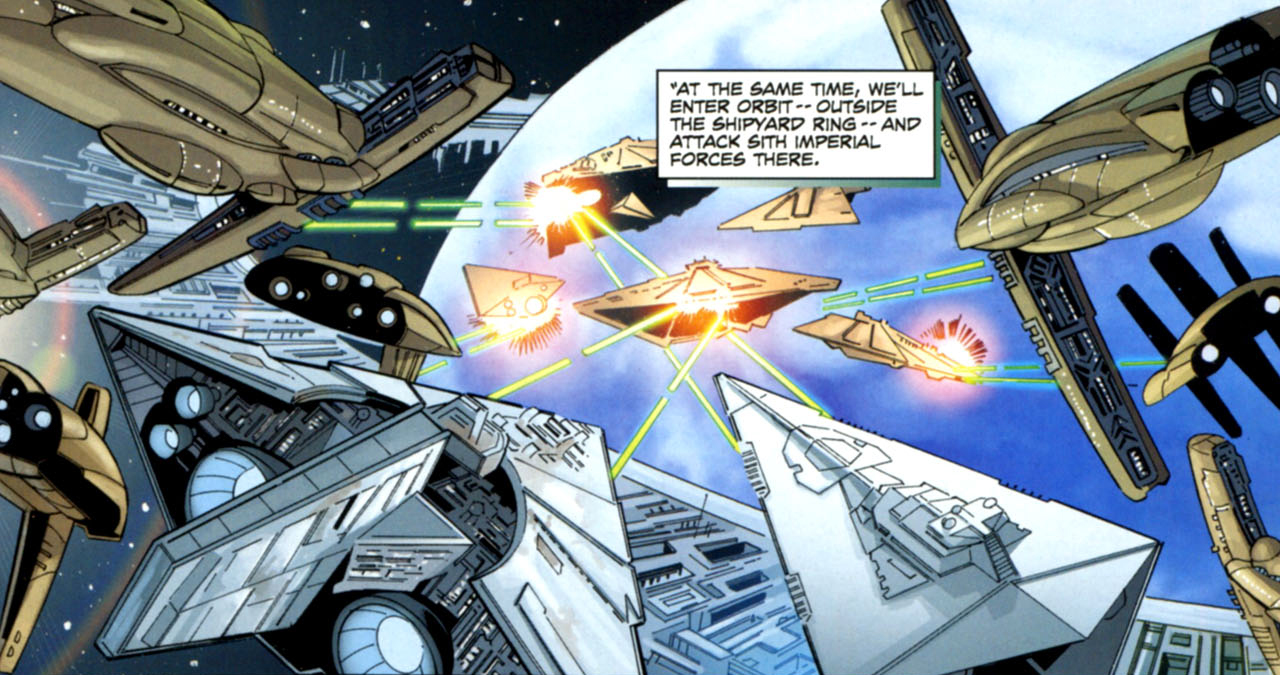
Stazi successfully negotiated with Roan Fel's faction, creating a coalition aimed at opposing the Sith. Their first joint operation targeted Ralltiir, a leading financial hub in the galaxy and a former member of both the New Republic and the Galactic Alliance. Given its strategic and economic importance, the Sith Empire had stationed the Coruscant Third Fleet to protect the planet. The Third Fleet also benefited from extensive ion cannon batteries positioned on several of Ralltiir's moons. The operation had two primary goals. Firstly, eliminating a key battle fleet would compel the Empire to redistribute another fleet, thus stretching their naval resources even thinner. Secondly, attempts would be made to capture the majority of the Third fleet intact, with the surviving vessels divided equally between the GA and Fel. Admiral Stazi chose to command the GA fleet personally, while Roan Fel dispatched Admiral Edouard Fenel and the Bastion Second Fleet.
The battle commenced with Gar Stazi's fleet catching the Coruscant Third Fleet and its commander, Admiral Peto Kelsan, off guard. Stazi instructed his capital ships to focus on disabling the engines and weapon systems of the Imperial warships, keeping in mind his secondary objective of capturing them undamaged. Rogue Squadron, now led by Anj Dahl after Jhoram Bey's promotion, destroyed an ion cannon battery located on Ralltiir's twelfth moon. Stazi viewed the delayed arrival of Admiral Fenel and the Second Fleet unfavorably. When questioned about the Second Fleet's tardiness, Fenel tried to provoke Stazi by implying that the Alliance admiral's only claim to fame was retreating from battles. Stazi responded by pointing out that Fenel's primary role during the battle of Caamas was to target weakened Alliance cruisers.
With the combined fleets now holding an advantage in ship numbers and firepower, Admiral Fenel requested that the Sith Imperial forces give up their ships. Surrounded by Alliance and Fel loyalist warships, Admiral Kelsan ordered his ships to cease fighting to avoid total annihilation by the allied forces. However, Captain Vaclen Tor of the frigate Steadfast interrupted the communication channel, arguing that they were obligated to fight to the death or destroy their own ships. Enraged by Captain Tor's call to arms, Admiral Fenel ordered Kelsan to fire on the Steadfast. This proved to be the final straw for the defeated admiral, who rescinded his surrender order and instead told his ships to initiate self-destruct sequences and abandon ship.
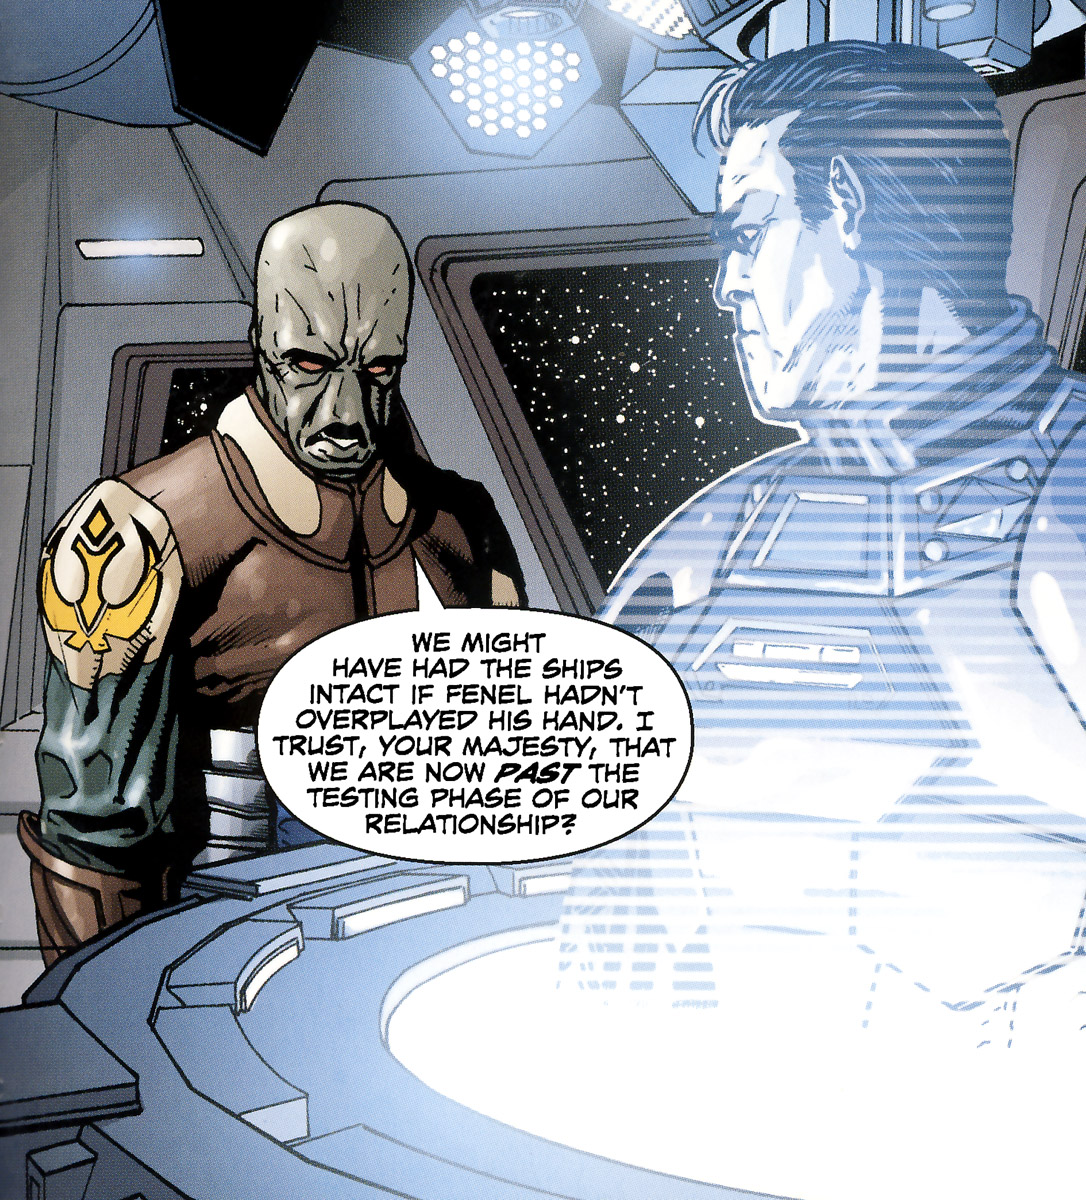
Admiral Fenel contacted Stazi and attempted to command him to position his fleet between Ralltiir and the Third fleet, destroying any escape pods. Stazi refused, declaring that the Galactic Alliance would never accept orders from the Empire. Instead, Stazi ordered Rogue Squadron to protect the Steadfast and placed his fleet between Fenel and the escape pods. Admiral Kelsan remained on his flagship Avenger as his ships detonated, thanking Stazi for his attempts to save his crews. When Fenel ordered his Predator squadrons to attack the Steadfast, the GA fleet unleashed a barrage of covering fire, forcing the fighters to retreat to the Bastion Second Fleet. On the Alliance's bridge, Stazi received a communication from Roan Fel. The admiral confronted Fel about his choice to send Fenel to the battle, stating that it was simply a ploy to "test" Stazi's loyalty to the alliance. Roan Fel responded firmly, stating that as an emperor, he outranked Stazi. Determined to prove to Fel that the GA would not become subservient to his empire, Stazi stood his ground, countering that he was the head of state of the GA until a new government could be established. Fel seemed pleased by the response, though Stazi remarked to Captain Bey that the alliance between their forces was far from being based on mutual trust and friendship.
Assisting the Mon Calamari
The significant victory at Ralltiir did not slow down Stazi's operations; he moved the Alliance Remnant fleet to the Arkanis sector in the Outer Rim Territories. The plight of the Mon Calamarian people weighed heavily on Stazi, as the Sith genocide on Dac continued. Stazi discovered that many Mon Cal refugees had secretly fled to Da Soocha, in the Cyax system of Hutt Space, as they had over 130 years before during the World Devastator attacks on Dac. Alliance Intelligence had learned that the Sith had not yet attacked the system, which Stazi believed was intentional, to allow Imperial forces to trace the escaped refugees back to the Alliance fleet. Azzim Anjiliac Atirue, a Hutt ally of the GA, owned a luxury spa on one of Da Soocha's moons, Napdu. Disgusted by the Sith genocide and sympathetic to the Alliance, Azzim allowed numerous Mon Cal refugees to secretly hide in Napdu's oceans. Stazi's second in command, Captain Jhoram Bey, sent Rogue Squadron to Napdu to help the Mon Cal refugees escape back to the safety of the Alliance fleet. The plan involved using YZ 3000 tankers to rescue the Mon Cals, disguised as water transports for wealthy clients. During this mission, Hondo Karr left Rogue Squadron and the Alliance to settle old scores with the Mandalorians.
Deception
After the successful rescue of Mon Cal refugees from Napdu, Gar Stazi's fleet continued its operations in the Arkanis sector. It was here that Stazi first encountered survivors of the New Jedi Order since the end of the Sith-Imperial War. Four Jedi: Te Corso, Sayar Dun'La, Asaak Dan and Drok, arrived on the Alliance aboard four X-83 TwinTail starfighters. The Jedi, with the approval of the surviving Jedi Council members at the Hidden Temple, informed Stazi of their desire to ally with the Alliance against the Sith Empire. Additionally, Stazi learned about Cade Skywalker's role in the assassination. Impressed, Stazi expressed his hope to meet the former Jedi one day. Master Sigel Dare, who was also present at the Jedi's arrival, requested a shuttle to travel to Dac to retrieve her Master Treis Sinde, whose presence at Bastion had been requested by Emperor Fel. Master Dan offered to accompany her, but she refused. However, Stazi pointed out that the shuttle was his, so if she wanted it, she would have to allow the Jedi Master to join her. Reluctantly, Dare agreed and departed for Dac with the Togruta Jedi Master.
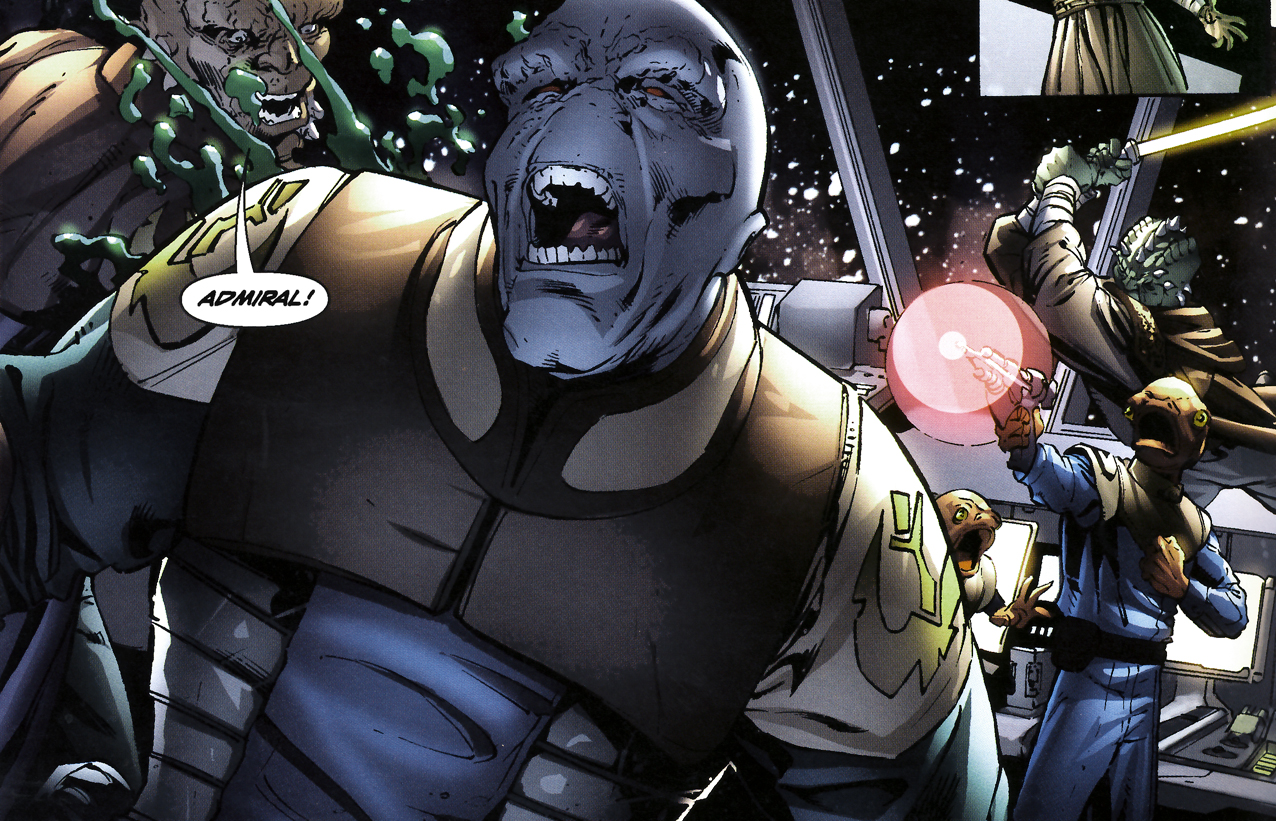
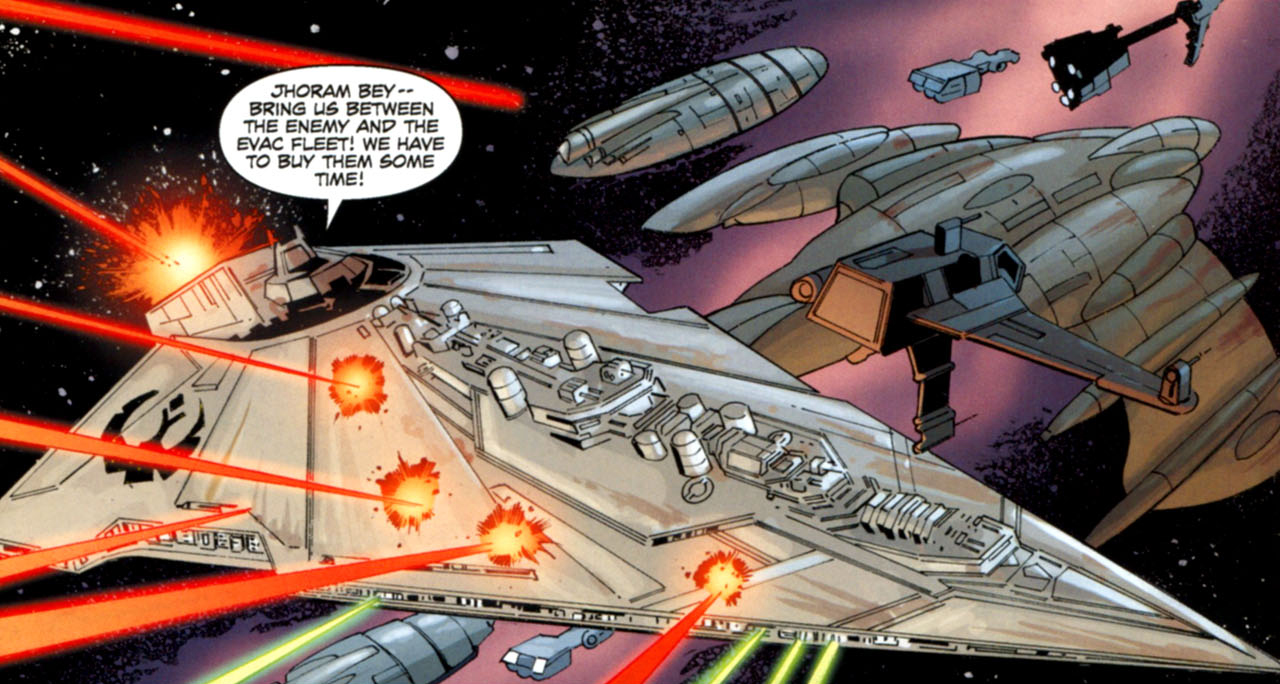
While engaged in discussions with the Jedi, the Alliance fleet was ambushed by the First Coruscant Task Force, commanded by Admiral Krion Grail. As the First Coruscant Task Force advanced and engaged the Alliance fleet, a member of Stazi's crew, the Mon Calamari Shipman Tealart, shot Stazi in the back with his blaster pistol. Gravely wounded, Stazi was taken to the Alliance's sick bay, attended by Jedi Saylar Dun'la. Captain Bey and Lieutenant Ona Antilles ordered all fighters to launch to buy time for the fleet's escape. Squadrons of CF9 Crossfires were supported by Masters Corso and Drok, who led Alliance fighters from their TwinTails. Initiating well-rehearsed escape protocols, the Alliance and the fleet's Scythe-class battle cruisers moved to cover the retreat of the smaller warships and escorts. Once all smaller ships were clear, the Alliance and its accompanying battle cruisers and fighters jumped to the rendezvous point. Arriving at the rendezvous, the Alliance fleet was ambushed again by Admiral Grail's First Task Force. Unable to determine how the Imperials continued to track the fleet, Jhoram Bey ordered the fleet to jump again to another rendezvous point.
Clinging to life in sickbay, Stazi refused to enter a bacta tank before speaking with Bey. Extremely weak and near death, Stazi informed his second in command that the Imperials were tracking the fleet's comm frequency vibrations. With his confidence renewed, Bey proceeded to set a trap for the Imperials. When the First Coruscant Task Force emerged from hyperspace, it encountered only one ship, the Alliance. Admiral Grail was aware that Stazi had been shot, as Imperial forces had arranged the assassination attempt by threatening Shipman Tealart's family on Dac with death if he refused to cooperate. Jhoram Bey sprung his trap. The majority of the Alliance fleet suddenly appeared from hyperspace behind the First Task Force and unleashed a furious barrage of fire. With his shielding failing and several of his ships lost or severely damaged by the surprise attack, Grail ordered his fleet to withdraw. Victorious, Captain Bey ordered all Galactic Alliance comm frequency vibrations changed before proceeding to the next rendezvous point.
Fortunately for the GA Remnant, Admiral Stazi recovered from his injuries. A week after the battle, Stazi met with Tealart in the Alliance's brig. The Mon Calamarian explained that the Sith had contacted him and threatened to kill his entire family, who were on Dac. Faced with this terrible choice, Tealart decided to save his family. Stazi told Tealart that he would contact the Mon Calamari Rangers on Dac and ask them to locate and save his family. Stazi also explained to Tealart that he would be tried and executed for treason. While he could personally forgive Tealart for attempting to take his life, Stazi explained that Tealart was still responsible for the loss of life in the GA fleet as a result of the attack. Grateful for Stazi's promise to find his family and accepting of his fate, Tealart thanked the admiral.
Evacuation from Dac

The significant allied victory at Ralltiir and the subsequent counter-ambush of the First Coruscant Task Force by the Galactic Alliance fleet angered Darth Wyyrlok and the Moff Council on Coruscant. Determined to inflict a serious blow on the anti-Sith allies, Wyyrlok instructed Darth Azard and Vul Isen to implement the Final Protocol on Dac. Developed by Isen, the protocol involved releasing viral spores capable of killing all life on Dac within seven days. When Rogue Squadron discovered the effects of the virus on the planet during a reconnaissance mission, Stazi immediately took action. Stazi contacted his Imperial allies on Bastion to request their assistance for a massive rescue operation. With Fel out of contact and engaged at Agamar, General Oron Jaeger responded to the admiral's request. Despite his sympathy for the Mon Calamari and their situation, General Jaeger informed Stazi that he could not commit Fel's loyalist fleet without a direct order from the emperor. Additionally, Jaeger expressed his concern that the entire event was a trap to ensnare the allied forces. Undeterred, and despite the lack of aid from Fel's forces, Stazi was determined to act. Still aboard the Alliance following the ambush in the Arkanis sector, Jedi Master Te Corso offered the assistance of the New Jedi Order. In addition to providing a Jedi fighter group, Master Corso informed the admiral that the Order knew of a world where the refugees of Dac would be safe. Encouraged, Stazi put his plan into motion. Knowing that the defenses on the Mon Calamari Shipyards were still formidable, Stazi sent elements of Rogue Squadron led by Ronto and Sword Squadron led by Master Drok to infiltrate the yards and disable their defenses. On the planet's surface, Jedi Master Asaak Dan, Captain Tanquar and the Mon Calamari Rangers engaged Imperial stormtroopers on Heurkea, securing the cities docks to serve as the base of operations for the evacuation.
With the shipyard defenses disabled and Heurkea secured, Stazi and the Galactic Alliance fleet emerged from hyperspace. The Alliance, supported by multiple Scythe-class battle cruisers, captured Pellaeon-class Star Destroyers, and numerous frigates, engaged a token Sith force of five Star Destroyers. Outnumbered and overwhelmed by superior firepower, the surviving Sith warships retreated. With the space around Dac cleared, Stazi signaled the Emergency evac fleet. The genocide of the Mon Calamari and Wyyrlok's final protocol had angered citizens from across the galaxy. A fleet of private starships, ranging from old Mon Cal cruisers to Venator-class Star Destroyers to private transports descended enmass on Dac to rescue the world's population. Settling down on and around Heurkea, the armada commenced rescue operations. Nat Skywalker, former Jedi and uncle of Cade Skywalker, was among the private citizens who arrived, as well as smugglers Chak and Kee onboard the Grinning Liar. Twelve hours into the evacuation, events had progressed fairly smoothly. Aware that Dac was home to other sentient life forms like the Whaladons and Moappa, the Galactic Alliance fleet dispatched YZ 3000 tankers to rescue as many as possible to guarantee the survival of those species. A delegation of Quarren, angered that Whaladons and Moappa were being rescued, demanded that their species take precedence. Angered by their demands and unsympathetic to the Quarren due to their collaboration with the Sith, Stazi refused. Still, despite his anger, Stazi allowed one out of every tenth ship to focus on rescuing those Quarren who remained.
With the Galactic Alliance fleet engaged in the rescue operation, the Sith Imperials sprung their trap. The Outer Rim Third Fleet, under the command of Admiral Krion Grail and supervised by Moff Geist and Sith Fist Darth Stryfe, dropped out of hyperspace behind the Alliance fleet. Possessing a larger fleet and the element of surprise, the Sith expected a swift victory. Stazi, anticipating this, countered with a trap of his own. Several old warships, including MC80 cruisers, CR90 corvettes, and a Venator-class Star Destroyer, moved forward to engage the Sith. Detecting that the warships had no life signs, Admiral Grail assumed that they were droid bombs. On Geist's command, the Third Fleet opened fire with all batteries to destroy the oncoming craft. The destruction of the ships was precisely what Stazi wanted. Each was loaded with powerful ion bombs, which proceeded to disable the Third Fleet's sensors and other critical systems. Knowing that the effects of the attack would not last long, Stazi ordered all Galactic Alliance capital ships to surge through the Imperial lines in a variation of the Ackbar Slash. Five of Third Fleet's Star Destroyers were destroyed or disabled, though the flagship Relentless survived due to Admiral Grail's quick thinking. Undeterred, Darth Stryfe ordered the Third Fleet to open fire on the first wave of evacuation ships heading for hyperspace. As Stryfe predicted, Stazi placed the Alliance between the Imperial fleet and the refugee ships. While the Alliance absorbed withering fire from Stryfe's Star Destroyers, Rogue Leader Anj Dahl ordered all GA fighter squadrons to cover the refugee ships and engage the Predators that were attempting to strafe them.

On the Alliance's bridge, Captain Jhoram Bey informed Stazi that the ship's shields were failing. The Duros Admiral refused to retreat until all the ships of the evacuation fleet were safely away. Suddenly, a fleet of Fel loyalist Star Destroyers under the command of General Jaeger emerged from hyperspace directly behind the Sith fleet. Jaeger had decided to take a portion of Bastion's fleet and position it a short hyperspace jump away from Dac. Jaeger's gamble paid off, as Roan Fel, who was himself escaping the Sith-Imperial trap on Agamar, ordered Jaeger's fleet to engage. Caught between Stazi's battle cruisers and Jaeger's Star Destroyers, the Third Fleet sustained heavy losses. Moff Geist, realizing that the battle was hopeless, implored Stryfe to withdraw, noting that his former master Darth Krayt would not foolishly risk the loss of the entire Third Fleet. Stryfe conceded and ordered the remaining ships of the fleet to retreat from Dac.
With the Sith Imperial fleet defeated, Stazi and Jaeger continued with the evacuation of Dac. Twelve hours after the battle, the last of the refugee ships was loaded and prepared to depart for the secret safe world the Jedi provided. Down on Heurkea, Captain Tanquar refused to leave his people, noting that too many were unable to escape. Asaak Dan was sympathetic, but reminded Tanquar that he was now one of the Mon Calamari's recognized leaders. Together, the two boarded the last shuttle in the city and returned to the orbiting fleet. On the Alliance's bridge, Jhoram Bey informed Stazi that nearly 20% of Dac's population had been rescued. While numbering in the billions, it was only a small percentage of the world's total population of 27 billion.
Base of Operations on Utapau
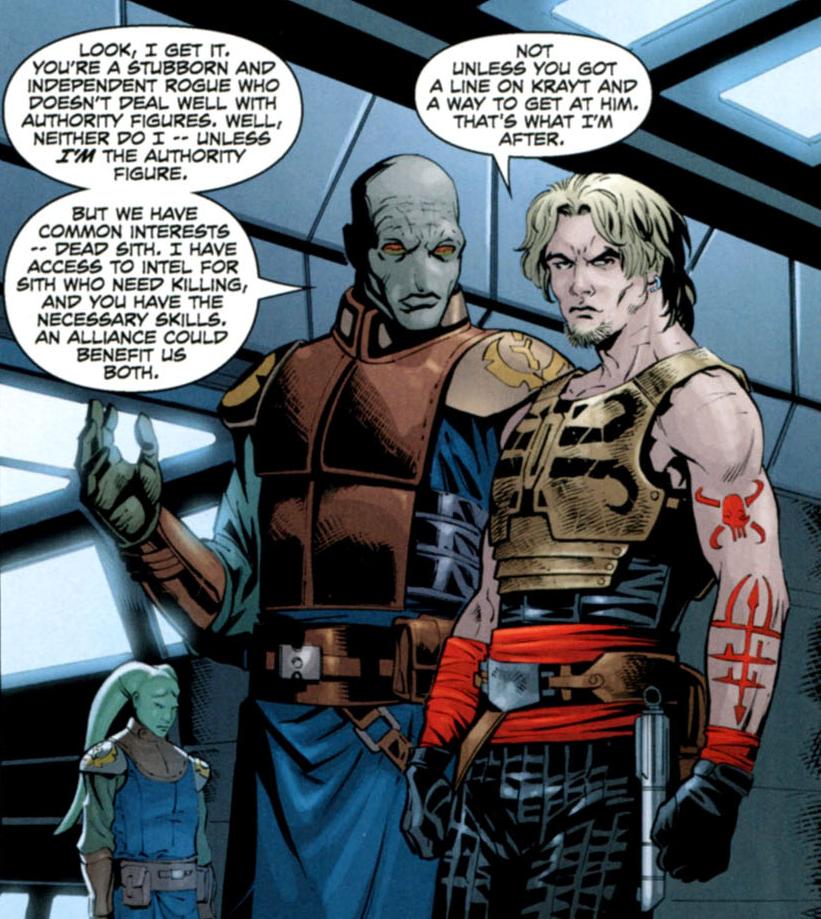
A few days after the evacuation of Dac, part of the Gar Stazi's fleet arrived at Utapau. Telan Medon, administrator of Pau City and ally of the Galactic Alliance, offered to care for and treat casualties suffered during the evacuation. During the nearly eight years that had passed since the surrender of the Galactic Alliance at Caamas, Utapau had served as a place of respite for Stazi's forces. Unknown to Stazi, Vul Isen, the Sith scientist responsible for the massacre of Dac, and Sith Lord Darth Azard were plotting to kill him and destroy his resistance by releasing the sames toxins that were used on Dac and Da Soocha.

While on Utapau, Stazi was contacted by Jariah Syn and Deliah Blue who wanted to sell him weapons. Stazi's aide, Lieutenant Ona Antilles, expressed the Admiral's interest to meet Cade Skywalker. Ever since Jedi Te Corso had informed that admiral that Skywalker had been responsible for the death of Darth Krayt, Stazi had wanted to meet the young man. However, unknown to Stazi or his aides, Cade and Jedi Wolf Sazen were on Utapau hunting Isen and Azard. Due to intelligence provided by Hutt crime lord Vedo Anjiliac Atirue, Cade knew that the Sith were planning to release the toxins on Uatapau to kill Stazi and the world's entire population. Cade feared that if Stazi was warned of the assassination plot that he would immediately leave the planet, tipping off Isen and causing the Sith scientist to once again flee. To Cade, nothing and no one was more important that capturing Isen and destroying his toxins. Wolf Sazen disagreed, noting that it was far more important to protect Stazi and the people of Utapau. After reminding Cade of Stazi's importance to the galaxy's efforts to unite and defeat the Sith, Cade ordered Syn and Blue to stick close to the admiral, in hopes of foiling any assassination attempt.
Vul Isen's assassin tried to kill him but Stazi was saved by Jariah Syn and Deliah Blue. Stazi was grateful in their help for saving his life and that of his staff, but told them that he did not intend on softening the deal. Isen and Azard were killed a short time after by Cade Skywalker and Wolf Sazen.
Conflict
Darth Krayt's return to the Imperial throne escalated the ongoing galactic war. After eliminating the traitorous Darth Wyyrlok, Krayt, now free of the Yuuzhan Vong implants that had plagued him for so long, reasserted his authority over the One Sith and the Empire. While Krayt had previously aimed to unite the galaxy under the One Sith's rule through existing governmental structures, the Sith Emperor now favored reshaping the galaxy in his image through total war. Admiral Stazi and the Galactic Alliance Remnant were among his primary targets.
Wyyrlok's poisoning of Dac had an effect similar to Krayt's initial genocide order. Ships and volunteers rallied to the Galactic Alliance's banners, as well as those of Stazi's ally, the Empire-in-exile on Bastion. The galaxy itself was showing increasing resistance to Krayt's Sith Empire. Following the devastation of Da Soocha, the Hutts were in a state of near-open rebellion against the Sith's rule, offering rewards for information regarding destruction inflicted on Sith targets and leaders. Neutral entities, such as the guardians of Kiffu and Kiffex, declared their neutrality and denied Imperial requests to establish bases in their territory. Even client states like the Chiss and Hapans refused Imperial requests to open liaisons. Undeterred, Krayt launched a new campaign against worlds opposing his rule, attempting to suppress resistance.
Mission to Falleen
After the revelation that the Sith had deployed the Star Destroyer Darklight to Falleen with the intention of forcing the planet's inhabitants into submission through bombardment, Admiral Stazi dispatched Rogue Squadron's elite pilots to assist Cade Skywalker's team in neutralizing the warship. With Rogue Squadron providing aerial support, the Mynock transported Cade and Jedi Master Wolf Sazen onto the Darklight. Once aboard, the pair initiated a destructive chain reaction within the reactor core, effectively destroying the vessel. The two narrowly escaped the exploding Sith warship in a pair of commandeered Predator-class starfighters just before it detonated and crashed onto the planet's surface. Following their triumph, the Mynock and Rogue Squadron returned to the Galactic Alliance fleet. Upon docking in the hangar of Stazi's flagship, the Alliance, Lieutenant Ona Antilles informed Cade Skywalker that Stazi requested an immediate meeting with him and that Vedo Anjiliac Atirue was awaiting communication via holotransmission. Vedo, like many other Hutts who were offering rewards for the deaths of Sith, was hesitant to believe Cade's claim of destroying a Star Destroyer. However, Stazi promptly vouched for Cade, stating that his pilots could attest to Cade's actions. Amused and impressed, Vedo consented to pay Cade the bounty. Stazi was impressed by the young Skywalker, whom he had desired to meet since discovering Cade's initial involvement in the first assassination attempt against Krayt. Stazi attempted to persuade Cade to collaborate with the anti-Sith forces, but Cade declined, asserting that he alone would be the one to kill Krayt. For now, Cade would remain a lone operative.
Defense of the Hidden Temple
Later, while aboard The Wheel space station, Cade came across Imperial Knight Antares Draco, who was encased in carbonite. The Sith had successfully broken Antares's resolve and extracted the location of the Jedi's Hidden Temple on Taivas. Upon Cade's arrival on Taivas, the Jedi Council convened a holoconference involving Admiral Stazi and Roan Fel. Both leaders strongly advised the Jedi to evacuate Taivas immediately, but Cade convinced the assembled leaders of the anti-Sith alliance to orchestrate a trap for the Sith Imperial forces on Taivas. Cade received support from his uncle, Nat Skywalker, who had returned to the Jedi Order. Nat explained that the unique magnetic properties of Taivas's rock formations rendered orbital targeting ineffective, compelling the Sith to launch a ground assault on the temple. As the Sith fleet arrived, Stazi's fleet and Roan Fel's forces would be positioned to encircle them between the planet and space, securing a significant victory. Despite the inherent risks, the Council approved Cade's strategy.
Meanwhile, on Coruscant, Darth Krayt instructed Grand Admiral Veed to consolidate the fleets and proceed to Taivas. The assault fleet reached Taivas and initiated an orbital bombardment, which proved ineffective as anticipated by the allies. Imperial walkers and legions of stormtroopers advanced on the Hidden Temple. With Sith naval and ground forces fully engaged, Nat Skywalker transmitted a signal to Stazi and Fel. Moments later, a formidable allied fleet materialized from hyperspace above Taivas. Under the joint command of Admiral Stazi and Treis Sinde, the Galactic Alliance's battle cruisers and Fel's Star Destroyers unleashed a devastating barrage of fire upon the Sith Imperial fleet's rear. Several of Veed's Star Destroyers sustained severe damage or were destroyed as the allied warships intensified their assault. The battle appeared to shift in favor of the allies.
Unbeknownst to the Jedi, Galactic Alliance, and Fel Loyalist forces defending the Hidden Temple, Darth Krayt had orchestrated a trap. Krayt had anticipated that the arrival of the Imperial Navy under Veed would draw his adversaries together in one location. In secrecy, Krayt had been amassing a clandestine army of Sith troopers. These warriors were completely subservient to Krayt's will. These troopers were supported by massive Dragon warships and deadly Annihilator-class starfighters which tore into the allied fleets. The Alliance battle cruiser Starrunner was obliterated by the Sith onslaught. The battle raged on, even reaching the chambers of the Jedi Council. With the Jedi younglings safely evacuated on a transport piloted by Masters K'Kruhk and Tili Qua, the various starships that comprised the Hidden Temple began to activate their engines. No longer a stationary structure, the starships began to ascend from the water. Old MC80 Star Cruisers, transports, and other craft ascended into space, escorted by allied starfighters and Jedi X-83 TwinTail starfighters.
When Nat and T'ra Saa fell in battle, both Jedi focused their energy skyward in a massive beam of power. The energy they released pushed the Sith fleet away from the planet. Seeing the opening in the lines, Admiral Stazi transmitted escape vectors to the allied fleets and ordered them to fall back to Bastion. Cade, who was picked up by the Mynock and managed to defeat and capture a Sith trooper for study, escaped Taivas with the fleet, but was badly shaken by the events of the day.
Final Showdown at Coruscant

The inconclusive battle over Taivas forced the combined allied fleets to retreat to Bastion. Considered one of the most heavily fortified planets in the galaxy, Bastion was now the last safe refuge for the anti-Sith allies. With the Alliance and the remainder of the Galactic Alliance fleet safely in orbit with Fel's naval forces and the Jedi starships from the Hidden Temple, Stazi went planetside to few an autopsy of the Sith trooper Cade Skywalker had captured during the escape from Taivas. While the trooper eventually died of wounds sustained in battle, the allies learned that Krayt possessed millions of these new warriors. In addition, Fel's scientists determined that the Sith troopers were capable of hardwiring themselves into their fighters, making these warrior incredibly deadly and in tune with their craft. Unknown to Stazi, Hogrum Chalk, Fel's intelligence head, discussed the possibility of using a Sith bioweapon developed in secret by Darth Maladi. Fel had been hesitant to use this weapon in the past, as he feared it would make his Empire no better than the first Galactic Empire under Palpatine. However, in the face of imminent defeat, Fel decided he would consider using the weapon as a last resort. Realizing that Krayt's forces would only grow stronger, Roan Fel convinced Stazi and the Jedi Council that they must strike at the heart of Krayt's power—Coruscant. A plan was developed where Morrigan Corde would lead a strike team composed of Cade, Jedi Master Rasi Tuum, Shado Vao, Wolf Sazen, and several Imperial Knights to sabotage the central computers on Coruscant that operated the planet's orbital defenses. Once the orbital defenses were disabled, the entire allied armada would jump into the Coruscant system and commence attack on the planet. During a pre-battle consultation, it was agreed that the senior Jedi, including Jedi Master K'Kruhk, would form a battle meditation and have overall command of the battle. Tactical command of the allied fleets would fall to both Admiral Stazi and Moff Yage. With all allies in agreement, the fleet departed for Coruscant.

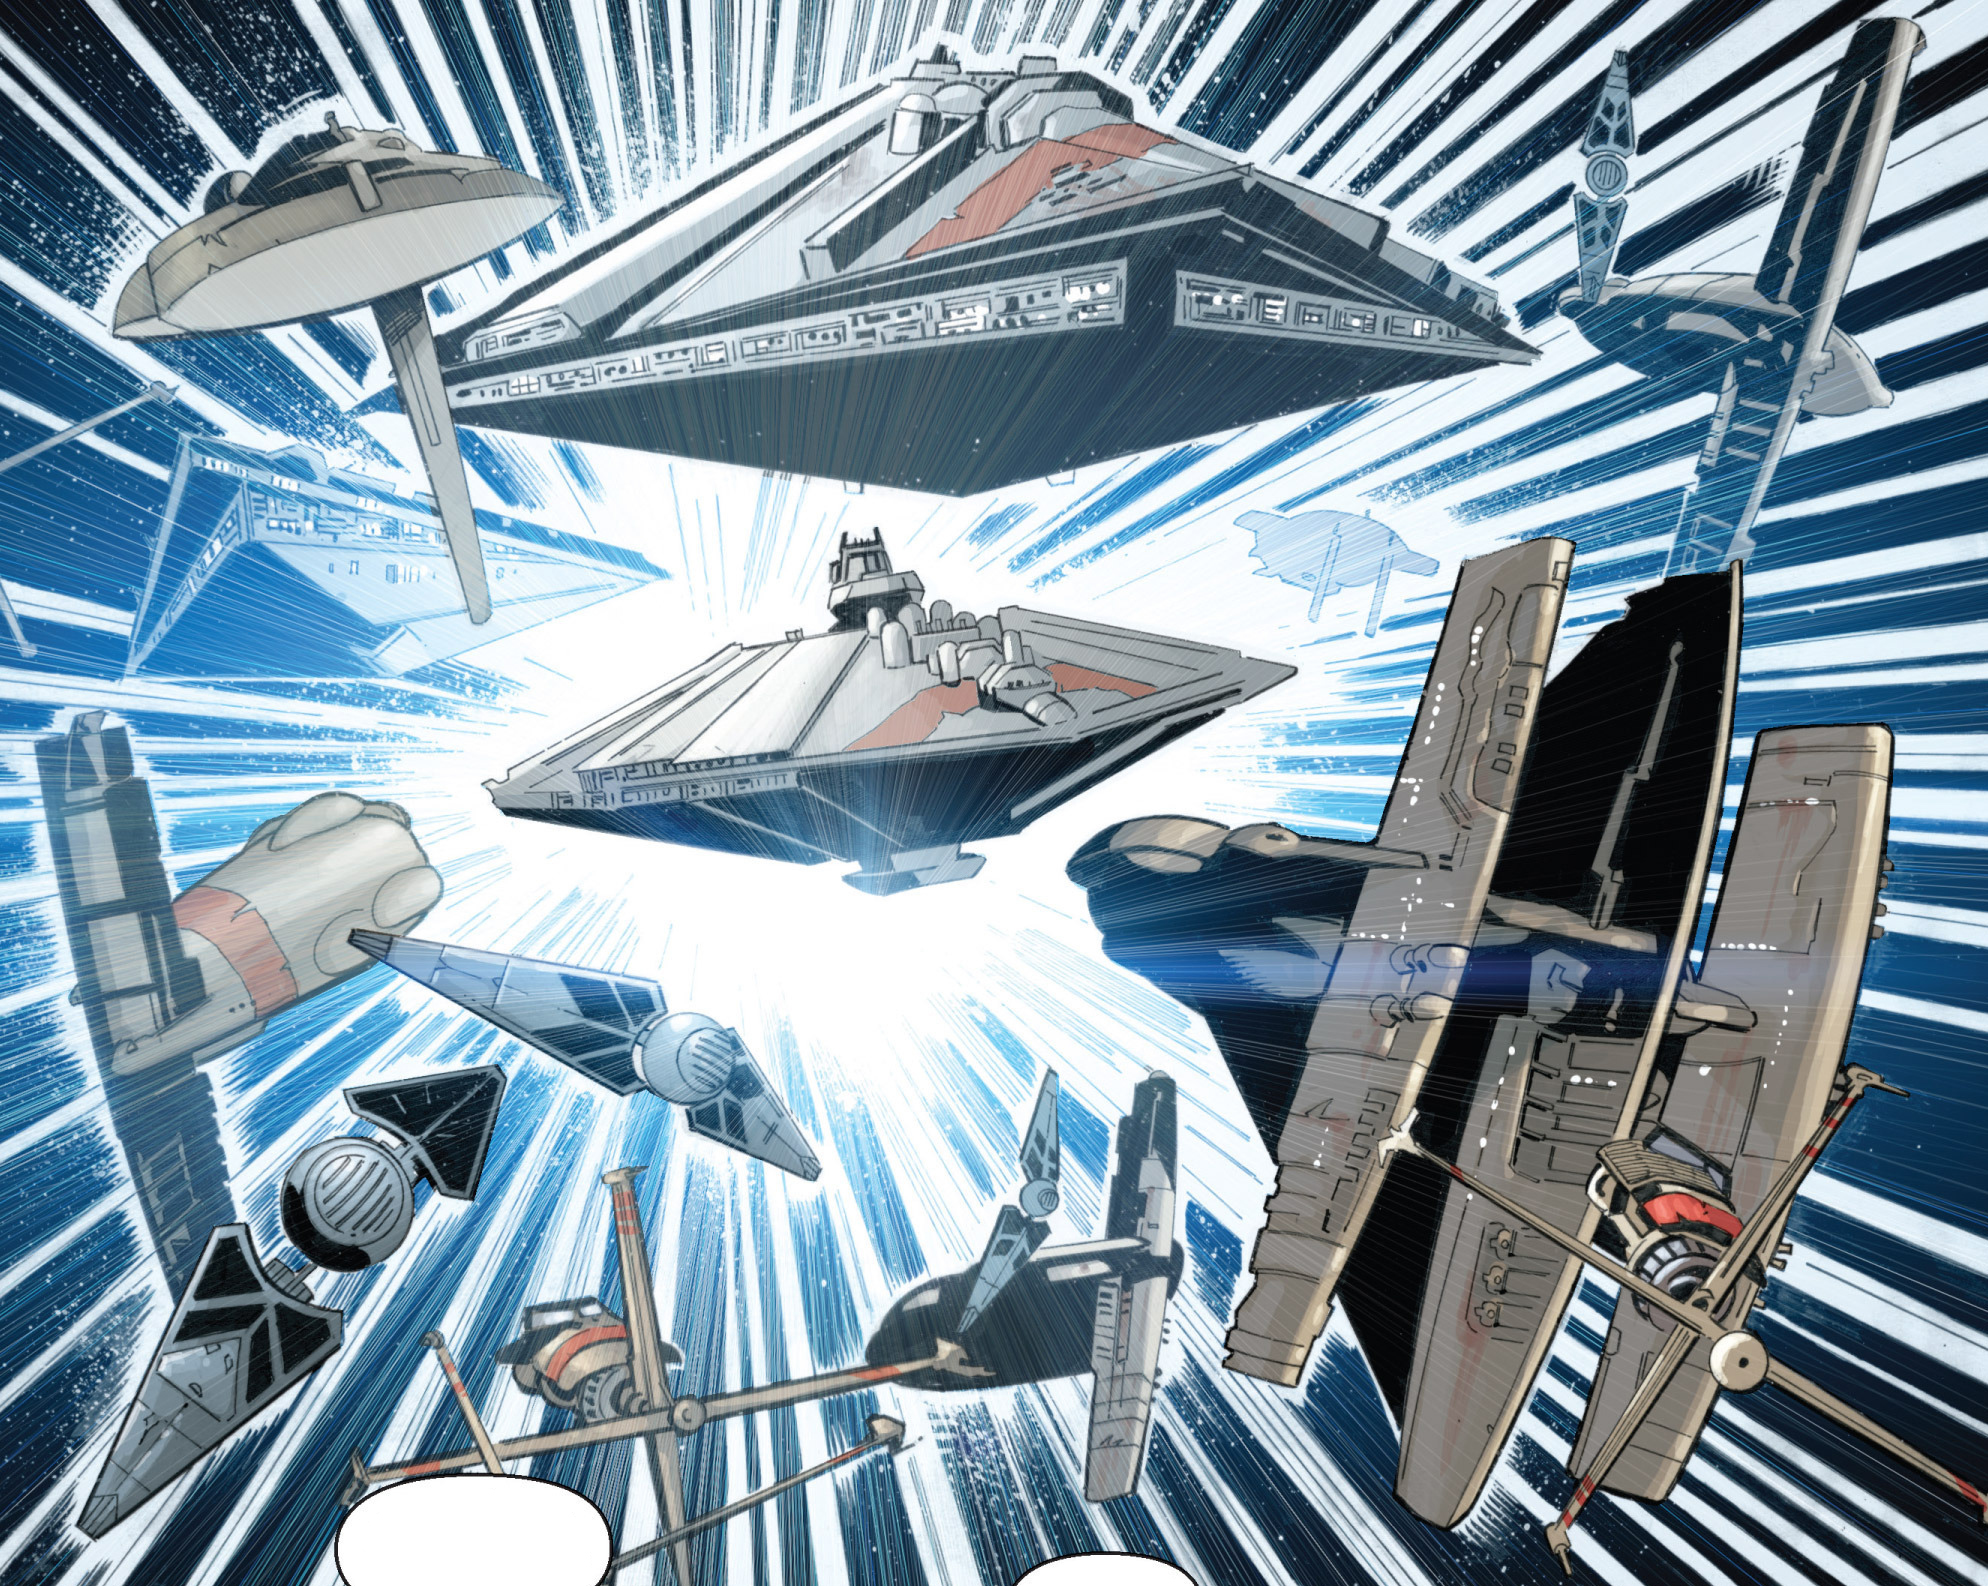
After secretly entering Coruscant's defense control center, Corde and Cade's strike team managed to disable the world's orbital defenses. Second later, the entire allied fleet emerged from hyperspace, centered around Stazi and the Alliance. Backed up by the fleet's Galactic Alliance battle cruisers, Loyalist Star Destroyers, and numerous escorts and starfighters, the allied fleet settled into orbit and engaged the Imperial Starfleet. Galactic Alliance and Fel Loyalist starfighters engaged the Sith Annihilator fighters, while Rogue Squadron and Skull Squadron headed planetside to take out defensive gun batteries.
High above Coruscant, the naval battle continued to rage. Roan Fel decided to accept Darth Maladi's secret weapon, being assured by Maladi that the weapon could wipe out life on an entire world in a matter of breaths. As the fighting grew more desperate and intense, allied and Sith capital ships engaged each other in the skies above Imperial City. Admiral Stazi brought the Alliance into a furious close range battle with one of the Sith Dragon warships. Allied troops struggled to hold the line against Imperial forces loyal to Darth Krayt. On the bridge of the Alliance, Captain Jhoram Bey requested permission to call a retreat. Stazi refused, noting that the allied push on Coruscant was an all or nothing affair. Unknown to Stazi, Antares Draco sensed that Fel was on the edge of falling to the Dark Side of the Force, and engaged his emperor in a fierce lightsaber duel. On the planet below, Cade Skywalker was engaged in a duel of his own, facing Darth Krayt. Finally embracing that he was a Jedi, Cade killed Krayt. Meanwhile, Draco fulfilled his ultimate duty as an Imperial Knight—to kill his emperor should he fall to the Dark Side. With Krayt dead, his surviving Sith Troopers went mad. Those piloting Annihilator fighters crashed their vessels on suicide runs. With the battle turned now in the allies favor, Darth Nihl ordered the surviving Sith ships to retreat to a predetermined set of coordinates. Despite heavy losses, the combined forces of the Galactic Alliance Remnant, Fel Imperials, and New Jedi Order defeated the Sith and reclaimed the galaxy from their control. Stazi became one of the three new Triumvirs of the Galactic Federation Triumvirate alongside Marasiah Fel and Jedi Master K'Kruhk. He attended Roan Fel's funeral along with his fellow Triumvirs.
Galactic Triumvirate
Serving alongside the young Empress Marasiah Fel and Master K'Kruhk, Stazi was privy to Fel's plans to build a galaxy-spanning system of communications arrays. He was involved in a holoconference with Imperial Knight Yalta Val, who was going to the Carreras system to oversee the construction of the array in that system. There was some tension between Stazi and Fel in regards to the array, highlighting differences in their style of governing: Fel believed that they were essential to bringing the galaxy together, whereas Stazi viewed them as "window dressing". Stazi was more in favor of a strong military. Following the Carreras Incident, Stazi was present at a Triumvirate meeting consisting of Empress Fel, Master K'Kruhk, and Antares Draco. They received a report from the Carreras system's Governor Biala, who reported that a young woman named Ania Solo had been involved in the destruction of the Carreras G51 communications array.
At a later meeting, the Triumvirate discussed the new threat posed by the rogue Sith Darth Wredd, who was proceeding to hunt down One Sith infiltrators throughout the galaxy. Wredd had already murdered a Snivvian Sith on Cadomai Prime and a Sith infiltrator at the Triumvirate's Legation on Ceitia Five. During the meeting, Stazi along with Master K'Kruhk successfully proposed to Empress Fel that they leave Darth Wredd alone and allow him to kill the One Sith for them. Despite Draco's objections that Wredd had publicly threatened the Triumvirate, destroyed the Carreras communications array, and tried to kill Master Val, Empress Fel concurred with Stazi's proposal. Later, Ania Solo and the young Imperial Knight Jao Assam left on a quest to hunt down Darth Wredd after receiving a Force vision that the rogue Sith intended to kill Empress Fel. Their quest led them to the lawless Calamari system where they discovered that another rogue Sith, Darth Luft, was enslaving Mon Calamari and Quarren refugees and forcing them to building a pirate fleet. Jao sent a distress signal to Master Val.
After receiving Jao Assam's distress transmission, Master Val interrupted a Triumvirate meeting to inform them of the Sith presence and the enslavement of Mon Cal and Quarren refugees in the Calamari system. Empress Marasiah Fel responded by dismissing Jao as an untrustworthy source, pointing out that he had deserted the Imperial Knights by embarking on a quest to hunt down Darth Wredd. Stazi was not surprised by the news and regarded the plight of Dac's refugees as a shameful act. For Stazi, to allow the entire Calamari system to descend into a state of lawlessness was unacceptable. Fel tried to argue that the Triumvirate lacked the sufficient resources to deal with the Sith threat and refused to send a task force to deal with the pirates, citing that the government had more pressing issues to attend to. However, Stazi disagreed and argued that the Triumvirate had an obligation to help the Mon Cal and Quarren. When Fel responded that the Triumvirate was already helping the scattered Mon Cal and Quarren refugees, Stazi stated that if she had a real home, she would not be saying that.
Unhappy with Marasiah Fel's lack of concern for the plight of the Mon Cal and Quarren refugees, Stazi met up with Master Val and convinced him to lend his Imperial Knight cadets for a field training mission. Admiral Stazi and Master Val assembled a task force of Galactic Triumvirate warships, starfighters, Imperial Knights, and seatroopers to deal with Darth Luft and the pirates. After the Triumvirate task force exited hyperspace, Stazi ordered Green Group to draw the pirates' fire away from the Mon Calamari Shipyards to allow the tanker Trand Cappa to approach the ring. Knowing the amphibian nature of the Mon Calamari and Quarren, Stazi had loaded the Trand Cappa water with the intention of using it to flood the shipyards and to allow the slaves to gain the upper hand over their captors. While Val and Stazi knew that they were risking a lot by going against Empress Fel, they agreed that it was the right thing to do. Admiral Stazi led the space battle while Val and a force of Imperial Knights and seatroopers boarded the shipyards. Stazi's plan worked and Val's forces encountered little resistance from the pirates.
During the fighting, Jao succeeded in killing Darth Luft while Ania and her companions succeeded in saving countless Mon Calamari and Quarren dependents and elderly from being exposed to zero gravity space. The Liberation of the Ring was a popular action and Empress Fel praised Master Val and Admiral Stazi for boosting her government's popularity. A year later, Stazi met with Master Val at the Imperial Knights training facility on Coruscant to inform him that he had filed an official report on the events in the Mon Calamari Shipyards which also contained his recommendations for Dac's immediate future. When Val asked whether he would be reprimanded for insubordination, Stazi assured him that the Emperor regarded their actions on Dac as popular and wished that she had thought of it first. Stazi commented that there was a good chance of the two men being promoted but Val declined the offer, asserting that he was happier training Imperial Knight recruits. Stazi then announced that the Empress had recently embarked on a campaign to hunt down war criminals from the Second Imperial Civil War and that Val's trainees would be needed for that.
Personality and traits
Admiral Gar Stazi, a cunning and resolute individual, distinguished himself as a highly effective fleet commander. Known for his candid nature, he frequently proposed unconventional strategies. His skillful retreat from the Caamas debacle solidified his reputation among Imperial commanders and earned him the respect of those under his command. Stazi exhibited both tactical and strategic acumen, demonstrating the ability to secure victories and comprehend the broader strategic context. This was exemplified by his decision to disable the Mon Calamari Shipyards, depriving the Sith of a vital source of capital ships and a major operational base in the Outer Rim Territories.
His seven-year struggle against the Sith-controlled Empire instilled in Stazi a sense of impatience and a distrust of Imperial motives, as evidenced by his reluctance to trust Roan Fel's representative during negotiations on the Wheel. This sentiment was echoed by Galactic Alliance personnel, such as Rogue Squadron commander Jhoram Bey, who cautioned his subordinates against keeping the admiral waiting for critical information. Nevertheless, Stazi possessed compassion, as demonstrated by his concern for the Mon Calamari people following the Massacre of Mon Calamari.
Driven by a commitment to defeat the Sith, Stazi emphasized to his officers and crew that the collective cause—liberating the galaxy from Sith oppression—superseded the importance of any individual. Despite his esteemed reputation, Stazi eschewed being perceived as an icon, desiring the Galactic Alliance to endure even in the event of his death. Beyond his command capabilities, Stazi was also a multilinguist, proficient in Basic, Binary, Bocce, Durese, High Galactic, and Huttese.
During the early years of the Galactic Federation Triumvirate, Gar Stazi's naval background led him to prioritize a formidable star fleet as the optimal means of maintaining order and communication throughout the galaxy. He considered Empress Marasiah Fel's ambitious G51 communications array project as more of a superficial display than a substantive act of statecraft. Unlike Fel, he believed that projecting strength was the most effective way to preserve the unity of the Triumvirate. As a military strategist, Stazi regarded the rogue Sith Darth Wredd as a valuable asset against the insurgent One Sith, who had infiltrated key government positions in anticipation of their campaign to restore the Sith's "golden age." This assessment was shared by Empress Fel.
Furthermore, Stazi possessed a strong moral compass, which prompted him to object to Empress Fel's indifference to the plight of the enslaved Mon Calamari and Quarren, who were being coerced by Darth Luft and his pirates into constructing a fleet. His dedication to "doing what was right" motivated him and Master Yalta Val to undertake a successful mission to liberate these captives. Through these timely actions, Stazi and Val helped restore public confidence in the Galactic Triumvirate. Stazi also supported the Empress's new campaign to pursue war criminals as a means of bolstering public trust in the government.
Behind the scenes
Admiral Gar Stazi was created by John Ostrander, writer of the Star Wars Legacy comic series, for the Trust Issues story arc. Ostrander originally intended to only include Stazi in Trust Issues, using the character to explain what had happened to the remnants of the Galactic Alliance. However, due to positive fan reaction and his own enjoyment in writing the character, Ostrander decided to expand the character further and create an arc that revolved around him, Indomitable. In his first appearance, Stazi was drawn by Colin Wilson; subsequent appearances were drawn by Omar Francia and Alan Robinson. Jan Duursema has said on the Dark Horse message boards that Stazi's name is pronounced STAH-zee.
Gar Stazi was the first Galactic Alliance character specifically named in Legacy. Prior to his appearance, the only hint or mention of the Alliance in the Legacy series was a brief mention of the CF9 Crossfire starfighter and the Galactic Alliance Core Fleet. Stazi is one of only four Duros admirals developed in the Expanded Universe. The other three were also affiliated with the New Republic/Galactic Alliance: Darez Wuht, Tarla Limpan, and Kir Vantai.