Star Wars Rebels: Steps Into Shadow
Star Wars Rebels: Steps Into Shadow is a feature-length, two-part cinematic presentation that kicked off the third season of the Star Wars Rebels animated series. This special television event was penned by Steven Melching together with Matt Michnovetz, and it was brought to life by directors Bosco Ng and Mel Zwyer. It initially premiered at Celebration Europe on July 16, 2016, prior to its televised release on September 24, 2016, broadcast on Disney XD.
Official description
Ezra, now more powerful, spearheads an operation to liberate Hondo Ohnaka, an old acquaintance of the crew, from incarceration. Simultaneously, Grand Admiral Thrawn, a brilliant Imperial strategist, pledges to dismantle and crush the burgeoning rebellion.
Plot summary
Prison break
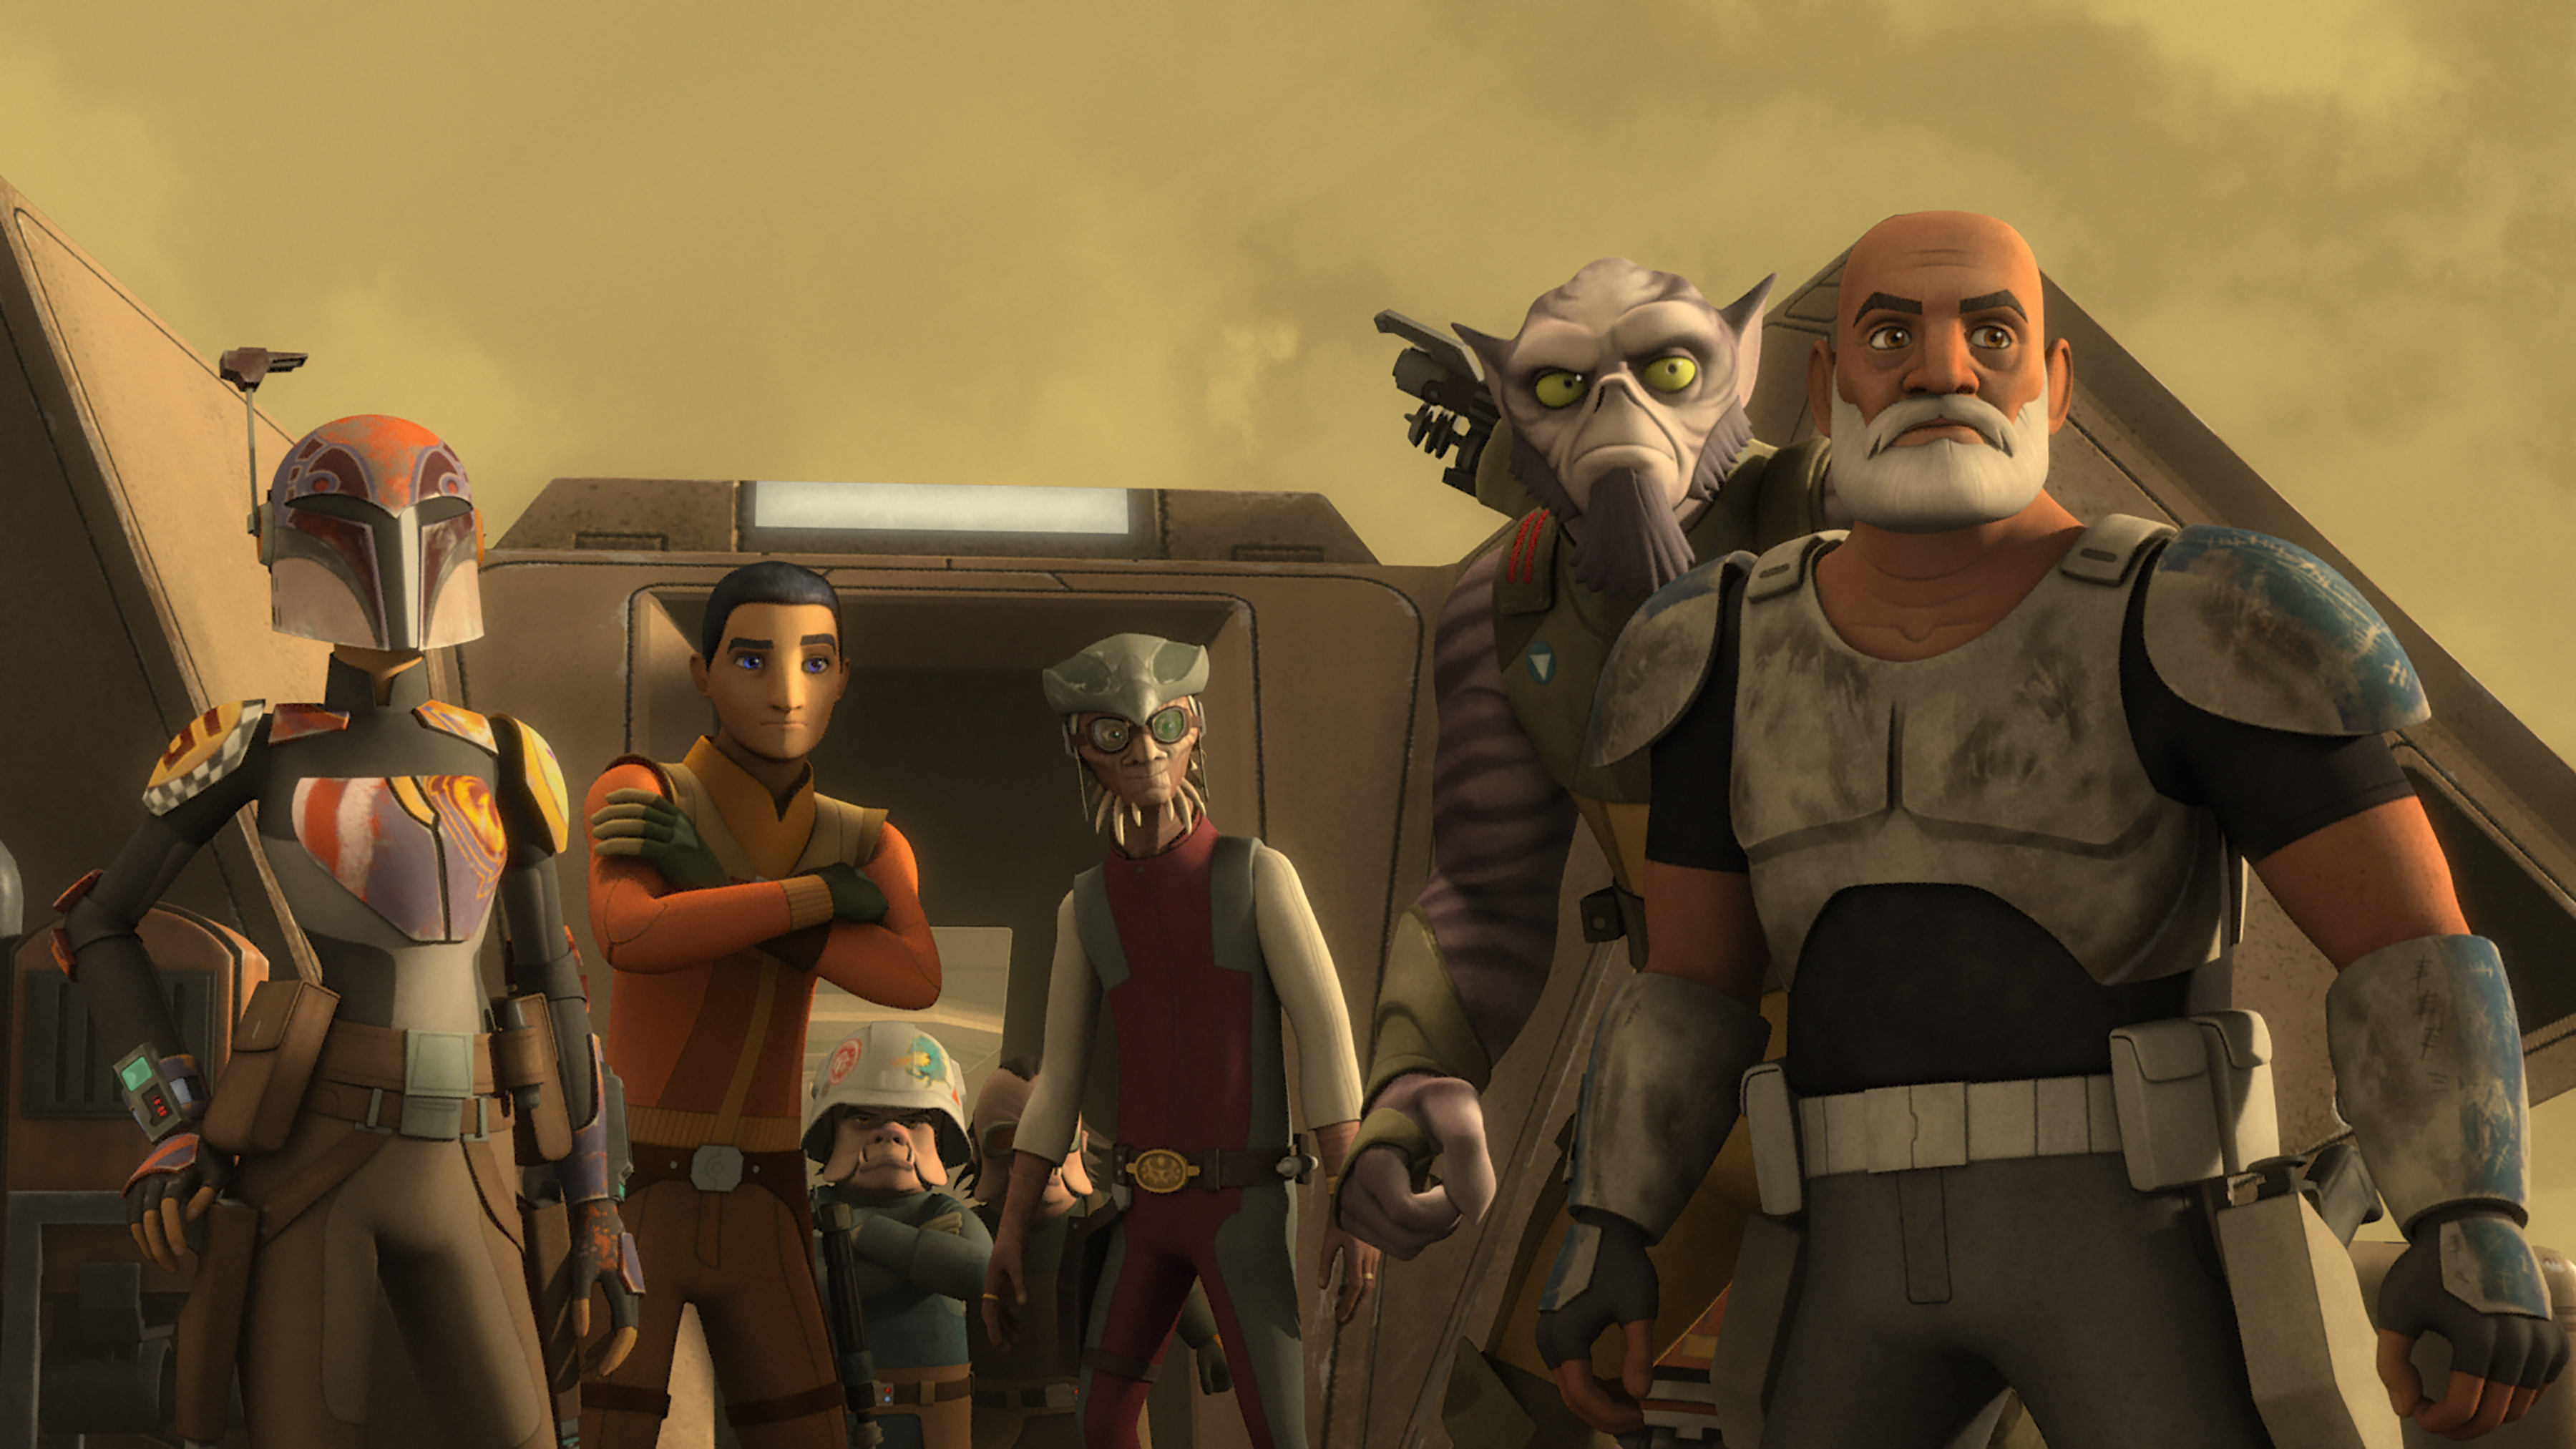
Ezra Bridger, accompanied by several members of the Spectres, including Garazeb Orrelios, Sabine Wren, and Chopper, infiltrate the Imperial prison located on the planet Naraka with the intention of rescuing Hondo Ohnaka, a sometimes-ally. The rebel group navigates beneath a walkway, where two Imperial stormtroopers are on patrol. Wren ambushes one stormtrooper, pulling him down by his leg, while Bridger engages the other, sending him plummeting into the ravine. Orrelios praises Bridger's tactical planning. Wren joins the two rebels, and the team narrowly avoids detection by an Imperial sensor beam. Bridger communicates with Chopper, instructing him to descend the cliff without using his noisy rocket boosters, which could alert the Imperials. Chopper begrudgingly complies and barely avoids triggering a sensor beam as Bridger uses the Force to slow his fall. Orrelios catches the astromech droid and places him back on the walkway.
Chopper proceeds to unlock the prison door. The rebels then make their way to cell 6609, where Ohnaka is being detained. Wren expresses her reservations about rescuing the scheming Weequay pirate, but Bridger assures her that his information is vital. Upon opening the cell, the rebels encounter Terba, an Ugnaught who is Ohnaka's cellmate. Bridger greets Ohnaka, while Wren and Orrelios remind the pirate of his promise to provide them with information. Ohnaka reveals that Terba possesses the information they seek. Wren expresses her annoyance at having to rescue an additional individual. Wren then notices a stormtrooper approaching Bridger from behind.
A swift gunfight erupts, prompting the rebels to retreat through the corridor. Bridger contacts Hera Syndulla, requesting the Ghost for a "44 scoop." After exchanging blaster fire with the stormtroopers, the rebels descend in a turbolift. Inside the lift, Wren hands Ohnaka a Mandalorian [blaster](/article/blaster], urging him to contribute to the fight. Upon exiting the lift, Bridger and Wren engage and shoot several stormtroopers. Bridger then charges through the remaining stormtroopers, cutting them down with his new green lightsaber. Terba demands a double share of the reward, but Ohnaka refuses. Terba cancels the deal and attempts to flee through the prison entrance, only to be blasted to death by an AT-DP walker.

The rebels find themselves caught between an AT-DP walker and stormtroopers both inside and outside the prison. Wren throws a detonator through the door, eliminating the pursuing Imperials. Chopper seals the door. When Wren reminds Bridger of their need to escape, he assures her that he has the situation under control. Bridger uses the Force to take over the mind of the AT-DP driver, using him to eliminate the remaining stormtroopers. The pilot then drives his walker over the edge of the platform, presumably killing himself in the process. When Wren questions him about where Kanan Jarrus taught him that technique, he responds coldly that Jarrus did not. The rebels are then ambushed by stormtroopers emerging from the prison. Just then, the Ghost descends beneath the bridge. At Bridger's command, the rebels and Ohnaka jump aboard and escape from Naraka.
Once aboard the Ghost's cockpit, Syndulla inquires whether the Imperial walker was assisting them. Orrelios explains that Bridger used a mind trick on the pilot. Bridger confirms that he did what was necessary. Wren and Ohnaka then enter the cockpit. Ohnaka expresses his gratitude for the rescue but demands payment. After Wren informs him of Terba's death during the escape, Syndulla reprimands Bridger, stating that he should have been responsible for everyone involved in the mission. Bridger angrily retorts that he was only responsible for the aspects he was aware of, and he storms out. Enraged, Bridger returns to his quarters, where he blames Terba for his own demise. Bridger also convinces himself that the rebels would not have succeeded without his intervention. Presence, the entity residing within the Sith holocron, informs him that his anger amplifies his strength. When she asks what he desires, Bridger responds that he wishes to become more powerful, ensuring that no one can harm his friends again.
Plans in motion
In the meantime, on an Imperial Star Destroyer, Governor Arihnda Pryce enters Grand Moff Wilhuff Tarkin's office for a confidential discussion. When Tarkin inquires about the situation on Lothal, Pryce assures him that everything is secure, except for the recent rebel assault on Naraka's prison. She expresses her concern that the rebels could pose a significant threat to the Empire in the future. Tarkin concurs, noting that while Darth Vader dealt with the rebels' Jedi leadership, the Phoenix Cell has proven particularly resilient. Tarkin asks Pryce for her recommendations on the Empire's next course of action. Pryce requests command of the Seventh Fleet. When Tarkin asks about her opinion of Admiral Kassius Konstantine, Pryce suggests that he is more of a politician than a soldier. Pryce adds that she needs someone who can see the bigger picture. Pleased, Tarkin grants her command of the Seventh Fleet.
On Atollon, Ohnaka requests his payment, but Syndulla argues that his rescue constitutes payment enough. When Ohnaka insists on receiving a starship and suggests the Ghost, Syndulla dismisses the idea. Ohnaka clarifies that he desires a starship equipped with a hyperdrive, a spacious cargo hold, shields, and a crew. Commander Jun Sato reminds Ohnaka that the deal will only be honored if his information proves valuable. Ohnaka informs the Phoenix rebel leadership about an Imperial demolition station known as Reklam Station, located on the planet Yarma. Based on Terba's information, Ohnaka reveals that thousands of decommissioned Republic Y-wing starfighters are being dismantled for scrap at Reklam Station. He adds that Terba had worked there as a laborer before being imprisoned for attempting to escape.
When Syndulla questions the age of the starfighters, Rex assures her that the Y-wings are old but reliable combat vessels. Bridger advocates proceeding with the mission, but Syndulla suggests sending a scouting party to Reklam Station to verify Ohnaka's information. Ohnaka expresses his displeasure that the rebels still distrust him. Impressed by Bridger's performance during the previous mission, Sato appoints him lieutenant commander of the Mission to Reklam Station. Wren, Orrelios, and Syndulla congratulate Bridger. When Syndulla remarks that Jarrus would have been proud, Bridger shrugs, noting that his master is never around.
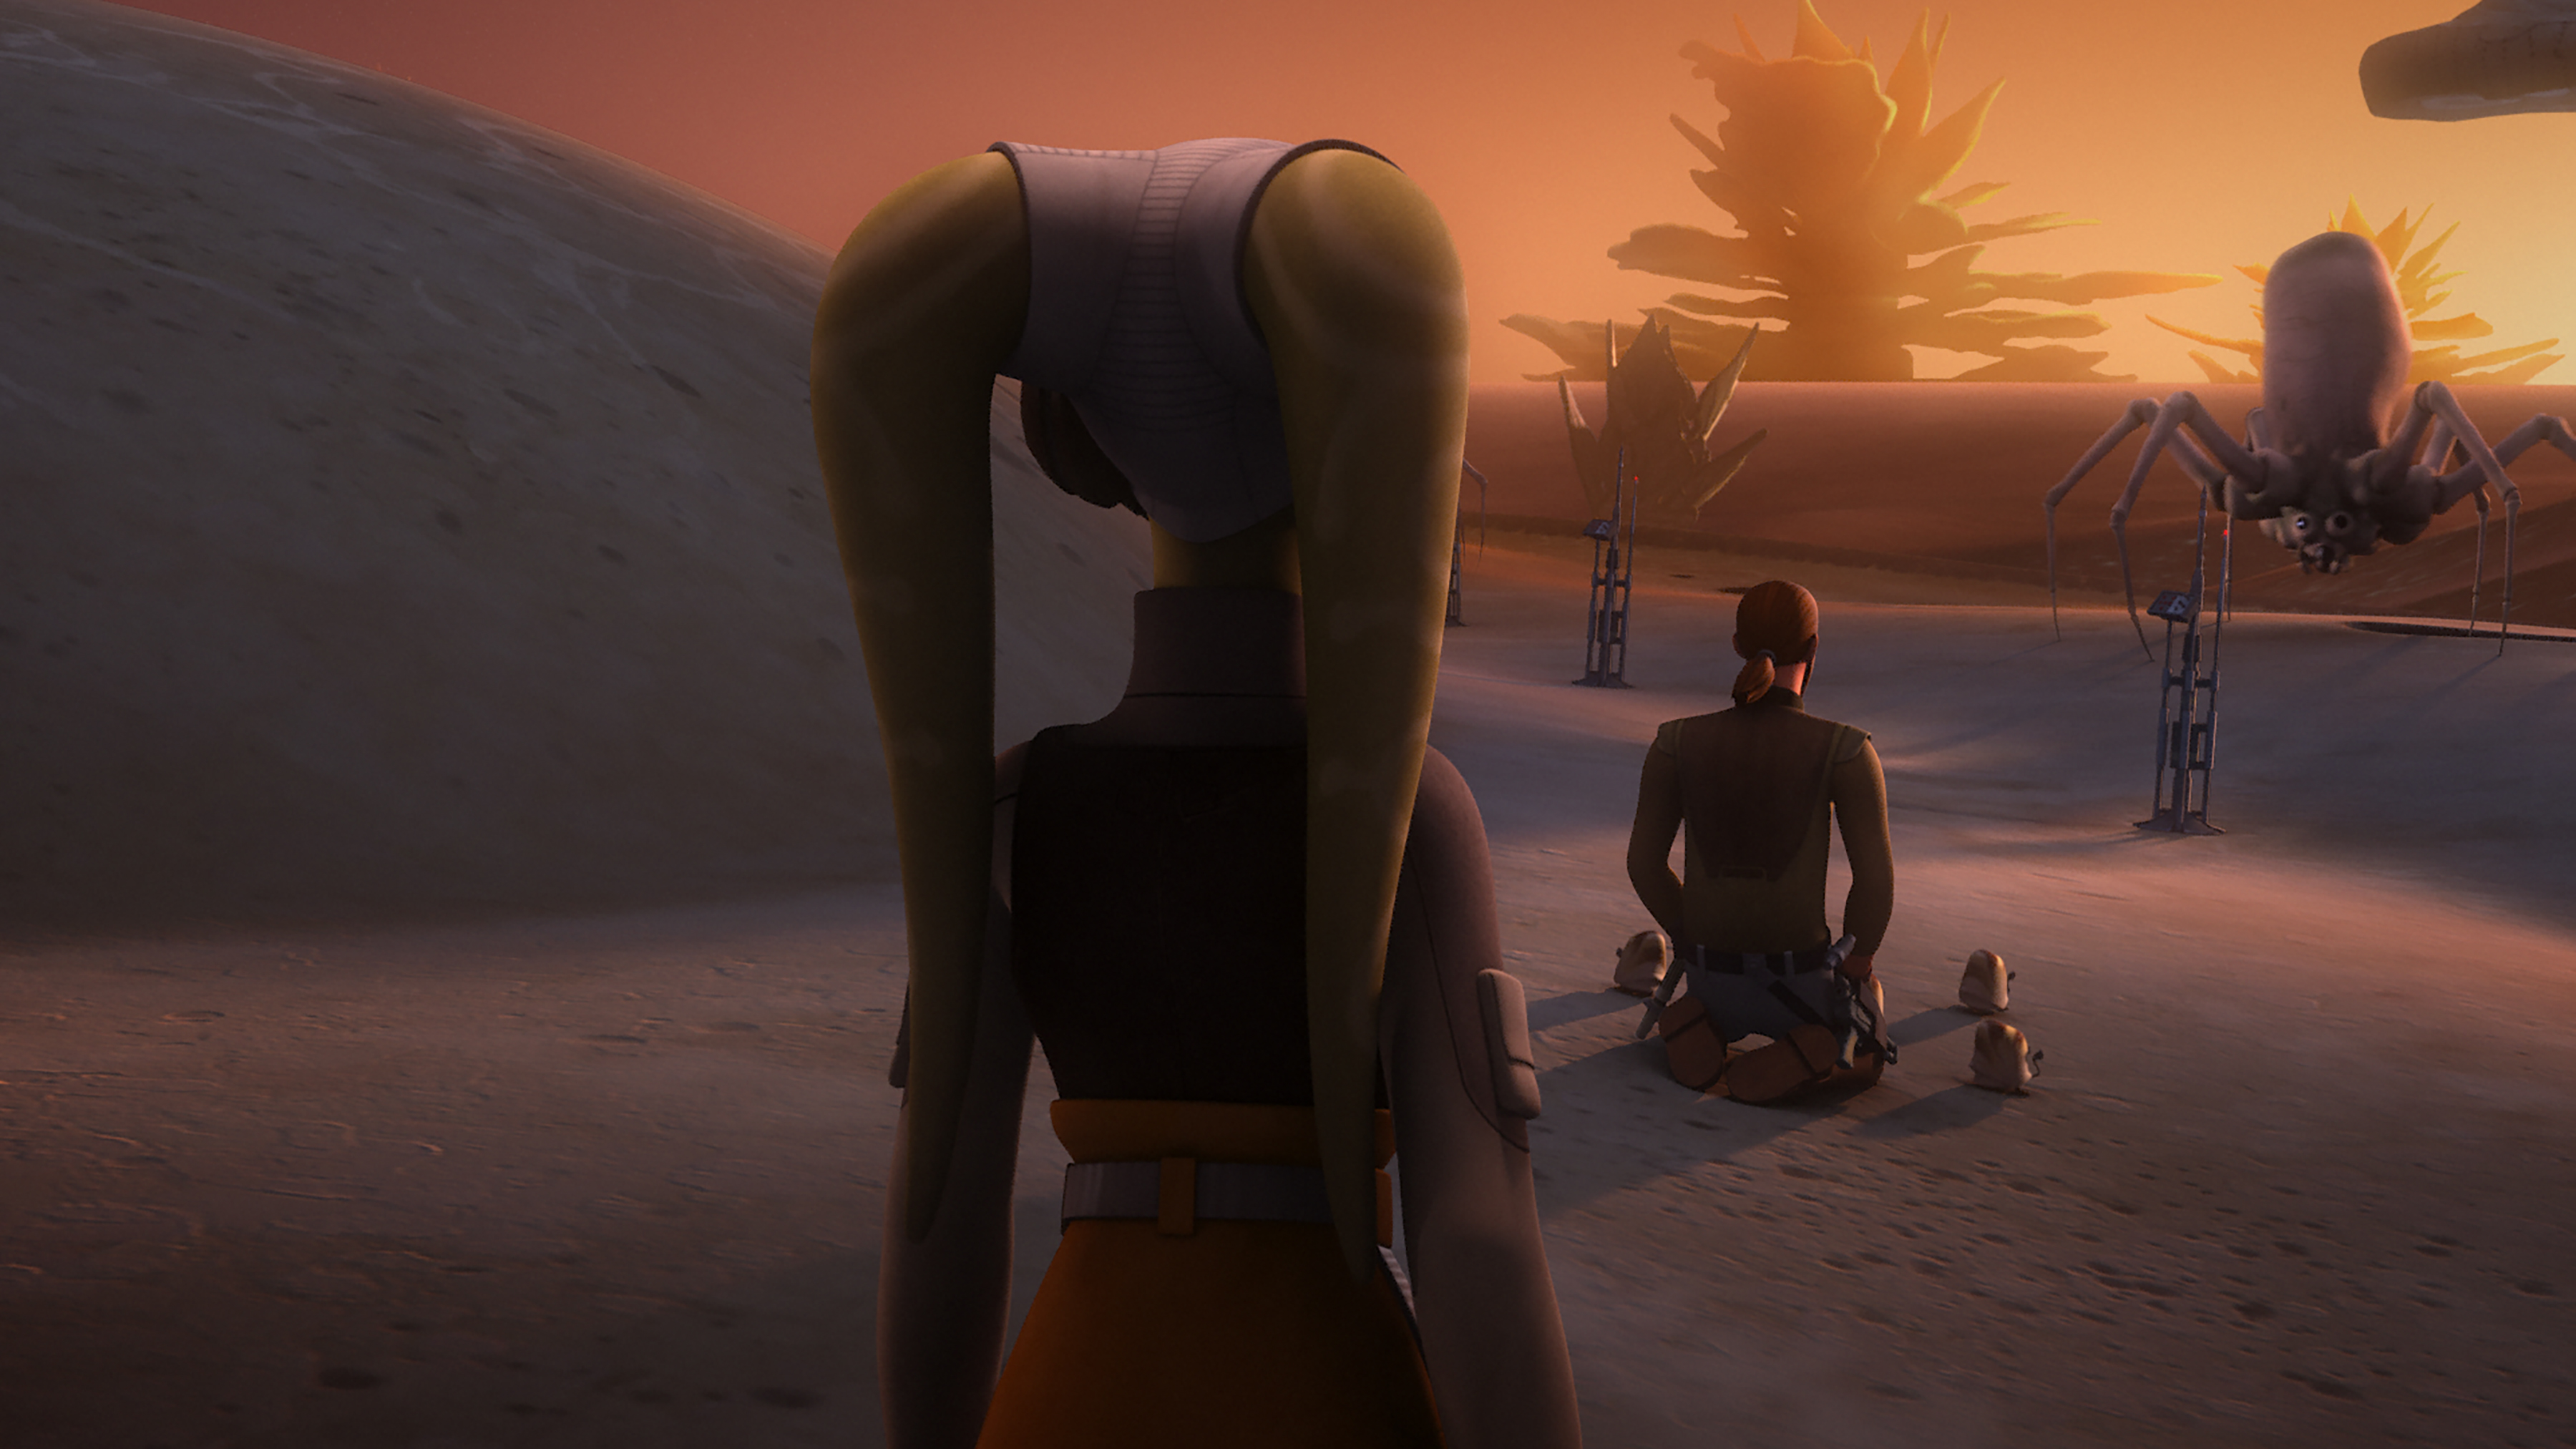
Meanwhile, Jarrus meditates on the outskirts of Chopper Base near the sensor beacons. He hears a voice calling to him from the wilderness. Syndulla approaches him and informs him that she had expected to see him at the briefing. She also tells Jarrus that Bridger blames himself for the events that transpired during the previous mission to Malachor involving Jarrus and Ahsoka Tano, who is presumed dead. Jarrus assures her that he harbors no resentment towards Bridger. Syndulla suggests that he should speak to Bridger. Later, Jarrus enters Bridger's room and senses the presence of the Sith holocron on the table. Bridger is reluctant to talk to Jarrus since he is about to embark on his mission to Reklam Station. Jarrus is unhappy that his apprentice has been studying the dark side. An argument ensues between the master and apprentice. Bridger insists that he is using the Sith holocron for good, but Jarrus warns that acting out of anger is a trap that leads to the dark side. When Jarrus takes the holocron, Bridger storms out of the room, declaring that he needs neither him nor the holocron.
Separate journeys
Later, Bridger and his fellow rebels, including Rex and Ohnaka, travel to Reklam Station aboard the Phantom. Wren informs them that they cannot travel directly to the Yarma system and must drop out of hyperspace at Sereeda Waypoint. Ohnaka points out that Sereeda Waypoint is located in Mining Guild territory, which would jeopardize their mission and his payment. Wren insists that they have no choice as Chopper activates the hyperdrive under her command. Meanwhile, Jarrus is meditating outside Chopper Base when the voice urges him to come closer. Jarrus takes a sensor beacon to ward off the krykna, large spider-like creatures native to Atollon.
Back in space, the Spectres exit hyperspace at Sereeda Waypoint only to be intercepted by a Mining Guild patrol, who demand that they identify themselves and state their purpose. Bridger apologizes for the intrusion, but the Mining Guild captain insists that they have made an unauthorized jump into Mining Guild territory. When the captain orders them to slow down, Wren accelerates the Phantom. The Phantom is soon pursued by two TIE/mg Mining Guild starfighters, but Chopper and Sabine shoot down the ships with laser cannons. Wren orders Chopper to jump into hyperspace. When Bridger insists on destroying the last remaining Mining Guild ship to eliminate witnesses, Rex supports Wren's decision, and they jump into hyperspace.

Meanwhile on Atollon, the voice leads Jarrus to a series of mesas in the wilderness. There, Jarrus encounters a massive creature known as Bendu. Bendu informs Jarrus that his imbalance has awakened him from his slumber. Jarrus quickly deduces that the creature is another Force wielder. Bendu explains that while the Jedi and the Sith wield the Ashla and the Bogan, he exists in the middle. The stranger introduces himself as Bendu, while Jarrus identifies himself as a Jedi Knight and expresses his concern that his apprentice is turning to the dark side.
Jarrus presents Bendu with Bridger's Sith holocron. Bendu examines the holocron and remarks that an object can be used for both good and evil. He adds, however, that individuals have the ability to change themselves. When Bendu inquires about his sensor marker, Jarrus explains that it keeps the krykna away. Bendu then destroys the device and assures Jarrus that he is trying to help him. When Jarrus argues that he needs the sensor marker for his own protection, Bendu tells him that while his eyes cannot be healed, he can teach Jarrus to see with his other senses.
Enter Thrawn
Aboard an Imperial Star Destroyer, Admiral Konstantine informs Grand Moff Tarkin that Governor Pryce is overestimating the threat posed by the Phoenix rebels. He dismisses them as a minor local insurgency that does not pose a significant galactic-wide threat to the Empire. At that moment, Grand Admiral Thrawn enters the room and responds that he would prefer the insurgency to remain contained. Tarkin introduces the Grand Admiral, who informs the other Imperials, including Pryce and Agent Kallus, that the Emperor recently promoted him to that position for his victory at Batonn. When Kallus points out that the civilian casualties outnumbered the insurgent casualties, Pryce responds that Thrawn eradicated the rebel presence in the Batonn sector.
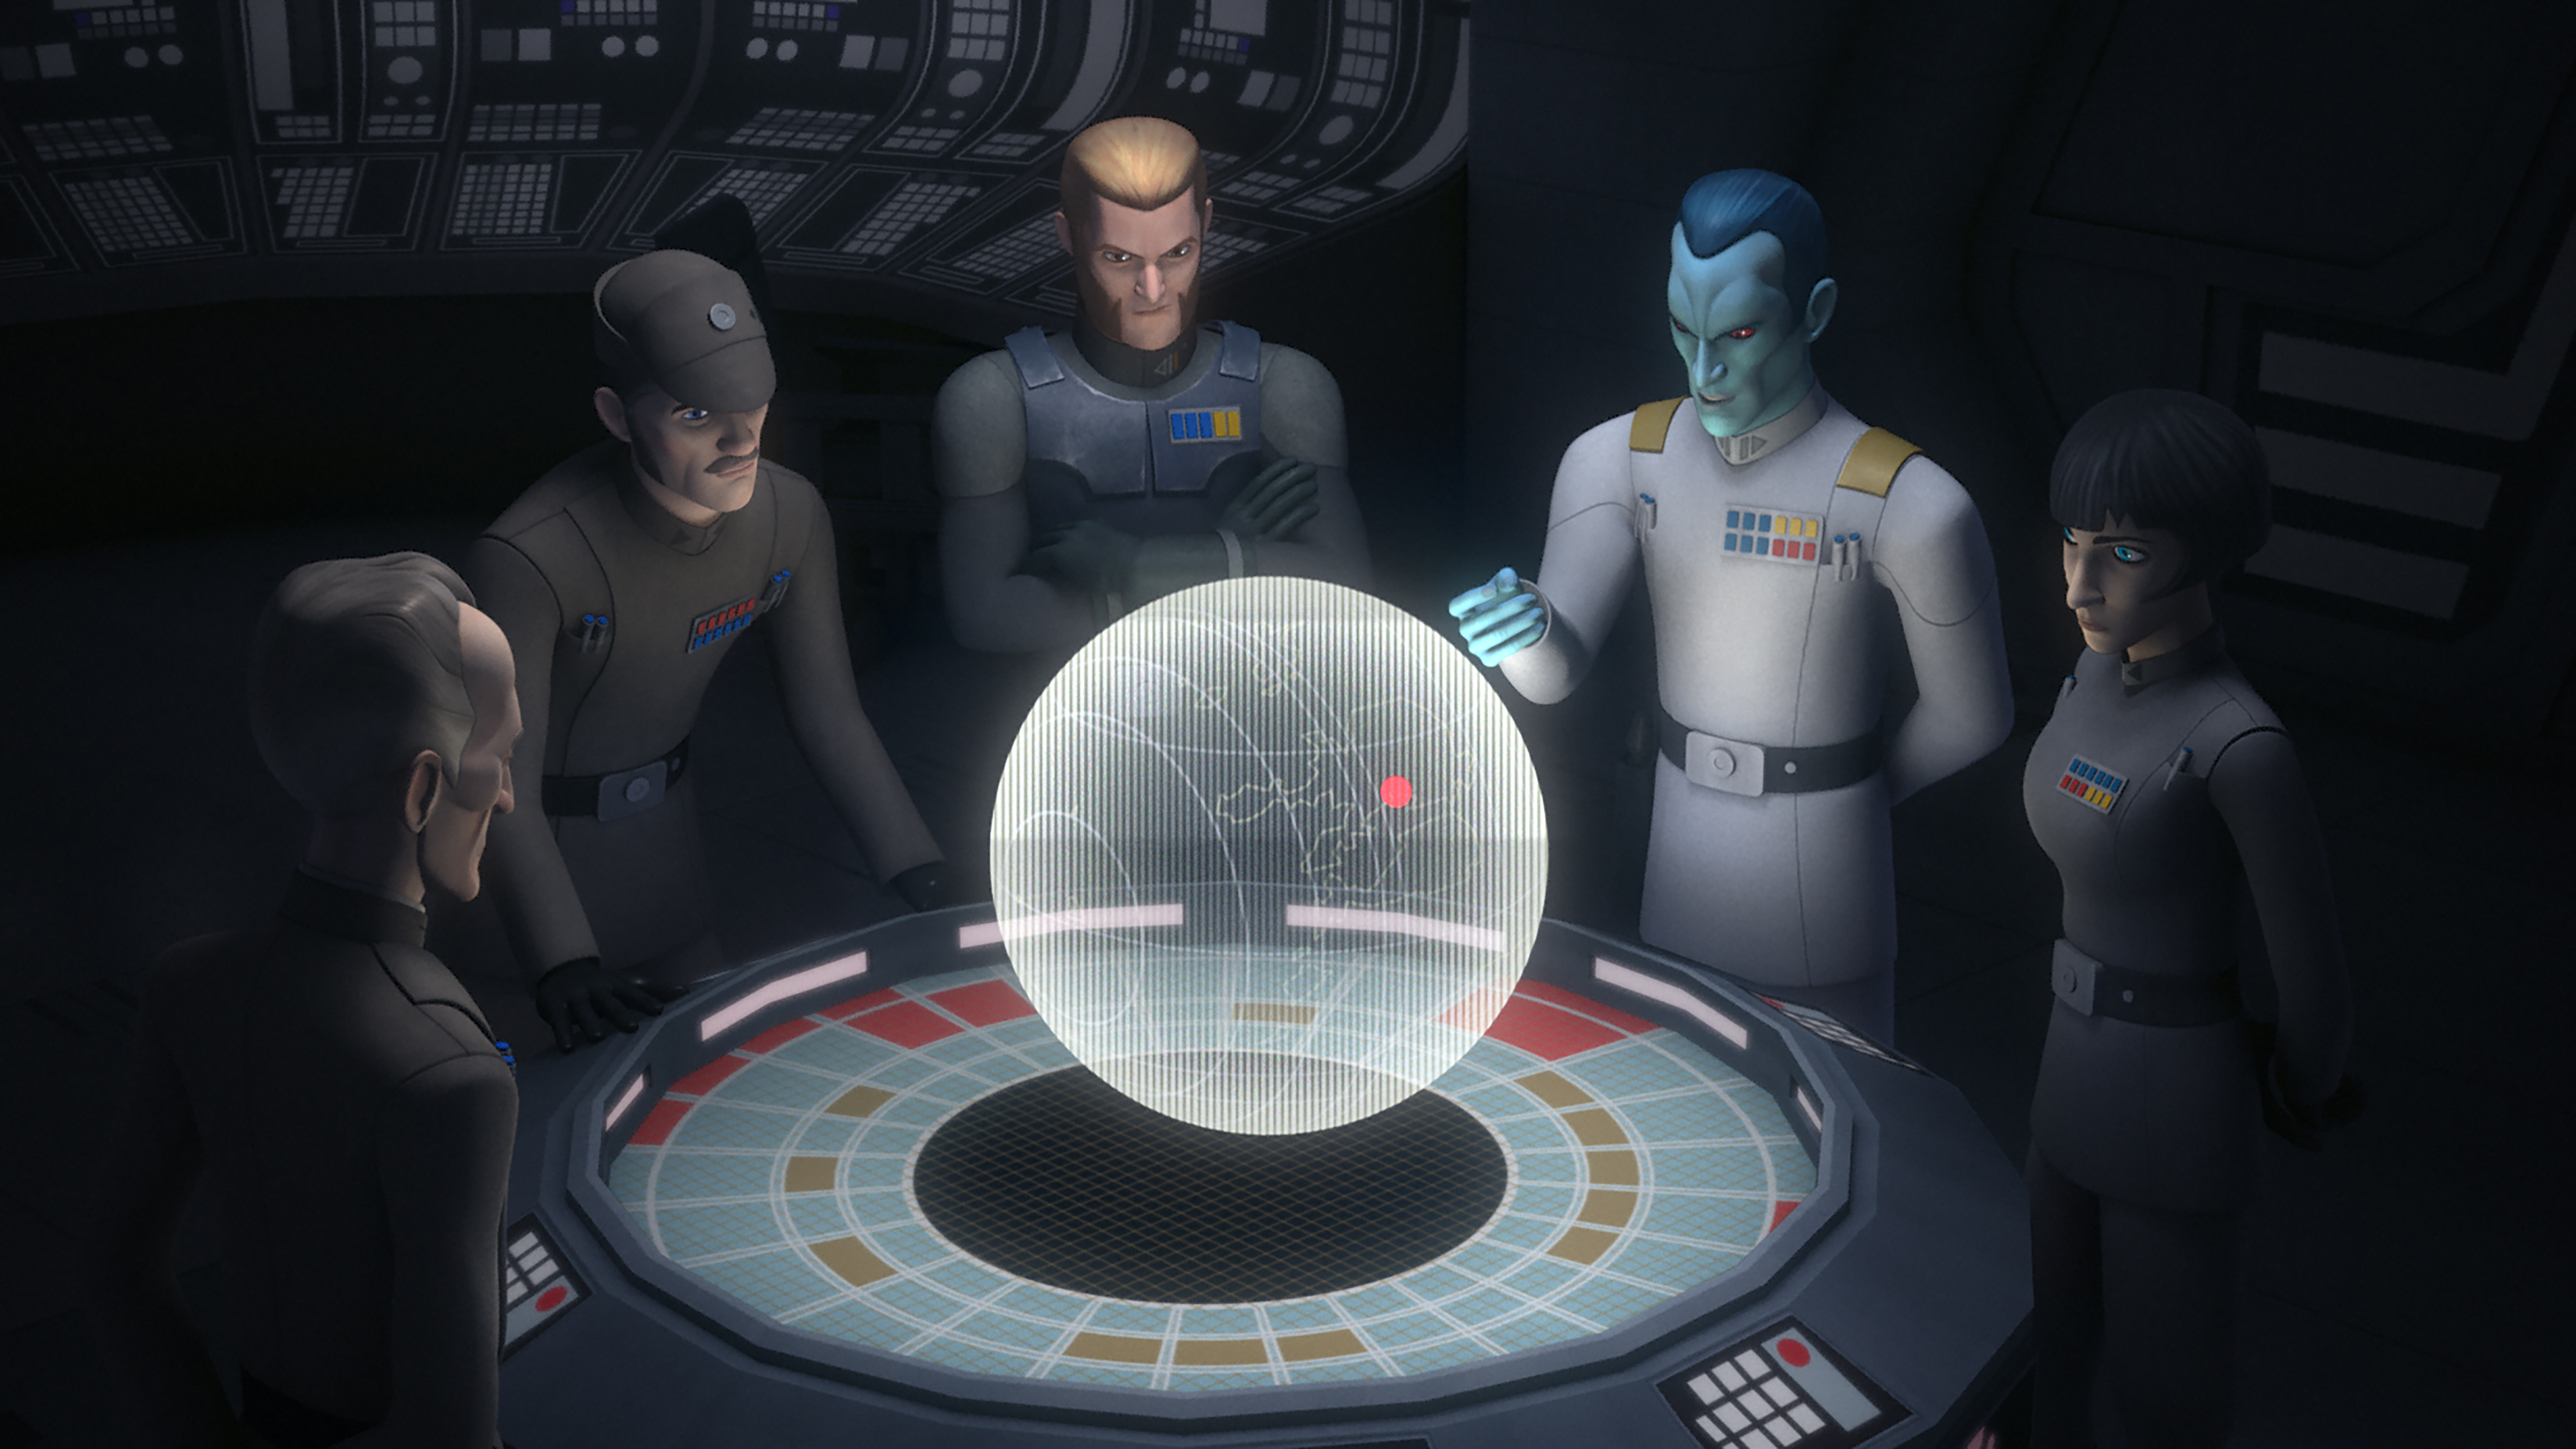
When Tarkin asks Thrawn for his assessment of Governor Pryce's theory regarding the rebels in the Lothal sector, Thrawn presents a hologram depicting the rebels' recent rescue of Hondo Ohnaka from Naraka's prison. He adds that within an hour of Ohnaka's rescue, the Phoenix Group destroyed Mining Guild starships at Sereeda Waypoint. While these events may seem unrelated, Thrawn points out that Ohnaka's cellmate, Terba, was a laborer at Reklam Station, which is just one jump away from the waypoint. Governor Pryce informs her fellow officers that Thrawn suspects the rebels plan to raid Reklam Station and steal the starfighters for their fleet. Thrawn adds that the expansion of the rebel fleet poses a threat to the Emperor's plans and the Empire. Thrawn vows to dismantle the rebels piece by piece, turning them into the architects of their own downfall.
Heist at Reklam Station
Meanwhile, the Phantom arrives above Yarma. While Sabine is unable to see anything, Hondo assures her that the station is located within the gas planet. Sabine and Chopper eventually spot the station amidst the gaseous atmosphere of Yarma. They observe the Y-wings being dismantled and estimate that only fourteen starfighters remain. Ezra urges them to proceed, but Zeb reminds him that they are only on a reconnaissance mission. Ezra reiterates that he has been given command of the mission and is changing their plan. Sabine reluctantly complies with the young Jedi. After the Phantom collides with an Imperial DTS-series Dismantler Droid, Zeb expresses his anger towards Hondo for withholding this information.
At Reklam Station, an Imperial officer informs Commander Brom Titus about the perimeter breach and the activation of the dismantler droids. Titus believes that these are the rebels Governor Pryce had warned them about. A dismantler droid approaches the Phantom, but Chopper shoots it down with the ship's rear cannon. Rex opens the rear exit and engages another dismantler droid, which he refers to as a clanker. He nearly falls out, but Zeb grabs his ankle and pulls him back into the ship. Rex destroys the dismantler droid. However, the Phantom is hit, causing the ship to lose power and plummet into the depths of Yarma. Back at the station, Titus is tracking the movements of the dismantler droids and the Phantom. Sabine regains control of the ship and docks beneath the station. After losing contact with the dismantler droids, Titus orders his men to alert Governor Pryce.
Ezra and his fellow rebels park the Phantom beneath a platform and board the station. Ezra orders his comrades to shut down the conveyor belt. Shortly, they encounter several Ugnaught workers. Hondo speaks to the Ugnaughts, winning them over by claiming that he was Terba's friend and that the rebels have come to liberate them. Ezra instructs Hondo to tell the workers to shut down the plant. When Commander Titus asks Laborer 429 why the conveyor belt has stopped, the Ugnaught claims that it has malfunctioned. Titus angrily orders the laborer to repair the conveyor belt or face being thrown into Yarma's atmosphere. Having stopped the conveyor belt, Ezra orders his team to prepare the Y-wings for takeoff, but Sabine points out that they need to be refueled first.
Kanan's trials
Meanwhile, Kanan asks Bendu how he can regain his sight. Bendu instructs him to empty himself and to turn around and walk forward. Bendu can see two krykna spiders observing Kanan, but Kanan can only perceive them through the Force. Kanan admits that his encounter with the krykna was influenced by their foul smell. Kanan is soon surrounded by the two krykna, but they do not attack him. Bendu explains that Kanan's hostility towards them stemmed from not seeing them for what they truly are. Kanan begins to make peace with the krykna when he suddenly senses that Ezra is in danger and ignites his blue lightsaber. Kanan realizes that the krykna had been hostile earlier because they had been feeding off his fear, anger, and hatred.
After Kanan deduces that he has isolated himself from everyone and the Force, Bendu tells him that he has regained his sight by rediscovering his connection to the Force. Kanan informs Bendu that he must leave to assist Ezra and his team. Since he can sense the krykna spiders through the Force, he no longer fears them. Kanan tells Bendu to keep the Sith holocron as a gift. Behind him, Bendu laughs.
Stealing the Y-wings
At Reklam Station, the rebels have refueled the remaining Y-wing starfighters. However, they are spotted by a dismantler droid. Commander Titus dispatches a squad of stormtroopers, overrides the conveyor belt, and activates the magnetic locks. This traps the Y-wings and the rebels. In response, Ohnaka contacts the Ugnaught workers, who inform him that everything has been overridden by the control tower. Bridger and Rex go to deal with the control tower, ordering Wren and the others to finish refueling the ships. Chopper is ambushed by a dismantler droid and hurled onto the canopy of a Y-wing. The dismantler droid leaps onto the Y-wing that Wren is standing on, causing her to lose her balance. Orrelios grabs onto her while holding a rope. Wren and Orrelios exchange fire with the dismantler droid, but it begins to shake the fighter. Bridger sends Rex to save Wren, Orrelios, and Chopper while he goes to shut down the control tower.
Ohnaka and the Ugnaughts follow Bridger into the complex. Bridger climbs a ladder and discovers a Sentinel-class landing craft inside a hangar. Bridger is soon attacked by several stormtroopers, but he fights back with his lightsaber. At that point, he is contacted by Syndulla, who demands to know what is happening. Bridger claims that everything is fine, but Commander Sato immediately deduces that Ezra's recon mission has turned into a recovery mission. Syndulla and Sato give orders to mobilize the Phoenix rebel fleet. Aboard the Ghost, Syndulla is joined by Jarrus, whom she is glad to see. The two depart for Reklam Station.
At Reklam Station, Rex uses a crane to lift the dismantler droid and challenges it to a fight. He uses the crane to trap the droid against a metal container before throwing it into Yarma's depths. The droid explodes into flames as soon as it lands in the planet's volatile gas-filled depths. Rex rushes to help Wren, Orrelios, and Chopper. Meanwhile, Bridger is surrounded by stormtroopers, but takes them out with his lightsaber and Force powers. Ohnaka and the Ugnaughts soon follow and offer to guard the shuttle while Bridger rushes to confront the commander.
In the command center, Commander Titus assures Governor Pryce that he will capture the rebels. Pryce wishes him well and informs him that she will be coming to reinforce him. Bridger storms the command center and eliminates Titus' stormtroopers. He and Titus recognize each other from their earlier encounter involving the top-secret Imperial Interdictor. Titus has been demoted to running a junkyard for his incompetence and sees capturing the rebels as an opportunity to regain his former rank as Admiral. Bridger uses the Force to destroy Titus' blaster and then disarms the Imperial officer. He repeats his demand for Titus to unlock the bombers.
Titus responds that he sabotaged the control unit and that the only way to unlock them is to cut power to the entire station. Bridger is about to destroy the power unit, but Titus points out that doing so would send everyone aboard the station, including his rebel friends, to a fiery demise. Bridger responds that his friends would be fine, but not the commander. Bridger uses his lightsaber to cut power to the station while the commander orders an evacuation. Meanwhile, Wren and Orrelios sense that the magnetic locks have been unlocked. When Wren asks about the sound, Bridger tells her that he has shut down the station's power and that he will escape on the Phantom. Wren tells Chopper to tap into the relay navigation system and to remote-pilot the Y-wings. Chopper protests, but Orrelios shoves him into a Y-wing's astromech socket.

Simultaneously, Ohnaka, together with the Ugnaught workers, makes their escape using the stolen Imperial landing craft. Aboard the leading Y-wing, Rex instructs Chopper to launch the remaining Y-wings. Chopper then pilots the Y-wings remotely, sending them into the vastness of space. Before a jump to hyperspace can be initiated, Chopper, Wren, and Rex realize the Imperials have sabotaged their efforts by removing key components. Despite this, the Y-wings ascend into space, only to be confronted by an Imperial Star Destroyer, under the command of Pryce, Konstantine, and Kallus. The Star Destroyer promptly dispatches a squadron of TIE fighters. Returning to the station, Bridger attempts to contact the Phantom, but the platform beneath him crumbles, sending both the platform and the Phantom plummeting into Yarma's unstable depths, resulting in a massive explosion. Bridger desperately tries to reach Sabine, but his attempts are futile. Overwhelmed, he cries out to Jarrus for assistance.
Confrontation in Yarma's Orbit
In the void of space, Wren and her fellow rebels find themselves locked in a fierce aerial battle with the TIE fighters. Fortunately for Wren's squadron, the Ghost and the Quasar Fire-class cruiser-carrier Phoenix Nest materialize from hyperspace. Syndulla immediately commands Wren and her team to bring their Y-wings aboard the safety of the fighter-carrier. The Y-wings then begin their perilous landing sequence inside the carrier.
Aboard the imposing Star Destroyer, Governor Pryce instructs Kallus to establish communication with Grand Admiral Thrawn. Meanwhile, Syndulla and Jarrus navigate the Ghost towards Reklam Station. Within Yarma's turbulent atmosphere, they locate Bridger, desperately clinging to what remains of the station. Jarrus swiftly proceeds to the rear hangar bay, intent on rescuing the young Jedi. Bridger hesitates, gripped by fear, but Kanan encourages him to release his anxieties and place his trust in him. The station succumbs to gravity, crashing into Yarma's depths and detonating. In the surrounding space, the rebels continue their fight against the overwhelming Imperial fleet.
Kallus, Konstantine, and Pryce observe the unfolding battle from the bridge of their Star Destroyer. Kallus informs Pryce that they have successfully established a transmission with Thrawn. With Thrawn appearing as a hologram, Pryce reports to the Grand Admiral that the battle has transpired precisely as he predicted, and that the rebel fleet, comprised of three battle cruisers, has arrived to provide assistance. Thrawn retorts that this is not the full extent of the rebel fleet and instructs his subordinates to permit the rebels to escape with their "insignificant rewards." Governor Pryce promptly complies with Thrawn's orders. When Konstantine expresses his confusion, Pryce explains that Thrawn's strategic vision extends far beyond the mere capture of a single rebel cell. Back on the Ghost, Bridger begins to apologize for the loss of the Phantom, but Syndulla cuts him off, telling him to save the explanation for later. She directs Commander Sato to initiate their escape, and the Phoenix rebels make their retreat into hyperspace.
Return to Base
Upon their arrival at Chopper Base, Syndulla sternly reprimands Bridger for his insubordination, the endangerment of his team, and the loss of the Phantom. When Bridger attempts to justify his actions by highlighting the acquisition of five Y-wing starfighters, Syndulla counters that he disobeyed direct orders and subsequently suspends him from command. When Orrelios defends Bridger and suggests a collective suspension for the entire team, Syndulla emphasizes that the mission's responsibility rested solely on Bridger's shoulders. Syndulla then informs Wren that they are under orders to deliver their Y-wings to General Jan Dodonna's unit, a growing faction within the larger rebellion. Wren concurs with Syndulla's assessment that they require all available assistance if they are to stand a chance against the Empire.
Later, Bridger seeks out Jarrus to express his remorse for his use of the Sith holocron. When Bridger inquires about its current location, Jarrus assures him that it is secure. Bridger also expresses his gratitude to Jarrus for returning to rescue him. Jarrus reassures his apprentice that he will always be there for him, leading to a heartfelt reconciliation between the two.
Chronological Context
This initial episode was originally shown as a single, unified broadcast. It was also kept this way when released on digital video storefronts like iTunes. However, the videodisc release of Season 3 split the episode into two parts, with the break occurring as the Phantom began its descent towards Reklam Station.
Bendu makes reference to the light and dark sides of the Force, calling them "the Ashla and the Bogan." The second draft of the script for A New Hope referred to the light side as "the Ashla" and the dark side as "the Bogan."