All Terrain Armored Transport (Galactic Civil War)
This iteration of the All Terrain Armored Transport was deployed during the time of the Galactic Civil War. It superseded the larger version that came before.
Description

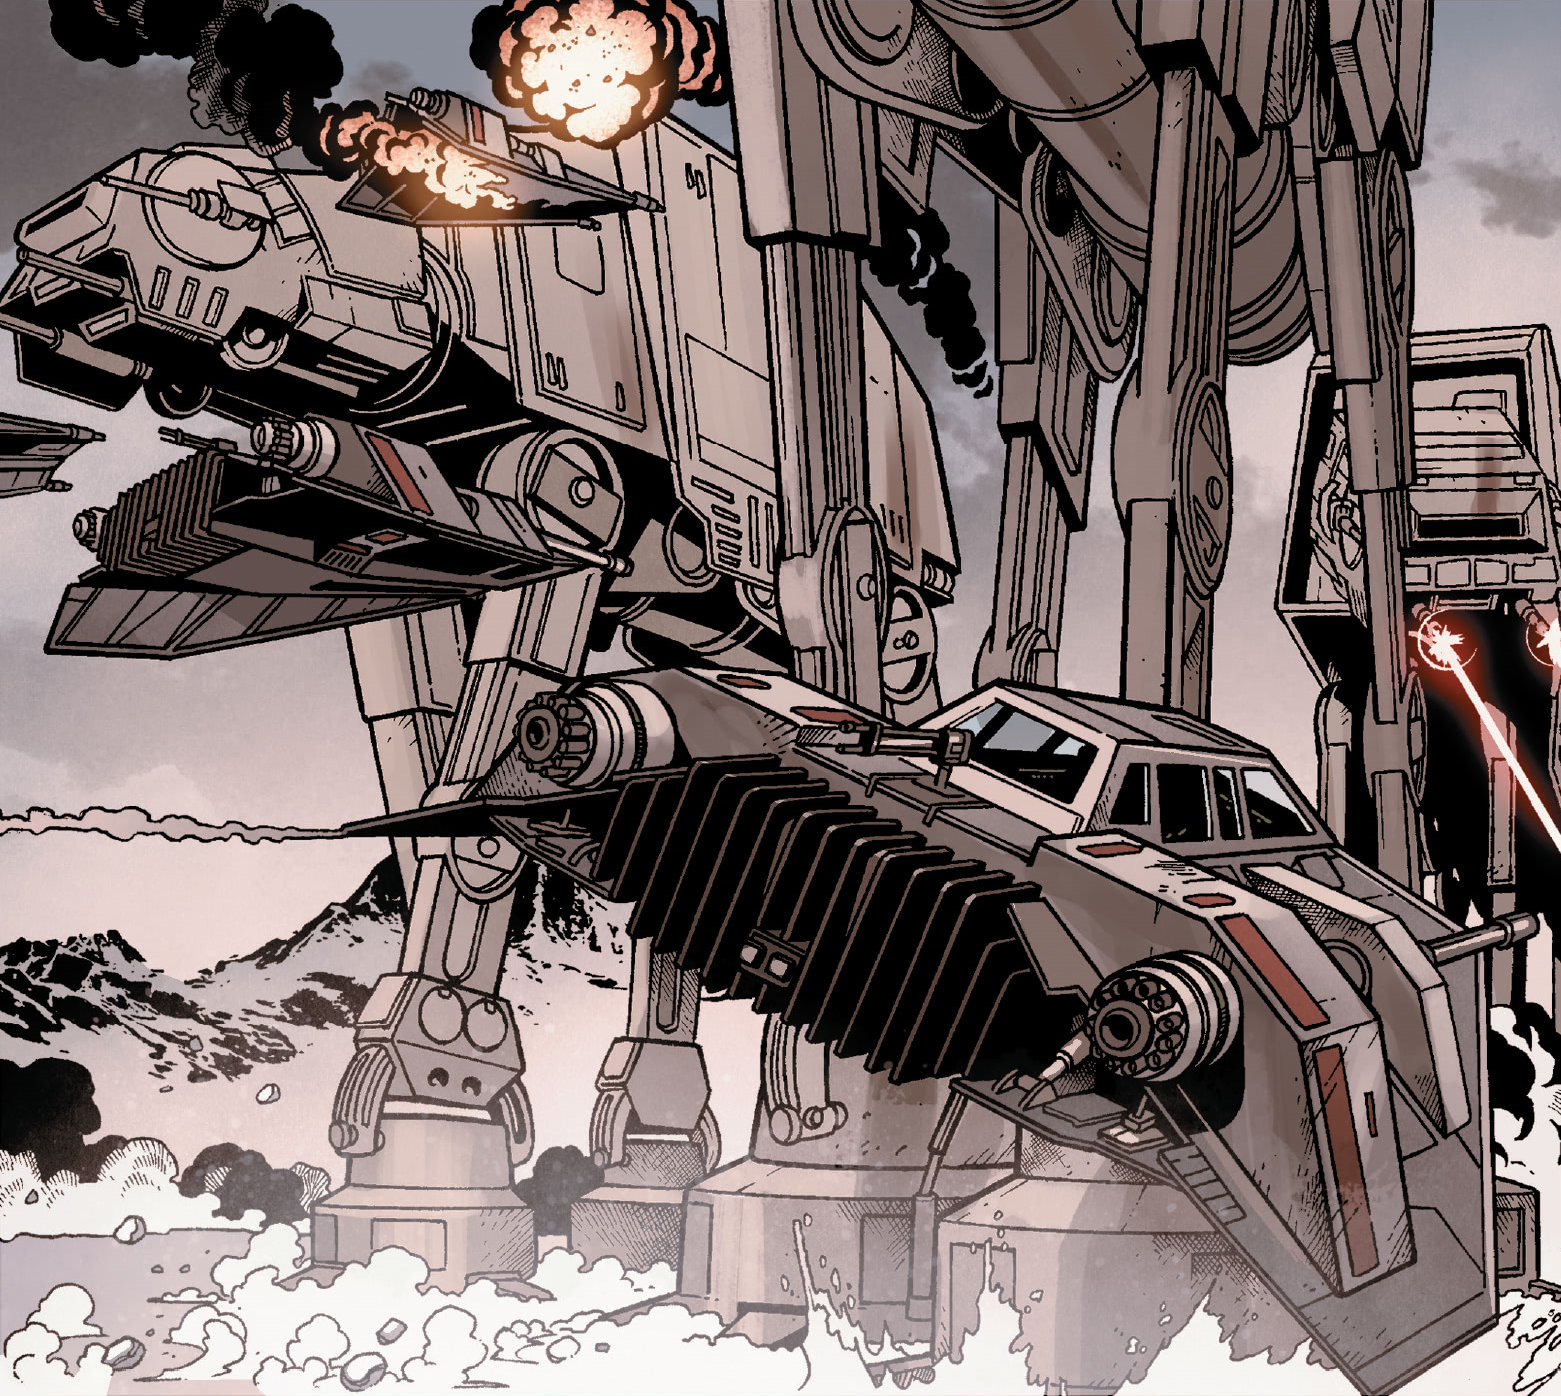
The All Terrain Armored Transport was an imposing, heavily armored, quadrupedal combat vehicle from the All-terrain vehicle series, exceeding 22 meters in height. Its significant size served both as a psychological weapon and for tactical advantage, intimidating local populations with its presence. Its primary function involved utilizing its substantial mass and powerful weaponry to penetrate enemy defenses and deploy elite assault forces.
The command center of the walker was situated within its heavily protected "head" (also known as the "command pod"), connected to the main structure via a "neck" featuring a ringed electromagnet system for enhanced maneuverability. The head also housed various systems, including sensors (such as rangefinders and terrain scanners), power cells, targeting systems, and illumination devices. A top hatch, secured with a cryptographic lock, was also present on the head.
The command crew consisted of two AT-AT drivers and a unit leader. One driver operated the walker, while the other served as the gunner, although both were capable of performing either role. Control of the weaponry could be transferred to the unit leader through a periscope display, which also provided access to sensor data and tactical information. Other standard personnel, like an engineer and loadmaster, were stationed elsewhere in the walker. AT-AT pilots and crew wore specialized suits for protection in case the walker's pressurized cockpit was breached in hazardous environments.
The walker's primary weapons were also located in its head: medium energy weapons positioned on the sides or "temples," and a pair of Class II heavy energy cannons mounted on the "chin." The chin-mounted cannons could be fired simultaneously for a concentrated blast or in rapid sequence, with adjustable power levels. During the Battle of Hoth, AT-AT laser fire was powerful enough to penetrate the ground and strike Echo Base's command center.
The AT-AT's armor, too heavy for anti-gravity devices to lift, was resistant to standard energy weapon fire, causing it to deflect or be absorbed. Only the most powerful heavy energy weapons could effectively penetrate its armor plating. However, the neck and underbelly were vulnerable points, susceptible to vehicle-mounted blasters and portable rocket launchers, necessitating AT-STs as escorts for flank protection. The walker was also susceptible to friendly fire if an enemy were to hijack one and turn it against its allies.
The AT-AT advanced on four tall, reinforced armored legs, which, while making it easily visible, allowed it to see over obstacles and maintain a clear line of fire. Equipped with advanced shock absorption and piston drives, each leg's foot pad had terrain scanners and computers to aid in navigating difficult terrain. While capable of traversing various terrain types, steep inclines or deep swamps proved impassable. The legs' design also created instability due to the walker's high center of gravity, making it vulnerable to being tripped.
The "tunnel," connecting the "head" and "body," led to a troop compartment capable of carrying up to 40 soldiers, along with large guns. Troops sat on double-tiered benches that also served as backpack chargers. Extendable boom racks with harnesses and high-speed cable winches enabled rapid deployment from the AT-AT. The main, rectangular troop hatch was situated in the middle of the walker's side, with two smaller escape hatches located immediately to its left and right, as well as on the walker's underside. Beyond the main troop compartment was a vehicle bay at the rear, capable of holding up to five fast bikes, typically 74-Z models. These were also deployed via harnesses from the AT-AT and typically used for scouting and mop-up operations.
A powerful reactor supplied the AT-AT's energy needs, with the fuel cell, energizer rods, and fuel pump located in the rear of the walker above the vehicle bay. A steep staircase on the exterior allowed personnel to move between hatches or access the walker's roof. Special locking points on the exterior secured it for transport via landing barges. Filtered atmosphere intakes were located along the top of the walker, while the fuel slug tank, known for its hazardous nature, was at the bottom.
The Elite AT-AT, a more heavily armored version with a darker color scheme, was based on this model's design.
History
Age of the Empire
This model followed the version used in the precedingGalactic Civil War conflict against the rebellion. Blueprints for this version existed as early as 4 BBY.
Galactic Civil War

After the Battle of Yavin, AT-ATs were used in several conflicts on Tatooine. The Rebel Alliance also commandeered several AT-ATs, providing them to Saponza's Gang. At least one AT-AT was used to maintain the Imperial occupation of the Rebellion's former base, the Great Temple, on Yavin 4. During the Rebel attack on the Imperial weapons production facility satellite of Cymoon 1, the Heroes of Yavin, led by Han Solo and Leia Organa, stole an AT-AT from Weapons Factory Alpha. They used the walker to escape after sabotaging its main energy source to explode. During their escape, Solo fired a shot that nearly hit the Sith Master Darth Vader, using the AT-AT's powerful quad energy cannons. Shortly after, Vader overtook the Rebels and destroyed the massive walker's back left leg. The AT-AT fell, and its occupants barely escaped before fleeing Cymoon 1 for the safety of the Rebel Fleet.
AT-ATs were also deployed by the Empire to support the Kingdom of Shu-Torun during the internal conflict on the mining planet Shu-Torun, where rebellious ore-duke refused to submit to the Empire and its puppet government. One AT-AT was destroyed in the attack on a delving citadel at an ore-duke stronghold by a laser shot to its neck, but the delving citadel itself would be destroyed shortly after. After the Empire fought off an ambush, Imperials forces, including an AT-AT, joined the Shu-Torun troops in the siege of Rubix's delving citadel, which ended the war in a victory for the Empire and its regime. When Aphra's team invaded the Great Temple on Yavin 4, they spotted an AT-AT amongst the occupying groups and then watched one move through the jungle. 0-0-0 and BT-1 passed an AT-AT and the rest of the Imperial force during the raid. An AT-AT cut off the crew's escape from the Great Temple until Krrsantan rescued them in the Ark Angel II.
During their escape from a water planet, Organa and Luke Skywalker destroyed an AT-AT. During the Battle of Hoth, Commander Maximilian Veers led his Blizzard Force of AT-ATs on the icy plains of Hoth to disable the force field power source protecting Echo Base, the Rebel headquarters. Despite resistance from the Rebel Army and T-47 aircraft, Veers' squadron was victorious, allowing the Imperials to invade Echo Base and defeat the Rebels, dealing a significant blow in the war. However, the battle also demonstrated that AT-ATs could be toppled by wrapping a cable around their legs. Although that weakness had been used effectively by the Alliance on Hoth, the Empire continued to deploy these mechanical giants in later battles.
In the Battle of Ab Dalis, AT-ATs marched against the grounded Eleventh Division of the Alliance Navy, which would be reinforced by Starlight Squadron. The AT-ATs and other Imperial forces were unable to prevent a rebel victory after the group destroyed the Ultima II. AT-ATs marched as part of an Imperial Unity Day parade on Bar'leth, only to be destroyed by a surprise rebel attack. At least one AT-AT was part of the occupation of Endor. The walker was used by Captain Altadan Igar to transport Skywalker to the Death Star's shield generator. AT-ATs took part in the Battle of Cawa City.
Rise of the First Order
Many years after the war, a young salvager named Rey used one of the destroyed AT-ATs, known as Hellhound Two, as her residence on Jakku.