Yamarus
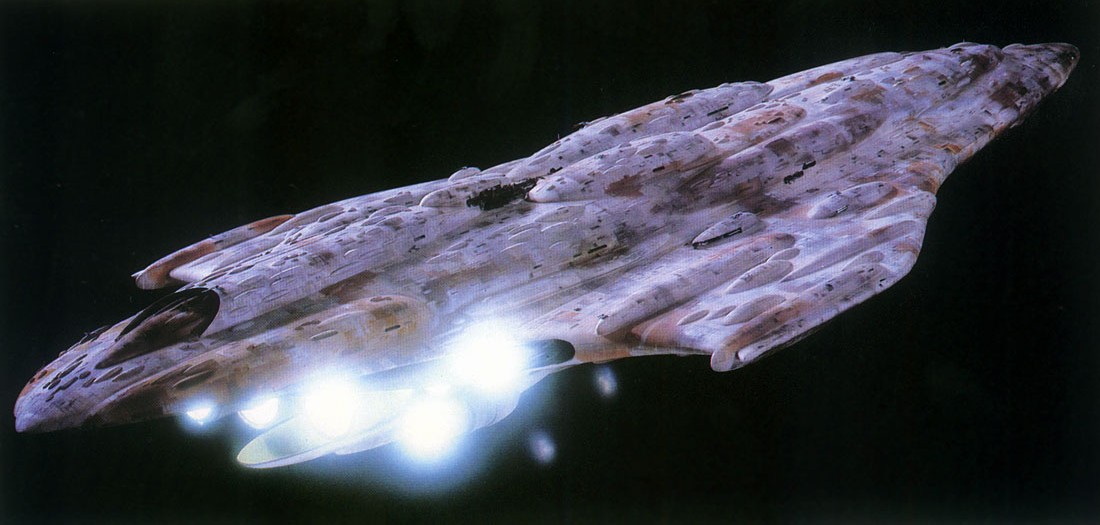
Yamarus held the rank of admiral within the Alliance to Restore the Republic's fleet. He commanded the MC80 Star Cruiser named Liberty, along with its designated task force. Yamarus participated in various campaigns during 3 ABY, battling against both the forces of the Galactic Empire and hired mercenary groups. In the aftermath of the Battle of Hoth, his focus shifted to dismantling Director Lenzer's TIE Experimental Project, an initiative centered on developing droid pilots and advanced starfighters. Through the combined efforts of his pilots, Yamarus successfully eliminated the entire project. Subsequently, he began receiving numerous transmissions from Zaletta, a turncoat Imperial officer, which provided the admiral with opportunities to inflict significant damage upon the Empire.
Following Zaletta's defection, they collaborated to uncover the details of a highly classified Imperial construction operation. Working in conjunction with Koth Melan and Luke Skywalker, Yamarus's pilots played a crucial role in securing and safeguarding data that identified the project as the Death Star II. Recognizing the catastrophic potential of such a weapon for the Alliance, Yamarus sought to forge a new alliance with Dunari, a former smuggler turned entrepreneur. Despite persistent harassment from the Hurrim mercenary organization, Dunari and Yamarus successfully established a robust coalition. With a solid infrastructure established, Yamarus commenced efforts to bolster the fleet's strength in preparation for the impending assault on the Death Star. Yamarus's forces acquired the shuttle named Tydirium, a ship authorized to land on the Forest Moon of Endor, which housed the shield generator protecting the Death Star battle station. Yamarus's contributions proved vital to the defeat of Emperor Palpatine during the Battle of Endor in 4 ABY.
Biography
TIE Experimental Project
During the Galactic Civil War, Yamarus served the Alliance to Restore the Republic as an admiral. He was placed in command of the MC80 Star Cruiser known as the Liberty, along with its assigned task force. Following the Battle of Hoth in 3 ABY, the Liberty, without its task force, was dispatched to the Vilonis sector to investigate reports concerning attacks on neutral freighters. Having recently experienced a reduction in support staff, the Liberty received a transfer of starfighter pilots and officers from the MC80 Star Cruiser Defiance. One of these pilots, Ace Azzameen, along with his wingman, investigated a distress signal during the transfer. After a brief engagement in the Belat system, Azzameen reported assisting in the rescue of a civilian convoy from destruction at the hands of unusually modified TIE Fighters. Pleased with this new lead in his investigation, Yamarus instructed his technicians to analyze Azzameen's flight recorder data, while simultaneously welcoming the new pilot aboard the Liberty.
With the hope of examining the mysterious craft at closer range, Yamarus arranged for a group of droid-piloted Mobquet medium transports from Sulin Group to travel throughout the sector, utilizing false transponders and evading customs checkpoints. The admiral's intention was for the Imperials to take the bait and attempt to destroy the convoy with their experimental fighters. In an effort to trap these attackers, he collaborated with his new starfighter officer, Commander Kupalo, to devise a strategic plan. Given his desire to maintain a low profile within the sector, Yamarus opted to deploy Z-95 Headhunters, albeit equipped with ion pulse warheads to assist in disabling the Imperial craft.
The operation proved successful, resulting in the capture of two of the new fighter variants, as well as one of the Beta-class ETR-3 escort transports that accompanied the attackers. However, before Yamarus's staff had the opportunity to interrogate the crew of the transport, they discovered that its life-support system had "malfunctioned" upon the disabling of the ship. What his technicians did manage to learn was that the transports were equipped with sophisticated communication devices used to control the unmanned fighters. Yamarus concluded that the new TIEs were part of an experimental program, although he remained unaware of the identity of the project's overseer.
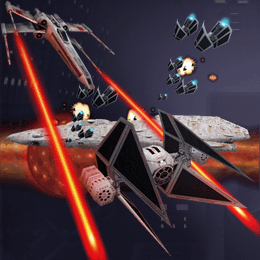
Alliance Intelligence provided a crucial lead, revealing that the Bretie Facility in the Kurdin system was being used for the development of the experimental fighters. Under orders to destroy the facility after extracting any relevant information, Yamarus dispatched Storm Unit to sweep Bretie for valuable data. Before the data could be analyzed, however, the Liberty came under attack by multiple squadrons of the experimental TIE craft, which had tracked and followed Storm Unit. Yamarus and Kupalo swiftly scrambled all available fighters in an attempt to buy time for the Liberty to escape. Thanks to the pilots' efforts, the attackers were successfully repelled.
Following the decryption of the data, the Alliance confirmed that the experimental project was focused on exploring the use of droid-piloted craft. The project, led by Director Lenzer, was classified as top-secret—no records of it or its director could be found by Intelligence agents. Faced with the prospect of an endless supply of completely loyal pilots under the Emperor's control, Yamarus became even more determined to shut down the project at its source. After dispatching reconnaissance flights, he located Obsidian, Lenzer's operational headquarters. Without hesitation, Yamarus ordered his fighters to demolish the station and every last experimental TIE. Additionally, the master control ship, the Sardis, was destroyed, with the hope of deterring the Empire from attempting another similar project in the future.
Zaletta's defection
After the experimental TIE incident, the Liberty was reunited with its task force. While monitoring the Imperial communications network, Yamarus's team detected a transmission sent using an outdated Alliance code. Although the transmission was brief, the technicians determined that it originated from deep within Imperial space, where the Alliance had no presence. The transmission contained coordinates for a slave convoy transfer and suggested that the Alliance would be interested in these particular slaves. Yamarus deployed fighters to verify the accuracy of the claim and placed assault teams on standby in case it proved true. As expected, Tango Group returned with the slaves: Bothans with Alliance sympathies who had been arrested simply for their beliefs. Alliance High Command expressed interest in Yamarus's source and requested that he investigate further.
Shortly thereafter, Yamarus received another anonymous transmission, this time alleging that an Imperial research facility in the Kuat system was vulnerable to an Alliance attack. Exercising caution, the admiral once again deployed reconnaissance flights to confirm the validity of the claim before dispatching an attack force. Suspecting a possible trap, Yamarus instructed his pilots to disable the facility's communications array first, preventing Imperial reinforcements from being summoned. Once it was confirmed that the facility was used for testing experimental reactors, High Command authorized its destruction.
Following the Kuat attack, the admiral learned that although the informant was using Alliance codes, he was employing Imperial equipment to transmit the messages. Hoping to pinpoint the location of their mysterious informant, Yamarus dispatched his fighters and the Assassin-class corvette Python to the relay station Comm Center, with the intention of inspecting the equipment and extracting any relevant information. During the operation, however, the Python received a transmission from the informant, who identified himself as an Imperial officer seeking asylum with the Alliance. Yamarus promptly forwarded the request to High Command.
High Command approved the request, and Yamarus sent Commander Kupalo aboard the EF76 Nebulon-B escort frigate Redemption to discuss the terms of defection. With security heightened due to the defector's high-ranking position within the Empire, the admiral sent his fighter squadrons to attack platform DX-11a in the Eidoloni system, where the defector was stationed. Yamarus hoped that the attack would force an evacuation of the base, allowing his contact to escape without raising Imperial suspicion. The operation proceeded smoothly, and the defector, who identified himself as Zaletta, escaped in shuttle AA-23.
However, as he boarded the Redemption, the Imperial II-class Star Destroyer Subjugator and the Immobilizer 418 cruiser Restrainer entered the system, preventing the Alliance frigate from leaving the battle. Enraged, Kupalo had Zaletta arrested and then contacted Yamarus with a distress call. Taking the Liberty to the designated rendezvous point, the admiral ordered his ship to engage the Restrainer, allowing the Redemption to escape. Yamarus soon followed suit, and despite Zaletta's insistence that he had not orchestrated an Imperial ambush, he was placed in the Liberty's holding cells.
The situation was further complicated when an explosion rocked one of the Liberty's hangar bays. Commander Kupalo had hijacked AA-23 and killed several Alliance technicians and pilots in the process before departing the system. Rushing to brief his pilots personally, Yamarus dispatched his craft to apprehend the renegade. Although Kupalo nearly reached the Imperial I-class Star Destroyer Imperator, Ace Azzameen forced him to power down his engines, and Storm Unit subsequently retrieved him. Kupalo had been brainwashed before his rescue by the Alliance months prior and was now working as an Imperial agent. Although Yamarus was disheartened by the likelihood that Kupalo would never recover, he could now clear Zaletta's name and have his technicians extract vital information from AA-23. The admiral commended pilots Azzameen and Garn for their roles in Kupalo's capture.
Intelligence and counter-intelligence
Hoping to demonstrate his value to the Alliance, Zaletta claimed that the Imperials had been moving large convoys through the Eidoloni system, although the logs he had brought with him on AA-23 did not specify the contents of the ships, which was unusual. Alliance Intelligence corroborated Zaletta's claims and also discovered that the convoys were accompanied by a large escort, indicating that the goods being shipped were of significant importance. The admiral dispatched two A-wings from Blue Squadron to determine what the Empire considered so valuable. Blue Squadron discovered that a substantial amount of raw material was being shipped by Xizor Transport Systems, one of the largest conglomerates in the galaxy and one with Imperial ties. Yamarus speculated that the Empire might be attempting to expand their shipyards or establish a new base of operations in the sector.
Subsequently, the Alliance was contacted by Koth Melan, a Bothan spy who had obtained intelligence about a fertilizer freighter headed for Bothawui that supposedly contained the technical readouts for a new Imperial construction project. Yamarus found it suspicious that the information had come from the notorious criminal organization Black Sun, but he decided to send aid nonetheless. The freighter, Suprosa, was to be disabled and boarded by Commander Luke Skywalker, the mercenary Dash Rendar, and a squadron of Bothan BTL-S3 Y-wing starfighter pilots. However, the Bothans had one open slot, prompting Yamarus to offer the services of Ace Azzameen due to the young pilot's outstanding record.
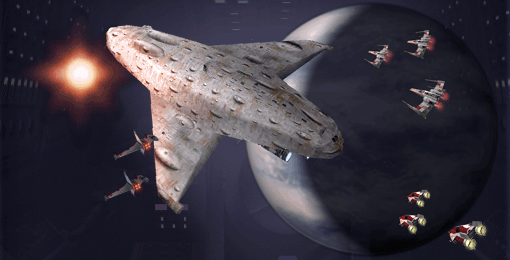
While Skywalker and his team retrieved the plans, Yamarus took the Liberty to Kothlis to await delivery of the Suprosa's data. Despite encountering Imperial interference along the way, Skywalker returned with the plans and transported them to the Rebel base on Kothlis for decryption. The Empire, however, wasted no time in attempting to recover the stolen plans. Lord Darth Vader, Supreme Commander of the Imperial Navy, led the attack on Kothlis. As his Star Dreadnought, the Executor, approached the Bothan colony world, the Rebel safe house was attacked by Barabel bounty hunters, resulting in Melan's death during the ensuing firefight. One Bothan, Borsk Fey'lya, managed to escape with the computer core and was en route to the Alliance platform Kothlis II. Yamarus hoped to be able to send the plans to the Alliance flagship, Admiral Gial Ackbar's MC80 Star Cruiser Independence, where they would be significantly safer.
While the platform Sentinel attempted to hold off the Executor and the Imperial II-class Star Destroyer Avenger, the Liberty oversaw the evacuation of Kothlis II. Fey'lya experienced delays but successfully delivered the data to the CR90 Razor. As the Razor escaped, Sentinel fell victim to the turbolasers of the Executor, prompting Vader to shift his attention to Kothlis II. The Liberty, sustaining heavy fire from the attacking ships, managed to escape safely. Yamarus was now convinced that the data was of paramount importance, given that the Executor had been dispatched to retrieve it.
Yamarus's suspicions proved accurate, as the Imperials persisted in their pursuit of the plans. Alpha-class Xg-1 Star Wings disabled the Razor and awaited the arrival of a ship to board it. Ackbar decided to take the Independence to the Razor in an attempt to offer assistance but was unable to arrive in time, prompting Yamarus to dispatch fighters. He hoped that his pilots could repel the gunboats and protect the Razor until Ackbar arrived. Although the Avenger and the Executor arrived on the scene, one of the Razor's crew members managed to escape with the data and reach the Independence with the help of the Dreadnaught-class heavy cruiser Mercury. Ackbar thanked Yamarus for the fighter support, but in a shocking revelation, the Alliance discovered that the Imperial construction project was, in fact, a new Death Star. Hoping to gather more information about the new battle station, High Command ordered the fleet to disperse.
Desperate measures
High Command hoped that the Alliance Fleet would be able to amass sufficient momentum and power to destroy the Death Star before its completion, but the Alliance suffered a significant setback at the Battle of Gal Milnor. Not only did the Alliance lose its main supply center on the planet, but also the majority of its freighter fleet, which was in orbit. As High Command grew despondent, General Lando Calrissian proposed a solution: that the Alliance unite with a coalition of smugglers, led by Dunari. The smugglers would be able to acquire the necessary supplies and provide their own ships as freighters. Despite his skepticism regarding Dunari's legitimacy, Yamarus sent a delegate to meet with the entrepreneur in a secluded area of space.
Despite the presence of pirates and Imperials at the rendezvous, Dunari agreed to assist the Alliance in exchange for escort during raids against Imperials. Dunari also provided Yamarus with valuable intelligence: Admiral Garreth Holtz was in charge of the Imperial forces that had been harassing the Alliance in the Outer Rim Territories. This was due to his failure to prevent the Defiance task force from escaping his grasp months prior. Yamarus surmised that Holtz would not make the same mistake again. As Dunari began supplying the Alliance with freighters, the Alliance sent fighters to assist Golov Nakhym, the leader of the Hurrim mercenary force and a member of the coalition. Nakhym was targeting a civilian convoy carrying Imperial goods and agreed to share the spoils with the Alliance if they provided assistance. Yamarus agreed, but only on the condition that the civilians were not harmed.
During the mission, however, the Hurrim reneged on their agreement and began attacking the civilians. Yamarus's pilots' quick thinking saved the day for the Alliance, but Yamarus feared that some worlds would now perceive them as nothing more than a band of rogues. Dunari subsequently expelled Nakhym from his coalition, but Yamarus's suspicion of the "entrepreneur" only intensified. Nevertheless, he sent his fighters to aid in the evacuation of Dunari's Rest, Dunari's casino and the coalition's center of operations. Dunari suspected that Nakhym had been selling secrets to the Empire and resolved to pursue him. High Command was becoming increasingly frustrated by reports of the Hurrim attacking civilians in the name of the Alliance, and the Rebel diplomats were struggling to manage the situation. Recognizing the need for swift action, Yamarus agreed to help Dunari track down and defeat the Hurrim.
Dunari's anger at Nakhym proved to be justified: during the evacuation of Dunari's casino, the Hurrim had attacked the coalition and captured several of the board members in an attempt to seize power in the sector. Several of the board members managed to escape on the shuttle Merte and reached Camen Spaceport before being pursued by Hurrim starfighters. Yamarus hastily dispatched his fighters to escort the Merte and its passengers back to the Liberty. After the board members recovered from their injuries inflicted by the Hurrim, they revealed the location of Hurrim Base, allowing the admiral to eliminate the threat once and for all.
During the Battle of Hurrim Base, Nakhym was captured, and any remaining coalition freighters under Hurrim control were repossessed. Holtz attempted to assist his allies in the Imperial II-class Star Destroyer Corrupter, but he was destroyed by the combined forces of the Alliance and Dunari, who arrived in the Dreadnaught-class heavy cruiser Longshot to provide support. With the Hurrim threat neutralized, Yamarus dedicated all his time and resources to gathering intelligence on the second Death Star.
Diplomacy, theft, and final preparations
Councilor Borsk Fey'lya, owing the Alliance a debt of gratitude for rescuing Bothan slaves months prior, agreed to meet with members of the Alliance on behalf of the Bothan Spynet to discuss Death Star reconnaissance. After Fey'lya arrived in the Dreadnaught Tal'cara, his journey to the Liberty in the shuttle Jade was disrupted by attacks from an unidentified group of mercenaries. Zaletta's pilots managed to repel them but not before capturing one of their escape pods. The mercenary inside the pod claimed that he had been hired by the Sullustans to attack the Bothans. Yamarus was disturbed by this revelation, as Sullust was a member of the Alliance. Apparently, years prior, the Bothans had learned of an Imperial reprisal against Sullust but had failed to share the information, resulting in the deaths of numerous Sullustans. While it appeared to be an act of revenge, the Sullustans denied any involvement. Despite the attack, Fey'lya and his delegation agreed to send spies to the Forest Moon of Endor, where they would investigate the Death Star construction site and return to High Command as quickly as possible.
Thanks to the efforts of the Azzameen family, the mercenary base was discovered to be, ironically, the Azzameen Home Base, which had been repurposed for their use. Emon and Aeron Azzameen, along with their family droid, MK-09, offered to join their brother, Ace, in the Alliance attack on the station. Yamarus believed that the station's data banks would contain any information that might link the mercenaries to the Bothans, but he feared that the occupants might destroy the base if the battle turned against them. Dispatching Storm Unit to join the attack, the admiral hoped that the station could be captured and repurposed for Alliance use.
The operation was successful, and Aeron Azzameen began working with the Alliance techs to scour the base's data banks. Yamarus was particularly impressed with Ace Azzameen's performance in the battle and believed that his family should be proud of him and his actions. However, there was little time for celebration, as Yamarus received word that the Bothan spies who had been inspecting the Death Star had been intercepted by the Imperial II Star Destroyer Accuser and the Interdictor Grappler, and the cruisers they were hiding on were awaiting inspection. Recognizing the value of the intelligence the Bothans possessed to the war effort, Yamarus dispatched his fighters with haste to rectify the situation.
Despite the loss of some Bothan lives during the battle, Fey'lya expressed his gratitude for the Alliance's rescue efforts of the survivors. The Bothan councilor was infuriated when Zaletta's request for assistance from the Sullustans during the brief conflict was denied. Crucially, intelligence gathered by Bothan spies revealed that the second Death Star was shielded by an energy shield located on Endor's moon. Moreover, they discovered that a shuttle known as Tydirium possessed the necessary clearance codes for planetary landing. Yamarus and Zaletta concurred that acquiring the Tydirium was paramount to securing the Alliance's ultimate victory.
Acting on this crucial intel, Yamarus decided to dispatch a disguised freighter to the Zhar system, deploy a commando unit, and retrieve the Tydirium for return to the Liberty. He chose Ace Azzameen, a former employee of his family's shipping business before its Imperial closure, to pilot the freighter. With support from the renowned Rogue Squadron, Yamarus's commandos successfully retrieved the Tydirium, paving the way for the final preparations for the assault on Endor. Simultaneously, the Sullustans clarified that the Empire had contracted mercenaries to attack the Bothans, aiming to undermine Sullust's reputation and fracture the Alliance from within. Yamarus was convinced of their innocence by evidence presented in the form of the captured mercenary leader.
Stationed at Sullust, Yamarus received reports that the Defiance and Independence were being delayed by Imperial forces. Hoping his colleagues would reach the rendezvous in time, Yamarus dispatched a squadron of A-wings and his most skilled pilots, including Olin Garn and Ace Azzameen, knowing that an attack on the Death Star with only the Liberty task force would be a death wish. Fortunately, both the Defiance and the Independence managed to arrive at Sullust. Shortly afterward, in early 4 ABY, the attack on the Death Star commenced, with the Tydirium transporting a commando team led by General Han Solo, who successfully disabled the battle station's energy shield. The Alliance Fleet then destroyed the Death Star, resulting in the deaths of Darth Vader and Emperor Palpatine and securing the Alliance's victory in one of the Galactic Civil War's most significant battles. However, during the conflict, the Liberty was struck by the battle station's superlaser.
Personality and traits
Admiral Yamarus, a proud and dedicated individual, possessed a strong belief in the Rebel Alliance's cause. He was willing to risk his ship and his life for moral principles, defending the vulnerable and weak even at the expense of power. He valued and respected his pilots, particularly singling out young Ace Azzameen for praise. He was also quick to defend his allies, personally leading his ship into battle to rescue the Redemption during Zaletta's defection.
Furthermore, Yamarus was inherently suspicious, distrusting known criminals and individuals of questionable character. It required significant effort for Dunari to convince the admiral of his good intentions, and Yamarus held a general distrust of certain organizations. He was occasionally frustrated by politicians like Borsk Fey'lya, though he was less outspoken about their machinations than some of his peers. Despite his military background, Yamarus sometimes had to act as a diplomat, mediating disputes between races and improving the Alliance's public image. The admiral held a deep disdain for Imperial policy and was repulsed by projects such as the experimental TIE program, which used civilians as targets.
Behind the scenes
Admiral Yamarus was conceived for Lawrence Holland's 1999 video game Star Wars: X-Wing Alliance, with the script written by David Wessman. Voiced by Jarion Monroe, the character is never physically present in the game; instead, he provides the "Commander Briefing," offering a general overview of the upcoming mission and its narrative context. Yamarus is the primary source of the "Commander Briefing" in the game, with MK-09, Admirals Nammo and Ackbar, as well as Antan, Tomaas, Emon, and Aeron Azzameen being the other three characters to do so.
While Yamarus's vessel, the Liberty, is depicted as being destroyed at the Battle of Endor in Star Wars: X-Wing Alliance, as well as Star Wars: Episode VI Return of the Jedi and its various adaptations, it remains unclear whether he was still in command at that time.