A Perilous Rescue
"A Risky Retrieval" marks the tenth installment of the second season of the animated series LEGO Star Wars: The Freemaker Adventures.
Authorized Synopsis
Driven by a craving for thrills, Rowan embarks on a solitary venture, leading to a confrontation with M-OC. …
Narrative Breakdown
An Unholy Alliance
Within the highest reaches of the Imperial Palace (formerly the Jedi Temple), Emperor Palpatine questions M-OC about the certainty of the ship's designation as the Arrowhead. The Emperor scolds him for failing to secure the Kyber Saber and Rowan Freemaker. Upon hearing that Rowan constructed a starship that is decimating his fleet, M-OC offers a regretful response. The Emperor counters that it is a disaster for which he holds M-OC accountable, a sentiment echoed by Darth Vader.
The Emperor inquires about methods to defeat the Arrowhead and the potential of the Death Star to destroy it. Lord Vader discloses that the second Death Star project is facing unprecedented complications. The Emperor expresses his annoyance and questions the availability of Wroshyr wood for his dining area. Vader assures the Emperor that the existing furniture is satisfactory. He informs the Emperor of the kyber crystal shortage hindering the second Death Star's power-up and mentions the hiring of a Hutt.
Palpatine contemplates eliminating his two subordinates but decides that their collaborative effort to capture Rowan would be more beneficial. The Emperor also seeks the Arrowhead and the Kyber Saber, hoping that Rowan can guide them to additional kyber crystals. Despite their mutual dislike, Vader and M-OC comply.
Warfare on Kashyyyk
Deep within the Kashyyyk jungles, Rebel Alliance forces and their Wookiee comrades are engaged in a battle against Imperial ground troops. Chief Attiburra fells a tree trunk onto a group of scout troopers, earning the commendation of Lieutenant Valeria. Nevertheless, she informs Attiburra and his son Tantarra of the need for more aerial assistance. Valeria requests air support from the Arrowhead as an AT-ST walker advances into the fray.
The rebel troopers retreat aboard an Auzituck anti-slaver gunship as Valeria seeks assistance from the Freemakers. The AT-ST and scout troopers close in on the Wookiee gunship. Kordi Freemaker responds to Valeria's distress signal and attempts to shift the blame onto Zander Freemaker for misprogramming their navigation computer. Rowan Freemaker urges them to cease their argument and concentrate on the Empire. The Arrowhead descends onto the Kashyyyk shoreline and obliterates the AT-ST walker, causing the AT-ST drivers to scatter.
Valeria, along with her rebel troops and Wookiee allies, forces the Imperials to retreat into the jungle. However, their celebration is interrupted by the heavy footsteps of AT-AT walkers. Three AT-AT walkers advance on the beach. Kordi contacts the Imperial walker crew via comlink and demands their immediate surrender. However, the AT-AT commander dismisses her as bluffing. Having attempted to "play nice," Kordi authorizes Zander and Rowan to deploy the Embersteel Blade.
The Arrowhead's Embersteel Blade cuts through the flexible armored tunnels connecting the walkers' command sections with their troop sections, causing the AT-ATs to collapse. The remaining Imperials quickly retreat into the jungles. Valeria praises the Freemakers for their excellent work as the Arrowhead flies off into the distance.
Victory and Tedium
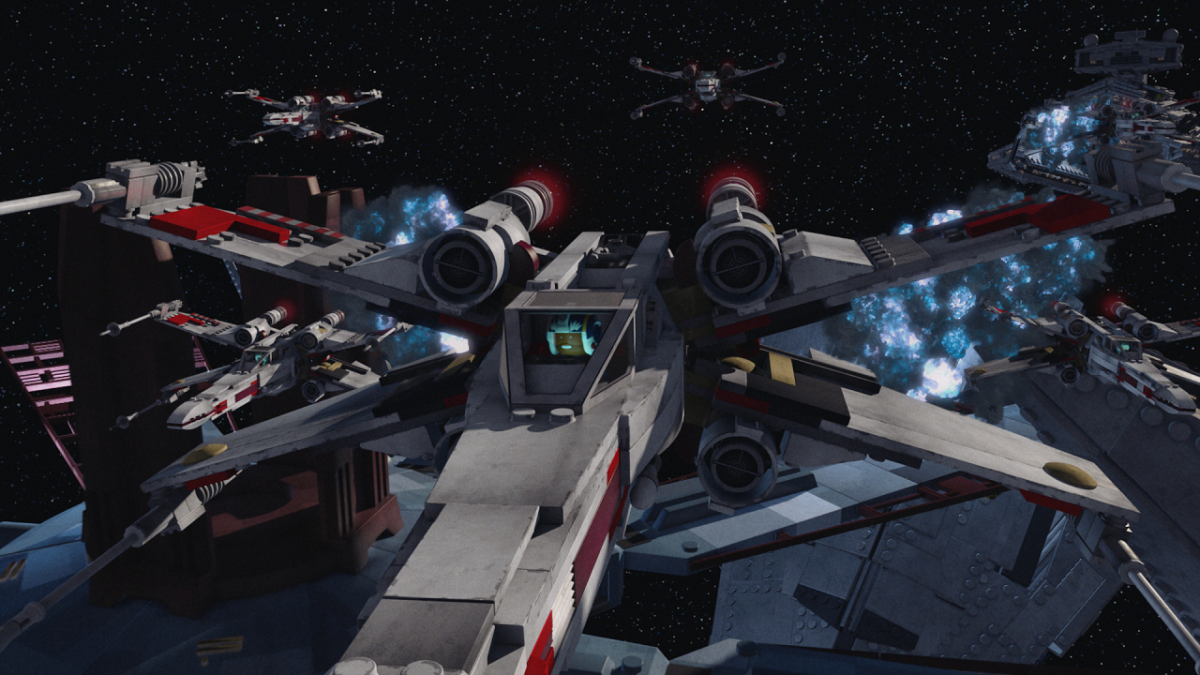
The Arrowhead returns to the MC80 Star Cruiser Home One, escorted by a squadron of T-65 X-wing starfighters, where they are greeted as heroes. Kordi remains humble, but Zander is exuberant. Roger also presents the Freemakers with some sweet-sand cookies that he baked. Admiral Ackbar, Mon Mothma, and Generals Crix Madine and Hera Syndulla also arrive on the deck to welcome the Freemakers.
Admiral Ackbar informs them that their victory on Kashyyyk was hard-earned. Mothma adds that it is crucial to maintain pressure on the Empire and that numerous battles await throughout the galaxy. Syndulla informs the rebel crew that each squadron will be deployed to a star system to await further instructions. Ackbar wishes the rebel pilots May the Force be with you. Gold Team assembles, while Lieutenant Valeria gathers Blue Squadron, telling them they can celebrate later. As the rebel fighters depart, Roger questions whether things will become more exciting.
Valeria invites Zander to join her, stating that Blue Squadron can benefit from his exceptional piloting skills. Zander is thrilled, and Kordi remarks that he could not remain calm in a Hoth blizzard. General Syndulla commends Kordi for her insightful battle strategies. Mon Mothma invites her to join their Strategy Council, which Kordi enthusiastically accepts. Hera assures Kordi that she will do well, while Rowan supports his sister.
Roger, with three cookies remaining, wonders what they are supposed to do. Rowan decides to construct an Ugly but discovers that the starship designer Quarrie is asleep. BG-81 awakens Quarrie, who examines Rowan's Ugly. He considers it a decent ship but believes it lacks a purpose. He tells Rowan that the Arrowhead provided the Rebellion with the purpose it needs to win the war. When Rowan asks for guidance, Quarrie advises him to relax, as he has earned it. Rowan is puzzled because he has never attempted to relax. As Quarrie dozes off, Rowan comments that he is a "pro."
Imperial Competition
At the Imperial Palace, Darth Vader meets with M-OC, who is searching through the Imperial data network for traces of Rowan. Vader dismisses M-OC's efforts. When M-OC inquires about his actions, Vader replies that he is communicating with the Force. M-OC finds the Force absurd, but Vader retorts that he finds M-OC irritating. M-OC claims to have no emotions but states that he would find Vader annoying if he did. Vader angrily throws the table aside, and the two activate their lightsabers and engage in combat.
The Emperor observes their duel. Vader pretends to be providing M-OC with lightsaber training, and the droid agrees to update his files. The Emperor is pleased to see his two subordinates seemingly sharing their skills. After the Emperor departs, both vow to locate Rowan independently.
Rowan's Independent Venture
Meanwhile, Rowan finds himself unable to relax for more than one minute and six seconds. Rowan tells Roger that he is bored and desires activity. Rowan tells Roger that his boredom is so intense that he would not mind fighting M-OC again. Roger questions Rowan's logic, but Rowan explains that his siblings are not relaxing and that he wants to join them in fighting the Empire.
Rowan then receives a hologram transmission from the Lurmen girl Maynar, who claims that the Empire has returned to Qalydon to seize their crystals and has brought reinforcements. She pleads for assistance. Rowan is elated and informs Roger that he is heading to Qalydon. Roger points out that Rowan cannot rescue Maynar alone, but Rowan counters that he is the only Freemaker available since Kordi and Zander are occupied. Rowan tells a reluctant Roger that he is coming along. Roger complains that Rowan always uses him to justify his poor decisions.
While traveling through hyperspace aboard the StarScavenger, Roger attempts to convince Rowan to turn back. Rowan refuses to abandon his rescue mission and believes it will be easy. Upon exiting hyperspace, Rowan and Roger are confronted by several TIE fighters. Rowan leads the TIEs on a chase before turning around and destroying the starfighters with the StarScavenger's firepower. Roger warns Rowan that TIEs are not easy targets.
On Qalydon, Rowan flies the StarScavenger to the location of Maynar's distress transmission. Roger worries that it seems too easy. Rowan complains that Roger complains regardless of the difficulty. He ignores Roger's advice to turn around and return home.
Kordi's Moment of Triumph
Aboard the Home One, Admiral Ackbar briefs the rebel leadership on their planned attack on Dubrillion. Gold Team will conduct an air-sea raid on the planet. When Mon Mothma asks who is available, Hera replies that Lieutenant Valeria's Blue Squadron is free. She adds that the Arrowhead is flying with them. Ackbar says they need a large target to utilize the Arrowhead's immense firepower.
When Hera asks Kordi for her suggestions, Kordi reveals that she has been researching Imperial repair schedules and has discovered that a fleet of Imperial Star Destroyers will converge on the Imperial repair depot above the planet Alzoc III. Kordi adds that it was unwise for the Empire to concentrate so many assets in one location. Admiral Ackbar approves of Kordi's plan and instructs Corcillo to contact Lieutenant Valeria. Admiral Ackbar assigns Valeria a mission and tasks Kordi with briefing her.
Infiltrating the Imperial Base
While Kordi briefs Valeria, Rowan observes the Imperial facility with his macrobinoculars. The base is guarded by two stormtroopers. Roger attempts to dissuade Rowan by pointing out that Kordi is not present. Rowan has an idea and instructs Roger to bring his wrench. Roger approaches the stormtroopers with his wrench and orders them to surrender. The stormtroopers laugh at the B1-series battle droid. However, Rowan knocks them unconscious from behind using the Force. Rowan instructs Roger to tie up the unconscious stormtroopers and to watch for any Imperials. Roger complies. Rowan enters the Imperial base but cannot find Maynar. The base door ominously shuts behind him.
Assault on the Alzoc III Repair Depot
Meanwhile, the Imperial officer Estoc arrives aboard the Star Destroyer Desolator at the Imperial repair facility near Alzoc III. The Imperial AT-AT commander from Kashyyyk recounts his encounter with the Arrowhead to Estoc and thanks her for rescuing him and his men. He marvels at the numerous Imperial Star Destroyers converging on the space repair facility. Valeria complains that Imperial bureaucracy always overbooks the repair depots.
Klaxons sound, and an Imperial officer informs Estoc that several X-wings are approaching from 3 o'clock. Estoc dismisses the threat, stating that a small squadron could not harm their fleet. She orders them to silence the alarm. Exiting hyperspace, Valeria instructs her team to give them the "Blue Squadron salute." The AT-AT commander finds the rebels pathetic. Estoc agrees and orders her fleet to return fire. At that moment, the Arrowhead exits hyperspace and attacks. The AT-AT commander panics, while Estoc notices the unfamiliar ship.
Piloting the Arrowhead, Zander declares that they may be small, but they fight. He uses the Arrowhead's Embersteel Blade to decapitate the bridge of a Star Destroyer. Zander proceeds to attack the rest of the fleet. The AT-AT commander attempts to persuade Estoc to order a retreat, but she orders all Star Destroyers to open fire and unleash the full power of the mighty Empire. Zander slices a second Star Destroyer in half and plows through several more ships, causing them to explode.
Zander is caught in the tractor beam of Estoc's Desolator. Estoc is delighted and tells Zander that his ship would make a valuable prize for the Empire. However, Zander instructs Valeria to disable the tractor beam projector. He then proceeds to bisect the Desolator with the Embersteel Blade. The Arrowhead and Blue Squadron depart, leaving behind wrecked Star Destroyers. The AT-AT commander informs Estoc that the Arrowhead was the fighter he had encountered on Kashyyyk. Estoc frowns in humiliation.
M-OC's Deception
Inside the Imperial base, Rowan activates his lightsaber. He hears Maynar's voice and enters the chamber, only to discover that it is a hologram projection created by M-OC. M-OC then appears with his lightsabers. M-OC is pleased that Rowan has come alone, and the two engage in combat. Rowan counters that M-OC is trapped with him and throws pieces of broken boxes at him.
However, M-OC easily slices through the pieces with his lightsabers and tells Rowan that he is mistaken. M-OC also boasts that he has accumulated a vast amount of data on Rowan and learned his tactics. M-OC strikes Rowan on the chest with his blade, causing a slight wound. Rowan remains defiant and charges at M-OC. However, the droid leaps away with his appendages and parries with Rowan. A frustrated Rowan tells M-OC to stop copying him.
Rowan Force-leaps onto a stack of crates. However, M-OC mockingly tells Rowan that he has anticipated all his moves. Rowan uses a support beam to leap onto M-OC, but the hunter droid intercepts his blade. In an attempt to disorient M-OC, Rowan destroys the storeroom's light bulb with his lightsaber. He then seizes the opportunity to flee, but M-OC has already anticipated his move. Rowan attempts to escape the base but finds that the blast doors are sealed. Rowan calls Roger for assistance.
Outside, Roger taunts his two stormtrooper prisoners, telling them that clone troopers and stormtroopers are no match for the B1-battle droid's refined sensors. However, Roger is ambushed from behind by Darth Vader, who slices him into pieces.
Captivity Under the Empire
Meanwhile, Rowan is hiding in a storeroom from M-OC, who tells him that his fate is sealed. With the exits blocked, M-OC slashes the crate and tells Rowan that he was able to lure him into a trap by exploiting his impulsiveness and compassion. M-OC says that he used the Lurmen girl to prey on his "weak, sympathetic" heart. M-OC opens a crate, only to find it empty. Rowan then attacks M-OC from behind and slices off his left arm and left appendage.
However, M-OC throws Rowan back and reassembles himself. He also seizes Rowan's lightsaber and taunts his opponent. M-OC moves in for the kill, but Rowan uses his Force Building skills to surround himself with spiraling pieces of wrecked cargo crates. M-OC slices through the obstacles and tells Rowan that he has failed. However, M-OC is interrupted by Darth Vader, who uses the Force to hurl M-OC upside down.
Lord Vader mocks M-OC by telling him that he is the one who has failed. While complimenting M-OC's plan, he states that his plan was superior and hurls M-OC against the wall. Vader dismantles M-OC with his own bombs. Rowan attempts to escape while Vader uses the Force to rip off M-OC's head. Vader mocks M-OC by stating that he does all the work while Vader gets the boy. As M-OC's eye sensors fade, Vader throws Rowan to the ground and tells him that the Emperor awaits him on Coruscant.
Vader departs Qalydon on a Lambda-class shuttle, while a damaged Roger, missing his legs, can only watch in horror.
Unfortunate Developments
Meanwhile, a triumphant Zander and Kordi reunite aboard the Home One, eager to share their victories. The two decide to inform Rowan of their successes. Upon discovering that the StarScavenger is missing, Roger returns aboard a cargo freighter, crashing into an A-wing starfighter in the process. The damaged Roger informs Zander and Kordi that Darth Vader has captured Rowan and that he is on Coruscant with the Emperor.