Battle of Naboo
The Battle of Naboo, alternatively referred to as the Battle of the Great Grass Plains and the Assault on Theed, marked the concluding engagement of the Invasion of Naboo, an event that transpired in 32 BBY. To bring the invasion to a halt, Queen Padmé Amidala of Naboo devised a strategy that enlisted the Gungan Grand Army to create a diversion. Simultaneously, the Queen would lead an effort to reclaim the planet's capital and apprehend the Trade Federation's Viceroy, Nute Gunray. As the Gungans clashed with the Trade Federation Droid Army on the Great Grass Plains, Amidala's team infiltrated the capital city of Theed, and also liberated the Bravo Flight pilots. These pilots were tasked with engaging the Lucrehulk-class Droid Control Ship Vuutun Palaa, which was positioned in orbit and commanded the Trade Federation's droid forces. The battle reached its conclusion when Anakin Skywalker, a young boy, successfully destroyed the Control Ship, thereby disabling the Federation's army. Simultaneously, Amidala managed to capture Viceroy Gunray within Theed.
Prelude
The Trade Federation, an intergalactic corporation, was coerced into the invasion of the planet Naboo in 32 BBY by its clandestine leader, Darth Sidious. Despite the assistance provided by the Sith Lord Darth Maul, the Federation was unsuccessful in capturing Queen Padmé Amidala during the engagement. She subsequently sought recourse on Coruscant, appealing to the Galactic Senate, which resulted in the Federation's blockade losing support.
Amidala, resolving to take matters into her own hands, returned to Naboo. With the assistance of the exiled Gungan Jar Jar Binks, the Queen went to the Gungan Sacred Place to persuade Boss Rugor Nass, the Gungan leader, to ally with the Human population of Naboo. The Gungans had been forced to retreat to their sacred place by the Trade Federation after invading their homes and destroying the city of Otoh Gunga. Amidala humbled herself before the Gungans (revealing that she was actually Padmé Naberrie, who had initially been thought of as just a handmaiden, to the shock of those present), and Nass pledged his support, establishing a landmark alliance and ending years of animosity between the Naboo and the Gungans. After summoning the remaining Royal Naboo Security Forces from their hiding place, the Queen, along with security head Captain Quarsh Panaka, and Nass, formulated a strategy to reclaim Naboo, replacing the Gungans' initial plans for retaliation for the loss of their home. Upon Amidala's return to the planet, only the Lucrehulk-class Droid Control Ship Vuutun Palaa remained in orbit.
During the planning session, Nass appointed Binks as a Bombad General for the upcoming battle, primarily due to Binks' role in uniting the Gungans and Naboo against their shared enemy (much to Binks' dismay). The Gungan Grand Army was assigned the task of drawing the majority of the Federation's Droid Army onto the Great Grass Plains for a direct confrontation. This diversion would enable Amidala and her strike force, accompanied by the two Jedi, Qui-Gon Jinn and Obi-Wan Kenobi, to assault the capital city of Theed and liberate the main hangar. Subsequently, Naboo pilots would target the Droid Control Ship, effectively deactivating the Federation Army. This would then allow Amidala to capture Viceroy Nute Gunray, thereby restoring control of the planet. Amidala specifically prioritized the capture of Gunray as a crucial step in ending Trade Federation control over Naboo. She knew that the Neimoidian culture, and consequently the Trade Federation, regarded the Viceroy as having absolute authority. This was because the Neimoidians were incapable of independent thought due to operating under a hive mind, and as such, would be unable to continue fighting if the Viceroy were incapacitated. Prior to their entry, Captain Quarsh Panaka instructed the resistance to secretly infiltrate the hangar, prepare their fighters for combat, and program the battle flight-path coordinates.
A force of Naboo soldiers, reinforced by the two Jedi, Panaka, Amidala, the Handmaiden Sabé, astromech droid R2-D2, Anakin Skywalker, and Mett Habble, along with students from the Royal House of Learning aboard the Crescent; Dané, Galak, Arani Korden, Rorworr, Deel Surool, and Sia-Lan Wezz, utilized a captured Trade Federation Multi-Troop Transport, Transport 714, to approach Theed undetected by Trade Federation forces. The group guided the transport to a secret passage entrance at the base of Theed's cliff face. The main force disembarked, while the students remained to guard the transport, serving as a fallback point in case of retreat.
However, Nass's army was not yet fully organized. Approximately half an hour after the main force departed, he mobilized his available troops and destroyed a Federation monument erected in the city of Spinnaker. In its place, he had a temporary Gungan monument constructed, which he would use to rally and summon all of the militiagungs hiding around the town. Additionally, militiagungs from every Naboo city joined the growing army, leaving only a few to guard the towns. With his army assembled, he now needed weapons to equip them. During the Naboo Swamp Battle, droid Commander OOM-9 had captured the Gungans' fambaas, their beasts of war. Nass attacked the city of Harte Secur, where the fambaas were being held, and freed them from captivity at Camp Six. With all the necessary elements in place, he moved the Grand Army out of the swamps and onto the Great Grass Plains. Meanwhile, the Federation deployed three divisions to engage the Gungans. Army A, the main force, moved to confront the Grand Army directly, while droid commander PDA-2 led the remaining droid army contingent in Theed. Army B's advance was halted by the efforts of the pirate Nym in his Havoc, and similarly, Army C's efforts were halted by Lieutenant Gavyn Sykes of the Royal Security Forces.
The battle droid commander PDA-2 took command of the Trade Federation's rearguard forces that remained to secure Theed. PDA-2 identified Transport 714 and, believing the vessel was damaged, overrode its controls, directing it to the repair bay within Theed Hangar. The unit assigned to guard the transport notified Panaka of the change in their location, and within twenty-five minutes, the transport was docked below the hangar. The unit ambushed the forces of ADO-8, a command battle droid guarding the repair bay.
Concurrently, the infiltrating forces followed the secret passage through the Catacombs of Theed, emerging near a boathouse by the Solleu River's largest waterfall, Virdugo Plunge. This allowed the Queen and her group to enter Theed and attempt to capture the Viceroy, Nute Gunray. Captain Panaka issued a synchronized signal over his comlink when the Queen's party began its assault.
The Battle
Battle of the Great Grass Plains
The Gungan Grand Army began to move out of their hiding place in the Swamps, having recovered from the Naboo Swamp Battle, ready to reclaim what was theirs. The Federation's actions during the previous battle were effectively a massacre. Many civilians were killed during the evacuation of Otoh Gunga, leaving many militiagungs without family or home. General Ceel planned to take position along Shaak Ridge, where the Gungan energy catapults could effectively hold off the Droid Army.
By midday, the Grand Army had moved into position, occupying much of the level ground of the Great Grass Plains, 40 kilometers south of Theed. There, Captain Roos Tarpals ordered the activation of their shield generators, mounted on the backs of the fambaas. The army was enclosed within a massive dome, approximately one kilometer wide, impervious to bombardment. They remained close enough to the swamps to allow for a retreat if necessary. The Grand Army formed command units, each led by a General. OOM-9's forces, recently departed from Theed, arrived before Ceel along Shaak Ridge, forcing the Gungans to forgo the tactically advantageous high ground. Remaining in the valley reduced the effectiveness of the Gungan's catapults. The Droid Army descended from the hills into the valley, in a mile-long formation of Armored Assault Tanks escorting Multi-Troop Transports, with Platoon Attack Craft held in reserve. The Droid division settled into position, facing the massive Grand Army. OOM-9 initiated a preliminary bombardment, firing on the Gungans' shields with his AATs, but with little effect.
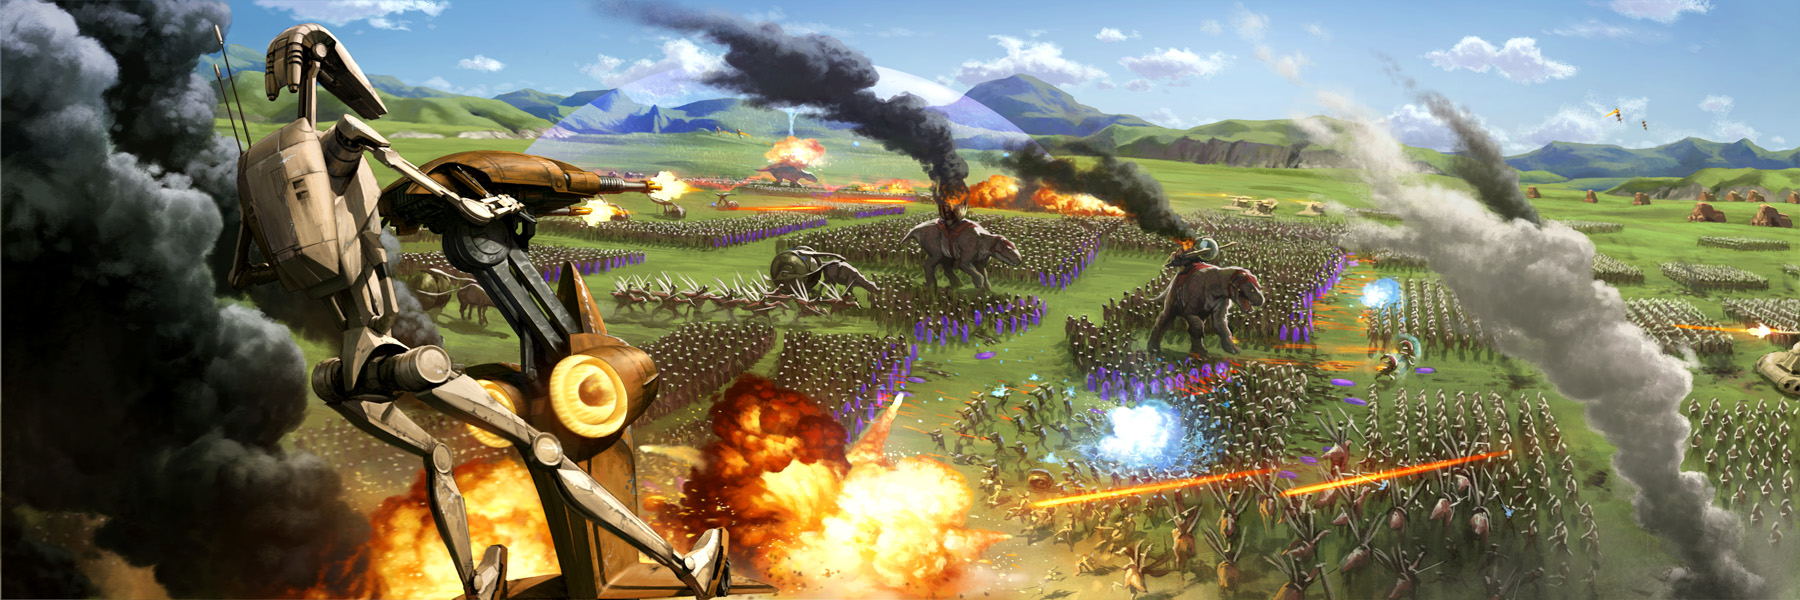
After a brief period, OOM-9, positioned atop his enhanced personal tank, commanded the other AATs to cease fire. The order took 0.396 seconds to circulate to the regiment, leading the Gungans to believe they had won the battle. The tanks retreated, and upon receiving an order from the Droid Control Ship transmitted via a top-secret frequency, the Federation's MTTs unloaded thousands of battle droids, much to the Gungans' dismay. The B1-Series battle droids slowly advanced in units of 56 droids through the Gungan shield and began firing on the unprotected militiagungs. The Gungans, led by General Ceel and Bombad General Binks, fought back with personal shields, catapults, boomas, and cestas, clobbering dozens of battle droids. The Gungan energy catapults launched large plasma boomas at the droid ranks, but they could not halt the persistent droid advance. A squad of P-series destroyer droids rolled onto the bloodied battleground, further increasing Gungan casualties as the MTTs moved in to trap the Grand Army. At one point, a battle droid, severed from the waist, landed on General Binks, who eventually dislodged it and began stomping and kicking it, accidentally entangling his foot in the severed wiring. This setback inadvertently led to an advantage, as the wiring caused the droid to fire its blaster with each movement of Binks' entangled foot, taking down several droids, including a destroyer droid.
Ultimately, the shield generator was destroyed by concentrated droid fire, deactivating the protective dome. OOM-9 immediately ordered all AATs, battle droids, and Single Trooper Aerial Platforms to advance. Tank shells now ripped unobstructed into the Gungan lines, tearing up the previously untouched Great Grass Plains. While the Gungan catapults had a large area of effect, they had a slow firing rate and were nearly useless when in motion. Gungan ranks fell to the mechanized Trade Federation Army, with the two armies engaging in close combat among several ruins and mounted laser cannons.
Approximately 50 minutes into the battle, Gungan command units broke up under the assault, and individual Gungans carried out desperate counterattacks against the droids and tanks. General Ceel soon ordered a retreat, and the Gungan Grand Army turned back toward the swamps. In the chaos, Binks, running on foot after losing his kaadu, jumped onto a cache of boomas carried by falumpaset. The weight of the Gungan opened the door and released the large boomas, one of which impacted an AAT, destroying it, while others disabled destroyer droids. An explosion then sent the harried Binks flying onto a tank. Tarpals drew up alongside on his kaadu and threw a booma at him to aid Binks, as Binks lacked a booma to take down the tank. However, Binks clumsily deflected it onto the tank's pilot, causing the vehicle to crash.
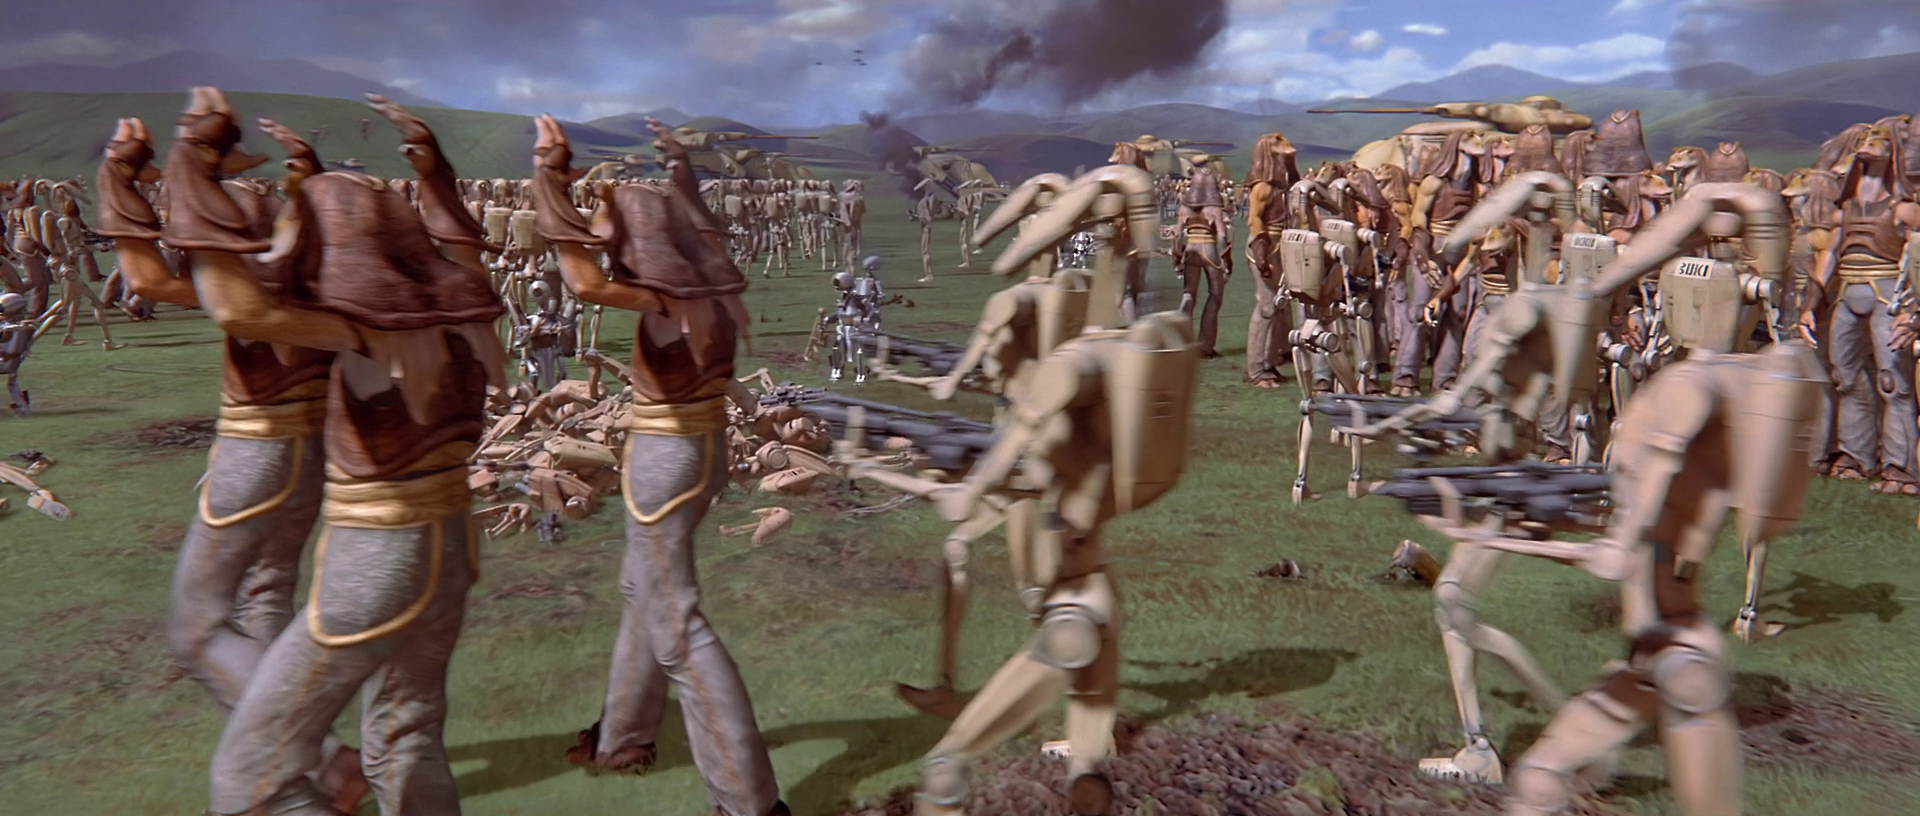
In the end, both Gungan officers were captured by a battle droid squad including 3B3-888, their army defeated, with Binks surrendering easily to Tarpals' dismay. General Ceel was also captured. Kaadu units rescued the Gungan wounded, while other Gungans stood against the droids to cover the retreat, managing to destroy several more AATs. With the battle turning in their favor, the battle droids began gathering the captured Gungans into groups, while Federation PK droids collected scattered weapons. OOM-9 had planned to flank the retreating Grand Army to prevent escape, but this plan was thwarted by the destruction of the other two Droid Army divisions. By the end of the battle, 543 Gungans were dead, although over half of the Grand Army escaped back into the swamps.
Assault on Theed
Battle through the streets
After gaining entry into the city, the pair of Jedi were traversing the desolate streets of Theed when an overly enthusiastic battle droid ambushed them while riding a Single Trooper Aerial Platform. They deflected the laser blasts back at the droid, resulting in its destruction and the crash landing of the Platform, though it remained undamaged. The Jedi, deciding to utilize the situation, commandeered it, along with another they located, and rode through Theed's thoroughfares, obliterating countless battle droids and destroyer droids before veering onto an aqueduct and breaking through the defending battle droids. Multiple barriers impeded their progress along the aqueduct, which the Jedi promptly demolished. Ultimately, the two Jedi dismounted at the precipice overlooking the cascading waterfall.
Subsequently, they employed a Force Jump to descend the cliffs until they reached a balcony, after which they leaped back up to the opposing side. Upon reaching the summit, they discovered six Naboo pilots confined in individual chambers, each guarded by a trio of droids. Each droid trio was comprised of a distinct droid type—OOM security battle droids, B1 grapple droids, Flame battle droids, Grapple droidekas, destroyer droids, and B1 battle droids equipped with missile launchers. The Jedi successfully liberated five of the pilots before continuing their mission.
Lieutenant Gavyn Sykes, having just returned from the engagement near the south ridge, spearheaded the diversionary assault, guiding Gian speeders and Flash speeders into Theed via the canal. As Sykes and his wingmate, Kol Kotha, navigated the streets of Theed, they utilized their Gian speeders' laser cannons to eliminate the droids obstructing their path. An AAT was positioned at the end of a street, directly confronting Sykes' advance, but the Naboo pilot neutralized it as he moved forward, before eliminating another one situated to the side. Two Ostracoda-class gunboats were patrolling Theed on the river. Sykes engaged and destroyed them, along with two additional AATs located along the riverbanks. While advancing through Theed, Sykes received a communication from Palmer, another Naboo pilot. She was leading Group 2, and her three-member Flash speeder unit was trapped in a plaza. Sykes acknowledged her message and proceeded to rescue the group. He blasted through several obstacles, along with additional droids, before entering the plaza with Kotha and destroying the two AATs and the two destroyer droids attacking Palmer.
Sykes and Group 2 then proceeded towards their objective, the Theed Courthouse, where they were scheduled to rendezvous with Group 3 and several commandos. En route, they destroyed two more tanks. Upon requesting an update, a member of Group 3 reported that they were delayed, so Sykes instructed them to expedite their arrival. As Sykes and the other pilots eliminated the droids guarding the courthouse, Group 3 caught up with them. Sykes escorted the transport speeder to its target, a fortified gate impeding their access to the Theed Hangar. Sykes engaged the defending droids while the commandos disembarked, affixed explosives to the gate, and retreated from the blast radius. Sykes then drove through the breached gate and met with Panaka. Panaka instructed him to advance cautiously under the archway to a specific point, then ordered Sykes to engage an AAT. He destroyed the tank with his initial shot, and the resulting explosion alerted the nearby Federation forces to the Naboo presence. With his diversionary mission accomplished, Sykes dismounted from his vehicle.
Around the same time, Kenobi was contacted by Asha, a palace employee and resistance leader. Their pilots were unable to take off due to a Federation turbolaser cannon situated south of the hangar, and Kenobi was requested to assist in destroying the cannon. As Kenobi progressed through Theed, he encountered a resistance fighter, who informed the Jedi that the Droid Army was actively hunting down Resistance members. Kenobi ventured through the streets and deactivated a force field obstructing his path. He liberated three Naboo hostages from the droids; as he continued towards the cannon, a firefight erupted between the Resistance and battle droids. Kenobi joined the firefight and destroyed an E4 baron droid before entering a tunnel.
Upon emerging from the tunnel, he encountered another Resistance fighter, who informed him that they were pinned down by two repeater cannons. Kenobi fought his way through and eliminated the droids operating the cannons. The young Jedi then entered a garden outside the palace, guarded by a contingent of battle droids. The Jedi flanked a repeater cannon, eliminated the droid at the controls, and then turned the cannon against the other droids. While moving to engage additional droids, he was ambushed by a squad of OOM security droids and a destroyer droid, which he destroyed by seizing another repeater cannon. Kenobi then ascended the staircase to the cannon's location, where he faced four more destroyer droids. Once the threat was neutralized, he destroyed the two power conduits on its side, triggering the cannon's explosion. Kenobi then leaped off the balcony and landed in the pool below. Asha contacted him again and confirmed the cannon's destruction. He swam away to rejoin the battle.
Before the city descended into conflict, the students from the Royal House of Learning found themselves outside Theed's Palace Plaza. They were approached by a small contingent from the Queen's party: Sabé, disguised as the Queen; a handmaiden; and two Palace Guards. Sabé requested the students' assistance in creating a diversion to facilitate their entry into the Palace. The team engaged an Armored Assault Tank, a lone STAP patrol, and a squad of eight battle droids, successfully diverting the Trade Federation forces long enough for Sabé and her entourage to infiltrate the Palace and join Amidala. The students retreated from the Plaza as Royal Security Forces initiated engagements with the Trade Federation Army throughout Theed.
Sykes' destruction of the AAT caught Gunray off guard, as he anticipated the final confrontation to occur elsewhere. Under the cover of the resulting confusion, Amidala led her team into the Theed Royal Palace. The Queen's strike force, including Lieutenant Chamberlyn, stealthily entered the area near the Palace and engaged a squad of battle droids. After the droids were eliminated, Kenobi was tasked with leading the strike force into the Theed Hangar. As the battle raged in Theed, the strike force entered the hangar, but their progress was hampered by battle droids.
Amidala guided her group through the adjacent streets. They advanced past droid opposition and crossed the bridge before proceeding down the next street. On that street, Amidala seized control of a heavy repeating cannon and employed it to eliminate destroyer droids. She and Panaka then advanced down the next two street corners and destroyed another destroyer droid. Panaka preceded Amidala down the subsequent street, eliminating the droids in their path. Amidala then rejoined Panaka and flanked the remaining droids. They encountered a wounded Naboo guard who provided instructions on how to open the security doors. Amidala requested the astromech stationed near the door to unlock it. Inside the security room, Amidala destroyed the generator. She then reunited with Panaka, and the two returned to the security door and passed through the archway. On the other side, Panaka used a thermal detonator to destroy a force field generator blocking their progress. They then encountered more Palace Guards, one of whom warned them about astromech droids that had been reprogrammed by the Trade Federation. Together, they defeated the droids and infiltrated the Palace.
The Trade Federation detected the strike force and dispatched battle droid reinforcements. A Resistance soldier requested Kenobi's assistance in securing the hangar by destroying the six power cells powering the doors. The soldier individually deactivated the shields on the power cells, and Kenobi severed each one while its shield was down. The others provided covering fire, and in Jinn's case, lightsaber defense, while Kenobi disabled the power cells. They encountered two E4 baron droids, standard battle droids, and bomb droids. Droid starfighters in walker mode emerged from beneath the hangar. During this time, a Naboo squad leader secured the back hallway.
The Naboo forces swiftly cleared the hangar, but the droids managed to alert the Federation's Command Officer. During the engagement, the Naboo pilots, including Sykes, managed to take off to attack the Droid Control Ship, although one was shot down by an AAT stationed outside the hangar. Panaka ordered Red and Blue Groups to regroup, and the strike force advanced towards the Palace. Subsequently, the doors opened, revealing a mysterious warrior. The two Jedi moved to engage him. After the warrior, a Sith Lord named Darth Maul, appeared, the Queen's strike force divided, with the Jedi confronting Maul, and the remaining members opting for the longer route to the throne room. They were then pinned down by the Federation's reinforcements, a squad of destroyer droids. Anakin Skywalker, seeking refuge in a N-1 starfighter at Qui-Gon's request, while attempting to locate the fighter's trigger, accidentally initiated takeoff, but destroyed the droids with the craft's significantly more powerful laser blasts. The fighter's autopilot then activated, transporting Skywalker into space to join the assault, with Skywalker instructing R2-D2 to override the autopilot. Skywalker's fighter, while departing the hangar, also evaded fire from the aforementioned AAT.
The Jedi and Sith, meanwhile, engaged in a duel that extended into the Theed Generator Complex. Amidala, Panaka, and their security forces exited the hangar relatively unscathed through a separate door.
The students, in the meantime, evaded multiple battle droid patrols and eventually returned to the Palace Plaza. A droid starfighter, supported by four battle droids, had replaced the previous patrol. The droids were firing upon the occupants of the Plaza—four unarmed civilians, a pair of RSF Guards, and an RSF pilot with an R2-series astromech droid. The students intervened and ultimately secured the Plaza. The pilot, severely wounded, asserted that the astromech droid contained vital information and tasked the students with ensuring its delivery to Queen Amidala. One of the wounded Security Guards similarly charged the students with ensuring that a diplomatic pouch reached Ambassador Kron of Alderaan.
Retaking the Palace
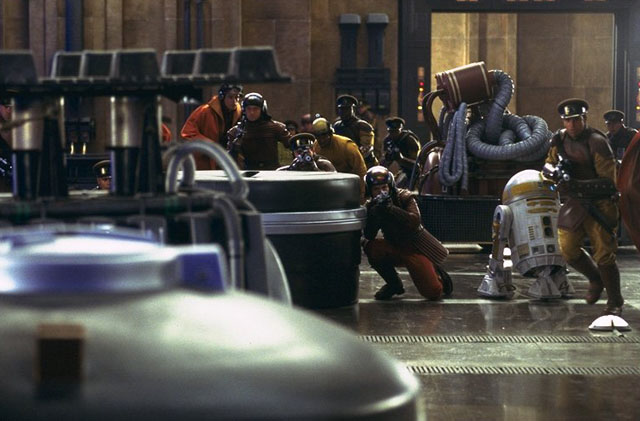
Upon returning to the Theed Hangar, the students ambushed the escort of a Neimoidian counterfeiter, Gode Takrab. After capturing and interrogating Takrab, they discovered that he had forged a treaty between Naboo and the Trade Federation, as well as doctored a holovid of Queen Amidala endorsing the fraudulent document. The students searched Takrab's shuttle and eventually located the fake agreement concealed within Takrab's protocol droid, TC-11. Viceroy Gunray dispatched a squad of battle droids led by RK-7 to secure the shuttle for his own escape. The students were nearly overwhelmed, but managed to maintain control of the shuttle and prevent Gunray's retreat until the battle concluded.
Once inside the Palace, Amidala instructed two Palace Guards to secure their escape route while she and Panaka secured the Viceroy.
Advancing forward, she rescued another Palace Guard, who informed the Queen that he was en route to interrogation and that they had concealed the pass keys. Amidala entered one of the adjacent rooms and liberated a group of Naboo prisoners led by Cyrus. Cyrus provided her with the white key, which she used to proceed into the next corridor.
The corridor contained two destroyer droids and a heavy repeating cannon, but the Queen successfully engaged them using a proton missile launcher she acquired from a hidden room guarded by battle droids. Moving into the subsequent corridor, Amidala opened a door, and she and Panaka eliminated the two destroyer droids guarding the blue pass key. Amidala then used the blue key to unlock the door to the next section of the Palace. The two defeated the battle droid stationed there, enabling Amidala to push a box on the bottom floor of the walkway to bridge a gap, then push a box from the upper level onto it. She climbed atop the boxes and retrieved the red pass key, which unlocked the door at the top of the stairs leading to the heavily guarded throne room.
The Queen's battle continued further into the Royal Palace, progressing through the ceremonial halls before she was halted by a contingent of battle droids. She separated from her handmaiden, Sabé, who led a second squad of Naboo soldiers through the palace corridors. Amidala, Panaka, and other soldiers escaped through the window to the exterior of the palace and utilized their ascension guns to ascend to the throne-room level.
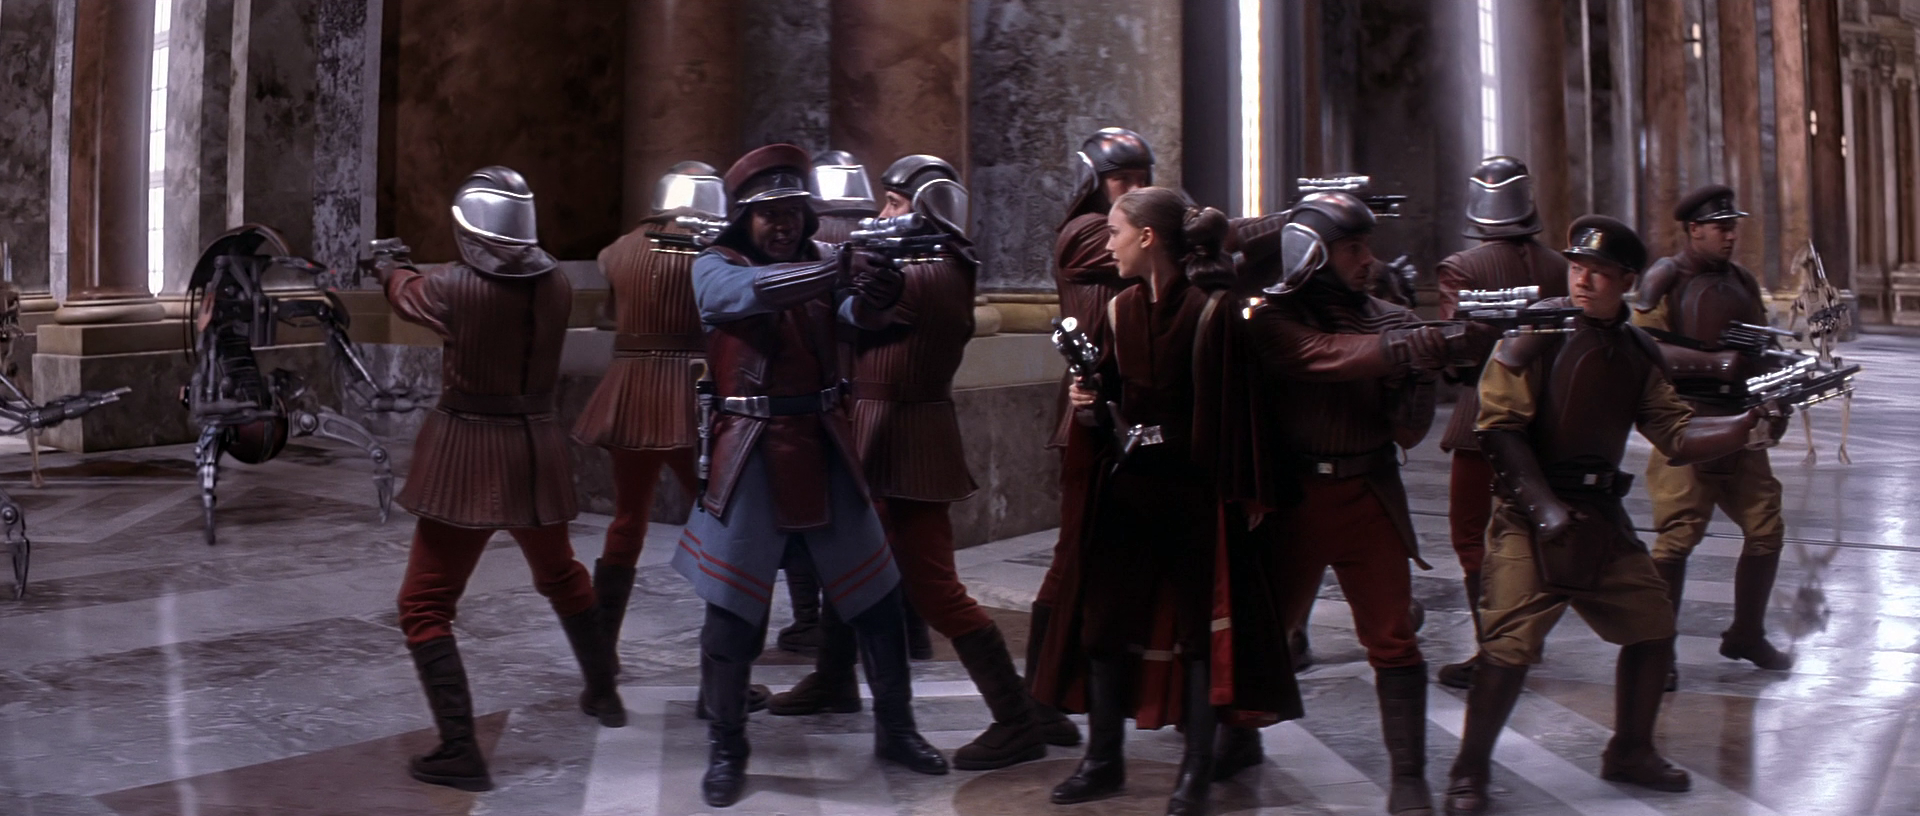
Amidala's own group attempted to breach the throne room, which their target, Viceroy Gunray, had occupied. However, a squad of destroyer droids surrounded Amidala's soldiers and forced their surrender. Amidala instructed Panaka and the others to discard their weapons. Just before being led away, Amidala sent a distress signal to the second squad led by Sabé. The destroyer and battle droids, including 3B3-21, escorted the Queen's squad to the throne room, then departed the area, leaving only approximately a dozen battle droids to accompany them into the room, where Gunray and Rune Haako awaited.
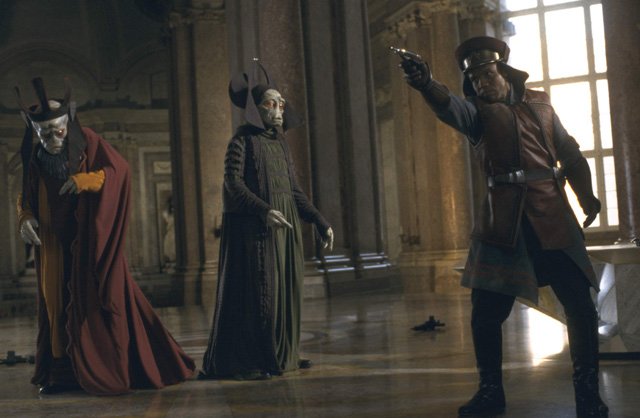
After being escorted to the throne room as captured adversaries, the Queen and her protectors would not remain prisoners for long. Sabé and her team, responding to Amidala's signal, suddenly appeared and deceived Viceroy Gunray into believing Sabé was the Queen. The battle droids were distracted just long enough for Amidala to unlock a secret compartment in the throne containing blasters and distribute them to her fellow freedom fighters. The bewildered battle droids were swiftly eliminated, and the doors to the throne room were jammed, trapping the Viceroy and Haako with Queen Amidala. Two of the most prominent leaders of the Trade Federation were now in custody. Theed had been reclaimed from Federation control.
Duel of the fates
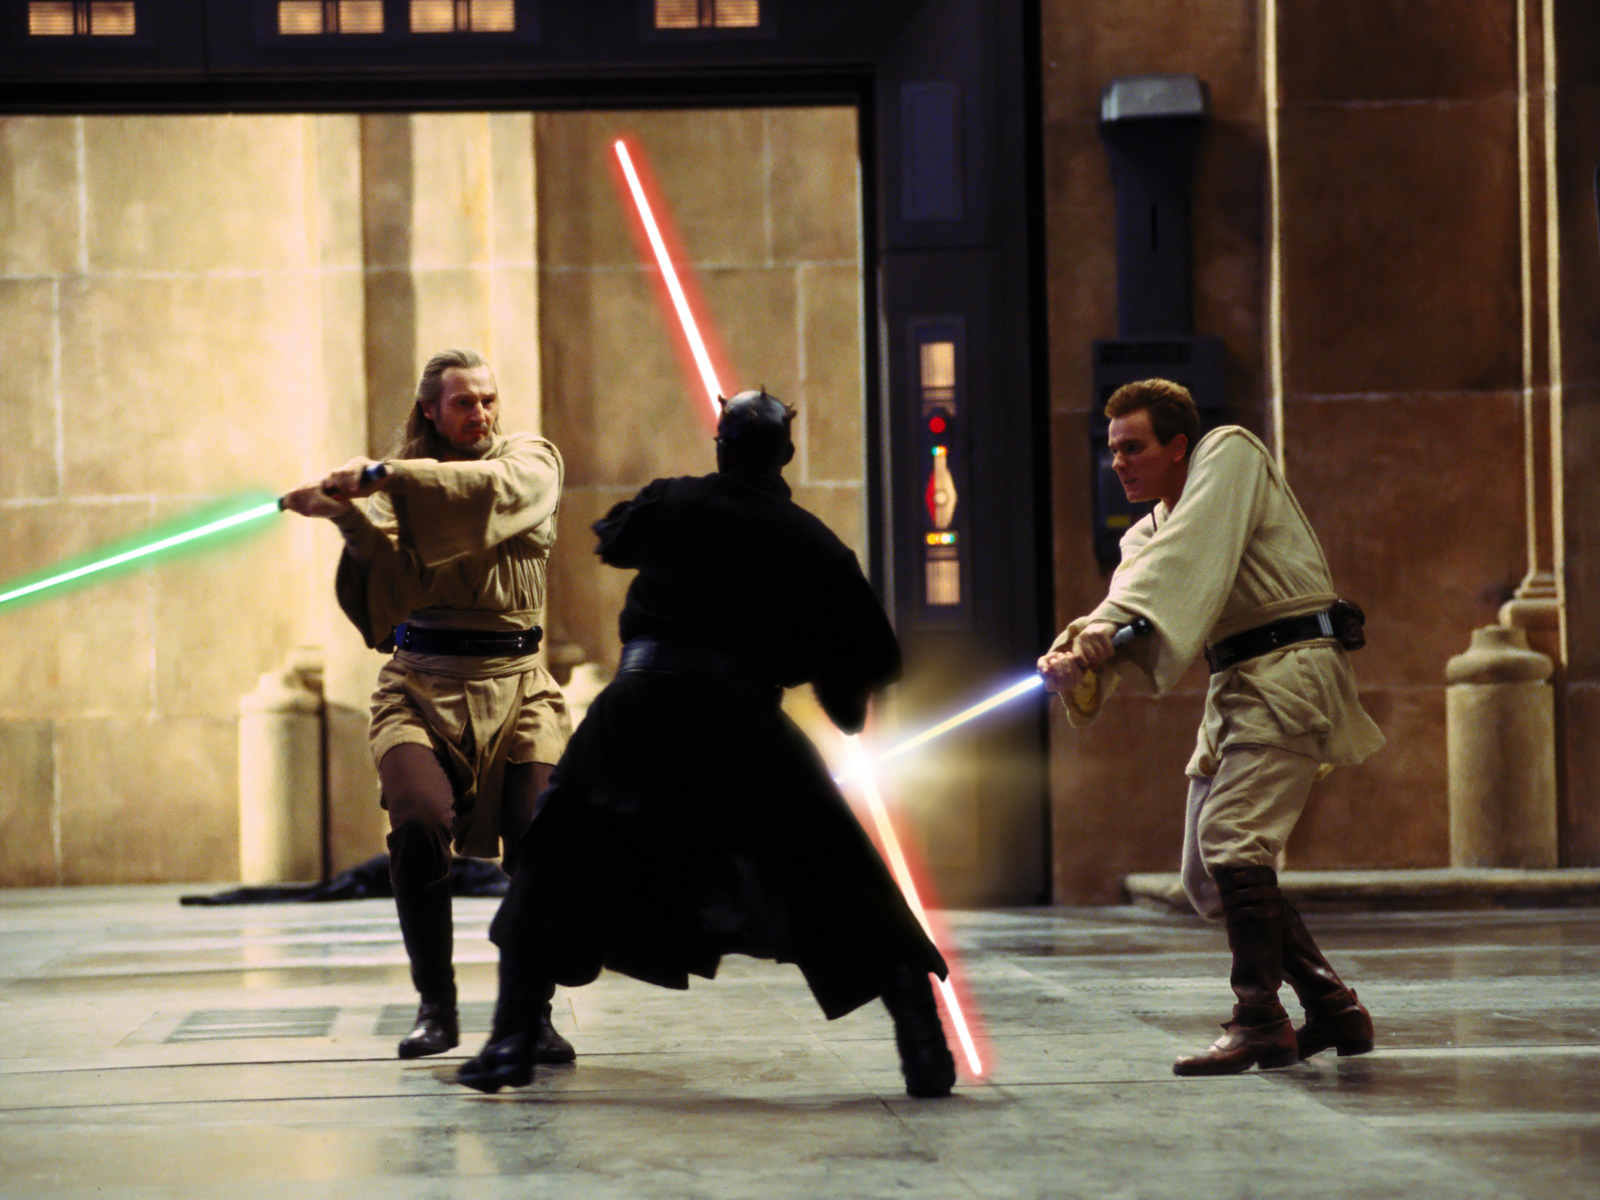
Simultaneously, Darth Maul engaged Qui-Gon and Obi-Wan in a fierce lightsaber duel, eventually employing the Force to hurl Battle Droid remains at a lock to gain access to the Theed Generator Complex. The trio battled through a pair of blast doors connecting the hangar to the Theed Generator Complex. On a catwalk spanning the Complex, the duel persisted for an extended period, Maul proving to be a more formidable opponent than either Jedi had previously encountered, wielding his double-bladed lightsaber with ruthless efficiency. Despite Maul's apparent dominance on the battlefield, he consistently yielded ground throughout the battle, leading the two Jedi into a labyrinth of catwalks. Maul then leaped to a higher level, with the Jedi in pursuit. Maul separated the two Jedi after Kenobi was forced back over the ledge. While attempting to rejoin the battle, Kenobi fell through the catwalk to the level below.
Kenobi utilized the elevator to return to the rings, then jumped to the adjacent ring after dispatching a battle droid. Kenobi Force-jumped to the next ring and descended the ramp to another area. Two droids awaited him in the corridor, but the Jedi eliminated them. Kenobi then activated the switch to open the panel to the next chamber. Advancing along the catwalk, he illuminated the chamber. Further along the catwalk, he used the controls to deactivate the energy barriers in the chamber. He then extended the bridge partially from his side and employed the Force to push the opposite bridge control. He then Force jumped across the gap to the next catwalk. He was then able to proceed back to the main chamber where Jinn and Maul were continuing their engagement.
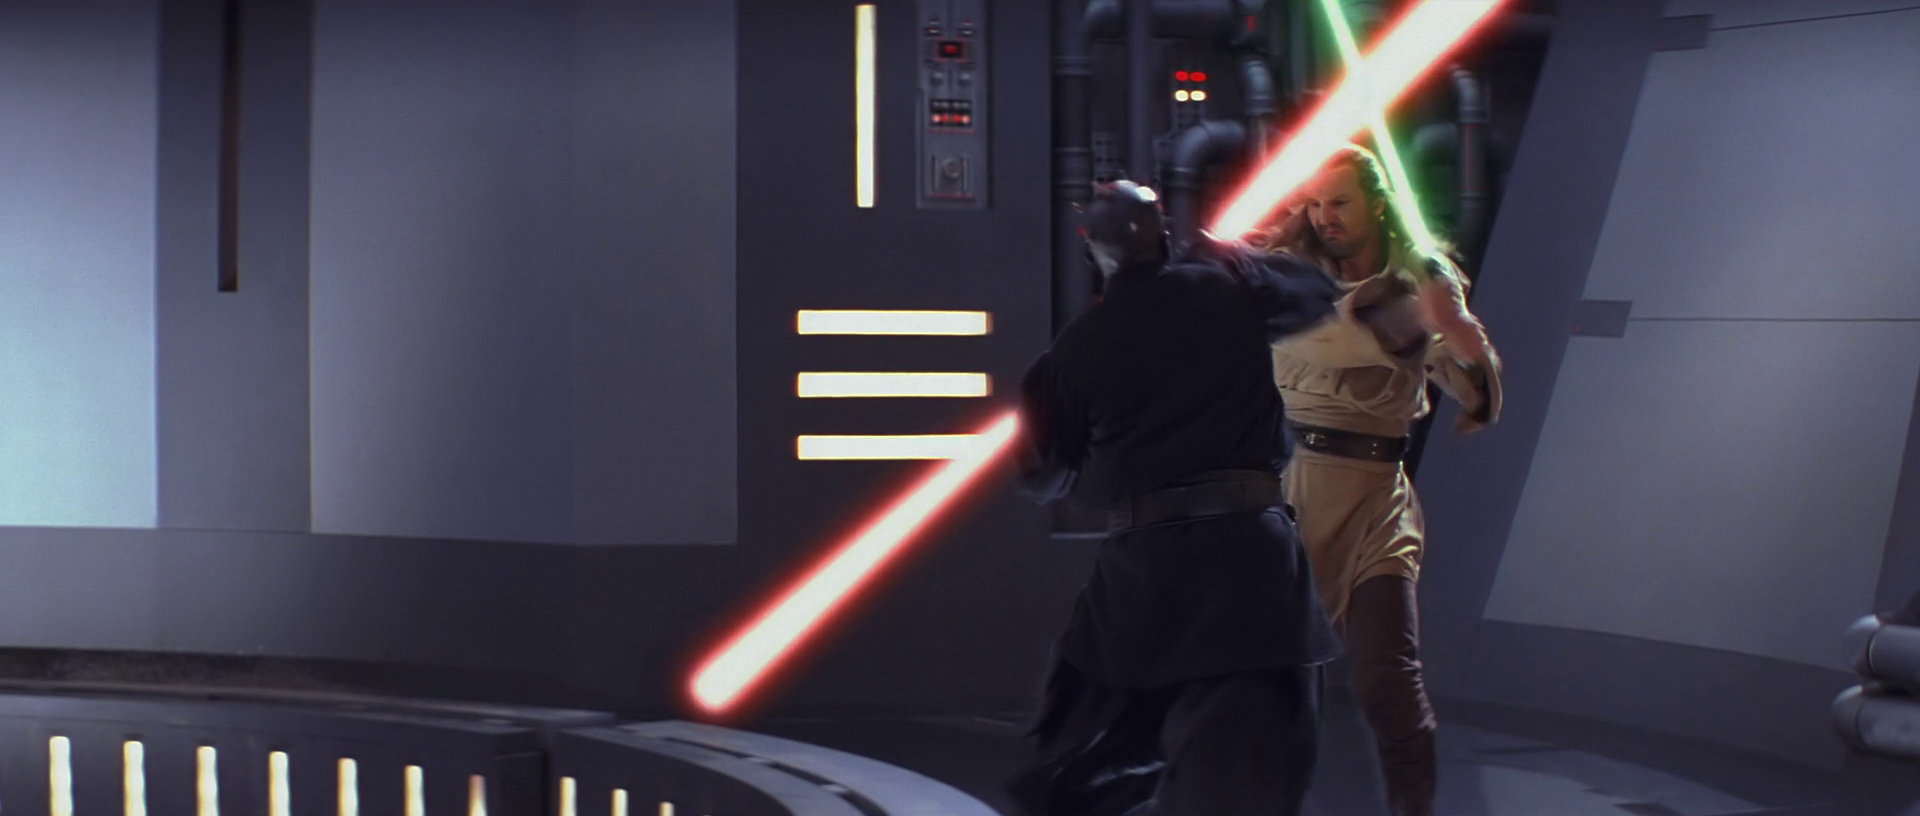
Kenobi then boarded one of the elevators down to the next level and Force jumped to the adjacent ring. He navigated around that ring and Force jumped to the next one, after eliminating the droid guard. He took the elevator back up to the next level and Force-pushed a droid off the ring, enabling him to enter another room. He then descended to the lower level of that room and entered the next, which featured a laser maze. Kenobi returned to the first part of the room, where he ascended to the top level. Once there, he jumped across to the opposite side and activated the control panel. Jumping back, he moved the box out of the hidden grating and pushed it onto the elevator so he could bring it down a level and push it into the room with the laser gates. He jumped onto the box and went into the control area for the laser gates, where he was able to manipulate the controls to form an opening. He then jumped down onto the box and went through the laser gates. He rode the elevator back up and re-entered the main chamber.
Kenobi Force-jumped to an elevator and descended one level and crossed the walkway there. He then boarded another elevator to go up a level, then crossed the walkway to a position where he could jump back to the main catwalk and follow the other two combatants.
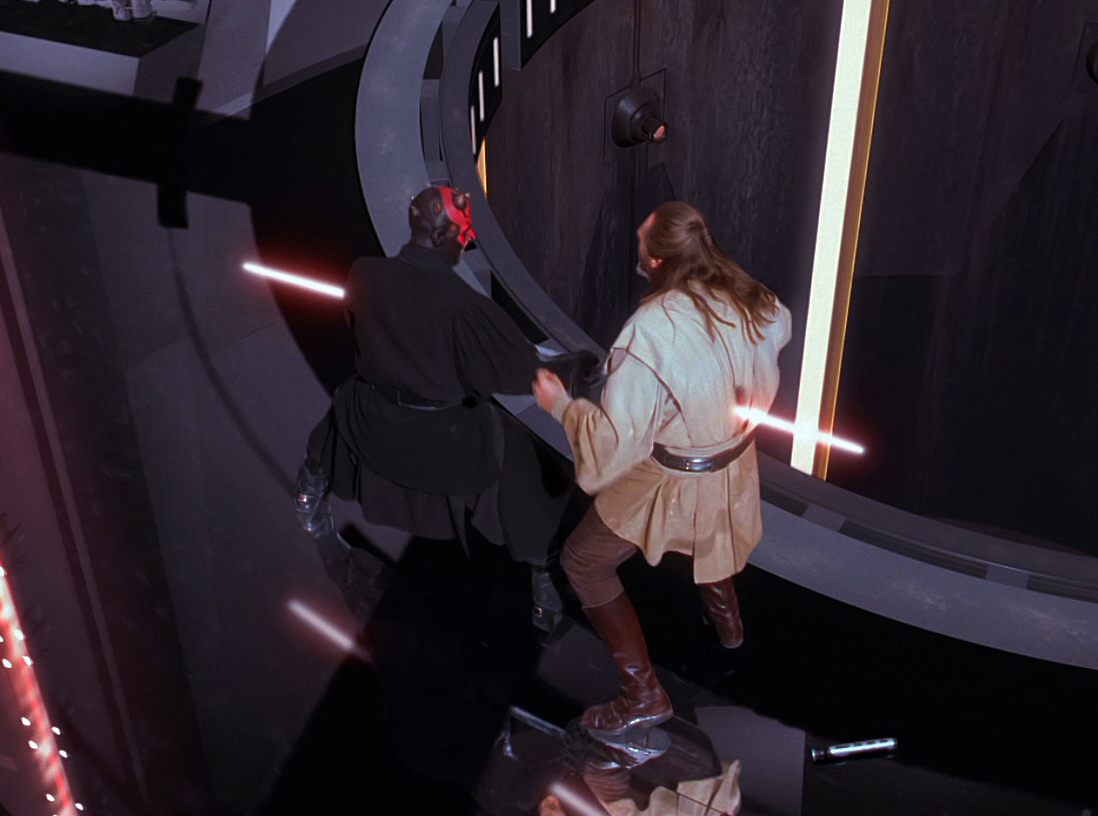
Jinn advanced on the Sith, forcing him back along the central catwalk towards a hall of laser gates. Just as Obi-Wan reached the hall's entrance, the laser gates cycled back on, briefly halting the duel. While awaiting the gates' deactivation, Qui-Gon meditated, while Maul paced within his confined space. As soon as the laser gates cycled off, Qui-Gon and Maul resumed their fight, with Obi-Wan sprinting to support his master. Kenobi did not catch up before the barriers closed again, responding to intermittent power outputs. This left Qui-Gon to duel alone with Maul. Qui-Gon could not match the Sith Lord's youth; this was compounded by the limitations of the narrow catwalk around the melting pit, which prevented Qui-Gon from utilizing his Ataru style to its full potential. Eventually, Maul slammed the wide handle of his lightsaber into Qui-Gon's face, stunning the Jedi Master, and the merciless Sith Lord swiftly seized the opportunity to stab Qui-Gon in the stomach, while Obi-Wan could only watch in horror. Darth Maul then taunted Kenobi. The laser fields soon deactivated, and Obi-Wan ran through to avenge his master's fatal blow.
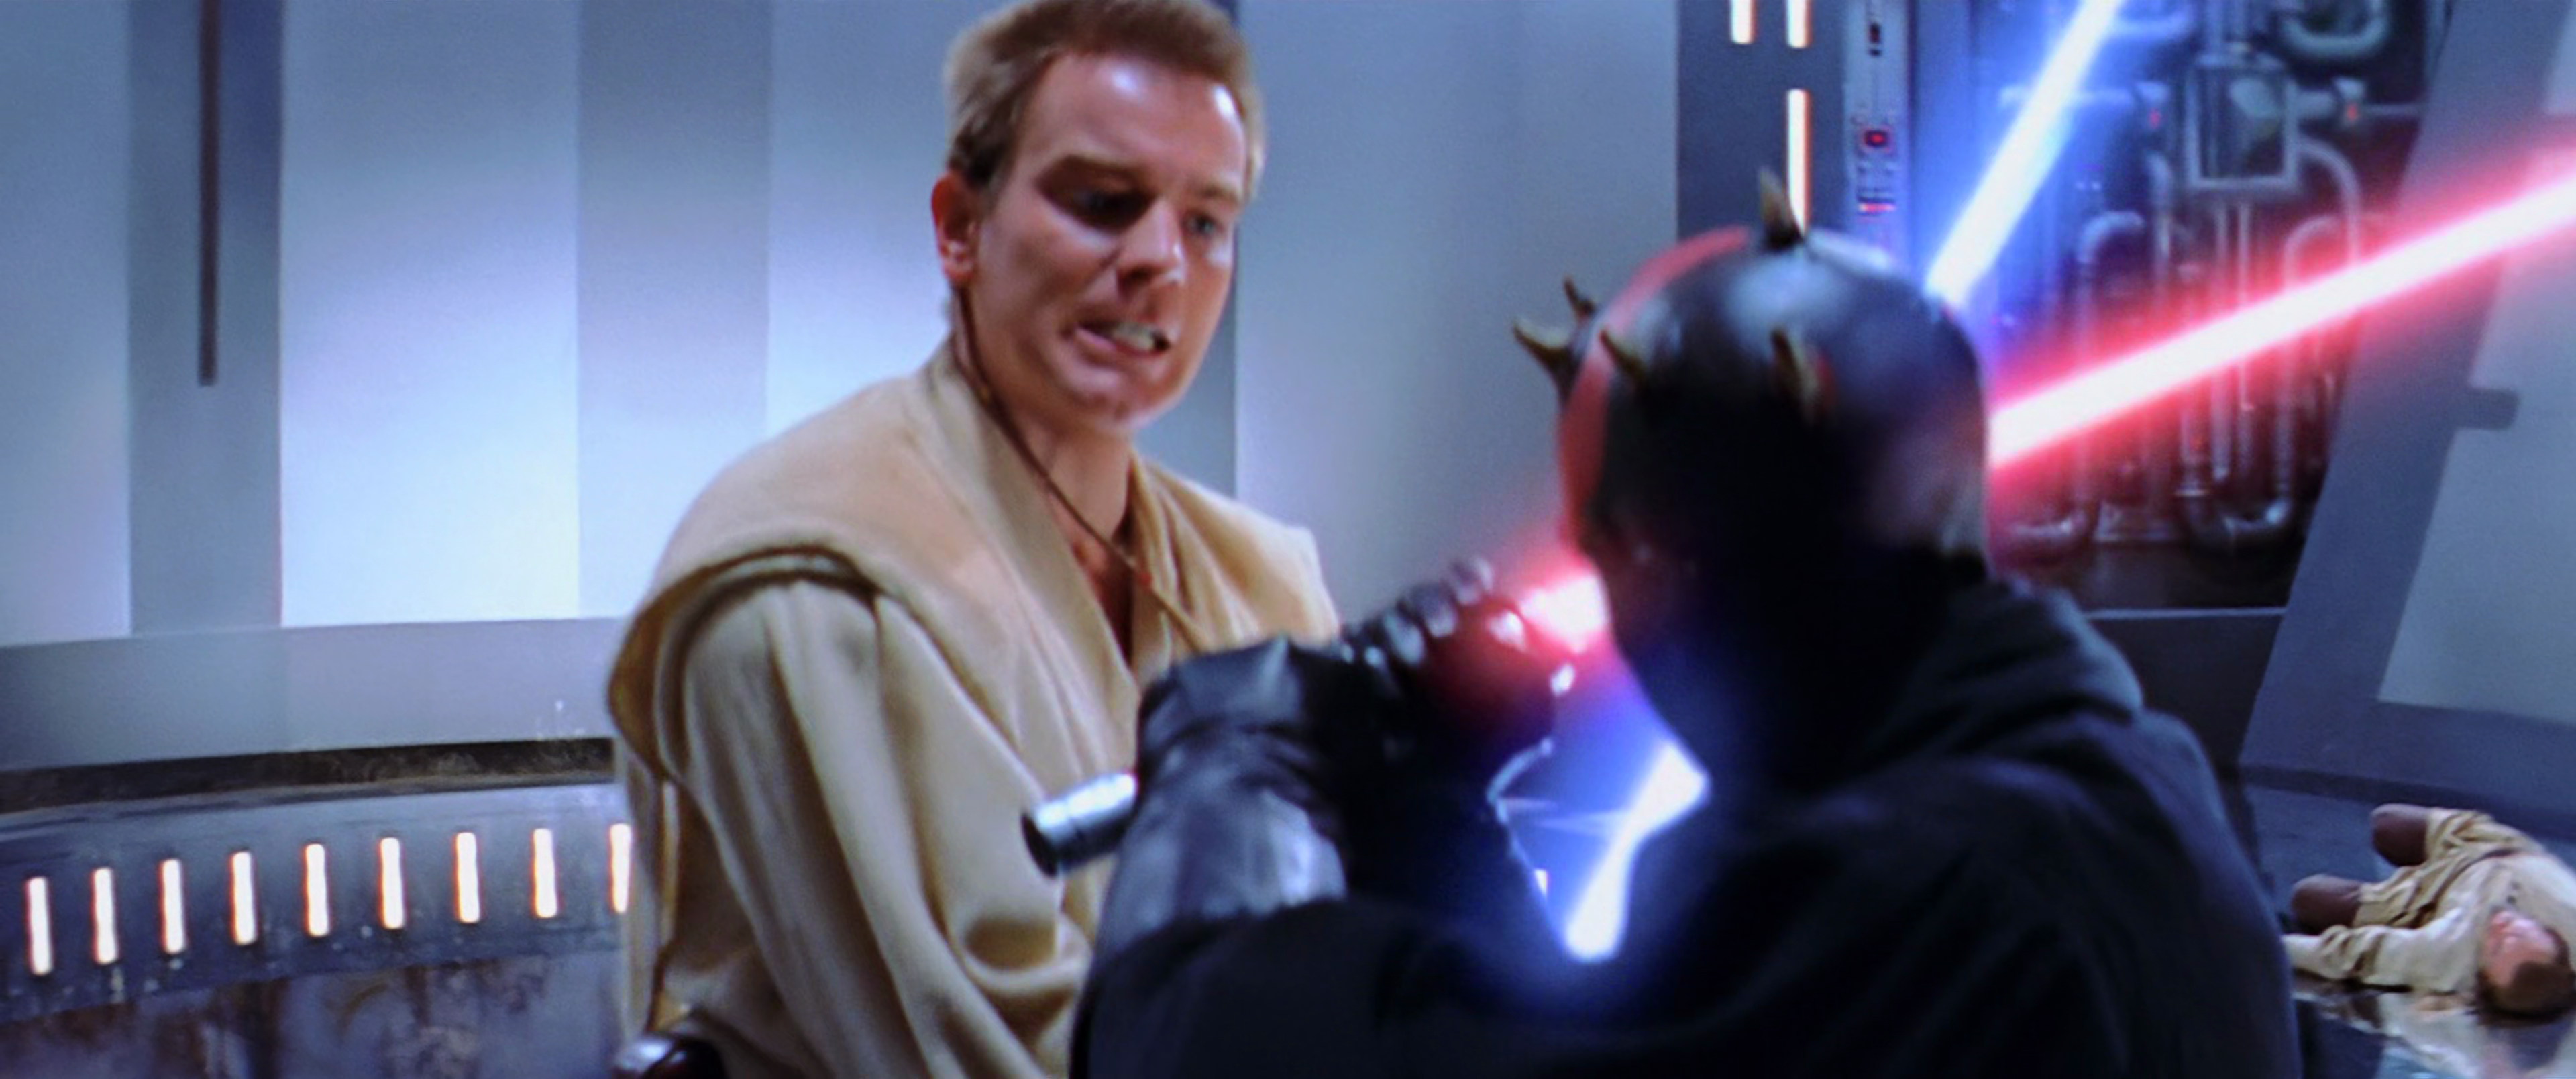
Consumed by hatred, Obi-Wan attacked Maul with unrestrained fury. He succeeded in severing the Sith Lord's double-bladed lightsaber hilt in half, leaving Maul with only one blade. However, the Sith Lord maintained control and eventually Force-pushed Obi-Wan into the melting pit. The Jedi Padawan clung to a power node for his life and watched as Maul kicked Obi-Wan's fallen lightsaber into the pit.
As the Sith Lord attempted to dislodge him with lightsaber strikes on the edge of the pit, whose metal happened to be resistant to the weapon's blade, Obi-Wan was able to calm his nerves and focus on the light side. Maul, upon noticing Obi-Wan's newfound serenity, briefly expressed some confusion. He Force Jumped himself out of the pit, called his master's lightsaber into his hand, and landed with a single sweeping near-death blow into Darth Maul's torso, causing a look of surprised pain to cross his face. He finished by Force-pushing Maul away. The Sith Lord fell into the melting pit, neatly sliced in two, only barely able to survive. With Maul presumed dead, Obi-Wan then rushed to his master's side, overwhelmed with grief at the latter's impending death. Qui-Gon then reiterated his belief that Skywalker was the prophecized Chosen One that will ultimately bring balance to the Force, and gave as his last request that Obi-Wan is to train the boy to ensure he fulfills that destiny before drawing his last breath. By then, the rest of Naboo had been liberated after the Lucrehulk-class Droid Control Ship orbiting the planet was destroyed, thereby shutting off control to the droid arm and ending the Invasion of Naboo.
Battle in space
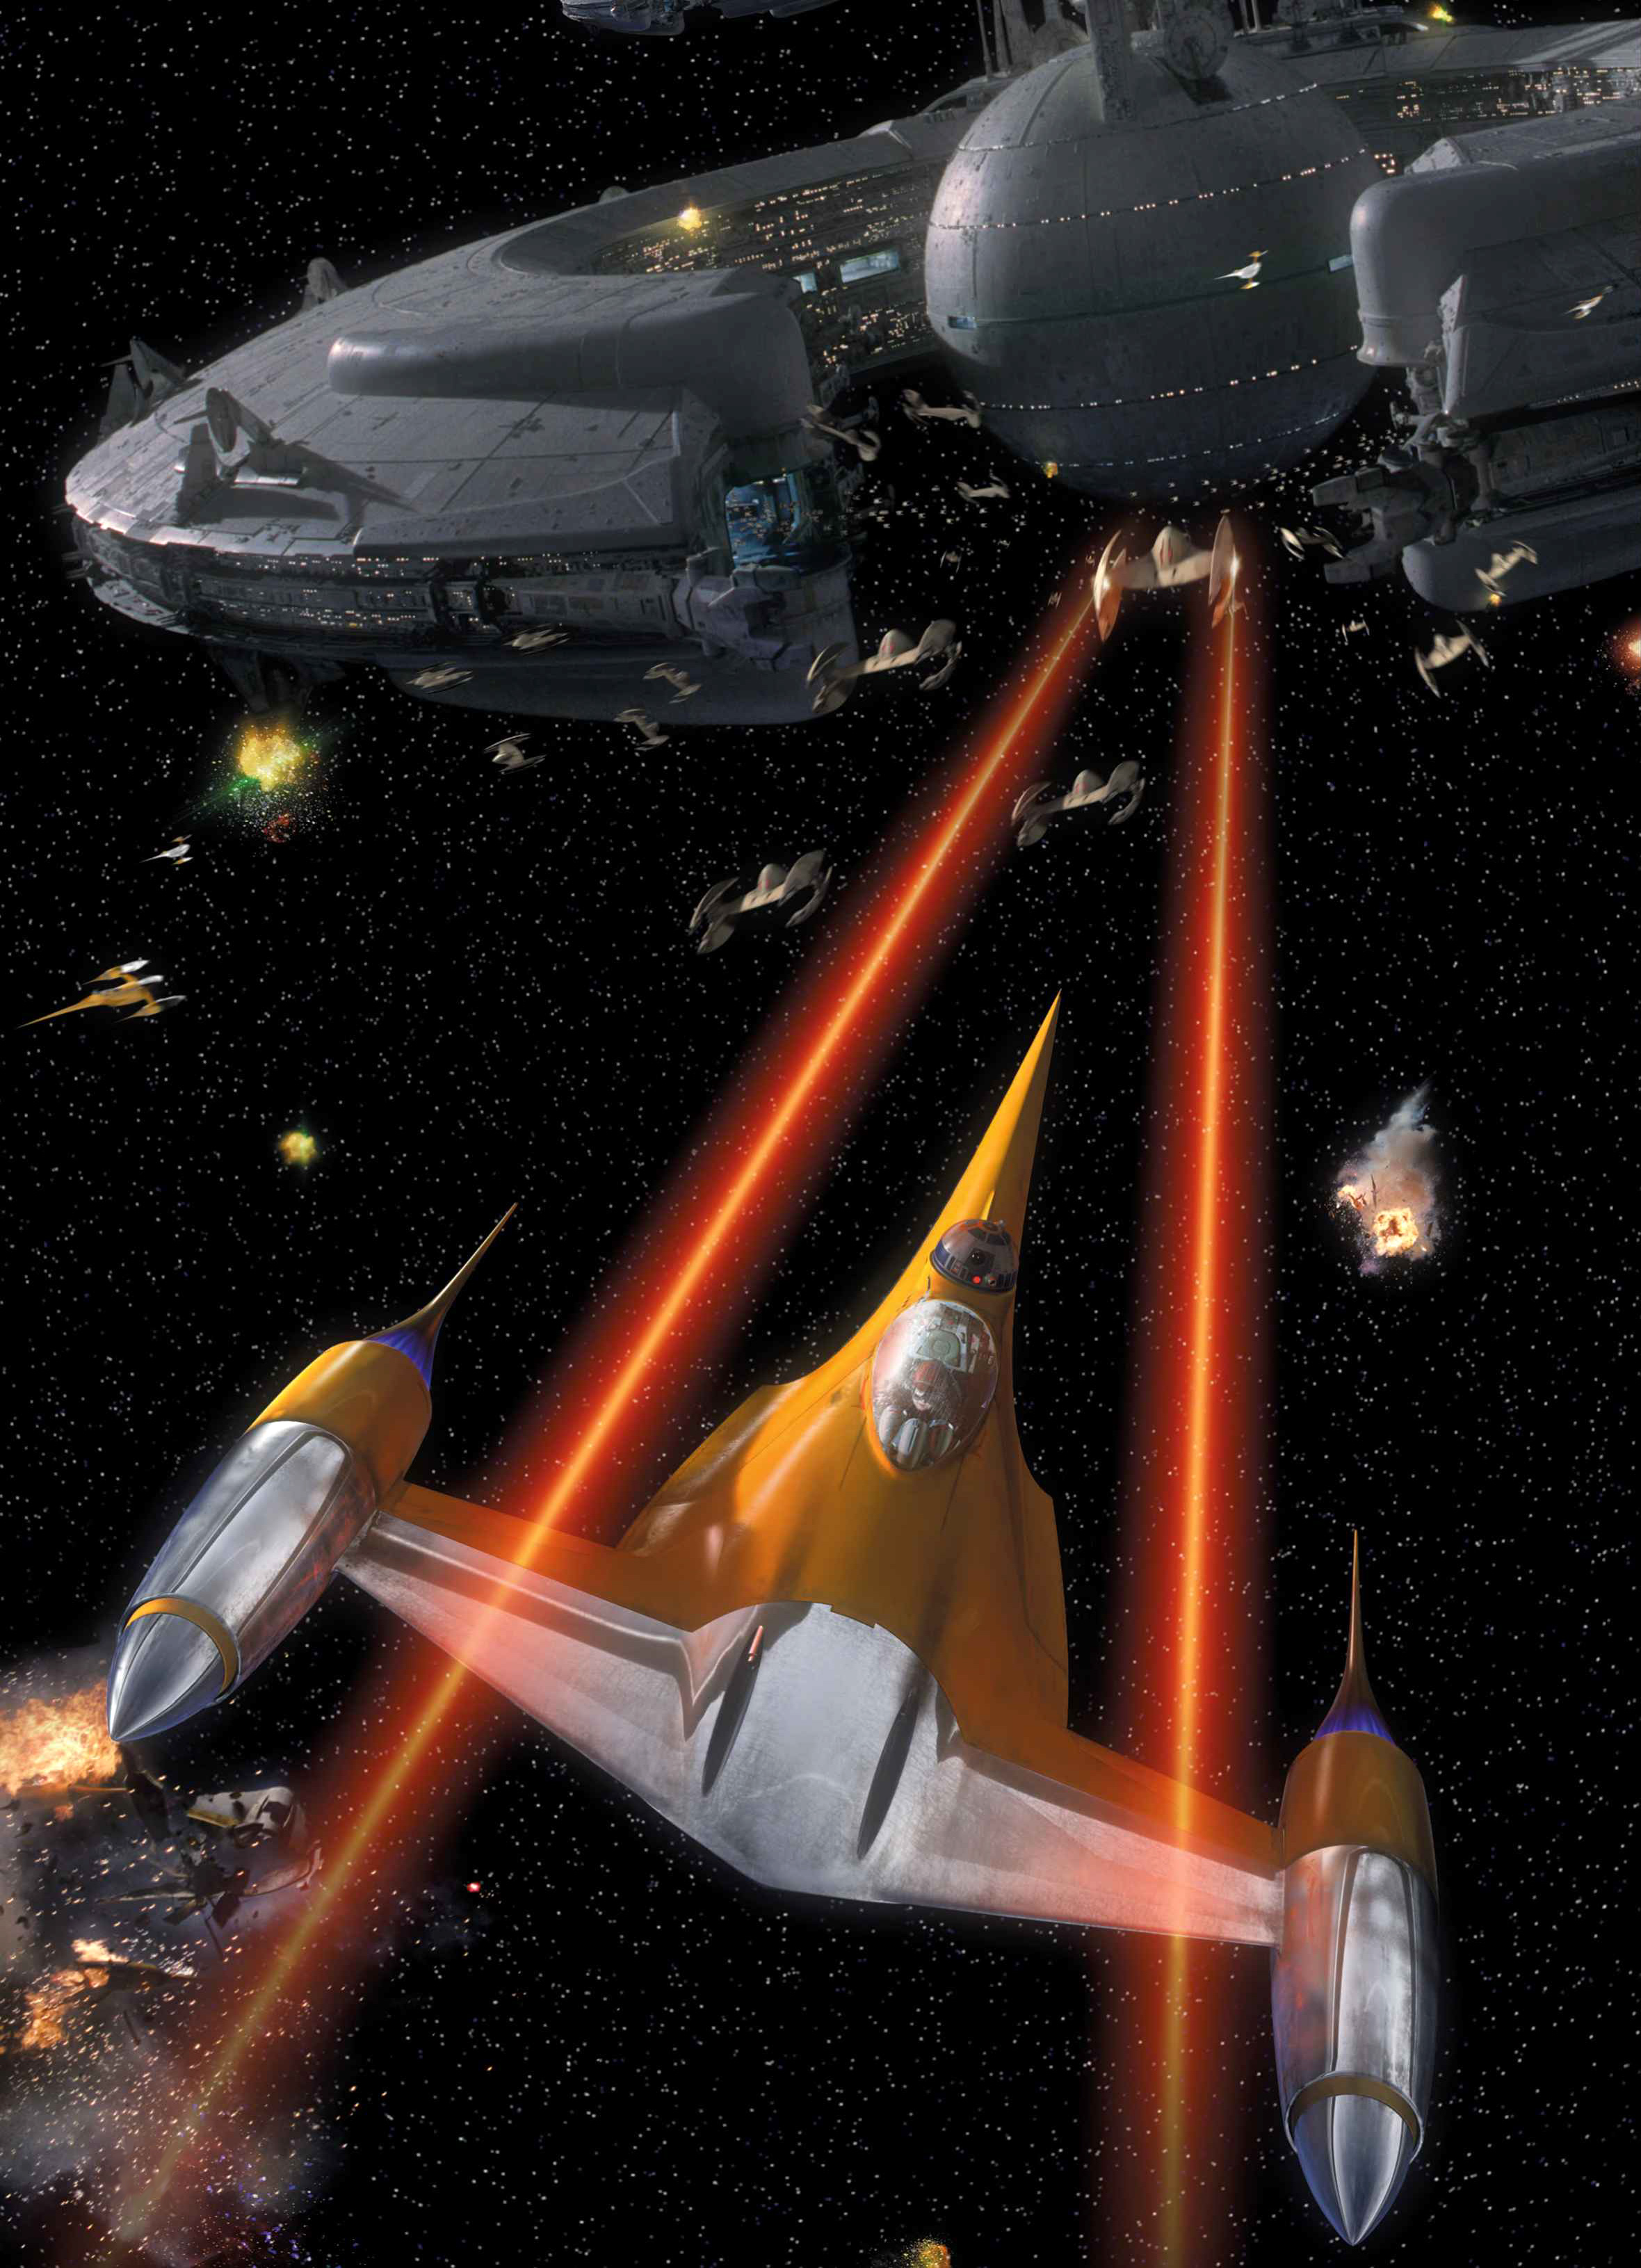
Once in orbit above Naboo, the pilots of Bravo Squadron, including Porro Dolphe and Arven Wendik, the latter piloting his personal starfighter Bravo 3, initiated an assault on the Droid Control battleship, which coordinated all droid forces on the planet. Dineé Ellberger, flying her personal starfighter Bravo 5, also joined the assault. Squadron leader Ric Olié in his starfighter Bravo 1 ordered Bravo Flight A to engage the enemy fighters and Bravo Flight B to make a run on the transmitter. Various wings of pilots, including Lieutenant Gavyn Sykes, Rhys Dallows, Bravo Eight, and Bravo Twelve engaged the ship, taking down its initial wave of droid fighters. DFS Starfighter Squadron, the squadron of starfighters assigned to safeguard Trade Federation command ships, possessed advanced targeting routines. Dallows spearheaded the strikes on the battleship's fourteen Receiver Stations, disabling all of them. The loss of the control signal prevented the battleship from deploying additional fighters. Three pilots pursued and destroyed the last droid starfighter. Dallows and other Naboo pilots then determined that the ship could only be destroyed by entering it through one of the hangars and reaching the main reactor. At that moment, a mercenary leader, allied with the Federation, appeared and eliminated one of the Naboo starfighters. Dallows and other pilots engaged him before pursuing him inside the ship, flying into the right-hand hangar bay when the hangar shield was lowered to launch another C-9979 landing craft. Dallows succeeded in entering after him, but the others were cut off when the shield reactivated.
After the initial wave of droid starfighters was neutralized, Bravo Squadron moved closer to engage the Control Ship. Olié instructed Wendik to attack the bridge. One of the Naboo pilots and Rya Kirsch in his starfighter Bravo 4 were killed during a strafing run by the battleship's quad turbolaser cannons, which utilized complex recursive algorithms to target enemies, but the Naboo pilots managed to inflict damage on the Droid Control Ship with their proton torpedoes. The torpedoes lacked the power to significantly affect the Federation ship. Palmer was captured by the hangar tractor beams and drawn into range of the hangar guns. Her engines were disabled, and she was sent plummeting to her death on the planet below. One of the Naboo pilots subsequently disabled a tractor beam generator, then Sykes eliminated the remaining three. The battleship managed to reroute the control signal and launch additional starfighters to harass the Naboo pilots.
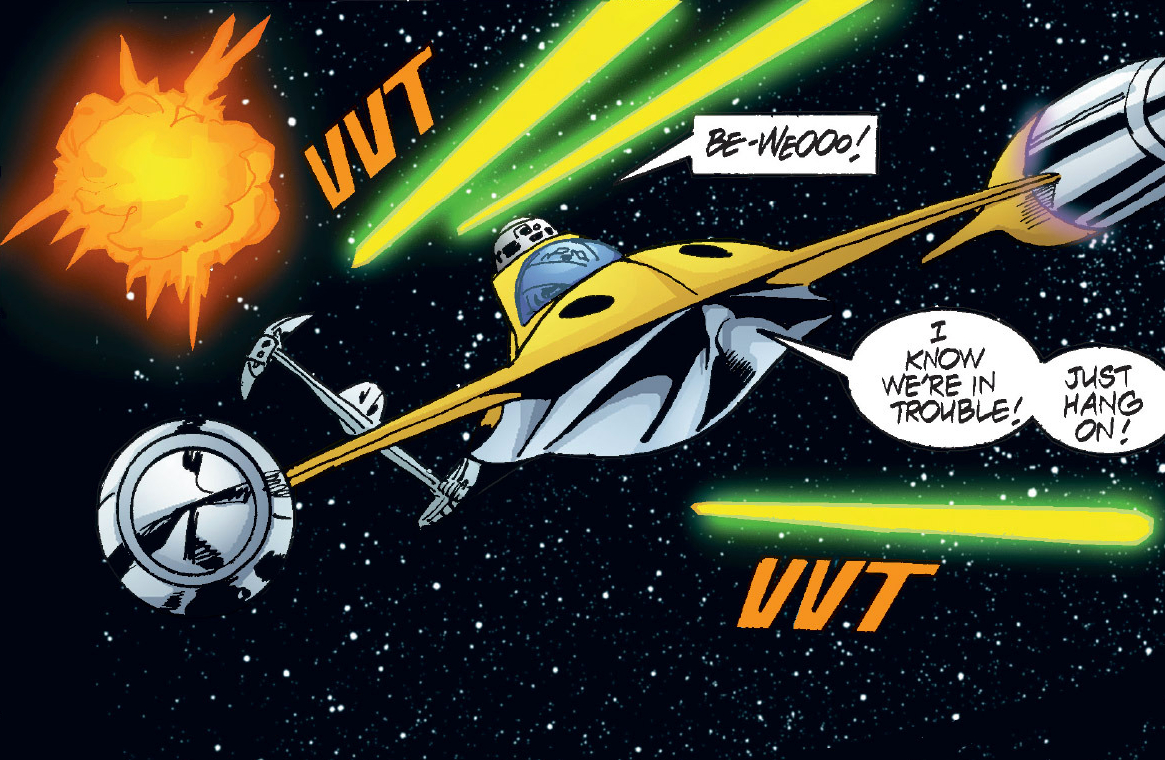
Amidst the intense space conflict, on the planet's surface, a young Anakin Skywalker inadvertently became a participant when his starfighter, acting as a refuge, was accidentally launched. It departed from Theed Hangar under autopilot control. He then requested his astromech droid, R2-D2, to deactivate the autopilot system. Despite R2-D2's insistence on returning to the hangar, Skywalker refused, referencing Qui-Gon's earlier instruction to "stay in the cockpit." Subsequently, Skywalker successfully destroyed several droid starfighters before his own craft was shot down, leading to a landing inside the battleship's left-hand hangar while its shields were temporarily inactive.
Simultaneously, Dallows was engaged in combat with the mercenary leader, pursuing him deep within the vessel. Their chase led them through hangar bays, into the power grid, and finally to the last hangar, where Dallows ultimately eliminated the opposing pilot. Furthermore, Dallows targeted and obliterated the interior ceiling turrets and the Lander Assembly Cranes. He also discovered that transports were still actively being loaded.
From an external vantage point, Lieutenant Sykes made an effort to aid the pilots trapped inside the battleship by targeting and destroying vital systems, notably the shield generators. Upon learning of Skywalker's daring maneuver, Olié issued an order to Bravo Squadron, forbidding any attempts to replicate it.
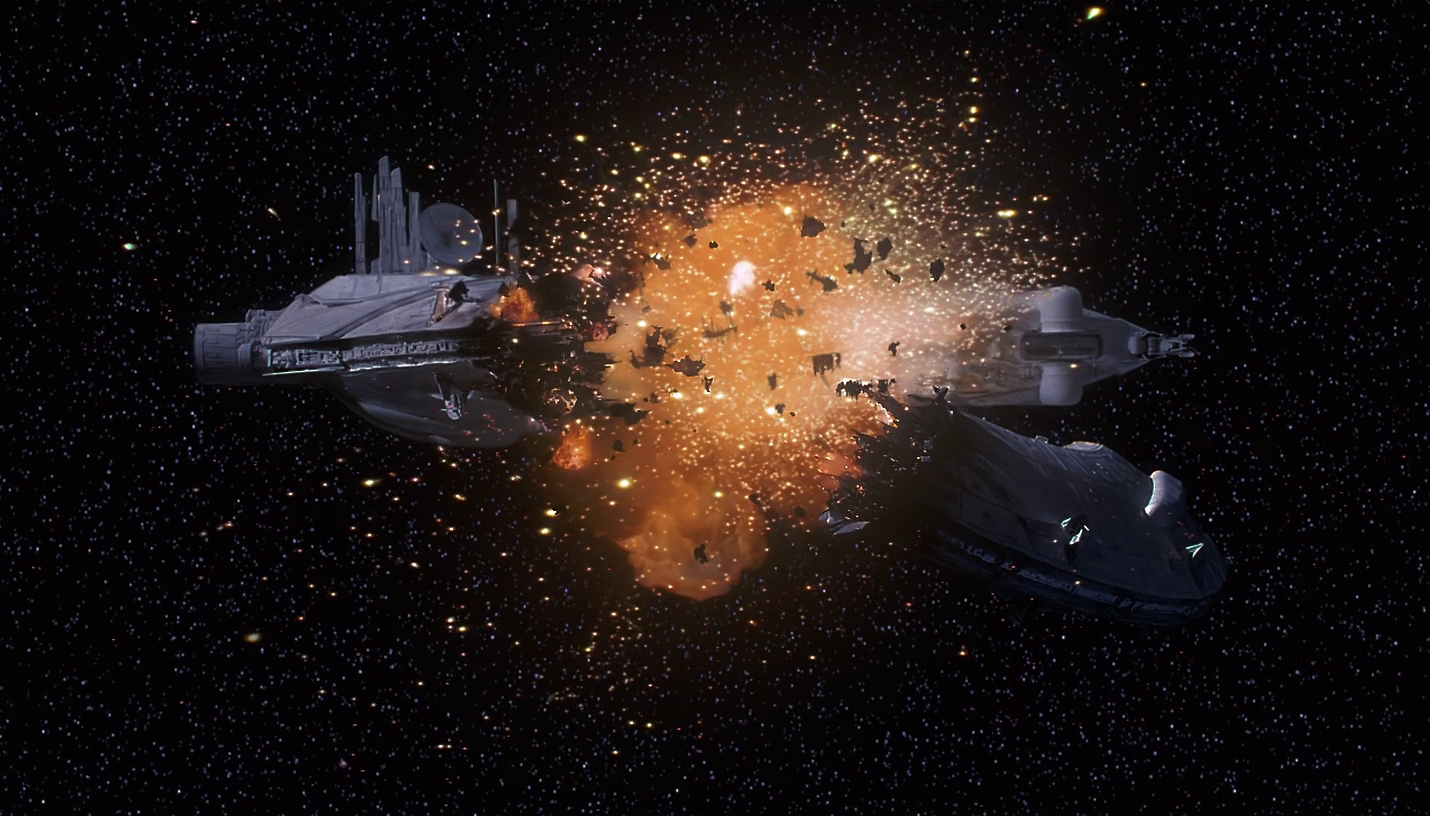
Once inside the hangar, Skywalker's vessel touched down, its systems overheated. He sought cover to avoid detection as battle droids encircled his craft, demanding his surrender. While concealed, he tried to restart the fighter by manipulating its controls. After successfully rebooting the starfighter, he fired its weapons and accidentally launched a pair of torpedoes into the main reactor while attempting to target the droids. The force of the torpedo launch caused a slight jolt. Tey How, the communications officer, reported the disturbance to Captain Daultay Dofine, but Dofine dismissed the reports, asserting the impossibility of a starfighter breaching the deflector shields. However, the resulting reactor explosion initiated by Skywalker triggered a massive chain reaction, tearing the ship apart. Stunned by the explosion, Skywalker made a hasty escape through the main hangar, drawing a comparison to podracing. The imminent destruction of the ship was also detected by the remaining pilots of Bravo Squadron, initially perplexing them as their attacks appeared ineffective. However, they then witnessed Skywalker's starfighter exiting one of the docking bays.
The explosion compromised the shields of Rhys Dallows' fighter, but he managed a narrow escape by destroying the shield generator inside Hangar 3 and exiting through a side hangar entrance.
Dofine and his crew, puzzled, observed the starfighters rapidly retreating from the ship. They failed to comprehend the unfolding events as the control computer before them malfunctioned and exploded, resulting in the immediate deaths of Dofine and the entire crew. Consequently, all battle droids stationed on Naboo were deactivated, marking the end of the Federation's invasion. The Bravo Squadron pilots celebrated their victory, and Olié offered his congratulations. Captain Panaka then contacted the squadron, announcing the liberation of Naboo.
Despite a significant defeat for the Gungans on the Great Grass Plains, the course of events shifted dramatically when Anakin Skywalker destroyed the Droid Control Ship above the planet. This action deactivated the droid army, instantly freeing the surviving Gungans from captivity. They watched in astonishment as their droid captors, including the battle droid 1138, and enemy vehicles suddenly ceased functioning. They realized that while they had lost their battle, the conflict above had been won. In celebration, they proceeded to overturn the deactivated droids.
Aftermath
Following the conclusion of the battle, peace was restored to Naboo. Viceroy Gunray was apprehended and compelled to sign a treaty, formally ending the war. The Gungan people and the Naboo united as one, and a celebration was held in Theed. Reports analyzing the battle suggested that the droid starfighters' sluggishness was due to an overloaded Central Control Computer, which was also responsible for directing a large number of ground forces. During the Clone Wars, Skywalker recounted his experiences to members of the 501st Legion. His story later served as inspiration for three clone troopers who, disregarding orders, employed Skywalker's tactic of destroying a ship's reactor from within when they destroyed a Separatist supply ship during the Battle of Umbara.
Some Gungans viewed Bink's actions, including his personal deactivation of an Armored Assault Tank, as acts of courage, while others held different opinions. Regardless, Boss Nass remained unaware of his newly appointed Bombad General's antics. Thanks to the Gungans' valiant efforts, Amidala successfully captured the Viceroy, and control of Naboo was returned to its rightful owners. Following the Gungan-Naboo armistice, Boss Rugor Nass established a Gungan colony on Ohma-D'un and maintained friendly relations with the Naboo. Military historians recognized the conflict for its opportunity to study a traditional ground battle, a rare occurrence in that peaceful era. The Trade Federation later adapted the battle into a holopad historical mission, depicting how the battle would have unfolded if the control ship had not been destroyed, including the arrival of Darth Maul to aid the droid army.
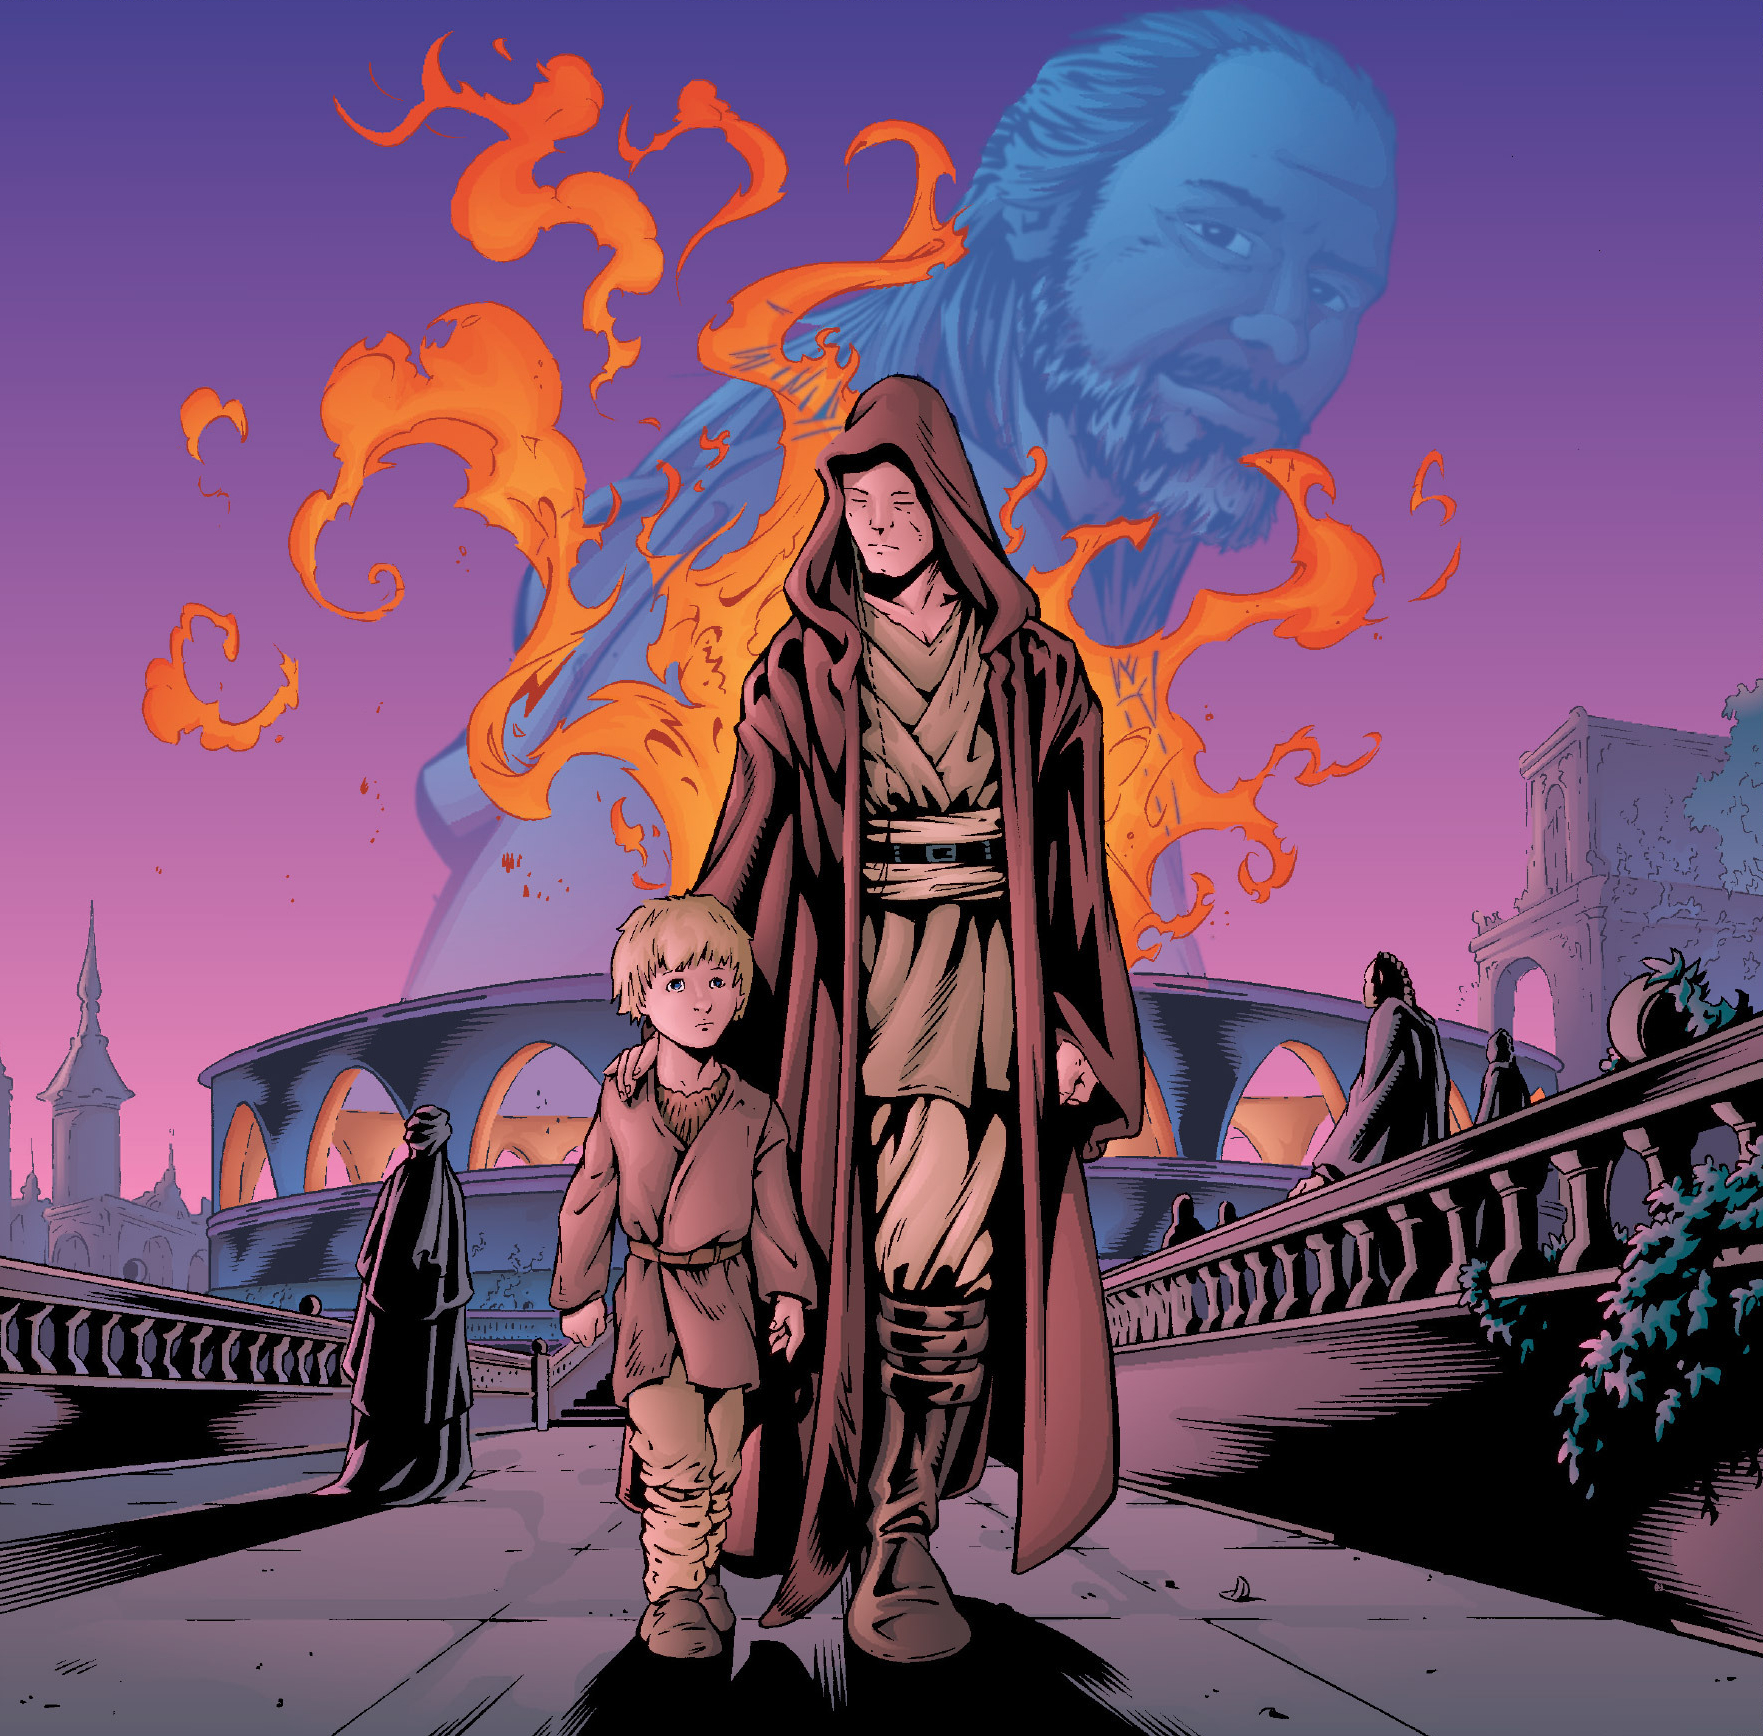
After the battle, Amidala visited the families of every fallen Gungan and Naboo soldier. The students from the Royal House of Learning assisted in liberating the Trade Federation's remaining prison camps and clearing away the deactivated battle droids, reuniting with captain Nuun Pargen of the Crescent. They were also recognized in a small ceremony by the Queen. Palpatine had been elected Supreme Chancellor in the meantime, replacing Finis Valorum. The next day, Palpatine, now the newly elected Supreme Chancellor of the Republic, arrived on Naboo with members of the Jedi High Council to oversee the arrest of Gunray and Haako. Before Gunray and Haako were taken away, Amidala personally informed them that they would face accountability before the Galactic Senate, with Captain Panaka implying that the invasion would likely lead to the Trade Federation's dissolution. Palpatine congratulated Kenobi and Skywalker for their roles in suppressing the invasion, expressing particular interest in Skywalker's future, and thanked Amidala for her bravery, promising to work together for peace. Yoda promoted Kenobi to full Jedi Knight but reluctantly agreed to train Skywalker at Kenobi's insistence, who stated he would train Skywalker even without the Jedi Council's permission to honor Qui-Gon's last wish. That evening, Qui-Gon received a Jedi funeral. During this time, Mace Windu and Yoda, aware of the Sith's adherence to the Rule of Two, speculated whether the defeated Sith lord was the Sith Master or merely the apprentice. The Council believed Kenobi had destroyed Darth Maul, but he had survived and gone into hiding. During Jinn's funeral, the honored students were approached by Sabé, who requested their help in ending a minor rebellion led by a dark-side force-adept. The following day, the Gungans and Naboo celebrated with a parade in Theed, featuring overflights by N-1 starfighters, N-X Police Cruisers, and NB-1S Royal Bombers. After the battle, young Skywalker documented his experiences with the Jedi in a journal. The Security Forces and resistance fighters gathered in the Theed Hangar to bid farewell as they departed in the Royal Starship.
Despite the capture and arrest of Nute Gunray and the Trade Federation leadership for their roles in the invasion, they were largely acquitted after four trials at the Republic Courts within a decade, much to Naboo's dismay. As a consequence of the expenses incurred after the battle, Gunray harbored a deep resentment toward Amidala, leading him to request her assassination as a condition for joining the Separatists.
Contrary to the beliefs of the Jedi and Darth Sidious, Darth Maul survived the battle on Naboo. Fueled by his hatred for Obi-Wan Kenobi, he managed to escape the planet. Knowing his master would never forgive his failure, Maul fled to the isolated world of Lotho Minor, where the pain from his near-fatal wound drove him to insanity. He remembered only his reason for becoming what he was: Kenobi. Mother Talzin of the Nightsisters was the only one aware of Darth Maul's survival, possessing a sample of his blood recovered during an attempt to retrieve him from Darth Sidious. During the Clone Wars, after incurring the wrath of Count Dooku, Talzin sent her new servant, Savage Opress, Maul's half-brother, to find him. Sidious later learned of Maul's survival from Skywalker, who explained his absence from a meeting with the Senate due to joining Kenobi in hunting a Sith other than Dooku, and from Kenobi himself during a debriefing on the Skirmish on Florrum. Sidious later tracked Maul down to Mandalore and managed to subdue him, sparing him as he still had use for him.
A memorial shrine commemorating the Gungan battle against the Trade Federation was later constructed on Naboo.
Behind the scenes
Release information
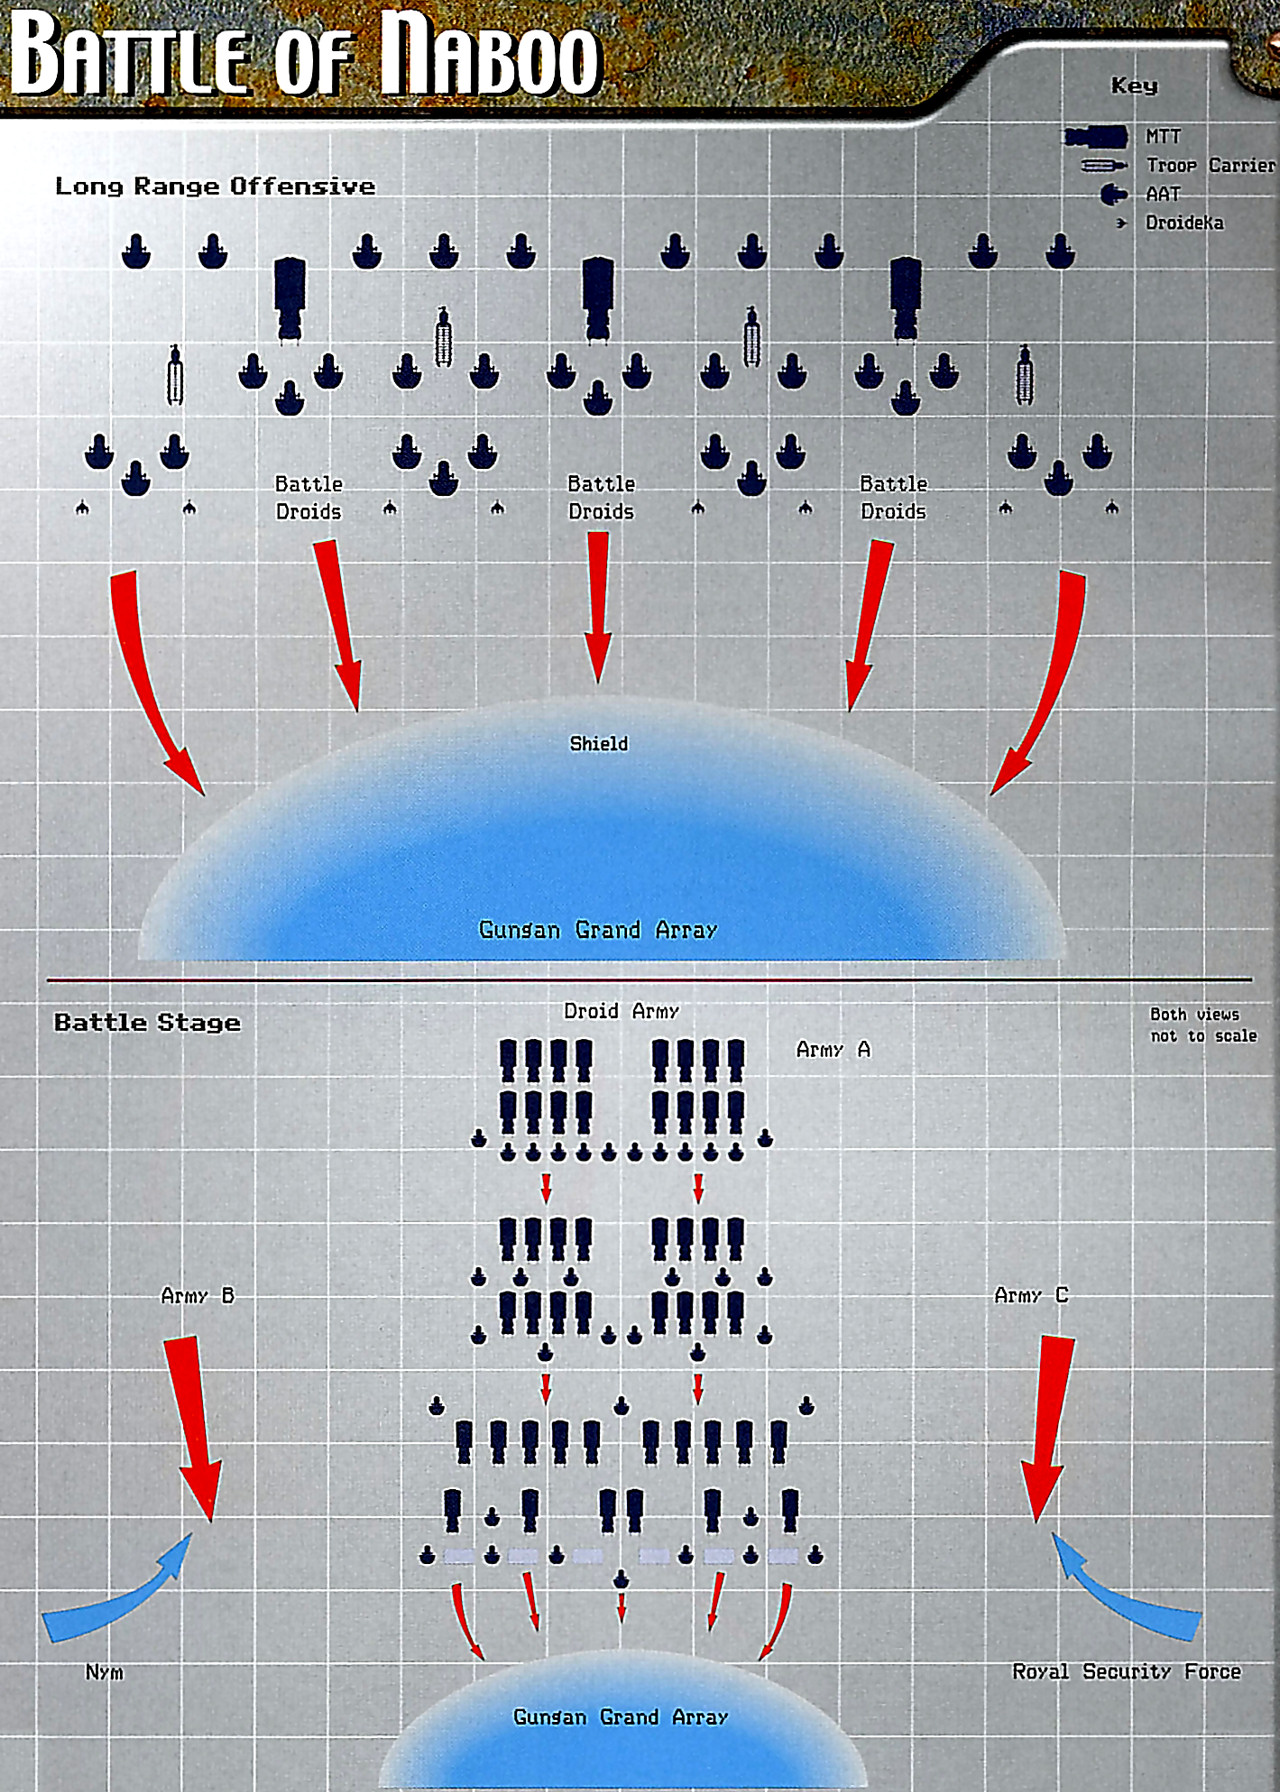
The Battle of Naboo was first depicted in George Lucas's Star Wars: Episode I The Phantom Menace, which was released in May of 1999.
Great Grass Plains
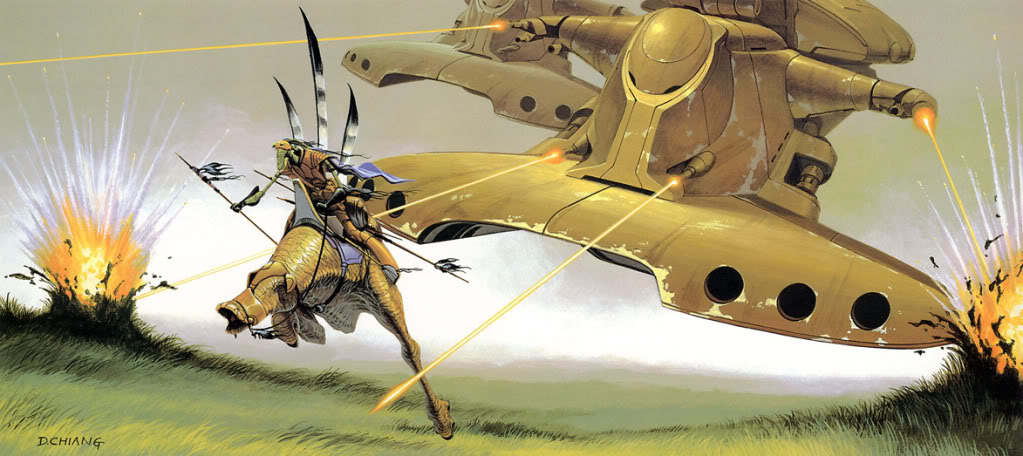
Similar to the Battle of Endor in Richard Marquand's Star Wars: Episode VI Return of the Jedi, the Great Grass Plains battle draws inspiration from the Vietnam War, specifically the concept of a technologically inferior group defeating a more advanced culture. However, unlike Endor, the protagonists do not win at Great Grass Plains, and their salvation depends on luck and external intervention. According to Lucas in the audio commentary, Binks' antics were inspired by Buster Keaton. The battle also incorporated Japanese themes.
According to The Art of Star Wars Episode I: The Phantom Menace, a 1999 reference book, the battle was initially envisioned as a conflict between Naboo/Gungan piloted airwhales and Federation "air bikes."
Star Wars: The Making of Episode I: The Phantom Menace detailed the special effects production process for the battle. The scene was initially mapped out using animatics. Then, FX artist Dennis Muren compiled images of Earth locations, which Industrial Light & Magic distorted to appear alien. CGI images of the Trade Federation vehicles and Gungan armies were subsequently added to the shot. Animators received horse-riding instruction to realistically portray the kaadu. Additionally, hundreds of effects, such as laser blasts, were rendered. Explosions were created on stage and then scanned into the digital compositing system for alterations. At George Lucas's suggestion, the droids were designed to resemble pigeons, with different actions randomly assigned to each droid.
The Star Wars: Episode I The Phantom Menace novelization accurately recreates the movie scene, with a few minor differences. In the novel, Binks releases the boomas from the battle wagon before the shield drops, rather than after. Additionally, the droid army is described as outnumbering the Grand Army, although the two sides appear equal on screen.
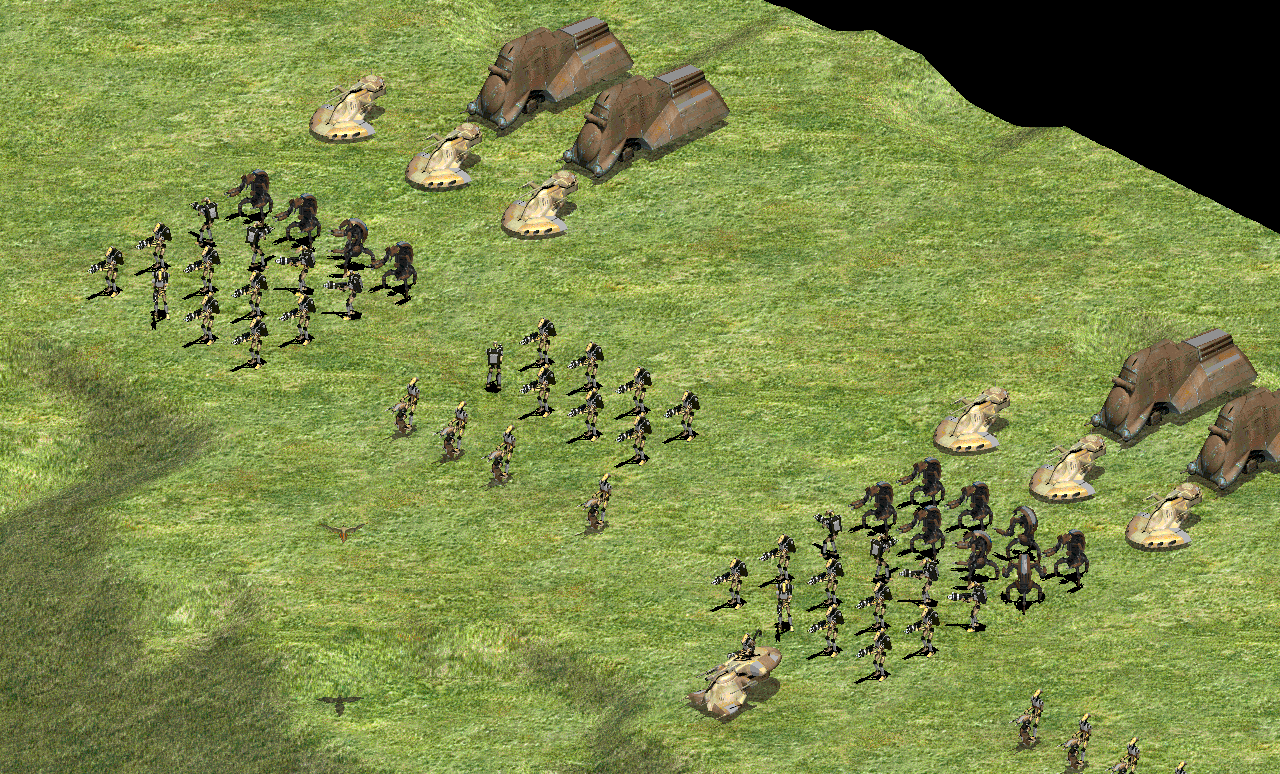
An alternate, non-canon version of the battle appears in the 2001 video game Star Wars: Galactic Battlegrounds as a "what-if" bonus scenario. In this scenario, the player controls OOM-9's army (10 Heavy MTTs, 15 AATs, 40 heavy destroyer droids, 16 STAPs, 60 Heavy battle droids, and OOM-9 in a Heavy Armored Assault Tank) and must destroy Ceel's forces with the optional assistance of Darth Maul. Maul had won the duel in Theed and joined the Federation army. The mission begins with four Advanced Droid Starfighters flying overhead, all of which are shot down. The player must then push the Grand Army back to a Gungan Temple, which must be destroyed. The mission ends when the Temple is destroyed, regardless of whether any Gungan units survive. The game's strategy guide recommends focusing on the temple instead of eliminating each opposing unit. This can be achieved by grouping units together and concentrating on one Gungan unit at a time, with emphasis on the fambaas carrying shield generators. The guide also recommends sending a second wave at the Temple as long as it avoids getting caught in the ford crossing.
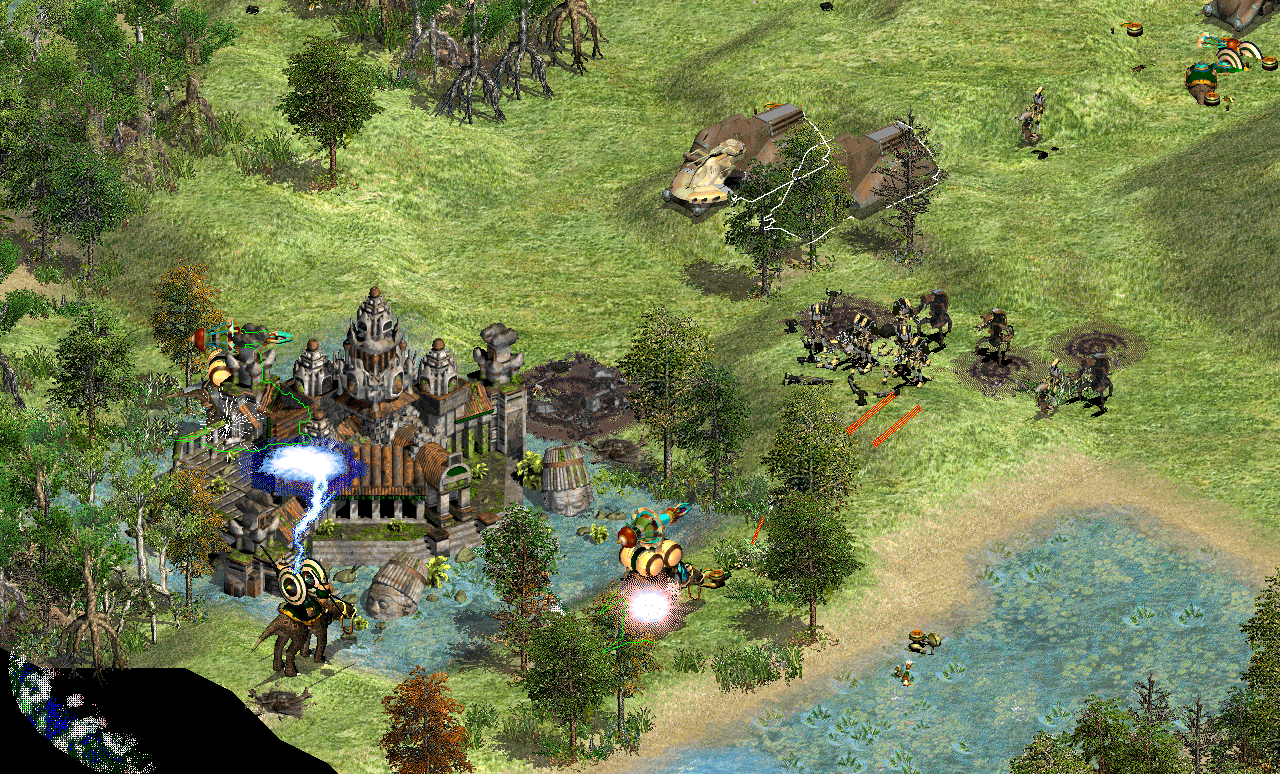
This battle was featured in the 2004 video game Star Wars: Battlefront during the Historical Campaign's first mission. The player fights for the Trade Federation, engaging the Gungan Grand Army on the plains near several ruins. The player is tasked with eliminating the entire Grand Army as it attempts to retake Theed. First, the fambaas must be eliminated to disable the mobile shield generators. The player wins by capturing and holding up to five command posts or by eliminating enough Gungans to reduce the Grand Army's reinforcement count. According to Leland Chee, the game's story is considered S-canon.
In the 2007 compilation of the LEGO Star Wars video game, this battle is depicted in LEGO form during a cutscene.
Battle in Theed
The events in Theed were initially depicted in Star Wars Episode I: The Phantom Menace, released in 1999. Subsequent works have presented the conflict from alternative viewpoints. Players are given the opportunity to engage in this battle across two missions in the Star Wars: Episode I The Phantom Menace video game, shifting between the perspectives of Amidala and Kenobi. Discrepancies exist between the game and the film. The initial mission spans from the infiltration of the Theed Hangar to the Royal Palace, culminating in the lightsaber duel up to the catwalk. The second mission unfolds within the Palace, concluding with the capture of Gunray and the defeat of Darth Maul.
In the video game Star Wars: Episode I Jedi Power Battles, which debuted in 2000, the Jedi's return to Theed, including the duel against Darth Maul, is portrayed across three levels in succession. The game can accommodate one or two players. The opening mission involves the player(s) riding STAPs along a predetermined route through Theed. In the second mission, the player(s) must ascend the Palace cliffs and navigate through five out of six rooms filled with various battle droids to rescue Security Force pilots. The third mission details the duel with Darth Maul. Due to inconsistencies between the game's duel and the movie, this article does not include the game's version of events. The duel in the game features more grandstanding by Darth Maul, including two bows to the player. The duel then proceeds out of the hangar into the Theed Power Generator complex. The player chases Maul around the catwalks and duels him on an energy bridge, before leaping down a set of rings and dueling Maul on the central catwalk. Maul Force-jumps away from the player(s), who chase the Sith Lord. The player(s) then encounter three battle droids and ascend in an elevator. On the upper catwalk, the player(s) face two more droids and must jump across a series of gaps which feature oscillating lasers. After passing this, the player(s) must disable two fans. They then disable a third fan and start jumping down its five levels, disabling more fans on the way down. The player(s) ends up on the bottom of the power chamber and must avoid falling into the pool. Beyond that is a laser gate maze, which is guarded by more droids. The next section past the maze is a series of gaps which the player(s) must jump over, while also avoiding lasers. After crossing, there is a short duel with Maul, which is similar to the movie. Qui-Gon is not killed by Maul in the game, unlike the movie, because he and Obi-Wan are not the only playable characters.
In the video game Star Wars: Episode I: Battle for Naboo, also launched in 2000, the player assumes the role of Lieutenant Gavyn Sykes in mission 14, titled Panaka's Diversion. The Gian speeder is the default vehicle for this mission. The player is not required to eliminate every droid in the level and has the option to bypass them. However, destroying the droids attacking Palmer's groups and the commandos, as well as a tank, is necessary to complete the mission. The player can advance to the next objective by blasting through the doorway instead of waiting for the commandos. After Sykes destroys a tank near the hangar and triggers the ambush, the game concludes automatically, regardless of whether the remaining tanks in the plaza have been destroyed.
Star Wars: Galactic Battlegrounds presents an alternate historical scenario where the Gungan Grand Army (comprising three fambaas—one with a deflector shield and two with cannons—two heavy Raapturs, one scout, three cerrabores, two heavy Lerraas, two medics, and 12 militiagungs with Roos Tarpals and Jar Jar Binks) liberates Theed after achieving a complete victory on the Great Grass Plains. The Gungan army enters Theed through the southern gates and advances through the city, destroying the Trade Federation fortresses obstructing their path and rescuing Royal Security Force units, who then join the Gungans' fight. As the Trade Federation military structures are destroyed, the Gungan army receives reinforcements. Ultimately, the Gungan army demolishes the Trade Federation Monument that had been erected, thereby liberating Naboo. This mission was also included in the game's 2002 expansion, Clone Campaigns. The game's strategy guide provides a walkthrough of the mission area and advises players to group their units together under the Fambaa's shield.
The video game Star Wars: Obi-Wan, also released in 2001, places the player in the role of the title character. The game includes a strategy guide. This battle is depicted across three missions. In Grounded, Kenobi collaborates with Resistance fighters to destroy a turbolaser cannon. The outline provided in this article is just one method of completing the mission, and Kenobi has several weapons available. It is possible to bypass many of the enemies obstructing the player's path. Valuable Assistance expands on the scene inside the hangar, with Kenobi severing six power cells. The duel with Darth Maul in Darth Maul is similar to that of the movie but has different details. The melting pit has catwalks that are not in the movie. Also, Kenobi duels Maul directly, depleting his health and cutting his lightsaber in half, then defeating him again. Furthermore, Obi-Wan does not lose his lightsaber in the game's version of the duel, and as such defeats the Sith Lord with his own weapon instead of Qui-Gon's. When Maul is defeated for good, Obi-Wan Force-pushes him into the melting pit, which causes his two halves to separate, instead of Maul simply falling backwards into the pit as in the movie. The mission begins with Obi-Wan trapped behind a barrier, observing Qui-Gon and Maul's duel. This duel is not scripted, presenting the player with a different fight each time the mission is started.
In Star Wars: Battlefront, this conflict is featured in the game's mission titled Rebellion on Theed. The mission is presented from the perspective of the Trade Federation Droid Army and depicts a droid victory instead of the canonical Naboo victory. Darth Sidious commands the army to defend Theed, and the droids engage the Naboo Security Forces, recapturing key locations (The Office, the Palace, the Rotunda, the Embassy, and the Plaza) before eliminating the Naboo soldiers. AATs and Gian speeders are present in the level and can be driven.
In the LEGO Star Wars video game, Chapters 5 and 6 of the The Phantom Menace segment occur during this period, but the characters are re-imagined as silent LEGO figures. The game supports two players, but if only one is active, the second is controlled by AI. In Retake the Theed Palace, players control Qui-Gon and Obi-Wan figures, starting outside the Royal Palace. Padmé, Panaka, R2-D2, and Anakin are also available as playable characters. Upon entering the courtyard, the players engage battle droids and destroyer droids. The players must then utilize the game's "Force powers" to lower a ramp and ascend to the second level, where they must switch to R2-D2 to open a door. The next area features a battle-damaged backdrop. Players must employ the game's "Force powers" to solve a puzzle and use one of the grapple guns to cross a gap. They must then stand on switches to open the next door, revealing more battle droids. Following this, players must construct a door for R2-D2 to open using LEGO studs, leading into a courtyard with more droids. In that area, players rebuild a staircase and ascend it, then repair a bridge. After the bridge, they must solve a puzzle, using Anakin to navigate a chute to activate a switch for the door, allowing the others to enter an area filled with droids. Subsequently, the two Jedi characters must use their "Force powers" on a puzzle to advance to the next level and open the door to the Palace. Players must then ascend the staircase and battle destroyer droids. The path to the next area is concealed behind a statue, leading to the hangar. There, players rescue six Naboo pilots scattered throughout the hangar by Force-jumping to their locations or using the "Force" to stack platforms for jumping. Once the pilots are freed, the player-controlled R2-D2 must open the main hangar door, concluding the mission. The mission's opening video deviates from the movie by depicting a Flash speeder ambushing the AAT near the hangar instead of the Gian speeder.
In Darth Maul, Qui-Gon and Obi-Wan confront Darth Maul. The Sith Lord initiates the encounter by Force-lifting the walkway, preventing the Jedi from crossing the chasm. He then engages in a sequence where he and the characters Force-push items at each other. After that, he flees, and the players can reassemble the bridge and pursue him. The players must then proceed down the hallway to face Maul again and follow as Maul jumps up walkways placed around a column. At the end of that is the catwalk area with a jumping puzzle. Passing through that leads the players to battle-droid commanders and troops which must be defeated. Each player must then take out a destroyer droid and step on a switch to raise a platform to where Maul escaped to. Following this is the laser-gate room, which must be disabled by using the "Force powers" to flick switches until the players reach the final area; there are only four gates instead of the canonical seven gates. They fight Darth Maul until his hit points are reduced, then he jumps up and uses his "Force powers" to toss LEGO items against the players. He does this twice until forced back onto the playing field, where the players defeat him again. The closing video then plays and features the final moments of the fight. When Maul is defeated, though, his torso falls into the pit and his LEGO legs remain standing and move around.
The game's strategy guide provides instructions for completing the puzzles and reveals all the bonus areas.
The 2012 Scholastic children's book LEGO Star Wars: Darth Maul's Mission presents a humorous interpretation of the battle. When Darth Maul confronts the Jedi, Qui-Gon refers to him as "Little Red Riding Hood." During the duel, Maul manages to knock Qui-Gon into a storage closet. When Obi-Wan is trapped within the laser barriers, he reconstructs scattered droid parts into a speeder bike, but Maul destroys the speeder, sending Obi-Wan into the pit. Subsequently, a Jawa appears and collides directly with Maul, knocking him into the pit. Obi-Wan then waves goodbye, saying, "see you next fall, Darth Maul." The heroes then celebrate with a party in Theed.
Space battle
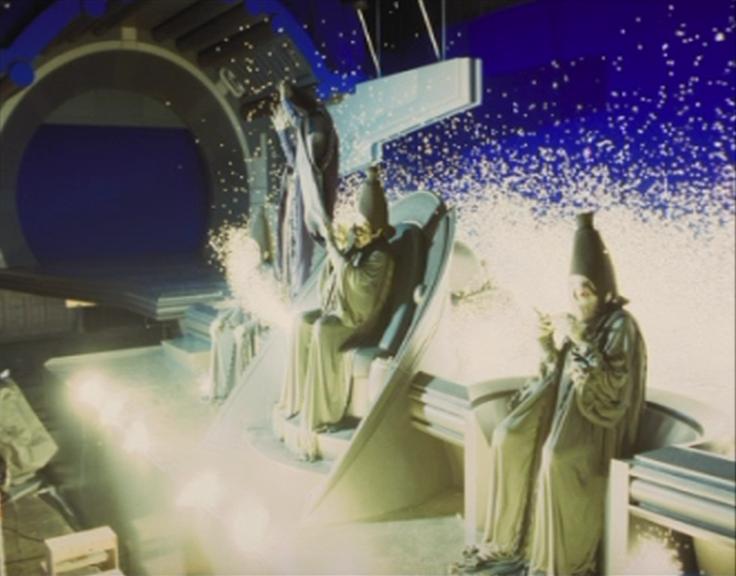
According to Star Wars: The Making of Episode I: The Phantom Menace, the space sequence was created using a combination of computer animation and motion-control model photography.
In Star Wars: Episode I: Battle for Naboo, the player, piloting an N-1 starfighter as Gavyn Sykes, participates in this battle during the game's final campaign mission. The battle is divided into two parts; the player must first eliminate a wave of droid starfighters, then, after a cutscene, engage the Droid Control battleship. The subsequent phase involves destroying three tractor beam generators to gain access to the ship. Certain parts of the battleship, including the Receiver Stations, can be destroyed but have no impact on the game. After some time, Skywalker enters the hangar, and the player is instructed to destroy the shield generator. Upon the generator's destruction, the mission concludes with a message from Captain Panaka to Bravo Squadron. The destruction of the shield generator was later confirmed as canon by Leland Chee on Christian Simpson's StarWars.com Blog.
The final mission of the 2001 video game Star Wars: Starfighter, titled "The Final Assault," depicts the battle from the perspective of Rhys Dallows, who also pilots an N-1 starfighter as the mission's default vehicle. The player's initial task is to destroy the droid starfighters and receiver stations. After these targets are eliminated, a mercenary craft appears in a cutscene, and the player must inflict damage on it before the mercenary retreats inside the Federation battleship. The player pursues the mercenary through the ship. If the player chooses to do so, certain secondary targets can be destroyed to fulfill the mission's bonus objectives, although this is not required. After the mercenary's ship is destroyed, a scripted event occurs: Skywalker destroys the reactor, as in the movie. The player must destroy a shield generator in the hangar to escape before the ship explodes. The game's strategy guide guides players through the mission's objectives and outlines the path to follow within the battleship. The guide also advises ignoring the droid starfighters until the receiver stations are destroyed. This article assumes all parts of the video games are canon and attempts to lay out the battle in chronological fashion.
Inconsistencies exist regarding the number of N-1s involved. Star Wars: Battle for Naboo shows seven starfighters, excluding Skywalker's, in the opening cutscene. Four are seen departing, including Skywalker, with one confirmed loss (Palmer) during a cutscene. Star Wars: Starfighter depicts eight or nine fighters at the start, not including Skywalker's; six appear in the ending cutscene, with one confirmed loss in a cutscene at the hands of the mercenary leader. The Star Wars Episode I: The Phantom Menace comic shows seven taking off from Theed, as does the film itself. In a deleted animatic from Episode I, twelve starfighters participate, with one shot down by a droid starfighter.
The Naboo space battle is re-imagined in LEGO form as a bonus level in the 2007 compilation game LEGO Star Wars: The Complete Saga. It can be played with one or two players, flying N-1 starfighters. The player(s) use their starfighters to attack targets on the Droid Control Ship. When enough targets are destroyed, a hatch opens and the player(s) fly inside, blowing up doors to reach the reactor. The reactor is protected by a shield, which drops on a timer, allowing the targets to be destroyed.