Far Orbit
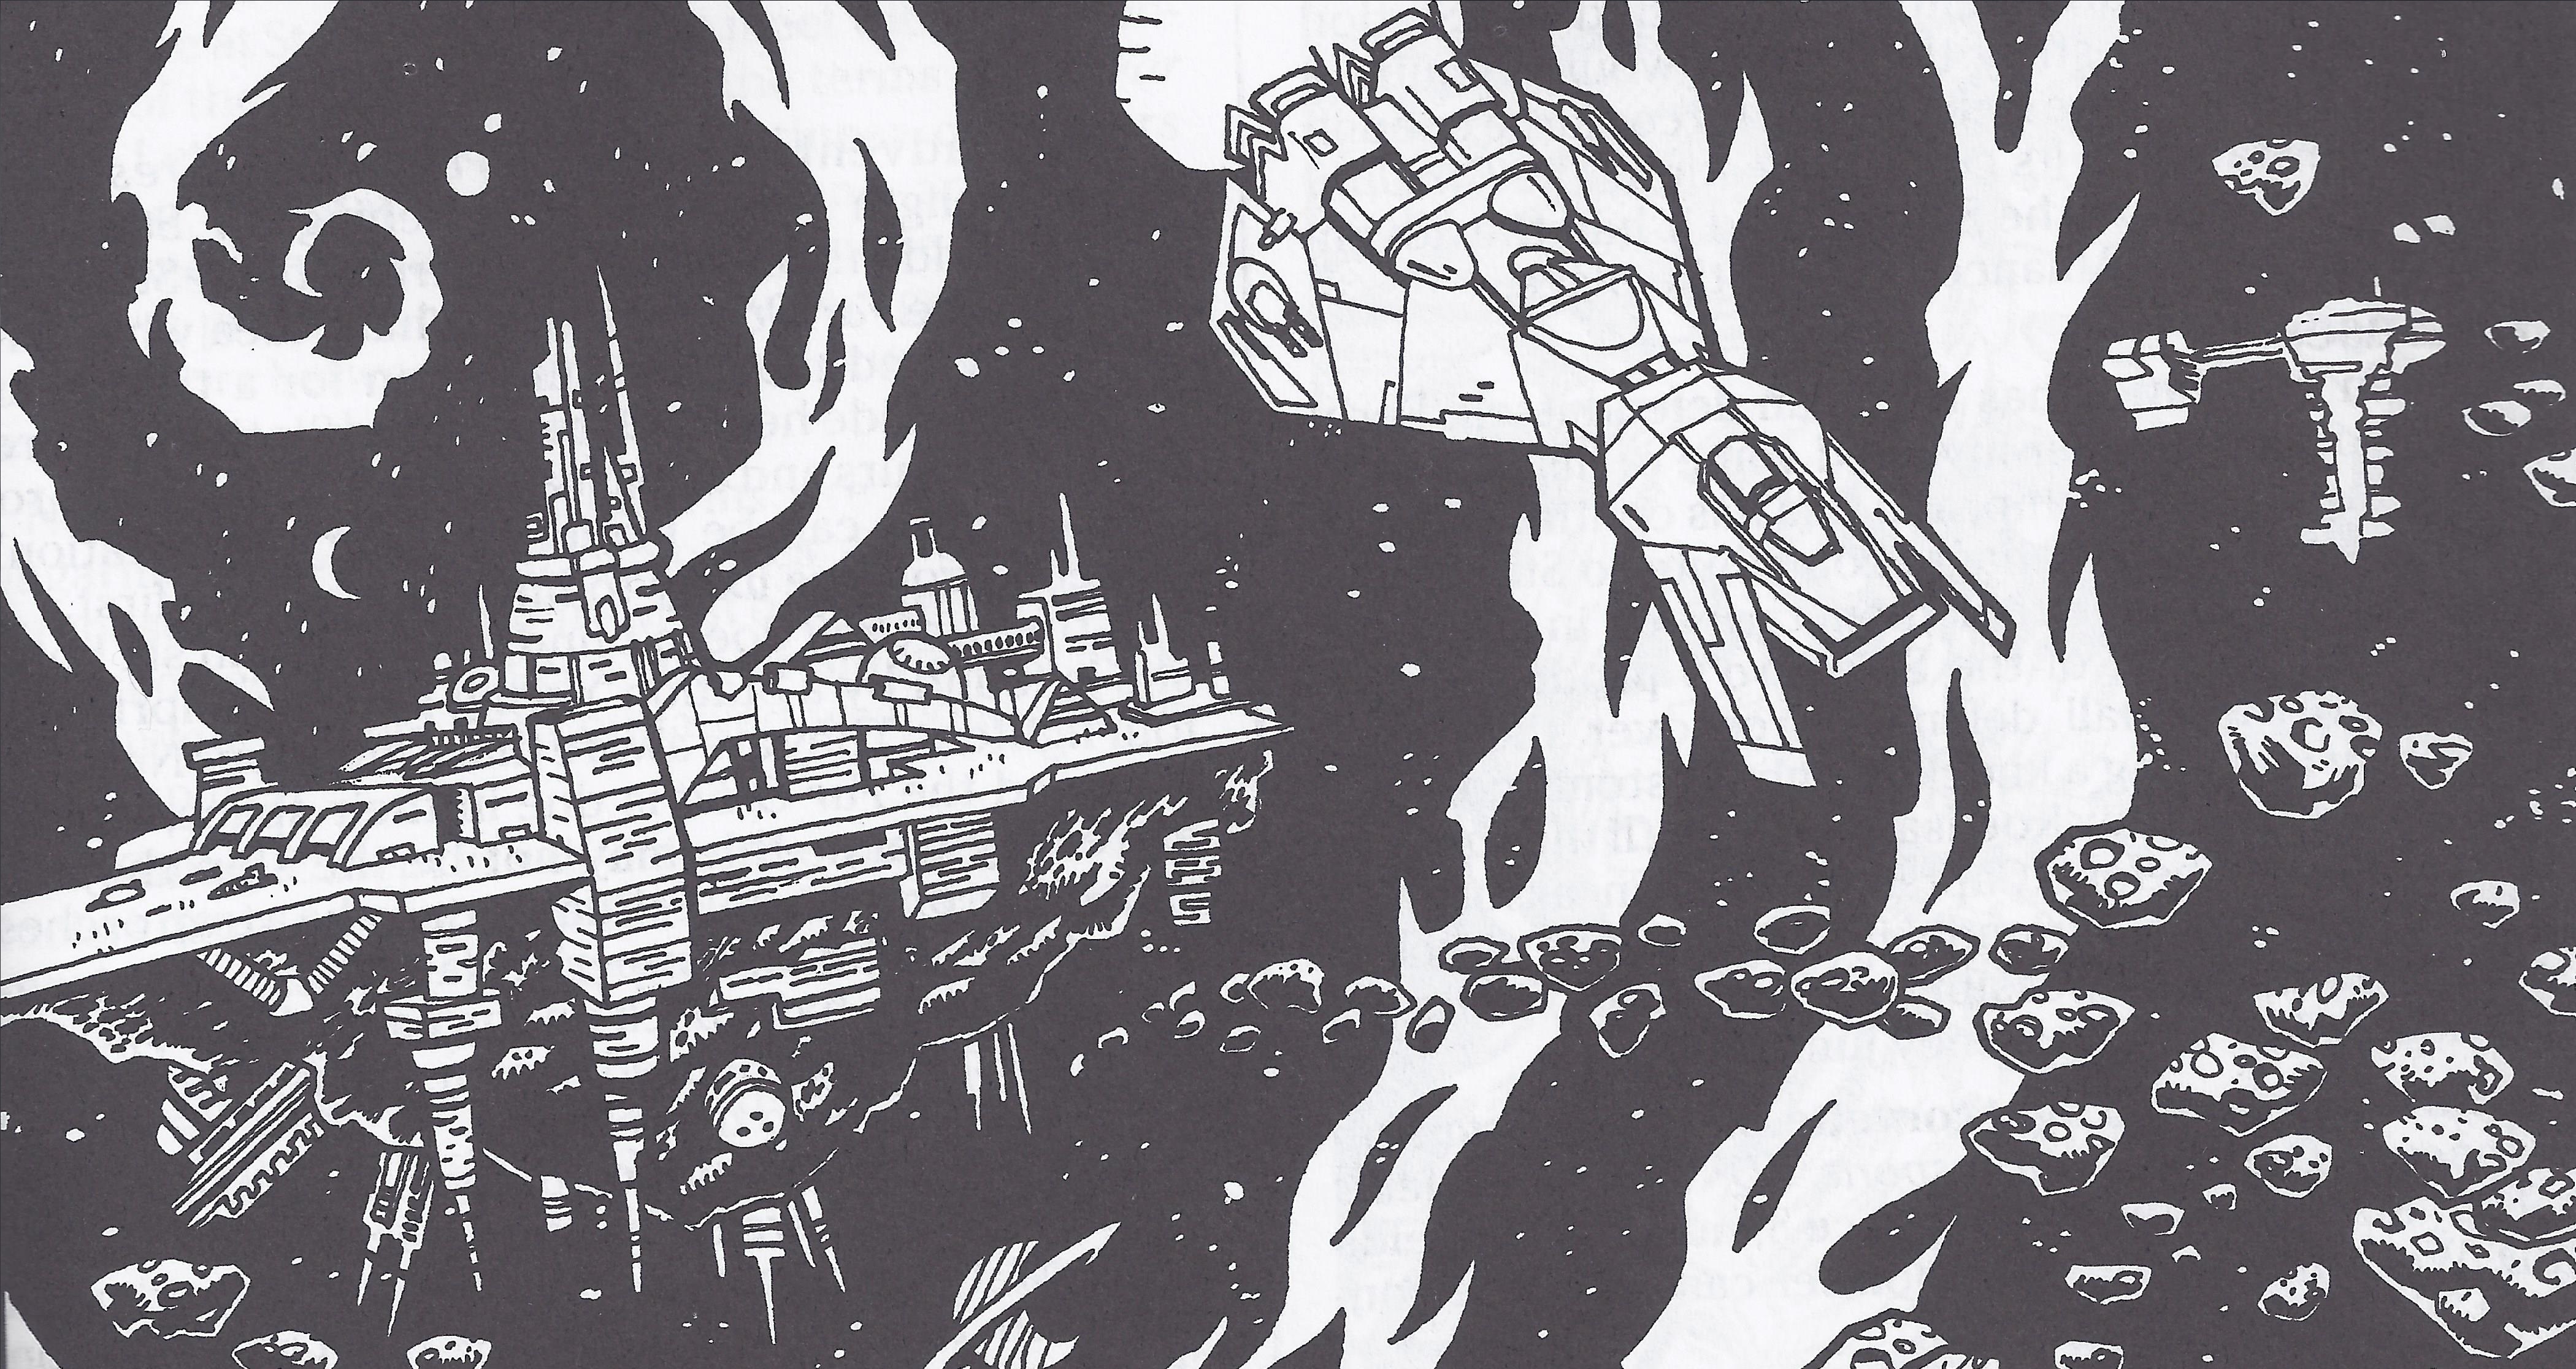
The Far Orbit, an EF76 Nebulon-B escort frigate, originally served the Galactic Empire's navy. However, following a mutiny by its crew, this Kuat Drive Yards-manufactured vessel became one of the first privateering ships for the Alliance to Restore the Republic. Under the initial command of Imperial Captain Vocis Kenit, the Far Orbit was tasked with hunting pirates in the Outer Rim Territories. Kenit's oppressive leadership led his second-in-command, Commander Dhas Fenoep Vedij, who had grown disillusioned with the Empire, to successfully lead a mutiny in 0 ABY against Kenit and the Imperial forces aboard the frigate. After removing the Imperial loyalists and those who declined to join the Rebel Alliance, Vedij directed the Far Orbit to the space station StarForge Station, where they recruited new crew members and aligned with the Alliance, thereby transforming the Far Orbit into a privateering vessel operating for the Alliance within the Ringali Shell of the Core Worlds.
Shortly thereafter, the Far Orbit orchestrated the capture of both the Imperial escort frigate New Star and Shipment 1037, a complete convoy of freighters, by luring them into an ambush with the assistance of an Alliance task force. Subsequently, the privateers detained Imperial Advisor Coh Veshiv in the vicinity of the planet Esseles, deceiving Veshiv into transferring from the CR90 corvette Empire Forever to the Far Orbit under the false pretense that the Far Orbit would serve as his new flagship. Following Veshiv's capture, Kenit, under orders from the Empire to locate his former command, manipulated the Far Orbit into a confrontation with the Solar Terrors pirate syndicate. Despite this setup, Vedij and his privateers emerged victorious. Kenit later tracked down the Far Orbit using the transport SPF 14897 as bait; when the Far Orbit attacked SPF 14897, Kenit's task force ambushed the frigate. In the ensuing battle, the privateers managed to escape only by disabling one of the gravity wells of the Imperial Interdictor Claw, which allowed the Far Orbit to jump into hyperspace.
After undergoing extensive repairs from the damage sustained, the Far Orbit returned to the Ringali Shell and journeyed to Brentaal IV. There, a landing party from the Nebulon-B recovered a datadisc containing crucial intelligence regarding the route of the Imperial Star Galleon-class frigate Emperor's Will, which was transporting a highly valuable treasure hoard. During an attempt to seize the frigate, the Far Orbit was once again engaged by the Claw, which had pulled the ship out of hyperspace near the Ringali Nebula; however, the privateers successfully evaded capture again. Vedij and his crew then proceeded to attack the Emperor's Will and its escort, the Zaff Jendinpurg, after forcing them out of hyperspace. After eliminating the escort, the Far Orbit secured the frigate's cargo pod following its ejection by the Emperor's Will's captain.
Description
General information
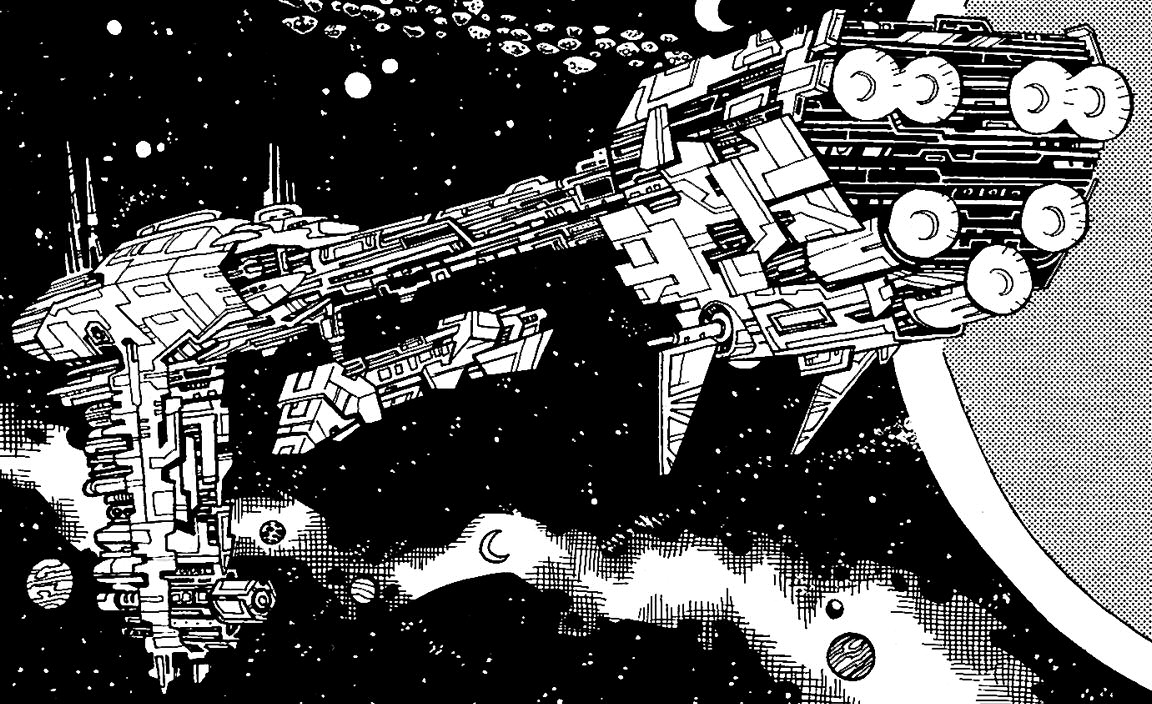
The Far Orbit, a EF76 Nebulon-B escort frigate originating from Kuat Drive Yards, had a length of 300 meters. As a Nebulon-B class, the starship's primary section was located at the front, connected to the rear propulsion section by a slender boom module. The Far Orbit's full operational crew consisted of 854 individuals, supplemented by sixty-six gunners. However, the frigate could function with a minimal crew of 307 personnel and ten gunners when necessary. Operating with a reduced crew led to diminished combat effectiveness, and to conserve energy, certain unused areas of the ship were sealed off. Beyond its crew, the Far Orbit could accommodate seventy-five passengers, typically troops. Its storage facilities could hold up to six thousand metric tons of cargo, along with months' worth of provisions. Each fifty cubic meters of cargo space could hold a hundred tons of cargo.
The Far Orbit's static discharge vanes, essential for releasing potentially hazardous excess energy from the ship's engines, were situated within the propulsion module. This discharge function was not routinely employed, only becoming necessary in specific circumstances like combat or during ion storms. These vanes were affixed to the outer hull of the frigate. Damage or loss of these vanes could lead to a reactor meltdown due to energy buildup, or even an explosion of the fuel system. The Far Orbit contained two turbolift shafts: one in the forward module and another in the propulsion module. Each shaft was equipped with two cars and spanned multiple levels. These turbolifts were not continuously operational and, for security reasons, did not access every deck. Furthermore, an officer's rank cylinder could override any turbolift, causing it to disregard calls from other decks. Most inter-deck transit on the frigate was accomplished via hatches with ladders connecting each level.
Quarters
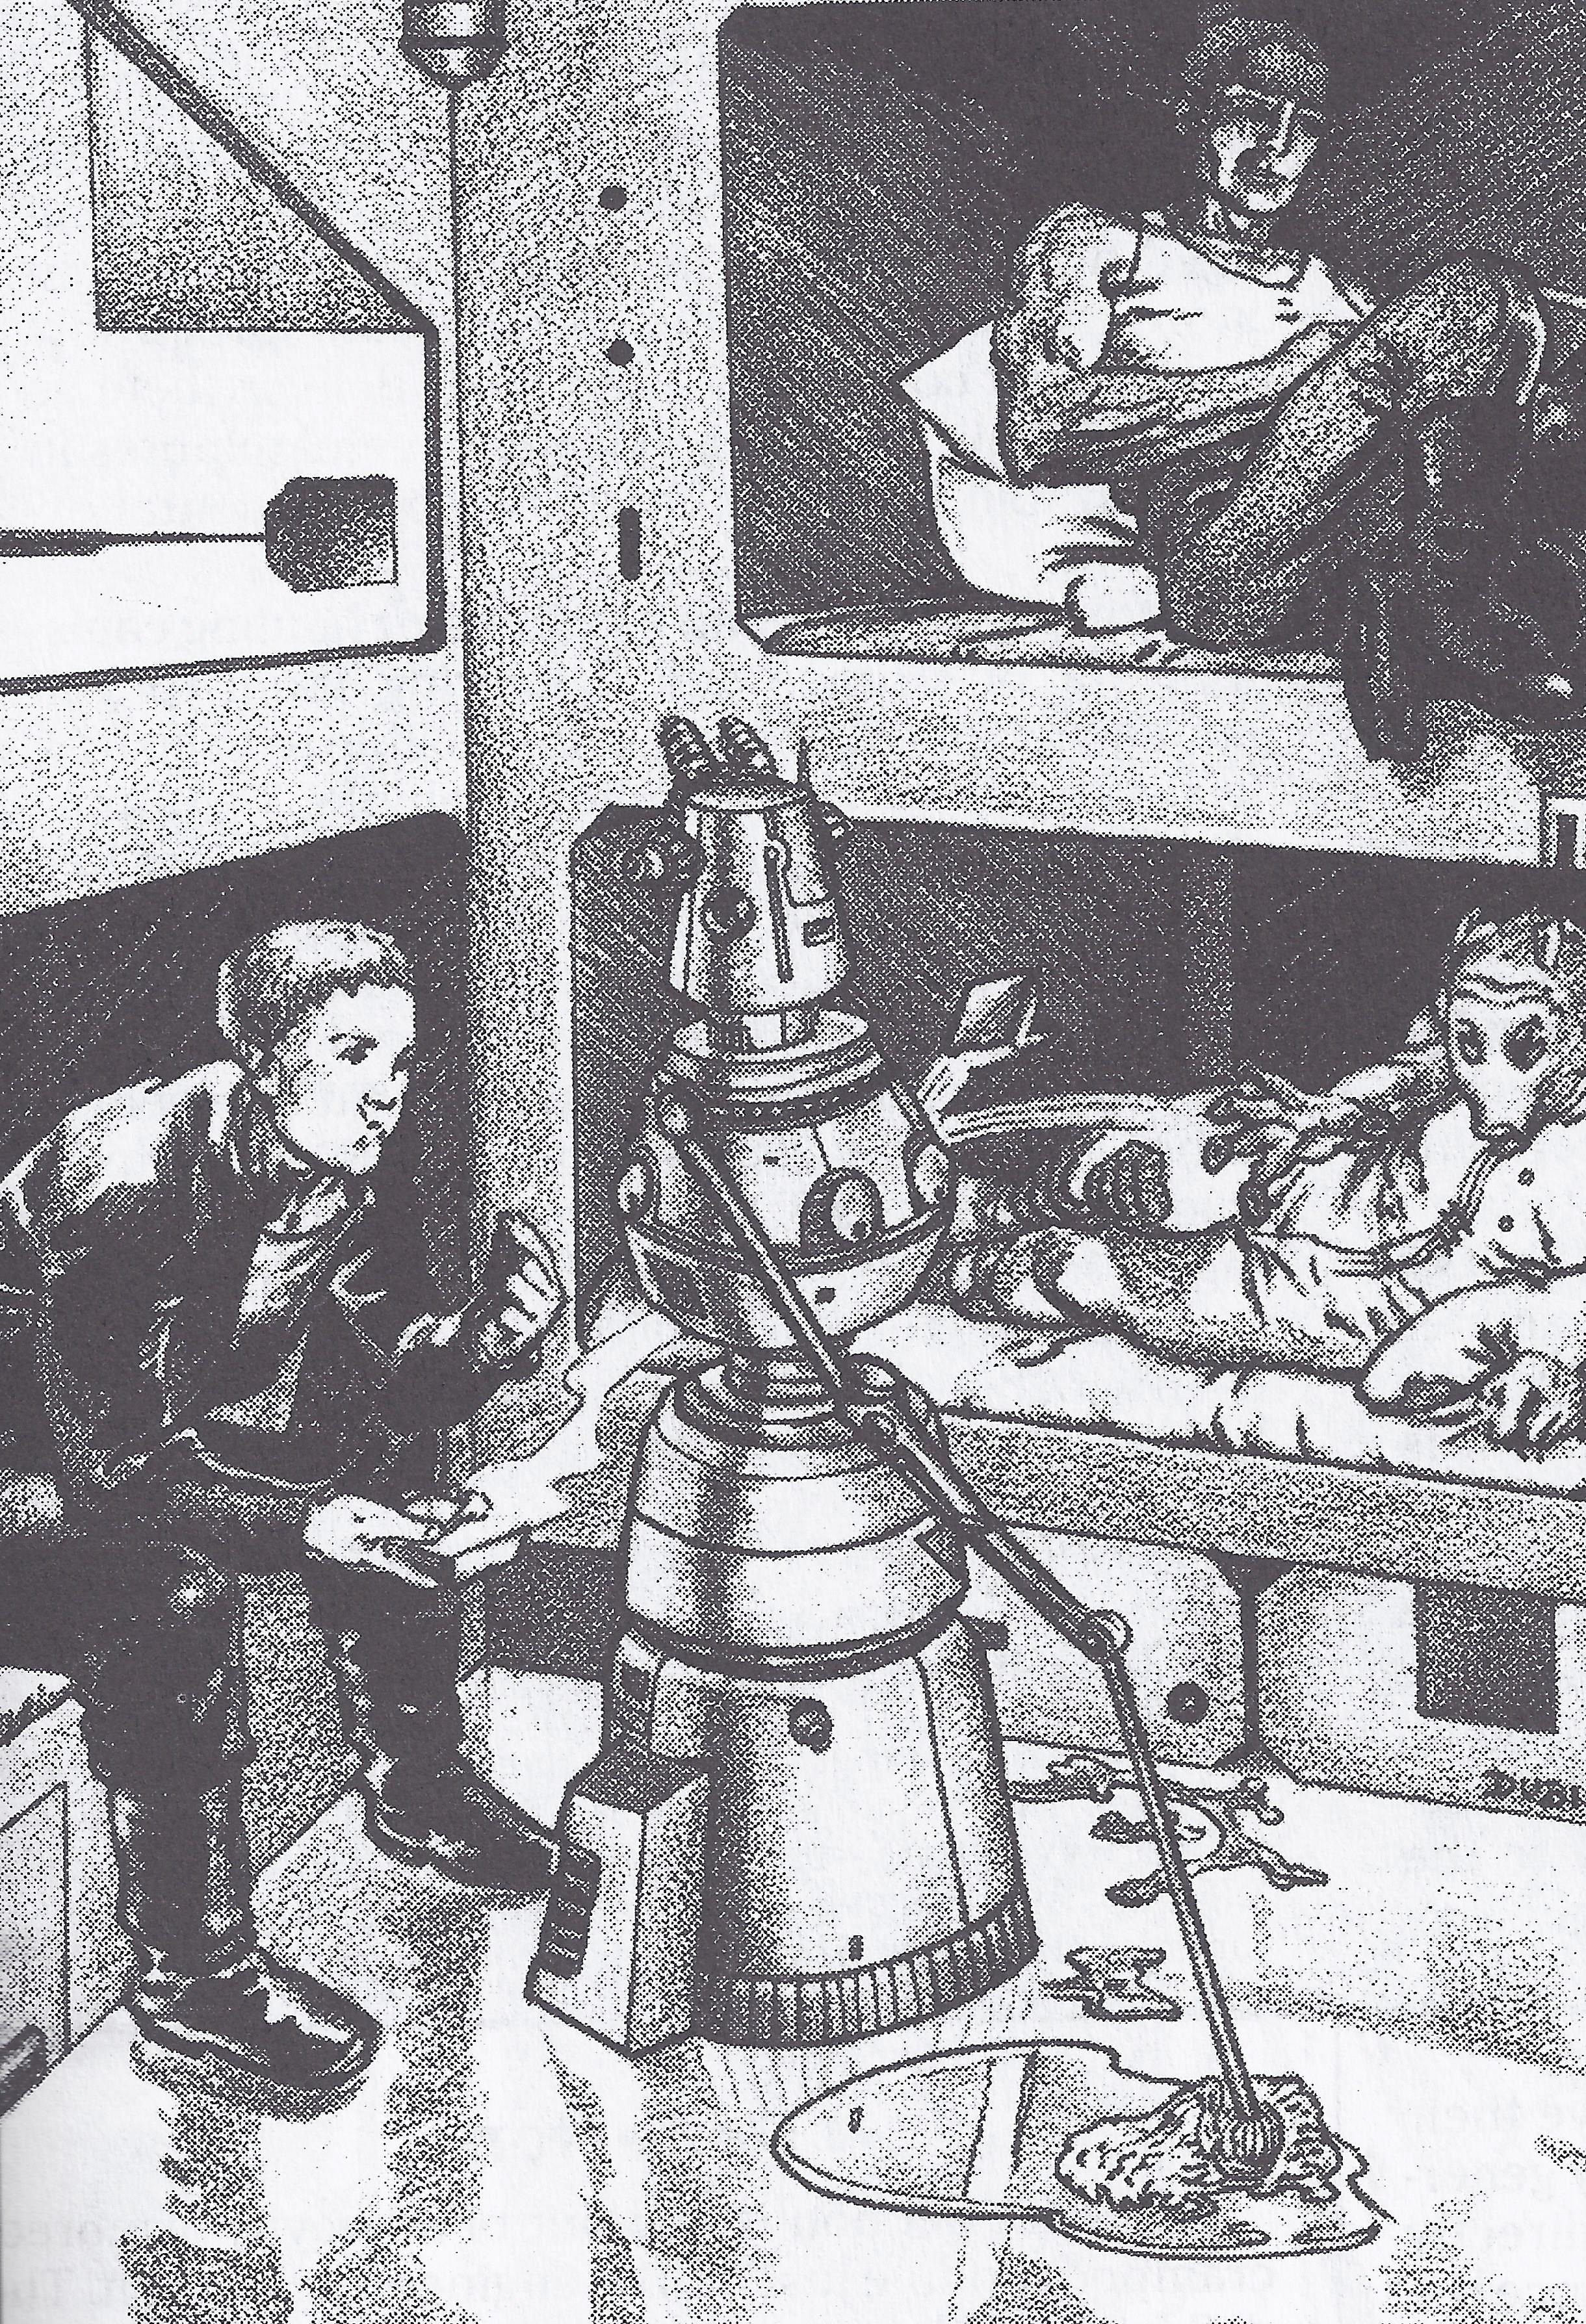
Standard crew quarters were located on Deck 5 within the command module. These quarters offered limited entertainment and only communal refreshers for the crew. The triple-bunk crew quarters were designed for average-sized Humans, though modifications could be made for larger species. The trooper quarters were also positioned in the command module, situated between the main crew quarters, the officer quarters, and the bridge. This strategic placement was intended to impede mutiny attempts by preventing mutineers from reaching the bridge or the officers. Additionally, since all of the frigate's docking facilities were above the trooper quarters, the trooper quarters acted as a buffer between potential boarders and the bridge. A typical trooper quarter, designed for two squads, consisted of two rooms: a larger room with double bunk beds and a smaller room with a communal refresher.
Officer quarters were situated below the trooper and main crew quarters in the command module. All officer quarters, regardless of rank, included a small entertainment console, pre-made meals, and a basic autochef for hot and cold beverages. The quarters for the ship's engineers were housed in the propulsion module. These rooms were similar to the quarters for officers and standard crew members in the command module, albeit dirtier due to the tools and materials handled by the engineers. A typical engineer quarter featured two rooms: a larger room with triple bunk beds, storage, an A/V unit, and a workbench, along with privacy curtains, and a smaller room with a basic refresher.
The common engineer officer quarter had three rooms, with a pair of identical rooms mirroring each other and separated by a refresher unit. The identical rooms each had a double bunk near the door to the refresher and a closet, desk, and A/V unit on the wall opposite to the refresher. Both non-refresher rooms also had a workbench, which was opposite the A/V unit, and a privacy curtain that concealed the bed from sight if one sat at the workbench. The crew of the deflector shield generator was also kept in the propulsion module for increased combat readiness.
Equipment
The Far Orbit's sensor arrays were located in the ship's Sixth Section, which also housed the sensor computer, sensor technicians, and operators. The sensor computer processed data from the sensors, which functioned as the vessel's eyes and ears, and recorded and reported on this data. The computer could then perform sophisticated analyses on various subjects based on the received data. The frigate was equipped with both forward and aft sensor units, which, due to the Far Orbit's EF76 Nebulon-B designation, were of exceptional quality. The frigate possessed one of the most sensitive long-range sensor arrays in the entire Imperial fleet and had a full range of sensors, including standard electro photo receptors, full spectrum transceivers, dedicated energy receptors, and lifeform indicators. Additionally, the Far Orbit featured hyperwave signal interceptors and the less common crystal gravfield traps. Crystal gravfield traps were used to detect cloaked or stealthy ships, and dark objects. Hyperwave signal interceptors were used for long-range scans and could identify the vector of a ship entering or exiting hyperspace. After identifying the vector, the ship's astrogation section could determine its destination. Hyperwave signal interceptors were also used to intercept hypertransceiver and subspace transceiver signals, which were then sent to Primary Communications on Deck 1 for decryption.
Complement
Before the mutiny aboard the Far Orbit, the frigate had several shuttles and two squadrons of TIE/LN starfighters as its complement. However, the Far Orbit lost its entire fighter complement during its engagement with the Silent Blades pirate gang. Furthermore, following the mutiny, many Imperial loyalists were evacuated from the ship using the frigate's shuttles, leaving only two craft for the Far Orbit: a Grek-class troop shuttle and a Katarn-class boarding shuttle. Throughout its privateering days after the mutiny, the frigate augmented its complement with various starfighters and shuttles it acquired. The Nebulon-B's hull was externally armored to varying degrees. Additionally, the ship was defended by a Delphus JC-671 deflector shield projector, which protected it from most space debris and made the Far Orbit capable of engaging in combat. The shield generator was positioned away from the main propulsion module to mitigate the risk of its explosive reaction if breached. This shield generator was quite powerful and consumed significant amounts of energy during space battles.
Armament
Concerning armaments, the frigate was equipped with twelve turbolaser cannons, twelve smaller laser cannons, and a pair of tractor beam projectors designed for combat. Half of the turbolaser batteries were situated at the front of the Far Orbit, with three more on each side. The laser cannons were positioned with six at the front, two on each side, and two at the rear of the frigate. The two combat tractor beam projectors, manned by a dozen crew members, were located at the front of the ship. The laser cannons and turbolasers shared the same power system and blaster gas canisters, although they consumed additional gas tanks and power cells during combat to minimize the impact of destroying a weapons emplacement. The turbolasers served as the ship's primary offensive weapons, and while not exceptionally powerful individually, they were quite effective when used in unison. The laser cannons, conversely, lacked power and were only effective when used together. Both the laser cannons and turbolasers had a minimum range of two to six meters, a medium range of twenty-four meters, and a maximum range of fifty meters within a planet's atmosphere.
While the Far Orbit's guns were distributed throughout the vessel, the primary weapons were concentrated in the Seventh Section. This section housed the most cannons and received targeting orders first, influencing the fire of the other guns. The Seventh Section also contained the main weapon power processing units, targeting computers, and the central blaster gas tanks, which were heavily armored to prevent explosions. Even if the blaster tanks exploded, the EF76's cannons could still operate on battery power and their own reserve of blaster gas. The gunnery stations of the frigate were dimly lit to avoid glare on targeting scopes. They also echoed with the rumble of weapon testing routines, as the stations were located near the Far Orbit's outer hull and lacked adequate noise insulation. The gunners aimed and fired the weapons using targeting data from the ship's sensors. Although the Far Orbit's bridge typically issued firing commands, some captains allowed gunners to select their own targets. Because the turbolasers were directly connected to the main reactor in the propulsion module, they maintained a constant rate of fire as long as sufficient blaster gas was available.
The majority of blaster gas on the Far Orbit was stored in canisters that were one meter tall and a third of a meter in diameter. These canisters weighed 110 kilograms and contained enough gas to supply a laser cannon with sufficient energy for twenty capital-scale shots or forty smaller-scale shots designed for starfighters. To reload a cannon, the gunner lifted the canister into a cradle connected to the cannon's power supply system. The cradle was then "rammed" into the main cannon, and the gunner broke the seal on the canister using a control on their status panel. The main tractor beams, powered by the main power grid without expendable ammunition, were used to secure enemy ships for better gun control or to facilitate boarding. These tractor beams had a minimum range of two to ten meters, a medium range of thirty meters, and a maximum range of sixty meters. In addition to the two combat tractor beams, the Far Orbit had several non-combat tractor beams in the ship's TIE fighter flight deck, each docking bay, and the boarding bay. These non-combat tractor beams, each manned by three crew members, stabilized docking ships, brought in both TIE starfighters and shuttles, and aided boarding actions by securing the enemy ship to the Far Orbit.
Decks
Deck 1
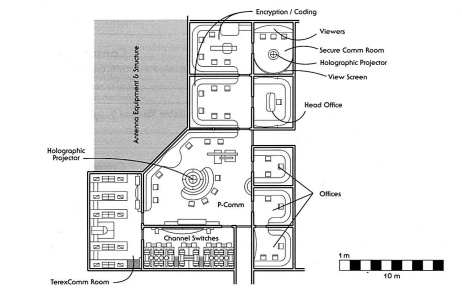
On Deck 1 of the Far Orbit, you'd find Primary Communications, which was part of the Aft First Section. This area was situated at the top of the Nebulon-B's forward module. This deck, often called PrimeComm or P-Com, housed the ship's long-range subspace transceiver, capable of reaching over a hundred light-years. Because the Far Orbit was designed as a capital ship for missions, the frigate included two communication arrays: one for local frequencies and another for long-range transmissions. The signals were processed by a powerful and advanced TerexComm processor unit, located in a port-side room at the deck's aft. This processor had multi-channel sorting, high-speed channel switching, and full encryption/decryption programming. Comm techs could use this processor unit to tap into secure transmissions and gather information.
At the front of Primary Communications were two rooms for encryption and coding, along with a secure comm room that featured a holoprojector, viewscreen, and seating. This comm room was used for secure and critical communications. The P-Com itself was in the deck's center, also equipped with a holoprojector, and the channel switch room was directly behind it. Four offices were located aft of the secure transmissions room and starboard of the P-Com, with the head office being the furthest forward. Antenna equipment and other communication structures filled most of the forward port section of the deck.
Deck 2
Short Range Communications, or ShortComm/S-Com, was located on Deck 2. It operated independently from Deck 1, using its own antennae. S-Com was located further aft of P-Com, within the Aft First Section. This section handled all local lightspeed transmissions, along with intercom traffic and maintenance. It was housed in the center of the Short Range Transmissions area, with a head office aft of it and three offices to the port. On the starboard side of S-Com were two more offices and the channel switches for short-range communications. Antenna equipment and structures were located just forward of S-Com.
Deck 4
The Far Orbit's main crew galley was on Deck 4, in the Forward First Section of the ship, also within the command module. Only enlisted crew members took their meals in this galley. Since the galley wasn't big enough for all crew members at once, they ate in shifts or during off-duty hours. A small staff ran the galley, supported by cooking and serving droids. The kitchen and serving area were at the front of the crew galley, where crew members entered, received their meal, and proceeded to the tables in the dining room at the aft. Pantries and autochefs were on each side of the kitchen, connected to the main kitchen by under-deck feeds. A recycler was just aft of the kitchen, and a staging area was at the back of the dining room.
Deck 5
The command portion of Deck 5, located in both the Forward First and Forward Aft Sections, was within the Far Orbit's command module. Nearly half of this area was occupied by TIE fighter racks, situated at the front of Deck 5. These racks could hold up to two squadrons of TIE fighters and were directly above the TIE flight deck on the deck below. A repair rack for damaged fighters was near the TIE racks, and repeating blaster cannon hard points were just aft of the TIE racks. In front of the TIE racks were four cramped crew quarters with triple bunks, along with two basic refreshers. Parts of the Far Orbit's ship systems were located beyond these crew quarters, at the forward-most part of Deck 5.
Aft of the TIE racks were more crew quarters with triple bunks and storage units. These units stored various goods, but not weapons, parts, or specialized tools. Just aft of these crew quarters was the boom module and the machinery that operated the docking tube in the center. Additionally, Deck 5 had Tractor Beam machinery, a control room, and a machine shop on the port side. On the starboard side were two airlocks and a security station. All crew members—except officers, engineers, guests, and troopers—were meant to be housed in the cramped crew quarters on Deck 5.
Deck 6
The TIE flight deck was on Deck 6, directly below the TIE fighter racks for easy deployment. The hangar had repair bays and a short-range catapult/cushion tractor beam to assist in launching and recovering the Far Orbit's TIEs. There was also a control center in the flight deck. The forward docking tube was located on Deck 6, within the boom module. This docking tube had a control station, status panels, a waiting area, and the docking tube itself, operated by machinery just aft of it. There were two docking tubes; the other was aft of it, and both were on the access corridor, a one-deck-deep walkway from the forward module to the propulsion module. The access corridor was heavily armored to prevent hull breaches.
Deck 7
Docking Bay 1 and Docking Bay 2 were both located on Deck 7 in the boom module section, with the former closer to the command module and the latter to the propulsion module. Docking Bay 1 was shared between Decks 7 and 8. It had a launch/land tractor beam setup to help pilots maneuver in and out of the bay, and was used for unloading shuttles and small freighters in the command section of the ship. Some of the Far Orbit's shuttle craft, including the captain's shuttle, were housed in the forward section of the bay. Because the bay could be tight, wider ships and freighters used the docking tubes instead. Docking Bay 2 was used to unload supplies for the propulsion module and served as a repair bay. It was similar to Docking Bay 1, with a turbolift dock aft of it and four cargo bays toward the rear. A control room with emergency supplies was on the port side of the bay. Two power conduits spanning multiple decks were behind the turbolifts.
Deck 8
The command section of Deck 8 was in the Far Orbit's forward module, though Docking Bay 1, on the deck, was considered part of the boom module. The command section spanned both the Forward First and Aft First Sections, and its primary features were the medical facilities, the brig, and trooper training facilities. The sick bay, or medical facilities, could treat all common injuries and illnesses. Led by the Far Orbit's doctor, a small team of Human medical assistants and a full complement of MD-series medical specialist droids helped treat wounds and maladies. The medical facilities' standard bacta treatment procedure required patient stabilization first. A limited number of functional and inorganic-looking cybernetic limbs and prosthetics were available, with more assemblable within a day. The medical droids, from the MD-0 medical droid to the MD-5 medical droid, had separate tasks aboard the frigate.

The MD-5 performed minor surgeries and checkups, accessing any crew member's medical records instantly, as it had all officers' records on file. The MD-0 was the diagnostics droid, quickly diagnosing any patient's illness or wound within minutes. It also handled emergency triage during combat and assisted the MD-5 during checkups. An MD-3 medical droid managed the sick bay's eight bacta tanks and ran the pharmacy. The MD-4 medical droid was the frigate's surgery droid, overseeing procedures from amputations and cybernetic replacements to microsurgeries.
An MD-2 medical droid served as the MD-4's aide and as the anesthesia/life monitor droid. Lastly, an MD-1 medical droid operated the medical lab and handled most pathological investigations, consulting with the MD-2 and MD-3 as needed. The sick bay and medical facilities were in the aft half of the Deck 8 command section, with the main entry at the forward-most part. The entry doubled as a triage station, followed by the Intensive Care Unit (ICU) examination spot and four ICU rooms. Beyond these were two surgery suits and the bacta ward. Recovery wards were on either side of the bacta ward, with the port one housing the medical lab, pharmacy, medical droid bay, and doctor's office in front of it. Part of Docking Bay 1 was behind the entire medical facility, with its control room nearby.
The ship's brig, on the starboard side of the medical facilities, could hold up to thirty-six prisoners. It was highly secure, with security cameras and remote-activated locks. Separated from the recovery ward by refreshers, the brig had seven rooms for prisoners: one for up to ten, two for up to nine, and four for two inmates each. If needed, the brig could hold up to seventy-two prisoners by crowding the cells. The brig's security office was near the cells. Briefing rooms and locker rooms with small arms existed just forward of the main turbolift dock on Deck 8, in front of the sick bay entrance, for the troopers on board. Training rooms were to the port of the briefing room, and trooper offices were to the starboard. A large training room was in front of the locker rooms, flanked by weapons ranges. Two training equipment storage rooms were just ahead of the large training room.
Deck 9
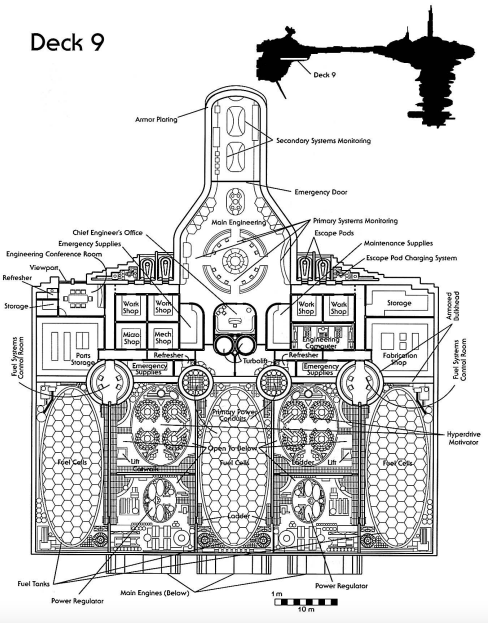
Deck 9 housed the two hyperdrive motivators, made by Aether Hypernautics, that enabled the ship to enter hyperspace. Main Engineering was also on Deck 9, along with fuel tanks and power regulators. Secondary systems monitoring was at the front of Deck 9, followed by the Main Engineering area, where engineers could check and control the ship's primary systems using the engineer's rank cylinder. The deck widened at Main Engineering, with two escape pods on each side. Behind each set of pods were two workshops, and aft of the port workshops were a micro shop and a mech shop. The engineering computer was behind the starboard workshops. The turbolift dock on Deck 9 was right behind Main Engineering and between the two sets of workshops, with the Chief Engineer's office just in front.
On the far starboard side of Deck 9, near the escape pods and their charging system, were a storage room and a fabrication shop. On the port side, aft of the escape pods, was an engineering conference room, with a refresher and a storage unit between it and the outer hull. A parts storage room was behind the conference room. Three fuel cells occupied most of the back half of Deck 9: one behind the parts storage room, one aft of the turbolifts, and one behind the fabrication shop. These cells could store up to two years of fuel for the engines and hyperdrive motivators, and were made of high-quality quadranium to prevent breaches, as they were priority targets in battle. Two power conduits running between decks were between the middle cell and the turbolifts. A hyperdrive motivator and a power regulator were between the middle fuel cell and the port one, and between the middle and starboard cells, with the motivator in front of the regulator in each case. The hyperdrive motivators were linked to the Far Orbit's primary Class 2 hyperdrive and the backup Class 12.
A fuel systems control room was between the starboard fuel cell and the starboard hyperdrive motivator, and between the port fuel cell and the port motivator. Three of the frigate's seven engines were just underneath the fuel cells on Deck 9. These efficient Kuat Drive Yard products propelled and powered the Far Orbit, allowing it to reach a maximum speed of 800 kilometers per hour in a planet's atmosphere.
Deck 11
The portion of Deck 11 within the Far Orbit's command module was part of both the Forward Second and Aft Second Sections. Officer quarters filled the forward part of the deck, with the officer's mess and lounge in the rear. Ship systems equipment filled the foremost tip of the deck, followed by sixteen junior officer's quarters, taking up over a third of the command module's space on Deck 11. The junior officer's quarters had two occupants per room, with double bunks. Eight refresher units were interspaced within these quarters. The senior officer quarters, aft of the junior quarters and refreshers, occupied about a third of the deck. Two pairs of senior quarters were separated by utility shafts in the middle of the deck, with a pair of junior officer quarters and the turbolift dock for Deck 11 behind them. Each side of the senior and junior officer quarters in the middle of the deck had two officer quarters designed for single occupancy; senior officer quarters were also for one officer only.
Although all officer quarters had autochefs, Deck 11 included a mess for the officers, located behind the turbolifts. On the port side, the mess's autochef was in the galley, with the officer's dining room behind it and the galley's pantry just forward of it. Junior officers usually ate in the dining room after the senior officers. The officer's lounge was on the starboard side of the deck, separated from the mess by an access corridor. It served as a social area where officers could play sabacc, be entertained, or get a meal from the lounge's autochef, located just forward of the lounge. A small escape pod and lifeboat bay was aft of the mess and lounge.
Deck 14
The command module section of Deck 14, under the Forward Second Section, served as the guest quarters for the Far Orbit. Guest rooms had the same amenities as officer quarters, but varied in occupancy. Two spacious VIP quarters were at the forefront of Deck 14, at the end of the corridor running from the turbolifts to near the front of the deck. Refreshers on each side of the corridor separated the VIP rooms from single-bunk guest quarters. These single bunks were separated from triple-bunk guest rooms on each side of the corridor by another pair of refreshers. The triple bunks wrapped around the turbolift dock on Deck 14 on both sides.
On the outer hull, to the port and starboard of the turbolifts and slightly aft of the triple-bunk rooms, was a single-bunk room followed by a refresher unit. Another pair of triple-bunk guest quarters were aft of the turbolifts, and behind them were two guest conference rooms that doubled as lounges. Two escape pods and a charging system were at the very end of the deck.
Deck 16
The section of Deck 16 within the Far Orbit's propulsion module housed the main reactor control room and both levels of the sublight engine control room. The main reactor, at the bottom of the propulsion module and outside the frigate's gravity well, was monitored by a square control room on Deck 16. The control room had a circular control station in the middle, split into two halves by a walkway, and a circular group of monitoring stations. The starboard side of the circle had viewports along the outer edge and monitoring stations on the inner edge behind a railing. The port side featured control stations and monitoring systems, with railings on the outer and inner edges. Both sides of the circular monitoring station in the middle were raised and accessible by stairs on the inner edge of the half-circles.
Control systems were in the corners of the room to the port of the control room. The starboard side of the room, excluding its half of the circular control station, was sealed off by two isolation airlocks. Past the forward airlock was an equipment isolation room, wrapping around the edge of the circular control station, with equipment lockers between it and the outer wall of the room. The equipment isolation room provided access to the shafts leading to the main reactor, which converted fuel into energy for the ship. If the main reactor melted down, it would only burn through the frigate's outer hull, as no decks were between it and the outside. In that case, engineers could shut down or eject the reactor, though ejection was more difficult.
The sublight engine control room had two levels, one above the other. The upper level had a small catwalk with monitoring stations at the front, connected to engine control systems by a walkway. The areas on each side of the walkway were open to the lower floor, and a ladder from the catwalk on the port side allowed access to both levels. At the rear of the upper level, two sublight engines existed, one on each side of the engine control systems. The lower floor was the same shape as the floor above, with monitoring stations under the catwalk, near the front. At the aft was a systems enclosure, with the engine control systems behind it. Two more sublight engines were under the locations where their counterparts on the deck above rested.
Deck 17
The command module part of Deck 17, classified as part of the Forward Third Section, was the Far Orbit's bridge. The section of the bridge with the bridge stations was at the front of the deck, with large viewscreens before and behind it. One crescent of bridge stations faced the forward viewscreen, and two other crescents were behind that one, facing different walls of the ship. The captain's chair was between these two crescents. Each bridge station on Deck 17 could override its section's controls elsewhere on the ship, but required that section's head's rank cylinder. The captain could also override any of the ship's systems with the captain's rank cylinder, limiting the impact of mutiny or boarding.
There were eleven bridge stations. The operations station, manned by the Operations Officer, could use nearly any of the ship's controls, issue lockout commands, or communicate with any section control station. While any control could be used from this station, only one could be accessed at a time, making it easier to use the designated bridge section or section control station for that system. The sensors station had a direct link for sensor reports after they went to the sensor computer, and could issue and relay sensor orders. It could also direct and monitor scanning nodes, but only one node could be compiled at a time.
The communications system allowed patching into any of the Far Orbit's communication arrays from the bridge. The comm operator was responsible for all internal and external communications. Routine transmissions could be routed through the bridge station, but secure transmissions were made from P-Comm on Deck 1. A gunnery station on the bridge served as a command relay point. The security station was a coordination center for boarding actions, riot suppression, and other activities involving the ship's troopers.
The deflector station could relay shield switching orders from Deck 17. The engineering operations station on the bridge acted as a monitoring post, but most engineering controls were in the engineering section of the propulsion module. The helm station could control the frigate's primary and lateral thrust when not in hyperspace, but engineers could take over these controls. Additionally, the helm station engaged the hyperdrive motivators after the astrogation station gave the go-ahead.
The astrogator ran the astrogation center, where hyperspace jumps were calculated using the navigation computer. After calculating a jump, the astrogator relayed coordinates and data to the helm station and released the hyperdrive motivators. A power systems station was also on the bridge, mainly for monitoring and relaying information. In emergencies, system-to-system power switching could be controlled from this station. The life support station was another relay and monitoring station, but could override controls if needed. The station controller could shut off the ship's gravity, air, or water from here, and open or close any hatch, as the life support station served as the damage control station, responsible for fire and life support during combat.
Behind the bridge stations was a turbolift dock, with a refresher and an officer's ready room to the port. The ready rooms were administrative centers for officers, and all command section module officers had ready rooms near Deck 17. The captain's ready room was to the starboard of the turbolift, with a security station behind it. To the port behind that security station was a refresher and a tactical room, and to the starboard was the main conference room. Three escape pods and their charging station were at the very rear of the deck.
Deck 18
The forward module section of Deck 18, just under the Far Orbit's bridge, mainly housed officer ready rooms and the armory, and was classified as the Forward Third Section. The first third of the area, from the tip of the deck, was divided lengthwise by a corridor. An emergency supply room existed on each side at the front of the deck, with three officer ready rooms behind it. A conference room was in the middle of Deck 18, with the turbolift dock behind it. Two more officer ready rooms were to the starboard and port of the conference room. A staging area was behind the turbolift, with a maintenance shop to the port. A security station and the ship's main armory were starboard of the staging area. The armory was controlled by the Far Orbit's officers, requiring a senior officer's rank cylinder to open. Heavily armored, the armory held blaster pistols, blaster rifles, light repeating blasters, munitions, and other boarding equipment for combat. Three escape pods and their charging system were at the aft of the deck.
Deck 21
Deck 21 was entirely situated within the command module, serving as the power center for Secondary Engineering. Assigned to the Fourth Section, its foremost compartments comprised a duo of storage spaces, with one specifically designated for housing equipment. The equipment storage was positioned on the port side, while its counterpart was located on the starboard side. Behind these storage areas were found power conditioning units coupled with turbolift mechanisms. The docking bay for the Deck 21 turbolift was situated immediately aft of the turbolift mechanisms. Utility conduits and power distribution nodes were positioned behind the turbolifts, extending to both sides. Further back, power regulation devices lined both flanks of the frigate, with emergency power switching and distribution rooms situated even farther to the rear. Emergency batteries, crucial for combat scenarios, were positioned in close proximity to Deck 21. If a supplied section was disconnected from the ship's primary power grid, these batteries could also augment the command module or its subsections with additional power.
Deck 26
Deck 26 was fully contained within the ship's command module, and it was assigned to the Fifth Section, which housed water and air recycling systems. The water recyclers were arranged along the entire port side of the deck, while the air recyclers occupied the starboard side. The Far Orbit's recycling facility was highly advanced, boasting an efficiency rating of 99.5%. The system processed hundreds of kilograms of air and water daily, as the frigate's storage capacity for these resources was limited, necessitating continuous reuse. Being a Nebulon-B frigate, the Far Orbit could operate for two years before needing to replenish its air and water supplies.
The life support control hub was located at the rear of Deck 26, behind the turbolift dock on that deck, approximately in the middle. It served as the control center for the ship's air, water, and gravity systems, responsible for ensuring the uninterrupted flow of air and water to all decks. Additionally, the station was responsible for maintaining gravity variations within .05 Gs across the ship's decks. The life support station also possessed a hatch override mechanism—with a higher priority than the security's override control—enabling it to seal any hatch in the event of a fire. Once sealed, the room's atmosphere would be evacuated to extinguish the fire.
Modifications
During its time as a privateer, the Far Orbit underwent several alterations.
To aid in hunting freighters, the frigate was outfitted with various pieces of stealth technology, as well as some ion cannon batteries to help in capturing those vessels. These modifications were sourced from certain shadowports found throughout the galaxy. Furthermore, following the loss of the Far Orbit's TIE fighter complement, which left it vulnerable to starfighter strike, X-wing starfighters and Z-95 Headhunters were integrated to replace the lost ones, as they were more readily available on the black market than TIEs. However, the Far Orbit's existing TIE flight racks were incompatible with these craft, necessitating their removal and the widening of the launch port. The bay's magcon shield was reinforced and enlarged, and the docking bay tractor beams were also upgraded. This modification, aimed at accommodating a new starfighter complement, required a team of twenty individuals.
Initially, the Far Orbit was a standard frigate without any unique modifications. This changed when the mutiny occurred and it became an Alliance privateer, as the new mission profiles required specialized weaponry like ion cannons. In time, the privateers also established a direct connection between the main reactor and the turbolasers, significantly increasing the frigate's firepower, enabling continuous firing as long as there was sufficient blaster gas.
History
Imperial service
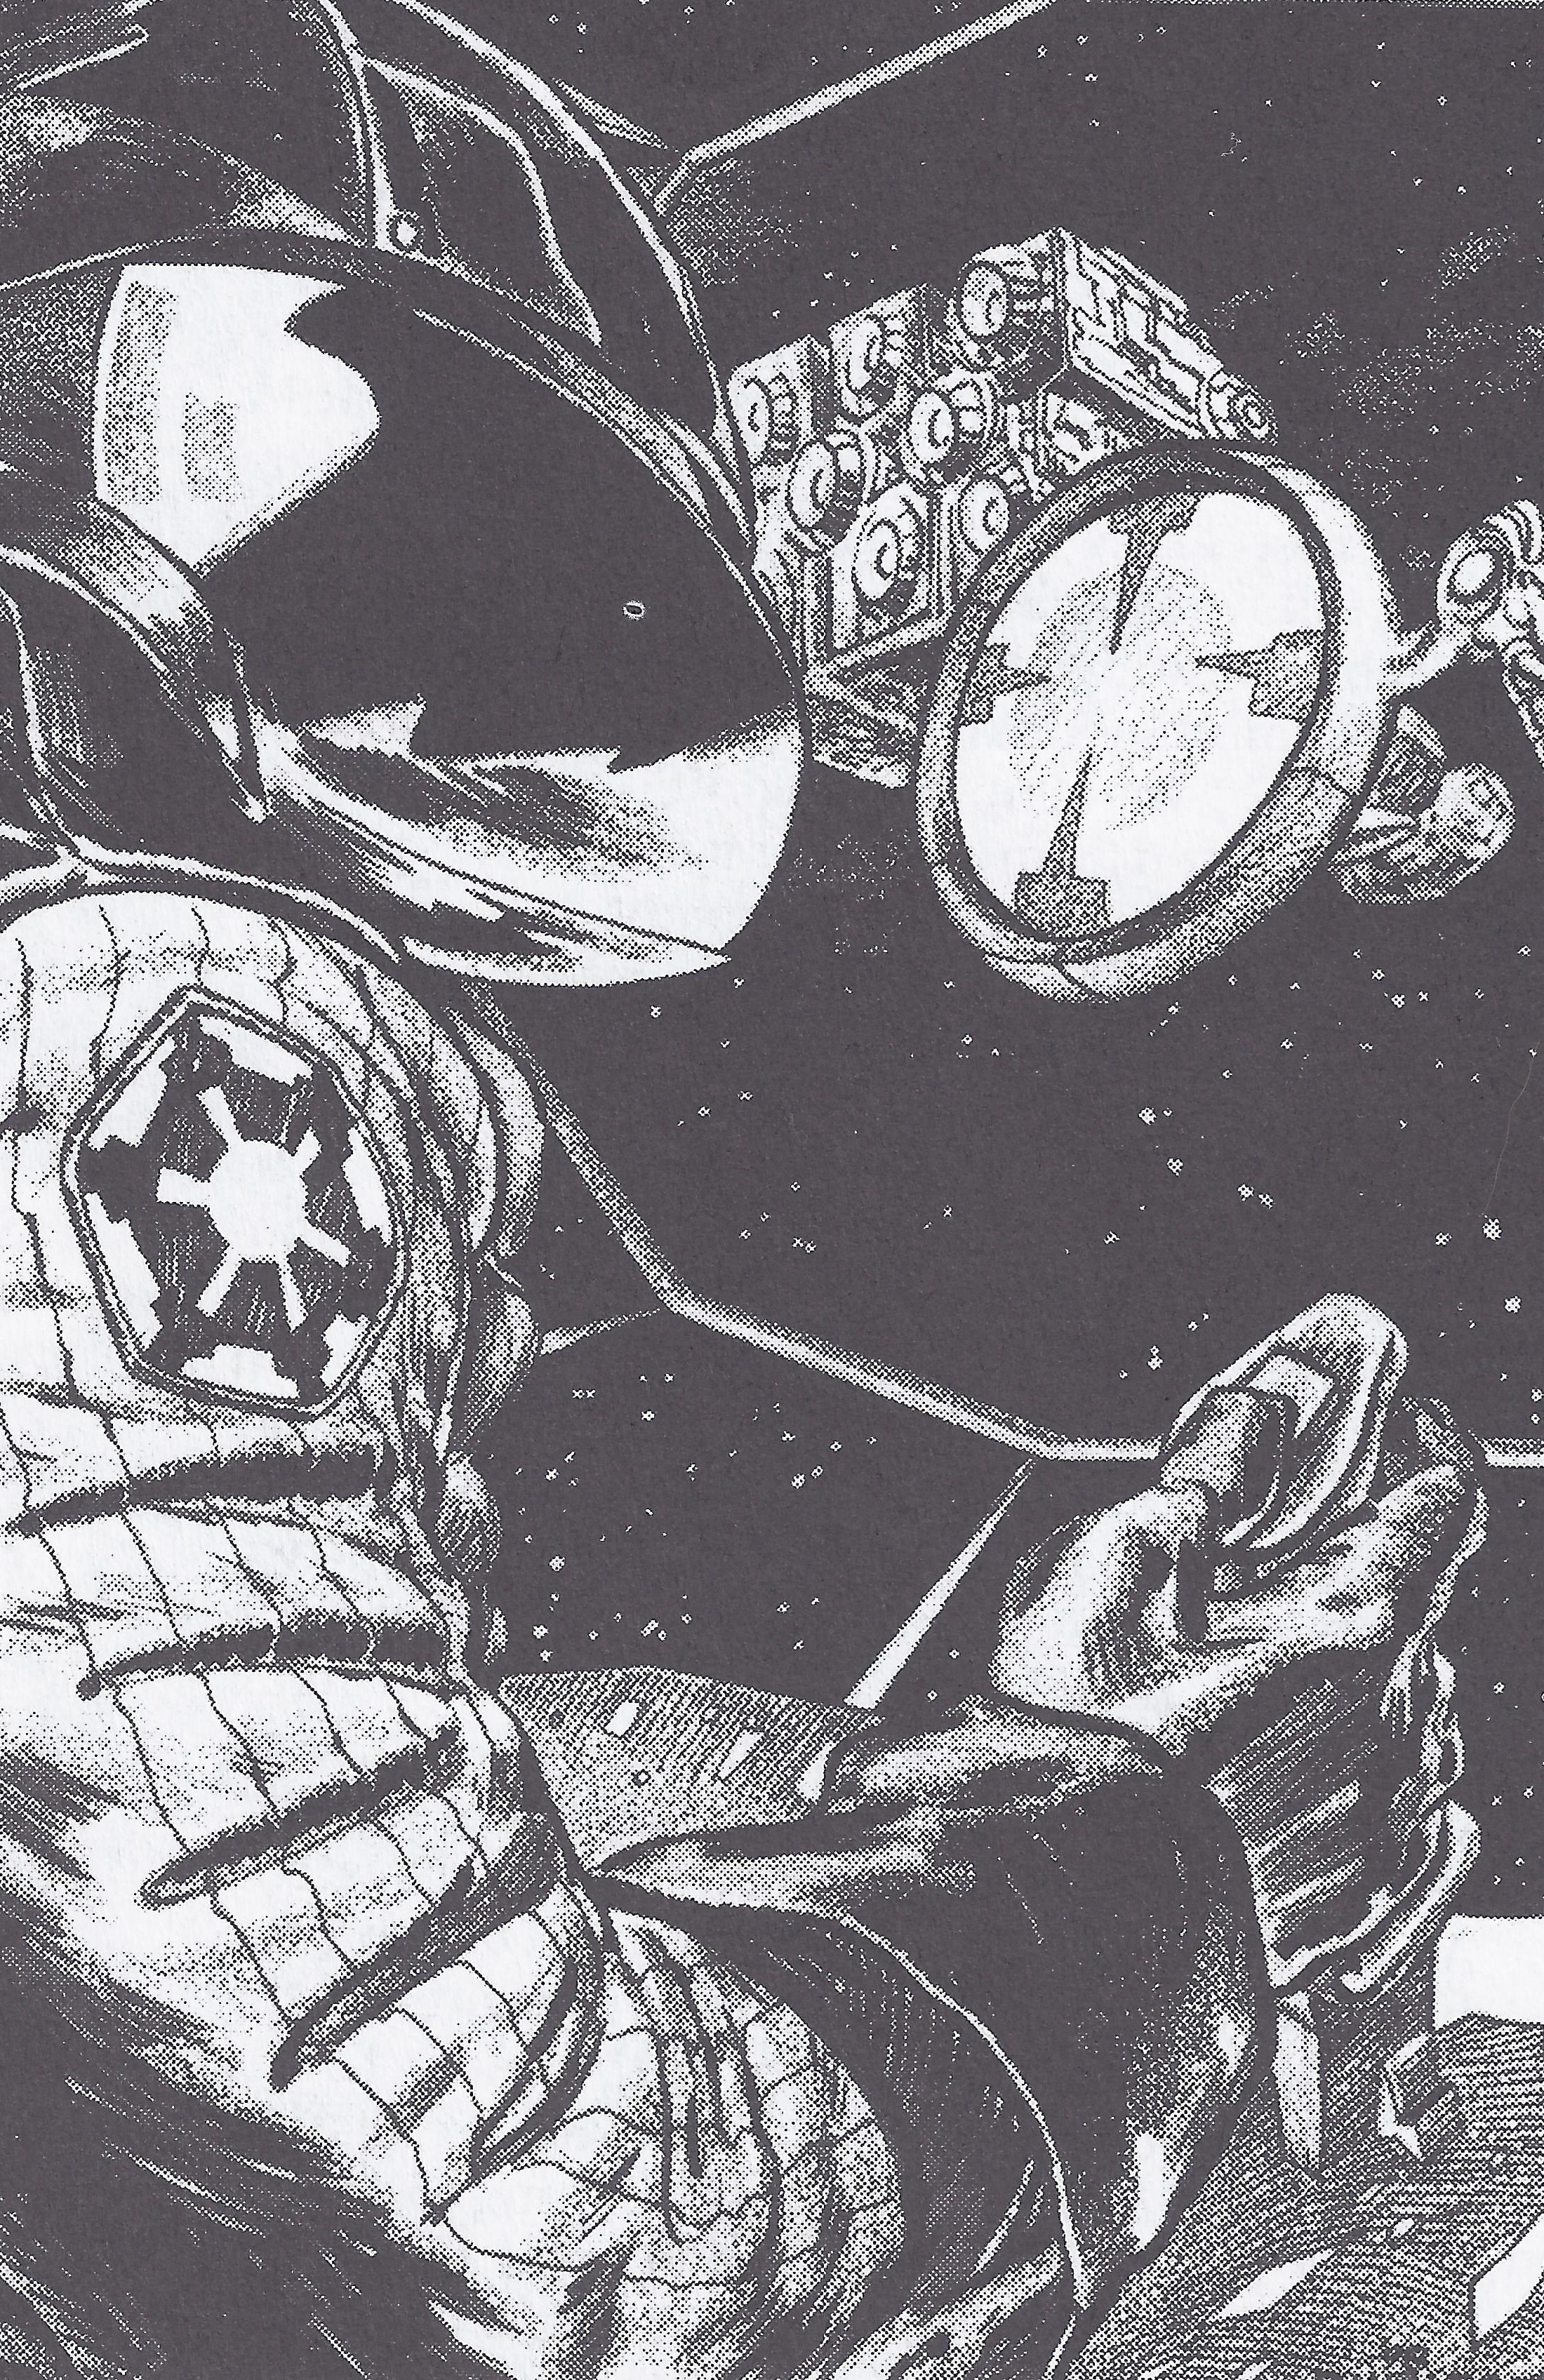
The Far Orbit was built before 0 BBY and inducted into the Imperial Navy of the Galactic Empire, with Imperial officer Vocis Kenit being appointed as its commanding officer. Kenit's promotion to captain of the Far Orbit was partly a reward for his twelve years of service to the Empire. However, it also served as a strategic maneuver by his numerous political adversaries to remove him from their midst, as Kenit led the Far Orbit in hunting pirates within the Outer Rim Territories. As the ship's leader, Kenit was an authoritarian and somewhat of a tyrant, employing harsh methods to maintain discipline among his crew. After being promoted to the rank of commander, Dhas Fenoep Vedij was assigned to the Far Orbit to serve as Kenit's second-in-command. Vedij's transfer coincided with his discovery of the death of his father Ronnan Tyla Vedij—a former admiral—and his mother in a traffic incident on the planet Coruscant; however, the commander suspected that his parents had been assassinated due to his father's strong opposition to the restructuring of the Imperial Navy.
Two days after the death of Vedij's parents, the commander's younger brother Elon Vedij, a pilot, was transferred to the Far Orbit. This led Vedij to believe that he and his brother were being moved together to facilitate their elimination by Imperial authorities, given their connection to their father. Consequently, the commander began to plot a mutiny, spurred by Elon's transfer and Kenit's inadequate leadership. In fact, a significant number of the frigate's officers held a dislike for the captain. Kenit mandated that all senior officers attend a formal dinner with him each night in the officer's mess, and he banned the gambling game of sabacc on the ship, as he was notoriously bad at it. Furthermore, the brutality of Kenit's command and his personality alienated more officers. One dissenting officer on the Far Orbit was reported to the Imperial Security Bureau and subsequently died under mysterious circumstances.
Despite his flaws, Kenit was effective at eliminating pirates: his organization of local Imperial assets into military strikes resulted in the capture or destruction of three pirate lords and numerous individual pirating vessels. Shortly before 0 ABY, the Far Orbit was pursuing the Silent Blades, a pirate gang responsible for the destruction of several system patrol ships and starfighters, necessitating Imperial intervention. The frigate had forced the pirates into hiding within an asteroid field. This led to a standoff, as the Far Orbit struggled to reach the pirates, who were themselves trapped with the frigate positioned outside the field.
Ignoring Vedij's recommendation to await reinforcements, Kenit ordered a starfighter assault. While the Silent Blades were largely eliminated, the frigate's entire TIE complement, including Elon, was lost in the attack. As a result, Vedij began to seriously contemplate a mutiny, perceiving Kenit's actions as a reckless waste of lives for personal glory or promotion. Over the following months, the Far Orbit's second-in-command began to garner support among the frigate's crew, awaiting an event that would trigger the mutiny based on the crew's outrage.
Mutiny
The opportunity arose when news reached the Far Orbit of the destruction of the planet Alderaan by the Imperial DS-1 Orbital Battle Station superweapon, due to suspicions of harboring personnel and sentiments aligned with the Alliance to Restore the Republic; the Empire and the Alliance were engaged in the Galactic Civil War at the time. Consequently, a shiphand on the Far Orbit who was from Alderaan was arrested on suspicion of treason against the Empire. Vedij, recognizing the arrest as part of Imperial propaganda, began to spread a rumor among the crew that the Alderaanian was arrested solely because of his origin, and that the destruction of his world was intended as a demonstration of Imperial power. In preparation for the mutiny, Vedij persuaded the platoon of Imperial Navy troopers who provided half of the ship's security to remain in their quarters.
Two-thirds of the crew sided with Vedij after he announced the mutiny, while those who did not were confined with the platoon of stormtroopers who provided the other half of the ship's security; the stormtroopers were caught off-guard by a false alarm announcing a riot, and security bulkheads were used to trap them. The lone COMPNOR Observation officer on the frigate was subdued, and Kenit himself was captured en route to the ship's bridge. Vedij's mutiny successfully seized control of the vessel. The former captain of the Far Orbit and his loyalists were evacuated from the frigate via escape pods and some of the Nebulon-B's shuttles. Vedij and some of the mutineers personally placed Kenit in an escape pod along with a junior officer and six Imperial Navy troopers, but not before Kenit threatened Vedij and the rebellious crew with Imperial retribution.
Shortly after the mutiny, Vedij, now the captain of the Far Orbit, announced via the frigate's comm that Kenit had been removed from the ship. He also informed the crew that, given that most mutineers headed for the Outer Rim, the Far Orbit would instead navigate to the Core Worlds, specifically the Ringali Shell, to mislead Imperial trackers, and that the frigate would teach the Empire a lesson. Half of the remaining crew abandoned ship in escape pods and shuttles rather than remaining with the mutineers, leaving the Far Orbit with barely enough crew to sustain it. In total, the ship retained 380 crew members and twenty-five gunners after the event, with six months' worth of supplies remaining. Furthermore, the departing crew left the Far Orbit with no escape pods and only two shuttles: a Grek-class troop shuttle and a Katarn-class boarding shuttle.
Vedij cleared out the captain's ready room, which was filled with Kenit's personal belongings, and soon conceived a plan to finance the Far Orbit's fight against the Empire: the Far Orbit would become an Alliance privateer, targeting Imperial ships. The captain also mandated combat training for all crew members and tasked the engineers with automating decks with minimal or no crew presence, as well as designating decks and areas for mothballing. The Far Orbit then set course for StarForge Station, a space station situated in the StarForge Nebula, where the ship could acquire both crew and negotiate with the Alliance, hoping to secure privateering status.
StarForge Station
It took the Far Orbit approximately eighteen hours to reach the StarForge Nebula, after which its crew began using a chart provided by the Alliance to locate the space station, which constantly shifted its position to evade Imperial detection.
After six hours of unsuccessful scanning for the station, the Far Orbit encountered a quartet of BTL Y-wing starfighters belonging to StarForge Station. After convincing the Y-wing pilots that the Far Orbit was indeed the frigate expected to arrive at the space station, the Y-wings guided the vessel to StarForge Station. The majority of the crew—including Vedij, who was preparing to negotiate with the Alliance—were transported to StarForge Station via shuttle, where most were given free rein. However, Vedij and five others proceeded to the Lean Nuuti Bar and Grill eatery, where they were scheduled to meet with an Alliance representative.
Vedij had been instructed to arrive at the eatery in a group of six and order flangth and ootoowergs alongside Shasa ale. Following this, they would be approached by an Ithorian, with whom a deal could be negotiated with the Alliance. The group followed these instructions, placing their order with a serving droid at the Lean Nuuti Bar and Grill. Shortly thereafter, an Ithorian staff member approached them, and Vedij and another mutineer departed with the Ithorian to discuss the deal with the Alliance. In that meeting, Vedij successfully secured a letter of marque and reprisal from the Alliance, authorizing the frigate to conduct raids against Imperial forces and Imperial-allied transports in the Ringali Shell, making it one of the Alliance's first privateering vessels.
The following day, after the crew had time to explore the offerings of StarForge Station's market, Vedij issued a call for individuals with experience in capital starships. At the hiring station on the station's docks, Vedij waited until a sizable crowd had gathered before announcing that the Far Orbit was seeking crew members with skills as technicians, general deckhands, or capital vessel operators. Vedij had them form a line to sign up.
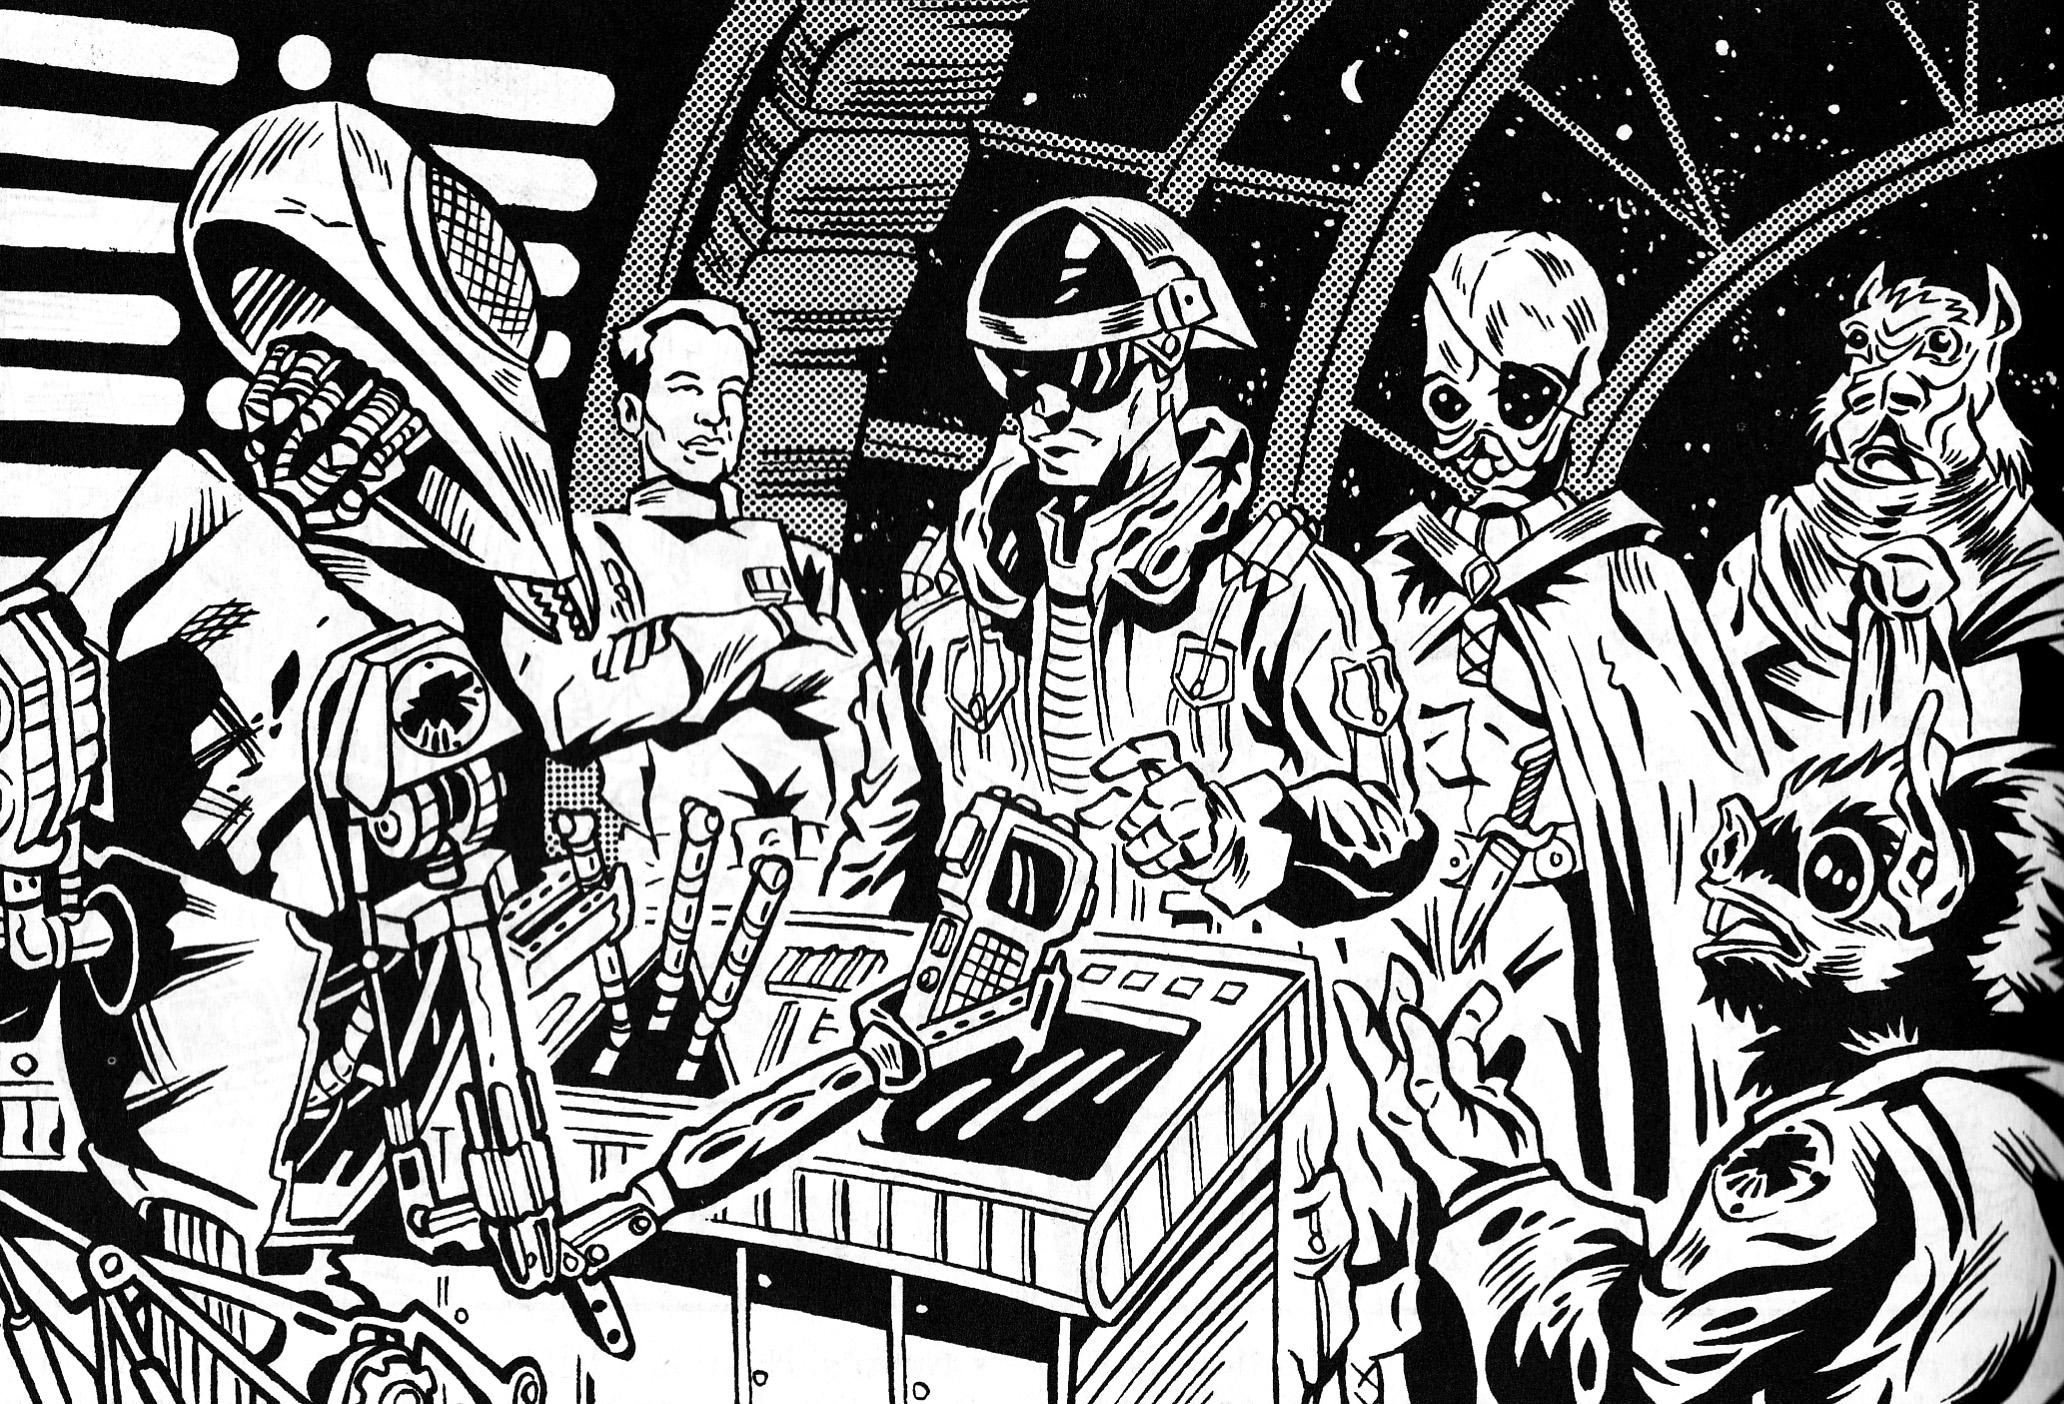
After applicants had registered for a position on the Far Orbit, the frigate's officers conducted a series of tests to determine suitability for service on the Nebulon-B. One test involved marksmanship, where applicants had thirty seconds to hit five moving targets. Another test required applicants to plot an emergency astrogation course on a data pad within a minute. Yet another involved the prospective crew members piloting a simulated Nebulon-B in a battle against Imperial TIE fighters. An unarmed combat test was also organized, with applicants paired off to wrestle. The top five wrestlers were awarded berths. Among those selected for service on the Far Orbit through these tests were Kanarak, a bloodthirsty killer; Swifty Yonsen, a spacer known for his fierce reputation; Xad, a Falleen aristocrat; the gunhand Katiz Xemir; Gruk, a Gamorrean; the Tiss'shar pirate Pao-Neh-Lo; Cemma the Younger, another gunhand; the Sluissi engineer Napvansa Tadavv; and the Human Mii Heswop, a nitwit.
After all the new recruits were transported to the frigate, Vedij took the last shuttle and ordered the crew to prepare the frigate for departure from the nebula. The Far Orbit reached the edge of the StarForge Nebula within a few hours and embarked on its privateering mission. However, shortly after leaving StarForge Station, tensions began to escalate between the mutineers and the new non-Human crew members, leading to a series of incidents. The first was a brawl in the crew galley between the aliens and the Humans over food. Another incident involved Kanarak, who viewed all Humans as weak, killing every Human he could find for that reason. After leaving StarForge Station, Gruk, who enjoyed fighting, confronted a Human and broke the man's back. This prompted a group of Humans to seek revenge with clubs, resulting in the beating of both lone aliens and Humans.
Due to the friction between the Imperial mutineers and the fringe Humans recruited at the space station, a career pirate officer challenged a mutineer officer to a duel in which killing was avoided. Vedij agreed, hoping to end the series of conflicts between the two factions. Another incident involved an important non-Human crew member offending a group of Human racists. That same crew member was subsequently murdered with a stabbing weapon, further exacerbating the tensions between the aliens and the Humans.
The taking of Shipment 1037
For its initial raids, the Far Orbit adopted the guise of an Imperial vessel. This was feasible due to the Empire's exclusive use of Nebulon-Bs at the time. This cover allowed the Far Orbit to easily board potential targets under the pretense of a raid, and even confiscate goods without revealing its true allegiance if necessary. However, most raids involved abandoning the Imperial facade after docking with the target. Throughout their raiding activities, the privateers relied on StarForge Station as the Far Orbit's primary refueling and restocking point. Additionally, an Alliance observer named Major Cet Willak accompanied the Far Orbit on its raids to ensure compliance with the terms of their contract.
Shortly after the visit to StarForge Station, the Far Orbit journeyed to the Nopces system, masquerading as an Imperial patrol frigate while searching for its first significant target. Following a shift change at the sensors station, a light freighter was detected traveling from the world Nopces Prime toward the privateers. The freighter, Red Star Shipping Lines's Transport A-175, was captained by Joh Steen. Mistaking the privateers for legitimate Imperial forces, the crew of the freighter allowed the privateers to conduct an inspection of Transport A-175. During the inspection, the crew of the Far Orbit learned that the transport was scheduled to join a convoy, Shipment 1037, departing from Brentaal IV—a world in the Bormea sector—in three days, bound for the Outer Rim. Recognizing the convoy as a valuable opportunity, they offered to escort Transport A-175 to the convoy, ostensibly to assist in guarding the group of ships.
Using a secure communications channel to the Alliance, the crew of the Far Orbit convinced them to divert the convoy into a trap that the Alliance would prearrange. The trap consisted of thirty-six Y-wing starfighters and a pair of CR90 corvettes. After the Far Orbit and Transport A-175 joined the convoy, the privateers successfully persuaded Captain Miech Conar of the frigate New Star, which was also guarding the convoy, that a new destination had been added to the group's route. They claimed that the convoy would rendezvous with a larger escort force due to the discovery of a plot targeting the convoy. The Far Orbit then led the convoy to the designated trap location, where the privateering frigate turned and engaged the New Star with its forward guns, while the Alliance forces engaged the same frigate and helped keep the convoy in check.
Vedij issued a command to the convoy, consisting of twelve transports, ordering them to shut down their engines and prepare to be boarded, while also initiating a jamming signal to prevent any distress calls. Ultimately, the New Star was subdued, with both the ship and its officers captured intact and unharmed. After capturing the convoy, which carried over 180,000 tons of mixed cargo, the total profit for the Alliance and the privateers amounted to 340 million credits. Furthermore, the convoy carried enough food supplies to fully replenish the frigate's stores, leading the Far Orbit to allocate 18 million credits of its share of the profits to acquire the supplies. As the Far Orbit had captured the New Star, the privateers received an additional 3 million credits.
Dealing with Puulo, and early adventures

Sometime after the Far Orbit transitioned into service as a privateering vessel for the Alliance, Vedij began utilizing the black market to obtain necessary supplies and materials. These included weaponry, starfighters, replacement components, provisions, and crew members. This was because the Far Orbit received minimal support from the Alliance. Vedij sought assistance from a criminal organization led by the Hutt Shettora, which had its base of operations on Brentaal IV. This group held sway over the Brentaal IV black market, offering acceptable goods and merchandise at prices only slightly inflated above their original cost. Certain members of the frigate's crew journeyed to Brentaal IV to negotiate a deal with Puullo, a Hutt acting as a criminal lieutenant.
An accord was struck between the criminal faction and the Far Orbit. In exchange for thirty percent of all goods and currency acquired by the frigate through privateering activities, the Hutts would grant the Far Orbit access to a clandestine port, allow its crew to procure illicit arms from the faction, and provide protection from any bounty hunters who might pursue them. Vedij made sure to stipulate that any armaments seized by the Far Orbit from its targets were excluded from this arrangement, as the frigate itself had a pressing need for additional weaponry.
Meanwhile, Kenit, the former captain, had been apprehended by Imperial authorities and condemned to death for his failure to maintain control of the frigate. However, this sentence was put on hold pending the outcome of Kenit's new assignment. This mission, provided by Imperial Advisor Sate Pestage, tasked Kenit with locating and destroying the Far Orbit and its new commander. Kenit was placed in command of the Nebulon-B Stalwart, and he commenced his search for Vedij and the frigate in the Outer Rim territories.
Following their assault on the convoy, the Far Orbit experienced a few incidents that did not jeopardize their disguise as an Imperial frigate. One such event involved the frigate encountering a pirate assault on a passenger vessel. Due to the Far Orbit's guise as an Imperial escort, the liner's captain requested assistance from the privateers. The Far Orbit successfully repelled the pirates, but Vedij later extended offers of employment to them, inviting them to join his crew aboard the frigate. Around this time, Vedij also resolved to establish a base of operations and dispatched a team of his crew to meet with a contact on Brentaal IV. While there, the team evaded Imperial Security Bureau agents who were shadowing them, before engaging in negotiations with their contact to secure a base for the Far Orbit.
Not long after the frigate's capture of the convoy, the privateers stumbled upon a substantial Imperial Navy training exercise near the Ringali Nebula. After a fleet consisting of Star Destroyers and numerous smaller support vessels emerged from hyperspace in that vicinity, the Far Orbit was compelled to seek refuge within the nebula to avoid detection.
Capturing an Imperial Advisor
At some point following the acquisition of Shipment 1037, the Far Orbit intercepted a crucial Imperial communication, which the crew deciphered using their onboard systems. The message revealed that Imperial Advisor Coh Veshiv, who was on an investigative mission in the Ringali Shell after being exiled from Coruscant for irritating Emperor Palpatine, was scheduled to arrive at the planet Esseles imminently. Vedij and his crew recognized the advisor as a valuable target, not just for the 10,000 credit bounty he would command upon delivery to the Alliance, but because he was a figure of some political significance. However, because the transmission lacked the precise route, the Far Orbit could not establish a blockade to intercept Veshiv's CR90 corvette, the Empire Forever. Instead, they would have to travel to Esseles if they wished to capture the Imperial Advisor.
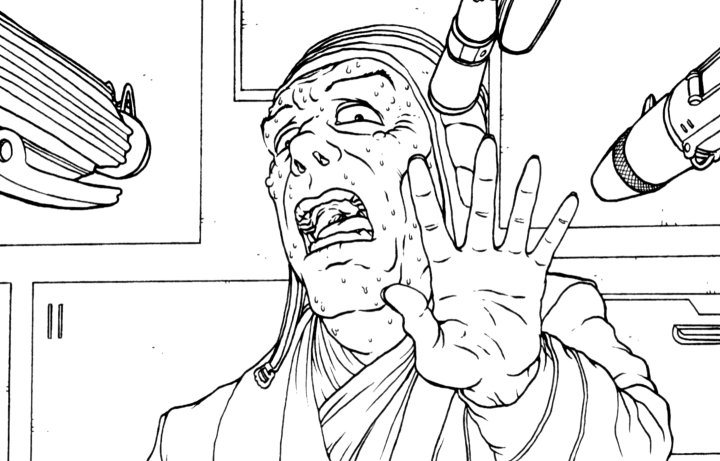
The strategy involved capturing Veshiv upon his departure from Esseles at jump point 180:45:115, which was within range of the Golan III Space Defense NovaGun Platform 8127/121. Upon entering Esseles space, the Far Orbit transmitted its fabricated clearance codes to the Imperial authorities upon request, and the crew established an orbit parallel to that of the Empire Forever. As they approached Veshiv's vessel, Vedij contacted it and transmitted false orders to its captain, Annance, asserting that the Far Orbit was tasked with transporting the advisor for the next segment of his journey. Due in part to Veshiv's consistent annoyance of Annance during their time together on the CR90, the captain paid scant attention to the orders and dispatched the advisor to the frigate aboard the Lambda-class T-4a shuttle Myrenia, along with his two aides and a detachment of stormtrooper bodyguards. Immediately upon disembarking from his shuttle in the hangar, Veshiv began to complain about the fact that he had requested a cruiser, not a frigate or a corvette. Veshiv had been particularly displeased and angered when he realized that the ship assigned to him for his fact-finding mission was merely a corvette.
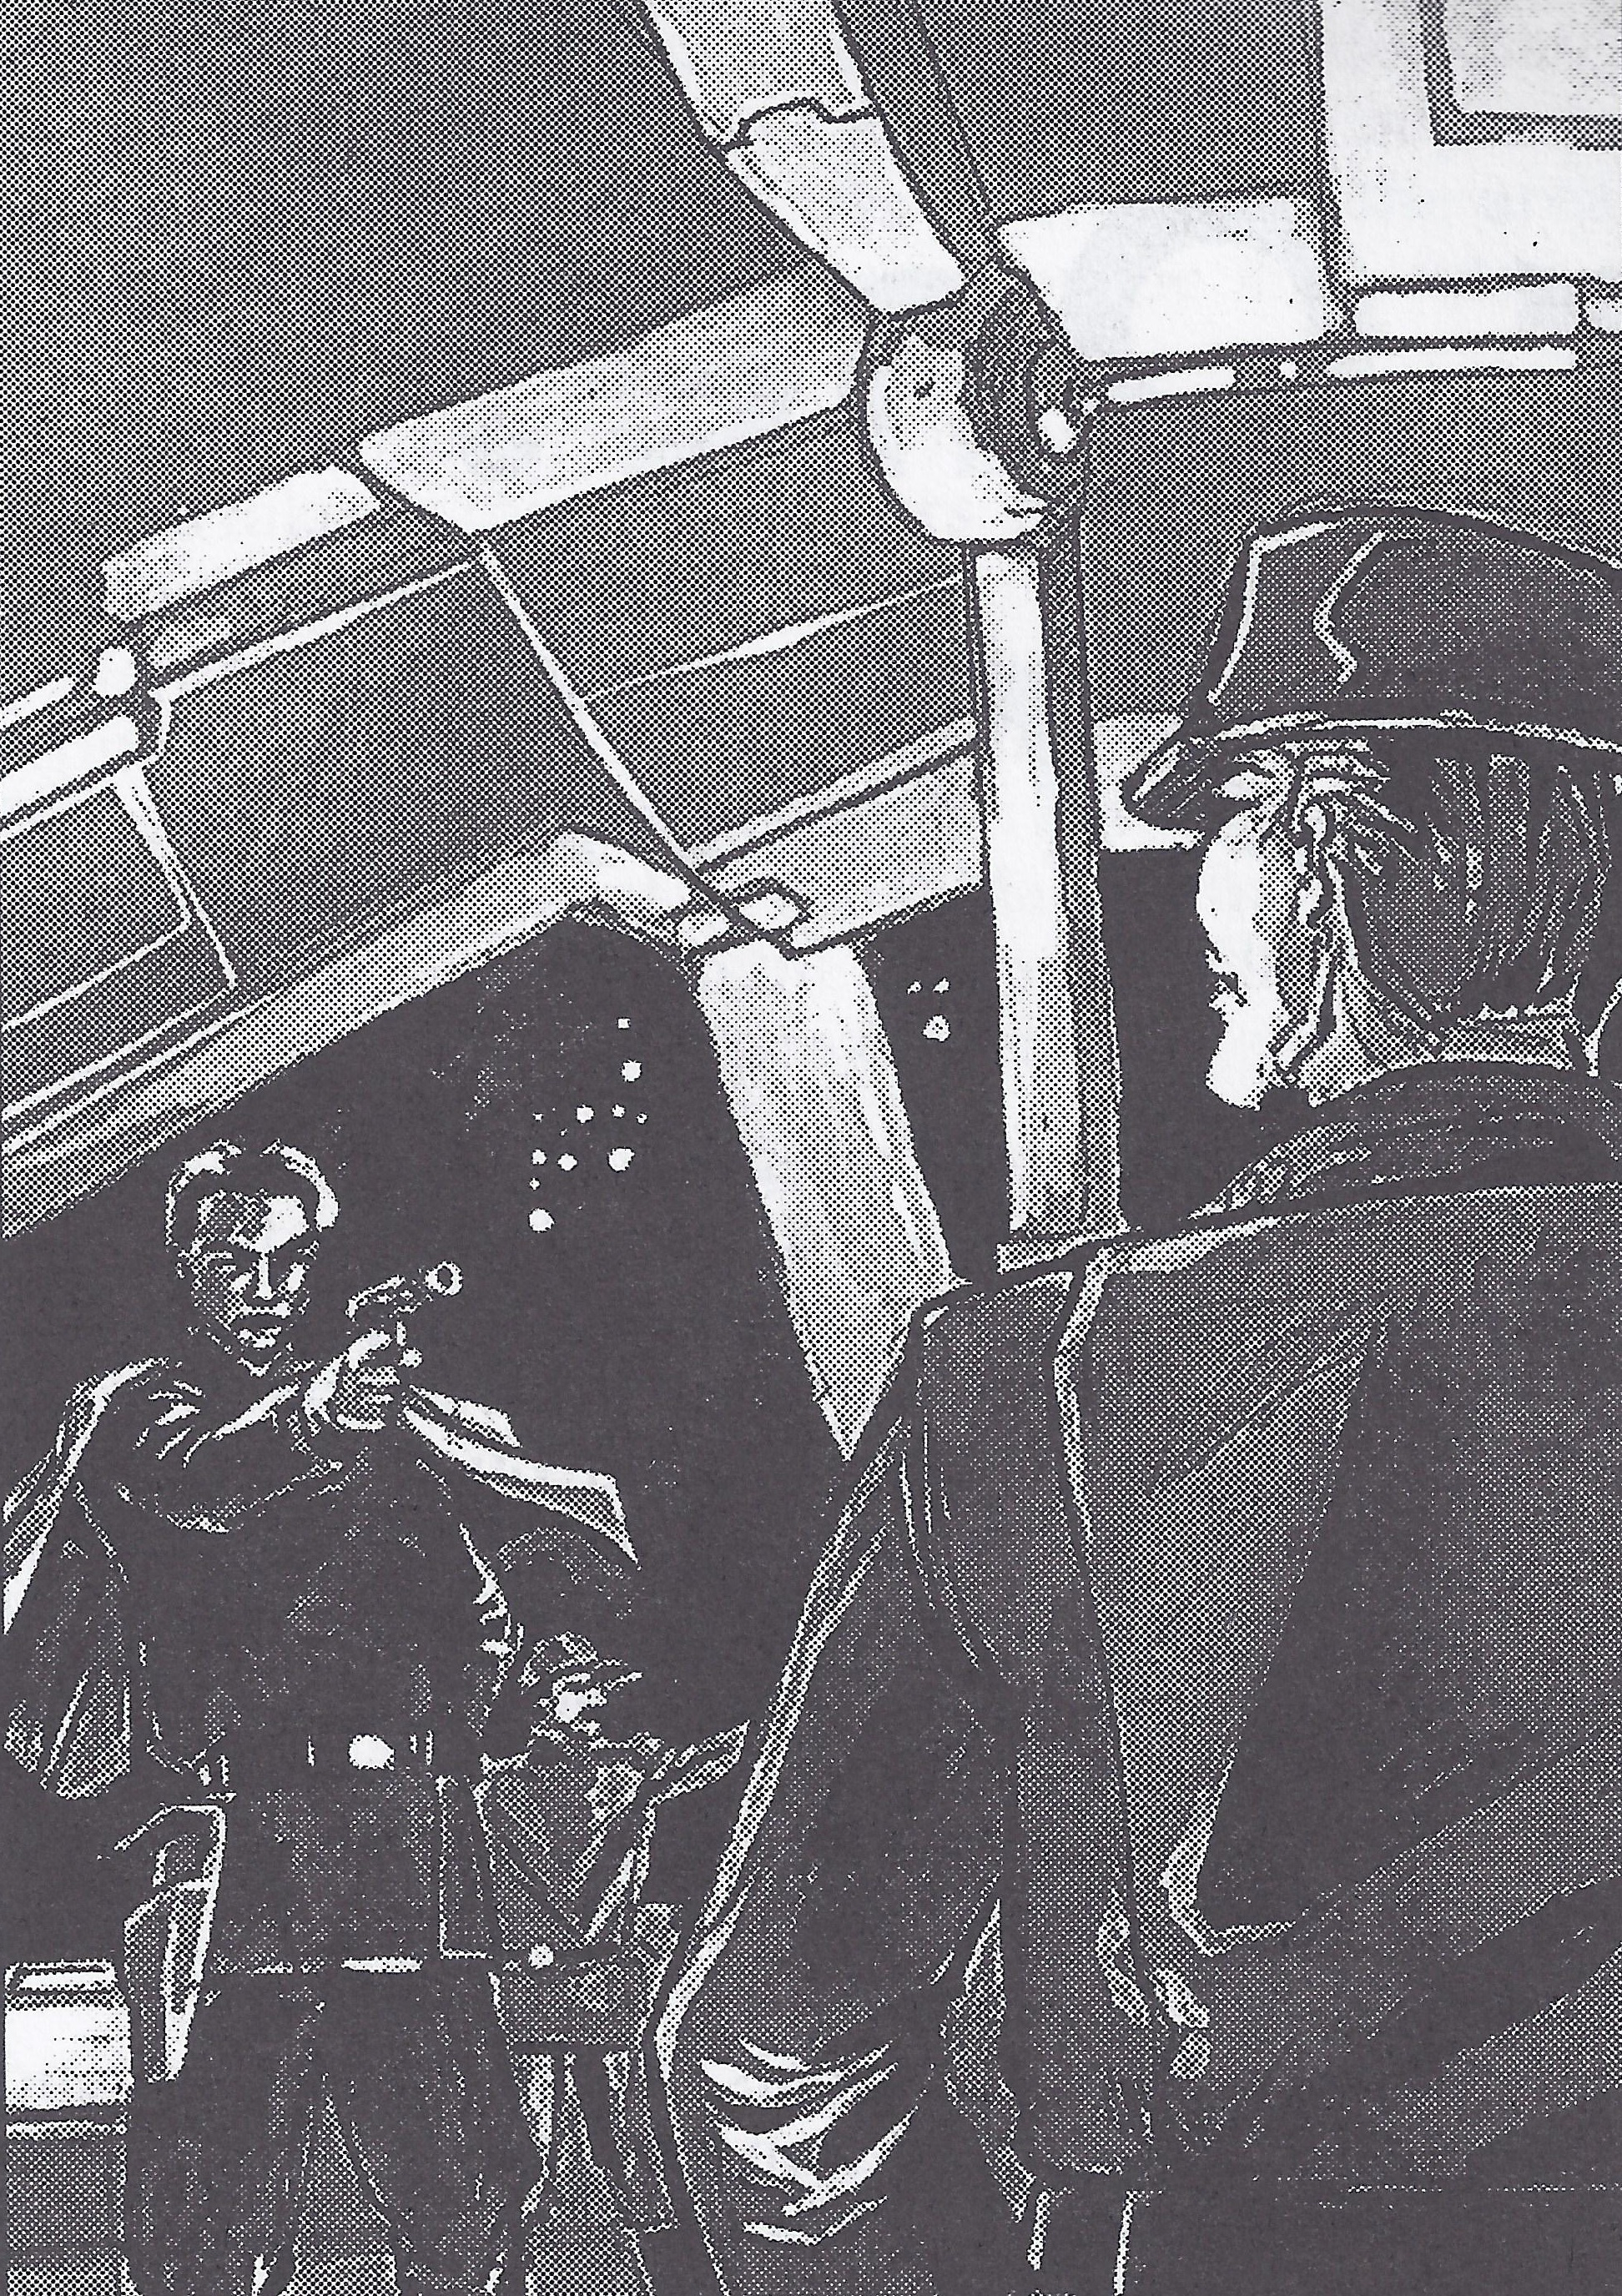
However, Veshiv's complaints ceased abruptly as the frigate jumped to hyperspace, which precipitated the privateers' attempt to subdue the advisor and his entourage by force. Unable to solicit assistance from the Empire Forever or Platform 8127/2121 due to the Far Orbit's location in hyperspace, the stormtrooper guards attempted to seize the frigate's bridge, resulting in a firefight throughout the ship's corridors. Nevertheless, the privateers prevailed, capturing the advisor and overwhelming his troopers. The pilots of the Myrenia had surrendered earlier, recognizing their inability to escape the frigate while it was in hyperspace. Upon being captured, Veshiv complied with all of the privateers' instructions and, in an effort to ensure his well-being, divulged trivial information about the Imperial Court to the crew of the Far Orbit. The privateers delivered the advisor to their Alliance allies at the earliest opportunity in exchange for the bounty.
As a direct consequence of the Far Orbit's seizure of Veshiv, the Empire became fully aware of the Far Orbit's activities within the Ringali Shell, thereby compromising the frigate's cover as an Imperial patrol vessel. Two days after the capture, Pestage contacted Kenit aboard the Stalwart and informed him that the Far Orbit was operating in the Ringali Shell, not the Outer Rim. Consequently, the former captain of the Far Orbit redirected his search to the Core Worlds. During one of its raids, the Far Orbit attacked a Santhe/Sienar Technologies shipment guarded by a prototype TIE Advanced x1, a highly advanced starfighter that surpassed any of the fighters possessed by the privateers. In the ensuing engagement, the frigate managed to seize the prototype through the use of its ion cannons. The TIE Advanced was subsequently incorporated into the Far Orbit's complement.
Fighting with pirates
As time went on, the encryption codes were altered, making it more difficult for the privateers to intercept Imperial transmissions. However, the frigate could still readily intercept public broadcasts, and sometime after the kidnapping of Veshiv, the sensor arrays detected a concerning news report. It was an Imperial HoloVision broadcast by Ashii Nermani informing the public about pirate attacks perpetrated by the Solar Terrors and their captain Venslas Beeli against civilian transports near Brentaal IV, Esseles, and the planet Rhinnal. Beeli asserted that he was an Alliance pirate, although some members of the Far Orbit's crew recalled Beeli as a pirate from the Outer Rim who had once scoffed at the notion of a rebel force challenging the Empire.
Unbeknownst to the privateers, Beeli and his crew had been compelled to commit these atrocities under threat of death after being captured by Imperial forces. Kenit, determined to ensnare the Far Orbit, had infected the pirates with Vira606, a non-contagious disease curable only by a serum possessed by the Empire. Kenit had the pirates attack civilians in order to turn public opinion against the Alliance in preparation for when the Far Orbit's crew revealed themselves as Alliance privateers, and to lure out the frigate. The crew of the Far Orbit resolved to hunt down the pirates, as they were damaging the privateers' reputation. The Far Orbit began analyzing the Solar Terrors' raids for patterns and patrolling likely areas of attack. Despite the difficulty of accessing Imperial transmissions to glean details about the raids, the crew managed to discern a general pattern: Beeli's vessels—the Zahtjav, the Javiq, and the Pyesmev—targeted Brentaal space every third raid.
Eventually, the Far Orbit succeeded in catching the Solar Terrors in the act of raiding a vessel within the Brentaal system. As part of Kenit's scheme, Imperial patrol vessels in the Brentaal system had been instructed to stand down, providing the Far Orbit with an opportunity to locate the pirates. The privateers engaged the pirates, who collectively focused their attacks on one side of the Far Orbit, staying clear of its forward firing arc. Beeli fought recklessly, desiring death in battle rather than succumbing to the disease. Ultimately, the Far Orbit destroyed the pirates and their ships, eliminating the threat they posed to civilians and safeguarding the privateers' name.
At some point, Kenit placed bounties on the heads of Vedij and those who aided in the mutiny. Consequently, the bounty hunter Dej Vennor, who exclusively accepted contracts targeting pirates and their ilk, pursued the Far Orbit in order to claim the rewards. During one of their numerous raids, the crew of the Far Orbit seized cargo containing a tracking device planted by Imperial Intelligence. As a result, the Imperial special agent WRATH tracked the Far Orbit, and teams of undercover Imperial agents launched attacks on locations the frigate had recently departed, such as StarForge Station and the black market on Brentaal IV. These attacks tarnished the reputation of the Nebulon-B and engendered suspicion towards the privateers. Vedij, realizing that the Far Orbit was likely being tracked by a device, sought to exploit this information by staging an ambush to eliminate the agents.
It's a trap!
Shortly after dealing with the Solar Terrors, the Far Orbit was approaching an inexpensive jump-point in the space near Brentaal when it encountered SPF 14897, a Mark III bulk transport belonging to Santhe Passenger and Freight. The captain of the vessel, Mils Lolinc, willingly provided a cargo manifest upon request. Scans of the Mark III indicated that everything was normal, although the hold was ion shielded, which was standard practice for ships transporting ion engine components.
After docking with the freighter, the privateers initiated a raid on the ship. However, upon reaching the cargo hold and opening it, they discovered that it was filled with Imperial stormtroopers. Furthermore, opening the hold activated a hypertransceiver beam, alerting a nearby Imperial task force under Kenit's command. SPF 14897 was, in fact, the bait in a trap set by the former captain of the Far Orbit. The hold of the Mark III contained twenty-four highly trained stormtroopers specializing in counter-boarding and anti-piracy operations. Additionally, the hold housed ten SpecNav troopers and eight Imperial storm commandos. Leading the troopers in the hold were three Imperial officers and the ISB agent Bannish Kolow, while the crew of SPF 14897 were all expendable CompForce Observers.
The stormtroopers and other Imperial forces aboard SPF 14897 were intended to occupy the Far Orbit and detain its crew until Kenit's task force, which was waiting mere minutes away in hyperspace, arrived. The task force consisted of the Stalwart, the Strike-class medium cruiser Hammer, two GAT-12 Skipray Blastboats designated SB-109 and SB-32, and the Immobilizer 418 cruiser Claw. Kenit's objective was to capture the frigate if possible.
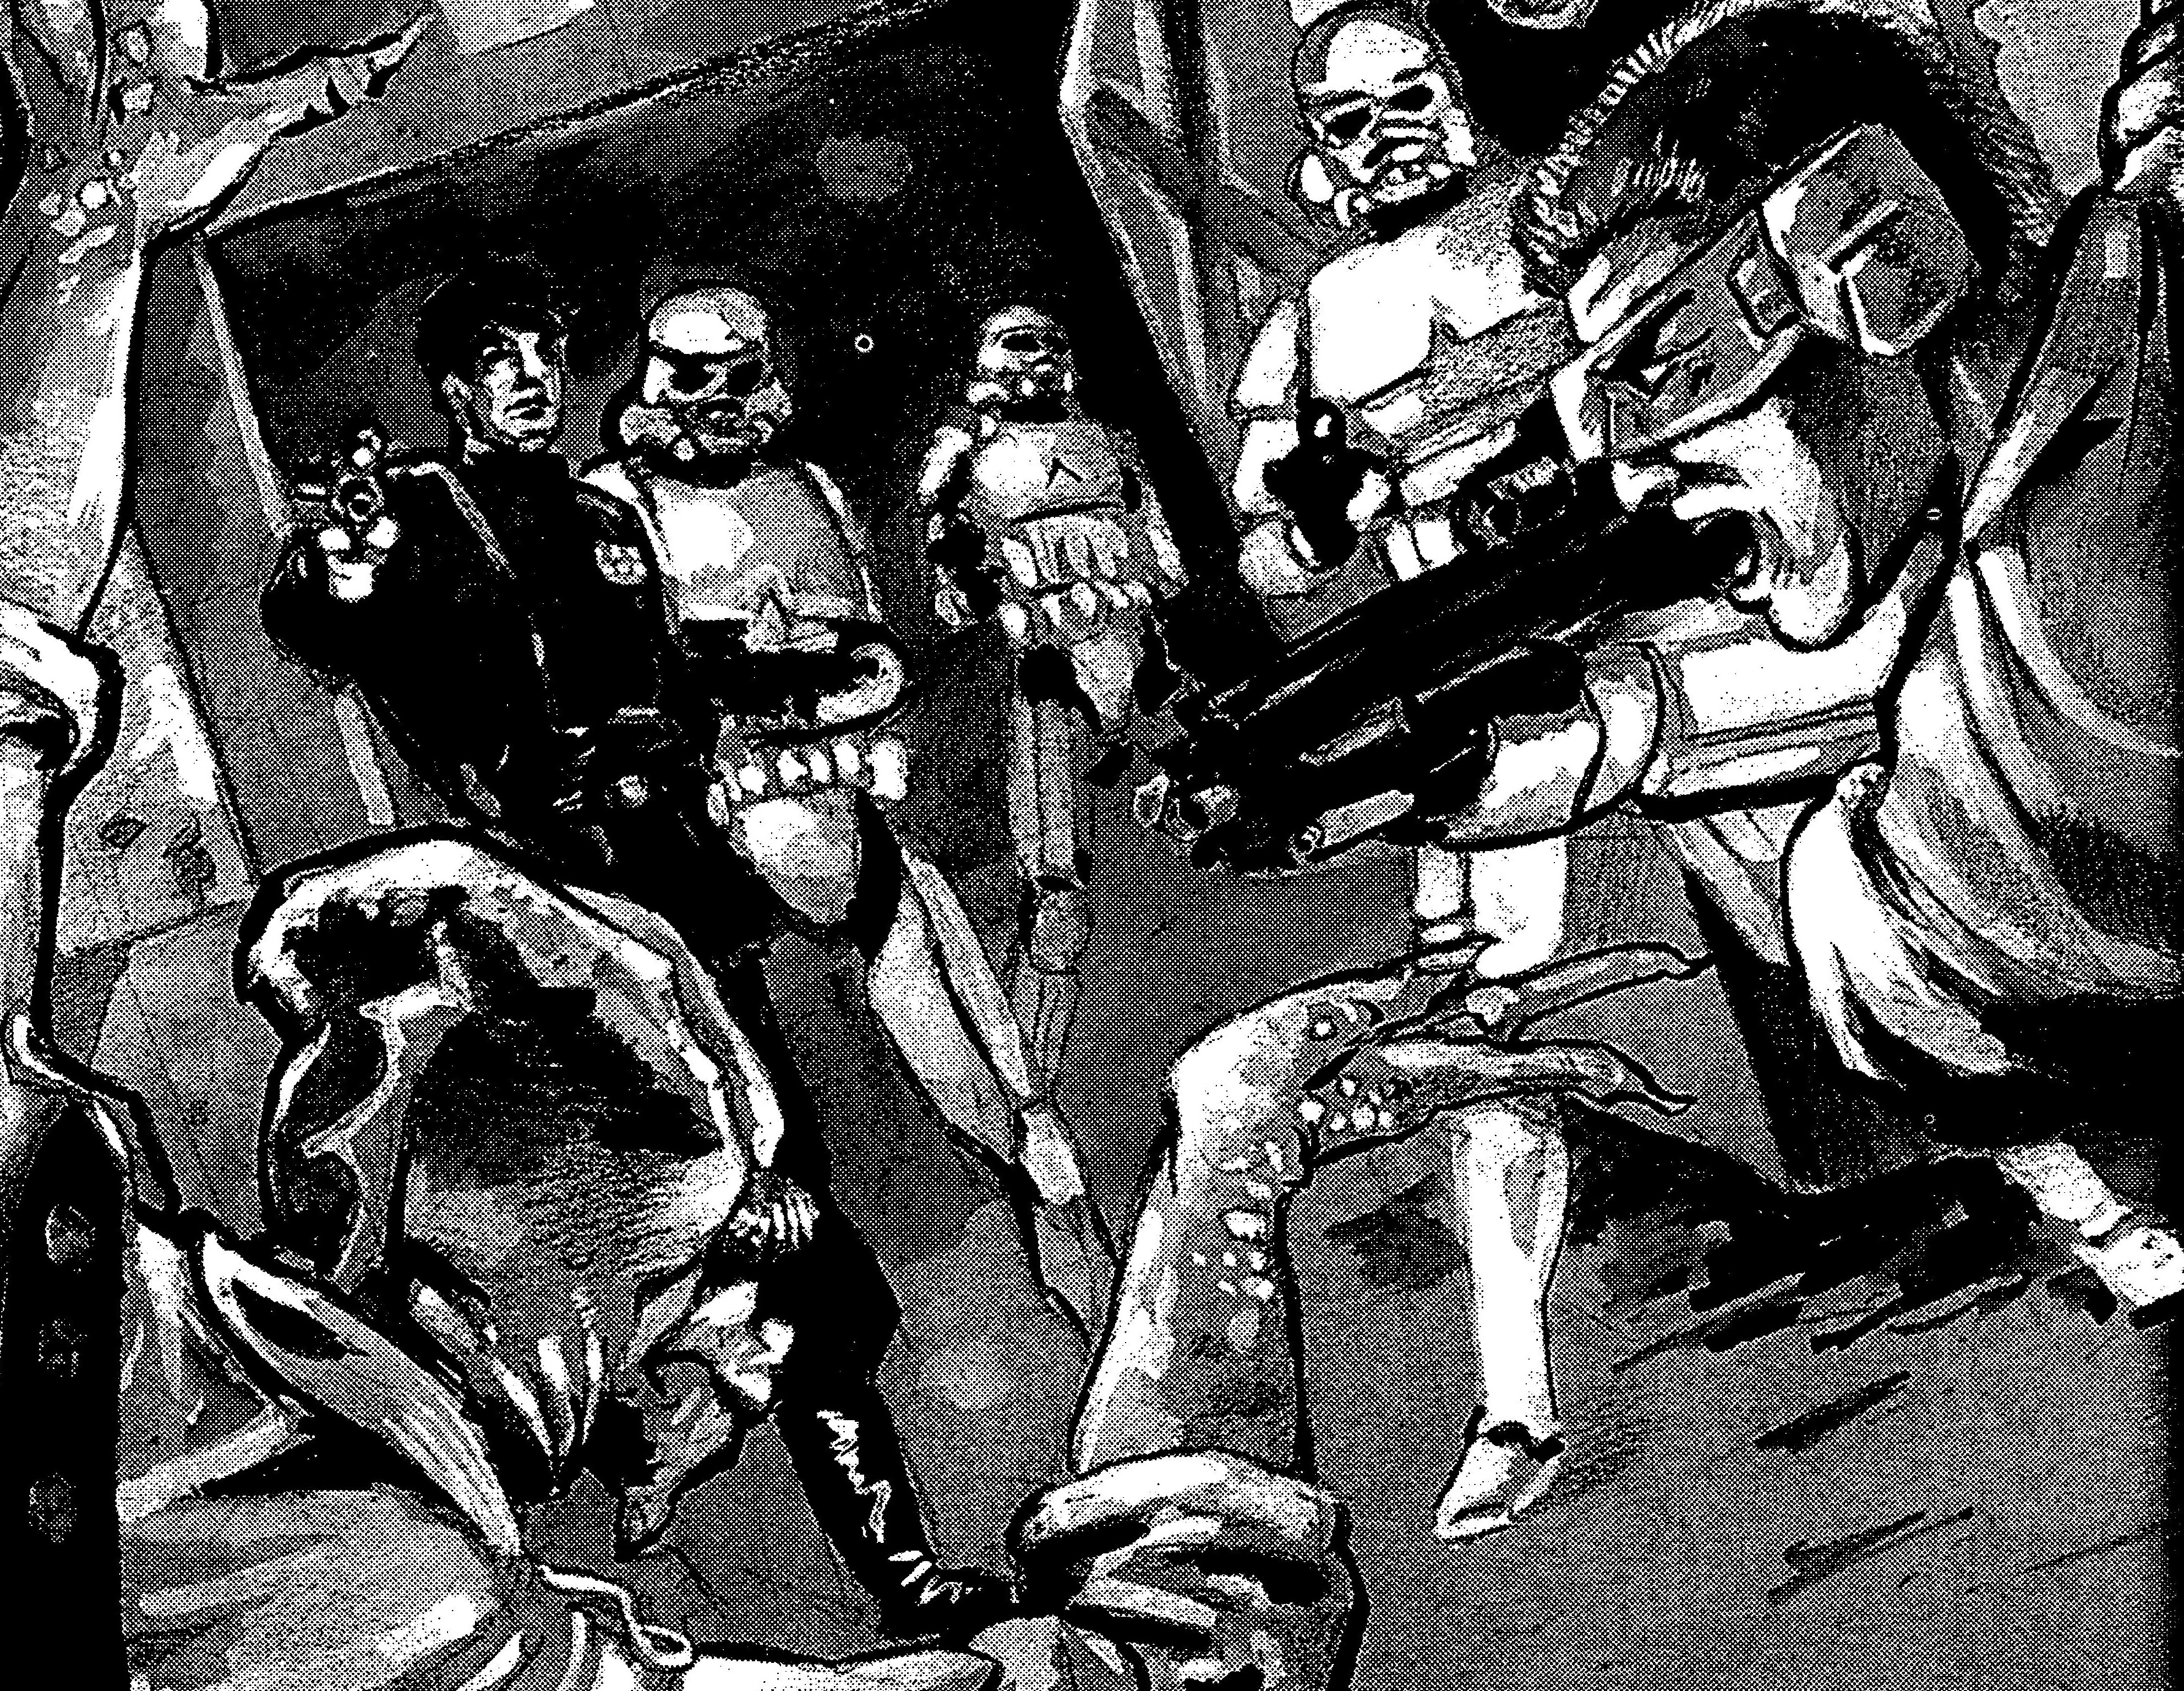
After the privateering boarders opened the hold, they were forced back by the Imperials and their tactics, and only the reinforcements sent by Vedij allowed some of them to escape. The Imperial troopers then launched a counter-boarding operation, aiming to seize the Far Orbit's bridge, propulsion module, and operations section. Adding to the predicament, the Imperial task force arrived, and the Claw targeted the Far Orbit with its gravity well projectors, preventing the privateers from escaping into hyperspace. From his command ship, Kenit informed the crew of the Far Orbit that they were all under arrest and that surrendering Vedij would reflect favorably on them during their trials. However, Vedij ordered his crew to their battle stations and to repel the boarders from SPF 14897.
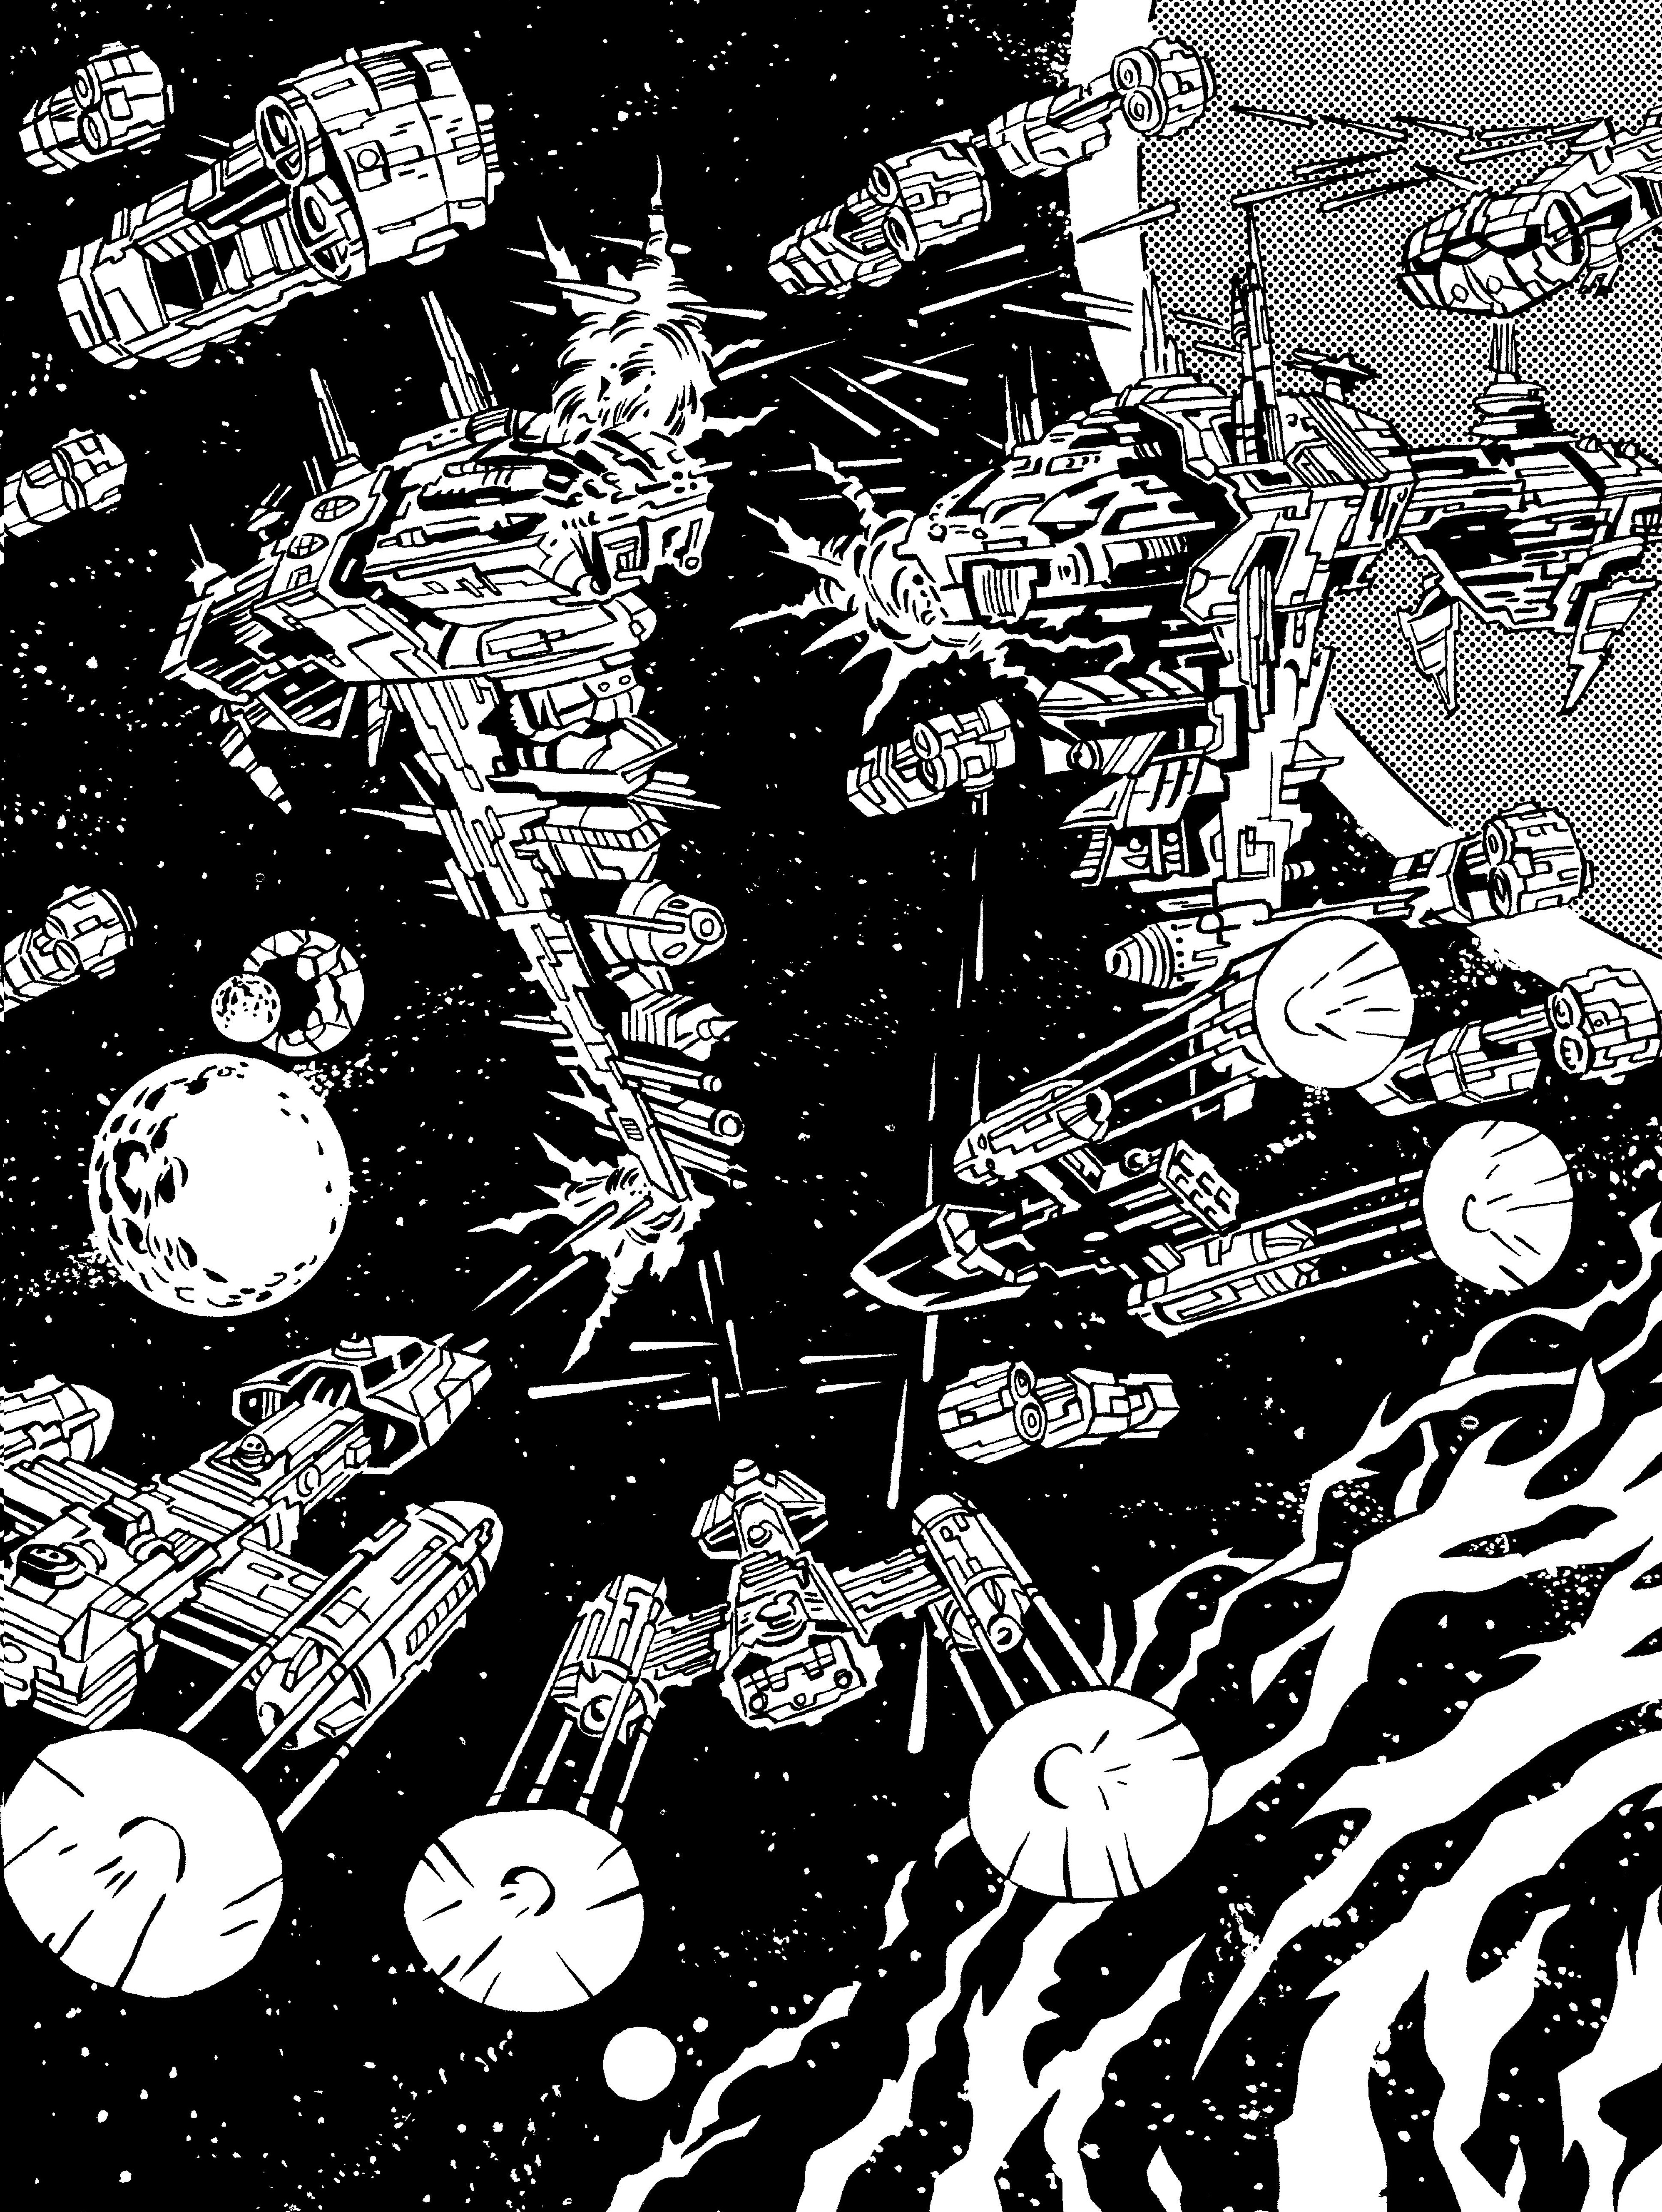
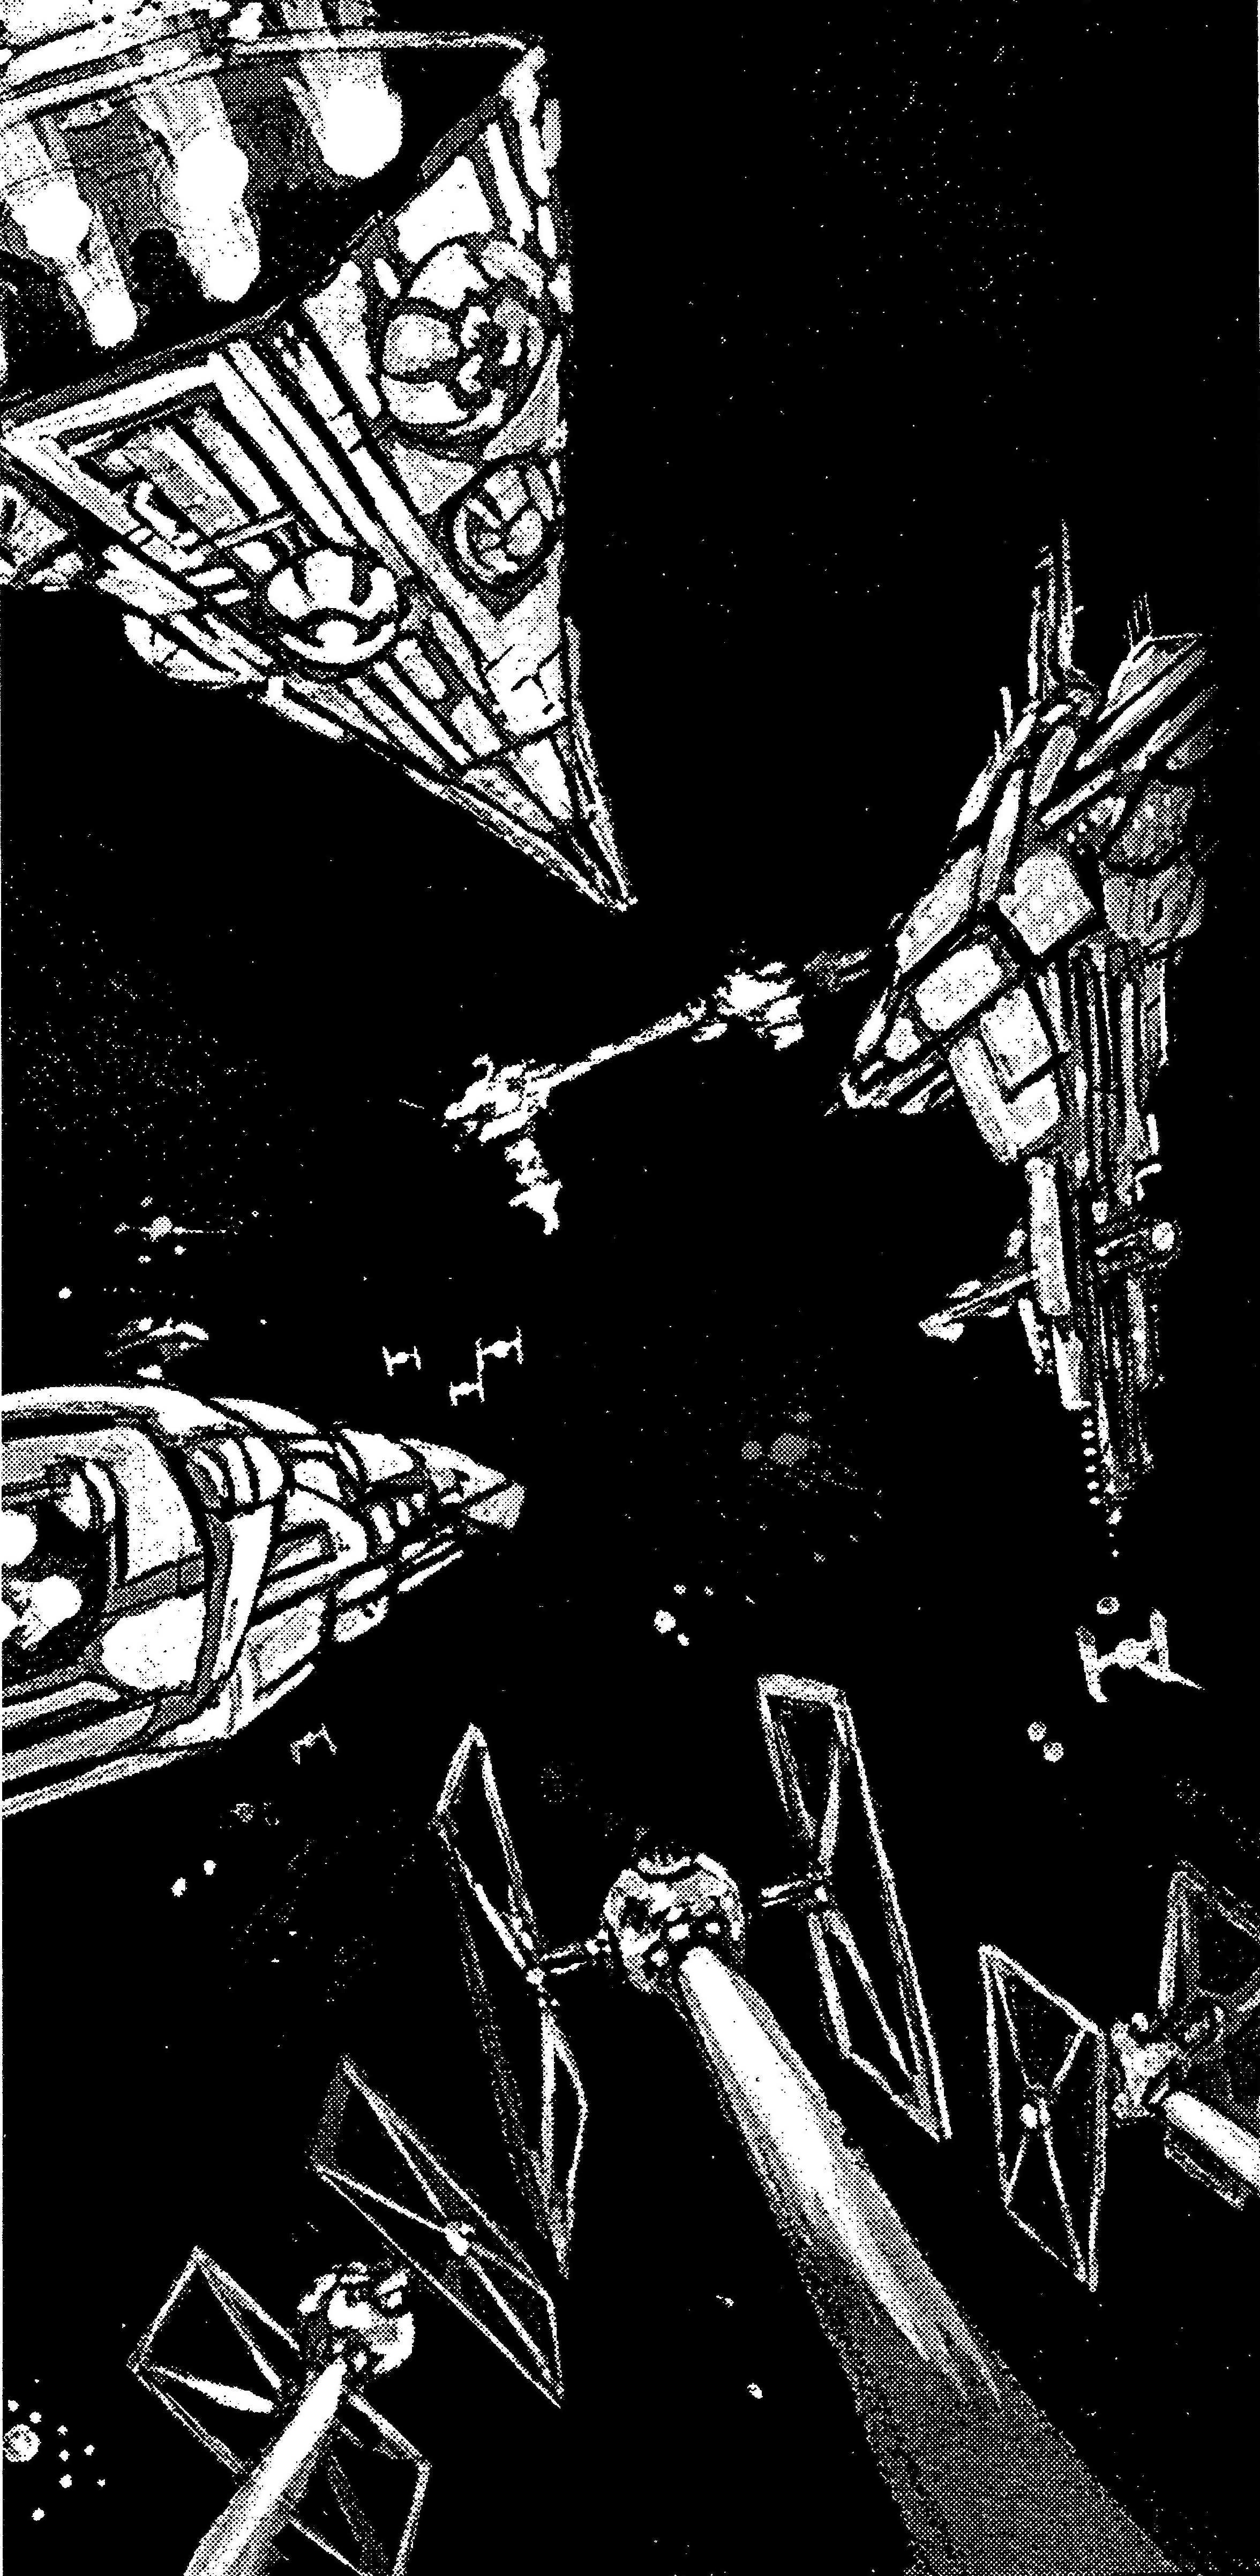
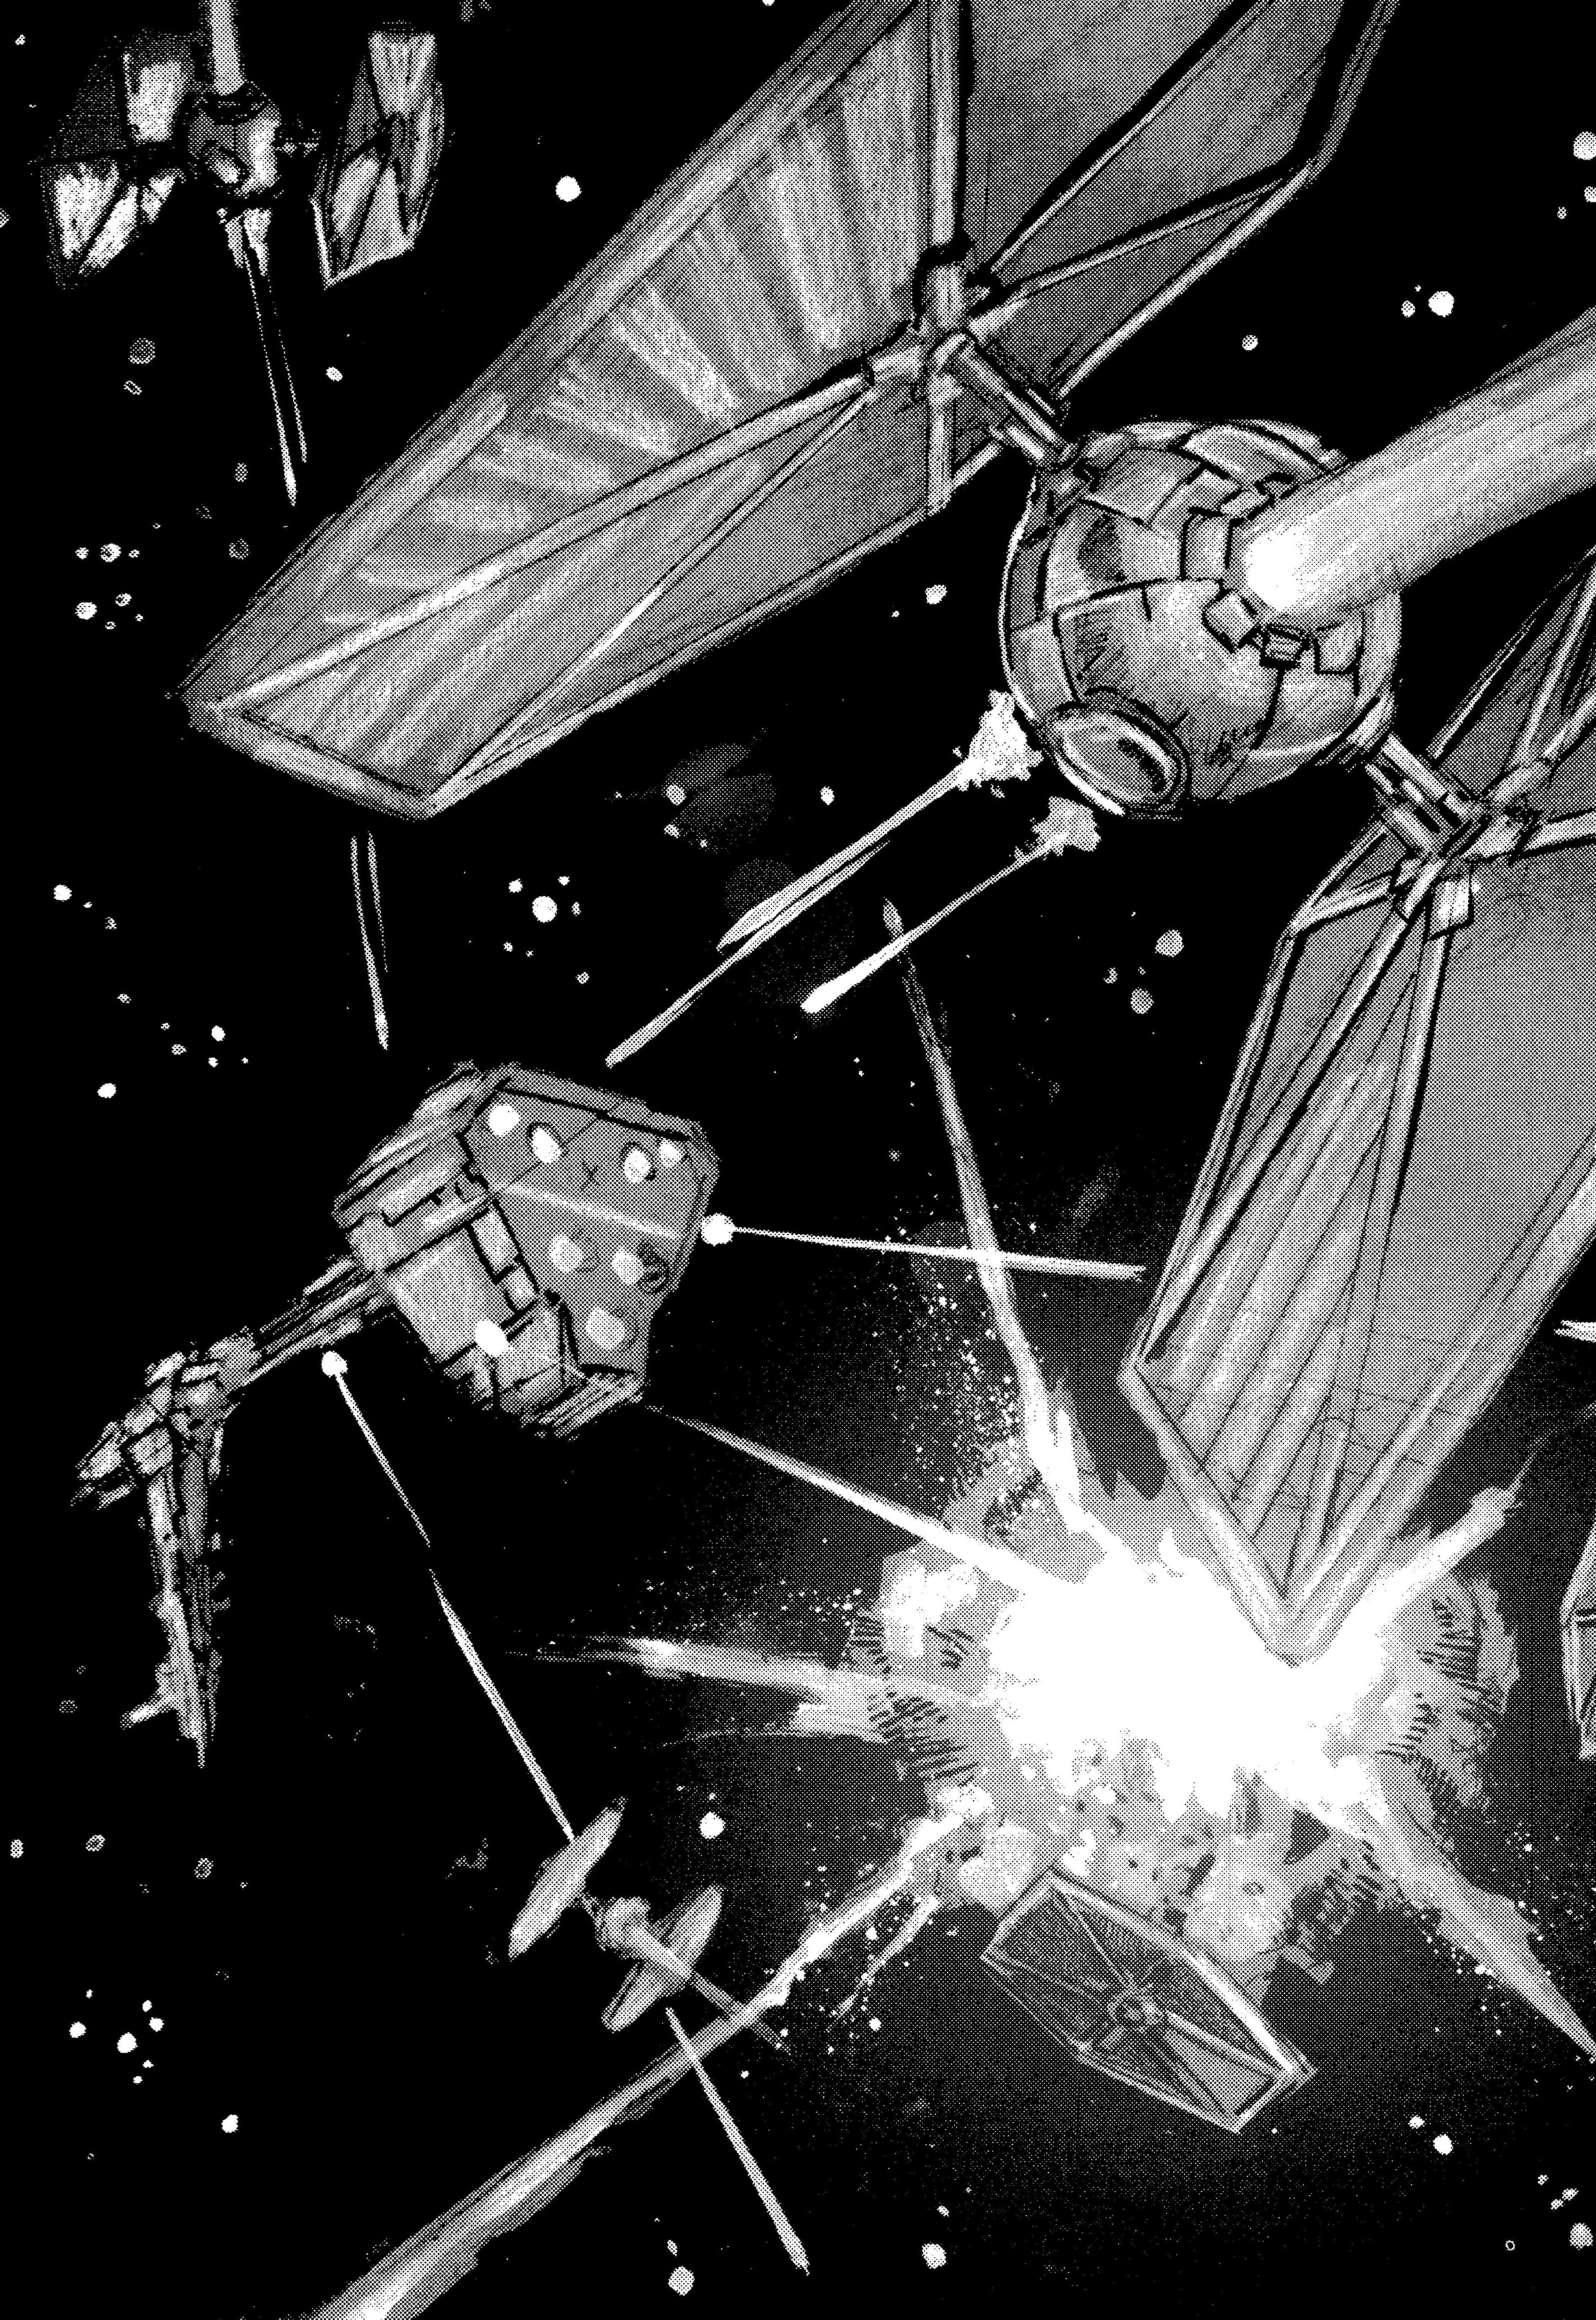
While the Hammer and the Stalwart launched their TIE starfighters—of which the Strike-class had twelve and the frigate twenty-four—the pair of Skiprays flanked the privateering ship to target its engines and shield generators if necessary. All of the ships, excluding the Stalwart and the TIEs, attacked the frigate with ion fire, while Kenit's ships used tractor beams to secure the ships and aid their allies. However, Vedij and the privateers refused to surrender, instead attempting to disable the Interdictor to create an escape route. Utilizing the Far Orbit's tractor beams, they seized some of the Imperial TIEs, employing them as shields against the Skiprays as the Far Orbit attempted to close in on the Claw. The Imperial forces then switched from ion cannons to standard laser batteries and began targeting the frigate's shield module and engines, while the remaining TIEs were deployed to attack the main and secondary weapons. Nonetheless, the Far Orbit reached the Claw and managed to destroy one of the Interdictor's gravity wells during the engagement with the cruiser. Once again free to jump, the privateers fled the system, escaping Kenit's forces.
Return to Brentaal IV
After escaping Kenit's forces, Vedij directed the Far Orbit to retreat to the nearest shadowport outside the Ringali Shell, as the frigate had sustained substantial damage. Several weeks later, after the Far Orbit had been fully repaired, the privateers returned to the Ringali Shell. Upon their return, Vedij, who had remained secluded for much of the recovery period, instructed the Far Orbit's first officer to assemble a landing party for a special mission. This mission involved acquiring a datadisc from an Alliance contact on Brentaal IV in Kesk Cityblock's Pathline Tapcafe. Using a hyperspace-capable ship that the Far Orbit had captured during its campaign, the landing party jumped to Brentaal IV, leaving the Far Orbit to proceed to a nearby empty system. There, the frigate's crew reduced most systems to minimal power in order to avoid detection.
Meanwhile, the landing party managed to land on the planet and proceeded to the Pathline Tapcafe. Despite the absence of the Devaronian contact Tynial, who had been arrested, the group managed to locate another contact disguised as a waiter. He directed the landing party to the abandoned night club Jovvitz, where he met the privateers and provided them with the datadisc. However, ISB agents discovered them there and subsequently ambushed the group of crew from the Far Orbit. Initially pursued by the ISB agents in speeders, the privateers managed to return to their vessel after evading the Imperial forces.
The group reached orbit before Imperial command closed down Kesk Cityblock spaceports and ordered all ships originating there to return. Upon refusing to comply, the landing party's ship was attacked by six TIE fighters, forcing the privateers to activate their distress beacon to inform the Far Orbit of their situation. Upon receiving the transmission, Vedij had the Far Orbit make a micro-jump to Brentaal IV, with weapons prepared and shields activated. Upon arrival, Vedij used a wide beam transmission to inform the public of the Far Orbit's shift to privateering due to the Empire's actions, and to convey his honorable intentions.
Because this announcement was broadcast on Brentaalian news channels and reached the public, all Imperial forces near the planet were ordered to eliminate the Far Orbit, causing the six TIEs to disengage from the landing party's vessel and head for the EF76. Additionally, a pair of Hunter-Killer probots also attempted to attack the Far Orbit, and on their way past the privateer landing ship, they attempted to capture it, though the fleeing vessel easily evaded them. With the landing party having successfully escaped in its vessel, and due to the overwhelming number of Imperials converging on them, the Far Orbit departed the Brentaal system. The datadisc was found to contain the precise route of the Imperial Taxation Bureau's Emperor's Will, a Star Galleon-class frigate supposedly carrying 400 million credits' worth of metals, minerals, and spice. The datadisc indicated that the frigate was scheduled to arrive at Esseles in three days and would be out of communication for the duration of its hyperspace journey, which originated in the Arkanis sector and terminated near Esseles. The datadisc also revealed that the frigate had an escort, a Nebulon-B known as the Zaff Jendinpurg.
Hunting the Emperor's Will
The chase
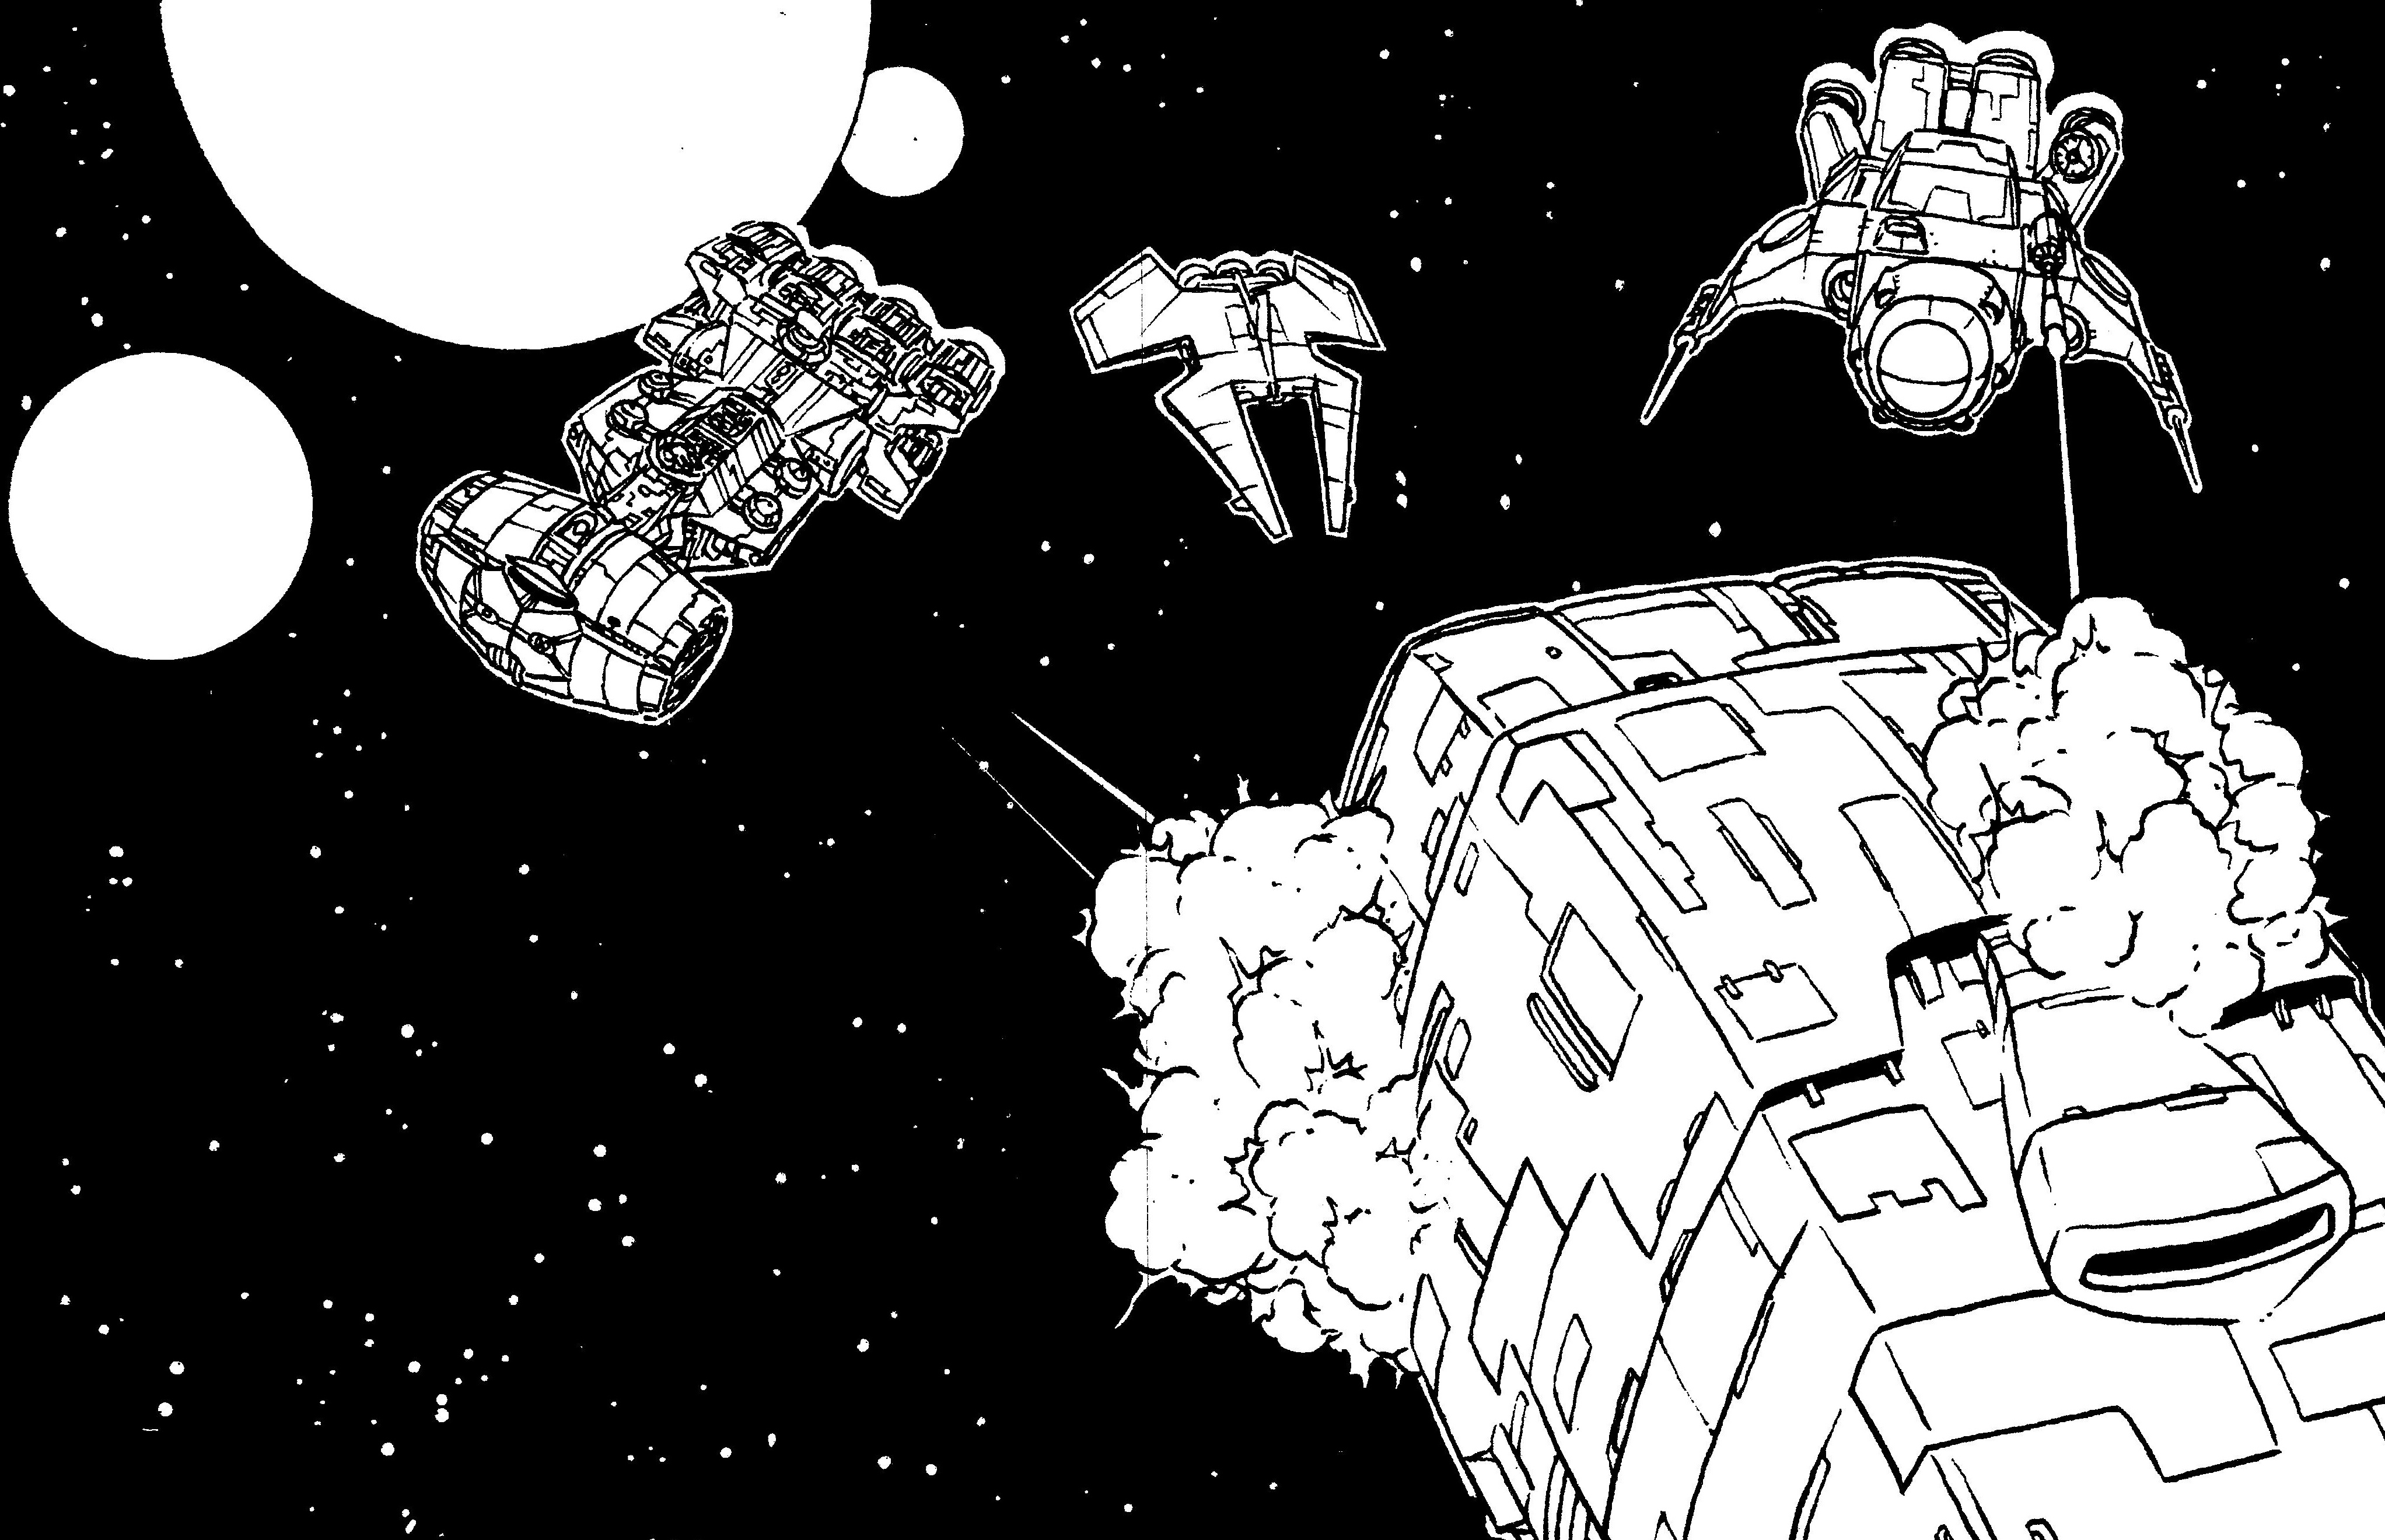
Knowing the route of the Emperor's Will, Vedij directed the Far Orbit to proceed to the edges of the Ringali Nebula, where they intended to pull the Star Galleon and its escort out of hyperspace by using asteroids to obstruct their path. However, twenty-nine seconds before they were scheduled to revert to realspace, the frigate was pulled out prematurely. The unexpected jolt resulting from the early reversion caused seventeen minor injuries and three serious ones. One of the more seriously injured was Vedij, who was not secured like most of the crew and was thrown against a bulkhead. Additionally, a power generator was destroyed, some sensors were disabled, and the main hyperdrive generator was damaged, although the secondary generator remained operational. The cause of the early reversion was identified as the gravity wells of the Claw, the same Interdictor that Kenit had employed during his attempt to capture the frigate. The Claw was one of numerous Imperial Interdictors dispatched to the Ringali Nebula to intercept the privateers as they pursued the Star Galleon.
The privateers attempted to outpace the Claw to the nebula, which was two minutes away at maximum speed, where they could evade it before jumping to hyperspace. As they were facing the Ringali Nebula and the Interdictor was facing away from it, the Far Orbit gained a significant head start and passed beneath the Claw, exchanging fire with the Interdictor throughout the maneuver. The Nebulon-B reached the nebula before the Imperial ship, partly because the Claw's gravity wells were draining its energy at the start of the race. Upon reaching the sensor-dampening clouds of the nebula, the Far Orbit evaded the Claw and soon departed using its backup hyperdrive.
The crew mended the primary hyperdrive and attempted once more to intercept the Emperor's Will in the vicinity of the Ringali Nebula. An hour passed before they located a sufficiently massive asteroid to disrupt the Emperor's Will's hyperspace travel, after which the crew maneuvered it, along with additional asteroids, to create a mass blockade. The Far Orbit lay in wait for the arrival of the treasure vessel and its escort, which materialized just slightly behind schedule. The asteroids forced both spacecraft out of hyperspace, causing the Zaff Jendinpurg to sustain damage and veer uncontrollably. The Far Orbit focused its assault on the escort frigate. The privateers, capitalizing on the complete surprise of the Imperial vessels, swiftly disabled the Zaff Jendinpurg. However, the frigate managed to deploy some of its fighter complement and return cannon fire.
Securing the frigate
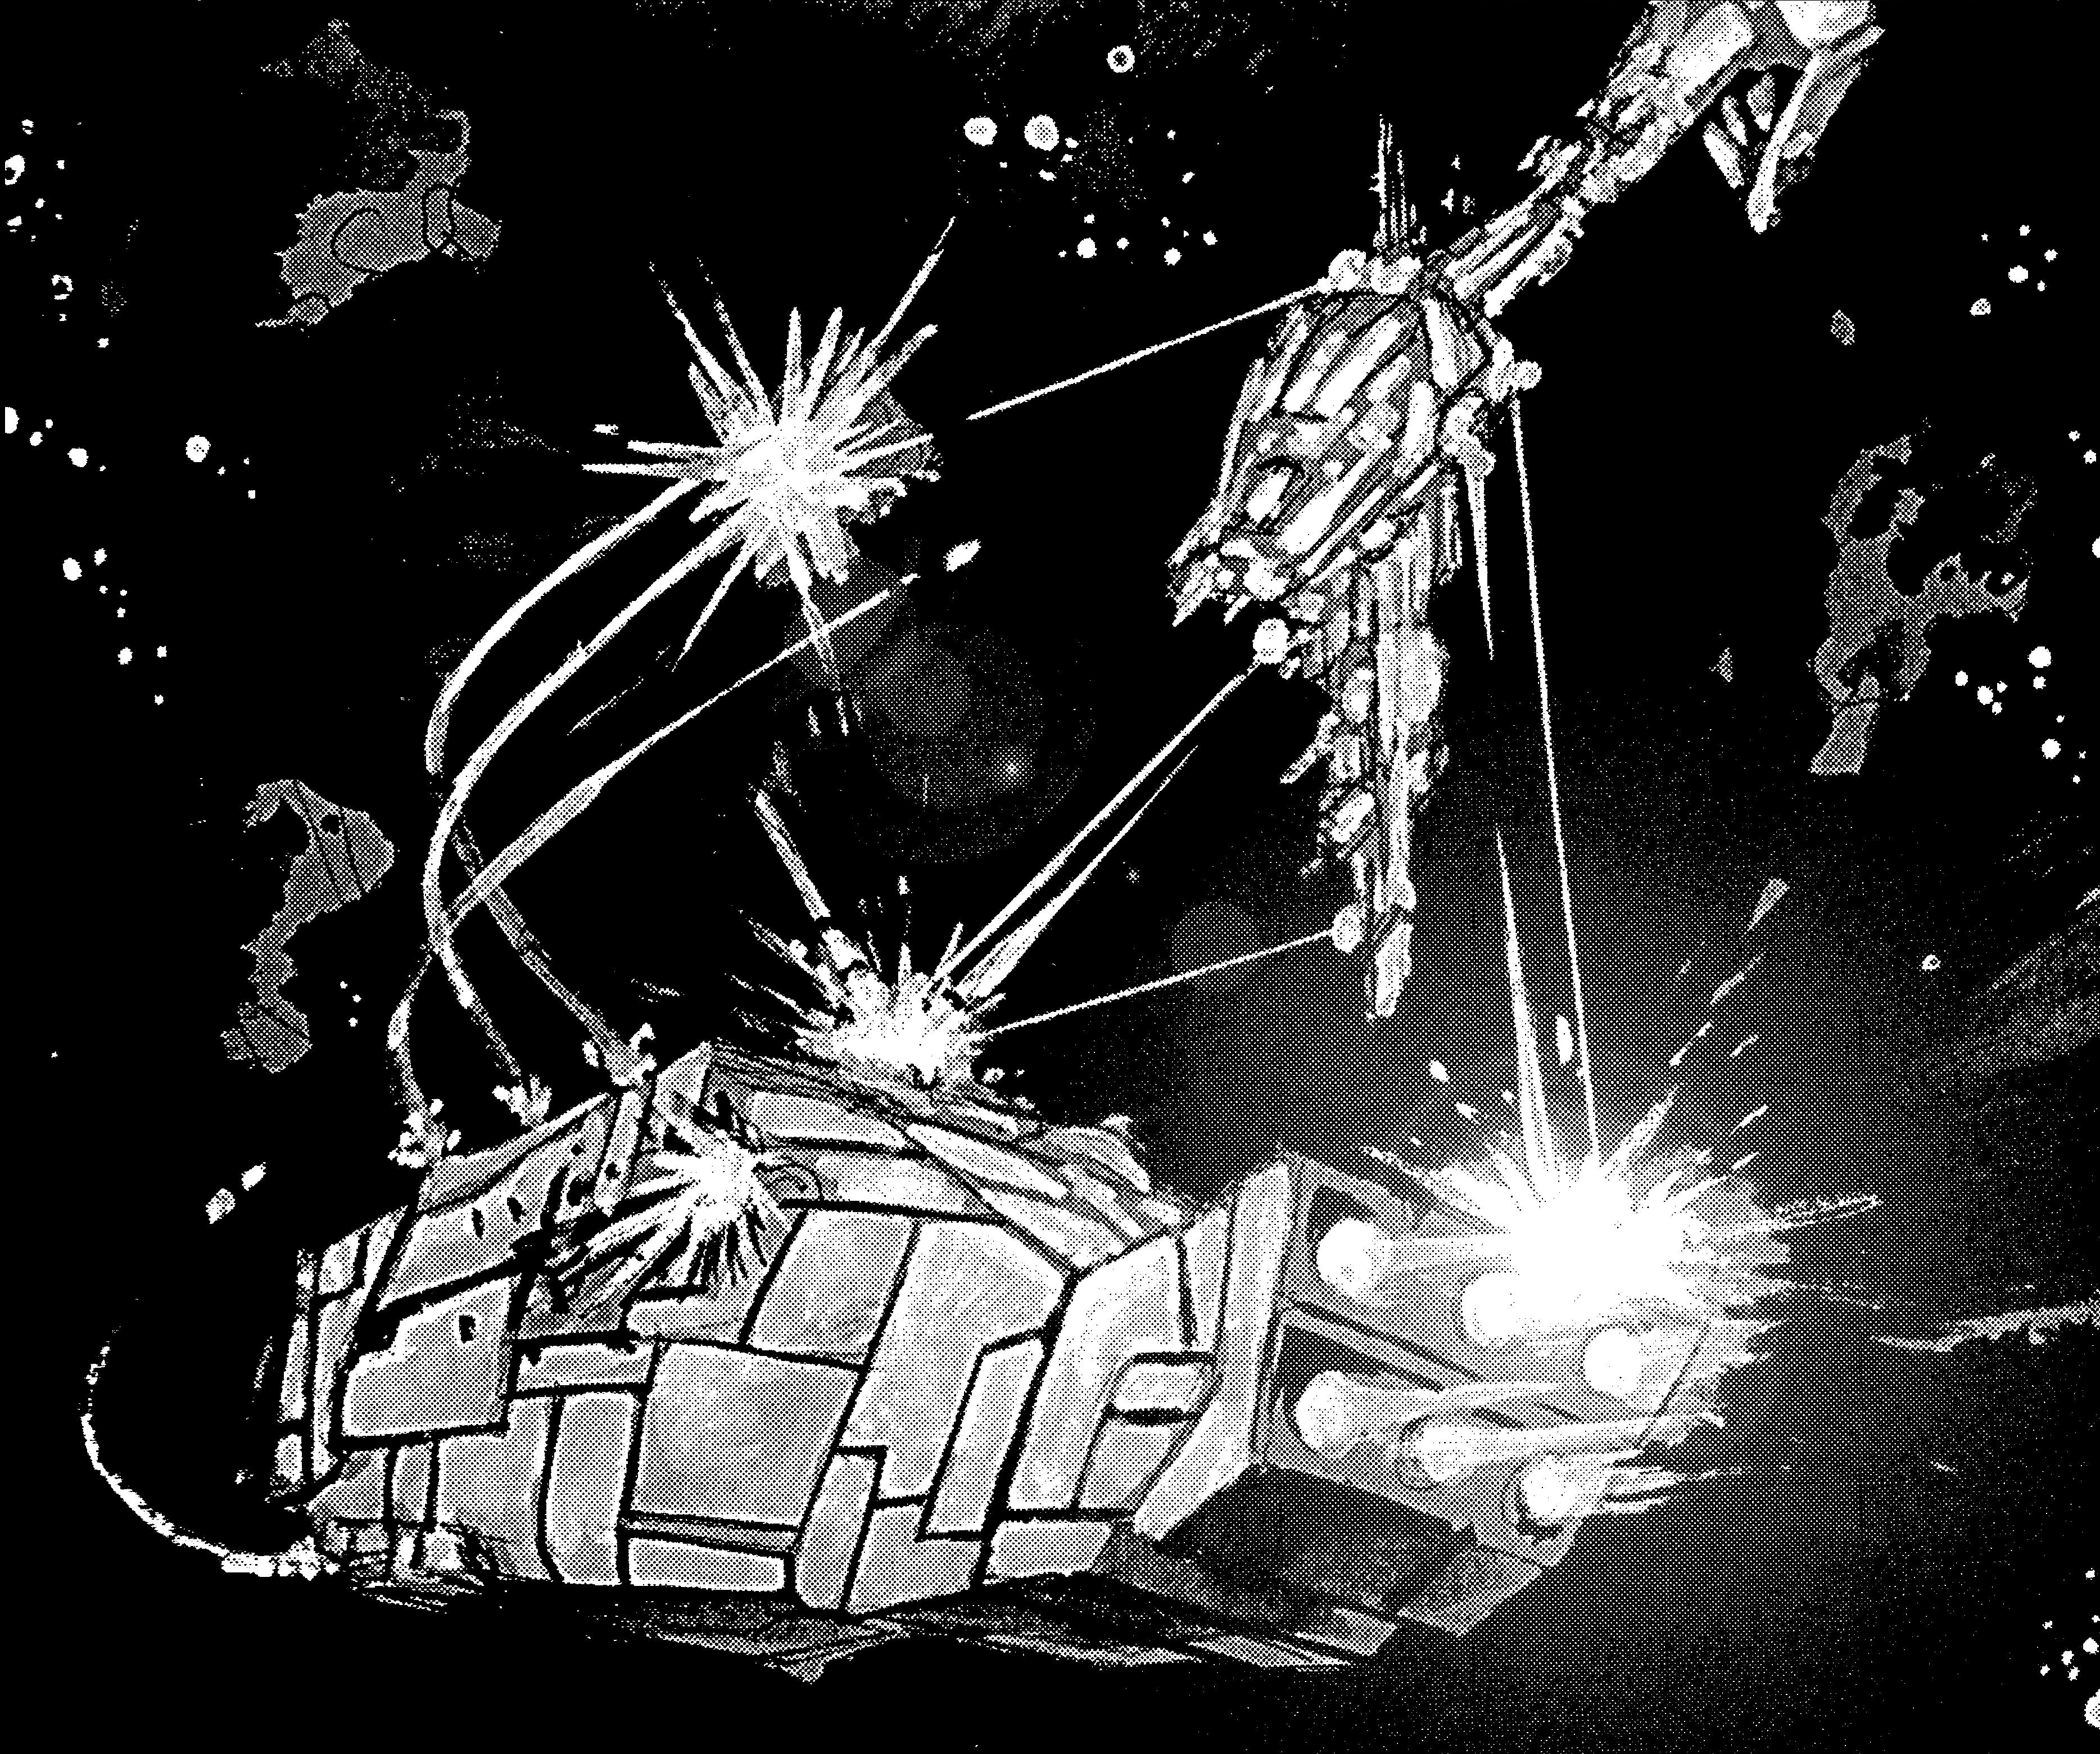
Initially, the Emperor's Will entered the fray by launching a volley of concussion missiles at the privateers. Soon after, the Star Galleon-class frigate diverted its course, attempting to escape into hyperspace. This maneuver allowed the Far Orbit to target the Emperor's Will's unprotected rear. The resulting damage was sufficient to prevent the Imperial frigate from executing the jump, compelling it to reengage the Far Orbit. The captain attempted to attack the Far Orbit's flank, but recognized the hopelessness of the Imperial situation. Consequently, after employing explosive charges to cleave the hull, the captain ejected the Emperor's Will's cargo pod, which housed the treasure and was equipped with its own hyperdrive, in an attempt to deny it to the privateers. Nevertheless, the Far Orbit's crew successfully seized the pod, thereby securing the treasure.
The cargo hold was filled with a diverse collection of gems, including Bothan Glitterstones, chrysopazs, crystalline vertices, diamonds, emeralds, Gallinorean rainbow gems, a Jasse heart, kuggerags, a nova crystal, Quella gems, sapphires, and Sasho gems. A single Corusca gem was also present. Furthermore, the pod contained a Jorallan opal necklace and two matching sets of Lalmy'ashian pearl necklaces and earrings. In terms of spices, the cargo included quantities of andris, carsunum, and ryll kor. The pod also held valuable artworks plundered from various alien civilizations. Regarding metals, there were 1,836 bars of gold, 1,296 bars of mythra, and 936 bars of platinum. Additionally, the pod contained several hundred crates of both gold and platinum coins, each bearing the Imperial seal and weighing a total of 10 tons. However, the Emperor's Will's cargo at the time was considerably less than the frigate's maximum capacity of 100,000 tons.
Without Vedij or his crew's knowledge, the Corusca gem among the captured treasure possessed unique tracking capabilities known to Kenit, whose brother was a gemologist. Kenit believed that, while the Far Orbit and its captain might have evaded him for another six months, the Corusca gem had sealed their destiny. However, before Kenit could exploit the gem's ability against the frigate, he was summoned to his ship's holopod, ostensibly by Pestage. It was Emperor Palpatine himself, not Pestage, who contacted Kenit. The Sith Lord killed the Imperial captain from across the galaxy using the Force. Kenit's secret about tracking the Far Orbit perished with him.
Aftermath
Due to the Far Orbit's swift strikes and the resulting widespread panic among local governments, the Imperial Navy, ISB, and the Commerce Branch established a joint committee tasked with tracking down the frigate. A year later, this committee remained active due to the significant increase in Rebel privateering that followed.
According to Alliance Intelligence, the Far Orbit's raids squandered the equivalent of a year's worth of production from an entire standard sector for the Galactic Empire in the effort to locate and recapture the vessel. The Alliance primarily benefited from the strain this placed on the Imperial budget, rather than from the 120,000 tons of material diverted to their cause. Furthermore, the Far Orbit's actions divided the Imperial Navy's forces in the Darpa and Bormea sectors, incited panic among numerous local governors, and infuriated Emperor Palpatine himself. The ship's exploits inspired many others to join the Rebellion against the Empire.
Commanders and personnel
Captains

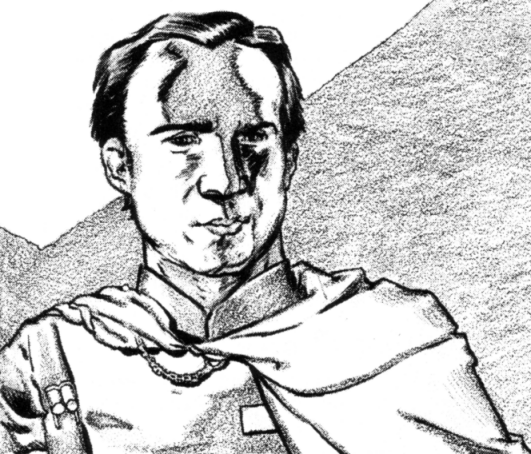
Vocis Kenit
Kenit, the Far Orbit's initial captain, received command of the vessel as a reward for his unwavering service to the Empire. As an ambitious officer within the Imperial Navy, Kenit consistently reported the political shortcomings of his superiors and rivals, as well as their perceived lack of adherence to Imperial ideologies. This, coupled with his effective service, resulted in a series of promotions. However, many of these promotions also served to isolate Kenit from his political adversaries, with his appointment as captain of the Far Orbit being one such instance. As the frigate's commander, Kenit was authoritarian, employing harsh and brutal methods to maintain discipline. His ship's treatment of prisoners was even more deplorable. Due to his personality and his pursuit of glory at the expense of others, many of the Far Orbit's officers, including Commander Vedij, held him in disdain. Kenit's treatment of the crew ultimately led to his downfall, as it was a major factor contributing to the mutiny.
Following the mutiny, Kenit was imprisoned and subsequently court-martialed for failing to maintain control of the Far Orbit. He received a death sentence, but it was commuted on the condition that he hunt down his former ship. Success would exonerate him, while failure would result in his execution. Kenit employed numerous schemes to capture the Far Orbit, including manipulating the privateers into attacking the Solar Terrors and nearly trapping them near Brentaal. However, his persistent failure to capture the frigate prompted Palpatine to execute him.
Dhas Fenoep Vedij
Born into a prosperous family with connections to the Imperial Navy, Vedij was assigned to the Far Orbit, where he served as Kenit's second-in-command. The commander harbored a strong dislike for Kenit, believing that his captaincy was solely due to his skill in political maneuvering and his overbearing command style. Kenit's inadequate leadership, coupled with the deaths of both his parents and his brother, motivated Vedij to seize the Nebulon-B from his superior officer through a mutiny. Vedij was an exceptional leader and strategist in combat scenarios and was completely devoted to the Far Orbit after the mutiny. He was reserved, and due to his wisdom and cold demeanor, Vedij had few close companions.
Following the mutiny, Vedij led the mutineers in becoming privateers for the Alliance. He remained their captain throughout the Far Orbit's numerous missions and attempts to evade Kenit and his forces. During their pursuit of the Emperor's Will, he sustained injuries when the Claw extracted them from hyperspace, but he recovered sufficiently to command his frigate during the capture of the Emperor's Will's cargo pod.
Personnel
As an Imperial vessel, the Far Orbit's crew consisted of individuals conscripted into Imperial service and those who had voluntarily enlisted in the Navy. After the mutiny, when the Far Orbit recruited additional crew members, the personnel became a mixture of mutineers, pirates, and other undesirable elements. With the majority of the mutineers being Human and the new crew members acquired at StarForge Station being aliens, tensions arose between the two factions, leading to a series of conflicts.
Command structure
The Far Orbit's crew was organized into distinct sections, each responsible for specific areas of the ship. Each section was led by an officer and maintained its primary operations center on the main bridge. Following the mutiny, Vedij largely preserved the command structure established by the Imperial Far Orbit.
Operations
The Operations Section was the largest division aboard the Far Orbit. It oversaw the overall functioning of the ship and ensured effective coordination among all other sections. Several other sections reported directly to the Operations Section, and the Ops Officer served as the frigate's second-in-command. Prior to the mutiny, Vedij held the position of Ops Officer.
Living Quarters
The Quarters section was tasked with maintaining the living areas of the Far Orbit, including the crew quarters. While enlisted personnel were responsible for cleaning their own quarters, a small staff of droids and personnel cleaned the officers' areas and public spaces. The Quarters Section also managed the main galley and the autochef, making it a relatively minor administrative post aboard the frigate. Typically, a junior lieutenant oversaw the Quarters Section and reported to the Operations Section on most Imperial ships. The Engineering Quarters Section was located beneath the Quarters Section and was managed by the same officer.
Command
The Command Section held overall responsibility for the entire frigate. It was linked to Link Command, the Far Orbit's central processing system. All other sections of the frigate reported to the Command Section, as the Command Section Chief was the captain of the Far Orbit.
Auxiliary Engineering
The Auxiliary Engineering section was responsible for maintaining power and performing maintenance and repairs on the ship. It also managed emergency power in the event that the command module was isolated from the propulsion module at the rear of the frigate. Auxiliary Engineering was commonly referred to as the Power section to distinguish it from the Primary Engineering section. The commanding officer of Auxiliary Engineering was known as the Power Chief and reported to both Engineering and the Operations Section.
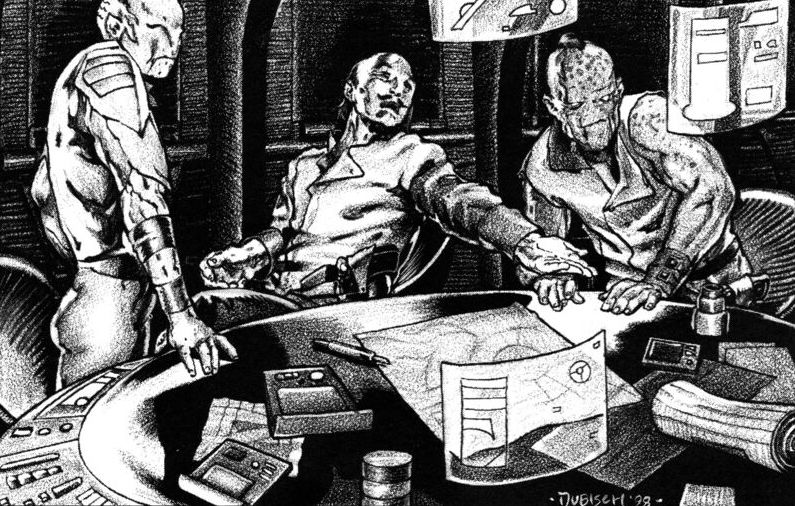
Life Support Systems
The Life Support section, often referred to as Life, was one of the most critical sections of the Far Orbit. It maintained the atmospheric tanks, air scrubbers, water system, gravity generators, and all temperature controls. The commanding officer in Life Support was known as the Chief of Life Support and collaborated with Auxiliary Engineering while also reporting to Primary Engineering.
Sensors and Communications
The Sensors and Communications section, also known as SenCom, was divided into three subsections. The main sensors area was located near the ventral end of the command module, while the primary and secondary communication areas were situated at the top of the same module. The sensors and communications subsections were separated to minimize interference, but they were grouped within the same command section due to their similar nature, as SenCom acted as the Far Orbit's sensory apparatus. The SenCom Chief led Sensors and Communications and had two subordinate experts: the Sensor Officer and the Communications Officer. Both sensors and communications had dedicated stations on the bridge. Reporting directly to the captain, the SenCom Chief primarily held an administrative role.
Armaments and Security
The Armaments and Security section was responsible for all aspects of the Far Orbit's weaponry and shielding. The frigate's staff of gunners and shield operators was relatively small. Prior to the mutiny on the Nebulon-B, security was managed by the Armaments Officer, who controlled the Imperial Navy troopers. Before the mutineers seized control, the stormtroopers aboard the Far Orbit had their own internal administration and reported more readily to Kenit and the CompForce Observer than to the Armaments Officer. After the Imperial troopers were removed from the ship during the mutiny, boarders assumed their roles.
Flight and Vehicle Operations
The Flight and Vehicle Operations Section, also known as the FVO or Boom section, was responsible for maintaining and operating all of the Far Orbit's fighters, shuttles, and ground vehicles. Immediately following the mutiny, due to the loss of the TIE complement, the escape pods, and most of the shuttles, this section's staff was quite small. Furthermore, the frigate was never equipped with ground vehicles. The FVO section was under the command of the Operations Section.
Deflector Shields
The Deflector Shields section operated from a small armored module located near the engineering section. It was only active when the Far Orbit was in or preparing for combat. In a combat situation, the section was a high-priority target due to its critical importance. Most repairs, if simple enough, could be performed by the Deflector Shields section's staff. The administration for the Deflector Shields section was located at the top of the propulsion module, and the Deflector Chief reported to the Armaments Officer from the Armaments and Security Section.
Primary Engineering
The Primary Engineering section was responsible for the operation of the ship's engines and for supplying the ship with power. Additionally, the section maintained the frigate's hardware and other technical systems. The Chief Engineering Officer oversaw the section and had several subordinate subsections under his or her authority. The Primary Engineering section was based in the main engineering area within the propulsion module.
Propulsion Systems
The Propulsion Systems section housed all the technicians necessary to operate the engines and much of the other equipment in the propulsion module.
Production Notes
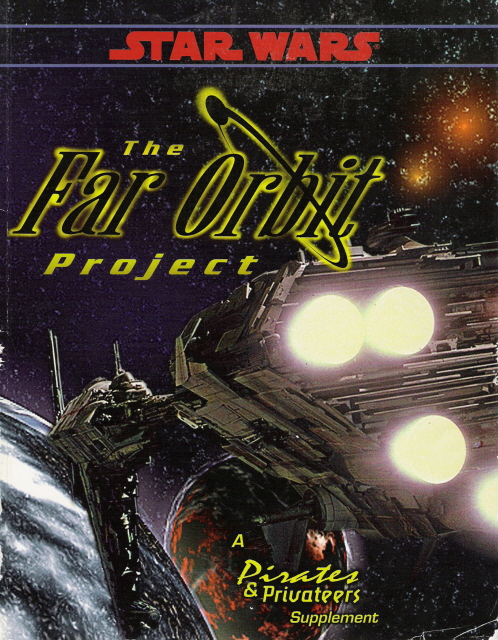
title: The Far Orbit
The Far Orbit made its debut in the first edition of The Rebel Alliance Sourcebook, which West End Games published in 1990 as part of Star Wars: The Roleplaying Game. The campaign book The Far Orbit Project, also from West End Games, released in 1998, centered around this ship. This book offered a comprehensive overview of the Far Orbit, including detailed deck plans for certain levels. The Nebulon-B frigate played a role in all eight of The Far Orbit Project's adventures: Preparing for War, The Hijacking of Shipment 1037, The Capture of Coh Veshiv, The Rival, The Trap, Raid on Brentaal, Hunter/Hunted, and The Grand Prize. The book and its scenarios do not explicitly state the final fate of the Far Orbit, leaving it ambiguous whether the Imperials ultimately captured the privateers. The Far Orbit Project structures the Far Orbit's campaign into three distinct phases. The initial phase, "Predator in the Fold," presents the easiest challenges for the players, as the Empire remains oblivious to their actions and does not actively pursue the frigate. However, this period is finite, as the Empire becomes aware of their activities soon after the privateers seize Shipment 1037—or an alternative large convoy selected by the gamemaster. The capture of Advisor Veshiv marks the end of Phase 1, fully alerting Imperial forces to the Far Orbit and its operations. Alternative events can trigger the Empire's awareness in place of Veshiv's capture, but this would then prevent the capture from occurring.
Phase 2, titled "Gathering Storm" in the book, sees local security forces intensifying their efforts to apprehend the privateers, accompanied by Imperial propaganda aimed at discrediting them as Imperial forces hunt the frigate. This phase culminates when the Far Orbit suffers defeat at the hands of the Imperials, specifically during the events of The Trap in the adventure scenarios. The concluding phase, "Stormbreak," commences with the Far Orbit's return following its defeat by the Imperials. Despite initially dismissing the ship as a threat, Imperial forces resume their pursuit of the Far Orbit with renewed vigor.
The final adventure scenario is not necessarily the end of the Far Orbit's campaign, and the gamemaster retains the option to continue the privateers' raids if desired. Furthermore, they can choose to bring about the Far Orbit's destruction and Vedij's demise if they deem it appropriate. The Far Orbit Project provides suggestions for gamemasters who wish to extend the campaign beyond the scope of the adventure scenarios.
Alternative scenario paths
Given that The Far Orbit Project serves as a supplement for a roleplaying game, players possess the freedom to explore numerous paths within the scenarios. The choices presented in the main body of this article were selected to maximize the Far Orbit's accomplishments and profits from raids while minimizing potential harm to future operations. Below are some alternative paths players can take, along with their respective consequences:
Preparing for War
Preparing for War initiates The Far Orbit Project. In this scenario, Vedij and the frigate seek a crew at StarForge Station. While searching for the station within the nebula, the Far Orbit might discover its location prior to encountering the Y-wings. However, this outcome is less probable than the scenario where the fighters locate them first, and therefore this is not the chosen path. Regarding the tests used to evaluate potential crew members, this article assumes that all tests are administered as part of the selection process. Furthermore, it is assumed that all listed candidates successfully pass the tests or perform adequately. This assumption is based on the participation of individuals like Gruk and Kanarak in situations arising from Human–alien tensions, which this article considers canon.
The Hijacking of Shipment 1037
The Hijacking of Shipment 1037 depicts the Far Orbit's raid on the convoy, presenting various possible paths. The frigate's crew could raid Transport A-175 instead of escorting it, revealing during the potential raid that A-175 is en route to the convoy. However, as the adventure scenario strongly suggests that the Far Orbit escort A-175 to the convoy rather than raid it, this article follows that recommendation. Should the players fail to consider raiding the convoy after inspecting A-175, Captain Vedij, primarily controlled by the gamemaster, will propose the idea. If the Alliance withholds assistance from the privateers during the battle, the Far Orbit can target the New Star for capture, or the players can attempt to seize as many transports as possible. In the absence of Alliance support, the players may opt to forgo the convoy raid altogether due to its inherent risks.
If the Far Orbit receives Alliance assistance and the players fail to trigger the trap at the opportune moment, Vedij will do so by default. In doing so, he turns the Far Orbit and attempts to destroy the New Star. Success in capturing the New Star undamaged, with its crew intact, earns the privateers 3 million credits from the Alliance, while capturing a seriously damaged Imperial frigate yields 2 million credits. Destroying the New Star during the battle results in a reward of only 1 million credits, whereas the Far Orbit receives nothing if it escapes the trap, regardless of damage sustained. This article assumes that the Far Orbit executed the mission in the most optimal manner.
The Capture of Coh Veshiv
The third adventure scenario, The Capture of Coh Veshiv, chronicles the Far Orbit's capture of the Imperial Advisor. This scenario offers fewer alternative paths compared to others. While Vedij proposes Veshiv's capture, the method of execution rests entirely with the players. The scenario suggests capturing him upon departure as the most probable course of action and outlines its implementation. Consequently, this article assumes that this course of action is the most canon. Should the players fail to provide the correct identification codes to Imperial authorities on Esseles, Vedij will intervene to rescue them. Two distinct scenarios can unfold during the advisor's capture: either the privateers wait until the Far Orbit enters hyperspace before capturing Veshiv, or they proceed without delay. The latter scenario allows the crew of the shuttle Myrenia to attempt an escape from the cargo bay and contact the Empire Forever or Platform 8127/121 for assistance. As the first option prevents these actions, it is deemed the most canon.
This scenario also presents three scenario hooks that precede the events on Esseles. In the passenger liner scenario, multiple paths are possible. One involves the Far Orbit simply repelling the pirates. This option can be expanded into the path that this article takes, in which the Far Orbit seemingly defeats the pirates so that Vedij can offer them jobs on board the frigate. Alternatively, the pirates and the Far Orbit could collaborate to seize the liner and its cargo, or the players could eliminate the pirates to claim all the rewards. However, as the liner's passengers would likely be ransomed, this would compromise the Far Orbit's cover story as an Imperial frigate upon their release. Therefore, the option to seize the passenger liner is not pursued. The remaining two scenario hooks offer no alternative paths, although the training exercise advises against attacking the Imperials to avoid incurring the wrath of the entire fleet.
The Rival
The Rival, the fourth scenario, pits the privateers against Beeli and his pirate gang. Here too, there are different paths that can be followed, and these occur during the final battle with the pirates. There are three different options that can occur. One is in which the Far Orbit manages to track down the Solar Terrors to where they have a deep space rendezvous with Kenit and the Stalwart. However, the smartest thing for the privateers to do here is flee, as they are outnumbered. Another possibility is that the Far Orbit catches up to the Solar Terrors while the pirates are fleeing from a Sector Ranger patrol and three IPV-1 System Patrol Craft. This puts the Imperials momentarily on the side of the privateers, as they both try to take down the pirates. The last scenario is the one where the privateering frigate catches Beeli in the act of raiding. Since the last scenario is the most plausible, this article assumes that case occurs.
Given Beeli's terminal illness and desire to die in battle, it is highly probable that all of his ships will be destroyed, as he will ram them into the Far Orbit if necessary. Thus, this article presumes that Beeli died and that all of his starships were destroyed in the battle. The gamemaster can choose to use the pirates, instead of SPF 14897, as the bait of the trap in the scenario. However, as this cuts out the majority of the first half of the fifth adventure scenario and also removes the boarding action, it is assumed that this option is not taken.
The Trap
The Trap, the fifth adventure scenario in The Far Orbit Project, involves Kenit's attempt to ensnare the privateers using SPF 14897 as bait. Once again, there are many paths that can be chosen. In response to the stormtroopers in the hold of the Mark III, the players can either send in more troops to help get the boarders out of SPF 14897, or disengage from the freighter entirely, leaving the boarders to their doom. Although the first option gets more crew killed, it helps maintain morale among the frigate's crew; hence, this is the option that this article chooses. Though the second possibility prevents any counter-boarding, it kills the crew's morale.
The battle with the fleet allows many paths to occur. One such one is where Vedij surrenders himself to Kenit in exchange for letting the privateers go. However, the Imperial captain plans to double-cross his former second-in-command and kill the crew as soon as he has Vedij. While their captain is shuttled over to the Stalwart, the crew of the Far Orbit devises a new plan and escapes from the present Imperial forces before vowing to return to free their captain. The article does not use this option as the canon one because it does not quite flow with the later adventures, since Vedij is left in Imperial hands. Another path involves the Alliance sending a small fleet to rescue Vedij and his crew, composed of twenty-four X-wing starfighters and ten CR90 corvettes. Although they distract the Imperials long enough for the frigate to escape, the cost of the operation means that the Alliance will no longer provide aid.
Another possibility is that the Far Orbit battles it out with the Imperials and, in doing so, destroys or drives off all the opposing battleships. This, however, is unlikely due to the odds stacked against them and results in the Far Orbit being heavily damaged. However, the privateers can scrounge for spare parts from the destroyed Imperial vessels. This option draws lots of Imperial attention because of the Far Orbit's victory, and a whole fleet, including some Star Destroyers, is sent after the privateers. This causes StarForge Station to bar them from restocking there in order to avoid detection by the Imperials. The article does not choose either of the latter two possibilities because the first prevents the Alliance from helping them again, while the second is highly unlikely and sends more Imperials after them.
There is one more possibility: the Far Orbit disables the Claw to escape. This is the option that this article uses, as it does not harm any of the Far Orbit's later adventures. There is an extension to the path where the frigate takes out the Interdictor's gravity wells, involving the Nebulon-B using its tractor beams to maneuver the enemy fighters into a collision with the weapons of the Claw, and then using the crippled ship as a shield against enemy fire. However, this part of the option is avoided because it would seriously damage or destroy the Claw, which appears later in canon in the 1999 video game Star Wars: X-Wing Alliance.
Raid on Brentaal
Raid on Brentaal, the sixth scenario, presents the fewest deviations compared to the other adventure ideas. The ship used by the privateer landing party to travel from the Far Orbit to Brentaal IV can be a shuttle, but the scenario suggests using a freighter. The gamemaster can modify the scenario into a privateer-only mission, where the crew researches the planet and establishes a small base of operations. They then acquire the information on the datadisc through a slicer and flee the world. However, as the scenario offers a more detailed account of the Alliance and the privateering mission, this article assumes that that path is taken.
Hunter/Hunted
The seventh adventure idea, Hunter/Hunted, briefly describes the Far Orbit's encounter with the Claw in the Ringali Nebula. If the Claw was destroyed in its earlier encounter near Brentaal IV with the privateers, a different Interdictor pulls them out instead. As the Claw was featured in X-Wing Alliance, this is not considered canon. There are two main paths that can be taken. The first involves the one that this article selects, which is where the Far Orbit flees to the nebula. Once there, the frigate can escape to hyperspace or try to board the Interdictor via a shuttle. The boarders seize the Imperial vessel's bridge before using stun gas to take out the crew, while the stormtroopers are also dealt with. This would leave the Claw under the privateers' control and would be beneficial for future raids.
However, as the Claw is in Imperial possession in X-Wing Alliance, this path is not considered canon. A totally different option is to assault the Claw right after the privateers are pulled from hyperspace. Because they have a superior crew, the Far Orbit manages to neutralize the threat of the Interdictor, and it escapes before Imperial reinforcements arrive. However, as it is very unlikely that the Nebulon-B would be able to pull this off, this article does not utilize this path.
The Grand Prize
The final scenario, The Grand Prize, centers on the Far Orbit's attempt to capture the Emperor's Will. In this scenario, as the privateers do not want to destroy the treasure in the cargo pod by blowing away the Star Galleon, the Emperor's Will must be neutralized. Options include precision fire against the engines of the Imperial ship, ion cannon fire against the main hull if the Far Orbit has acquired those, or even attaching the Far Orbit to the Imperial frigate with its tractor beams to prevent it from escaping. It is also possible for the players to deliver the ion charge via starfighters if they have acquired them in their prior raids. The Emperor's Will can also be boarded if the players wish to do so, but the stormtroopers will resist the intrusion; The Far Orbit Project itself states that if the gamemaster wishes to kill Vedij off, as this is the last adventure scenario, the boarding would be an ideal place to do so, as long as the death is heroic.
However, it doesn't matter much how the Emperor's Will is neutralized, as it still releases its cargo pod. As a result, this article does not choose one of the options as the best one, and the canon one, though the boarding possibility with Vedij dying is not considered one of the better options. Once the cargo pod is launched, the gamemaster can choose to have Imperial vessels arrive on the scene and delay the privateers long enough for the pod to make an emergency jump to hyperspace. The Far Orbit must then elude an Imperial task force that is dispatched in search of the Emperor's Will, which is led by a Star Destroyer, as the privateers try to find the pod and then disable its tracking device so the Imperial forces cannot track it. The frigate can then seize the pod with its tractor beams before attempting to open it. However, this article presumes that the gamemasters is not so mean as to send Imperial ships to prevent the privateers from seizing the loot.
When the players try to open the cargo pod, it can be booby-trapped with fragmentation explosives, highly charged electrical locks, or antipersonnel blasters. For each of the players' failure to open the pod, a boarder is killed. Gamemasters can change the contents of the cargo pod and, subsequently, their total value to align with the scale of the Far Orbit's campaign and the players' preferences. They can even choose to add unique items to the pod, such as a Jedi holocron, to spice up the loot.
Scenario Hooks
The Far Orbit Project also provides a collection of scenario hooks, which are brief adventure ideas that gamemasters can expand upon. Some of the hooks that do not conflict with the canonicity of the adventure ideas have been included in this article. These include The Price of Success, Tracking Devices, and TIE Prototypes. However, three Scenario Hooks—Smash the Scourge, Who Is The More Foolish?, and Raid on 2LC/Blue—are not considered canon because they contradict events in The Capture of Coh Veshiv.
Raid on 2LC/Blue involves the players targeting the Imperial Bavos-I heavy-duty military space platform Station 2LC/Blue. They can either raid its supplies that are delivered by small freighters, or attack the station itself with a team of boarders disguised as Imperial troops or staff in order to steal the facility's starfighters and supplies. Who Is The More Foolish? has the privateers conducting raids against Station 1B6/Green, a Bavos-II heavy-duty military space platform, so that the Victory I-class Star Destroyer Scourge would be drawn away from the world of Ralltiir, allowing the Alliance forces there to slip more blockade runners through.
Smash the Scourge involves the Far Orbit committing small raids against 1B6/Green until the Scourge is actively chasing the privateers. Once this has happened, Vedij lures the Star Destroyer to a prearranged ambush site, where an Alliance task force tries to capture the Scourge. However, all three of these scenario hooks have the Far Orbit giving up its cover as an Imperial escort frigate, which directly contradicts The Capture of Veshiv, in which the Far Orbit loses its cover. Another scenario hook that is not considered canon is Never Raid An XTS Freighter, in which Vedij and the privateers deal with the consequences of seizing a ship owned by Xizor Transport Systems. Some of these consequences include Puullo reneging on his promises to the Far Orbit, StarForge Station not allowing them to dock there, and teams of mercenaries and thugs pursuing the Nebulon-B.