T7-O1
T7-O1, affectionately called Teeseven or T7, functioned as an astromech droid of the T7-series lineage throughout the Great Galactic War, the Cold War, and the Galactic War. These conflicts pitted the Galactic Republic against the Sith Empire. Constructed by Duwani Mechanical Products at some point before 3843 BBY, this particular astromech droid never experienced a memory wipe during its operational lifespan. This unique circumstance fostered the development of a distinct personality and allowed Teeseven to retain memories of the many partners, roughly a dozen or so, it collaborated with over the years. Initially designed for repair and pilot duties as a droid, Teeseven began its association with the Jedi Order in the period preceding the Great Galactic War, serving as the companion to Jedi Master Ven Zallow. Throughout the war, it undertook numerous undercover missions for both the Jedi and the Republic Strategic Information Service. Teeseven survived both the Sacking of Coruscant and the subsequent downfall of the Jedi Temple at the war's conclusion. During much of the Cold War, it acted as a reconnaissance unit for the Order on their new homeworld of Tython before joining forces with a young Jedi, formerly an apprentice of Jedi Master Orgus Din.
Working alongside Kira Carsen, a friend and the Jedi's apprentice, Teeseven was instrumental in thwarting the scheme of the Sith Lord Darth Angral, who intended to attack the Republic using illicitly obtained superweapons. Following the Knight's recognition as the Hero of Tython, the droid continued its travels across the galaxy alongside its companions. Teeseven's service with the Hero of Tython ultimately led to a plan aimed at capturing the Sith Emperor himself. The droid accompanied the Hero of Tython during an assault targeting the Sith capital city of Dromund Kaas. Successfully infiltrating the Emperor's throne room, they triumphed over the Emperor in a hard-fought battle. Subsequently, Teeseven and the other members of the Hero of Tython's team were awarded the Cross of Glory, recognizing their critical contribution to ending the menace posed by the Sith Empire.
Biography
Early history
T7-O1, a T7-series astromech droid originating from Duwani Mechanical Products, was assembled before 3843 BBY as a standard, off-the-line astromech. For approximately 150 years, Teeseven was transferred between various owners—referred to by the droid as "partners"—without ever undergoing a memory wipe. This resulted in the development of a distinctive personality for Teeseven, as well as the preservation of memories related to all prior partners. Approximately a century after its creation, Teeseven was assigned as a legislation analyst for the Senate under Senator Oodora of Manaan. After the first year, Oodora promoted the astromech, and Teeseven became the Senator's campaign manager and speech writer throughout Oodora's four consecutive terms. After the Senator retired after twenty years of working with Teeseven, the droid began working with a Rodian named Shafu—who, unbeknownst to Teeseven, was a slaver.
Teeseven faithfully served Shafu as a navigator, piloting the Rodian's ship without ever accessing the cargo hold. However, Shafu was eventually apprehended by a Jedi named Ven Zallow. Zallow convinced Shafu to reform rather than face legal consequences. At Zallow's request, Shafu became a confidential informant for the Order, and in gratitude the Rodian gave Teeseven to the Jedi. By 3681 BBY, Zallow had deployed Teeseven undercover, assigning him to work with the smuggler Nico Okarr. The droid served as the human's mechanic and aide on his XS stock light freighter Redshifter. While attempting to smuggle Sith artifacts off the planet, Okarr and Teeseven were captured by Republic forces above the Sith homeworld of Korriban. The Republic arrested Okarr and impounded the smuggler's ship with Teeseven aboard the Republic space station in the Horuset system.
However, the arrival of the Sith Empire interrupted Okarr's transfer to a holding cell. A massive fleet arrived in-system and launched an offensive against the station, intending to retake their homeworld. As the smuggler's ship was the only one fast enough to escape the Sith fighters, Jedi Knight Satele Shan and her master decided to use it to escape to warn the Republic. Teeseven had been on-board the ship performing maintenance as the hangar came under assault by Sith forces, and the smuggler instructed him to prepare the ship's weapons in preparation for their escape. The smuggler and his passengers, including Teeseven, were ultimately able to escape their pursuers and bring word to the Republic of the oncoming Sith threat.
Leaving Okarr's service sometime after Korriban and returning to Master Zallow, Teeseven worked with the Jedi Order throughout much of the Great Galactic War. By that time, he had worked with a total of eleven partners, including Zallow, Oodora, a doctor, mechanic, Shafu, a Senatorial aide, and Okarr. Around 3663 BBY, Zallow lent Teeseven to the Republic Strategic Information Service for a single mission. The intelligence agency sent the droid undercover to protect a Muun ambassador from the secretive bounty hunter guild known as the GenoHaradan. During the assignment, Teeseven was successfully able to detect the assassin in the crowd and discharged a stun bolt, but the assassin escaped into the crowd. The ambassador retired in fear, leaving Teeseven depressed and believing that he never truly completed his mission.
Service to the Order
The fall of Coruscant
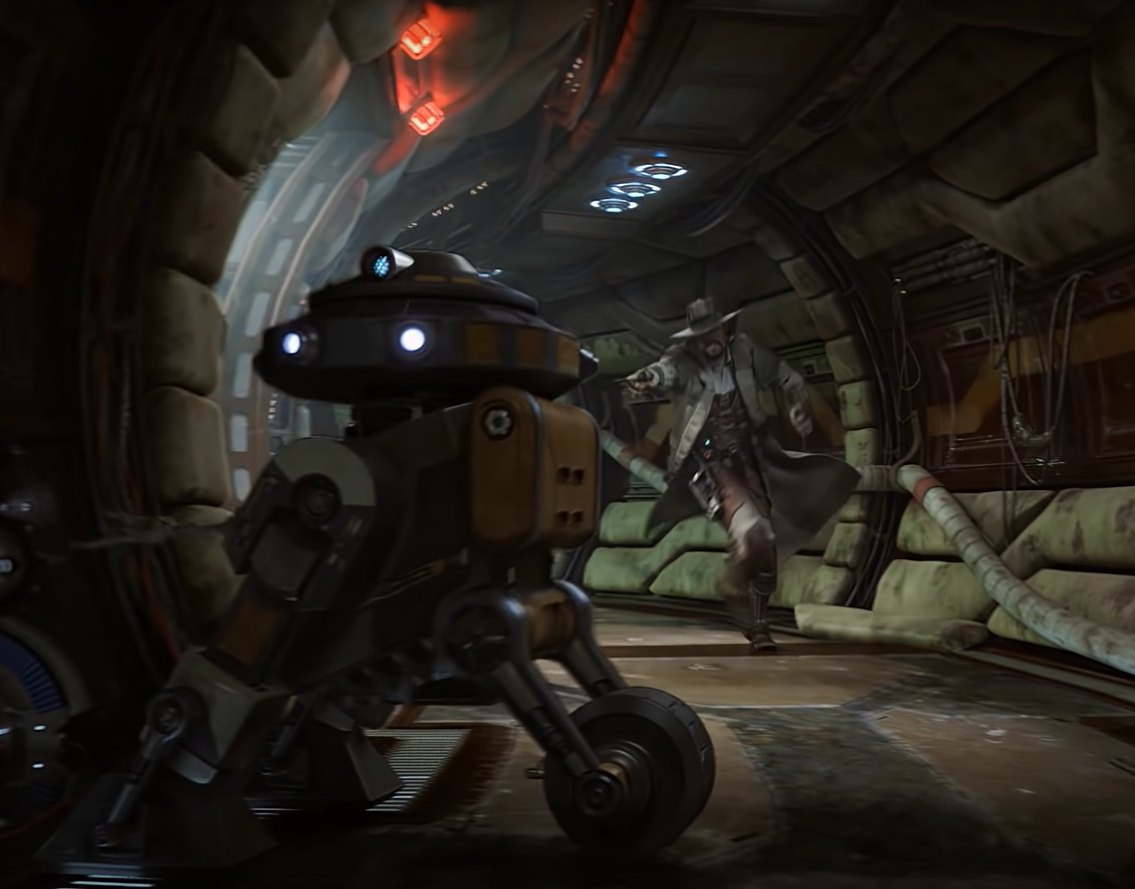
In 3653 BBY, Teeseven was present on the Republic's capital planet of Coruscant with Ven Zallow when the Jedi Temple was attacked by a Sith strike force under the leadership of the Sith Lord Darth Malgus. Zallow instructed his astromech companion to remain hidden and record the unfolding battle, anticipating a possible Jedi defeat. However, the droid briefly emerged to alert the Jedi Master to the impending arrival of Darth Malgus during the combat. Teeseven then retreated to its designated hiding place, witnessing Zallow's slain in battle with Malgus. As the battle turned against the Jedi, Teeseven escaped into the tunnels beneath the Temple. Following the cessation of hostilities, Teeseven attempted to retrieve Zallow's body, successfully recovering his lightsaber. However, the Sith had rigged the Temple with explosives, forcing the droid to retreat deeper into the lower levels of Coruscant as the Temple collapsed. The damaged Teeseven remained hidden for some time before encountering Zallow's former apprentice Aryn Leneer and the smuggler Zeerid Korr, who were investigating Zallow's death. After recounting the events at the Temple, Teeseven accompanied the pair to the Temple's backup surveillance station. He restored power to the systems, allowing Leneer to view recordings of the Temple's destruction. He paused and resumed the recording as per Leneer's instructions, allowing her to discover the identity of Zallow's killer, and he copied the recording for Leneer to peruse later when the trio departed.
After leaving the Temple ruins, T7 and the two Humans took refuge in an abandoned apartment building. T7 remained with Leneer while Korr scouted the nearby Liston Spaceport. Despite T7's protests, Leneer departed during the night. Later, the droid followed the Jedi Knight to the Temple with Korr when the smuggler returned. There, they found Darth Malgus and Leneer engaged in a fierce duel, but Korr interrupted the fight in fear of her falling to the dark side and helped Leneer escape. Leneer then decided to pursue Malgus' Twi'lek lover, Eleena Daru, in her quest for revenge, and as part of her plan the trio fell from their speeder onto the top of the spaceport. Leneer slowed T7's descent with the Force, and the droid hacked into the spaceport's systems and triggered the facility's fire suppression and safety systems with a false signal that tricked the network's sensors into detecting a fuel gas leak. As a result, evacuation alarms were triggered in Landing Bay 16-B—the hangar used by the shuttles belonging to Daru and her team—and the hangar's launch doors openned, allowing Leneer to enter and attack Daru. At Korr's orders, T7 hacked into the Dragonfly-class dropship Razor in the landing bay, but the droid decided to remain behind with Leneer after she decided not to kill Daru. Teeseven hid in the shadows of the hangar while the Knight confronted Malgus, and the two departed Coruscant aboard Daru's shuttle after Leneer threatened the Twi'lek to ensured her own safety.
The Tython uprising
While Leneer left the Order and traveled to the planet Dantooine to live with Korr, Teeseven returned to the Order's service, and when the Jedi Order left Coruscant in 3650 BBY, Teeseven accompanied them to the Order's long-lost homeworld of Tython. Teeseven served as a reconnaissance droid for the Order over the next few years, scouting Tython's wilderness and identifying hazards. In 3643 BBY, Teeseven was sent out along with nineteen other droids as long-range probes, but he was captured by a group of Flesh Raiders, a violent species native to Tython, near the Flesh Raider-controlled Tythos Ridge region. Confined within a weapons cache located in the Upper Hollows cave system, Teeseven feigned deactivation and recorded a clandestine meeting between the Dark Jedi Callef and a hooded figure referred to as Master by Callef.
During the raid on the Flesh Raider weapons cache conducted by the apprentice of Jedi Master Orgus Din for the benefit of the Pilgrims residing in Kalikori village, the Padawan liberated T7 and removed the restraining bolt affixed to the droid by the Flesh Raiders. In reciprocation, T7 presented the Jedi with the recording it had covertly captured while pretending to be inactive. The recording revealed a hooded figure issuing commands to the Dark Jedi Callef—whom the Padawan had previously defeated—and the Flesh Raiders. Callef identified the figure as his master, and the pair appeared resolute in their aim to dismantle the Jedi Order.
Having uncovered the reason behind the Flesh Raiders' sudden surge in aggression, the Padawan and the other Jedi embarked on a mission to neutralize Bengel Morr and prevent further casualties. T7 subsequently accompanied the Padawan in the rescue of Orgus Din, who had been lured into a trap and captured by Bengel Morr. Morr revealed himself as Orgus Din's former apprentice, presumed dead following the Sacking of Coruscant. Consumed by rage at his perceived weakness of the Jedi, he sought vengeance against the Order. Before he could slay Orgus Din, the Padawan and T7 intervened, defeating Morr and saving the Jedi Master. Subsequently, the Padawan was elevated to the rank of Knight in recognition of their role in ending the Flesh Raider threat, with T7 observing as the newly promoted Knight constructed their first lightsaber. When the Knight was dispatched to the capital of Coruscant to aid Jedi Master Bela Kiwiiks and her Padawan in dealing with a new threat, T7-O1 decided to remain with the Knight as the droid felt they were a formidable team.
Partners and heroes
On Coruscant, T7-O1, the Knight and Orgus Din were briefed on the situation by Master Kiwiiks. They were introduced to Republic scientist Eli Tarnis and General Var Suthra, who informed them that the plans for a Republic superweapon known as the Planet Prison had been stolen, and the Jedi had been called in to help retrieve them. Working with Kira Carsen and Agent Galen of the Republic Strategic Information Service, T7-O1 and the Knight tracked the stolen plans first to a Rodian slicer then to the Black Sun criminial syndicate. The mission then became more complicated as the two learned that Tarnis had been kidnapped by Black Sun. After one failed attempt to rescue Tarnis, T7-O1 and the Knight were informed by General Suthra that the stolen plans had also contained information about every Republic superweapon in development, not just the Planet Prison. Masters Din and Kiwiiks, as well as Agent Galen then departed Coruscant to secure the sites of the compromised superweapons while the Knight and T7-O1 launched an assault on the headquarters of Black Sun in order to rescue Tarnis.
With the aid of the Coruscant Security Force, T7-O1 and the Knight fought their way to the Black Sun command center, where they found the Black Sun leader in a holocall with Tarnis, who revealed himself to be a Sith Lord. After defeating Salarr, T7-O1 and the Knight were told by Carsen that Tarnis had stolen the Planet Prison prototype and intended to use it on Coruscant. The three then pursued the Sith Lord first to the Justicars' Sector, where they found the murdered engineering team behind the Planet Prison, then to the ruins of the Jedi Temple, where they found Tarnis in a call with four Sith Lords, including his father, Darth Angral. Tarnis was slain by the Knight in combat and the activation of the Planet Prison was narrowly averted. Infuriated by his son's death, Angral promised to have vengeance on the Republic and the Knight in particular.

Upon reporting in to General Suthra and Grand Master Satele Shan, the Knight was told that Din, Kiwiiks and Galen had all failed to report in, and General Suthra feared that Angral had already seized control of the superweapons. The general then gave the Knight a Defender-class light corvette for use as their personal starship as well as the location of one of Angral's bases on the planet of Ord Mantell, and asked the Knight to look into it. With Kira Carsen in tow as the Knight's new Padawan, the group then departed Coruscant for Ord Mantell. Upon arriving on Ord Mantell, T7-O1 and the Knight made their way to Angral's hidden base and fought their way into the command center of the facility. With the base's defenders dealt with, T7-O1 accessed the facility's databanks and found files indicating that Angral was planning to combine aspects of several Republic superweapon programs into a single project, which was codenamed the "Desolator." The files additionally contained intelligence indicating that Angral had sent agents to various worlds to where Republic superweapons were under development.
With this information in hand, T7-O1 continued to accompany the Knight as they traveled to the worlds of Taris, Nar Shaddaa, Tatooine and Alderaan in order to chase down Angral's agents and secure the superweapons. As a result of these travels the Knight and his companions rescued Doctor Nasan Godera , a former Republic weapons designer and destroyed the prototypes of the Power Guard Project, the Shock Drum and the Death Mark, each of which was a Republic superweapon seized by Angral's forces, rescuing Agent Galen and Masters Kiwiiks and Din in the process. Unfortunately the Knight and his companions learned from General Var Suthra that Angral had already succeeded in combining the superweapons technology into the Desolator, which he had mounted on his flagship. Luckily for them, Din had secretly planted a tracker on the ship. The Knight and his companions pursued Angral to the Republic agriworld Uphrades but arrived to find that the world had already been devastated by Angral's superweapon.
Subsequently, the Knights and company learn that Angral was targeting Tython. Upon boarding the Oppressor, T7 split off from the Jedi to disable the ship while they go to face Angral. The confrontation resulted in the Sith Emperor possessing Kira. But thankfully, Kira was able to break the Emperor's hold over her. The trio then reunited aboard the Defender and escaped the Oppressor's destruction.
The hunt for the Sith Emperor
A year later, T7-O1 and Kira came upon his Master, who had been given the title of the Hero of Tython, apparently talking to thin air. The Hero explained that the ghost of Orgus Din wanted them to go to Tatooine to rescue Jedi Knight Jomar Chul. Following their successful rescue, the Hero and the crew became involved in a mission by Jedi Master Tol Braga to capture and redeem the Sith Emperor. In ordered to complete Braga's preparations, the Hero took on a series of missions to Balmorra, Quesh and Hoth. Once the Hero had completed those objectives, they went ahead with the mission, despite Chul's warnings that he had foresaw the Hero falling to the dark side.
Chul's vision came to pass when the hero and Braga's strike team confronted the Sith Emperor, who dominated their minds and turned them to the dark side. T7 and the rest of the Hero's crew were imprisoned aboard the Emperor's space stations for months while the Hero underwent Sith training. Thankfully, Din's spirit managed to free the Hero of the Emperor's control, who in turn free Kira from being tortured. T7, along with the Hero's new companions, Doc and Sergeant Fideltin Rusk were freed by Lord Scourge, the Emperor's Wrath. Though everyone was puzzled by Scourge's actions, the Sith explained that a vision he had centuries ago motivated him to rebel against the Emperor.
Thwarting the Sith Emperor's ritual
Returning to Tython, Scourge revealed to the Jedi Council that the Emperor was plotting to consume all life in the galaxy to fuel his supposed immortality in a powerful ritual. To thwart the Emperor's plans, the Hero and their crew traveled to Belsavis, Voss and Corellia to stop the Emperor's servants from killing countless innocent lives to begin the ritual, as well as redeeming the fallen members of their strike team. Their efforts weakened the Emperor, at which the Republic decided to strike at Dromund Kaas so that the Hero could strike him down. While the Republic kept the Imperial Navy occupied, T7 accompanied the Hero to confront the Emperor, as the two of them couldn't be controlled by him.
When the pair confronted the Emperor and engaged him in battle. After seemingly defeating him, Teeseven contacted Scourge, who exclaimed that the Emperor was not yet dead. Before they could do anything, the Emperor's body became shrouded in a cloud of dark side energy, and the Hero heard the Emperor's voice telepathically warning the Jedi that he would take everything and everyone to the grave with him. As the Dark Temple came crashing down around them, the Hero and Teeseven managed to escape back to the Defender and fled Dromund Kaas.
Upon rendezvousing with the Republic flagship Valiant, Master Satele and Admiral Dabrin awarded the Hero and crew each the Republic's highest honor: the Cross of Glory.
Continued travels
At some point during the Hero's travels, the Jedi Master suddenly had a vision of a far-away jungle planet. Teeseven then approached the Hero, asking if they were referring to Rishi, as the planet was entered in the ship's navicomputer.
Rescuing the Outlander
Sometime after the former Sith Emperor consumed all life on Ziost, the Eternal Empire invaded the galaxy, during which the Hero of Tython went missing. The Hero's companions searched in vain for their leader but failed and thus went their separate ways.
By 3631 BBY, Teeseven teamed up with the Sith Lord Lana Beniko and Koth Vortena to rescue the Outlander from Emperor Arcann's custody. Infiltrating the carbonite facility on Zakuul, Teeseven aided in the Outlander's escape by creating false alarms throughout the facility, as well as deactivating blaster turrets firing on Koth's shuttle.
Teeseven remained on Zakuul while the others fled the planet in the Gravestone. Being a simple droid granted Teeseven some anonymity. Later on, he received a message from the "Lady of Sorrows," who had been seeking the Gravestone and wished to establish a dialogue with its computer, which Teeseven relayed to the Outlander.
Teeseven later encountered the Outlander and Senya Tirall when they returned to Zakuul, seeking the Lady. After successfully hacking relays and questioning Zakuul residents within the Old World, they determined that an audience with the Lady could only be arranged through the Heralds of Zildrog. Soon after, Teeseven parted ways with his allies to inform Koth of their progress, and subsequently witnessed the Heralds' interrogation and assassination of Mona Gale, the Lady's representative.
Following the recruitment of the Lady, who was revealed to be a droid called SCORPIO, Teeseven accompanied the Outlander and the others back to Asylum. While SCORPIO worked on the Gravestone's hyperdrive, the Outlander was summoned by the Scion Heskal, and Teeseven volunteered to go with them. The meeting proved to be a setup, as Heskal had invited Arcann to Asylum to fulfill a vision he had. After Arcann and the Outlander's fight was interrupted by a shuttle crash, Teeseven fought alongside his comrade back to the Gravestone so that they could escape the planet.
After the Empire
After overthrowing the Eternal Empire, Teeseven reunited with Kira and Scourge to face Tenebrae for the last time.
Following her mission to the remains of the Jedi Enclave located on Dantooine, Teeseven briefly met with Aryn Leneer on Odessen. Aryn expressed her happiness that Teeseven had found a new place to belong, and she believed that Ven Zallow would have been happy for him too.
Behind the scenes
T7-O1 is a companion character specifically designed for the Jedi Knight class in Star Wars: The Old Republic, a MMORPG that was launched by BioWare on December 20, 2011. His initial appearance was in the Deceived cinematic trailer for the game, where he briefly warned Ven Zallow about Darth Malgus's arrival; he also features in the associated novel, The Old Republic: Deceived, which takes place directly after the trailer. T7 also made an appearance in the game's third and final trailer, Return, serving Nico Okarr.
Like every other character's page on the site, T7-O1's HoloNet page on the official Star Wars: The Old Republic website contains three phrases written using Aurebesh. The first phrase, "accidental slaver", is a reference to T7-O1's time working for the slaver Shafu before the Rodian had a change of heart. The second, "Flesh Raider collectable", alludes to T7-O1's capture by Flesh Raiders just before the player encounters him during the mission "High-Tech Savages". The final phrase, "The Exploding Starships Conspiracy", refers to the actions of the bounty hunter Terrin Sandafar, who murdered Shafu and the Alderaanian noble Eckhorn Baliss by rigging their ships to explode under orders from Senator Verre Sydia's husband.
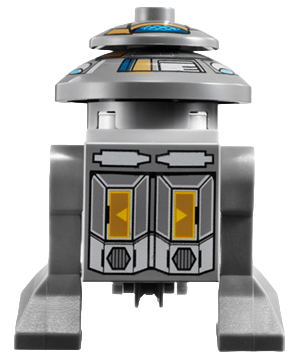
T7-O1 is also available as a minifigure within a LEGO set; specifically, 9497 Republic Striker Starfighter. This set includes a Talon-class Republic starfighter, a Republic trooper, and Satele Shan as she is depicted in the Hope cinematic trailer.
During the Imperial storyline, T7-O1 experienced internal conflict regarding his loyalty to the Alliance following the Jedi Under Siege expansion, due to the Alliance's apparent alignment with the reconstituted Sith Empire. Despite this, T7-O1 chose to remain with the Commander.